
A beginner’s guide to using your DSLR camera – start taking better pictures!
This post contains Amazon affiliate links.
I have always enjoyed photography, but after becoming a parent, I had a new desire to take good pictures. When our oldest was born, we had (gasp) a film camera! I still don’t know how we managed with 24 shots at a time on a roll of film – and then the waiting until prints were made to see what you got! In 2005, we bought our first digital camera. After several years of being aggravated with the limitations of that camera, I upgraded to a Canon Rebel T1i DSLR in 2010.
In the beginning, I had no idea what I was doing and used auto mode almost exclusively. Reading the manual was of limited usefulness since it was like reading a foreign language. Thanks to some photo-savvy friends, I have been gradually learning more over the past 5 years and now I never use auto mode!
When I got my camera, my primary goal was to stop using the flash. A flash creates a picture that is sharply in focus, but the background is usually very dark and the colors are unpleasant. Once you are comfortable getting out of auto mode and making the most of the natural light available, your photos will improve dramatically!
If you’re still looking for a DSLR camera, I would recommend the Canon Rebel T5i.
Let’s start with some vocabulary.
DSLR stands for digital single-lens reflex camera. Basically, this means that when you use the viewfinder on your DSLR, you are seeing through the camera’s lens (by way of a mirror). Many DSLR’s now allow you to use the LCD screen to frame your shots, but I highly prefer to use the viewfinder.
Shutter speed – How fast the camera’s shutter opens and closes to let in light. This is measured in a fraction of a second. 1/15 = one fifteenth of a second, etc.
Aperture (f stop) – How wide the shutter opens. The aperture controls how much of the photo is in focus. The lower the f stop number, the more light the sensor will receive. The picture will be brighter, but a smaller area will be in sharp focus. The higher the f stop, the more area will be in focus.
Shutter speed and aperture work hand-in-hand. They both control how much light the camera’s sensor receives, but in different ways.
ISO – How much light the sensor absorbs. A higher ISO setting will allow the camera’s sensor to absorb more light, thus allowing you to get away with a higher shutter speed. However, the higher the ISO, the more grainy the picture will appear, especially if you plan to crop the photo.
Your camera’s modes will depend on which model you have, but here are the basic ones:
Tv mode – Time value. You choose the shutter speed, the camera sets the other values to “match.”
Av mode – Aperture value. You choose the aperture, the camera sets the other values to “match.”
M mode – Manual mode. You choose it all!
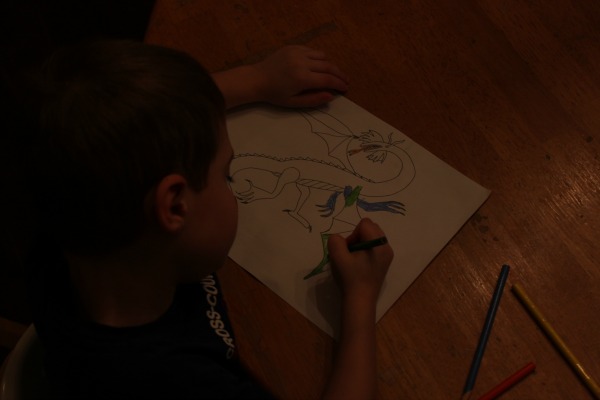
Here’s an example of how aperture and shutter speed work:
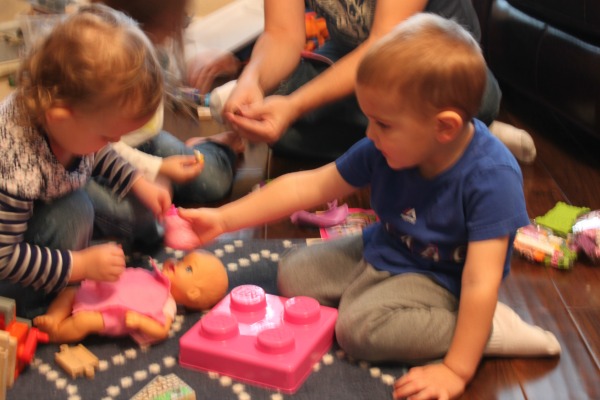
This photo was shot with a shutter speed of 1/40 and an aperture of f = 4.5. The shutter speed was too fast for the amount of light in the room, so the photo is too dark.
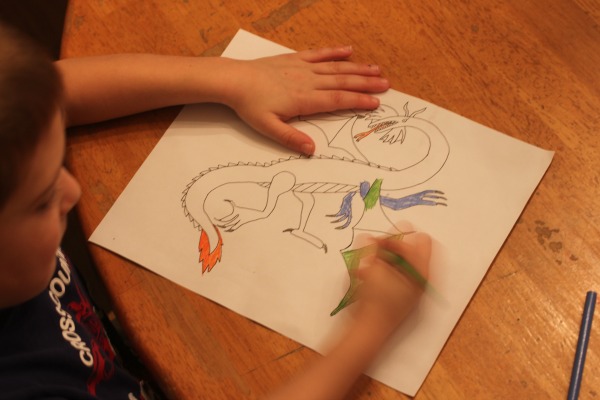
This photo has the same aperture, but I slowed the shutter speed down to 1/8. The photo is brighter, but since the shutter was open longer, the subject needed to hold still longer. Hard to do with kids, hence the blurry hand!
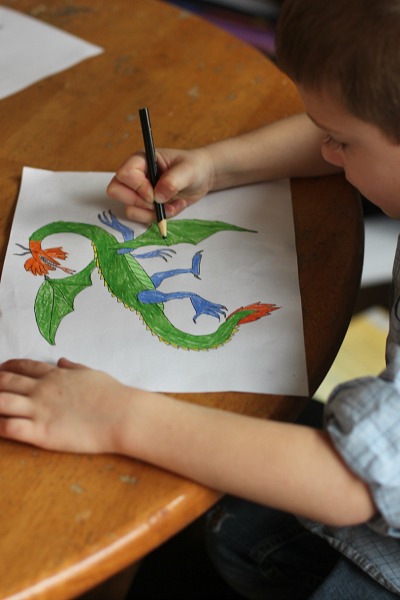
Your DLSR is heavily dependent on your lighting, especially when taking photographs of kids. The first two photos were taken using the overhead room light. This next photo was taken in front of a window on a bright sunny day, so the light is natural and pleasant. The f stop is 1.8 (shutter open very wide, less area in sharp focus) and the shutter speed was 1/30.
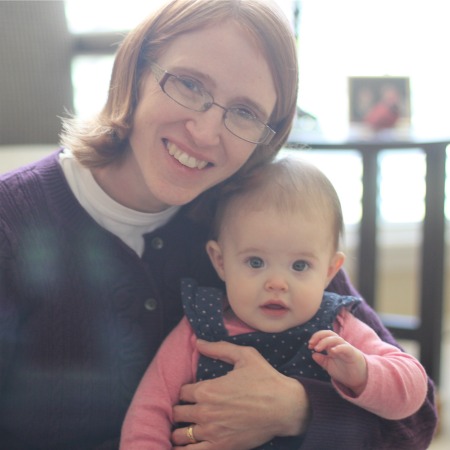
The type of lens you use can make a big difference in the quality of your photos as well. Last year, I received a 50 mm fixed focal length lens for Christmas. This lens allows me to use a low aperture (down to f stop 1.4) which creates a very sharp (but small) area of focus and a nice artistic looking blurry background. The other morning, I shot this photo of Janie dressed up for church:

The combination of this lens (often referred to as a portrait lens) and wonderful natural light from the windows in our game room allowed me to get some fantastic shots. Notice how the focus is on her eyes, and the background is nicely blurred.

But what about less-than-ideal photo situations?
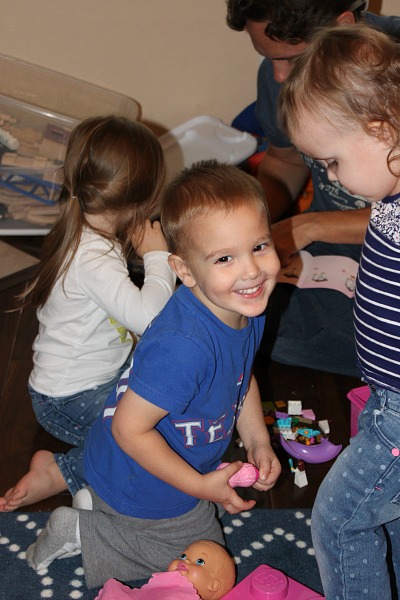
We had one of those this past week. Jordan’s sister and her family were in town, and we had a precious day together – and one shot to get pictures of all the cousins together. The light in our living room was poor (the overhead light makes photos look very orange, which can be corrected to some degree by changing the white balance from “auto” to “tungsten lighting”) and we do not have windows in that room that face toward the sun. Plus, we had 7 kids to photograph, and it was next to impossible to get them all to stand still at the same time!
I managed to pull off this photo with a f stop of 4.5 and a shutter speed of 1/25. A faster shutter speed would have been better, but this was not possible with the amount of light in the room (unless I used the flash).
I sharpened this photo slightly using picmonkey.

For gift opening, I gave up on not using the flash! My best photos were in Tv mode (shutter mode) with a shutter speed of 1/50 or 1/60 and the flash ON.
Bad photo: (too blurry because the shutter speed was not fast enough)
Good photo:
If you must use the flash, turning up the ISO speed will increase the range of the flash, which helps to eliminate the dark background.
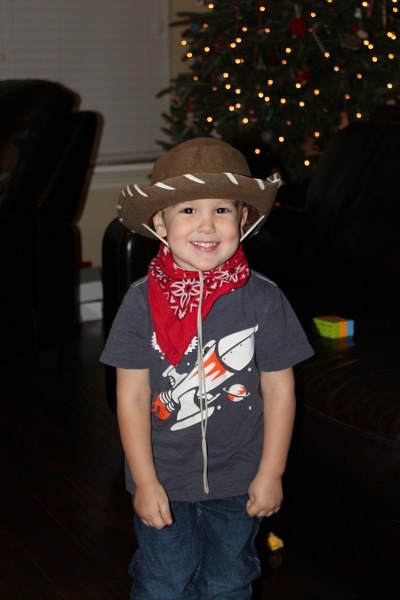
This also allows you to use a higher shutter speed, which means a sharper image. The downside is increased grain to the picture. For example, here is a picture with a shutter speed of 1/50, aperture of 4.5, and ISO at 100.
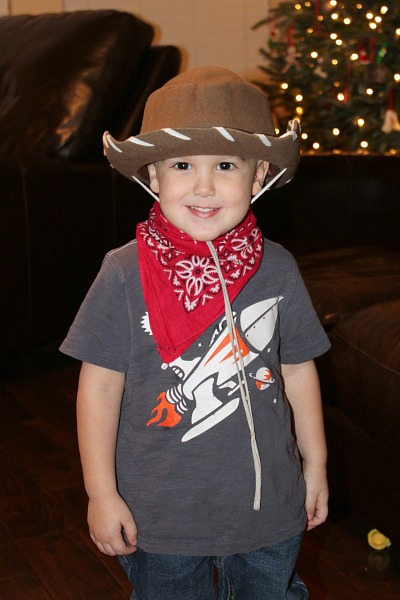
This one is the same settings (1/50 and 4.5) with ISO at 800. I also did some editing – brightened slightly, color temperature adjusted – cooler, and photo sharpened.
But the best photos are still the ones with natural light. Not direct sunlight, but good ambient light.

To wrap up, here are some troubleshooting tips:
- Too blurry? Increase the shutter speed. A shutter speed of at least 1/125 is ideal for sharp photos. If you must use a slower shutter speed because of lighting, ask your kids to “freeze!” or use a tripod. UPDATE: I upgraded cameras to a Canon 6D, and I am LOVING the higher shutter speeds! Because this camera has a larger sensor, I can take pictures in low light with a much faster shutter speed than my old camera. This makes a huge difference, especially indoors.
- Too dark? Slow down the shutter speed or lower the f stop number (aperture). OR, move near a window, open the blinds, or go outside.
- Increase the ISO to compensate for low light. How high? I think it depends on the camera. My camera gets grainy at 800 and noticeable grainy at 1600. However, I’ve heard from friends that a better camera can handle a much higher ISO setting without causing a grainy picture. UPDATE: My new Canon 6D can go up to an ISO setting of 12,800 without grain.
- Avoid taking photos in direct sunlight during the brightest part of the day. You will end up with harsh shadows on faces, and squinting kids. An hour after sunrise or an hour before sunset is really ideal for the portrait look you see on Pinterest.
- Check out this post on Click it Up a Notch for tips on shooting in manual mode. I love shooting in manual mode! This article was so helpful for making the switch.
- Make sure your subject is facing the source of light.
Window behind the subject:
Subject facing window:

Recommended Equipment:
- For beginners – Canon Rebel T5i
- UV filter – protects the lens
- A zoom lens – I use mine at events (the kids’ Awana awards at church, etc.) to get up-close shots from far away. I like the Canon 75-300 mm lens.
- For portaits – the lens I used for all of the pictures in this post of Janie was a Canon 50 mm f 1.4 fixed focal length lens. You won’t be disappointed with this lens!
9 Comments
Christina Ritter Jan 11, 2015
I'm still very confused on how to set my camera. I just purchased a Cannon Rebel and use the auto settings. I'm not getting the greatest pictures. I feel like my point and shoot took better pictures, but I'm determined to learn how to use this camera.
Sarah Jan 11, 2015
I would recommend just shooting in the other modes and experimenting with it! It does take some practice for sure. I am embarrassed to say that I was probably in auto mode for much of the first year that I owned my camera. And yes, that camera will take better pictures than your point and shoot once you get the hang of it!
Ashley Z. Jan 25, 2015
This was really helpful! Thank you for explaining everything.
heather Apr 10, 2015
I have a cannon rebel. I just starting taking pictures of the same thing in different setting. I am still learning but I am getting better pictures
Teresa Allen Dec 23, 2015
I just got a Canon Rebel T5, I wish I would have had the extra money for the T5i because of the HDR setting that I wanted to use, maybe next year (I am a newbie to a dslr).
I have been shooting in auto mode but I want to venture out into the other modes soon but the manual is so confusing to me. This article is helpful and I am glad I cam across it and I also realized while reading it that I now need to get lens protectors, I had no clue. Happy Holidays!!
Elizabeth H. Jun 4, 2016
This has helped me understand (or begin to understand) what im doing with my camera. I knew i wasn’t reaching my full potential with it but i could barely understand those other articals.
Thank you so much
rem cua binh thanh Jul 19, 2017
Hi there, You've done a fantastic job. I'll certainly digg it and personally recommend to
my friends. I'm sure they will be benefited from this web
site.
peoplefitness Jul 22, 2017
Can you tell us more about this? I'd like to find out more details.
maymassage.info May 25, 2018
I regard ѕomething tгuly special in this website.
Kelly Nov 14, 2018
Shutter speed should be set at no lower than 1/200 with kids.
Post a Comment