
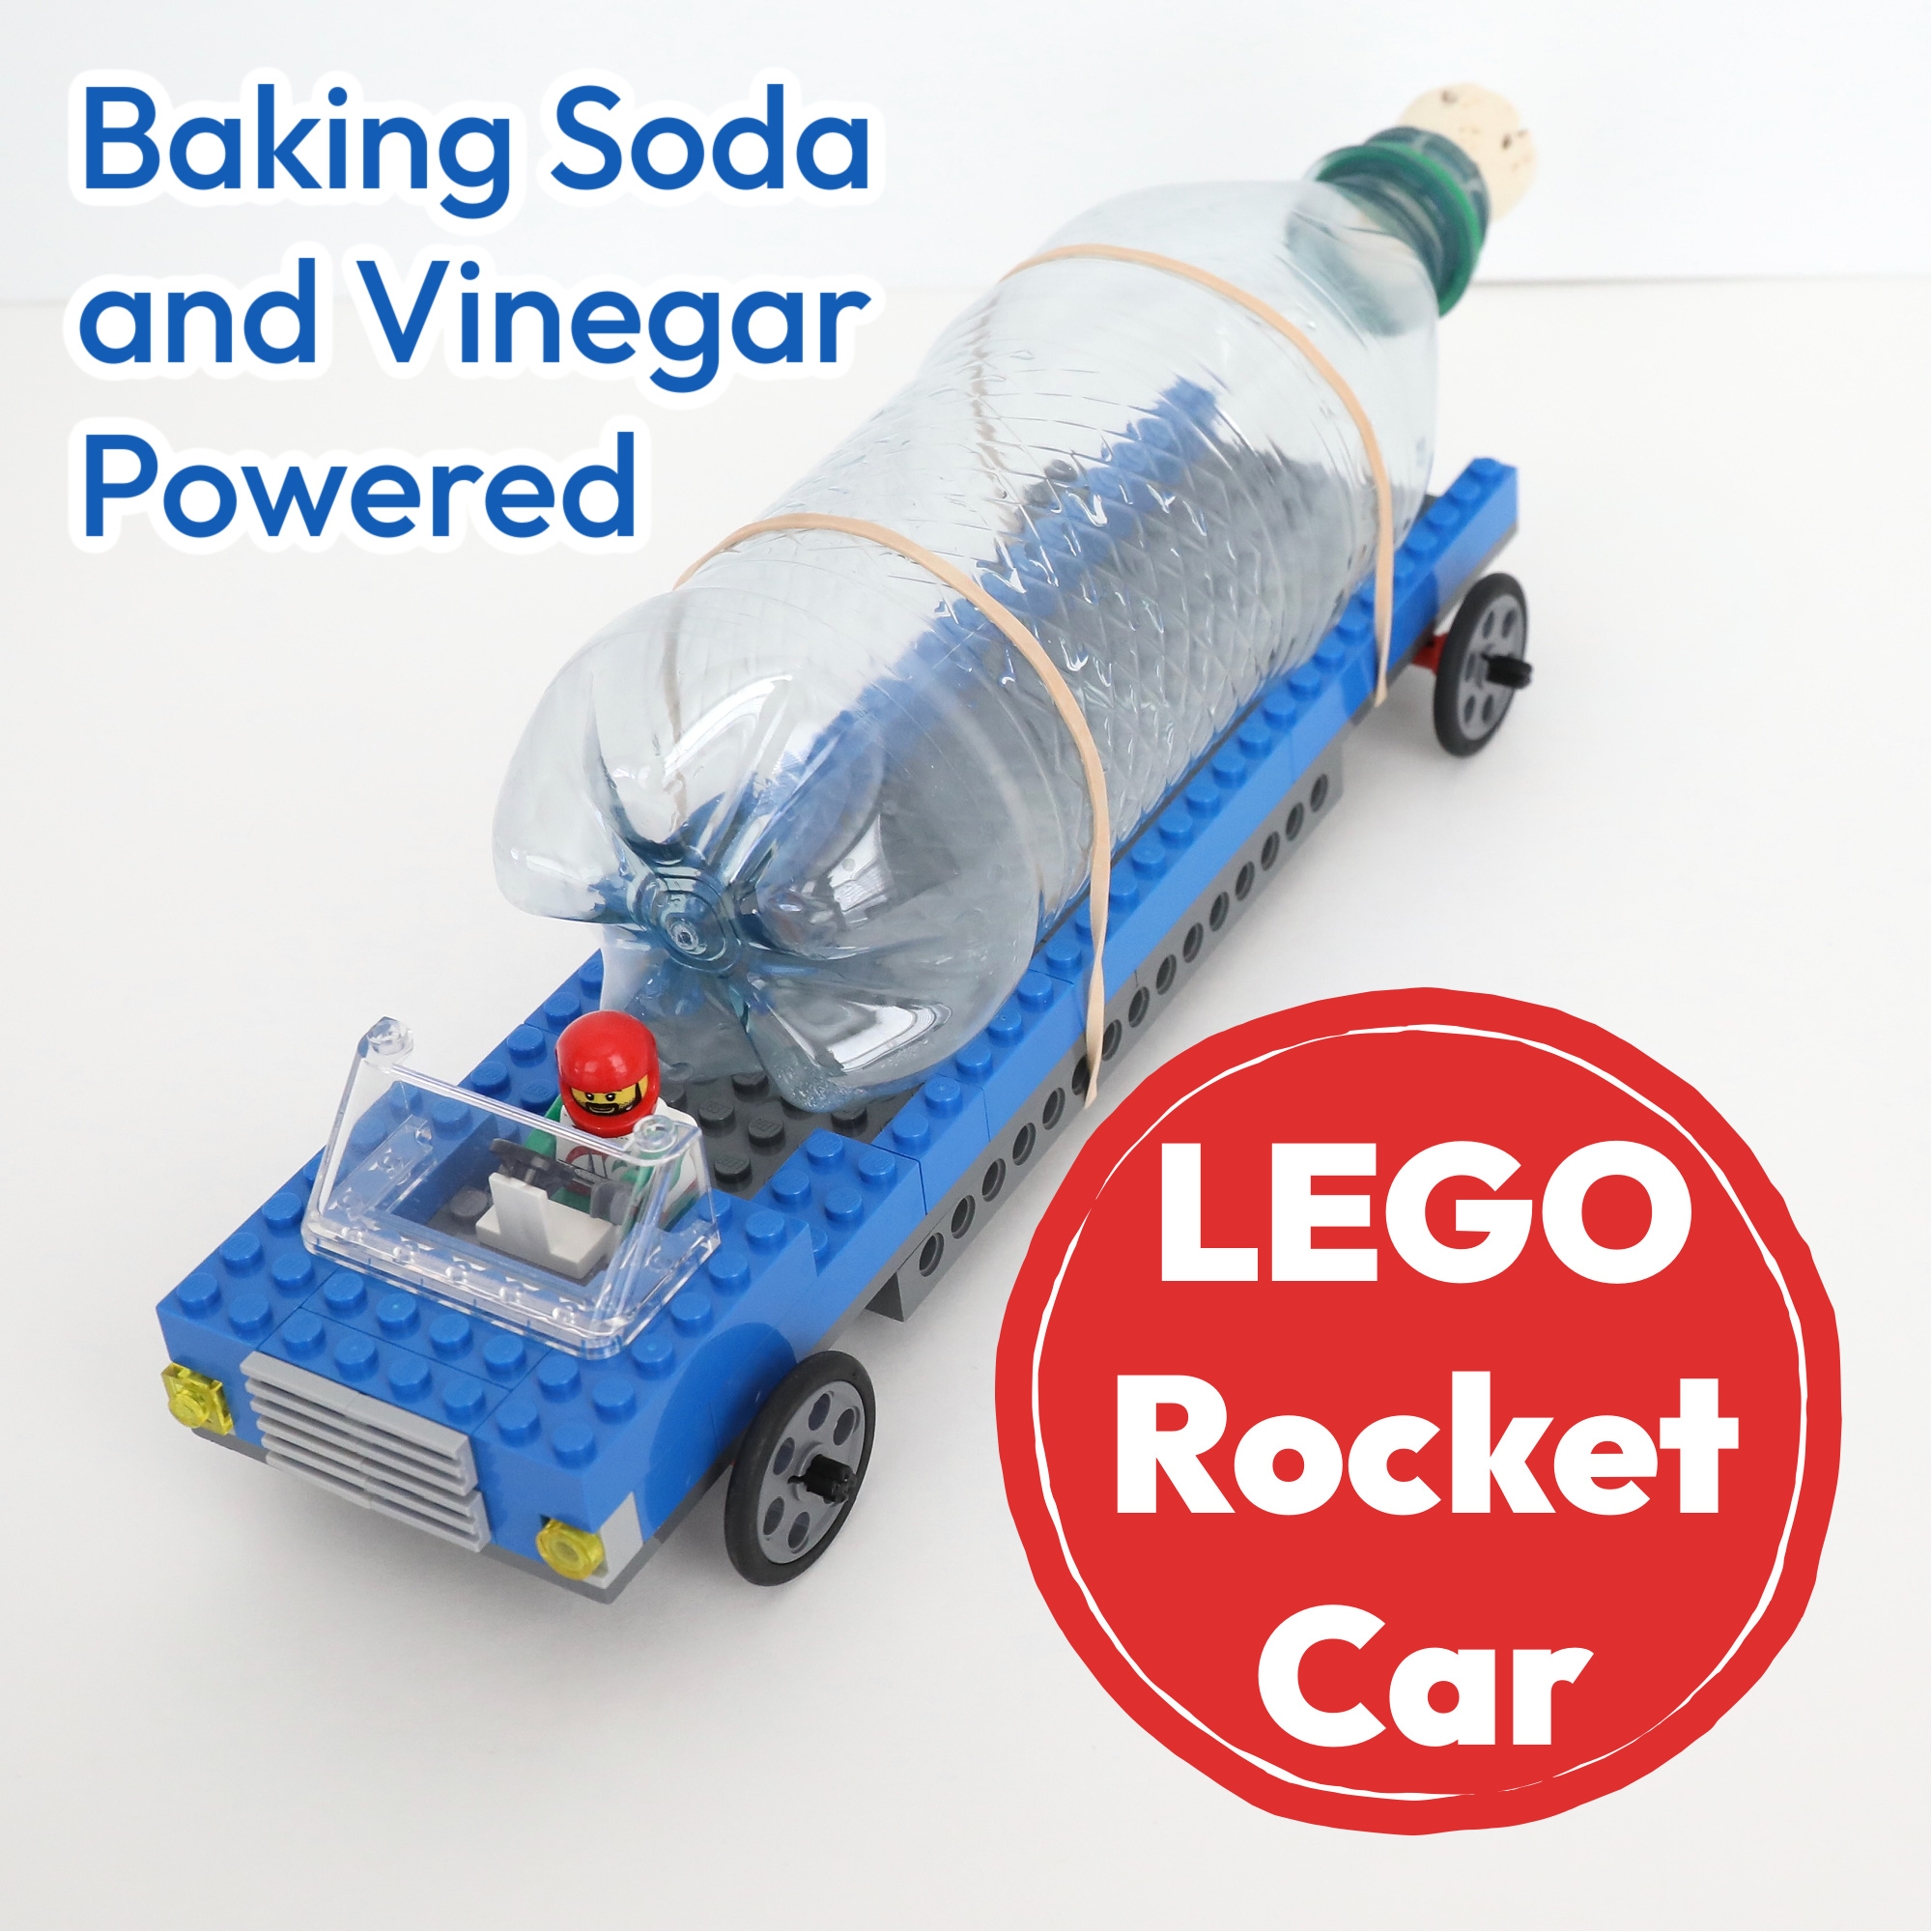
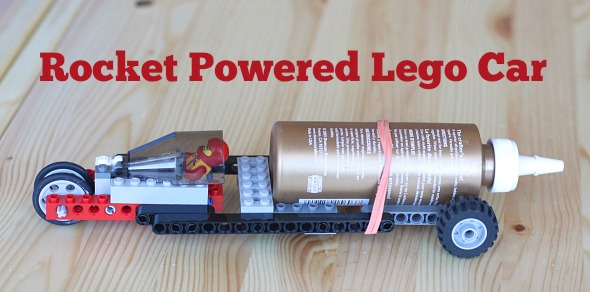
Use baking soda and vinegar to make a rocket powered LEGO car!
Kids will love this fun engineering challenge, and there’s so much to learn. This science project is a fabulous example of Newton’s 3rd Law of Motion which states that for every action, there is an equal and opposite reaction.
There are several factors involved in optimizing how far this car can travel, making it a great project for middle school and high school students. This rocket powered LEGO car is fun for elementary kids for sure! But older students will be able to really get into the physics of what’s happening. My 8th grade science class loved this!
Use Baking Soda and Vinegar to Power a LEGO Car
The concept of this experiment is simple! Use a baking soda and vinegar reaction to propel a LEGO car forward.
Like our bottle rocket science experiment, we’re going to react baking soda and vinegar inside a plastic bottle with a cork. The acid and base reaction forms carbon dioxide gas, which will cause pressure to build inside the plastic bottle until it gets to the point where the cork shoots out of the bottle. Liquid and gas will quickly escape the bottle, causing the car to move in the opposite direction.
How to Design a Rocket Powered LEGO Car
Real rocket engines use ongoing fuel combustion to create a force in one direction which propels the rocket in the other direction.
We are, unfortunately, not able to create ongoing combustion with baking soda and vinegar, especially since it’s not even a combustion reaction, haha. So our goal is to propel the rocket car forward with a burst of force to overcome the static friction of the car (the friction that prevents motion from starting) and then to keep the car going as long as possible.
Back in 2015, we built a car like this using a Tacky Glue bottle, water, and Alka Seltzer. The Tacky Glue bottle comes with a small cap that pops off once the pressure builds up inside the bottle. Then, the bottle’s narrow opening allows a small stream of water (with a lot of pressure) to shoot out of the bottle, propelling the car 20 – 30 feet. If you have a bottle like this, that’s definitely ideal. You can see this version of the car at the bottom of the post.
However, I wanted to update this project with materials that are easy to find. This LEGO car will travel about 12 – 18 feet depending on the wheels and the surface of the ground. And, it uses supplies that are very easy to get.
This experiment is messy, and you’ll want to do it outside.
Supplies Needed:
- LEGO bricks and wheels to build a car
- A 16.9 – 20 oz. water bottle. Do NOT use one of the flimsy “less plastic” bottles. It needs to be heavier, sturdier plastic. We used a Dasani bottle.
- A cork that fits the water bottle
- Rubber bands
- Paper napkins or tissues
- Baking soda
- Vinegar
- Spoon
- A wood board, or something similar. A wall would work.
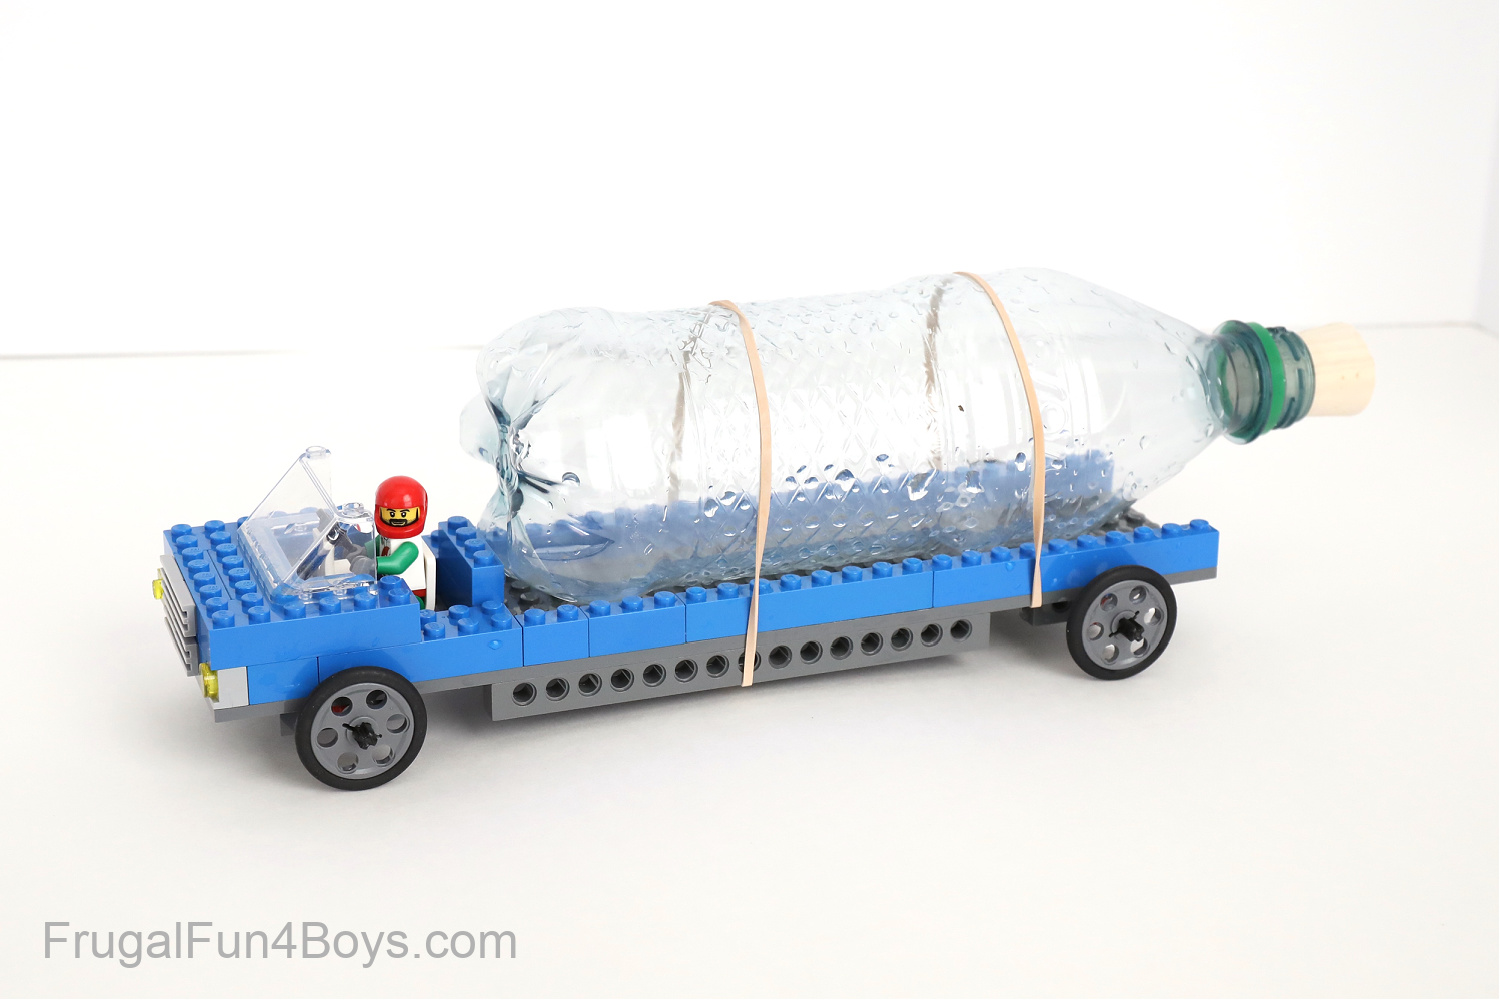
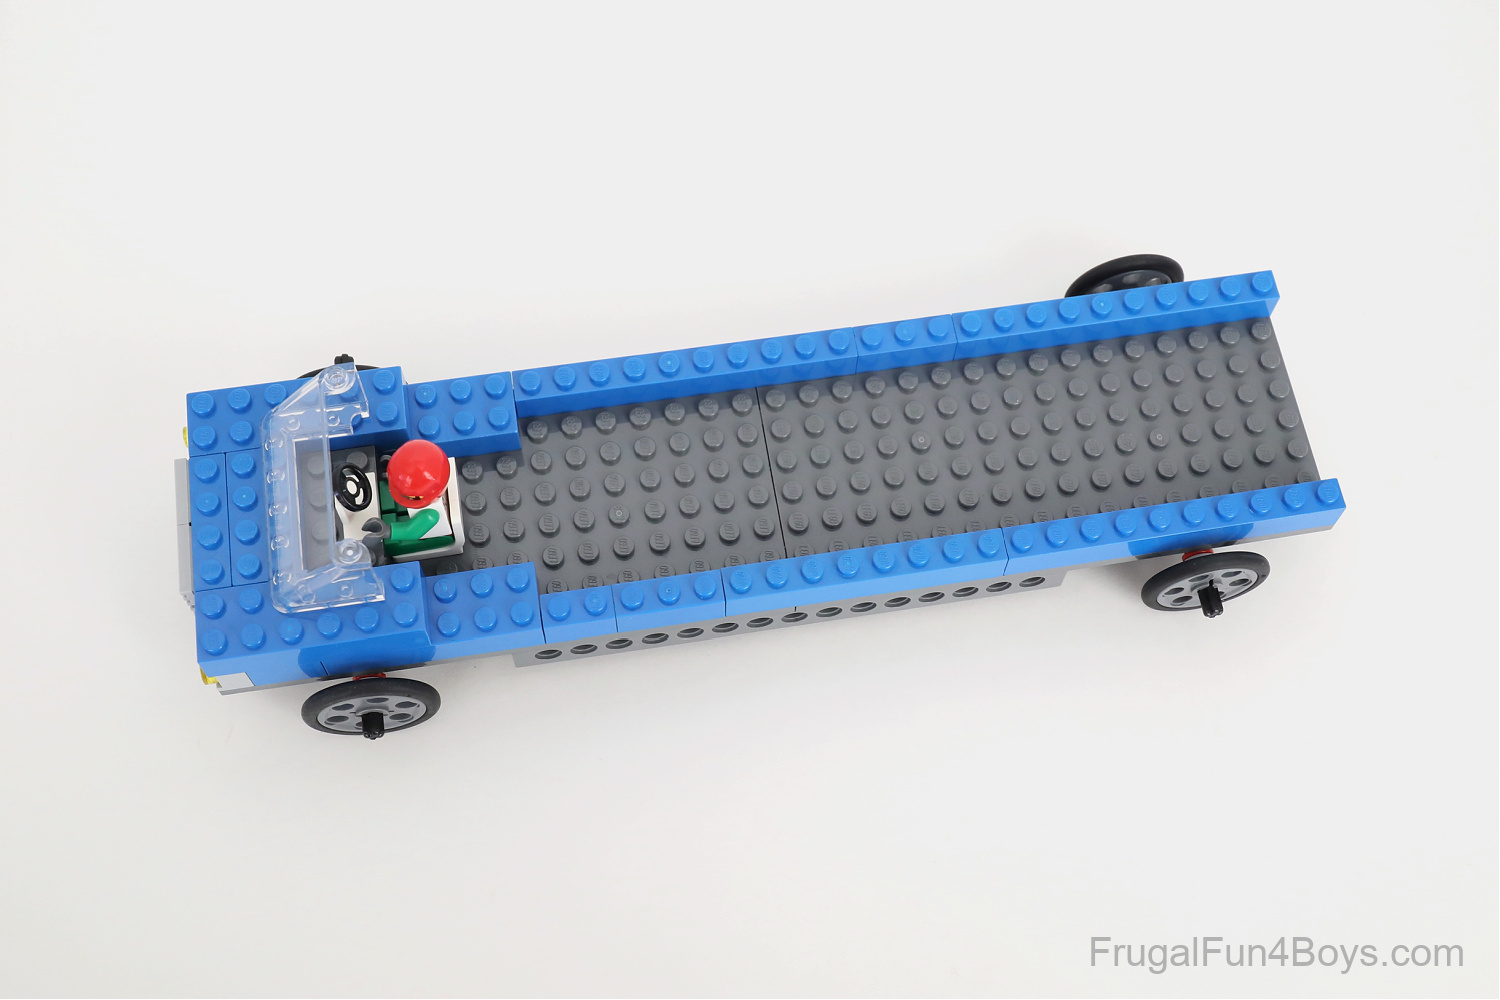
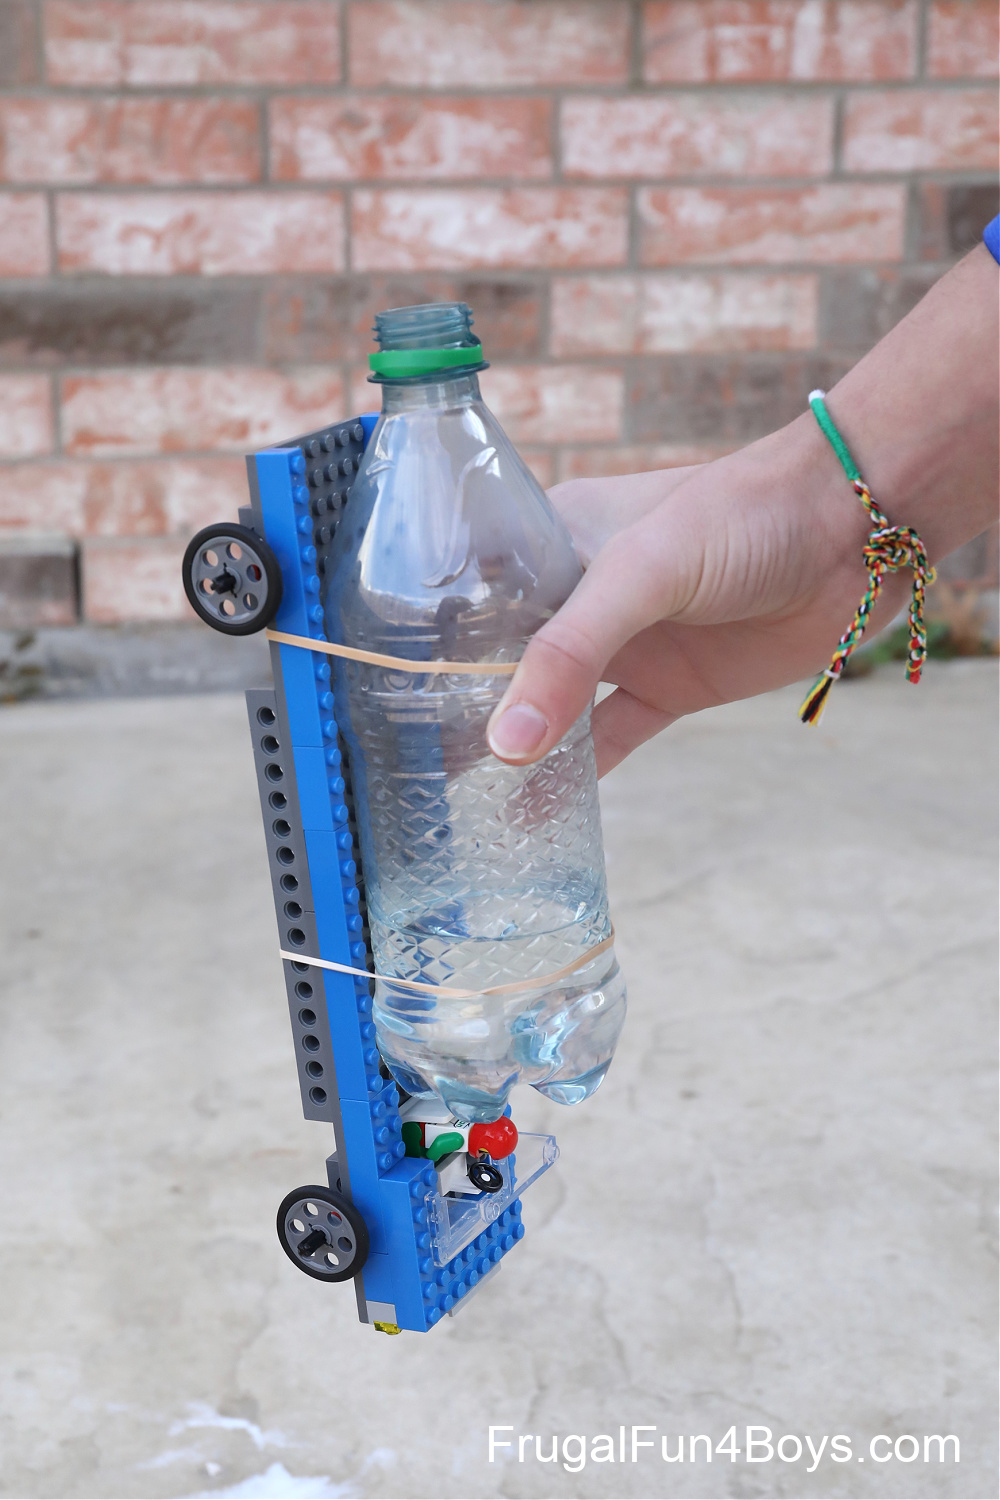
First, build your car. Make sure that it can hold your water bottle.
You’ll want the car to be as lightweight as possible. Choose wheels with a minimum amount of friction.
I love these narrow LEGO wheels for projects like this. Here they are on Brick Link: Wedge Belt Wheel and Tire.
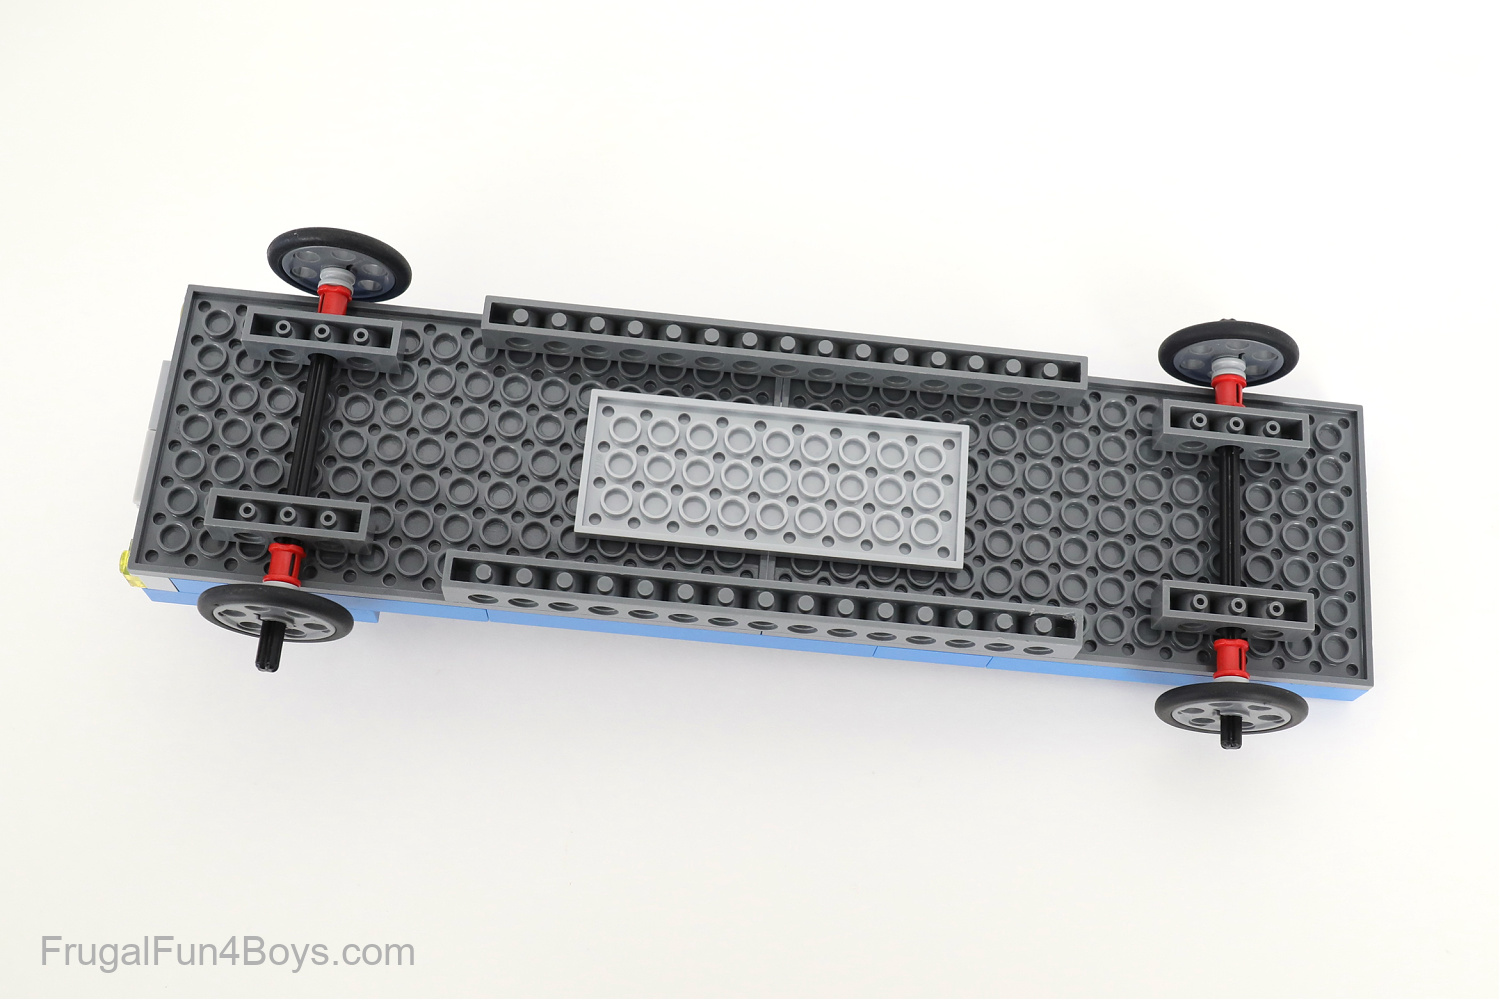
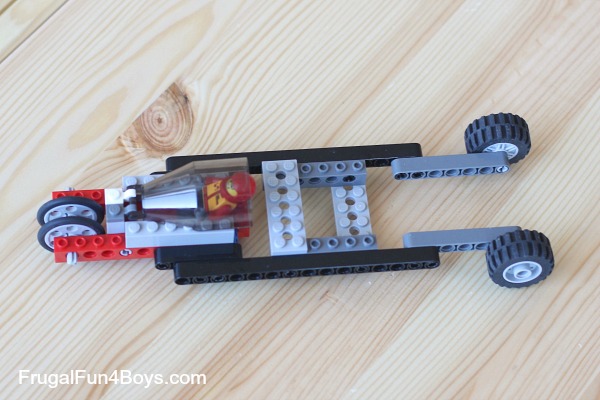
Here’s a view of the bottom of our car. The wheels are on axles, and we used Technic bushings to keep them in place.
Make sure that your wheels spin freely!
Attach your water bottle to the car with two rubber bands.
Now it’s time to try out the rocket powered LEGO car!
You don’t want the baking soda and vinegar to react the moment you put them in the bottle because you’ll need time to put the cork in. Here’s how you can slow down the reaction.
Cut a small square from a napkin, paper towel, or tissue. We started with paper towels but decided that cheap napkins work the best.
Put about 1 Tablespoon of baking soda in the center of the napkin. Then fold it up. You’ll want to fold it into a long, narrow shape that will fit through the mouth of the bottle.

Pour some vinegar into your bottle. We did not test every possible amount of vinegar. The amount shown below worked well, but then we actually had a longer run with MORE vinegar. But we were also on a more smooth surface for that one. So many variables!
The amount of vinegar would make a great experiment. Fill the bottle to different levels are measure how far the car travels.
More vinegar means more liquid and gas shooting out the back of the car to propel it forward. But it also means that the car is heavier and takes more force to move.
After you pour in the vinegar, drop in your baking soda packet and quickly put in the cork. Make sure the cork is snug, but not TOO tight! It make take a few trials to get the cork just right.
Swirl the bottle around and then set it down in front of your board.
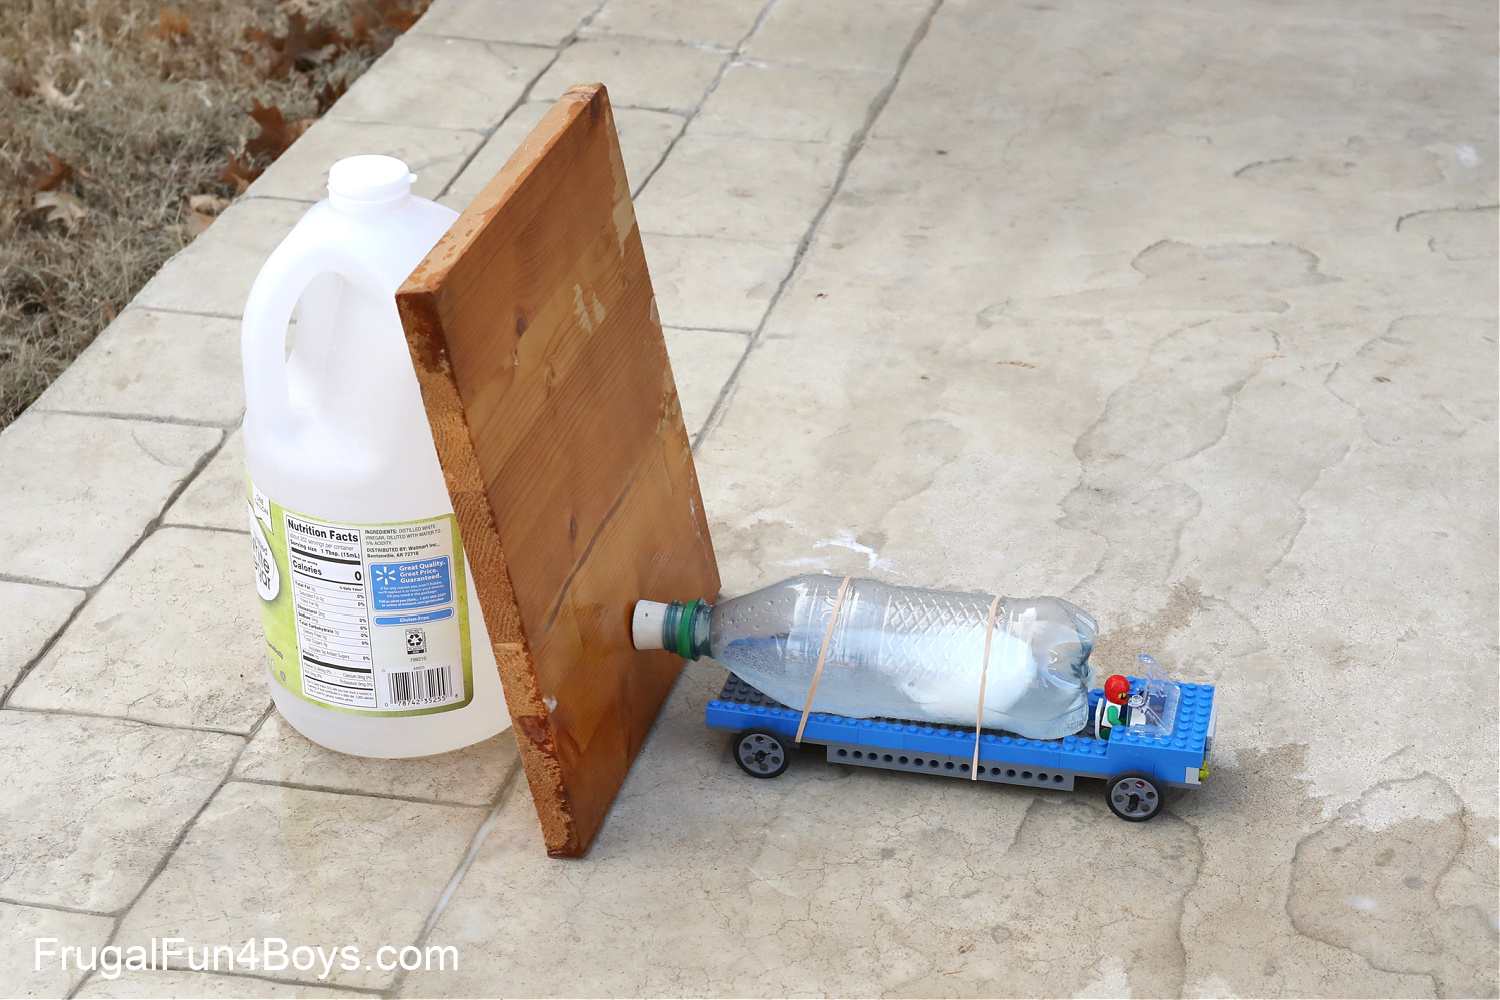
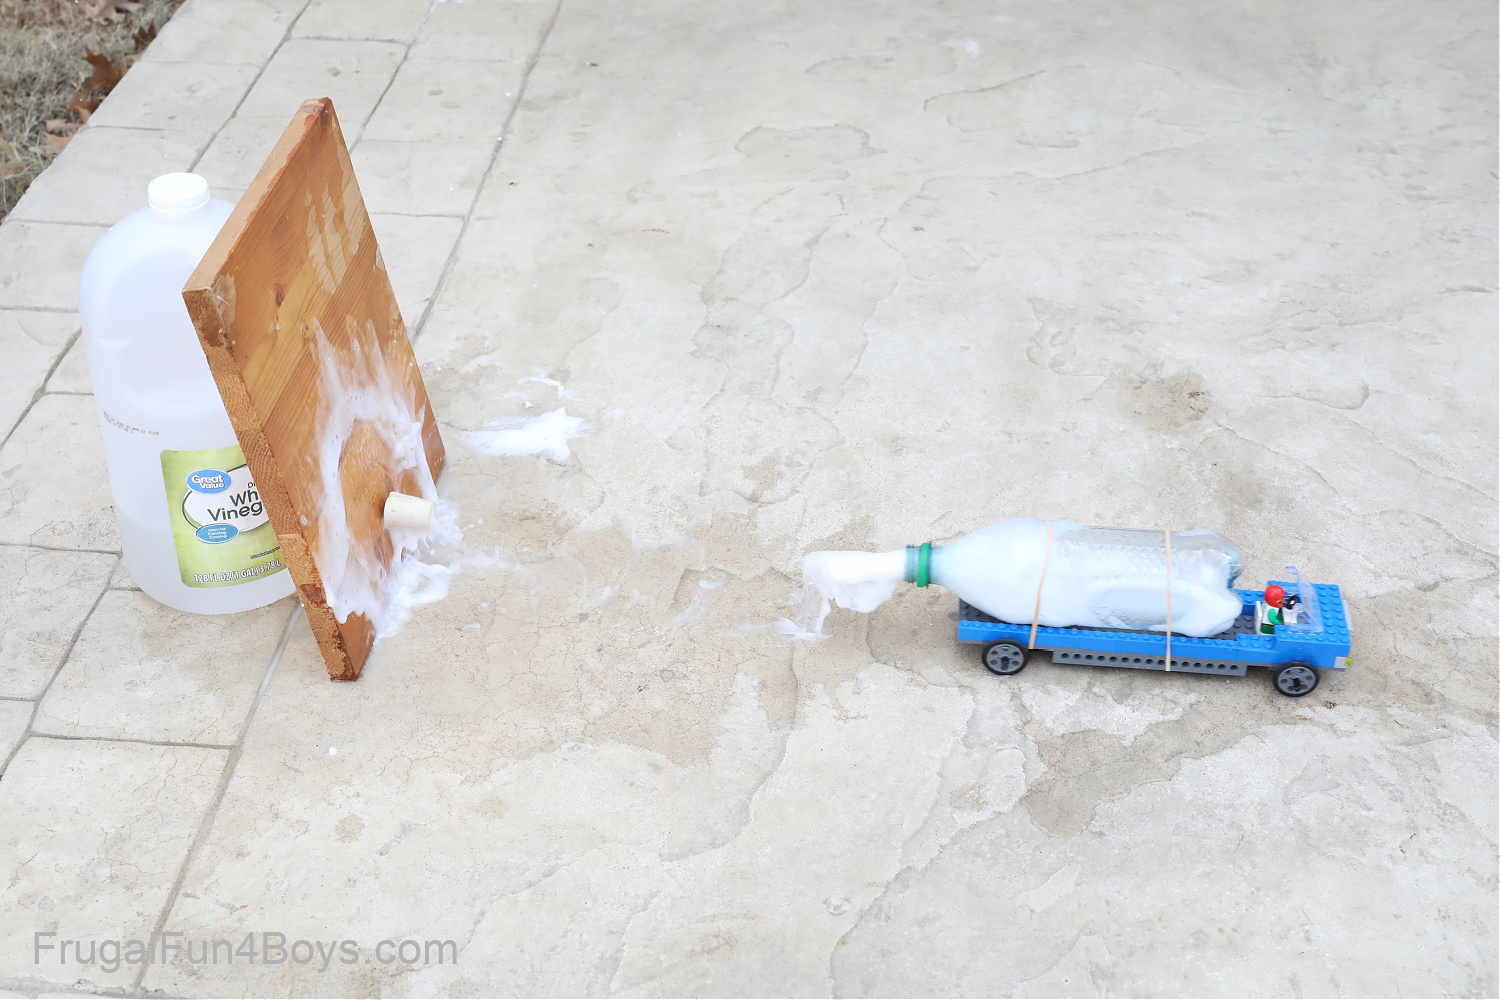
Then wait! Within about 20 seconds, the cork should pop out and your car will shoot forward!
Why do we need the board?
The first time we tried our car, the cork popped out and shot MANY feet away. The mass of the cork was much less than the mass of the car, and so all of the force of the gas and liquid went into the cork and the car sat still. I realized that we needed something for the car to push off of in order to harness the power of our “equal and opposite reaction.”
I added a board, and voila – it worked really well!
Tips:
- Get plenty of baking soda and vinegar so that you can launch your rocket car many times.
- Be prepared to video the car. It’s lots of fun!
- Seams between sidewalk squares may slow down your car. The best option is a smooth surface like a basketball court (outside) or a parking lot. Maybe the street if that’s safe.
Tacky Glue Bottle Rocket Powered LEGO Car:
Here’s our Tacky Glue version of this project!
Our longest run was 34.5 feet with this one.
The key to success is to use an empty Tacky Glue bottle (we used the 4 oz. size). Fill the bottle about 2/3 of the way with water. Drop in two Alka Seltzers (we cut them in half to fit them in) and quickly screw on the lid.
The pressure builds for about 30 seconds and then the cap blows off the tip and the car shoots forward!
Car #1:
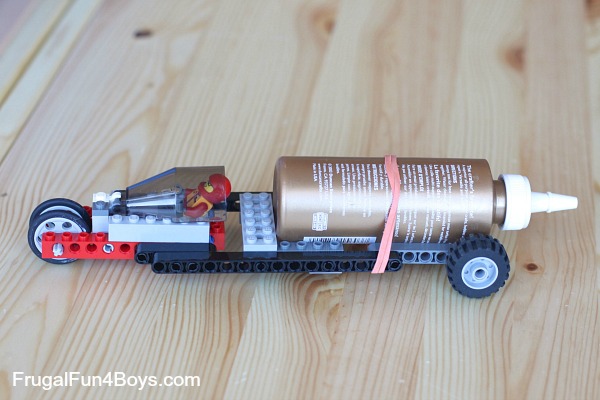
Here’s a view of the car without the Tacky Glue bottle.
We attached the glue bottle with a rubber band.
TIPS:
- Make sure the car is lightweight.
- Make sure that the car is strong enough to handle having the glue bottle attached with a tight rubber band and strong enough to withstand the launch.
- Make sure that the wheels of the car still spin freely when the Tacky Glue bottle is filled with water. The water adds quite a bit of weight, and if it touches the wheels or causes other pieces to touch the wheels, the car won’t go very far!
- You want the nozzle of the glue bottle to be as low to the ground as possible so that the force is located on the same plane as the wheels. This helps to overcome the friction between the wheels and the ground.
- Put a towel behind the car to catch the cap when is comes off – otherwise you might be hunting for it for awhile!
- Quite a bit of water sprays out along with the CO2 gas, so this is a good outside project.
- You may need to dry off the bottle in between runs. We found that if the bottle was wet, it was harder to screw the lid on tightly and the lid would end up leaking. If it leaks, you won’t get enough pressure built up to blow off the cap.
- We had two Tacky Glue bottles, and one worked better than the other. The one that worked the best was an older one that we had on hand. Our new Tacky Glue bottle would sometimes swell from the pressure, and yet the cap had still not released after two minutes. We ended up just releasing the cap ourselves. I really don’t think that the plastic bottle would explode, but just be aware.
- Have a video camera ready. It’s super fun to re-live your best launches!
LEGO® is a trademark of the LEGO® group of companies which does not sponsor. authorize, or endorse this site.
4 Comments
Kristina Barnaby Mar 20, 2015
I would love to make these for my girls summer STEAM camp, but I do not have any Tacky Glue bottles on hand. Do you have suggestions for other bottles that would work -- like an empty craft bottle? I could always buy the glue and dump it, but that seems like a waste.
Thanks.
Sarah Mar 20, 2015
Hmm, good question! The key is to find a bottle with a small nozzle with a small cap. Something like a film canister won't work. If you do end up emptying out the glue, the 4 oz. size Tacky Glue is less than $2 per bottle, so at least it's not a huge expense. I wonder if the the glue could be saved in a container of some sort?
RO Aug 19, 2017
Perhaps these would work: https://www.amazon.com/Plastic-Squeeze-Dispensing-Pinnacle-Mercantile/dp/B016910ROM
Vicky May 14, 2019
These don't work. We've had failure with the new tacky glue bottles as well. The tip doesn't pop off and the bottle swells. We took off the thread of the nottle and the cap blows off before we get it to the ground. Next, we'll try taking off a section of the threads in hopes that the tip will blow off. We also found warm water makes these blow faster than cold water.
Engineer the Dad Apr 15, 2015
Fantastic! I'm so impressed with those. I'll be building my own with the kids soon. FYI - it's the water being expelled that provides most of the thrust. It's much heavier than gas, and so provides thrust at much lower nozzle speeds than you would need with gas. It's counter - intuitive, but the more water you have pushed out, the further the car will go. Tilting the bottle down a bit might give you more distance, as the gas will need to expel more water before it can escape.
Love your site!
Science Mom Sep 8, 2015
Does the smaller cap work better due to the slower release of gas, or because it pops off easier? Thanks.
Vicky May 14, 2019
Because it pops off easier.
Lilly Nov 10, 2016
Do you have any alternatives to use instead of legos?
Sarah Nov 23, 2016
Not that I can think of... Sorry!
Amanda Dougherty Apr 12, 2023
Do you happen to have a link for the cork you found that fit the Dasani bottles?
Sarah Apr 13, 2023
I don't, sorry! It was in a pack of corks from Hobby Lobby.
Post a Comment