
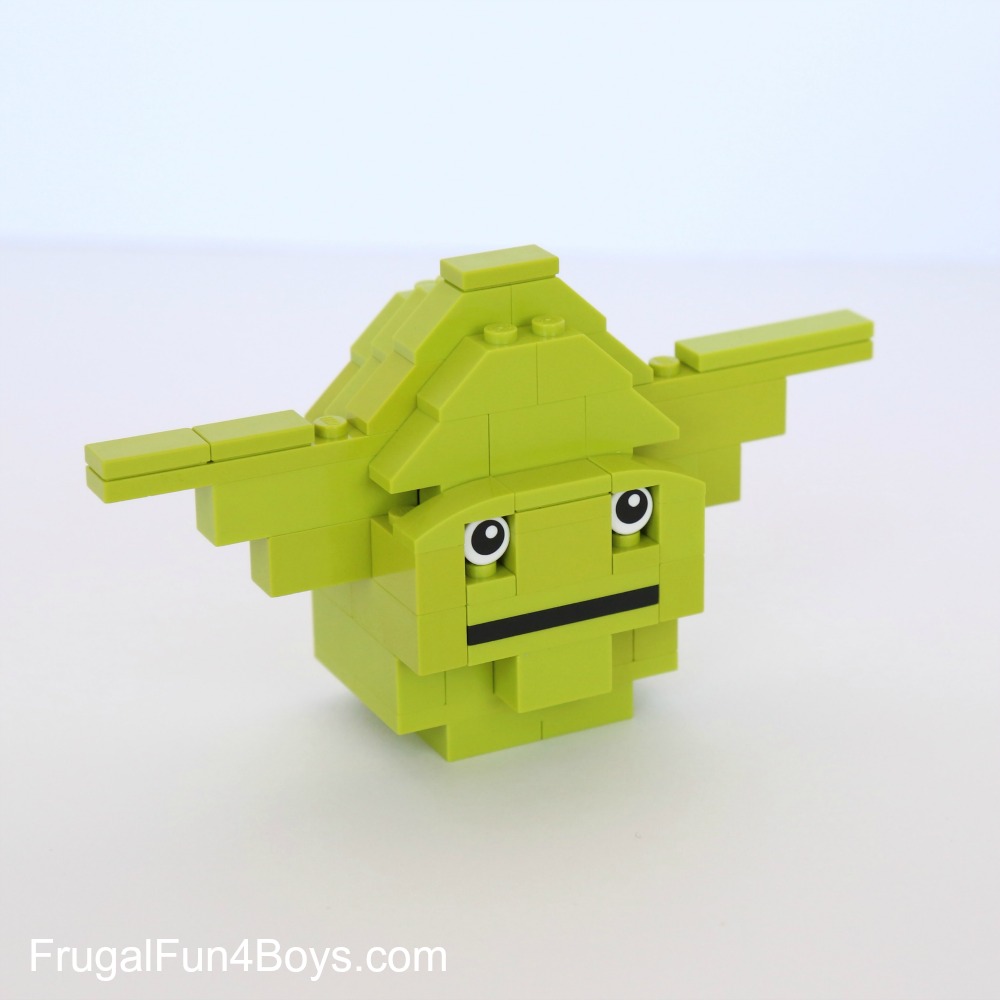
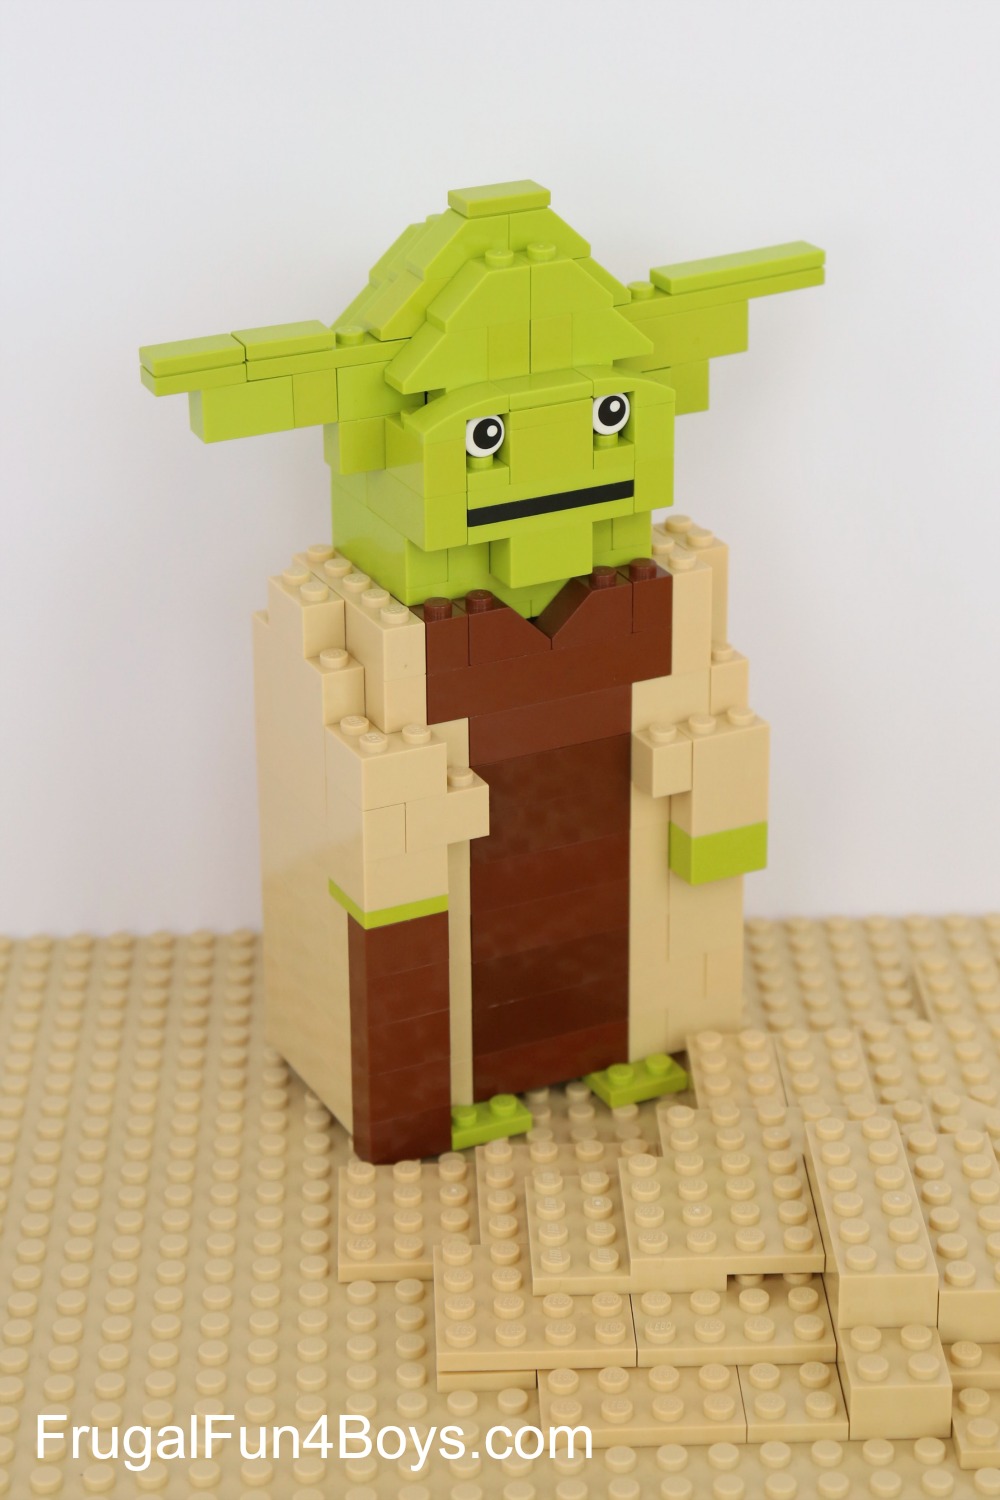
We have posted a LEGO® R2-D2 and a C3PO, and Aidan decided that it was time to create a Yoda! He worked and worked on Yoda’s head, and I am pretty impressed with his final version.
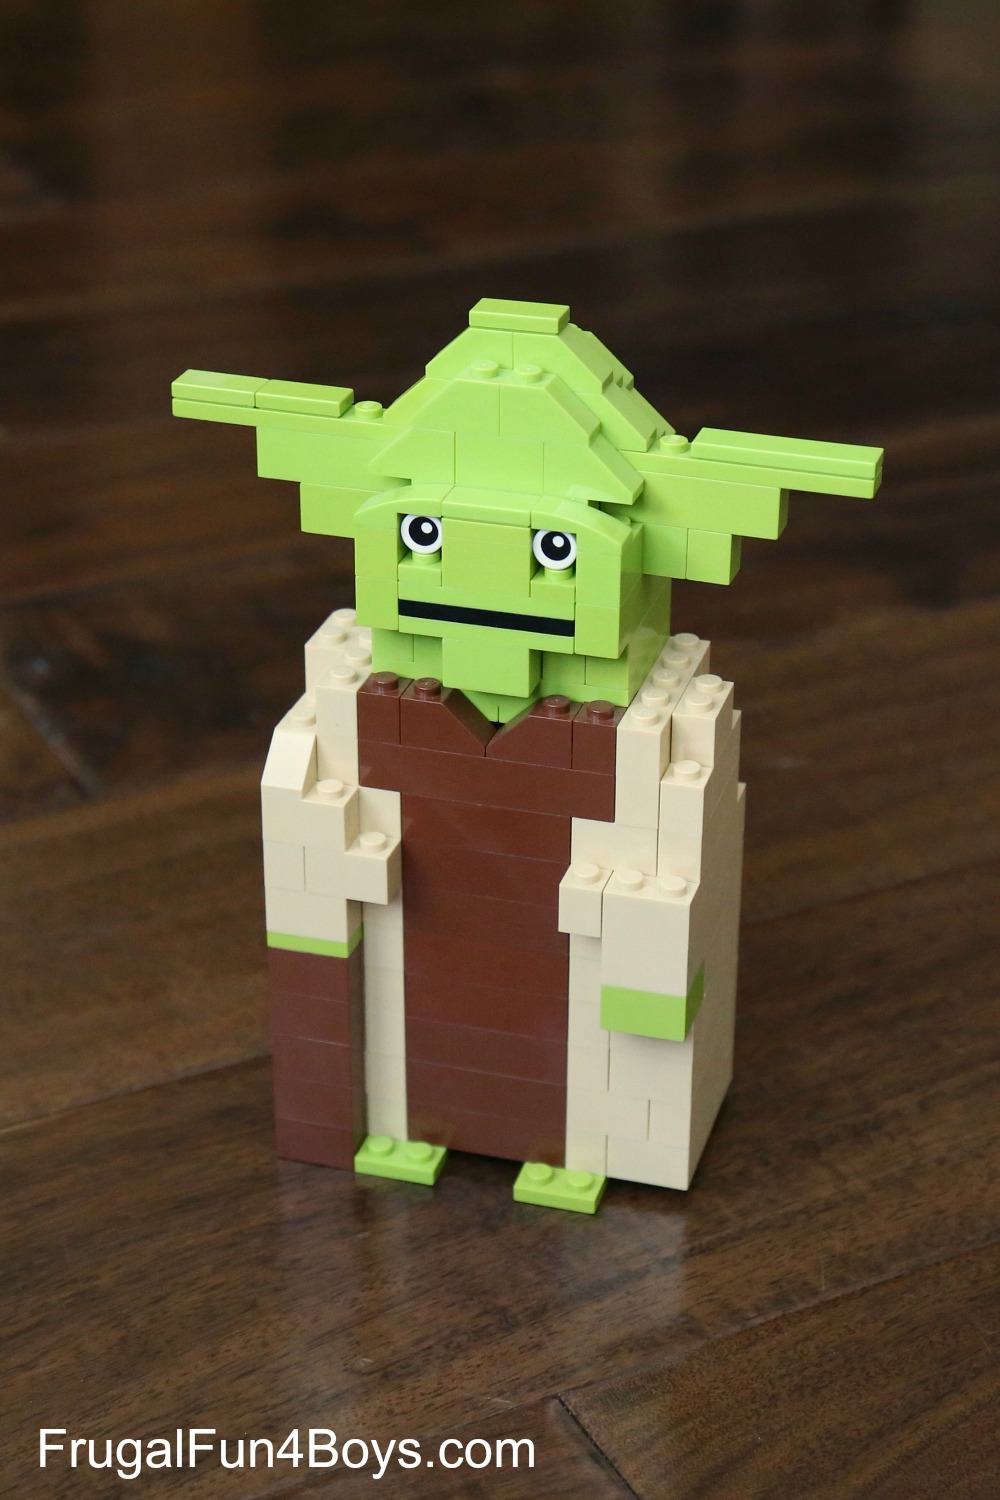
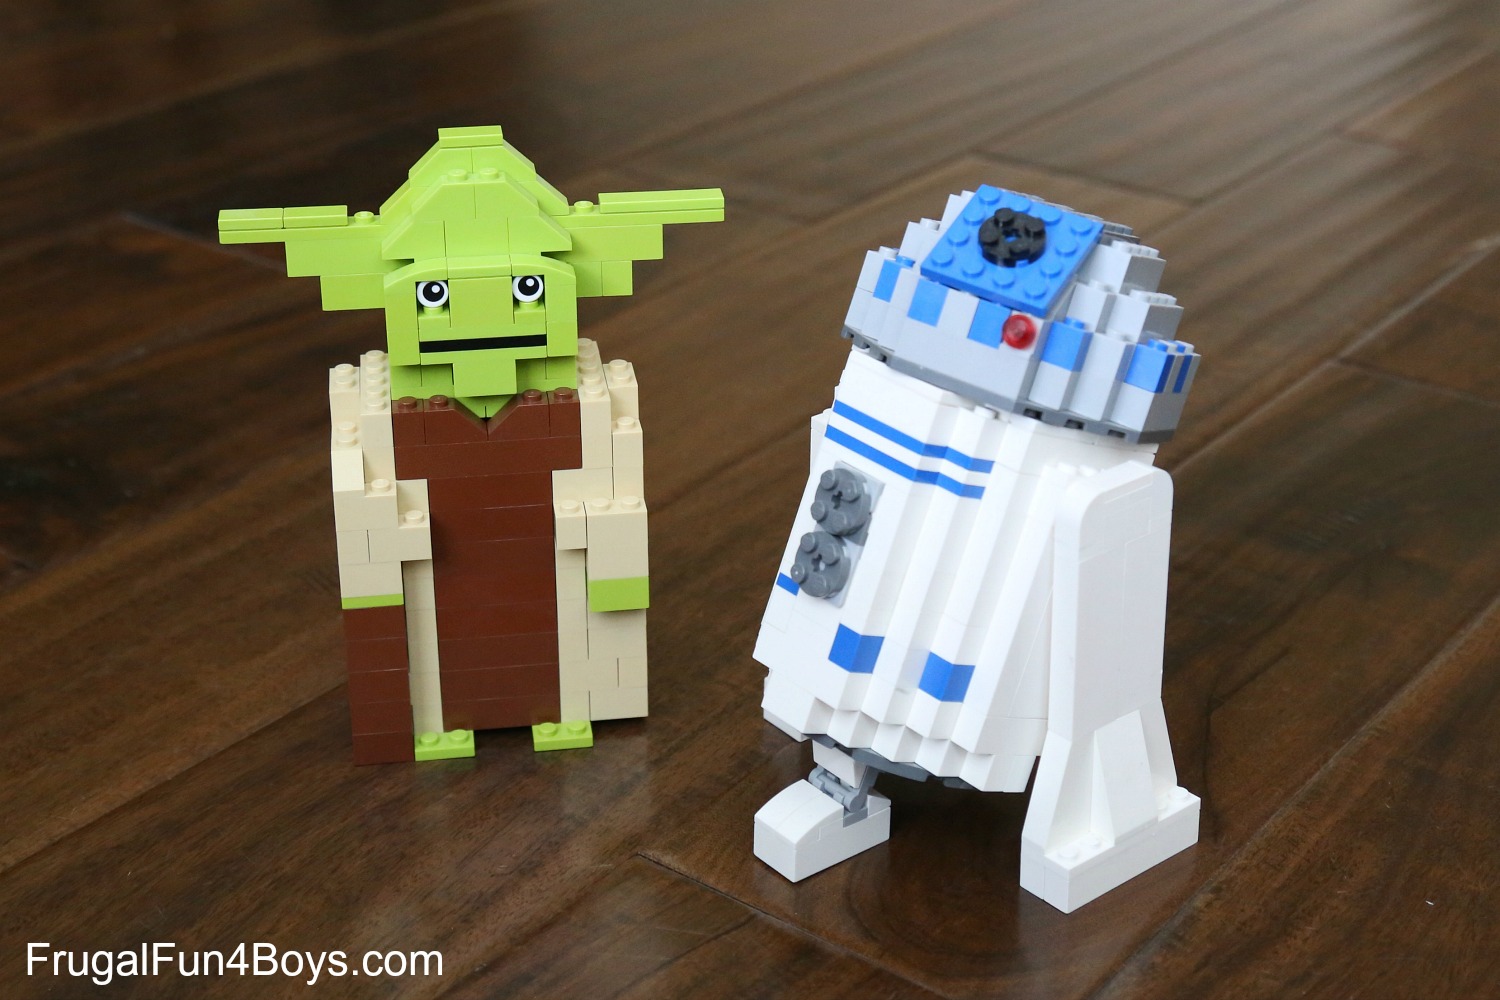
This Yoda is a great size to go with the R2-D2 that Aidan built. You can see our other Star Wars projects here: C3PO and R2-D2
Here’s how to build Yoda!
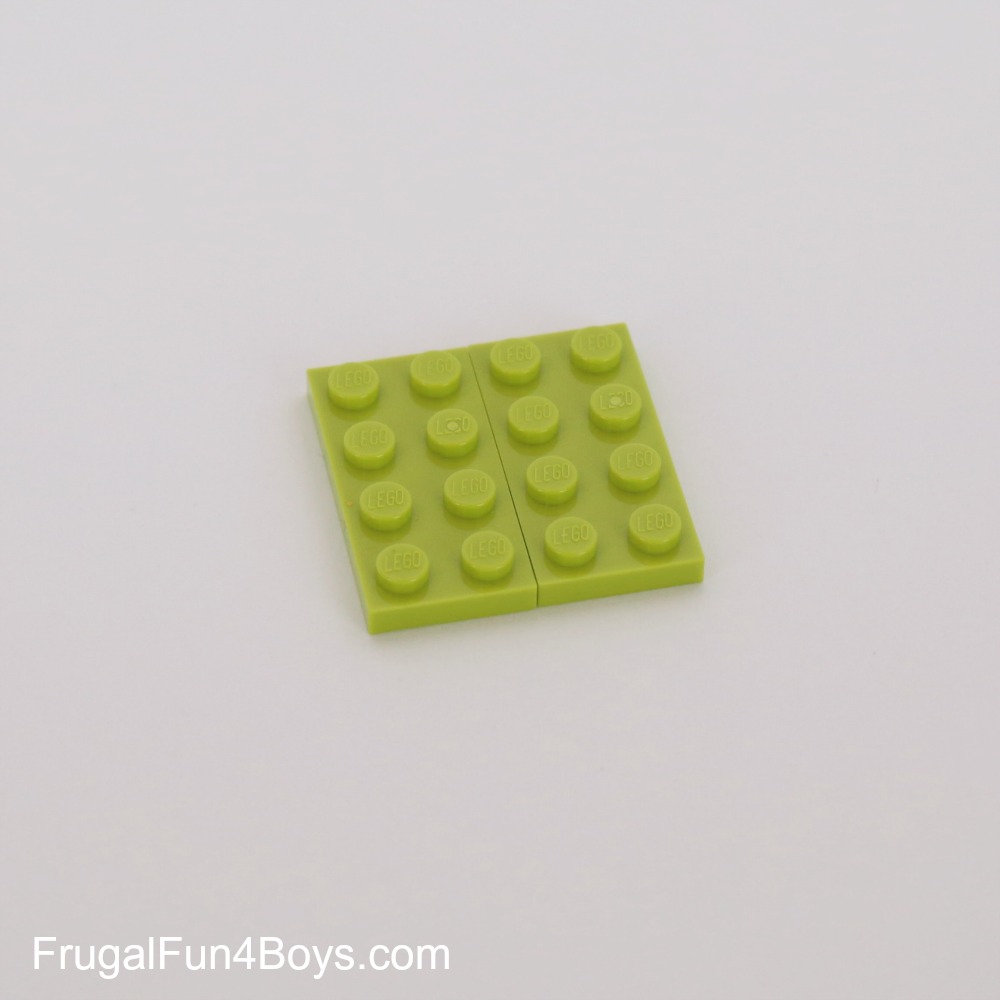
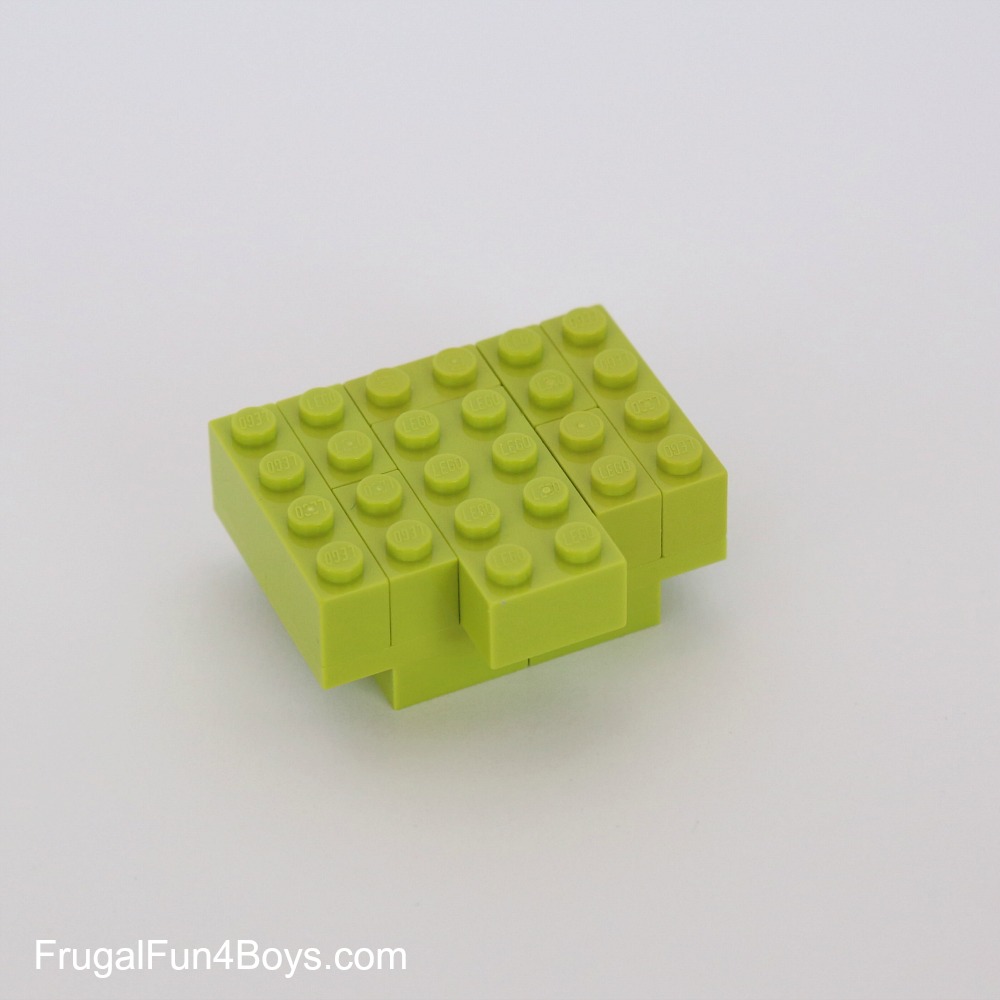
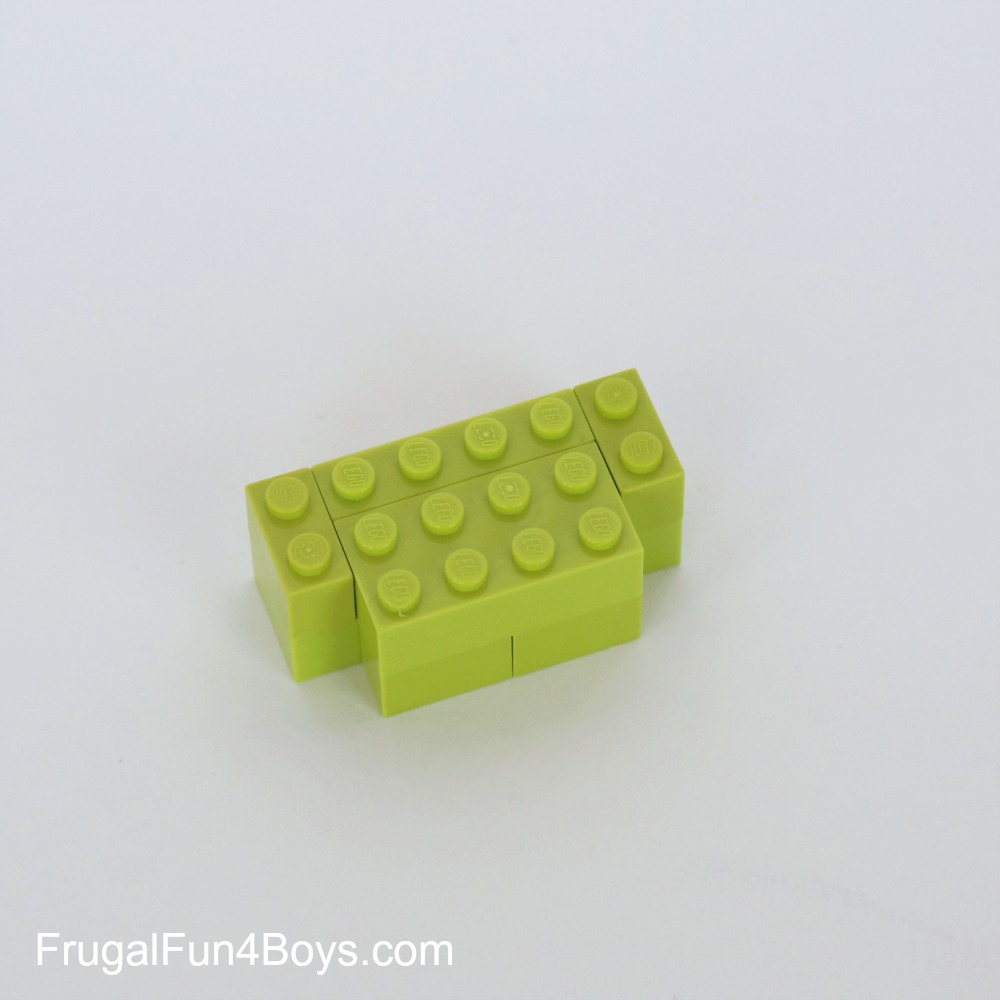
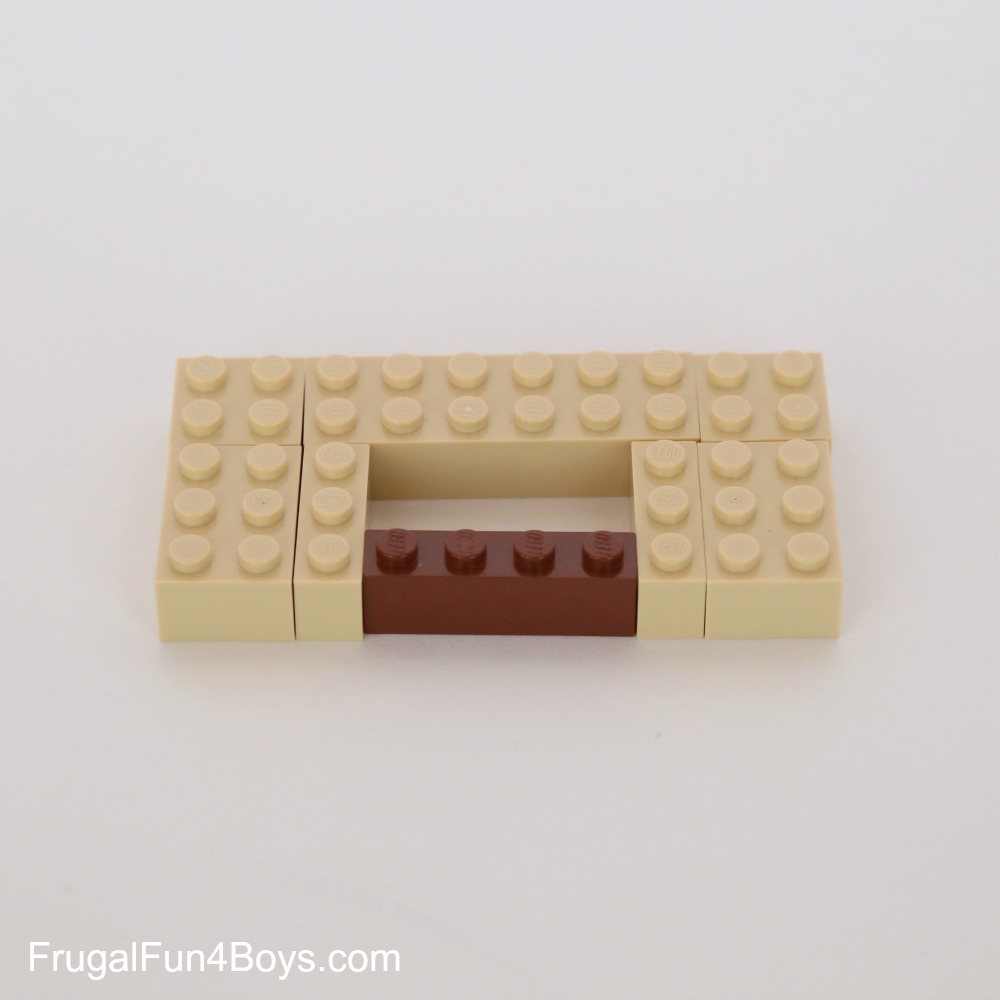
Step 1: Begin Yoda’s head with two 2 x 4 plates.
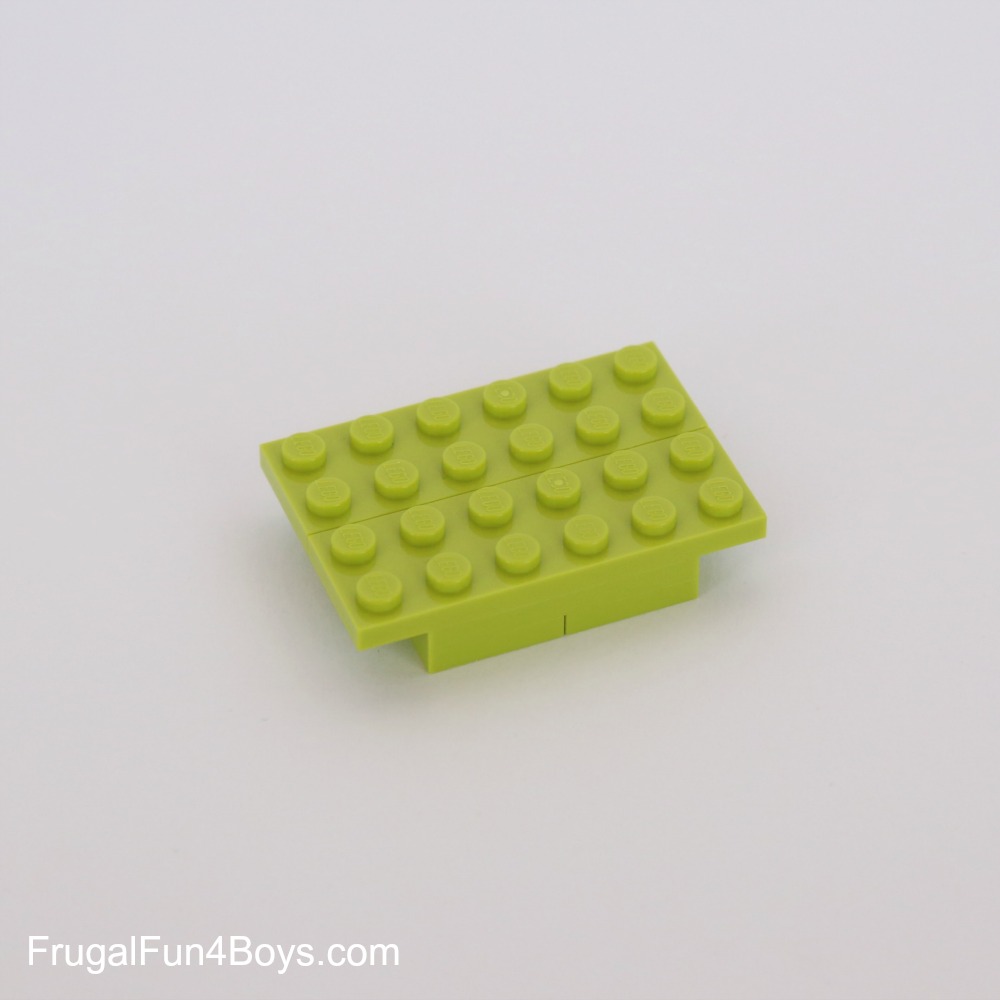
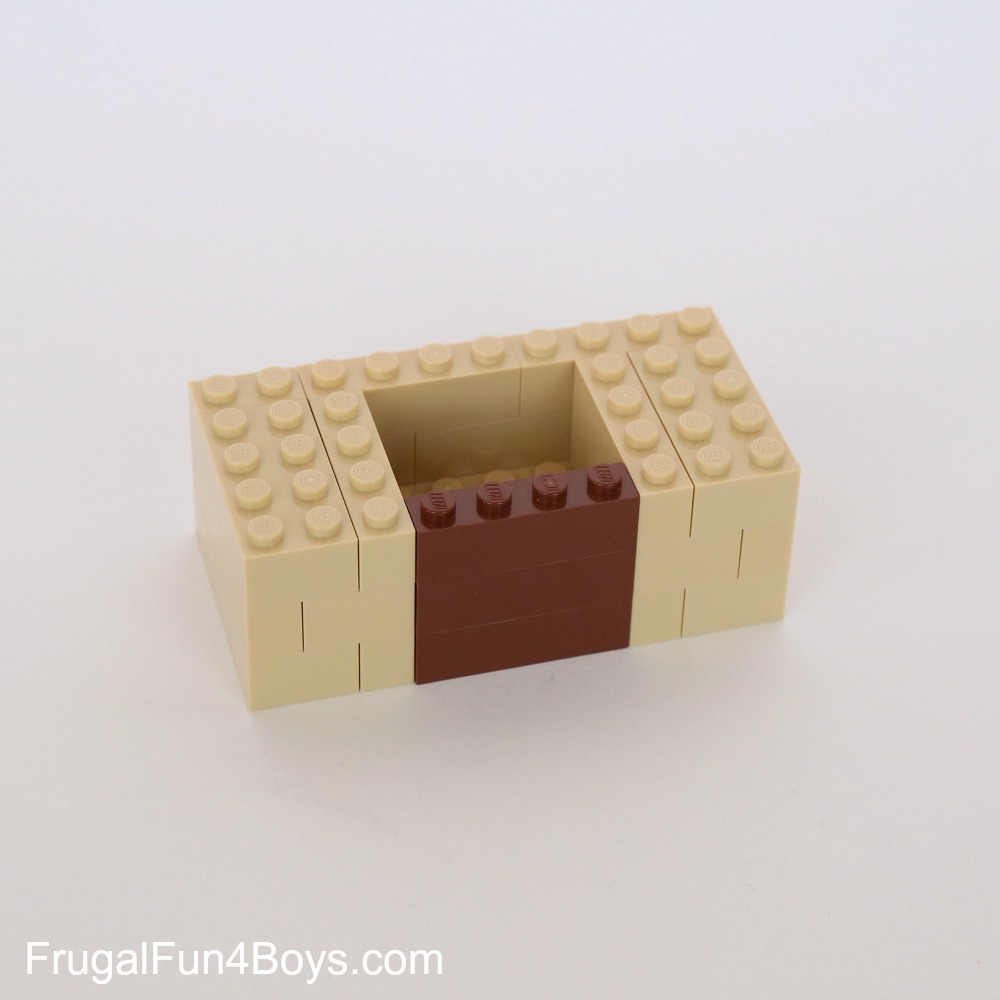
Step 2: Add two more 2 x 4 plates on top, and then two 2 x 6 plates on top of those.
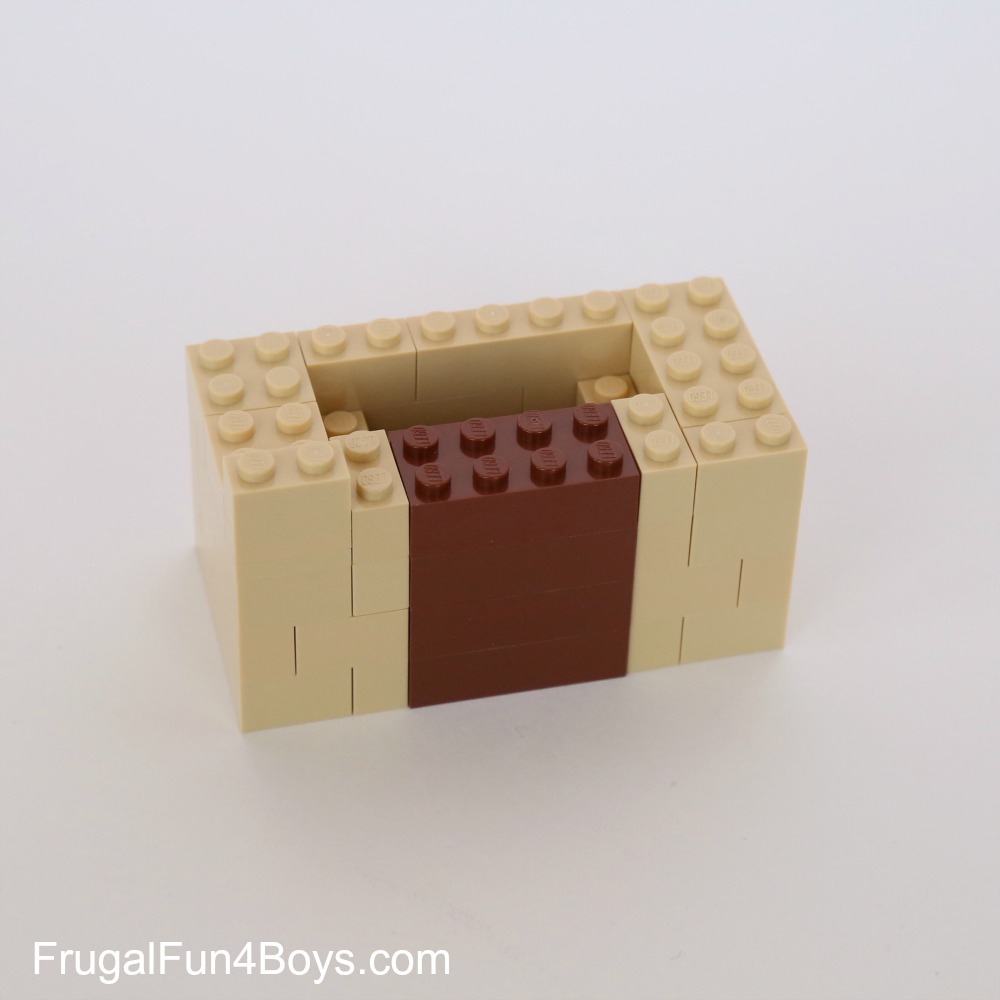
Step 3: Add a layer of bricks. Make sure that the brick in the middle hangs over by 1 stud.
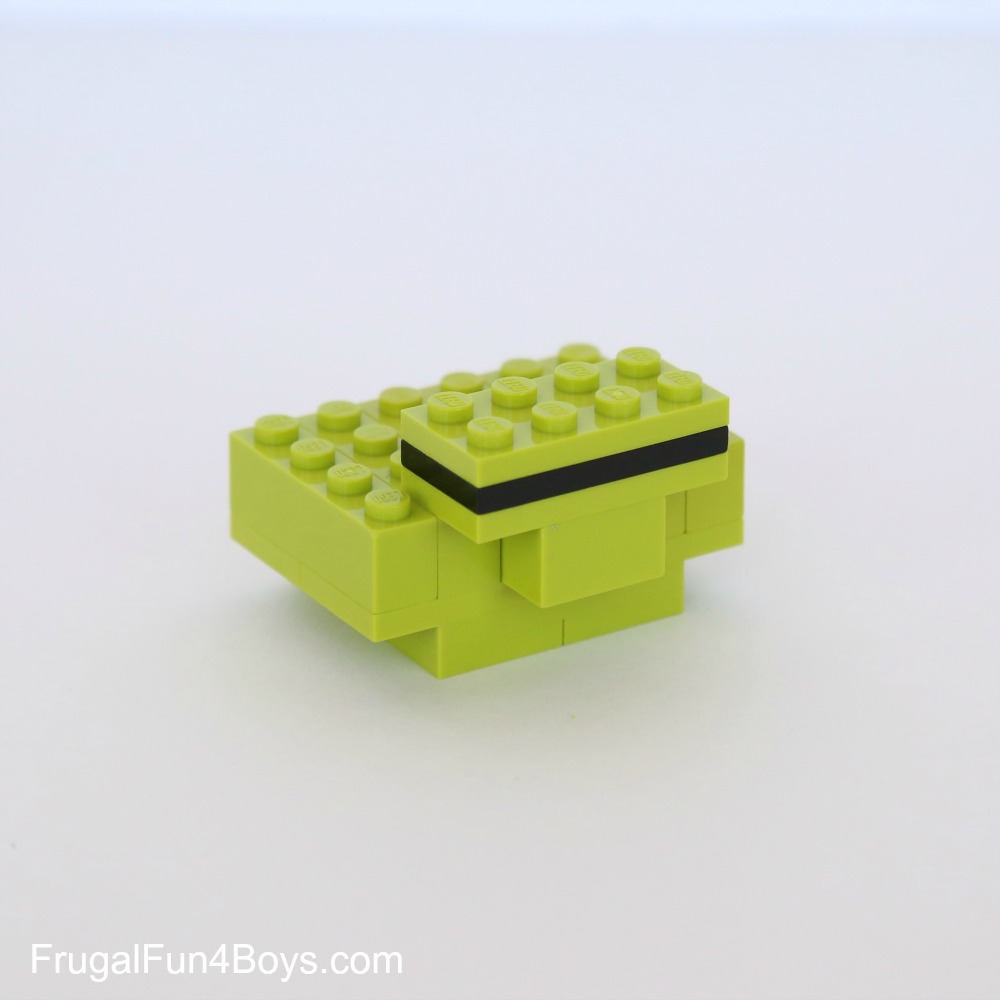
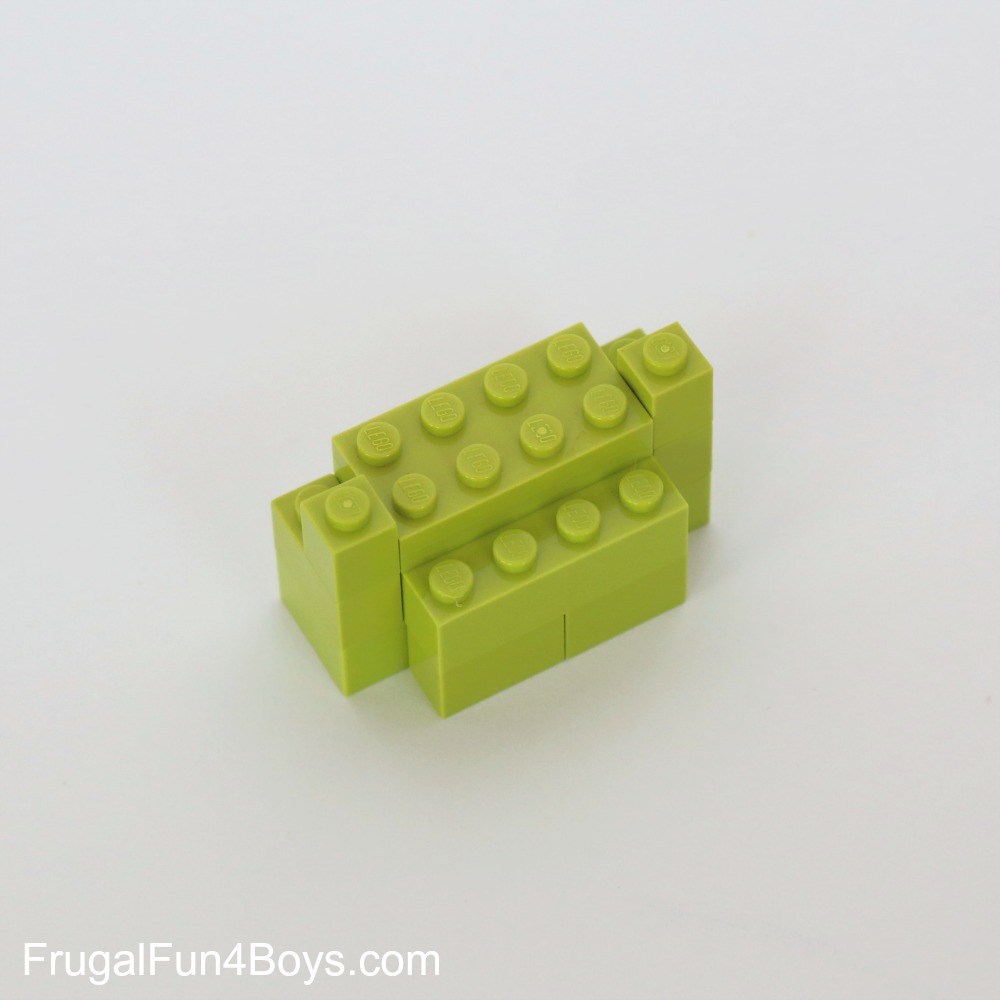
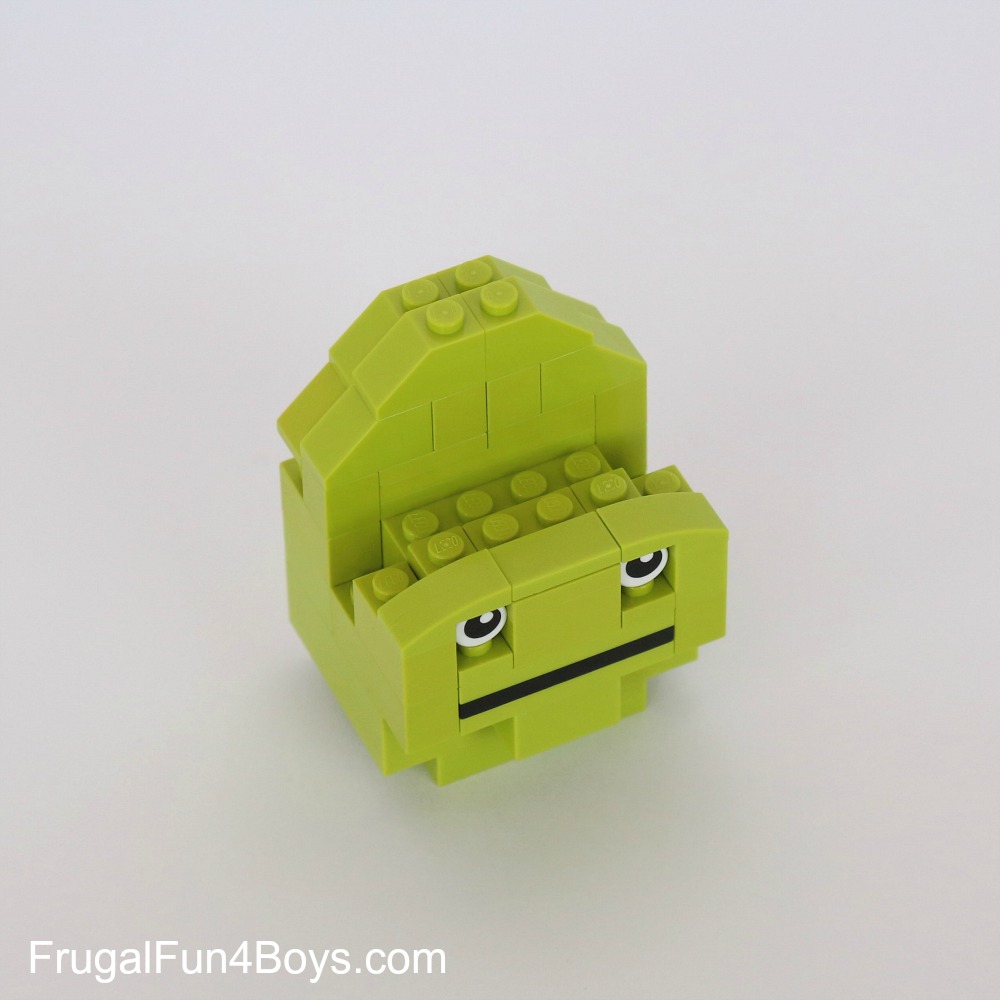
Step 4: Add Yoda’s mouth. One 2 x 4 lime green plate, then a black 2 x 4 plate, and another 2 x 4 lime green plate.
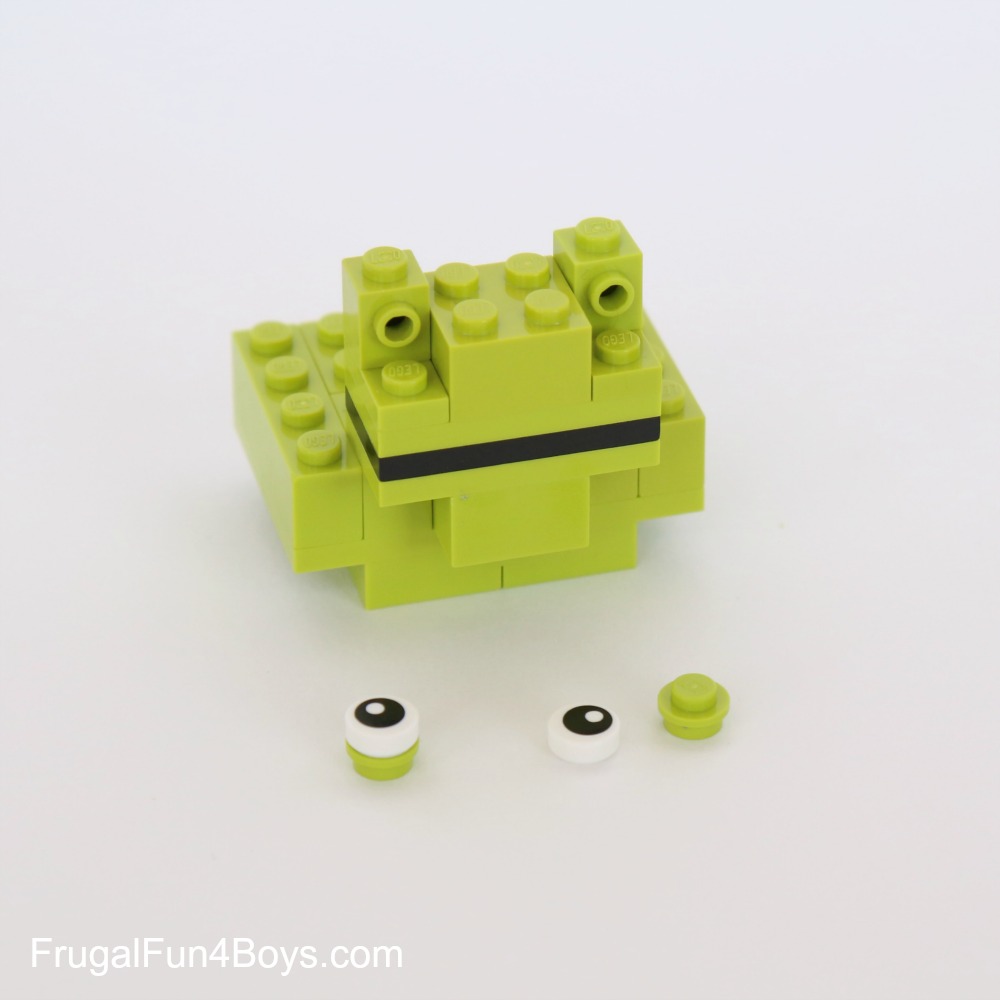
Step 5: On top of the pieces from step 4, add a 2 x 2 brick in the center, two 1 x 2 plates (one on each side), and two 1 x 1 bricks with a stud on the side. Find two eyes and two 1 x 1 round plates to put behind each eye.
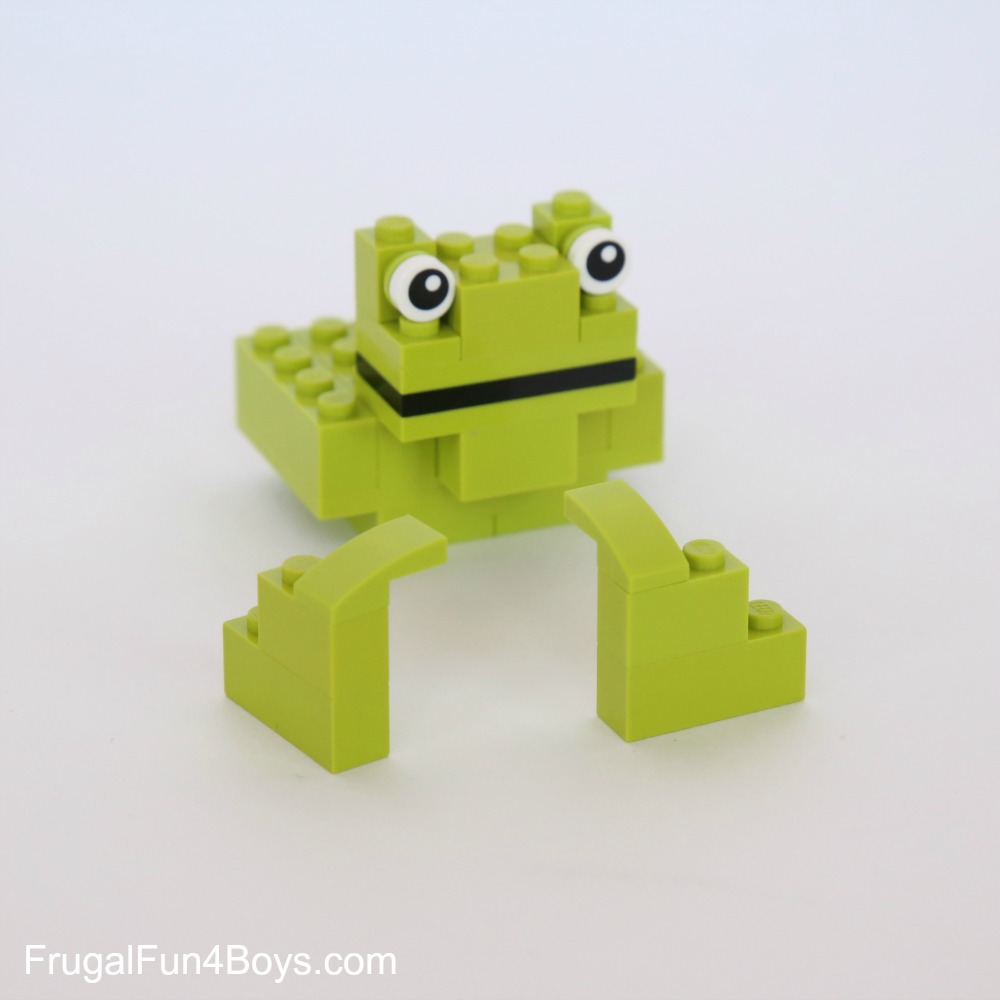
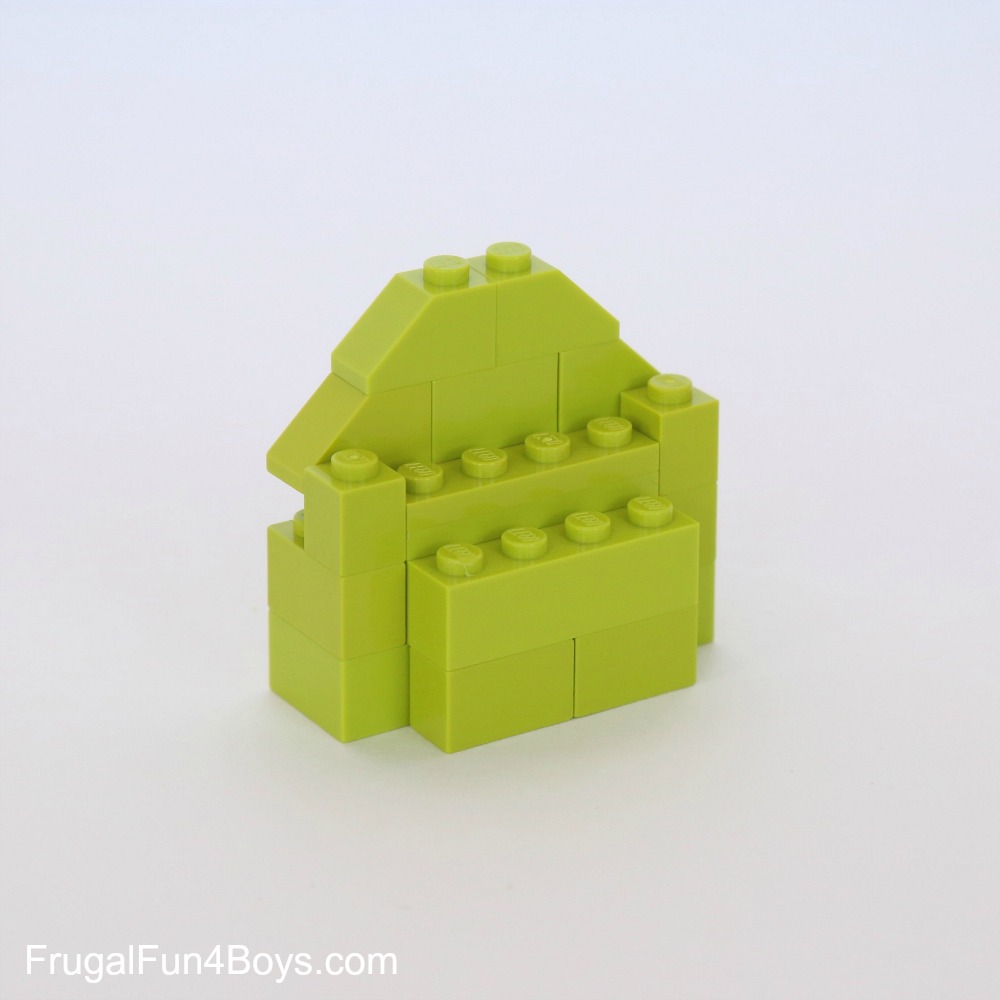
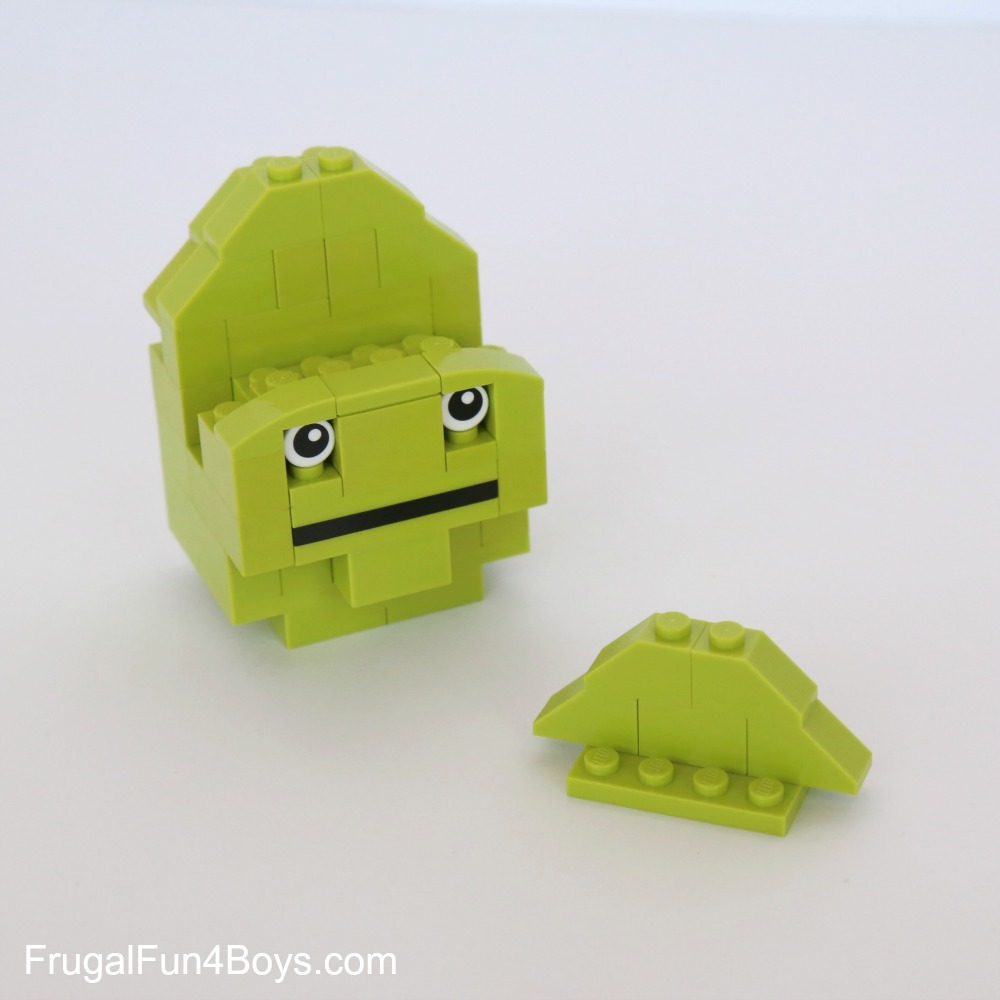
Step 6: Attach the eyes. Then build the sides of the face. Each section is a 1 x 3 brick, a 1 x 2 brick, and a 1 x 2 curved slope. (Yoda totally looks like a frog at this stage, ha ha!)
Step 7: Attach the sides of the face.

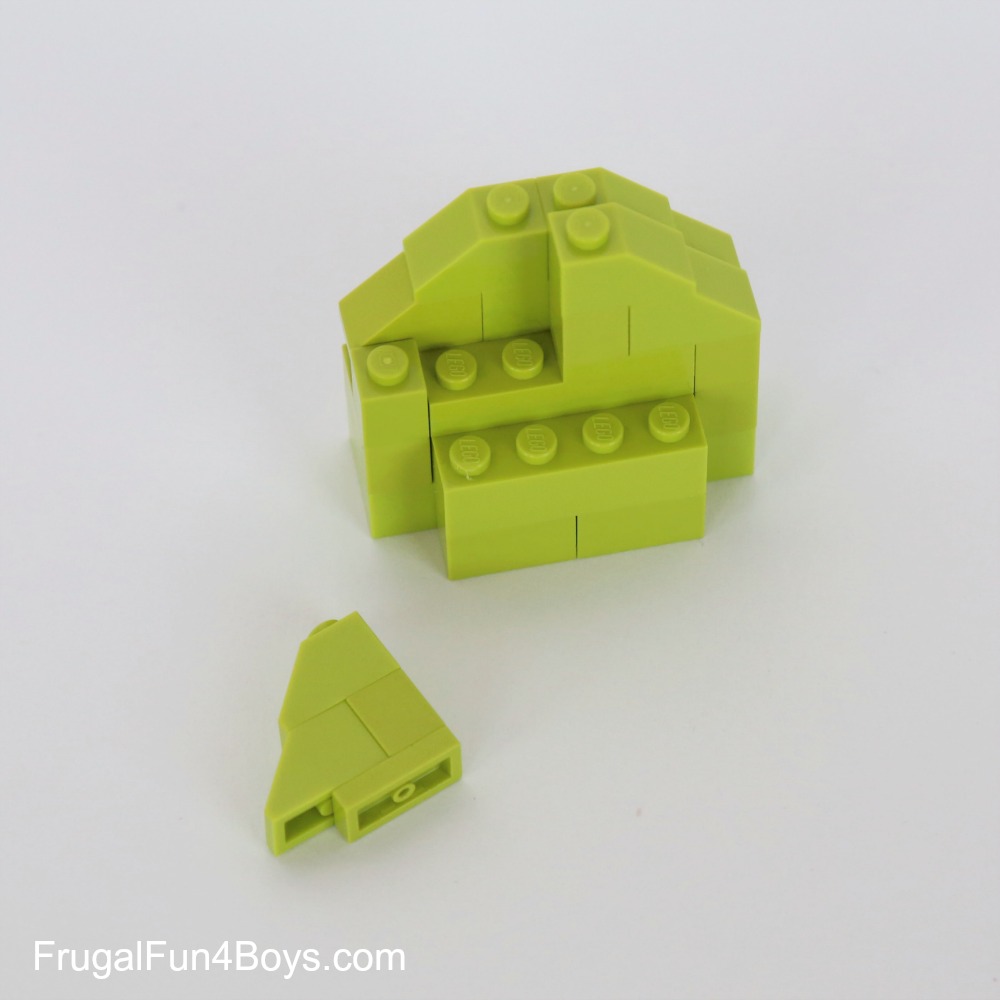
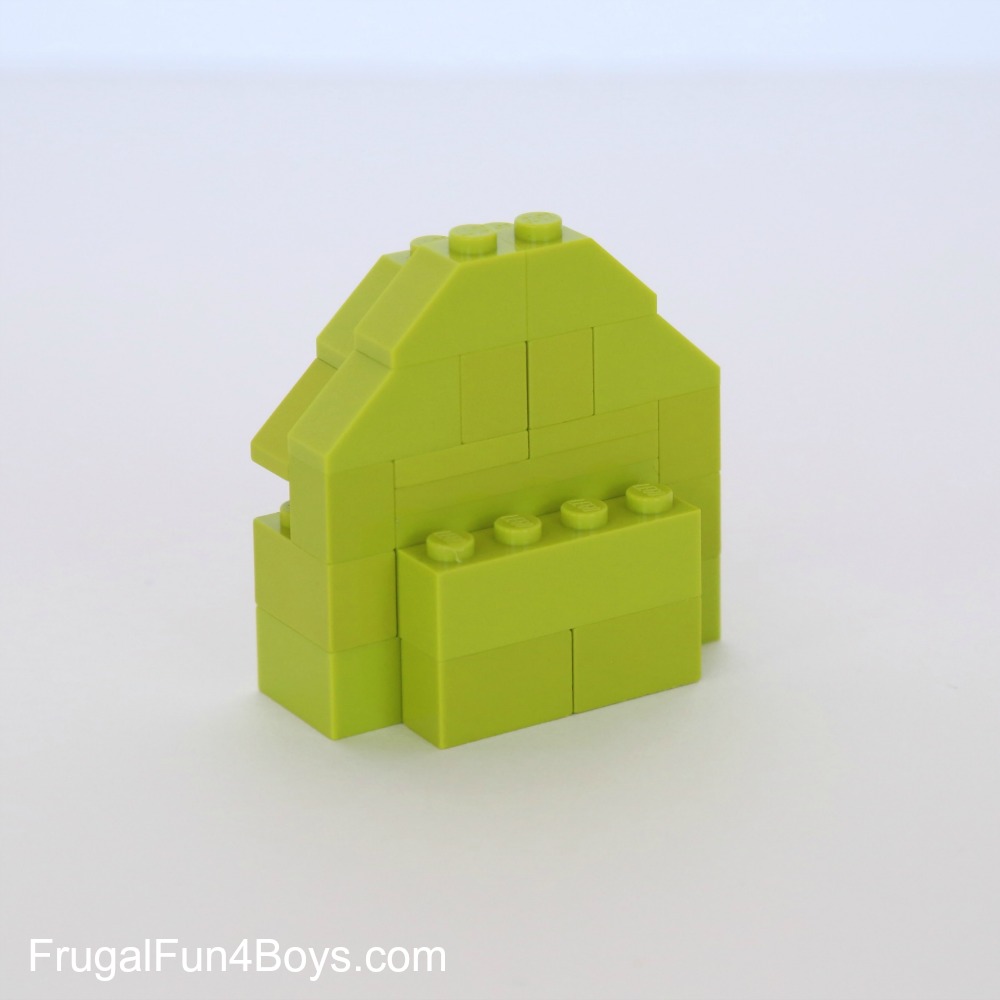
Step 8: This step begins the next section of Yoda’s head. Build this shape, two layers high.
Step 9: Add two 1 x 1 bricks and two 2 x 4 plates between them.
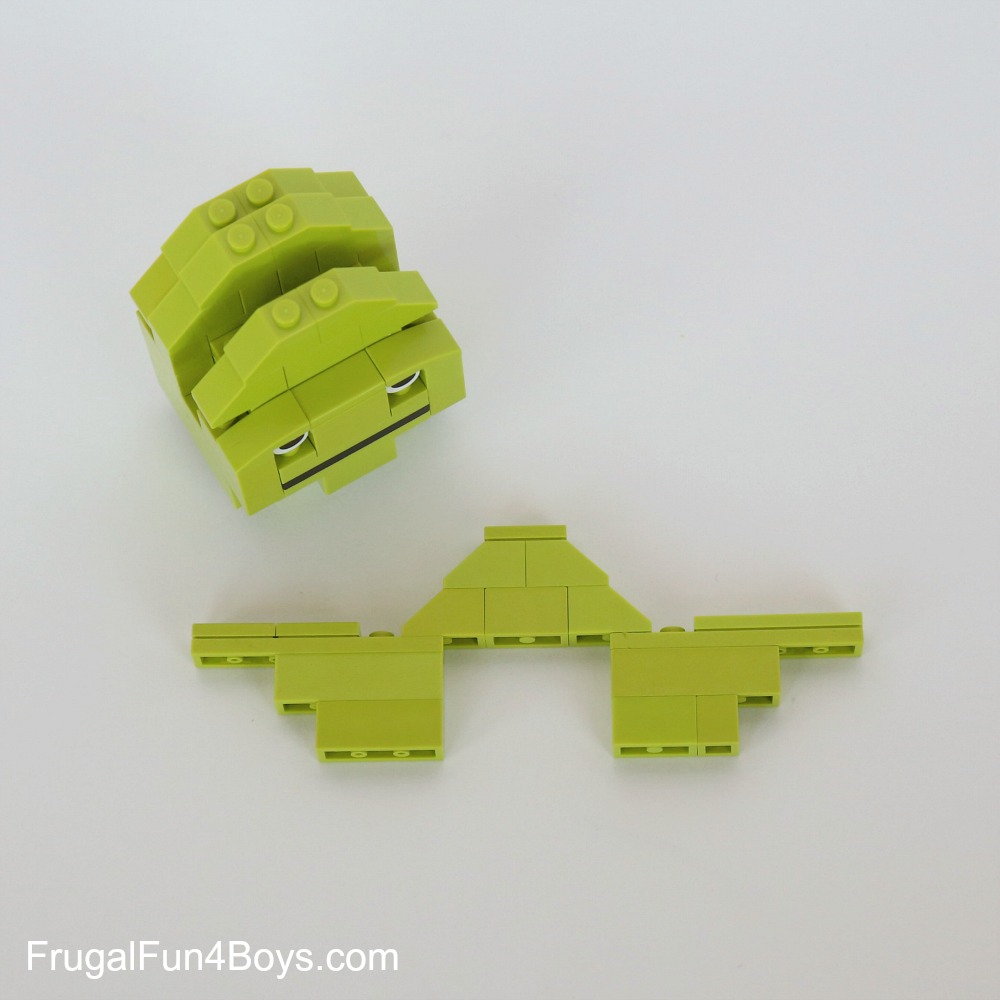
Step 10: Add four 1 x 2 slopes and one 1 x 2 brick. This leaves a slight gap on either side. You can fill in the gap with two 1 x 1 plates on each side, or just leave it. We didn’t have those pieces.
Step 11: Create two sections as shown below. Each section has two 1 x 2 slopes, one 1 x 1 brick, and one 1 x 2 plate.
Step 12: Attach both sections to the head.
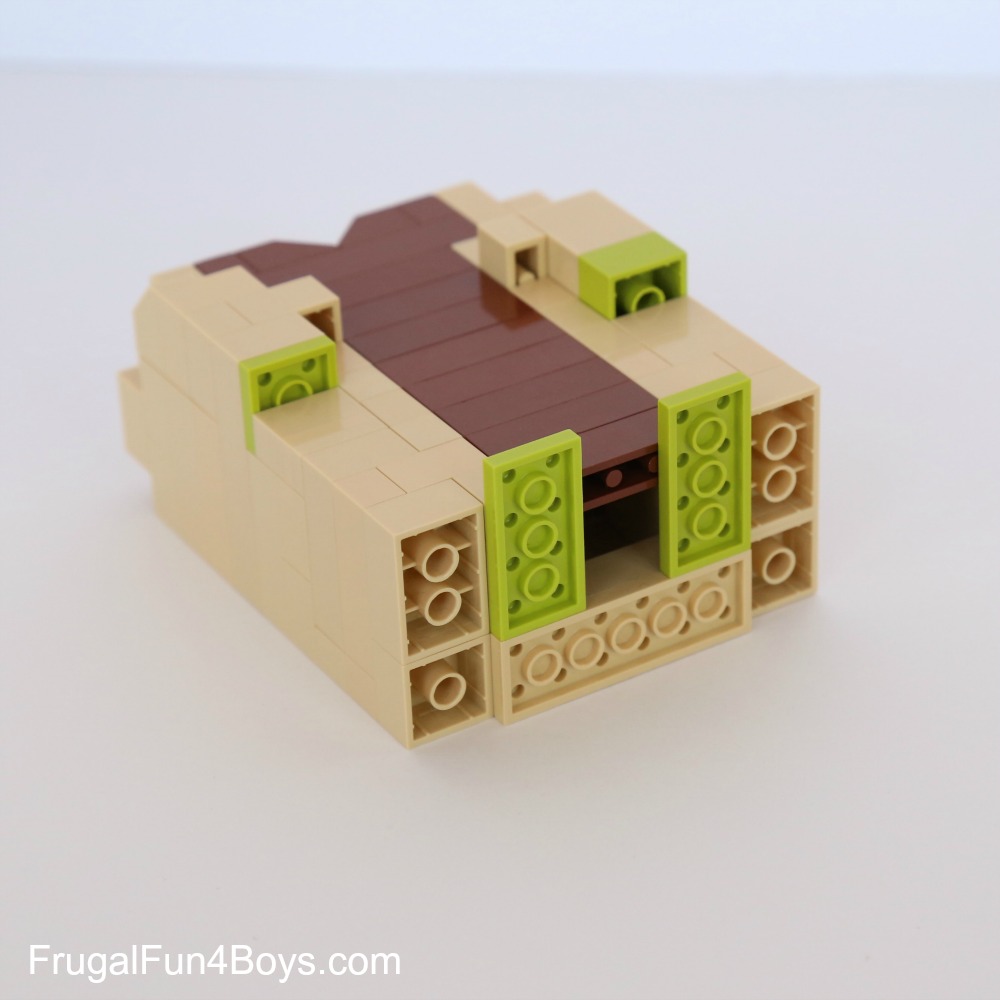
Step 13: Attach the front of the head to the back of the head.
Step 14: Build the next section shown. This section is a 2 x 4 plate, four 1 x 2 slopes, and a 1 x 2 brick.
Step 15: Add this to the head behind the eyes.

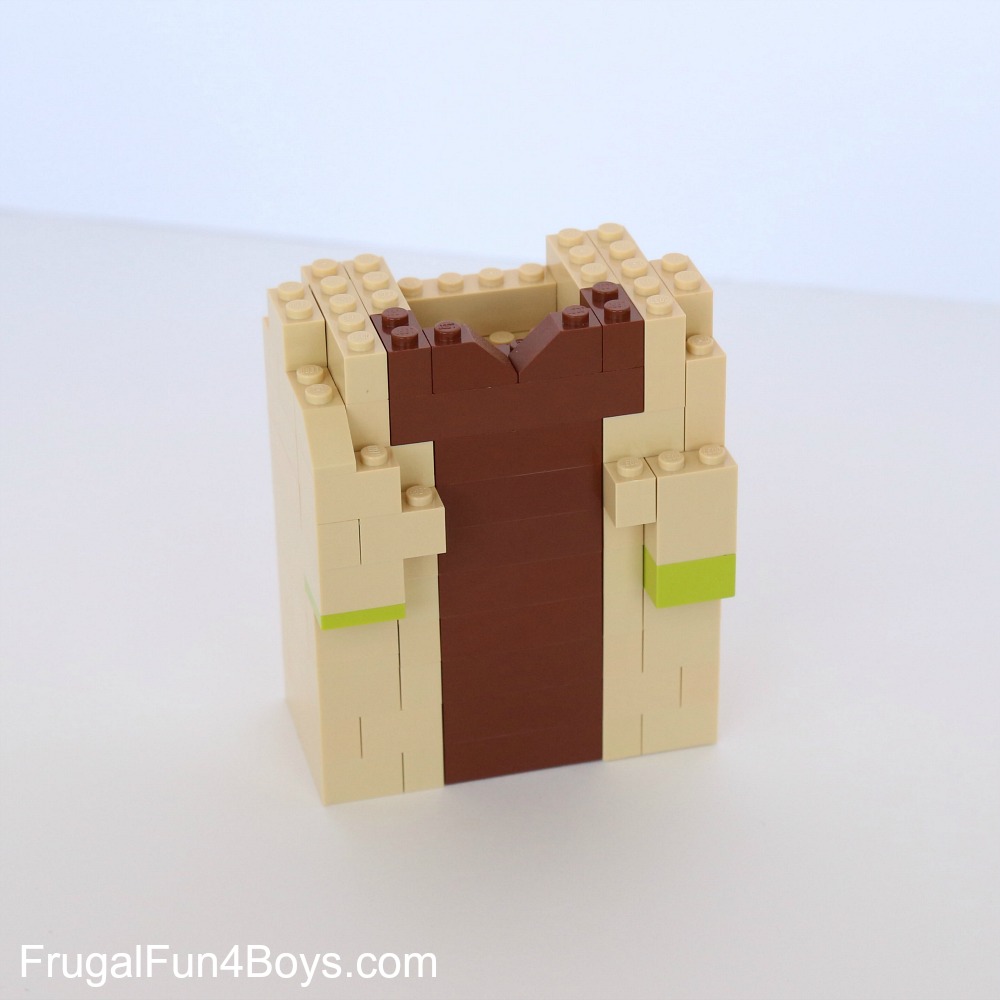
Step 16: Build Yoda’s ears and top of the head as shown below.
Step 17: Attach this final section to the head.
Step 18: Start building Yoda’s body. This is the bottom layer.
Step 19: Add two more layers.
Step 20: Add a fourth layer. Add two tan 1 x 2 plates in the front left (Yoda’s right) corner as shown.
Step 21: Add a 2 x 2 lime green plate on top of the two 1 x 2 plates from the last step. Then add another layer of bricks including a 2 x 2 lime green brick for the other hand.
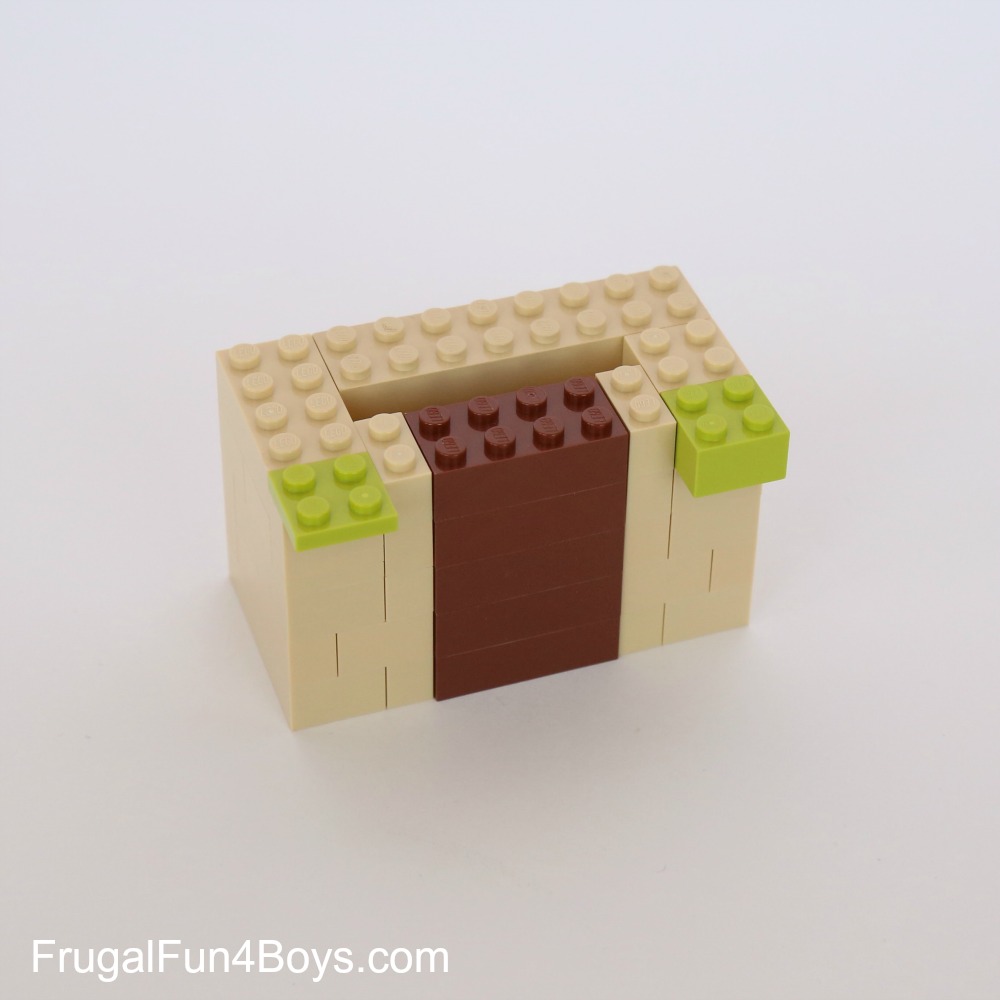
Step 22: The rest of the body is five more layers. Shape the arms as shown and use 1 x 2 brown slopes to create a v-neck tunic.
Step 23: Add 2 x 4 lime green plates as feet on the bottom. Add a 2 x 6 tan plate on the back of the body to balance out the feet.
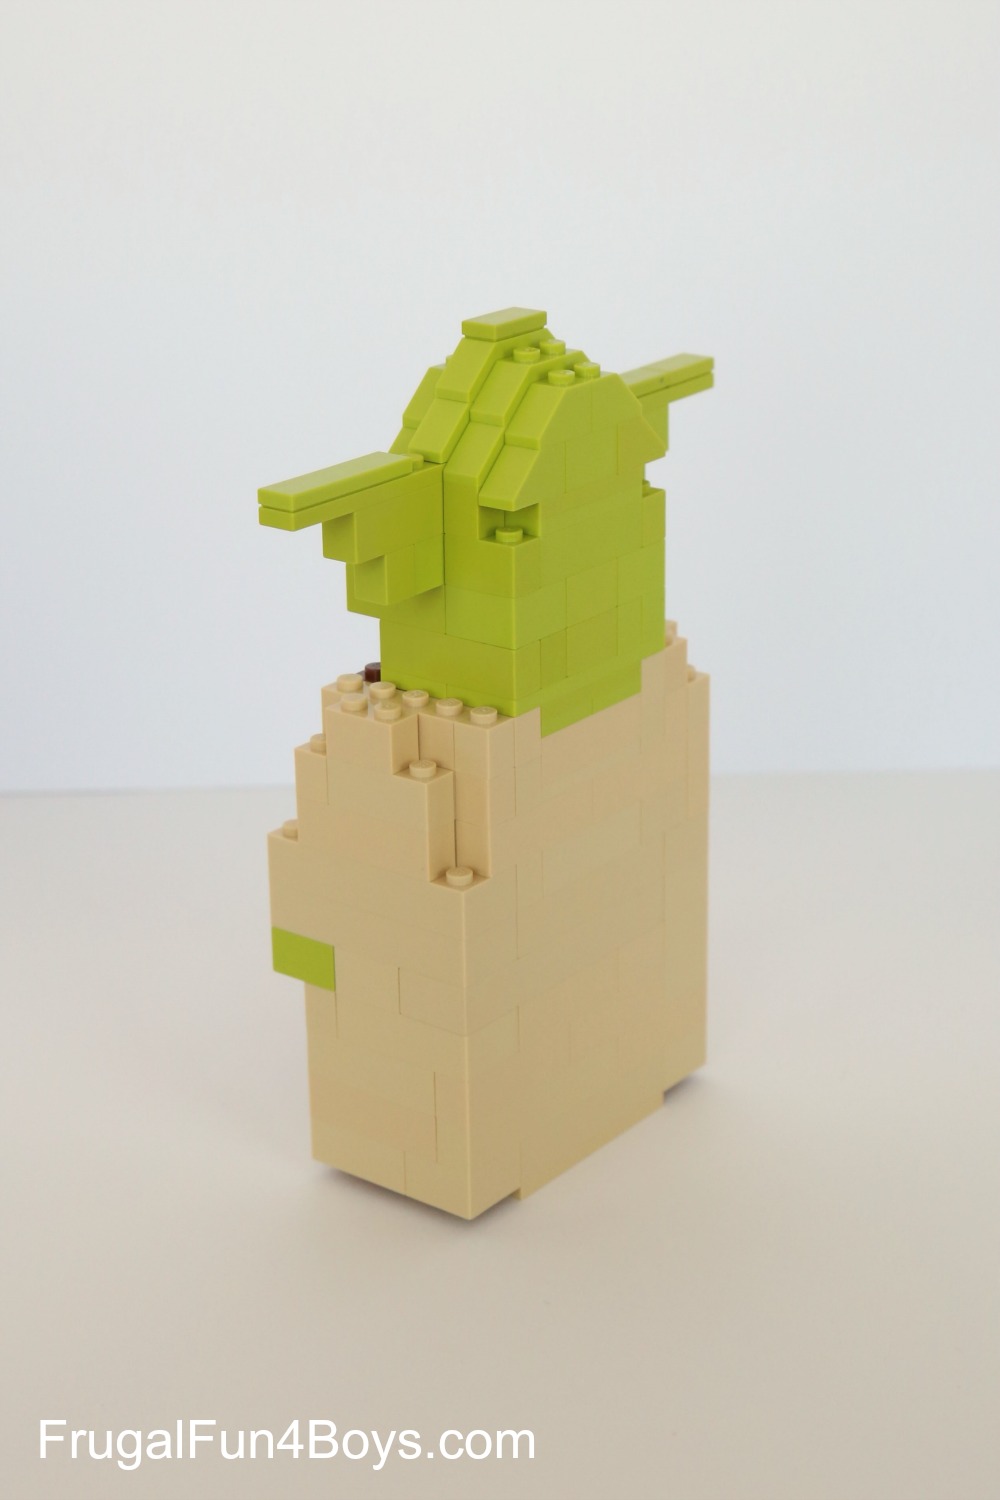
Step 24: Attach the head to the body! Add a stack of brown 1 x 2 bricks for Yoda’s staff.

Here’s a view from the back.
Have fun building! And be sure to stop by our LEGO R2-D2 and C3PO instructions as well.
LEGO® is a trademark of the LEGO® group of companies which does not sponsor, authorize, or endorse this site.
2 Comments
Nikkki Feb 12, 2016
Well done Aidan,fantastic work.Thanks for all the great builds !
mason Mar 4, 2016
AWESOME!!!!!!!!
Post a Comment