
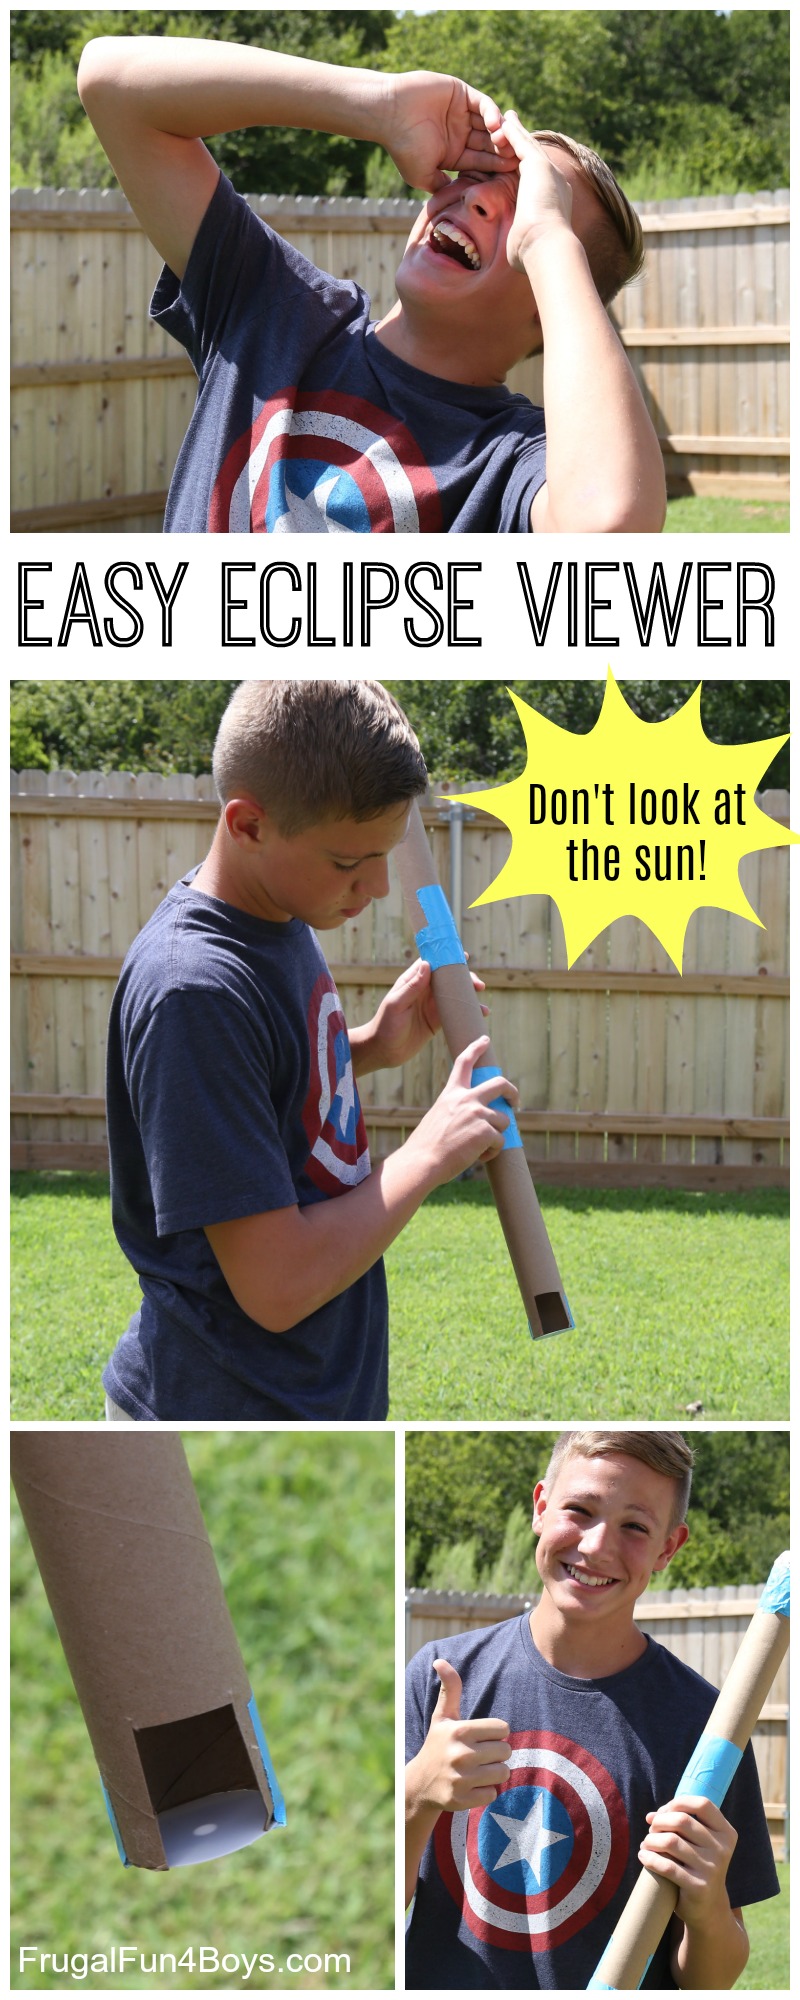
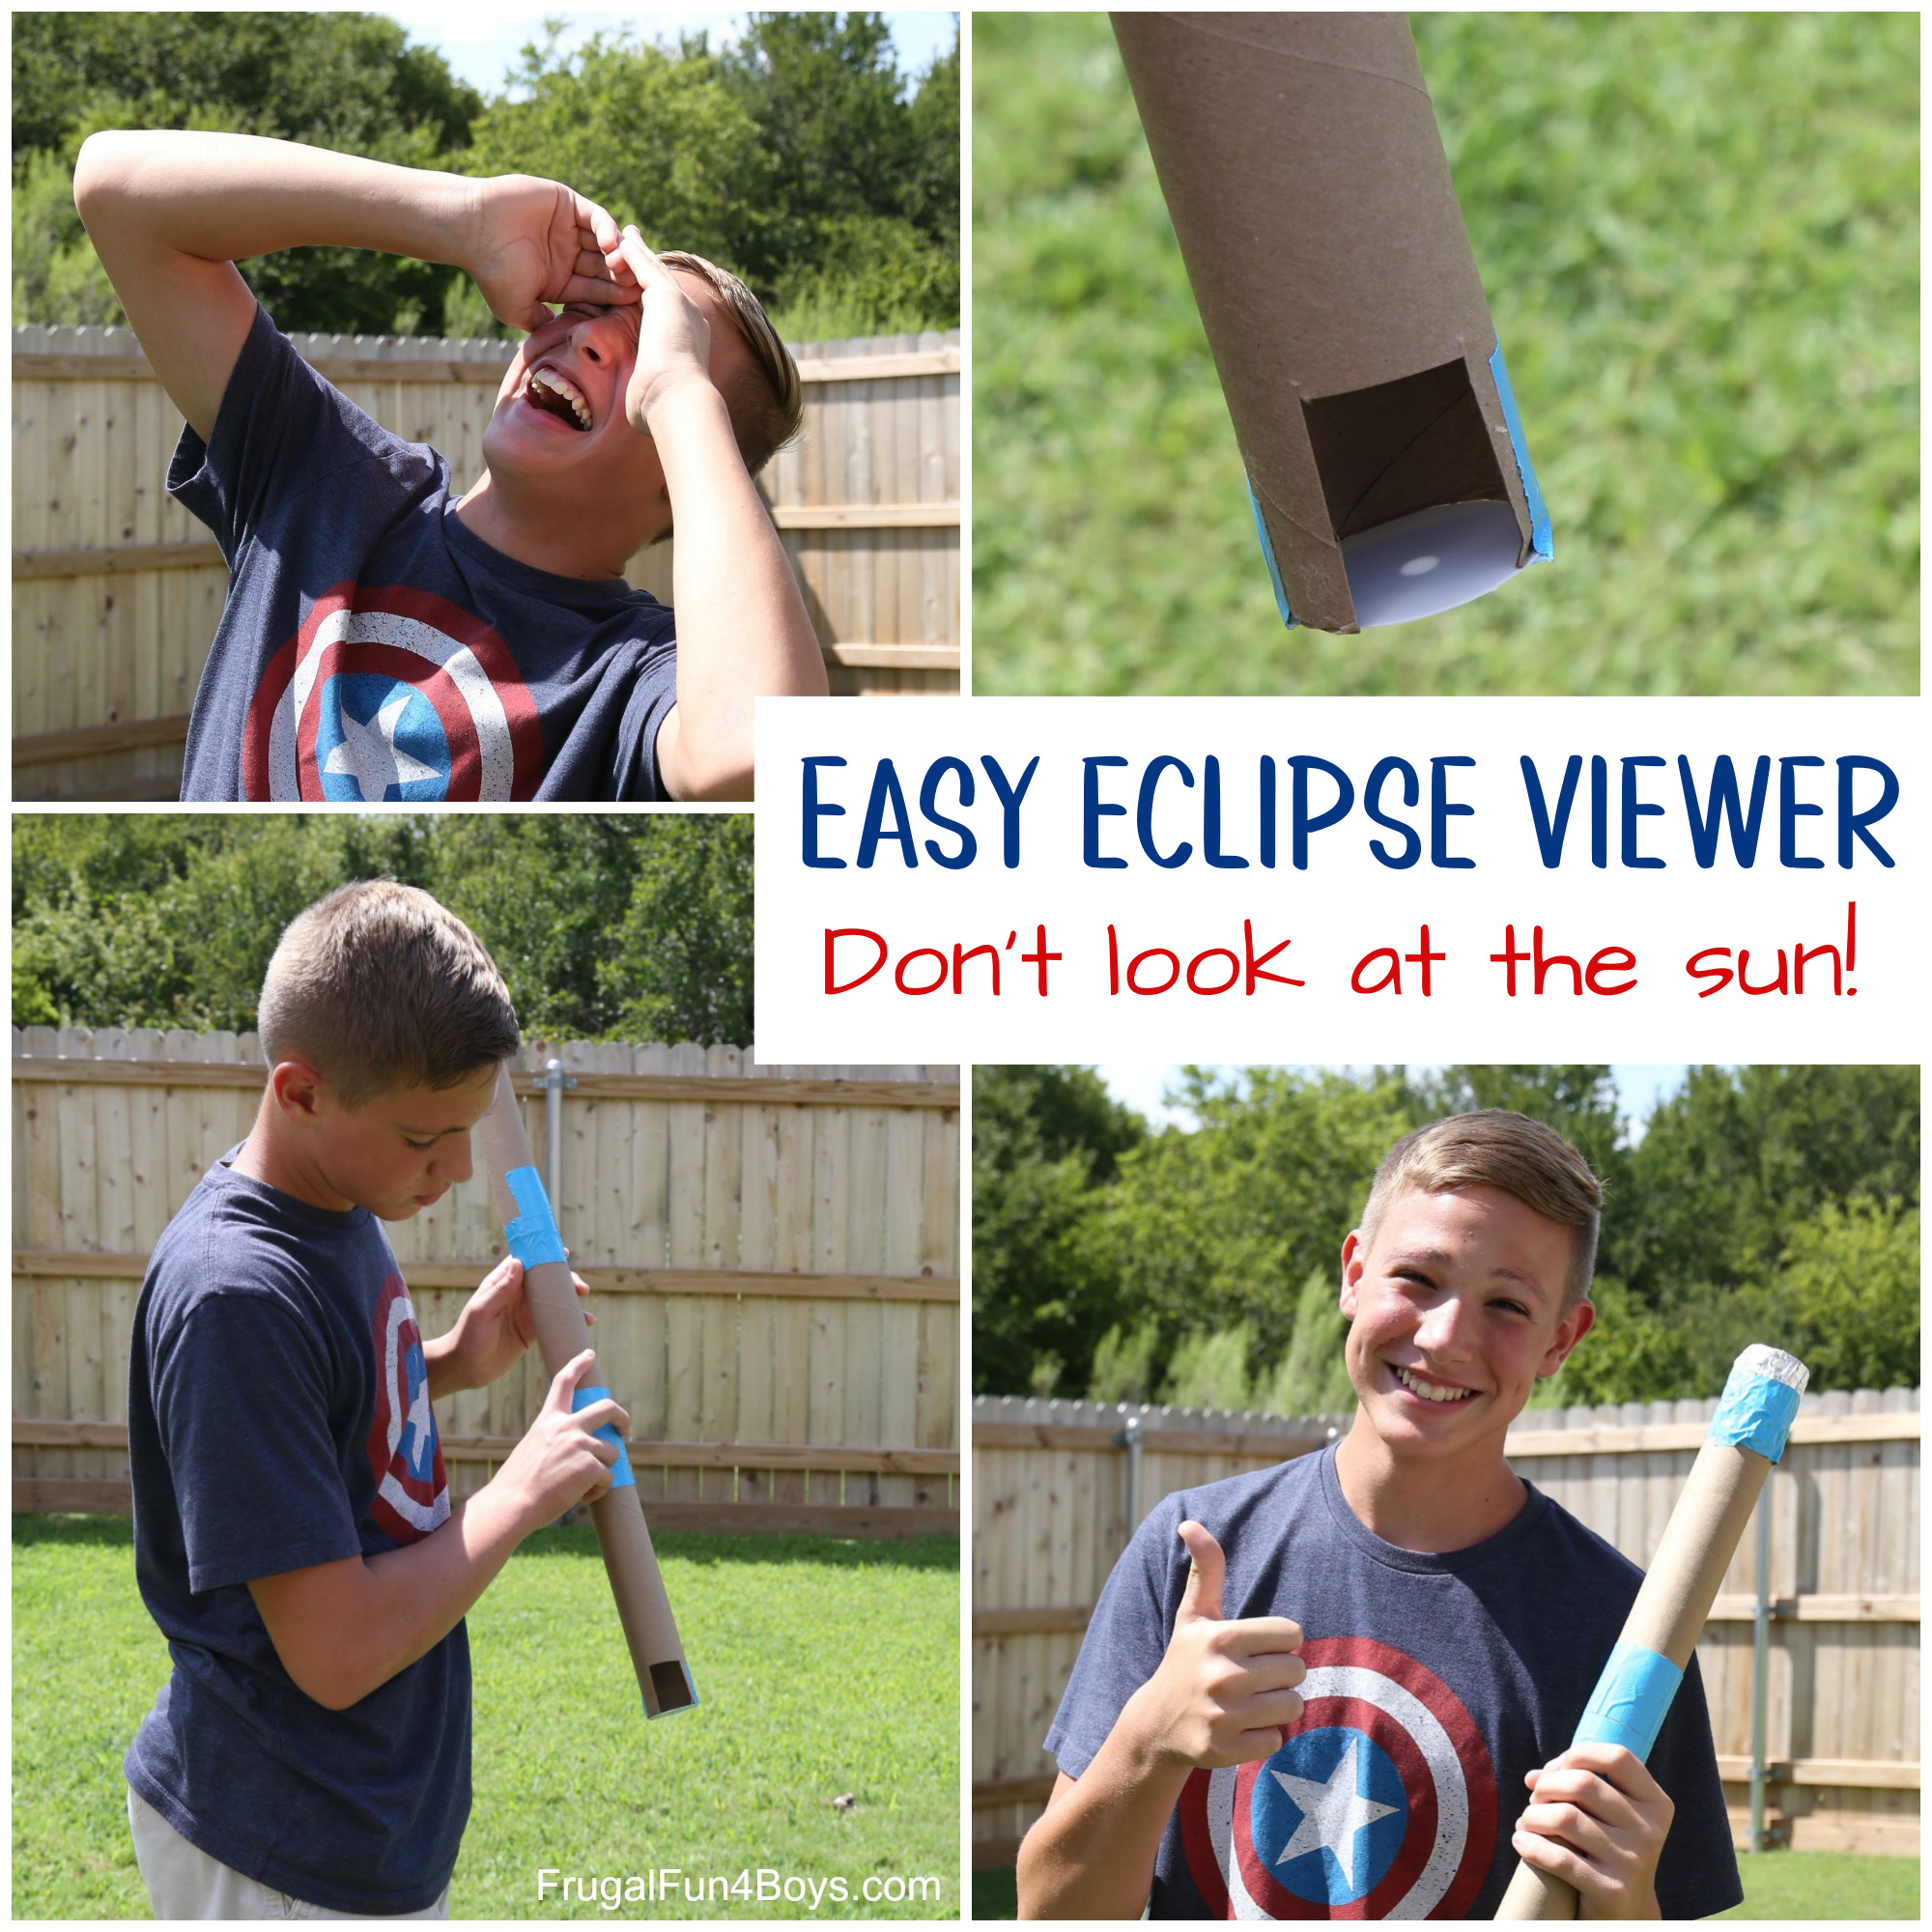
Make a pinhole eclipse viewer, and see the solar eclipse… without looking at the sun!
On April 8, 2024, a solar eclipse will occur all across the United States, and we live in the area of totality! So exciting! …except that our weather forecast involves significant cloud cover. I am extremely sad, but I’m also holding out hope that maybe we’ll get a break in the clouds.
Back in 2017, we had a significant partial eclipse, but I failed to order the eclipse viewing glasses. We had to look for other options!
Here’s a fun DIY project for safely viewing the eclipse. This worked VERY well for us in 2017! It may not be an impressive as viewing the sun directly, but the materials can be found around the house, and it takes only a few minutes to assemble.
There is more than one way to make a pin hole viewer, but we found this cardboard tube method to be simple and easy to use.
Thanks to Thrifty Fun for this idea!
To make one, you will need:
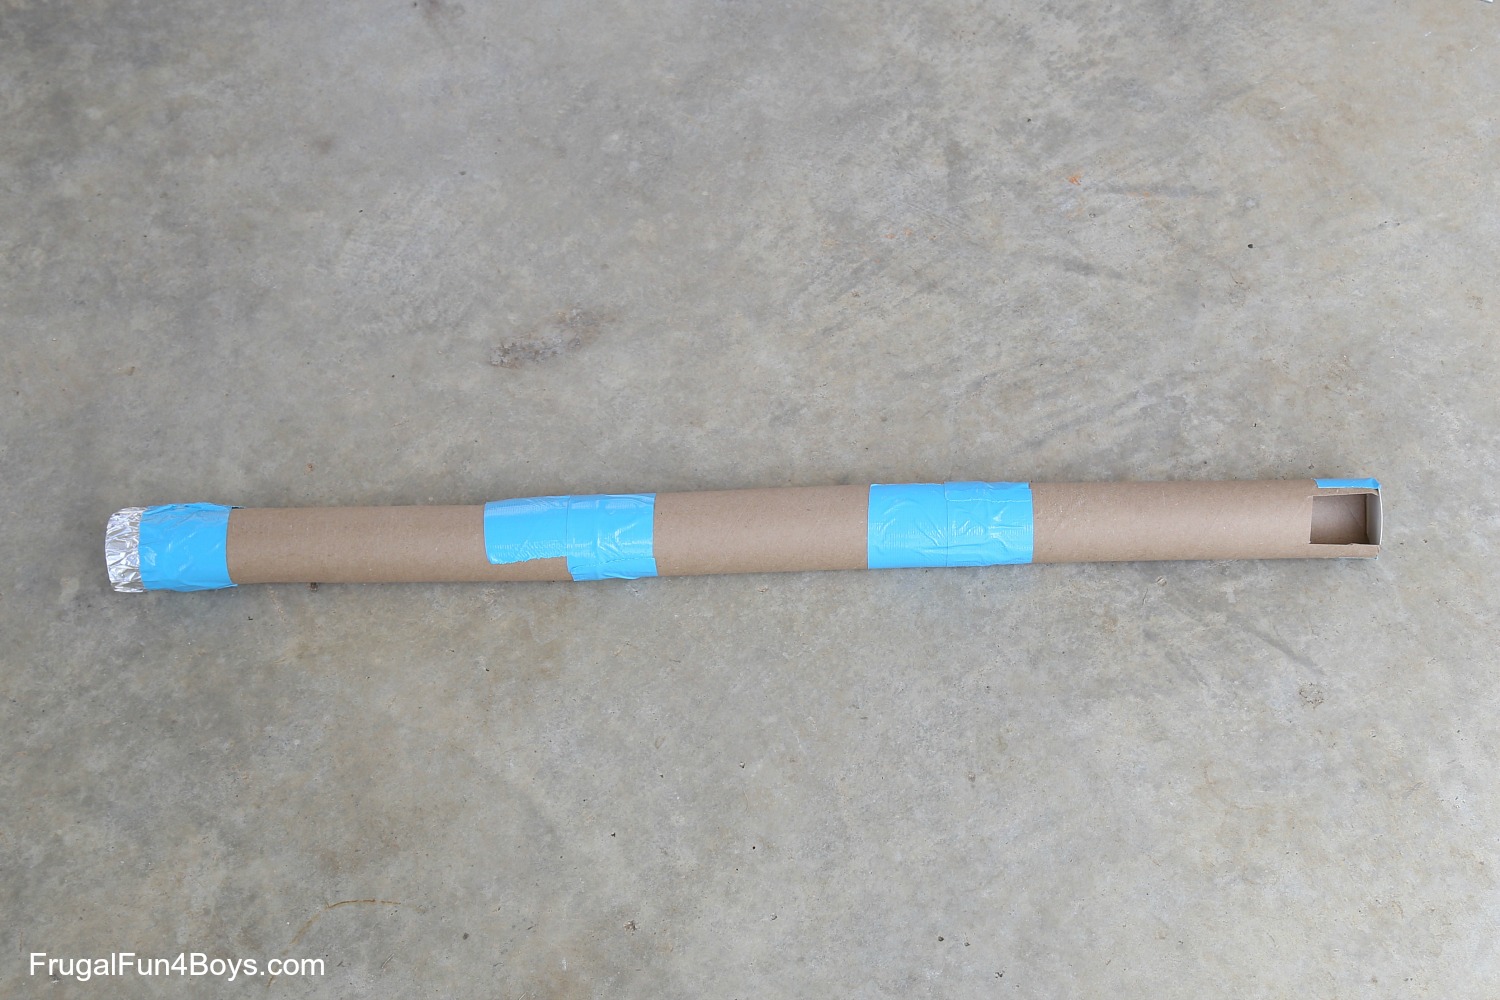
- A wrapping paper tube, or some cardboard rolls from paper towels – we used 3
- Tape
- White paper
- Scissors
- Foil
- A toothpick
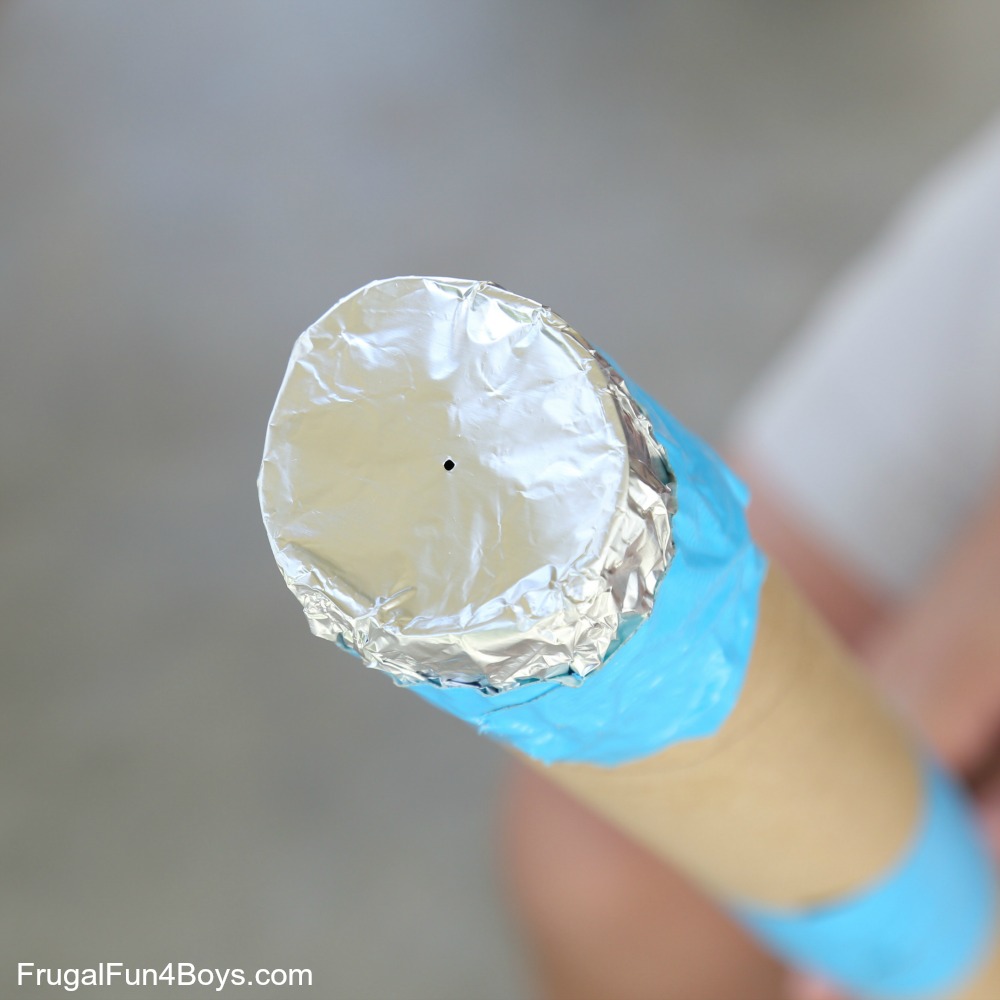
The process is simple. Cover one end of your cardboard tube with foil. Use the toothpick to make a small, neat hole in the foil.
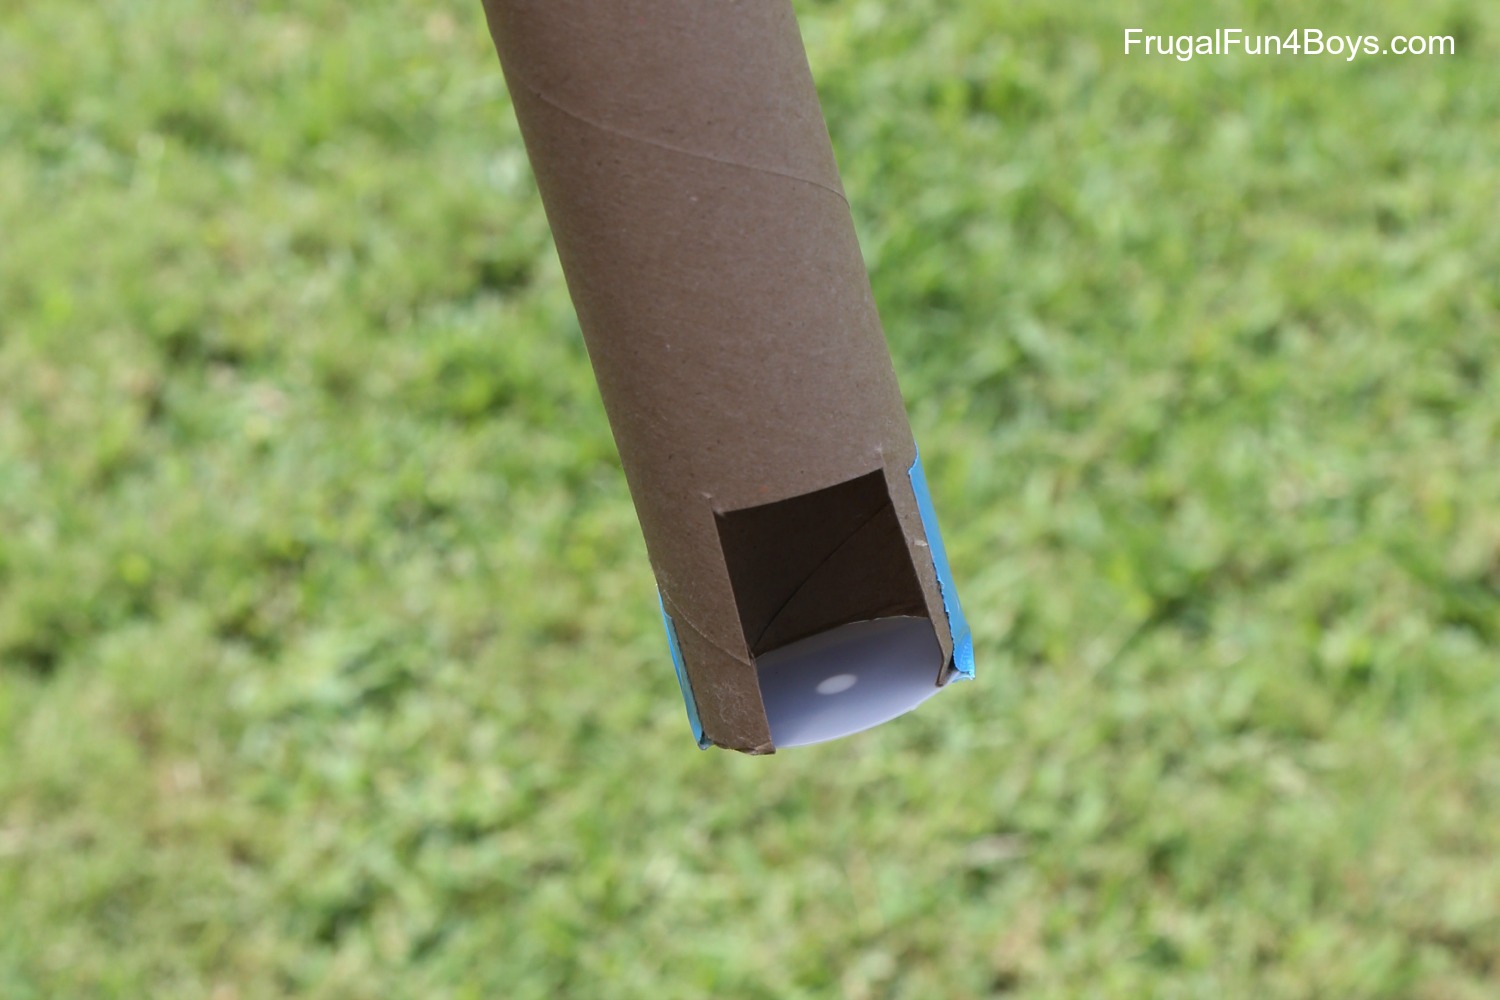
Tape a piece of white paper or poster board to the other end of the tube. Cut a section out of the cardboard tube so that you can view the image more easily.
Aidan cut a slit in each cardboard tube so that he could fold it over slightly and stick it inside the next tube. Then he taped the sections together.
To use the viewer, position the cardboard tube so that it does not make any shadow other than the round circle of its diameter. The angle you need will depend on the current height of the sun in the sky. This is an easy way to tell that you have it lined up correctly.

We found it easy to focus the light on the screen of the viewer!
Notes:
- The longer you make the tube, the larger the image will be. In fact, we will try making a viewer with four cardboard tubes and will test it out before the day of the eclipse.
- Do test your pinhole viewer before the day of the eclipse so that you can get used to using it.
- The image that you see will be upside-down compared to reality (as with all pinhole cameras).
- The image that you see will not be crystal clear, but you should be able to see an outline of the sun. As the eclipse progresses, you should be able to see the crescent shape of the sun.
Other ways to view the solar eclipse:
You can also use a colander as a pinhole camera!! Just hold your colander in direct sunlight. It’s best to try this BEFORE the eclipse begins. The shadows will be round, just like the round holes in the eclipse. Once the eclipse begins, the shadows will take on the crescent shape of the sun! It’s SO COOL to watch.
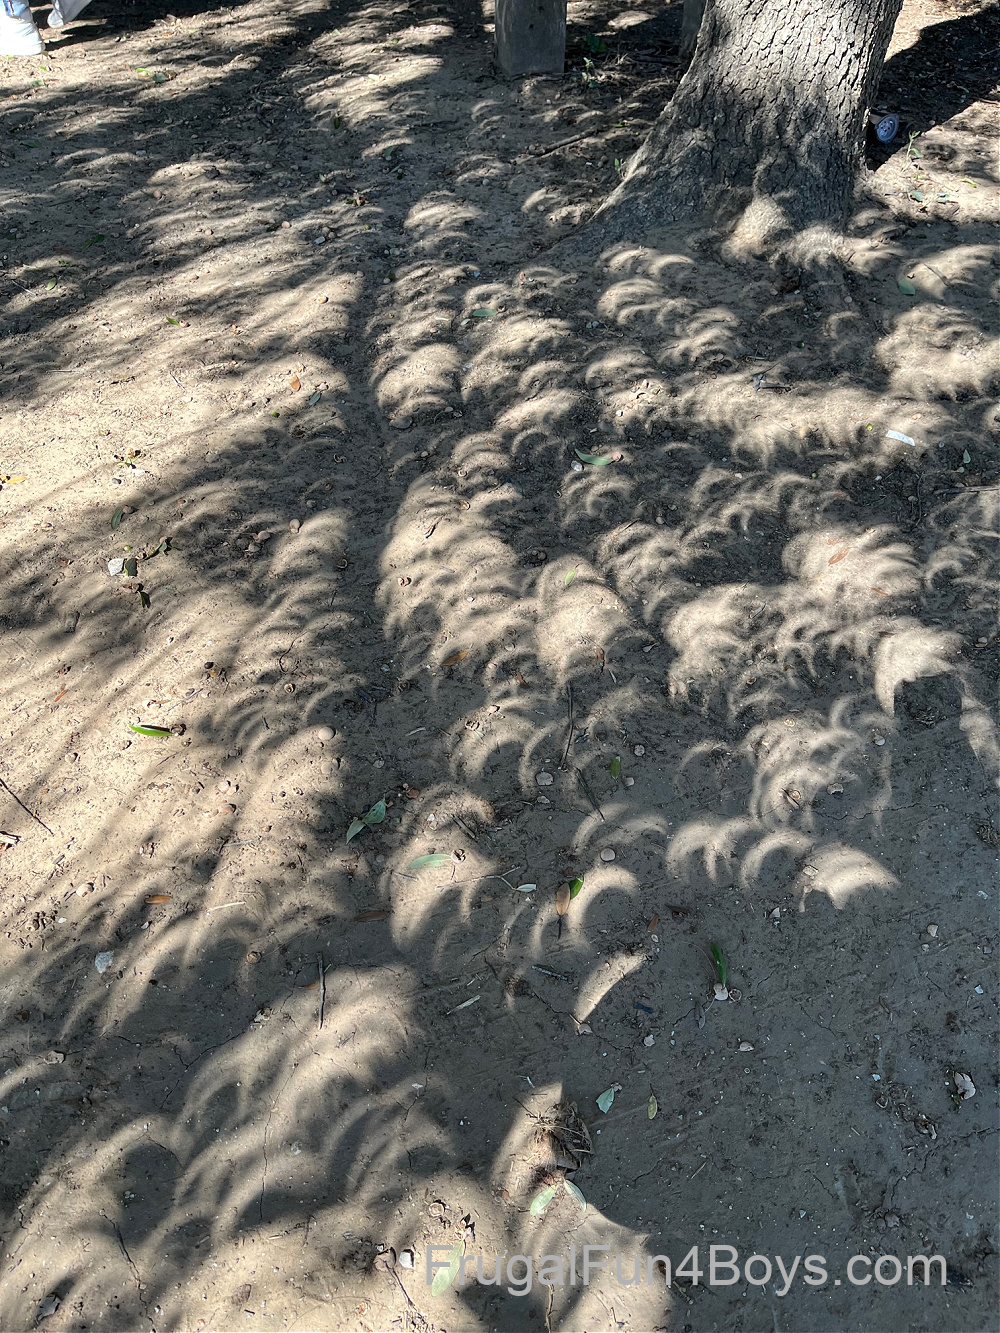
Also, look for crescent-shaped shadows everywhere during the eclipse. We took these photos on October 14, 2023 when we had a partial solar eclipse in Texas. We were up at the horse ranch at the time.
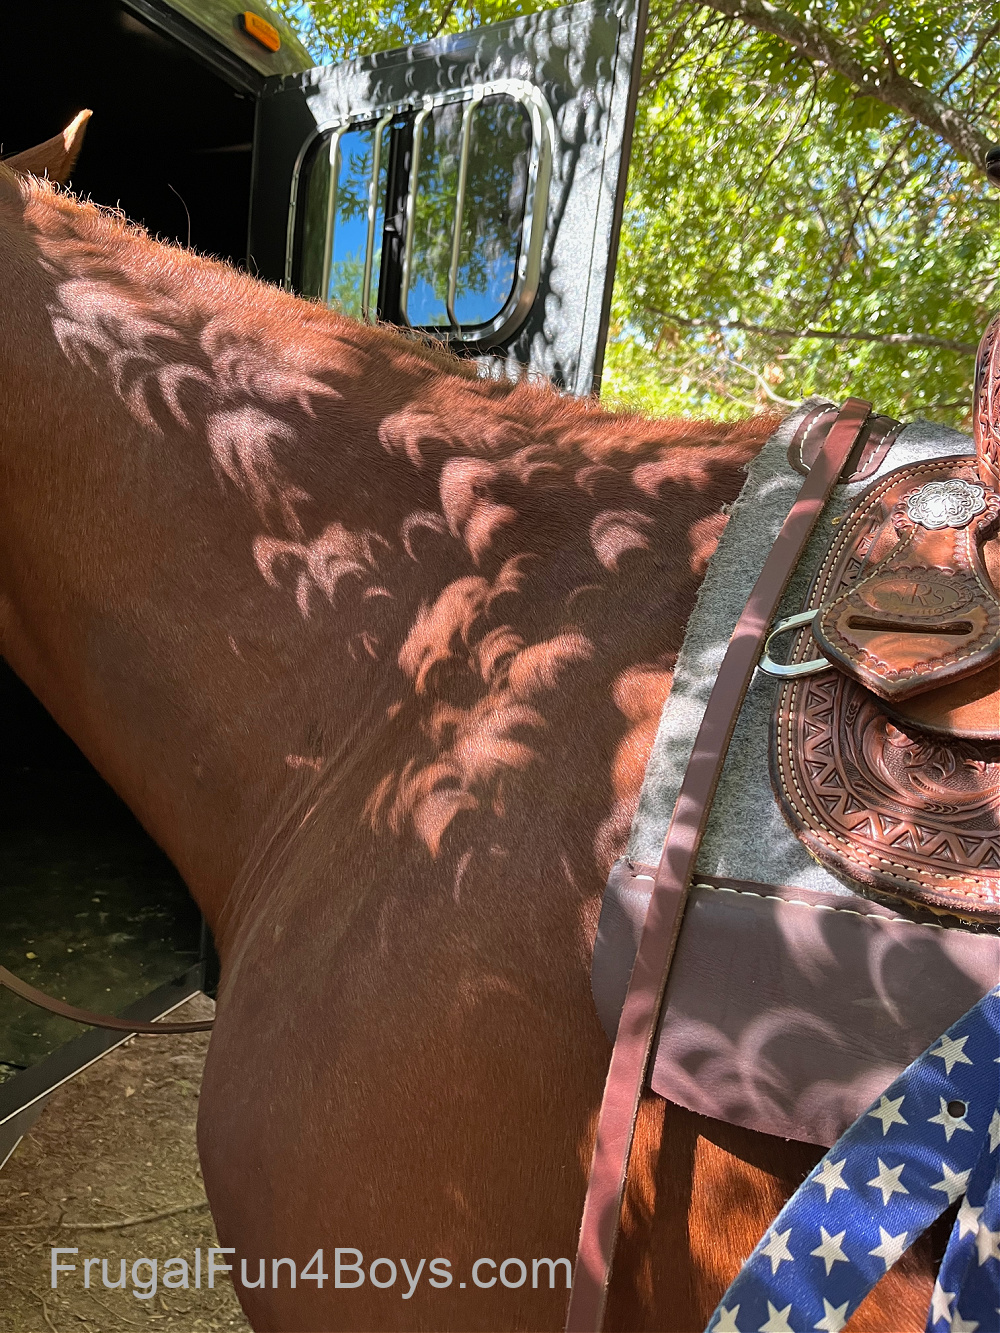
Isn’t this cool? It was a surreal effect!
Information about the eclipse in your area:
For more information about the eclipse, check out NASA’s website here.
Here’s a really cool Interactive Eclipse Map that will give you specific information for your location. Hint: type in your city name in the search bar WITHOUT the state and wait for the drop-down menu to pop up!
5 Comments
Nina Aug 20, 2017
What should be the dimensions of the
cutout area at the end, approximately?
Rachel C. Aug 21, 2017
Personally I used a round mailing tube from the stationary store. 36" long, approx. 3 1/8" in diametre (from side to side of the tube). I put a hole in the one end about 1/2" in diametre. The viewing port I cut out was 1 1/4" high. The section of tube I cut out was clean enough to reinsert into the tube part way and use as an awning of sorts to block out more light. Worked like a dream :D
Christel from Renton, WA Aug 21, 2017
It's working!!
Holly Aug 21, 2017
It totally worked. Thanks for the great tutorial!
Amber Aug 21, 2017
Made one with my daughter last night, worked wonderfully today. Thanks so much for the posting!!
Pertling Jul 6, 2018
Ouch!
Great screen at bargain prices! Was easy to install and there was no problem retracting the screen as many have mentioned. The packaging was extraordinary! I was really impressed. I am not an expert in video technology, but this screen is pretty good for my needs.
Appreciate it!
Post a Comment