
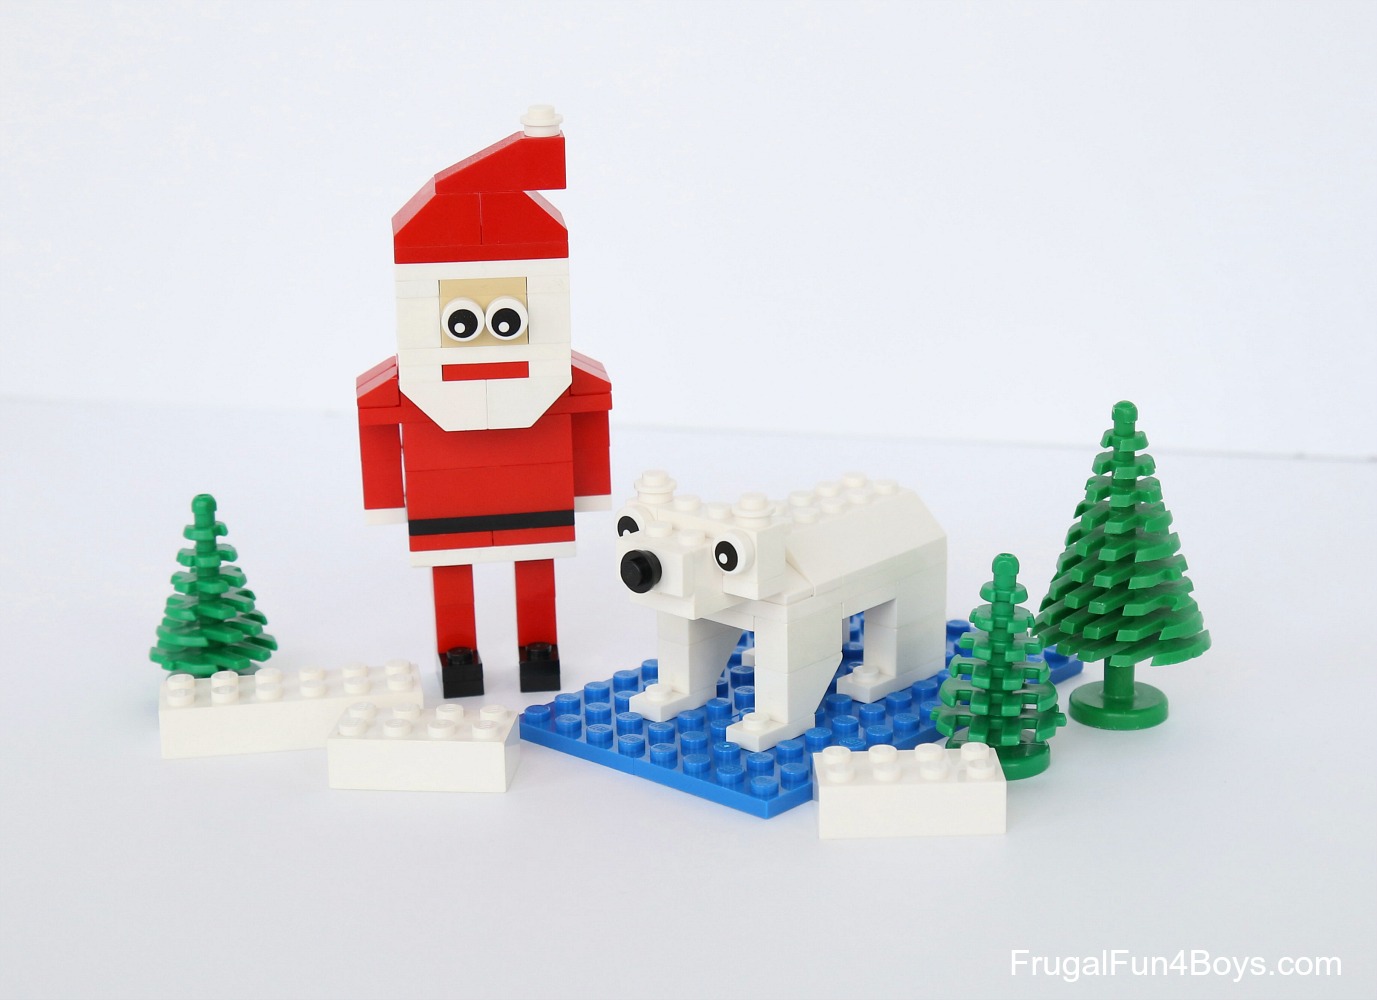
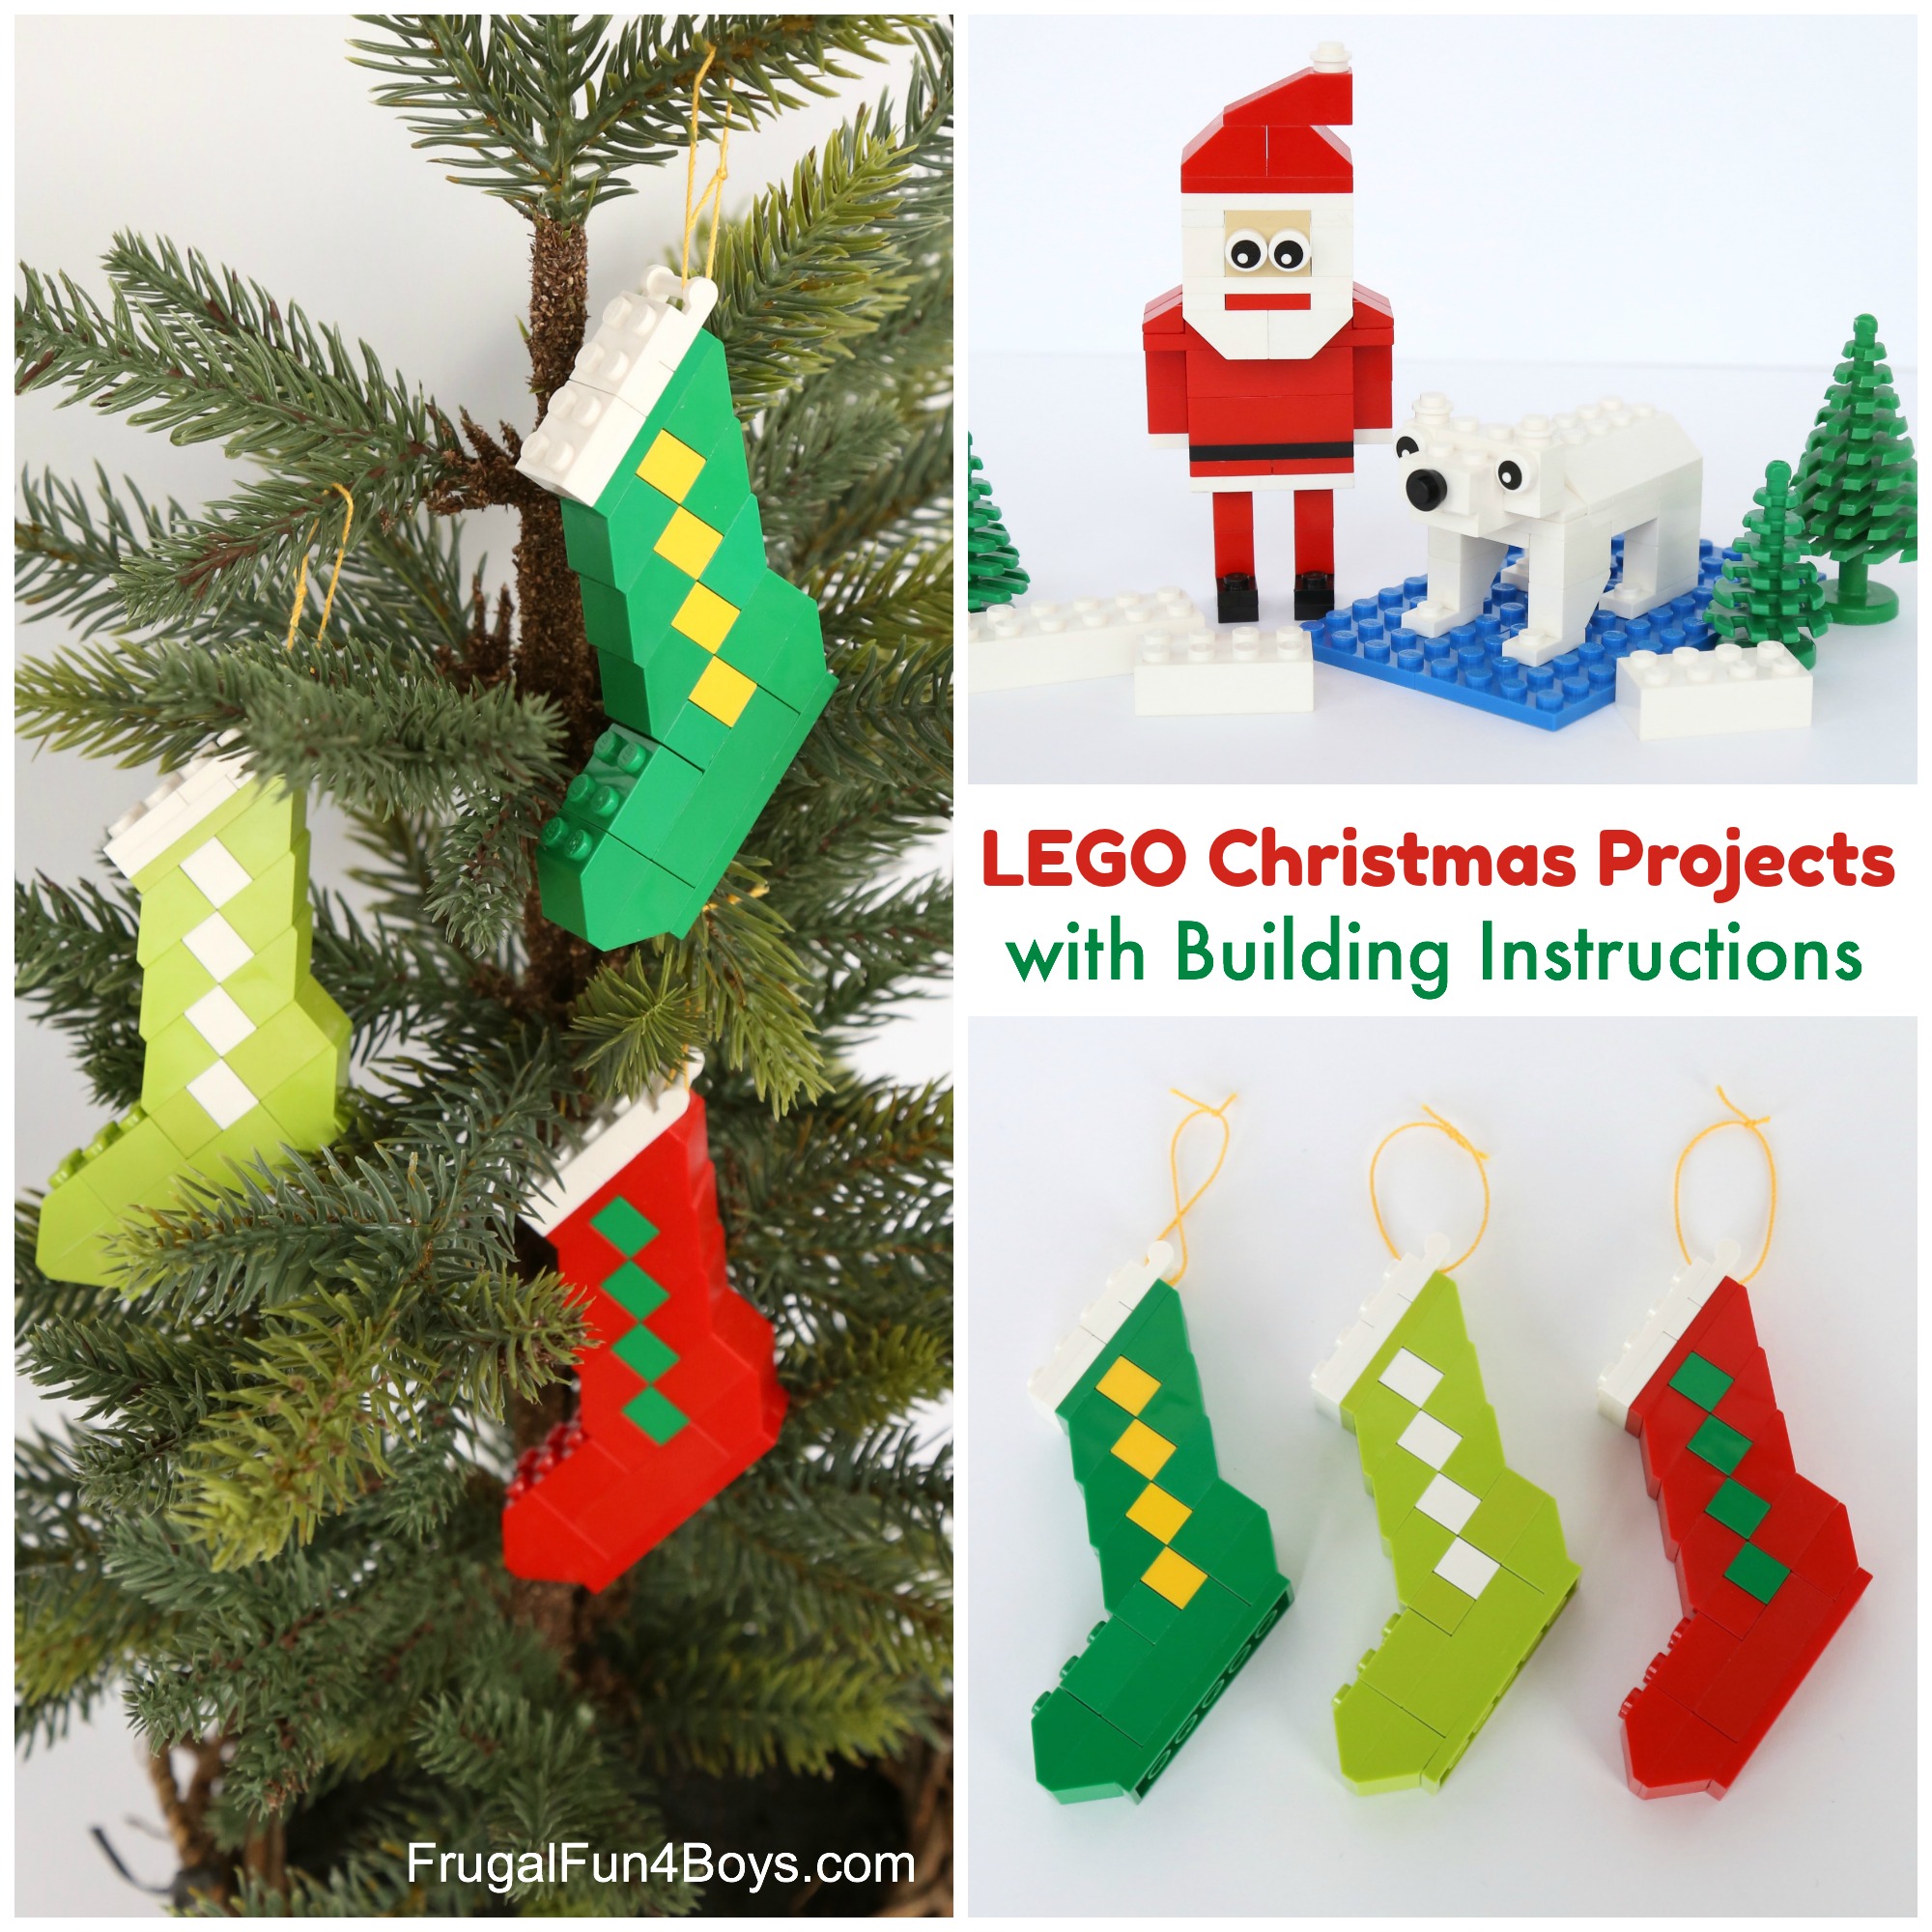
Every year, we love to create new Christmas LEGO® projects! Here’s what we came up with for this year (in addition to our Build-it-Yourself LEGO® Advent Calendar) – a cute little LEGO® Santa and some stocking ornaments to build. Decorate your tree with LEGO® projects!
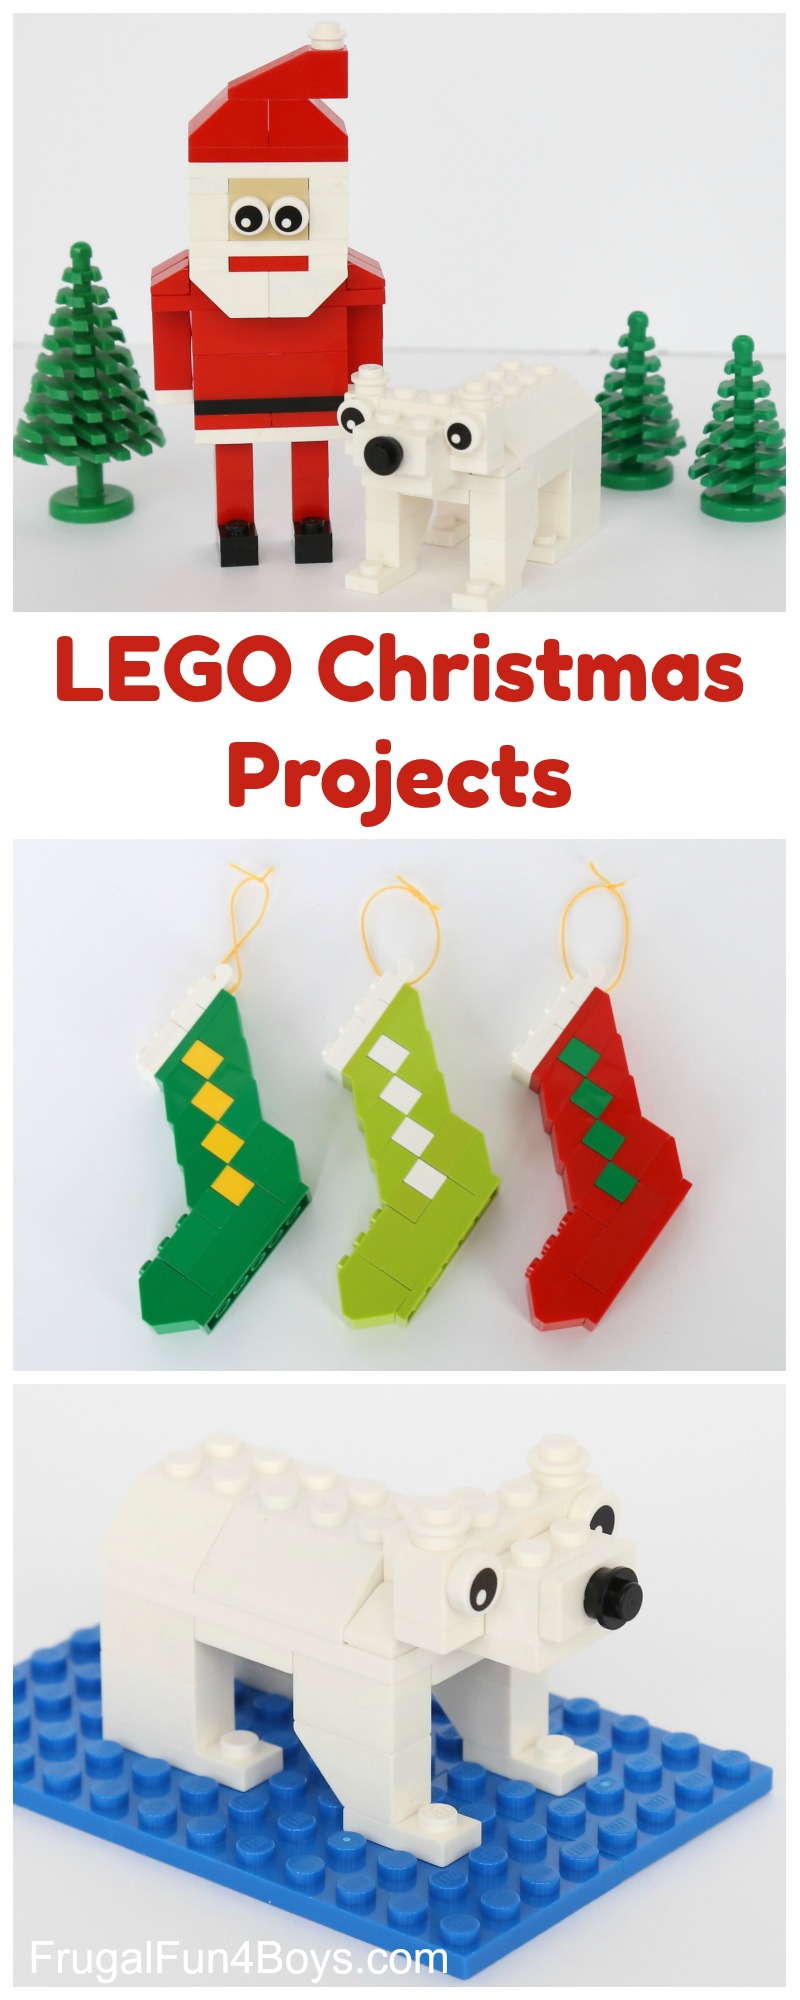
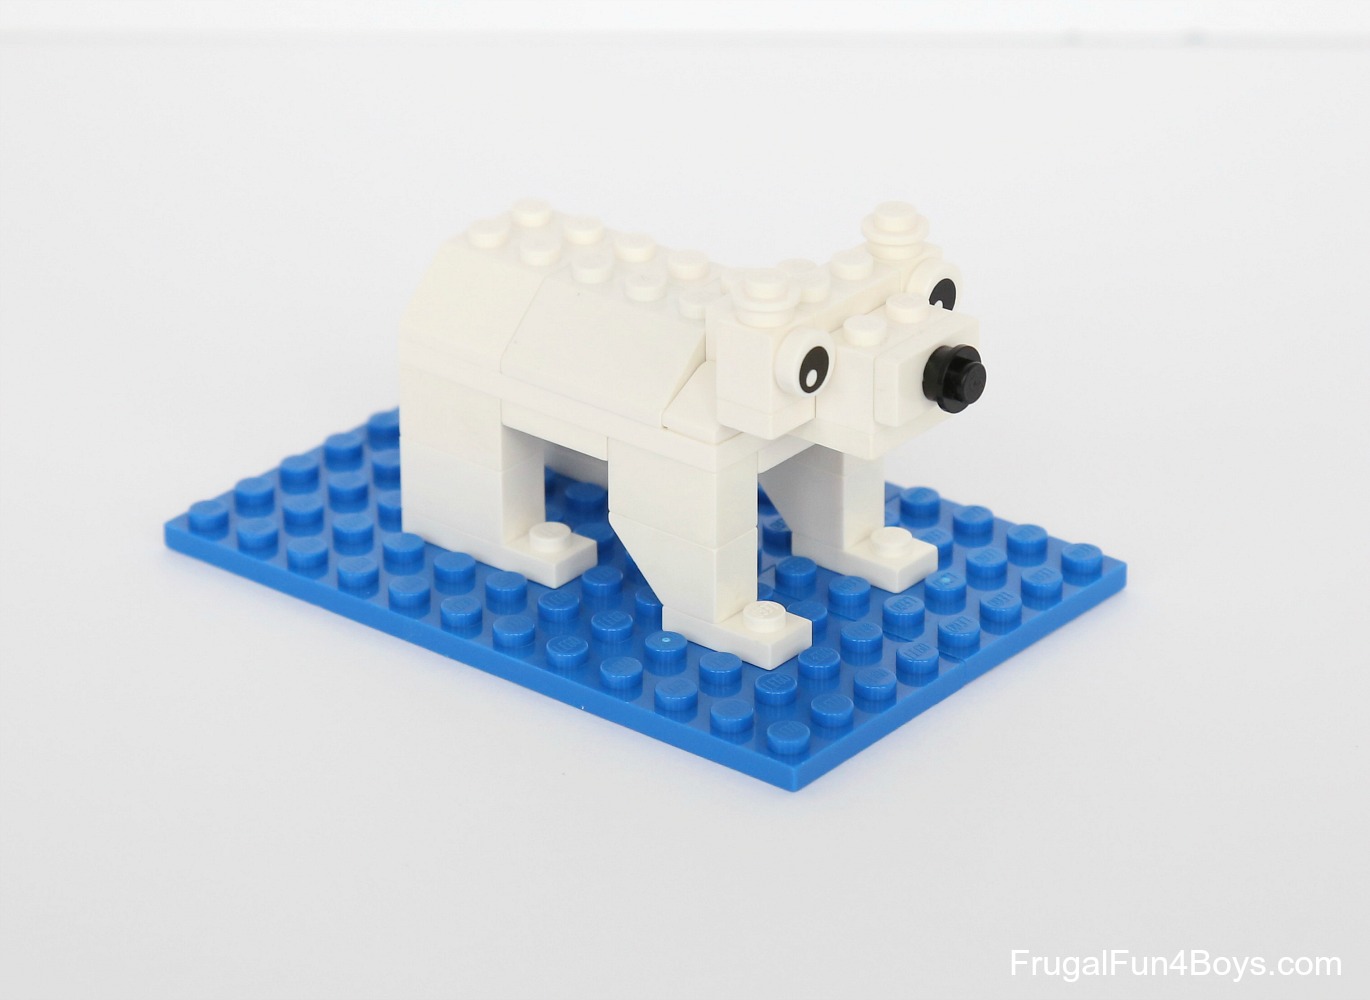
Santa has an adorable polar bear companion!
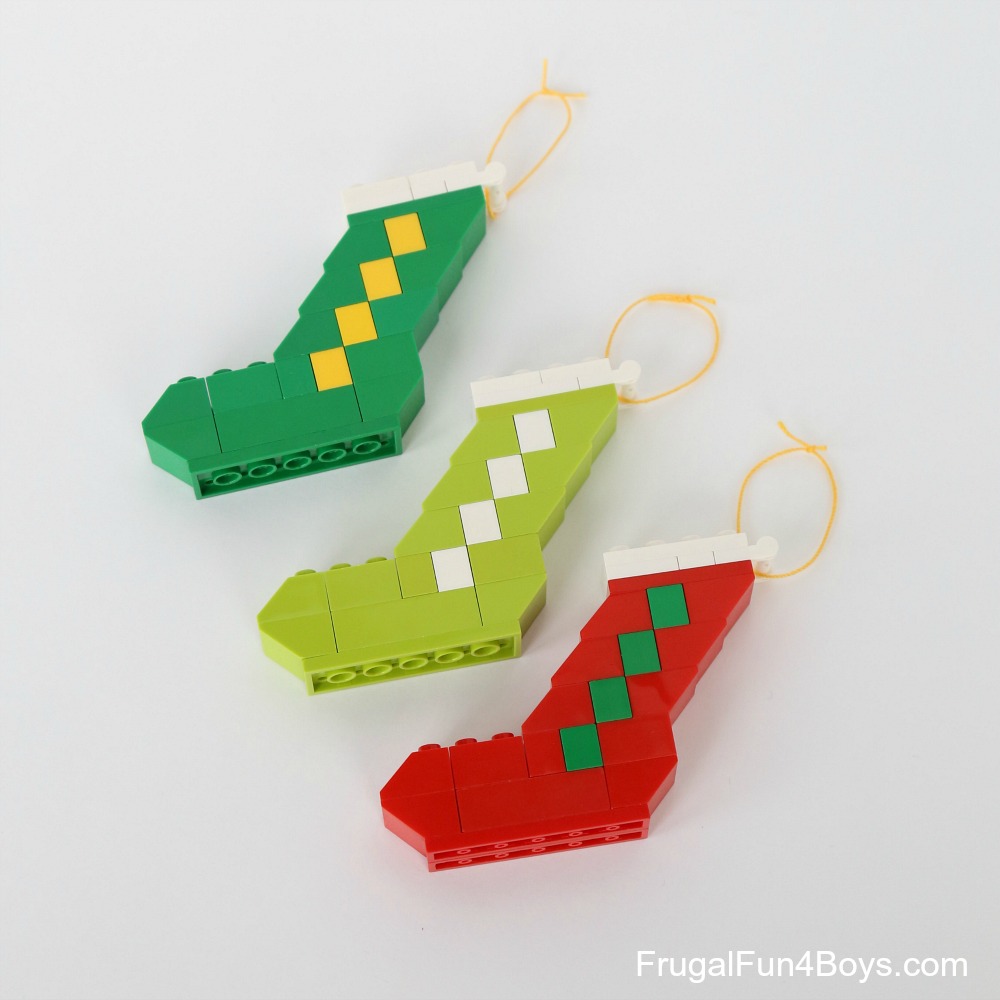
Build some stocking ornaments for your Christmas tree! These work with whatever color bricks you have. Use some string or ribbon to hang them on the tree.
Santa Building Instructions
Ready to build your own Santa? Here’s how to make one.
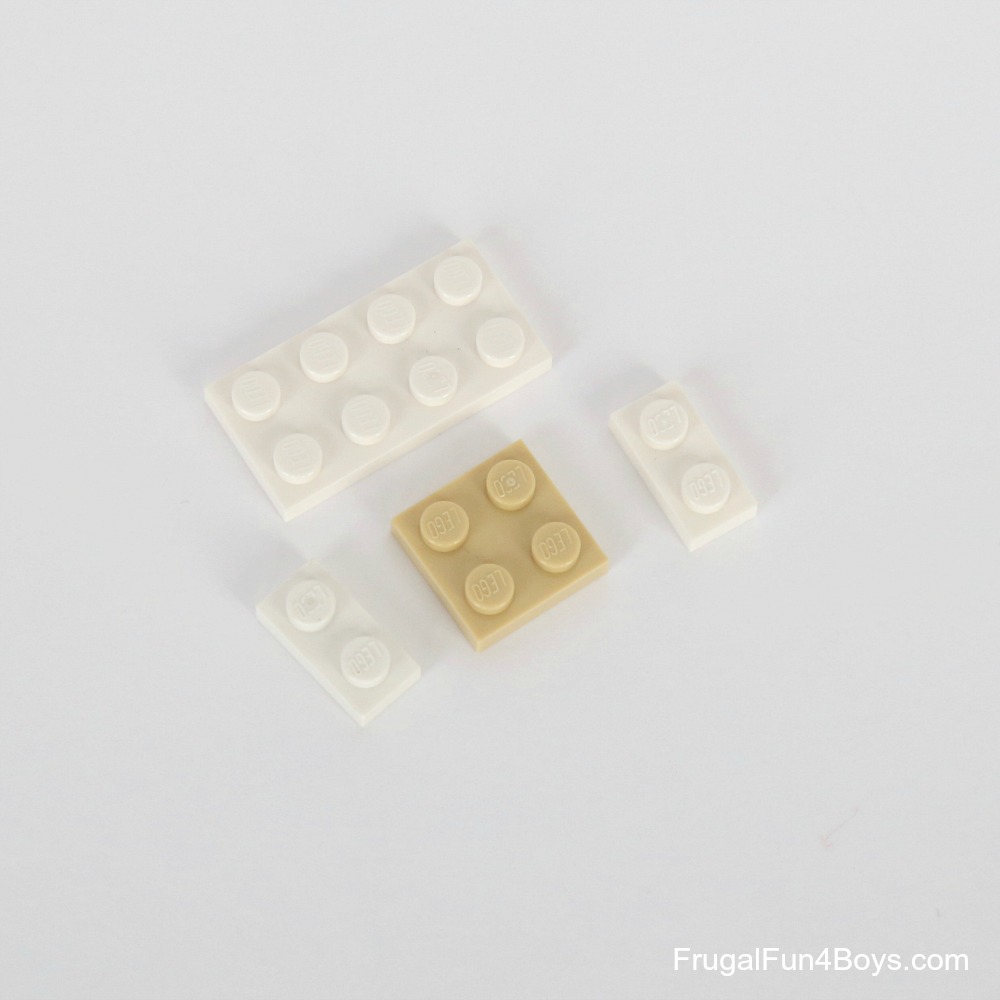
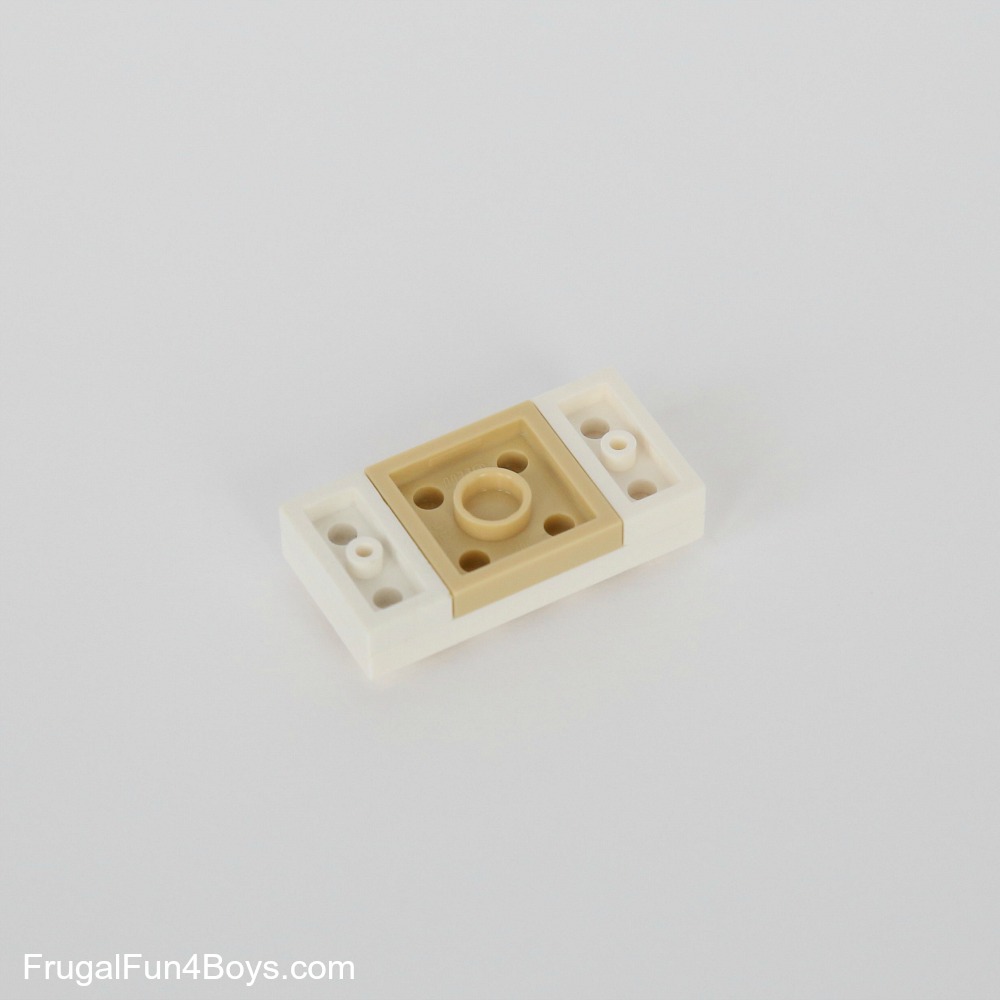
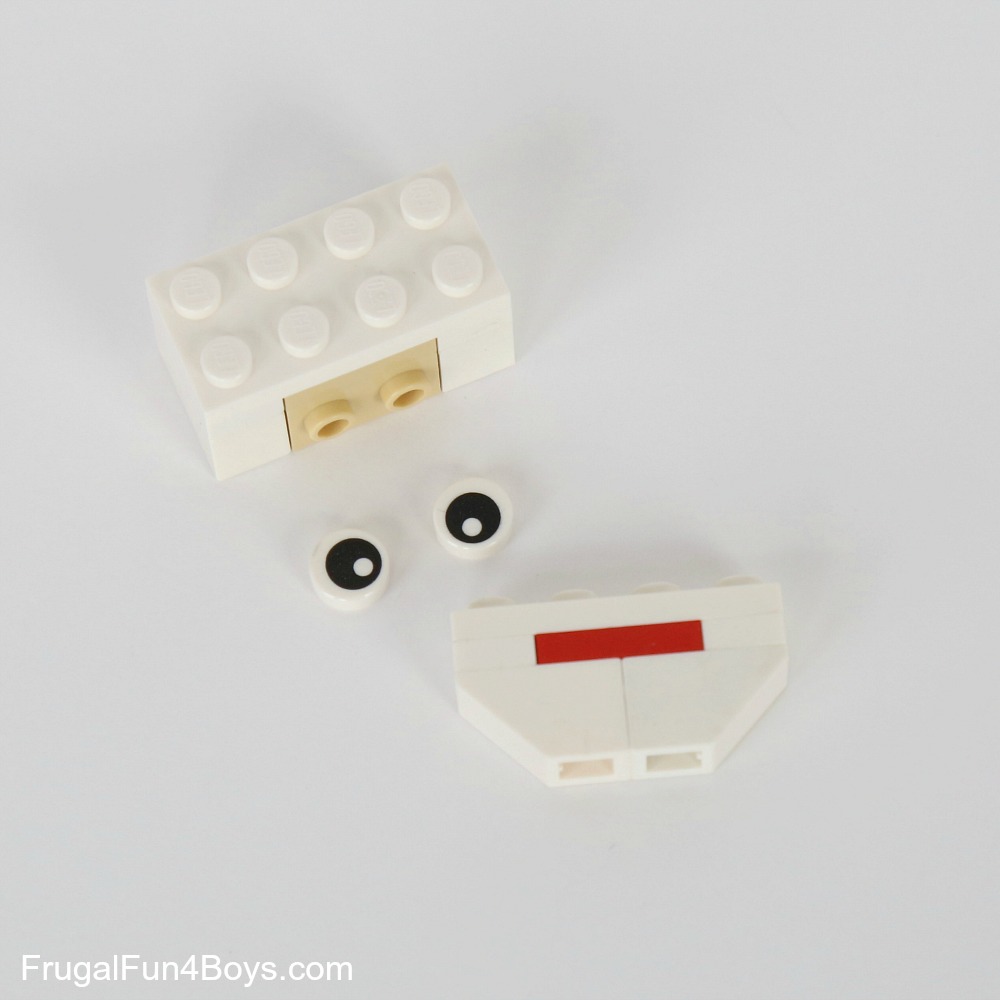
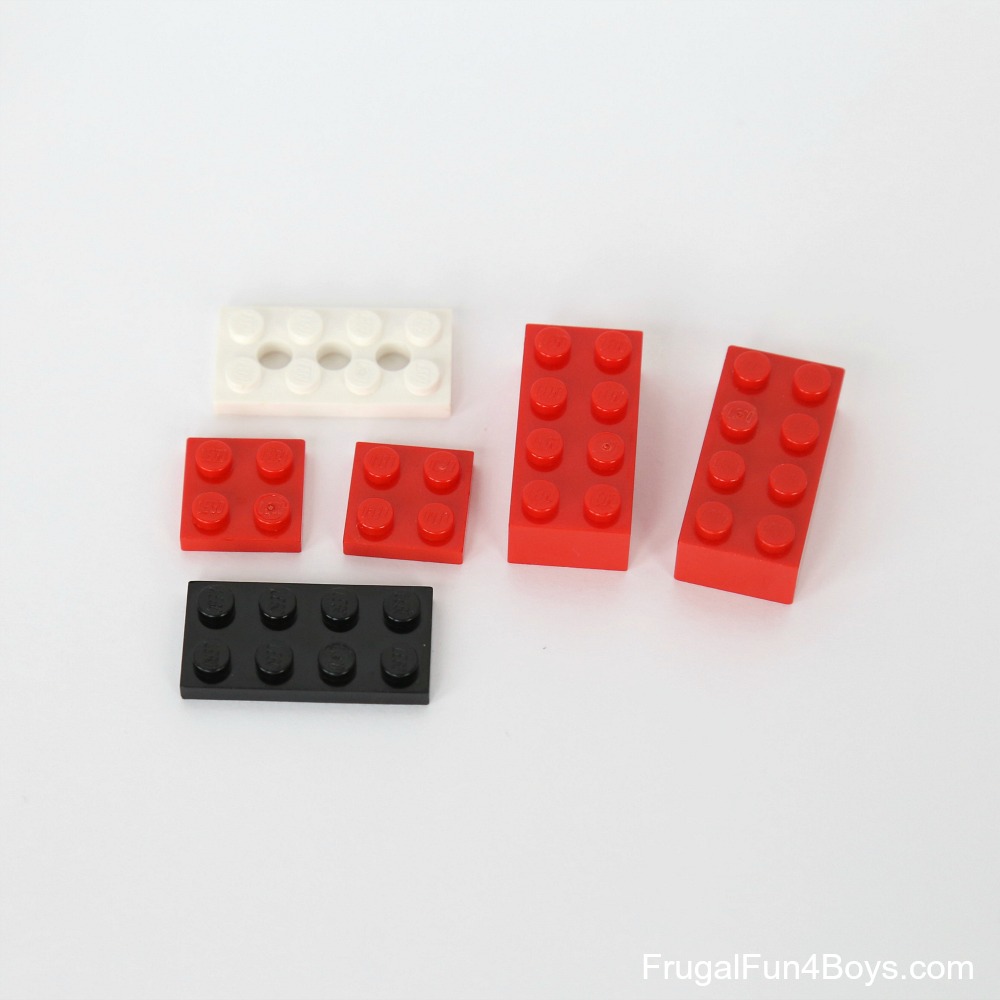
Step 1: Start with a 2 x 4 white plate, two 1 x 2 white plates, and a 2 x 2 tan plate.
Step 2: Attach the three smaller plates to the underside of the 2 x 4 plate.
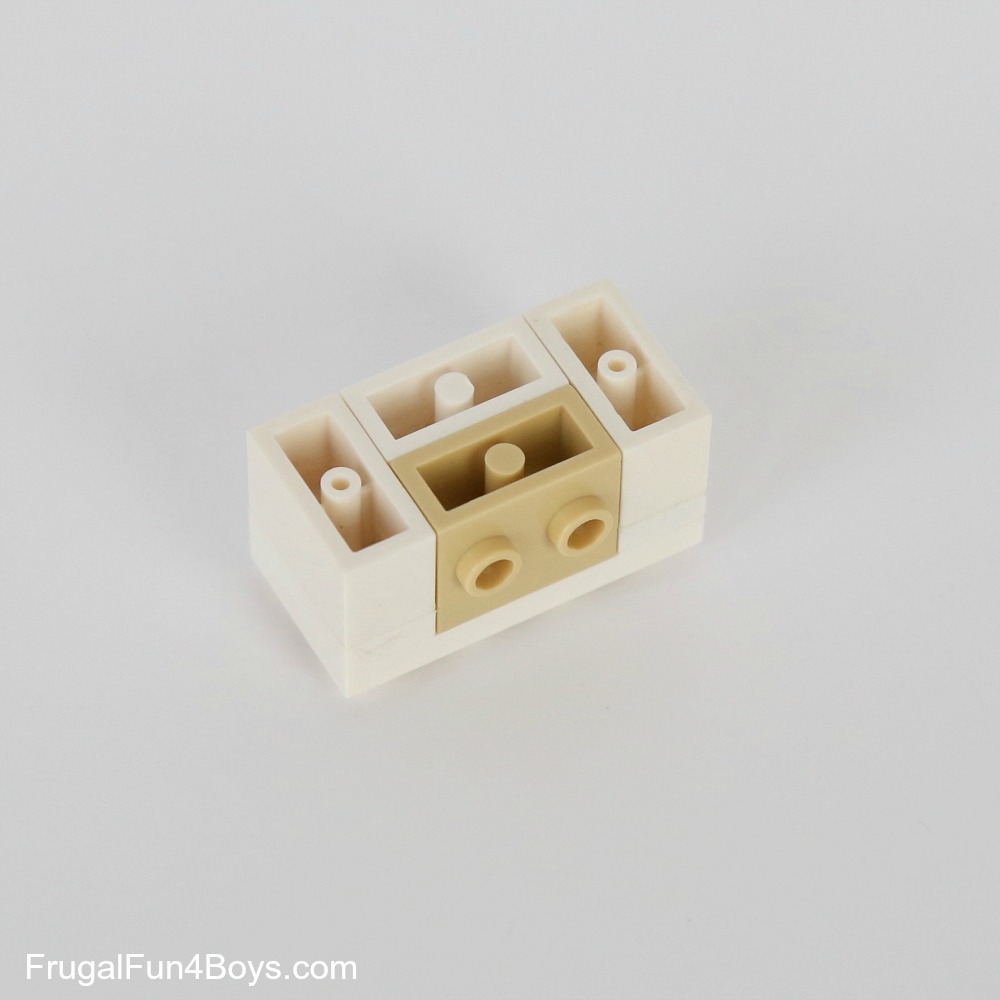
Step 3: Add two 1 x 2 white bricks and a 1 x 2 tan brick with two studs on the side.
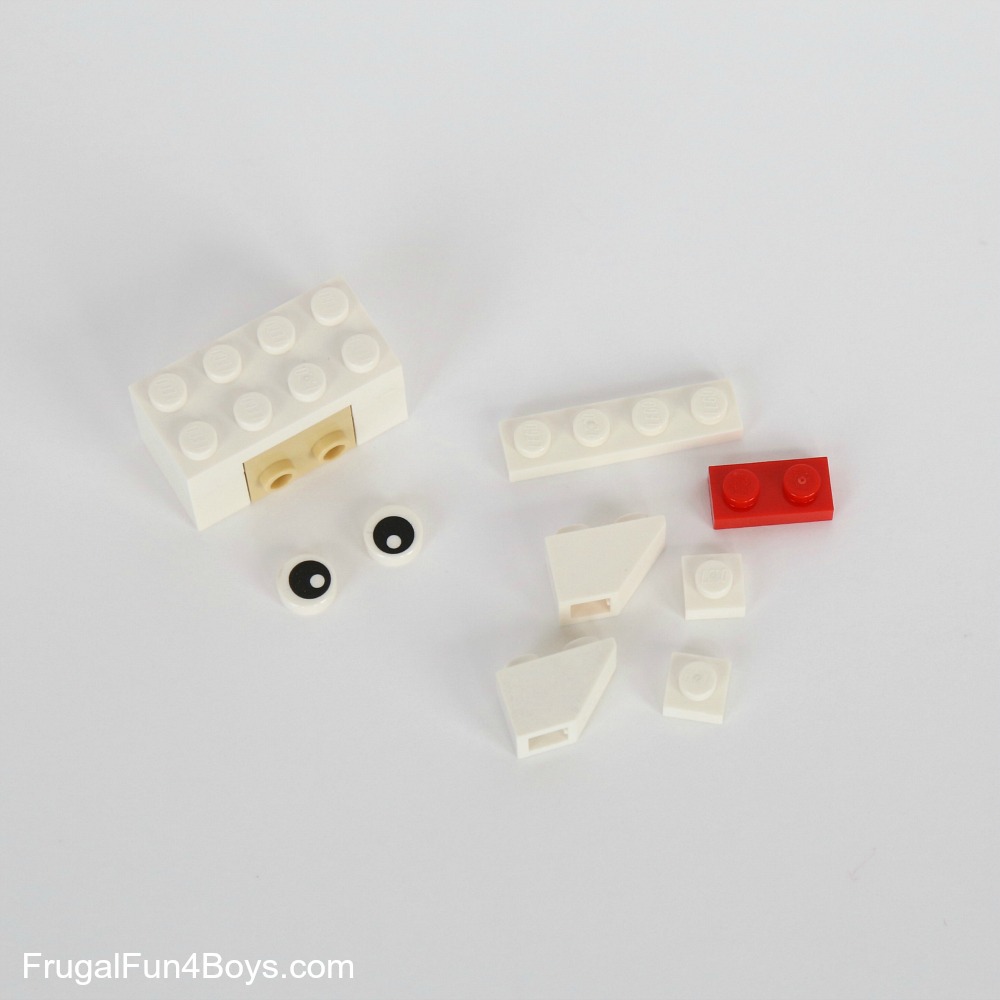
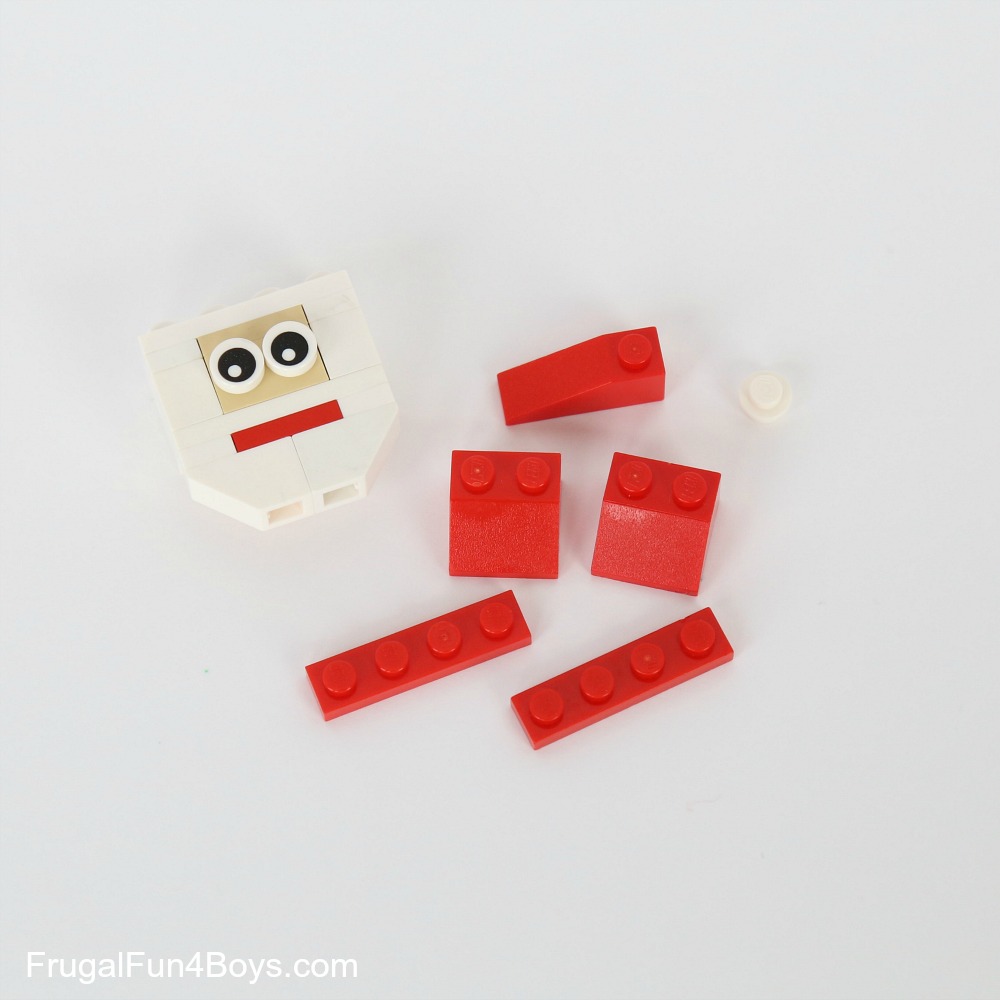
Step 4: Flip over what you have built so far. Gather the bricks shown: two eyes, two 1 x 2 white inverted slopes, a 1 x 4 white plate, two 1 x 1 white plates, and a 1 x 2 red plate.
Step 5: Attach the red 1 x 2 plate and the two white 1 x 1 plates to the underside of the 1 x 4 white plate.
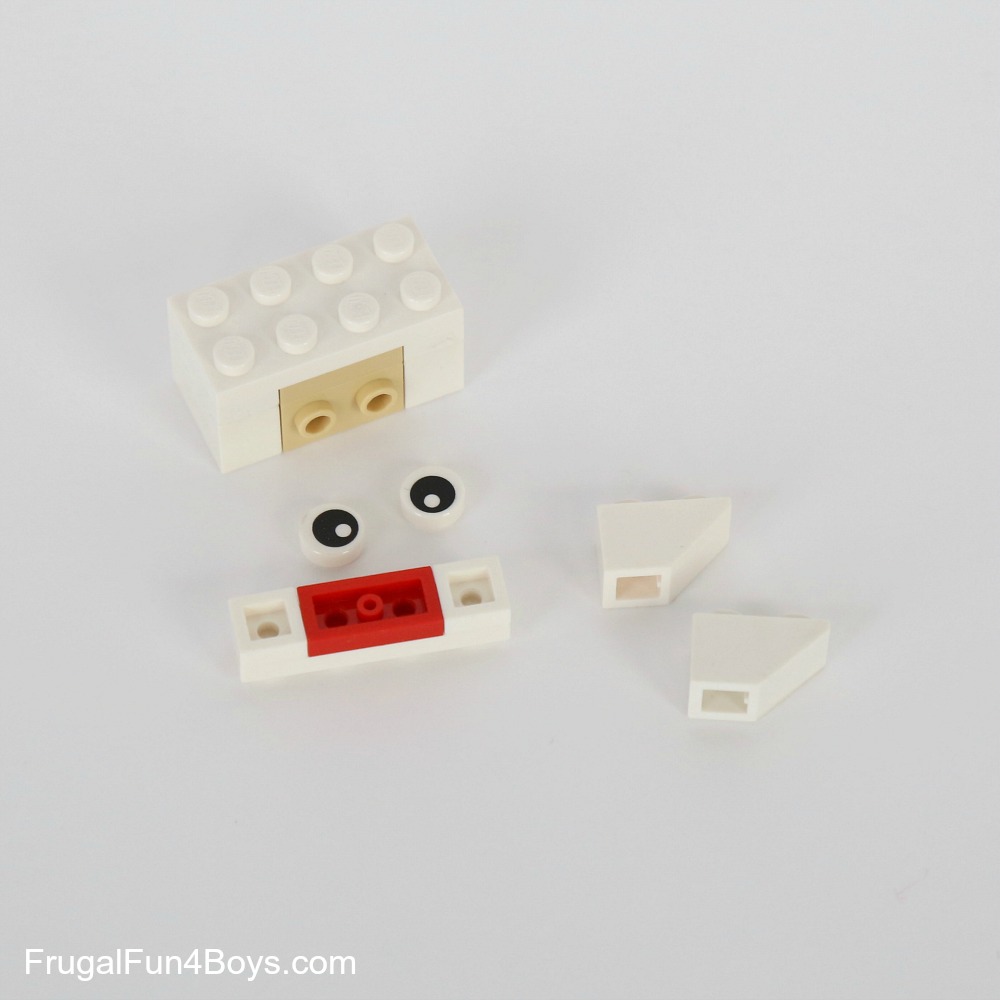
Step 5: Attach the two 1 x 2 inverted slopes to the underside of that.
Step 6: Attach the two sections and add the eyes. Then gather the bricks shown for building Santa’s hat.
Step 7: Attach the two 1 x 4 plates (or a 2 x 4 plate) and the two 2 x 2 slopes to the top of Santa’s head.

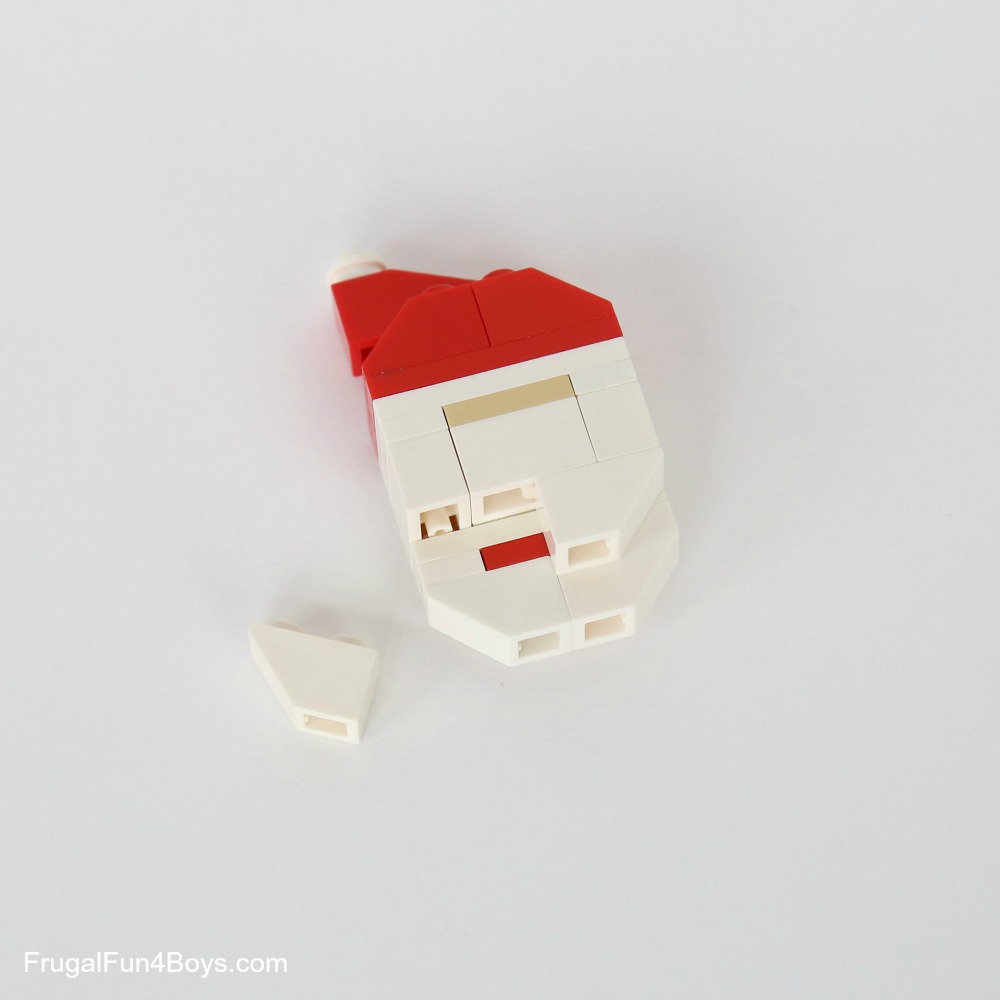
Step 8: Attach a 1 x 3 slope and a 1 x 1 white round plate to the top of the hat.
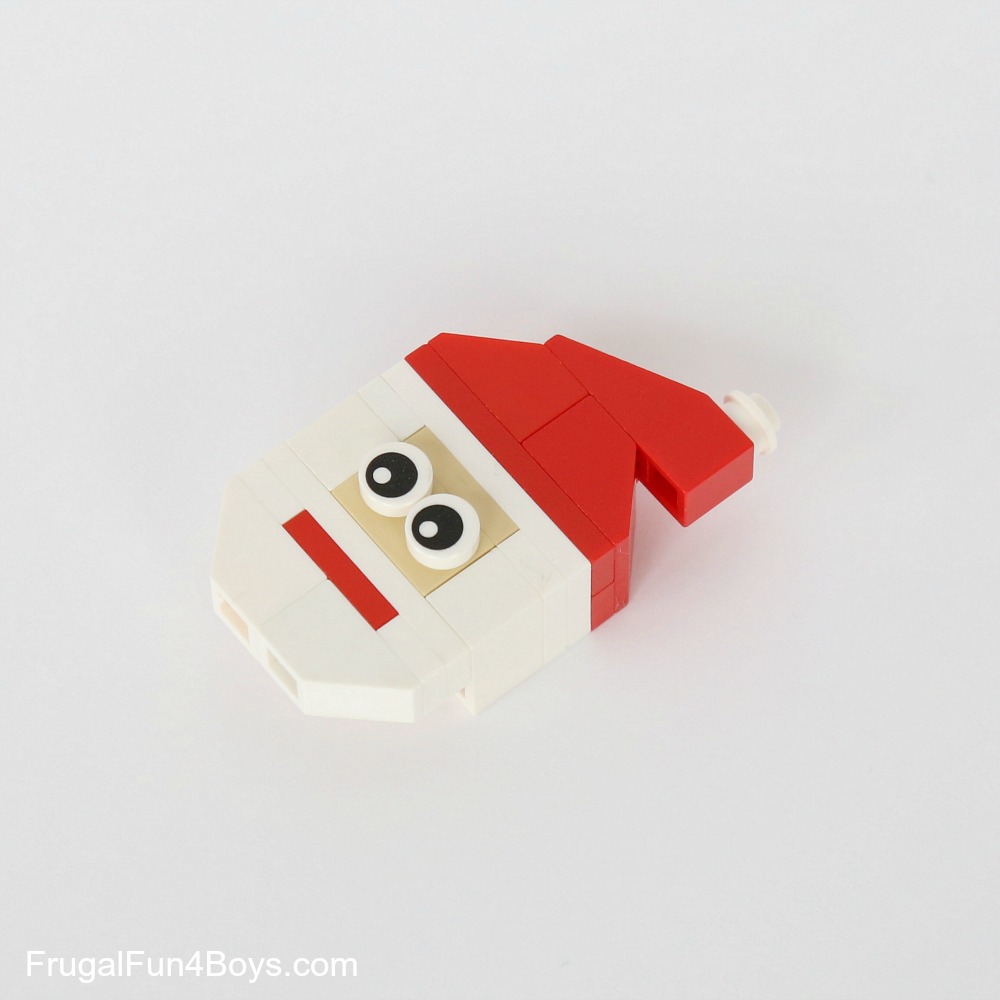
Step 9: Turn Santa’s head around and add two 1 x 2 inverted slopes to the back.
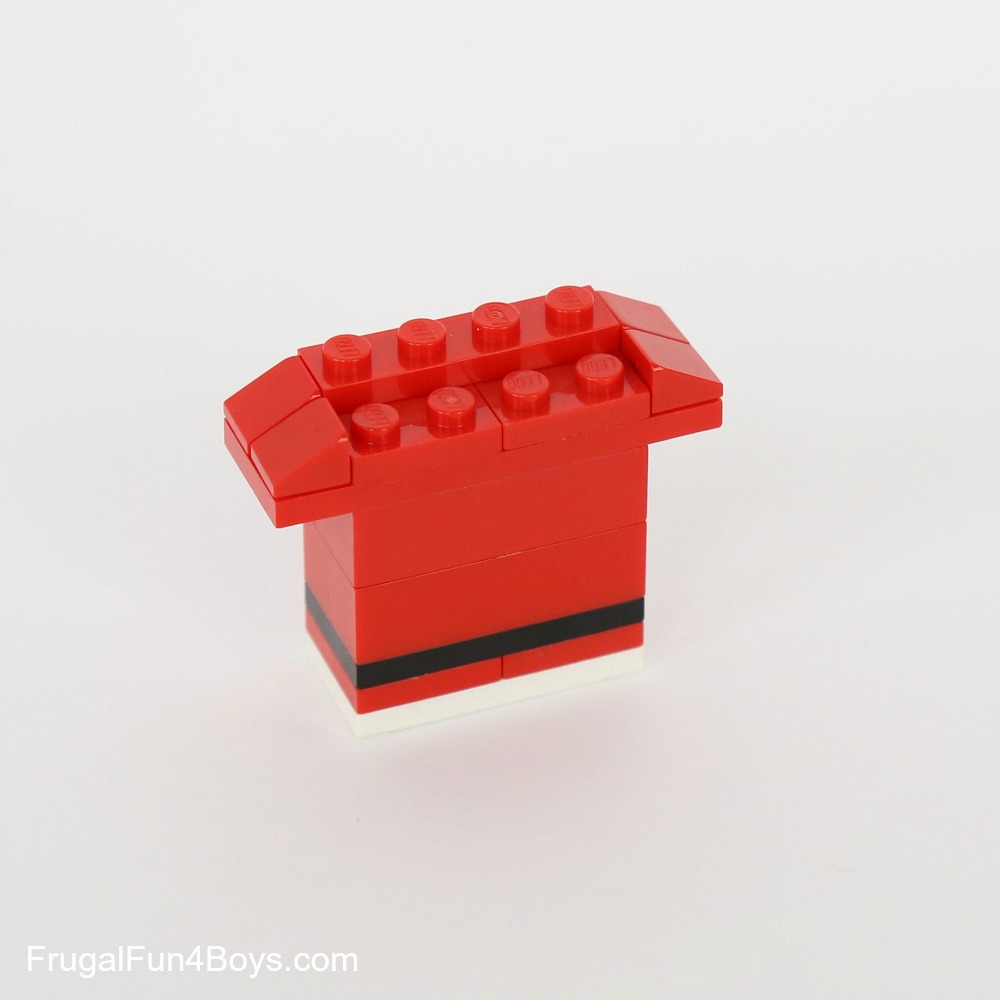
Step 10: Gather the bricks shown for building Santa’s suit.
Step 11: Stack the bricks as shown.

Step 12: Then add a 2 x 6 plate. On top of that, add two 2 x 2 plates and four 1 x 1 slopes. Then add a 1 x 4 plate.
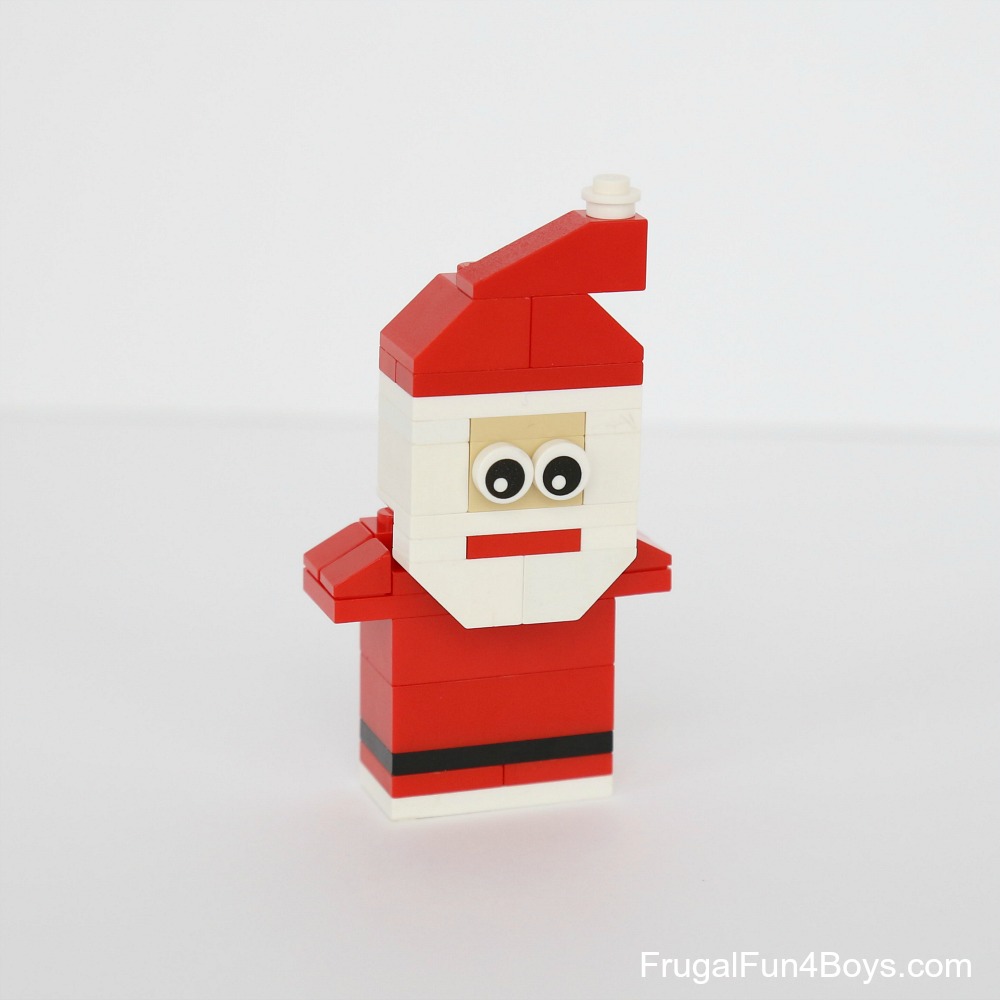
Step 13: Attach the head to the top of the body.
Step 14: Build Santa’s arms and legs. Each leg is two 1 x 1 red bricks and two 1 x 2 black plates. Each arm is two 1 x 1 red bricks and a 1 x 1 white plate.
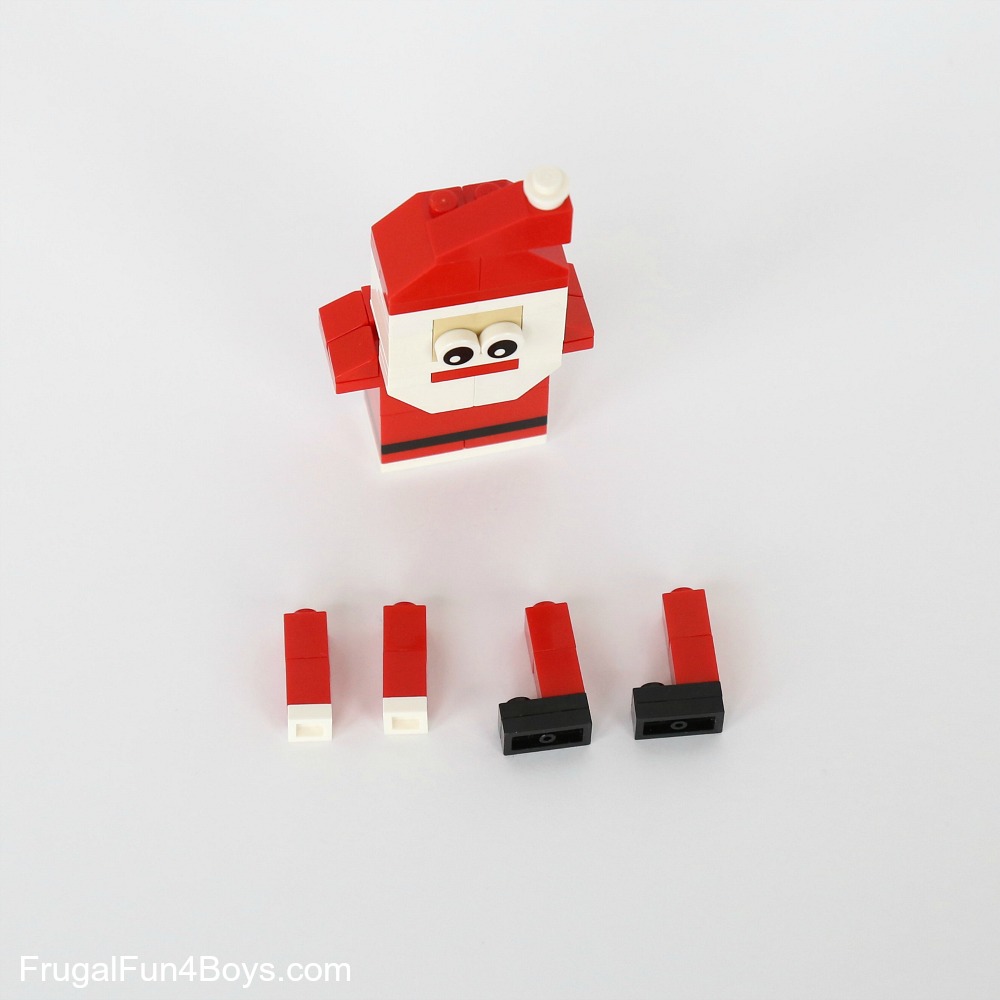
Step 15: Attach the arms and legs and Santa is complete!

Build Santa a cute little polar bear! For the polar bear, I used the same design as the bear cub in Epic LEGO Adventures with Bricks You Already Have. Check the book for instructions, or figure it out from the picture – it’s simple to build.
Build a Stocking Ornament
The stocking ornament is so simple and cute!
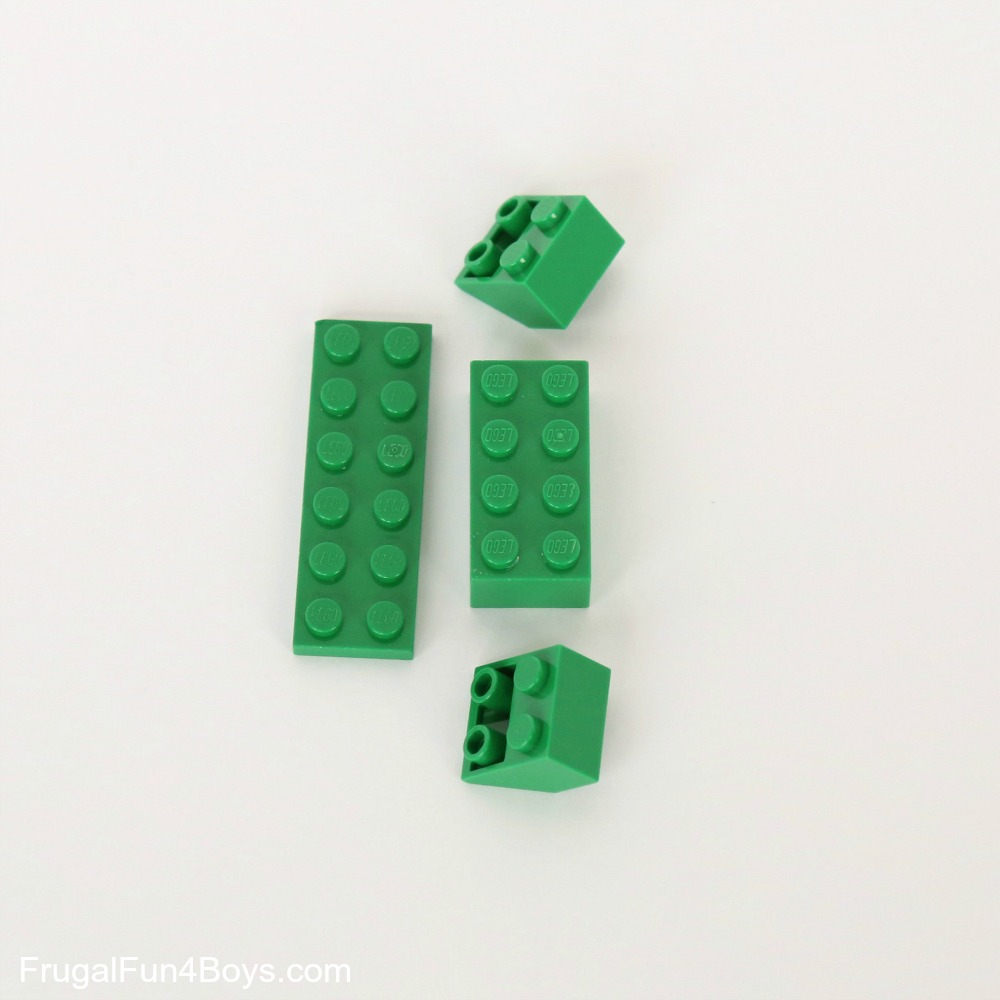
Step 1: Start the stocking with a 2 x 6 plate, two 2 x 2 inverted slopes, and a 2 x 4 brick.
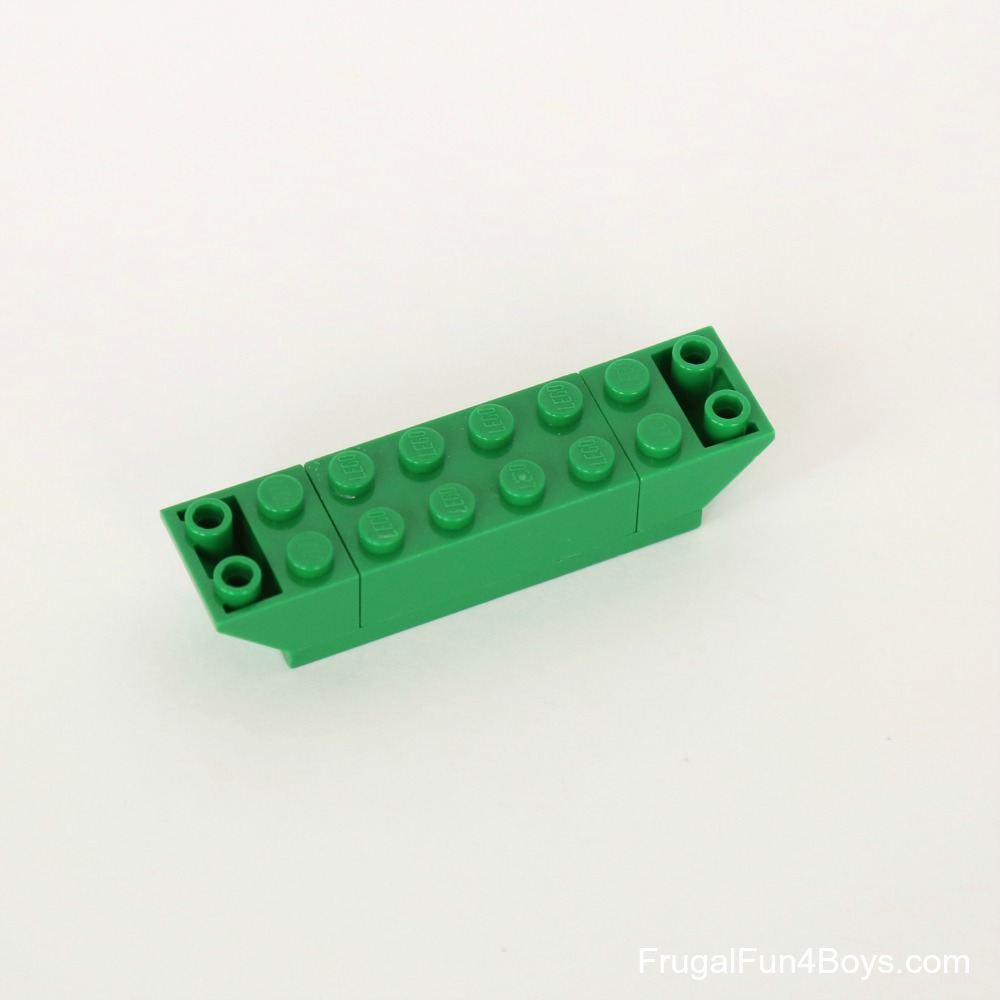
Step 2: Assemble the bricks as shown.
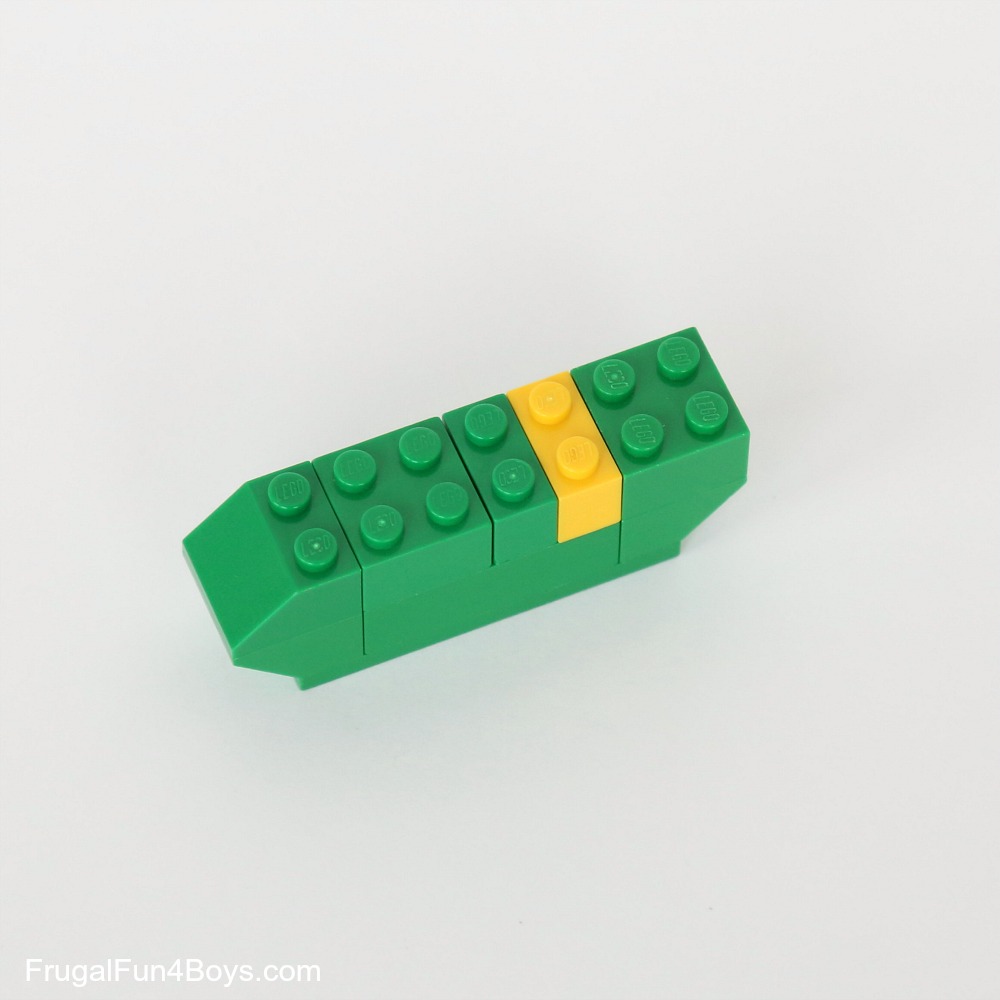
Step 3: Add another row – a 2 x 2 slope, a 2 x 2 green brick, a 1 x 2 green brick, a 1 x 2 yellow brick, and a 2 x 2 green brick.
Step 4: Add a 2 x 2 slope, a 1 x 2 yellow brick, and a 2 x 2 inverted slope.
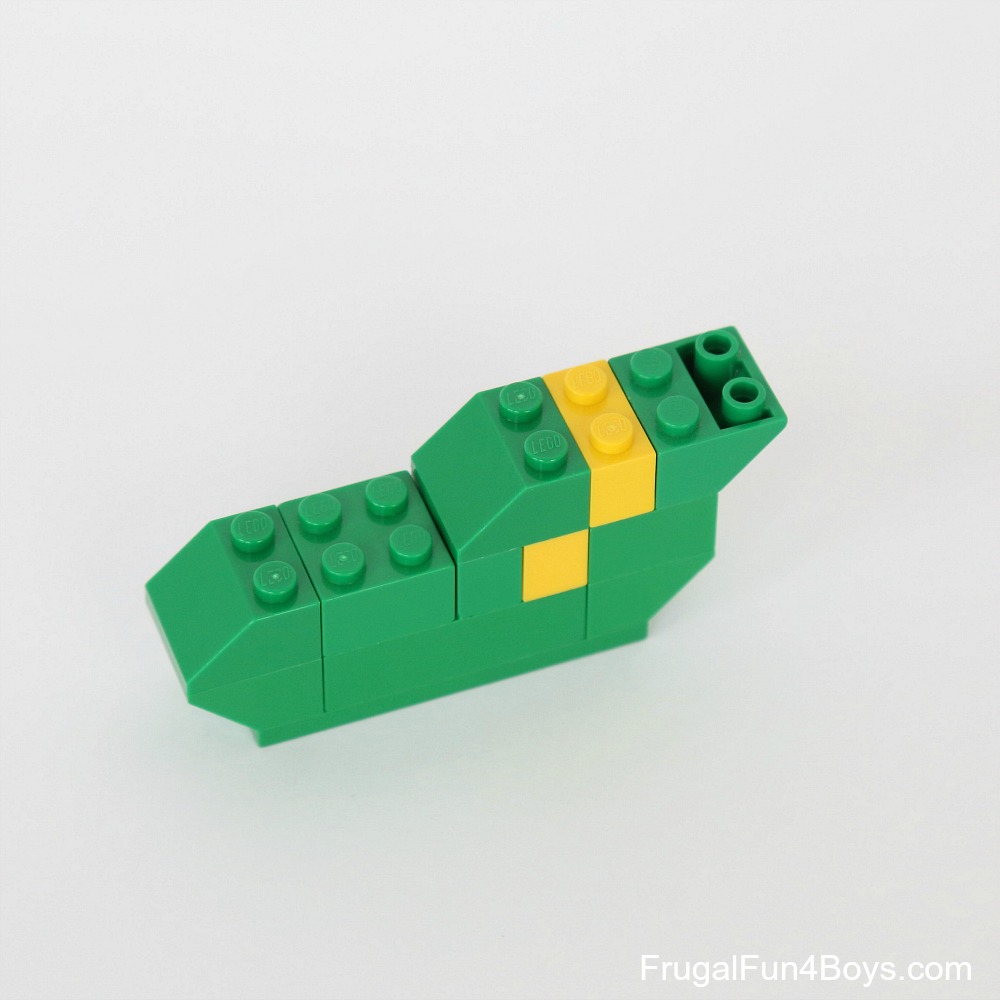
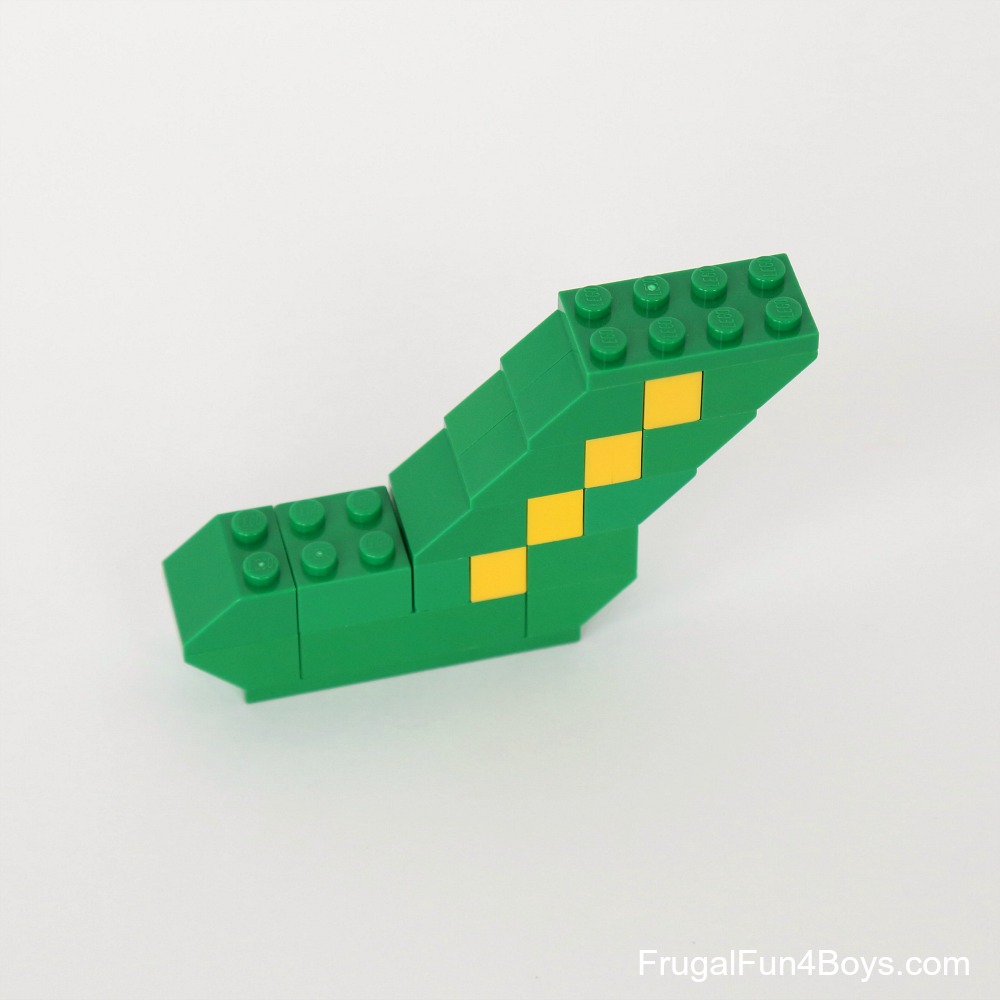
Step 5: Build two more rows just like the previous one. Then add a 2 x 4 plate on top.
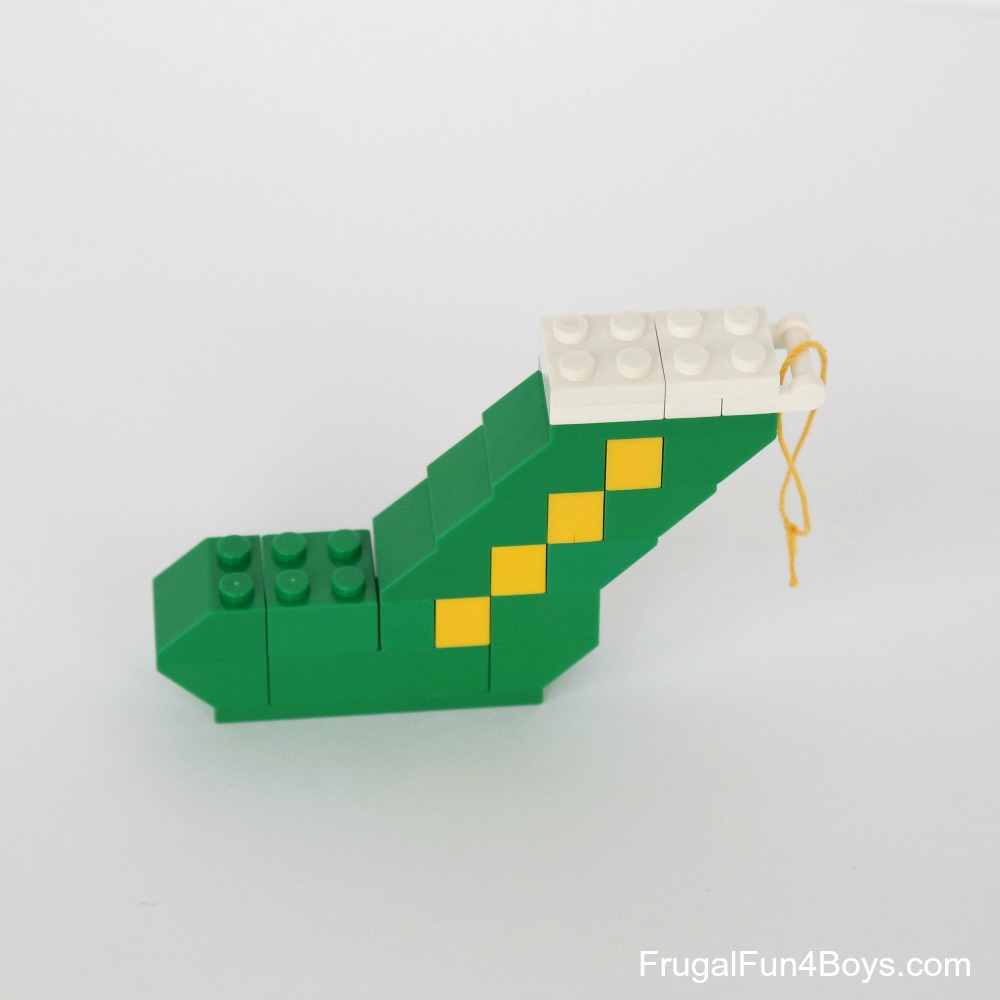
Step 6: Add a 1 x 2 white plate with a handle on the side, a 1 x 2 white plate, and a 2 x 2 white plate. Then place two 2 x 2 white plates (a 2 x 4 would be better but I couldn’t find one) on top of that.
Then make more in other colors! SO CUTE!

Have fun building! And be sure to check out our other LEGO® Christmas ideas!
Build an awesome LEGO Advent Calendar with 24 little compartments for candy and doors that open!
Five LEGO® Christmas Ornaments to Build
Build a LEGO® Nativity Set, plus 4 more Christmas projects
2 Comments
Charley Dec 31, 2017
Is the there a lego elf?
Legofan Dec 2, 2019
My 7 yr old so loved your creations. He easily made the stocking. He wanted me to comment on here ?
Post a Comment