
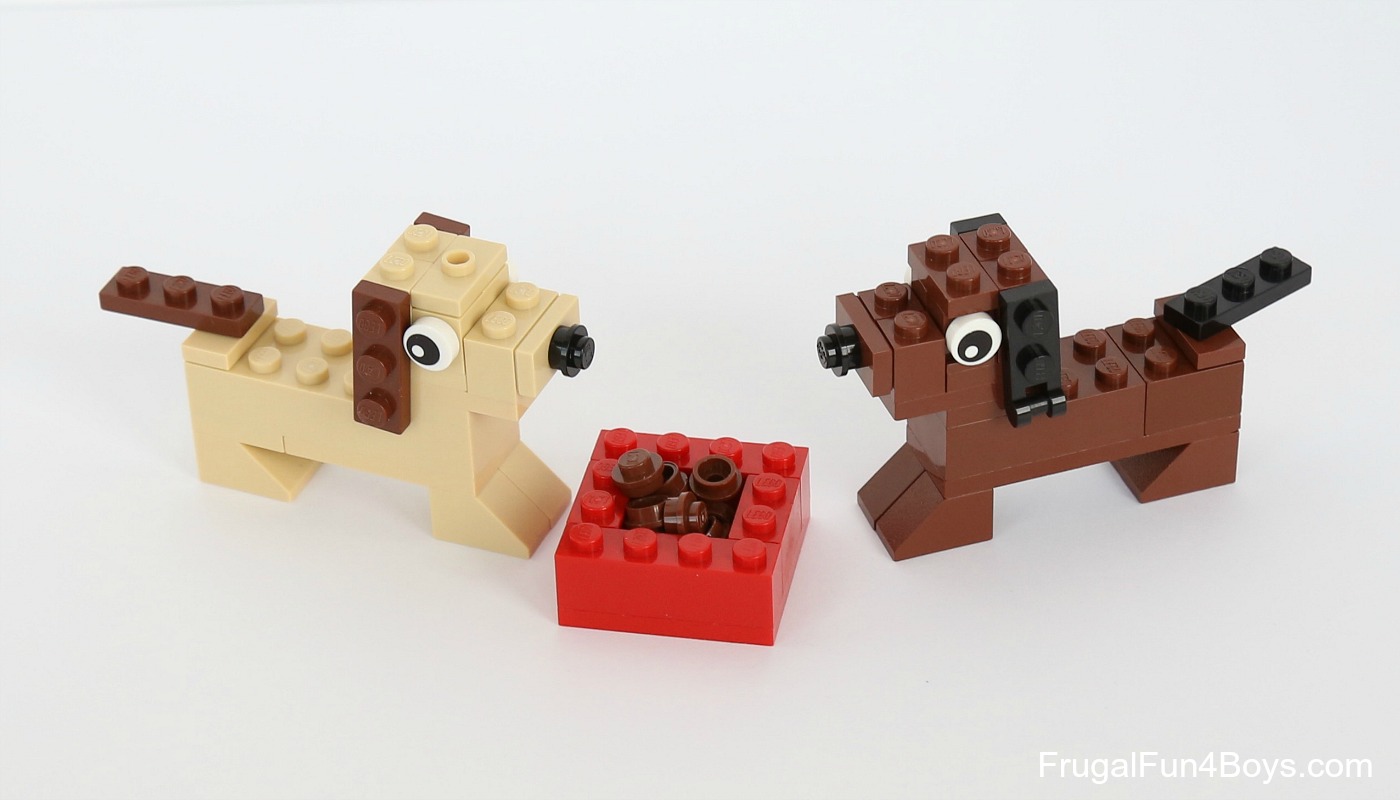
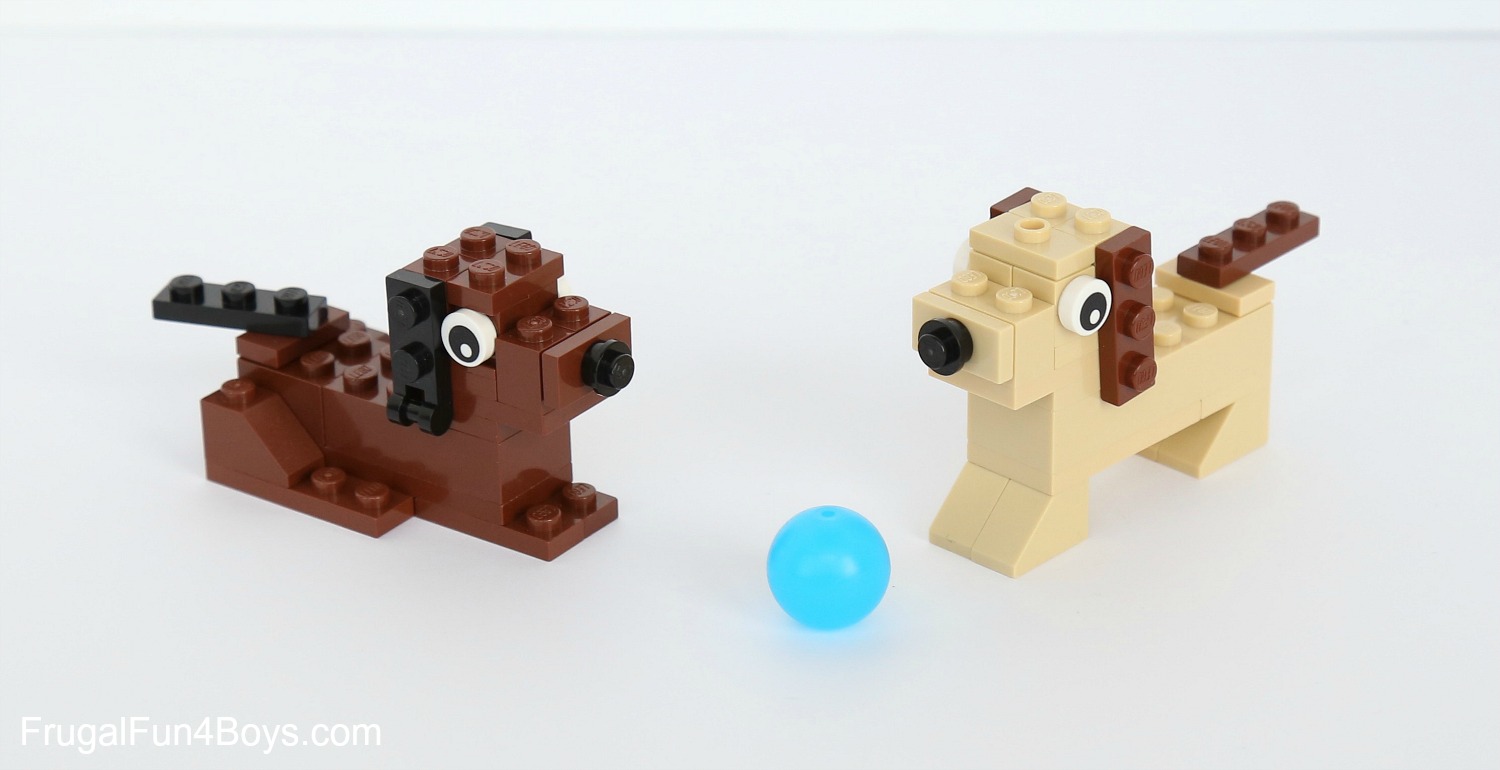
Build some LEGO® puppies with their own doggy bed and food bowl! These are such adorable little puppies. You can swap out the bricks in the legs to make them either lying down or standing up.
Janie asked to have the puppies after I finished the photos, and she has been playing with them ever since.
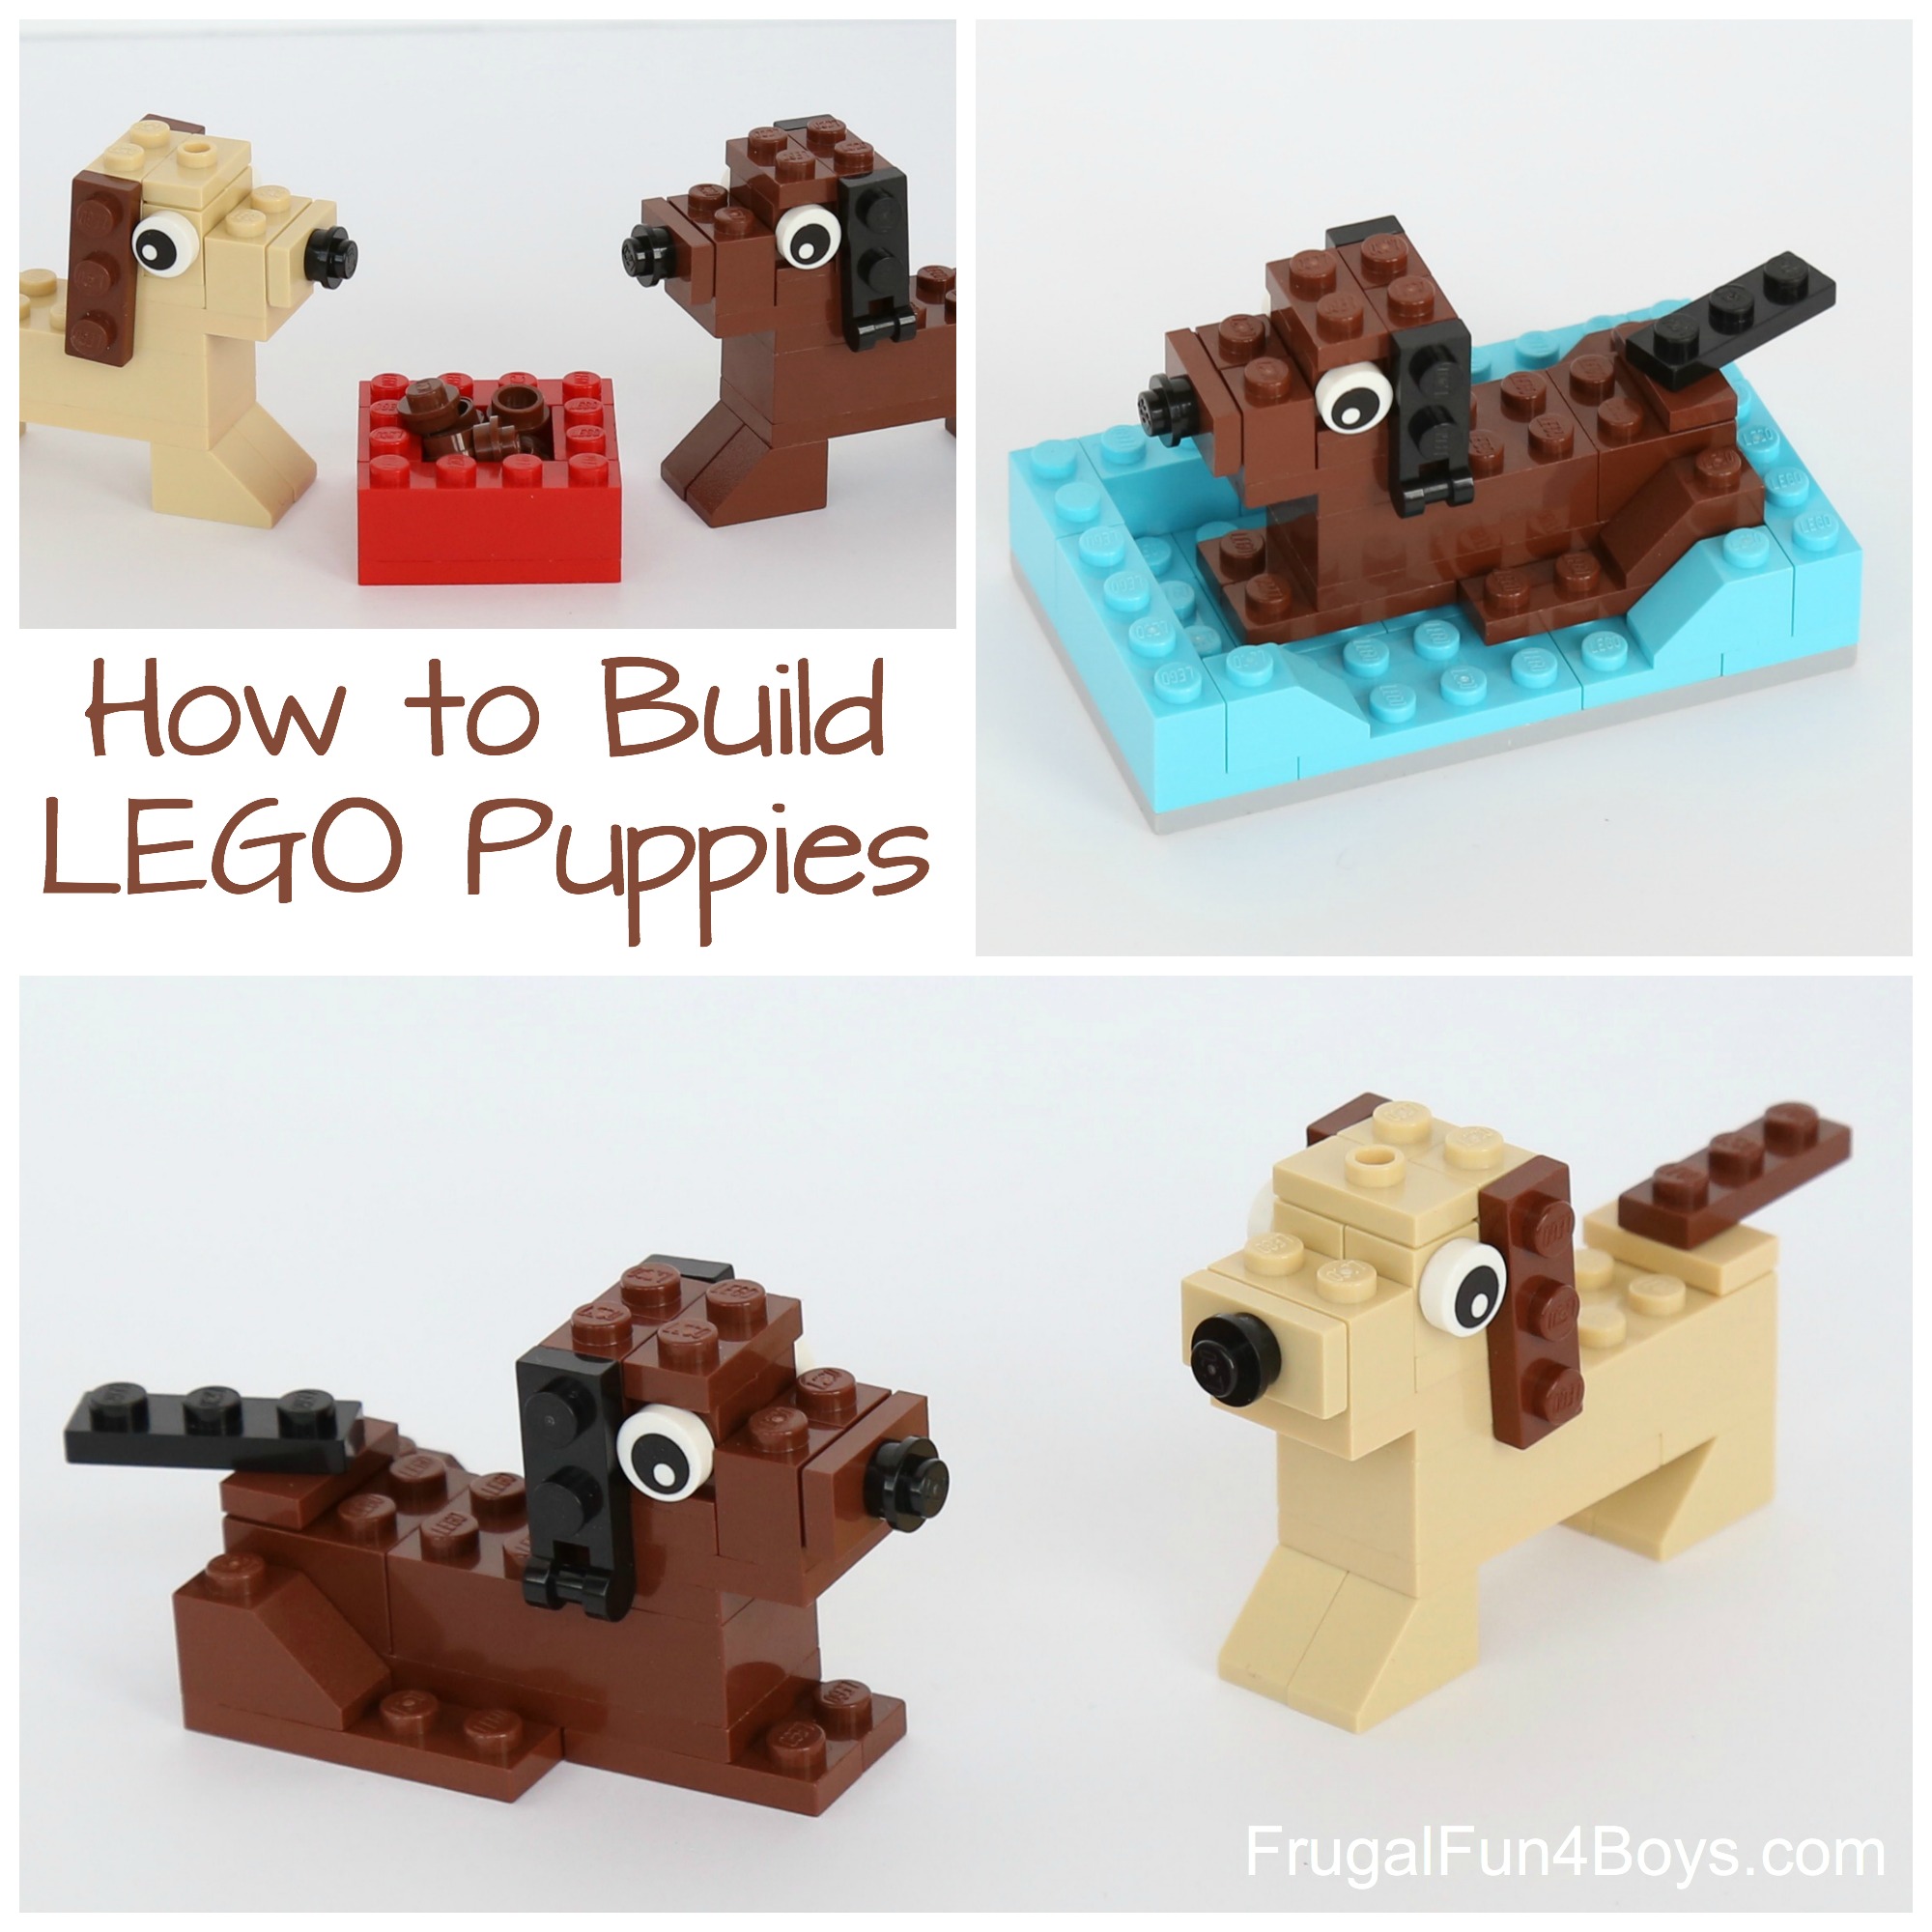
These brick puppies don’t require a lot of pieces. I’ll include a parts list at the bottom of the post because it would be fun to order the bricks on Brick Link or Lego.com and make them as a birthday party activity.
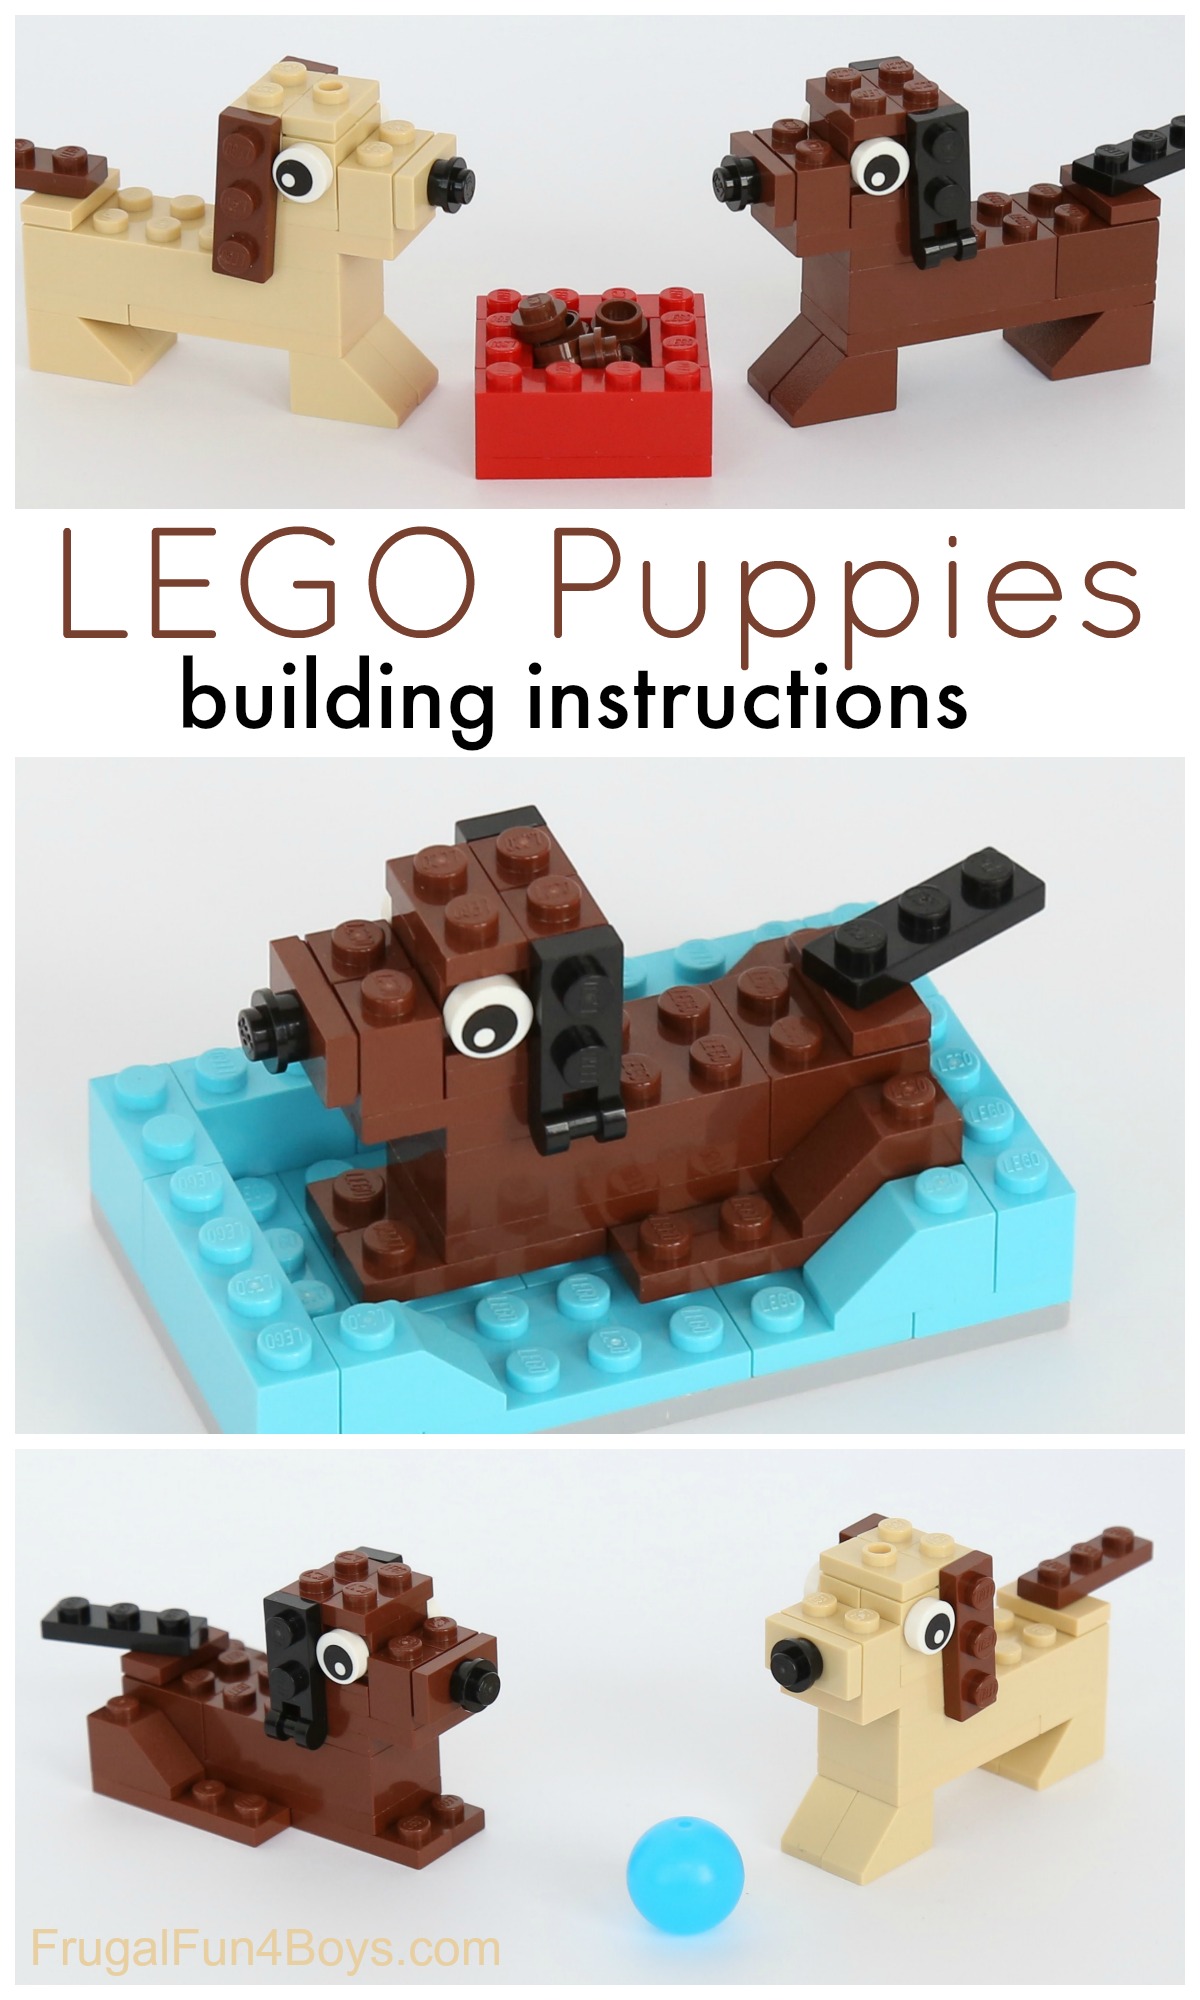
Use either 1 x 3 plates for the ears, or 1 x 2 plates that have a handle on the end (the black ears below). I can’t decide which is cuter! For dog food, I just used little 1 x 1 brown bricks.
Ready to build a puppy with LEGO® bricks?
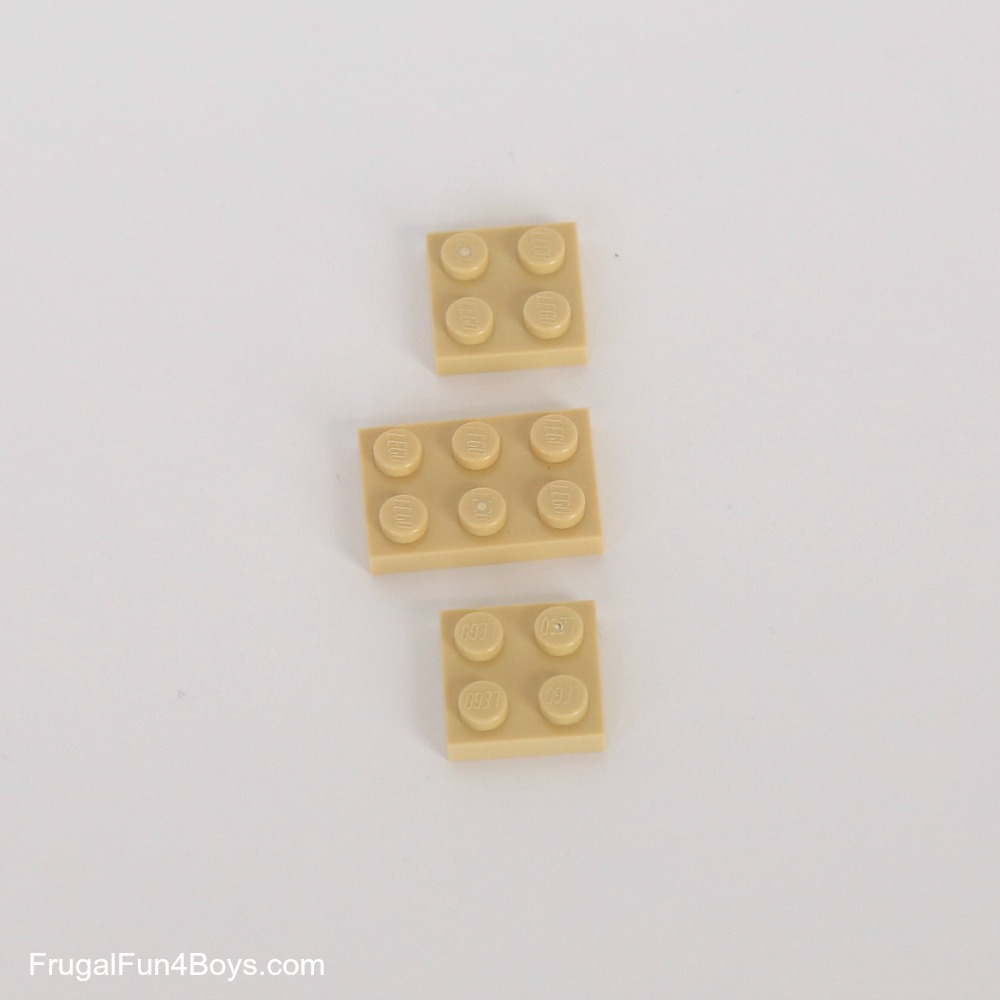
Step 1: Grab two tan 2 x 2 plates and a 2 x 3 plate. (Plates are flat bricks.)
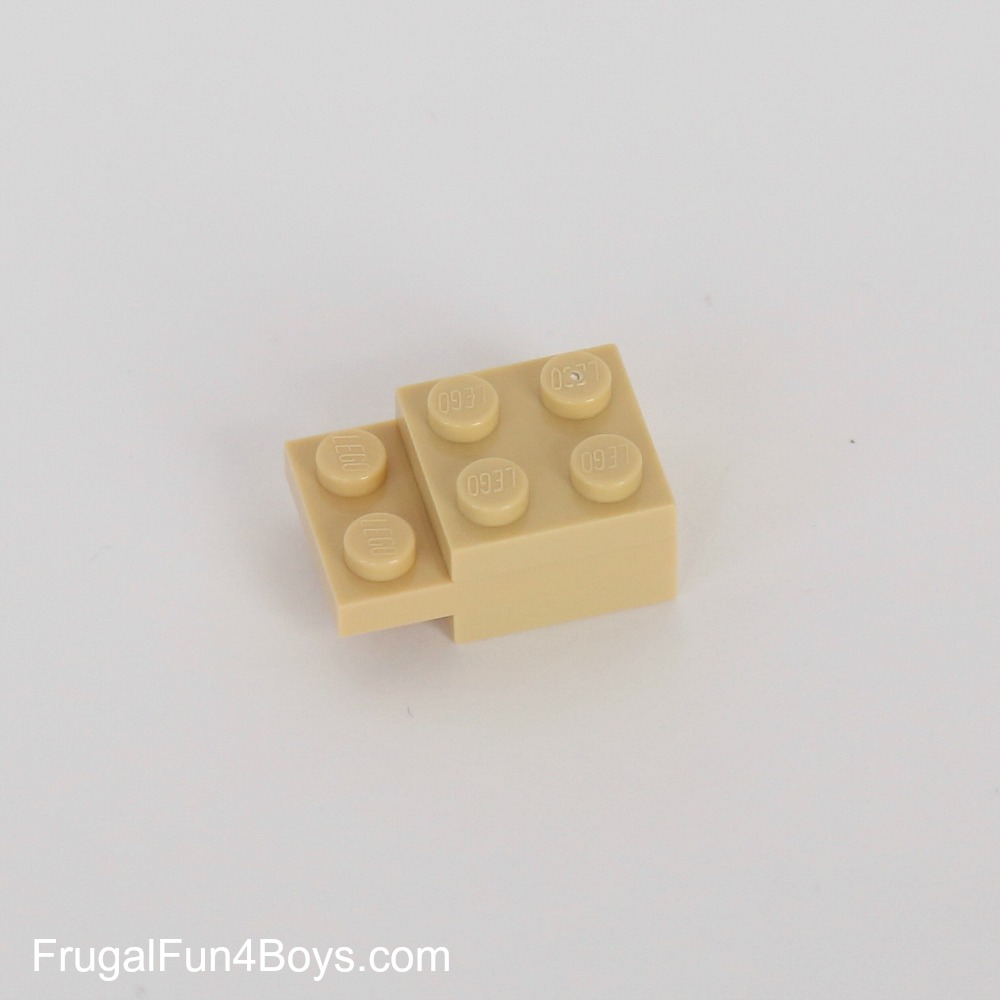
Step 2: Stack them like this.
Step 3: Add a 1 x 2 tan plate on the back of the head. Then place two 1 x 1 bricks with a stud on the side on top of that. Place two 1 x 1 bricks with a stud on the side in front of those.
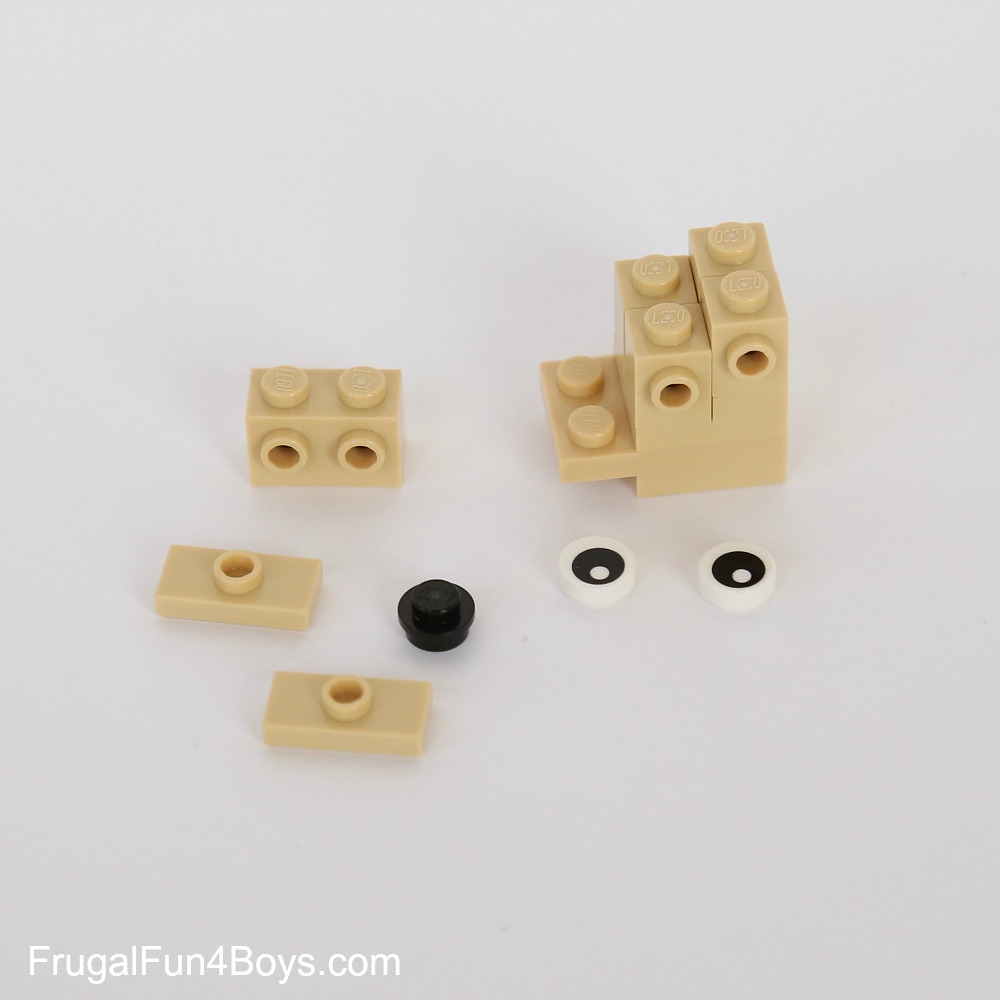
Step 4: Attach the eyes. Place a 1 x 2 plate with one stud on top of the eyes. Then add a 1 x 2 brick with two studs on the side in front of the eyes. Attach a 1 x 2 plate with with one stud and a 1 x 1 black round brick to be the nose.
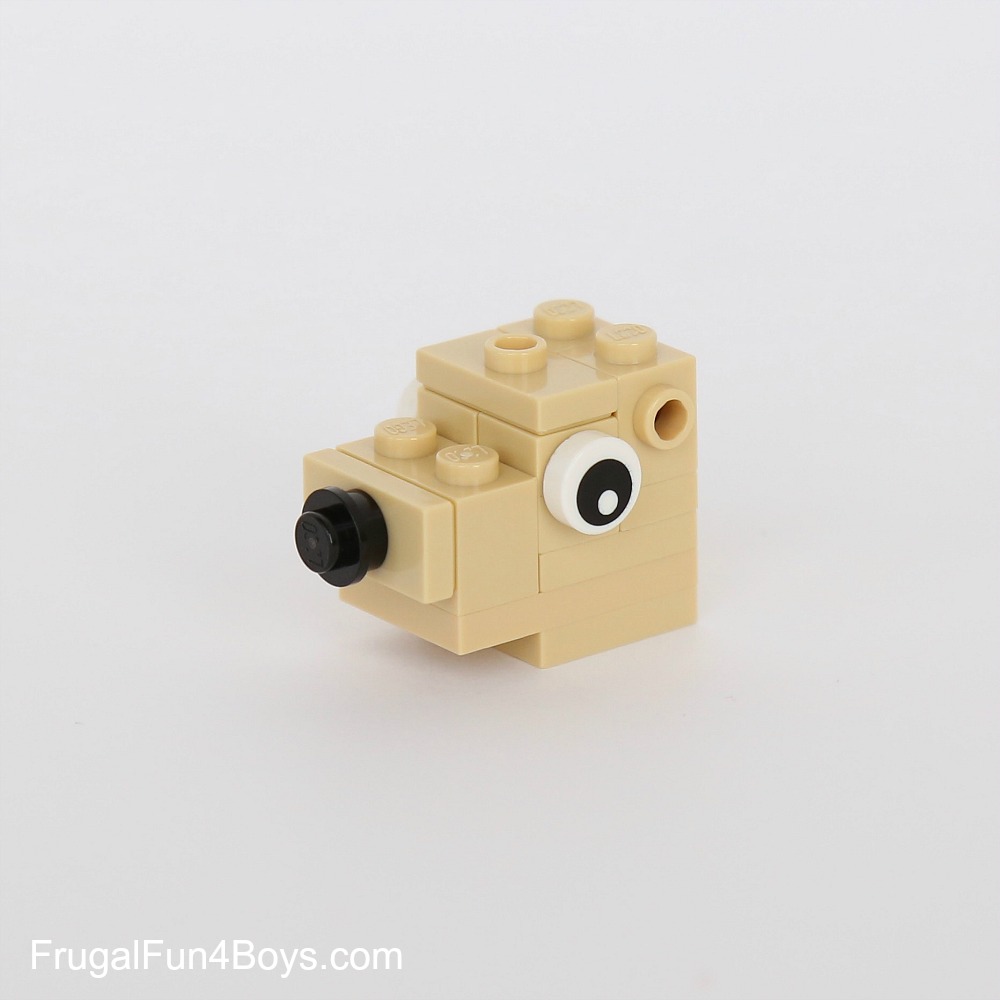
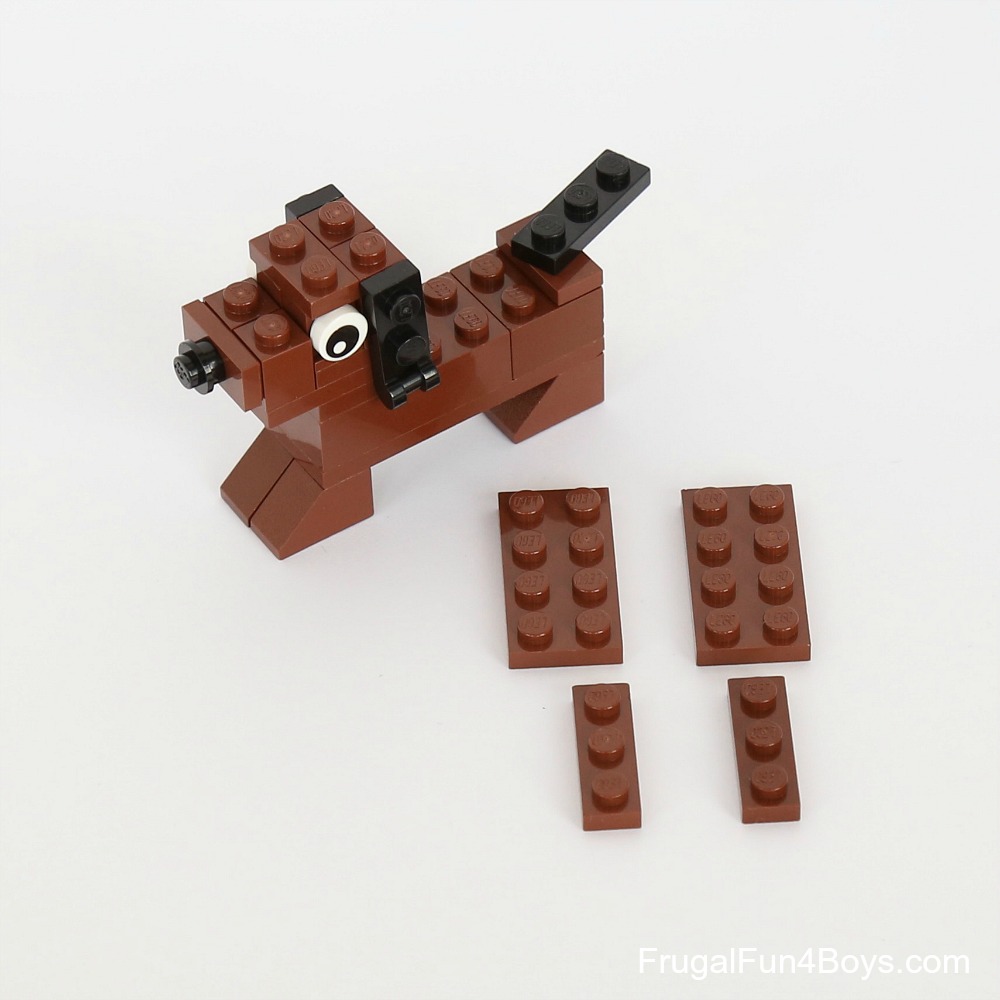
Step 5: Build the body. Find a 2 x 6 brick, a 2 x 4 plate, and a 2 x 2 plate.

Step 6: Attach both plates to the underside of the 2 x 6 brick. Then find four 1 x 2 slopes to use as feet. Grab a 1 x 2 brick with one stud on top and three 1 x 3 brown plates.
Step 7: Attach the ears to the studs on the back of the head, and use the 1 x 2 plate with one stud to hold the tail. Your cute little puppy is complete!
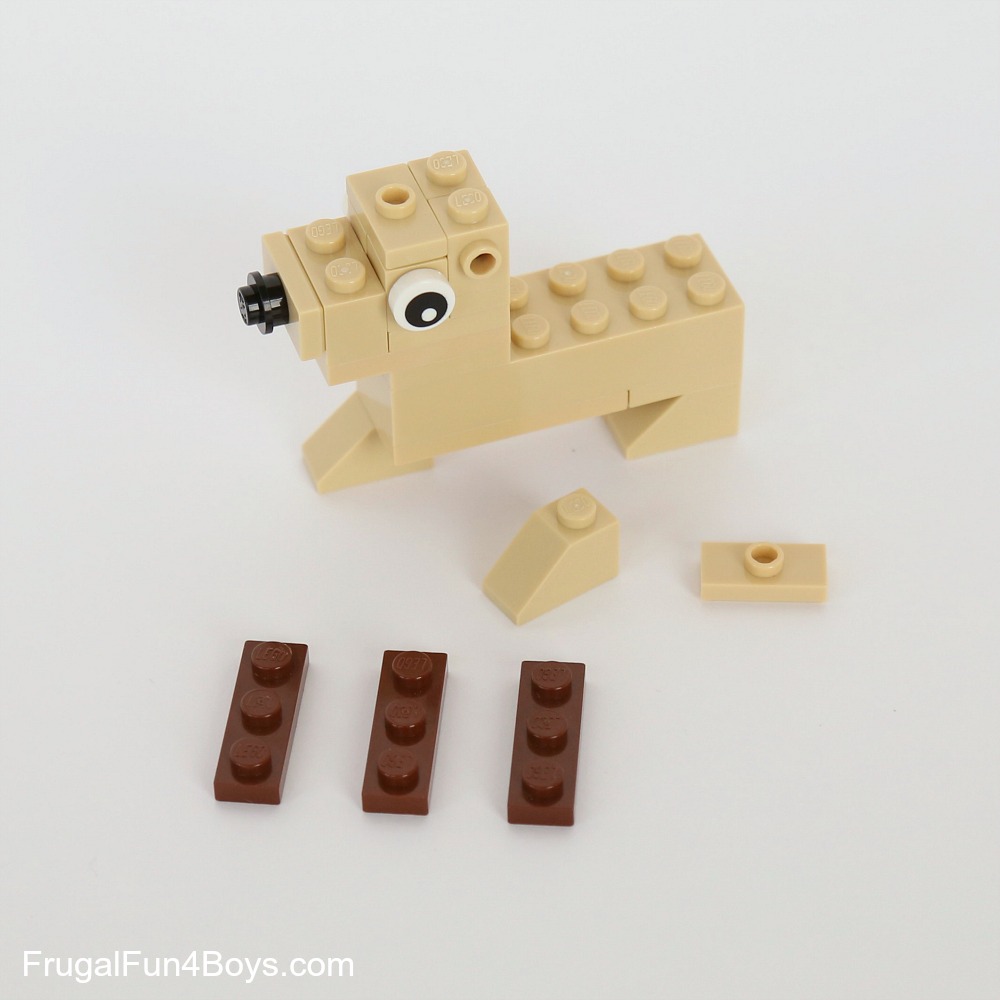
Here’s how to make the lying down puppy.
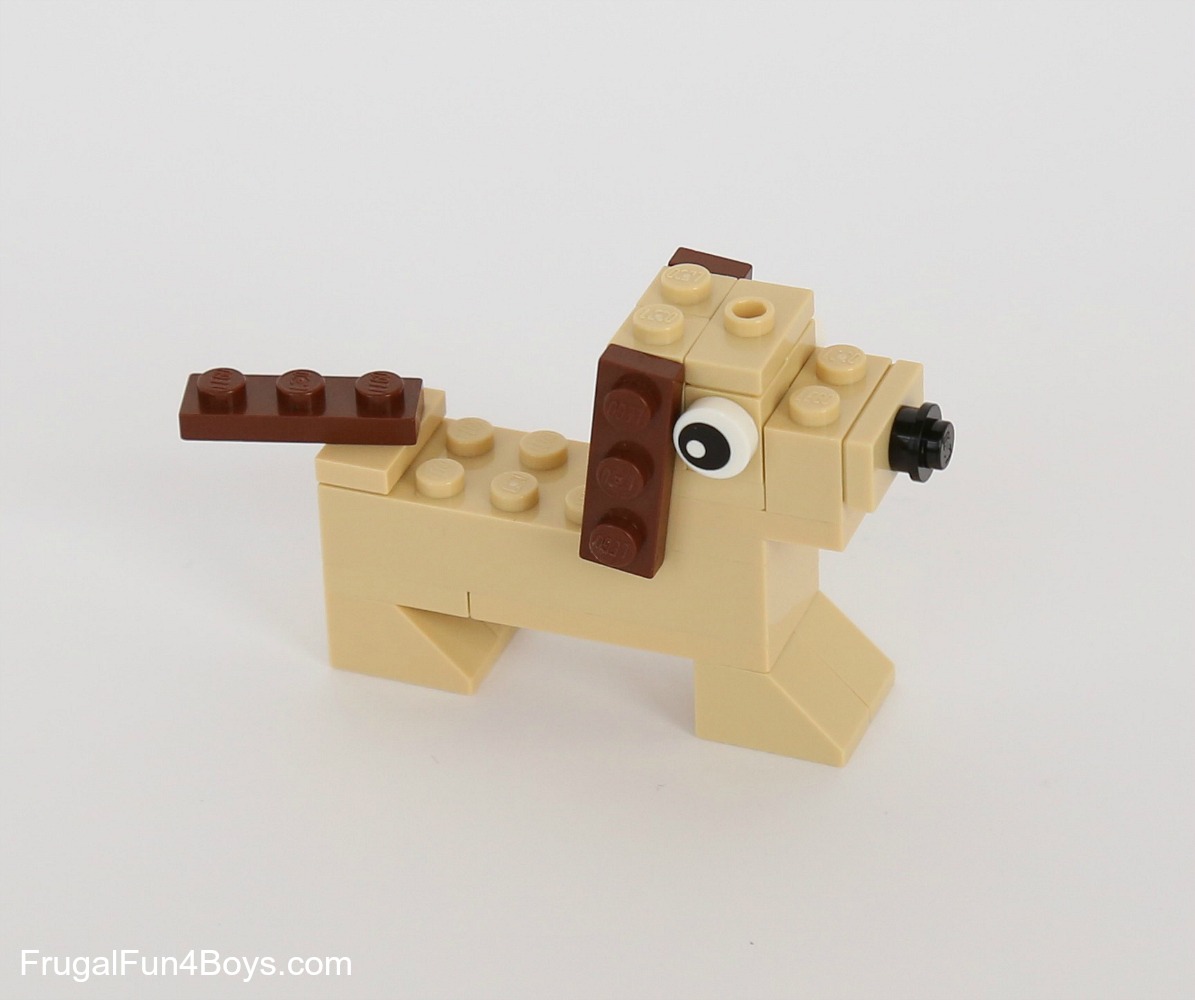
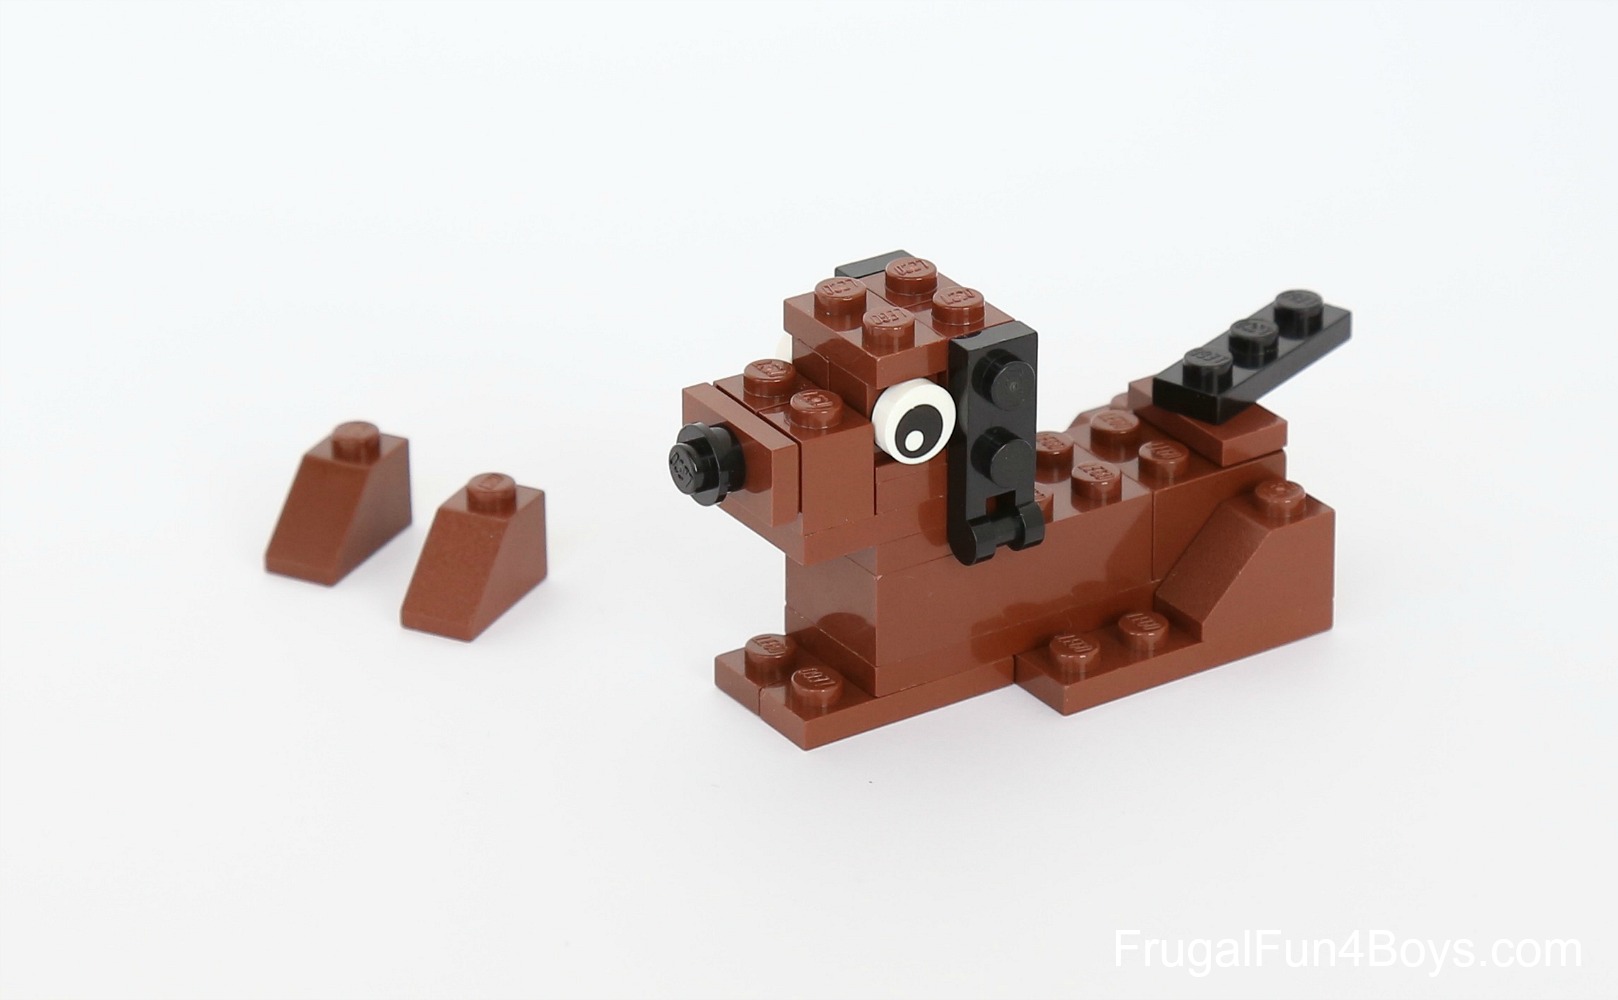
To convert the puppy to lying down, remove the four 1 x 2 slopes. Find two 2 x 4 plates and two 1 x 3 plates.
Attach the 2 x 4 plates to the back of the body so that they stick out by one row of studs, and use the 1 x 3 plates to make front legs. Take two of the 1 x 2 slopes that you removed and attach them to the 2 x 4 plates to complete the hind legs.
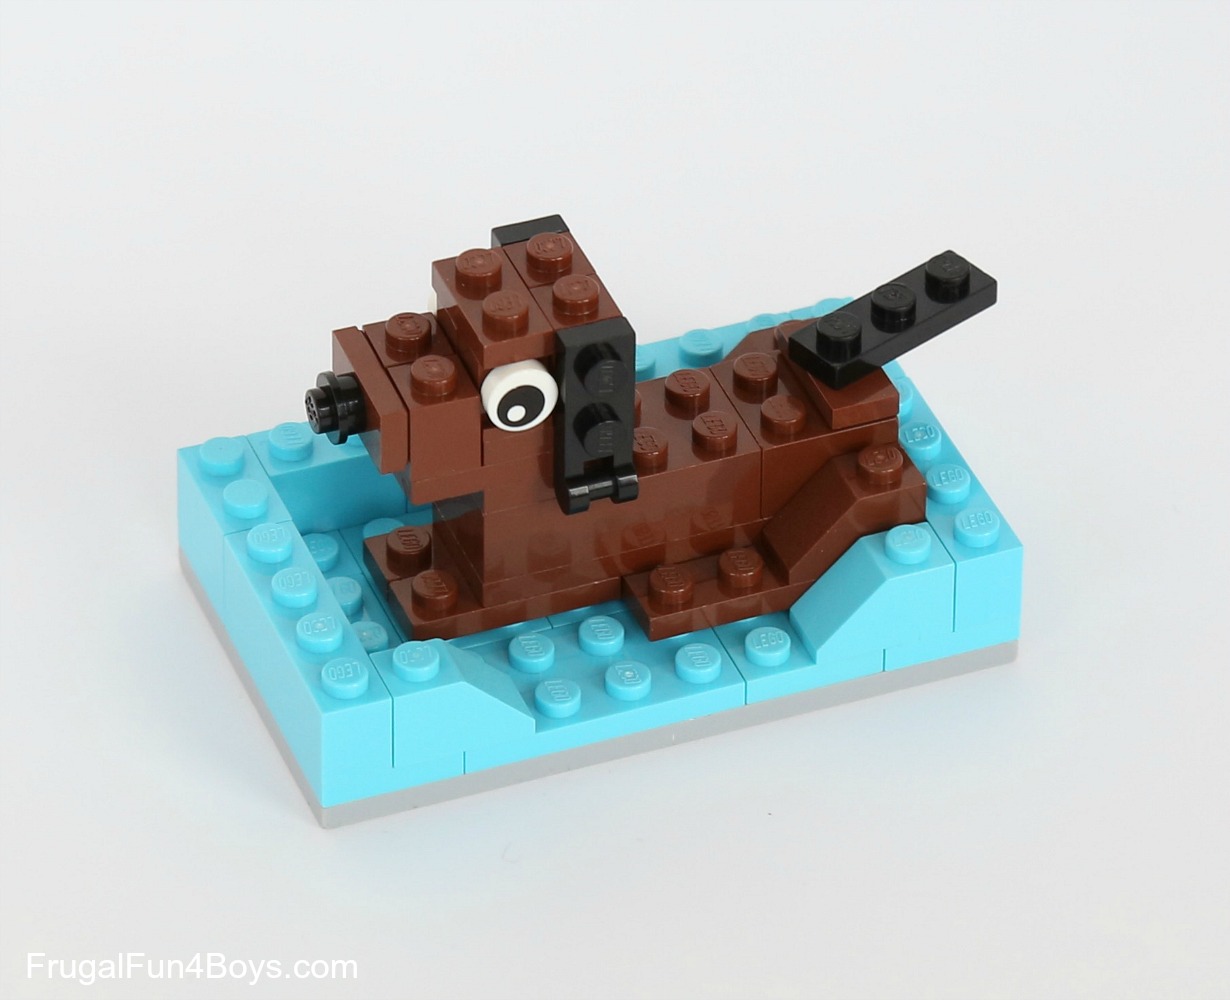
Then if you want you can build the puppy a little dog bed!
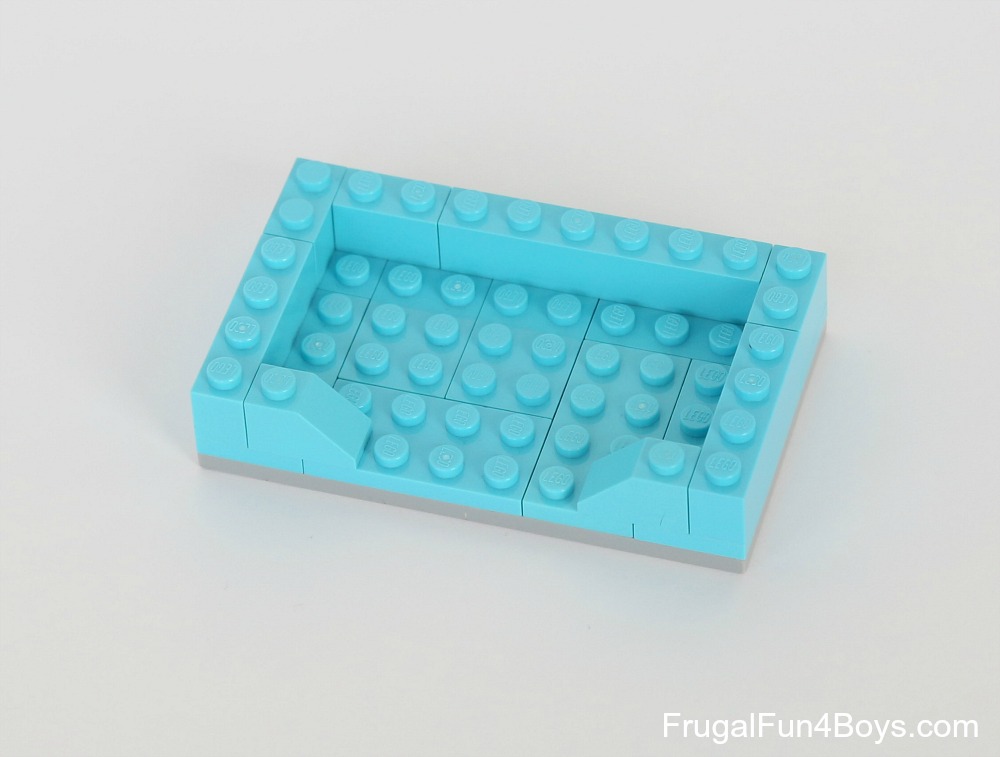
There is a 6 x 10 light gray plate on the bottom of the bed. Then I covered it with a layer of medium azure plates and added a row of bricks around the edges.
The puppy looks so cute in his little bed!
Make more puppies in other colors! Black and white would be fun, or brown and black.
Parts List:
Here’s a parts list for building the tan puppy. Remember that you can swap out different colors or 1 x 2 plates with handles for the ears instead of 1 x 3 plates. Also, this does not include the bricks to make the puppy lying down.
Tan bricks:
3 – 2 x 4 plates
1 – 2 x 3 plate
1 – 2 x 4 plate
1 – 1 x 2 plate
3 – 1 x 2 plates with one stud on top
1 – 1 x 2 brick with two studs on the side
4 – 1 x 1 bricks with a stud on the side (not the headlight style)
1 – 2 x 6 brick
4 – 1 x 2 slopes
Assorted bricks:
1 – 1 x 1 black round brick
2 – eyes
3 – 1 x 3 brown plates
Have fun building puppies!
1 Comments
Kate Evans Jun 20, 2018
These are awesome. Thank you.
Post a Comment