
Create your own adorable play food turkey dinner!
We’ve been having so much fun making felt play food lately, and by “we” I mean me along with our good friend and babysitter! She has helped me make play food breakfast and now this adorable turkey dinner. The boys don’t care about making play food, and Janie’s not quite old enough to help yet. But she loves playing with her kitchen!
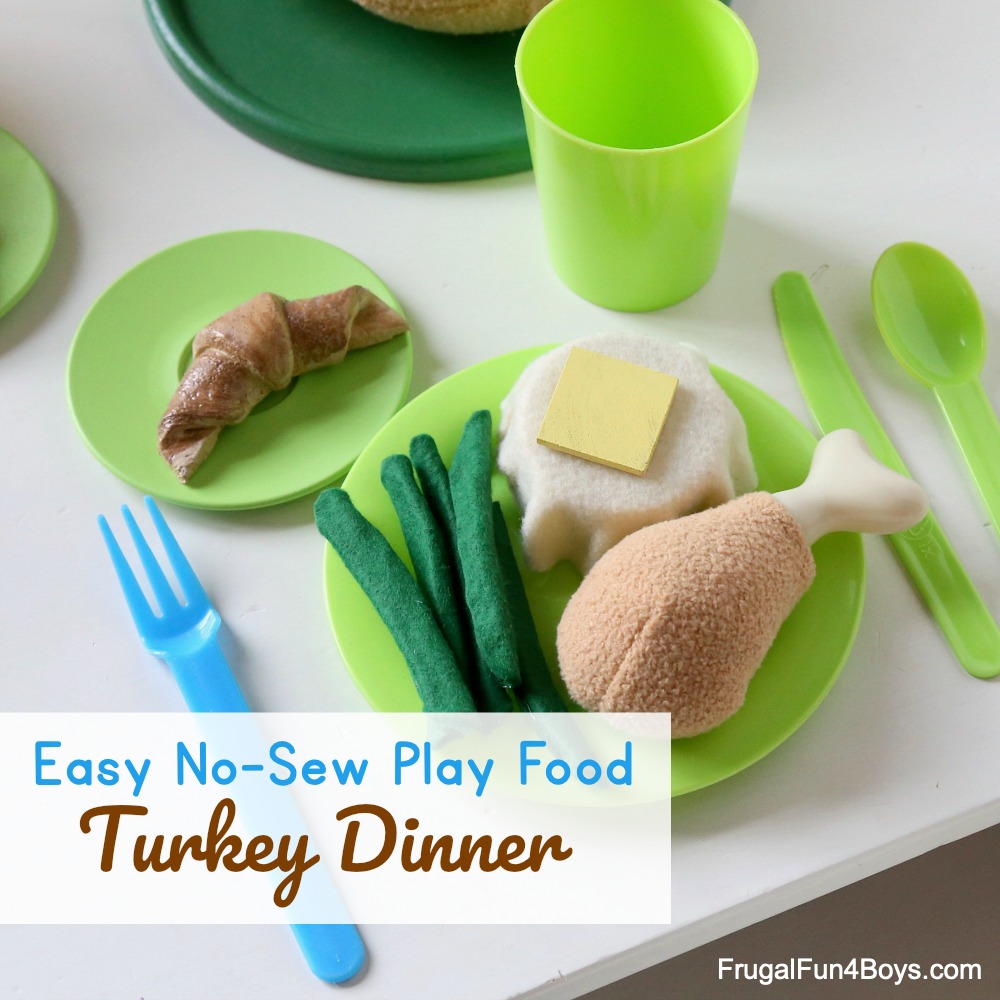
This adorable turkey dinner features a turkey that I purchased from Amazon (well, it’s actually a chicken, but who can tell?) and EASY DIY mashed potatoes, green beans, and rolls.
This post contains Amazon affiliate links.
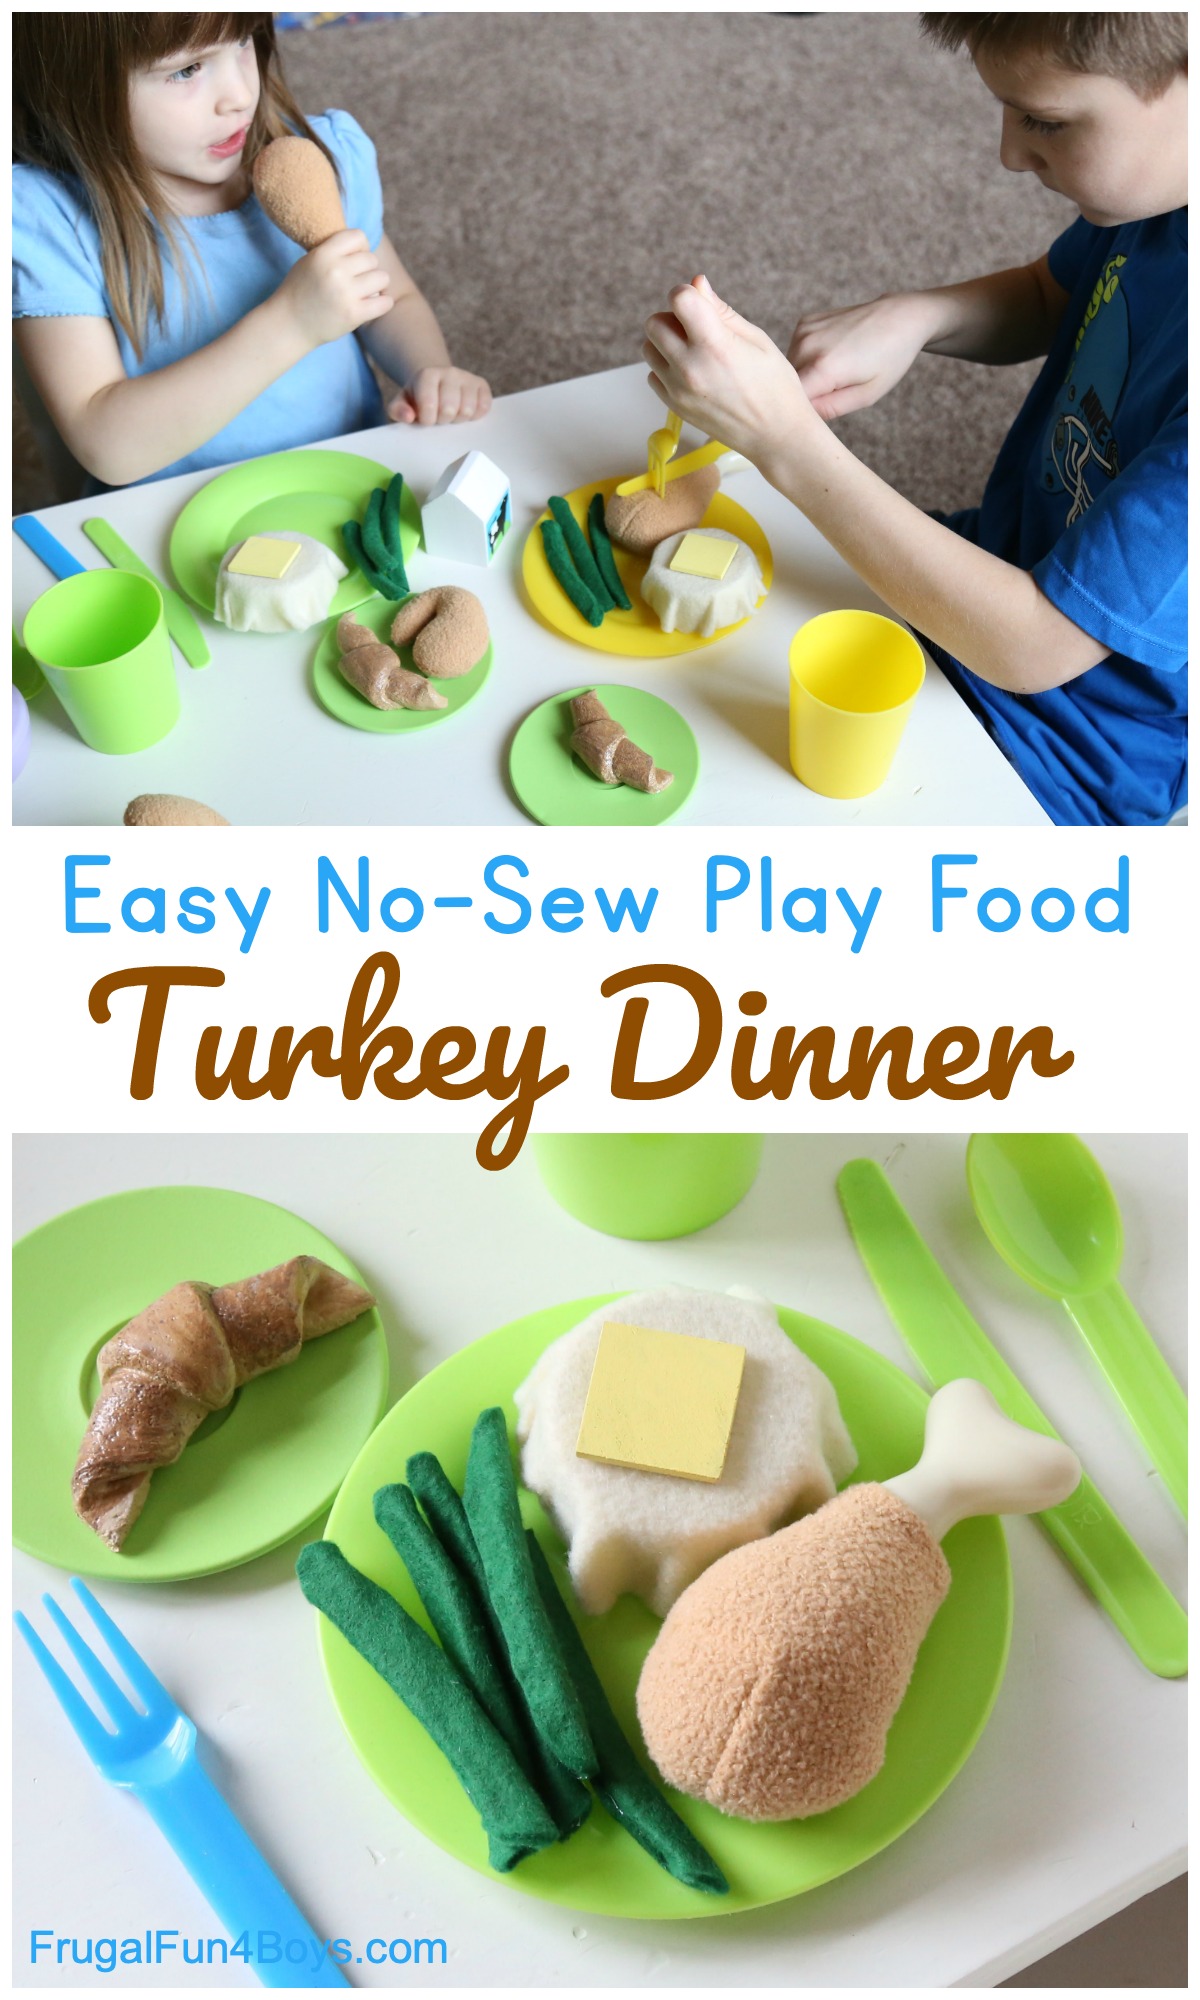
The turkey is a HABA play food chicken. It’s stuffed like a plush toy, and the legs and wings can velcro on and off so that you can “roast” the whole thing in the oven and then pretend to cut and serve it. So cute!
Aside from purchasing the chicken/turkey, the rest of this project is super cheap.
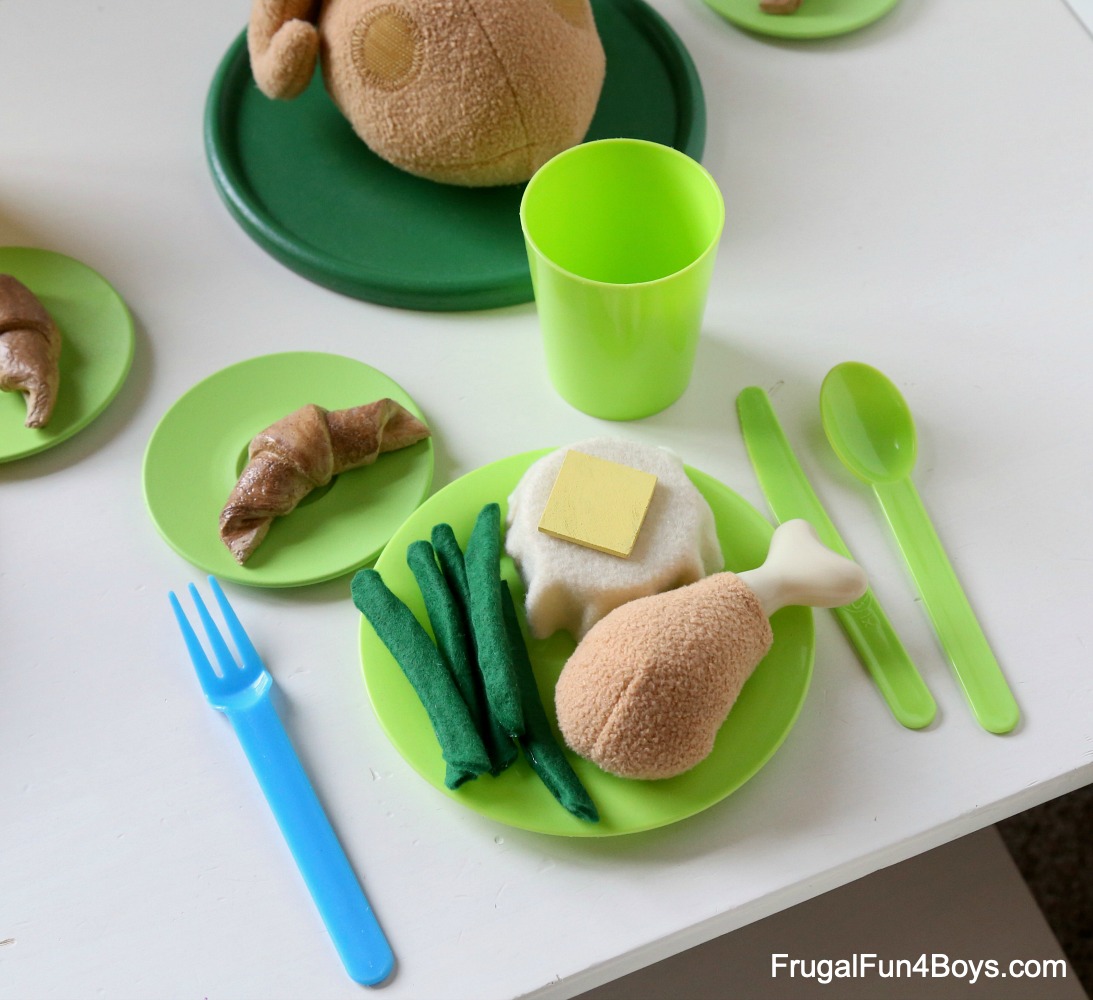
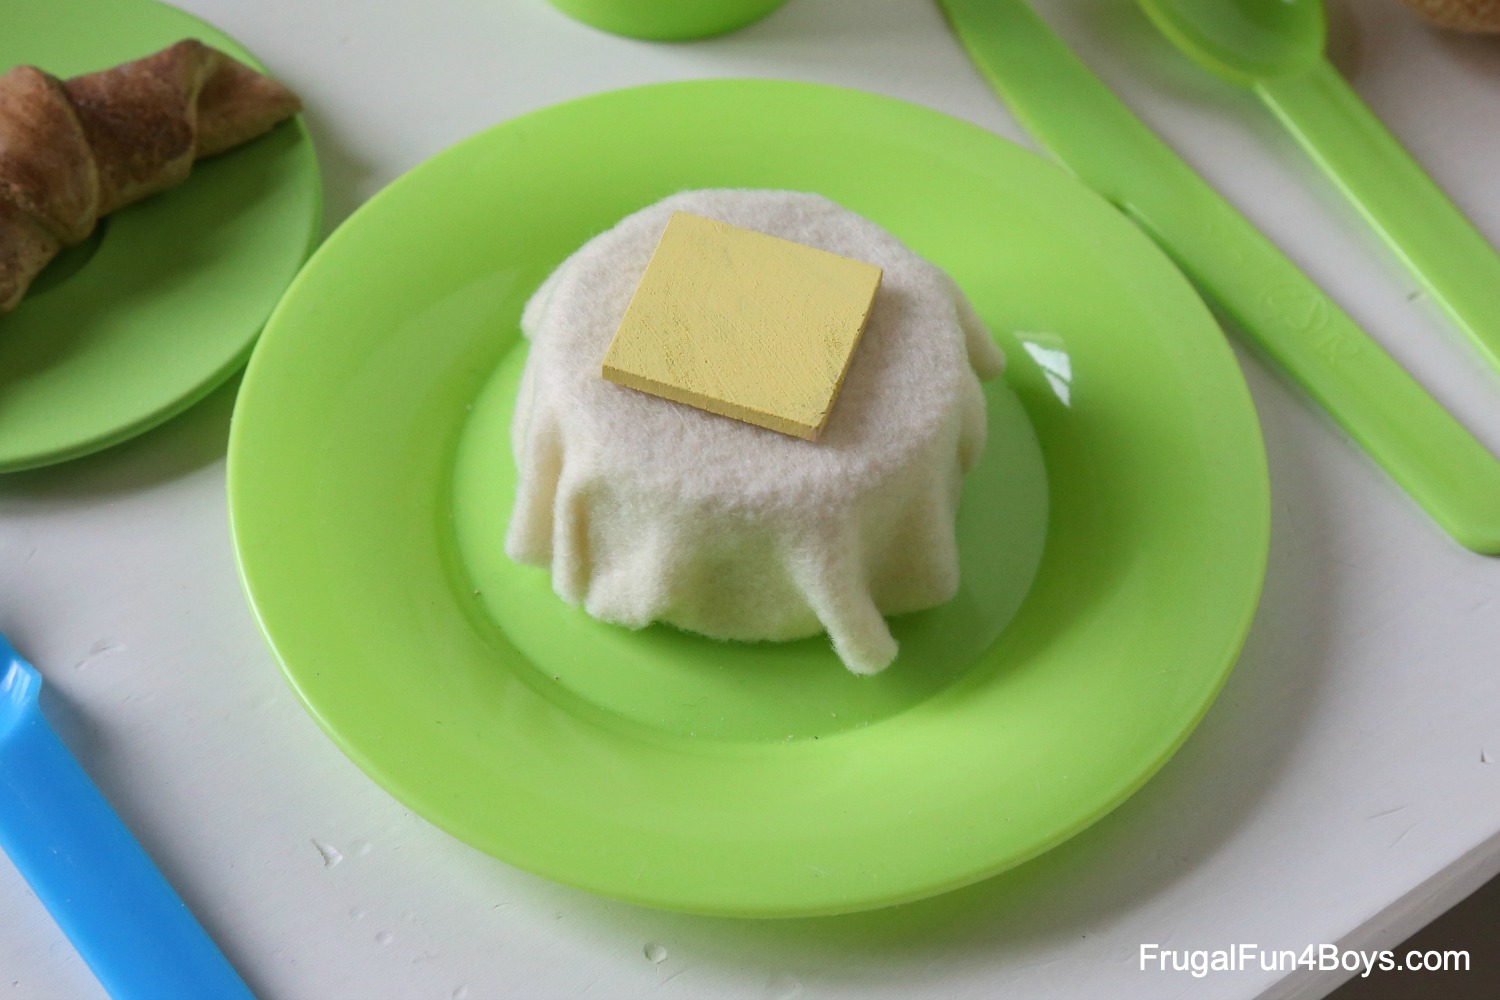
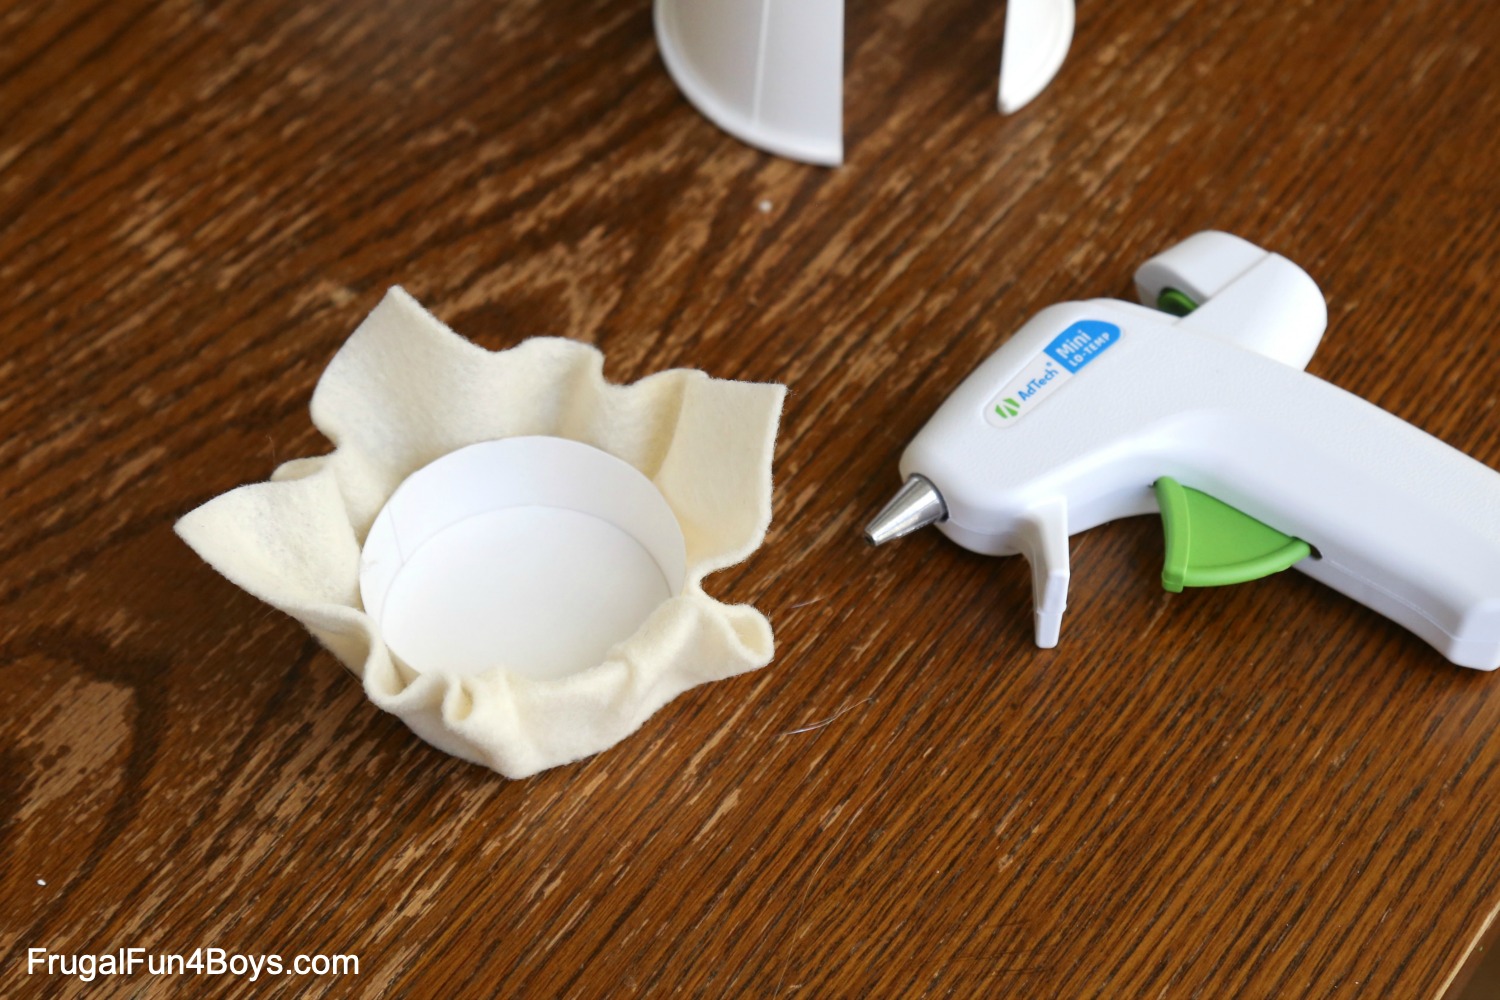
The mashed potatoes are made out of felt, a paper cup, and hot glue. That’s it! The butter is a wooden square from Hobby Lobby that we painted yellow.
Here’s how to make the mashed potatoes.
Cut the bottom off of a paper cup. I used a plain white cup. If you use a colored or patterned cup, it will show through the felt a little bit, but it’s not a big deal. My “trial run” version was with a blue cup, and you could see a little blue through the felt. So you can decide if that bothers you or not! I found my plain white cups at Walmart in the party aisle for 99 cents per pack.
Cut out a square of off-white or cream colored felt.
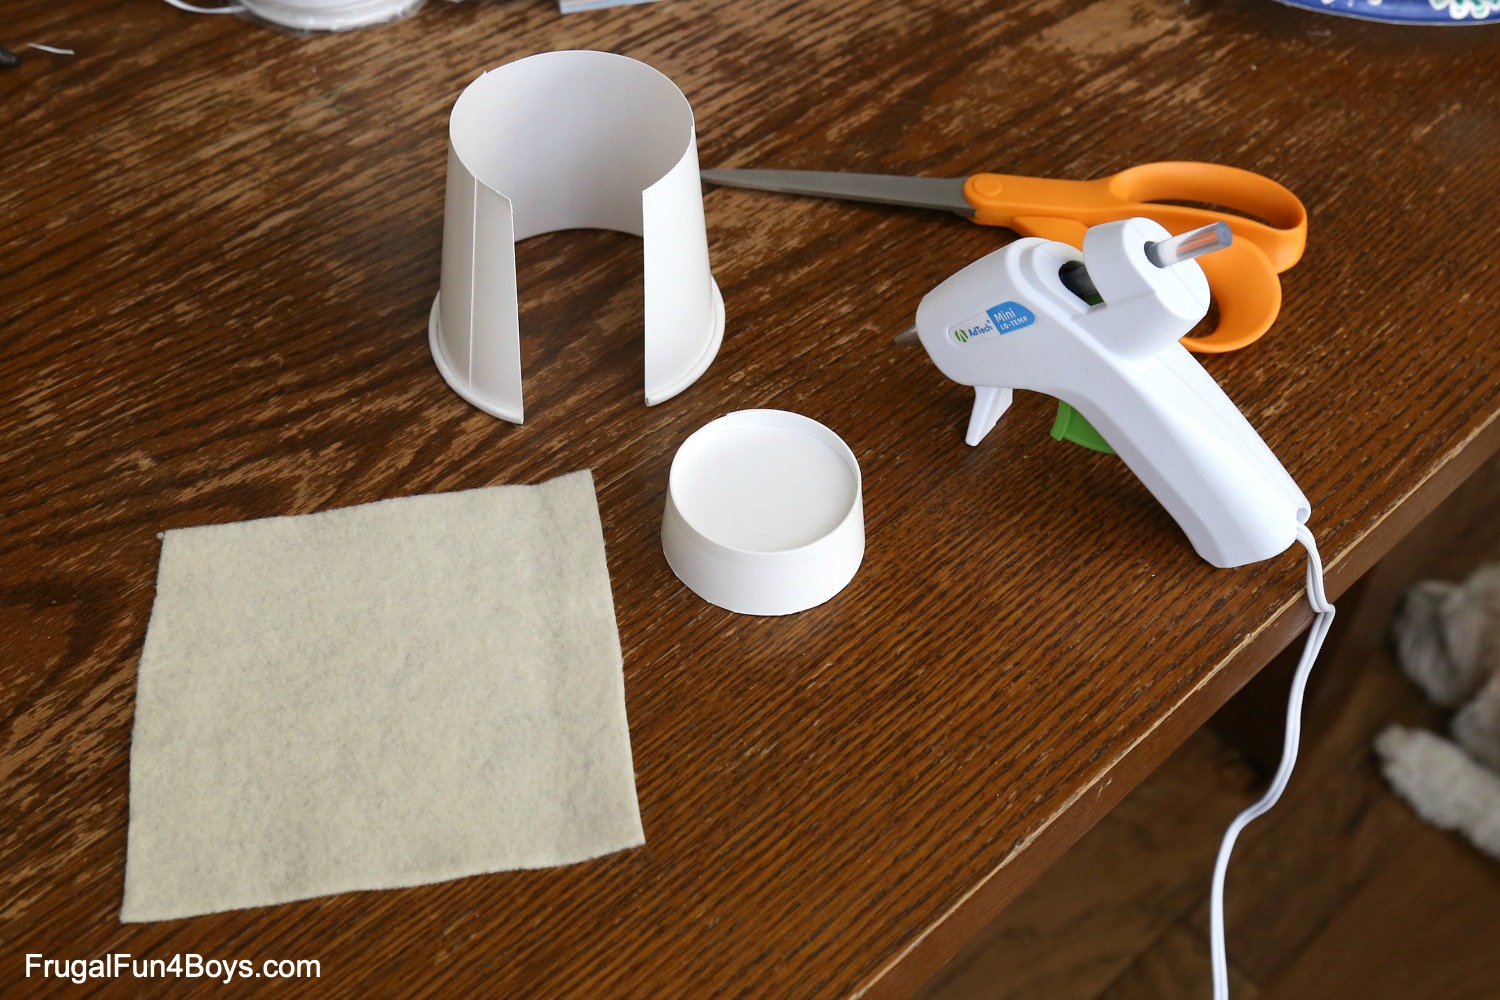
Fire up your glue gun and glue the felt to the cup. I put vertical lines of glue on the sides of the cup and then attached the felt, leaving wrinkles of felt in between the glue lines. The great part is that you WANT the felt to have a rumpled, uneven look, so it’s hard to mess this up! Glue the edges of the felt to the underside of the cup.
The green beans are made from extra thick dark green felt and hot glue. Hobby Lobby is the only place that I have found the thick felt.
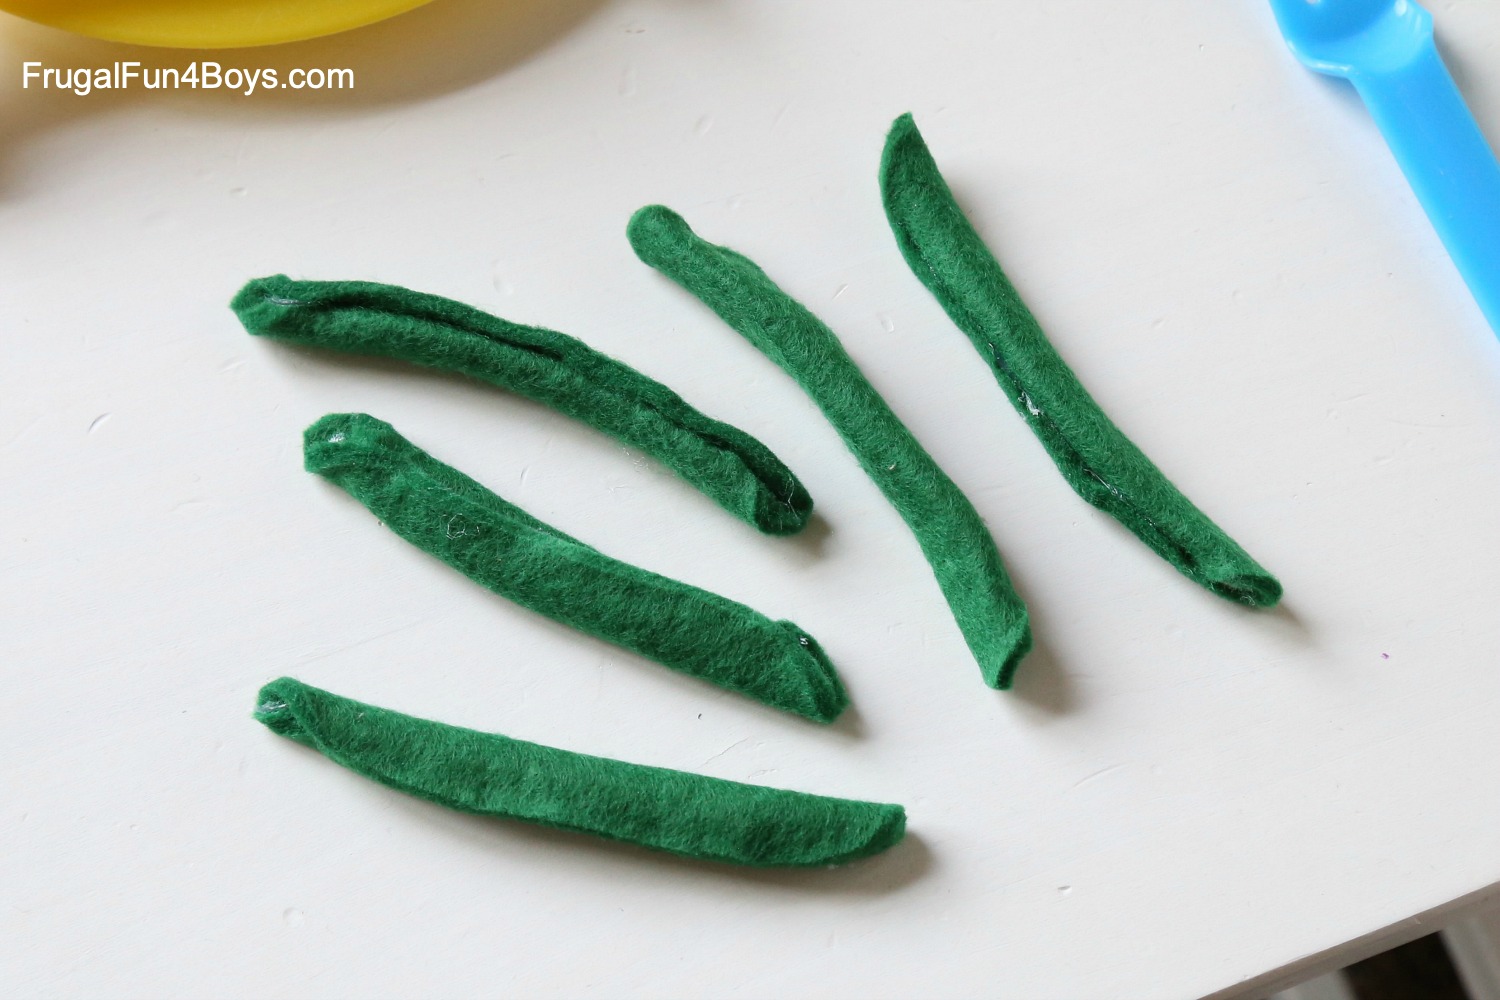
To make the green beans, cut long ovals out of felt. Gluing these is an adult job – it’s not difficult, but it’s easy to burn your fingers since you’ll be folding over just a small amount.
Put a line of glue near one edge and fold over 1/3 of the felt, lengthwise. Then add more glue and fold over the over third.

The little crescent rolls are made out of salt dough and then painted. Janie and I had so much fun making the salt dough! While we were at it, we also made a few salt dough donuts to paint, but I didn’t get a photo of those.
Here’s the recipe for the salt dough:
2 cups flour
1 cup salt
3/4 cup water
1 Tablespoon oil
No cooking – just stir the ingredients together and then knead the dough until it’s smooth. To make the crescent rolls, I rolled out the dough and cut it into small triangles. Then I rolled them up and shaped them a little.
Bake your salt dough creations for about 3 hours (yes, hours!) at 200 degrees. Salt dough is very forgiving. If I don’t have 3 hours for baking, I have taken things out early and let them air dry the rest of the way.
Just make sure that the dough has dried completely before painting.
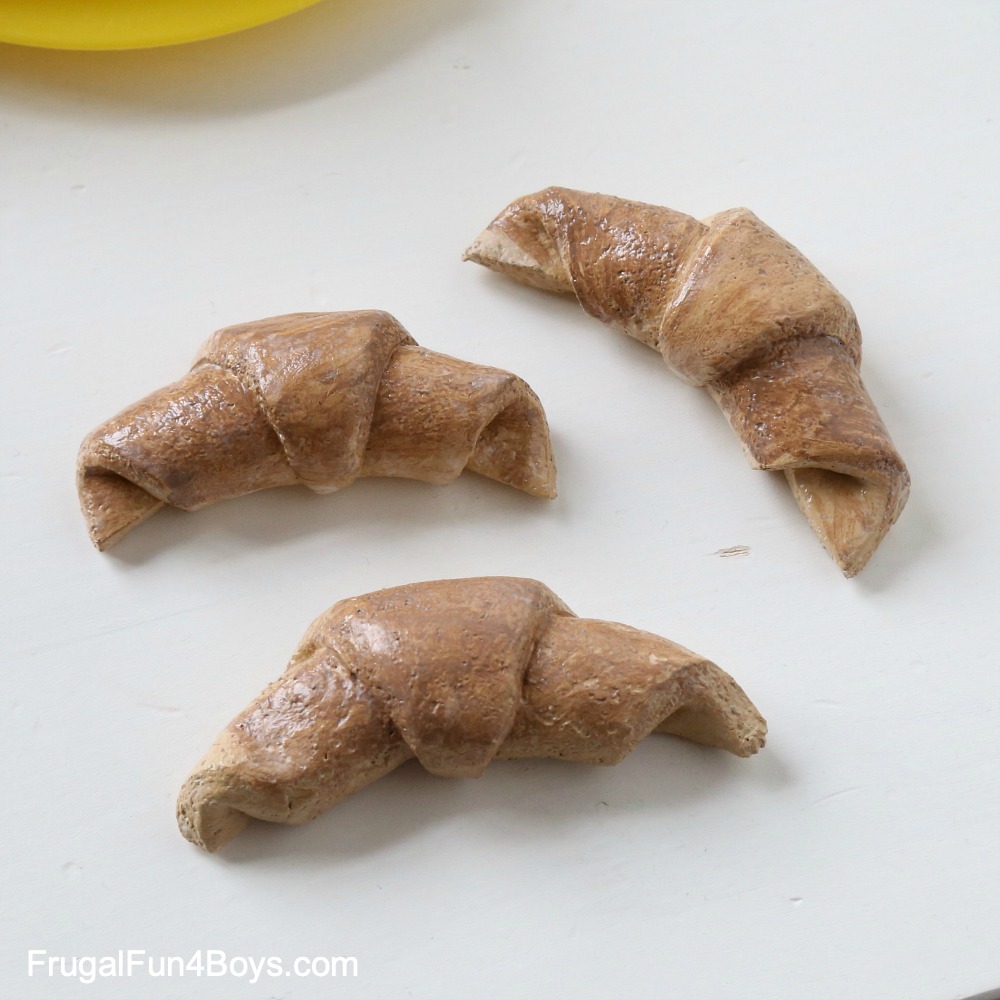
I painted the crescent rolls with brown acrylic paint. I added a little water to the paint so that it would spread more easily – I didn’t want them to look solid brown. When the paint was dry, I sprayed the rolls with a coat of polyurethane.
Then it was time to play! Pretend that you are eating Thanksgiving or Christmas dinner, or just a nice turkey dinner!

For dessert, check out our no-sew play food pies!
Have fun with pretend play!
0 Comments
Post a Comment