
One of the best LEGO® building challenges EVER is to simply give kids a tub of bricks and some marbles. You’ll be amazed at the LEGO® marble runs they can create! It’s fun to build ramps, jumps, and all kinds of creative projects.
In this post, I’m going to show you how to build a really awesome LEGO® marble run. I built this track myself (my kids didn’t help), but it was based off inspiration from kids at a recent LEGO® event we attended. I hadn’t thought of building ramps off the ground like this, but it works well! I added some really neat features to my LEGO® marble run, and you can find instructions for those below. Once kids have the basic idea, they’ll be able to create all kinds of things!
Before I show you how to build the marble run, here’s a video that shows it in action!
How to Build a Marble Run
It really would not be feasible for me to show every step in how to build this. Plus, that kind of misses that concept anyway – the idea is to inspire kids to be creative and make their own design. But here are some instructions for getting started.
- Start at the bottom. It’s SO much easier to build that way. Build a spot to catch marbles at the bottom, and then start building your ramps.
- Use tiles to make the marbles roll more easily. Use plates that are 4 x 8, 4 x 12, etc. to make the ramps. This gives you room in the center to line up 2 x 4 tiles with room on the sides for brick walls to keep the marbles from falling off.
- You don’t need a steep slope. Marbles on tiles roll very easily! Keep your slopes gentle to keep the marbles from rolling out of control.
- Use 2 x 3 slope bricks to help the marble gain speed. To make corners, I used 2 x 3 slope bricks at 90 degree angles. If you don’t have a lot of these bricks, experiment with other slope bricks!
- 1/2 inch steel ball bearings work better than glass marbles. Regular marbles are great, but what I like about the steel ball bearings is that they are a little narrower, and you can make your overall track smaller. Here they are on Amazon: Steel Ball Bearings. If you only have regular marbles, that is just fine. You may need to make some adjustments from what is shown, because a regular marble got stuck in our track in a couple places.
- If you don’t have this many bricks, just make a smaller version! It’s still so much fun.
How to Build the Track
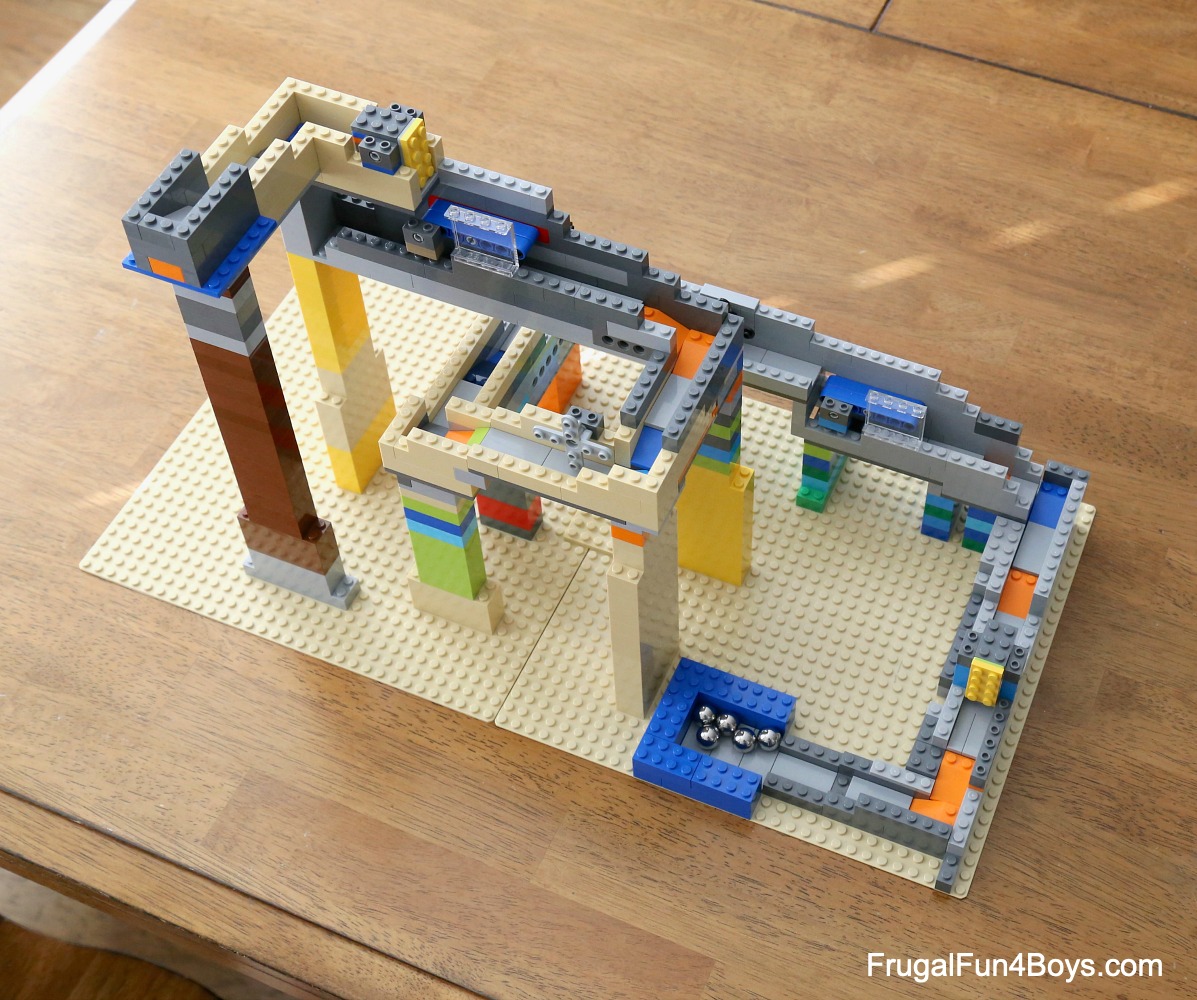
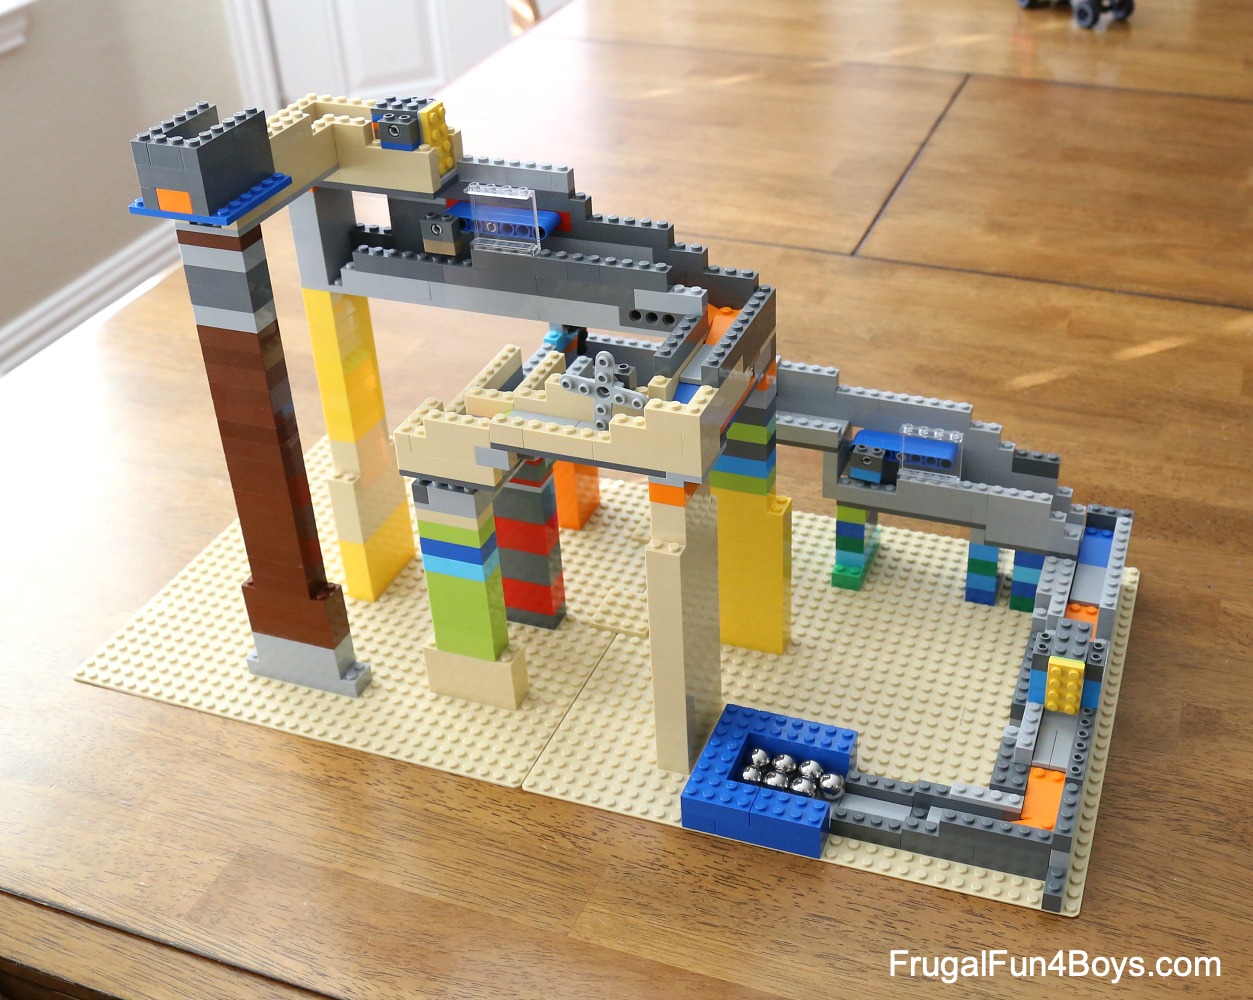
The photo below shows the basic track design. I removed some of the wall so that you can see the bricks and tiles I used.
Basically, the entire track is just plates supported by bricks underneath. Start building at the bottom, and keep testing your track as you go along to make sure the marble can navigate the turns.
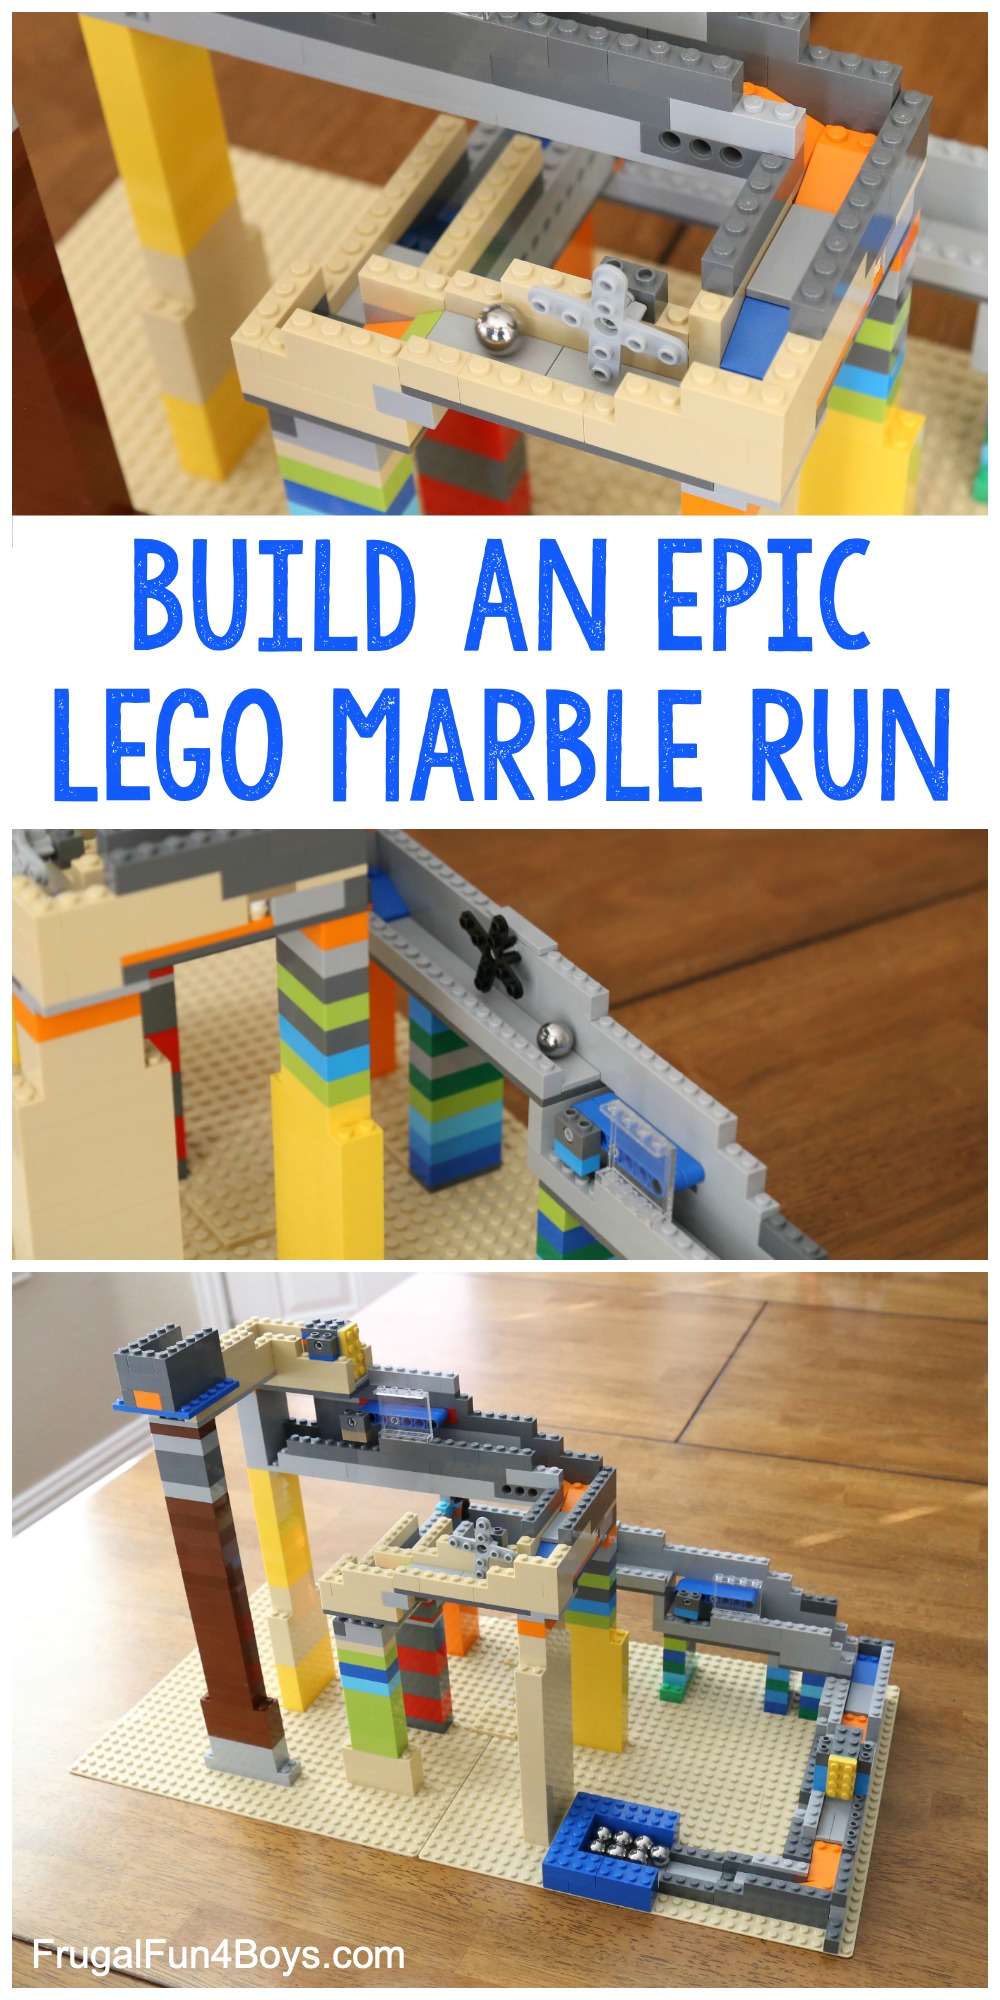
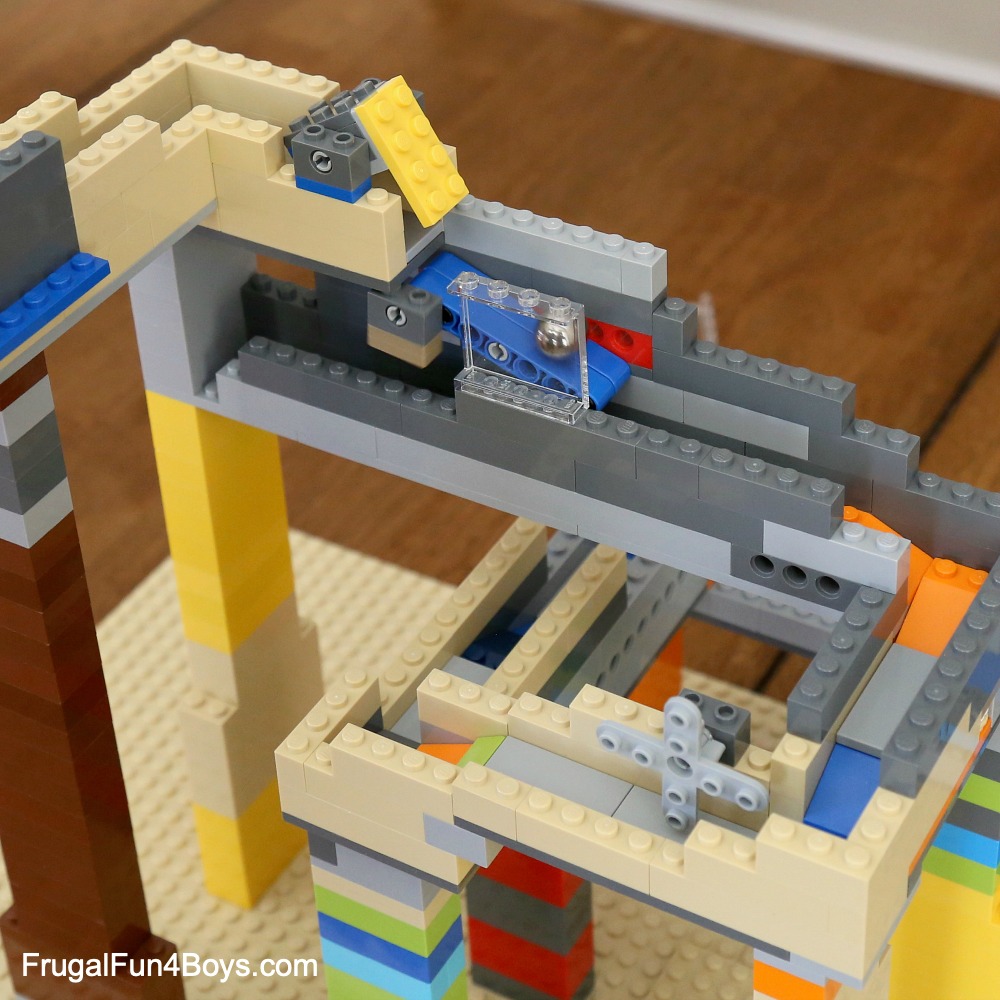
How to Build Tipping Steps
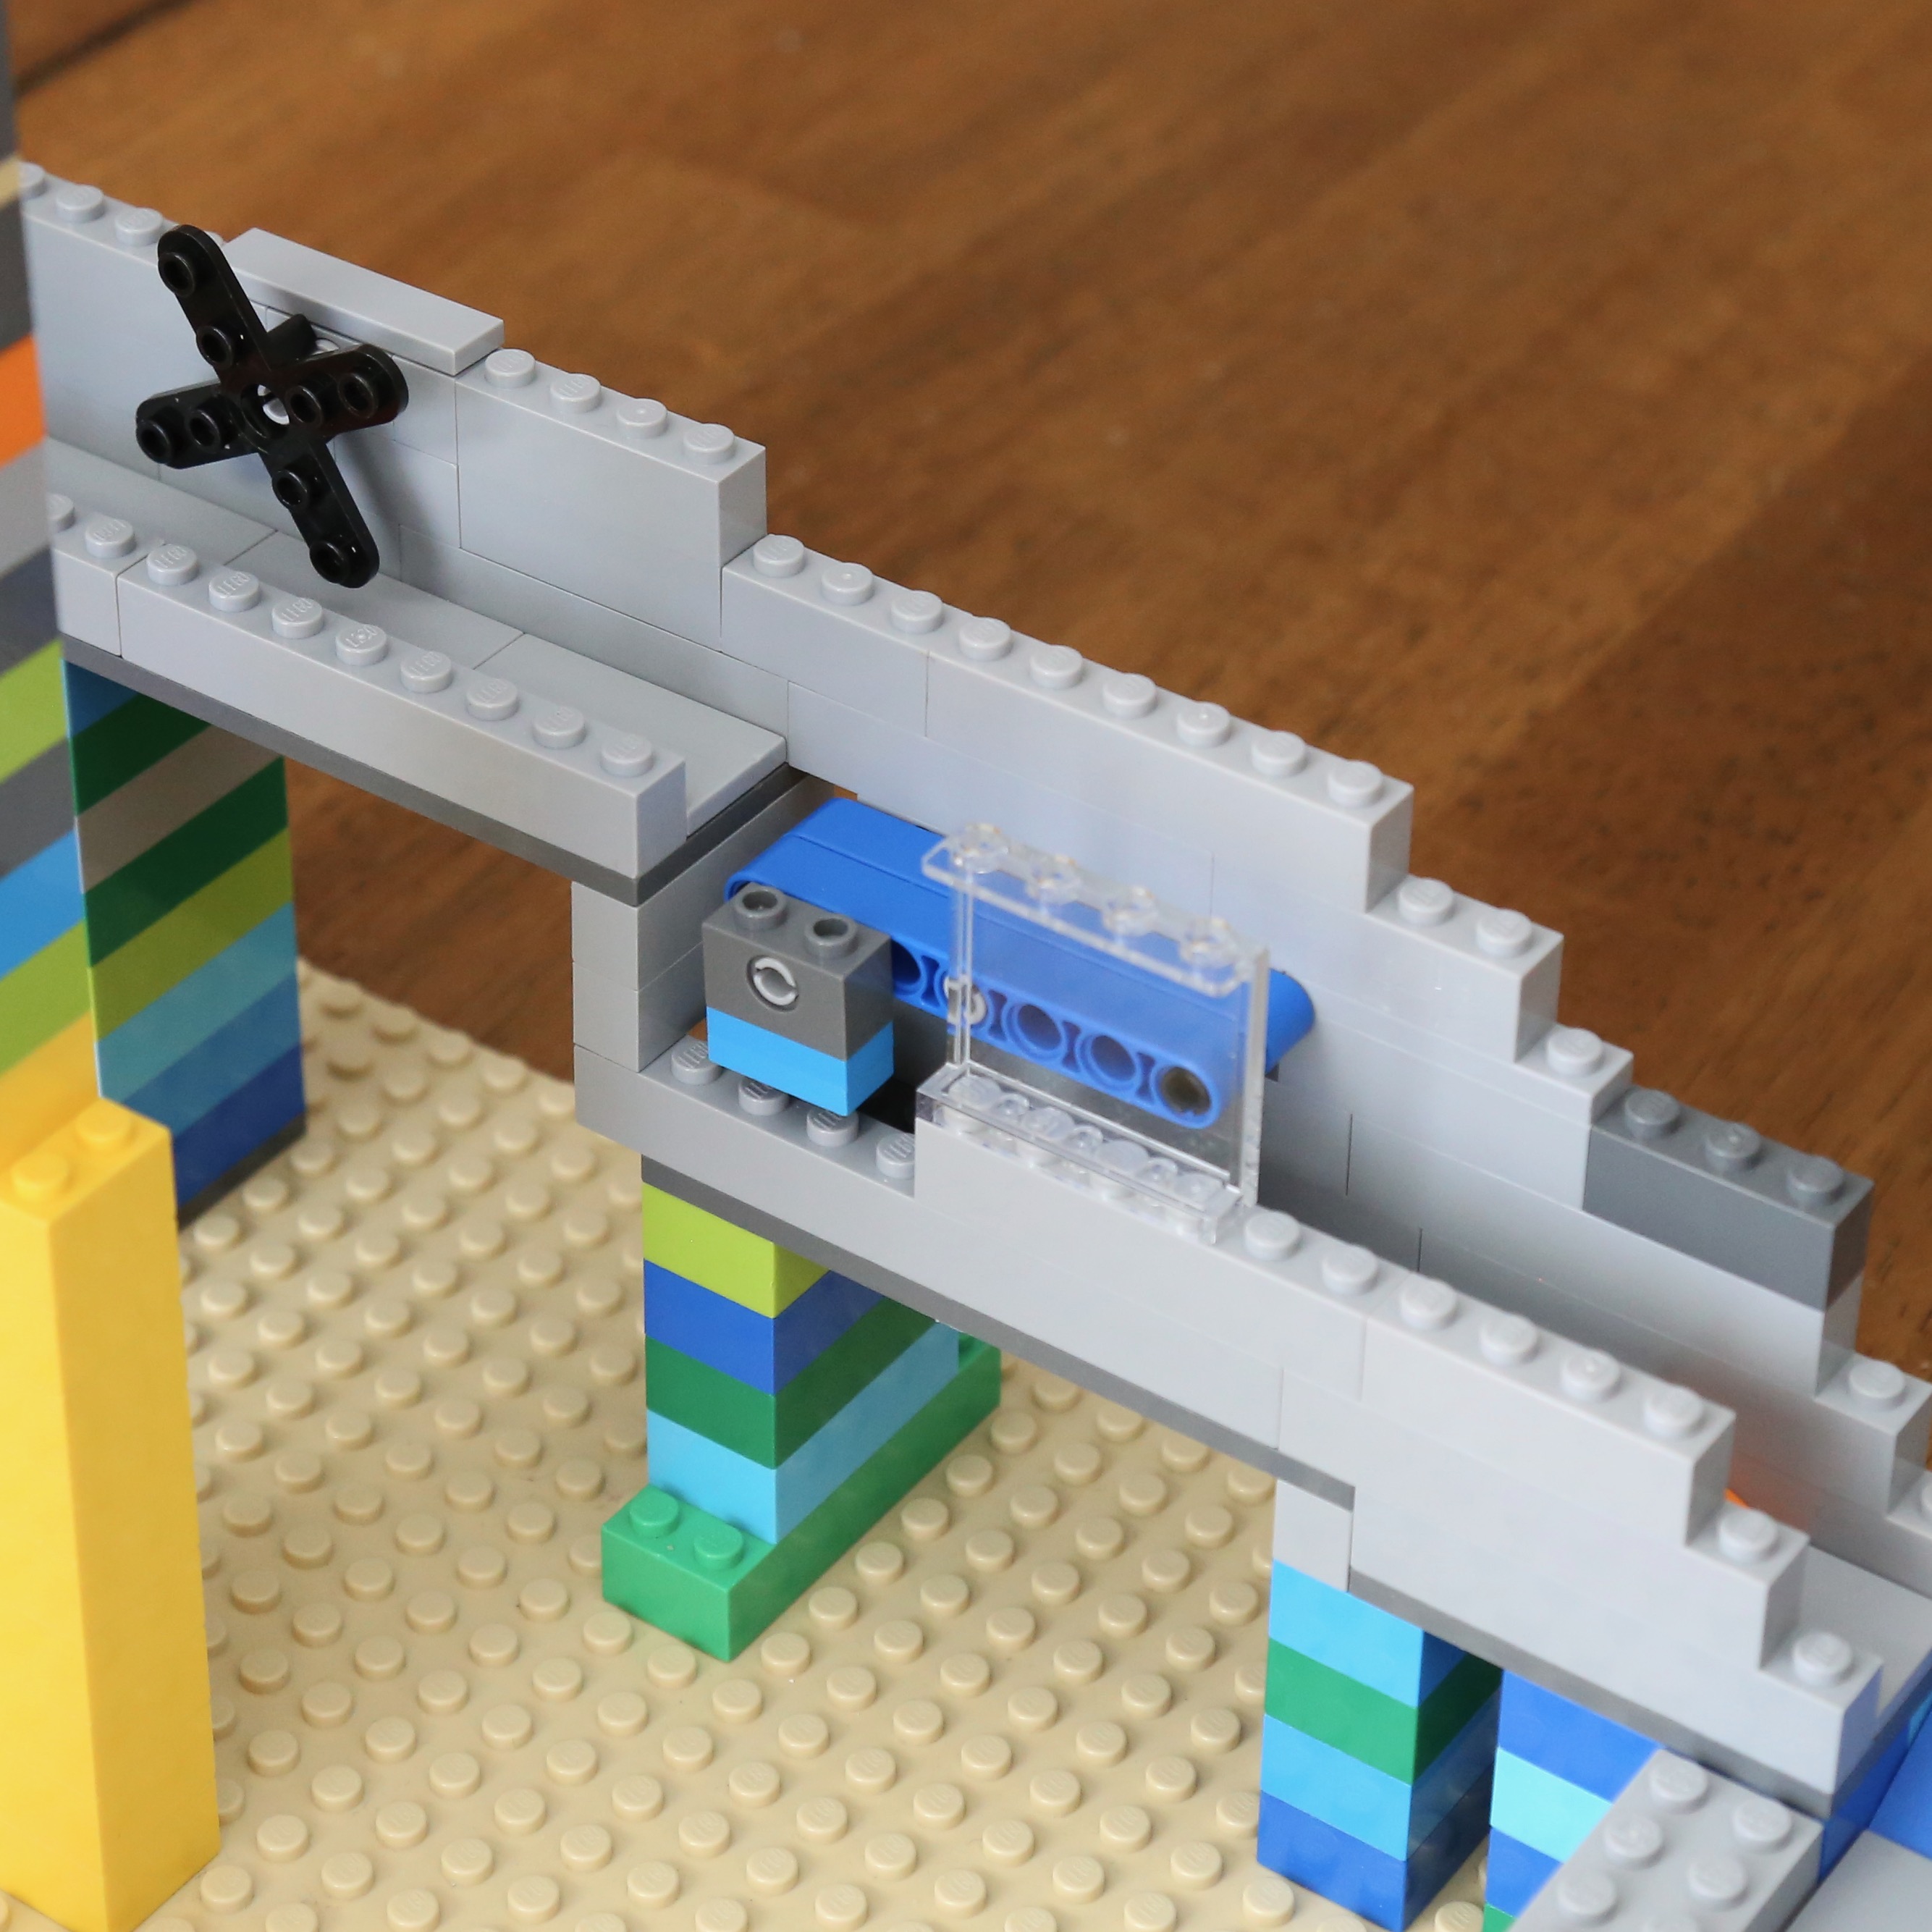
This is my FAVORITE part of the marble run! The step sits level, but one end will tilt when there is weight on it. When the marble rolls across it, the weight of the marble tips the step and the marble drops down. A weight on the other side of the step pulls the step back level again. A brick under the step keeps the weighted end from dropping down too far.
You can see the step in action below! After the marble rolls off, the weight of the 1 x 2 Technic brick will pull it back down.
You’ll need two liftarms that have 7 holes. Insert a gray pin (3 studs long) and two black pins with friction ridges.
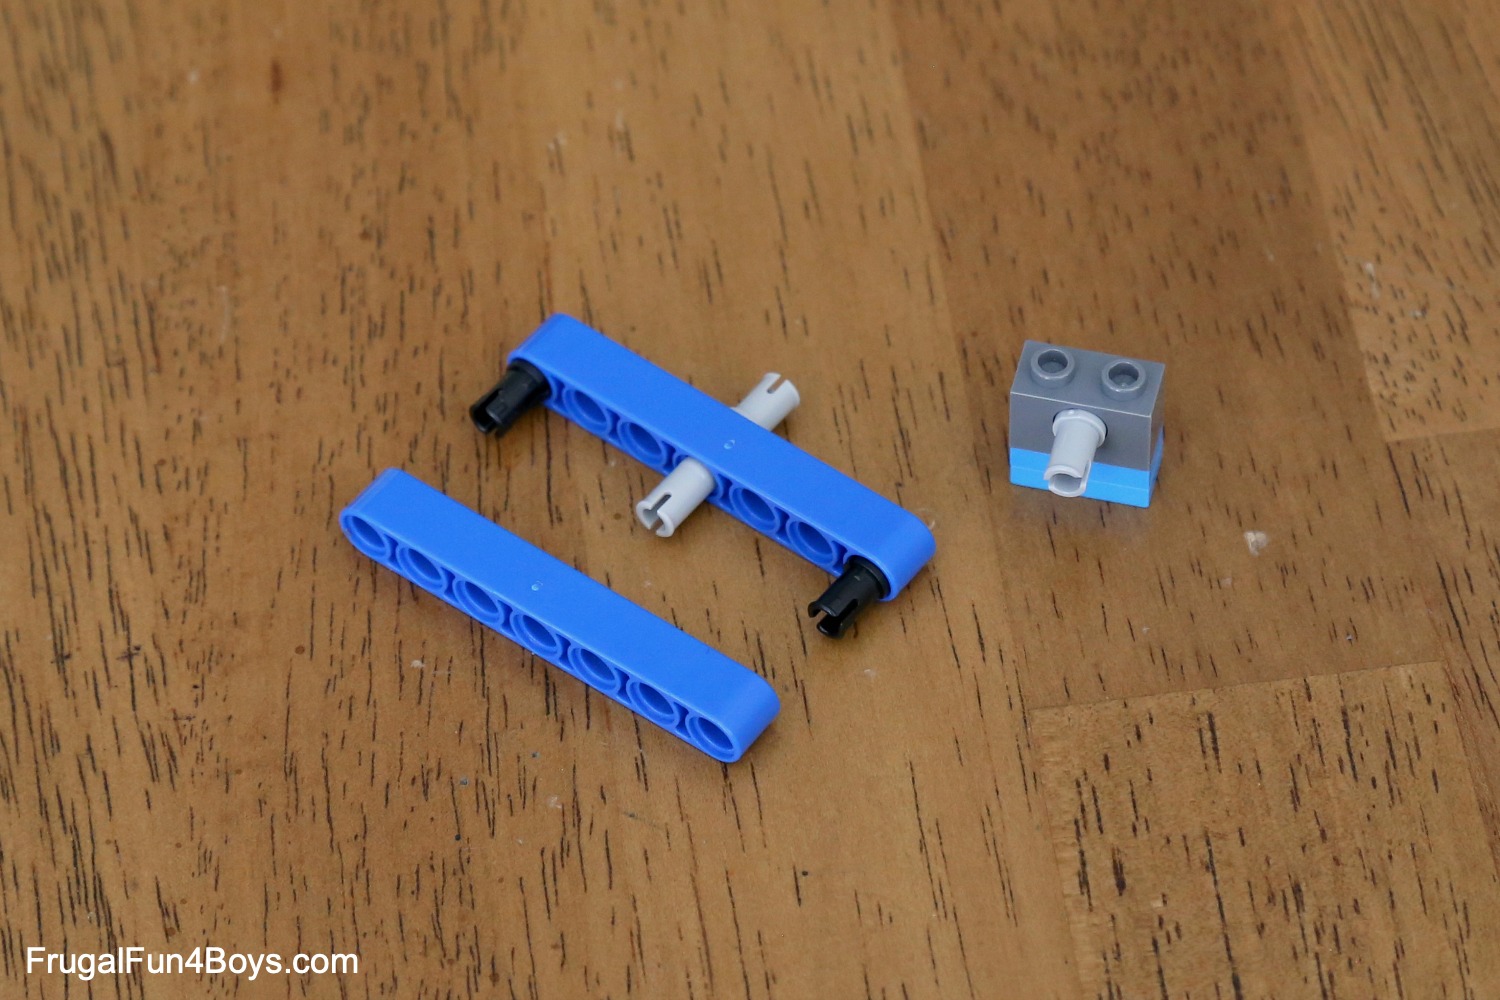
Attach the two liftarms – the three pins will hold them together. Then attach a 1 x 2 Technic brick. I added two 1 x 2 plates for extra weight, and it was just right.
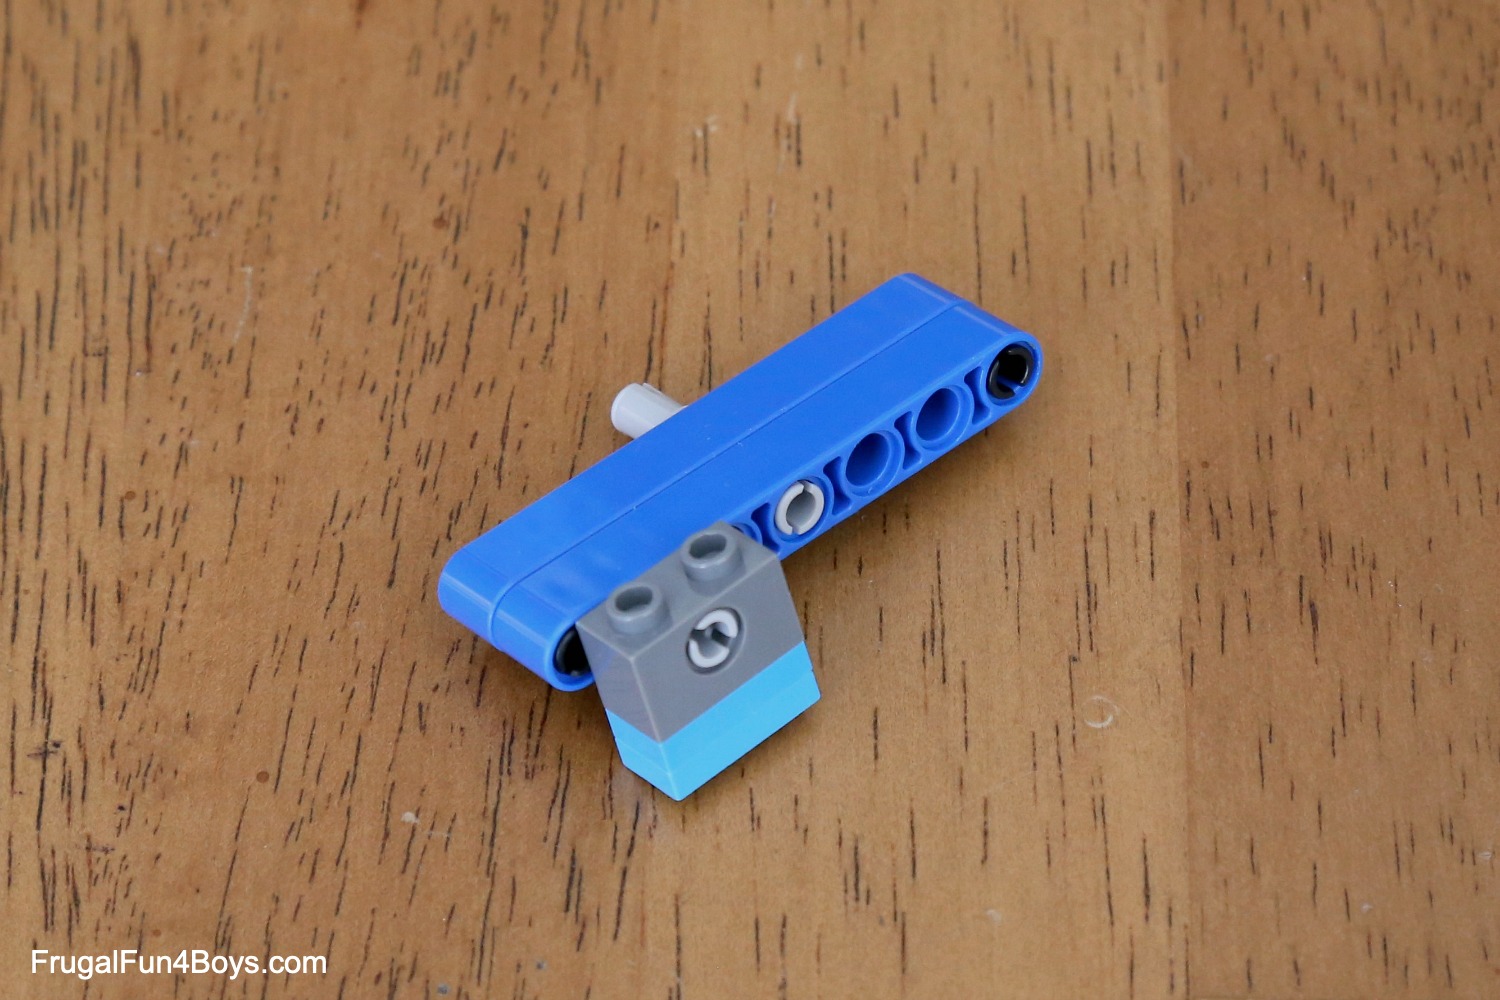
I added a 2 x 2 plate to the wall of the marble run as well as a Technic brick. Insert the “step” into the Technic brick so that the weighted end rests on the 2 x 2 plate.
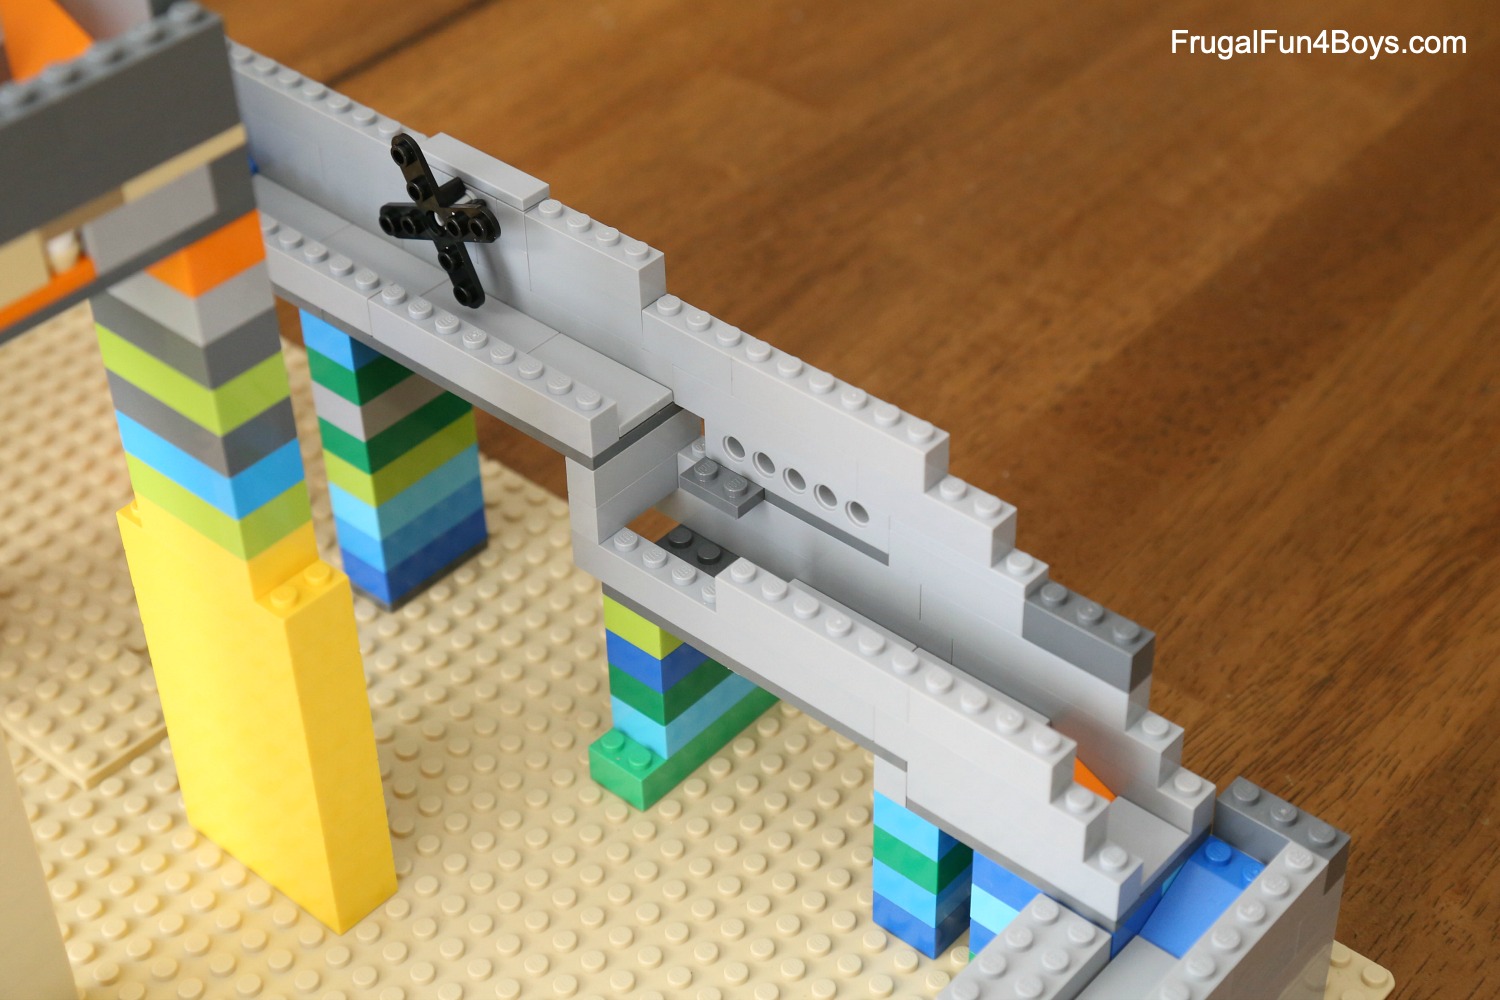
So much fun! You’ll want to add something to keep the marble from falling off the track. I used a clear panel so that we could still see the marble.
NOTE: We didn’t have trouble with our marble falling out of the opening until I moved to a different table! Tables are rarely perfectly level. You don’t notice it until you’re building something like this! If you’re having trouble, try turning your marble run a different way on the table.
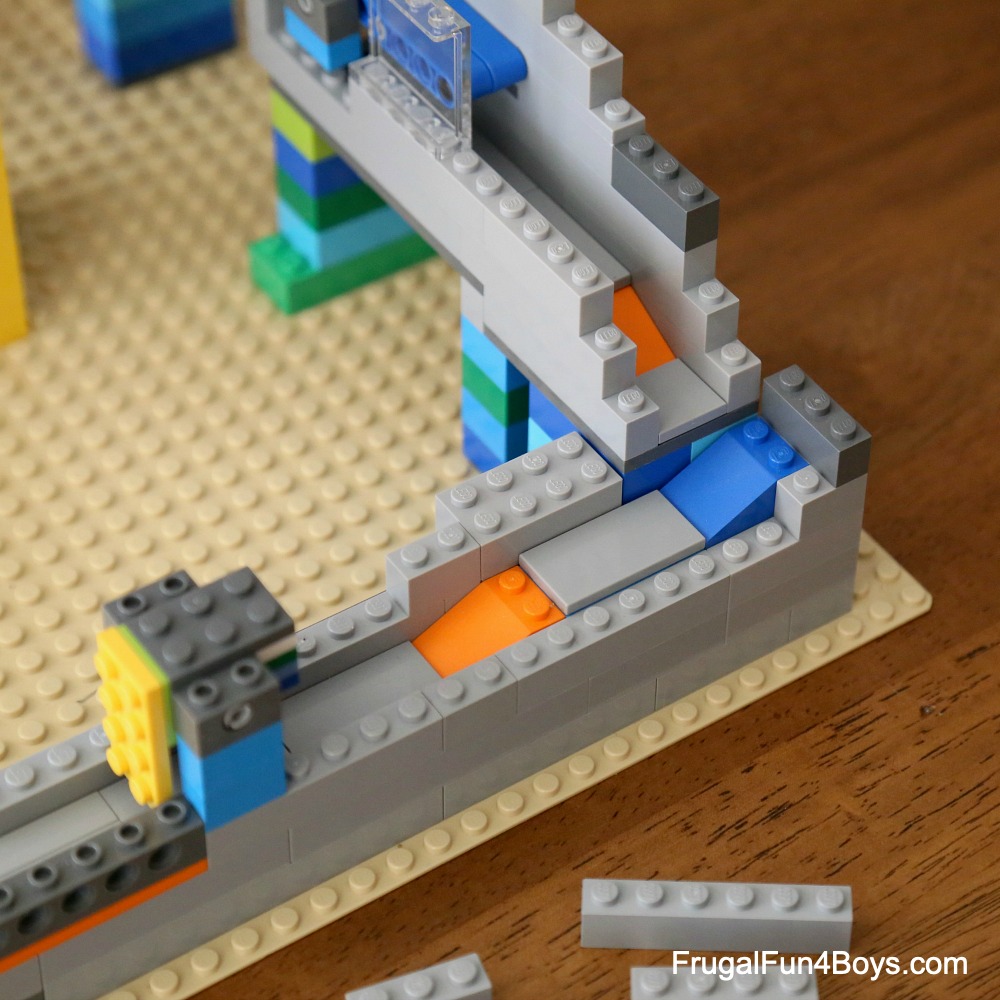
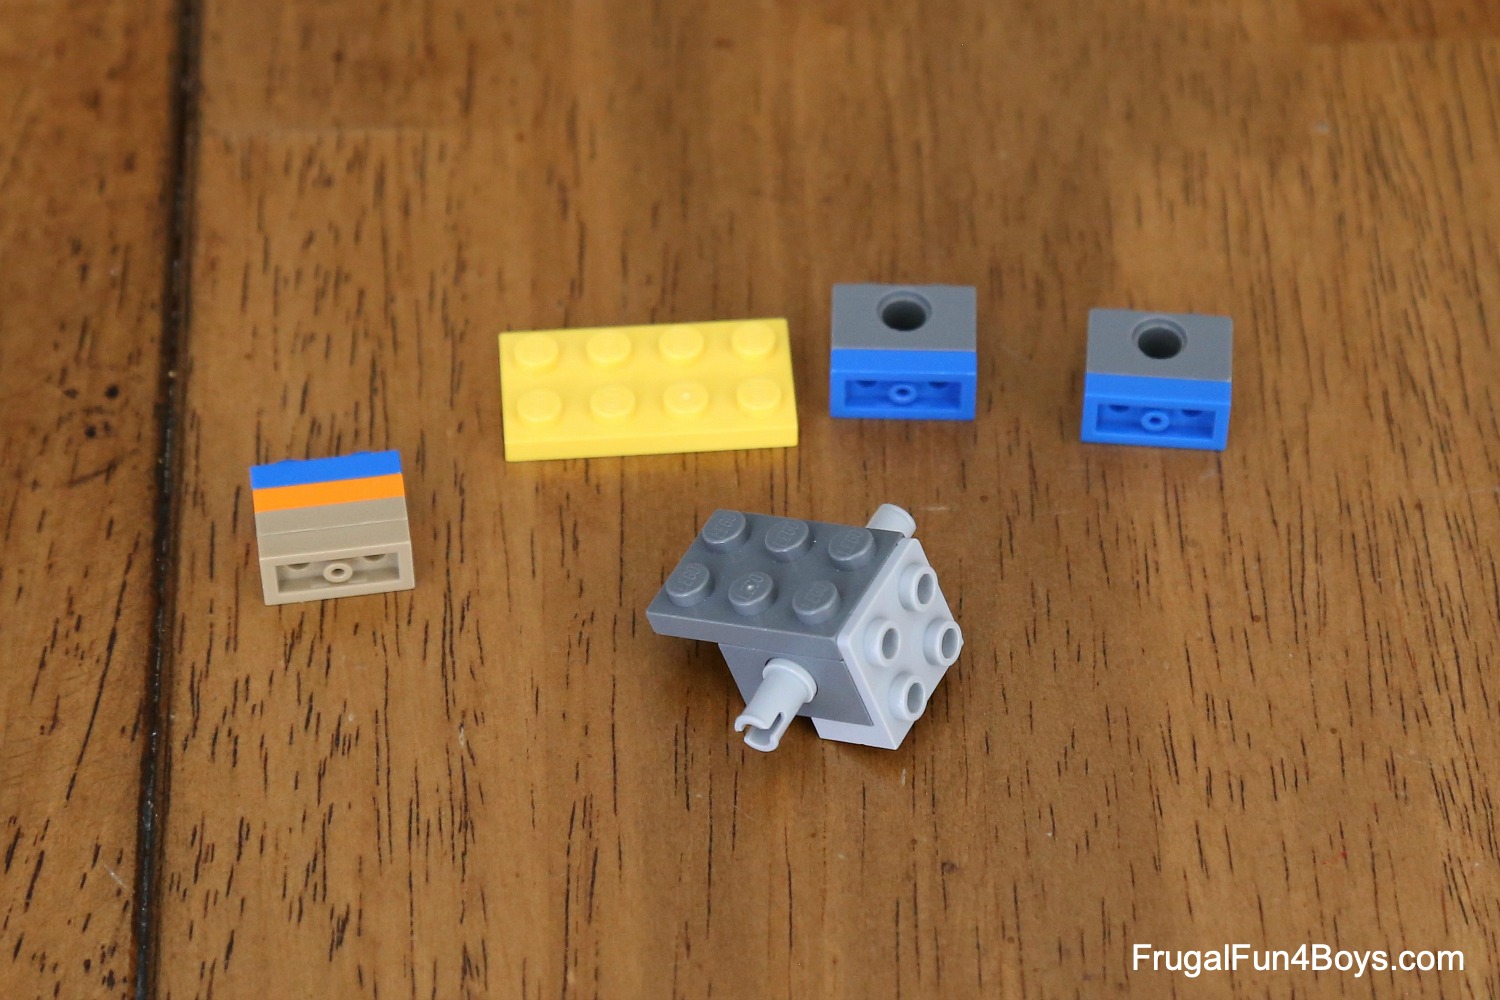
How to Build a Marble Door
Build a little door. The marble will push the door open. The door is weighted so that it will close itself again! Start by attaching two 1 x 2 Technic bricks to a 1 x 2 – 2 x 2 bracket (inverted).
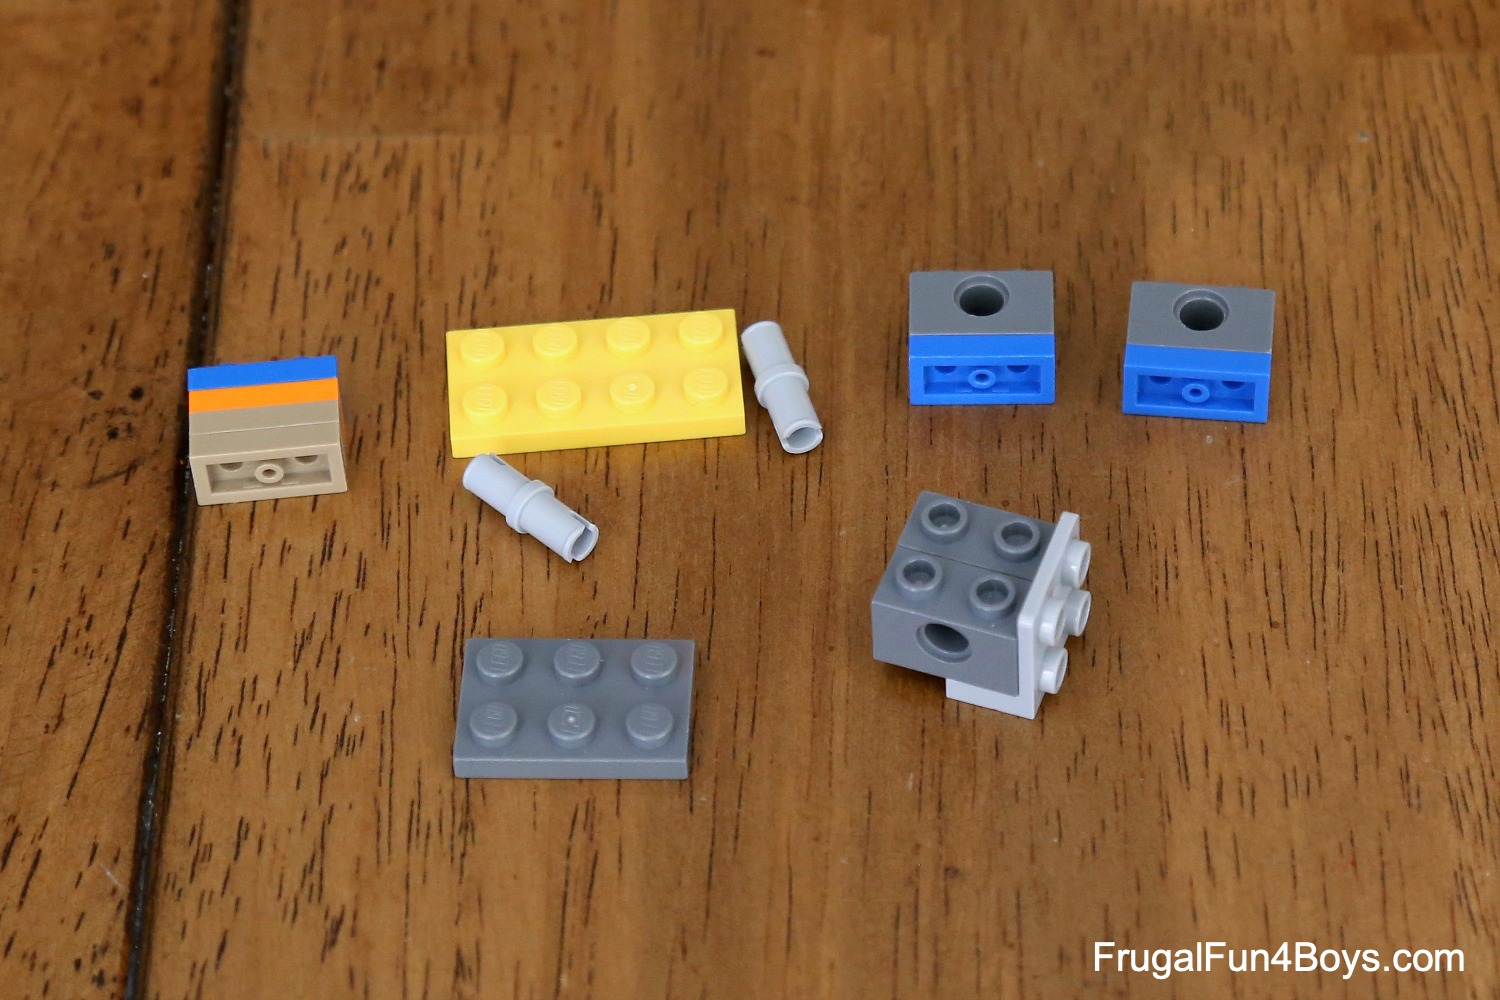
Then attach a 2 x 3 plate on top of the Technic bricks. Insert two light gray pins – on in each Technic brick. These are the pins that allow something to spin freely – with no friction ridges on the pins.
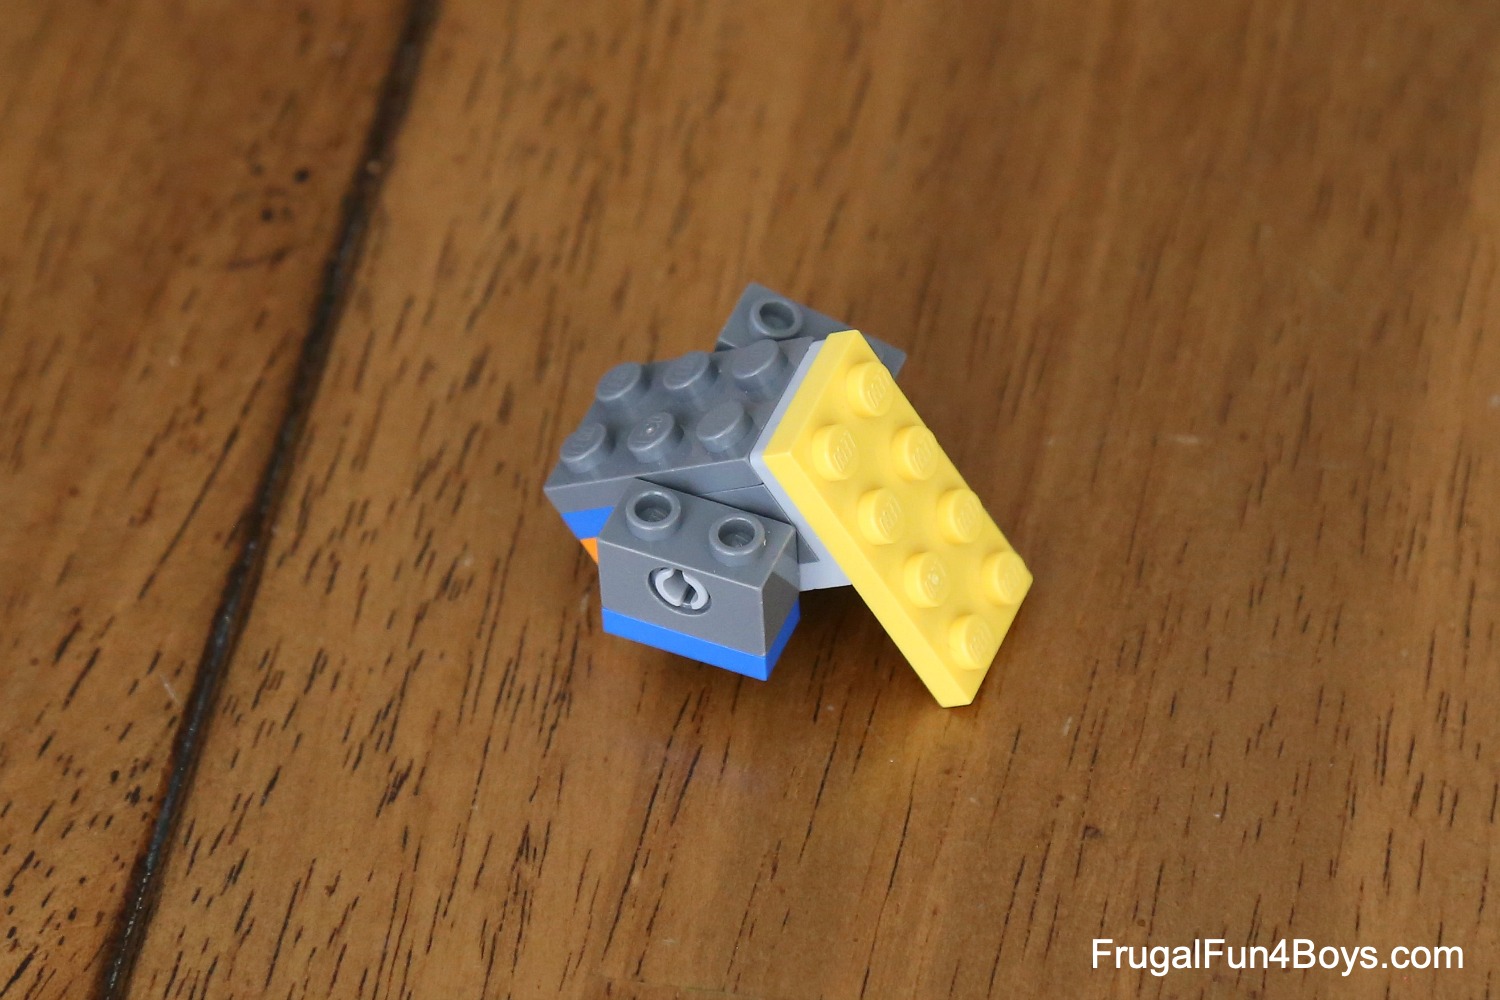
Then add a 2 x 4 plate to make the door. Attach four 1 x 2 plates on the other side to balance out the weight of the bracket and the yellow plate. Without the weight on the back, the door will just tilt forward when you attach it to the marble run.
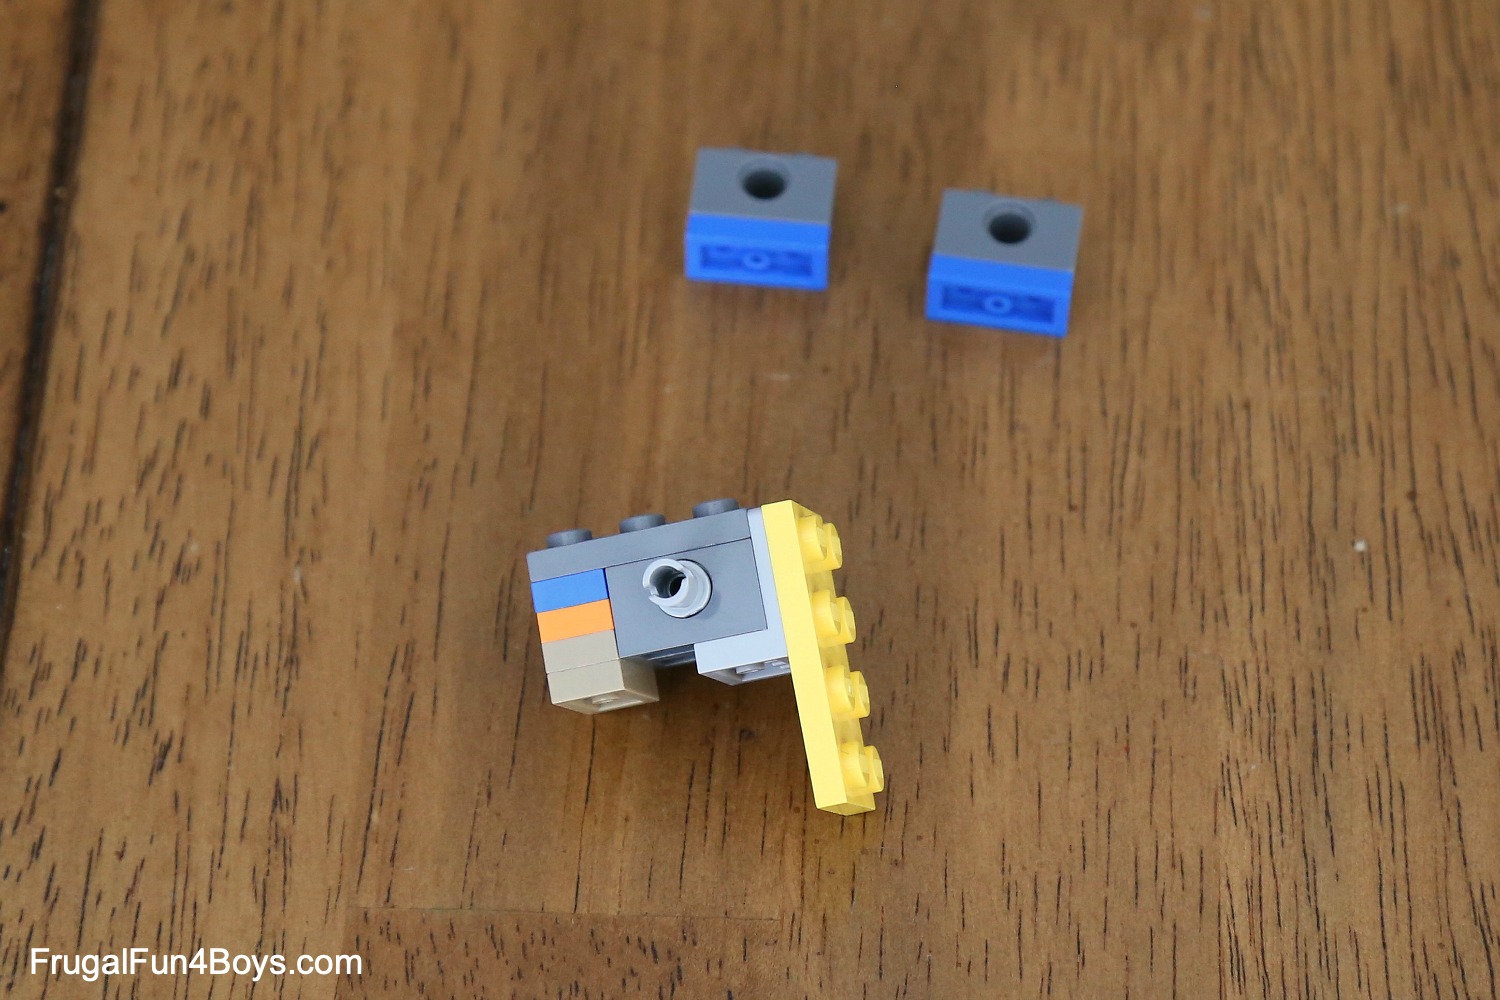
Attach two 1 x 2 Technic bricks. I needed a 1 x 2 plate under each Technic brick to get the right height for the door, but whether or not you need these will depend on the construction of your walls.
If your kids design a marble track, I’d love to see it! Feel free to post photos on the Frugal Fun for Boys and Girls Facebook page.
Need more LEGO STEM ideas?
First of all, be sure to check out our LEGO® STEM project book! It’s called Genius LEGO® Inventions with Bricks You Already Have, and it’s full of 40 awesome machines and contraptions to build. You can also read more about the book in this blog post.
Build a LEGO® Catapult – this is a fun project!
LEGO® Math Patterns – these awesome math creations go way beyond your basic red-green-red-green type of pattern.
5 Comments
Geeta Feb 1, 2019
This project is very creative and interesting.
Kay Peterson Jul 6, 2019
Thanks! I was wondering what to give/make for my grandsons for Christmas and now I am going to put together a collection of LEGO themed activities for them. They are aged 10 and 11 so hopefully these ideas will keep them occupied on wet or boring days.
Bob May 13, 2020
Awesome idea!
Kari Crosman Feb 7, 2021
I'm a STEM teacher and we use the "marbles" from the floral section of Dollar Tree. They're smaller than regular marbles so they can roll easier through the 2-pip width. The clear glass ones are smallest.
Josh Oct 28, 2021
COOL!!!
Post a Comment