
Celebrate fall with beautiful 3D fall tree collage art!
Here’s a fun fall tree art project for kids that you can make with supplies you probably already have!
The process involved in making this fall tree collage is so much fun. We love how our trees turned out, and my kids have requested that we make one of these trees for each season. (And then my son suggested that the summer tree can look all brown with the leaves falling off… it was not a good summer here in Texas!)
This project is also easy to adapt if you have a short class time. Kids can complete the project in installments over the course of a few days.
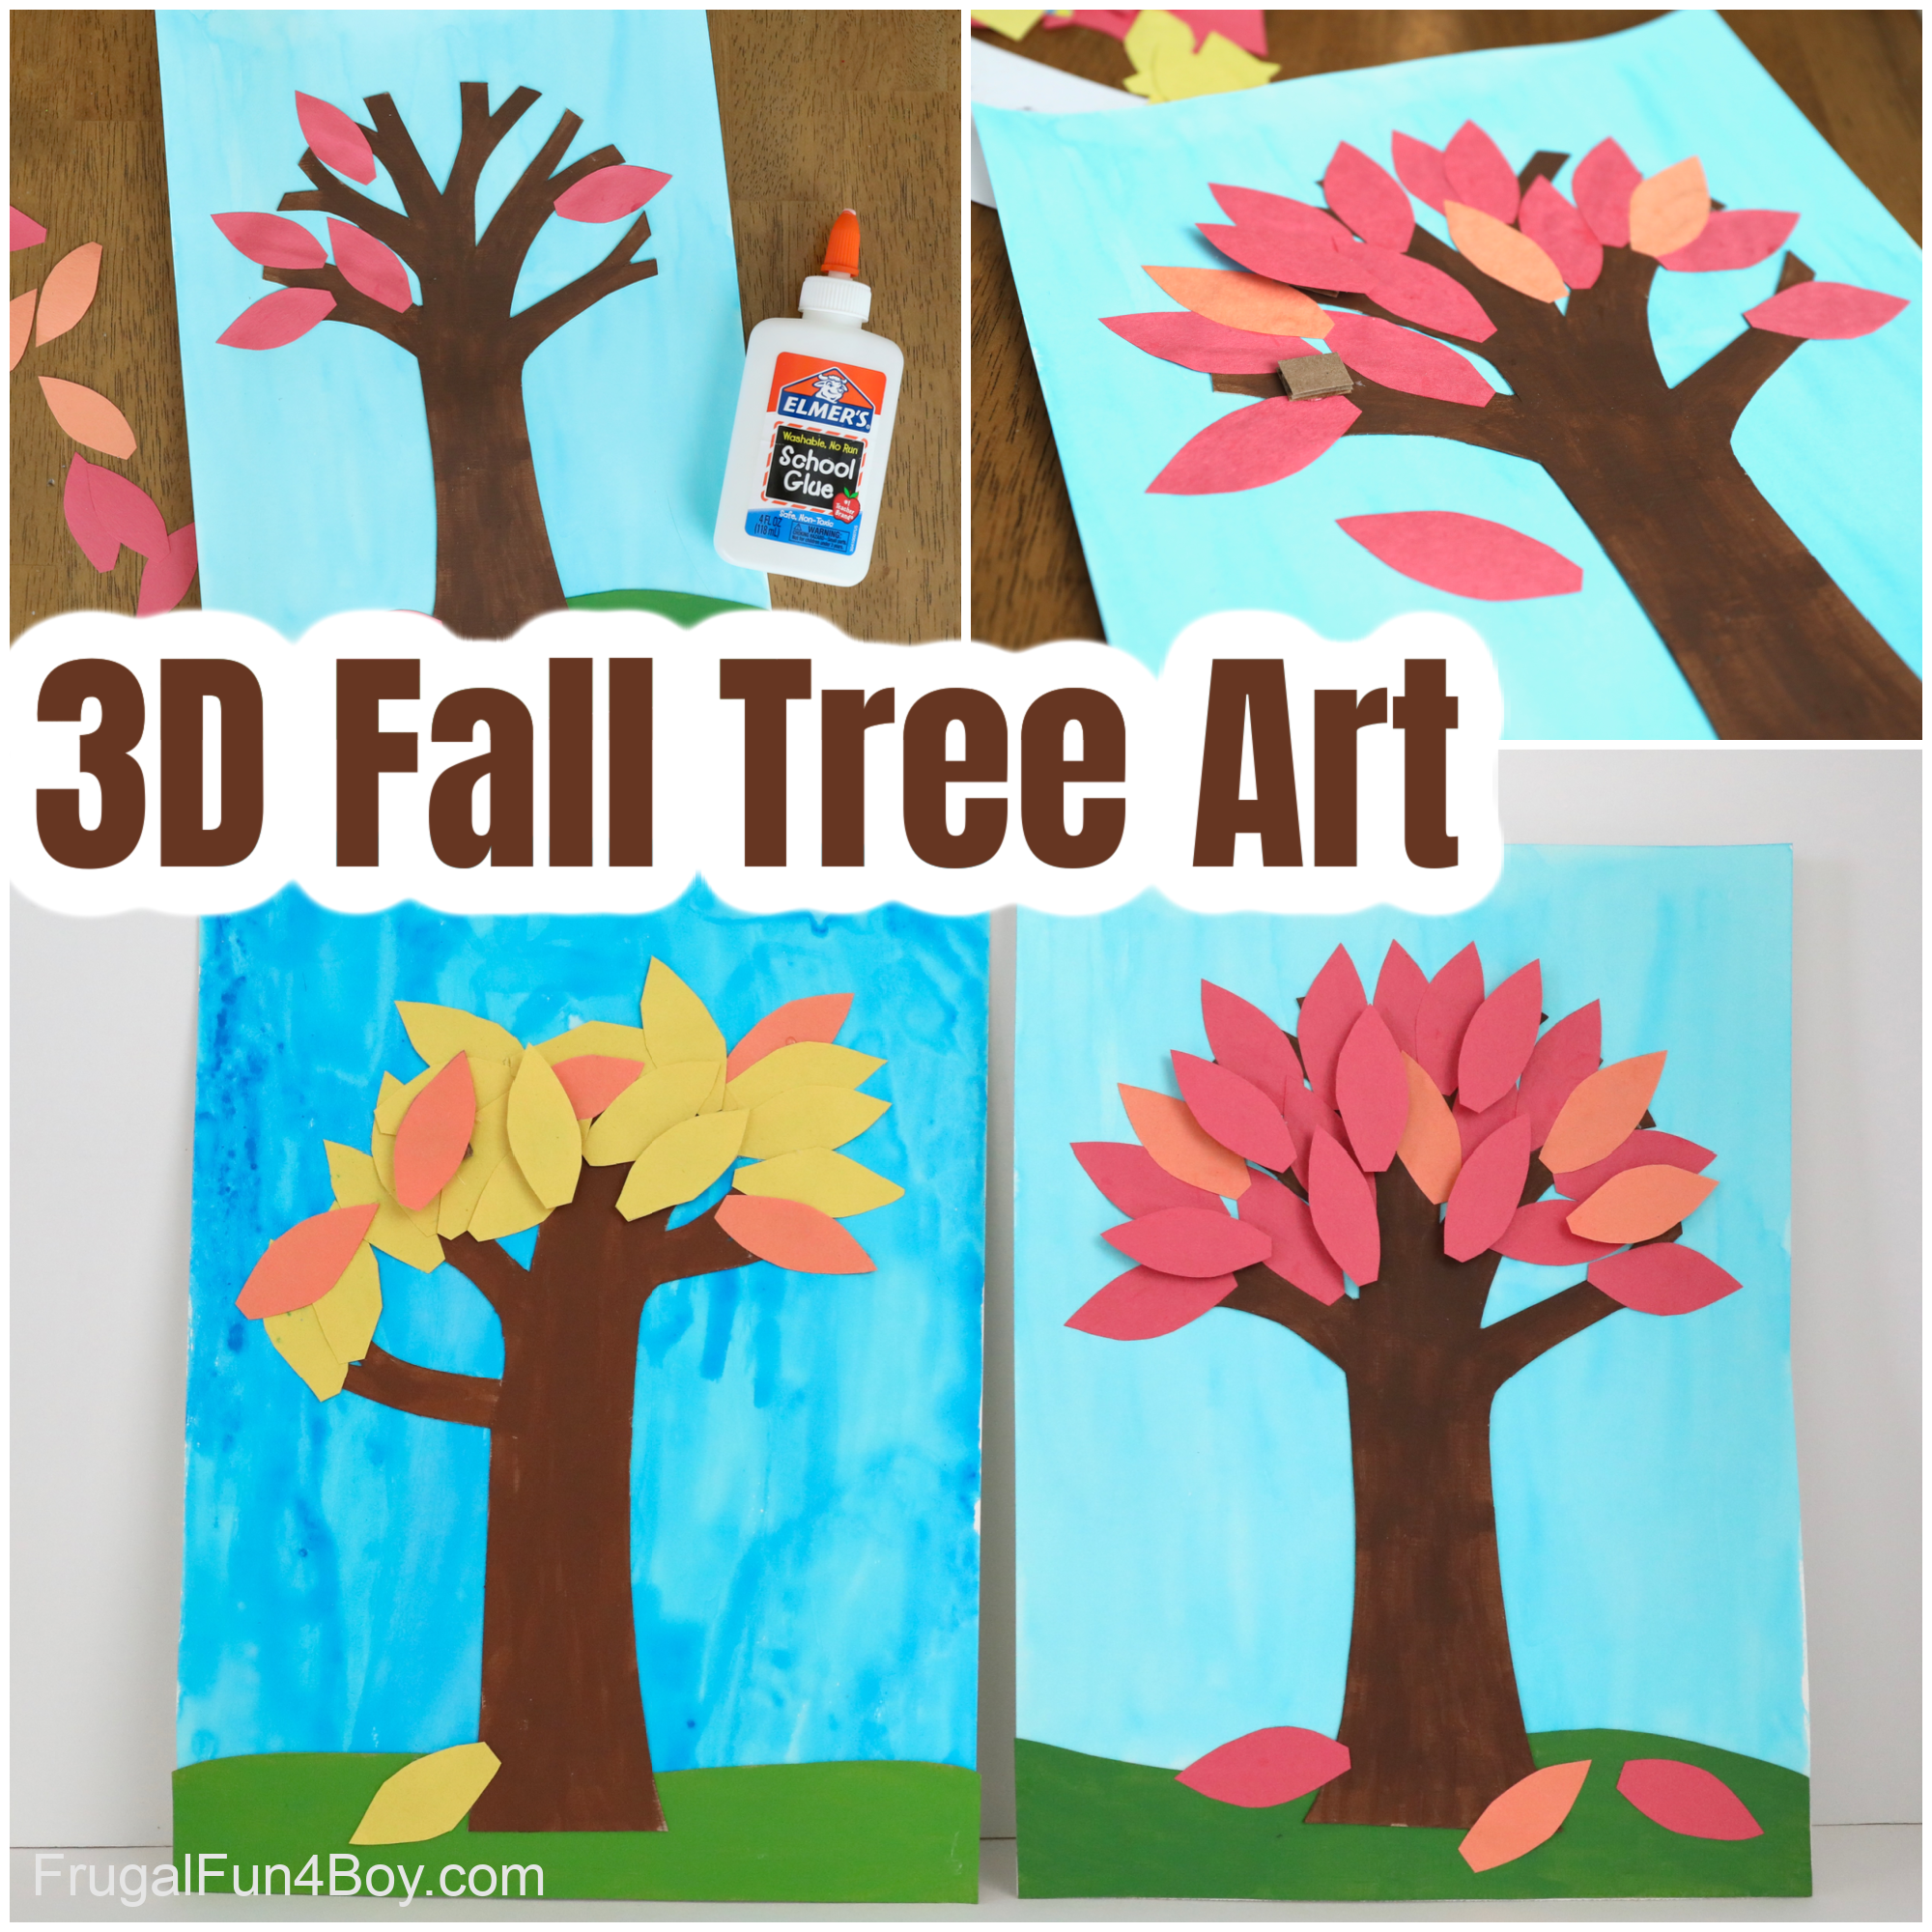
The completed trees are so beautiful!
Supplies Needed for 3D Fall Tree Collage Art:
- Heavy art paper – we used watercolor paper
- Construction paper in red, orange, and yellow
- Cardboard from a cereal box
- Corrugated cardboard – just a small piece
- Blue watercolor paint
- Brown acrylic or tempera paint
- Glue – we used Tacky Glue and Elmer’s Glue
- Scissors
- Pencil
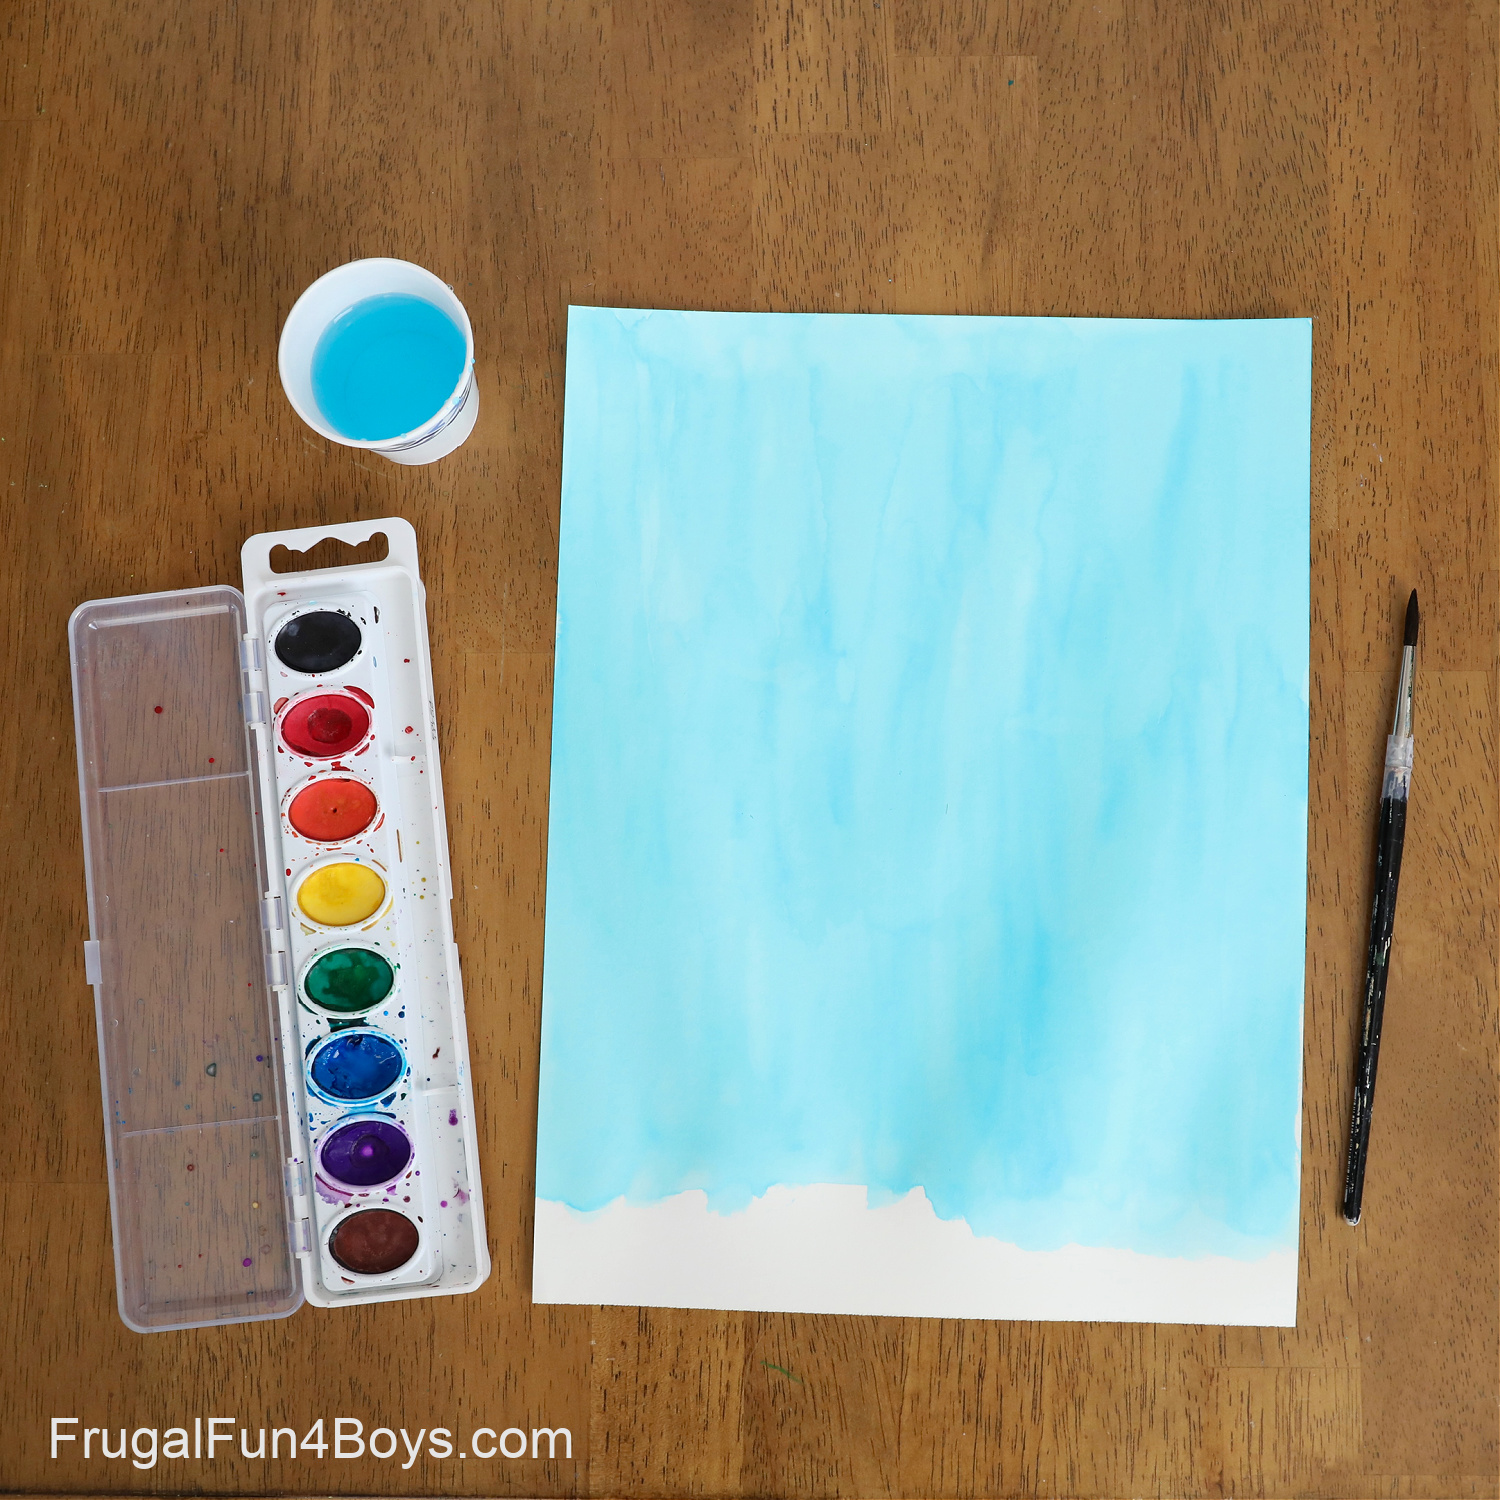
Step 1: Paint the Sky
We used watercolor paper and blue watercolor paint to create the sky. I made mine a light blue by adding a LOT of water to the paint, but Janie and Jonathan went with a darker blue color.
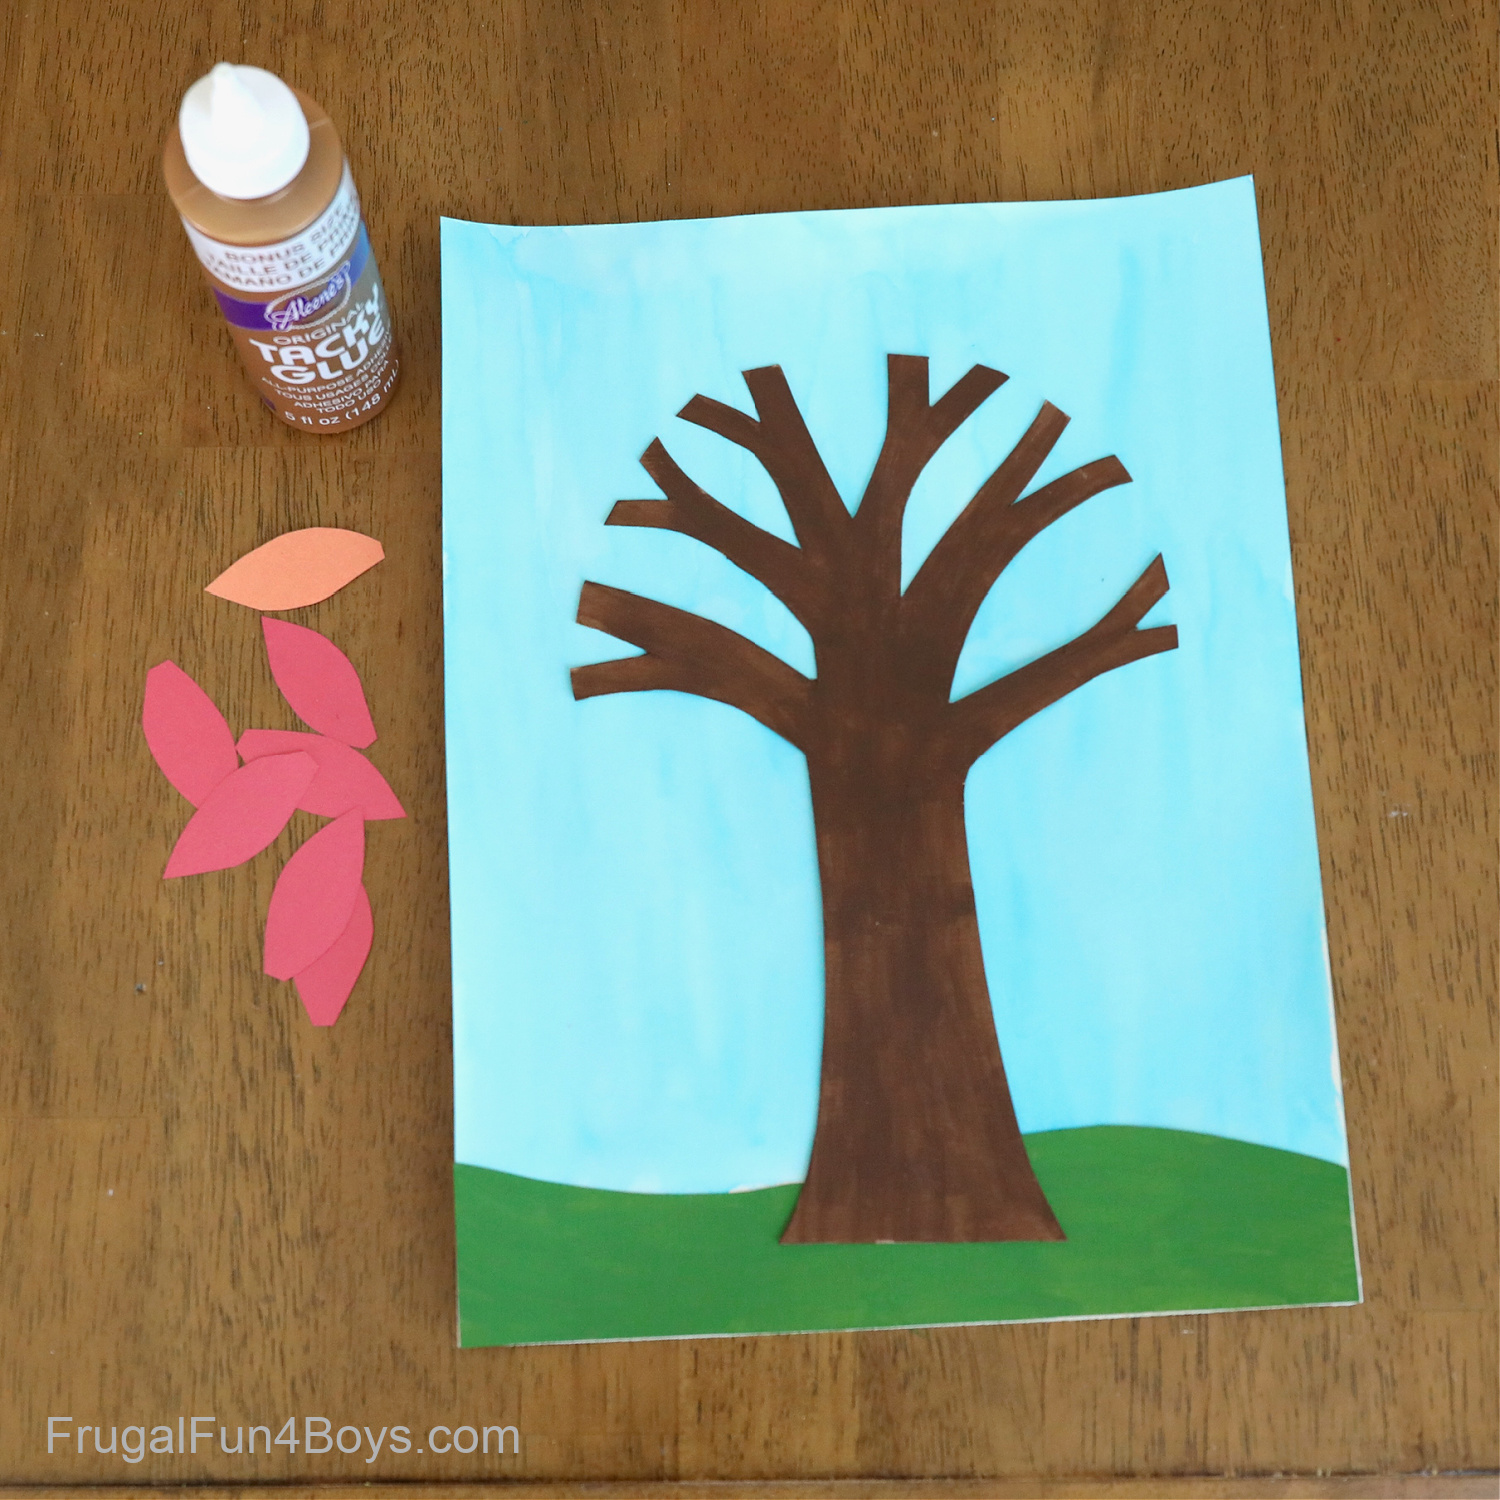
Step 2: Cut out a Cardboard Tree
This is where each person’s project can be different. Kids can draw their own tree and cut it out.
We used cereal box cardboard as it is much easier to cut than corrugated cardboard!
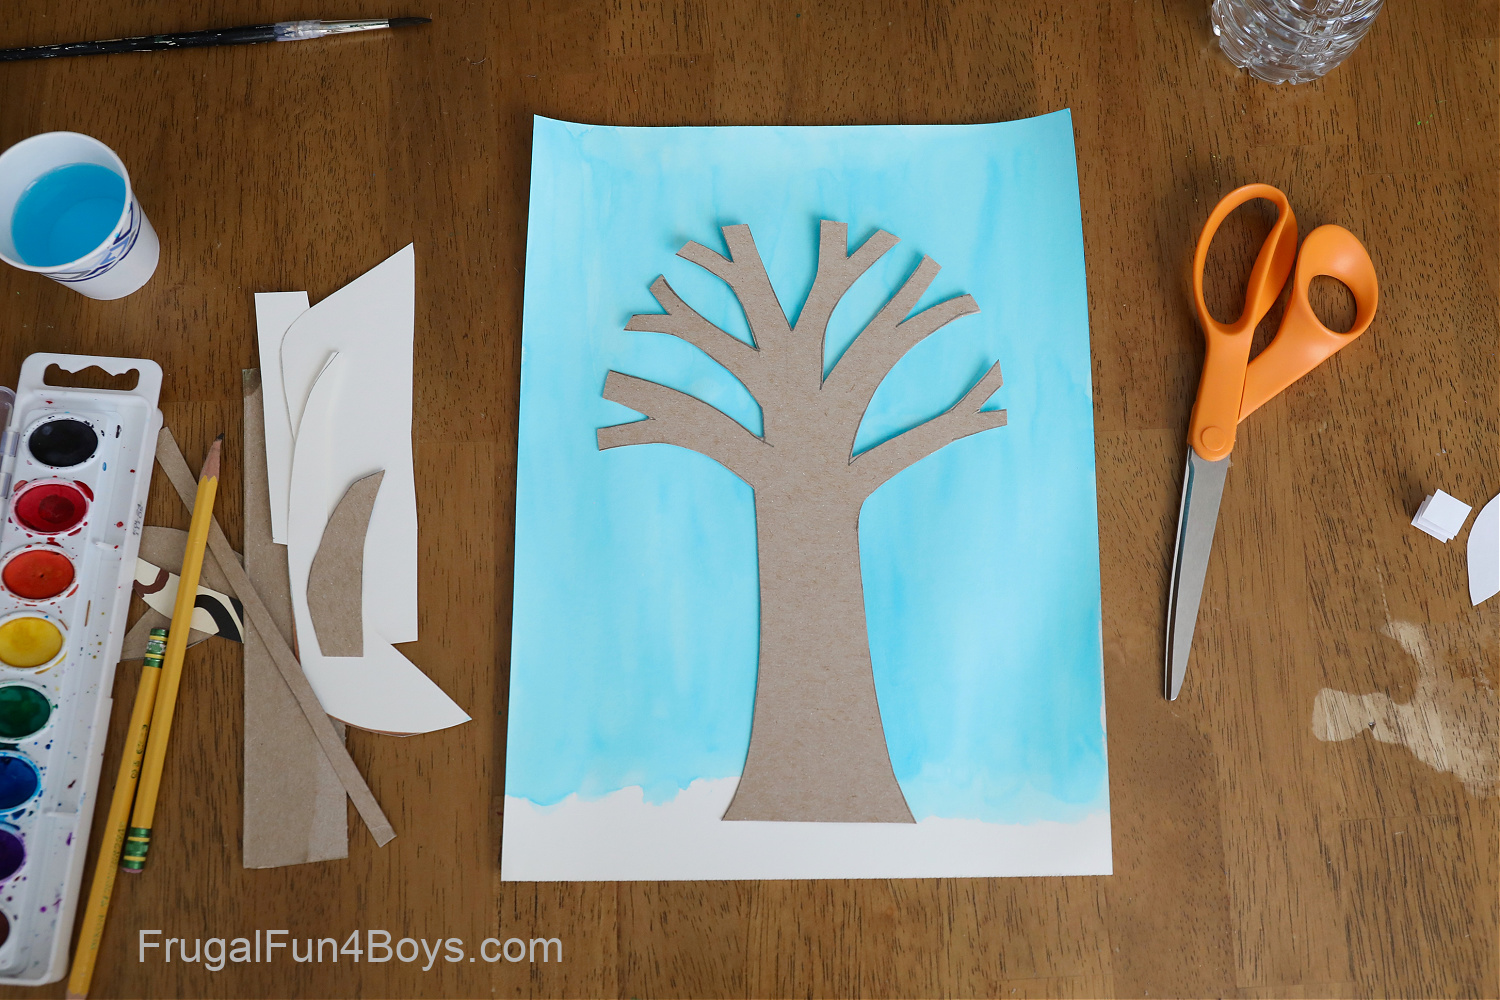
Step 3: Paint the Tree Brown and Make the Grass
Or, you may want to use white to make a birch or aspen tree! It’s up to you.
Cut out a strip of cardboard for the ground and paint it green for grass or brown for dirt.
Step 4: Glue on the Tree and Grass
We used Tacky Glue to attach the cardboard pieces to the watercolor paper.
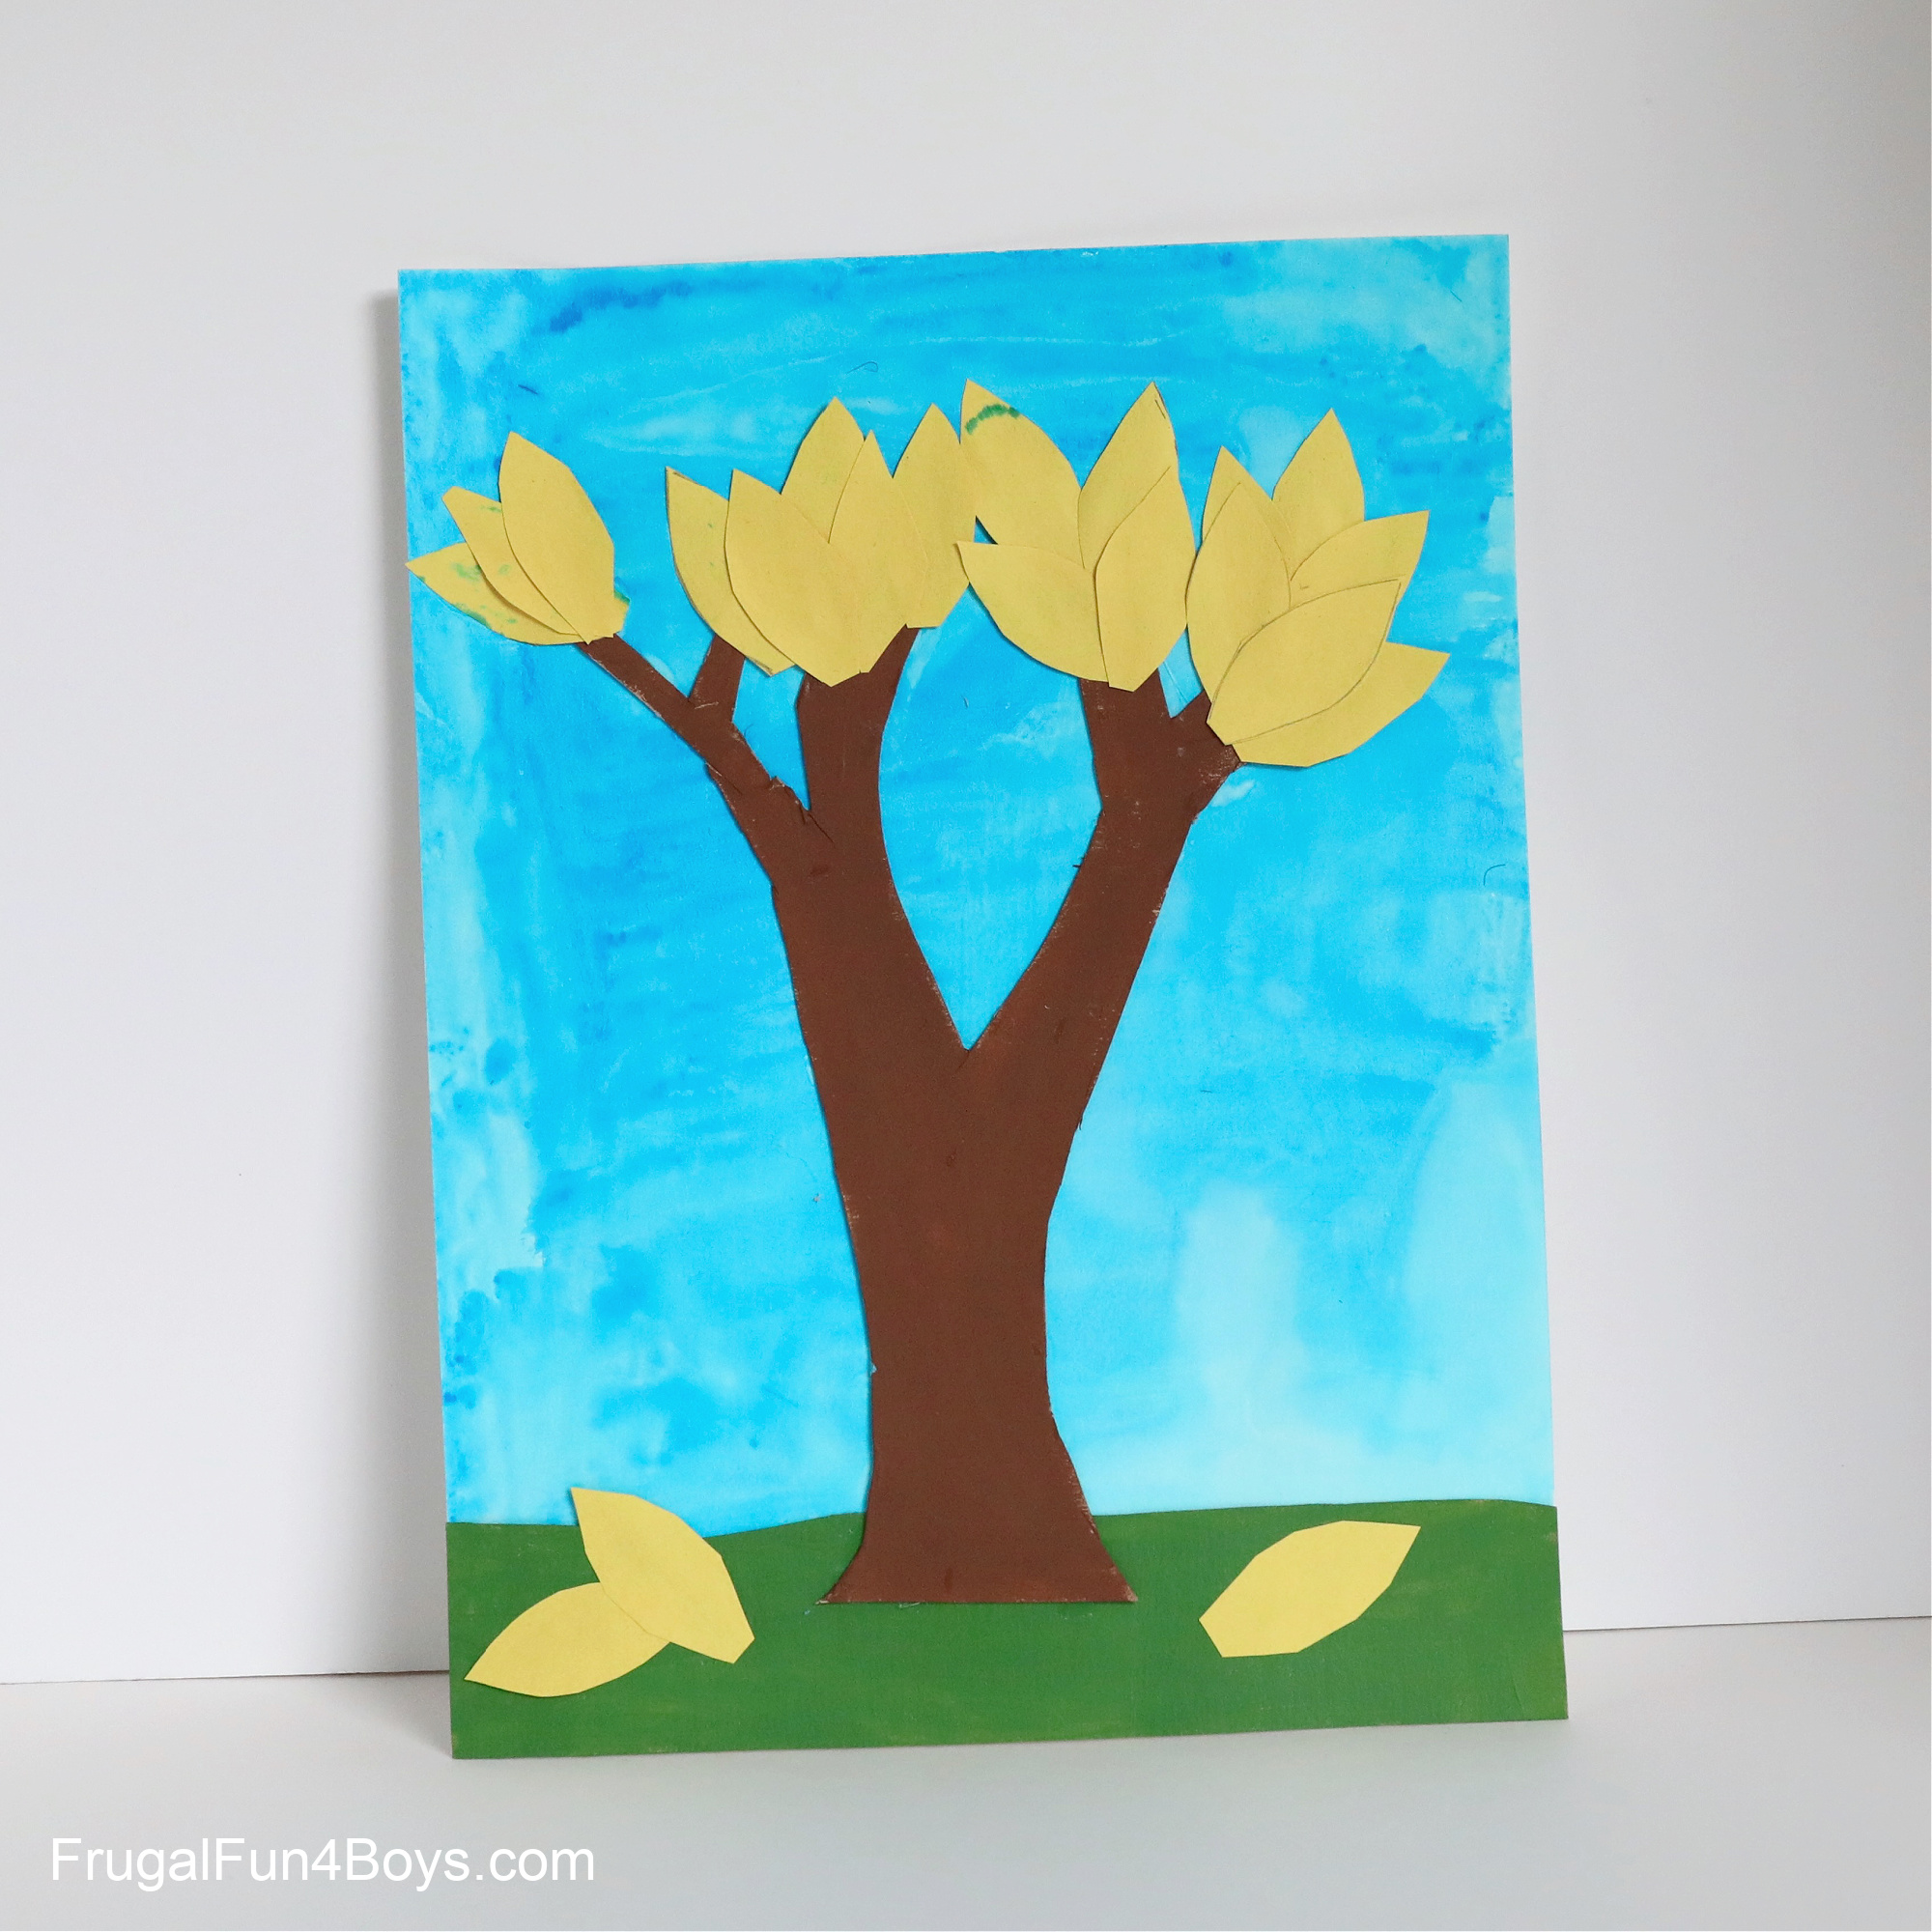
Step 5: Cut out Paper Leaves
You can choose the shape of your leaves! I made a pattern out of cardboard for the kids to trace. This made them all very uniform, but if you want a different look, you can freehand each leaf.
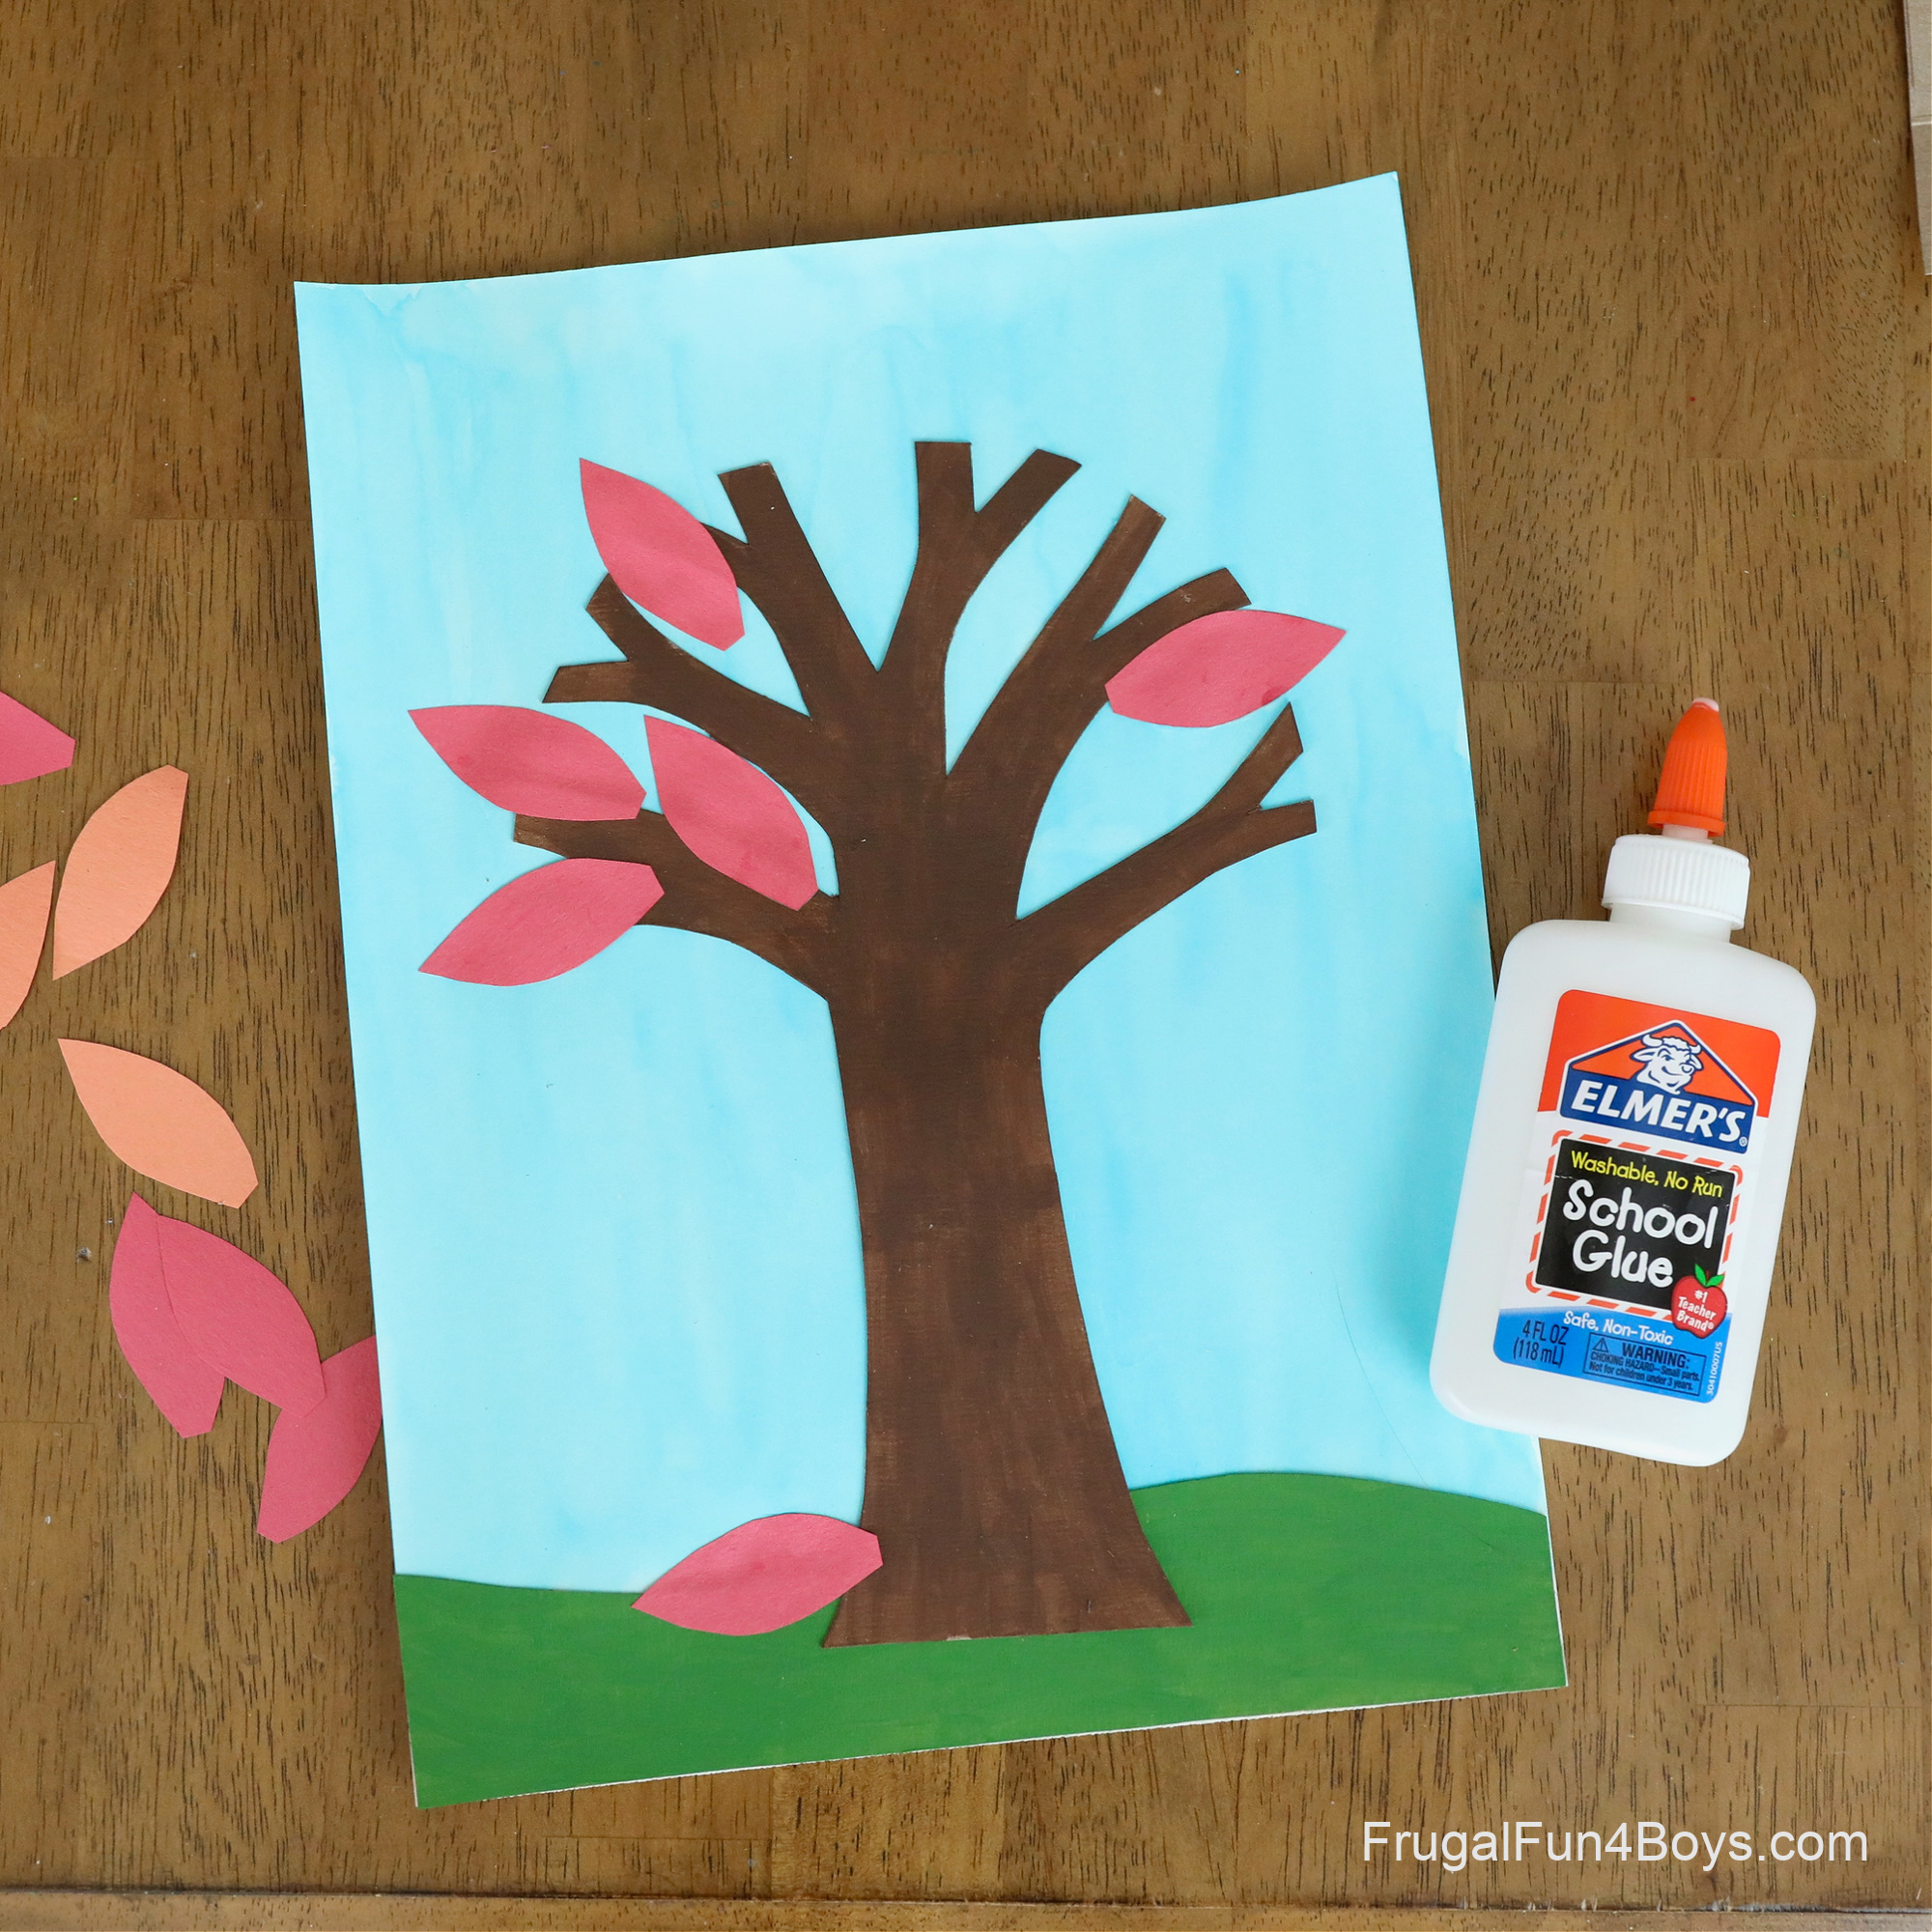
Step 5: Glue on the Leaves
We’re going to make some 3D leaves in a minute, but first glue down the ones that you want to be flat against the tree. We used Elmer’s glue for this (pva glue for my UK friends).
Step 6: Make 3D Paper Leaves
Finish up your tree by adding some leaves that stand out from the paper! This is so easy to do.
Cut out small rectangles from corrugated cardboard.
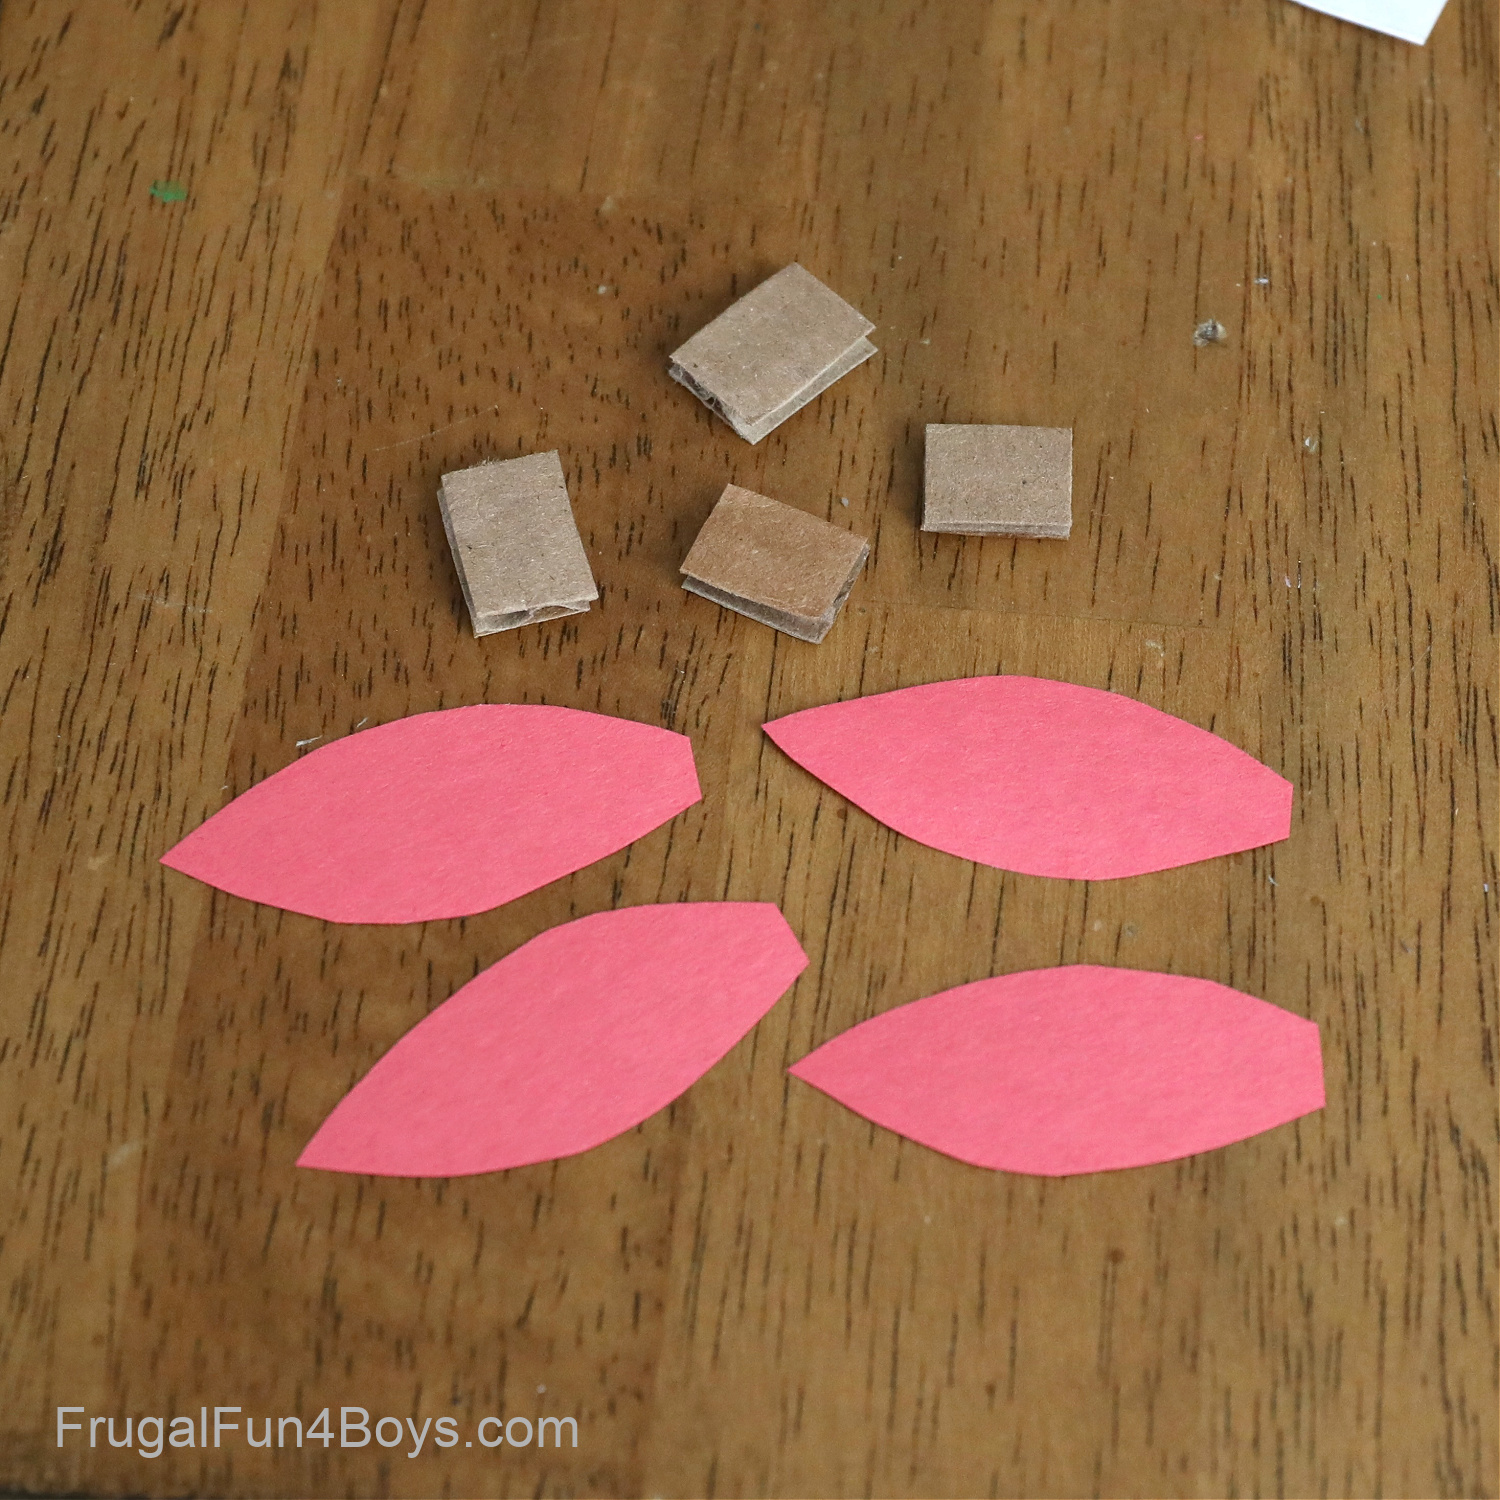
Then glue these to the tree anywhere that you want a 3D leaf.

Then glue leaves to your cardboard squares. The end result looks amazing!
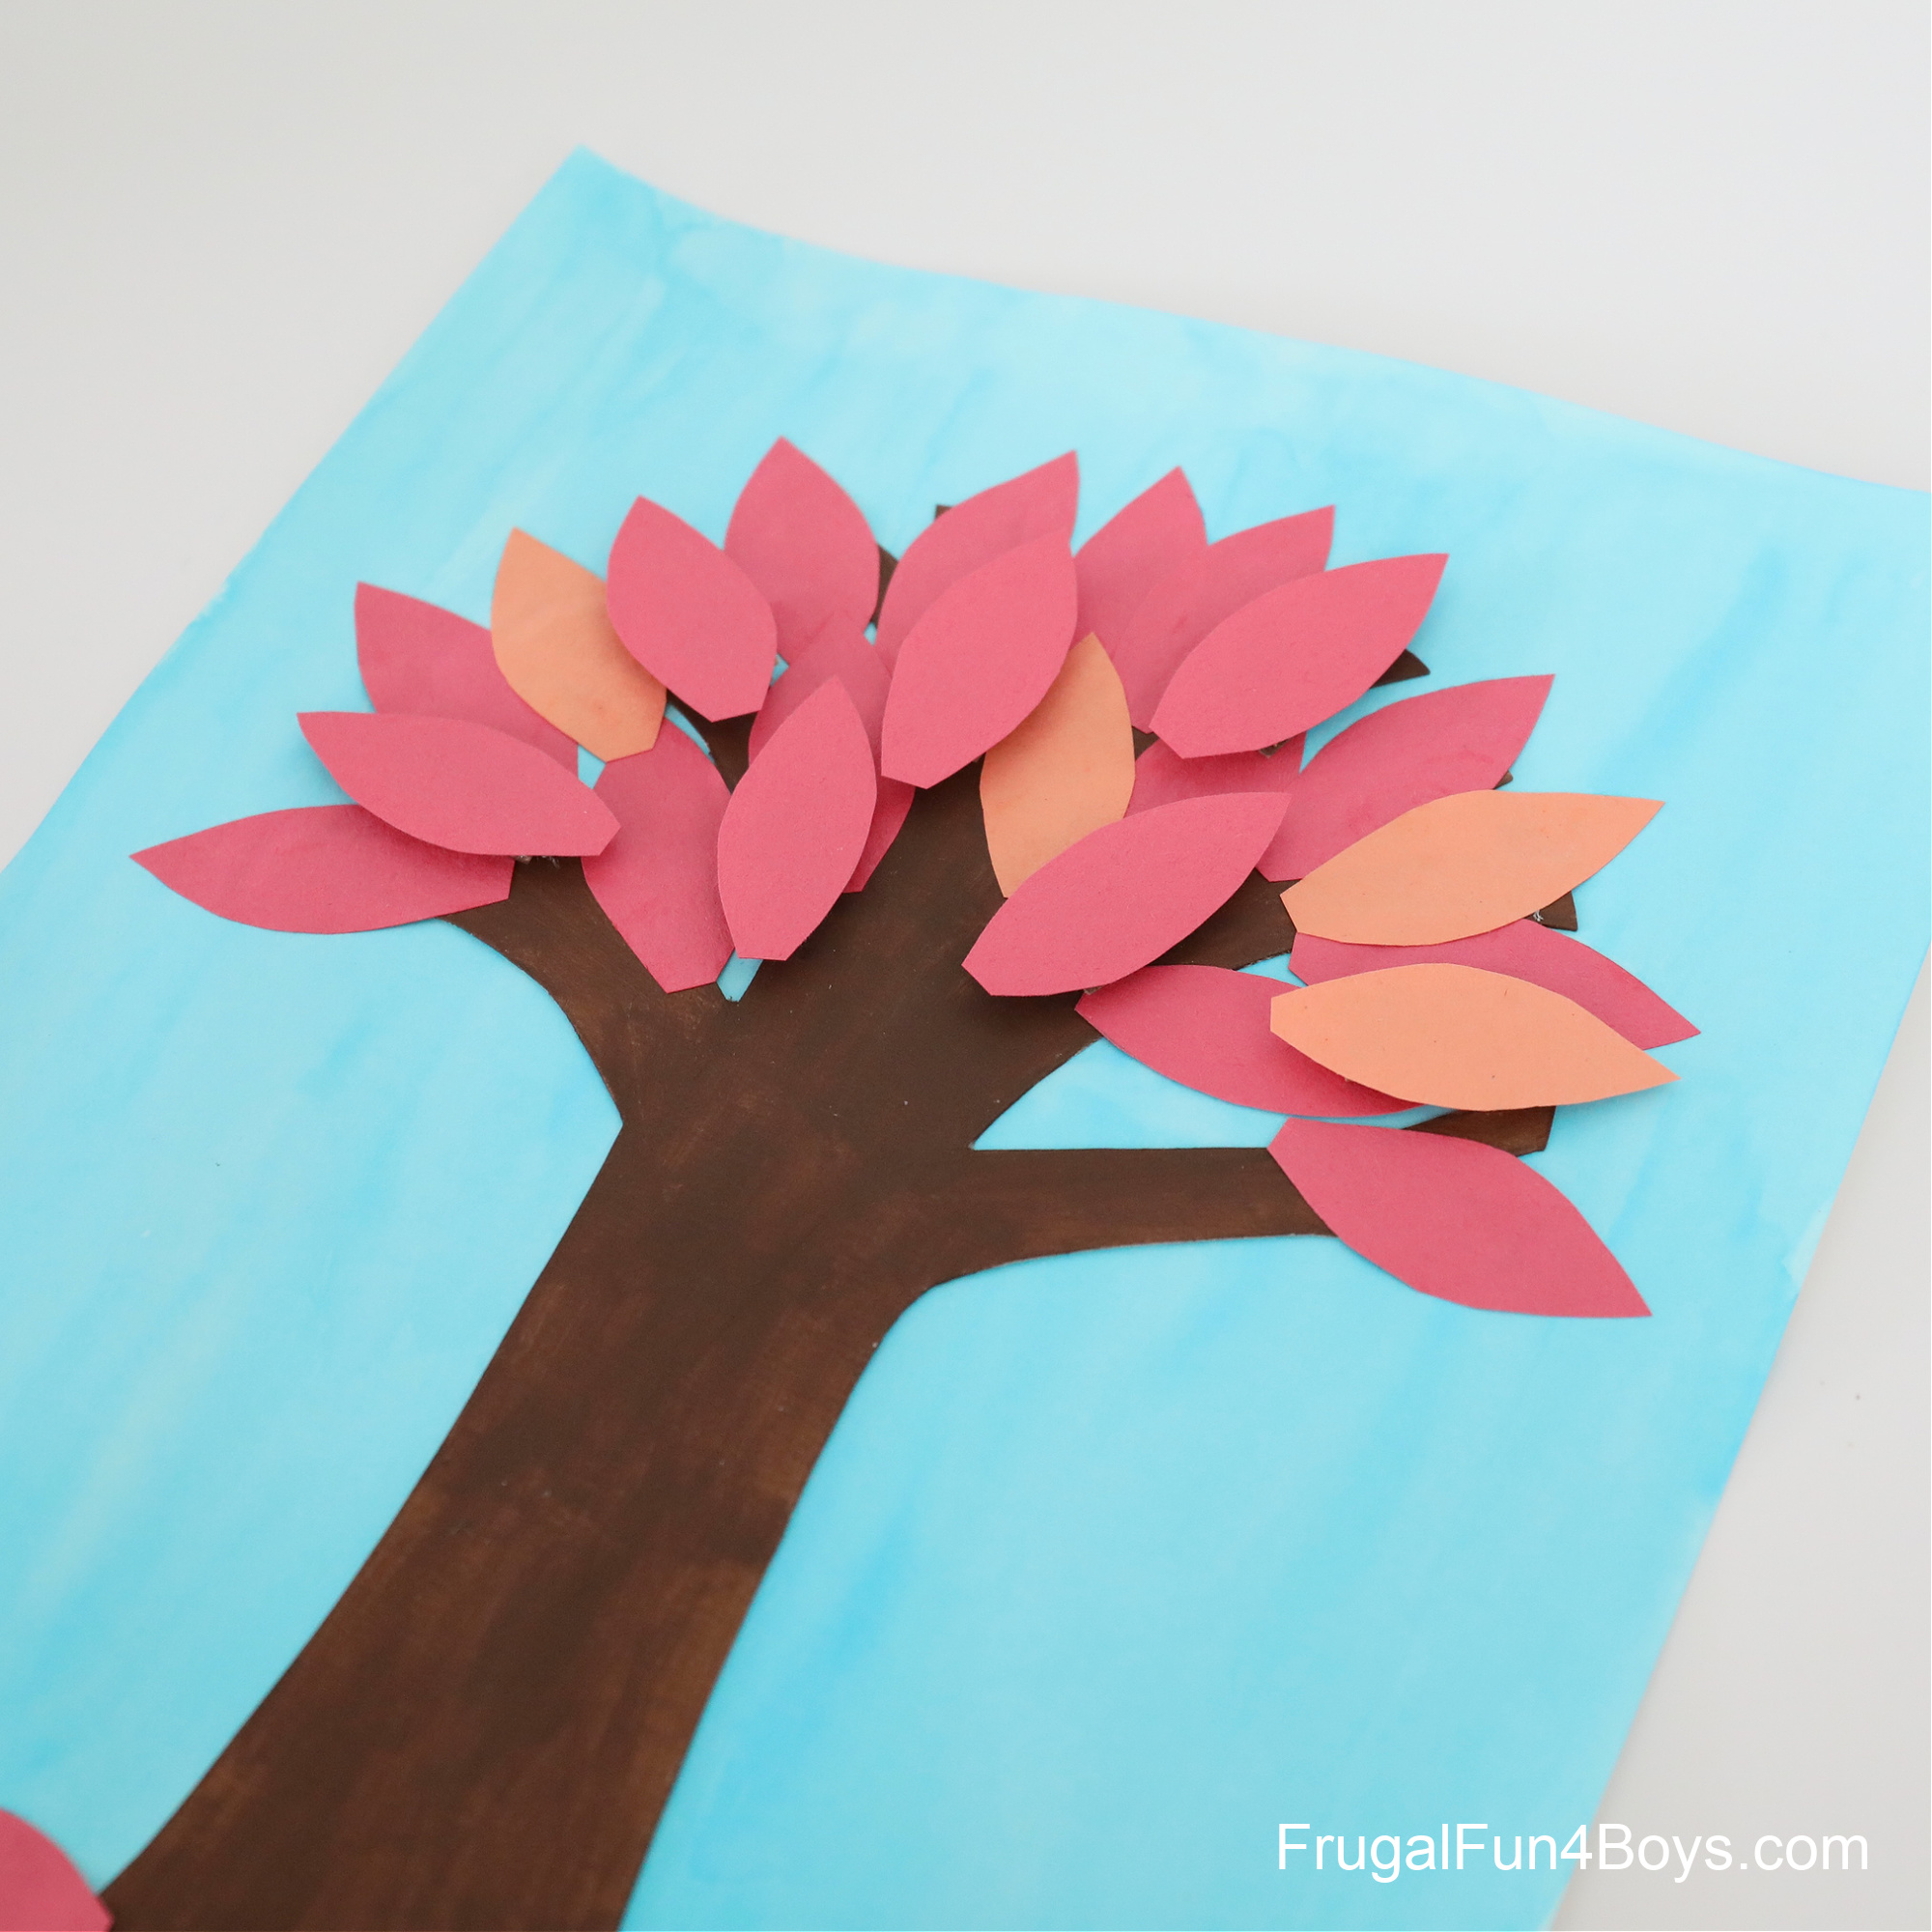
We decided that yellow leaves look really good with a deeper blue sky.

Need more fall tree crafts?
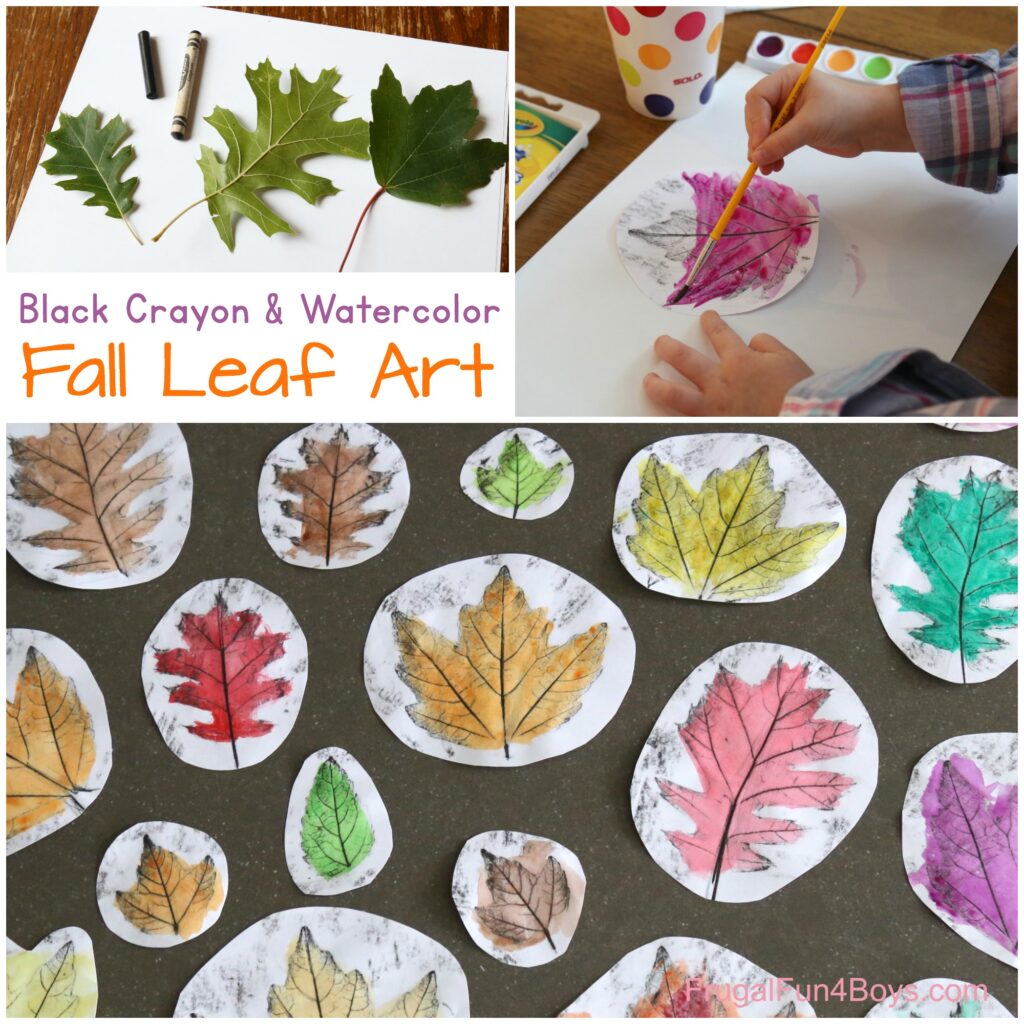
Black Crayon and Watercolor Fall Leaf Art – this is one of my TOP favorite fall art activities! It’s a great project to do if you don’t have access to fall colored leaves.
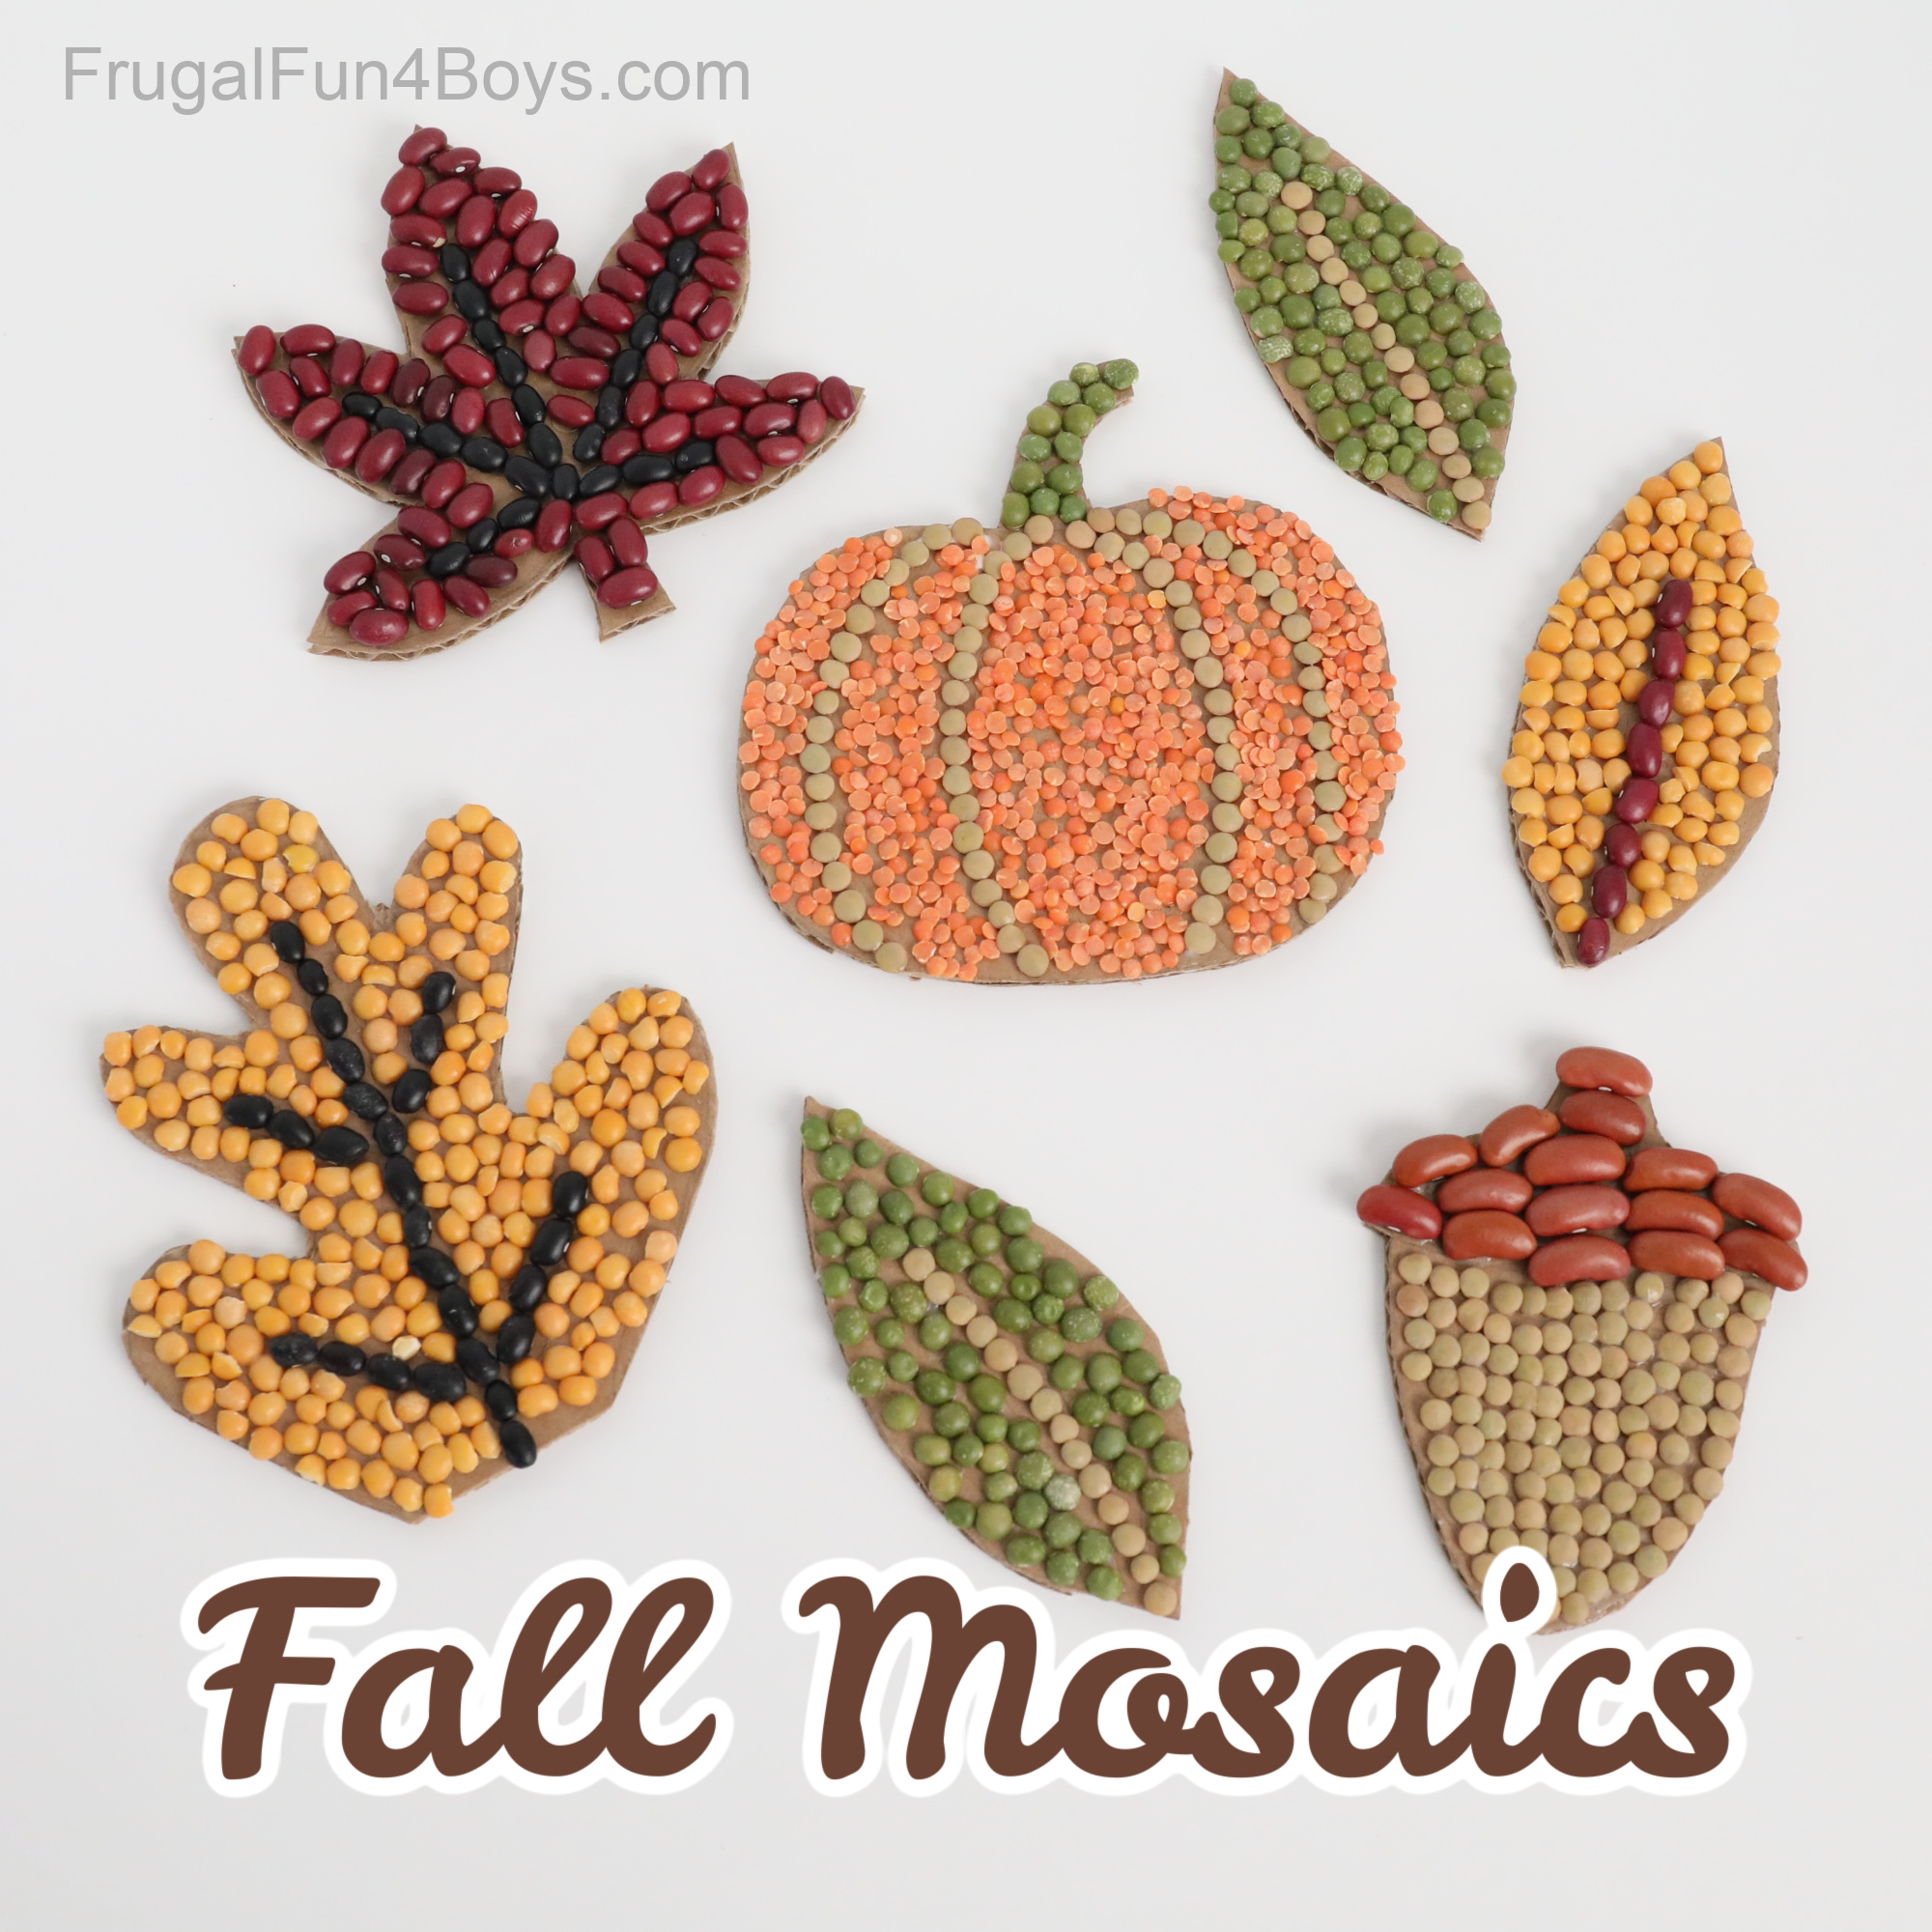
I also highly recommend these Fall Bean Mosaics! They look fabulous on display.
0 Comments
Post a Comment