
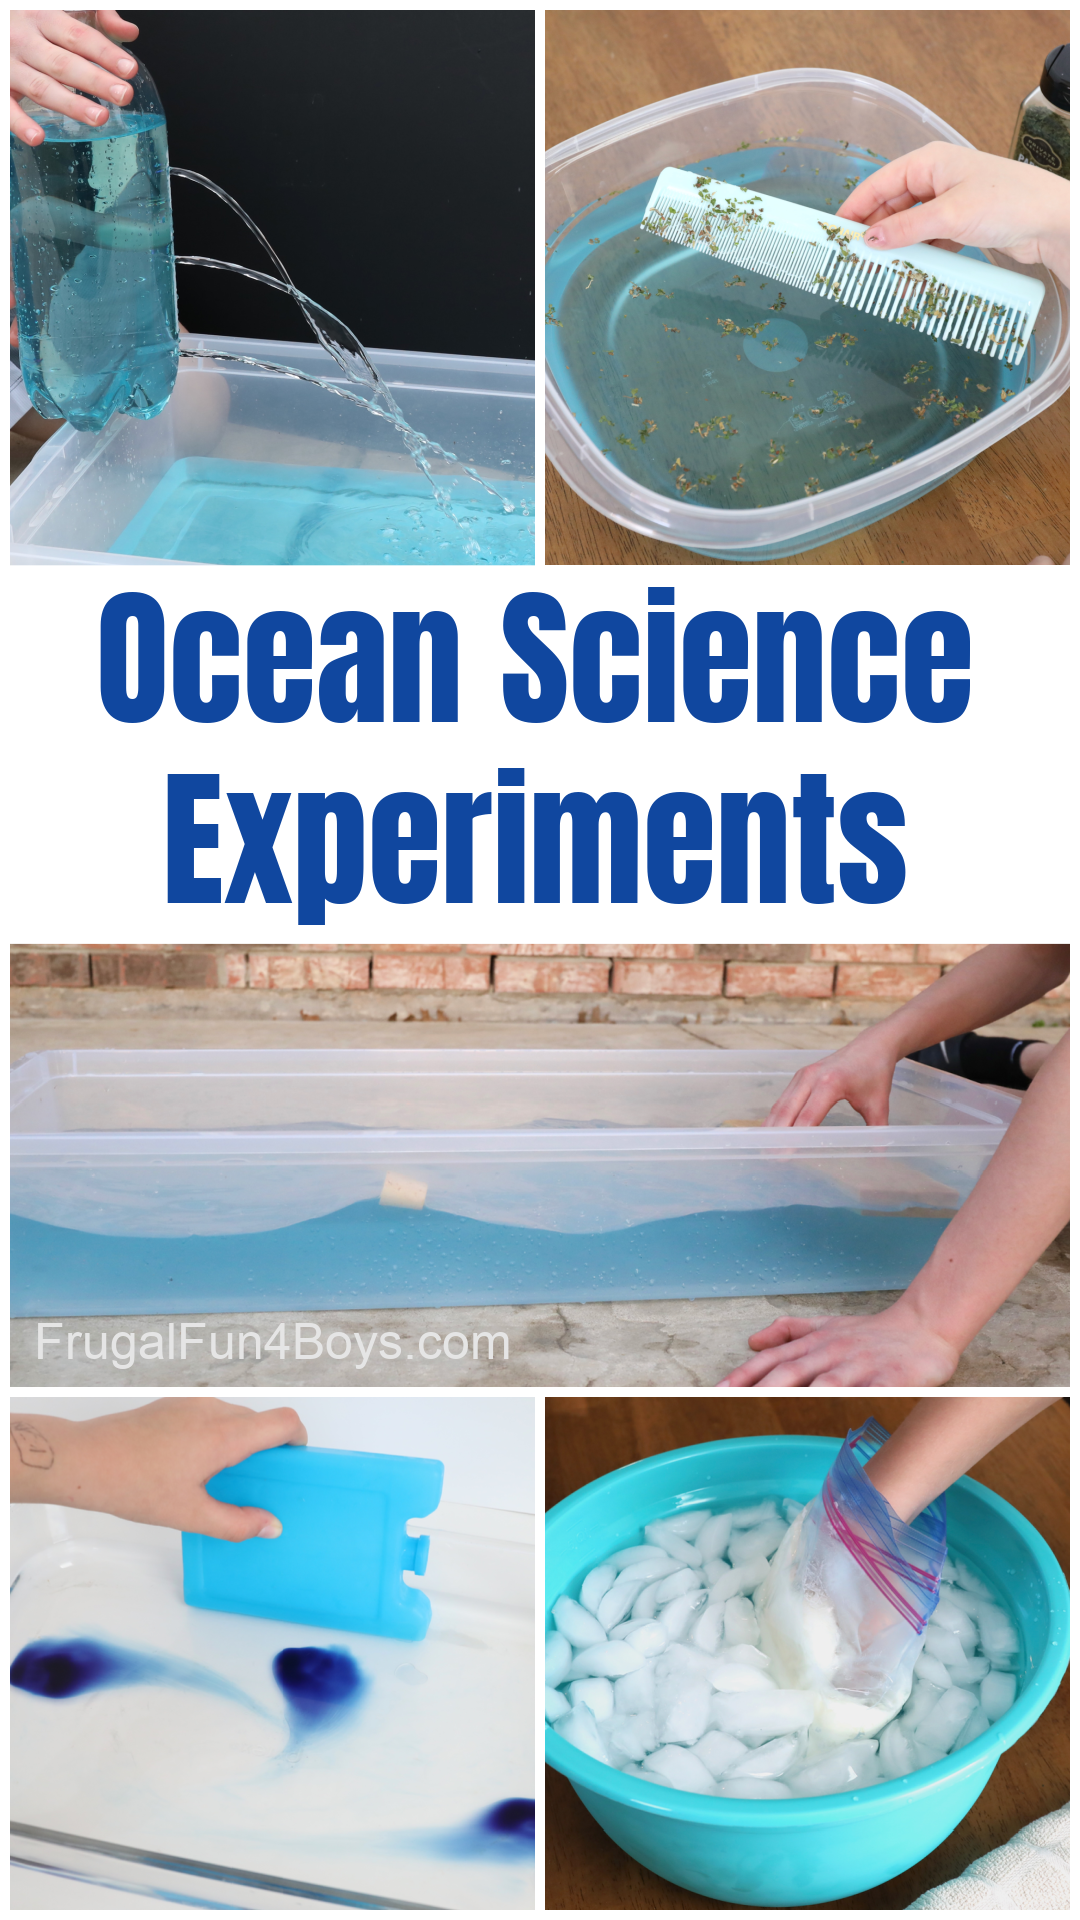
Here’s a collection of amazing ocean science experiments that kids will love! These are fun, hands-on learning activities about different aspects of marine science. And the best part is that you probably already have the supplies on hand!
In these ocean science experiments, kids will explore:
- Ocean currents
- Water pressure
- The motion of waves
- How baleen whales eat
- How arctic animals stay warm in icy oceans
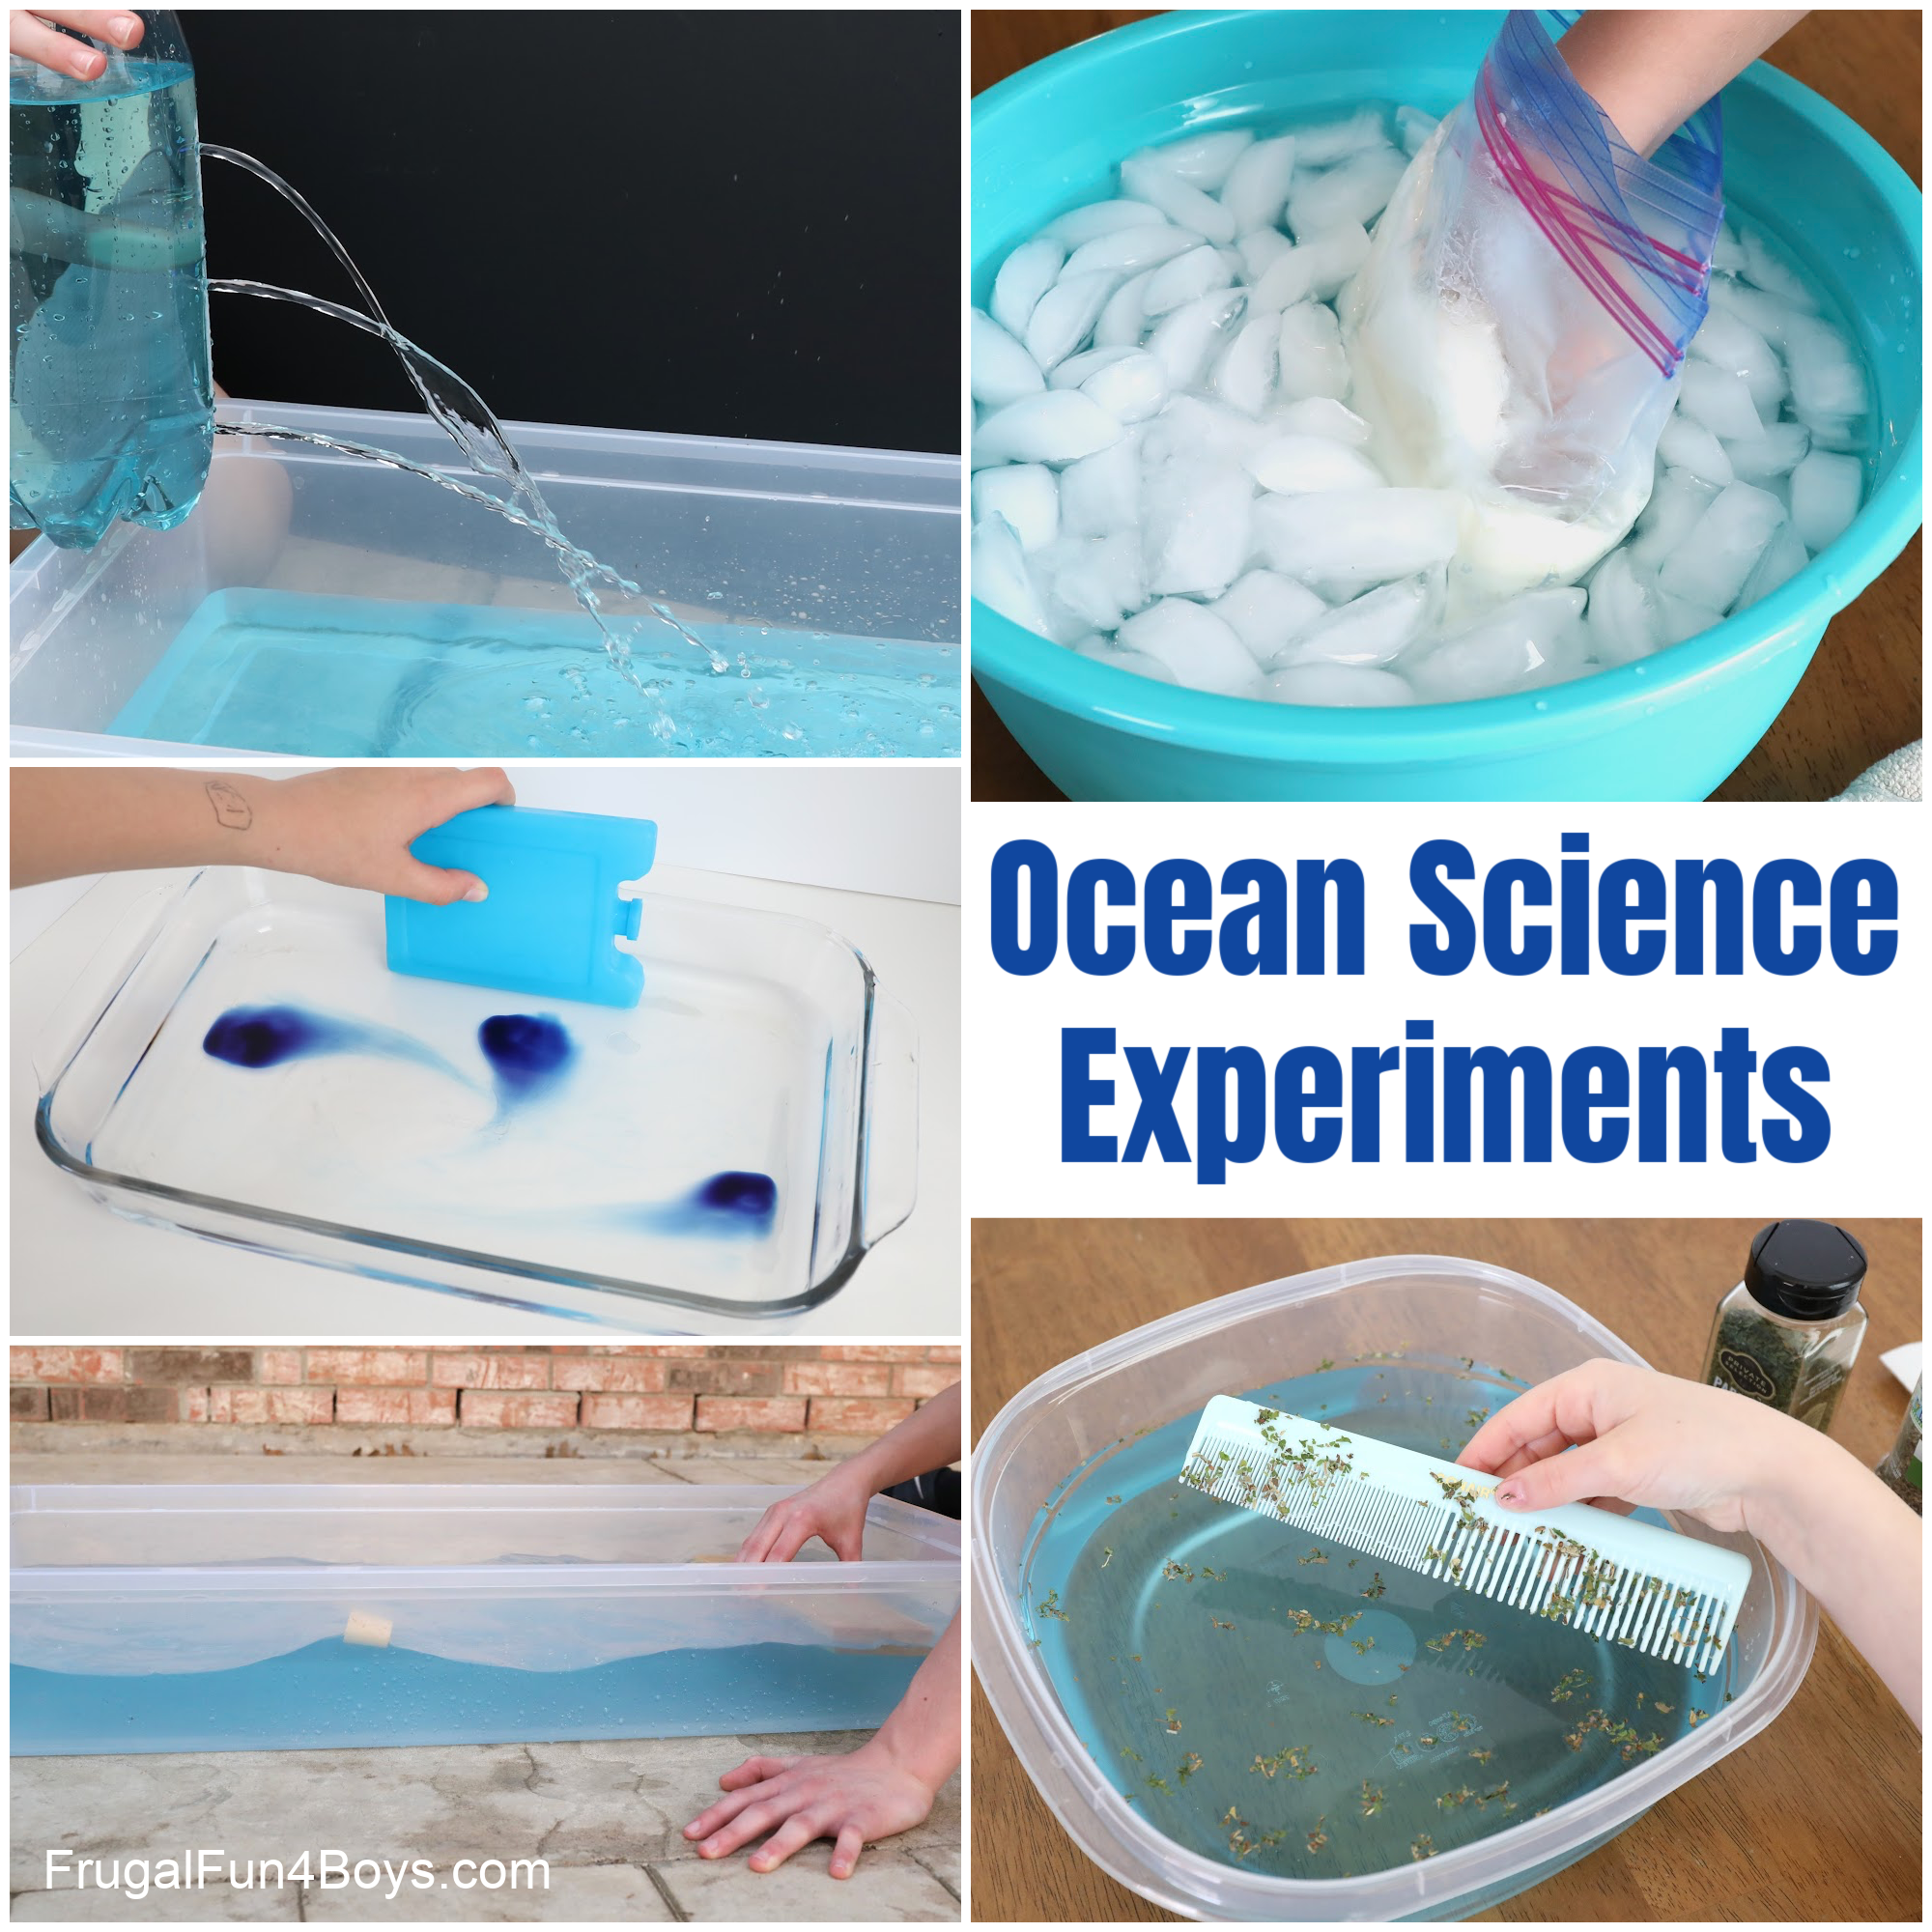
I tested out each of these experiments with my middle school science class. They would be suitable for upper elementary students as well.
Experiment #1: Ocean Currents
When I did this experiment, I broke the cardinal rule of teaching and did not try it out prior to the class. I don’t recommend this, haha! Thankfully, it worked well. In fact, it worked better than I expected, and the students were really interested in what happened.
This activity demonstrates how differences in water temperature create ocean currents. Ocean currents are also caused by differences in salinity. The more salty the water is, the more dense it is. Denser/saltier water sinks, while less salty water rises. But in this activity, we’re just going to focus on temperature.
Supplies Needed:
- A 9 x 13 glass dish, or something similar
- An ice pack or a baggie with ice in it
- Food coloring
- Water
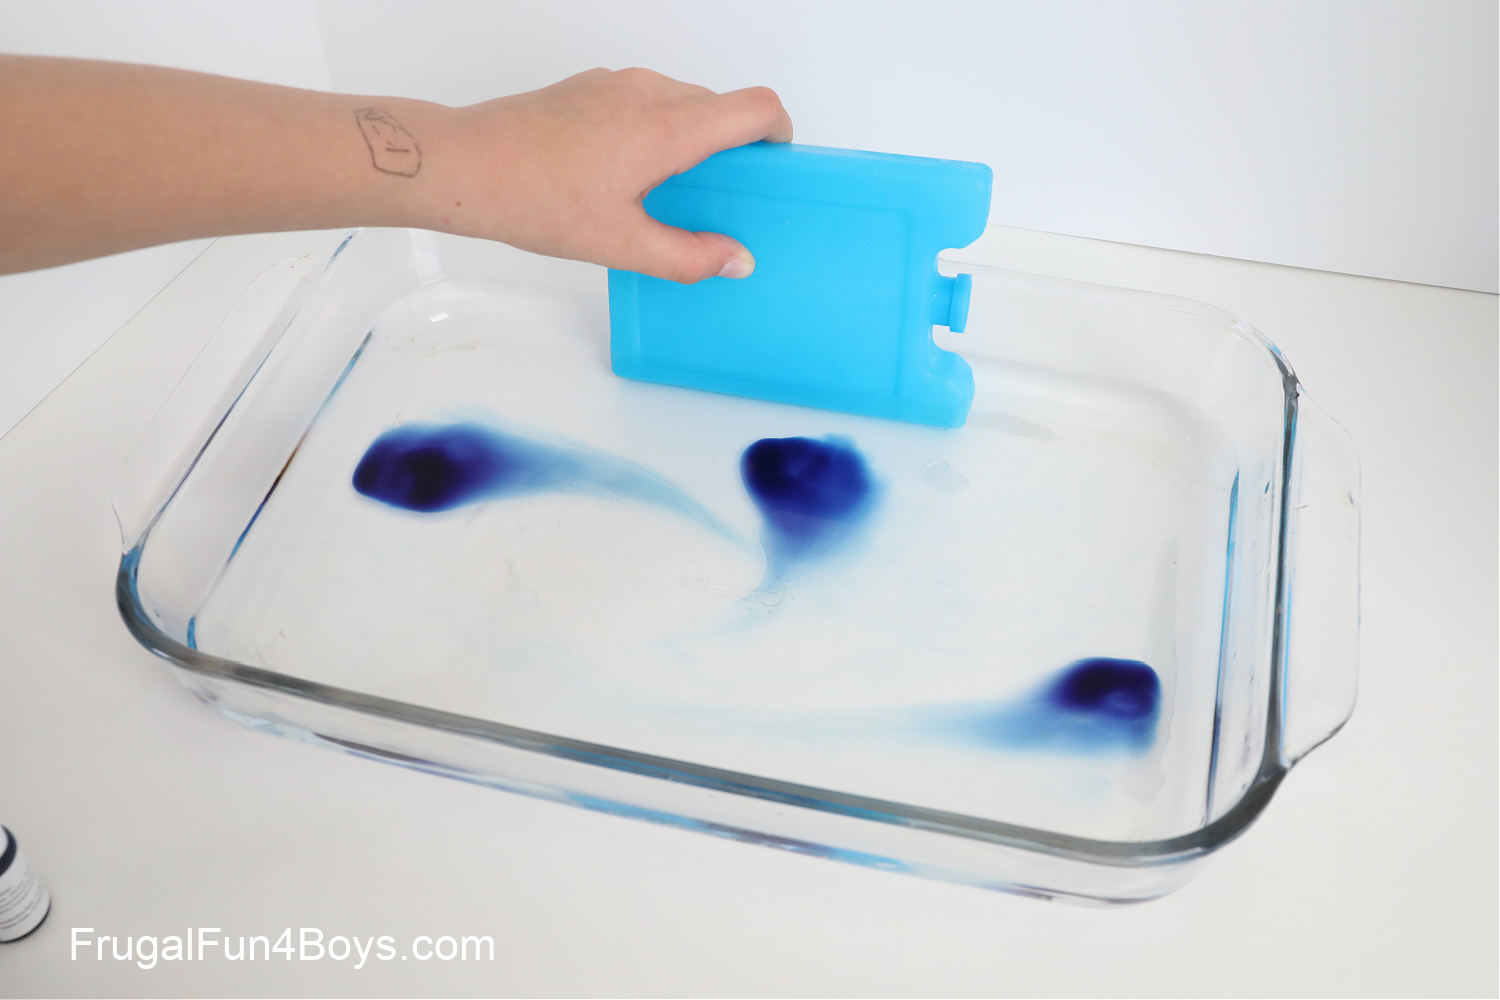
Fill the dish with water, about an inch deep. Let the water sit for a few minutes to make sure it’s still.
Then, place an ice pack on one side of the dish. We found that it worked best to have someone hold onto our ice pack. We didn’t want it to fall over and take up most of the dish. The goal was to have one cold spot in the water.
Quickly place one drop of food coloring right next to the ice pack. Place another drop on the other side of the dish. Then watch what happens! You should see the food coloring moving away from the cold near the ice pack. The drop of food coloring on the other side of the dish should mainly stay in one place.
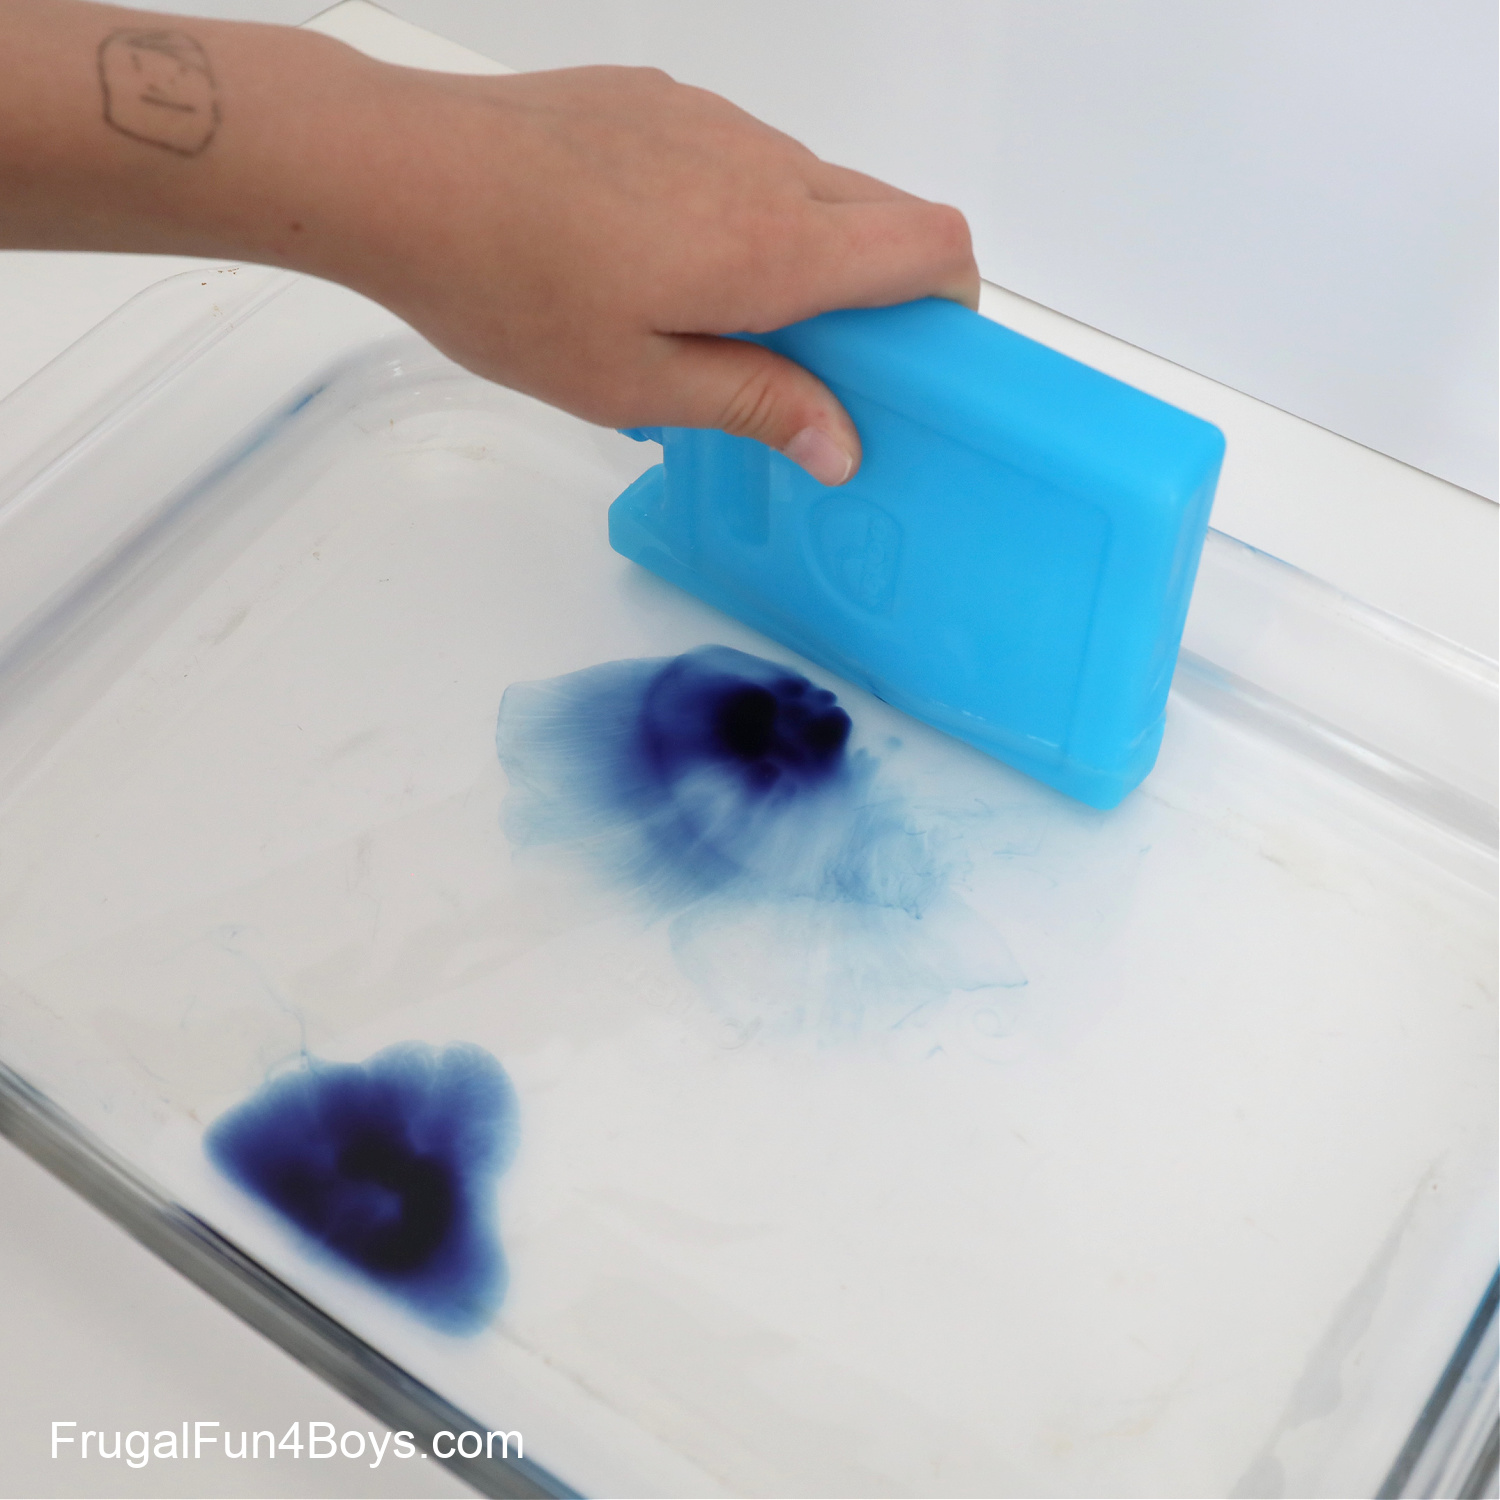
The students wanted to try adding drops of food coloring in different places, so we repeated the experiment with this configuration.
I wish I could have taken photos during class because our results were better there for whatever reason. But in this picture you can see each of the food coloring drops moving away from the cold! It was very interesting to watch.
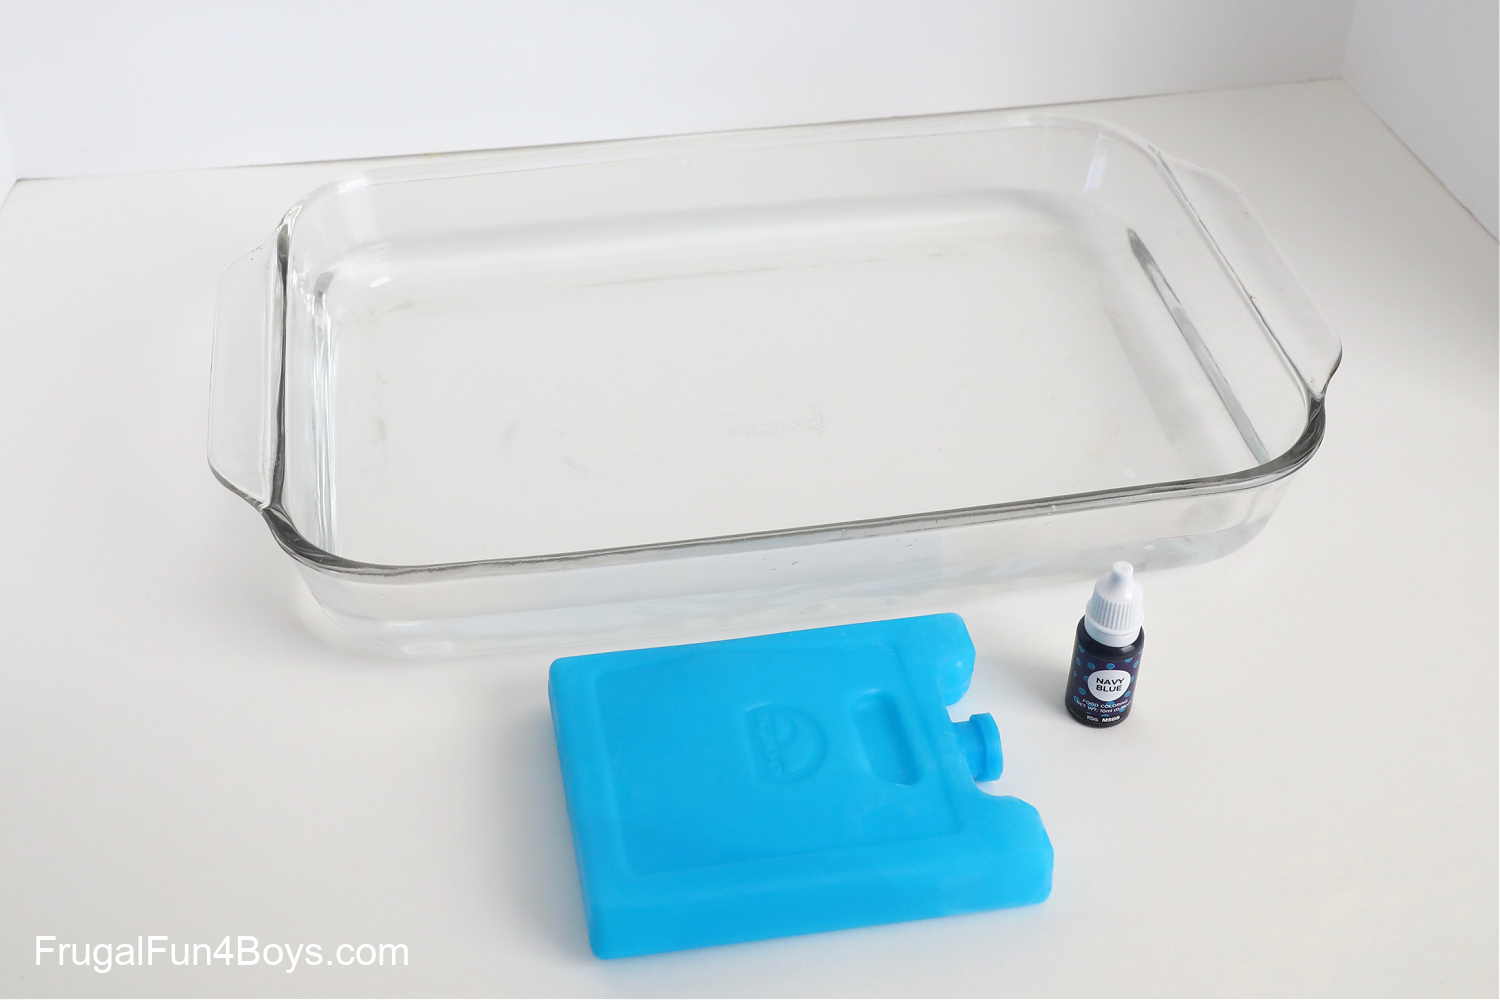
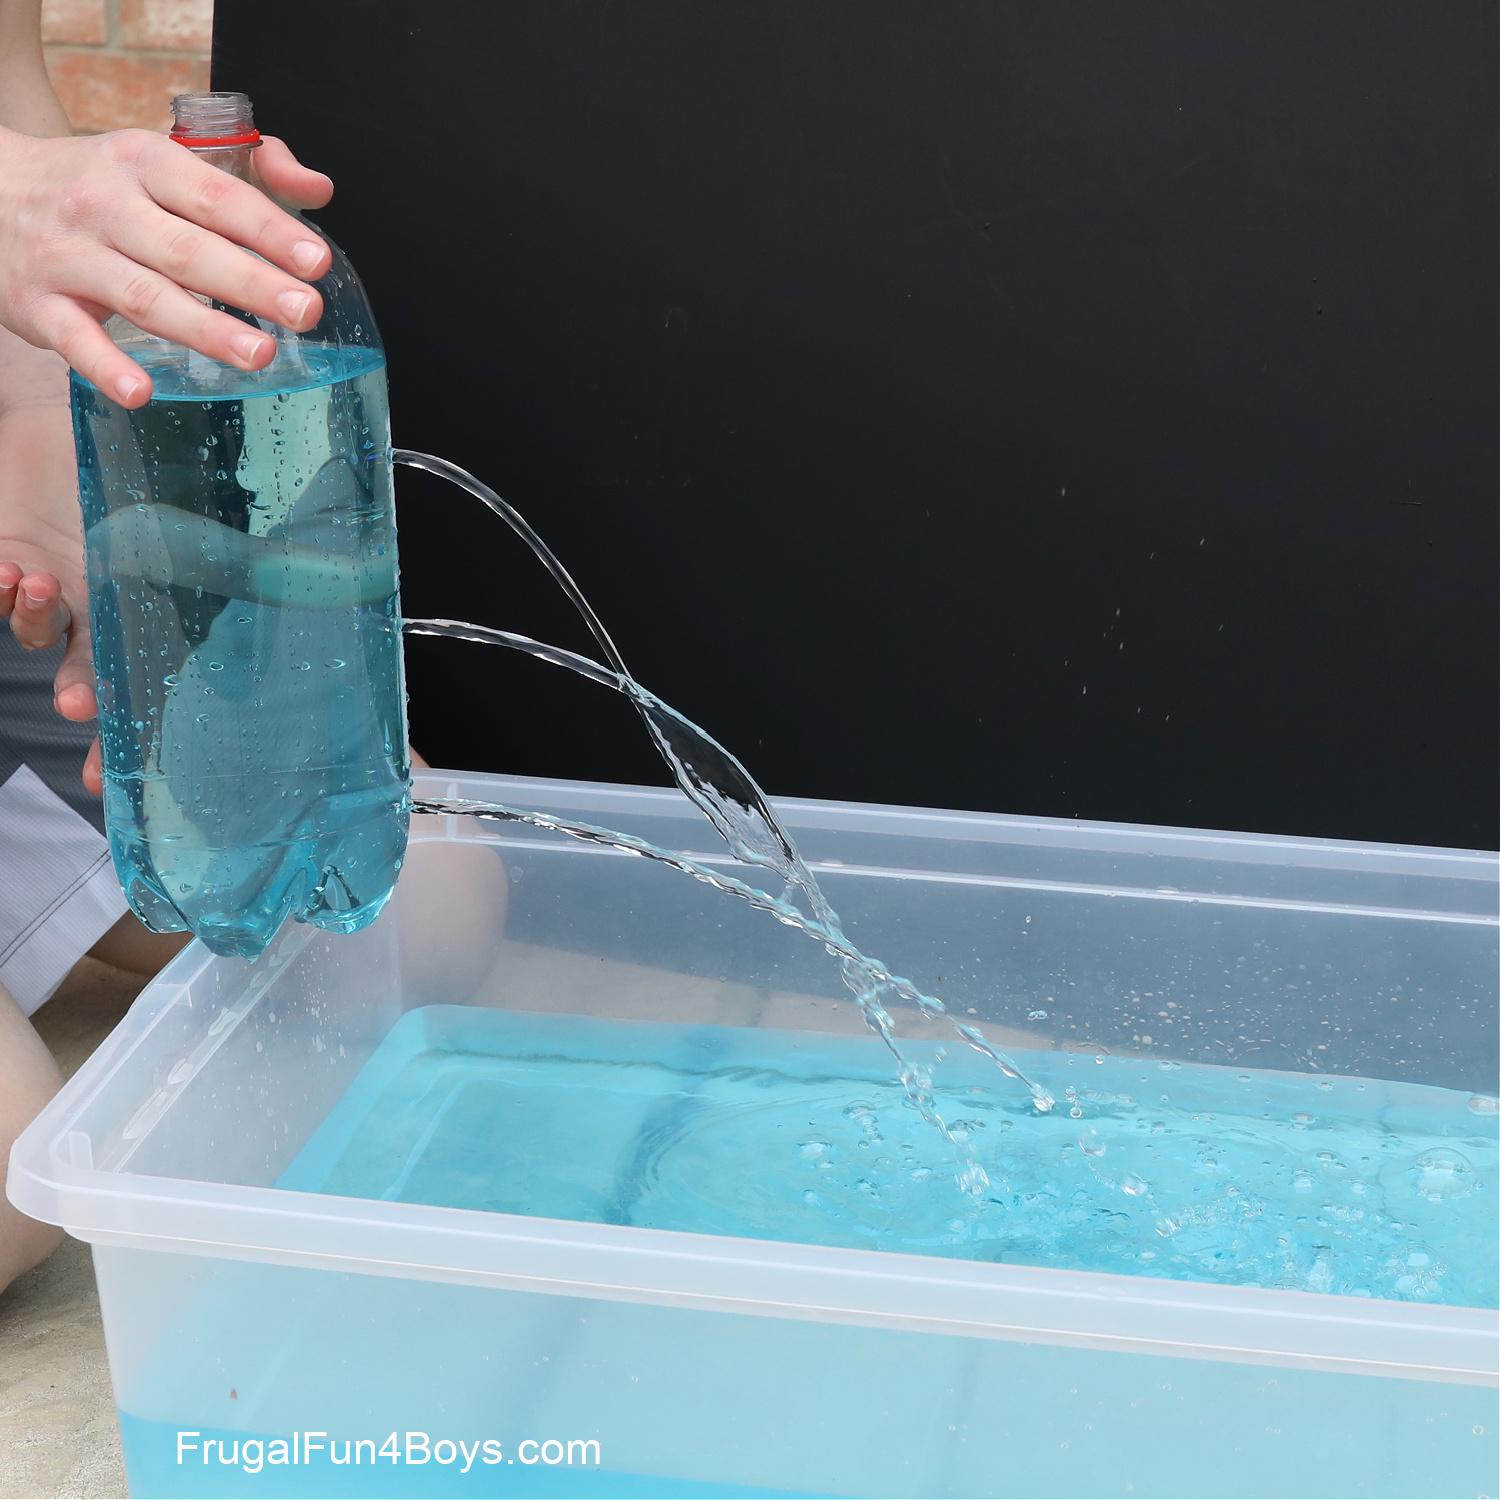
Experiment #2: Water Pressure in the Ocean Depths
Here’s a cool way to demonstrate the effects of water pressure as you go deeper into the ocean.
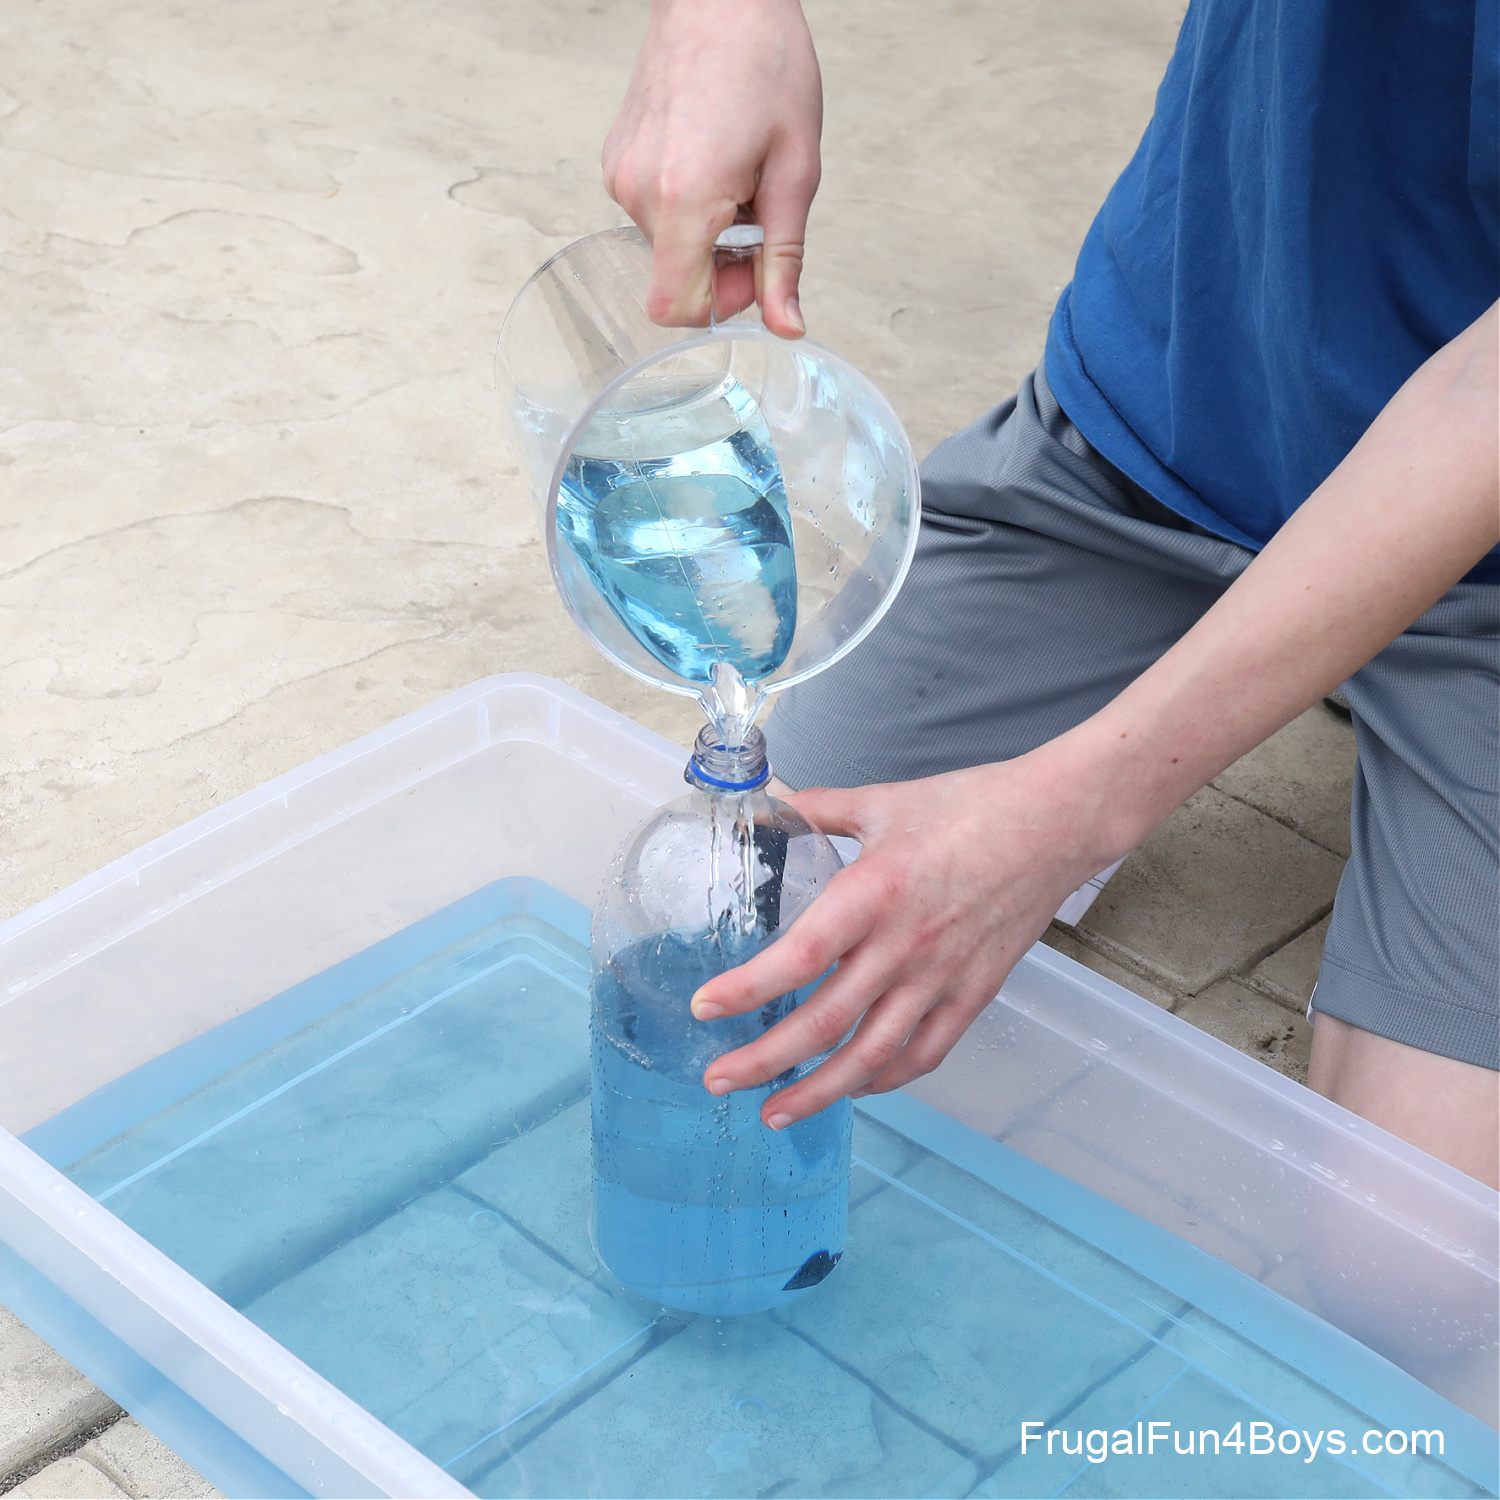
I used an under-the-bed box for both this experiment and the next one. I also colored the water with a few drops of blue food coloring to just make it more fun! Looks more like an ocean that way.
Supplies Needed:
- Tub for catching the water, or just do this activity outside. We used an under-the-bed box.
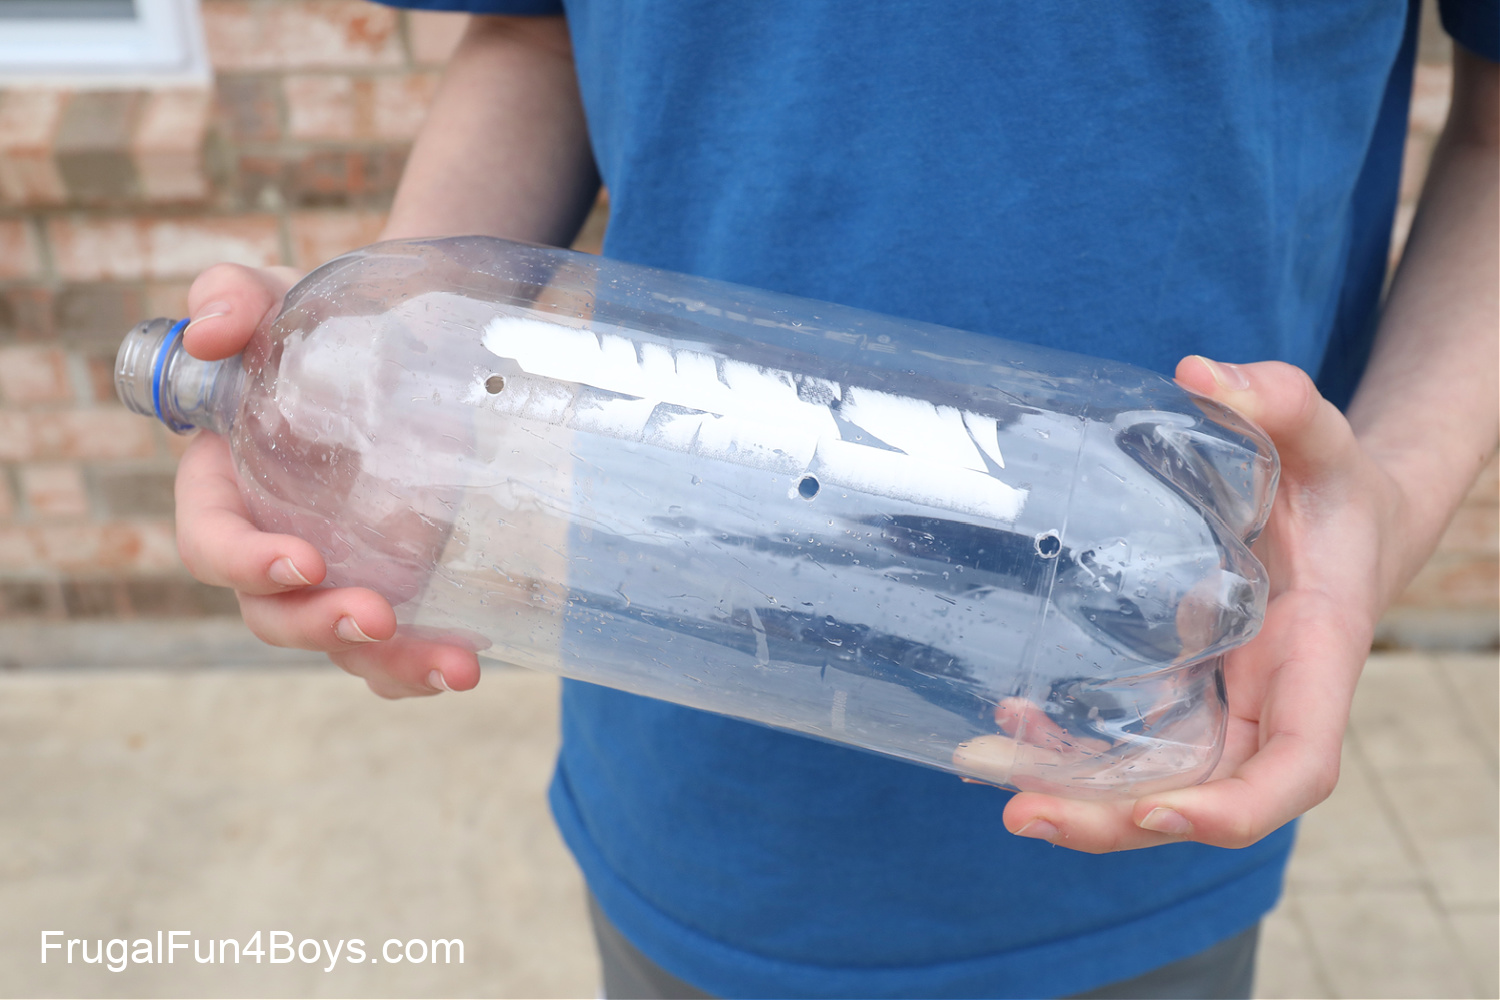
- 2 liter soda bottle
- Something to use to poke holes in the plastic soda bottle. We used a drill. You can also use a nail or the sharp point of a knife (adult job for all of those options).
- Electrical tape
- Pitcher
- Water
- Food coloring – optional
Start by drilling three small holes in your soda bottle as shown below.
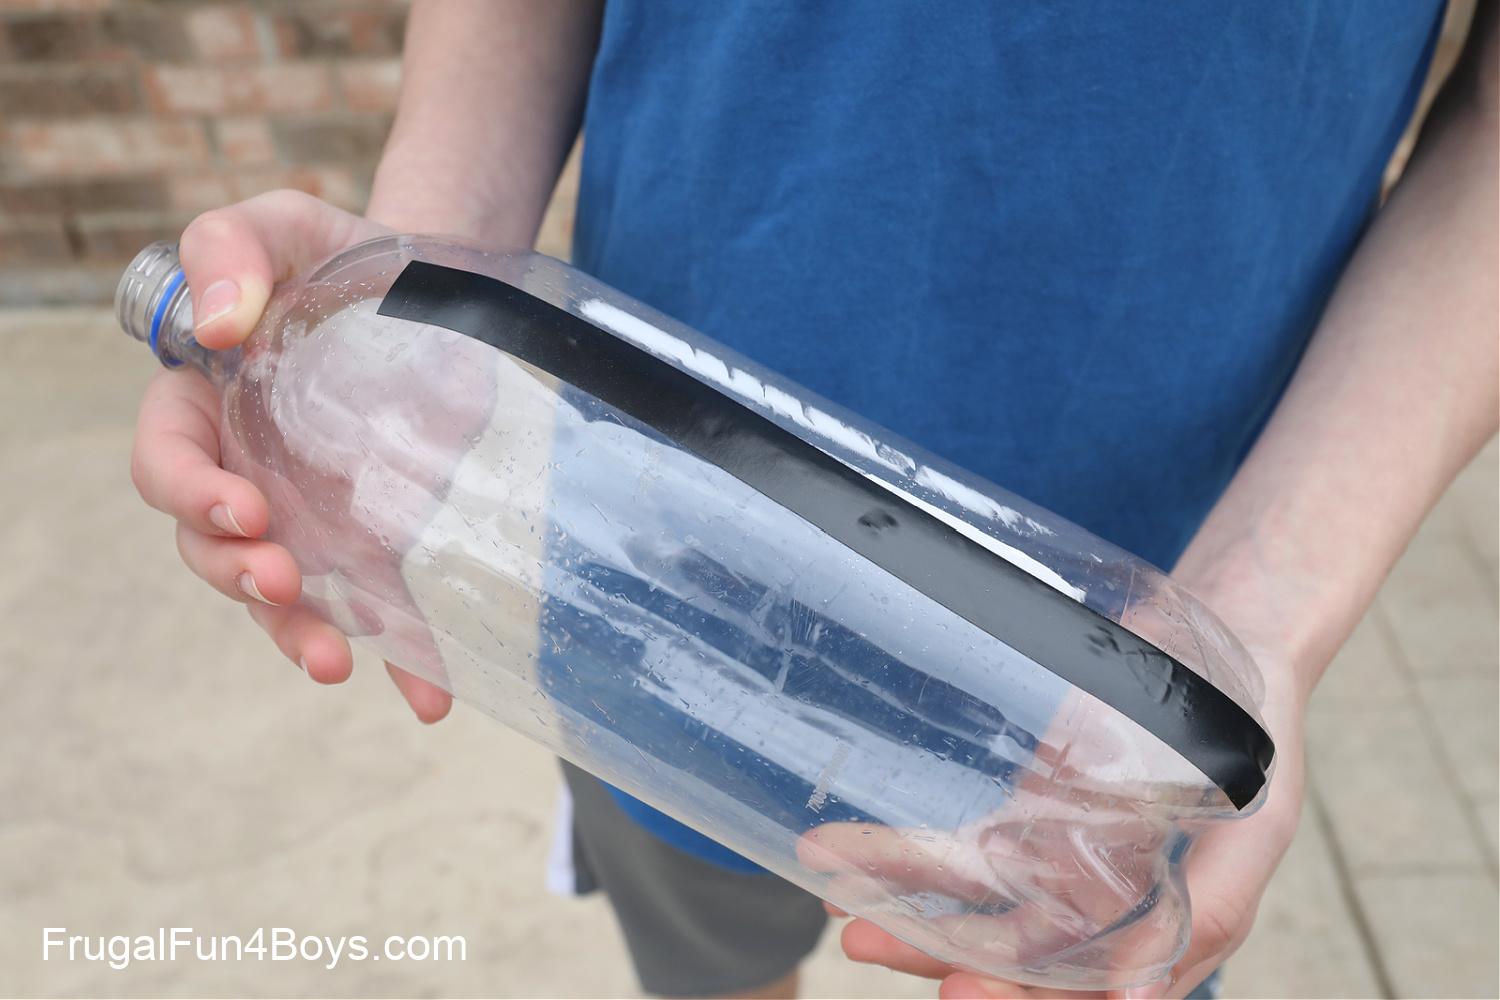
Then cover the holes with a long strip of electrical tape. You want to be able to fill the bottle with water without it all running out the holes immediately.
Use a pitcher or a faucet to fill the bottle completely with water.
Hold the bottle upright. Quickly peel the tape off all three holes at once.
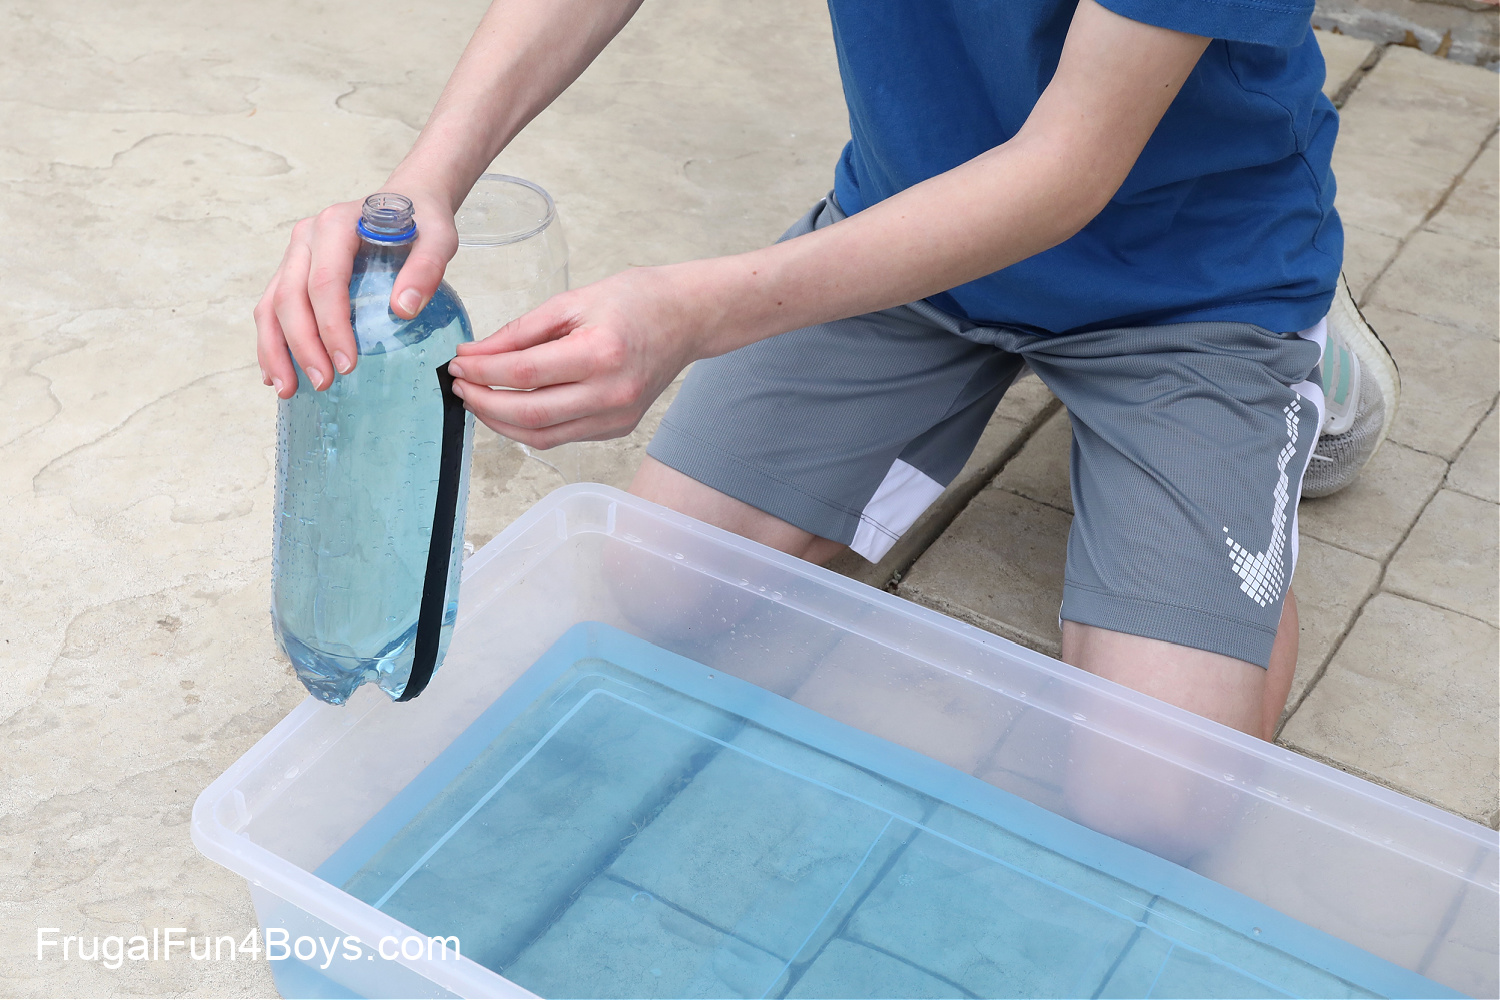
Then watch what happens! The water squirts out of the top hole with the least amount of force. The water coming out the second hole has a bit more force, and the hole on the bottom has the most. Why? Because the water coming out of the bottom hole has the greatest amount of pressure on it.
Experiment #3: The Motion of Ocean Waves
This experiment will demonstrate to kids that individual water molecules are not actually moving along with the crest of a wave as it travels. They stay in basically the same place, moving in a circular motion as the wave passes by.
Supplies Needed:
- A cork
- A shallow tub, like an under-the-bed box or even your bathtub
- Water
- Food coloring (optional)
- A small wooden board
Tell the students that the cork is going to represent a boat. You’re going to make some waves in the water. Will the boat simply move up and down? Or will it travel across the “ocean?”
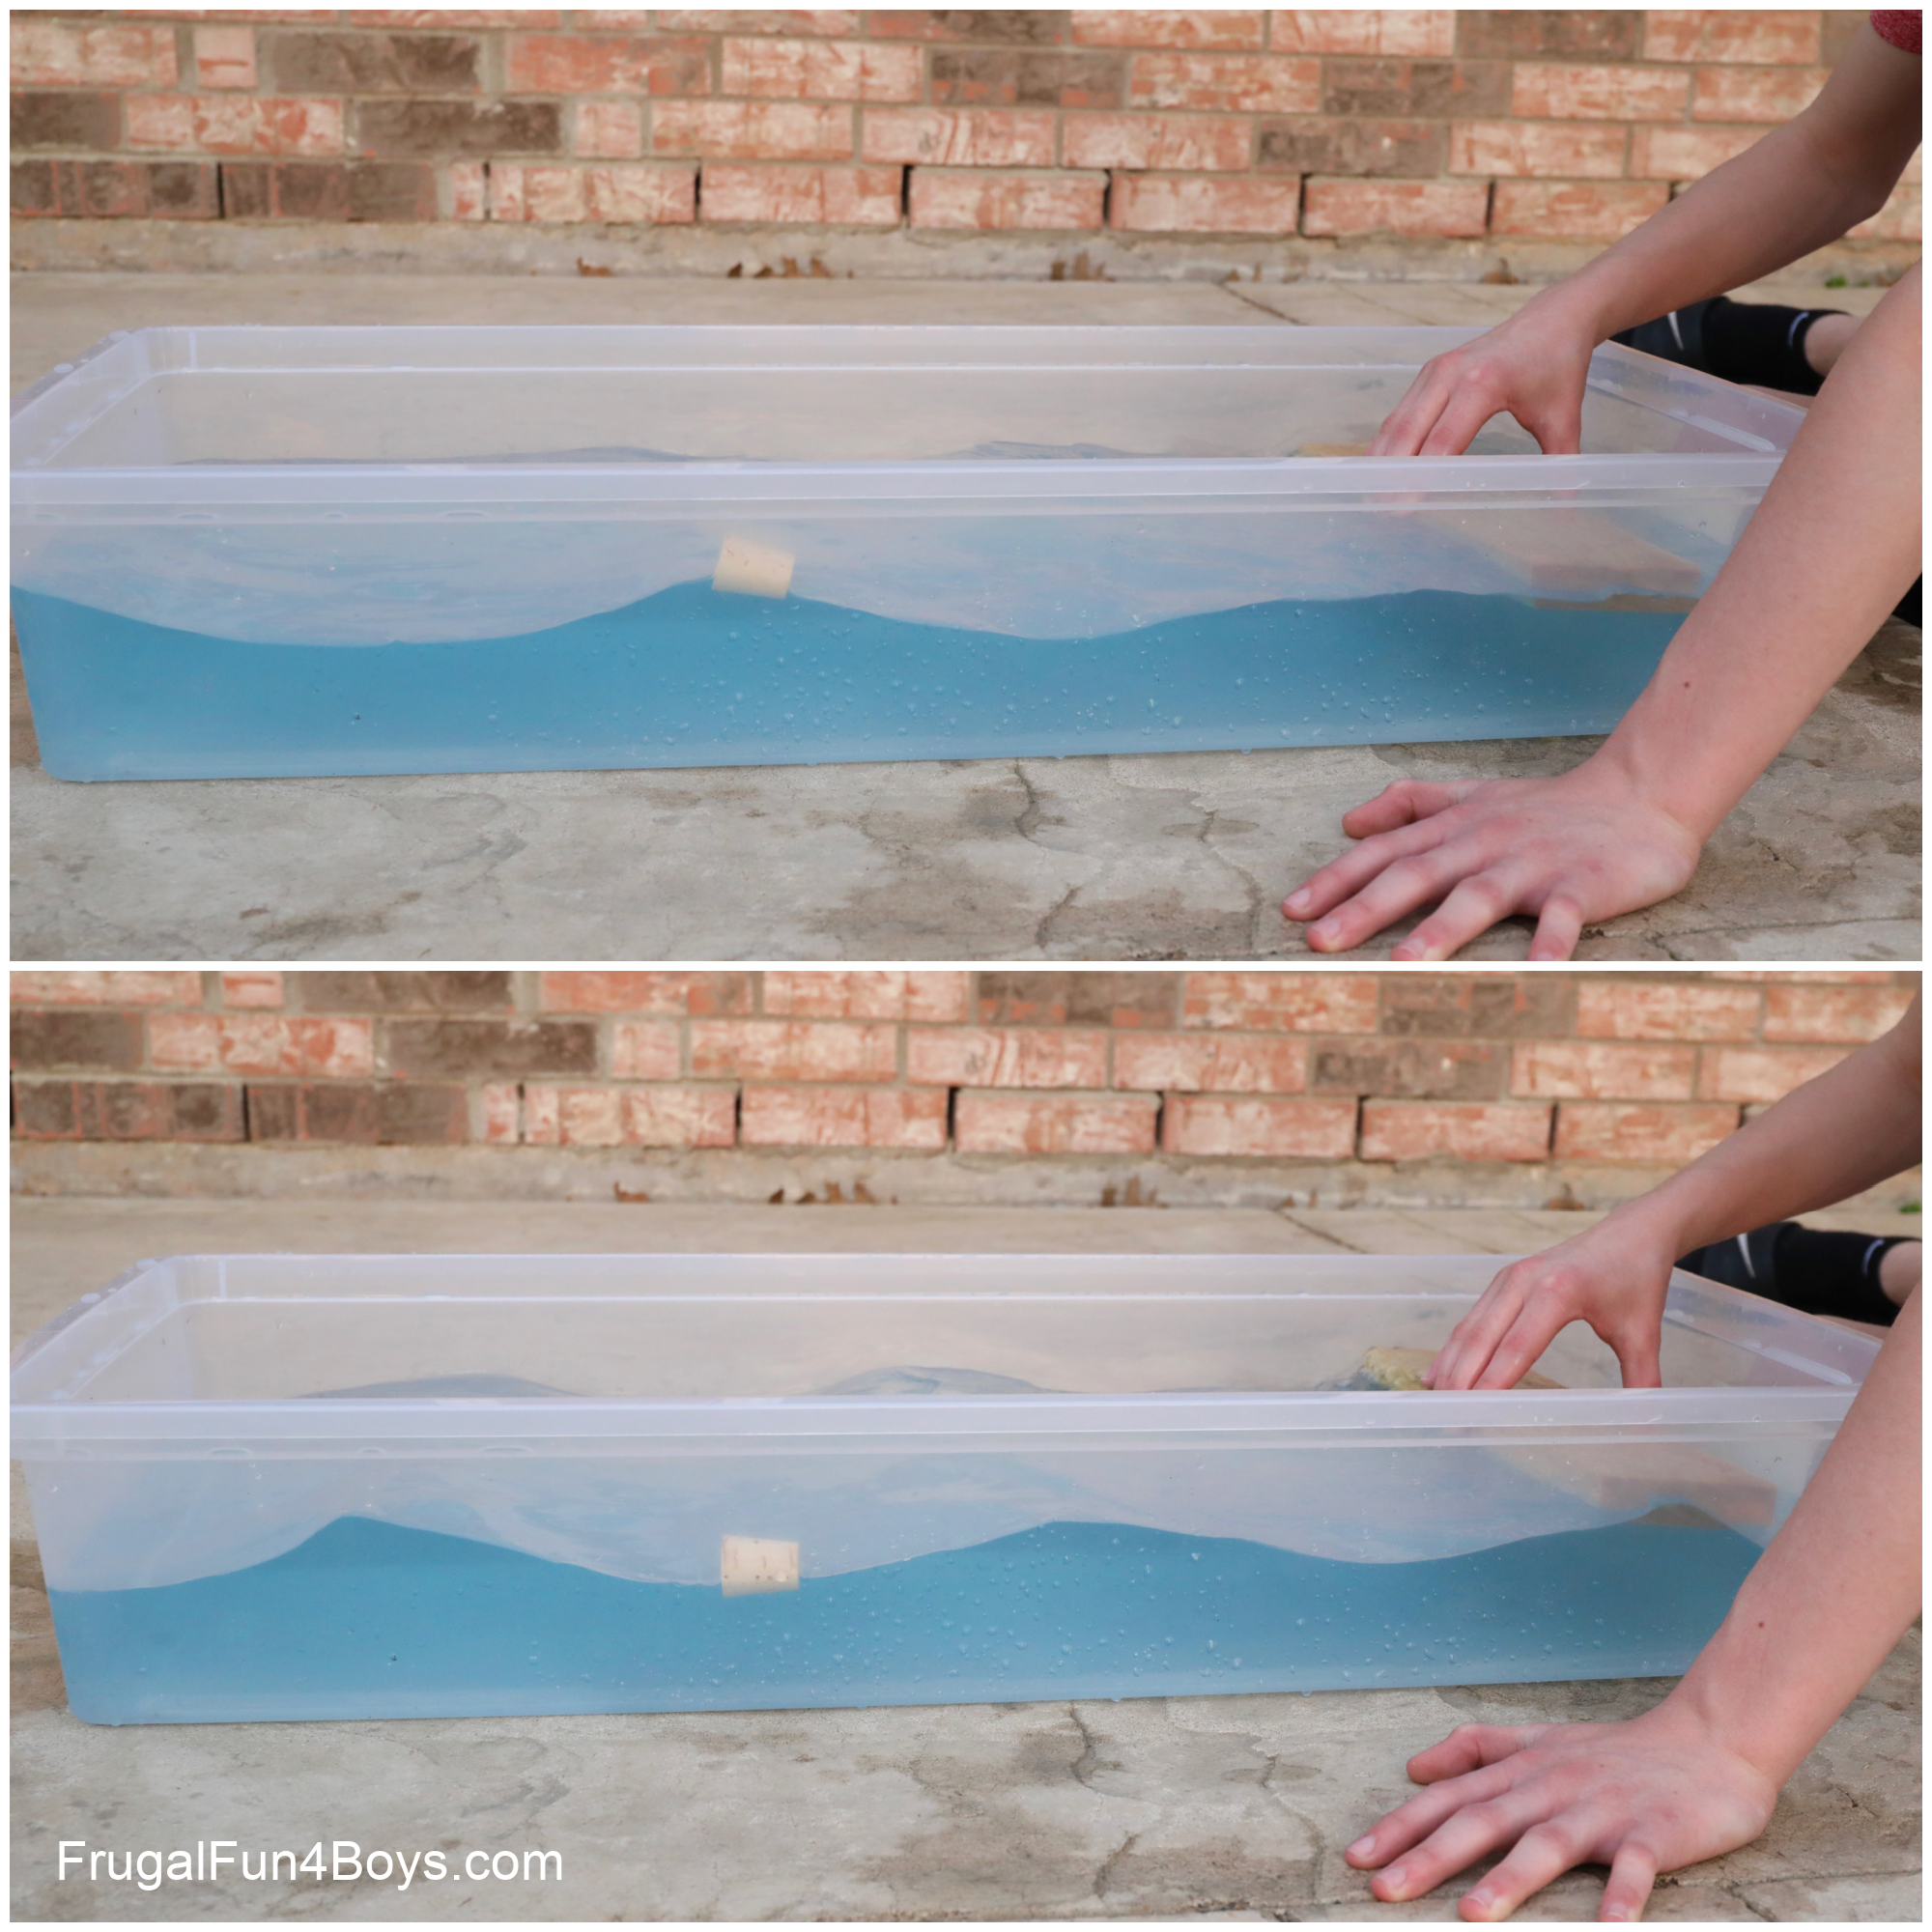
Lay your board in the water at one end of the tub, flat side down. Make waves by moving the board up and down. Watch the motion of the cork. It should mainly stay in place, while riding the waves up and down!
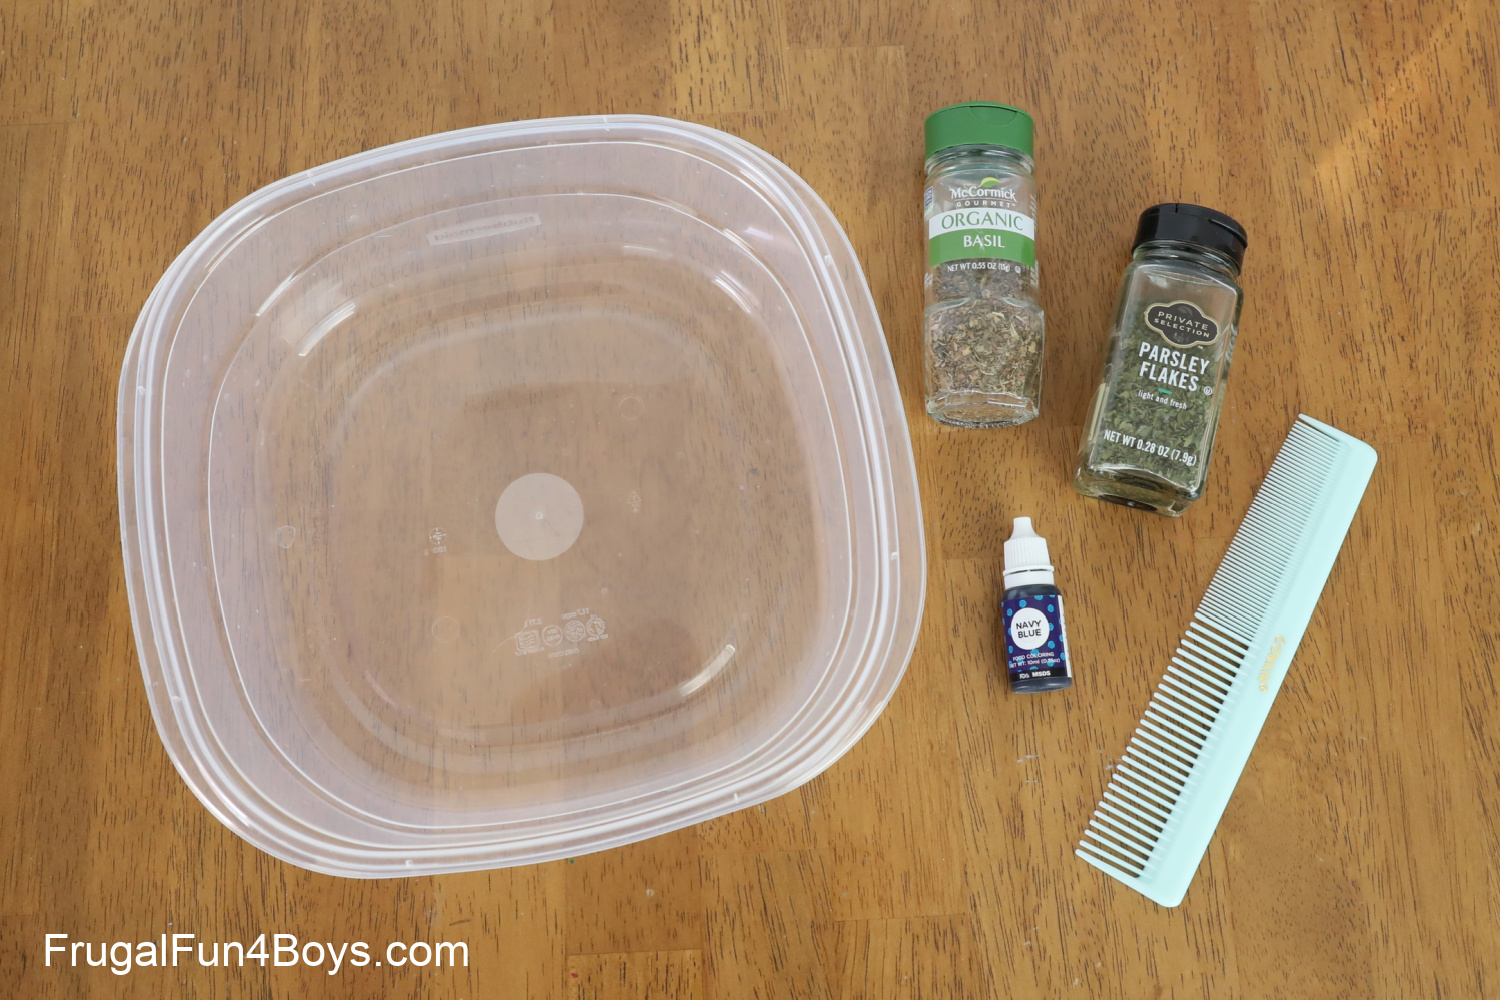
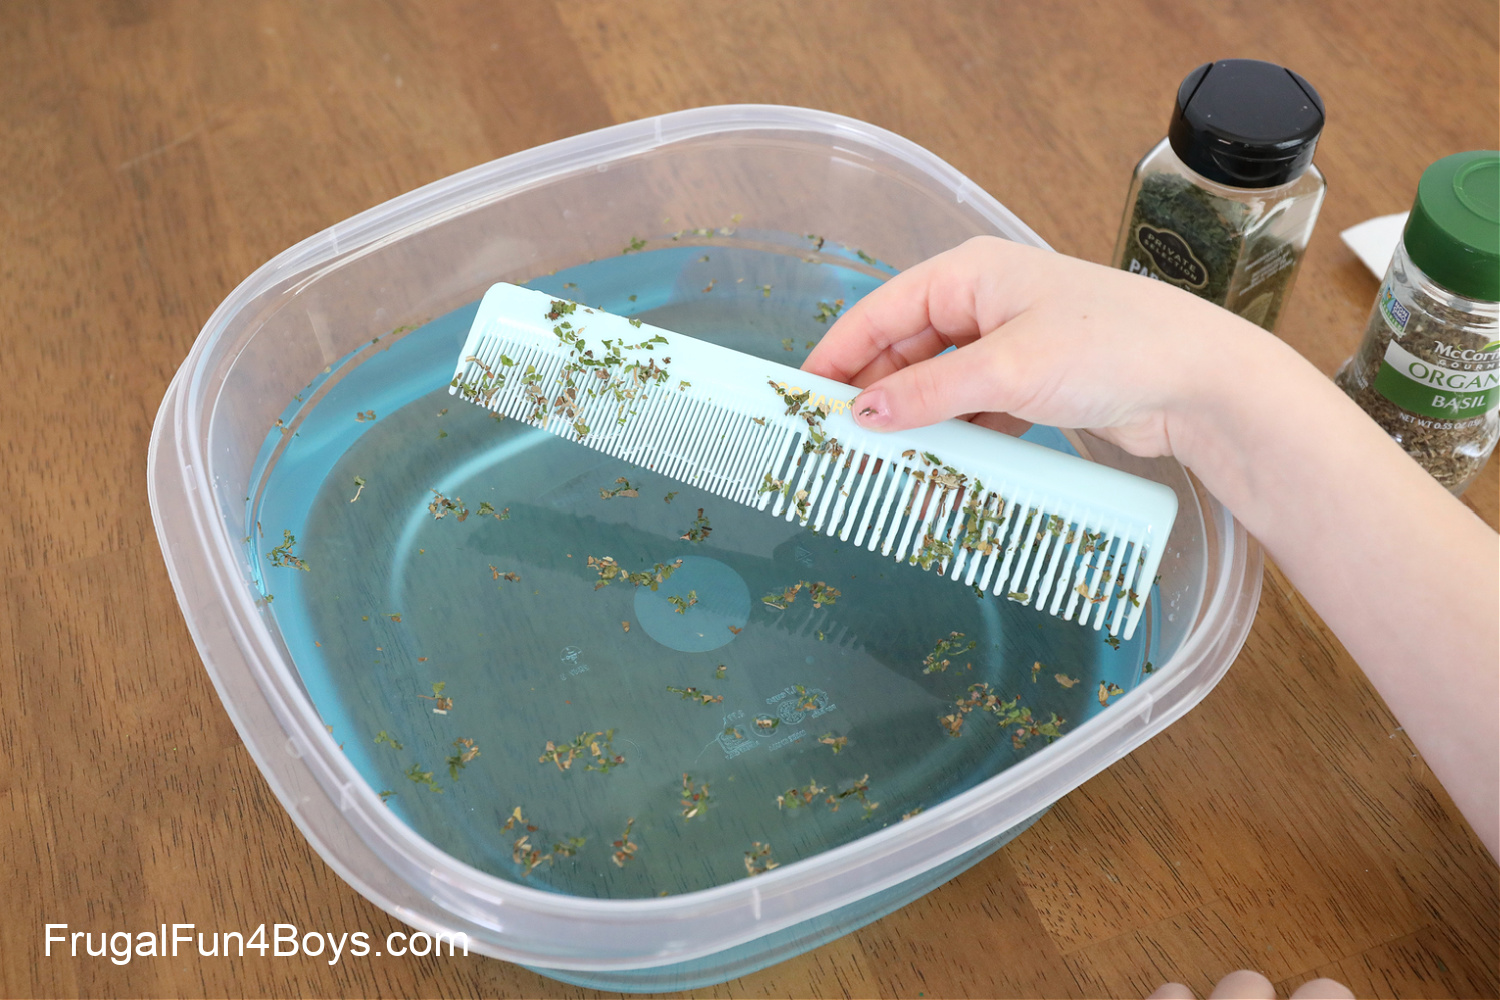
Experiment #4: How Does a Baleen Whale Eat?
Use a fine-toothed comb to quickly and easily demonstrate how baleen whales strain out krill from a large mouthful of ocean water. Instead of teeth, baleen whales have baleen, which acts like a filtering system. Baleen is made of keratin (the same thing our fingernails are made of) and looks similar to a comb or brush with bristles.
Supplies Needed:
- A small container
- A comb
- Water
- Dried spices – we used parsley and basil
- A spoon
- Food coloring – optional
Fill your container about 2/3 full of water. Add a few drops of food coloring, if you want.
Then sprinkle some dried spices in the water.
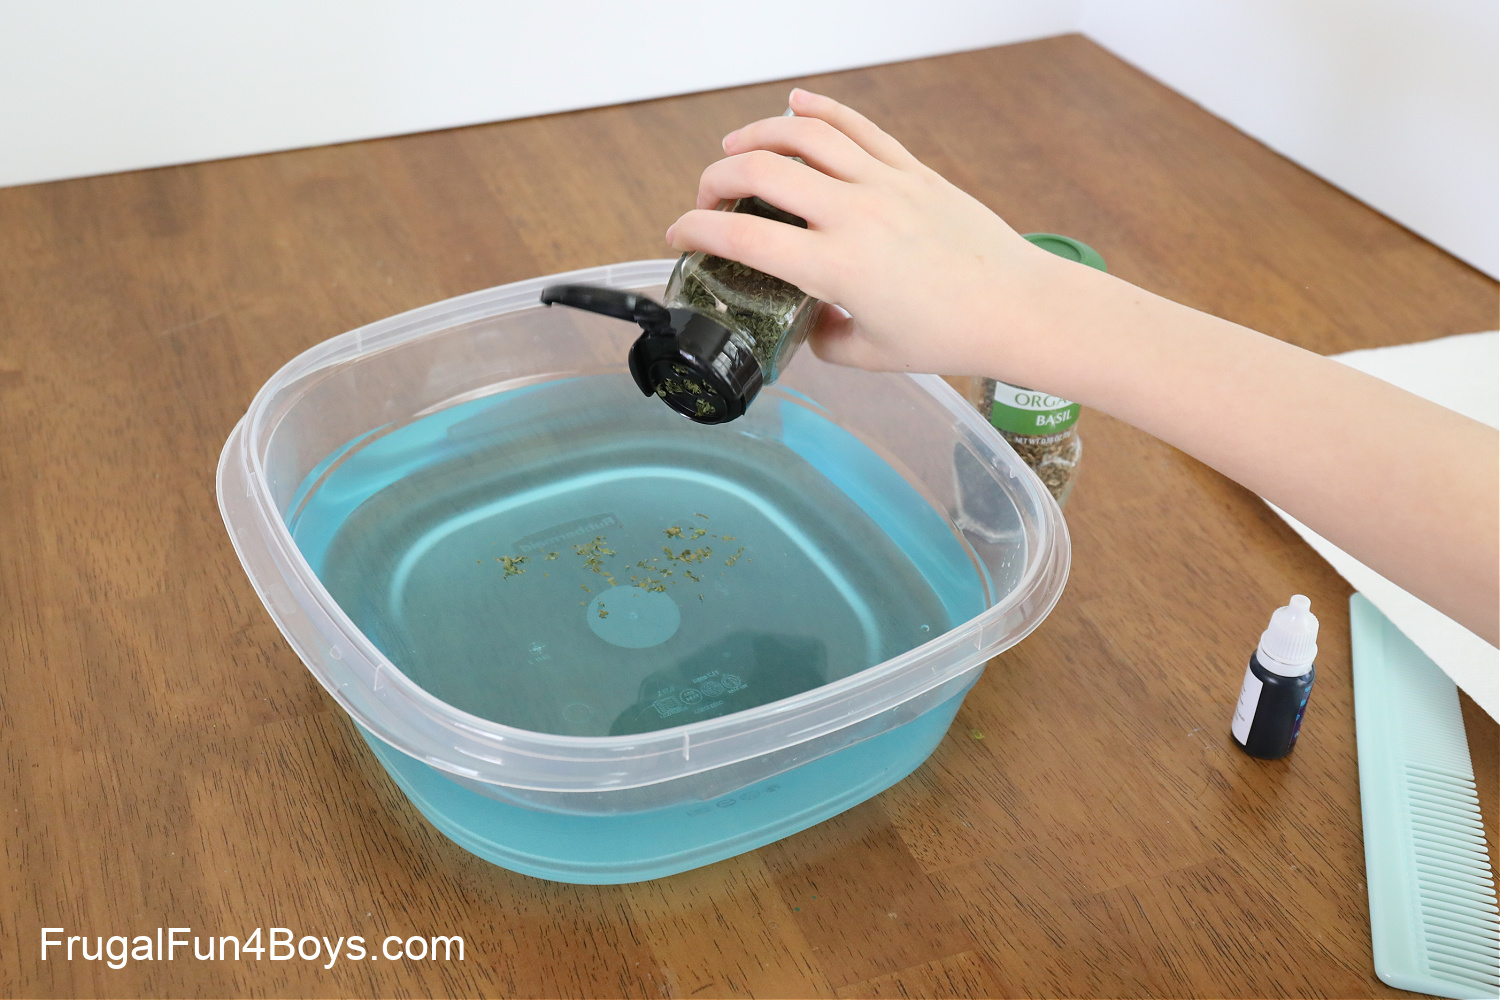
Stir up the water and spices. The run your comb through the water. It should catch the spices while letting the water run through.
A baleen whale, such as a humpback whale, eats by taking a huge gulp of sea water. The whale pushes the water back out, and the krill and plankton are left behind.
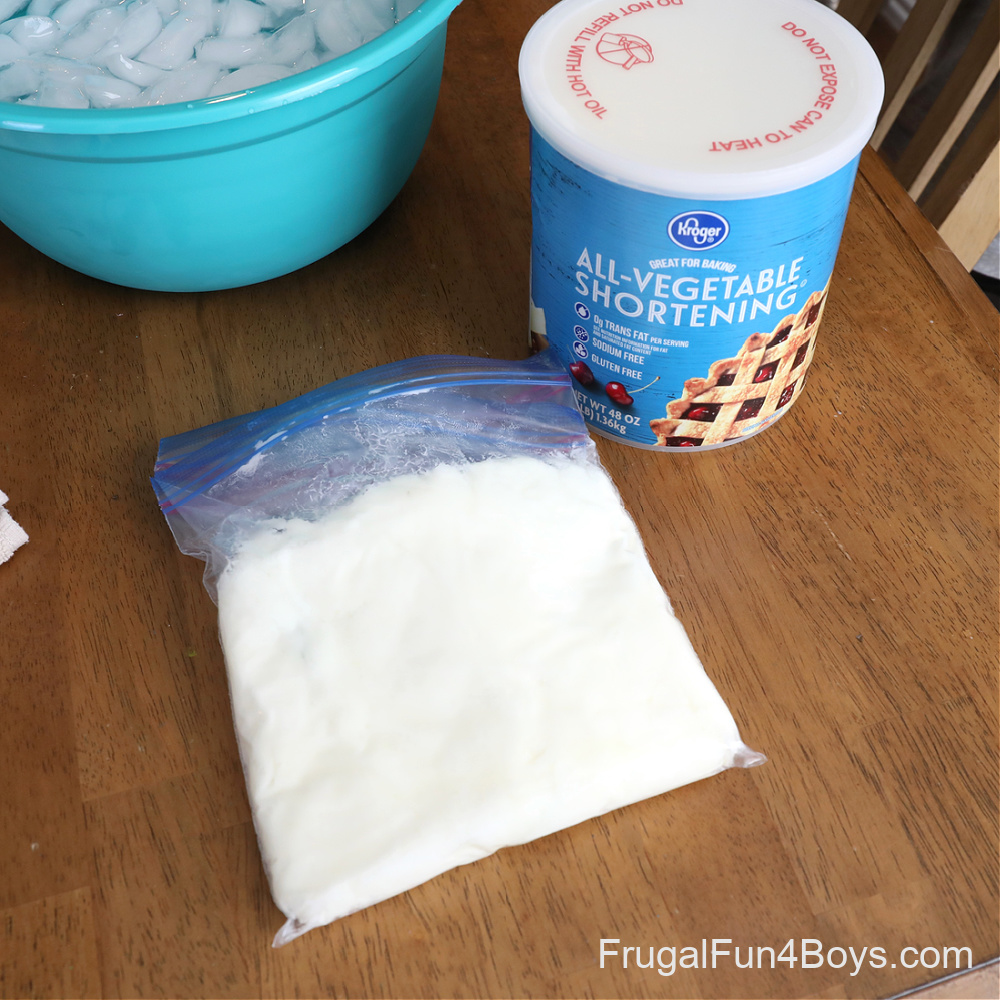
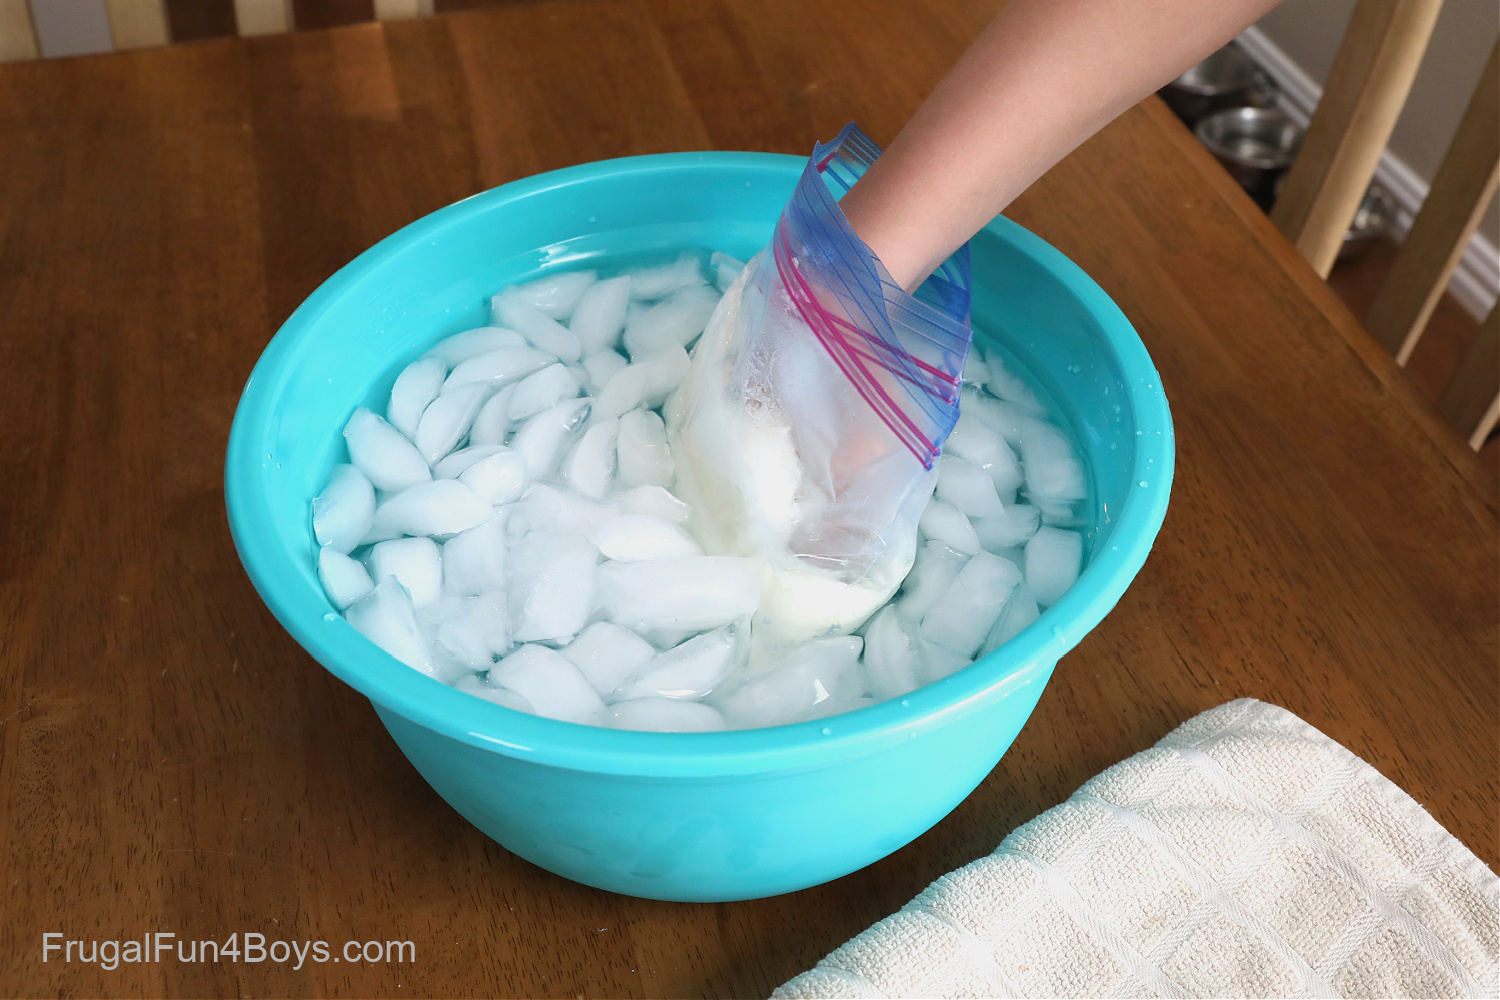
Experiment #5: How do Ocean Animals Stay Warm?
Marine animals that swim in cold waters keep warm with a layer of fat called blubber. How effective is blubber in keeping them warm? It’s very effective! In this experiment, we’ll use shortening (a saturated fat) to show how well fat keeps animals warm.
Supplies Needed:
- Shortening, such as Crisco or another brand
- Two quart-size plastic bags with a zipper
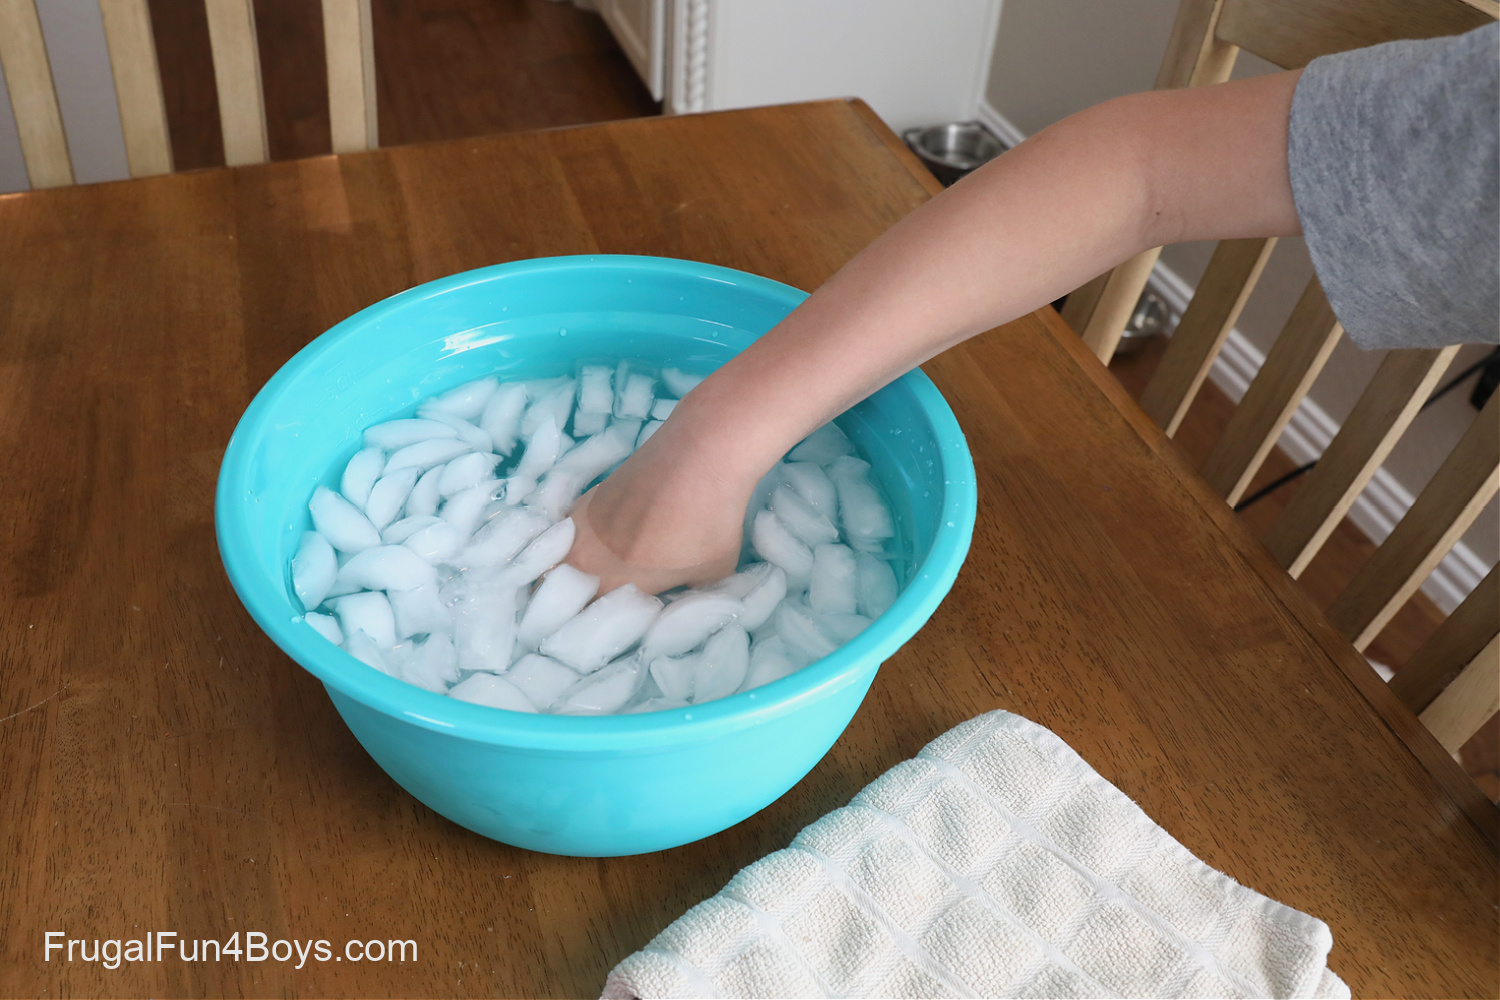
- A bowl of ice water
Make a blubber “glove” by filling a quart sized bag with a generous amount of shortening. Then use your hand to slide a second quart size bag into the bag full of shortening. The goal is to have a layer of shortening between the two bags.
Here’s how our glove looks. You can slide your hand in without getting shortening on it!
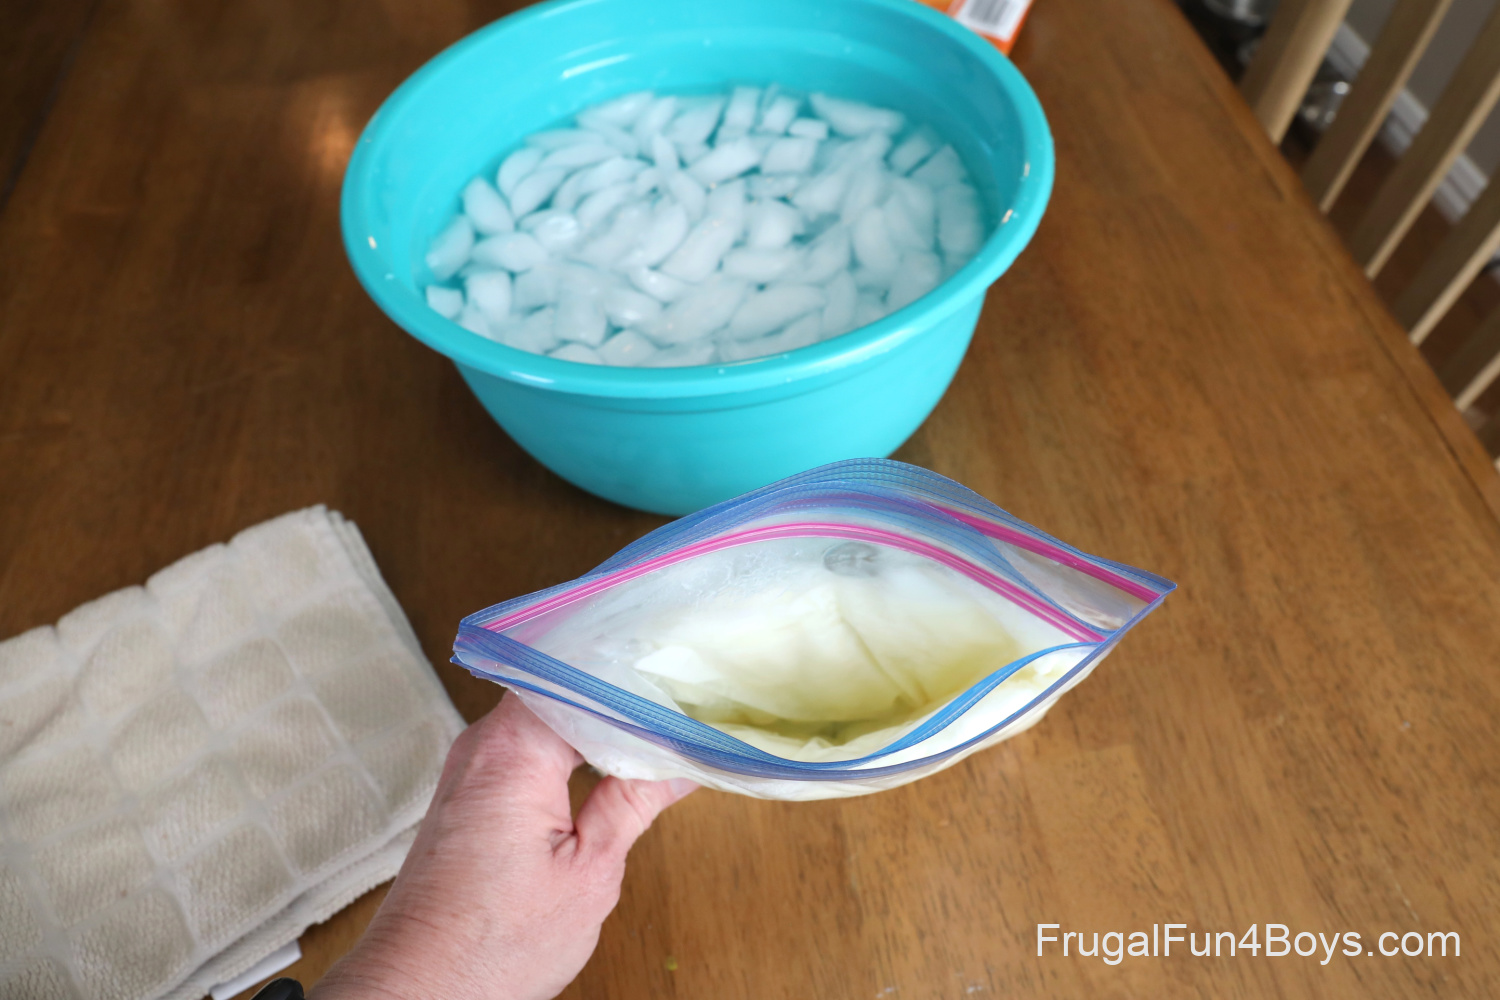
Have each student place their hand directly into a bowl of ice water. WOW! That’s cold!
Now put on the blubber glove and try the ice water again. You won’t be able to feel any cold at all! In fact, your hand will warm up the inside of the glove so that it is actually warm. Amazing!
That’s all for ocean science experiments, but we’ve got lots more science experiments to try!
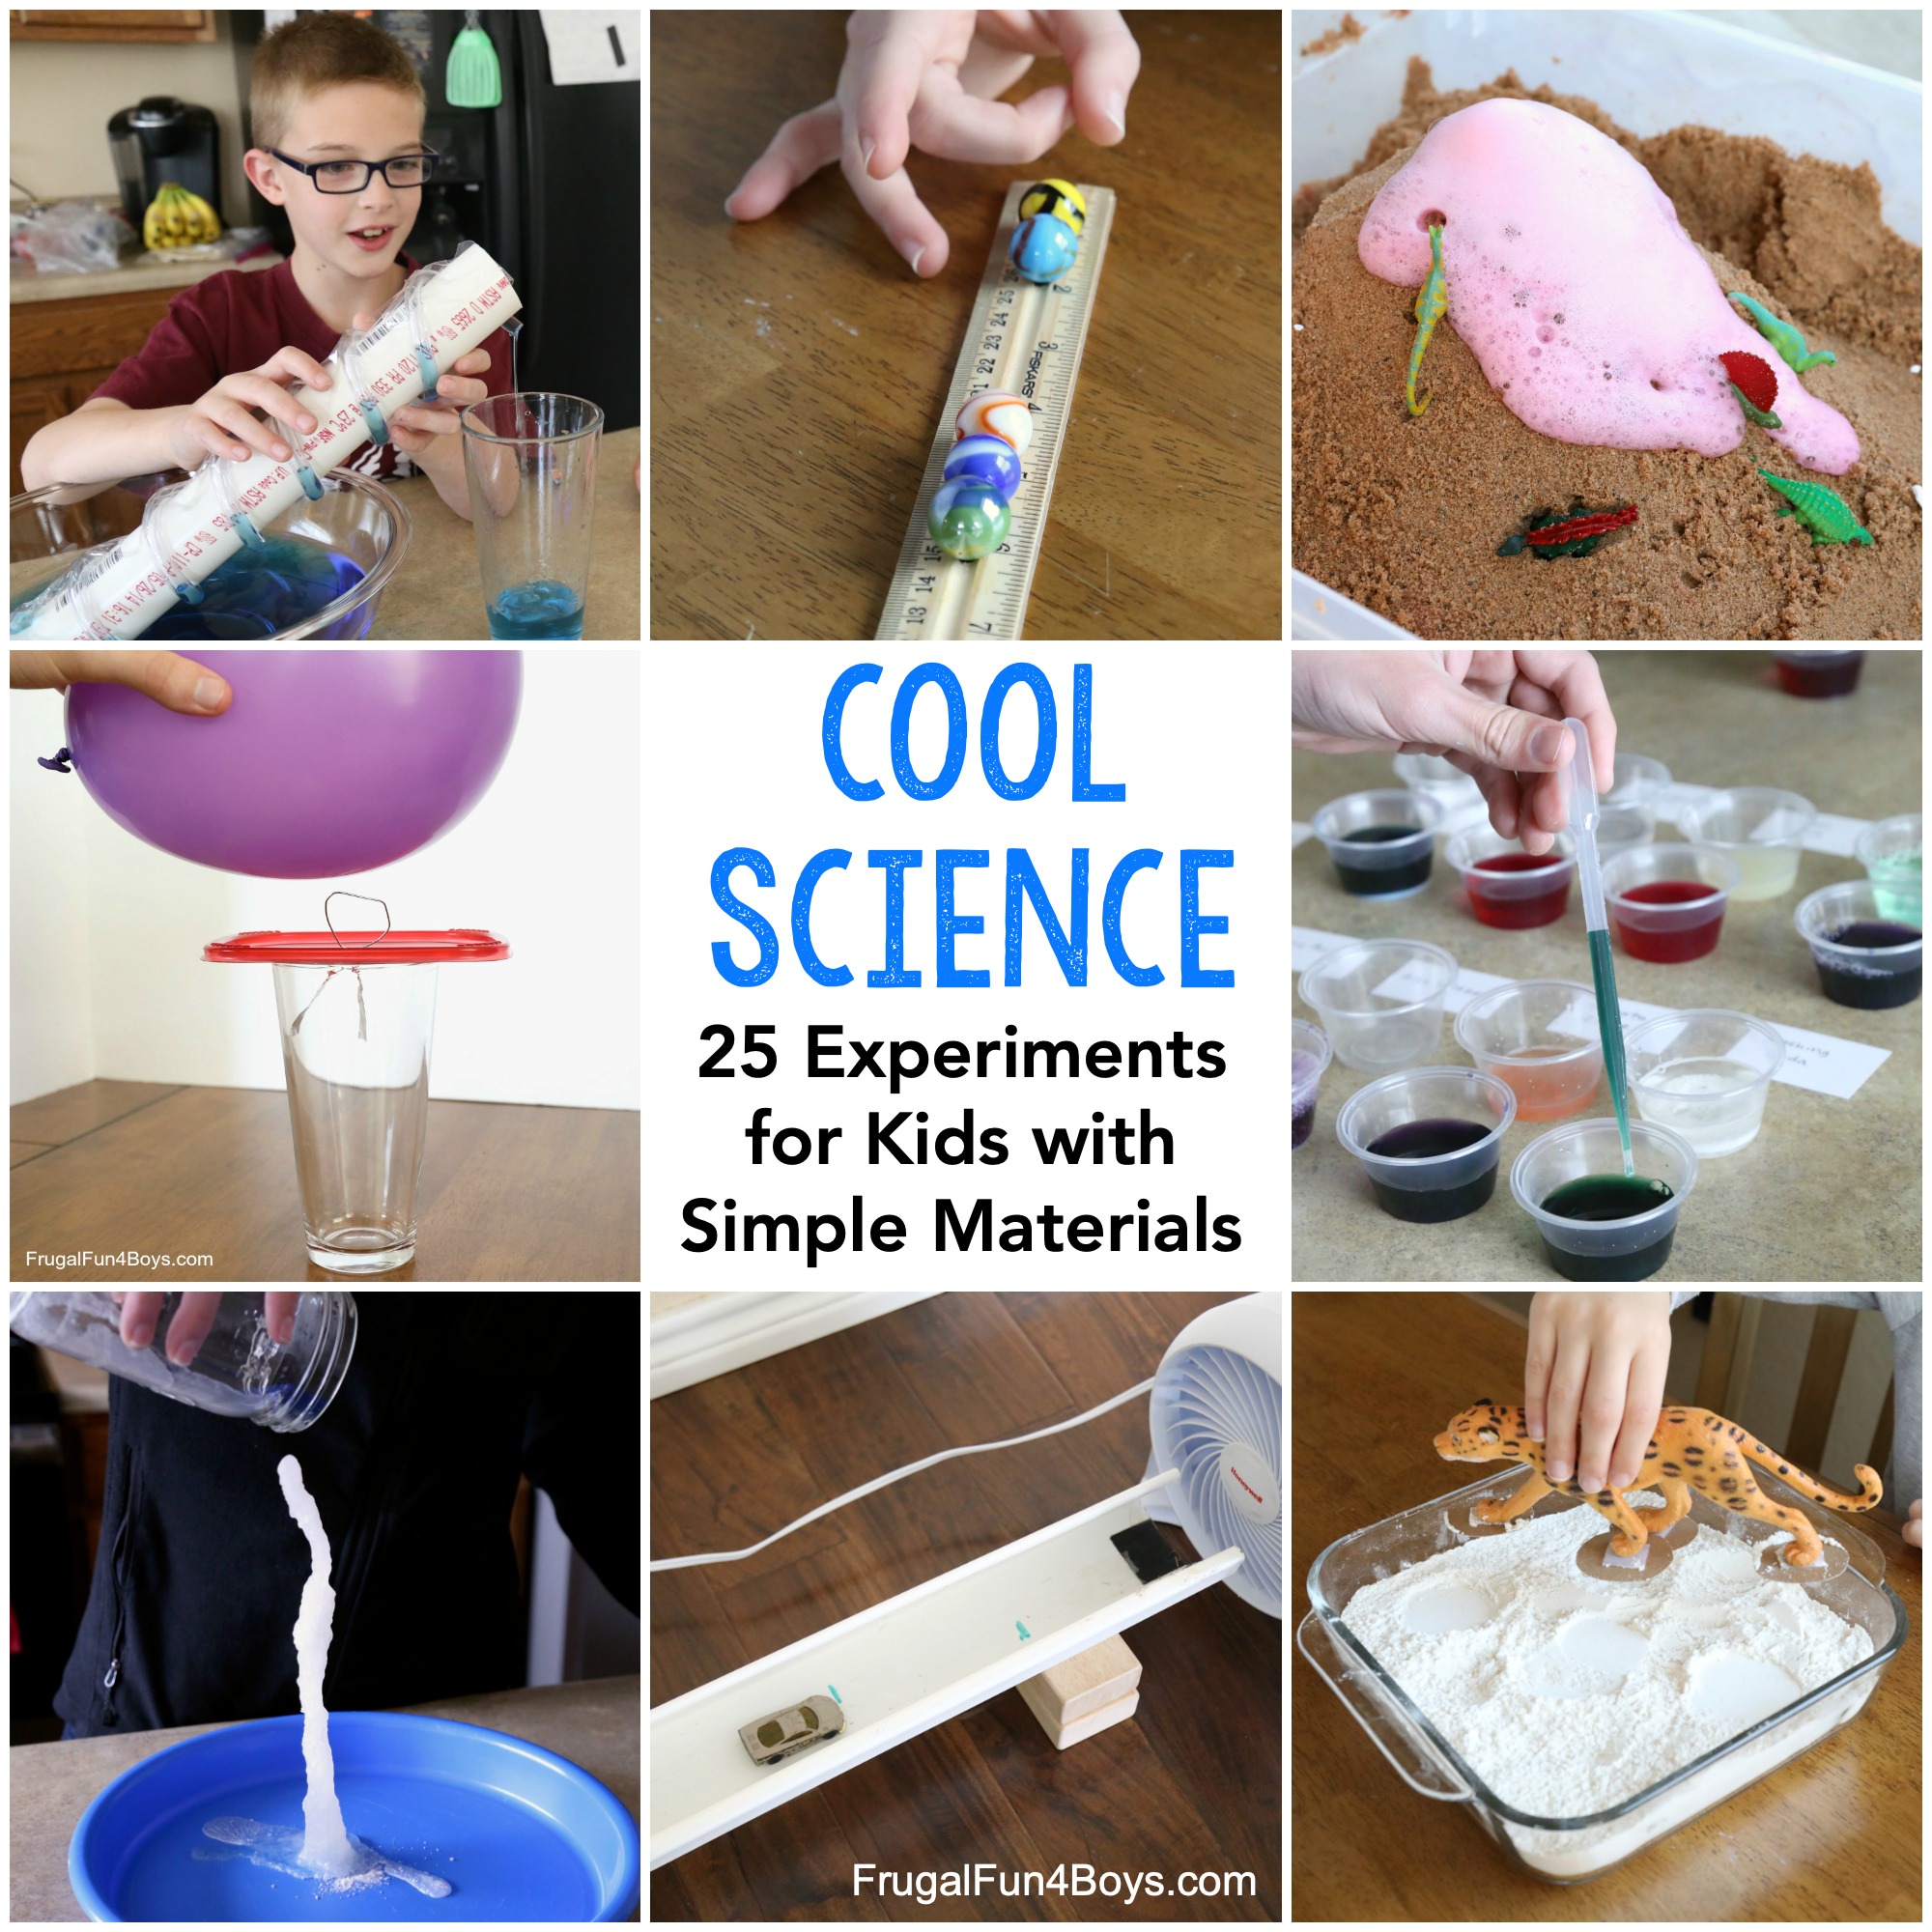
Head over to this collection of 25 Cool Science Experiments for Kids. There are eruptions, chemical reactions, force and motion experiments, and more.
1 Comments
Vickie Jun 20, 2024
We had a blast doing the "how ocean animals stay warm" experiment. The kids wanted to tray other insulating materials also. Messy, but fun and a good learning activity!
Post a Comment