
Are you familiar with LEGO Great Ball Contraptions? We love watching videos of Great Ball Contraptions on YouTube. A Great Ball Contraption (GBC) is built from various LEGO modules that work together to create a huge marble run. But the balls don’t just run under the power of gravity… GBC modules use motors to lift balls, hand balls off, etc. It’s like a giant Rube Goldberg machine!
We love building LEGO marble runs, like this Epic LEGO Marble Run. I’ve been wanting to build a marble run in the style of a great ball contraption with an elevator element. But I also wanted to use fairly common pieces and to keep the project realistic for kids to build. If you do a quick search, you’ll quickly realize that most GBC’s use a large quantity of special bricks and motors.
For this beginner LEGO Ball Contraption, you’ll need about 78 Technic track links, which you can easily order if needed. Other than that, you should be able to use mostly basic bricks and a few Technic elements.
At the bottom of this post, I’ve included links to the key bricks you’ll need.
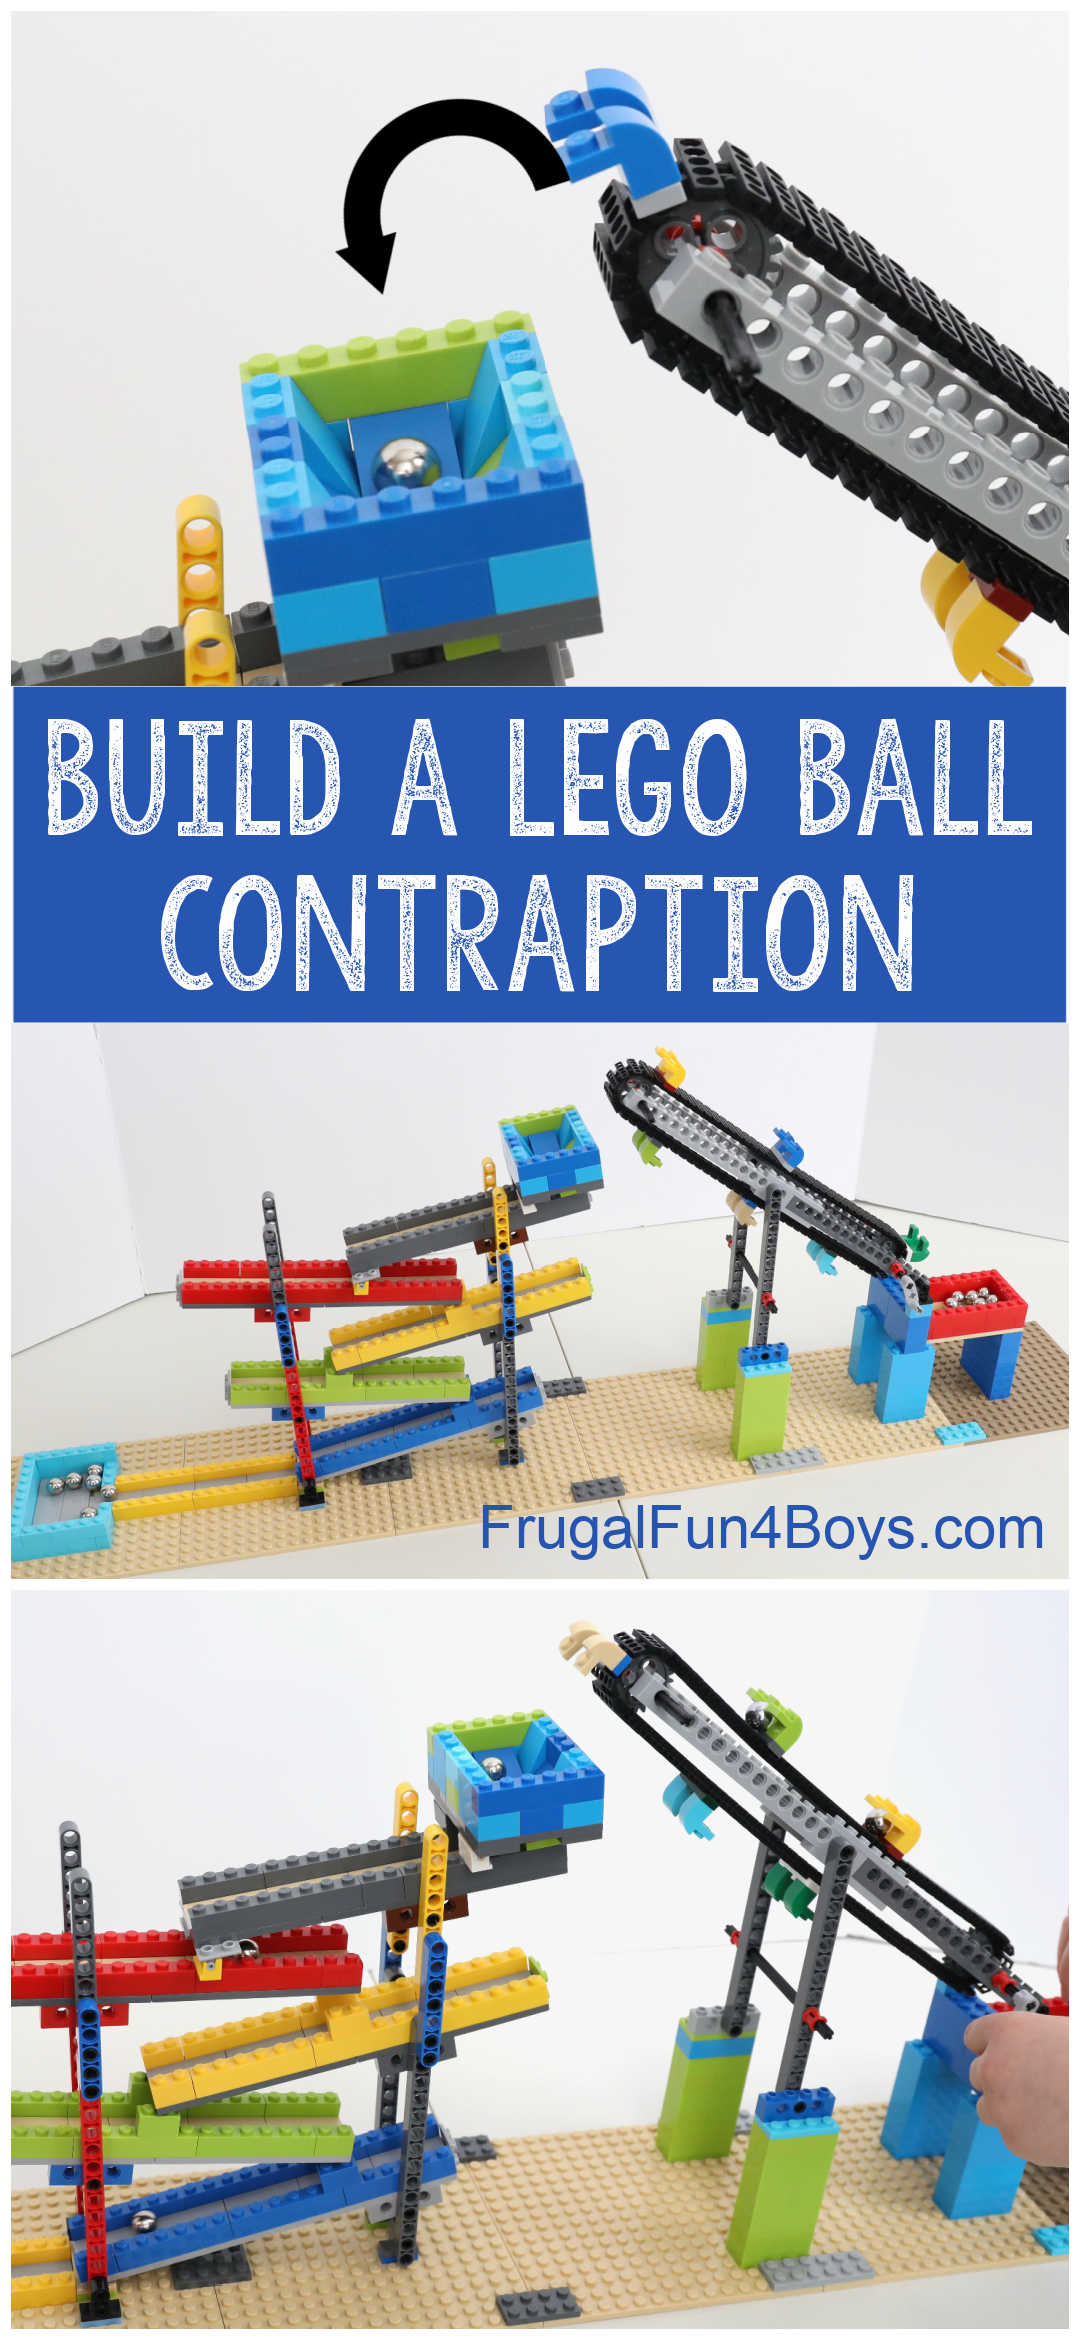
How does the LEGO ball contraption work?
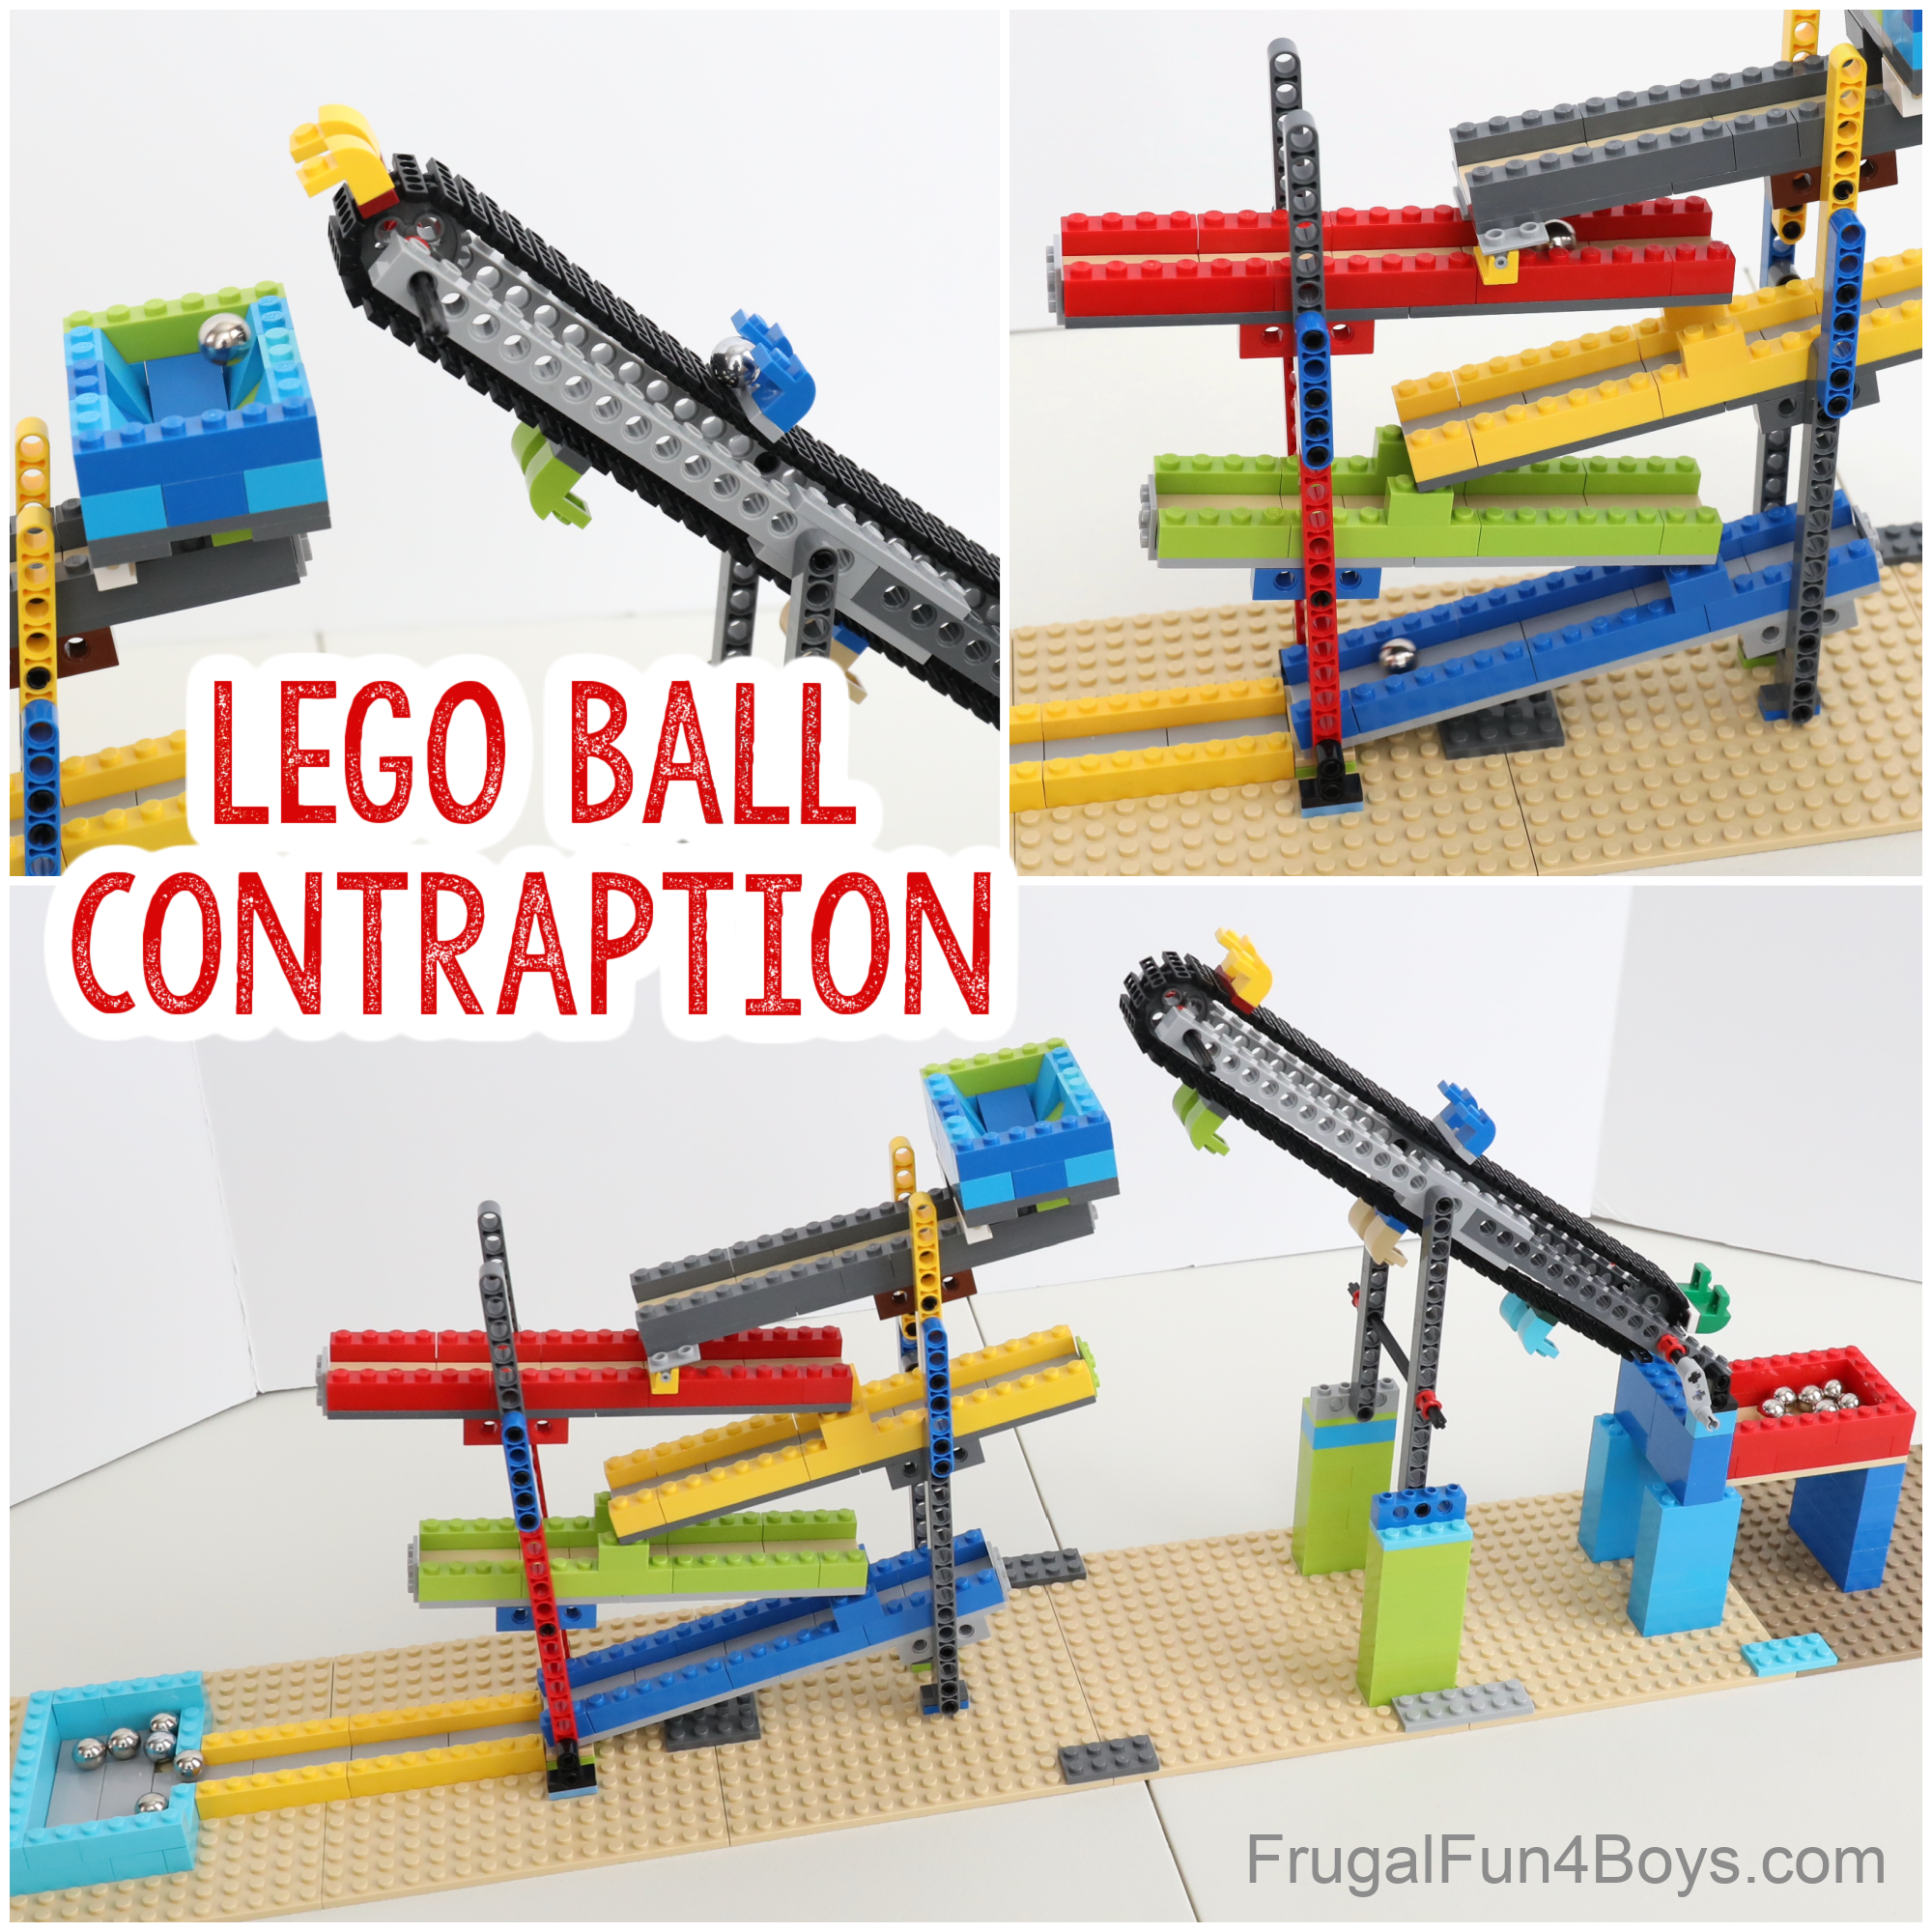
We have it going from right to left which may seem funny, but I built it from bottom to top, so I started on the left side.
The balls must be loaded into the conveyor belt elevator by hand. Then you turn the crank to lift them up to the top. The conveyor belt dumps them into a hopper, and then they drop down onto a series of back-and-forth ramps. Then they roll into a bin at the very bottom. Lots of fun!

Watch the video demonstration!
Click the play button to see our LEGO ball contraption in action.
What marbles should I use?
We used steel marbles that came in our Q-BA Maze set. They’re the perfect size for LEGO bricks! You can purchase them here: Q-BA Marble Refill.
The steel Q-BA marbles are smaller than most glass marbles. For LEGO projects, it’s best if the marbles can fit through a channel that is 2 studs wide. Most marbles and the solid color plastic LEGO balls require 3 studs. The LEGO basketballs or soccer balls will roll through a 2-stud channel, but they are hard to find. You can order LEGO basketballs on Brick Link. They definitely cost more per piece than the bag of Q-BA marbles, but the benefit is that they are plastic and lighter weight, if that matters to you.
We found it easiest to build the back-and-forth ramps first, and then set the conveyor belt elevator up at the right height.
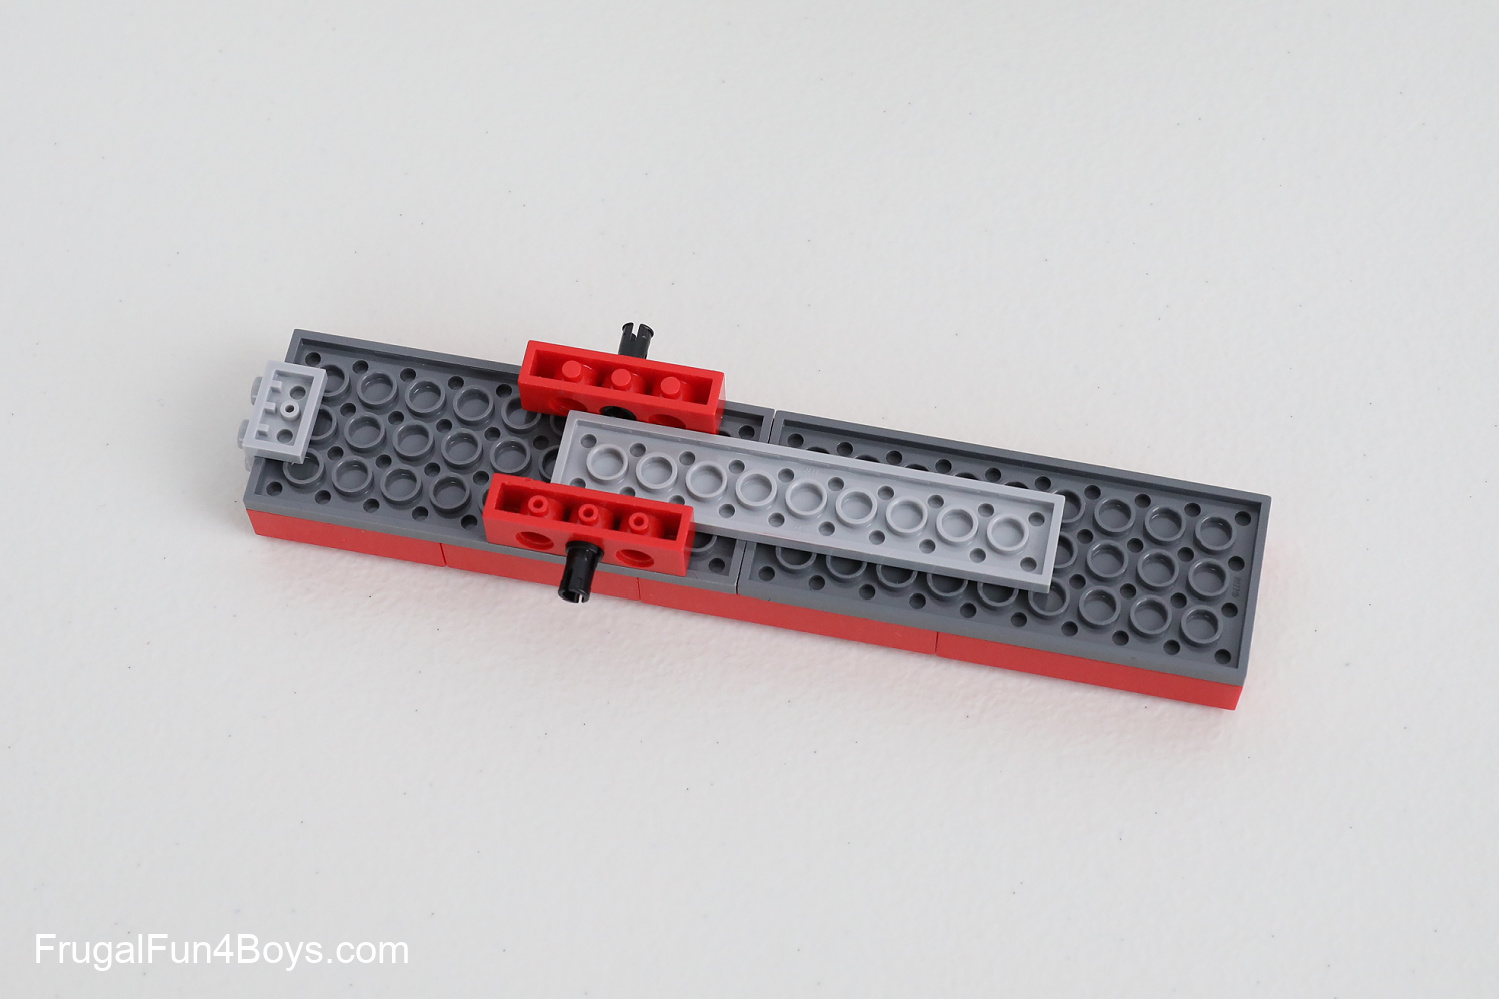
Here’s how the ramps are constructed. Each one is made of plates that are 4 studs wide. The center of the ramp is a row of 2 x 4 tiles. You can make the ramps tilt by attaching a Technic brick (the bricks with holes) to the underside of the ramp. Insert a pin in the Technic brick, and then use this pin to attach the ramp to the frame of the marble run.
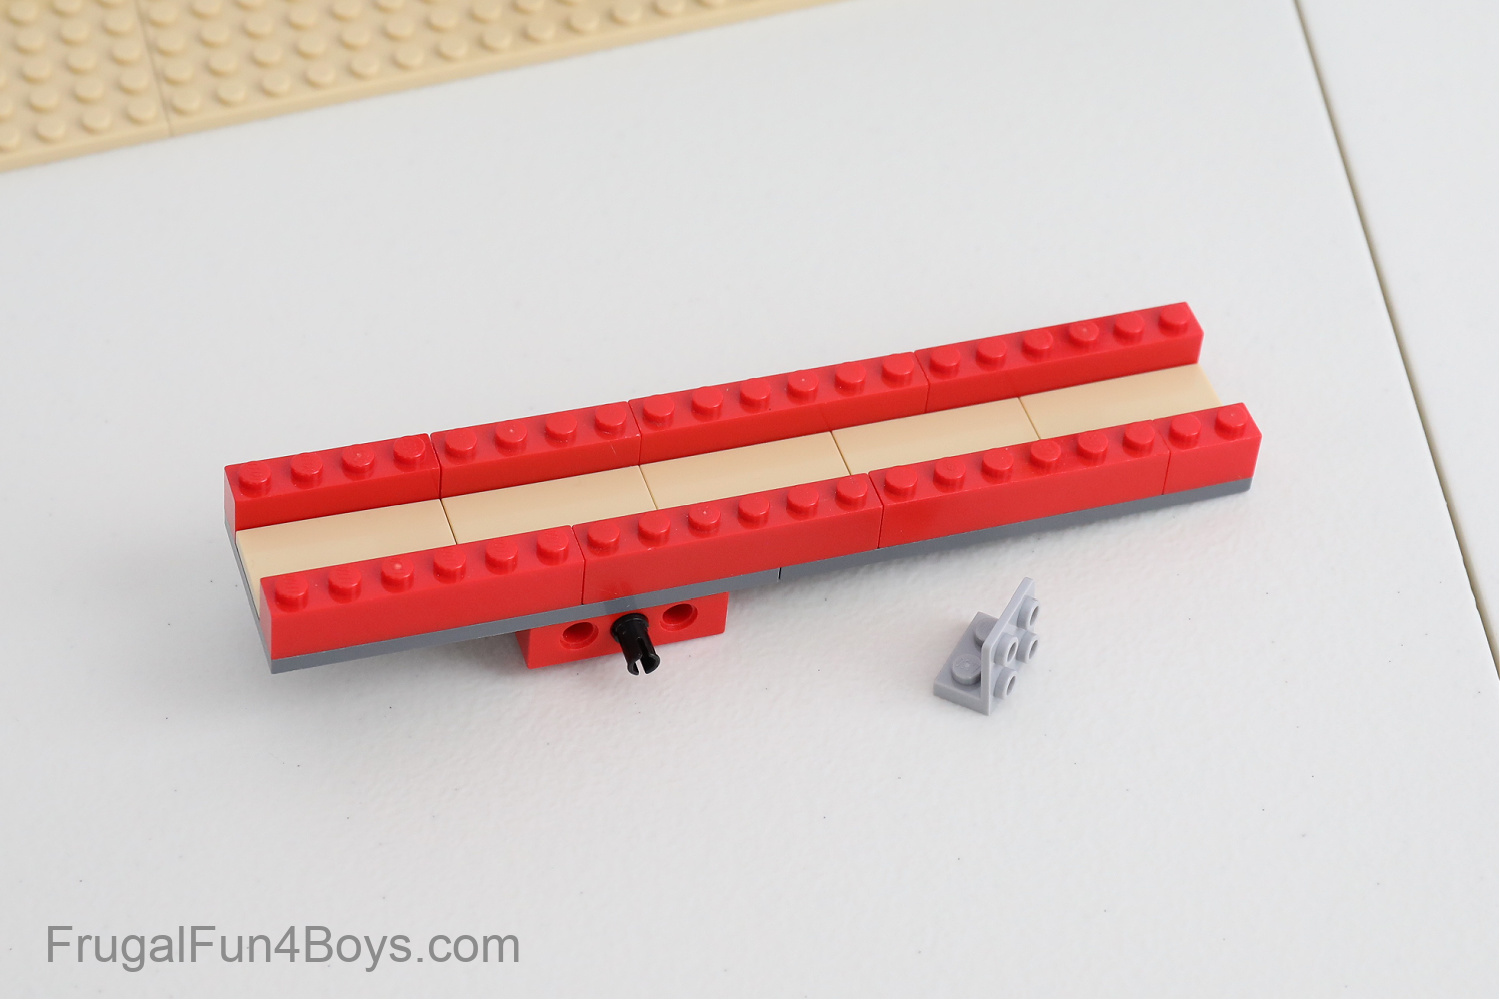
This is what the underside of the ramp looks like. Make your ramps a good length by attaching two plates together. This ramp is 20 studs long in total.
Use a 1 x 2 – 2 x 2 bracket (inverted) to make a bumper for the marbles.
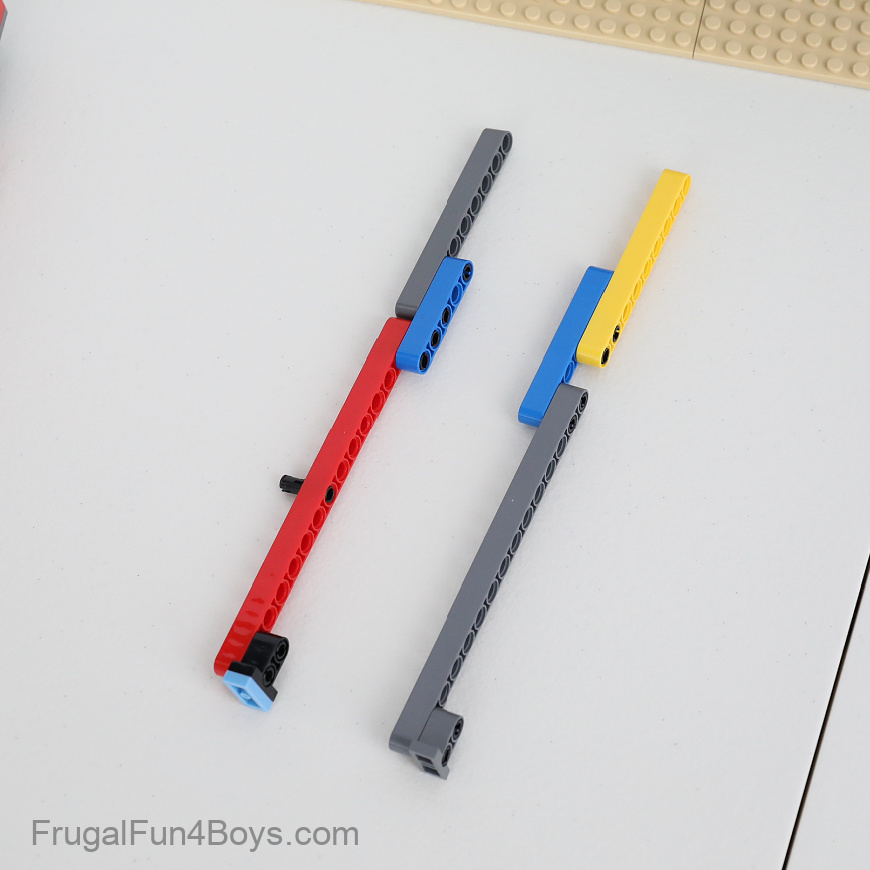
Build the support structure using Technic liftarms. It’s a really simple design!
I used built two of the structure on the left, and two of the structure on the right.
The piece on the bottom that attaches the liftarms to the base plates is a 1 x 2 x 1 2/3 Technic pin connector plate.
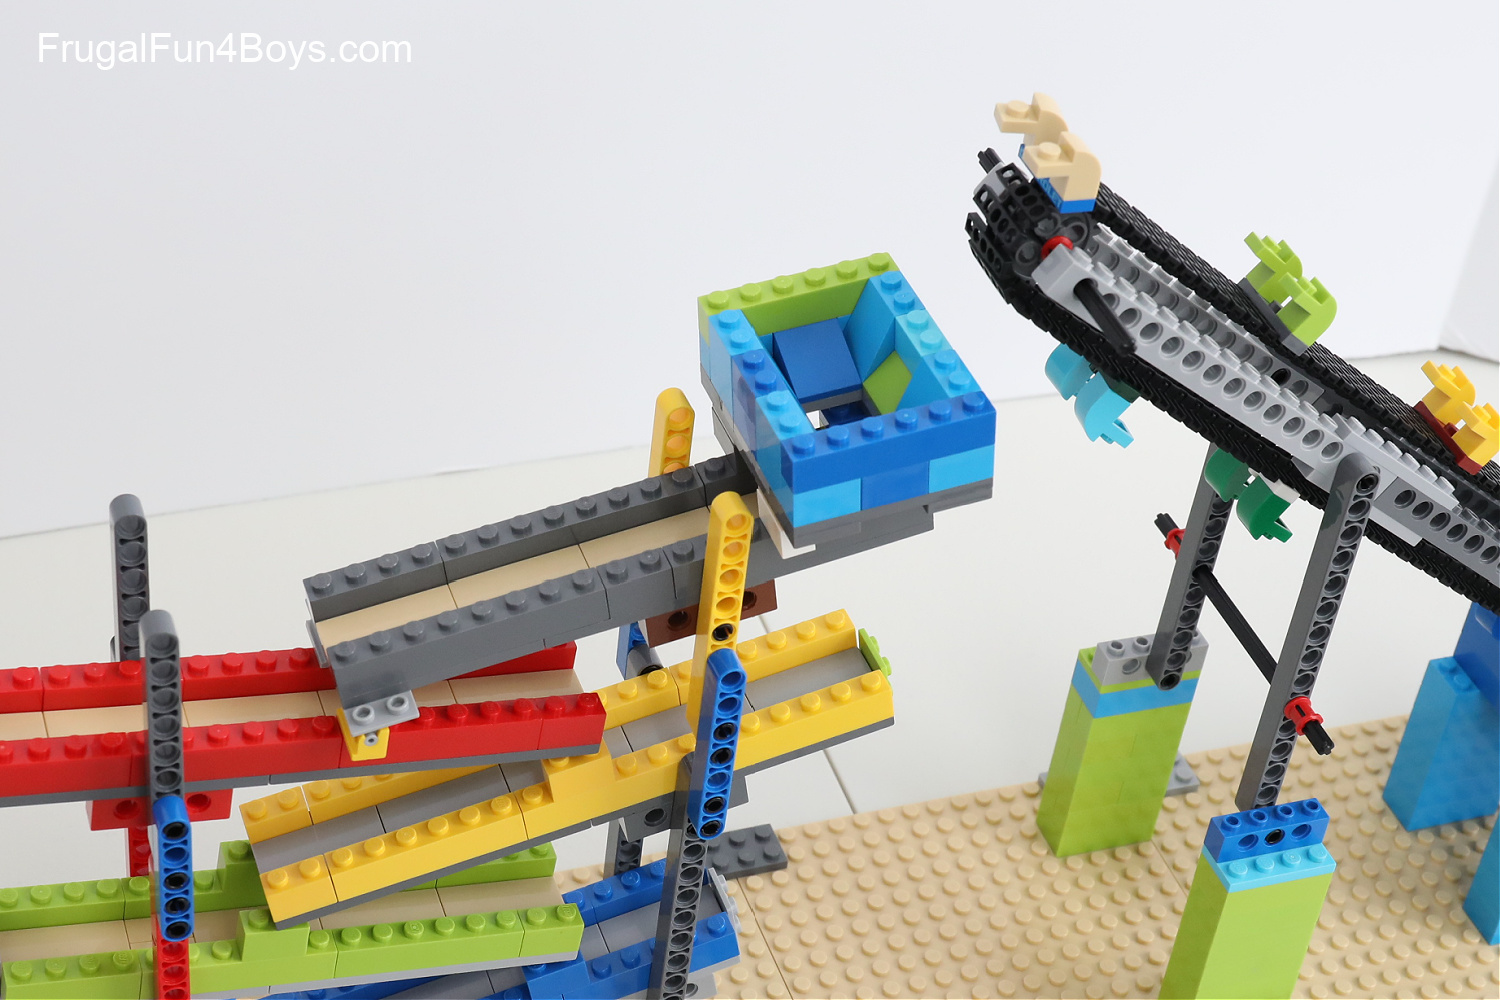
Here’s a close-up of the back and forth ramp. The supports on the left are holding up the red and lime green ramps. The supports on the right are holding up the dark gray, yellow, and blue ramps. Each ramp is tilted and is just resting on the one below it. I placed two 1 x 2 bricks on each ramp so that they support the ramp above.

Build a Hopper to Catch the Ball
It’s MUCH easier to transfer the balls from the conveyor belt to the ramps if you build a hopper for them to land in.
Attach plates together with a 2 x 2 hole in the center. Then add slope bricks to direct the ball toward the hole.
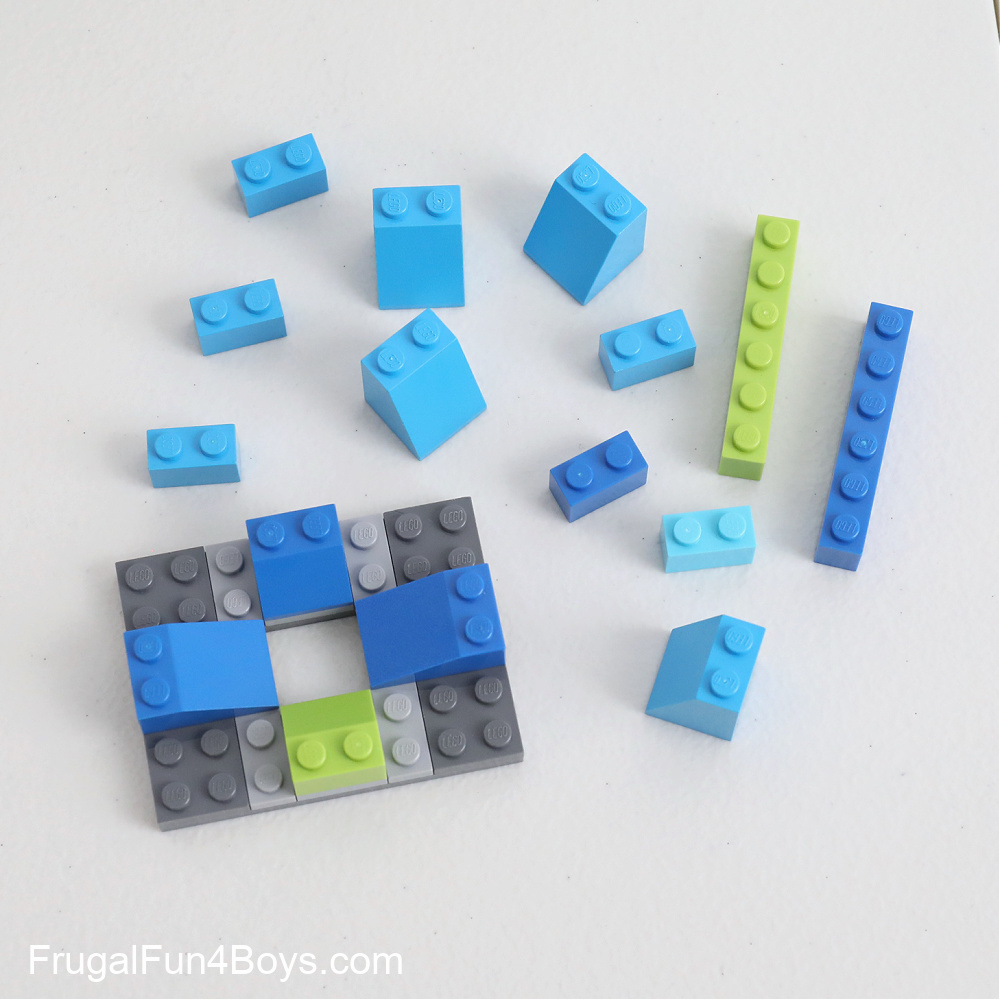
Then add more slope bricks and regular bricks.
The hopper is attached to the top ramp with two 1 x 2 hinge bricks. This allows the hopper to attach to the slanted ramp and still sit at the right angle.

The conveyor belt elevator has a 24-tooth Technic gear at each end. There is an axle running through the Technic bricks and the gear. I put a bush on each end to keep the axle in place. Then I added a handle.
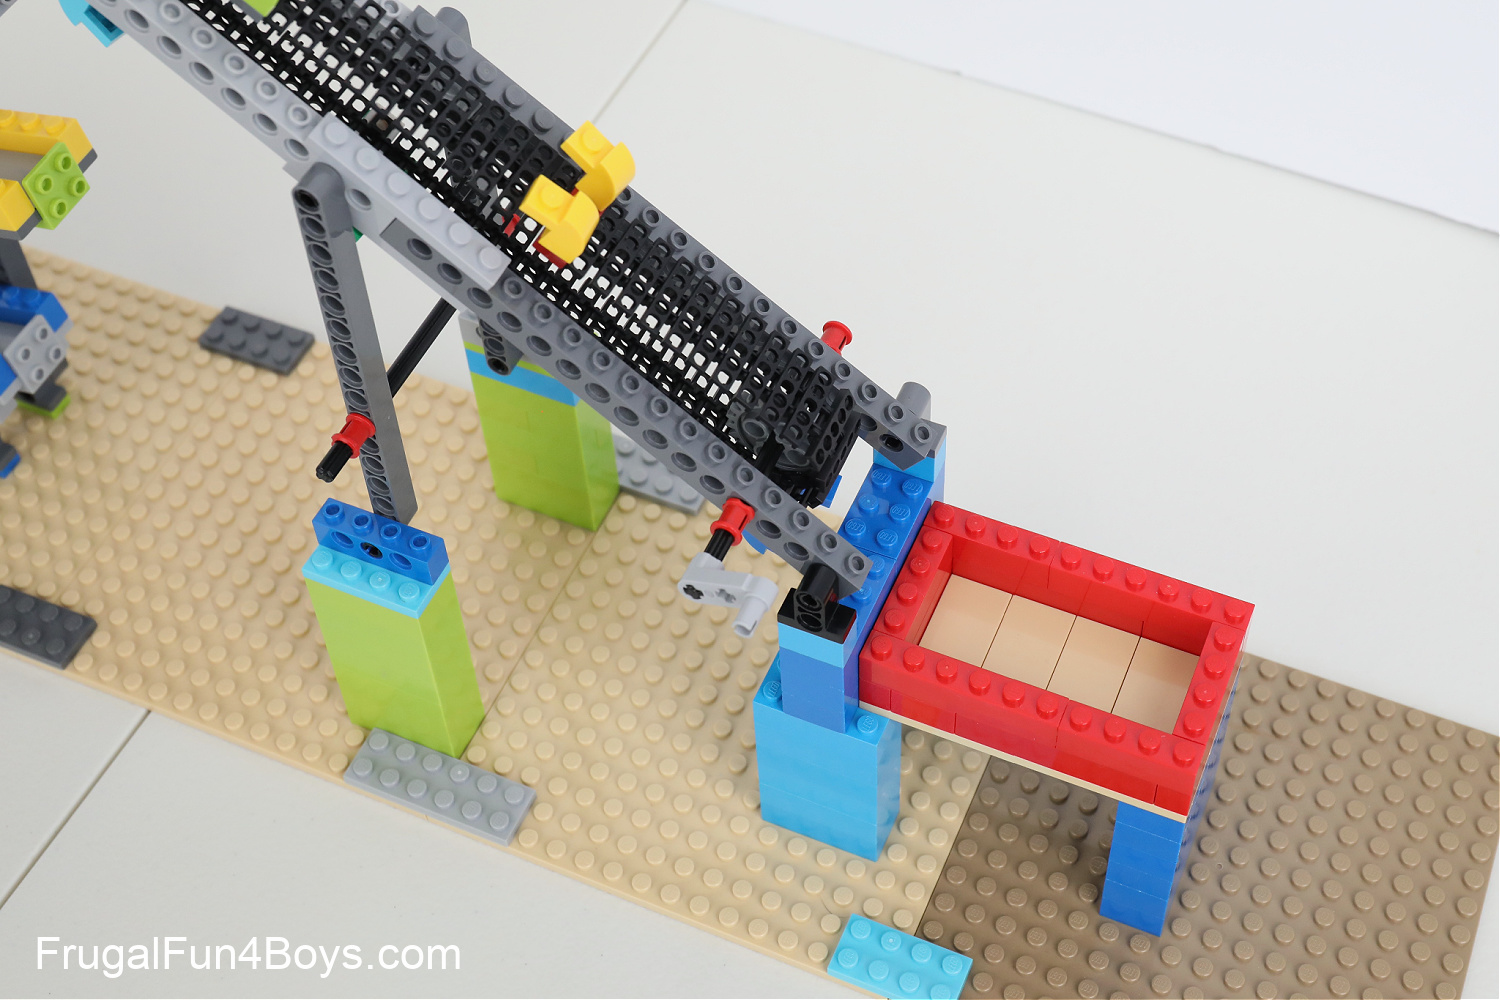
NOTE: We put a bin for the balls next to the conveyor belt, but the conveyor belt elevator does not scoop up the balls. If you want to scoop up balls, you’ll need a more complex design.
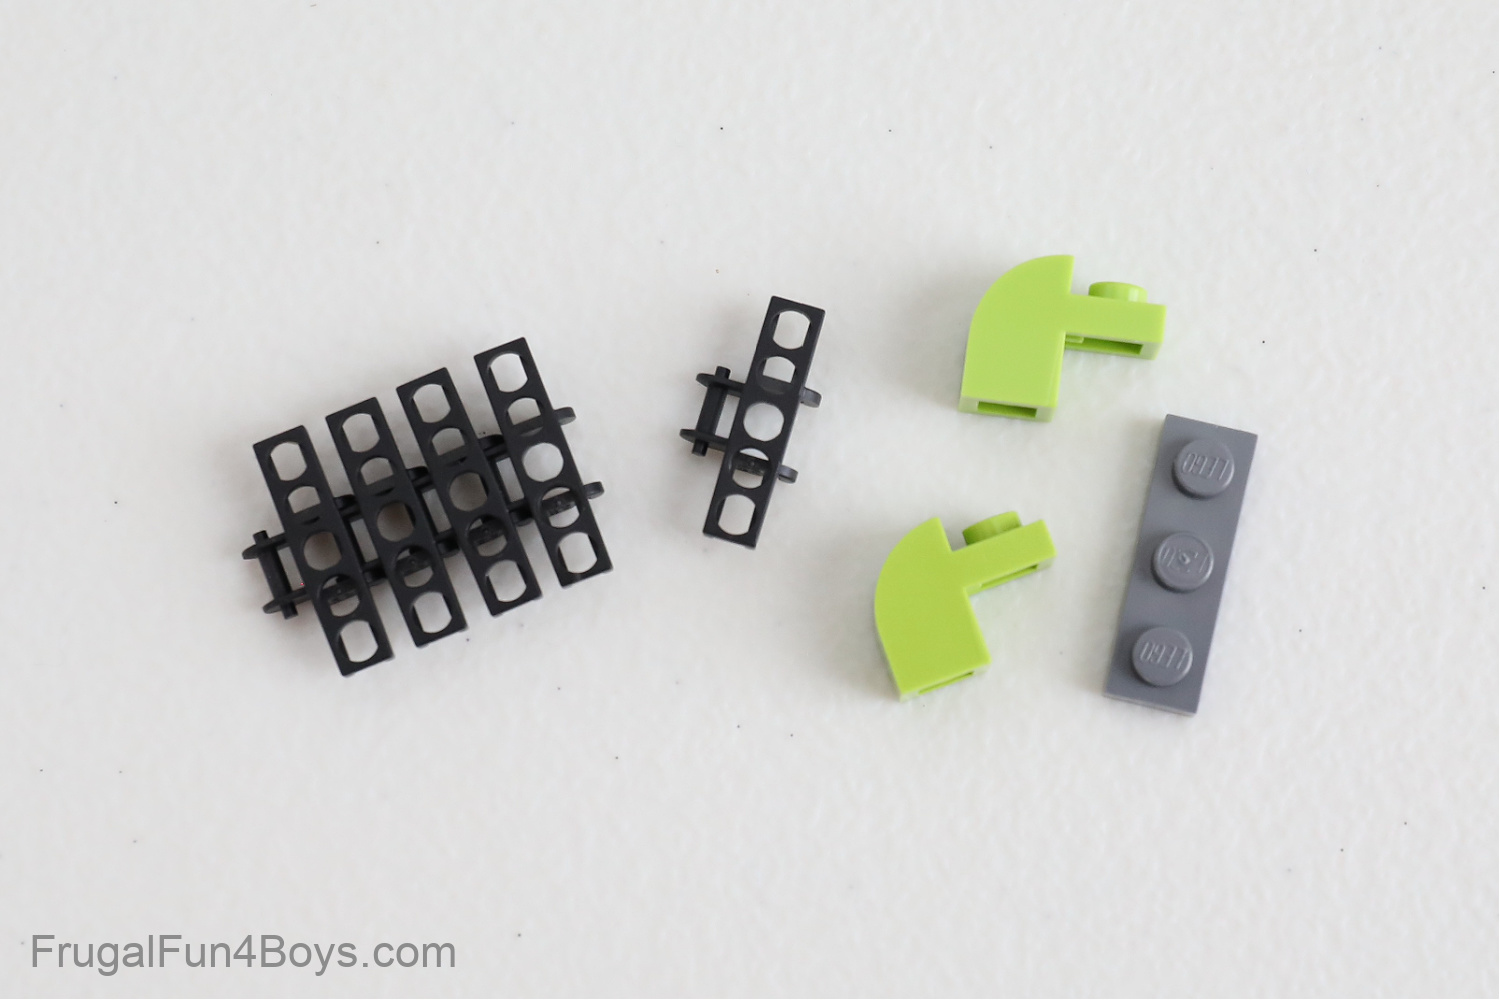
Here are the pieces we used to carry the balls up the elevator. Just a 1 x 3 plate and two 1 x 2 curved slopes with a recessed stud.
When you set up your ball contraption, you’ll need to make sure that there is enough room for the bricks on the conveyor belt to fit as they travel around the loop. However, if there’s too much space, the ball won’t land in the hopper. It wasn’t difficult to make a few adjustments, though, and our setup works great!
Here are some of the key bricks needed for this ball contraption:
Technic link tread – we used 78 links.
Technic liftarms – we used six 1 x 15 liftarms, two 1 x 5’s, four 1 x 9’s, and two 1 x 7’s.
Technic bricks – we used four 1 x 16 Technic bricks.
Technic Connector Pin Plate – We used 6 of these.
We used 12 Curved Slopes, 2 x 1 x 1 1/3 with recessed stud.
We used about 34 black Technic pins with friction ridges.
24-Tooth Technic Gear – we used 2.
You’ll also need axles, lots of 2 x 4 tiles (or fill in the spaces with whatever tiles you have), and 8 Technic bush.
Have fun inventing a LEGO Ball Contraption! It’s so much fun!
Do you kids love inventing with LEGO bricks?
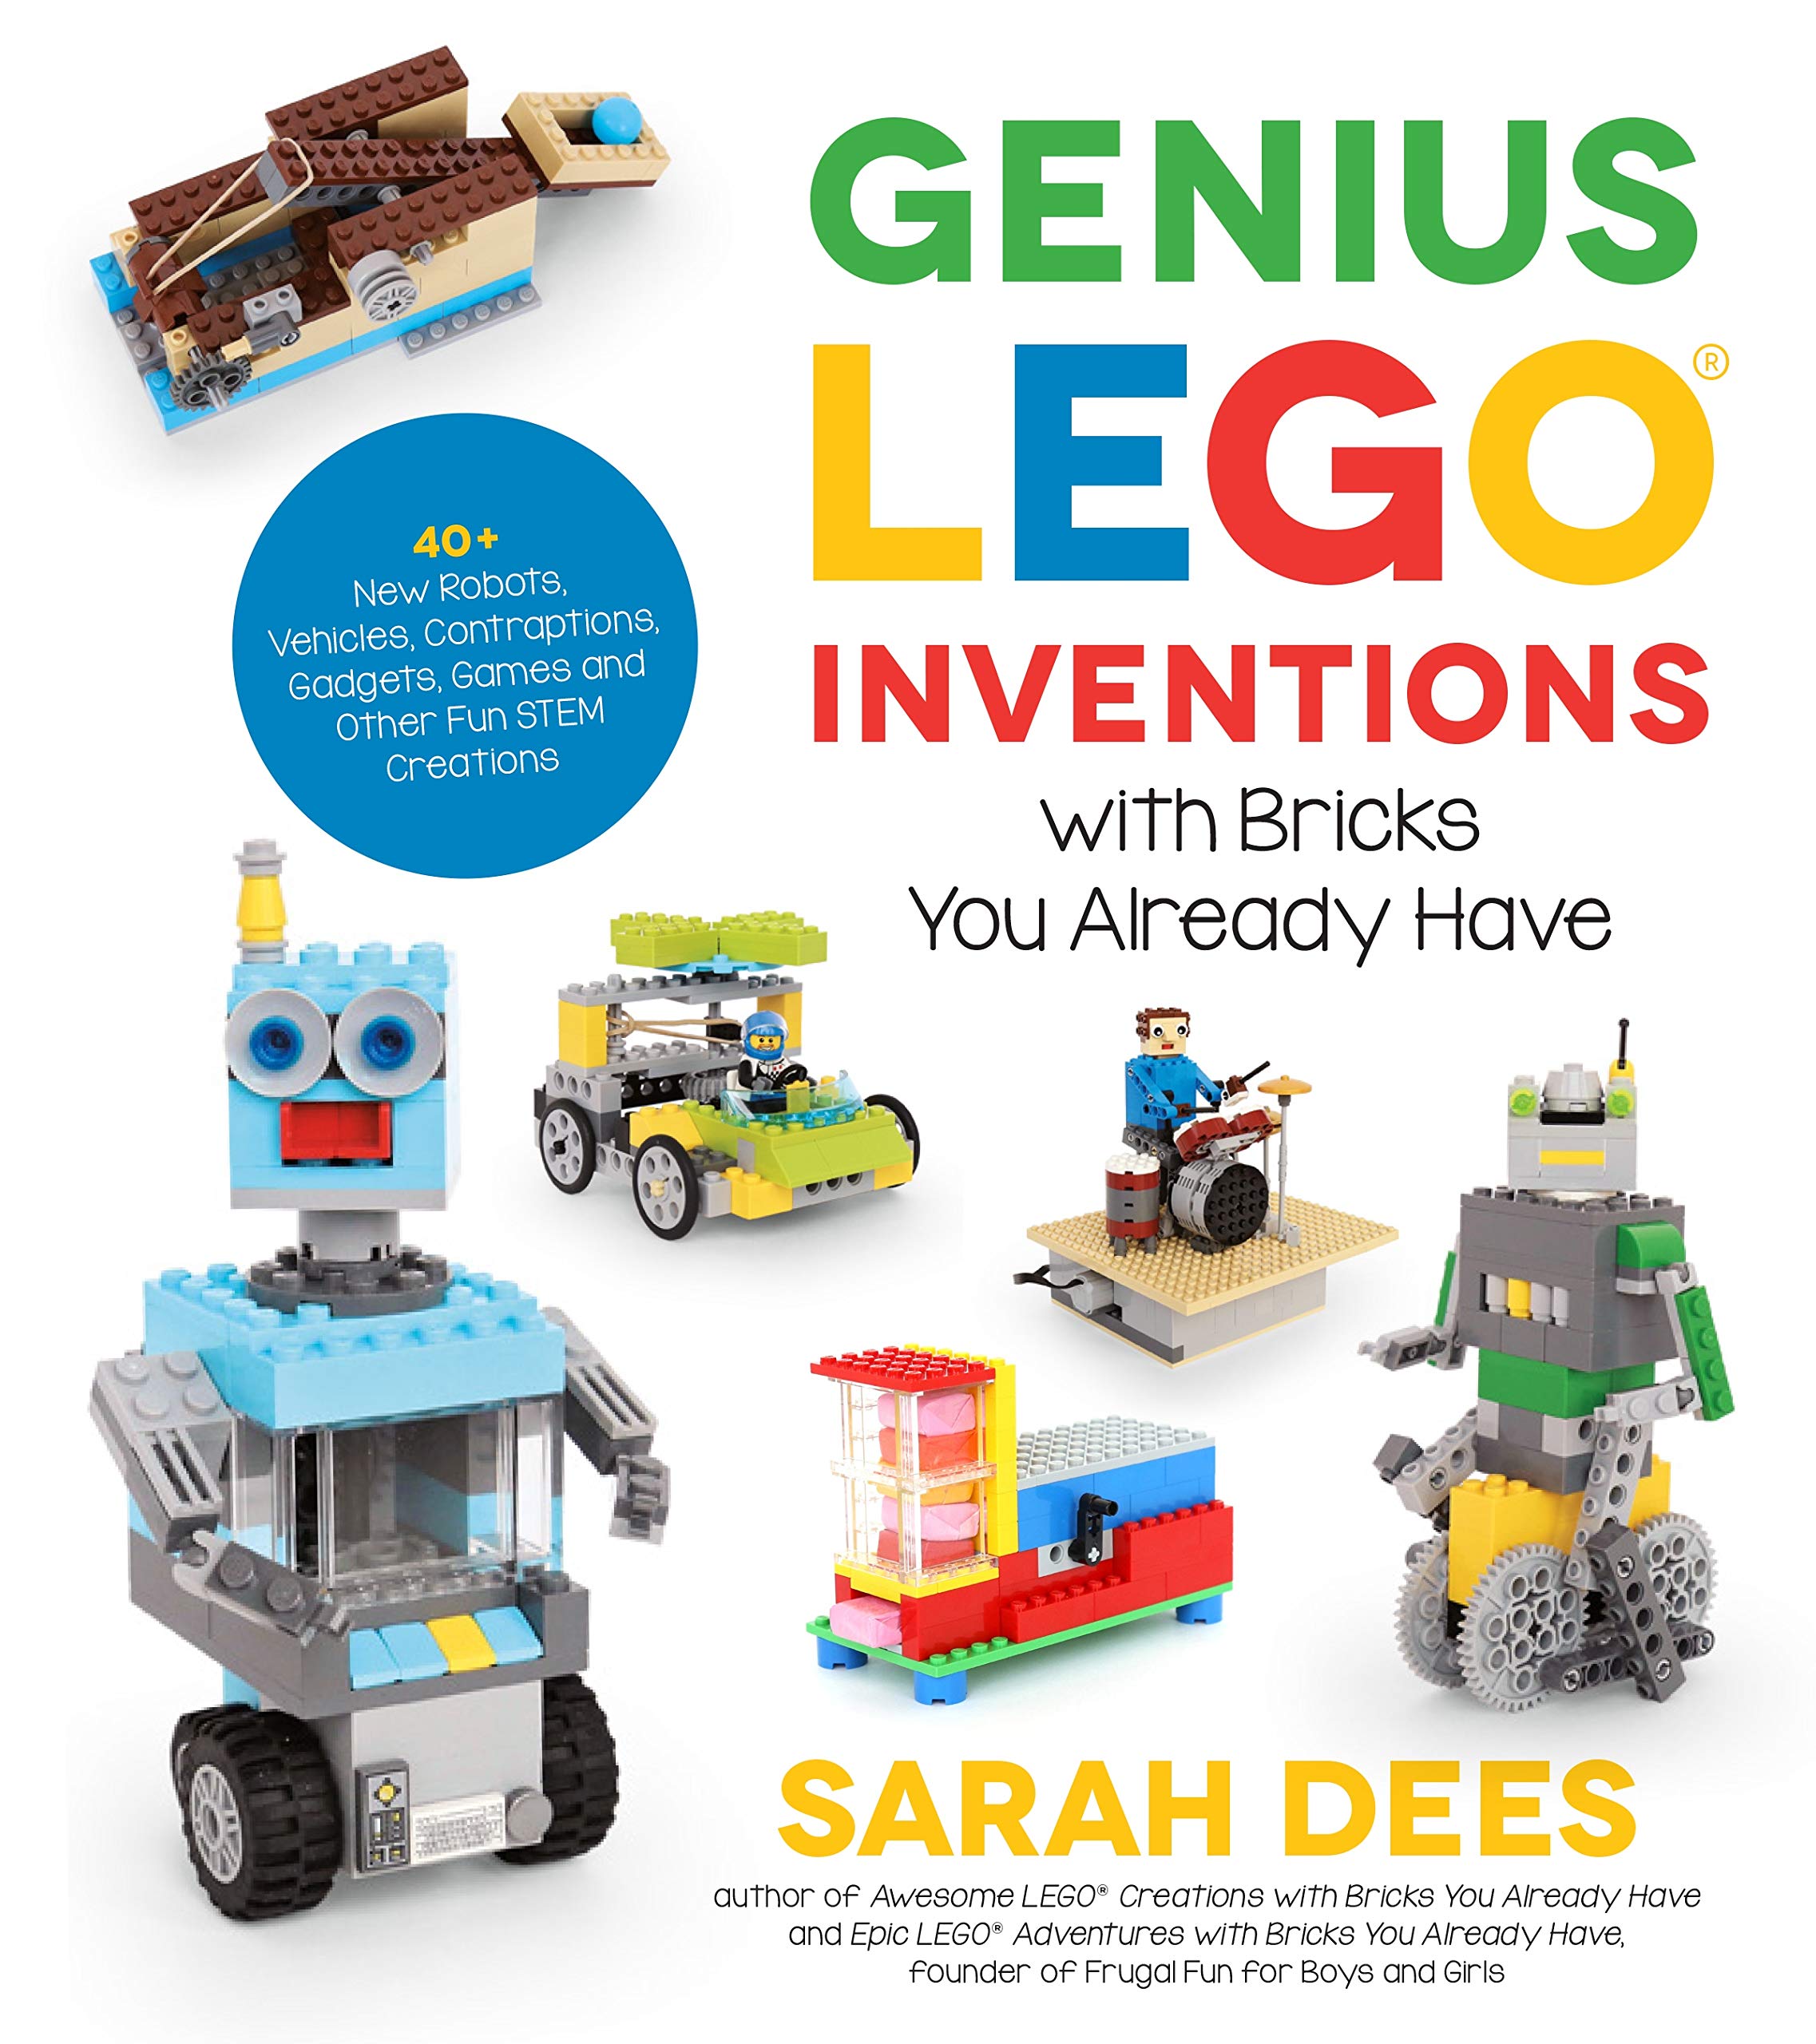
Then they will love our LEGO inventions book! Genius LEGO Inventions with Bricks You Already Have is full of 40 machines and gadgets to build. All projects have moving parts, and the book includes tons of physics and engineering concepts and vocabulary. They’ll be playing AND learning!
1 Comments
Aaron Mar 30, 2021
This is really cool! Maybe I'll do something like it!
Post a Comment