
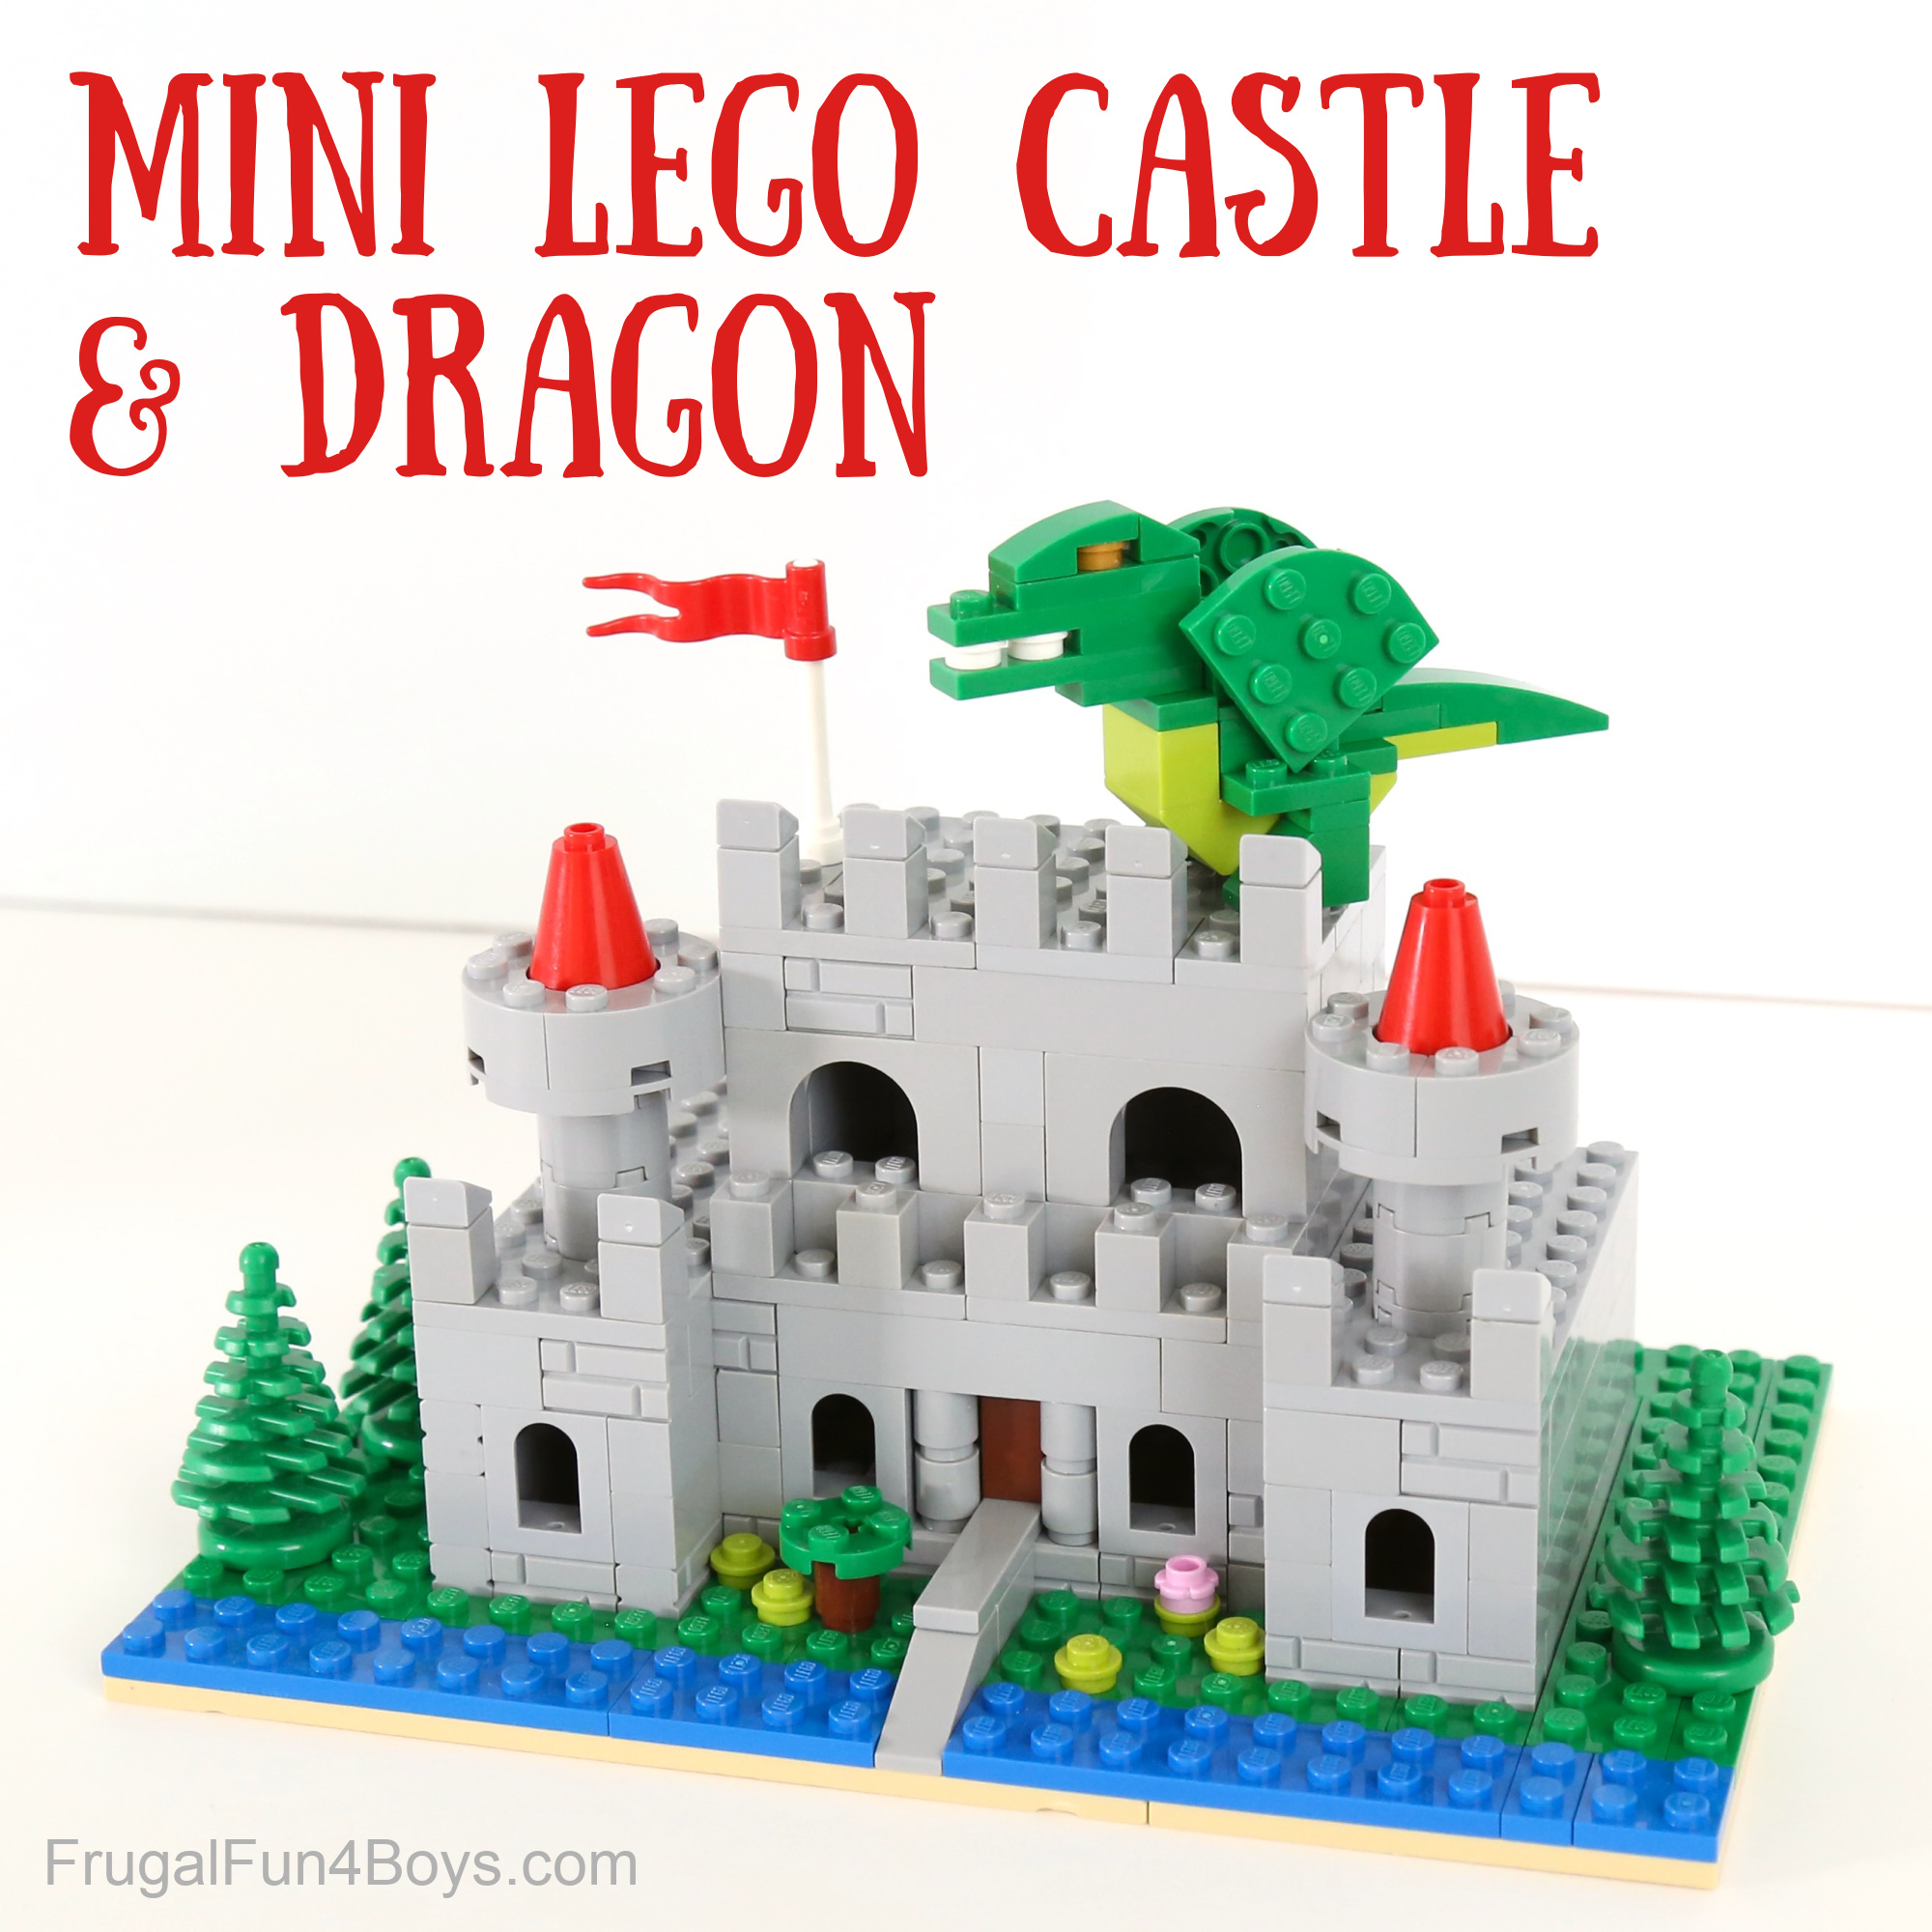
Build your own LEGO castle on a mini scale! Then construct a dragon to go with it. We’ll show you how to build both!
It’s definitely fun to build big impressive LEGO castles, but it’s also fun to design a mini LEGO castle. There are so many options and a mini castle is a great size to display. Note that the castles in this post are not minifigure scale. You won’t be able to fit your LEGO minifigures in these castles.
You can build an awesome LEGO castle with whatever bricks you have! Your castle doesn’t have to be light gray. Build your castle with the bricks you have. You can use light gray, dark gray, tan, brown, red, or a combination of colors.
This post was originally published in July 2023 and updated in April 2026.

Castle Building Instructions:
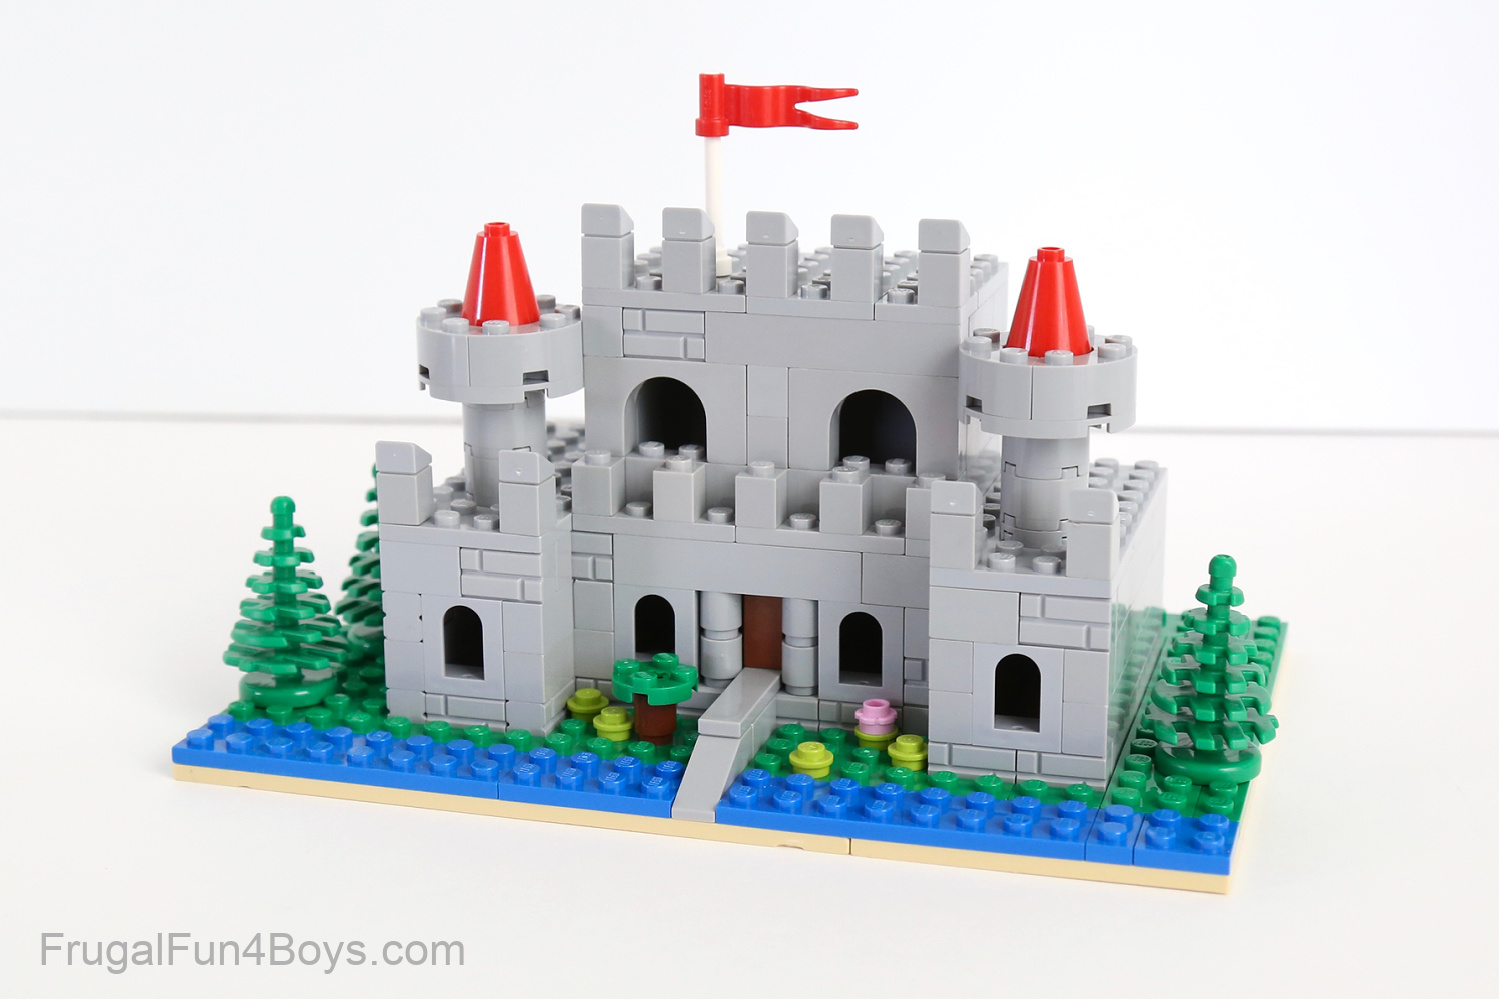
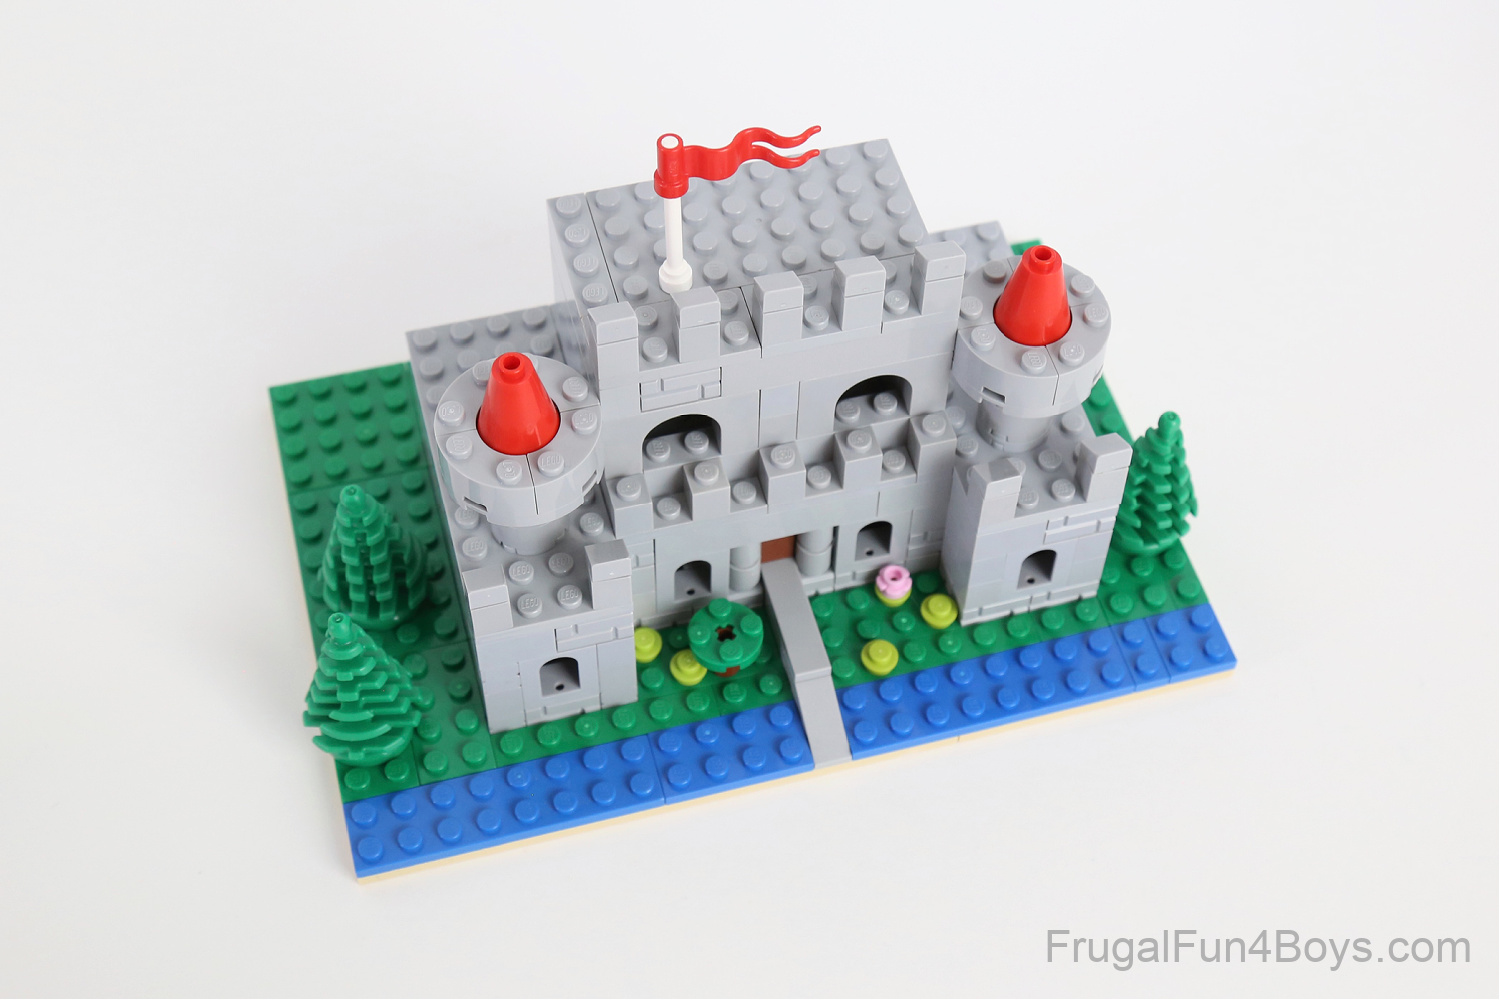
Let’s build the largest castle in the photo above.
The base for my castle is a 16 x 16 plate and a 8 x 16 plate.
Here are some of the key bricks I used to build the castle. But again, you can modify the design however you want with the bricks you have!
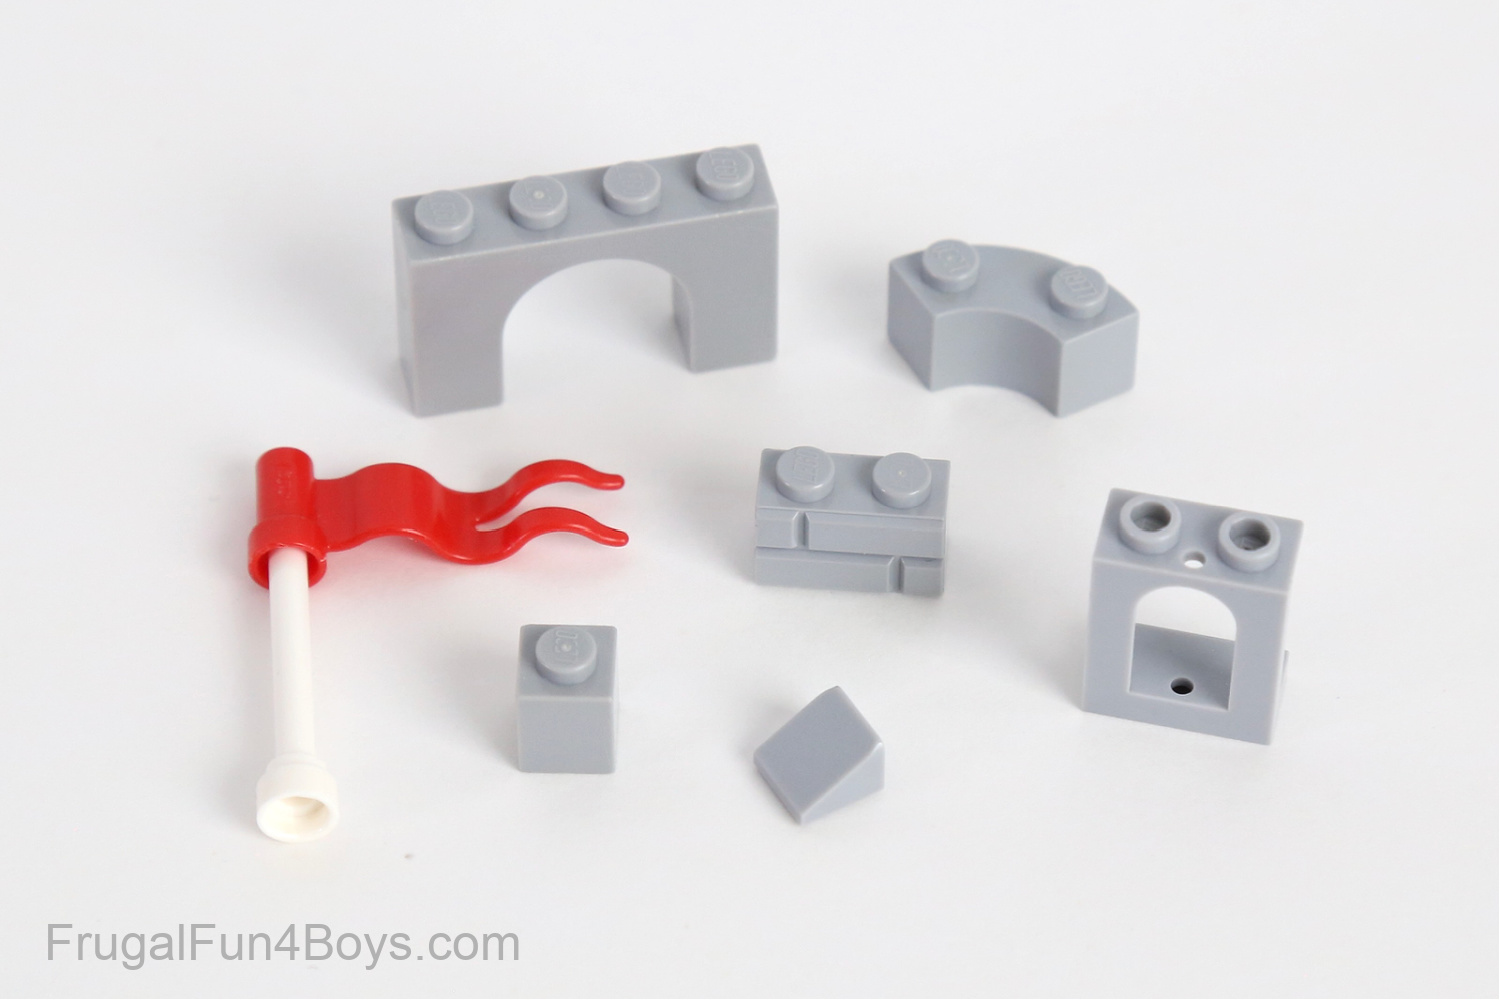
Arch bricks really give the castle it’s classic look. Here they are on Brick Link in case you want to order.
1 x 2 brick with masonry lines
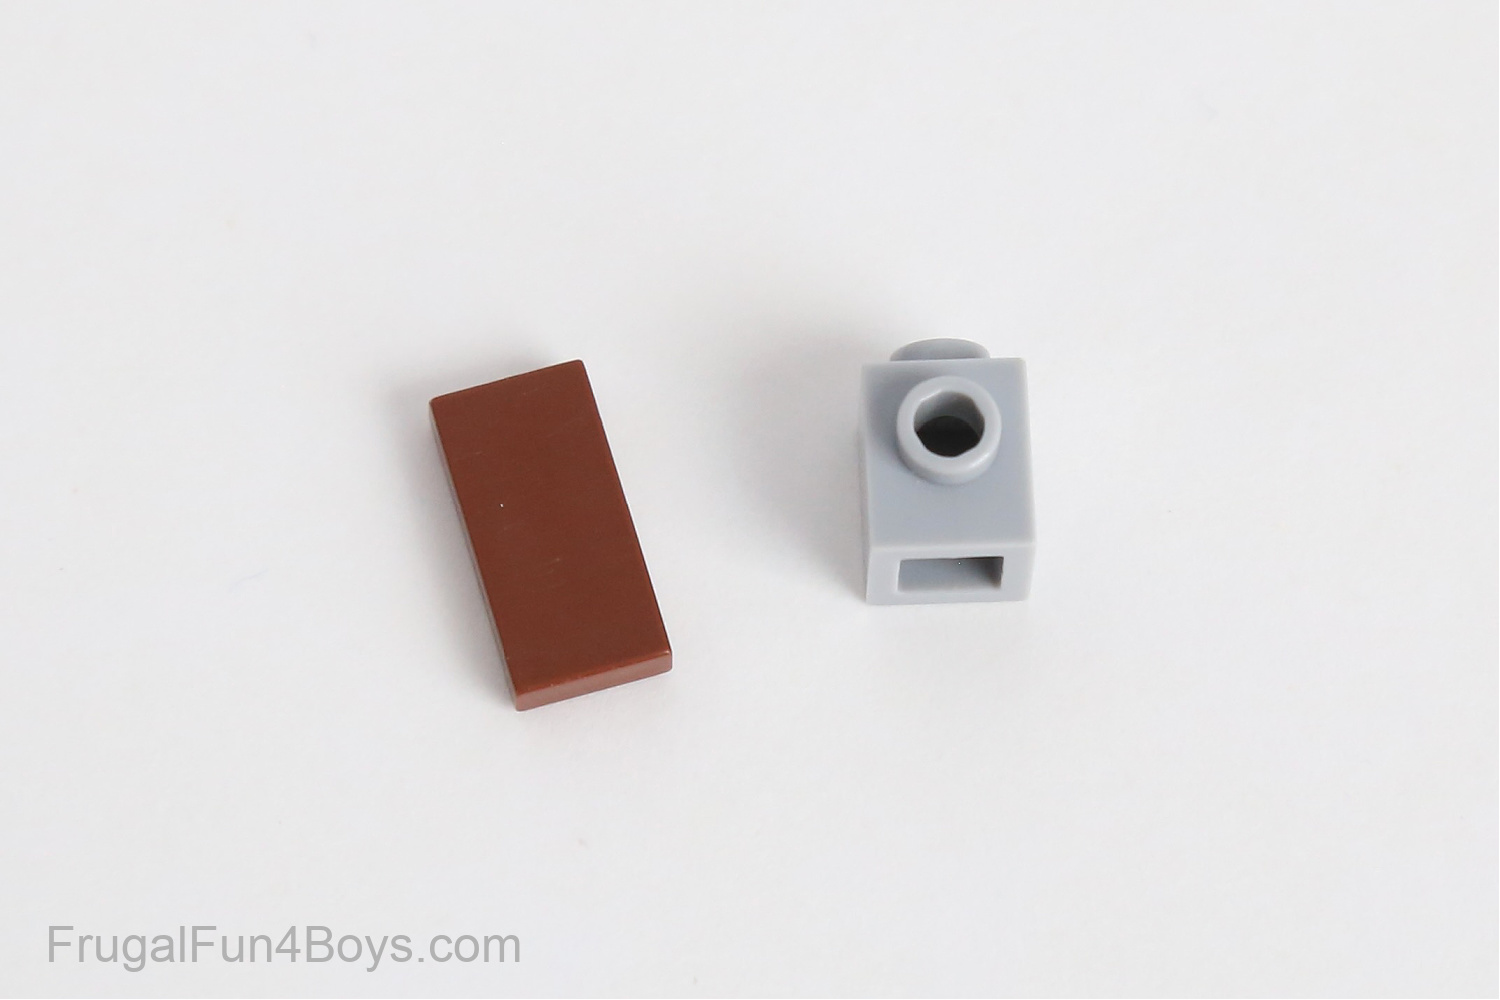
These are the pieces I used to make the castle door. It’s just a 1 x 2 brown tile attached to a 1 x 1 brick with a stud on the side.
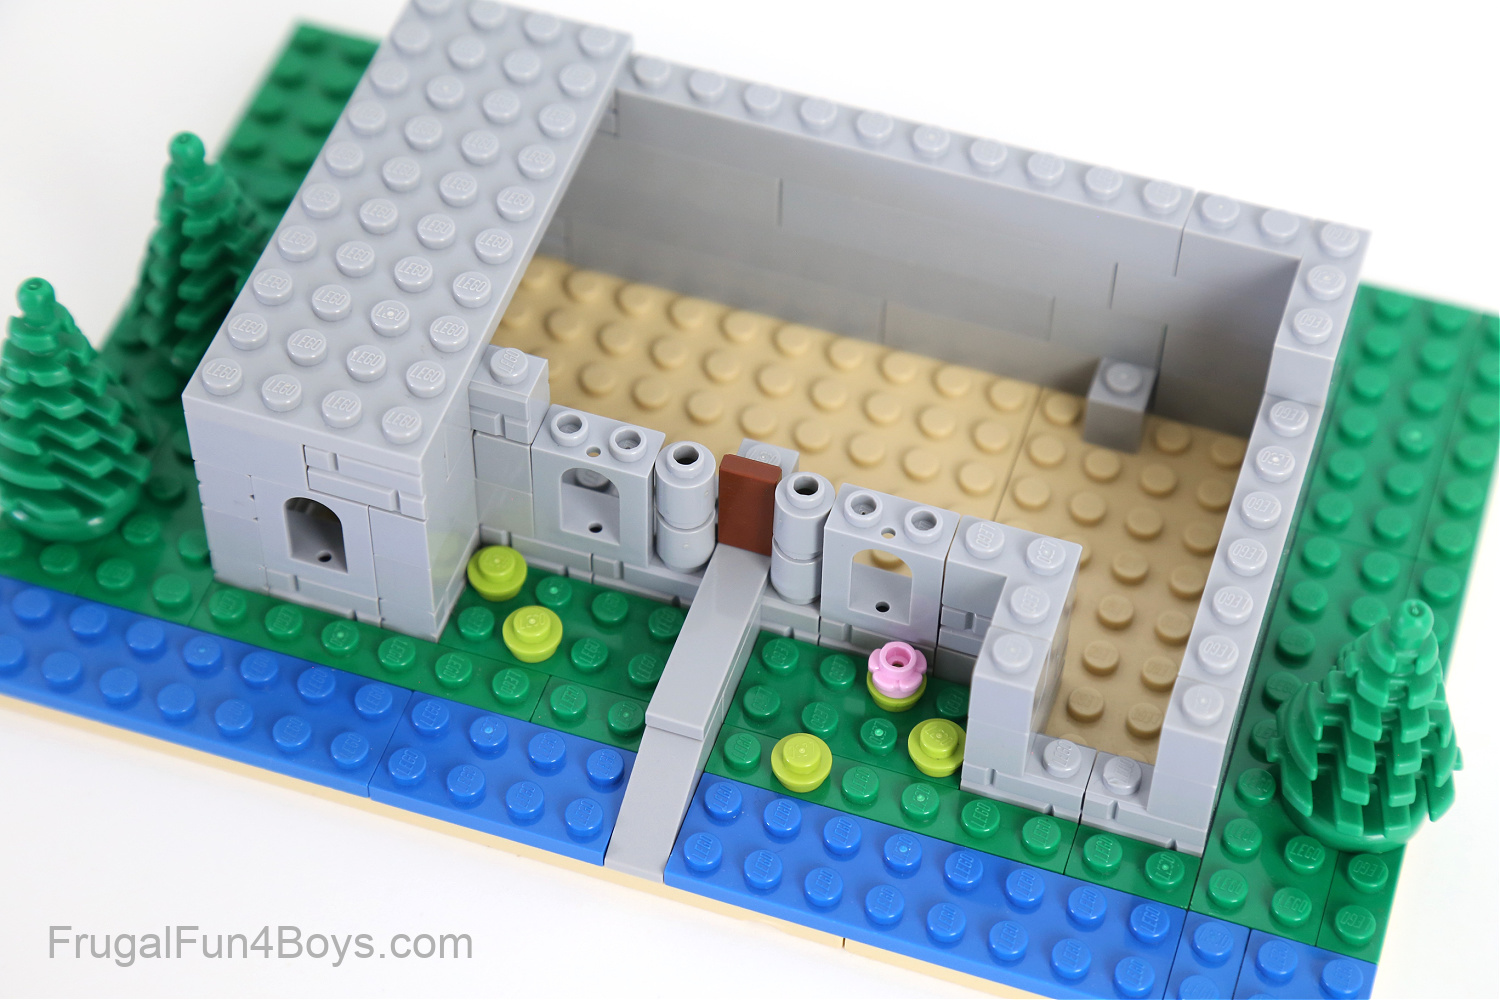
Here’s the door in place. I placed a long light gray brick on top of the door and the columns next to it to connect them. Then I covered the first floor in plates.
These are the pieces I used to make the towers. If you want two towers on your castle, you’ll need two sets of these bricks.
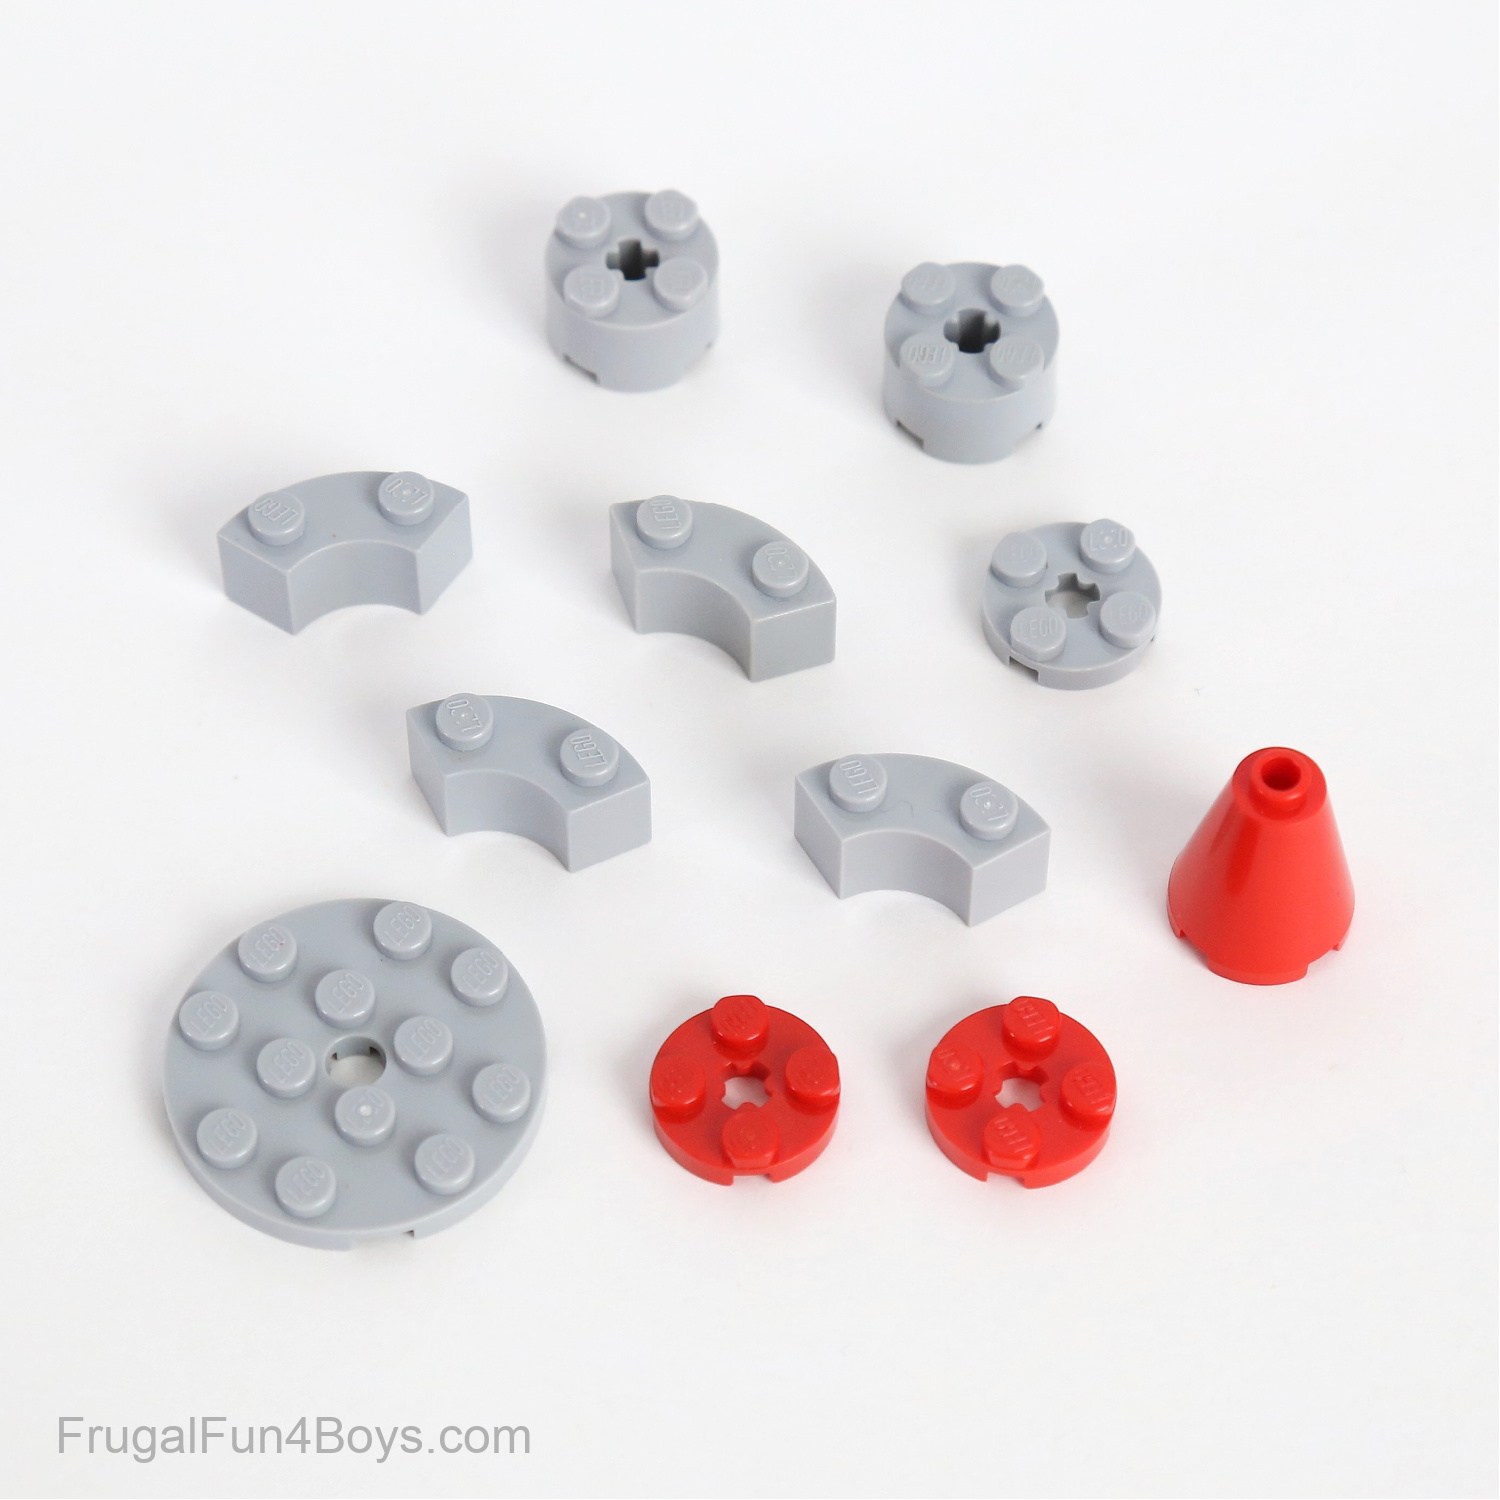
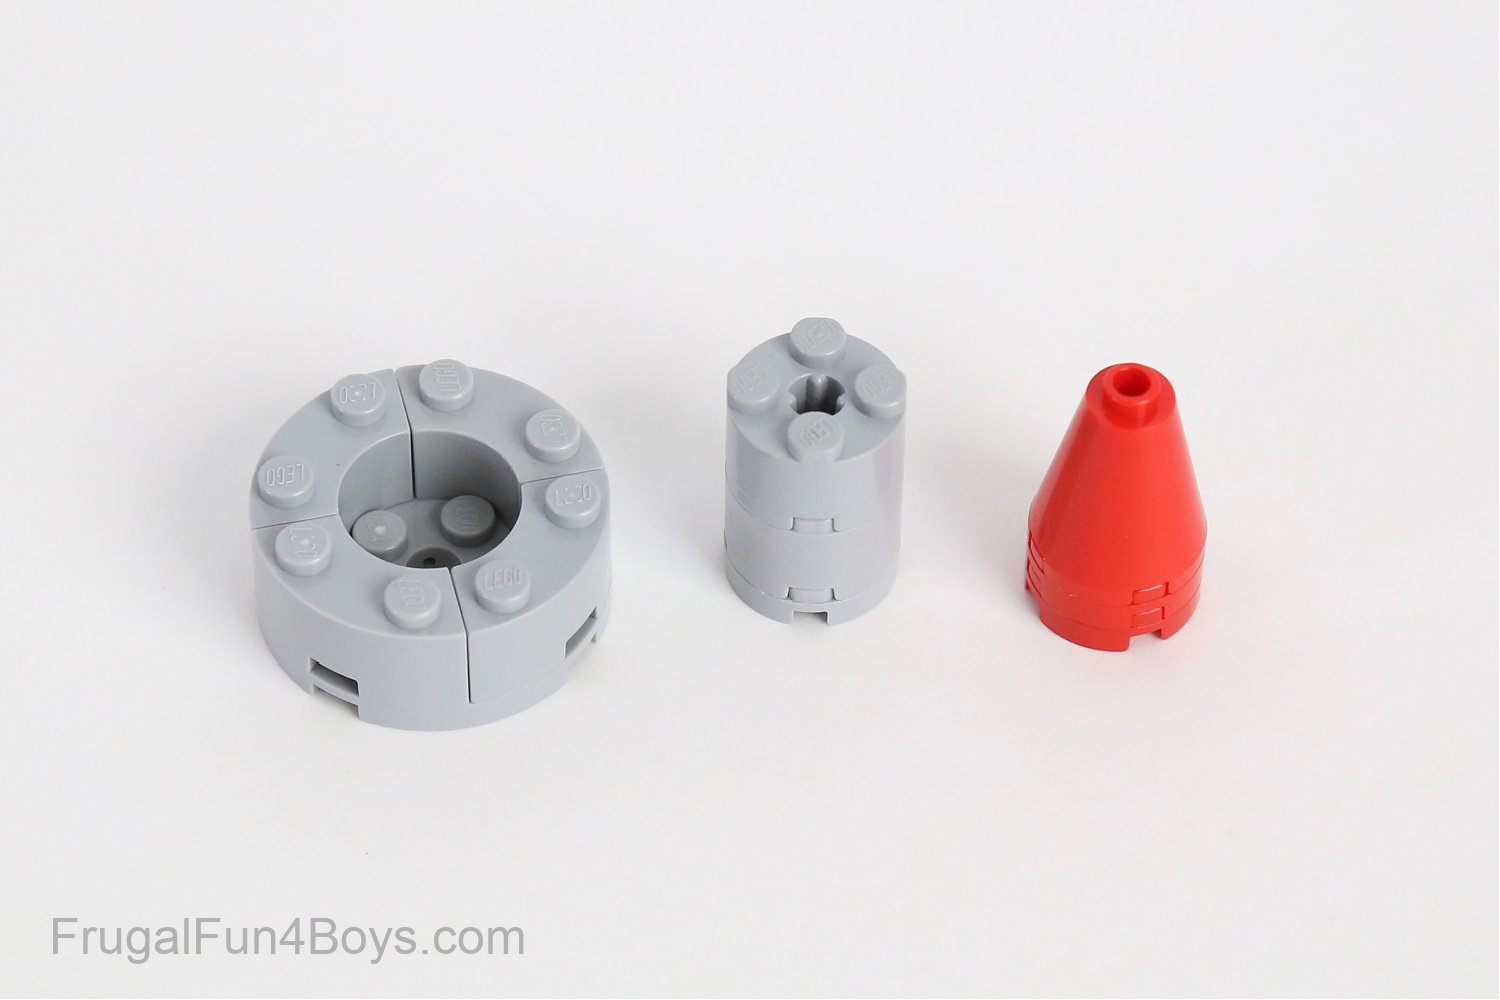
Place four 2 x 2 round corner bricks on a 4 x 4 light gray round plate. Then stack two 2 x 2 round bricks and a 2 x 2 round plate.
To make the red roof the right height, I put two 2 x 2 red round plates under a 2 x 2 red cone.
Here’s another view of the completed castle. If you have a flag, fly it on top of the castle!
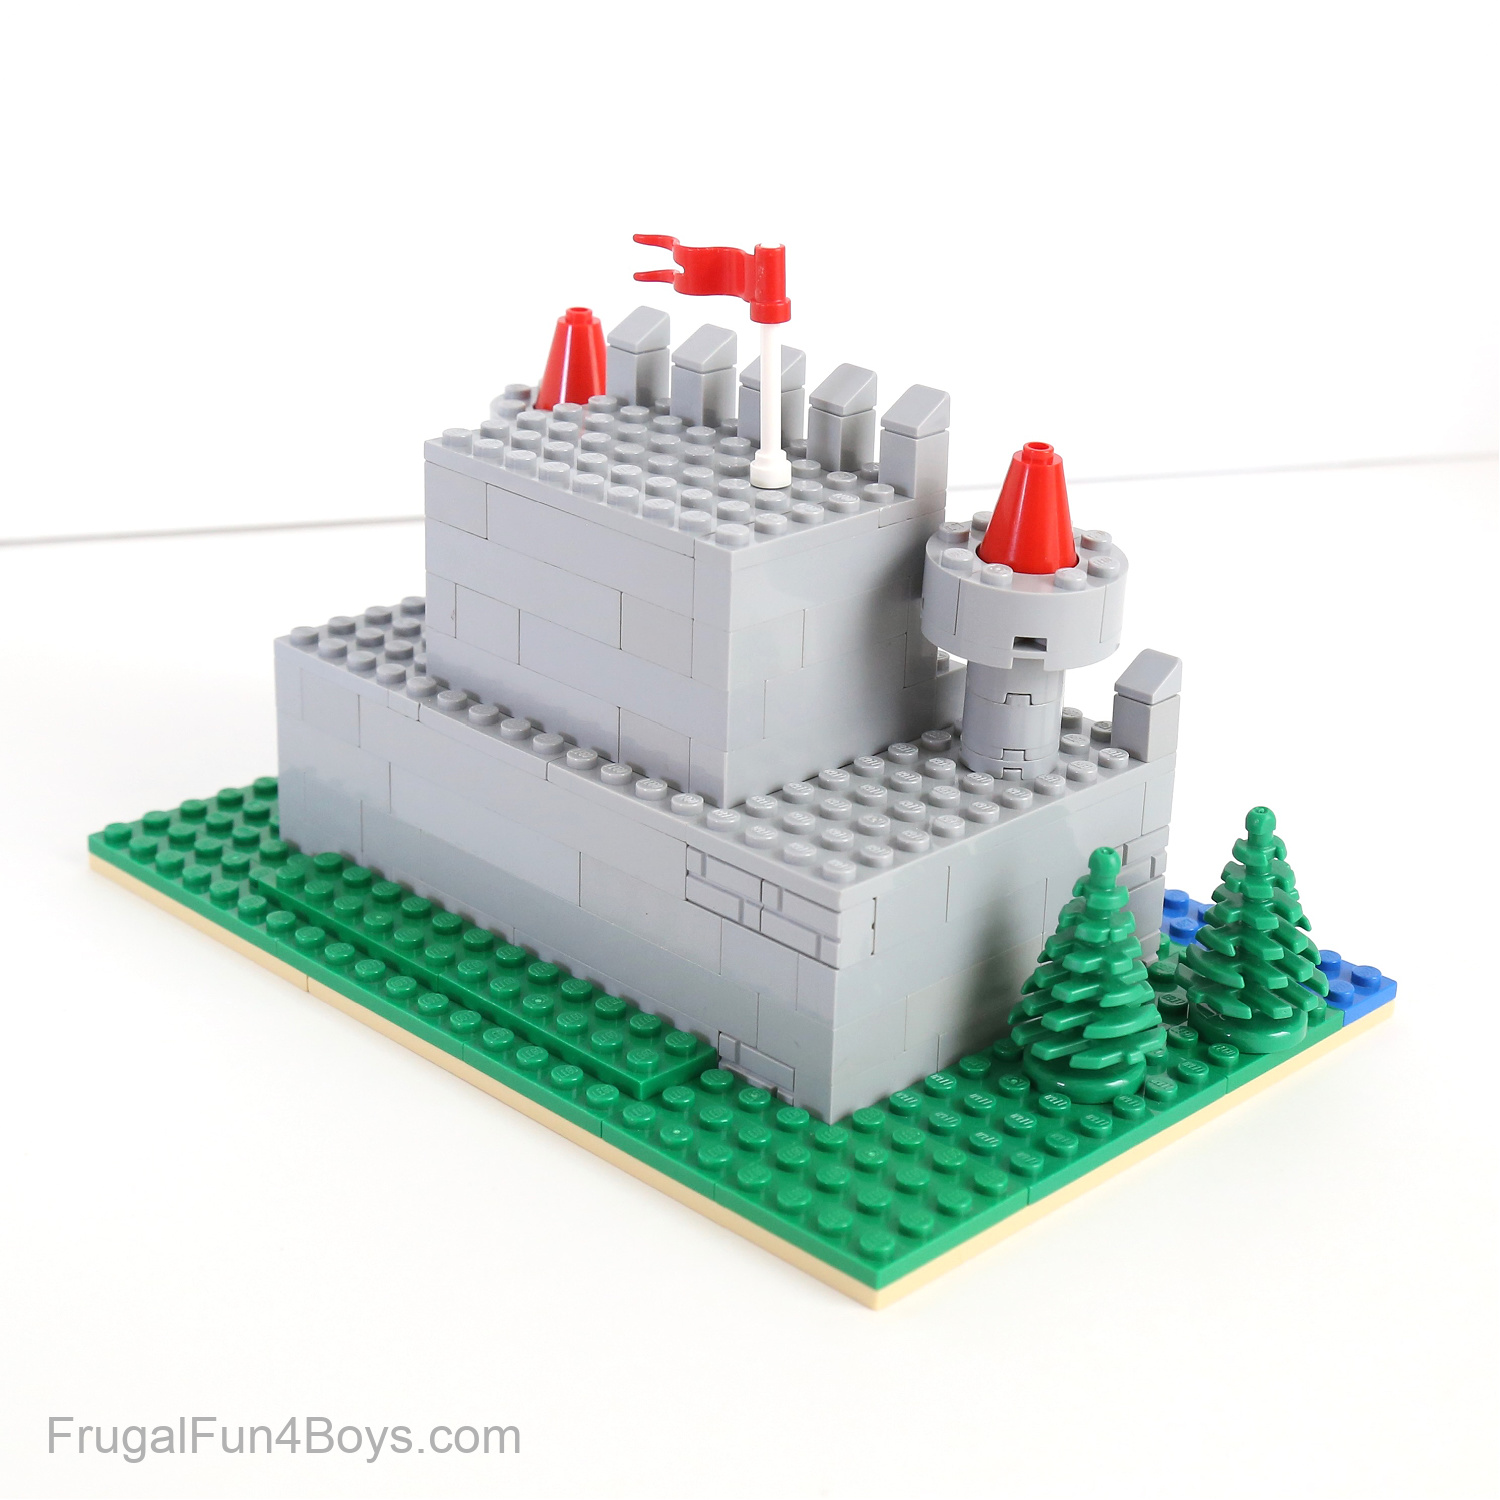
And here’s a view from the back.
More LEGO Mini Castles
Go even smaller with this next castle idea! The base of this mini castle is 6 x 8 studs.

Then here’s another cute one with a moat around it.


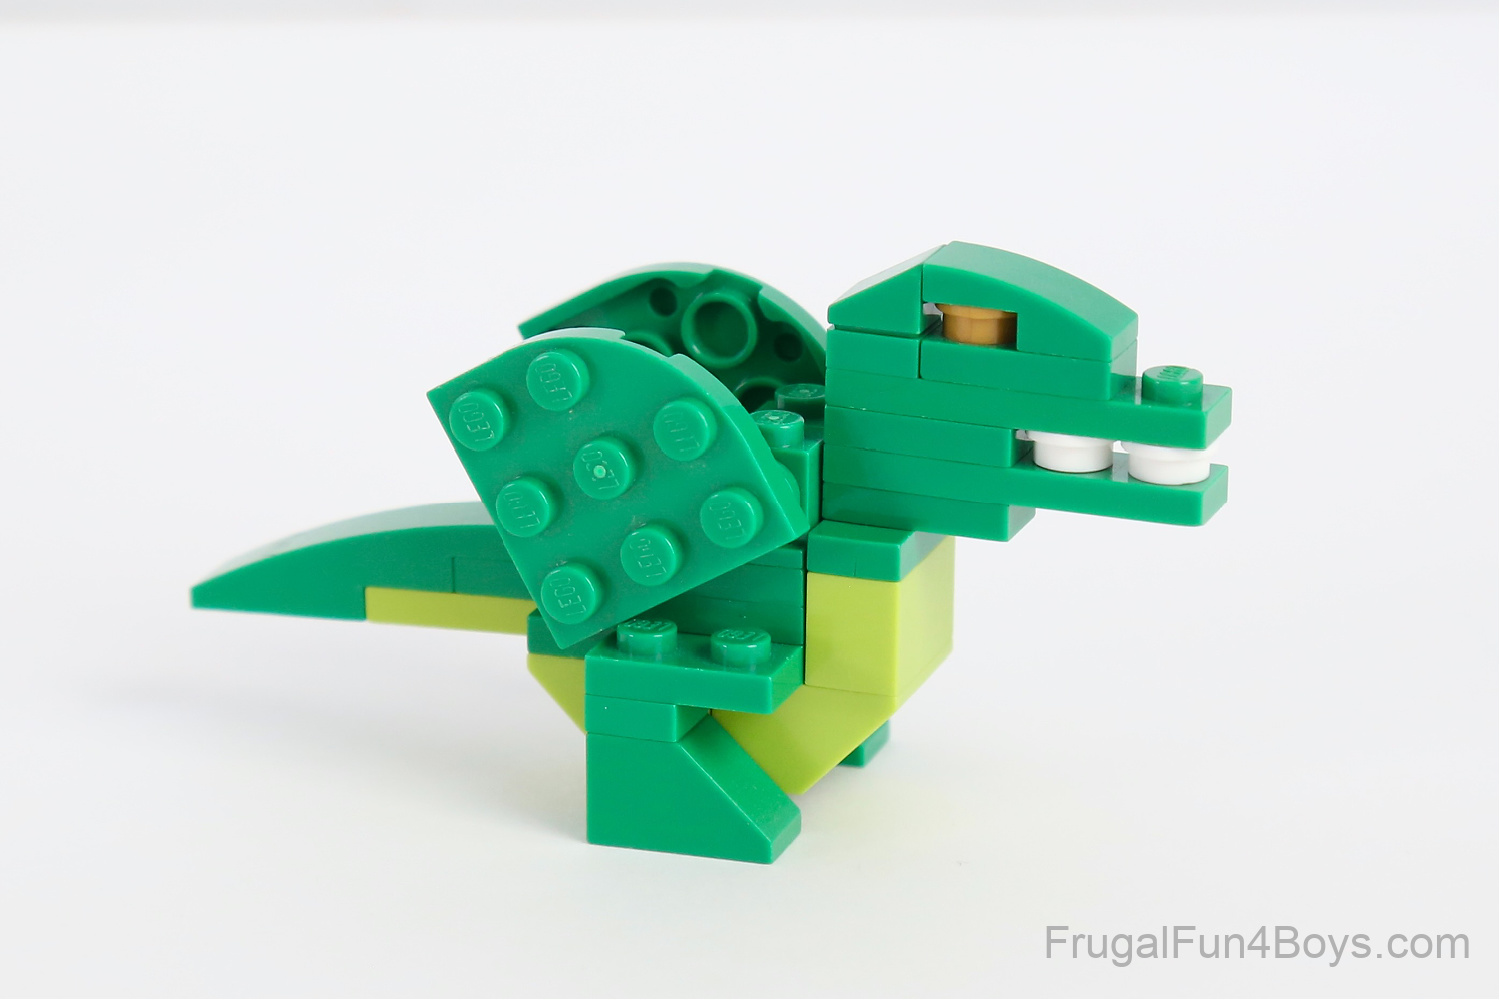
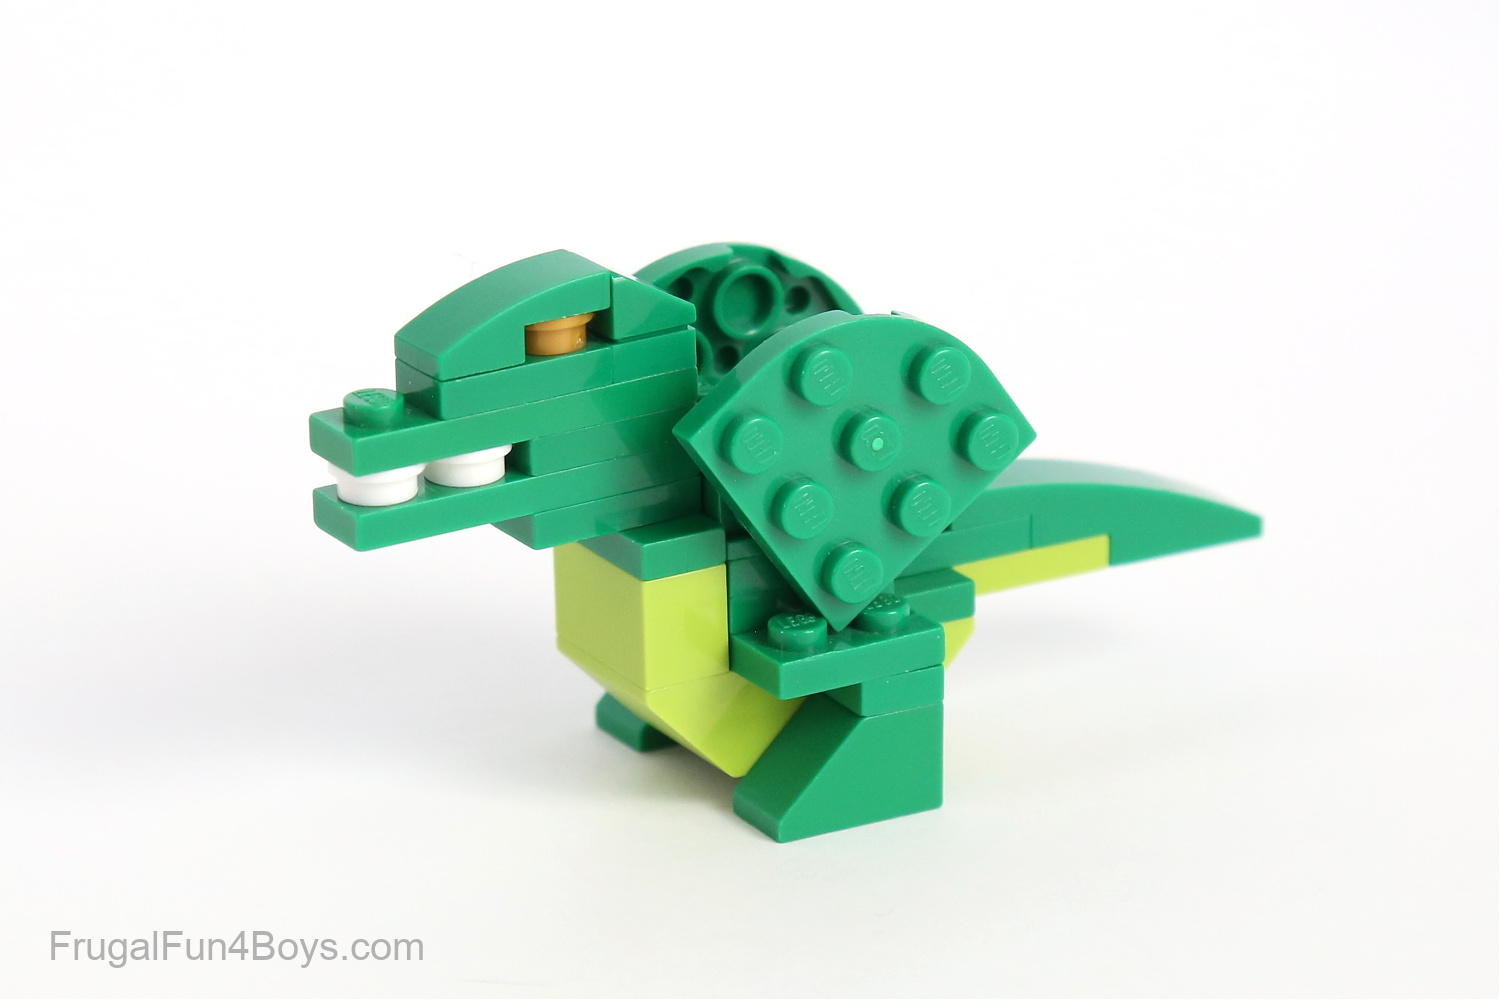
How to Build a LEGO Fire-Breathing Dragon
Now build a fierce little dragon to go with your castle!
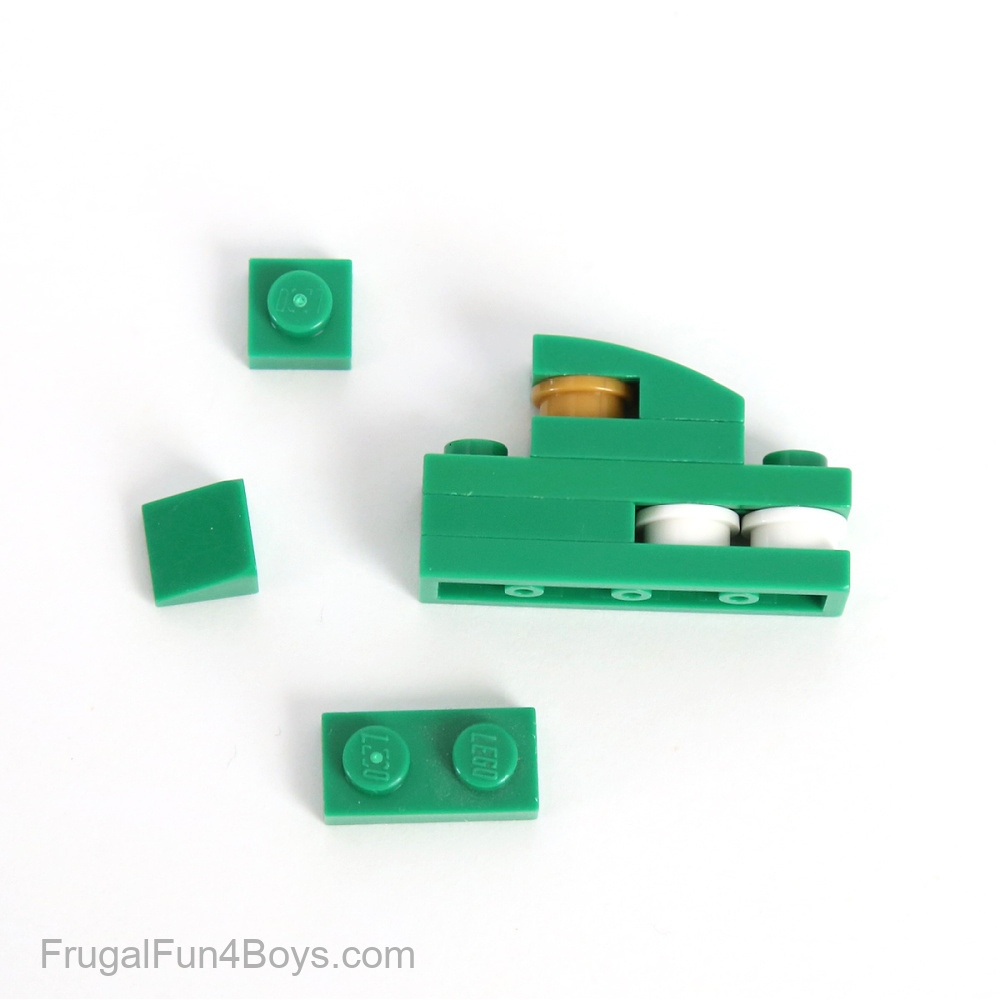
Gather the bricks shown for building the head.
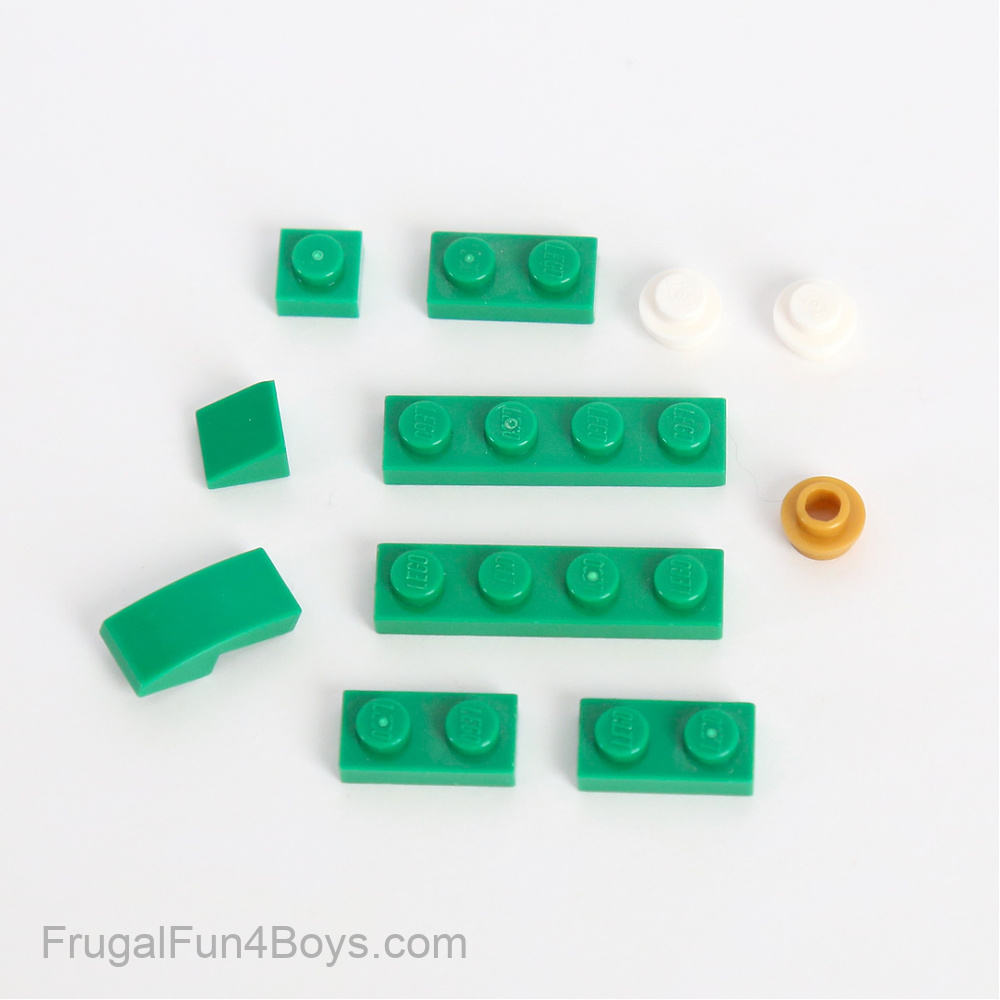
Place a 1 x 2 green plate and two 1 x 1 white round plates on top of a 1 x 4 plate.
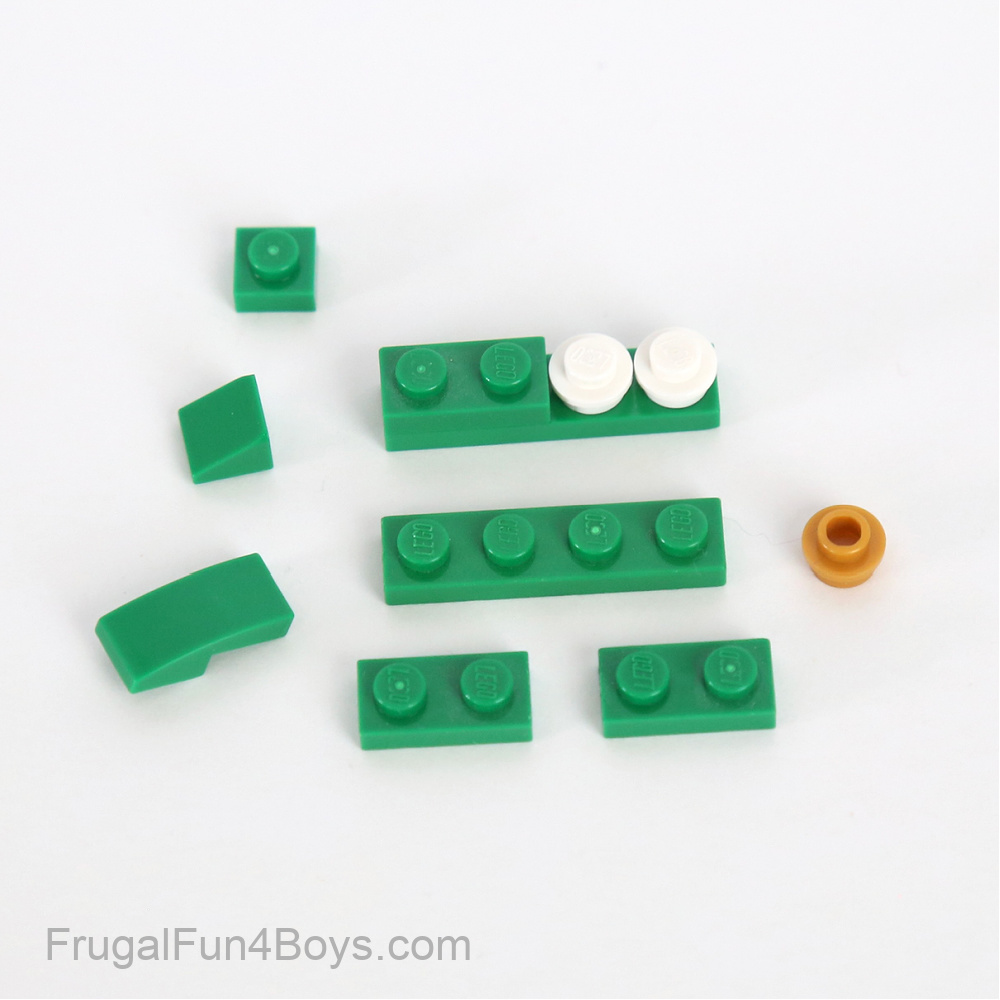
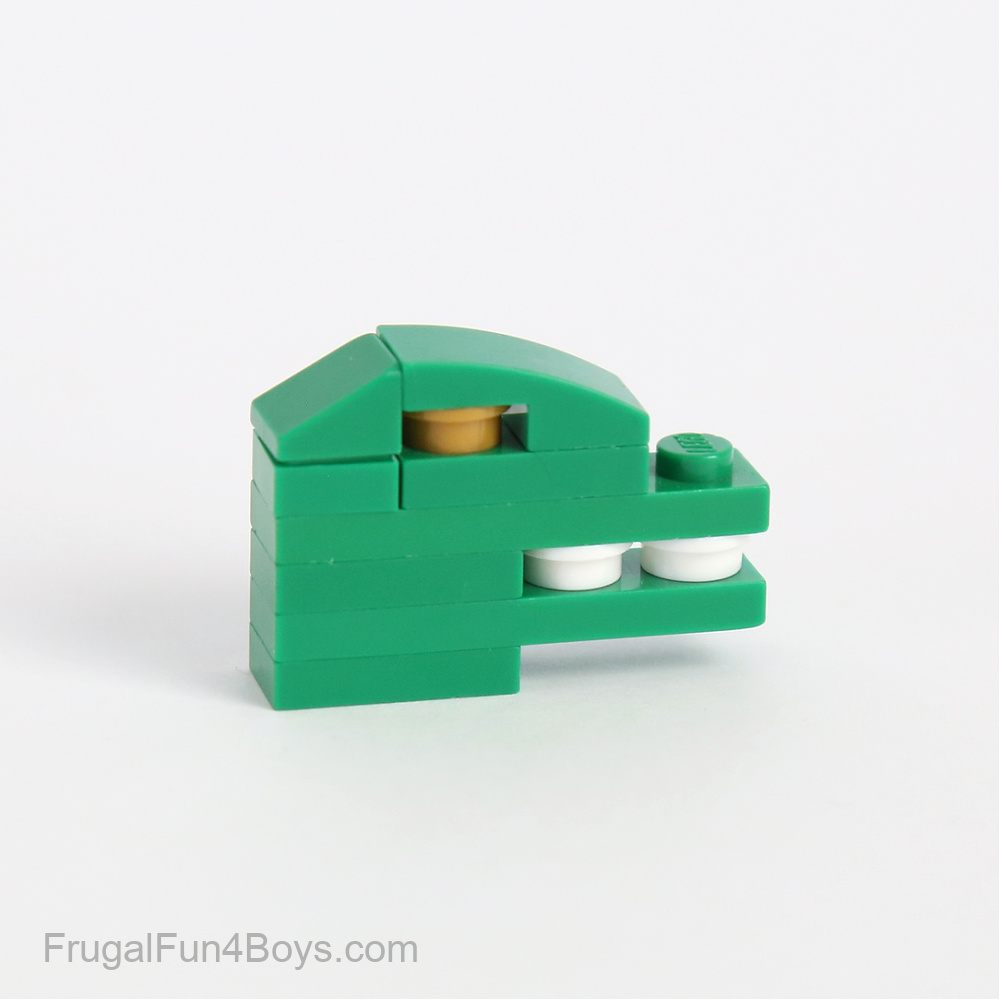
Add a 1 x 4 green plate, a 1 x 2 green plate, and a 1 x 2 green curved slope. Use a 1 x 1 round plate for the eye. I used gold, but really it can be any color!
Then add a 1 x 1 green plate and a 1 x 1 green slope to finish up the head.
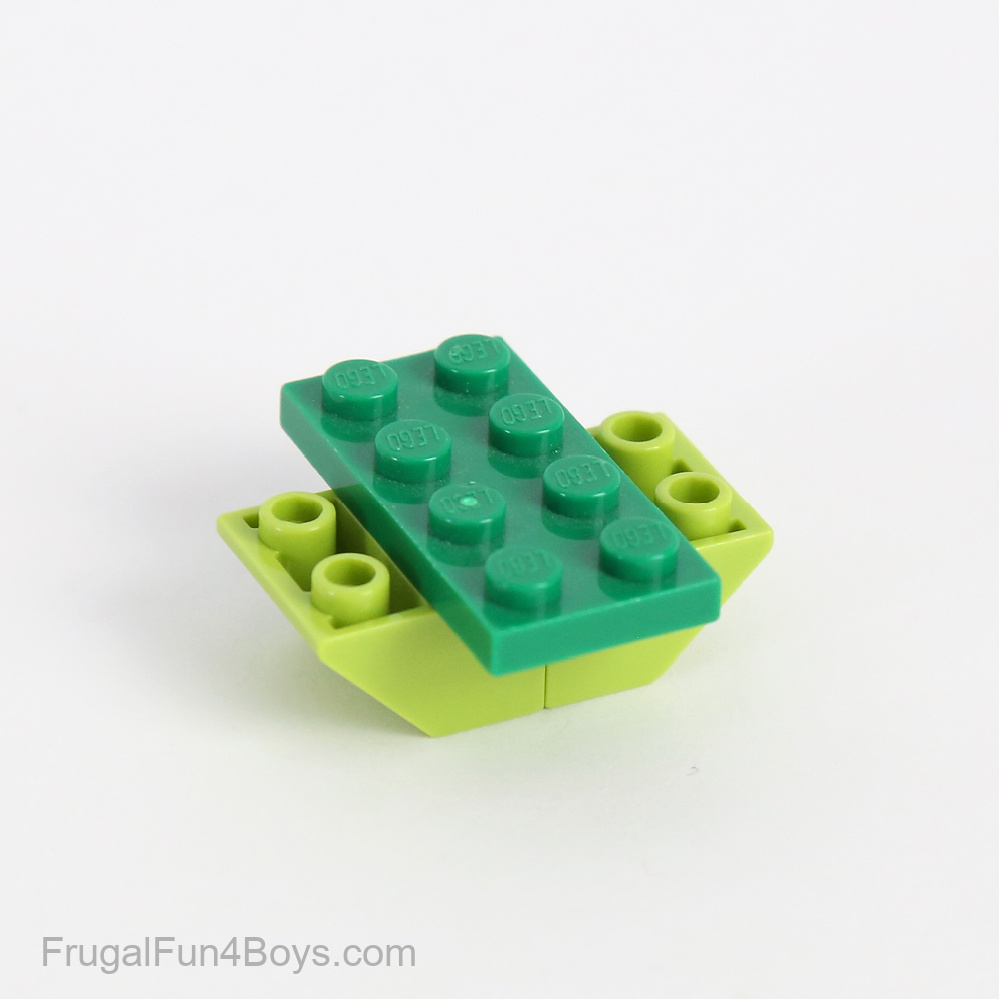
Build the body. Start with two 2 x 2 lime green inverted slopes. Connect them with a 2 x 4 green plate as shown.
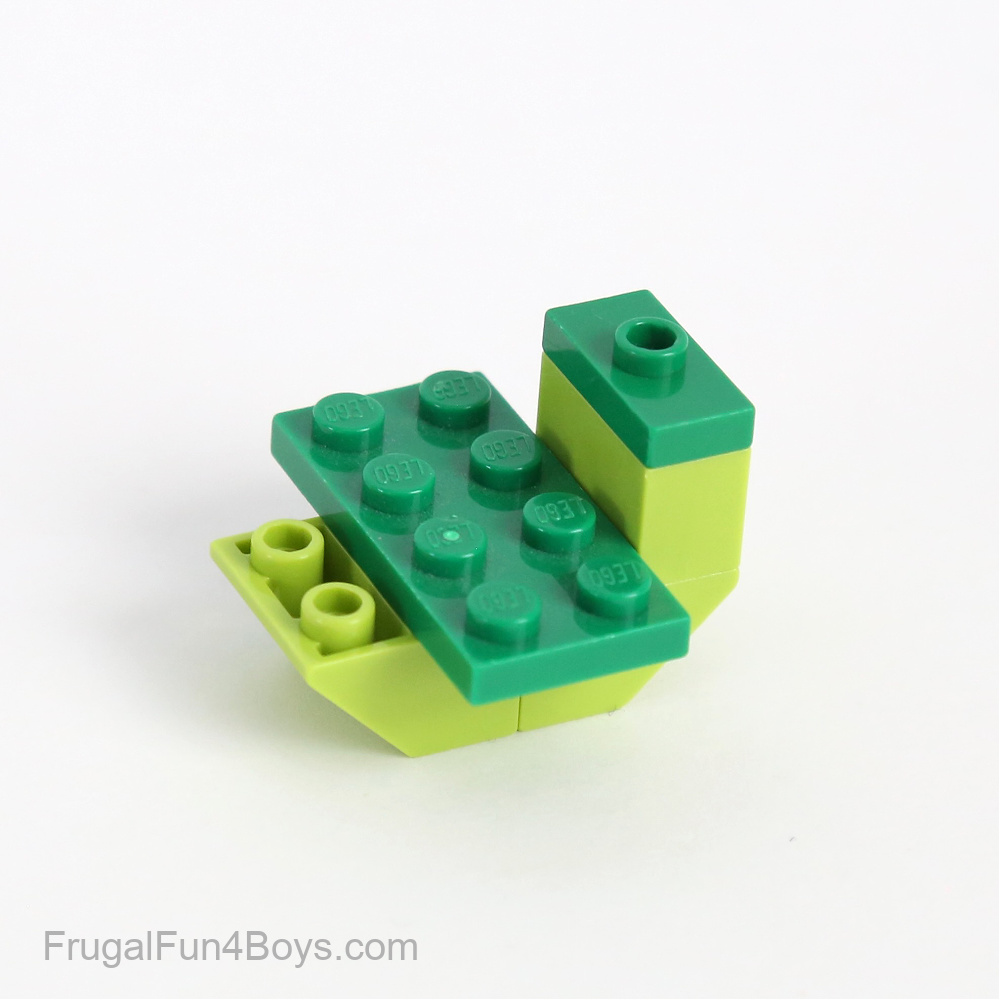
Then add a 1 x 2 lime green brick and a 1 x 2 green jumper plate (plate with one stud on top).
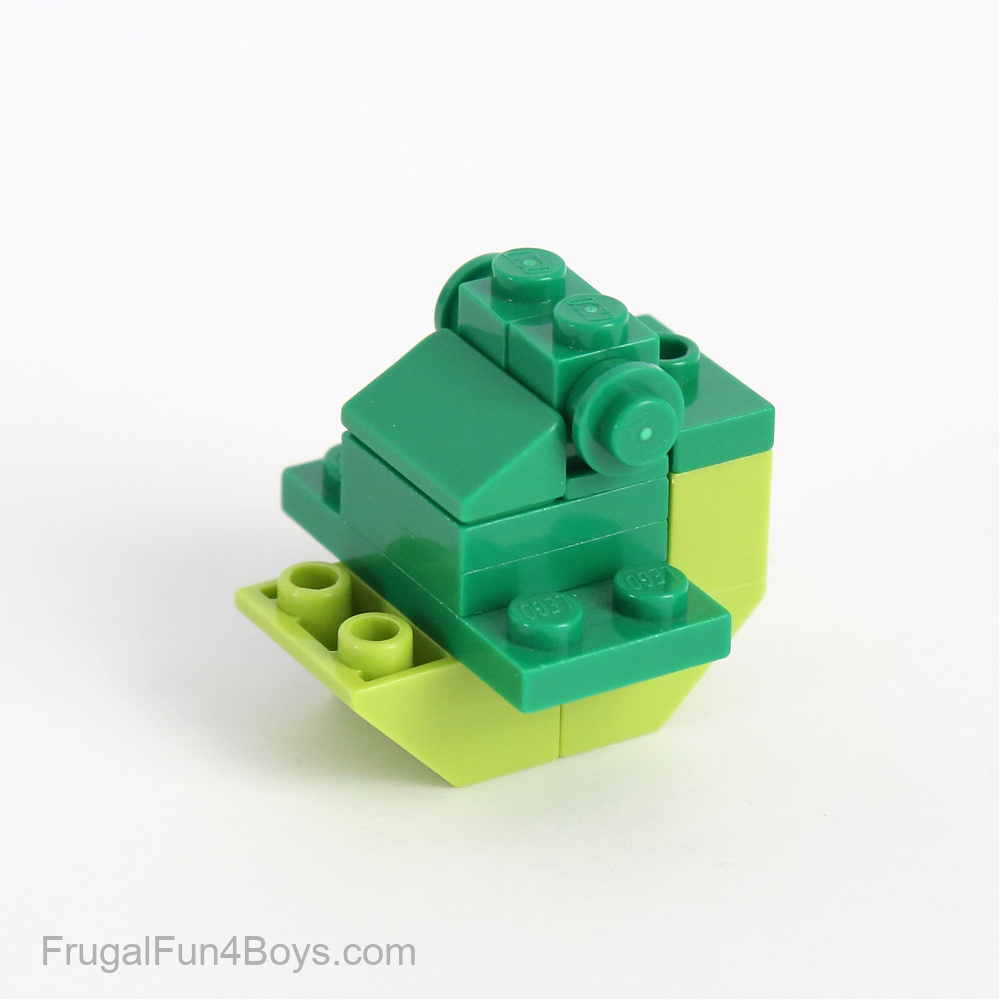
Place two 2 x 2 green plates on the body. Then add two 1 x 1 headlight bricks, one on each side. The studs will hold the wings.
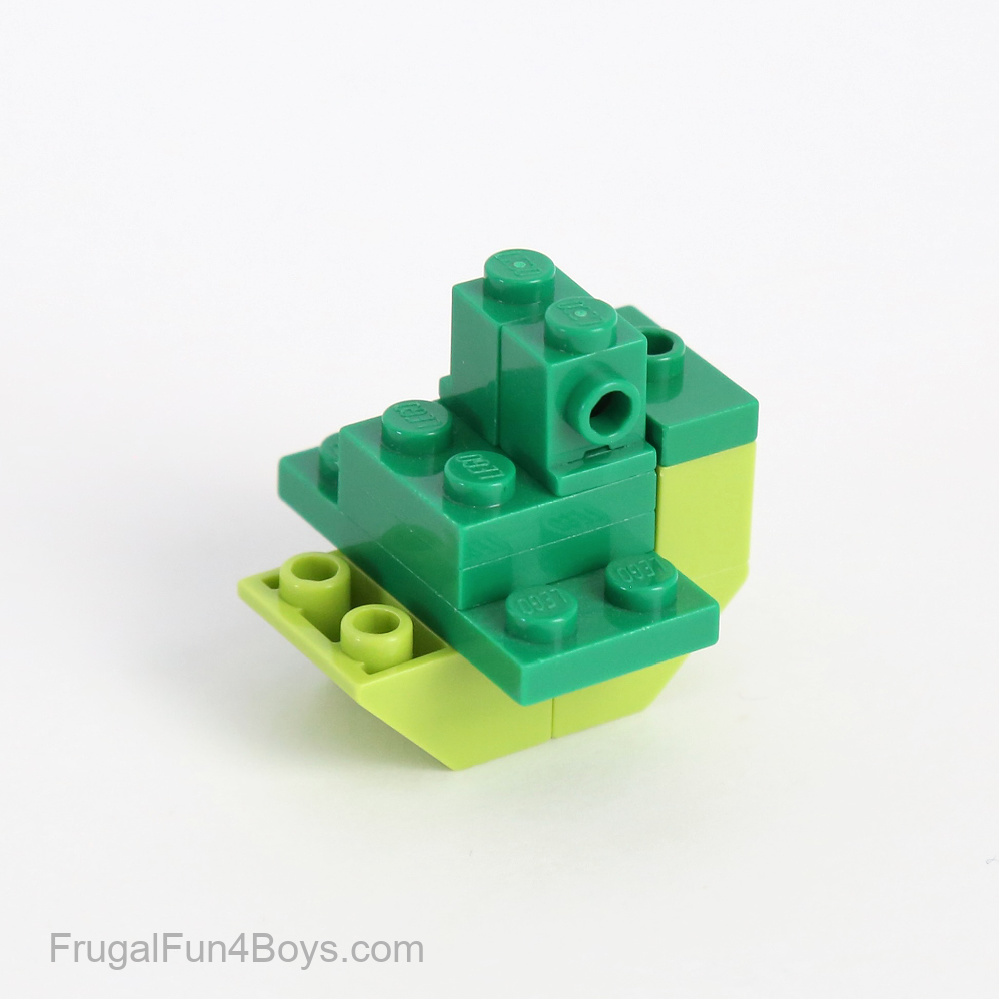
Add a 1 x 2 green slope (30 degree) and then put one 1 x 1 green round plate on each stud.
Find the bricks shown for building the tail.
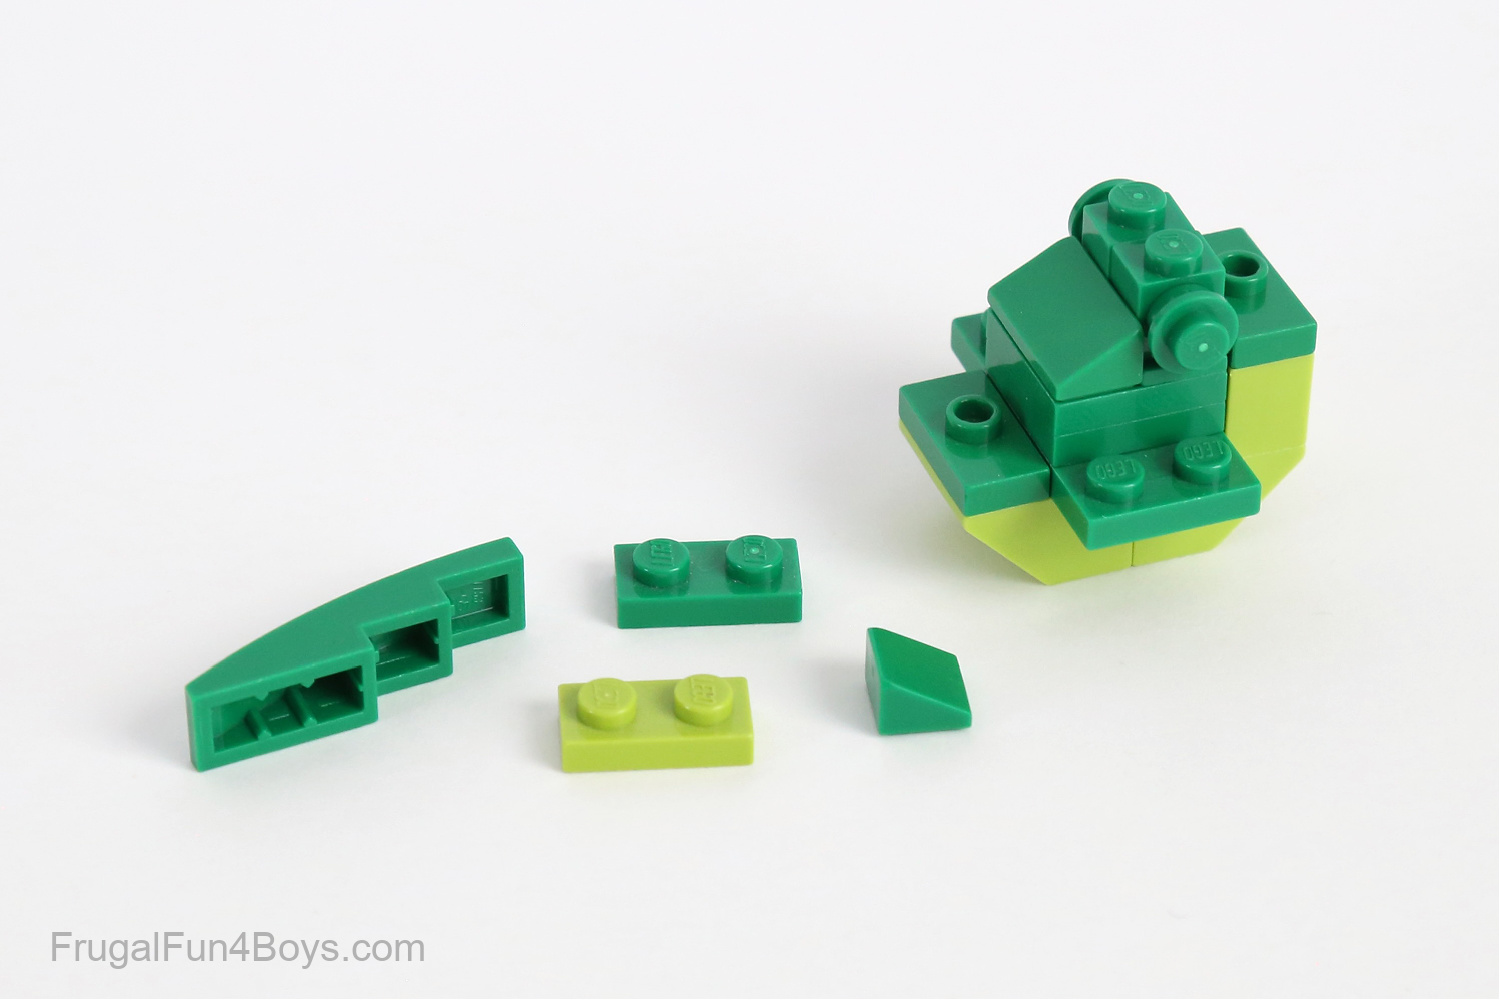
Complete the tail as shown.
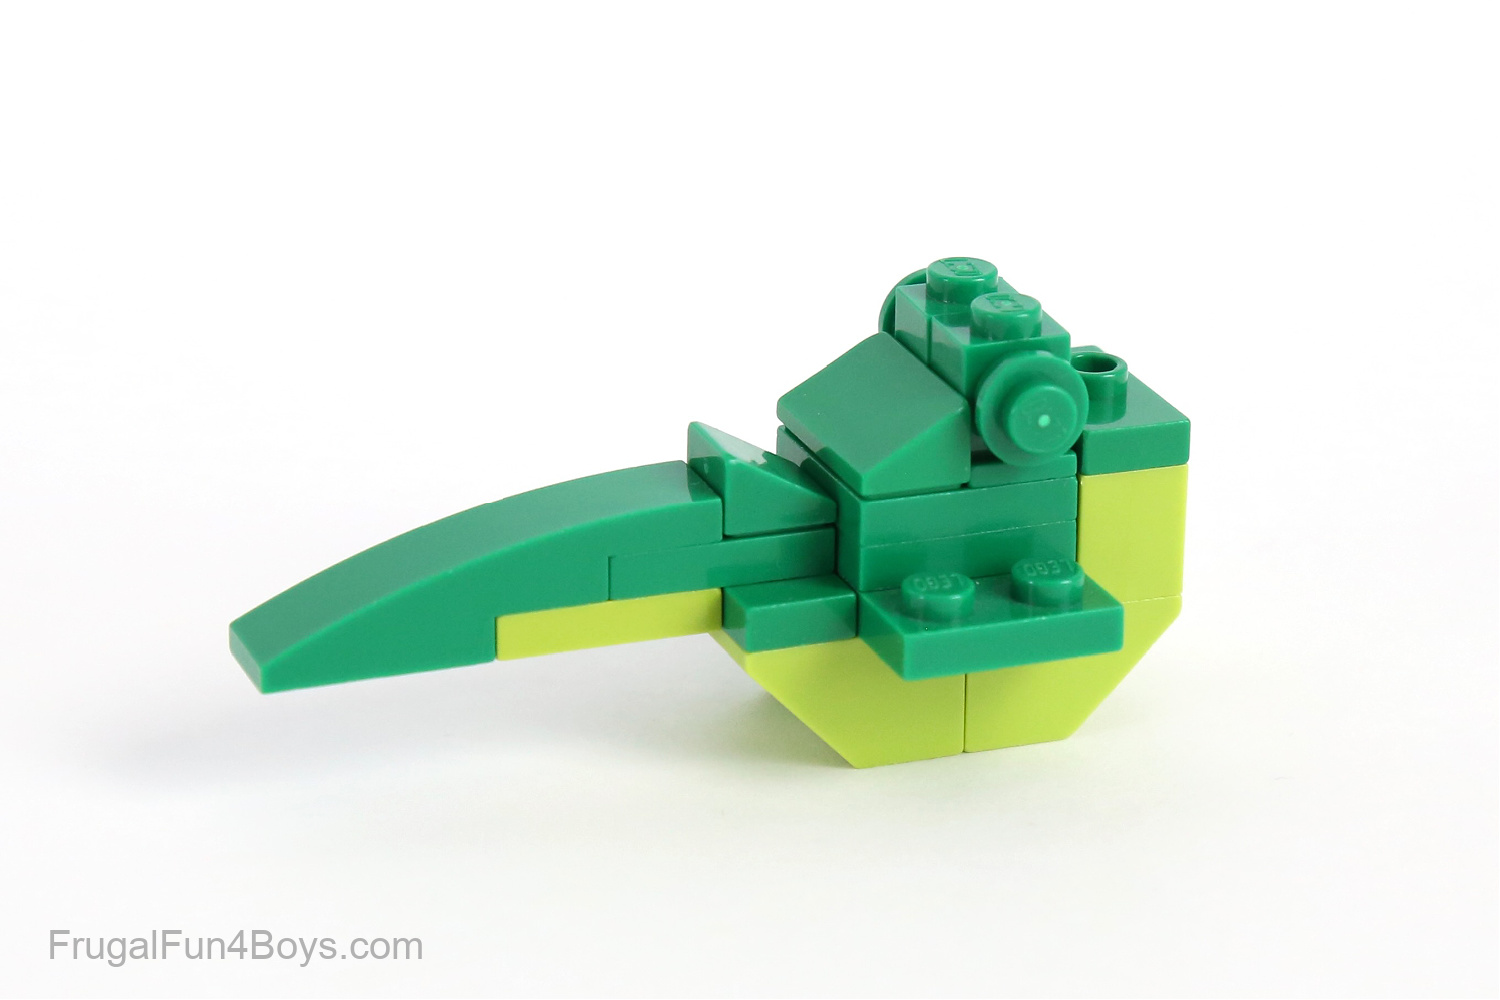
Attach the head to the body. Then add legs. Each leg is a 1 x 2 green slope and a 1 x 1 green plate.
Use two 3 x 3 green round corner plates for the wings. Each wing attaches to the green stud on the body.
Do you love LEGO projects? Join Weekly Brick Ideas!
Weekly Brick Ideas is a free email newsletter for LEGO fans! Each week, you’ll receive a new LEGO building idea.
1 Comments
Linda Austin Jul 18, 2023
I understand there are pros and cons to gluing Lego projects. Do you glue your projects? After spending several hours on a project, then to have it collapse with just a slight movement is discouraging. I think I will go with gluing. What is your opinion? Thanks. Linda Austin
Sarah Jul 19, 2023
We do not glue LEGO projects! If a project is built well, it shouldn't collapse with slight movement. I'd focus on building strategies that lead to secure LEGO creations. :-)
Post a Comment