
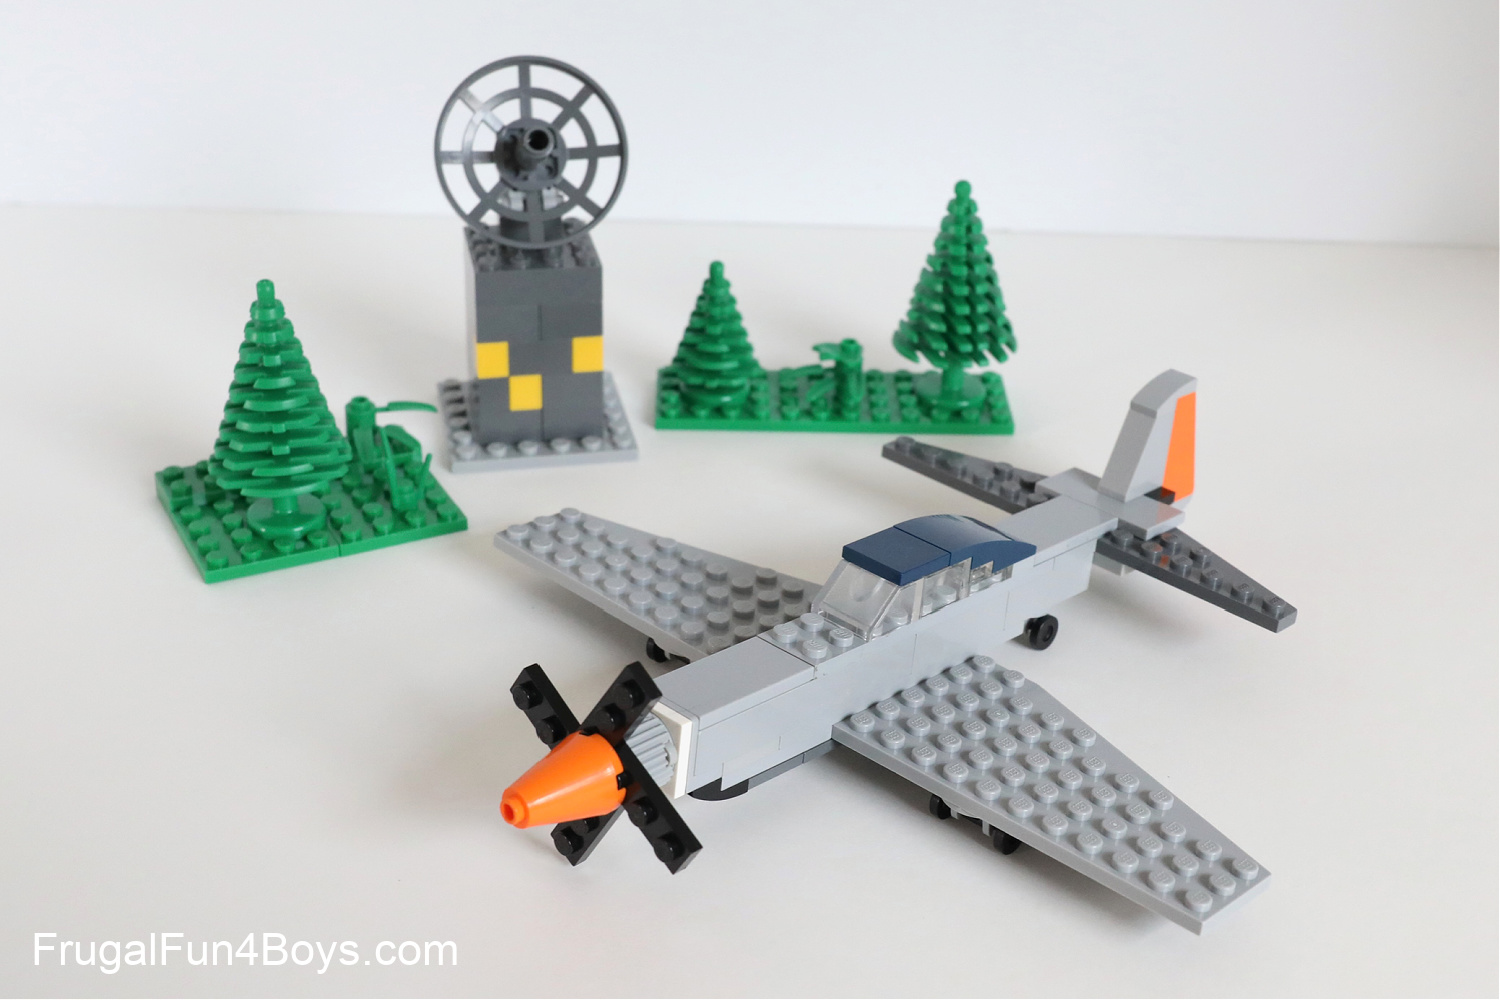
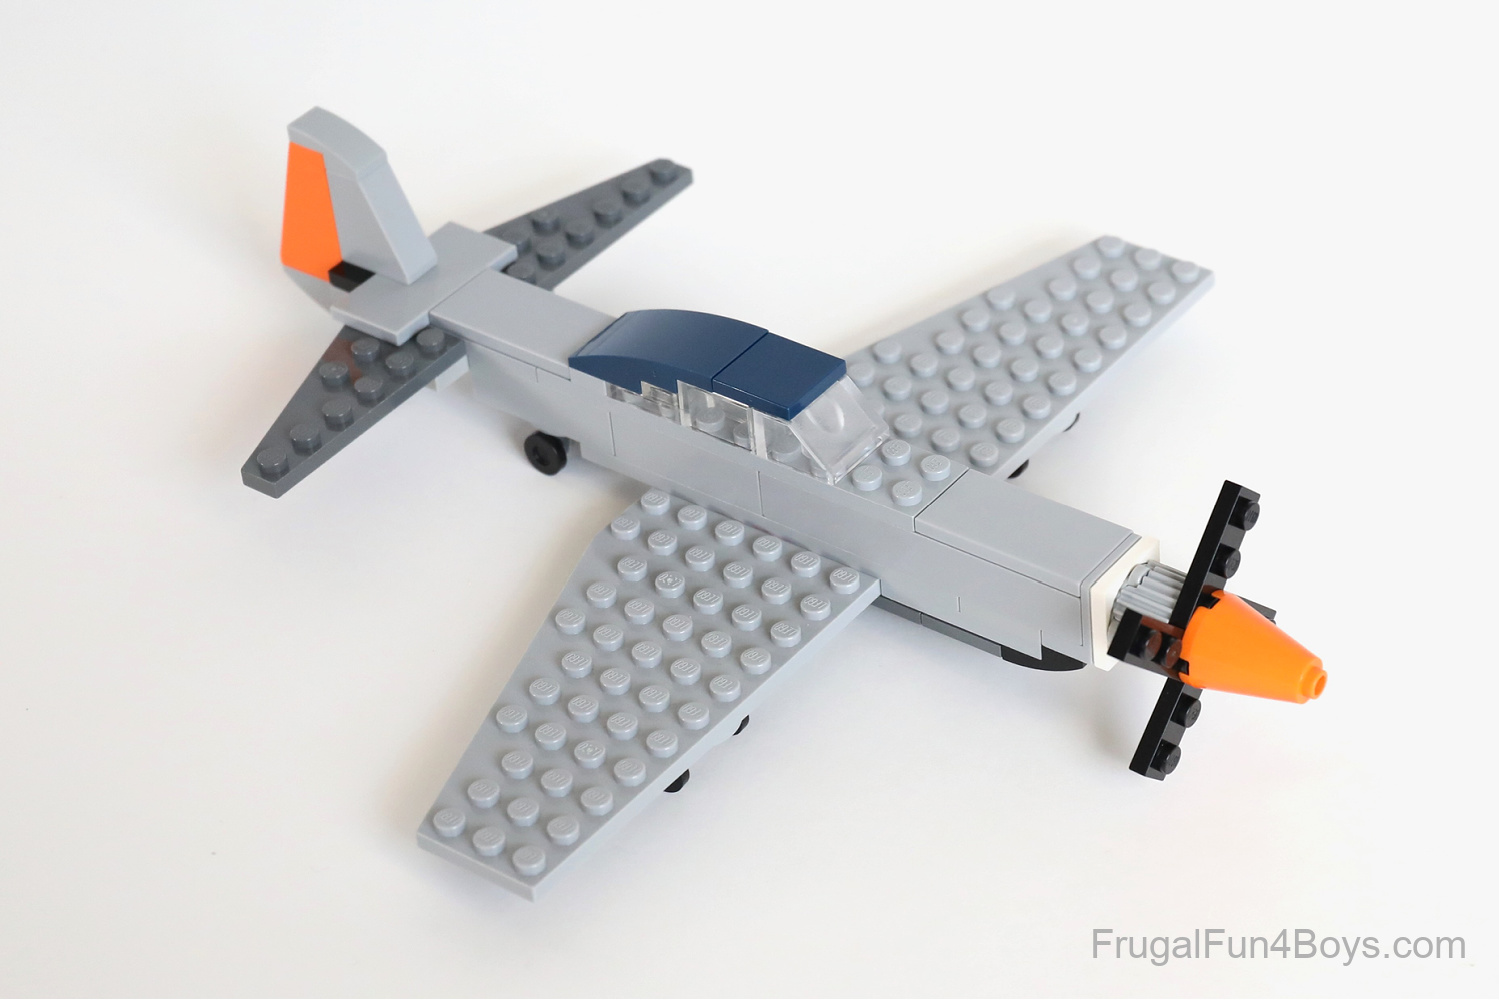
Use your LEGO bricks to make an awesome WWII era plane! Our friend Jacob built this cool Mustang replica and gave us permission to share it with you all. I love his plane because it’s simple to build and has that classic WWII look.
Customize your Mustang plane with the bricks you have. You may want to look at photos of real Mustang planes online as you choose your color scheme. Here’s an article with information about the Mustang fighter plane.
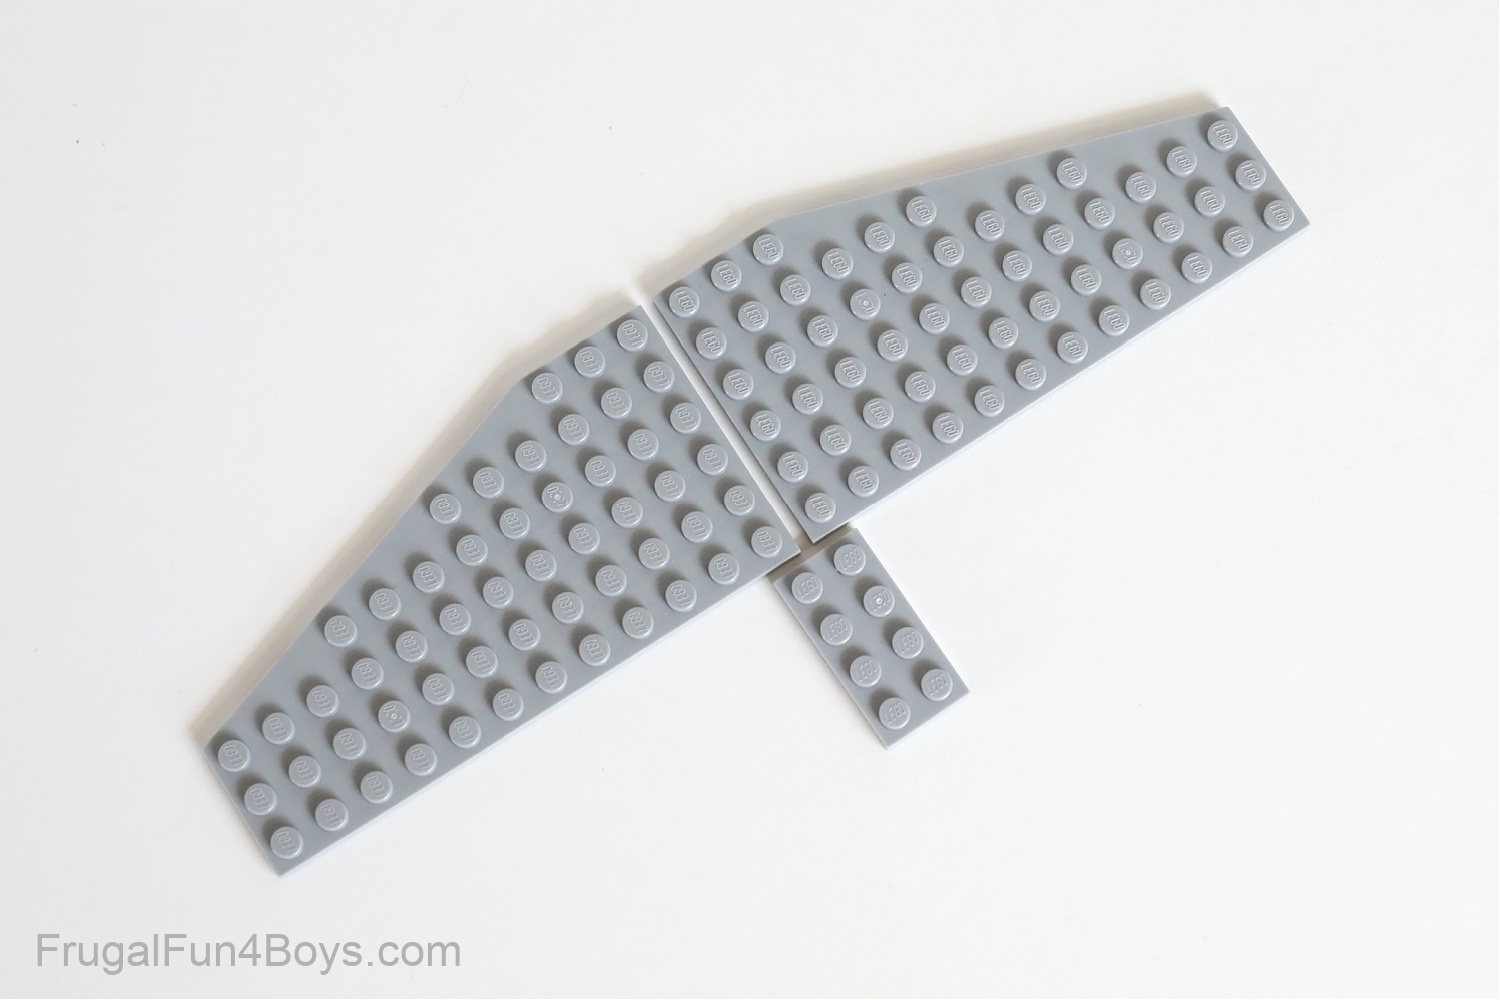
If you don’t have the exact wedge plates that we used for wings, you can easily adapt the design with what you have.
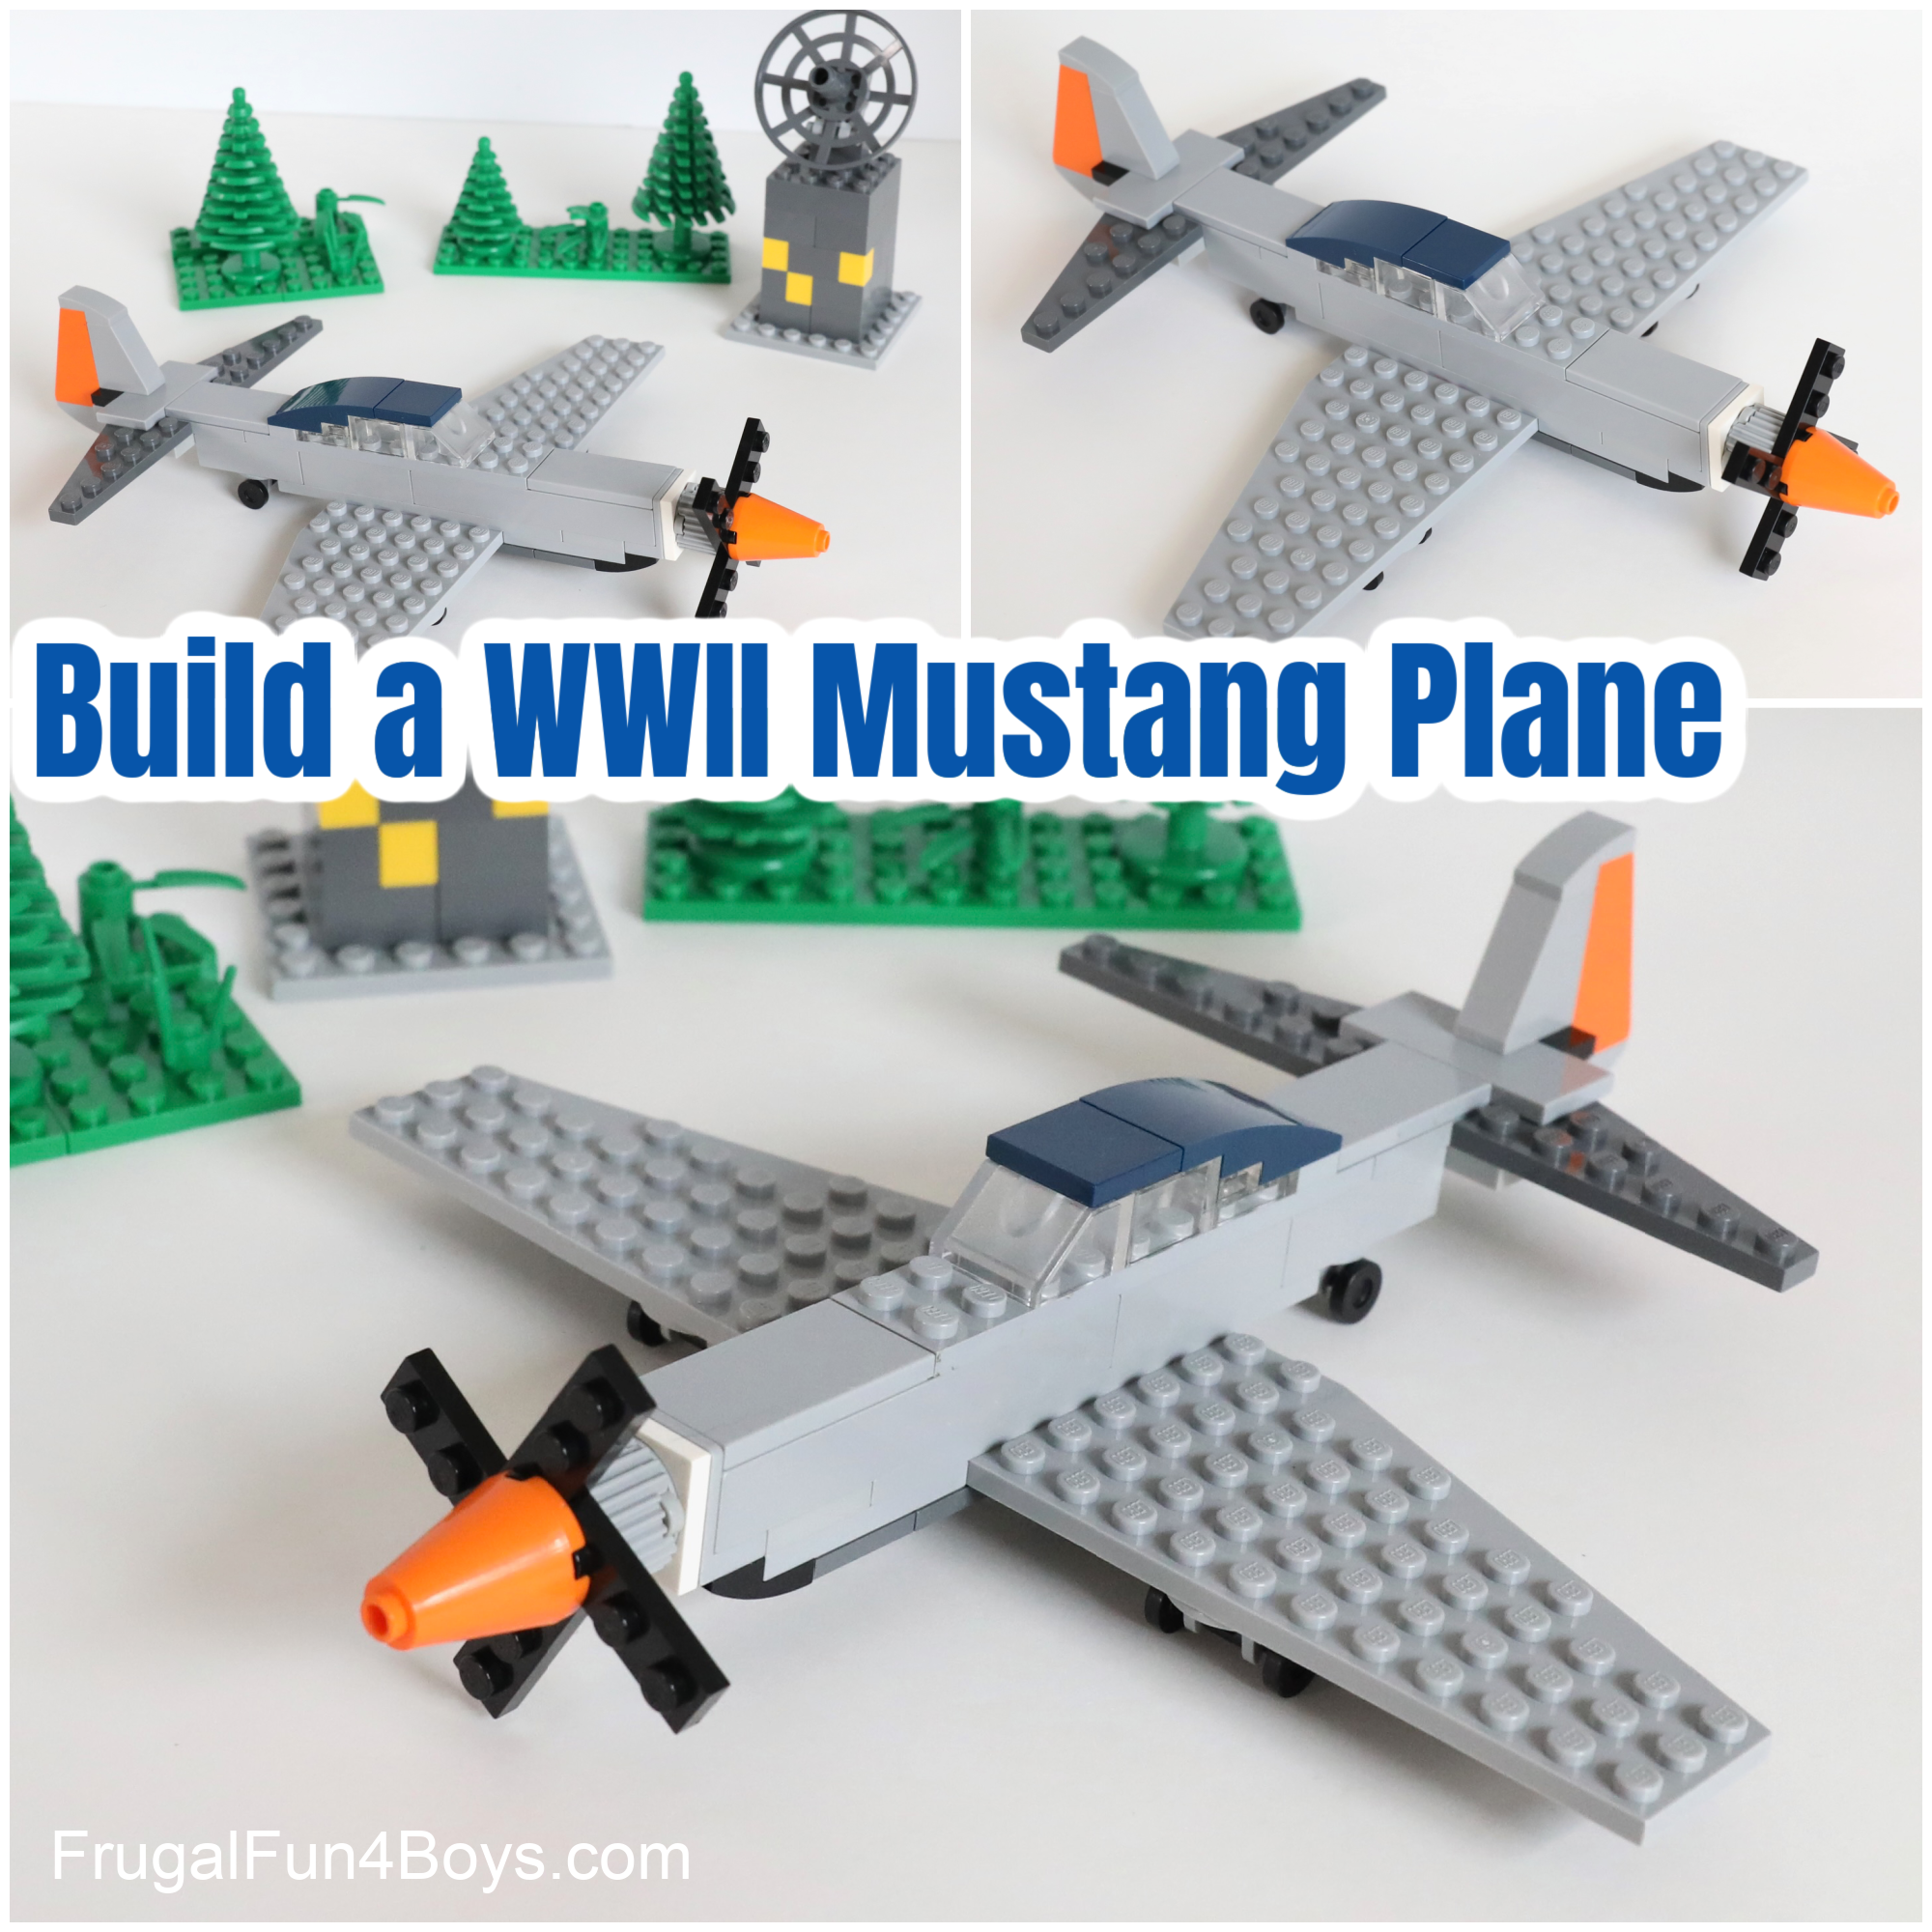
You may want to create a whole scene! We built a mini air traffic control tower.
How to Build a LEGO Mustang Plane:
The brick names that I use in these instructions are based on the Brick Link naming system. I sometimes shorten their names or make them less awkward, haha.
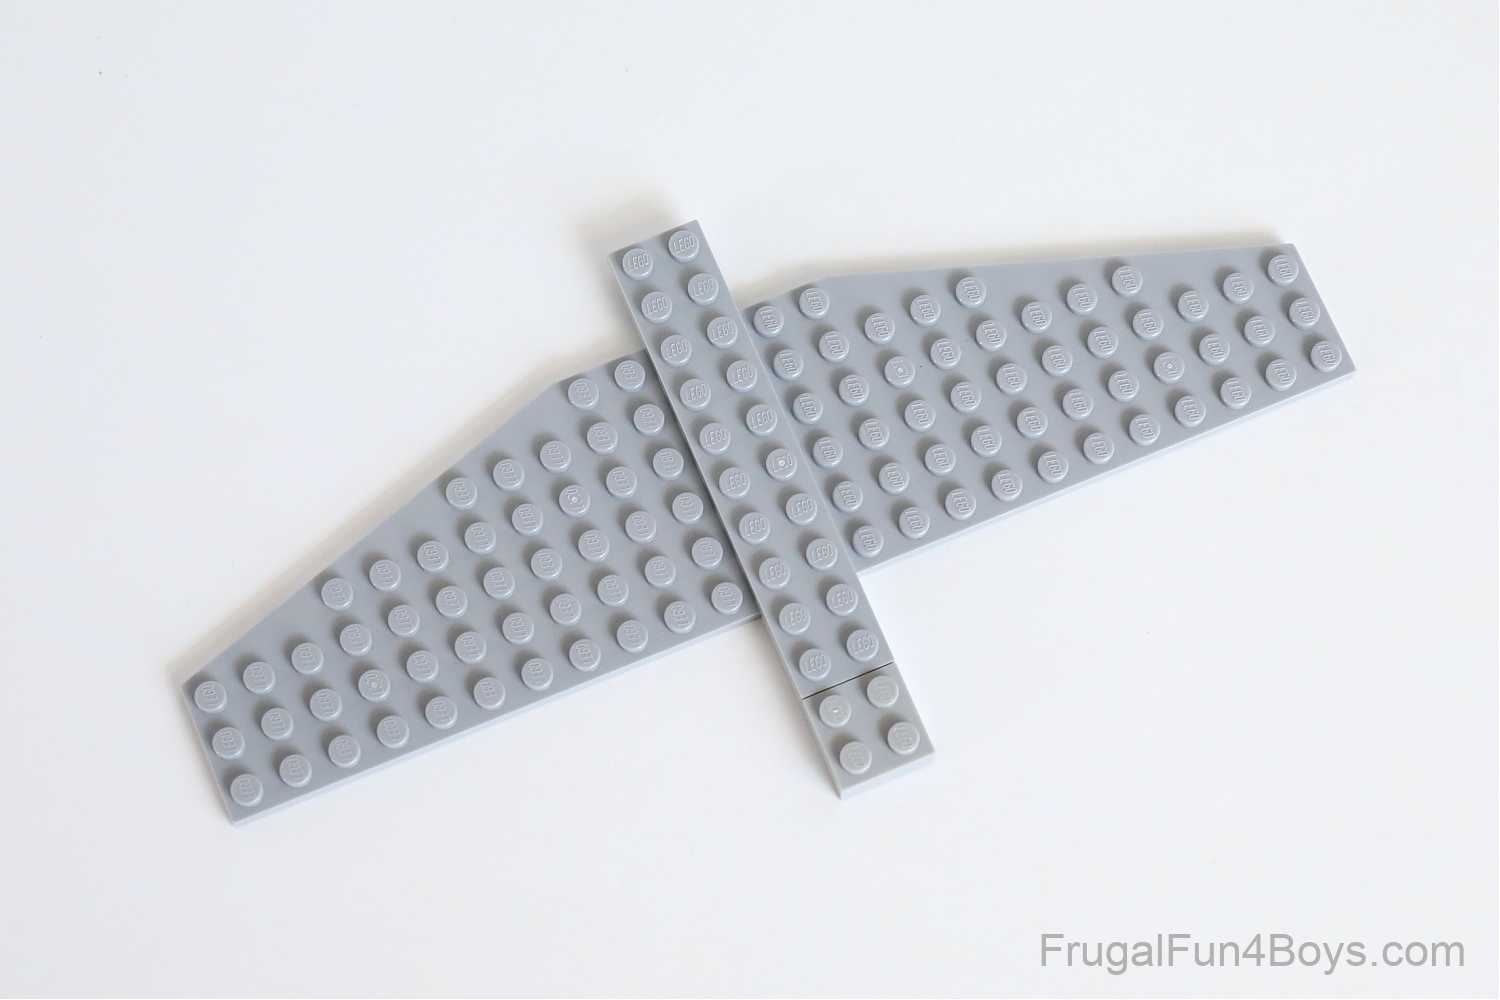
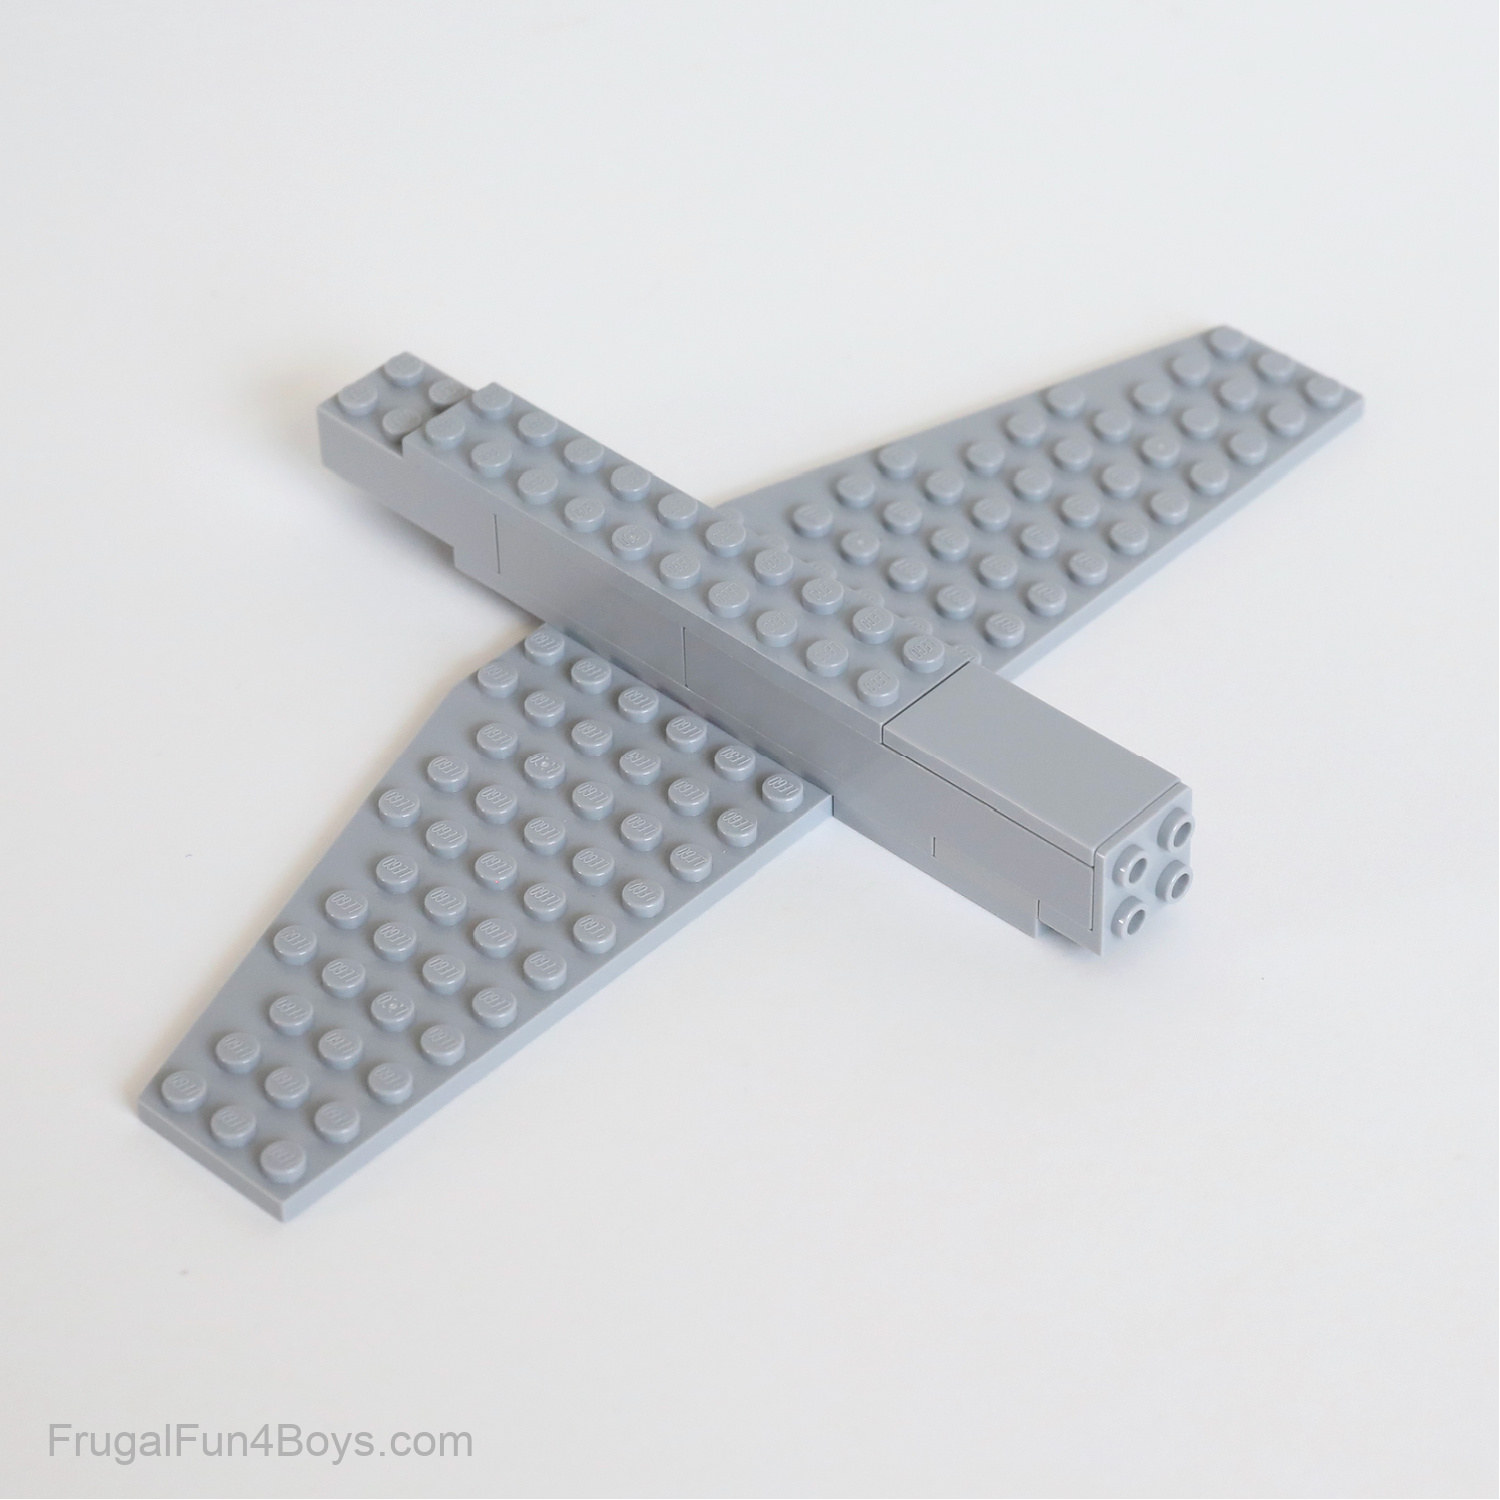
Step 1: Find two 6 x 12 light gray wedge plates. Note that one has a right orientation and the other is a left orientation. Also grab a 2 x 4 light gray plate.
Step 2: Connect these plates with a 2 x 2 light gray plate and a 2 x 10 light gray plate.
Step 3: Add two 2 x 4 light gray bricks and a 2 x 8 brick. (If you want to use two 2 x 8 bricks, that’s great.) The brick on the back of the plane will hang off the plates by 3 students. On the front end of the plane, the brick will hang off by 1 stud.
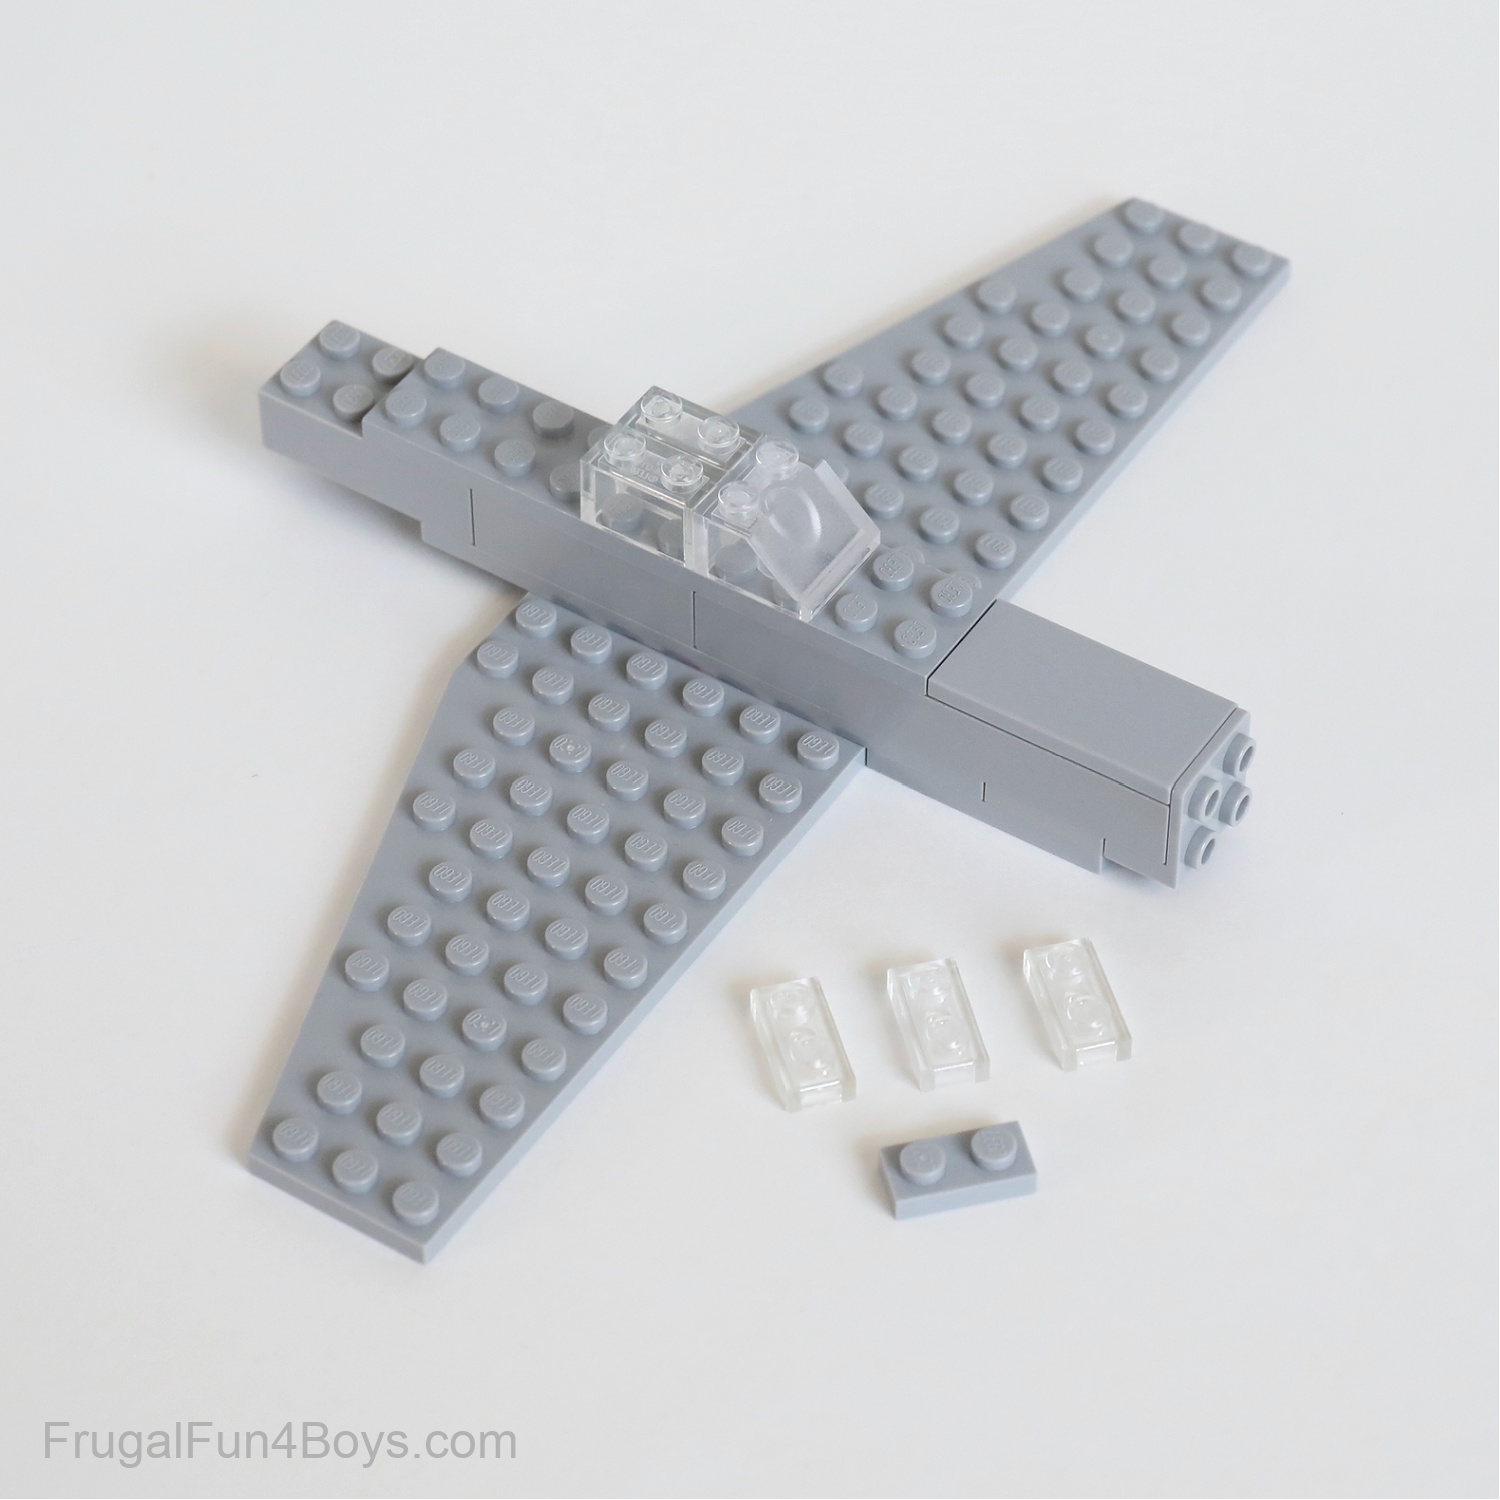
Then find a 1 x 2 – 2 x 2 bracket (inverted), a 2 x 4 tile, and a 2 x 10 plate.

Step 4: Add the plate, tile, and bracket to the front of the plane as shown.
Step 5: Build the cockpit by adding a 2 x 2 clear slope and two 1 x 2 clear bricks. Then find three 1 x 2 clear plates and a 1 x 2 light gray plate.
Step 6: Add two 1 x 2 clear plates behind the cockpit, and then place the third plate on top of the other two as shown. Place the 1 x 2 light gray plate behind the clear ones. Find a 2 x 2 tile and a 2 x 4 curved slope. We used dark blue.
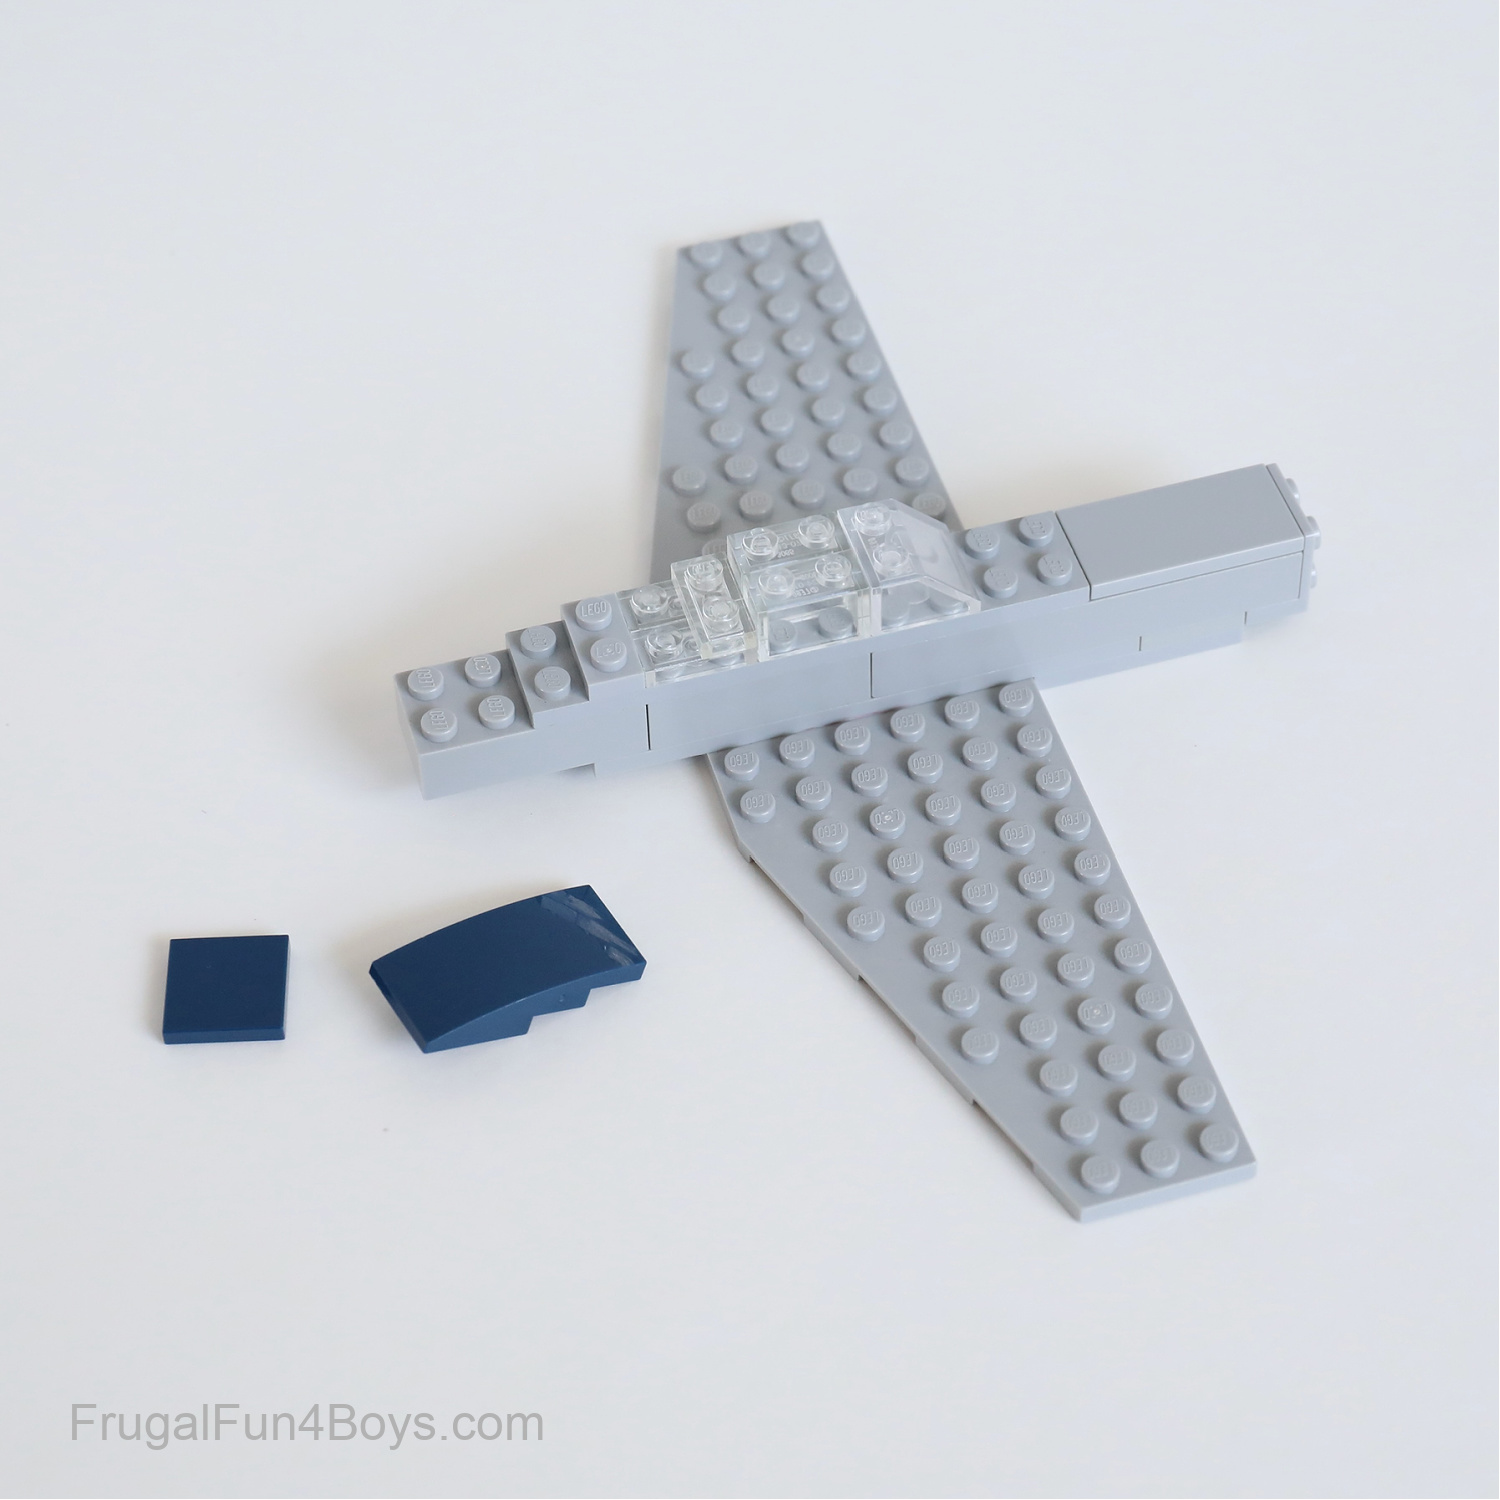
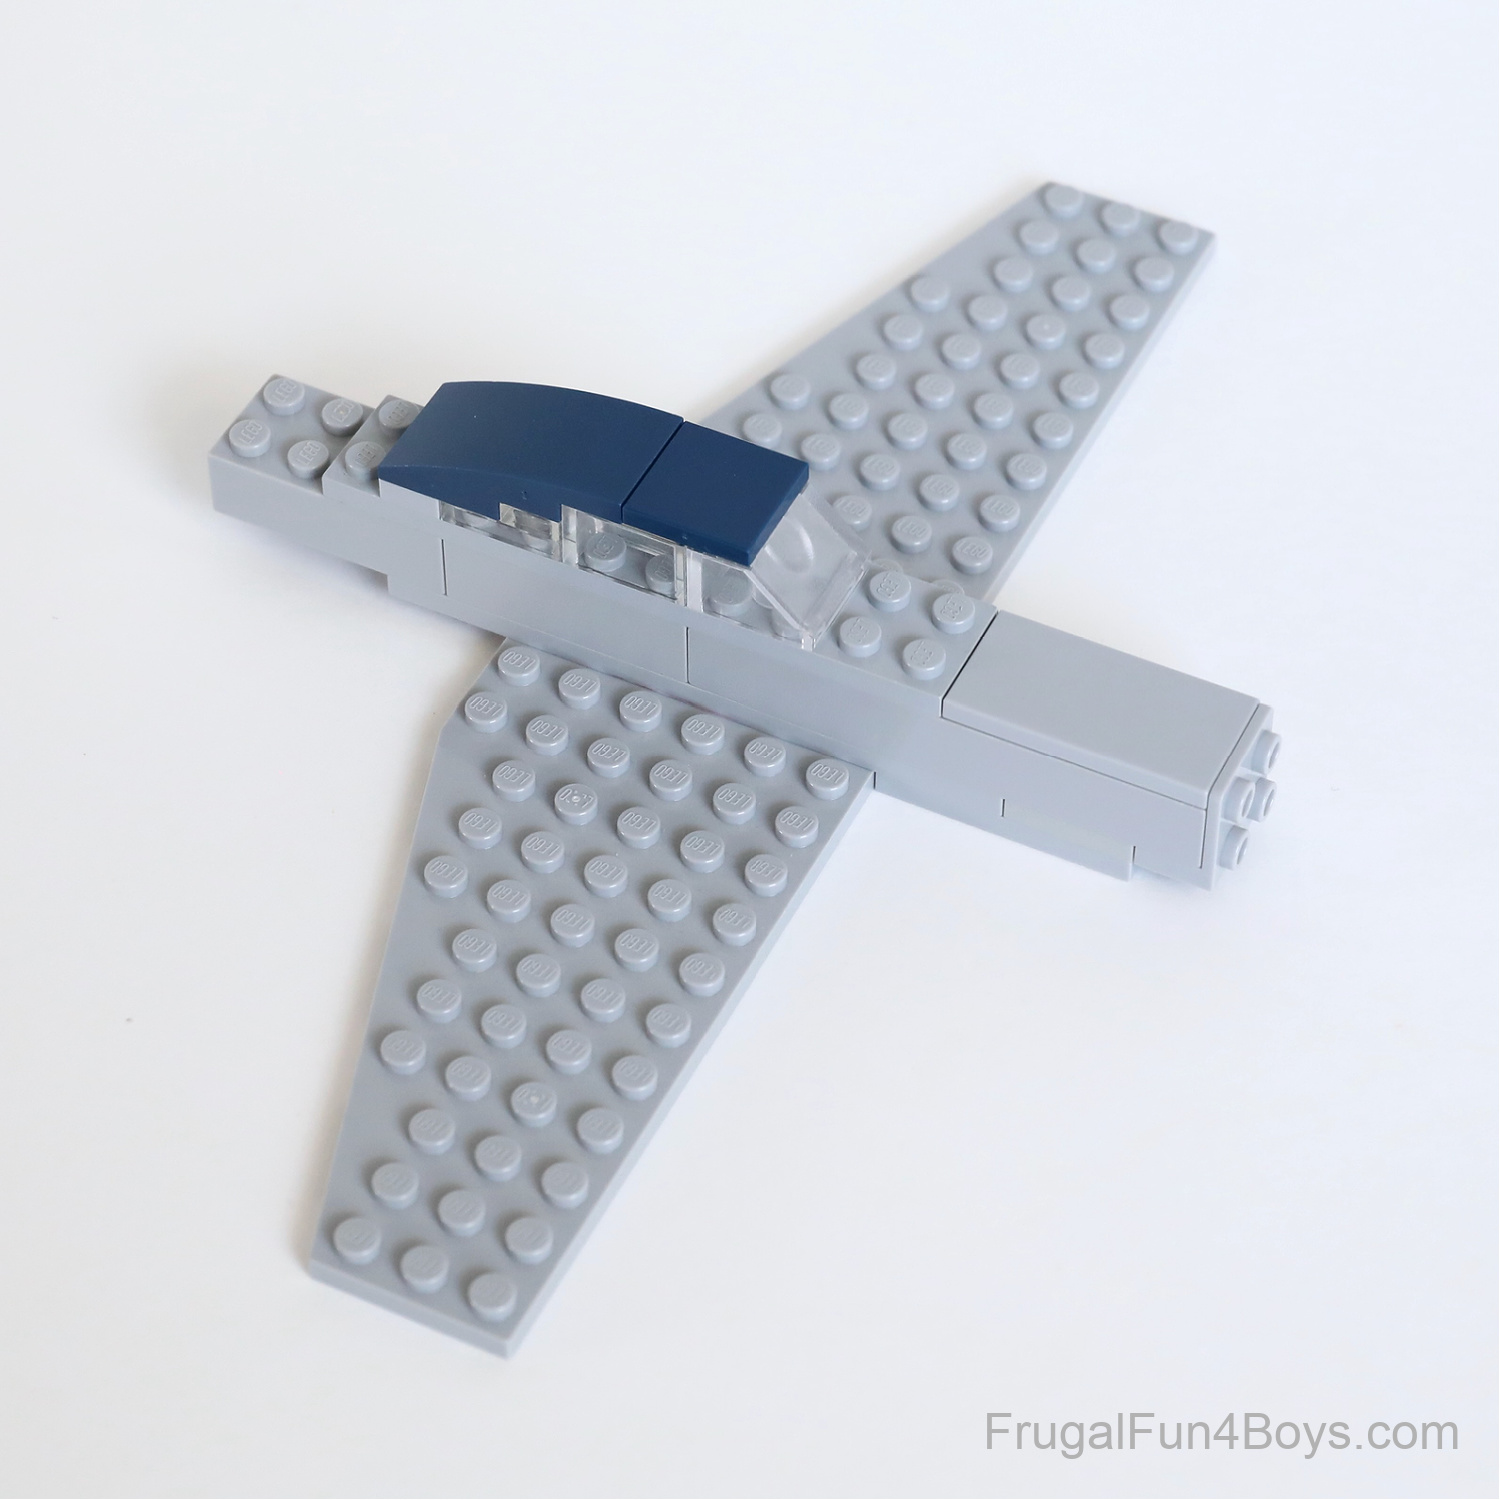
Step 7: Add the tile and curved slope to make the roof of the cockpit.
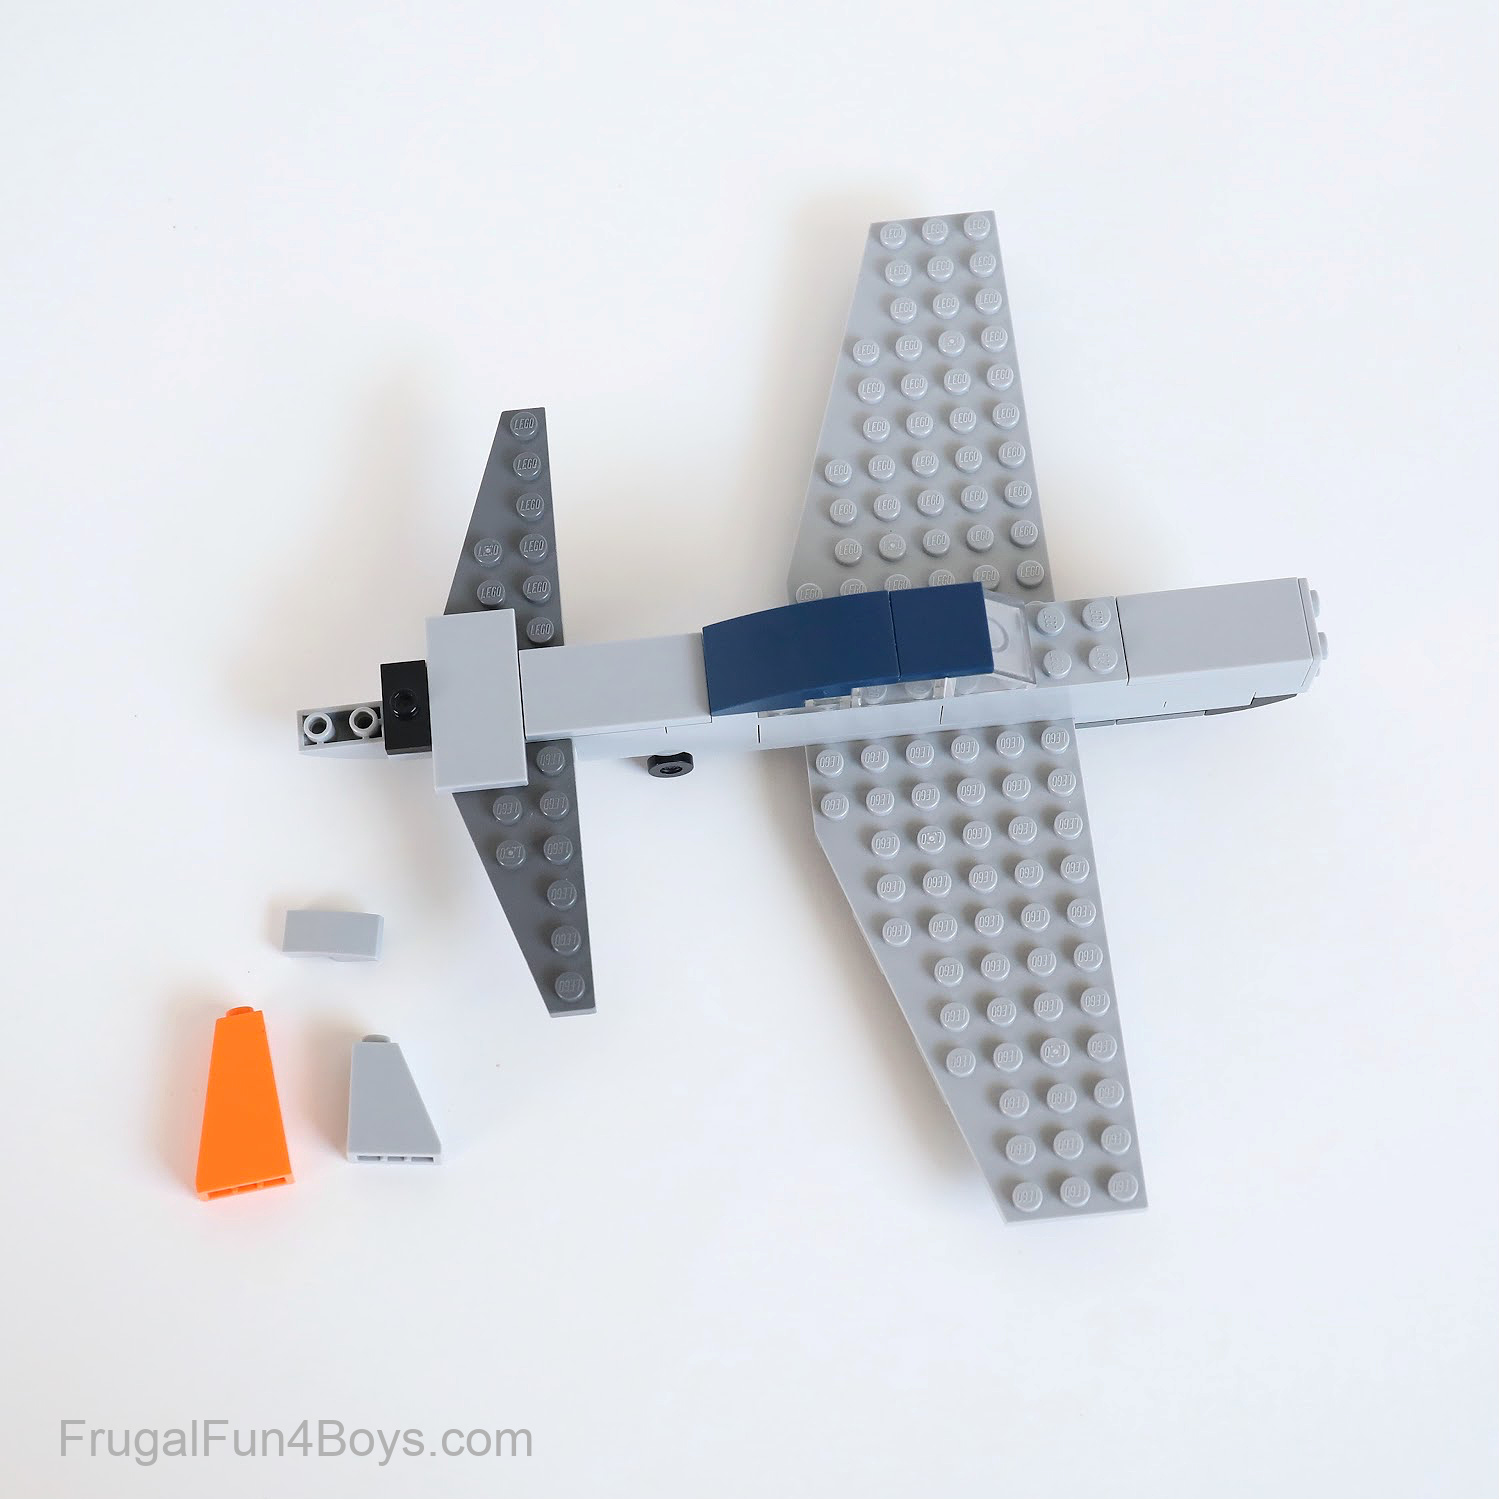
Step 8: Add a 2 x 6 plate behind the cockpit. Then add a 2 x 4 tile. Find the pieces shown for the tail.
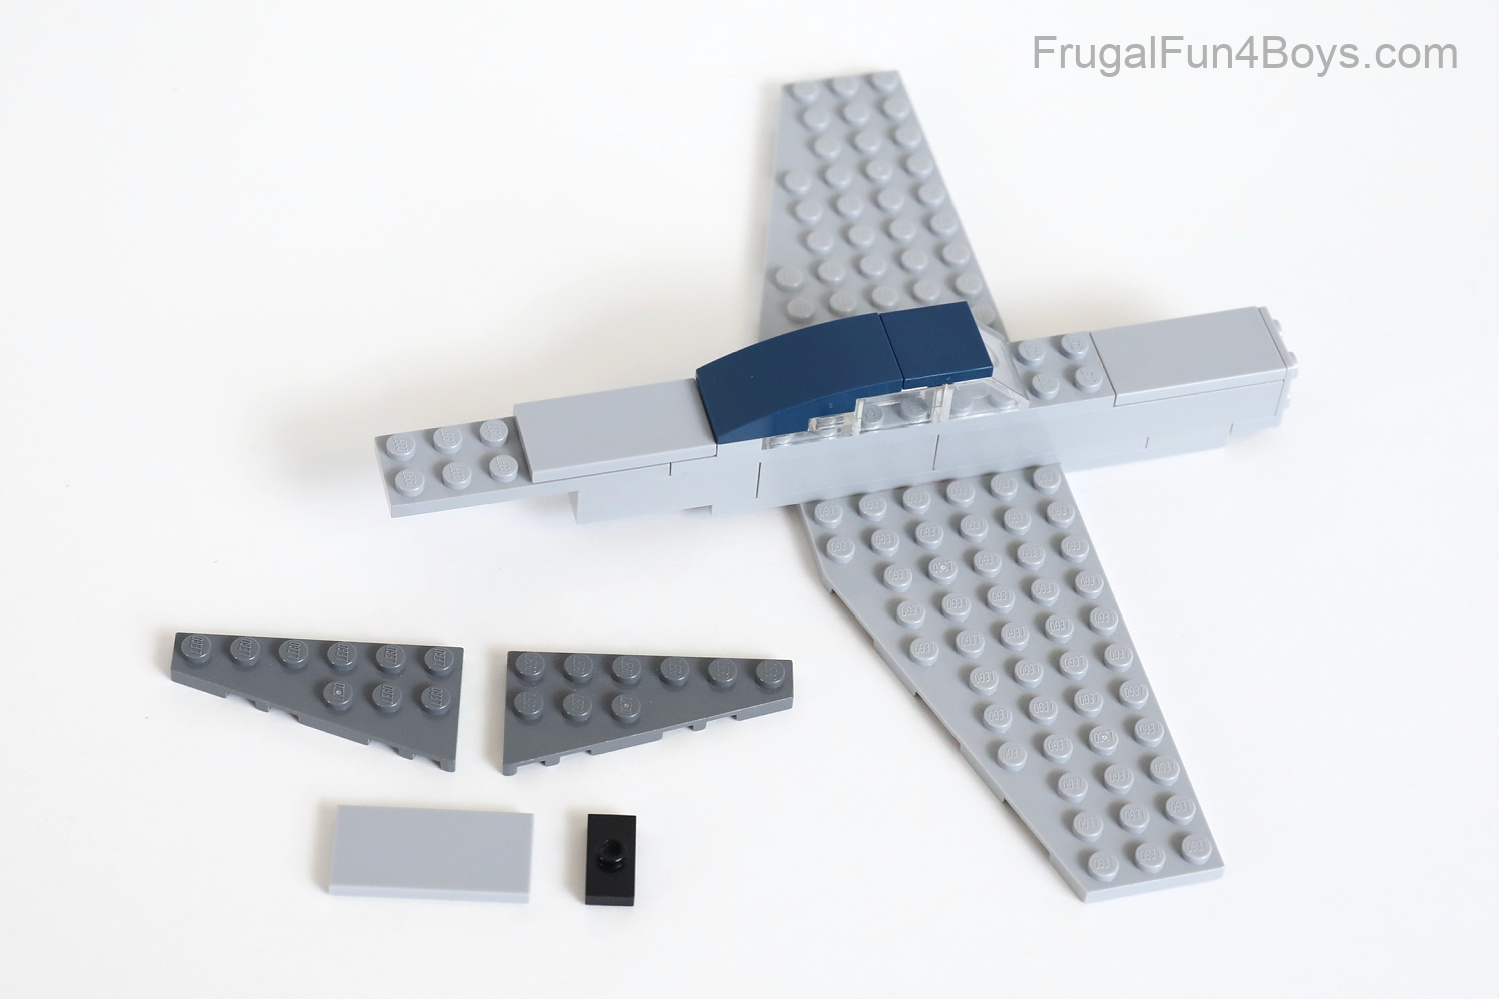
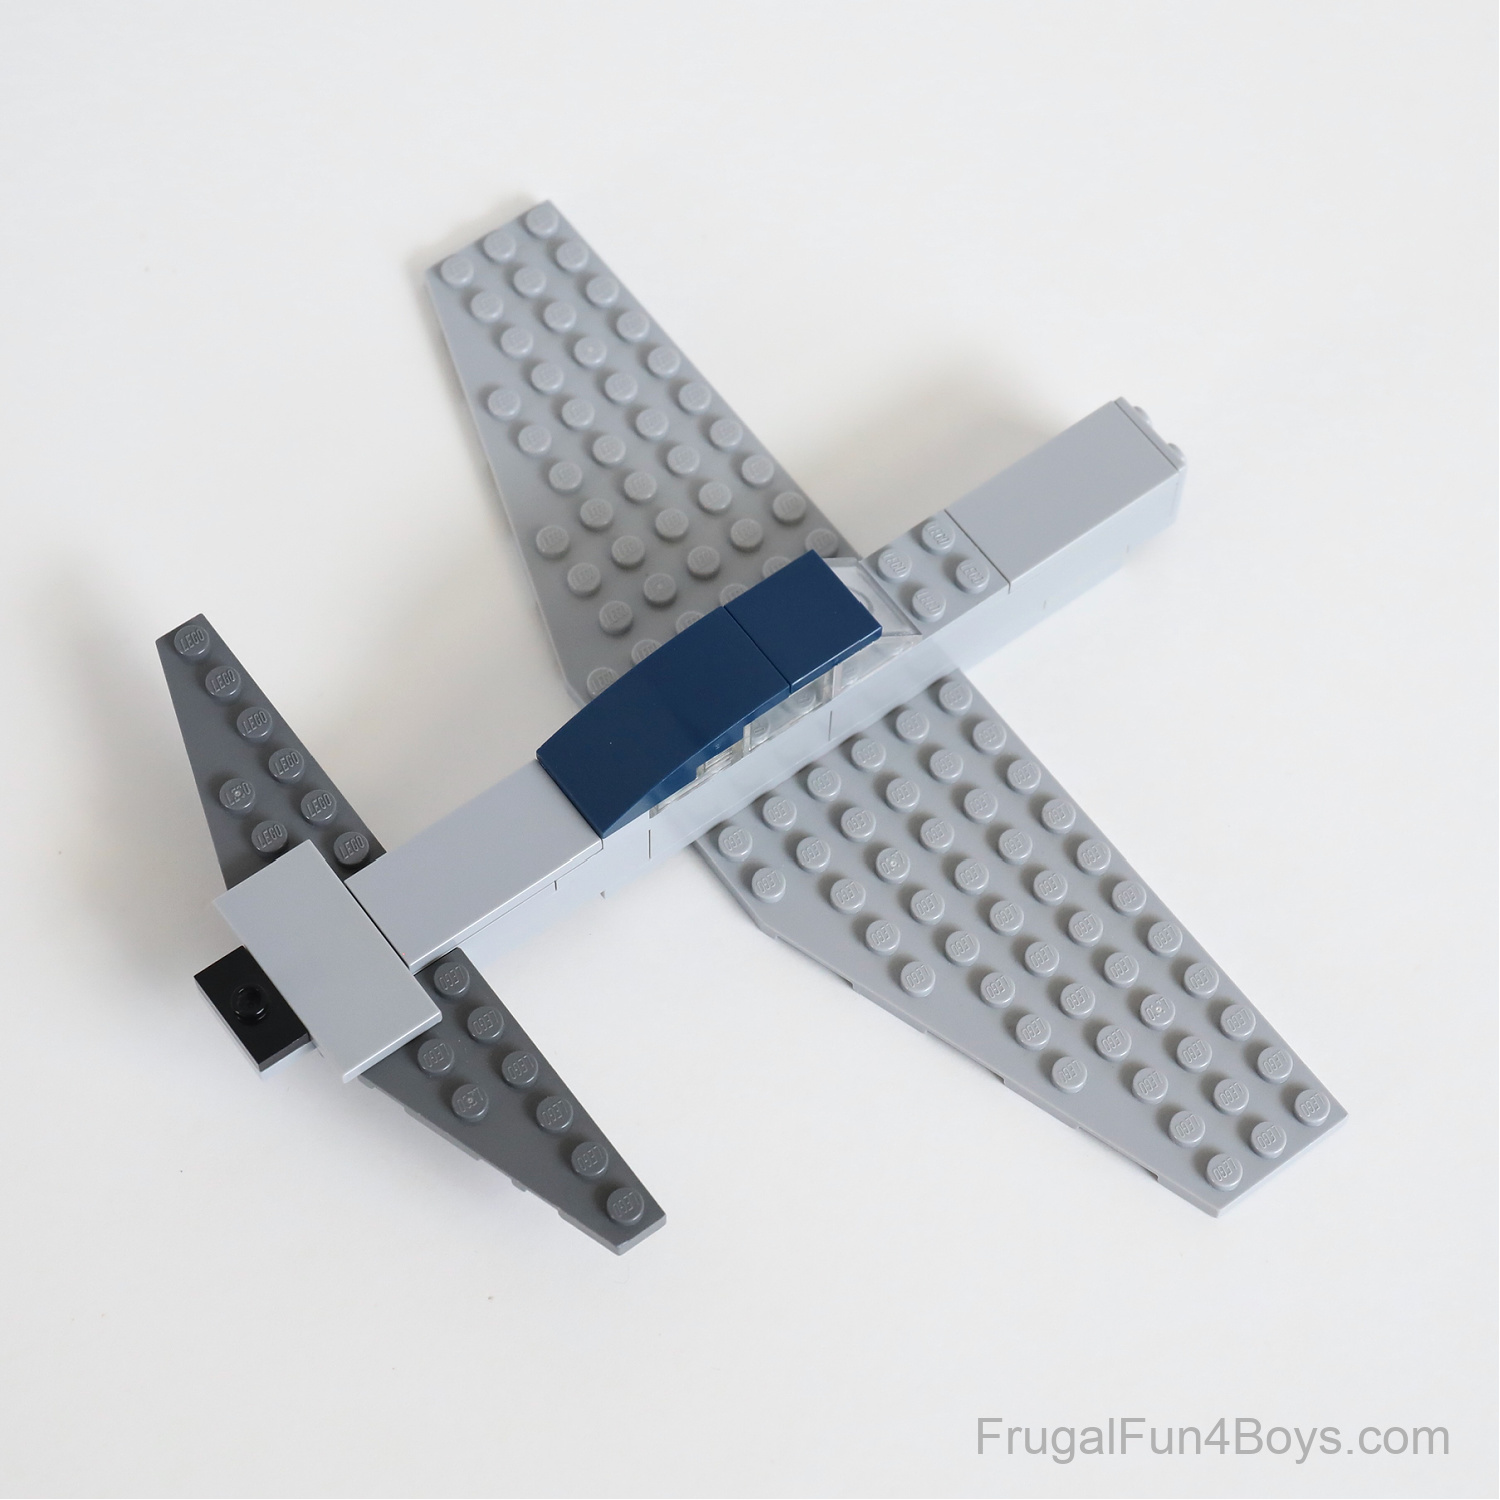
Step 9: Line up the 3 x 6 wedge plates on either side of the tail. Secure them in place with a 2 x 4 tile. We’re going to make this more secure in the next step. Add a 1 x 2 black plate with one stud on top.
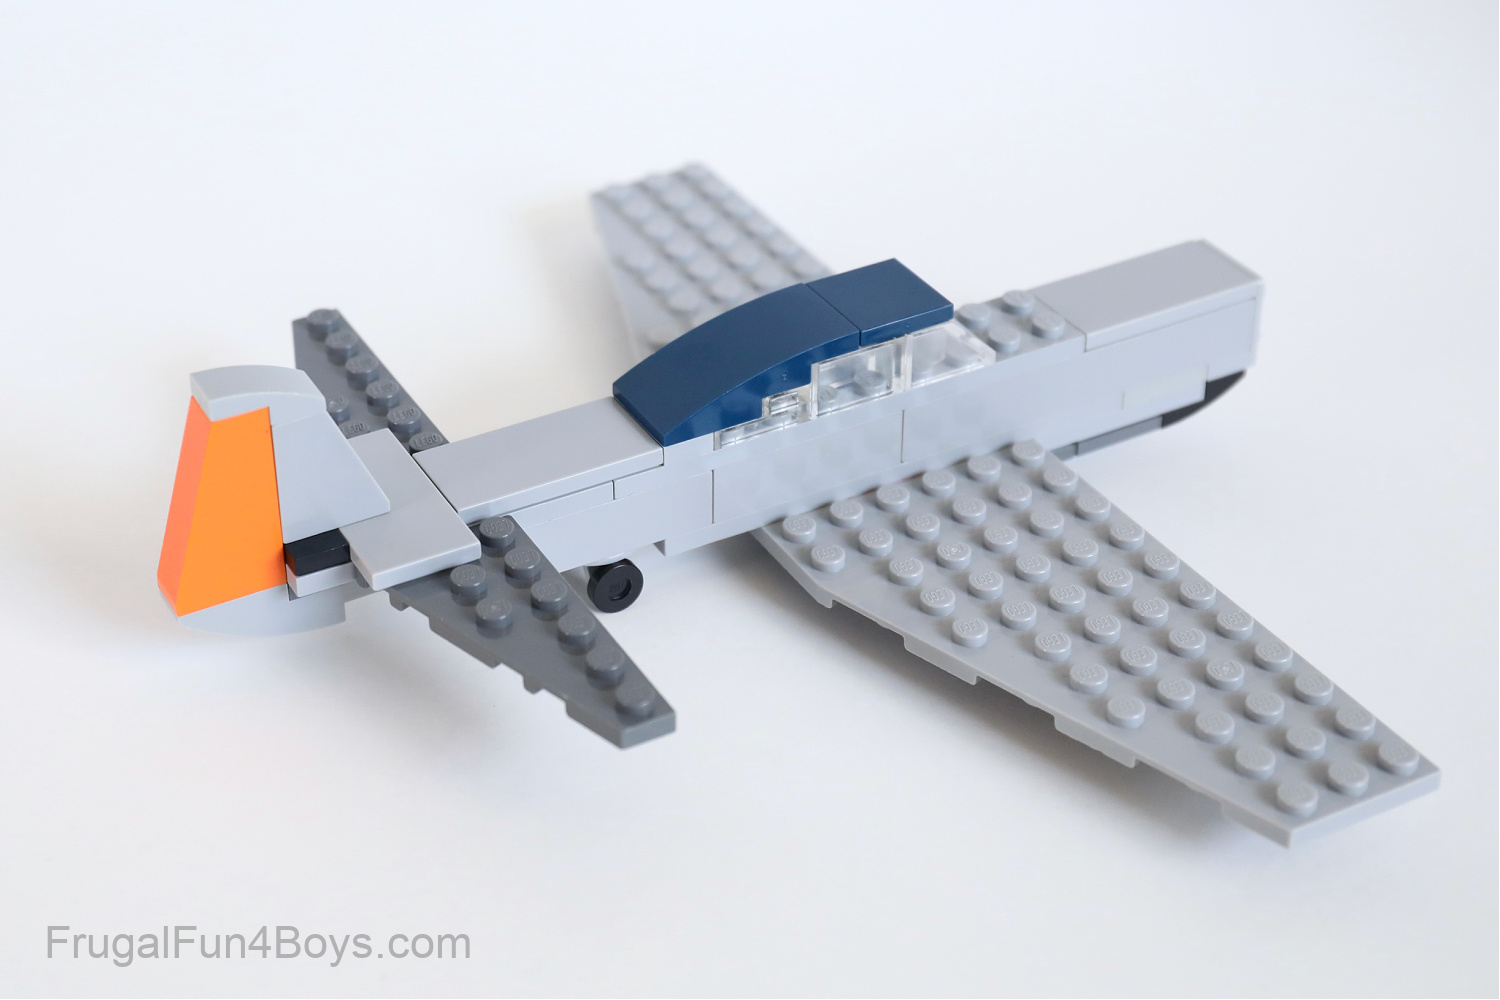
Step 10: Turn your plane upside down. Find a 2 x 4 light gray plate, a 1 x 2 dark gray plate with one stud on top (jumper plate), three 2 x 2 dark gray inverted tiles, a 2 x 2 black inverted curved slope, and a 1 x 4 inverted curved slope.
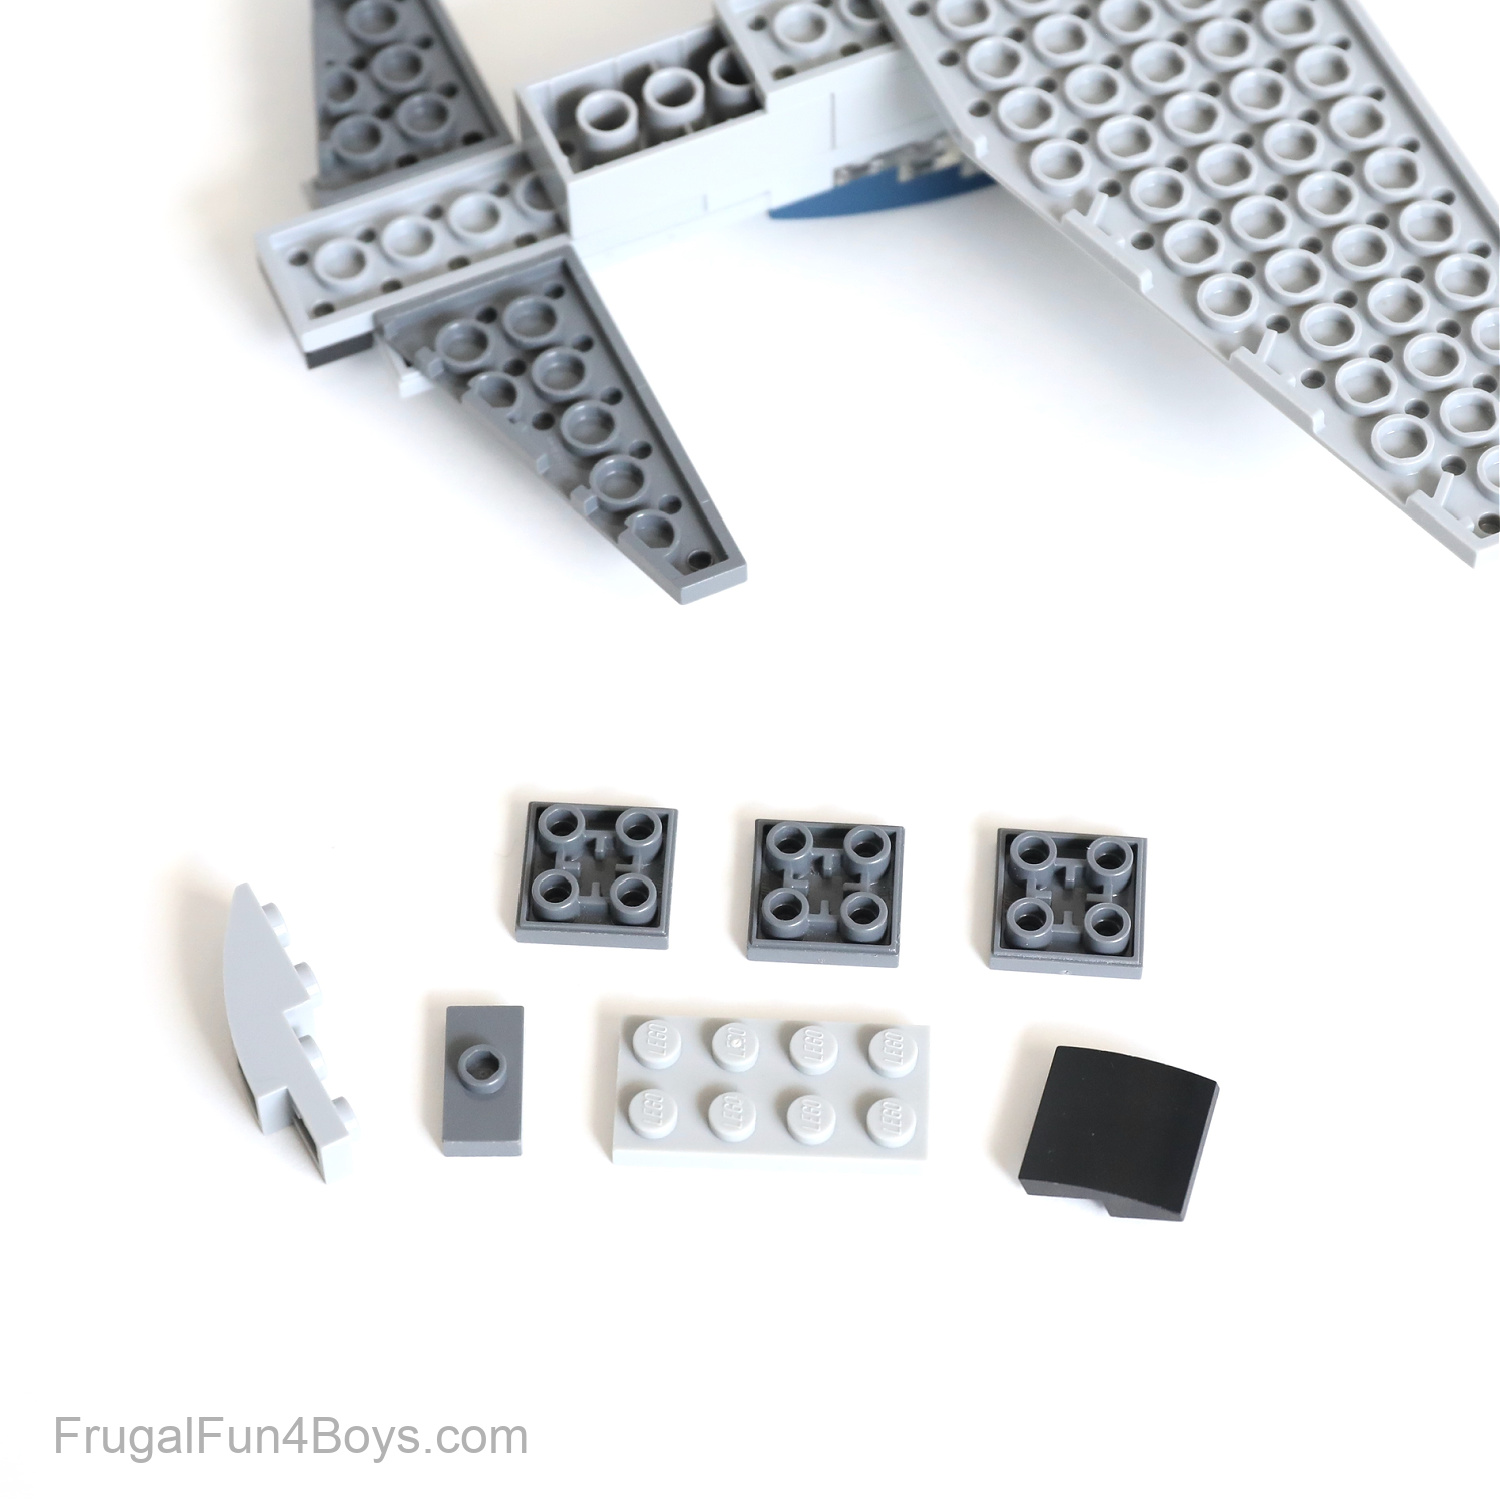
Step 11: Attach the three 2 x 2 inverted tiles and the 2 x 2 inverted curved slope to the front of the plane. Place the 1 x 2 dark gray jumper plate on top of the light gray inverted curved slope (these part names are a mouthful!). Then attach that to the back of the plate. Add a 2 x 4 light gray plate to secure the tail.
Add three sets of wheels. We used skateboard wheels.
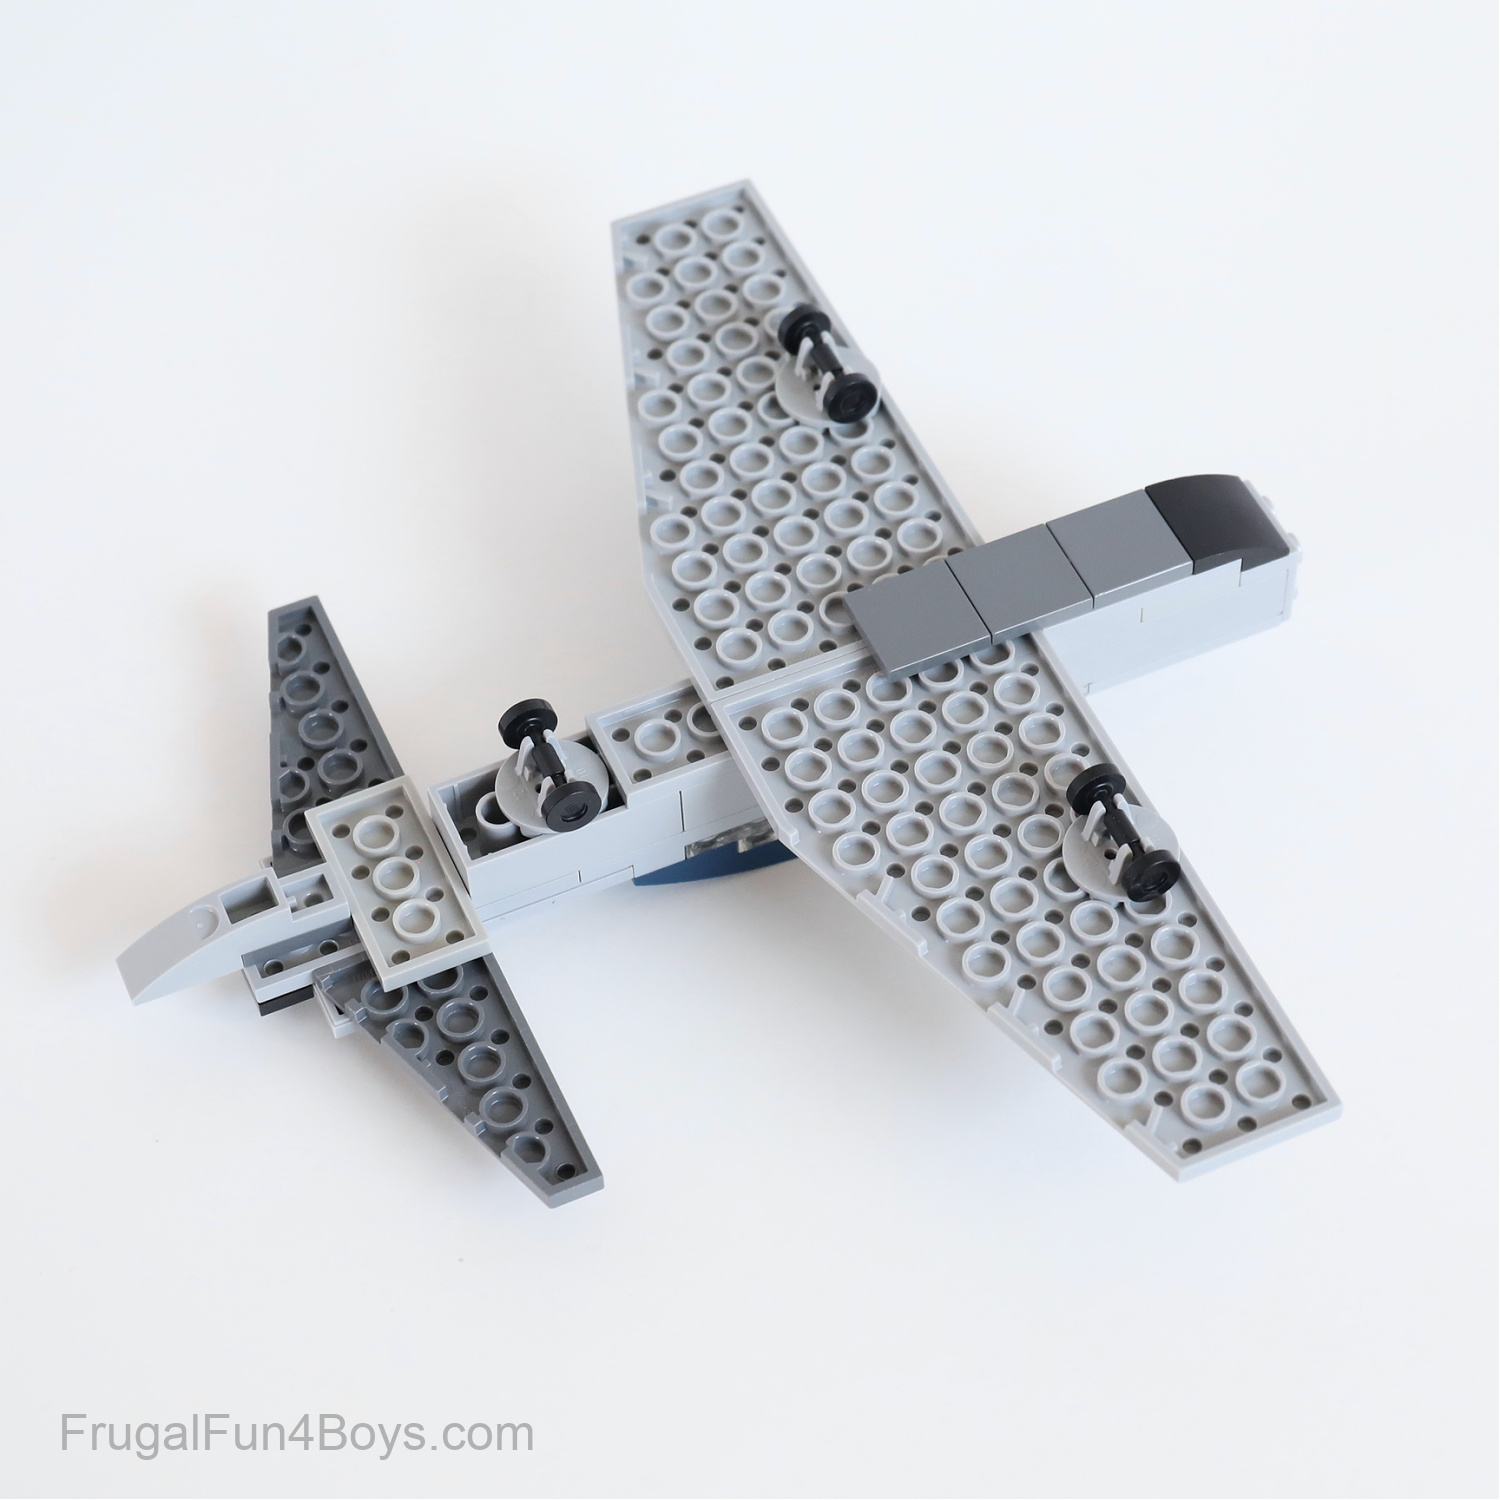
Step 12: Turn the plane over again. Find a 1 x 2 orange slope (3 bricks high), a 1 x 2 light gray slope (2 bricks high) and a 1 x 2 light gray curved slope.
Step 13: Use the 1 x 2 light gray curved slope to connect the other two slope bricks. Then add them to the tail of the plane.
Step 14: Find the pieces shown for building the propeller. Grab a 2 x 2 plate with turntable, a 2 x 2 light gray round brick with ridges, four 1 x 3 black plates, and a 2 x 2 orange cone.
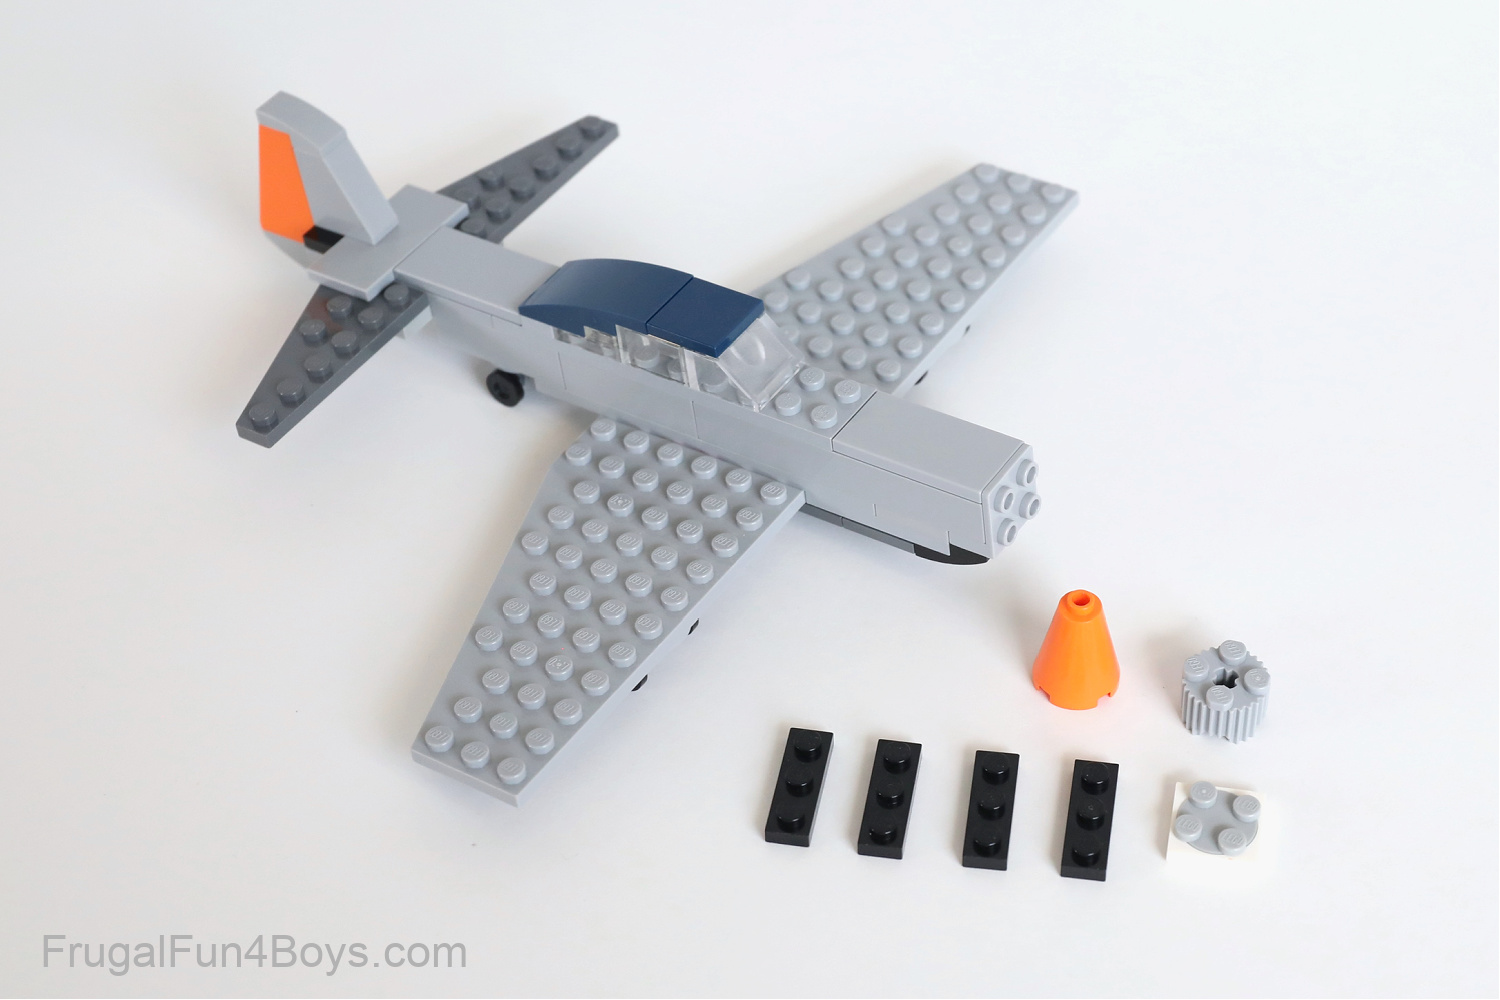
Step 15: Add the turntable to the plate and then the 2 x 2 light gray round brick. Then add the black plates to make a propeller.
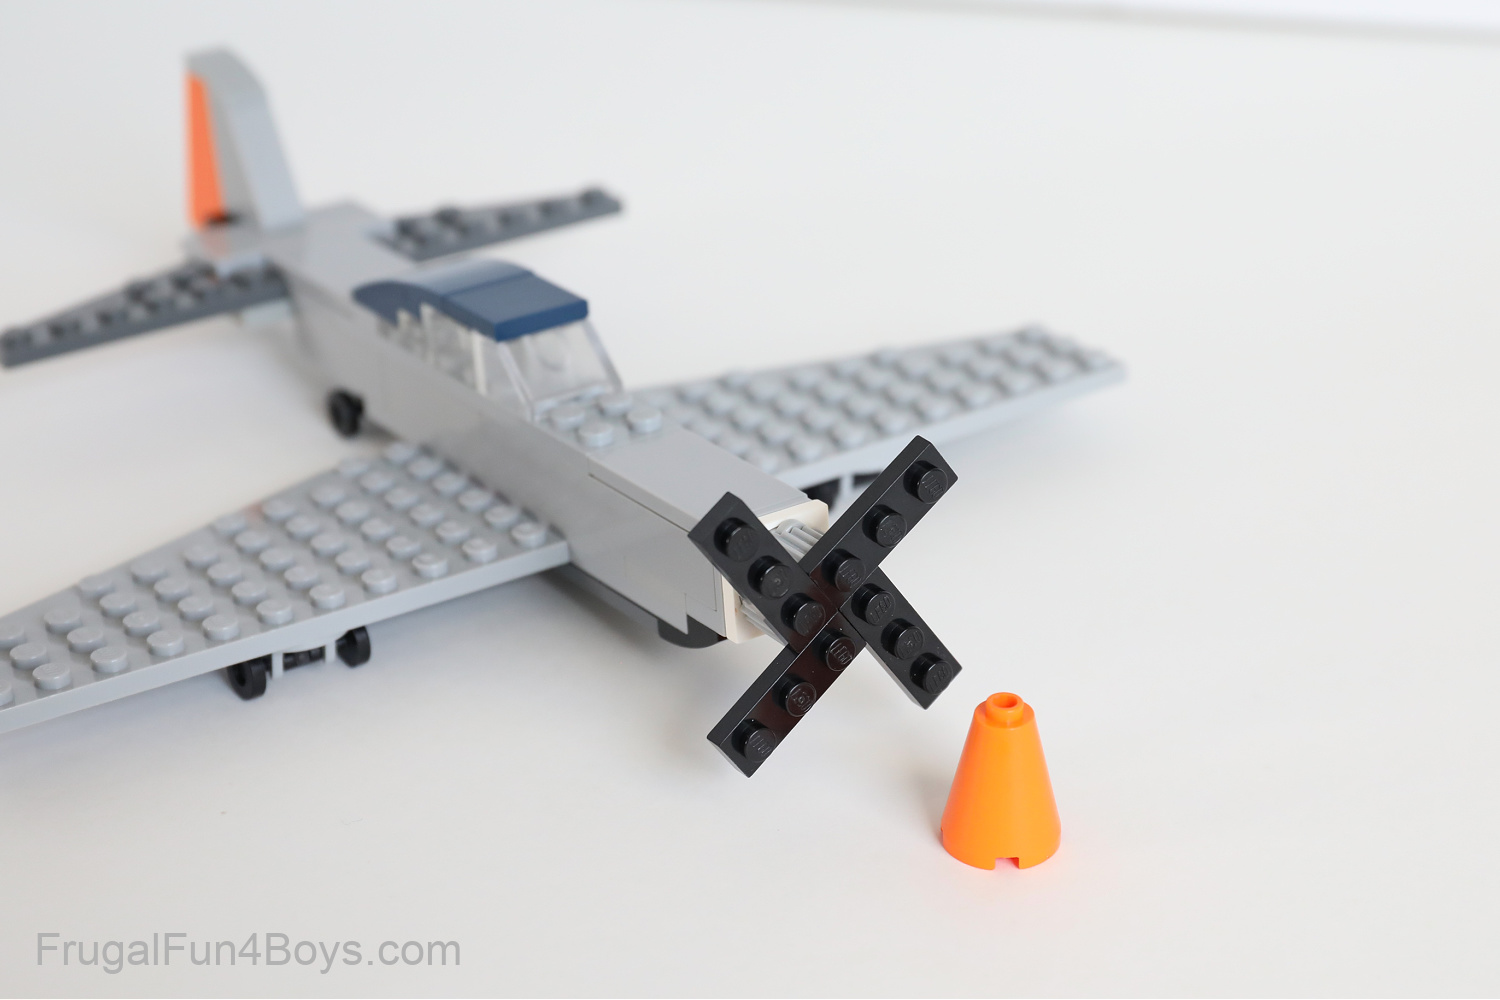
Step 16: Add the orange cone, and your Mustang plane is complete!
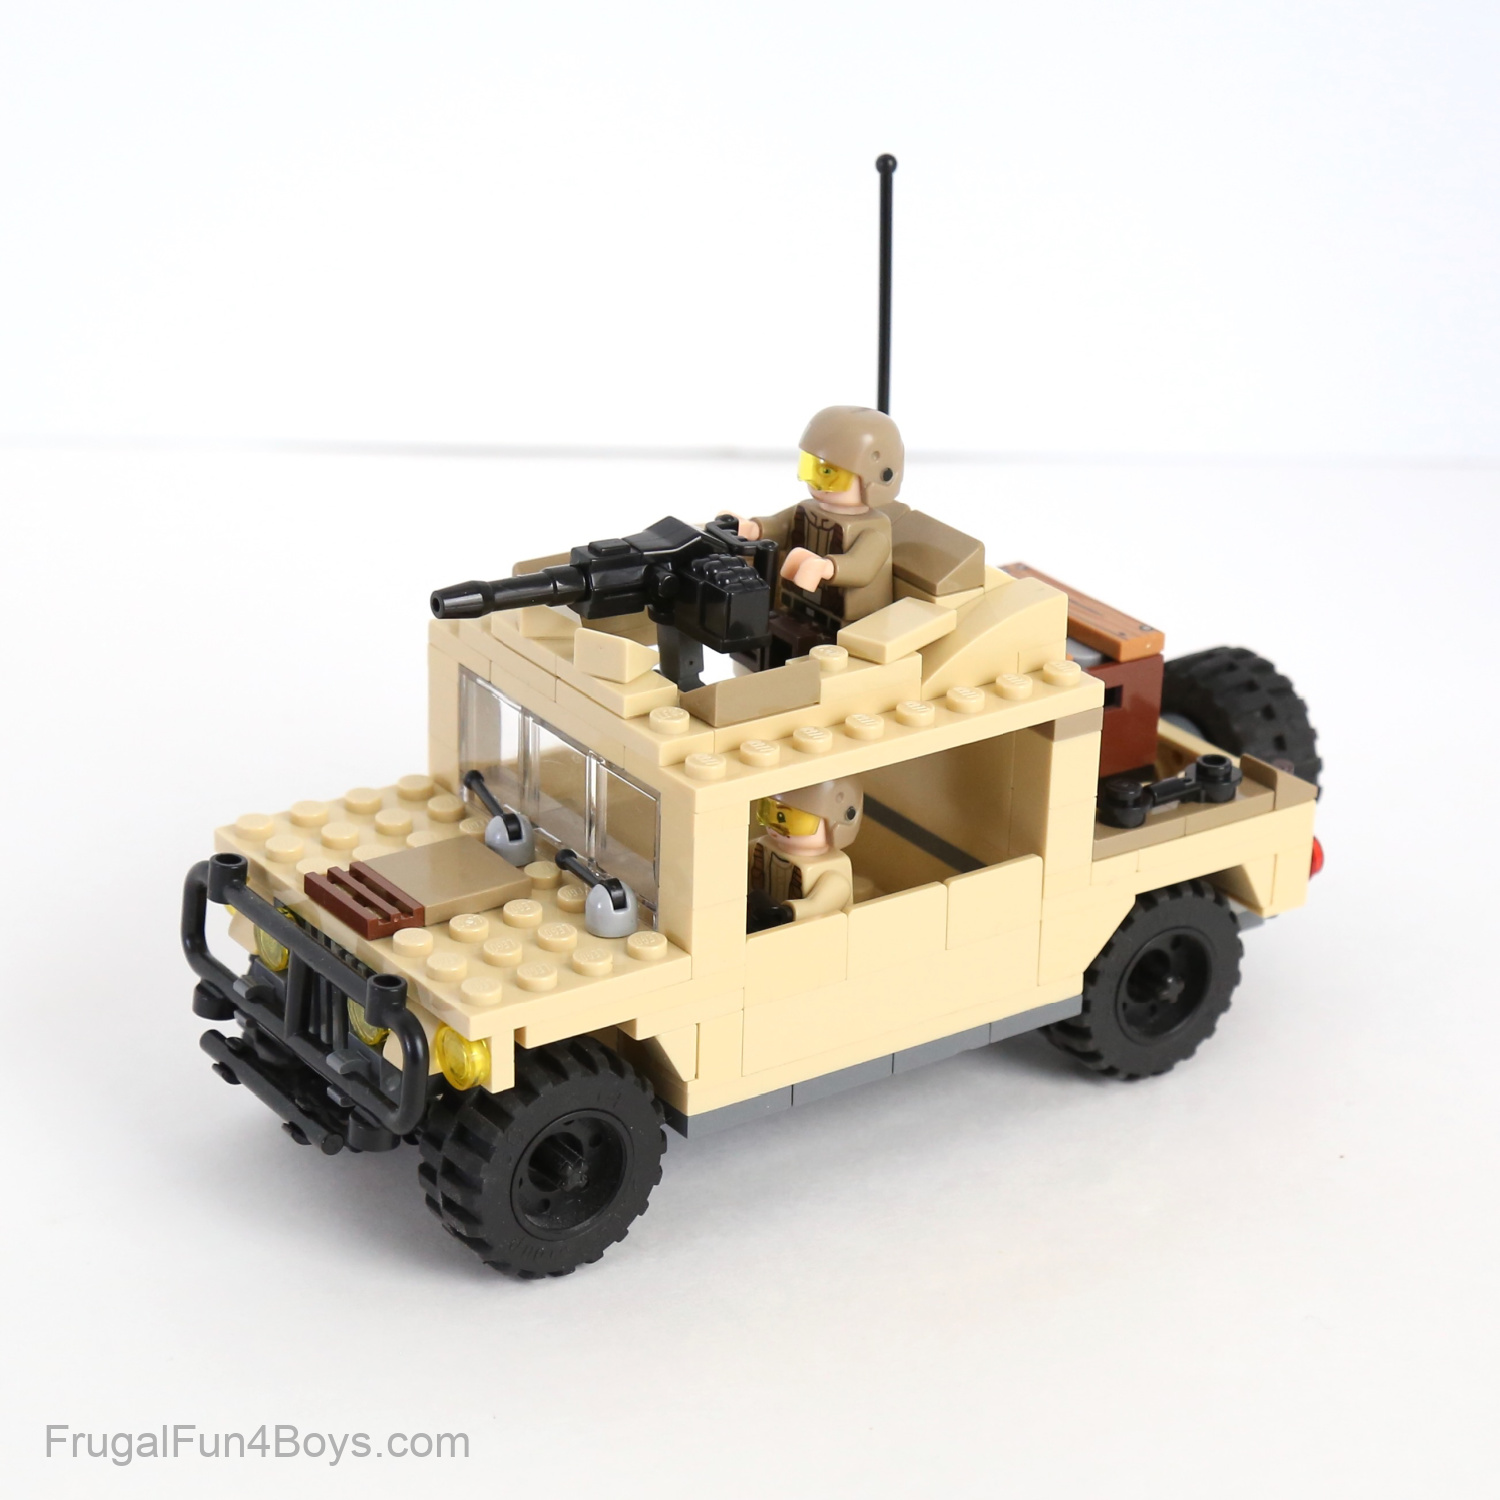
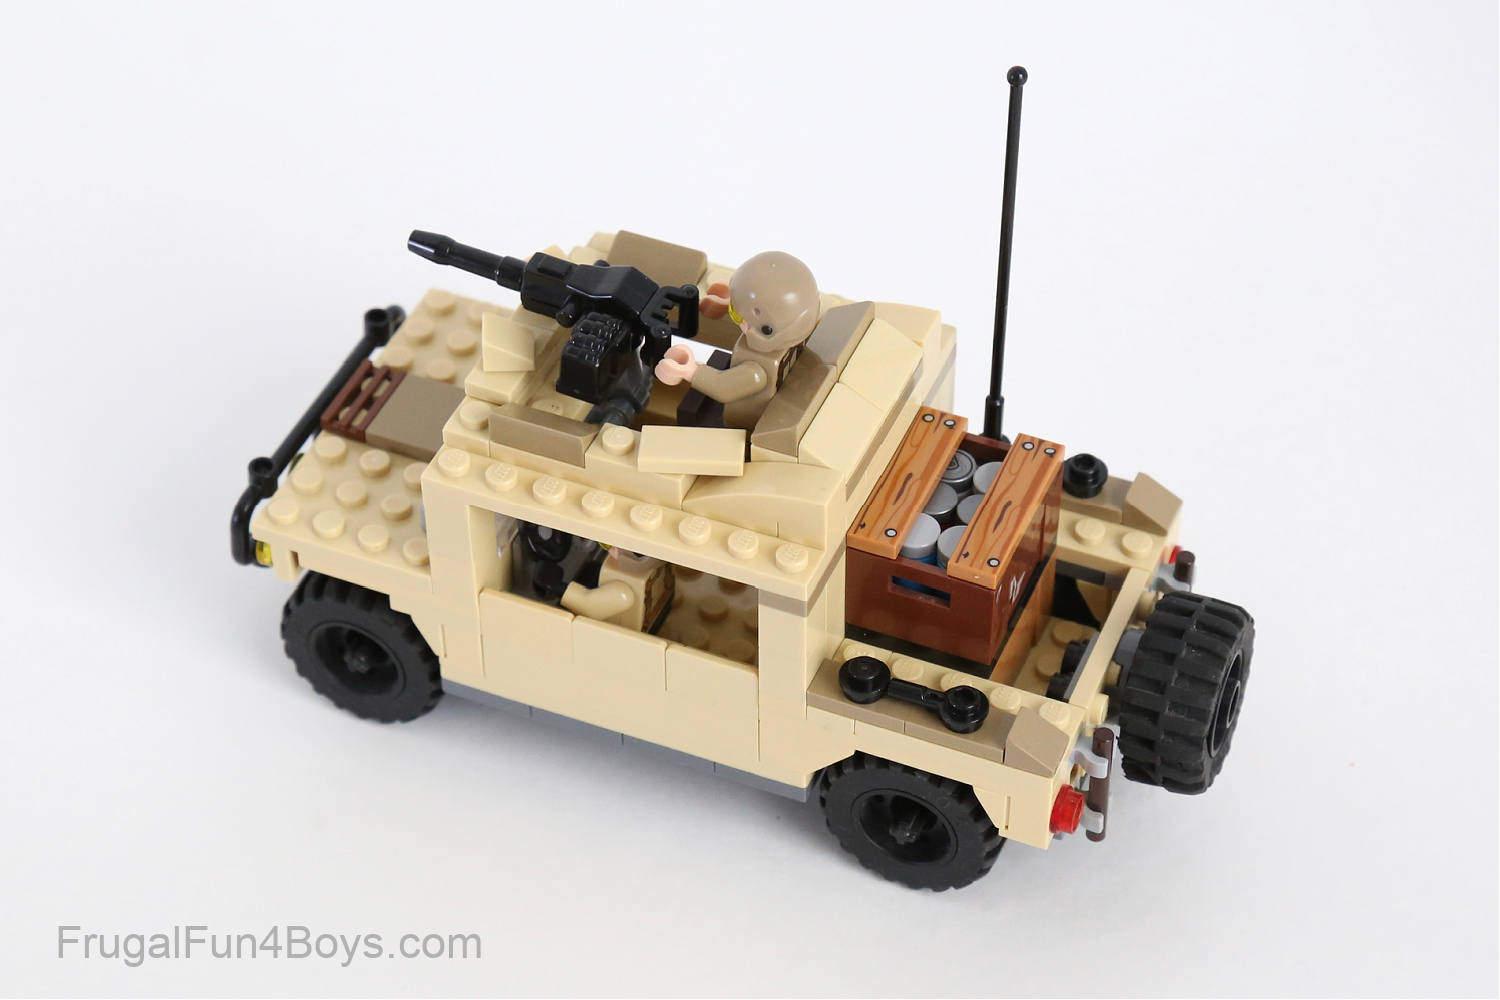
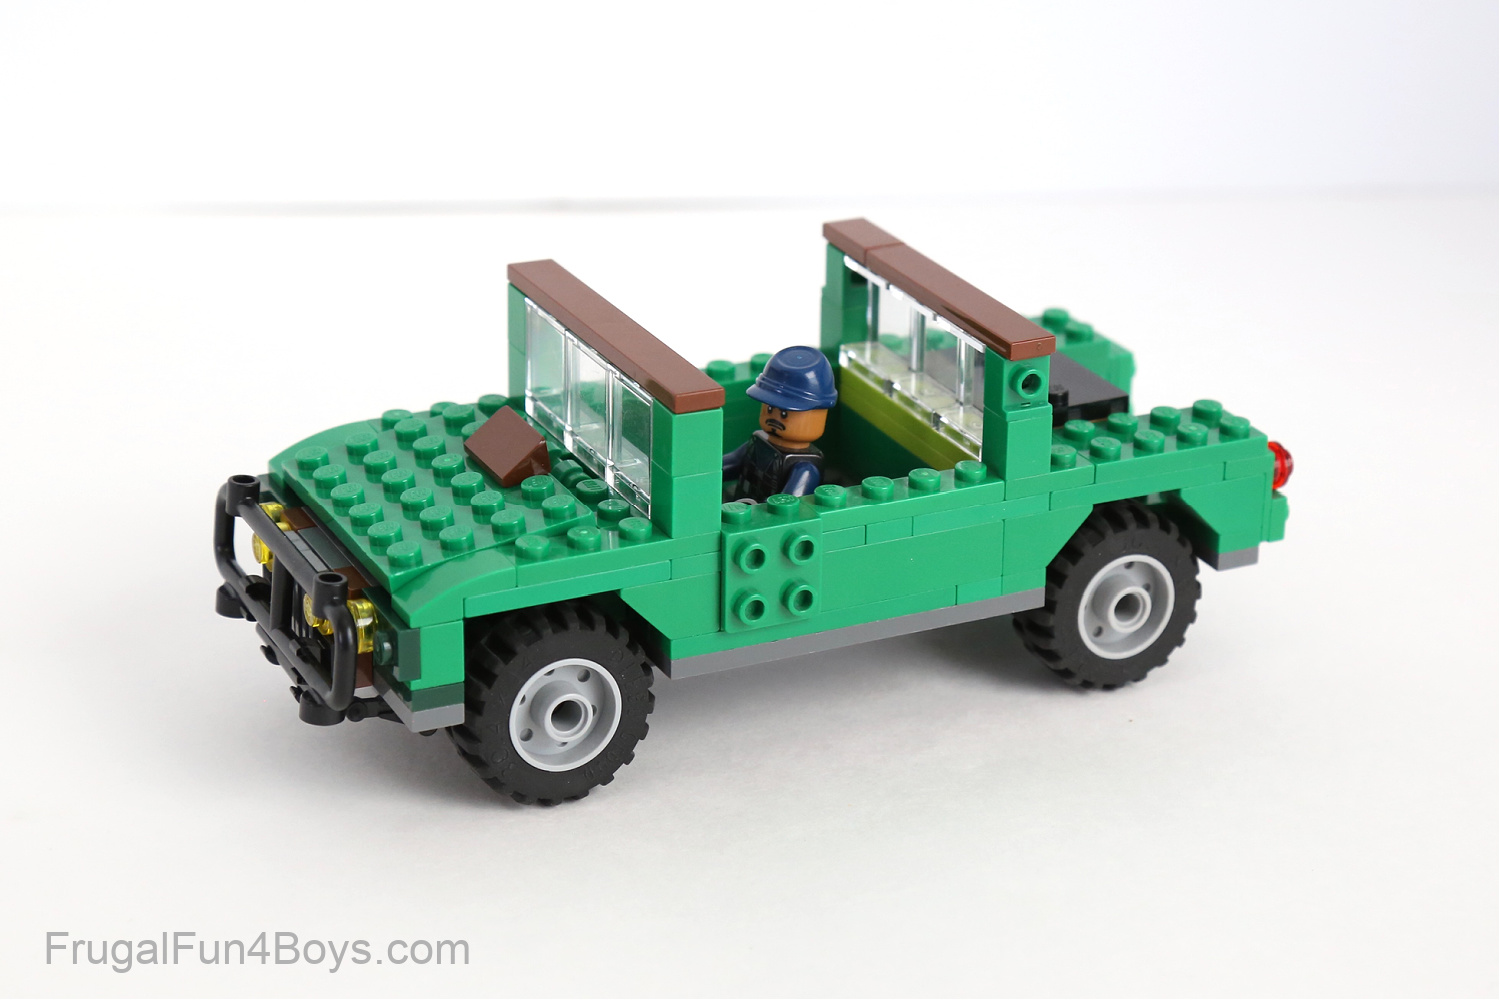
Need more ideas? Here are some more military LEGO projects that might inspire you.
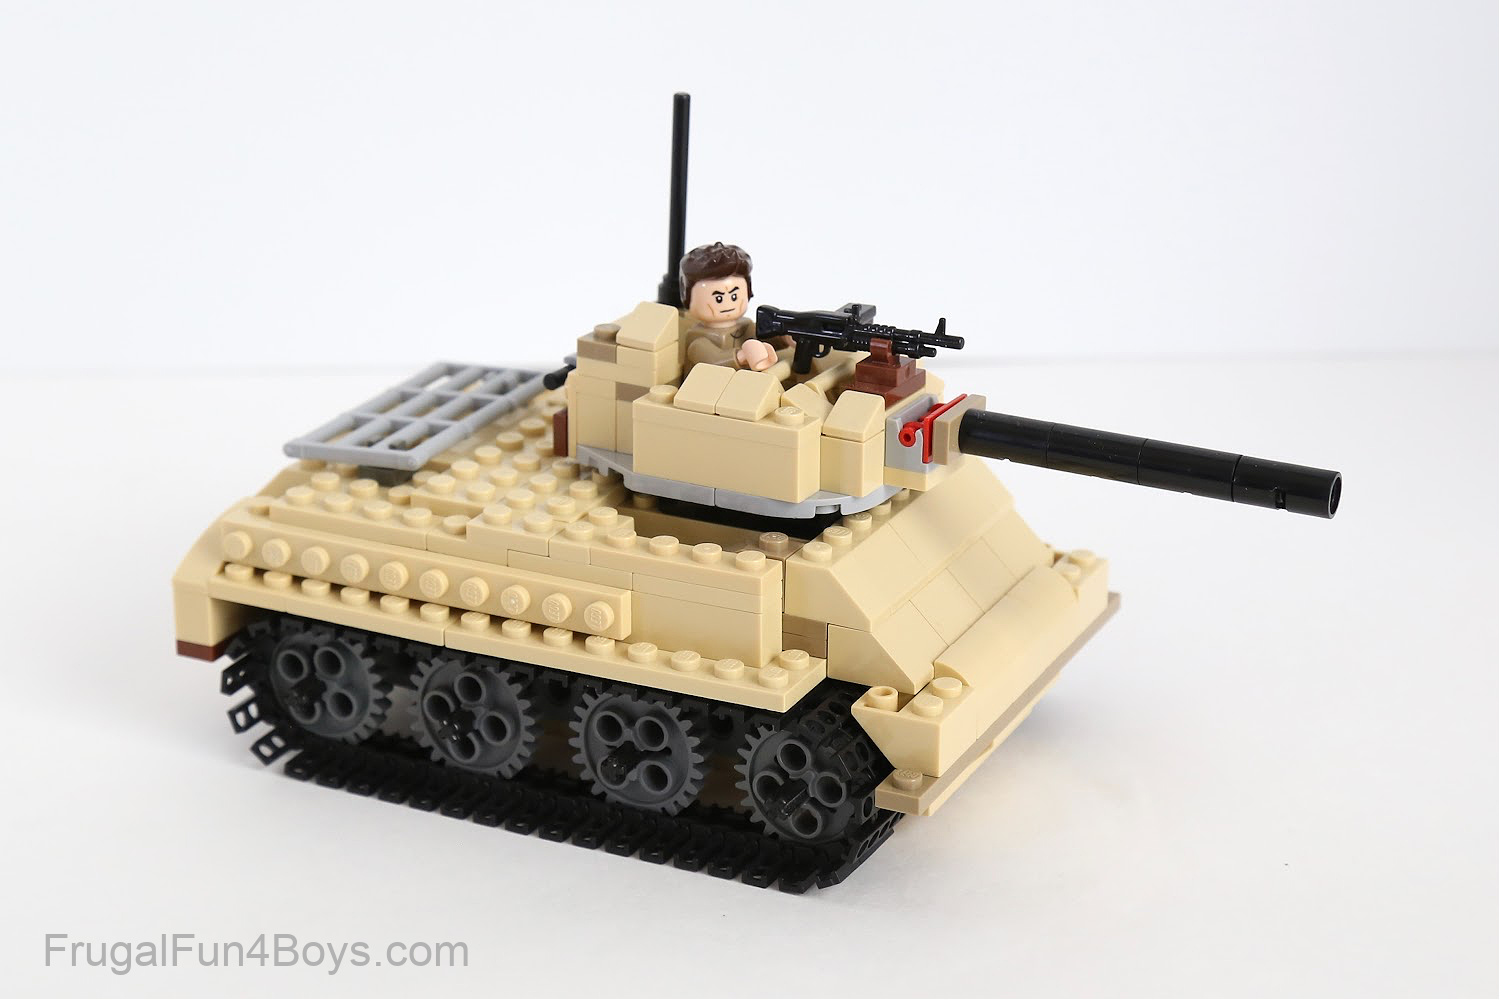
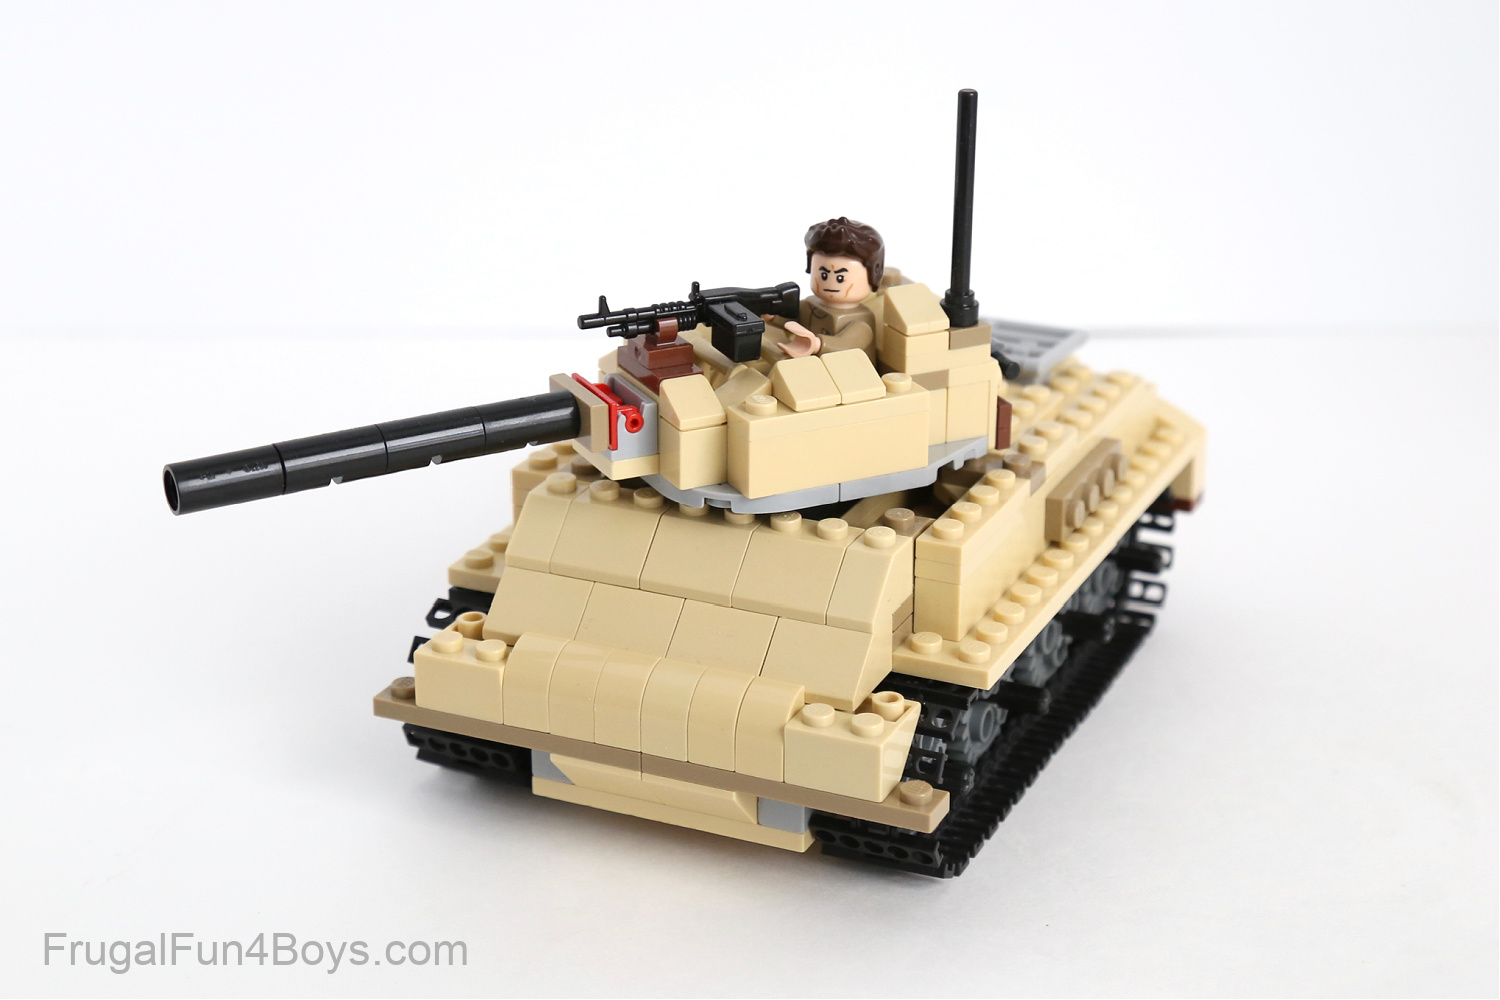
My son Owen (age 14) built these vehicles. We don’t have instructions for these, but you can find full instructions for the tan hummer in our 5th LEGO book – The Big Book of Amazing Lego Creations. We also have full instructions for a similar tank in the book.
Do you love LEGO projects? Sign up for Weekly Brick Ideas!
Get a new building idea in your inbox every week! And it’s free too.
0 Comments
Post a Comment