
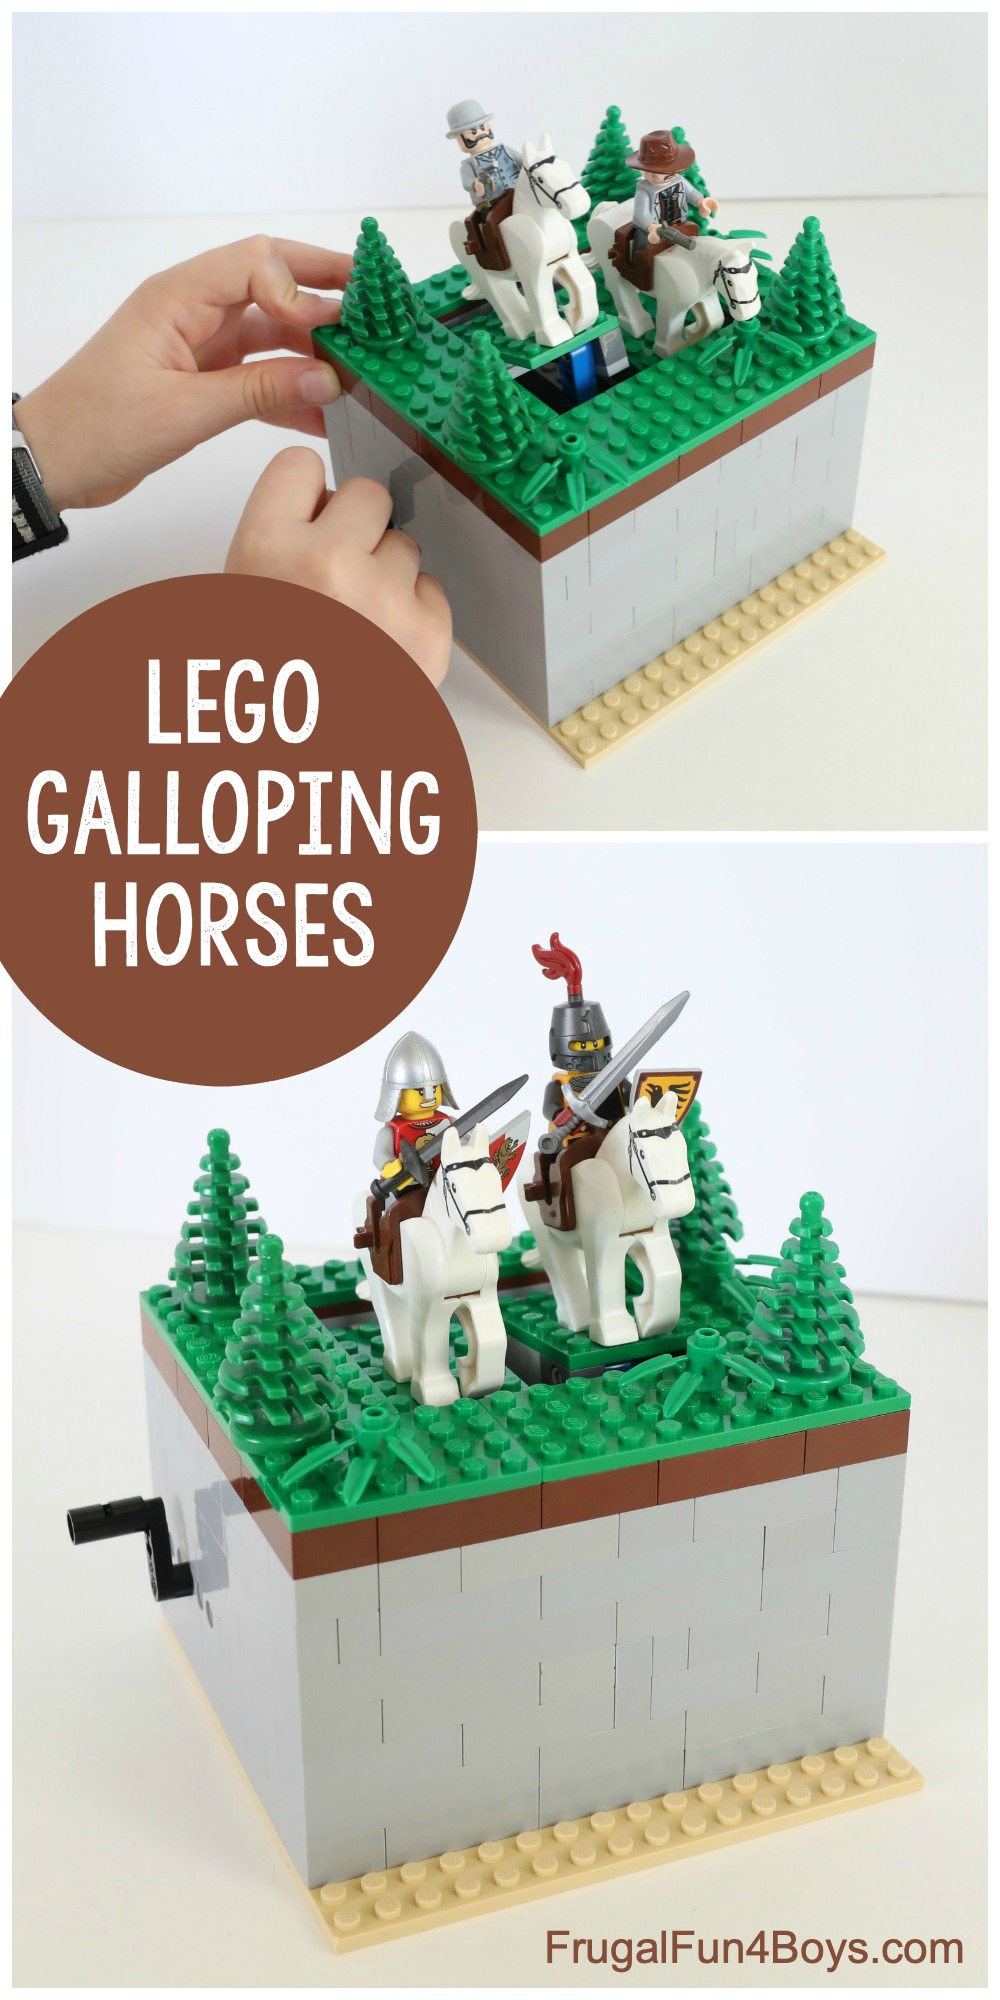
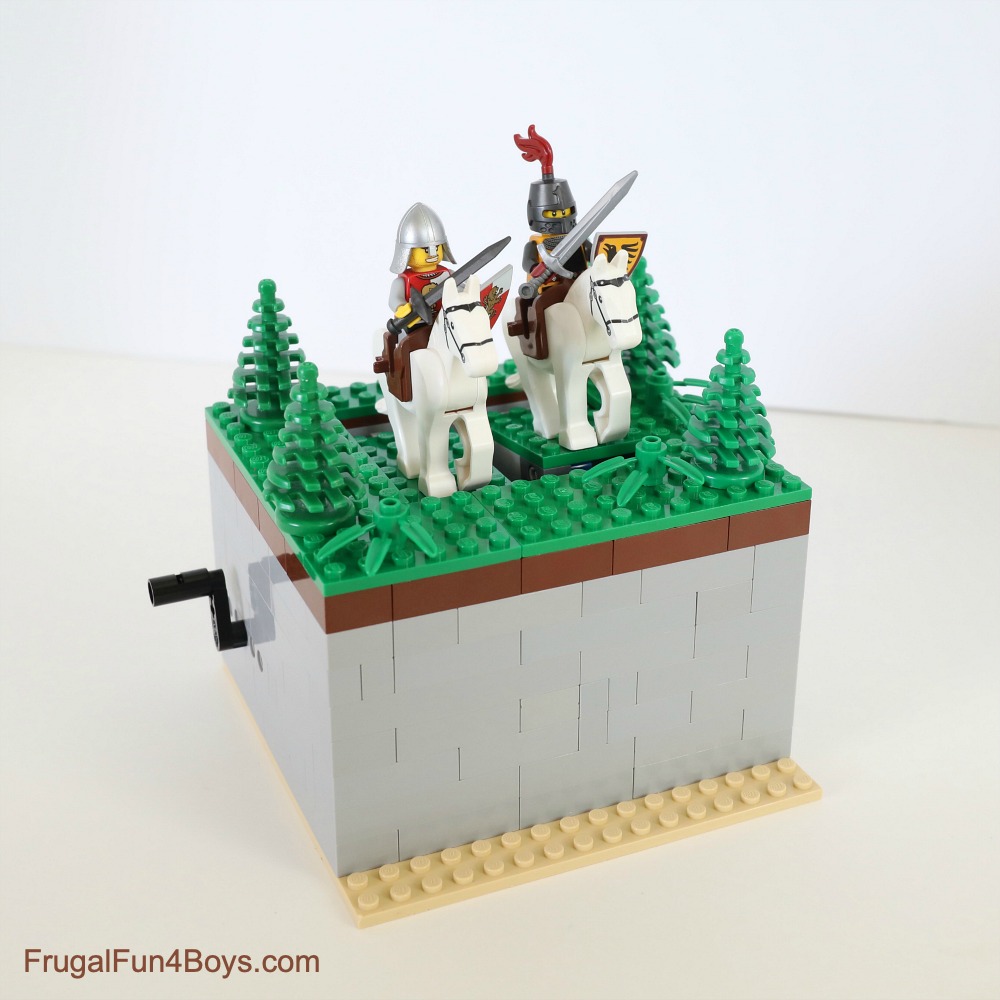
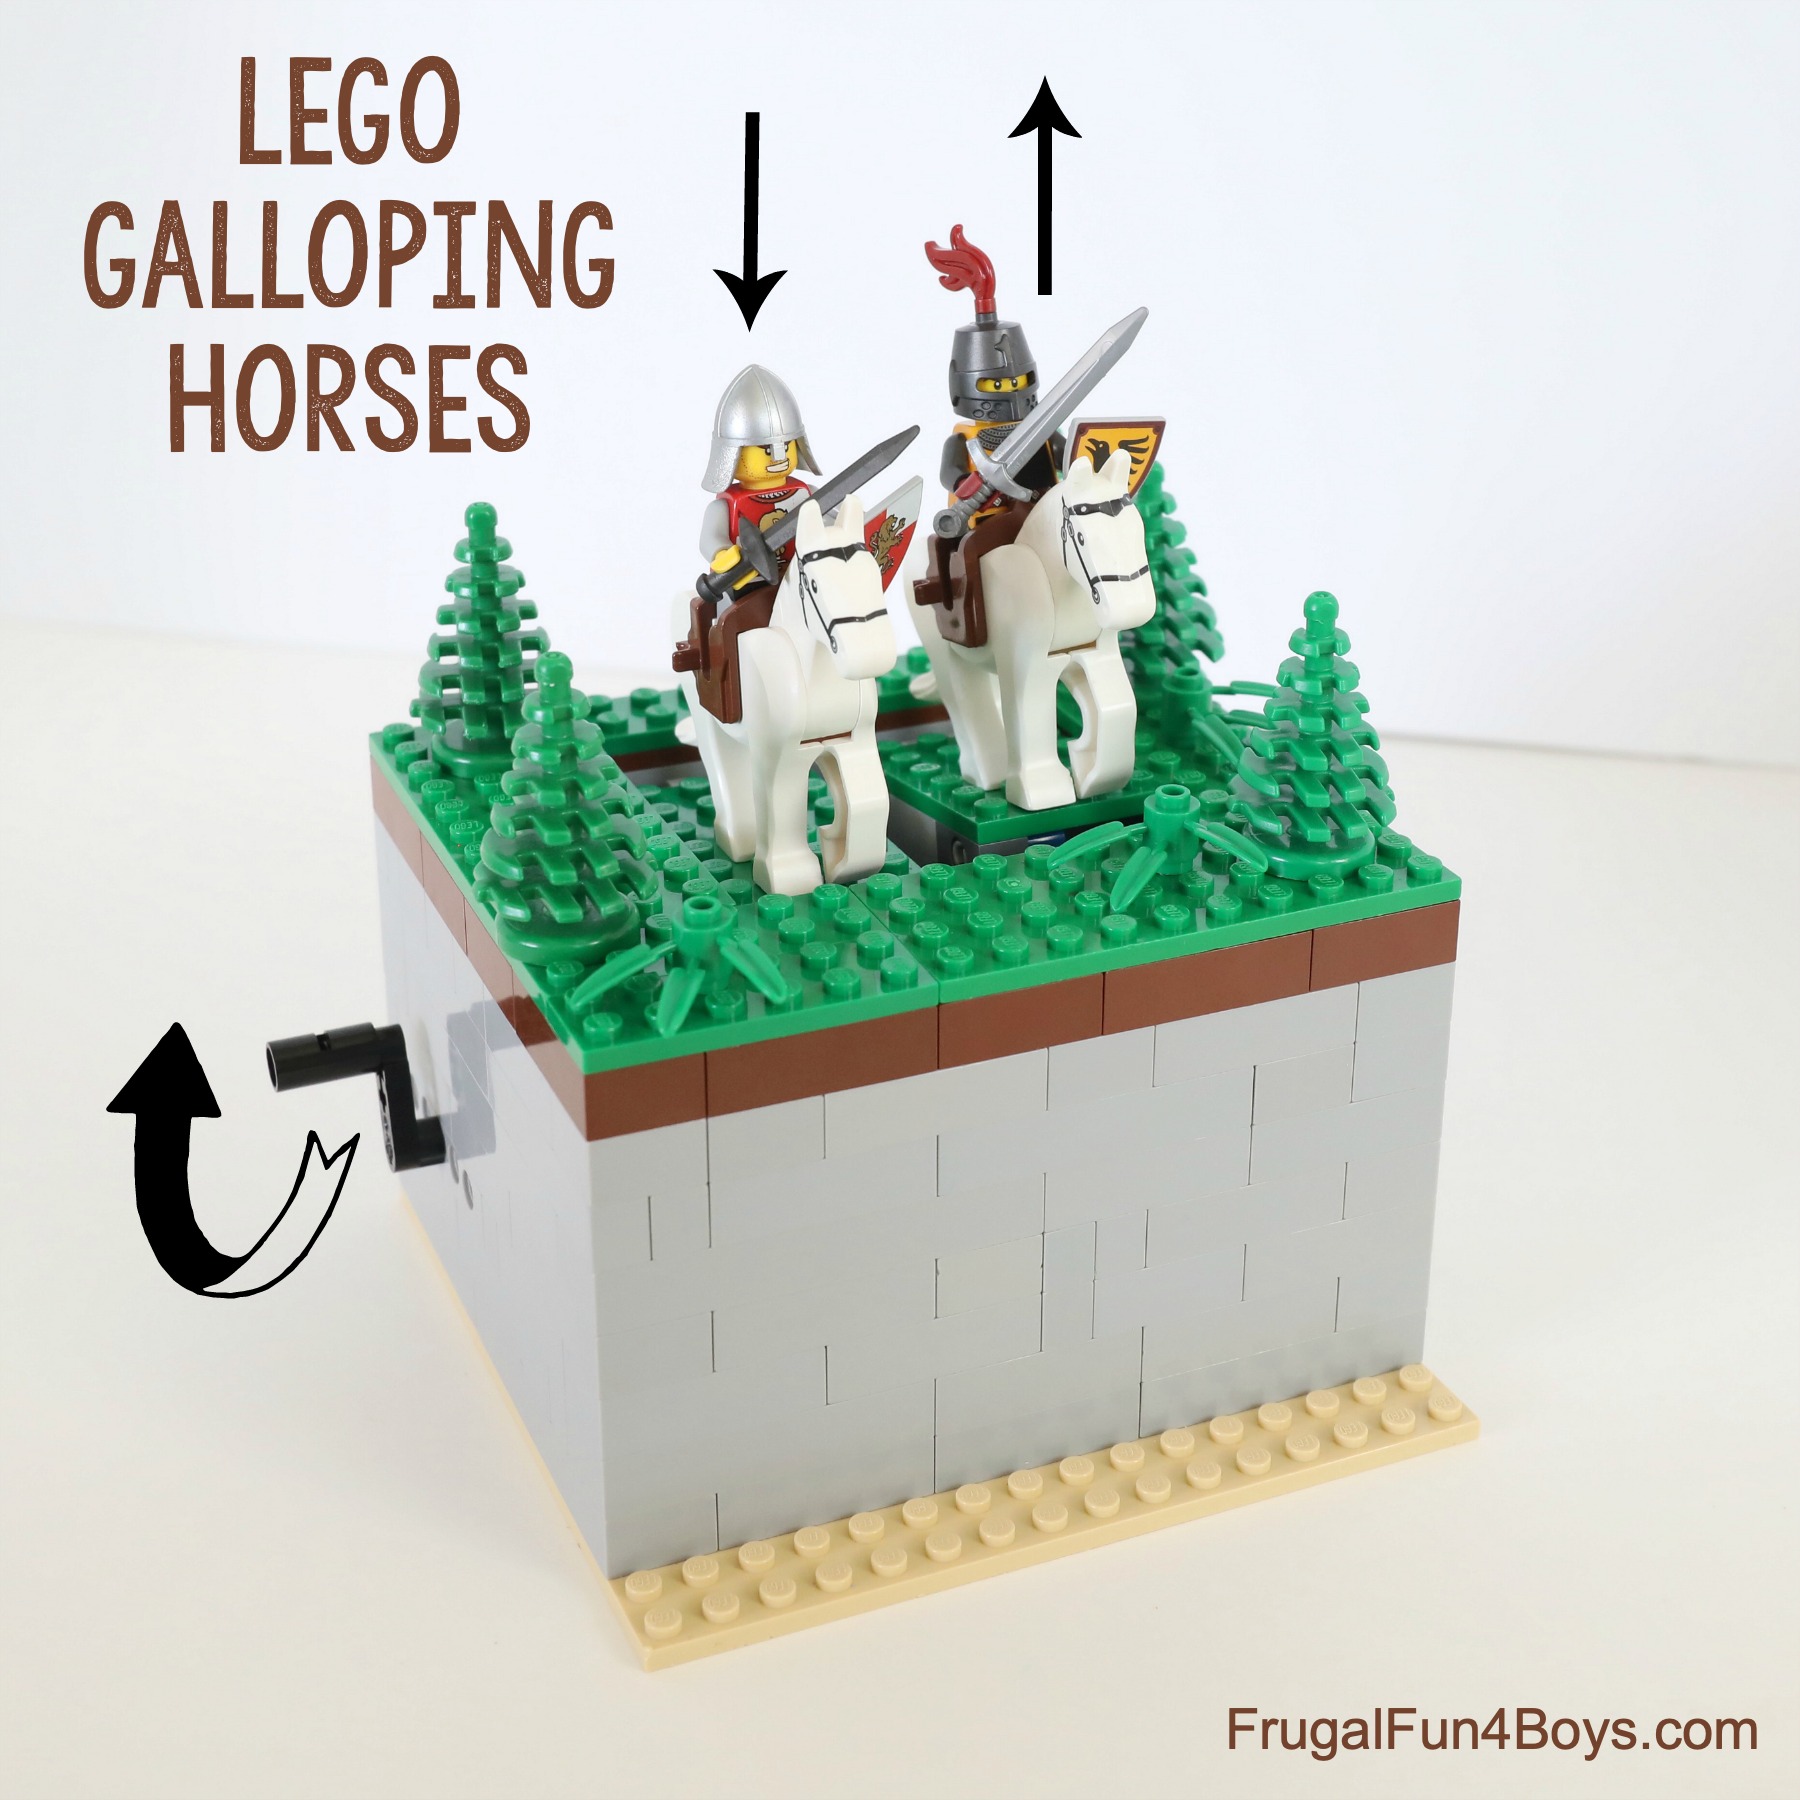
Learn about gears and pistons with this fun mechanical LEGO project! Turn the handle on the base of the machine, and the LEGO horses gallop through the forest. It’s so fun to create animated scenes with knights, cowboys, or any LEGO minifigures.
Machines and projects with moving parts are some of our favorite things to create with LEGO bricks. Ever since writing our book Genius LEGO Inventions, we’ve been exploring gears, linkages, and more. The LEGO Technic elements are patterned closely after real gears and mechanical parts, and it’s amazing what kids can learn just by tinkering!
Want to see it in action? Here’s a video demonstration! Then we have detailed instructions below that will show you exactly how to build the mechanism.
Hit the play button to start the video.
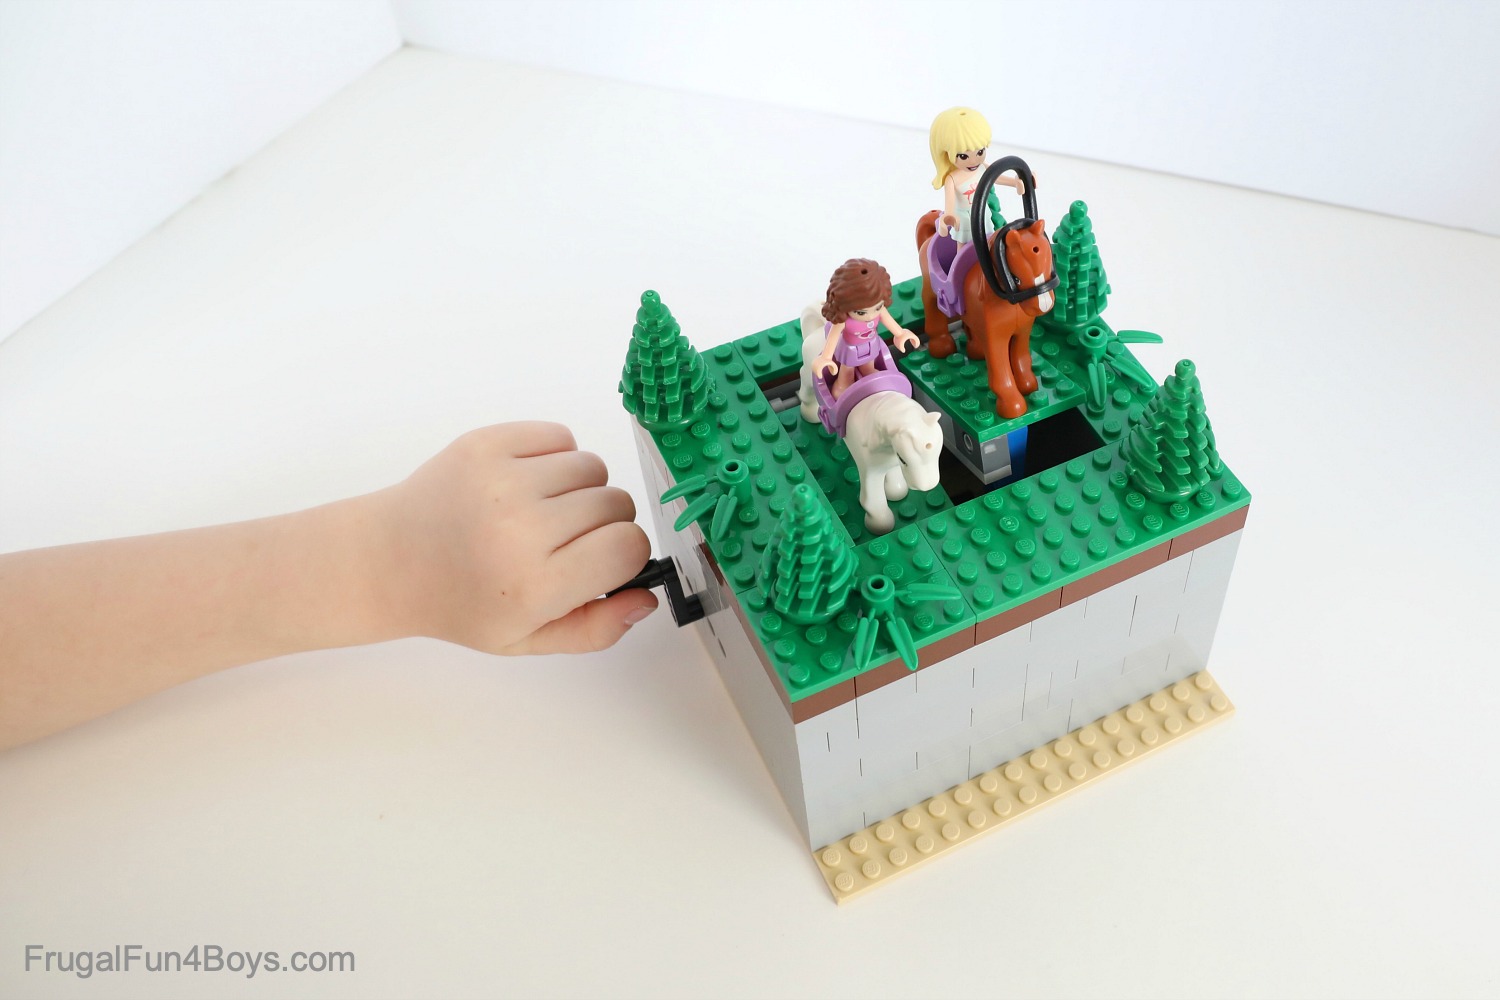
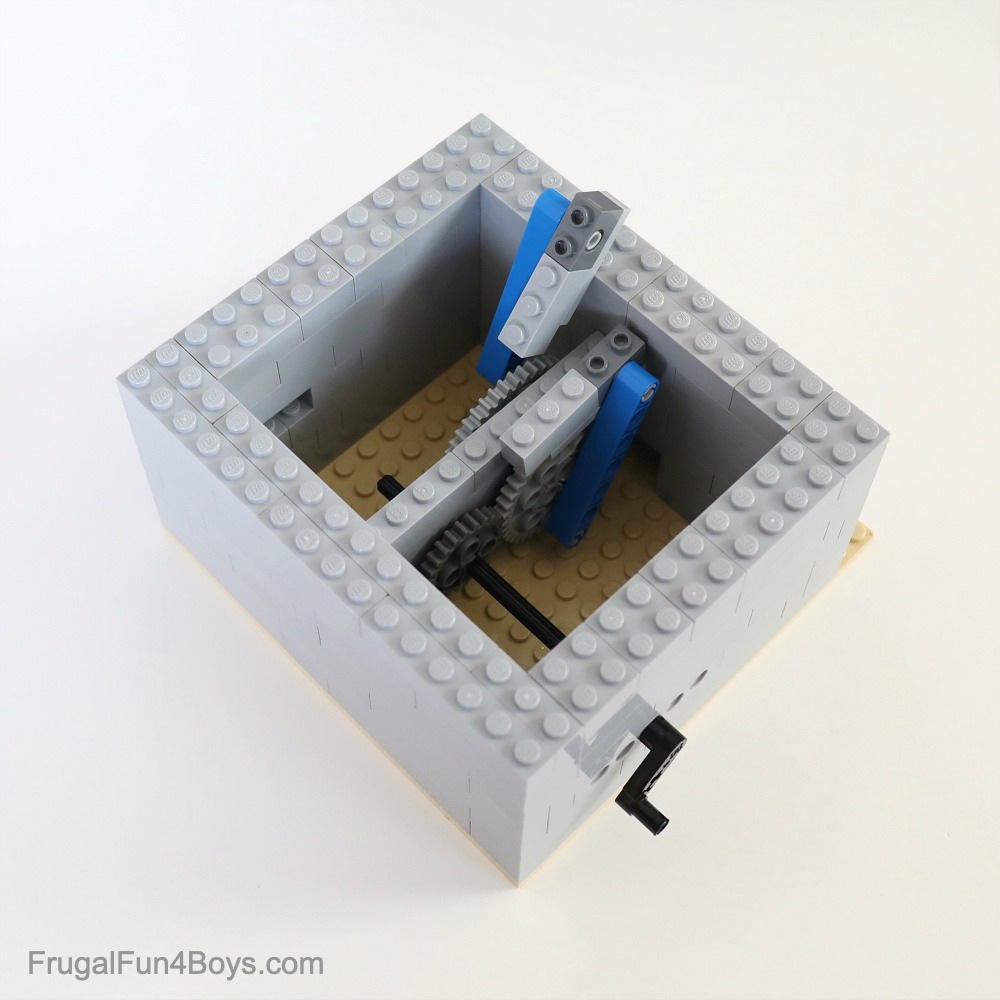
Here’s how this LEGO machine works. Each horse is attached to its own little platform. The gray box underneath holds the gears.
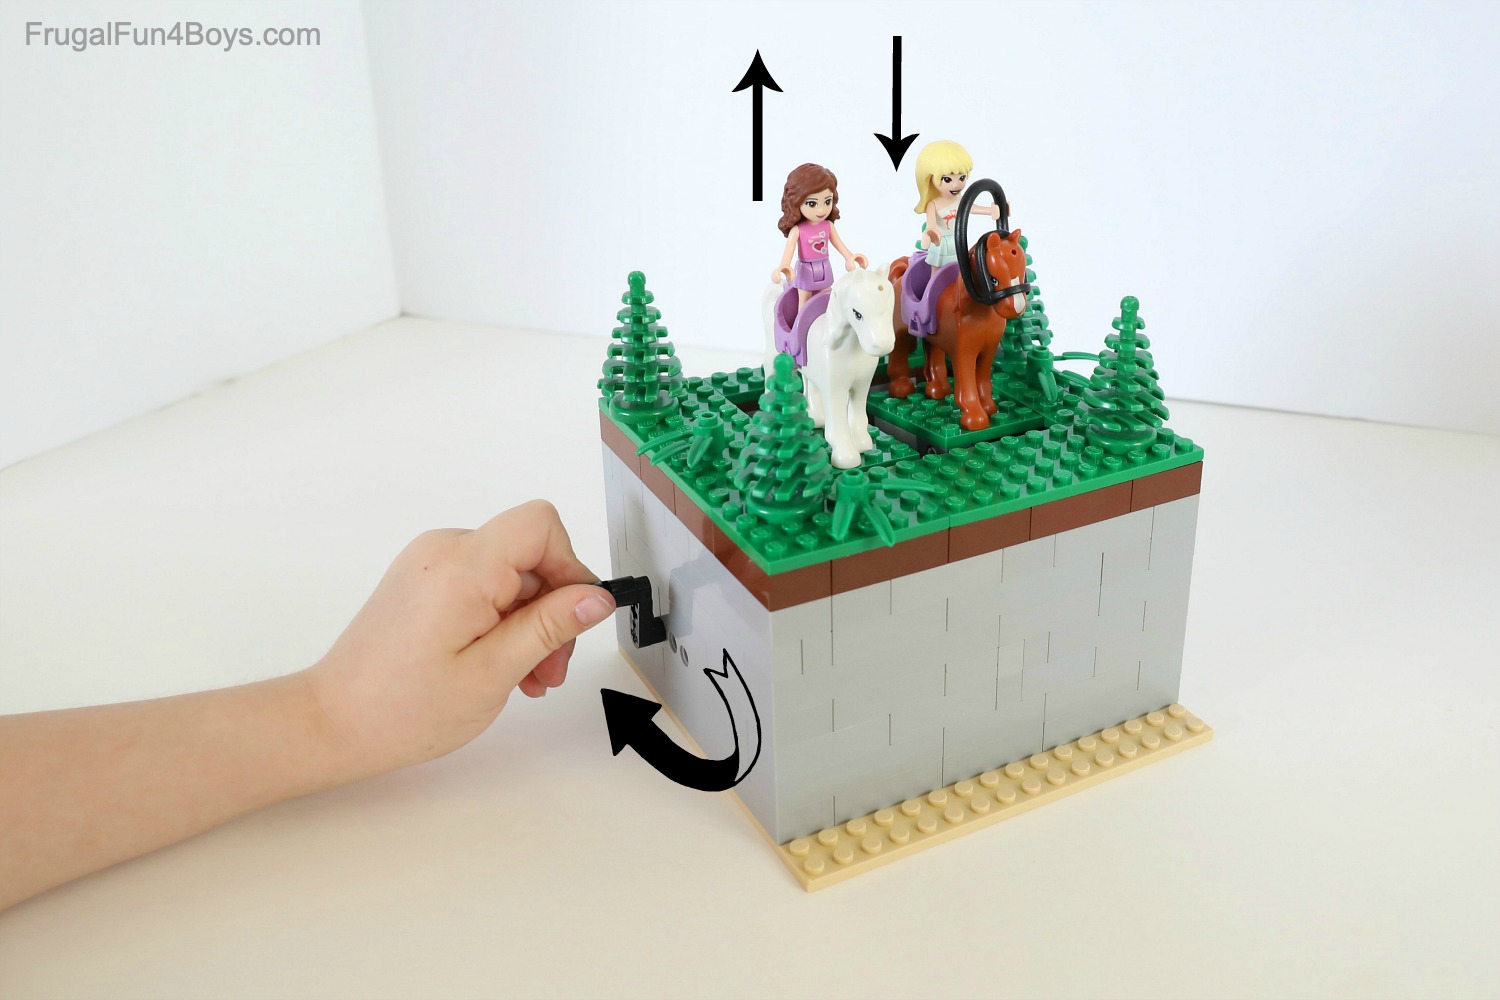
When you turn the handle, it turns an axle. There is a 24-tooth gear on the axle. The 24-tooth gear turns a pair of 40-tooth gears. There is a piston (a Technic liftarm) attached to each 40-tooth gear. The liftarms are attached off-center on the gear, so that when the gears go around, the pistons move up and down and push the horses up and down.
Ready to build your own LEGO Galloping Horses? Follow the instructions below.
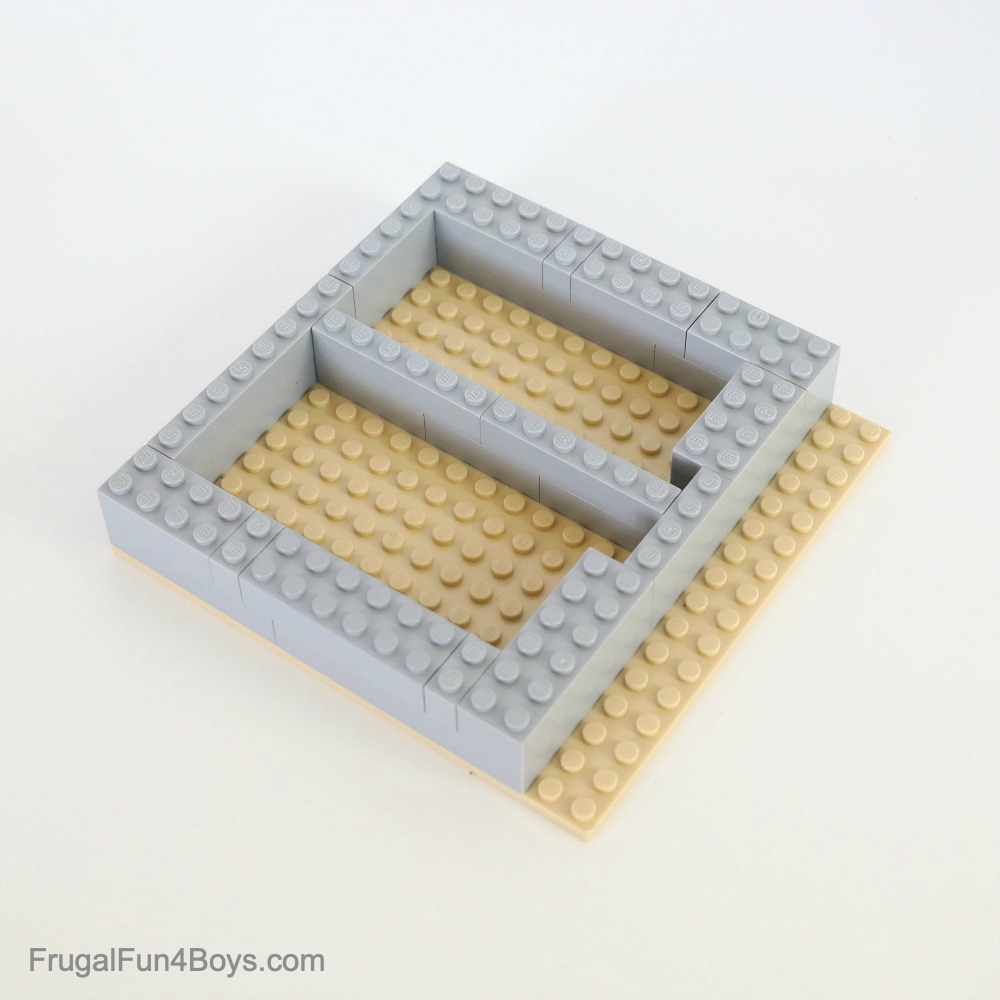
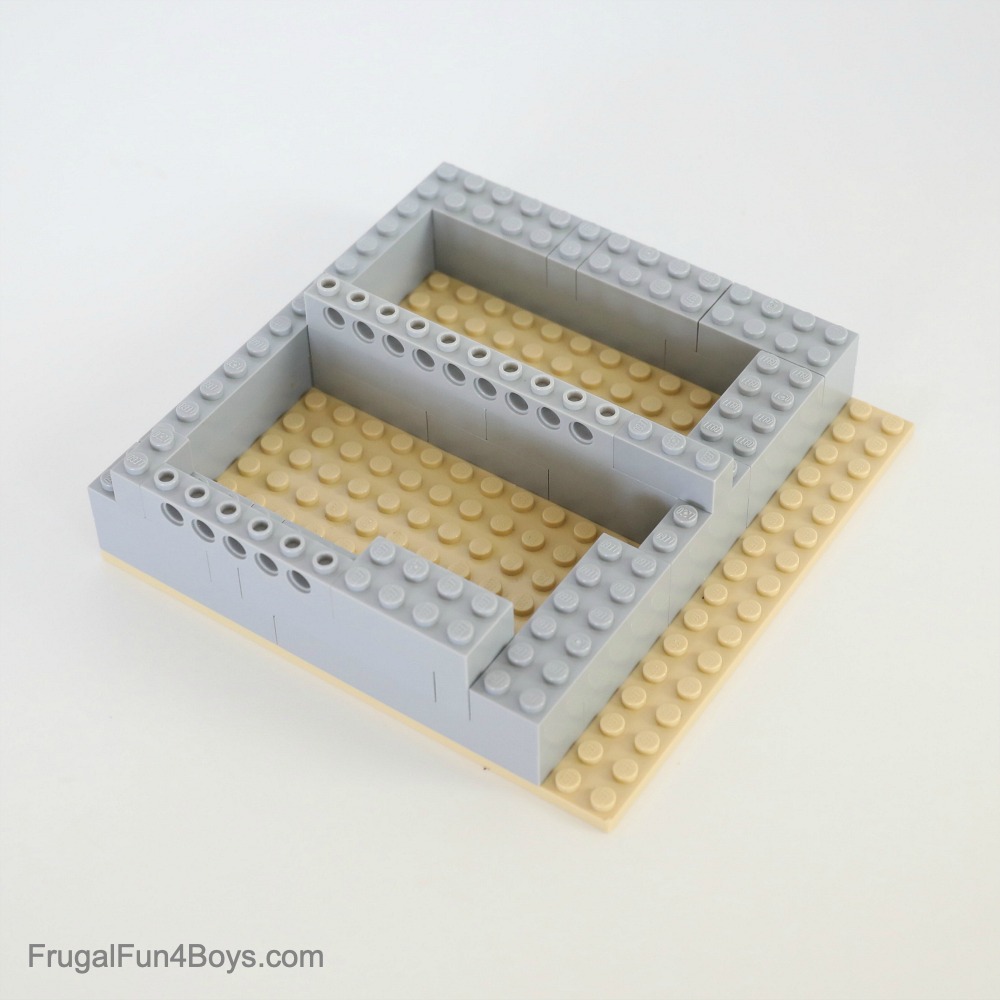
Step 1: First, grab a 16 x 16 plate. Construct two layers of bricks in the arrangement shown below. There are 5 studs of the plate exposed on the right side (meaning the space in the center) and 6 studs exposed on the left side.
Step 2: In the center, add a 1 x 3 brick and a 1 x 10 Technic brick. Add a 2 x 4 brick, a 1 x 6 Technic brick, and a 1 x 2 brick to the left side. The Technic bricks will hold the axles and gears.
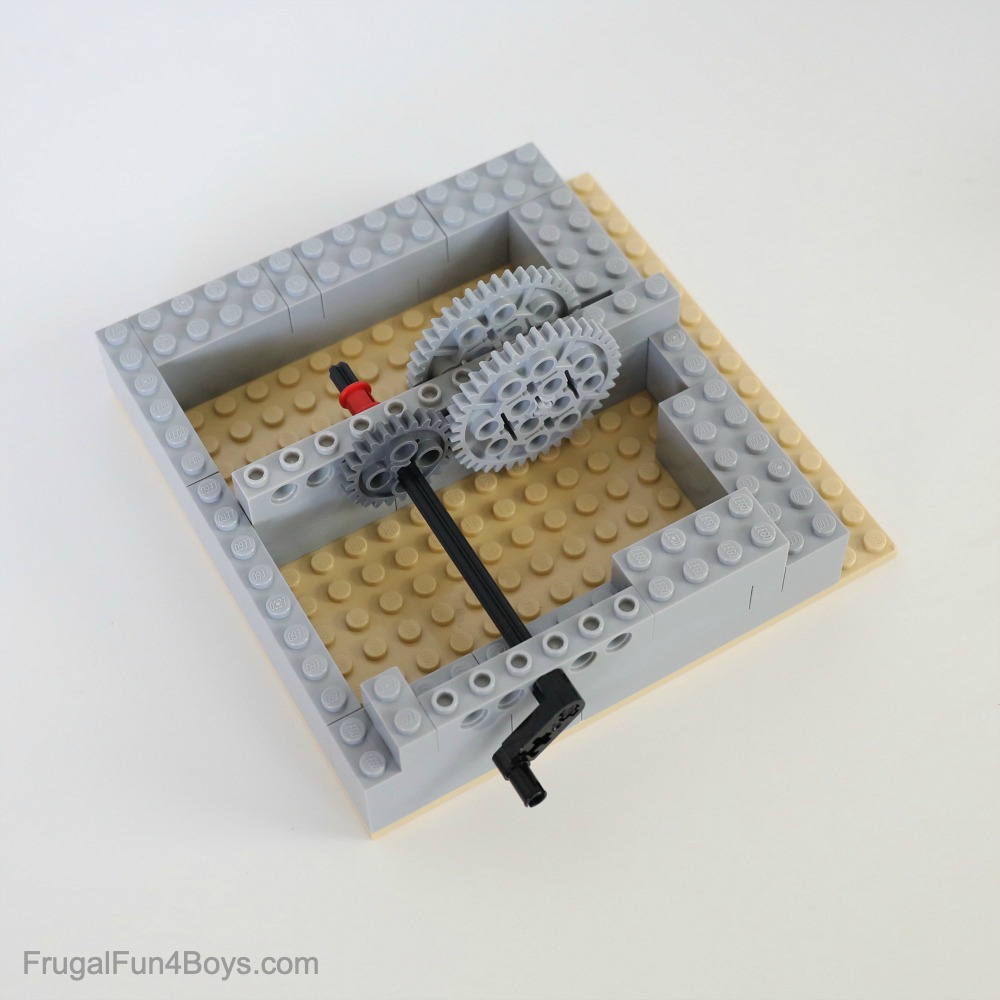
Step 3: Insert an axle (12 studs long) through both Technic bricks. Before sliding it into the second Technic brick, add a 24-tooth gear. Slide on a red Technic bush to keep it secure. Then attach a 1 x 3 liftarm with a pin/crank on the other end to make a handle.
Find two 40-tooth gears and an axle that is 3 studs long.

Step 4: Slide the axle through the Technic brick, and then slide on the 40-tooth gears, one on each side. One of the 40-tooth gears should mesh with the 24-tooth gear.
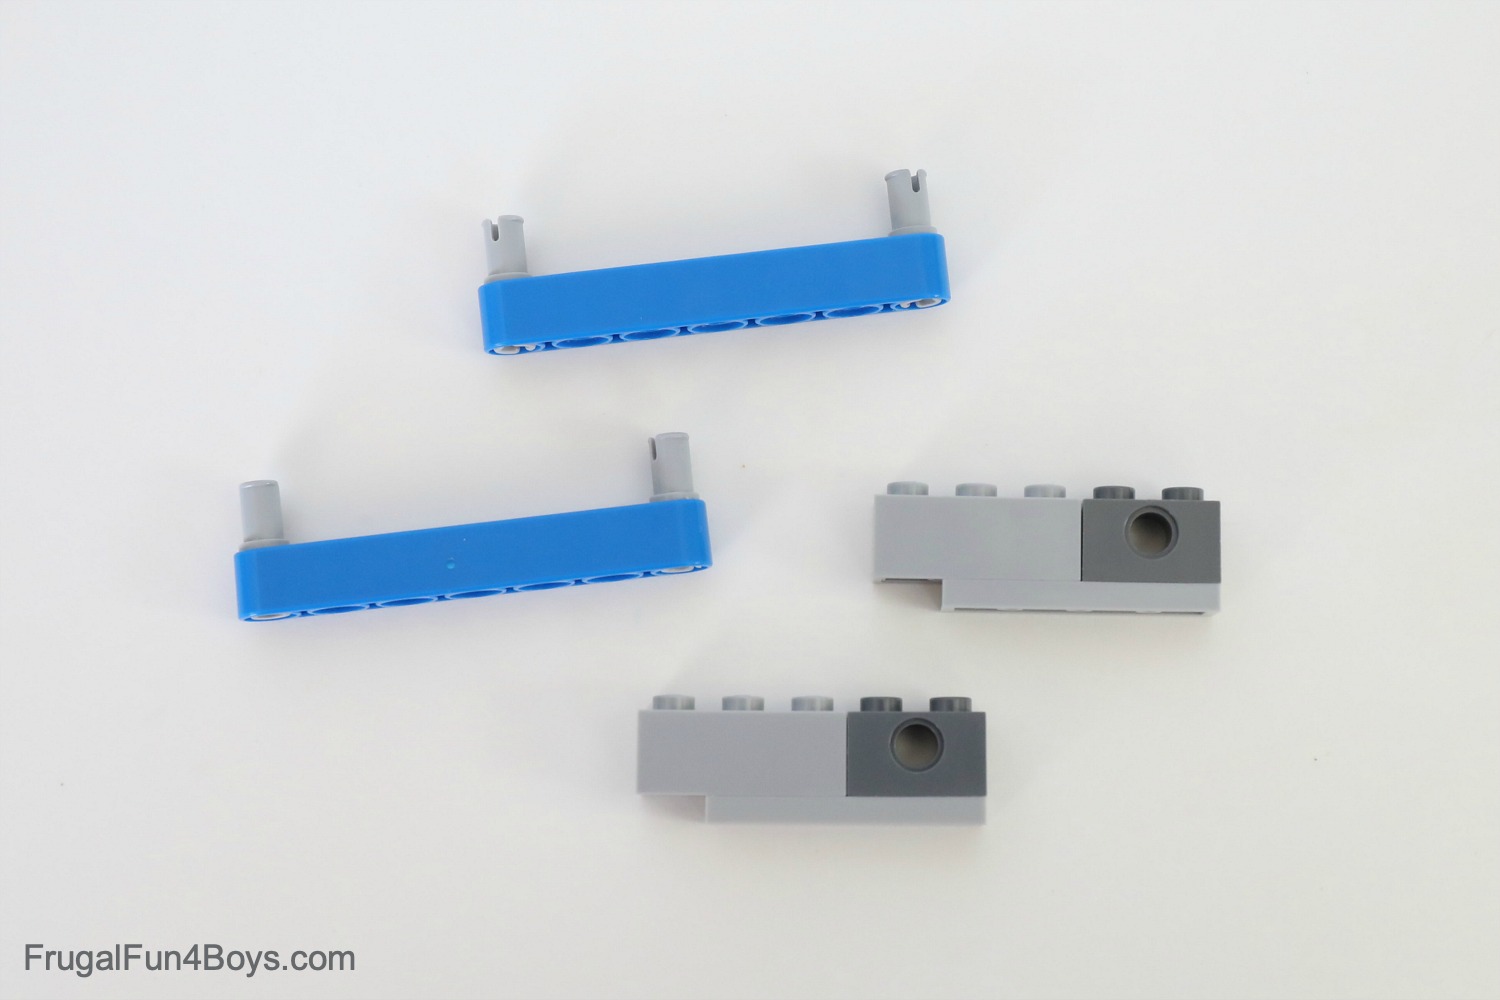
Step 5: Build the pistons. You’ll need two 1 x 7 Technic liftarms, 4 light gray pins, two 1 x 3 plates, two 1 x 3 bricks, and two 1 x 2 Technic bricks. These pieces can be any color, except for the pins. The light gray pins are the type that do not have friction ridges. They allow the pieces they are connected to to move freely.
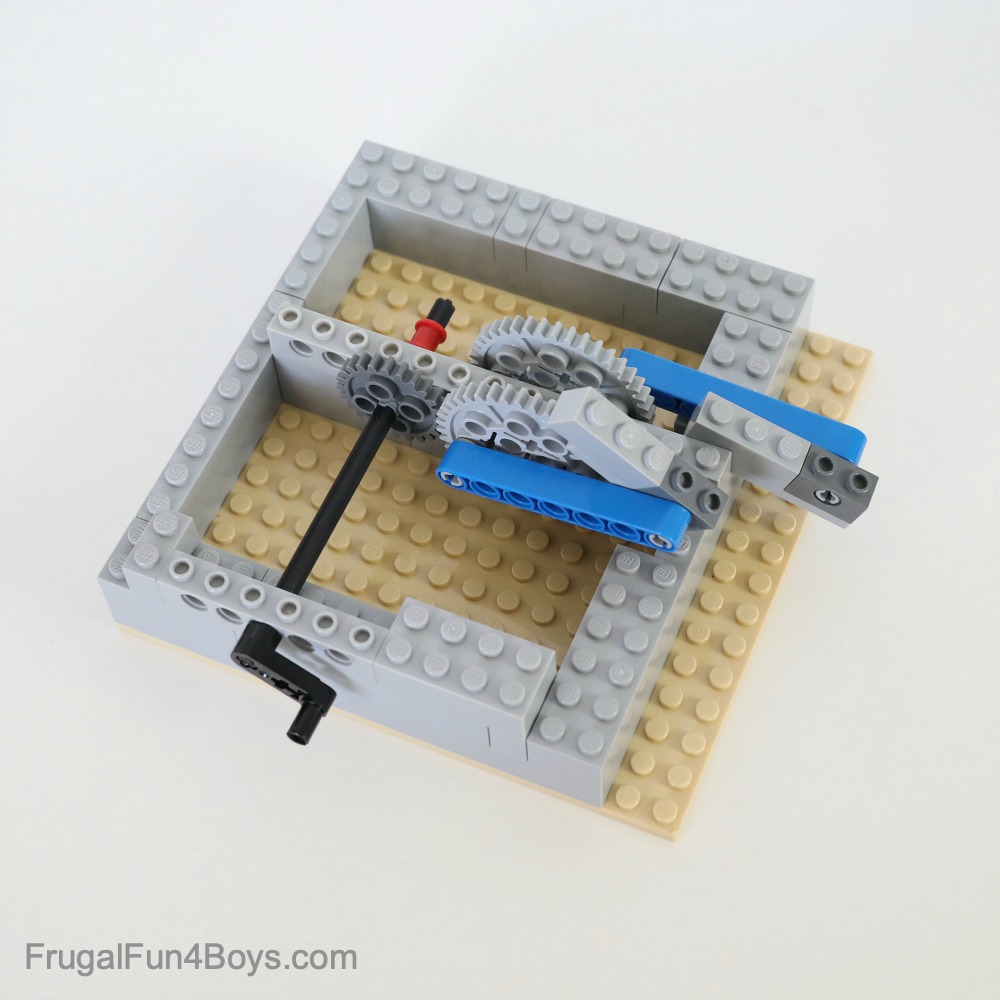
Step 6: Insert one of the light gray pins into the 40-tooth gear. Then attach one of the brick assemblies to the other light gray pin as shown. Repeat on the other side.
Step 7: Now build up the base. Add two rows of bricks in the center. Add five rows of bricks around the outside perimeter.
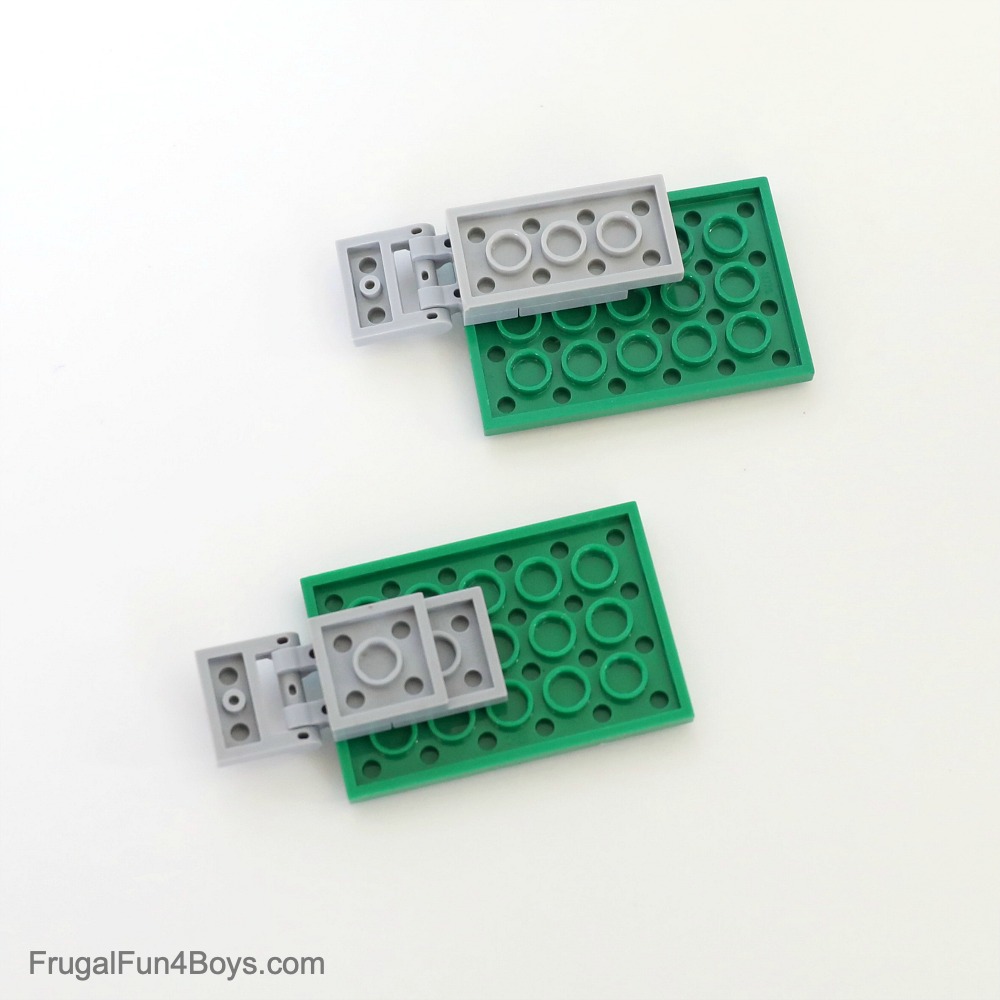
Step 8: We’re ready to build the platforms for the horses now! Find two 4 x 6 green plates. If you don’t have green, brown or tan would work well.
Each plate needs a joint with a handle and clips. This will allow the platform to move up and down, but it will stabilize the motion and prevent side-to-side motion so that the pieces won’t come apart.
Attach a 1 x 2 plate with two clips to the underside of each green plate. Strengthen the connection by adding another plate next to it, and then a plate on top of those.
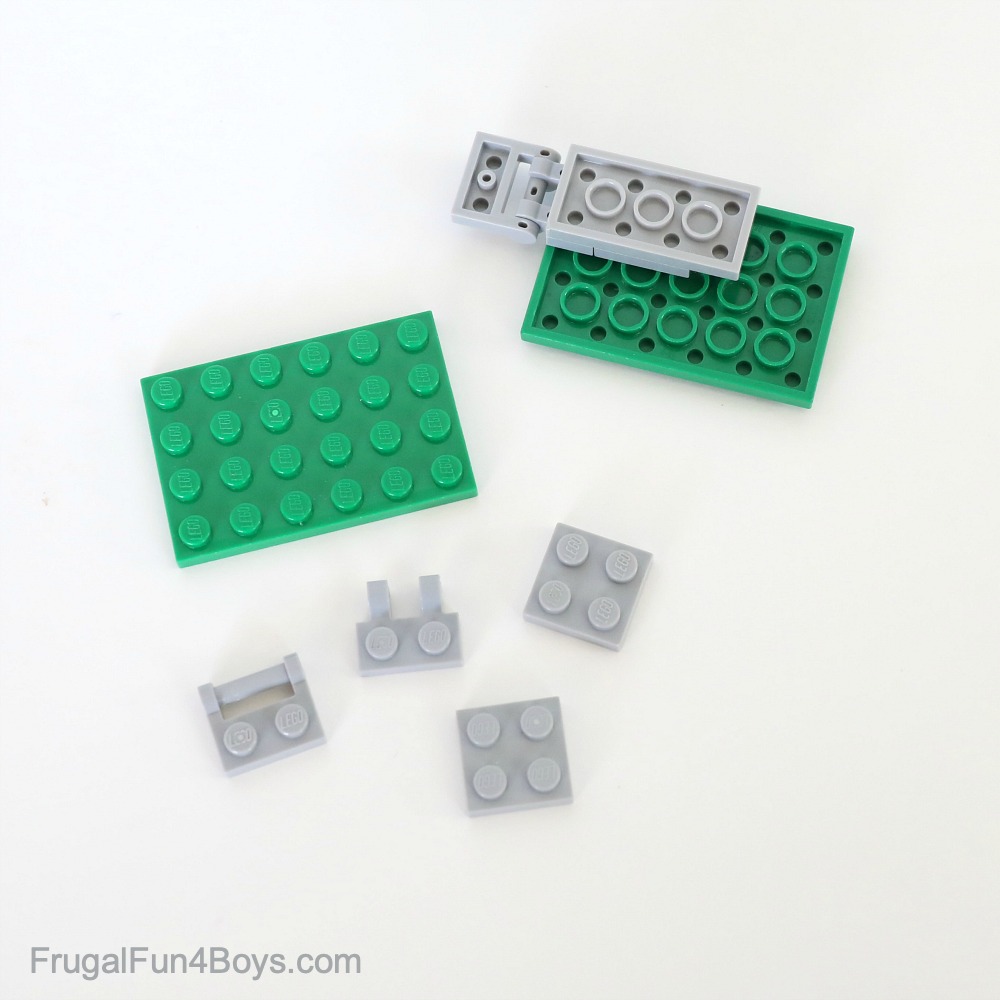
Then attach a 1 x 2 plate with a handle on the side. Note that the plates are in the center of one green plate, but over to the side on the other. This is on purpose!
Step 9: Attach the green plates by connecting the 1 x 2 plate with a handle to the frame. Attach the piston to the underside of the green plate.
Note that there are gray plates on the frame around the 1 x 2 plates with a handle on the side.
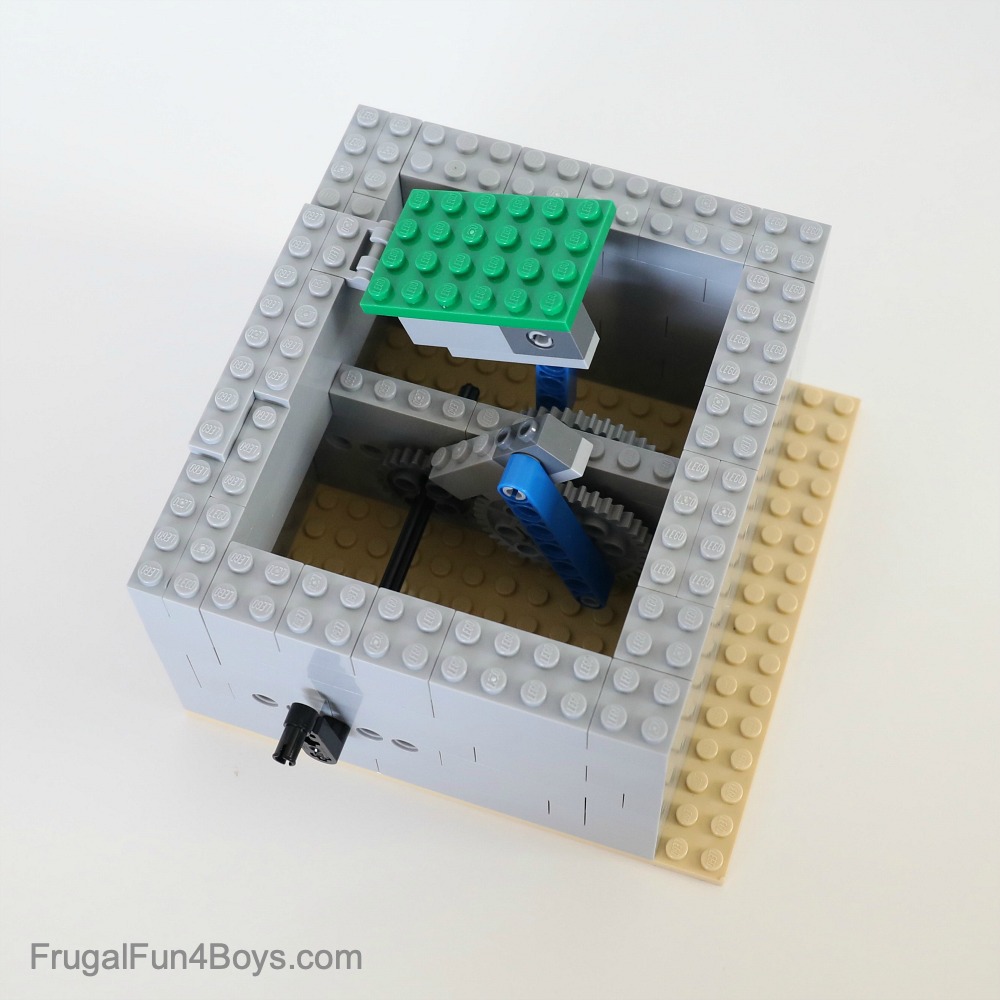
Step 10: After attaching both green platforms, add two 2 x 4 light gray plates on the frame. This will hold them in place.
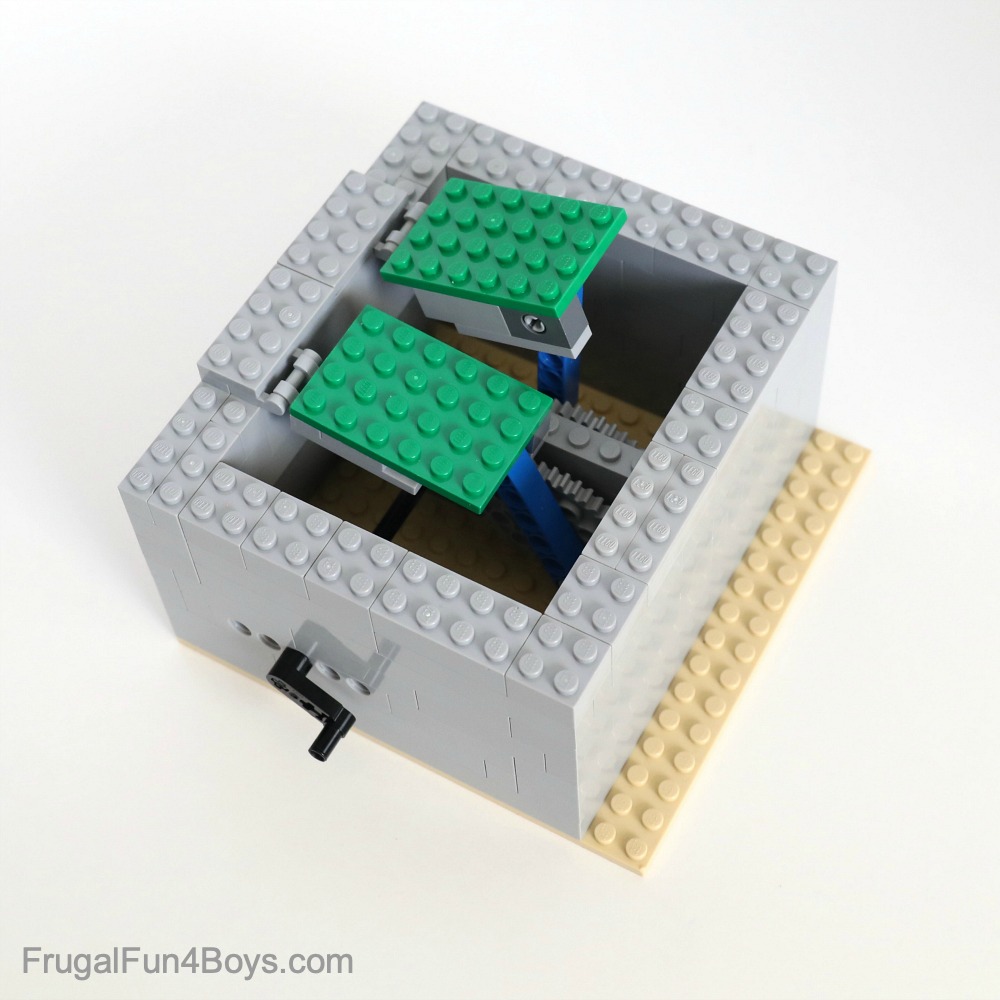
Step 11: Add a layer of brown bricks around the top of the base. Note that there are brown plates on the section where you attached the green platforms.

Step 12: Finish up your galloping horses project by adding trees, plants, horses, and minifigures! Choose LEGO Friends, knights, cowboys, or anything you want!
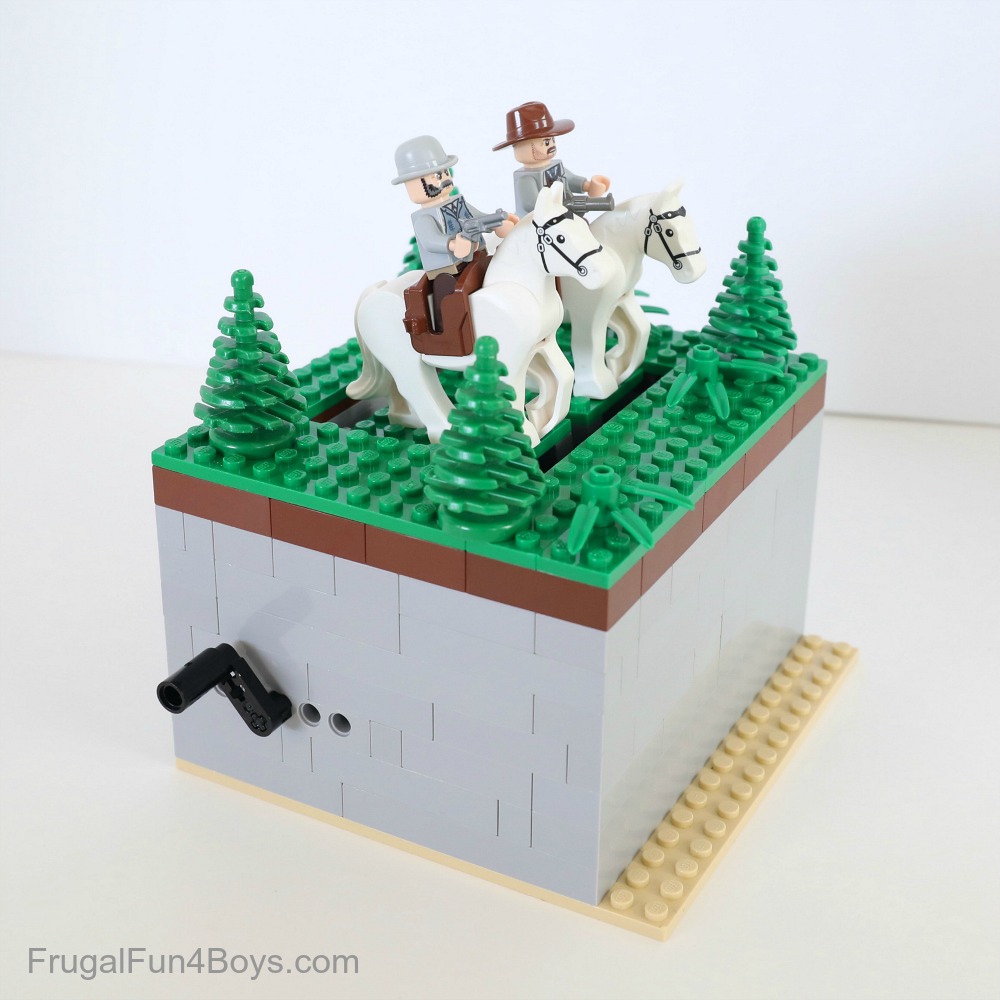
I think my favorite is the knights, although I do love the cowboy version too.
Need more LEGO machine ideas?
Then you’ll love our LEGO machines book! Go grab your copy of Genius LEGO Inventions with Bricks You Already Have.
This book is full of 40 projects to build, and each one has moving parts. Construct robots, a transformer, a candy machine, a coin bank, and so much more.

6 Comments
Sally May 26, 2020
What lego sets do you have to buy to make these things?
Judith Chari May 27, 2020
Dear Sarah
Thank you for the great ideas. They keeps our CREATIVE LEGO kids wanting to play for hours!!
EJEZ May 28, 2020
So cool!
Lynn May 31, 2020
love it all
Jessie Zawislak May 21, 2021
this is really cool!
Grandma Connie Sep 30, 2022
Sarah, want to thank you for the “Galloping Horses” LEGO build. We are using this challenge for our October LEGO club build........with a slight twist. We will read Sleepy Hollow and then build the Galloping Horses with the Headless Horseman chasing Ichabod Crane. What fun!!!
Post a Comment