
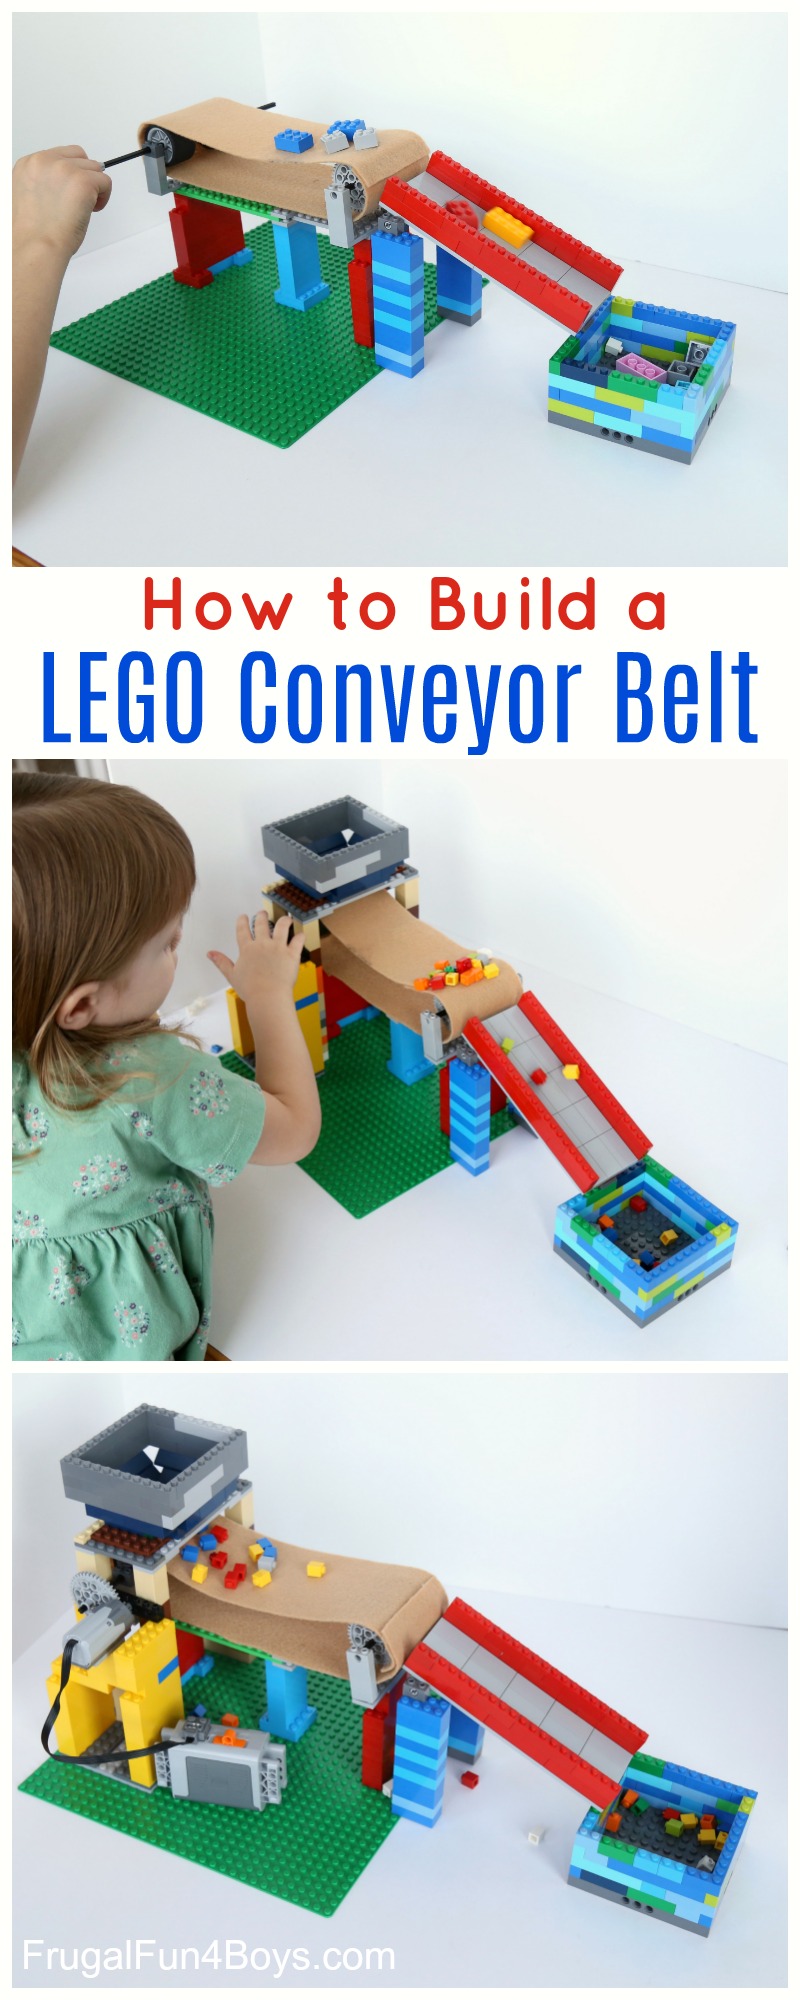
STEM Challenge: Build a conveyor belt with LEGO® bricks! Here’s a fun way to learn about machines while building with bricks. This working conveyor belt uses pulleys to move something, but not in the way that kids usually think of when they think of pulleys. My kids were pretty impressed. Jonathan (5) studied it and said, “Wow, so it’s just going around and around!” So simple, but a mystery to kids when they can’t see all the parts. Now he knows what’s really going on with the conveyor belt at the grocery store!
This post contains Amazon affiliate links.
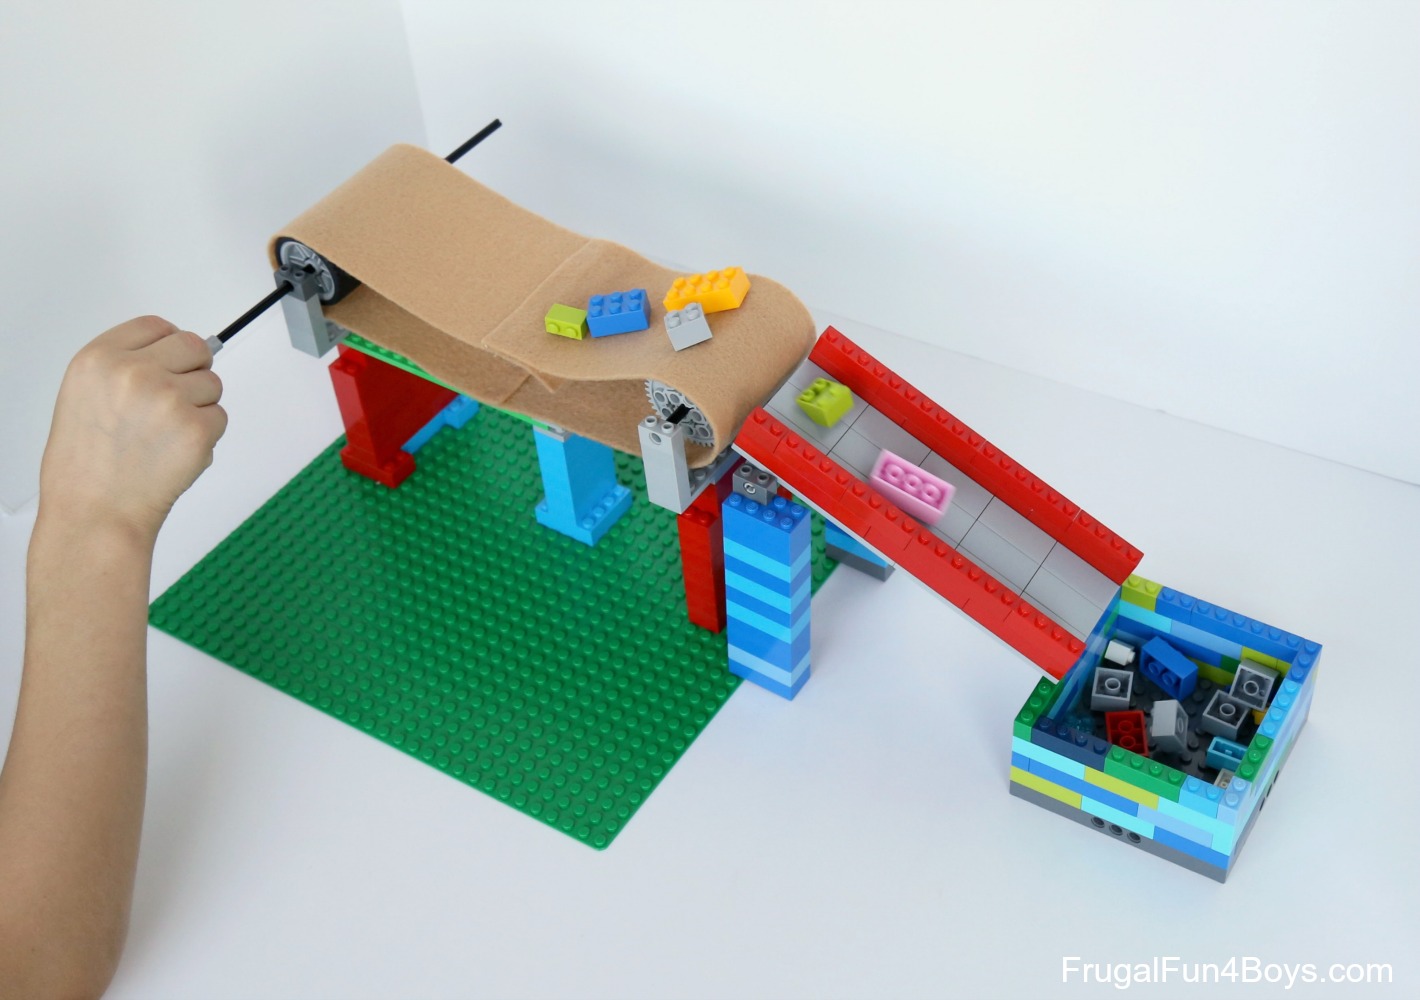
Build your conveyor belt with a simple hand crank, or add a power supply. It works well either way.
Here’s how it works!
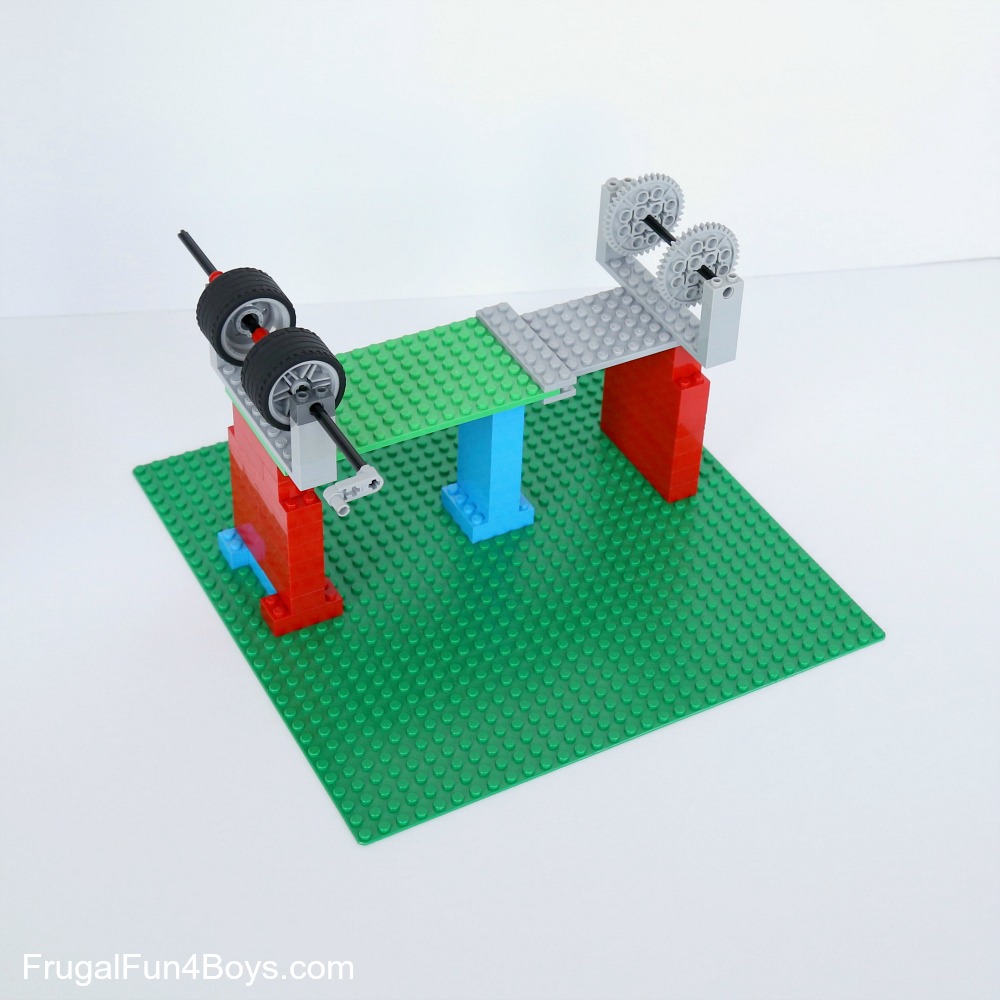
You’ll need two sets of either wheels or gears to build the conveyor belt. They will need to have an x-shaped hole in the center so that you can slide them onto an axle (x-shaped) and they will turn along with the axle. Wheels with a round hole will just stay in place while the axle turns inside them. (You can tell kids this or let them discover it on their own – great engineering principles at work here, and often discovery is the best way to learn!)
When constructing the frame, make sure there is room for the belt.
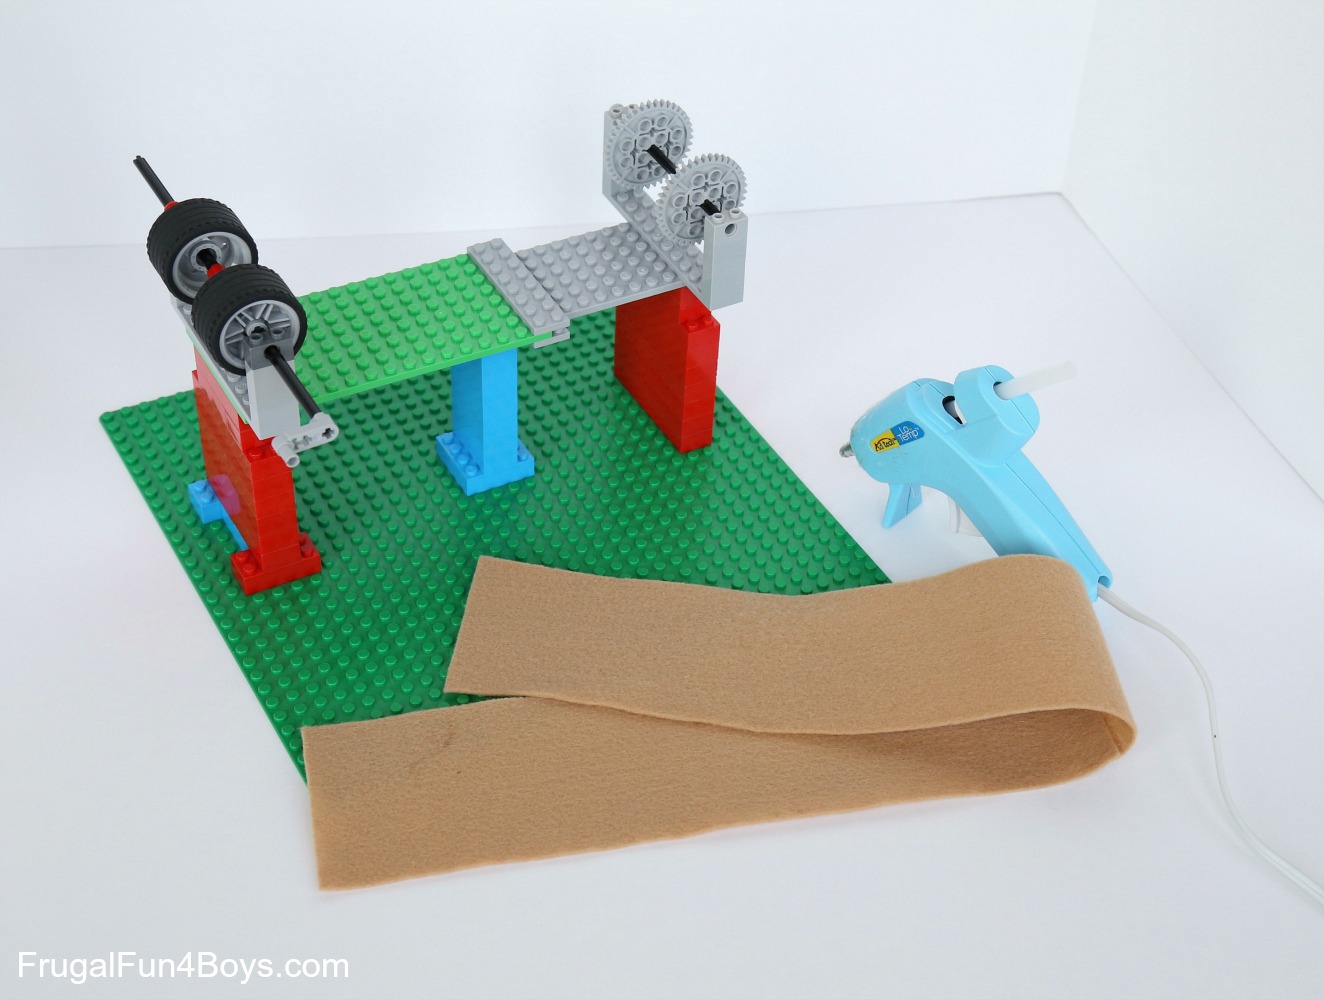
After we were happy with our set-up, I cut strips of felt for the belt. I hot glued the strips together to create a longer section.
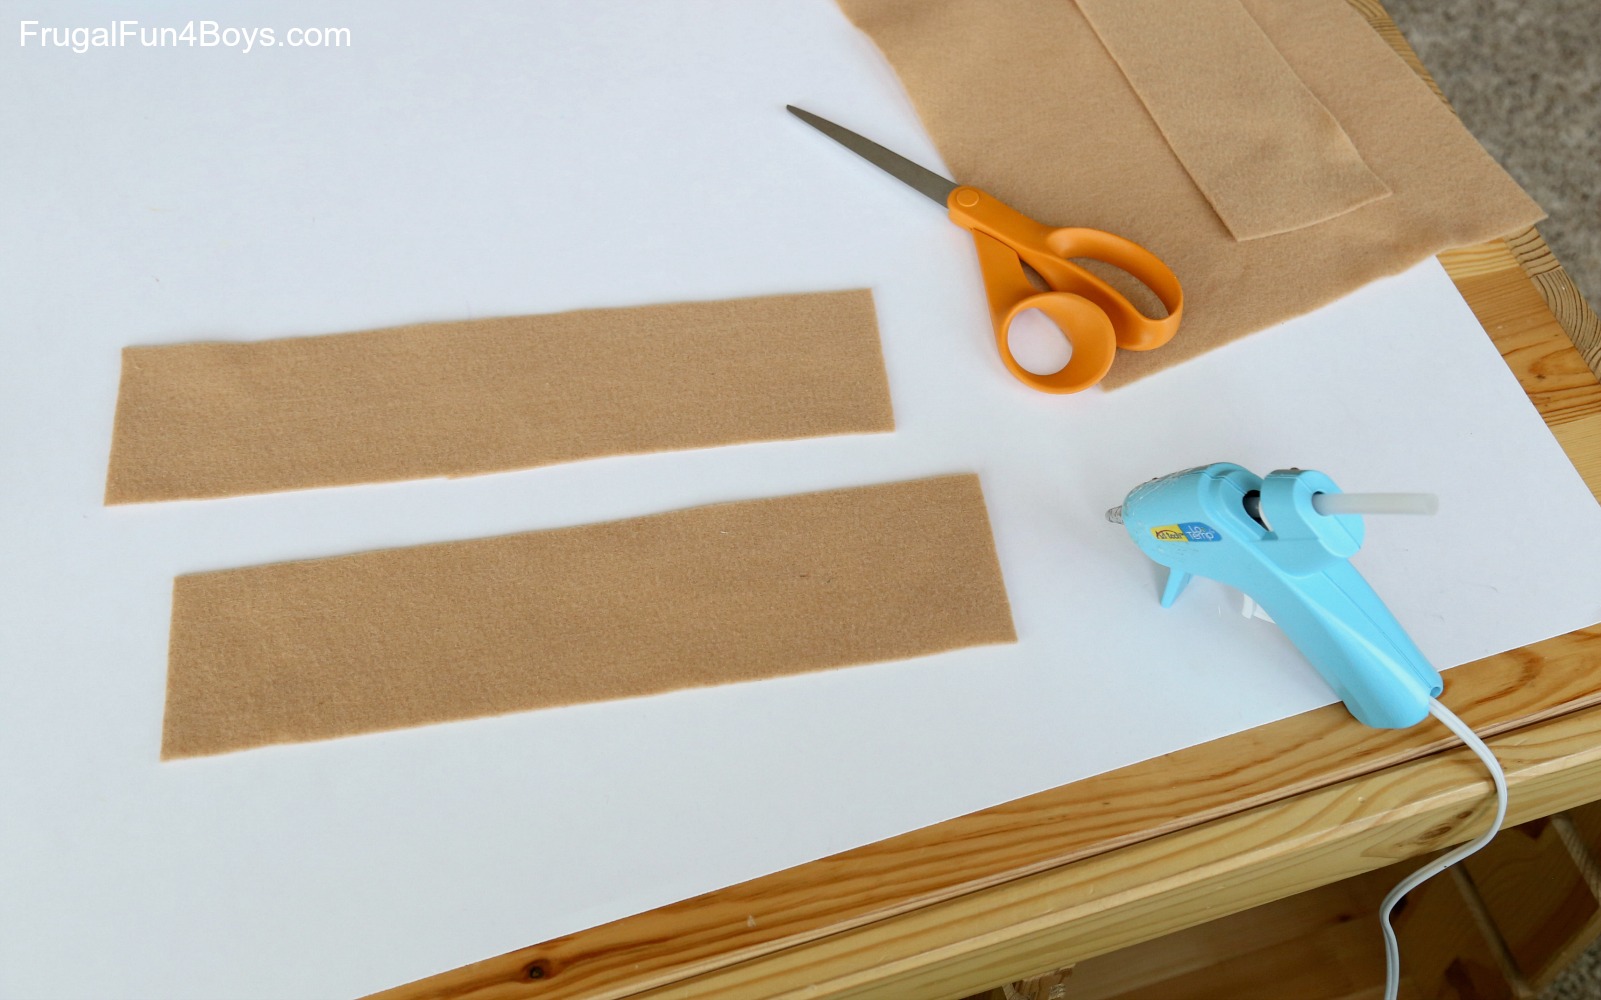
Then I hot glued the ends together around the wheels. You want to make it tight, but not too tight. Ours looks a little saggy, but it works well. I pulled the belt tight on my first attempt, but then it pulled the machine apart while it was running because it had too much tension.
We built our conveyor belt up off the table so that we could build a ramp to go with it. The LEGO® bricks travel across the conveyor belt, down the chute, and into the container. Very cool!
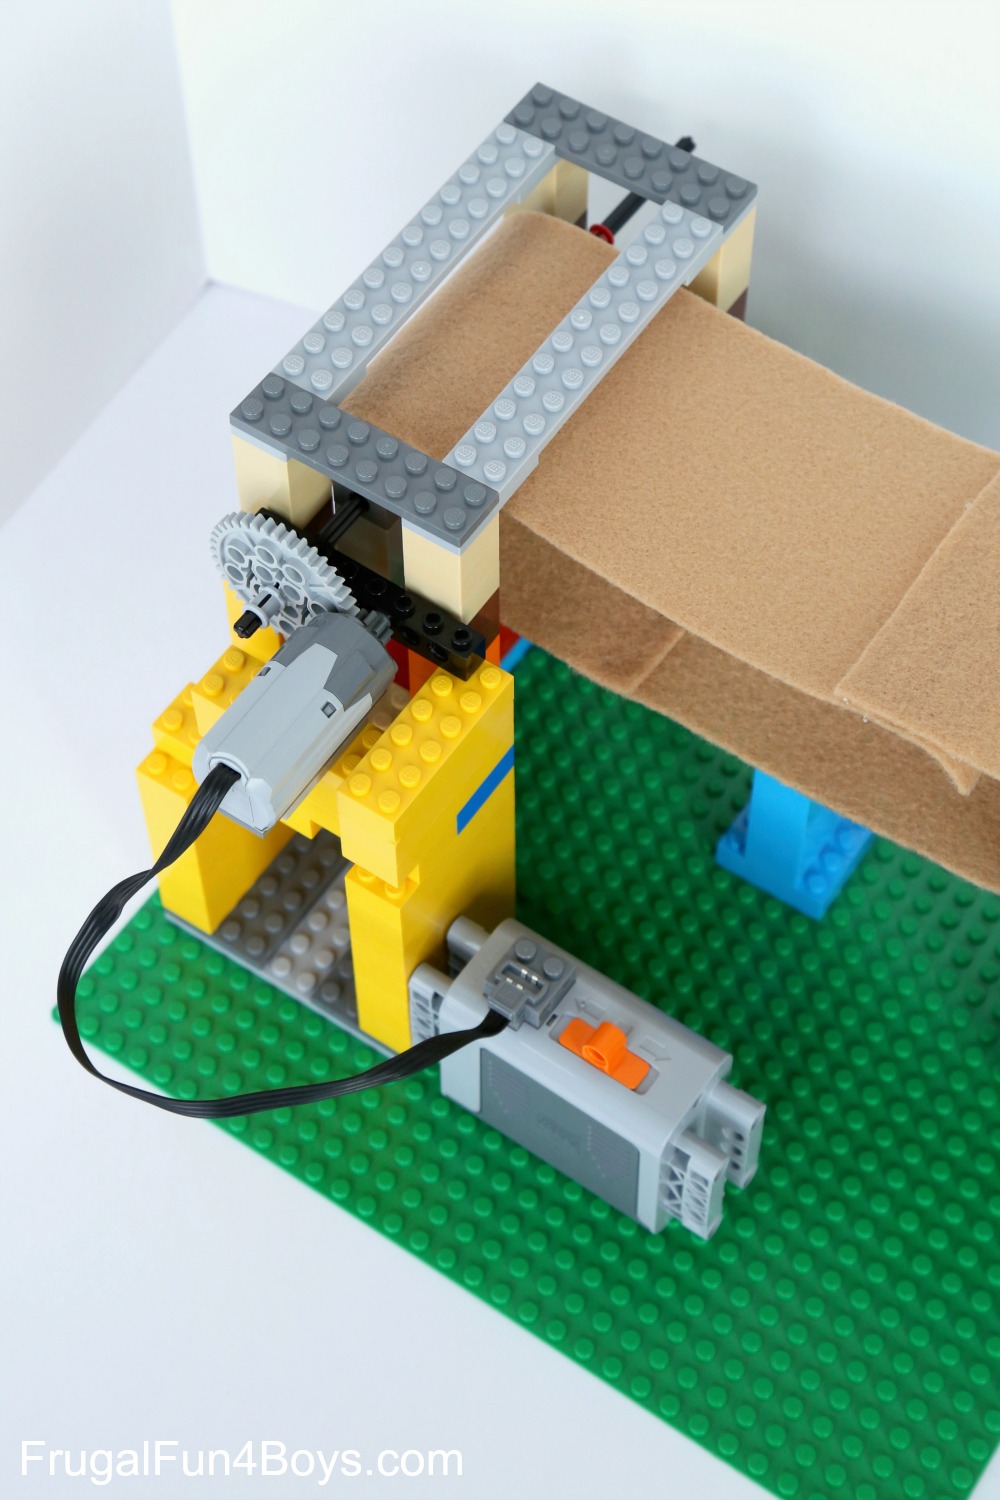
Well, then we decided to power up our conveyor belt! Because everything is more fun with power, ha ha.
We needed to reduce the speed of the LEGO® power functions motor, so Aidan put a large gear on the axle but attached the motor to the tiny gear next to it. That way, the tiny gear has to spin four times in order to make the large gear go around once.

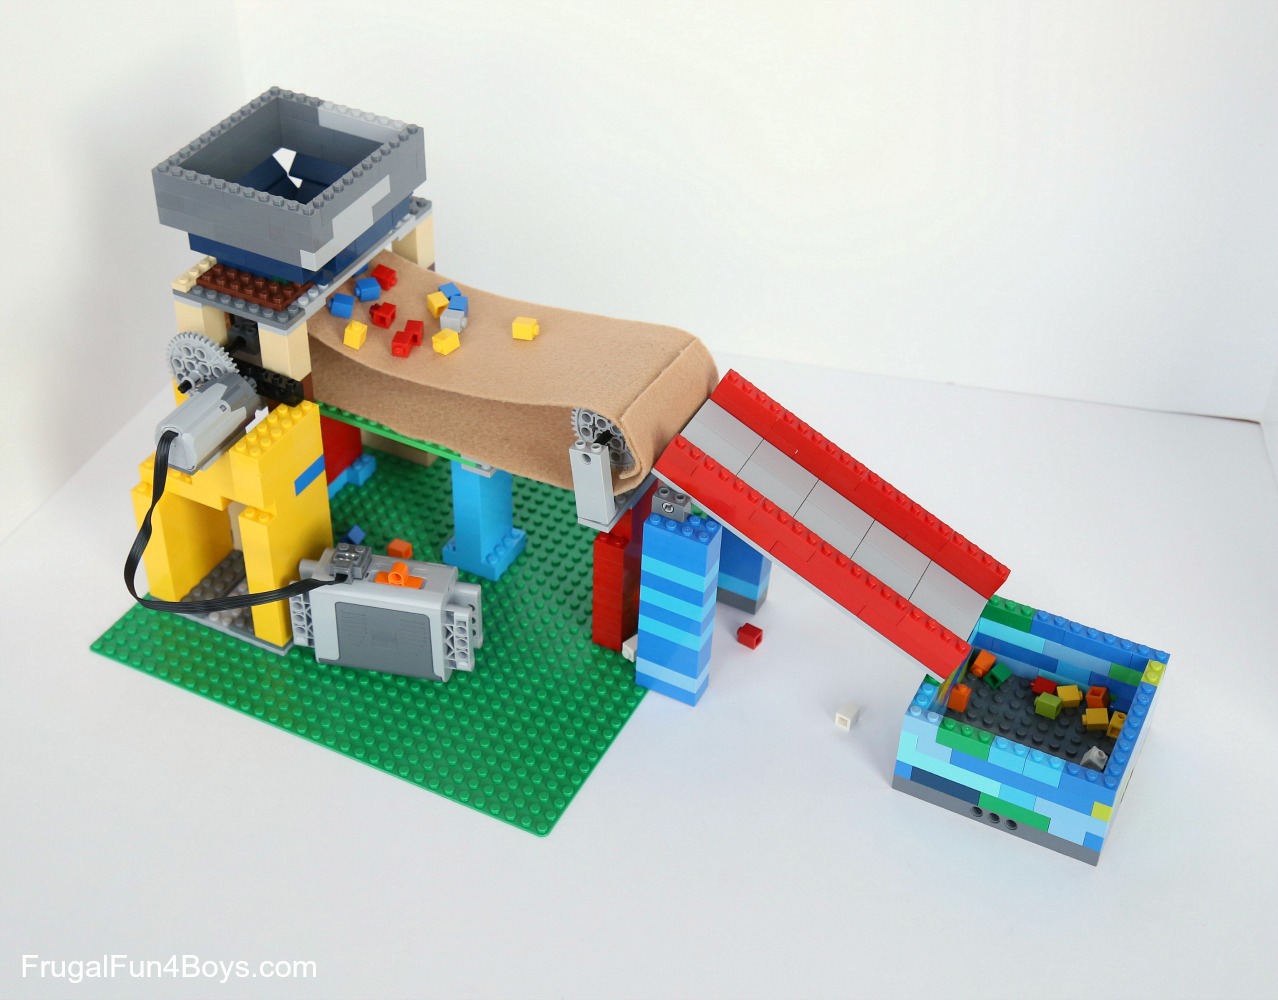
Once we had the power working, we decided to add a “hopper” type thing for loading bricks onto the conveyor belt. First we tried making a bin with a sliding door that could be opened at the bottom. The problem with that set-up was that it released all the bricks at once, and we didn’t really want them to be released at once. We ended up just building a hopper with an open bottom. So you can never fill it up, but Janie (3) was quite impressed with sticking bricks into it and watching them ride along the conveyor belt!
Here’s the completed conveyor belt. We decided it was a little factory! Fun for pretend play.
Have fun building!
This post is part of LEGO® Week, hosted by Toddler Approved. Be sure to check out the rest of the LEGO® Week projects and activities!
LEGO® is a trademark of the LEGO® group of companies which does not sponsor, authorize, or endorse this site.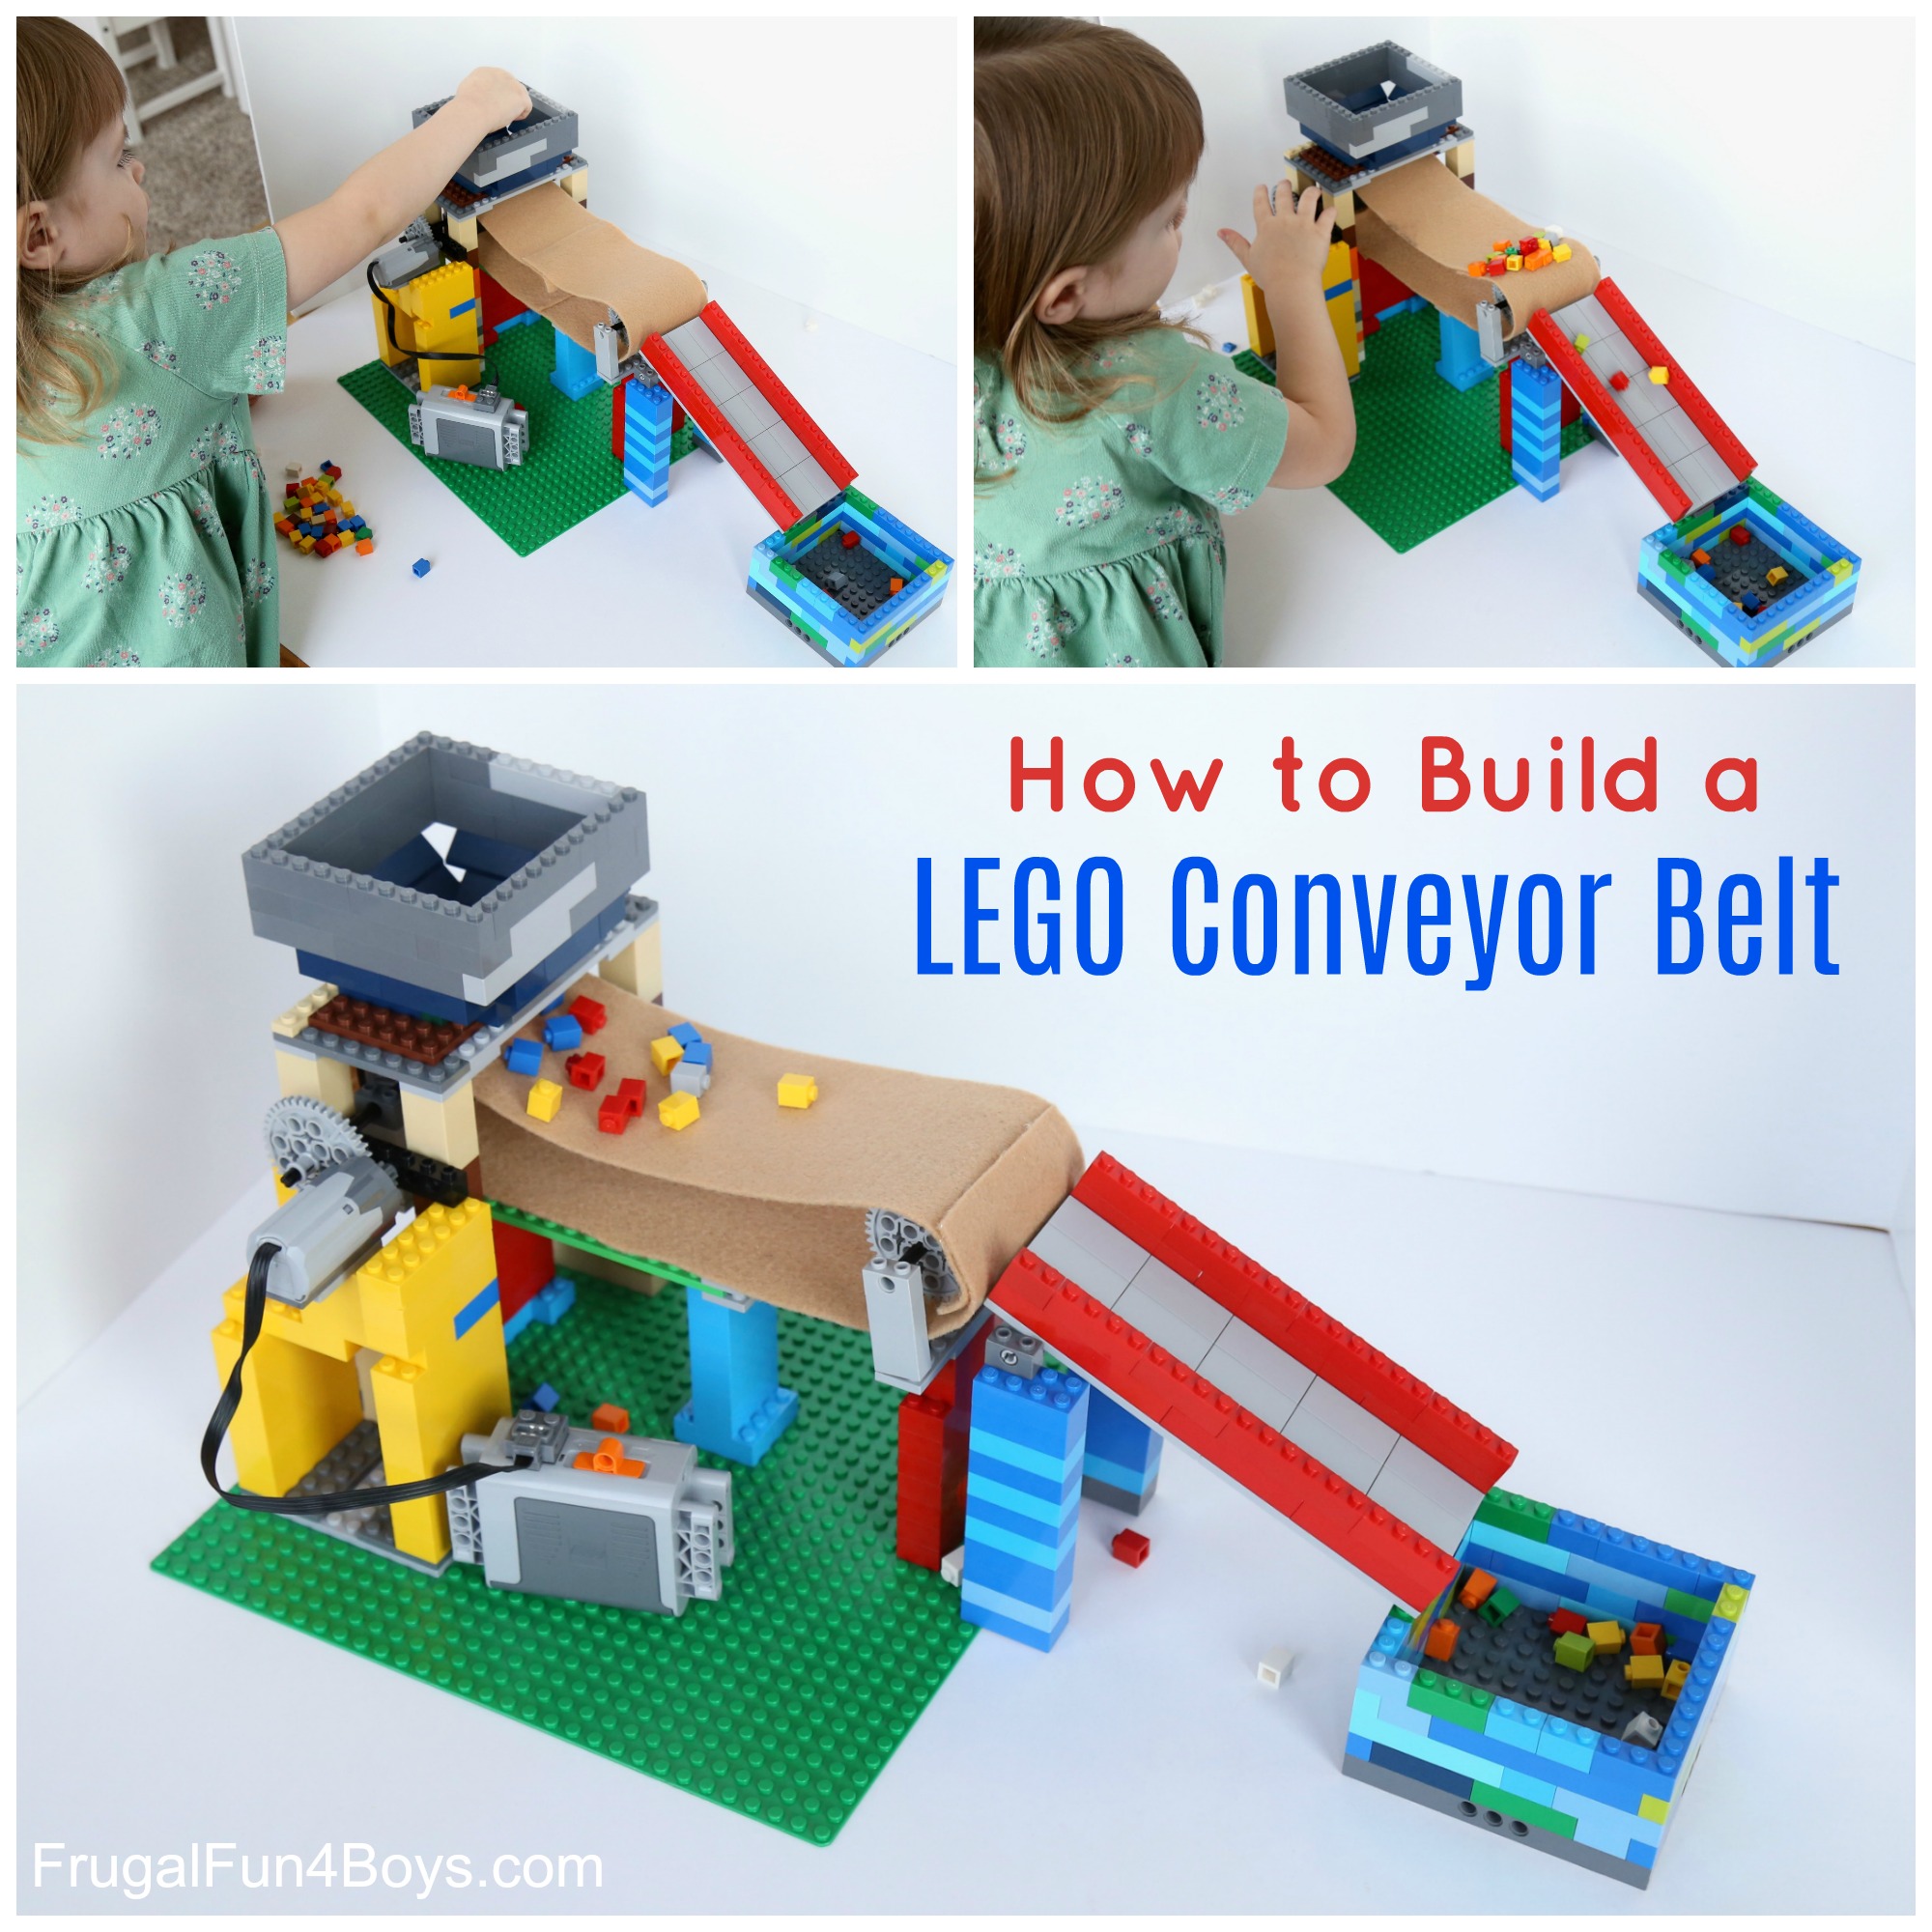
4 Comments
JDaniel4's Mom Jun 15, 2017
Wow! This is really cool! I can see my son exploring this over and over again.
Elizabeth Clark Jul 29, 2017
Love it love it love it!!
It's really an awesome idea, my son love lego projects. So, I have to learn building new projects. But now I'm making only easy and simple projects. I hope withing 6 month I will be able to make big projects.
Thanks for sharing your video, it inspire me to work with lego project.
Sue Oct 28, 2017
This is awesome. My 4yo and I want to do this, but we are new to legos. Is there a set you could recommend that would include the necessary parts, like the legos used to mount the wheels. We have a big bag of duplos but nothing that can be used to secure the wheels the way you did.
JanettheDog Nov 14, 2017
Awesome! That's so cool I am going to try it with my 4yo son.
Post a Comment