
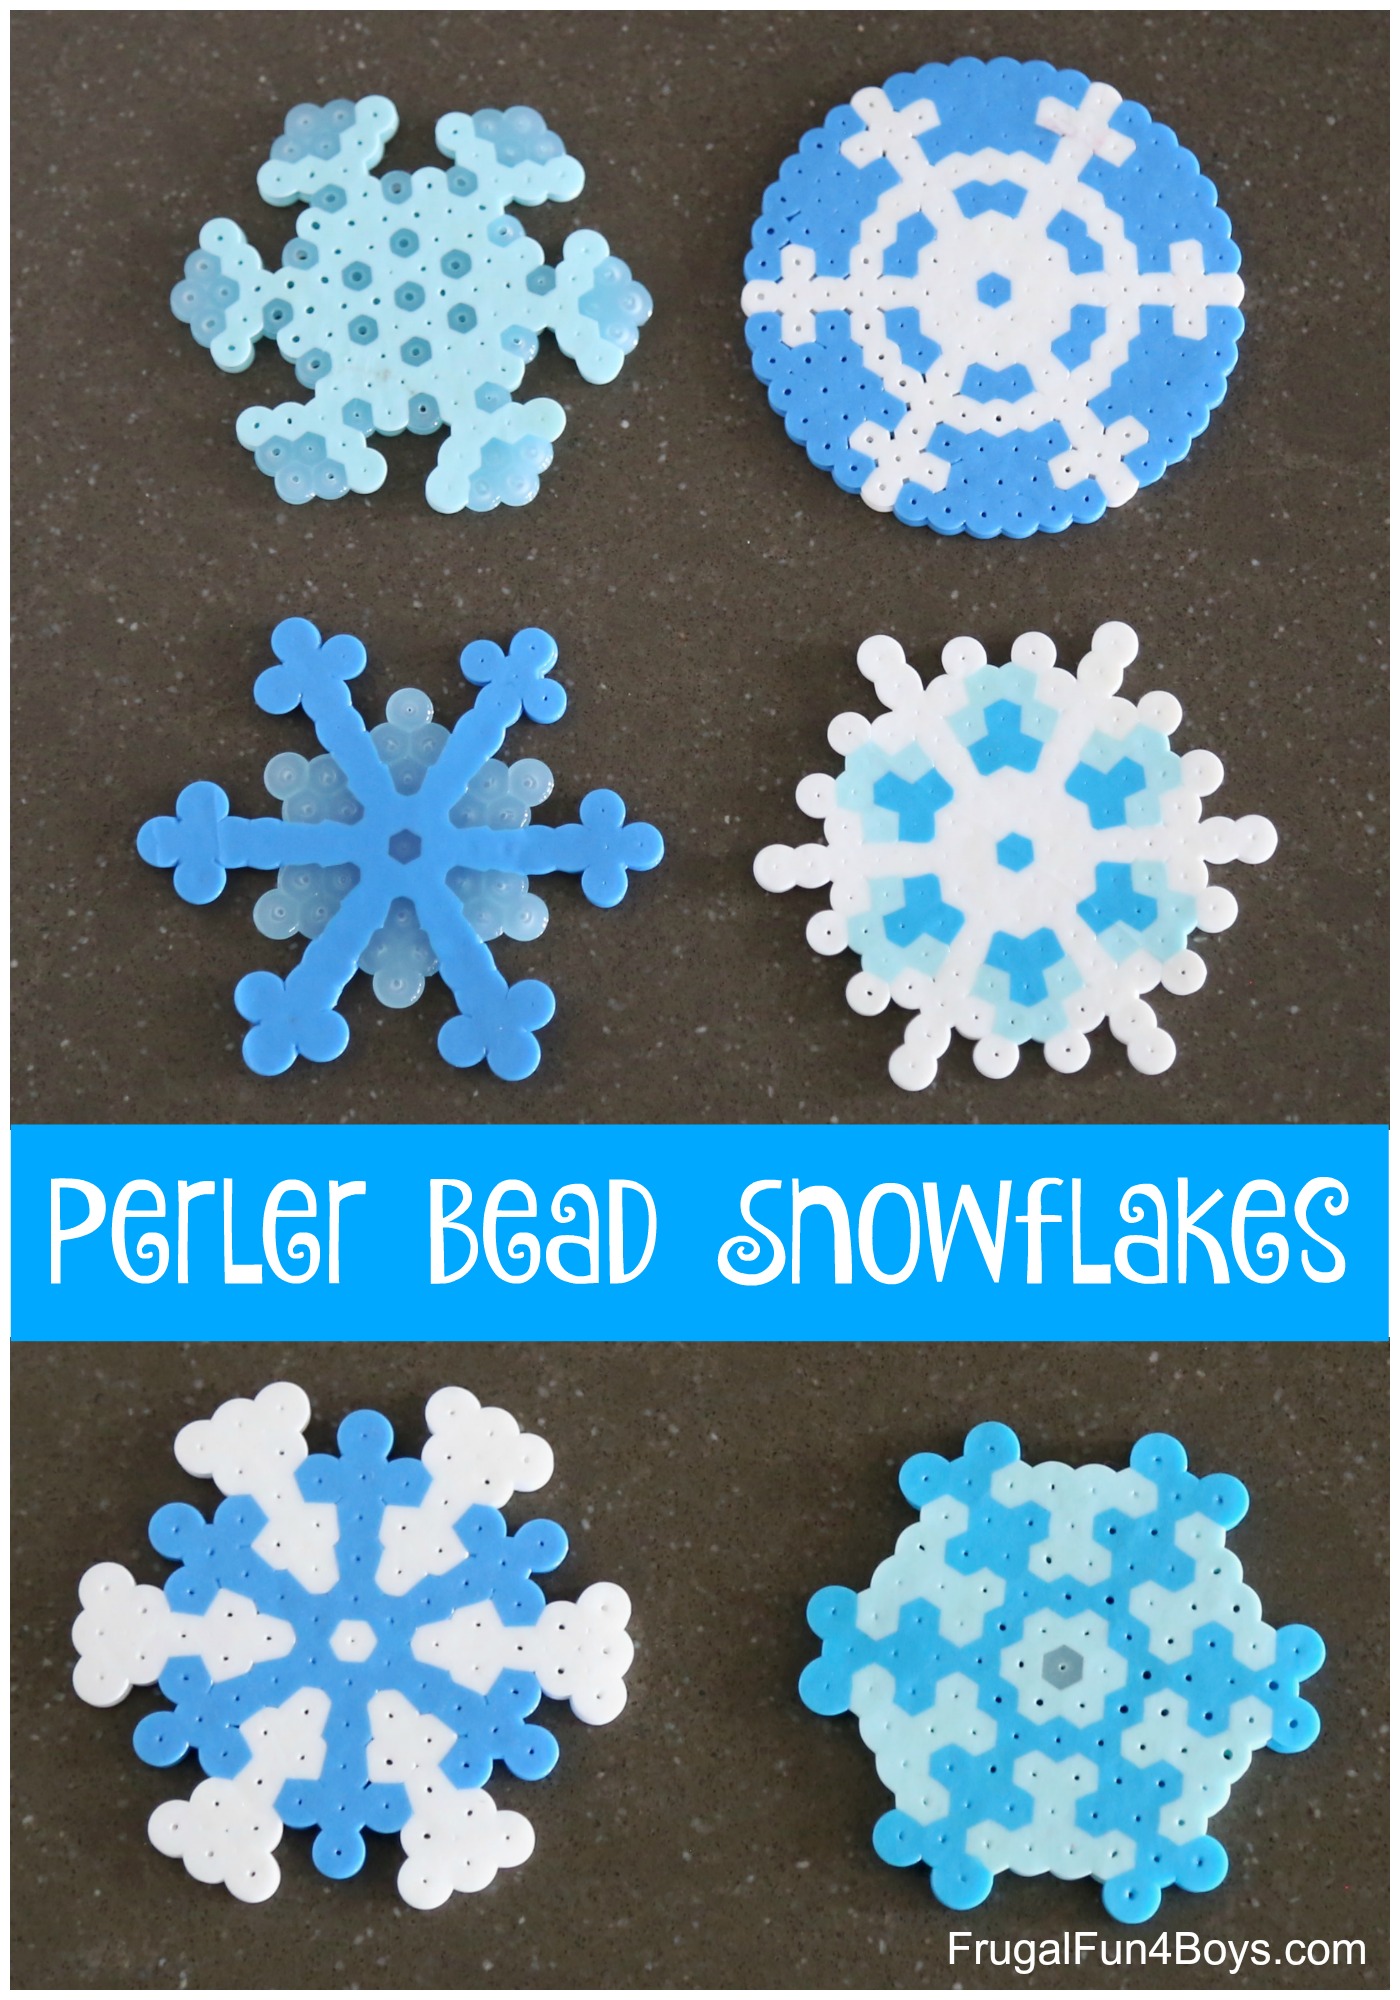
Kids of all ages will enjoy these Perler bead SNOWFLAKE PATTERNS! I’ve got several patterns for kids to make, and hopefully these will also inspire kids to design their own snowflakes.
If you’re not familiar with Perler beads, they are small plastic beads that fuse together when you iron them.
We’ve been fans of Perler beads for a long time. The colorful beads are so much fun, and even though most of my kids are boys, they have enjoyed making all kinds of Perler bead creations! We’ve made minions, Avengers, and Star Wars projects. It’s a great rainy day activity, and GREAT for developing fine motor skills!
This post contains Amazon affiliate links.

You’ll definitely want more than just white beads for creating beautiful snowflakes! We bought an extra bag of white and a bag of two different blues, but we also used other shades of blue out of our big multi-color tub. We sorted out the right colors before starting to design our snowflakes.
At the bottom of this post, you’ll find a list of recommended supplies for this project, with links.
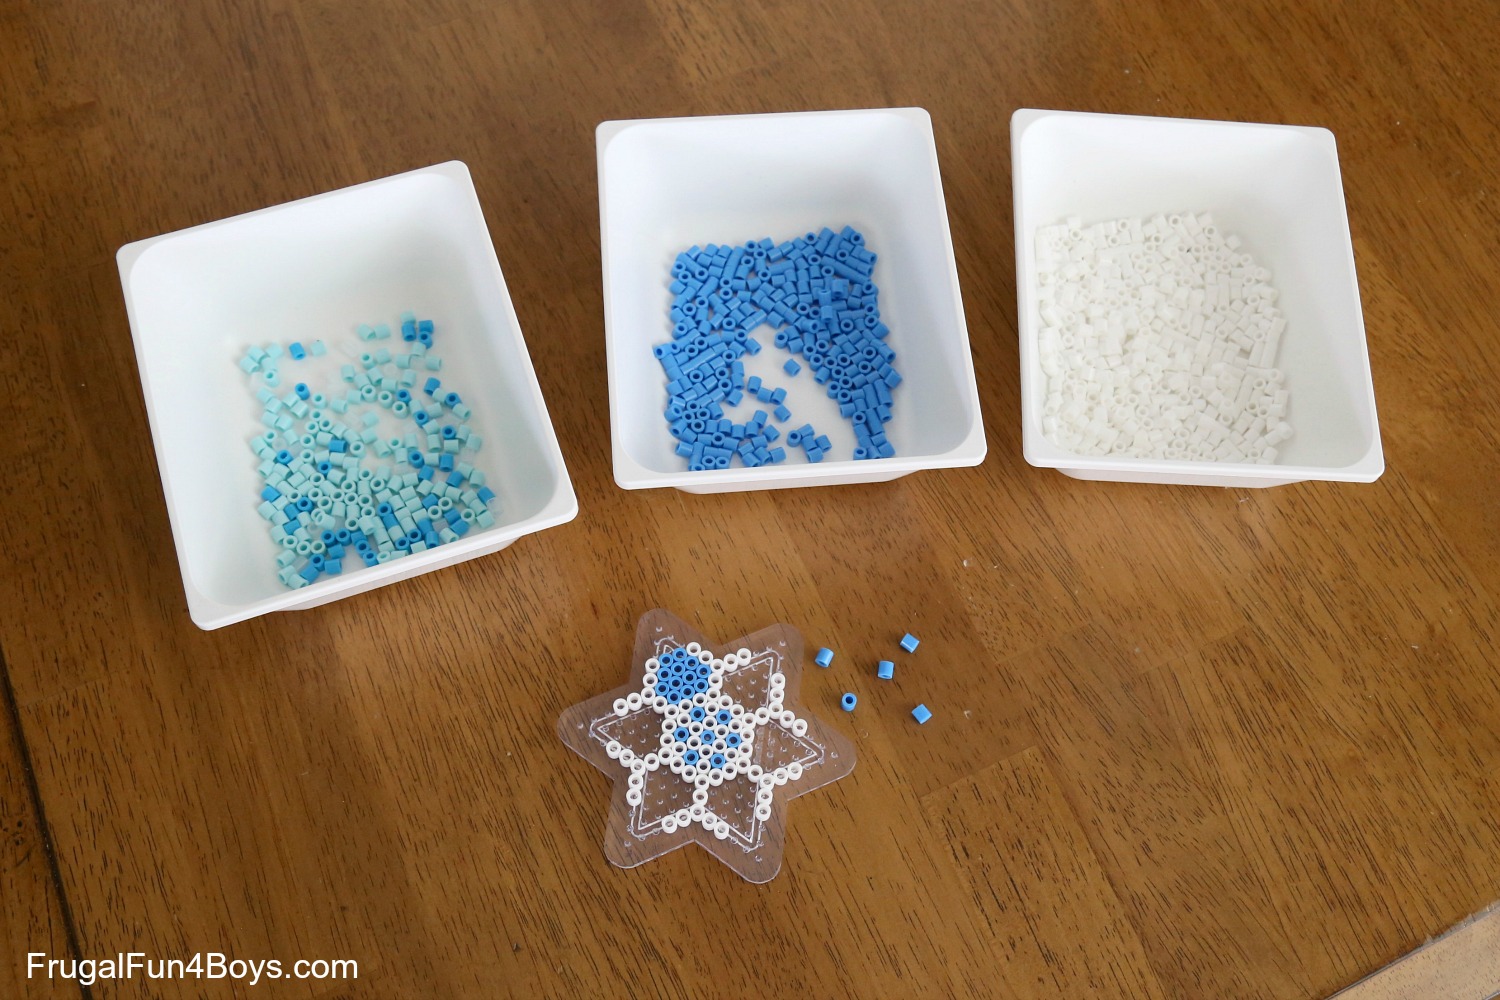
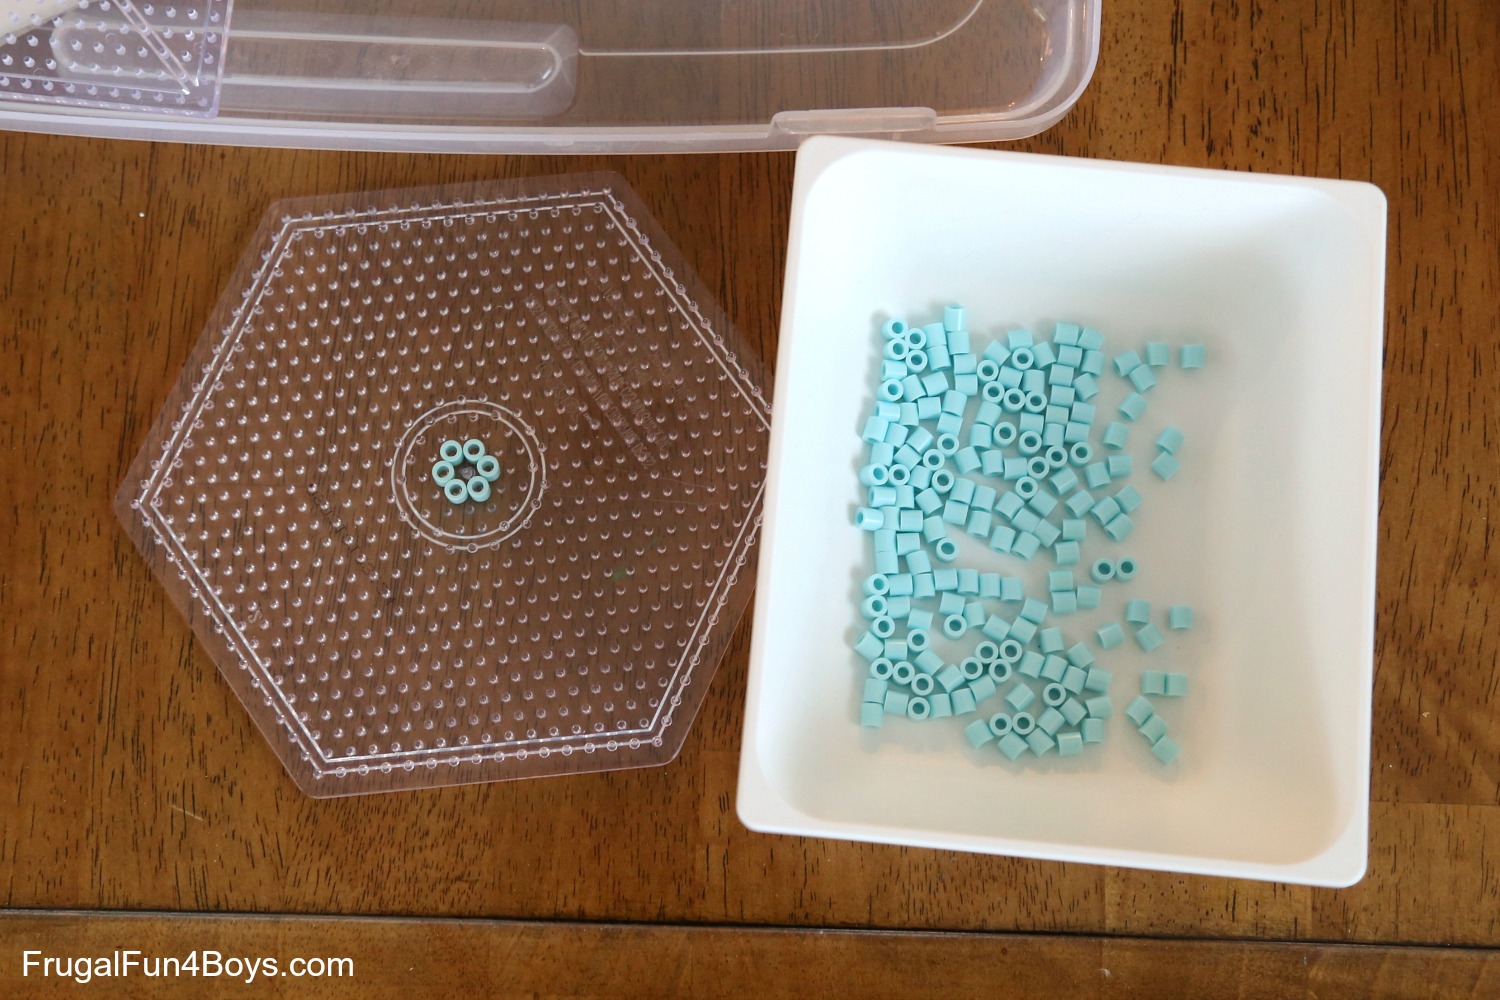
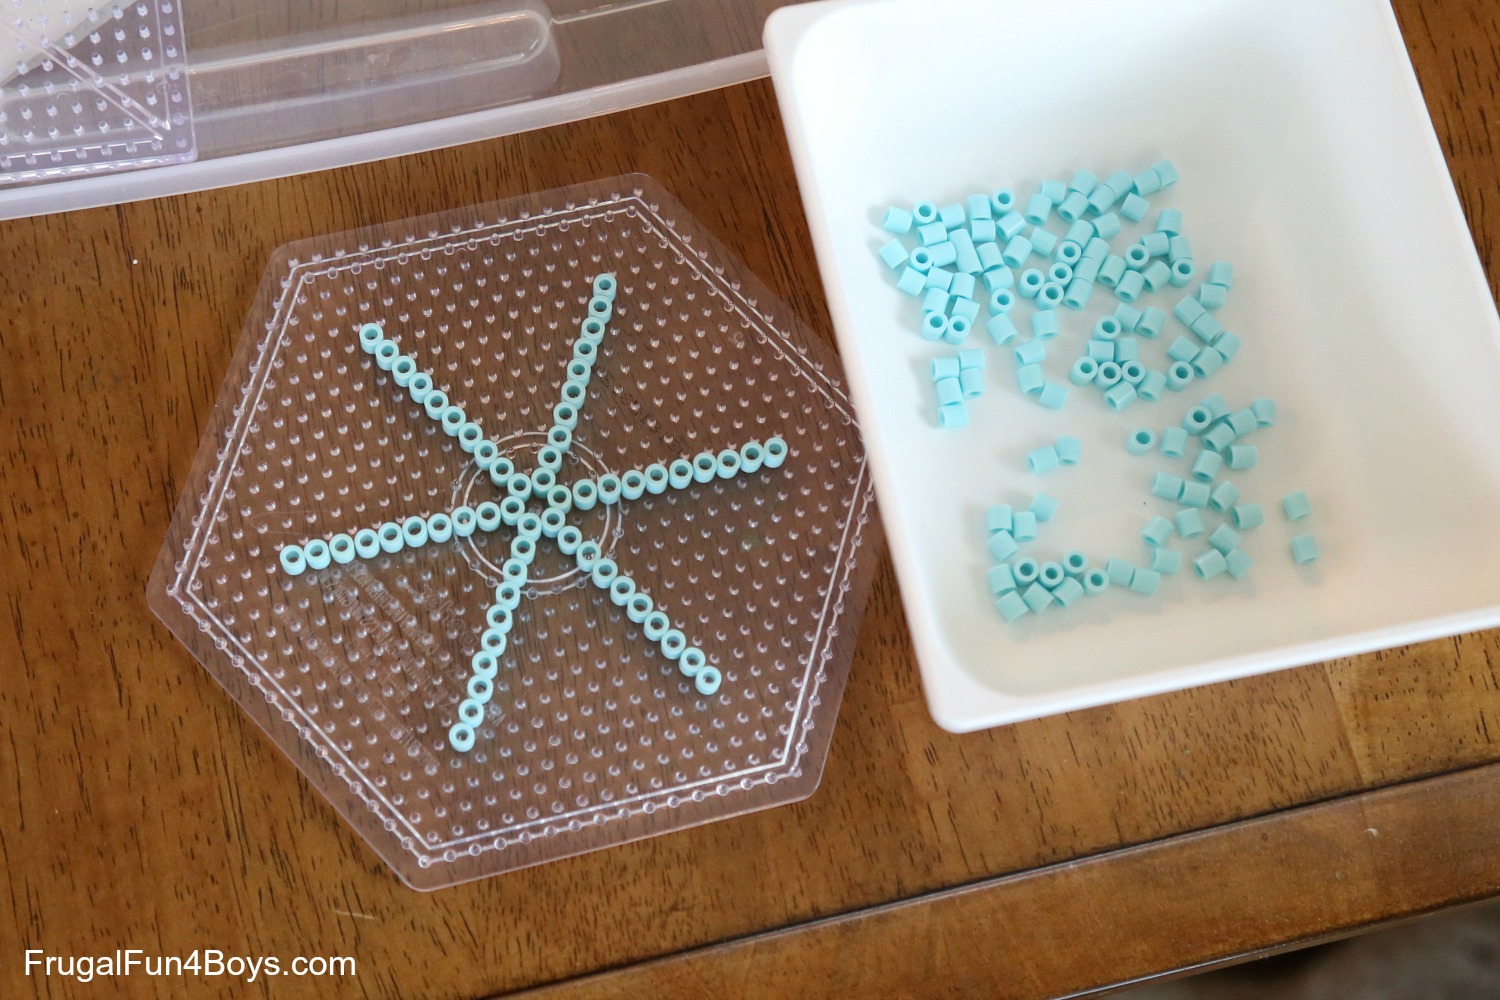
We enjoyed using our small round pegboard the most, but we also designed snowflakes on our hexagonal, star, and square pegboards.
How to Design a Six-Sided Snowflake
Here’s an easy way to design a beautiful snowflake. This method will work on the round or hexagonal peg boards (but not the square).
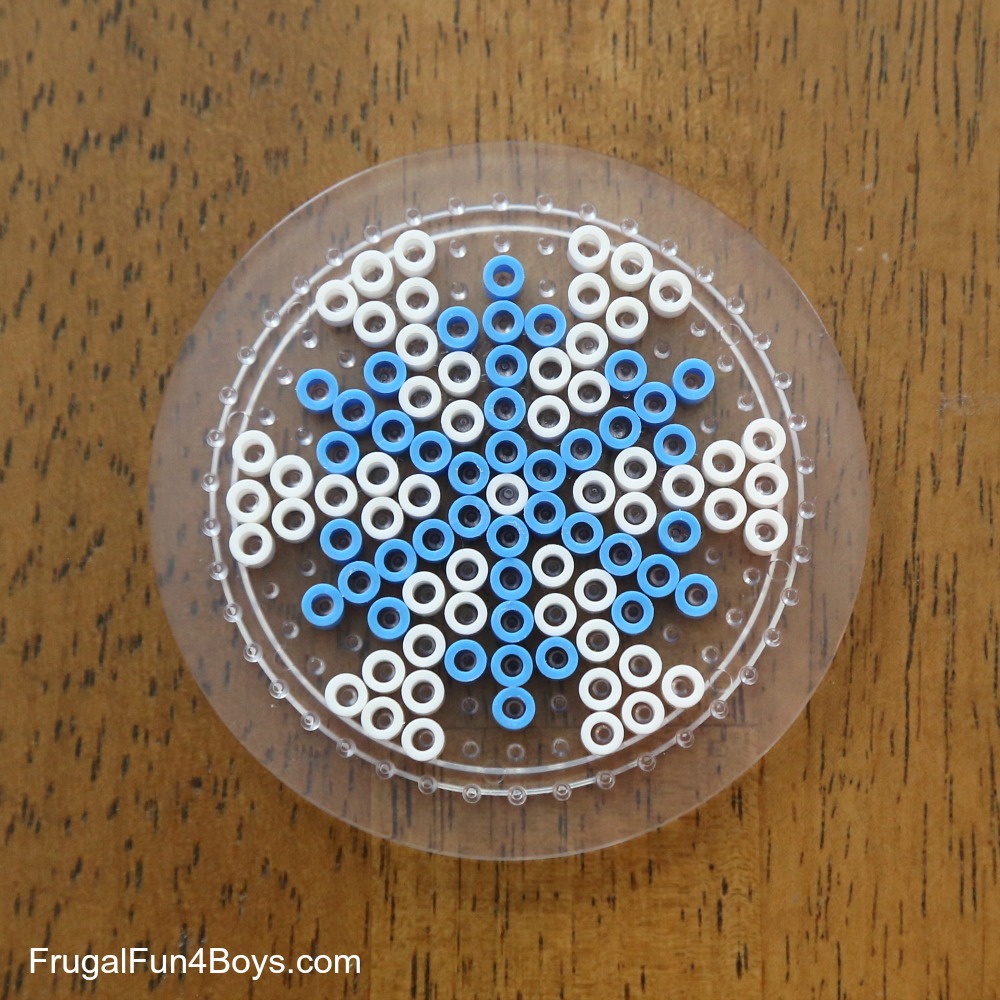
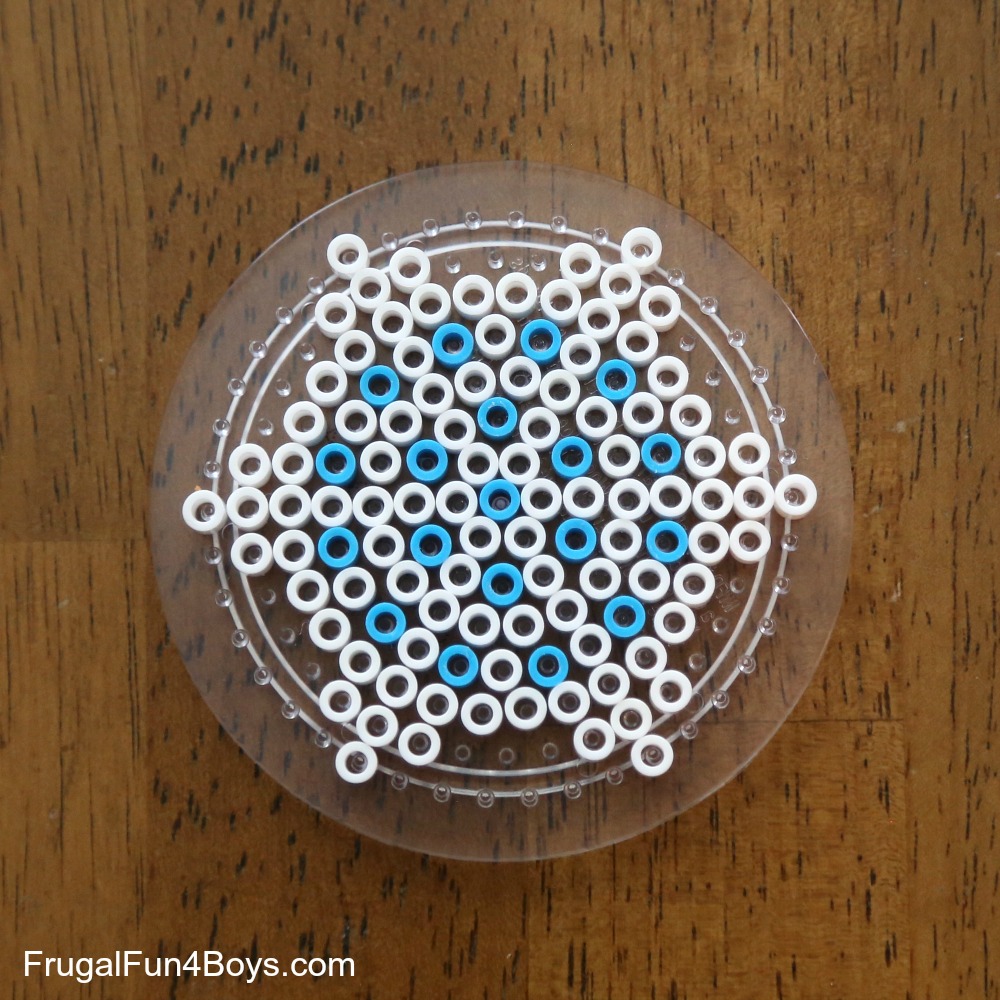
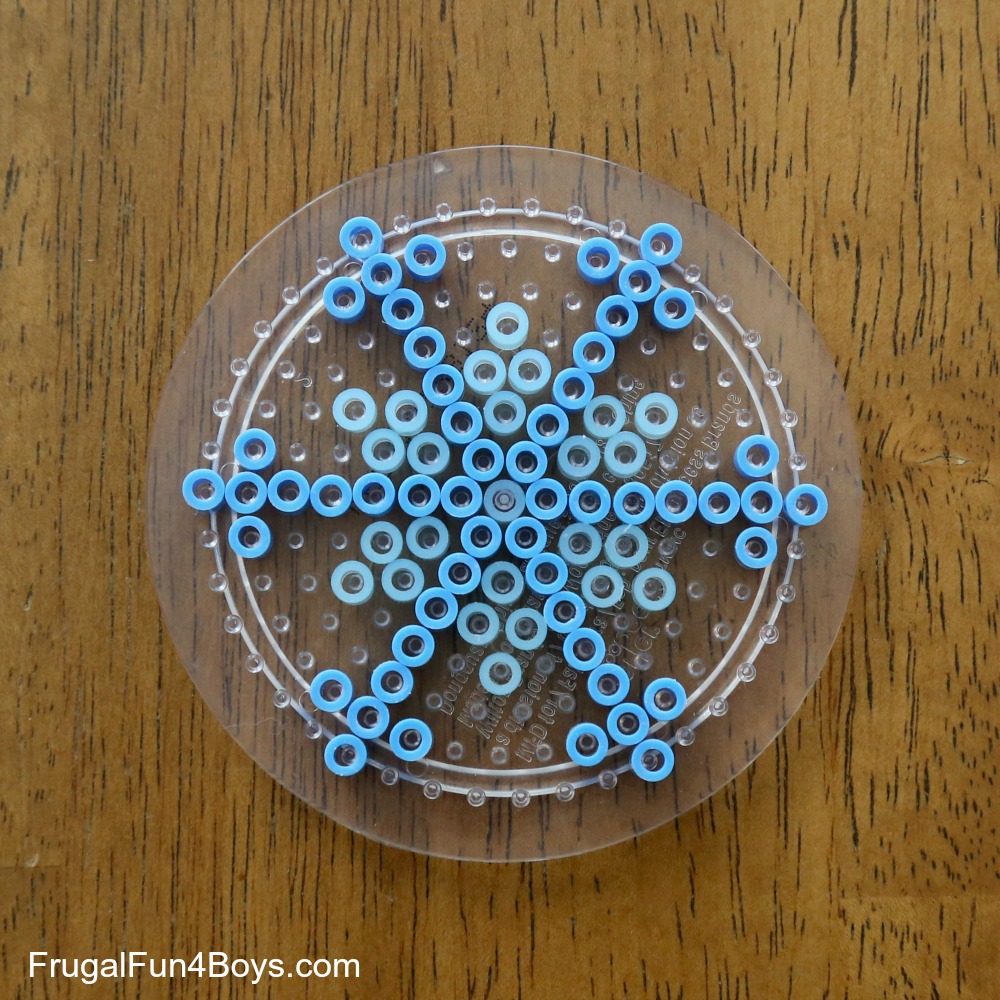
Start by building a tiny hexagon in the center of the pegboard.
Then build an arm straight out from each center bead.
Once you have this basic shape, you can add details to make your snowflake more intricate.
The only thing, though, about intricate designs is that they can be a little hard to iron. The pattern below has a blue snowflake that we built from the basic design above, but we used clear beads to fill in around the snowflake and complete the circle.
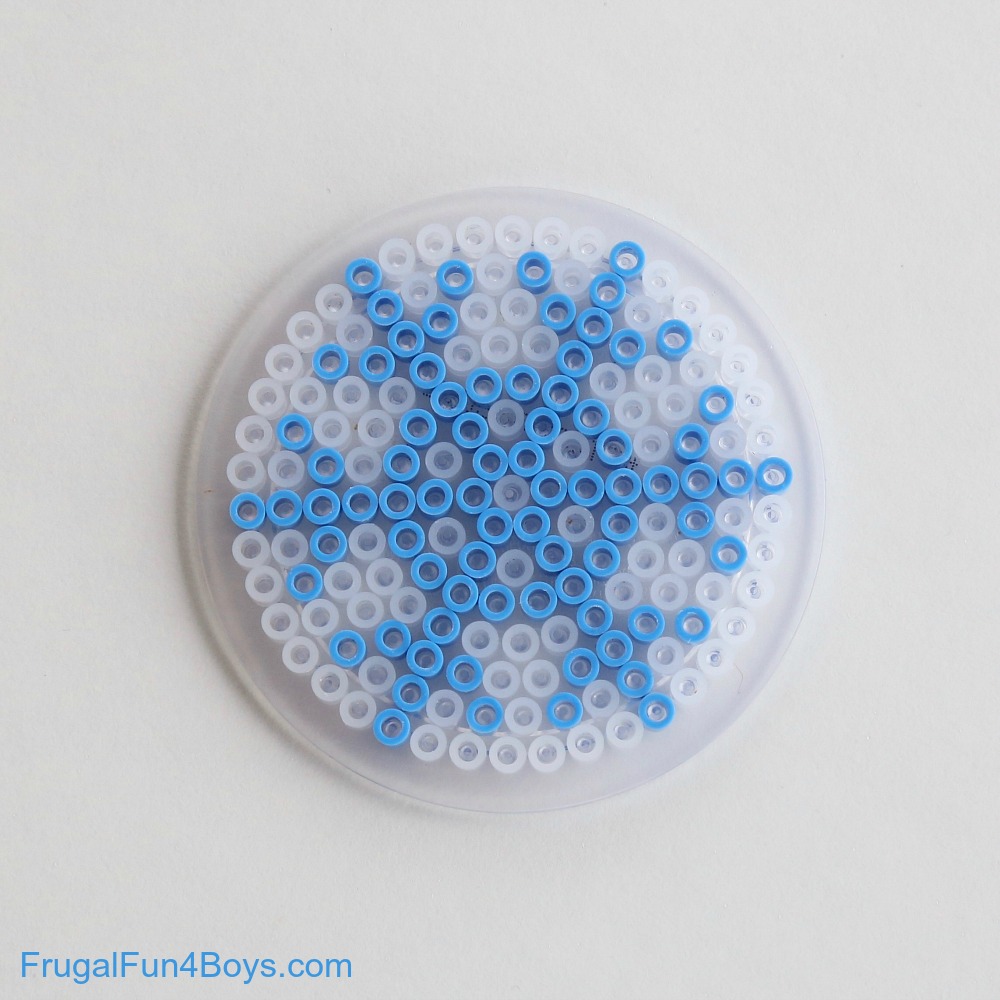
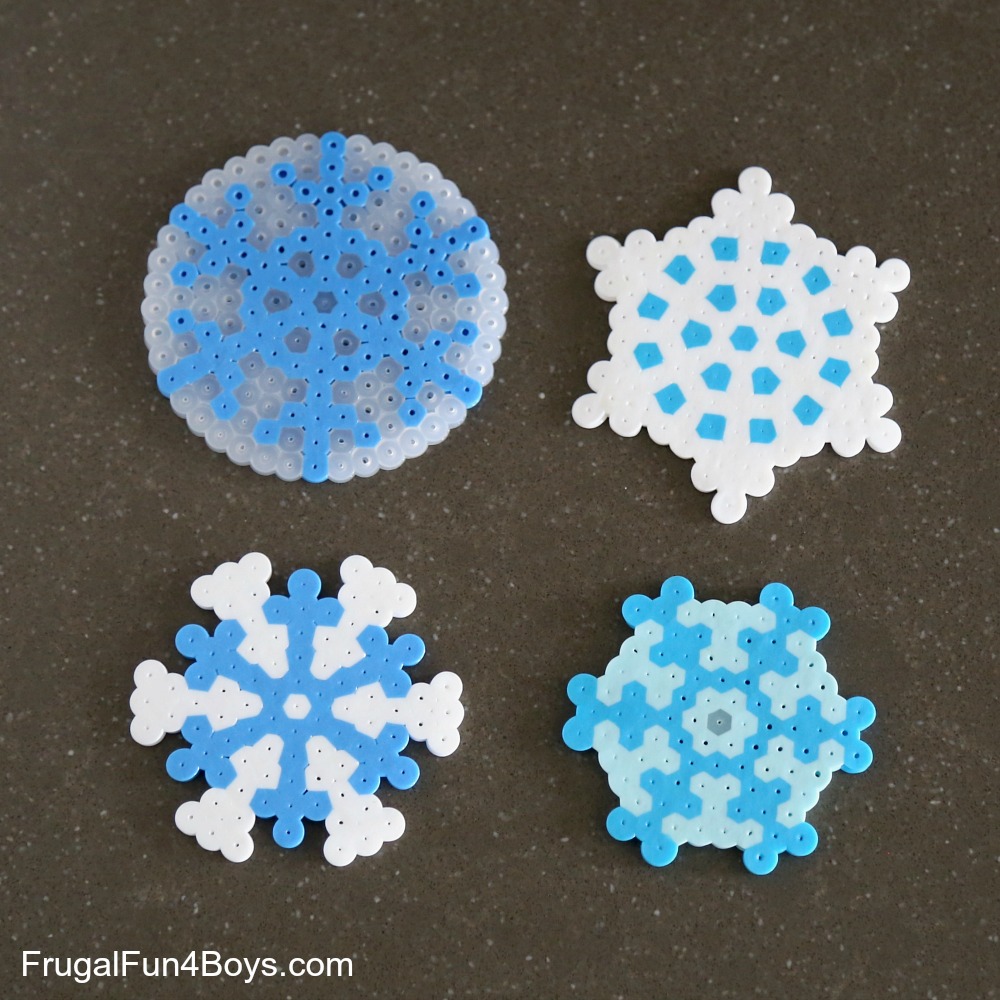
It turned out so pretty after I ironed it! This snowflake is the top left in the photo below.
Here are more Perler bead snowflake patterns:
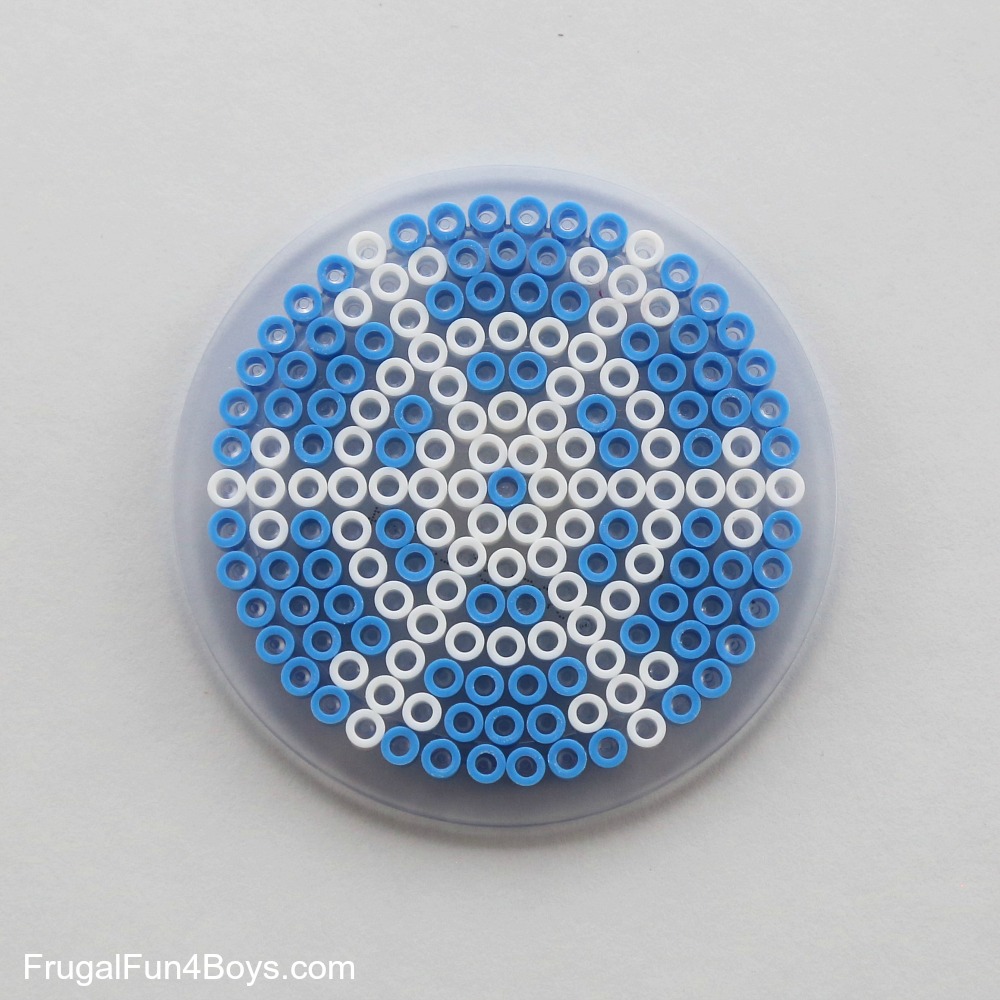
This pattern is the bottom left in the photo above.
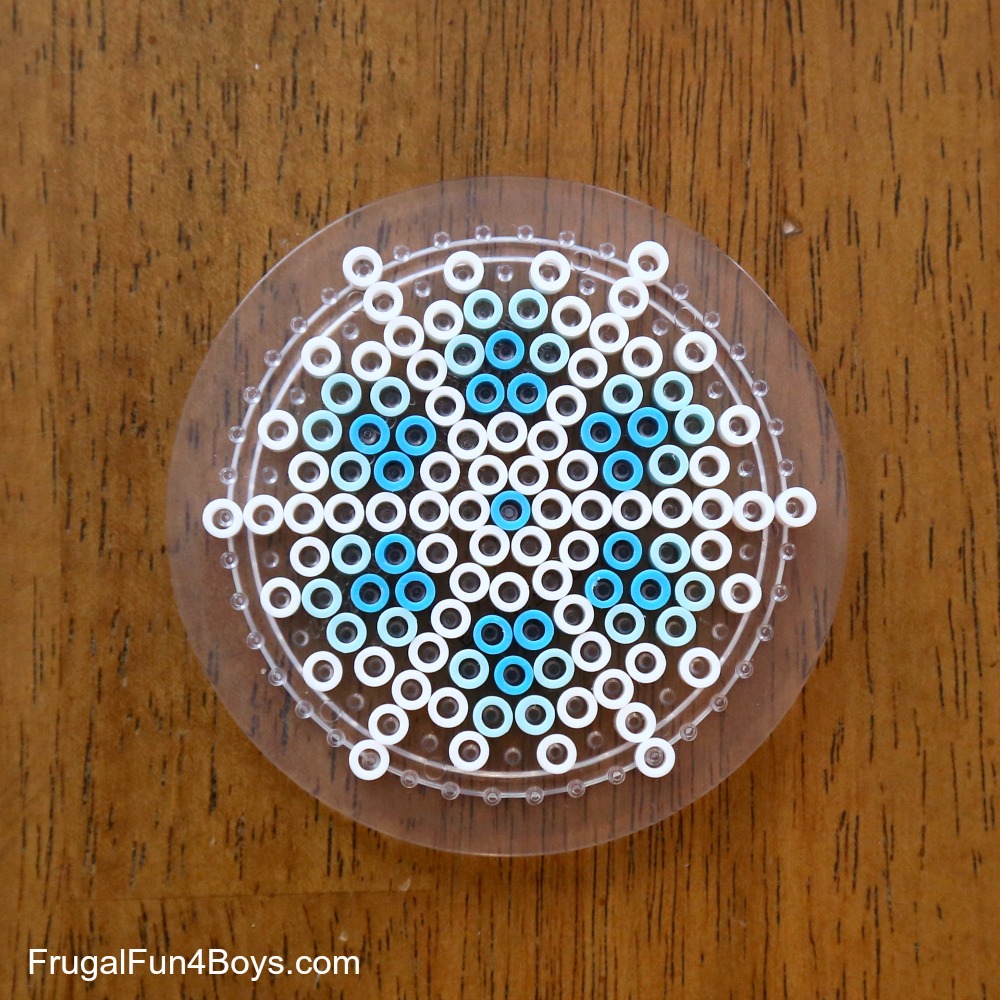
And this design is the top right:
Here’s another collection of snowflake designs, and then under this photo you’ll find photos of the beads.
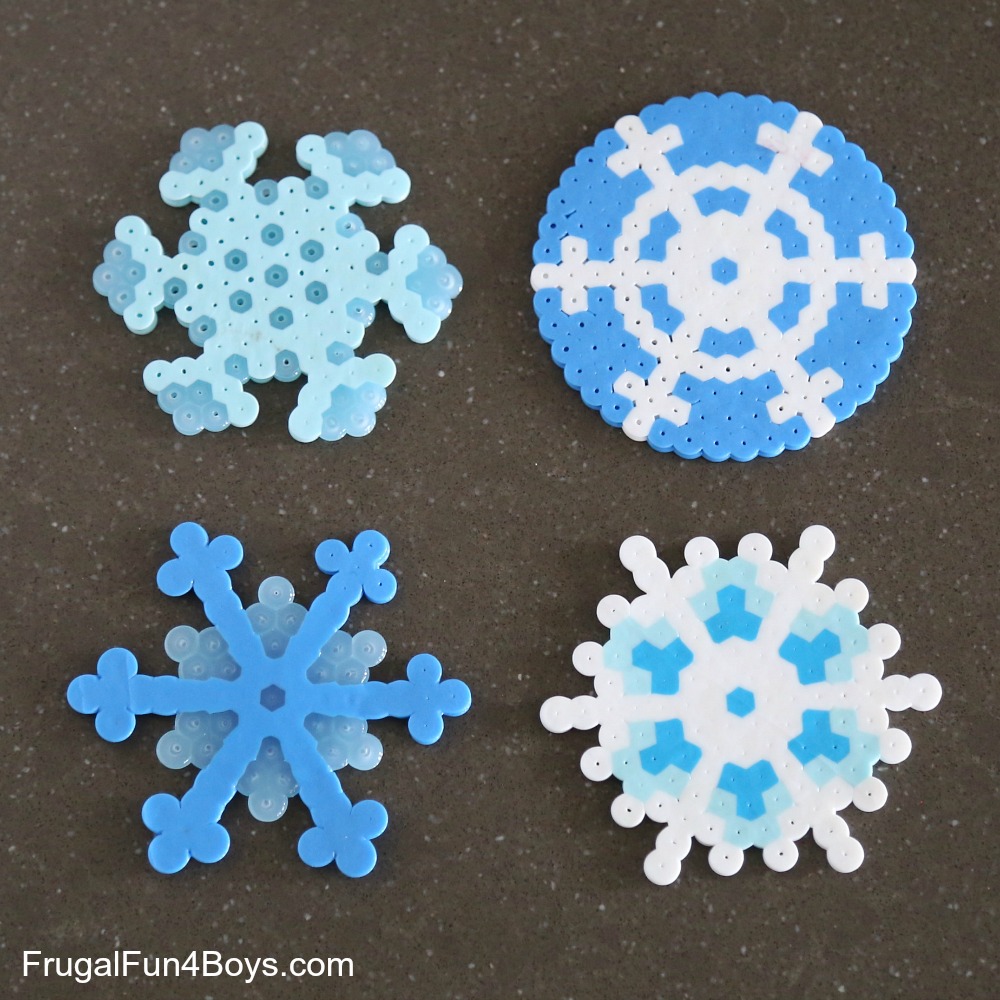
This next design is one of my favorites, but it was also a little challenging to iron. I wanted to make sure that I was melting the beads at the edges enough so that they would fuse together, but when I removed the snowflake from the pegboard, the edges bent a little. It probably would have been a good idea to let it cool a little after melting the first side before removing it from the pegboard and turning it over to iron the other side.
This one is the bottom left in the photo above.
Here’s another circular design. It’s the top right snowflake in the photo above.
This design is not based off the center circle method. My 12 year old designed this one, and I think it’s a neat design! This is the top left in the photo above.

And finally, this snowflake is the bottom right in the photo above. This one shows how you can use color to create a cool design without making the snowflake too delicate and breakable.
Supplies Needed:
If you’re just getting started with Perler Beads, you’ll need some pegboards, beads, and ironing paper. We usually buy all our supplies from Michael’s or Hobby Lobby, but you can also order from the Amazon links below.
This set of pegboards will give you all the shapes you need.
The pegboards come with one sheet of ironing paper, but if you’re doing this with a group you may want to order extra ironing paper.
I would recommend getting the Bead Tweezers – they make it easier to place beads in between other beads that are already on the board, or to remove just one bead at a time to make a change in your design.
You can get a large bead tub with tons of different colors, or you can get bags of just one color – here are the white beads and light blue beads. It’s hard to tell which blue is which on Amazon, but I think this is the one we used.
Have fun designing snowflakes!
1 Comments
Nancy Dec 28, 2020
Loving your ideas, explanations, sources for supplies, designated age groups etc ... blessings and thanks!!!
Post a Comment