
Do some beginning sewing with these adorable felt ocean animals! We love working with felt because the texture makes it easy to stitch on and it doesn’t unravel. Felt is great for simple stuffed animals that kids can make.
With this project, kids can do a basic running stitch with embroidery thread. There’s no need to stitch on the wrong sides of the fabric and then turn the animal right-side out again. Just lay the pieces together, stitch around the edges, add some stuffing, and you’re ready to go!
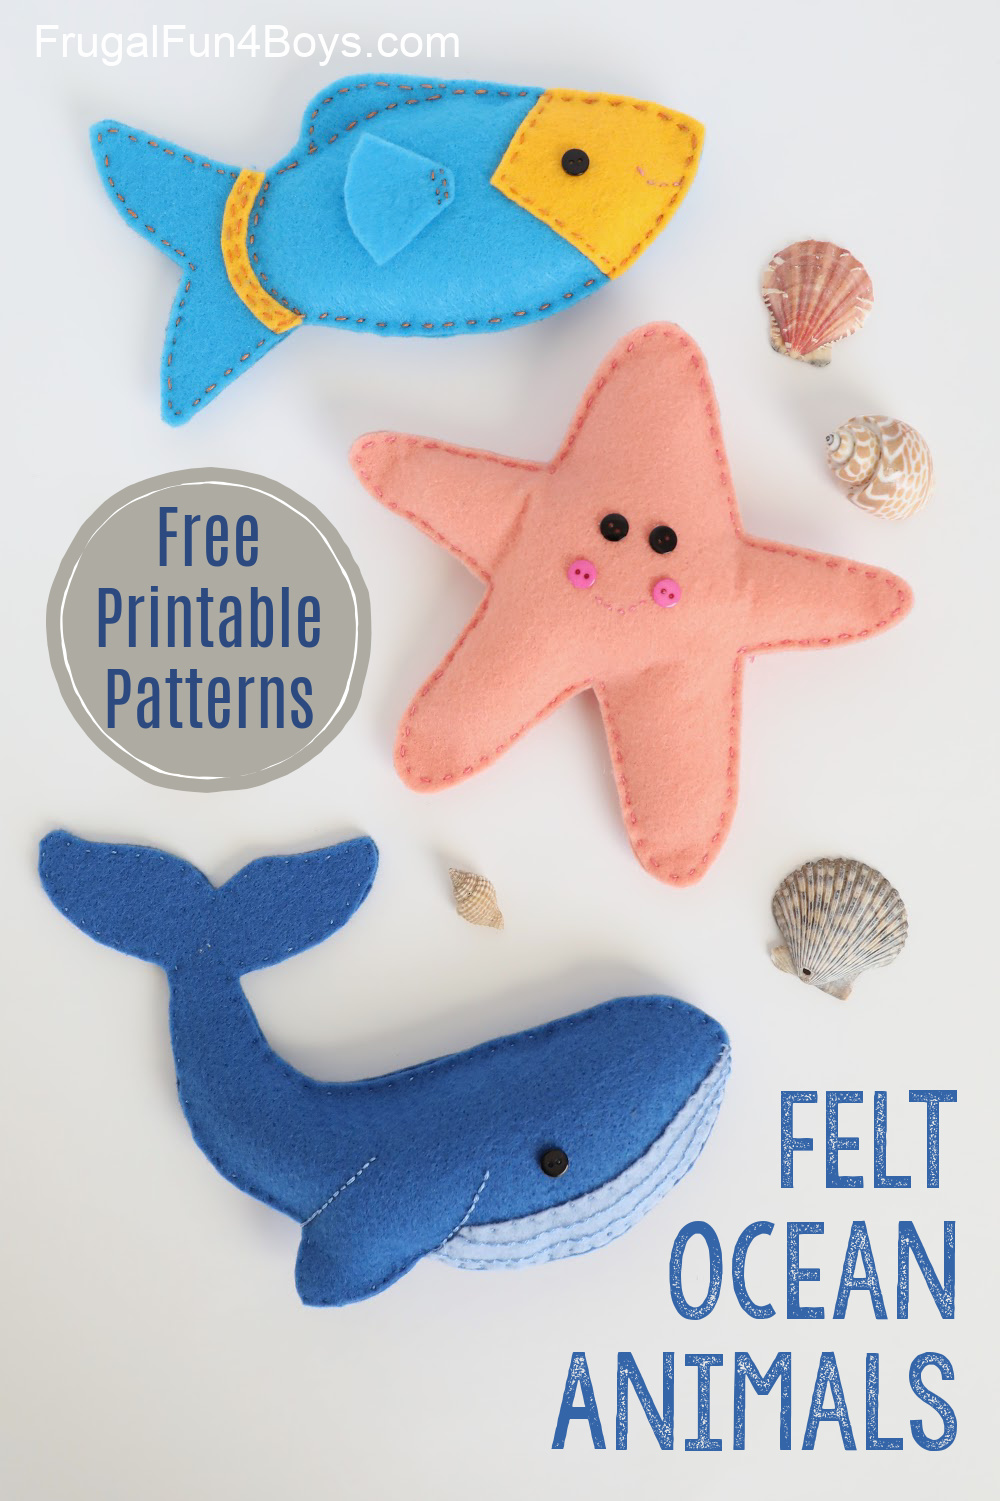
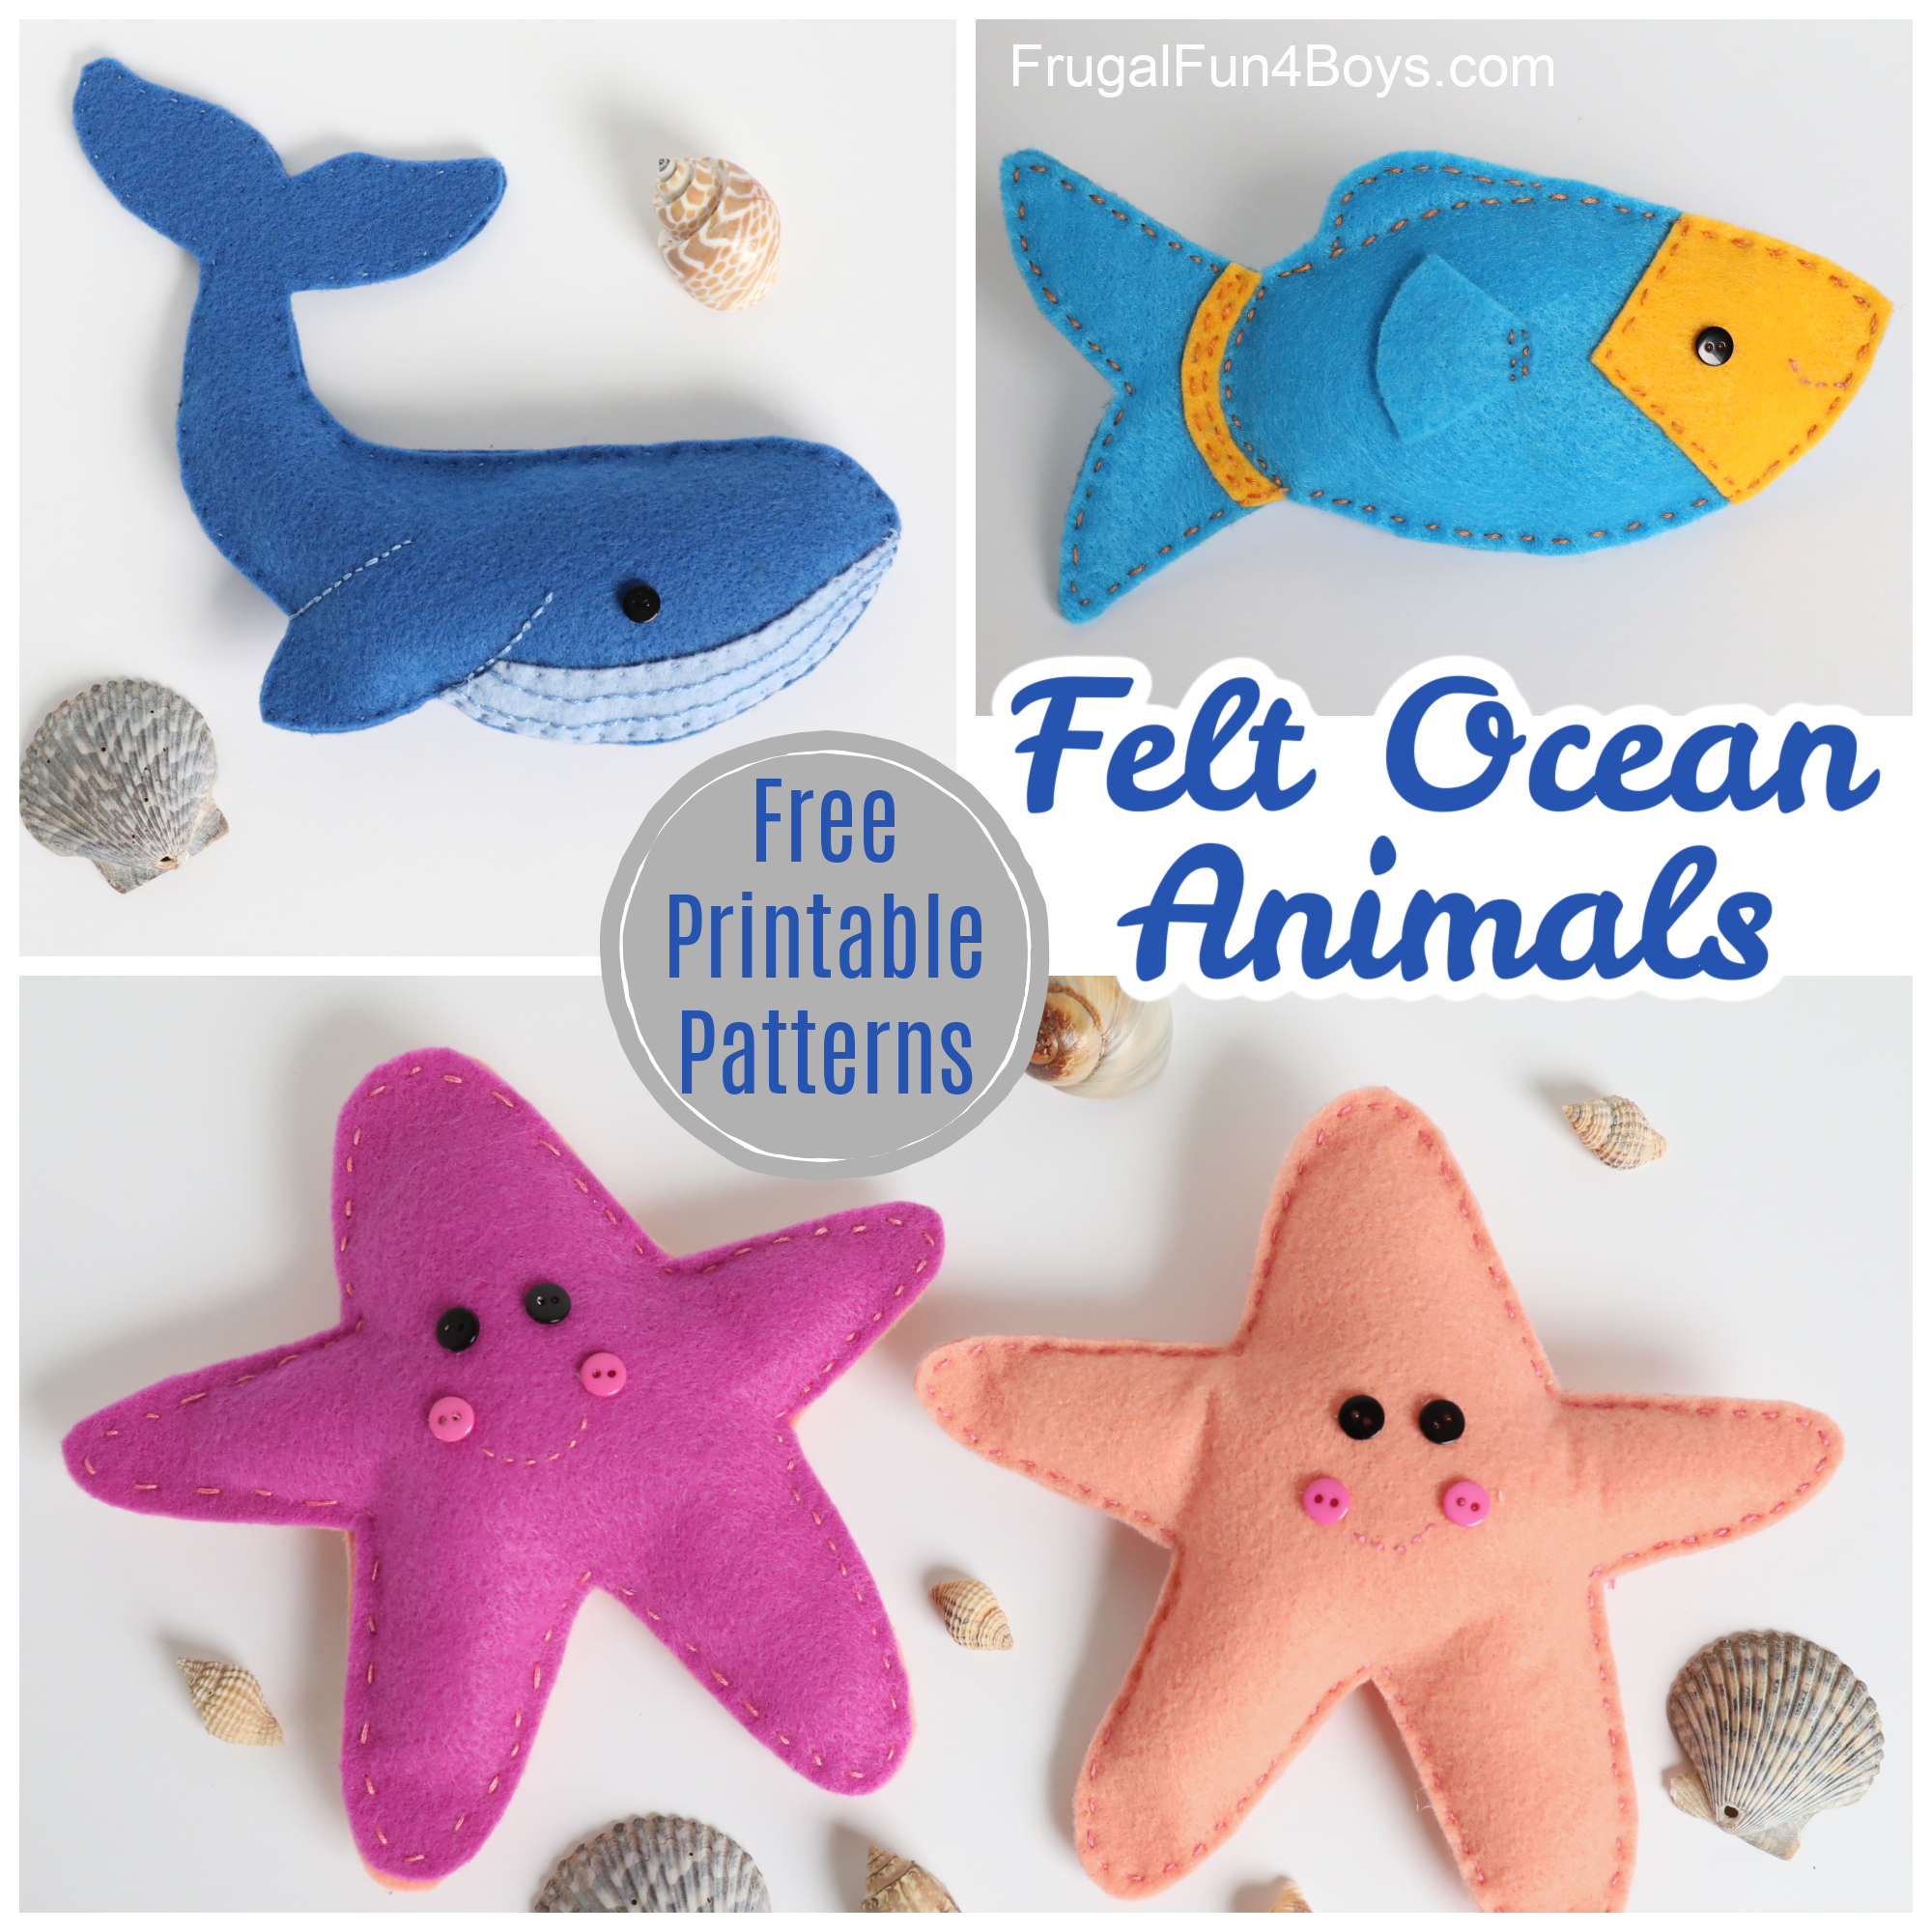
You can print free patterns to make a fish, starfish, and whale. Look for the file at the bottom of this post.
We had so much fun making these felt ocean animals! A big thanks to our friend Angela for designing the whale. He’s super adorable!
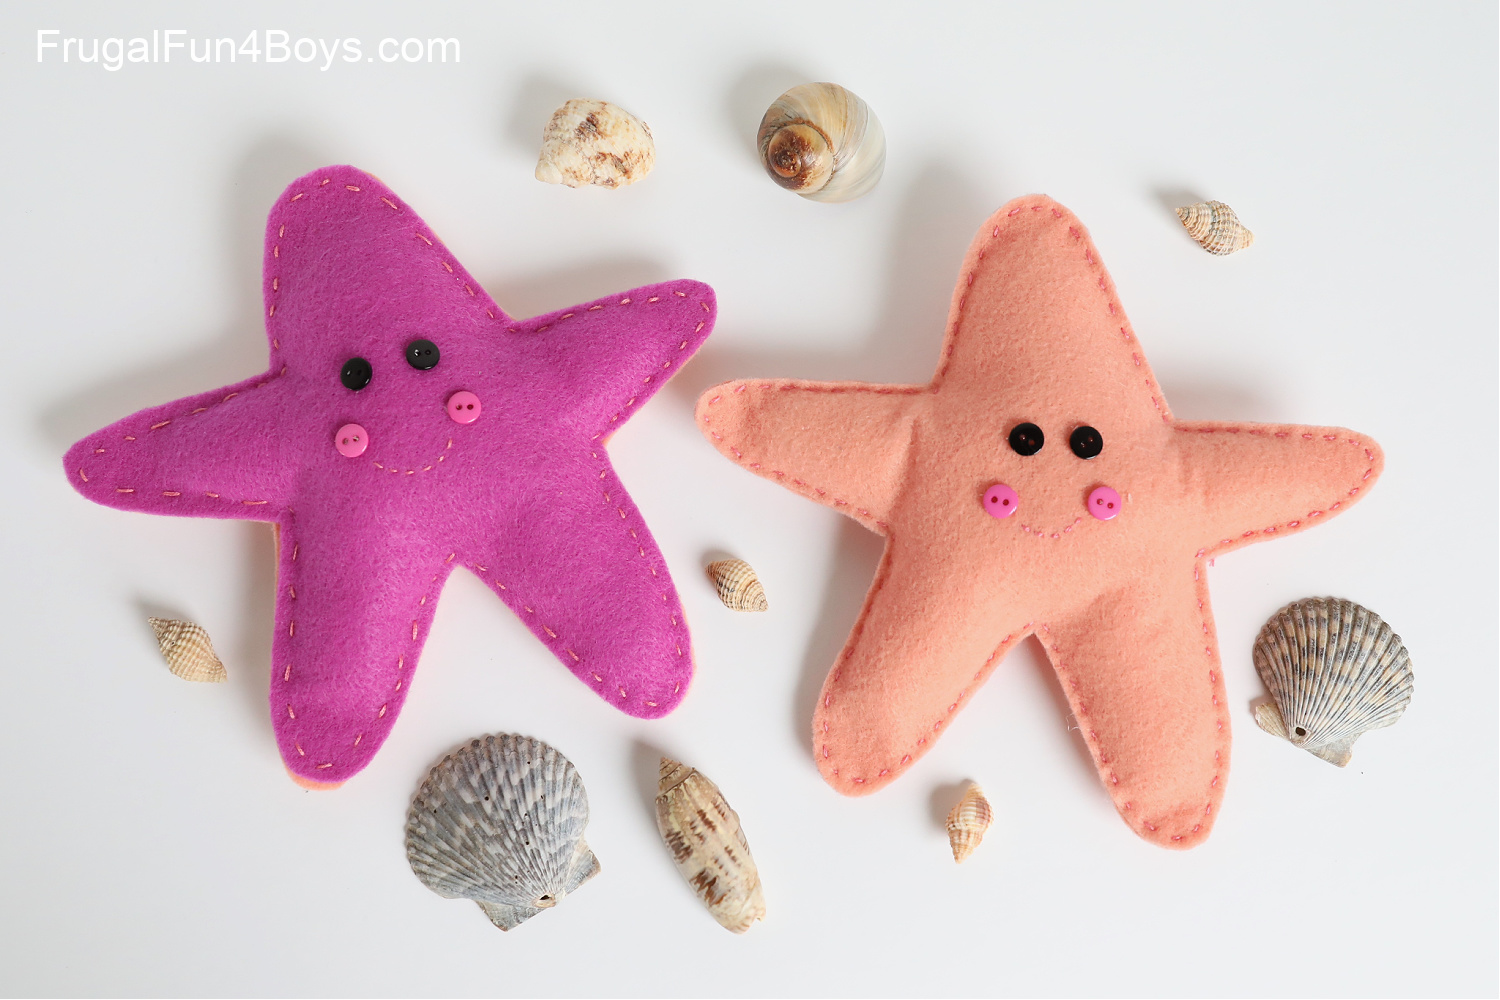
The starfish is fun to make, and a great place to start with beginning sewing. You can really use any color for this ocean animal. We found coral and magenta colored felt at Hobby Lobby. I think that light green, aqua, lavender, yellow, and tan would also be great colors for a starfish.
My 7 year old sewed the magenta starfish! I did the face and helped her along the way, but she sewed around the body.
The fish has a few more elements to it, but it’s so adorable and still very manageable to sew.

Supplies Needed for Felt Ocean Animals:
- Felt – in the colors of your choice
- Embroidery thread
- Needle
- Scissors
- Small black and pink buttons – for eyes and cheeks
- Hot glue – optional
- Patterns – print at the bottom of this post
Instructions and Notes:
STARFISH
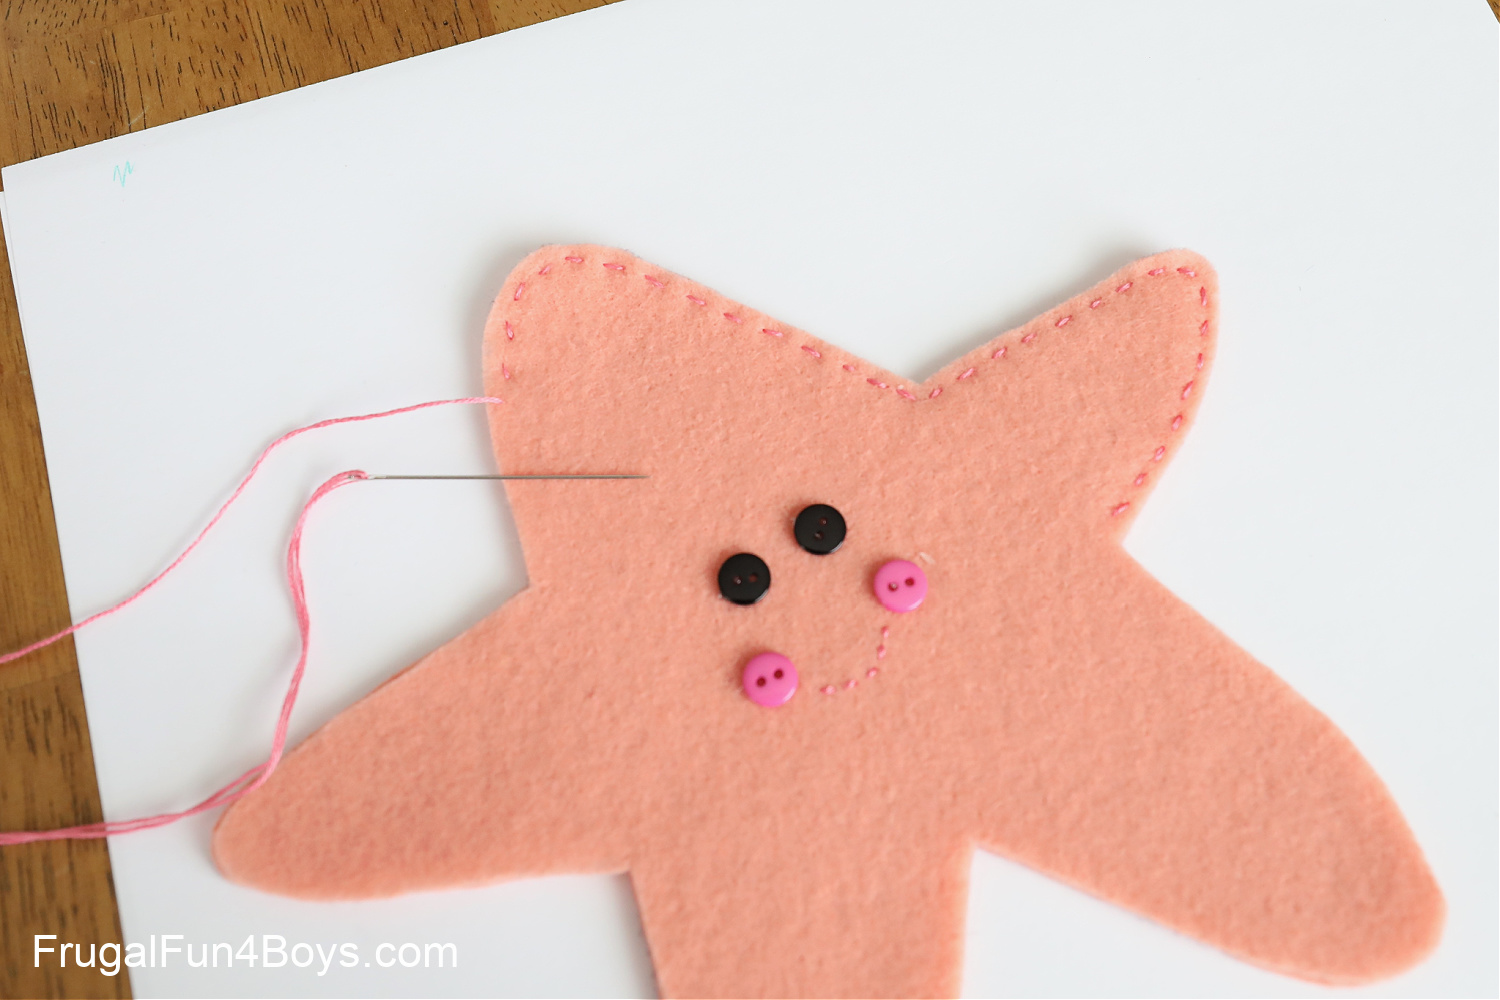
First, cut out the pattern pieces. For the starfish, you’ll need two identical body pieces. The starfish isn’t symmetrical, so be sure to match up the pieces correctly.
Attach black buttons for the eyes and pink buttons for the cheeks. We used hot glue, but you can sew them on if you prefer. Use pink or red thread to stitch the mouth.
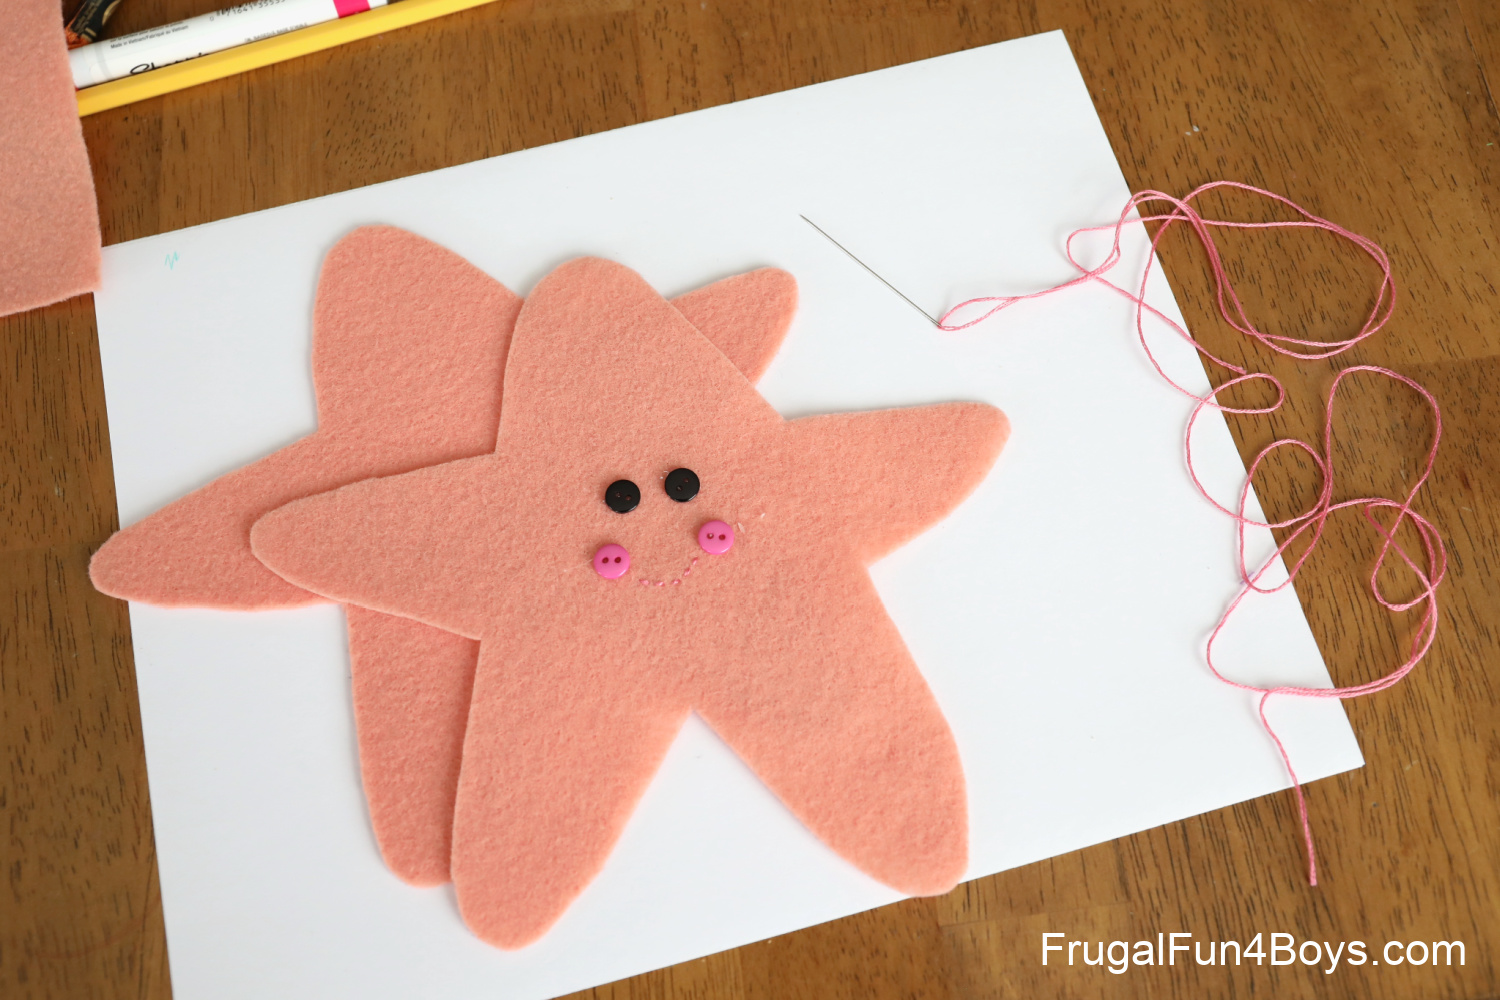
Then start your running stitch around the edge of the starfish.
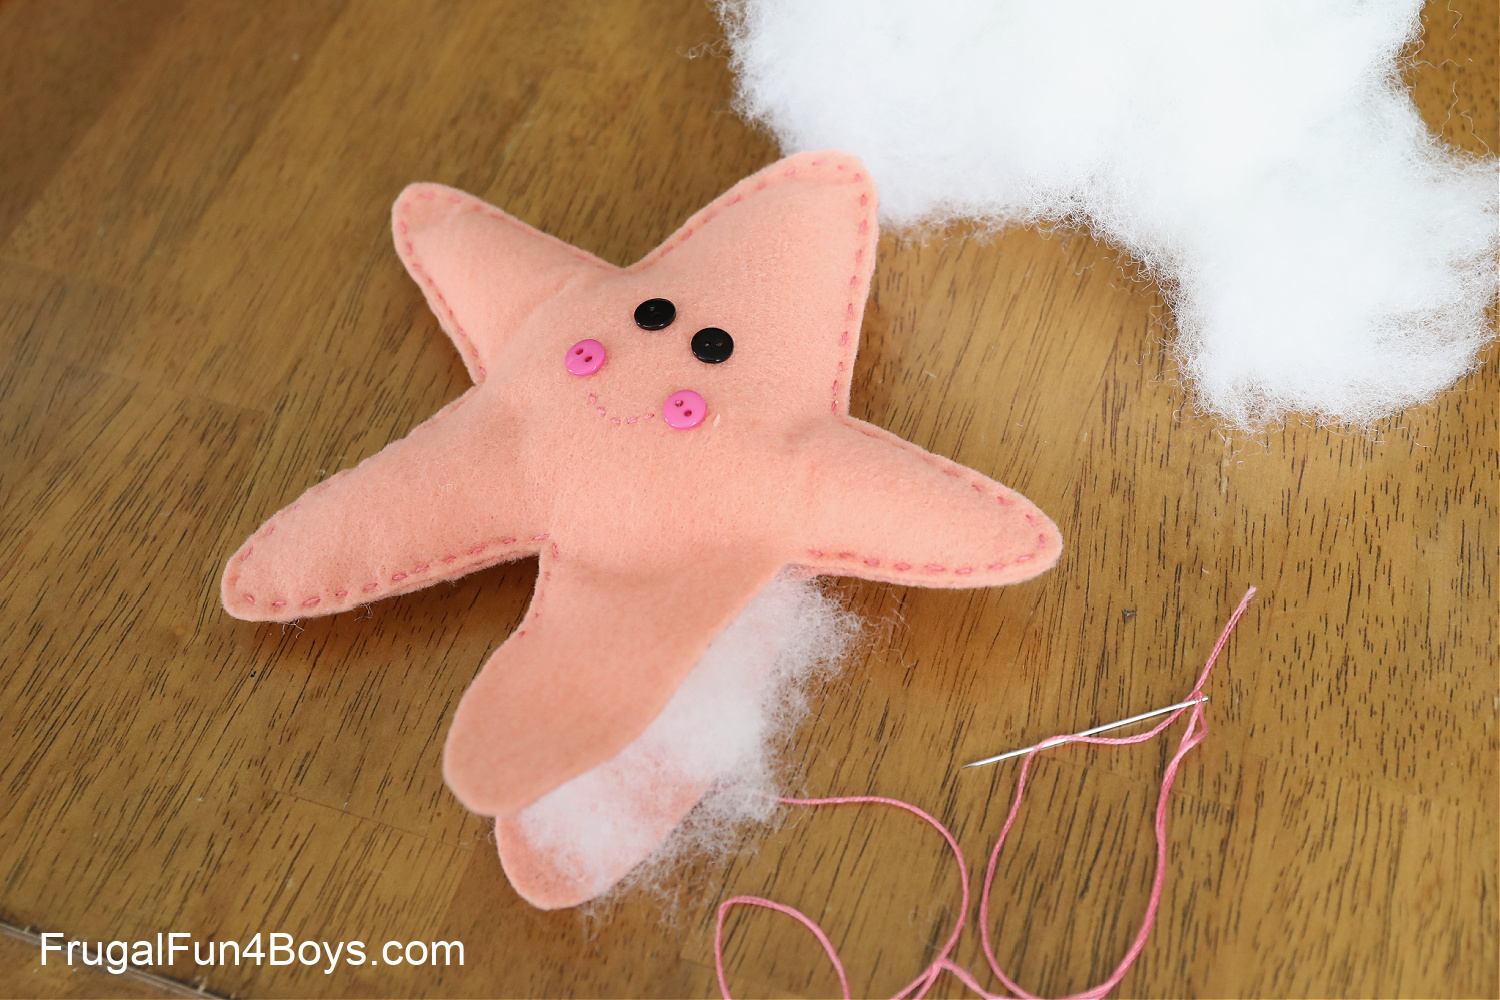
Once you’ve sewn around three of the legs (are they legs??) of the starfish, stop and add some stuffing to the areas you’ve sewn.
Then sew the fourth leg and stuff it. Finally, sew most of the way around the final leg and then stuff it before closing up the seam.
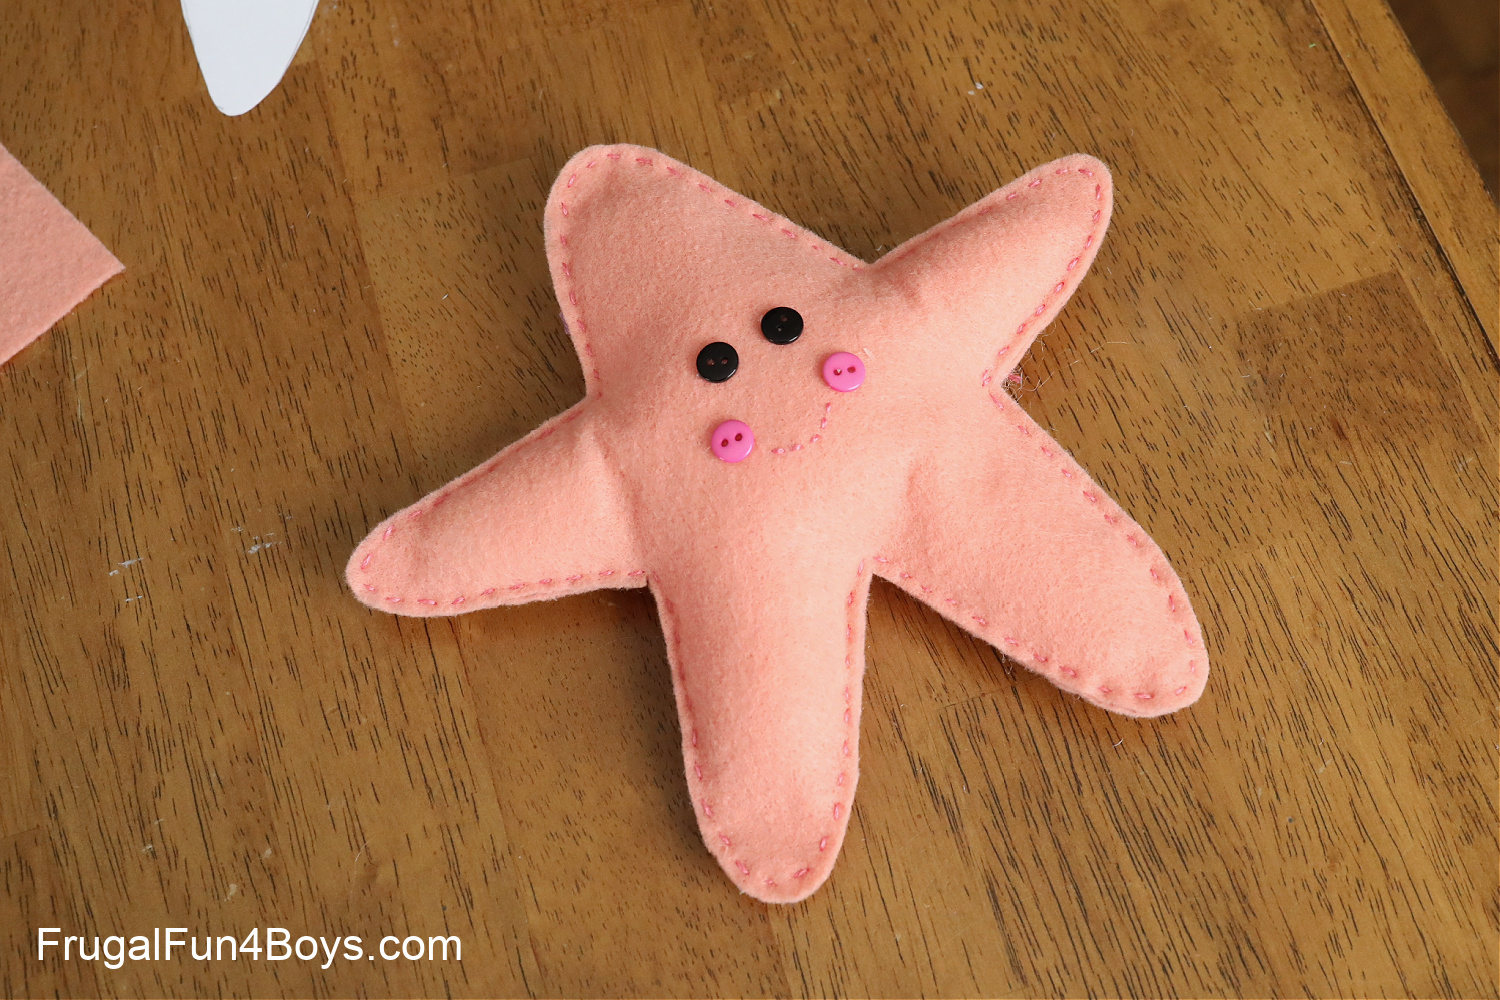
The finished starfish is so cuddly and cute!
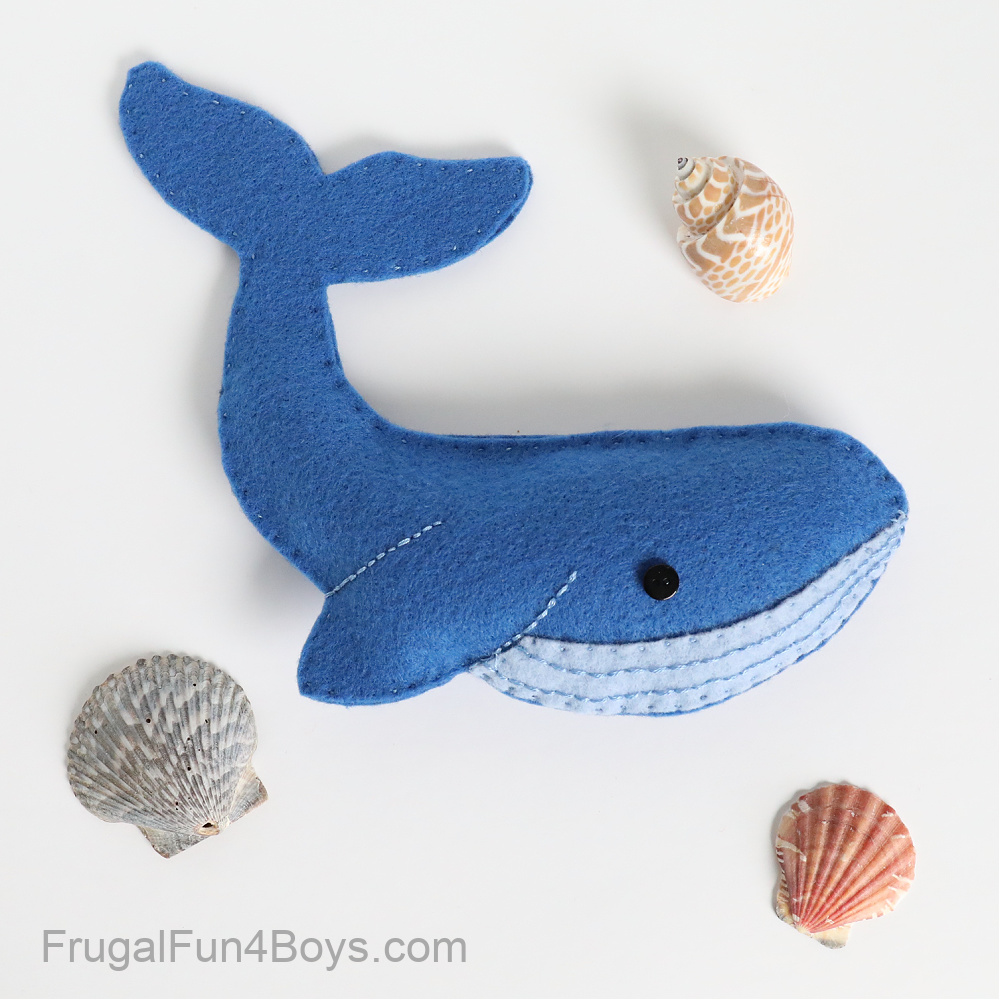
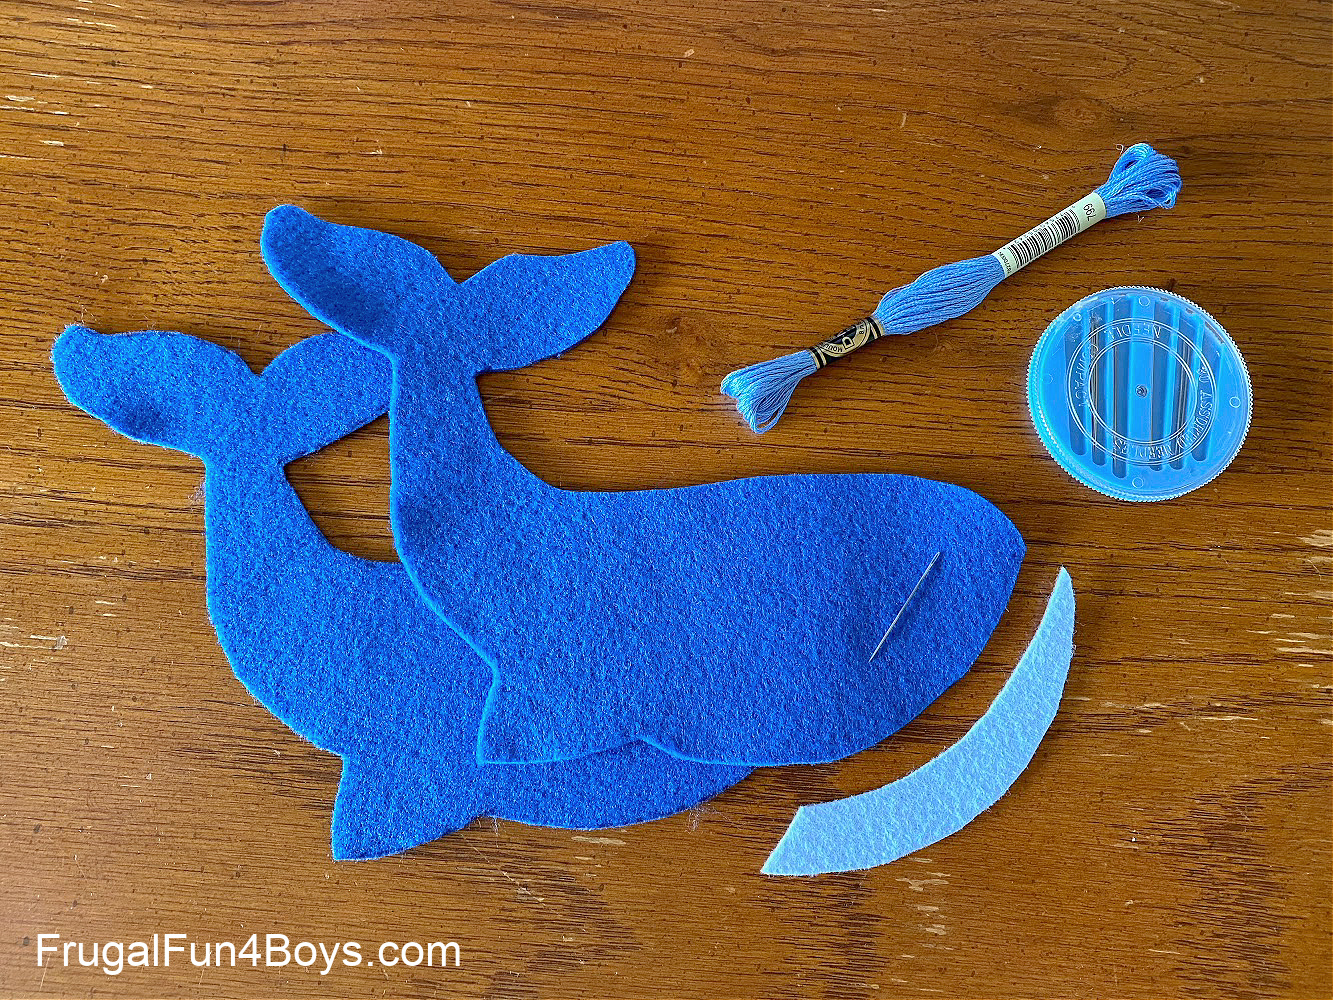
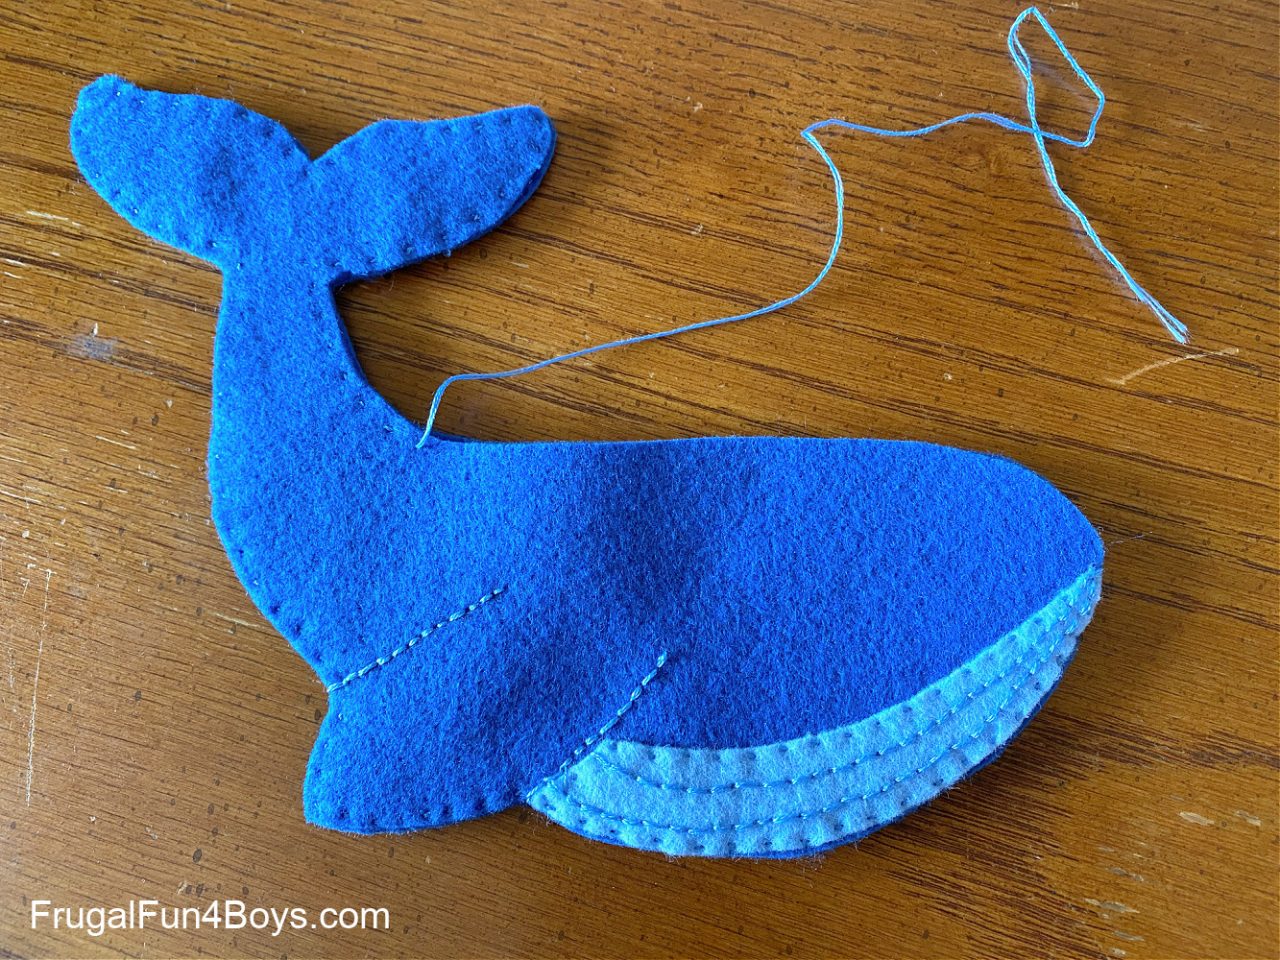
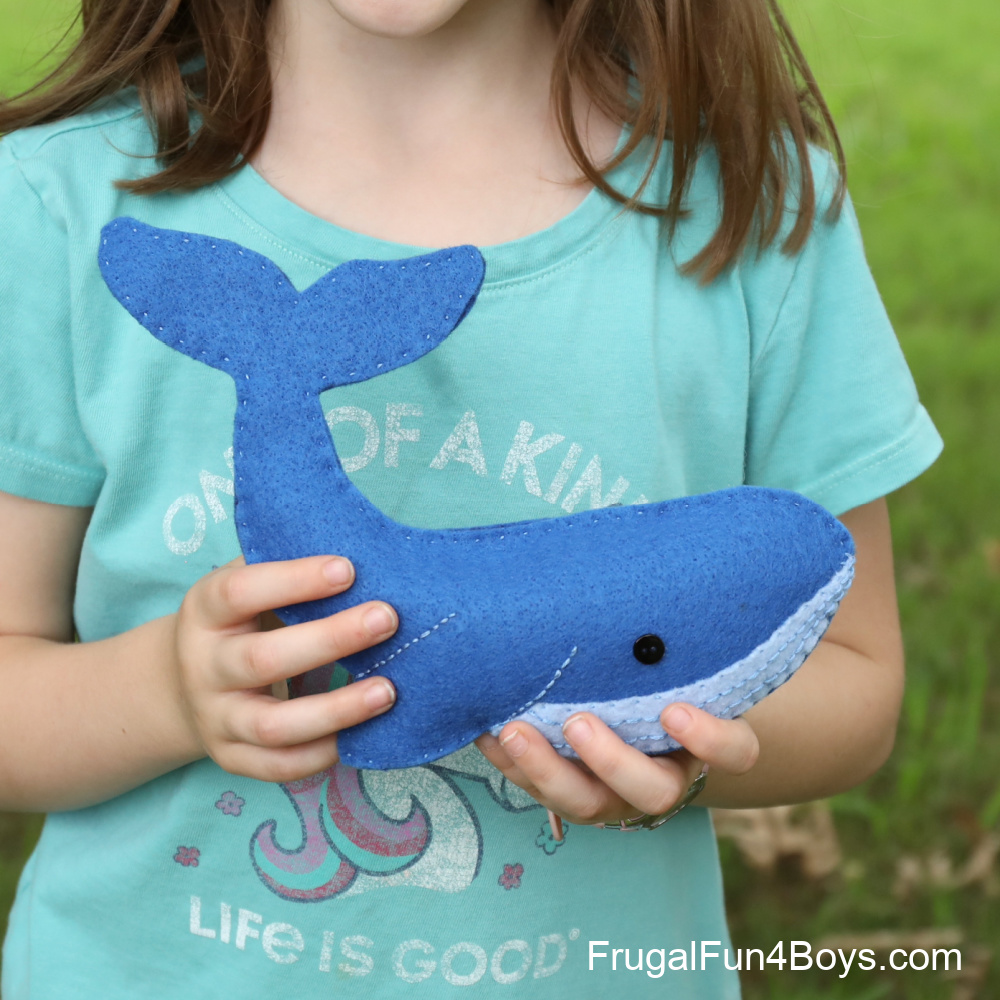
WHALE
For the whale, you’ll need two body pieces and one belly piece.
Use the back stitch to add lines to the belly. You’ll use this same stitch to go around the sides of the flippers to outline them. (If you’re not familiar with the back stitch, there are videos on YouTube. It’s really simple once you get the hang of it!)
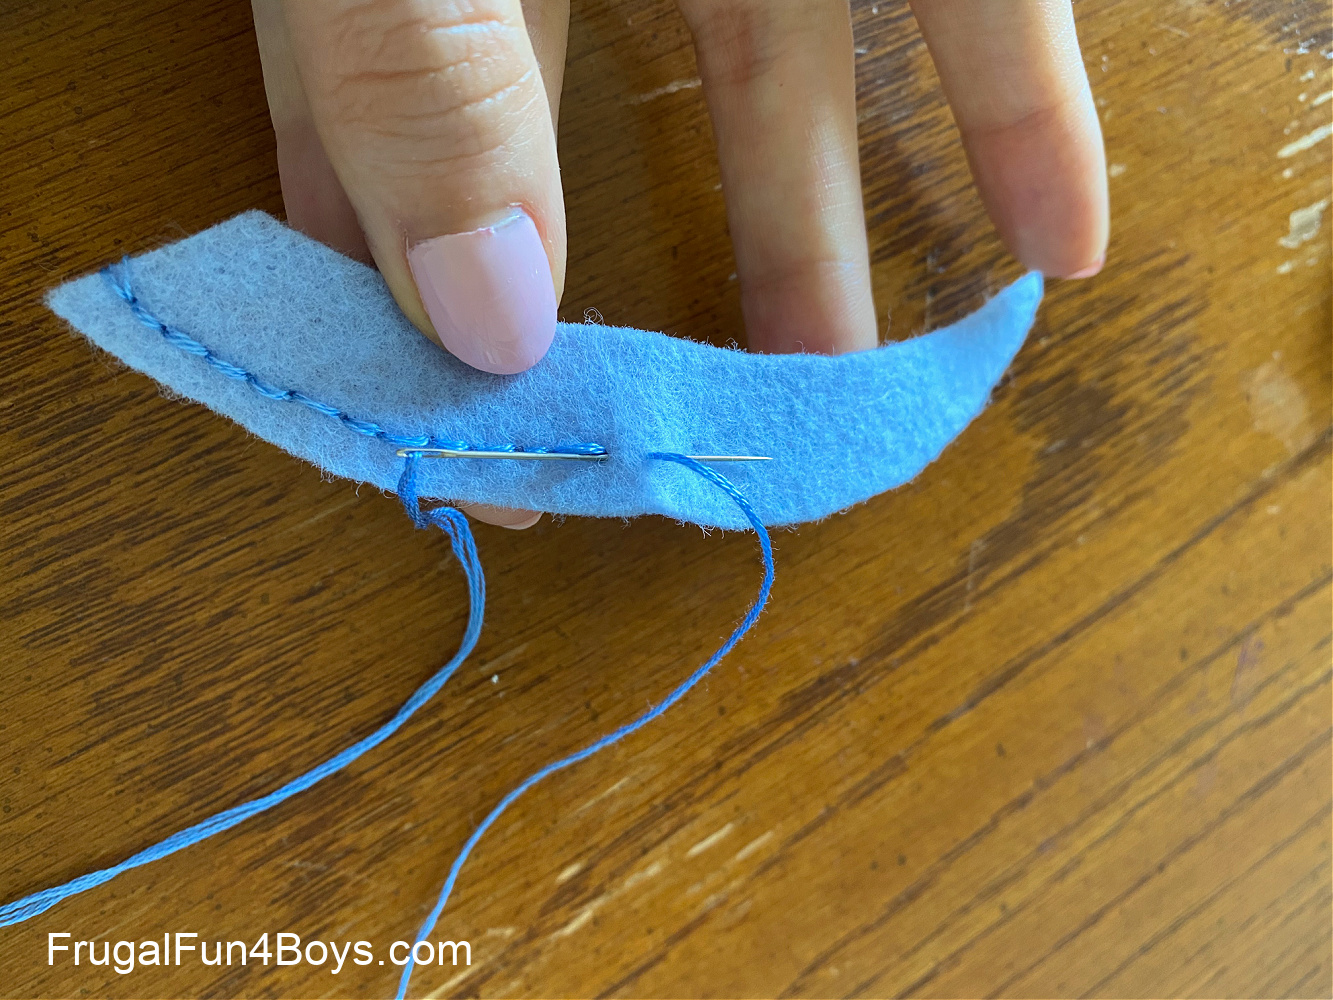
In this next photo, you can see the definition of the flipper using the back stitch for the outline.
Leave a small opening in the whale’s body for inserting the stuffing. Don’t worry about stuffing the tail! It’s too hard to get stuffing in there, and it looks better flat. After you’ve stuffed your whale, sew up the opening. Then glue or sew on the eye.
The whale is just soooo cute!
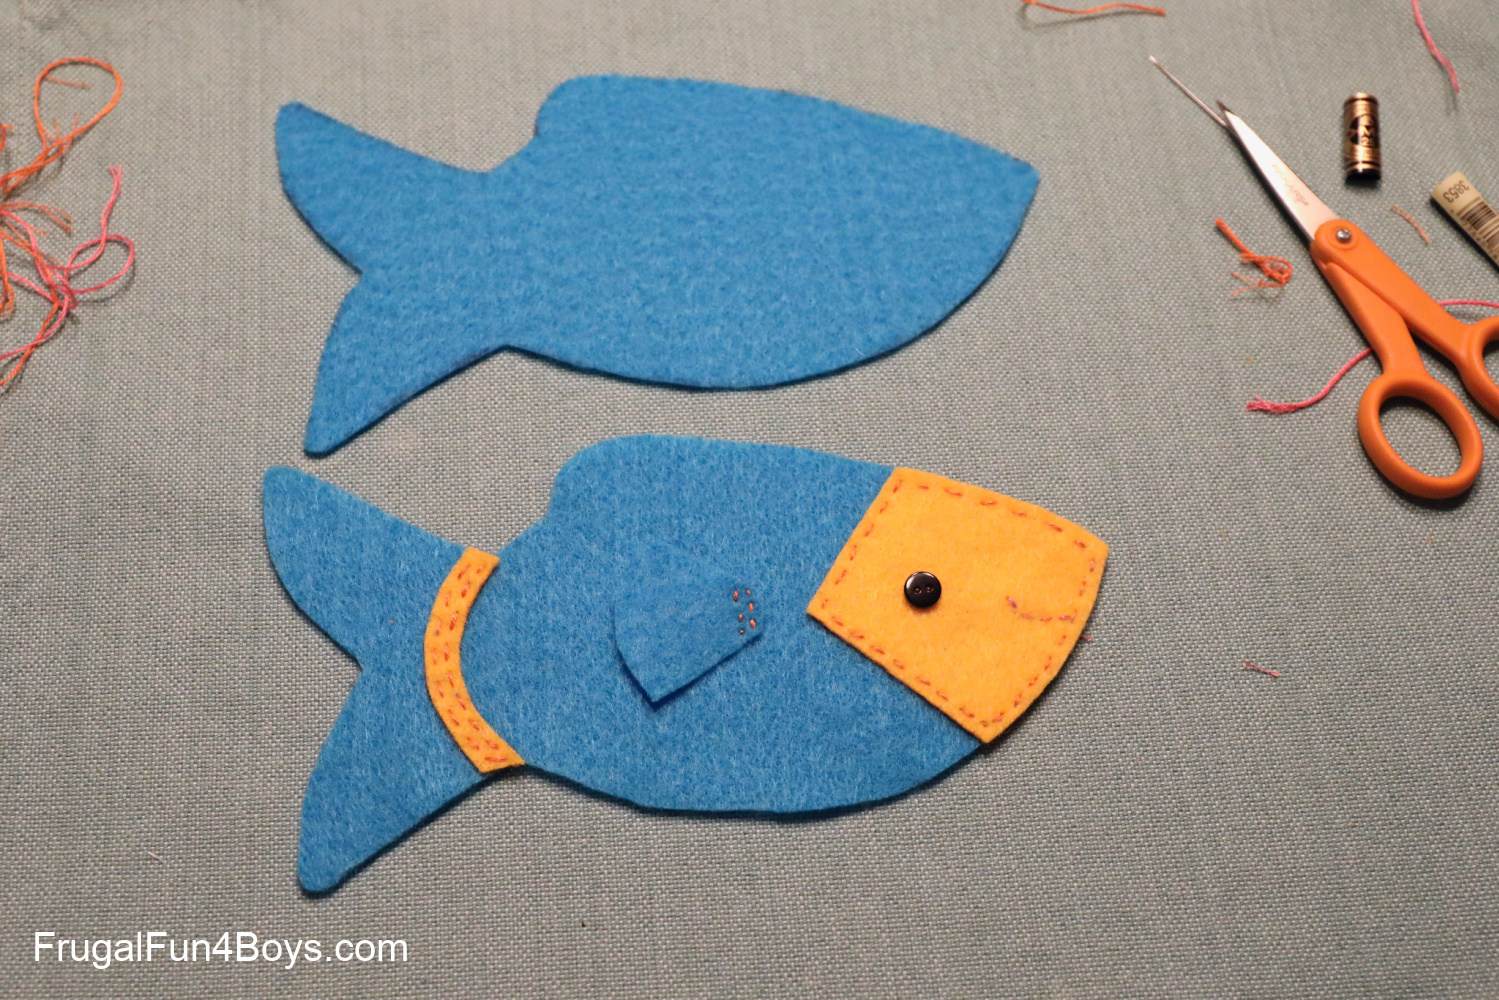
FISH
This is a HORRID picture of the fish because I was putting this one together at night and had to use bad lighting! But at least you can see how I assembled it. Cut out two body pieces. Then sew on the face, mouth, fin, and tail stripe before you sew the body pieces together.
Ready to print your Felt Ocean Animal Patterns? Click the link below. The file will open and you can print from there.
CLICK HERE: Felt Ocean Animals Patterns
Have fun crafting!
2 Comments
Alisha Gravette Jun 9, 2023
Thank you so much! 💓
Jean Jun 1, 2025
They look really cuddly so going to have a go. Thank you.
Post a Comment