
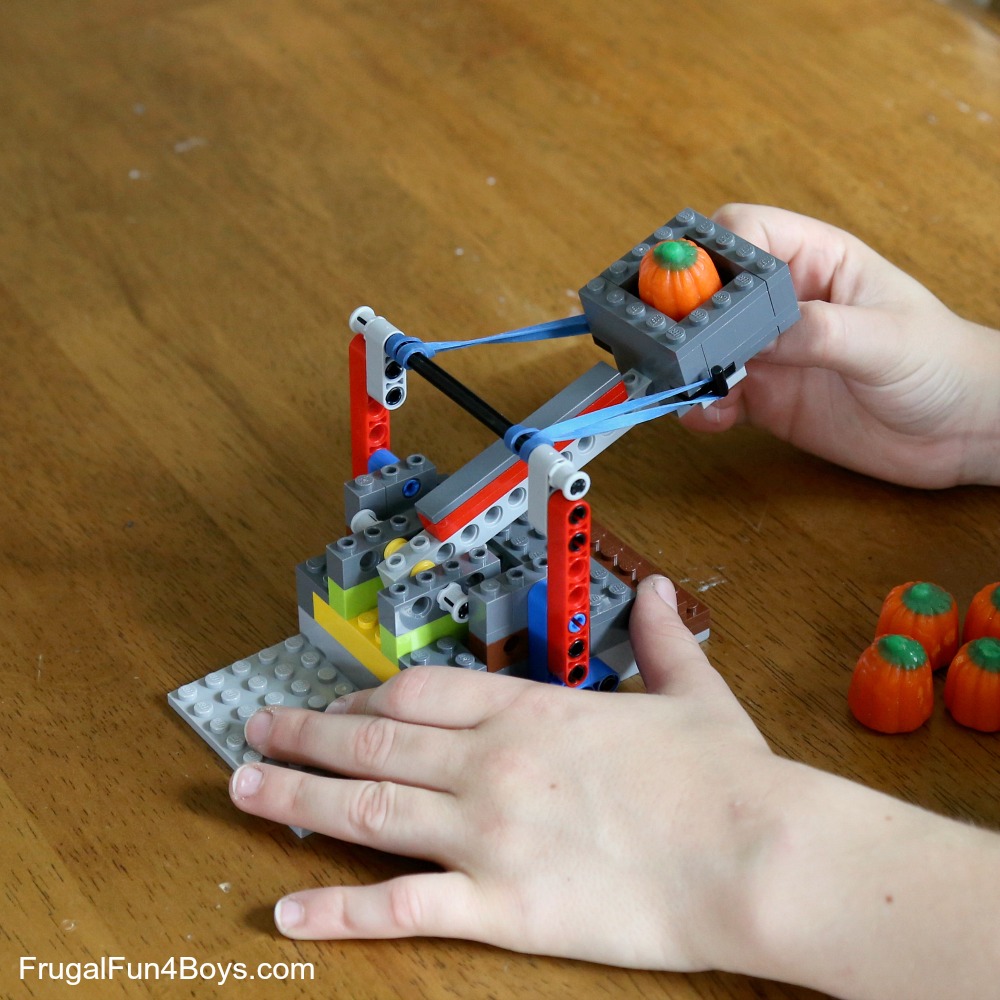
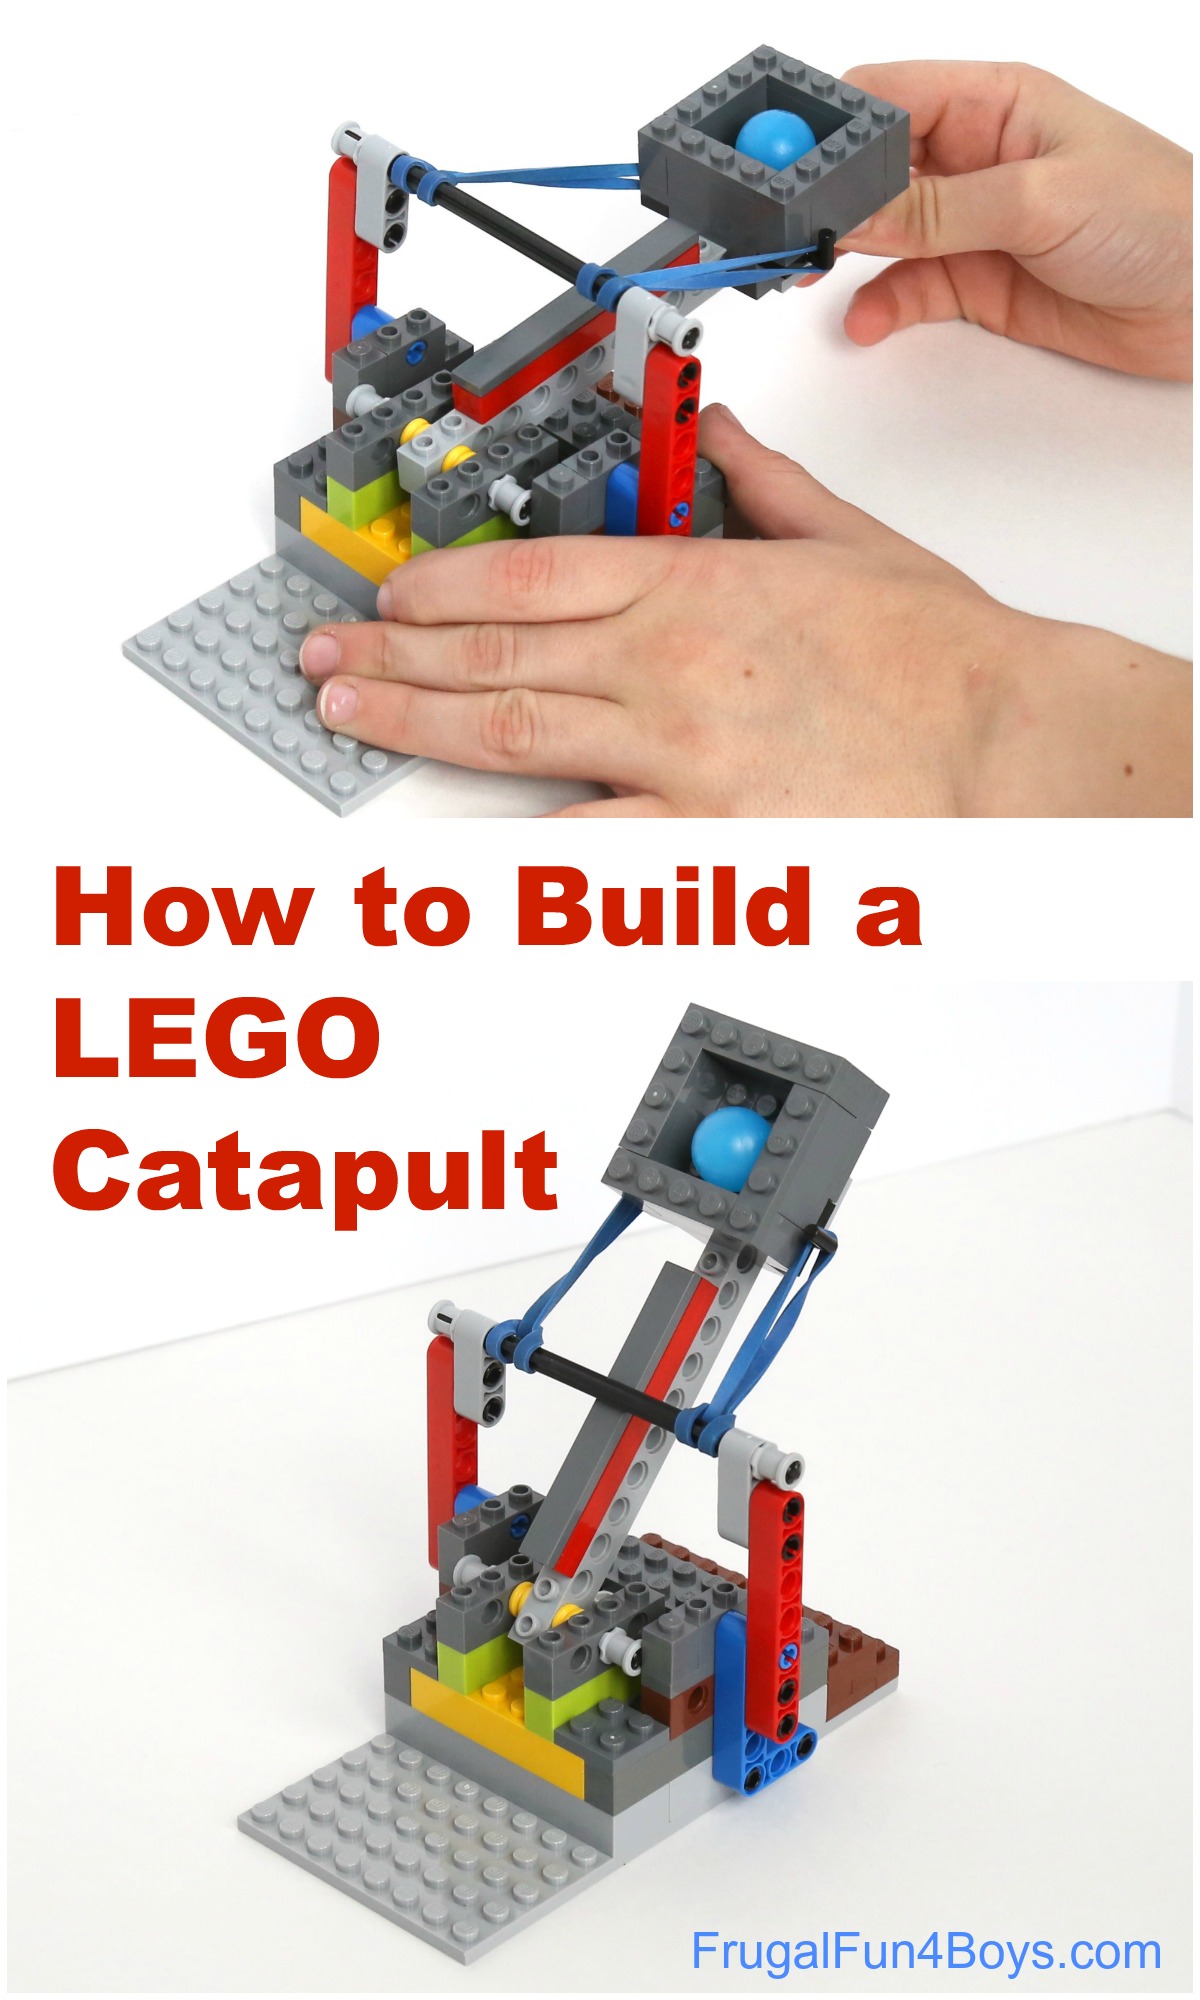
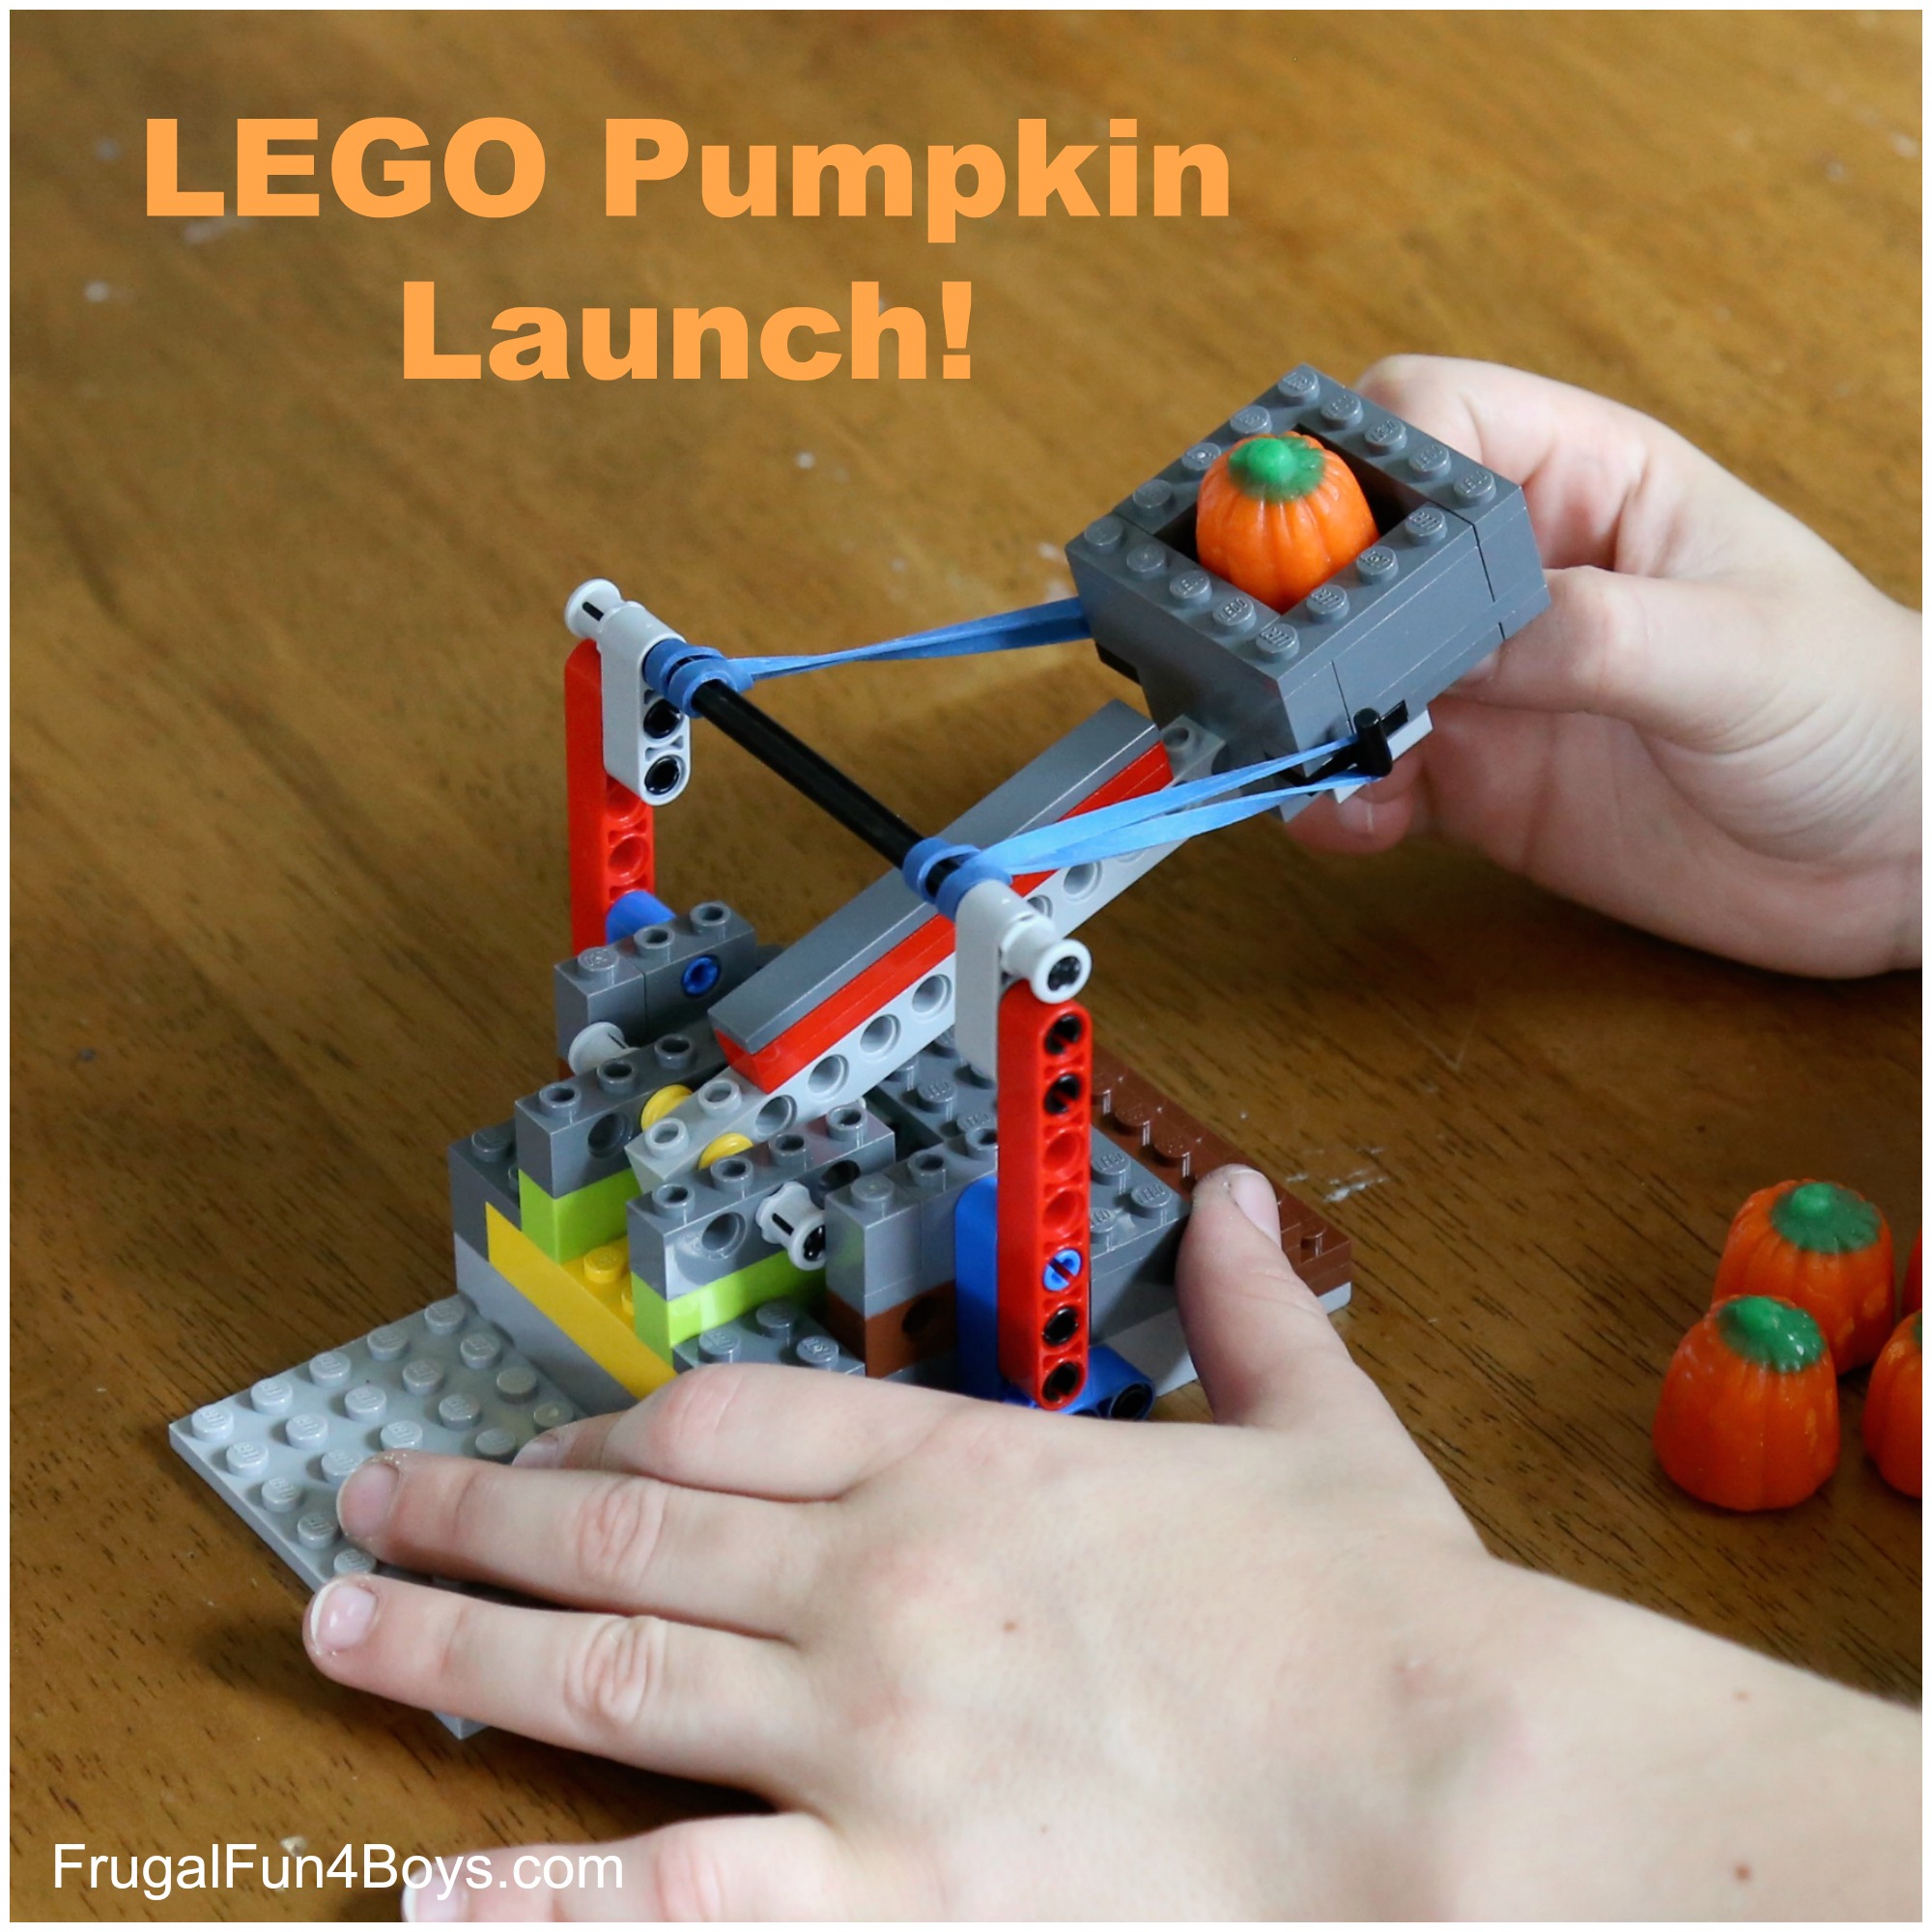
Here’s a fun LEGO® building idea for fall! Launch candy pumpkins with this awesome LEGO® catapult. This is a great activity for a rainy day, and it would also be fun to do with a club or other group. Kids can create their own catapults and tinker with them until they find a design that launches a pumpkin the farthest.
Plastic LEGO® balls also make great ammunition for some catapult action any time of the year – they are lightweight and won’t hurt anyone.
This post contains Amazon affiliate links.
We’ve totally been in LEGO® machine mode over here as we anticipate the upcoming release of Genius LEGO Inventions with Bricks You Already Have! This catapult is not in the book, but the book has a cool wind-up catapult and 40 total gadgets and inventions that kids will love. This book is a must-have for future engineers!

You’ll need a few Technic elements to build this catapult, but the pieces we used are common pieces as far as Technic goes.
This catapult is a great demonstration of potential and kinetic energy. When kids pull back on the arm, the rubber bands stretch and gain potential energy. Then when they let go, all that potential energy is converted to kinetic energy, or the energy of motion!
Ready to build one? Here are the instructions.
Keep in mind that this project is super flexible! I’m showing how we built our catapult, but there are so many ways to design one. So don’t get too hung up on having exactly the same bricks that we used.
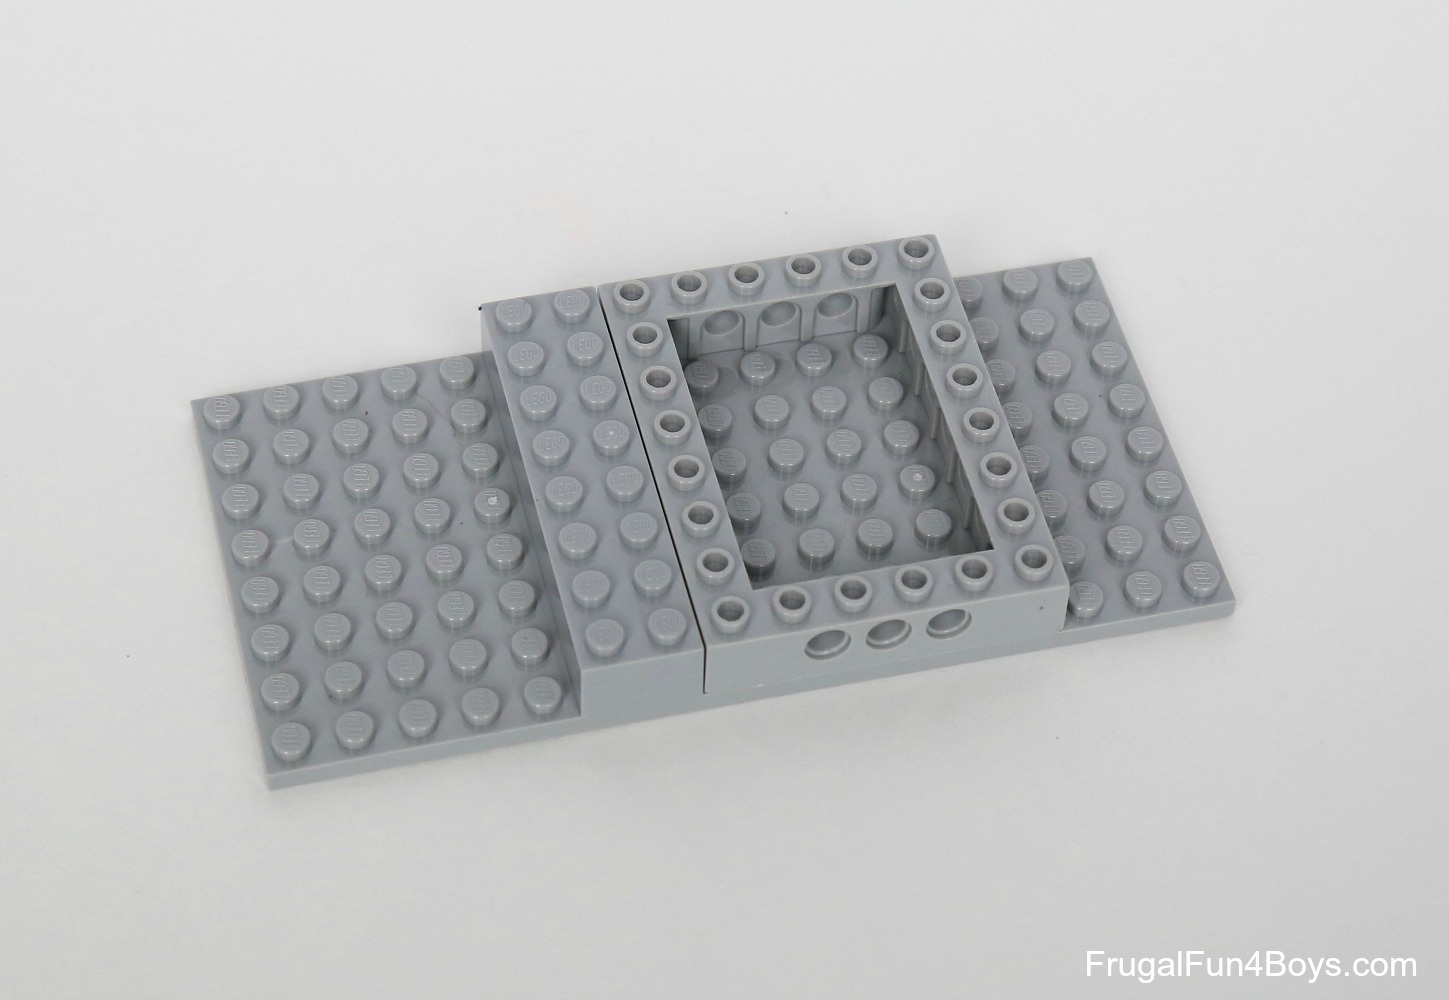
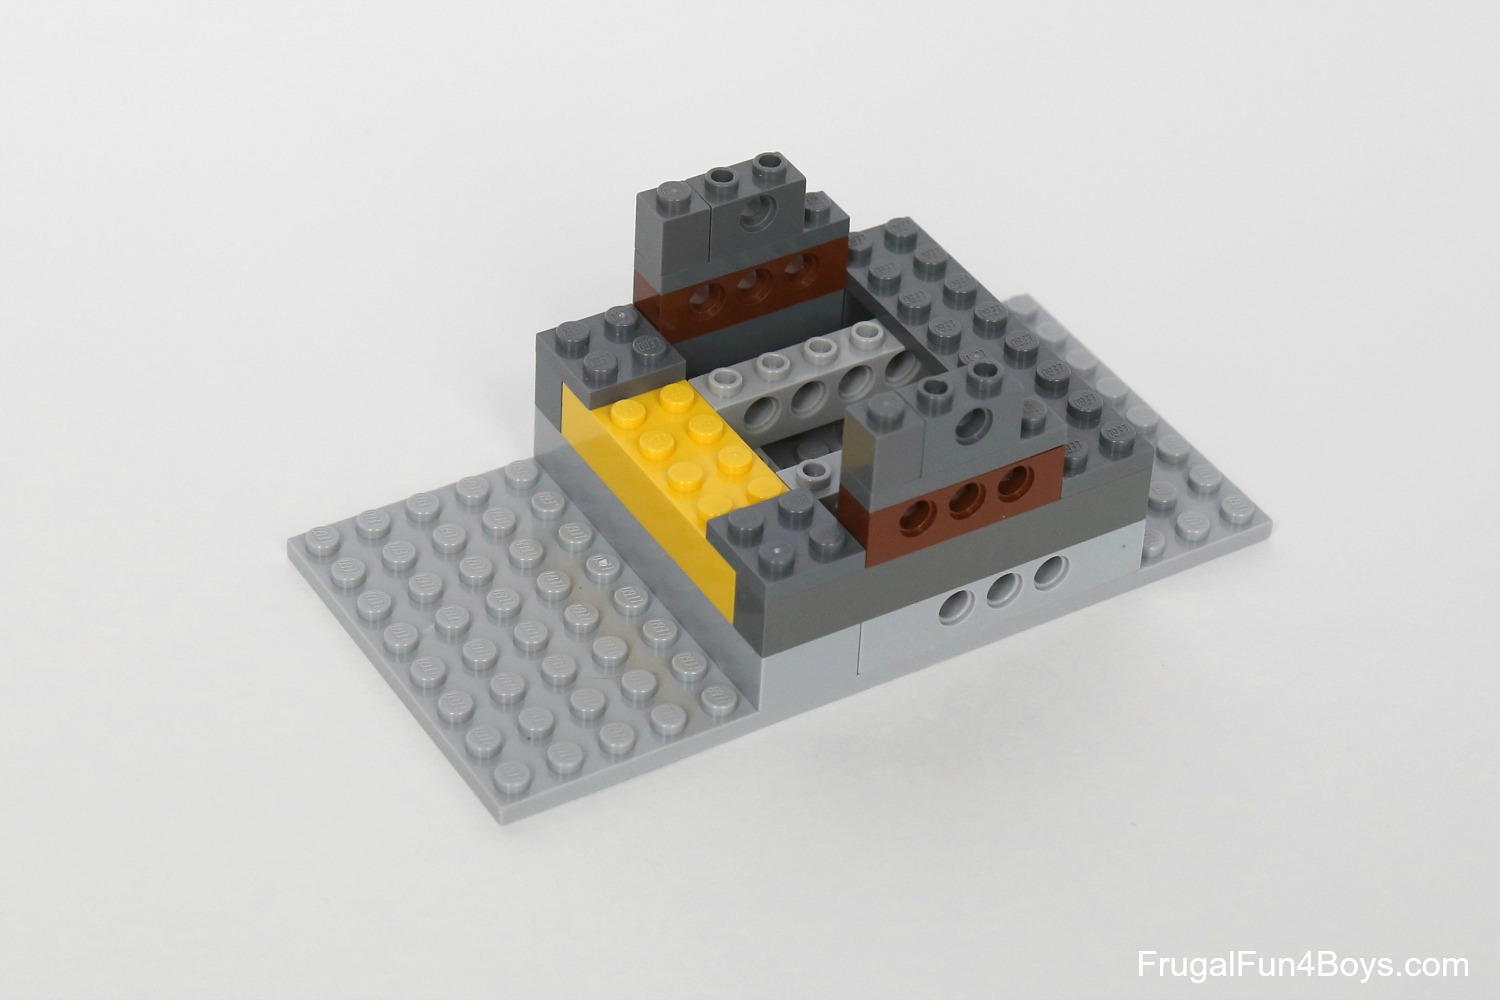
Step 1: Start with a sturdy base. We used an 8 x 16 plate. Then add a 6 x 8 rectangle brick with Technic holes and a 2 x 8 brick.
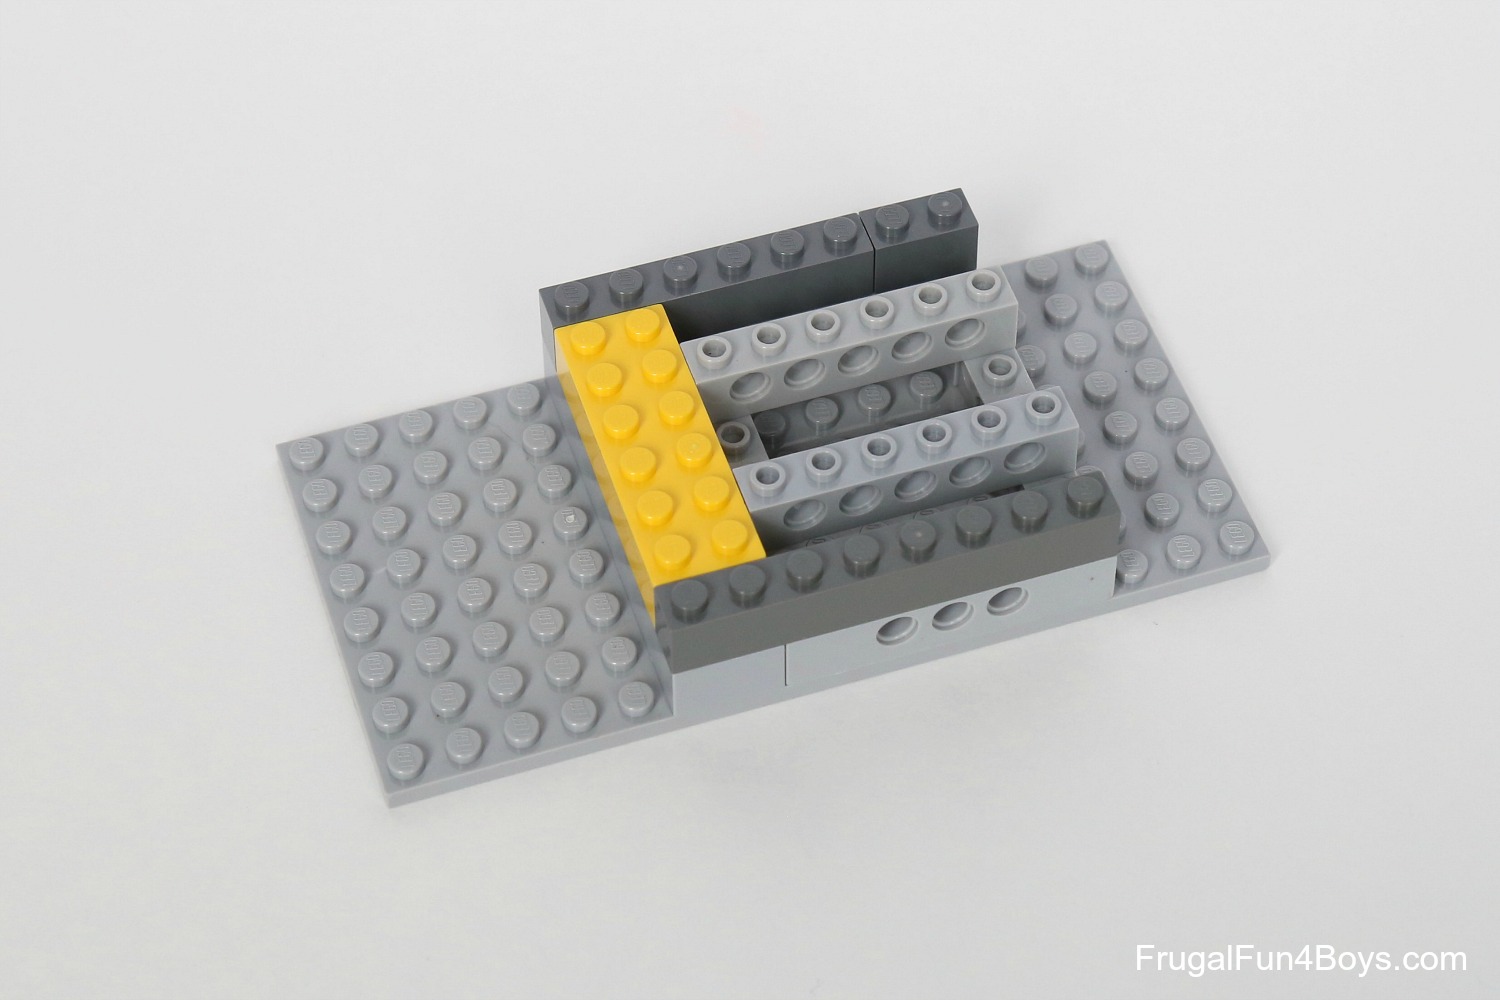
Step 2: Add two 1 x 6 light gray Technic bricks. Then place a 1 x 8 dark gray brick on each side and a 2 x 6 yellow brick in the middle.
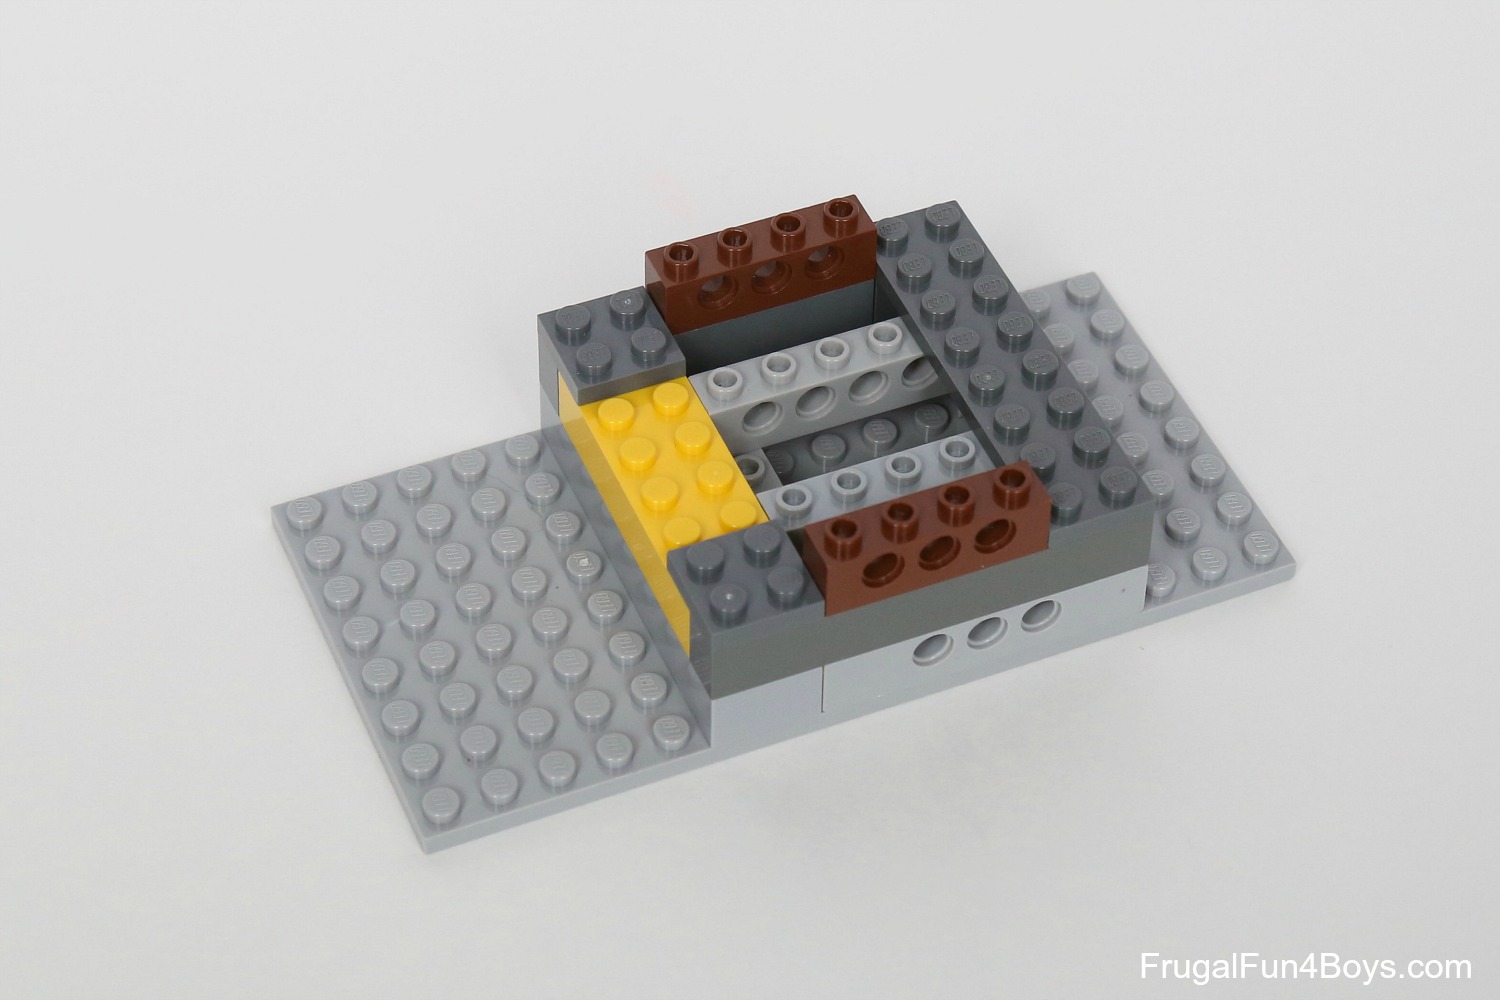
Step 3: The key to building a good catapult is making a sturdy frame. Add two 2 x 2 dark gray plates that attach the yellow brick to the gray bricks on each side. Then add a 2 x 8 dark gray plate and two 1 x 4 brown Technic bricks.
Step 4: Then add a 1 x 4 dark gray plate, a 1 x 2 Technic brick, and a 1 x 1 brick to each side.
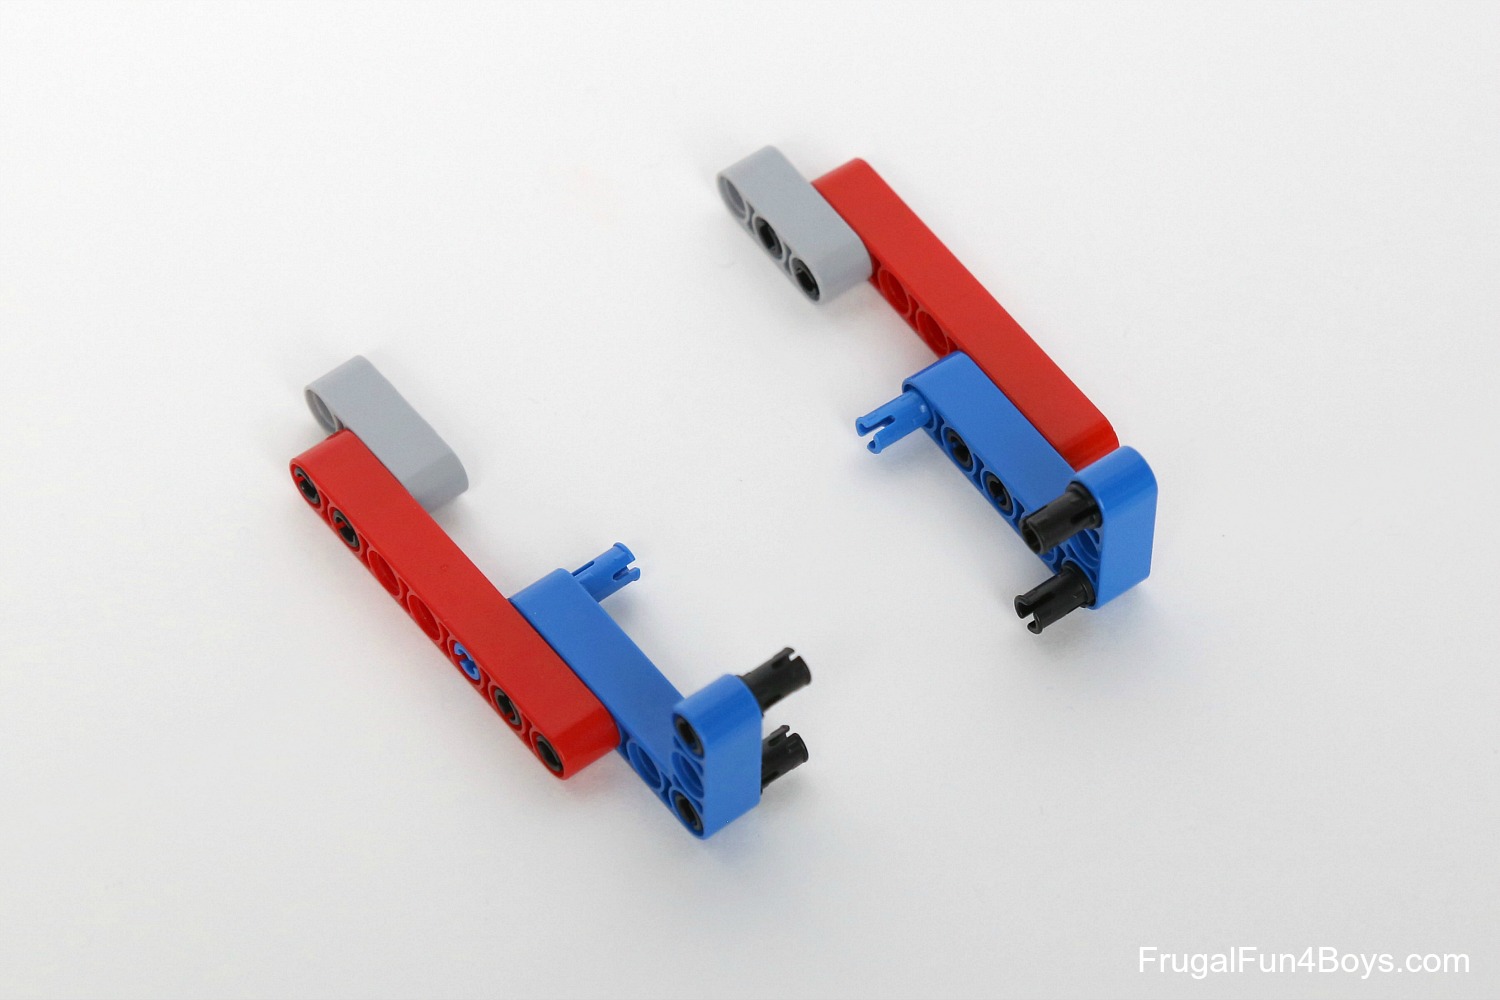
Step 5: If you use Technic liftarms and black pins to build the frame, it will be stronger than a structure built with bricks. Insert two black pins into a 3 x 5 L-shaped liftarm.
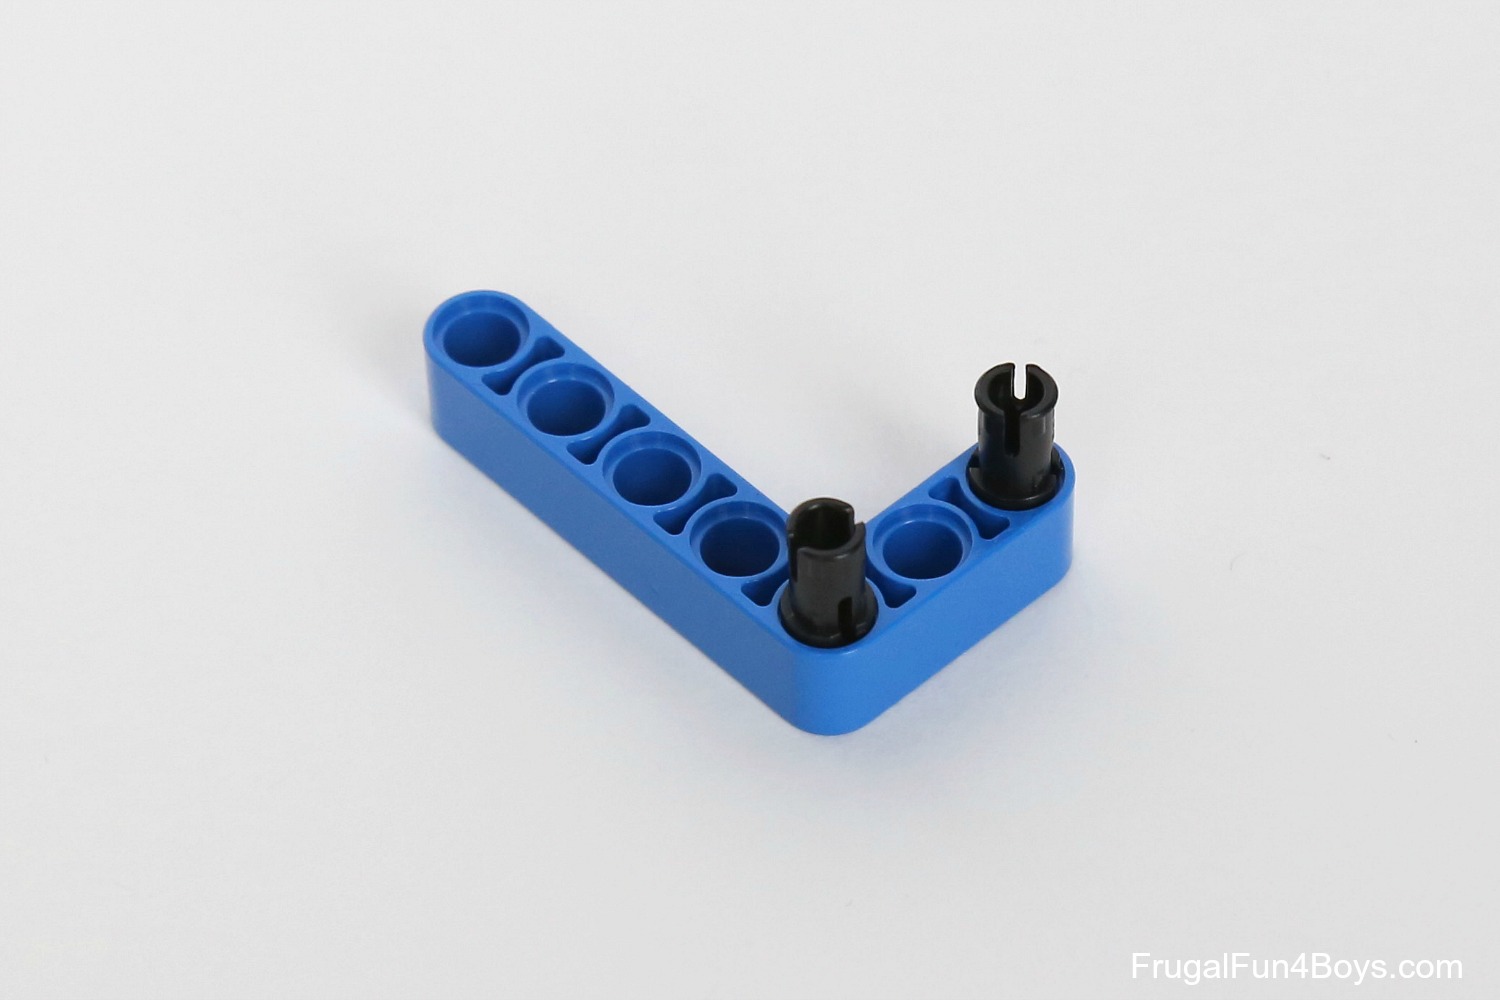
Step 6: Insert two black pins and a blue pin (3 studs long) into a 1 x 7 liftarm.
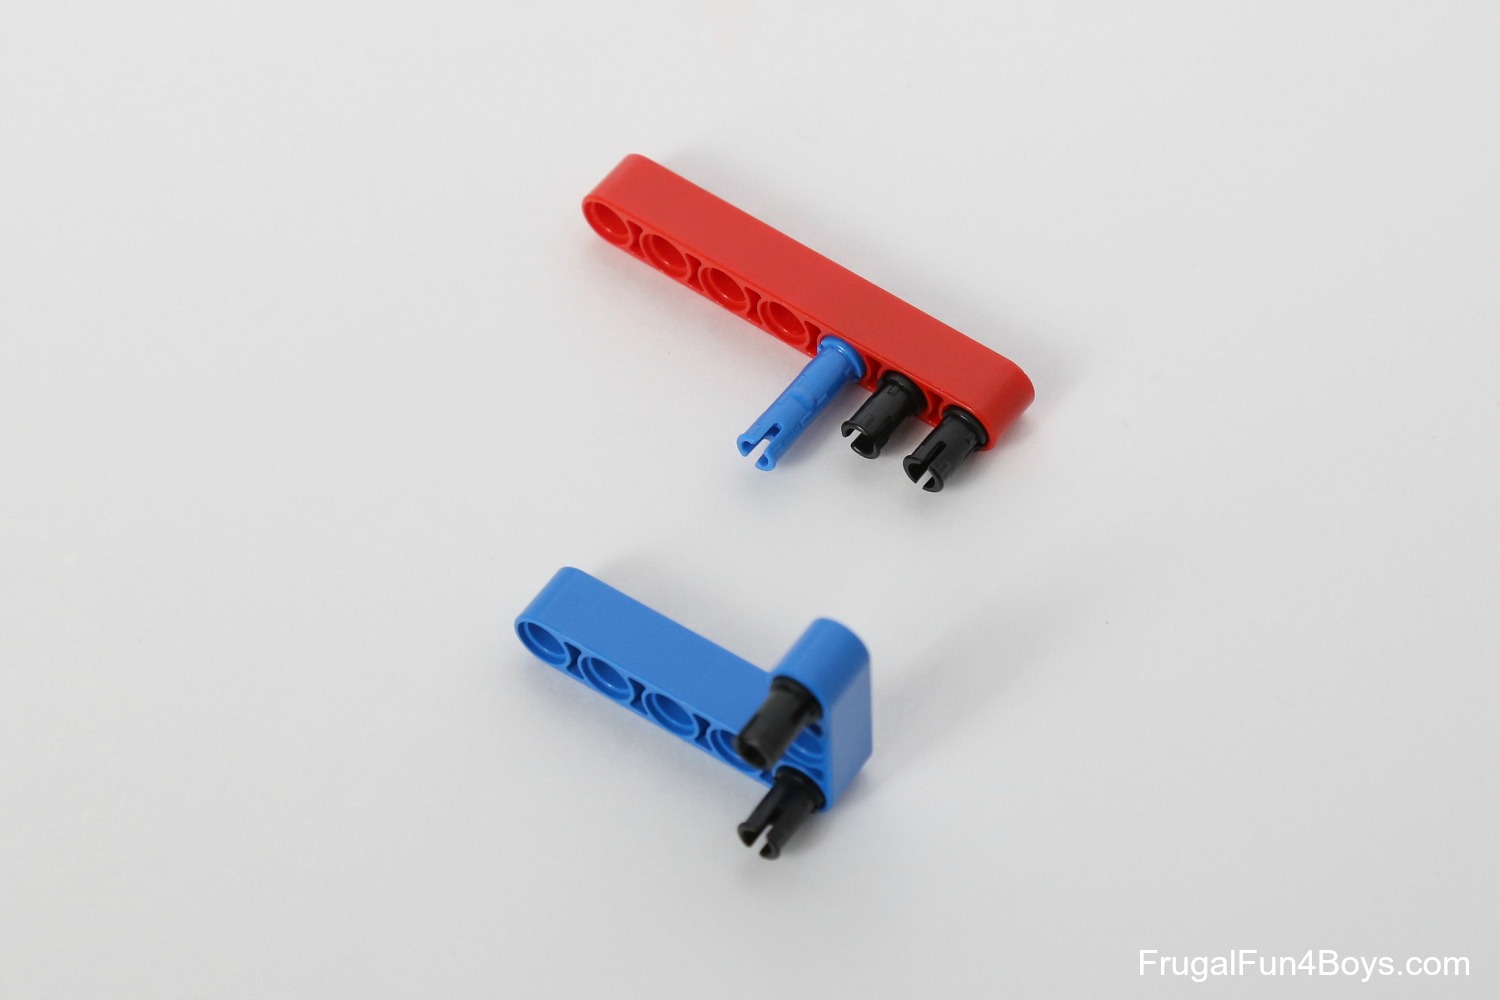
Step 7: Attach the blue L-shaped liftarm. Then grab a 1 x 3 liftarm and two more black pins.
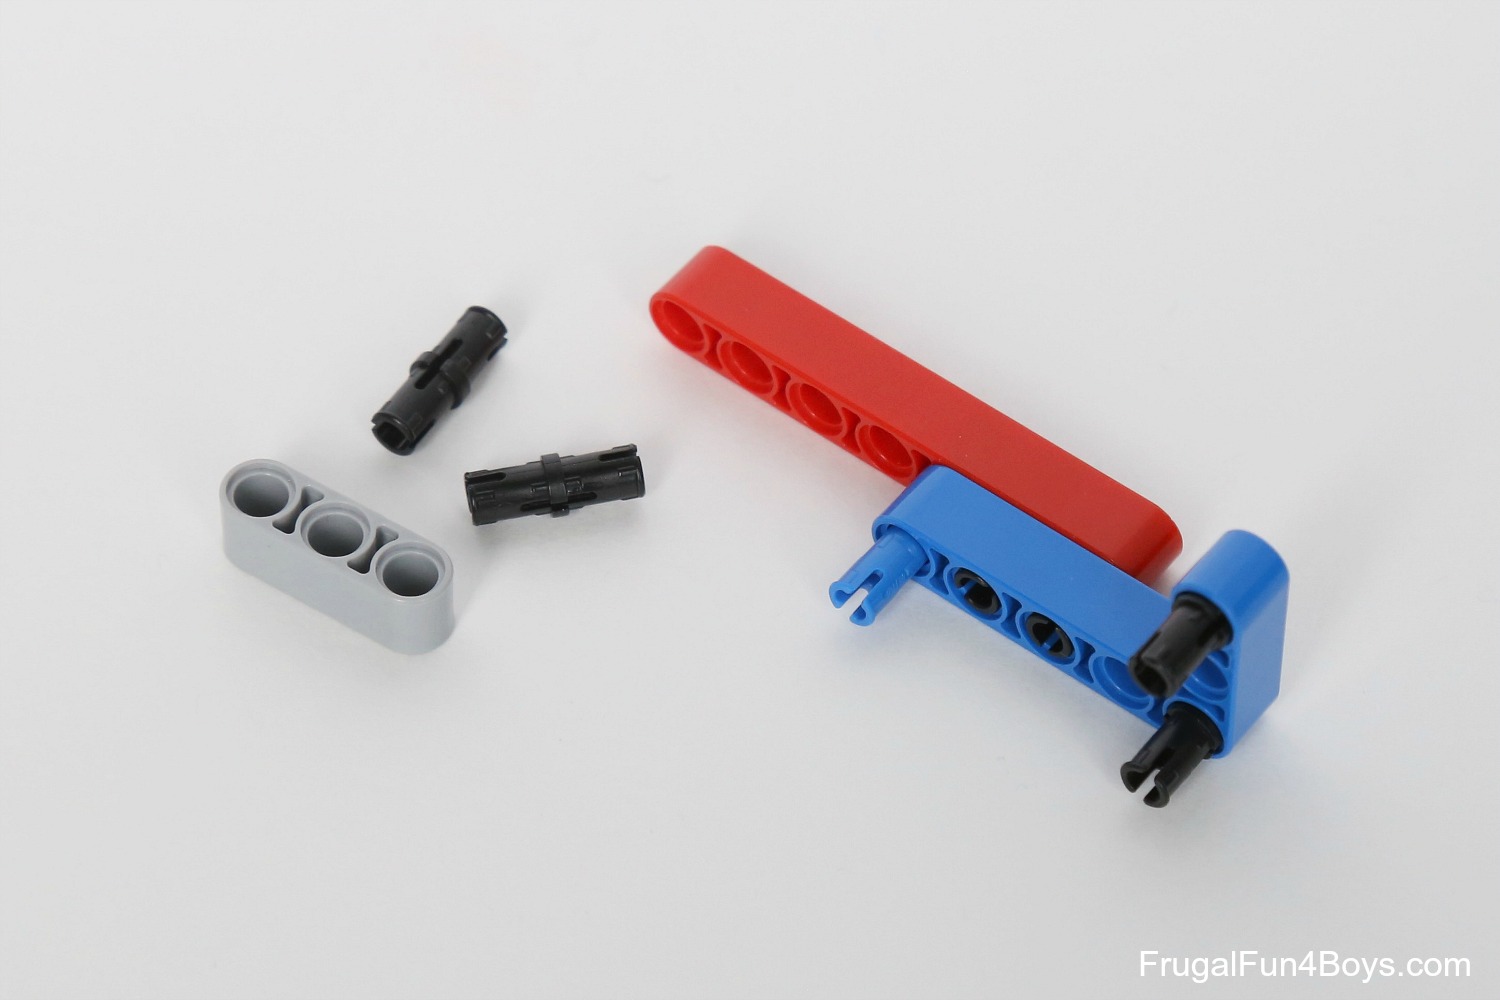
Step 8: Attach the 1 x 3 liftarm to the frame. Then build a second structure that is a mirror image of the first.
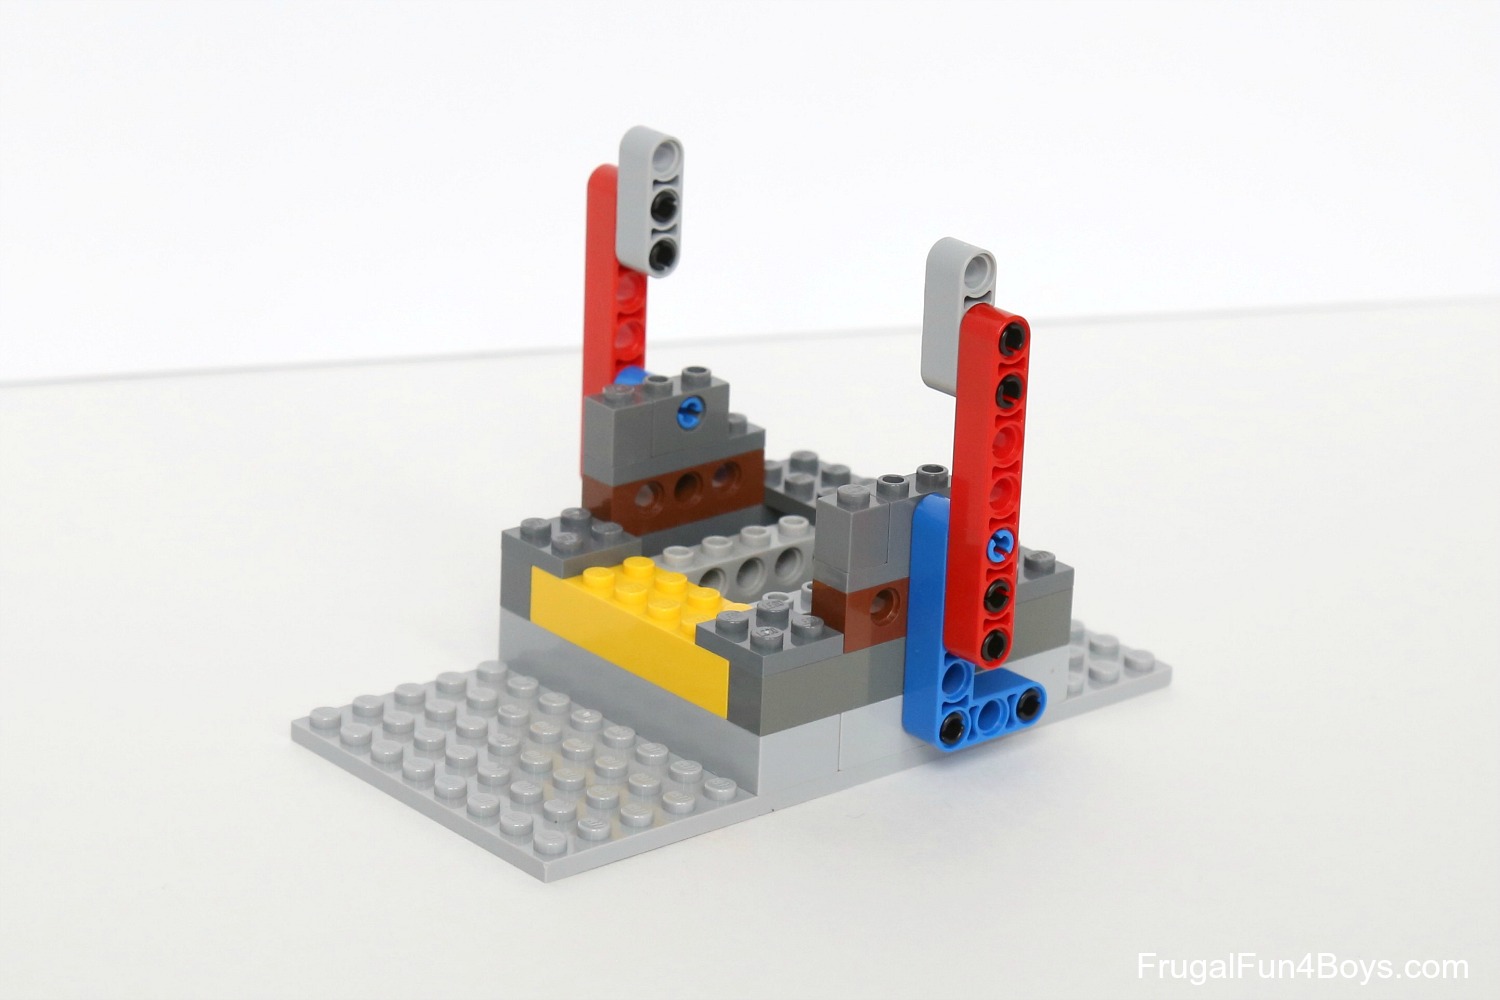
Step 9: Use the pins to attach the liftarms to the base of the catapult.
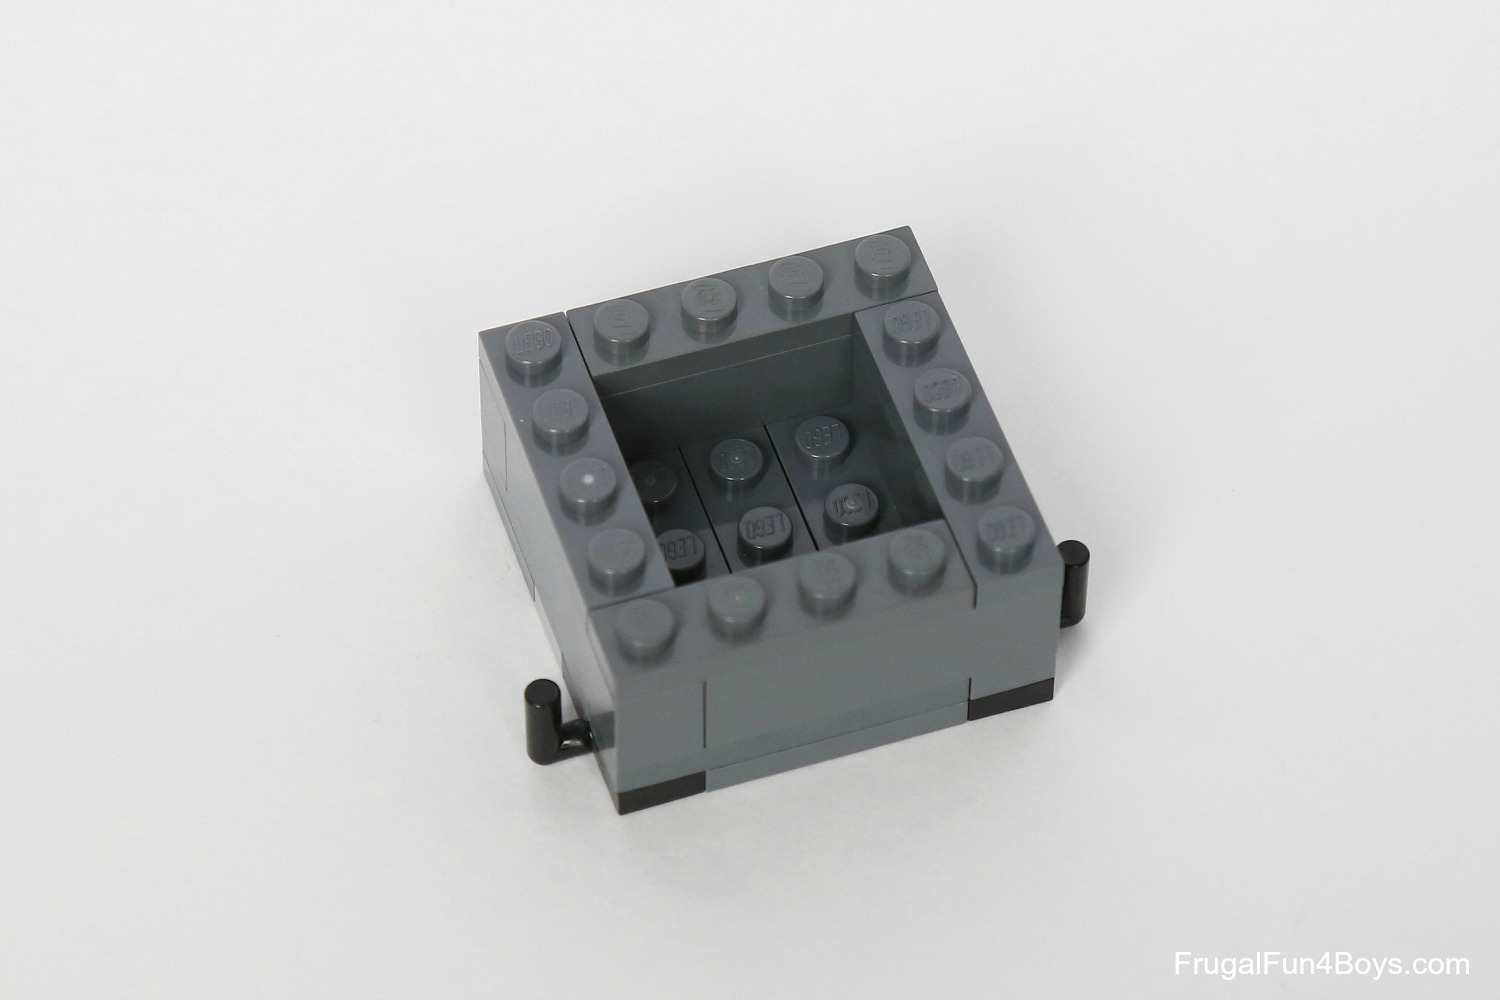
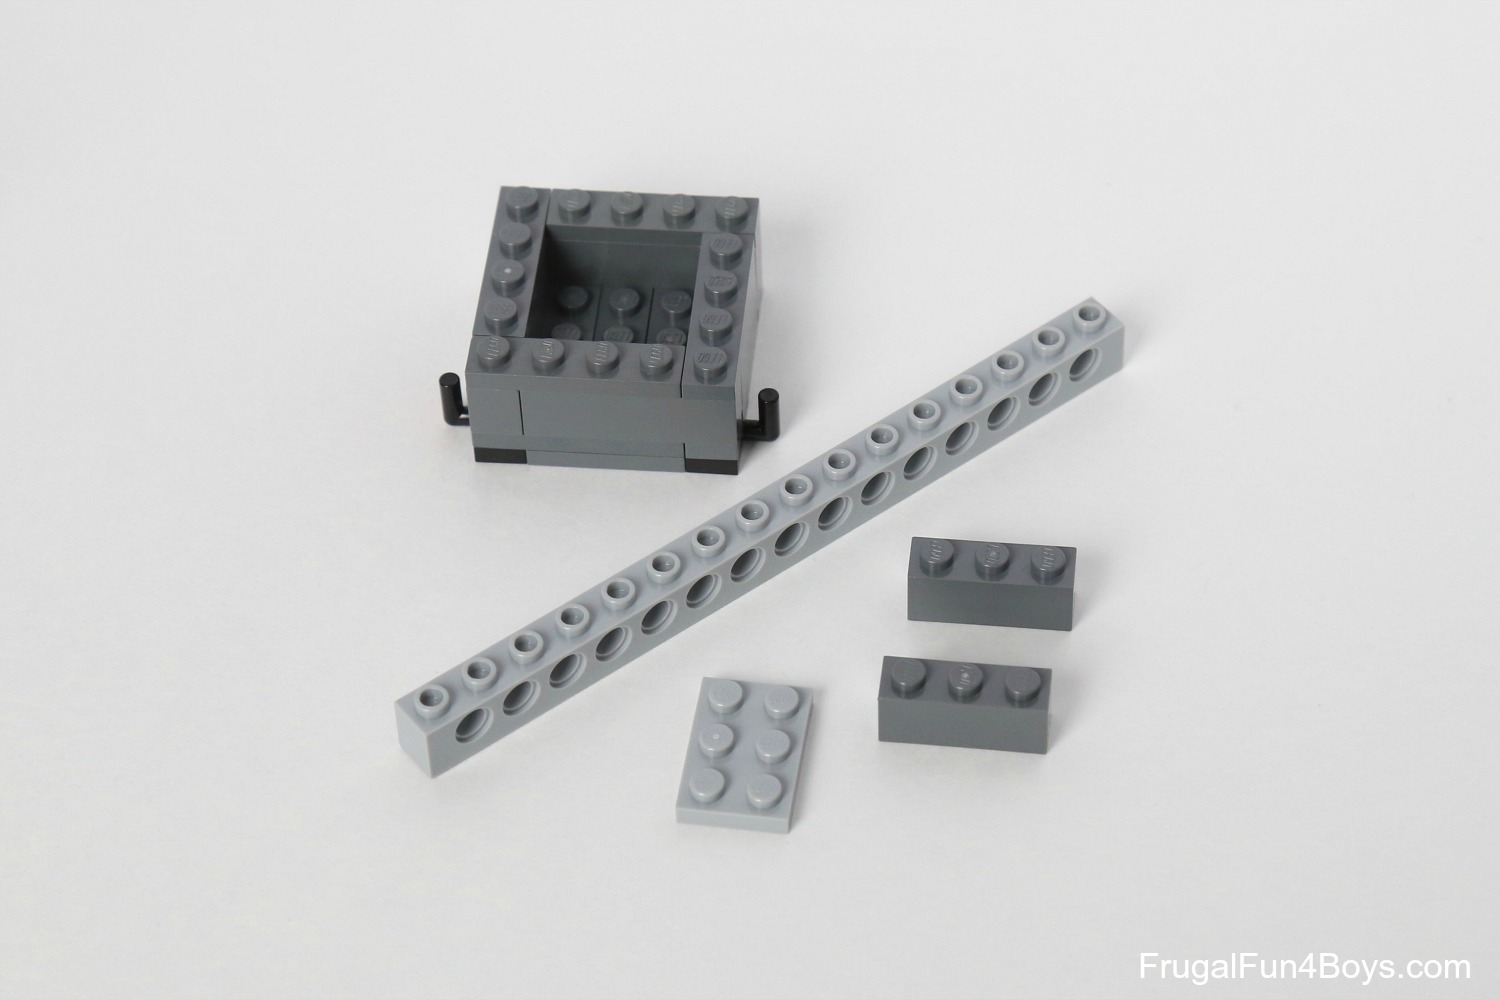
Step 10: If you’re using candy pumpkins, the perfect size for a basket is 5 studs by 5 studs, which will be the opening 3 x 3. That’s a little tricky to do, but kids can figure it out! I used two layers of plates (flat bricks), then one layer of bricks. Then one more layer of plates around the top for a little extra height.
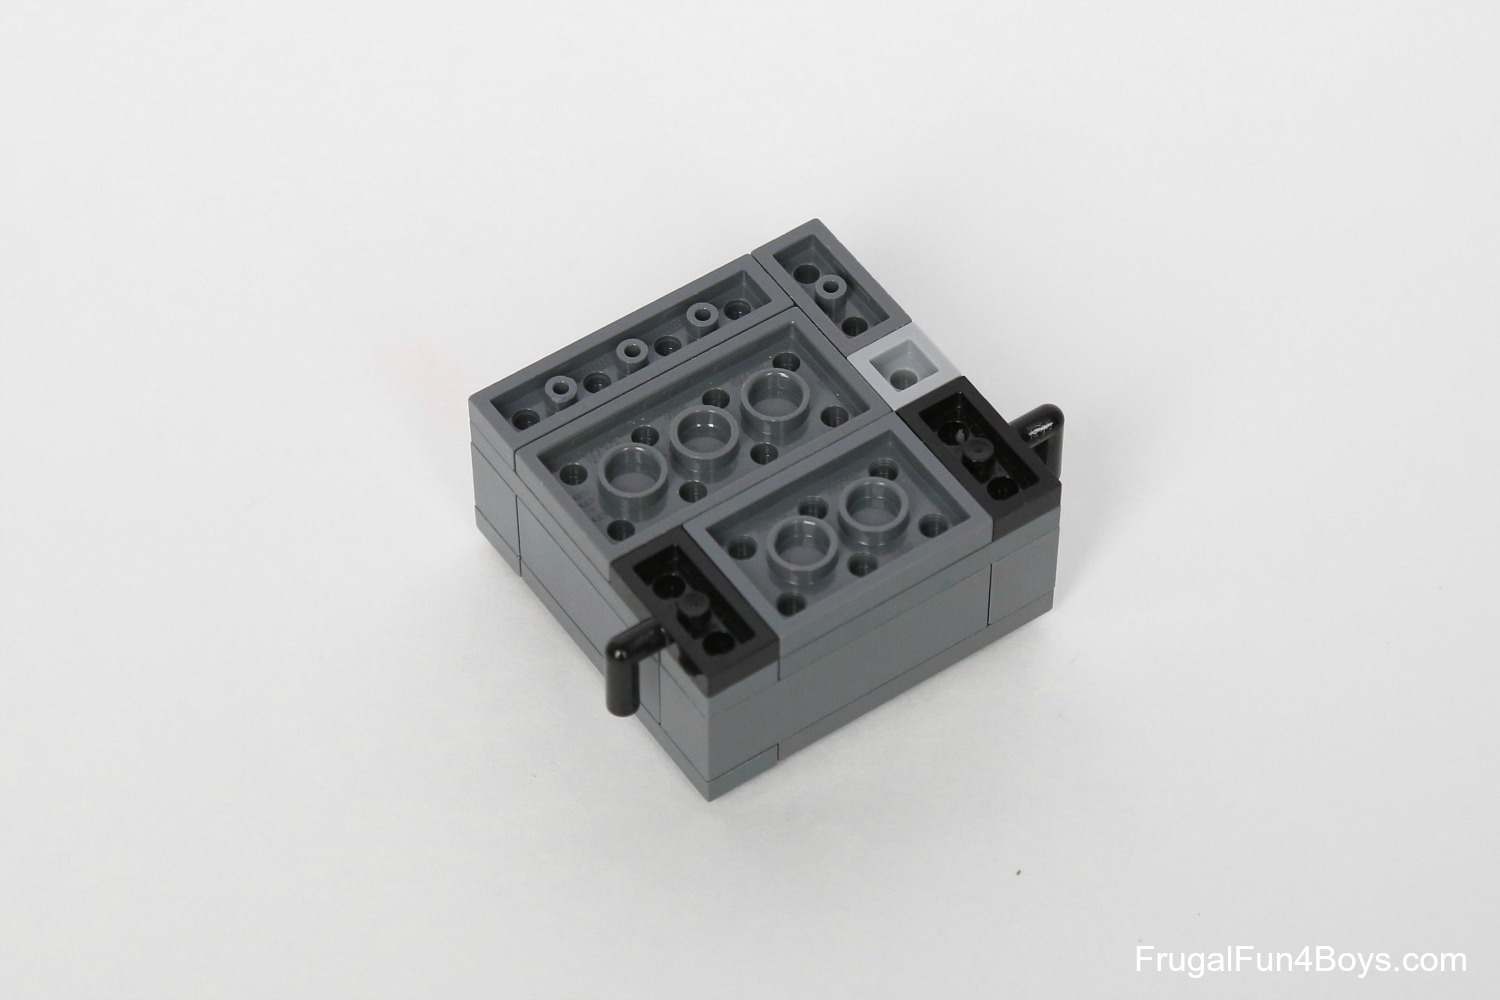
Step 11: Here’s a view from the underside. There are two 1 x 2 plates with an arm pointing up on the bottom. These will hold the rubber bands.
Step 12: We used a 1 x 16 Technic brick, a 2 x 3 plate, and two 1 x 3 bricks to build the arm for the catapult.
Step 13: Attach them to the underside of the basket as shown.
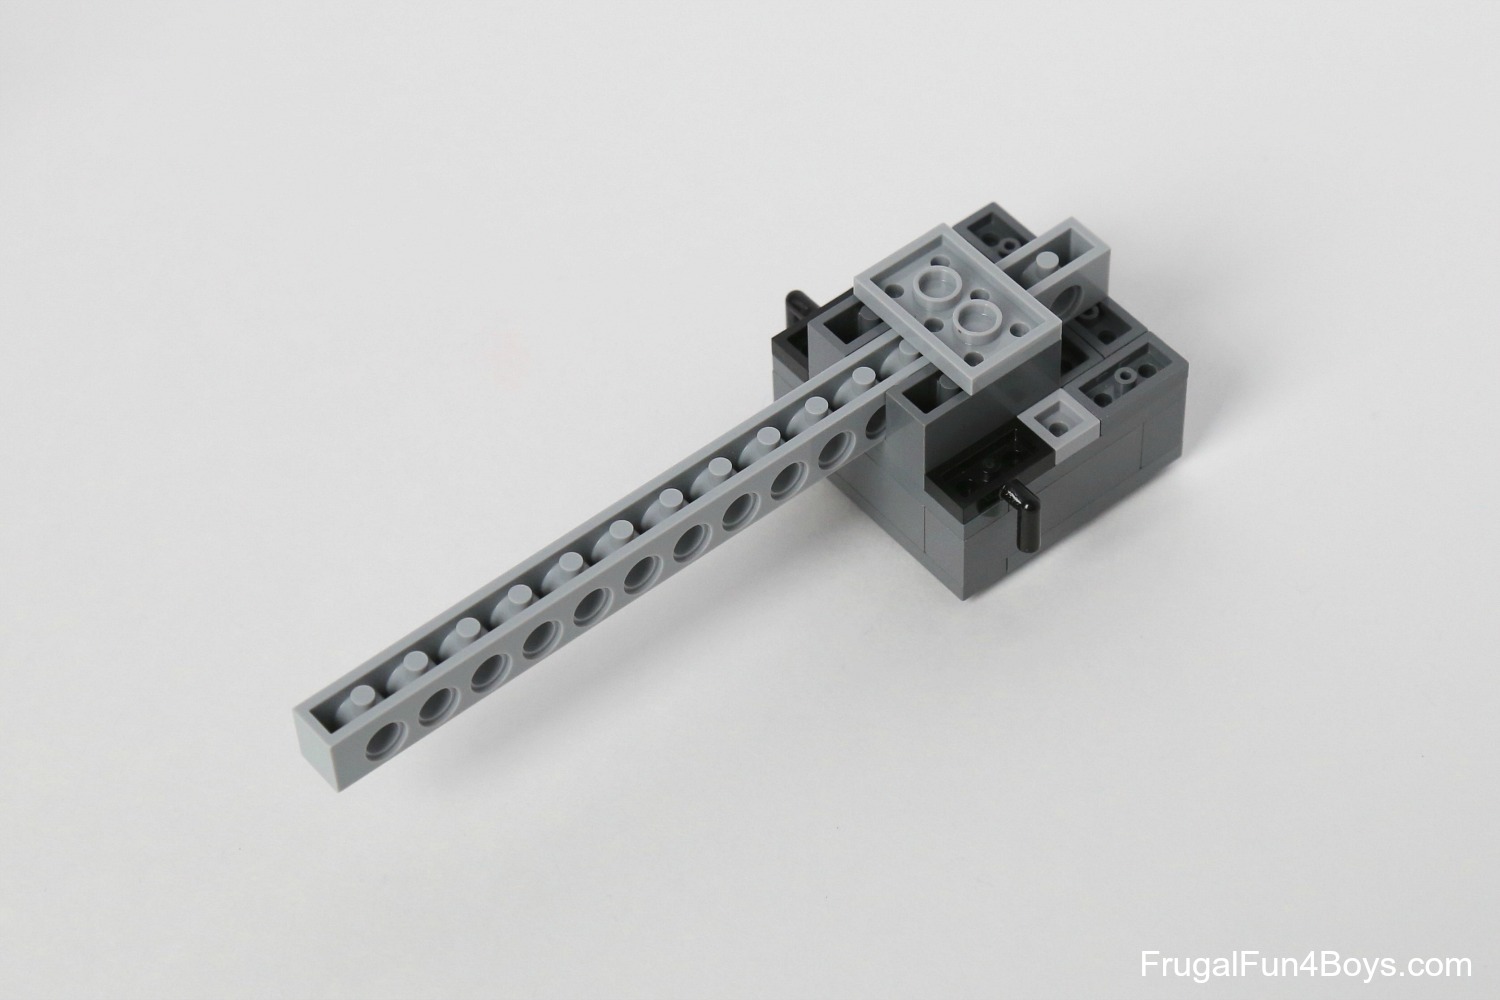
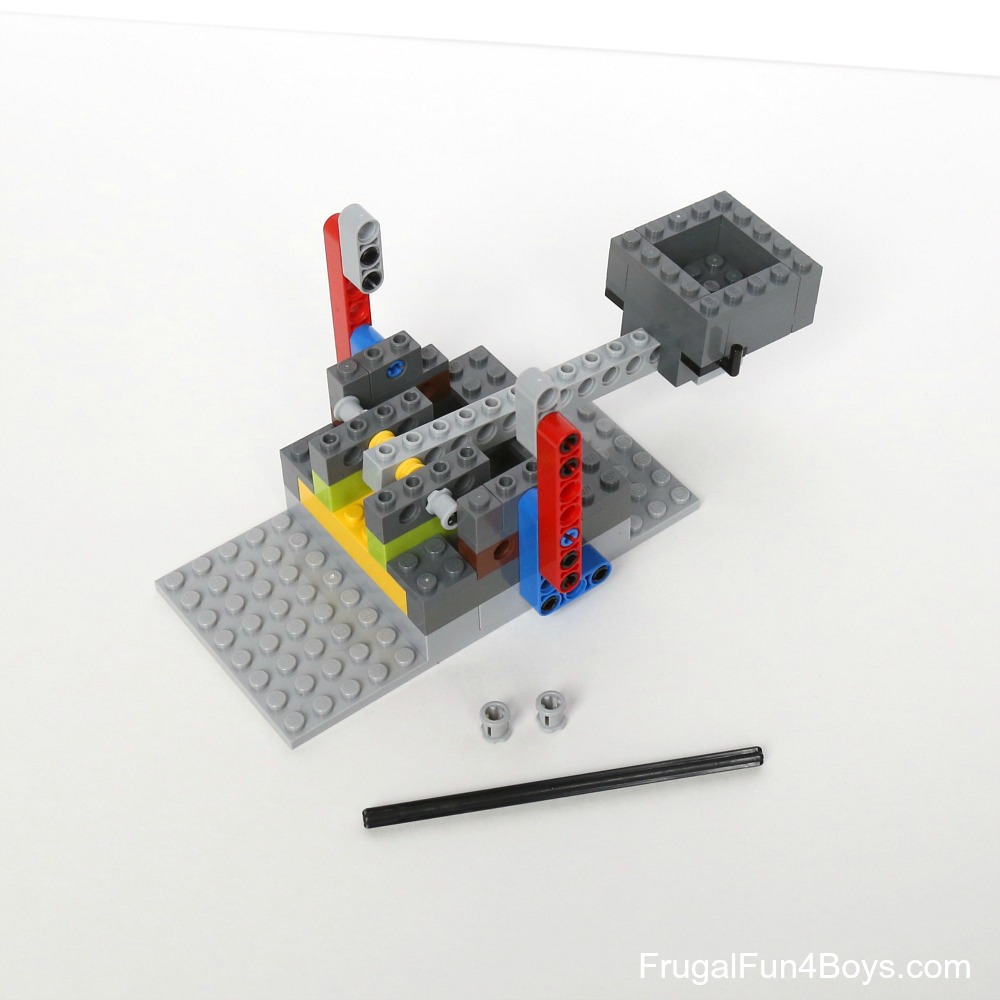
Step 14: Slide an axle (6 studs long) into the end hole on the Technic brick. Then side a bush (1/2 length) on each side.
Step 15: Then slide a 1 x 4 Technic brick and a 1 x 4 brick on each side. Hold them on with a bush on each side.
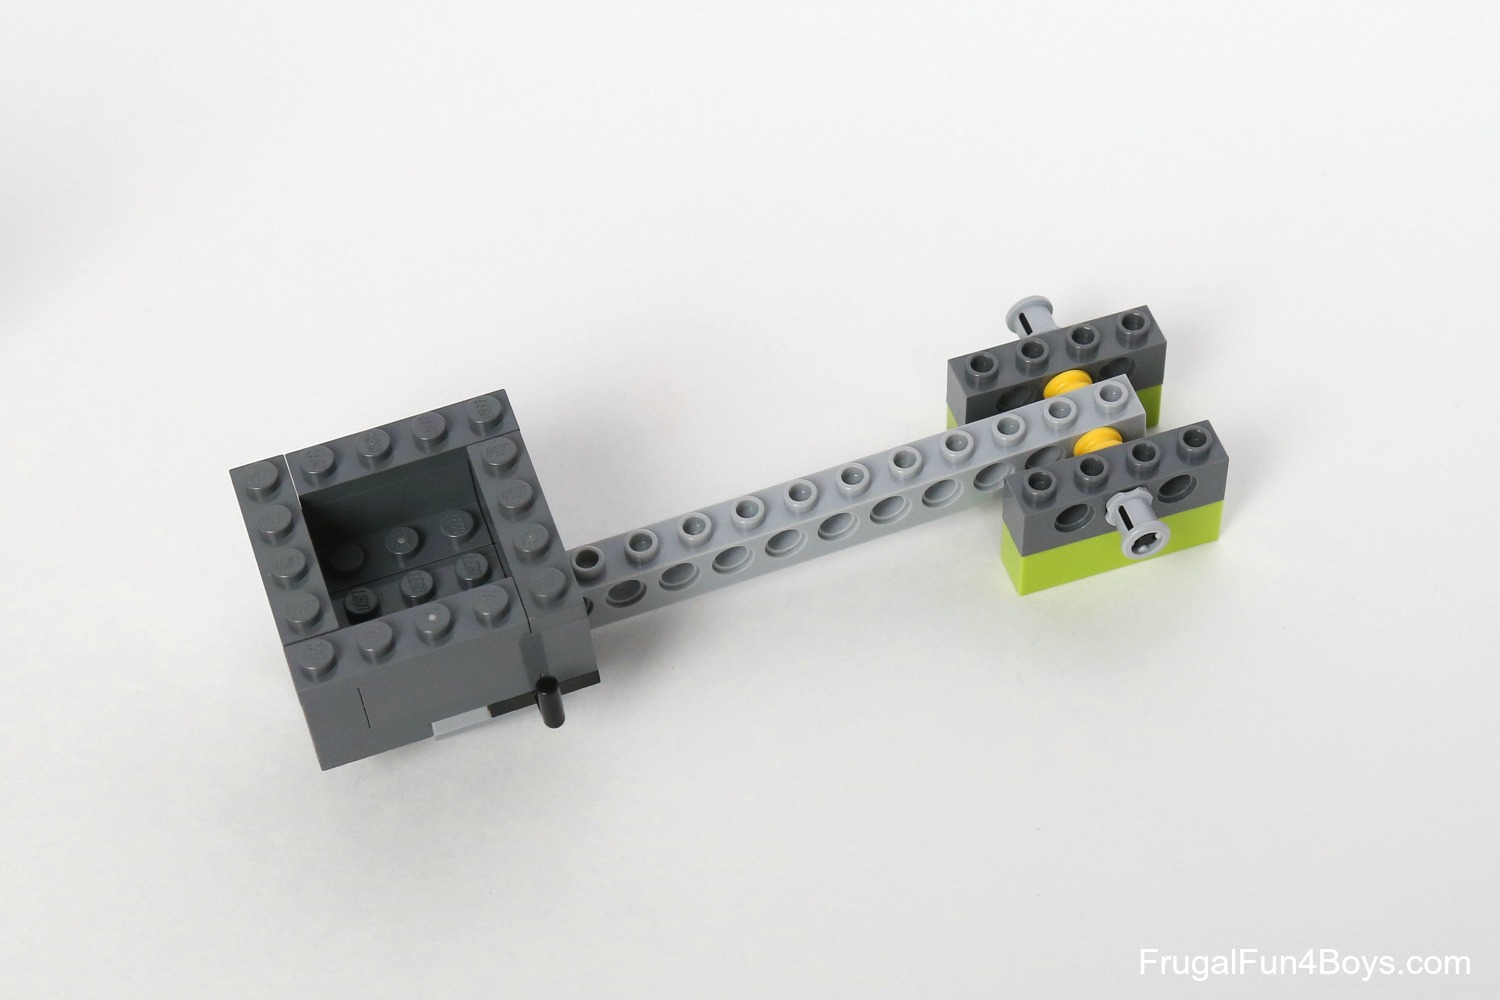
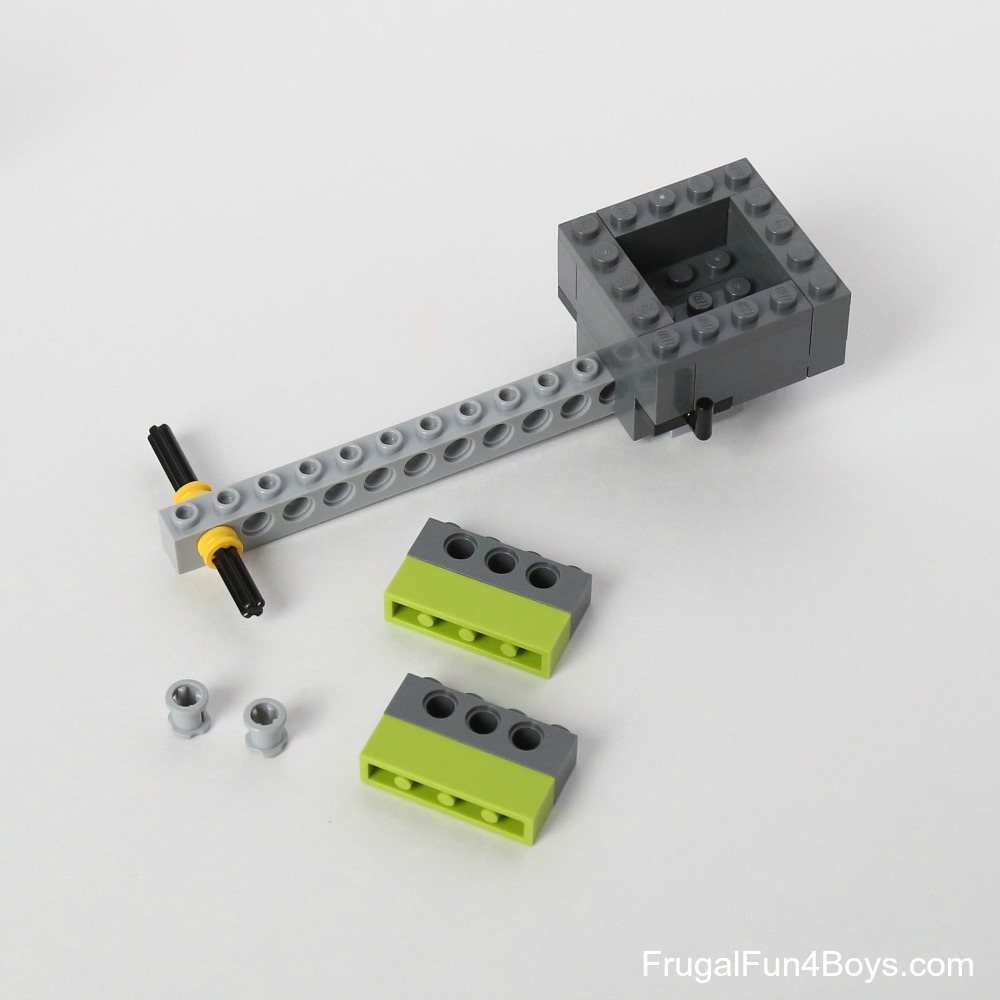
Step 16: Attach this assembly to the base of the catapult. Grab an axle (12 studs long) and two more Technic bush.
Step 17: The catapult will shoot the best if the arm releases the projectile at a 45 degree angle. We added some extra bricks (two red plates and a dark gray tile) to the arm to change the angle.
Slide the axle through the top of the frame and secure it with a Technic bush on each side.
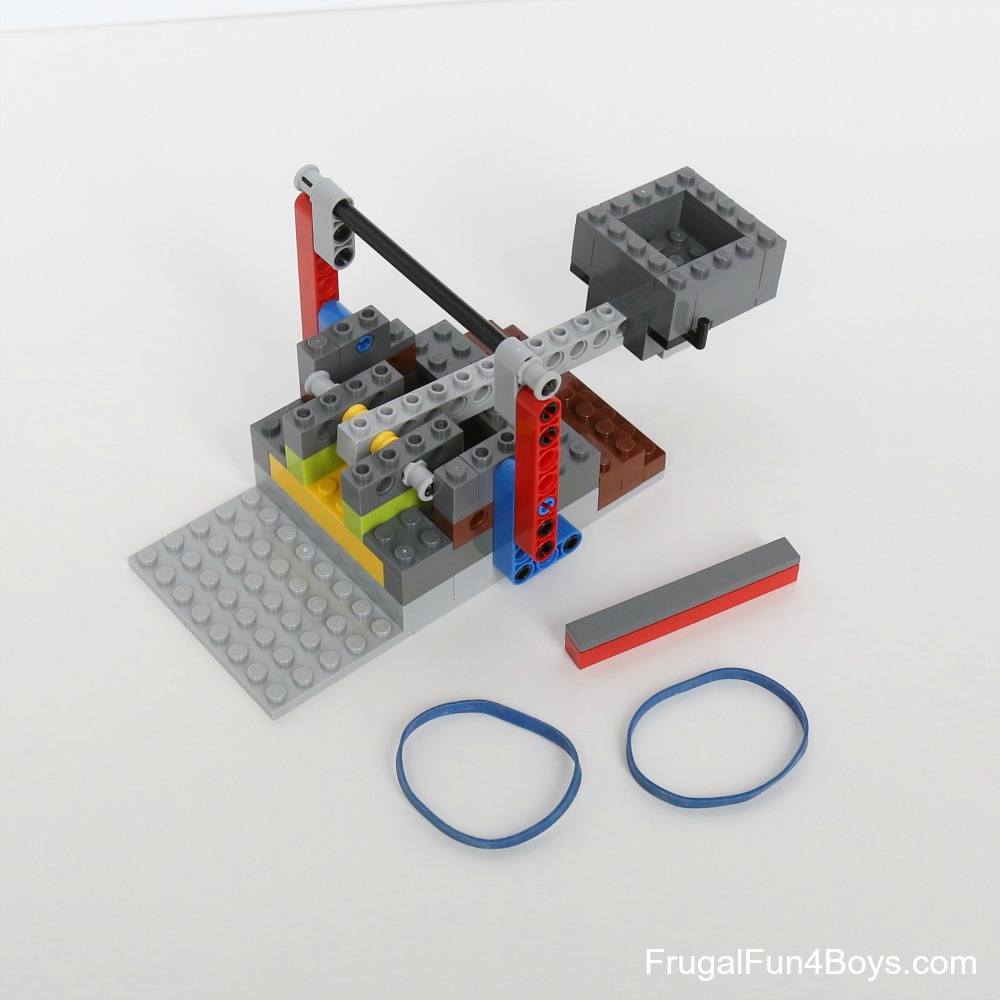
Step 18: Attach the rubber bands, and your catapult is ready to shoot!
You’ll want to get a pack of rubber bands that has multiple sizes and thicknesses of rubber bands so that kids can experiment with which ones shoot the best. If the rubber band is too tight, it will pull the catapult apart. If you don’t have enough tension, though, it won’t shoot very far! You’ll want to make sure that both rubber bands are the same size.
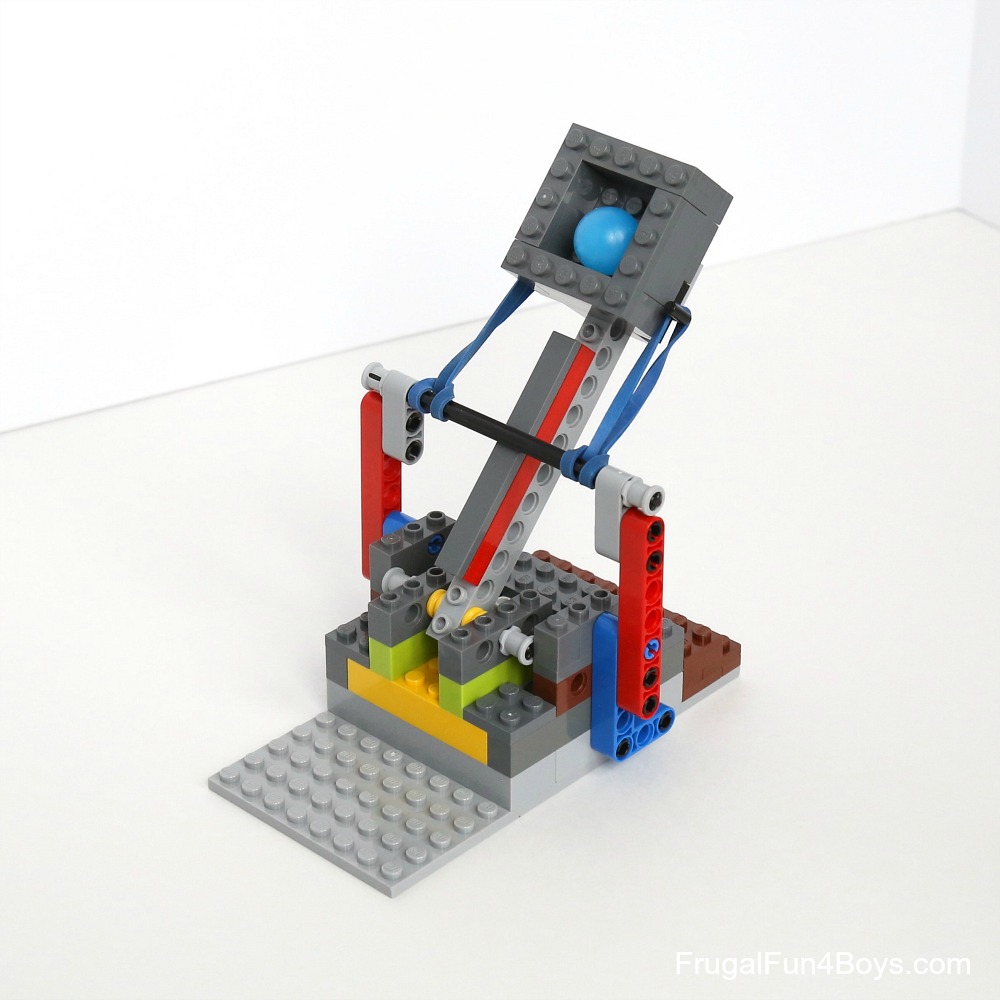
Whether you use candy pumpkins or another projectile, it would be fun to have a challenge to see whose catapult shoots the farthest! Great LEGO® club challenge.
Inspire future engineers with a book full of mind-blowing inventions!
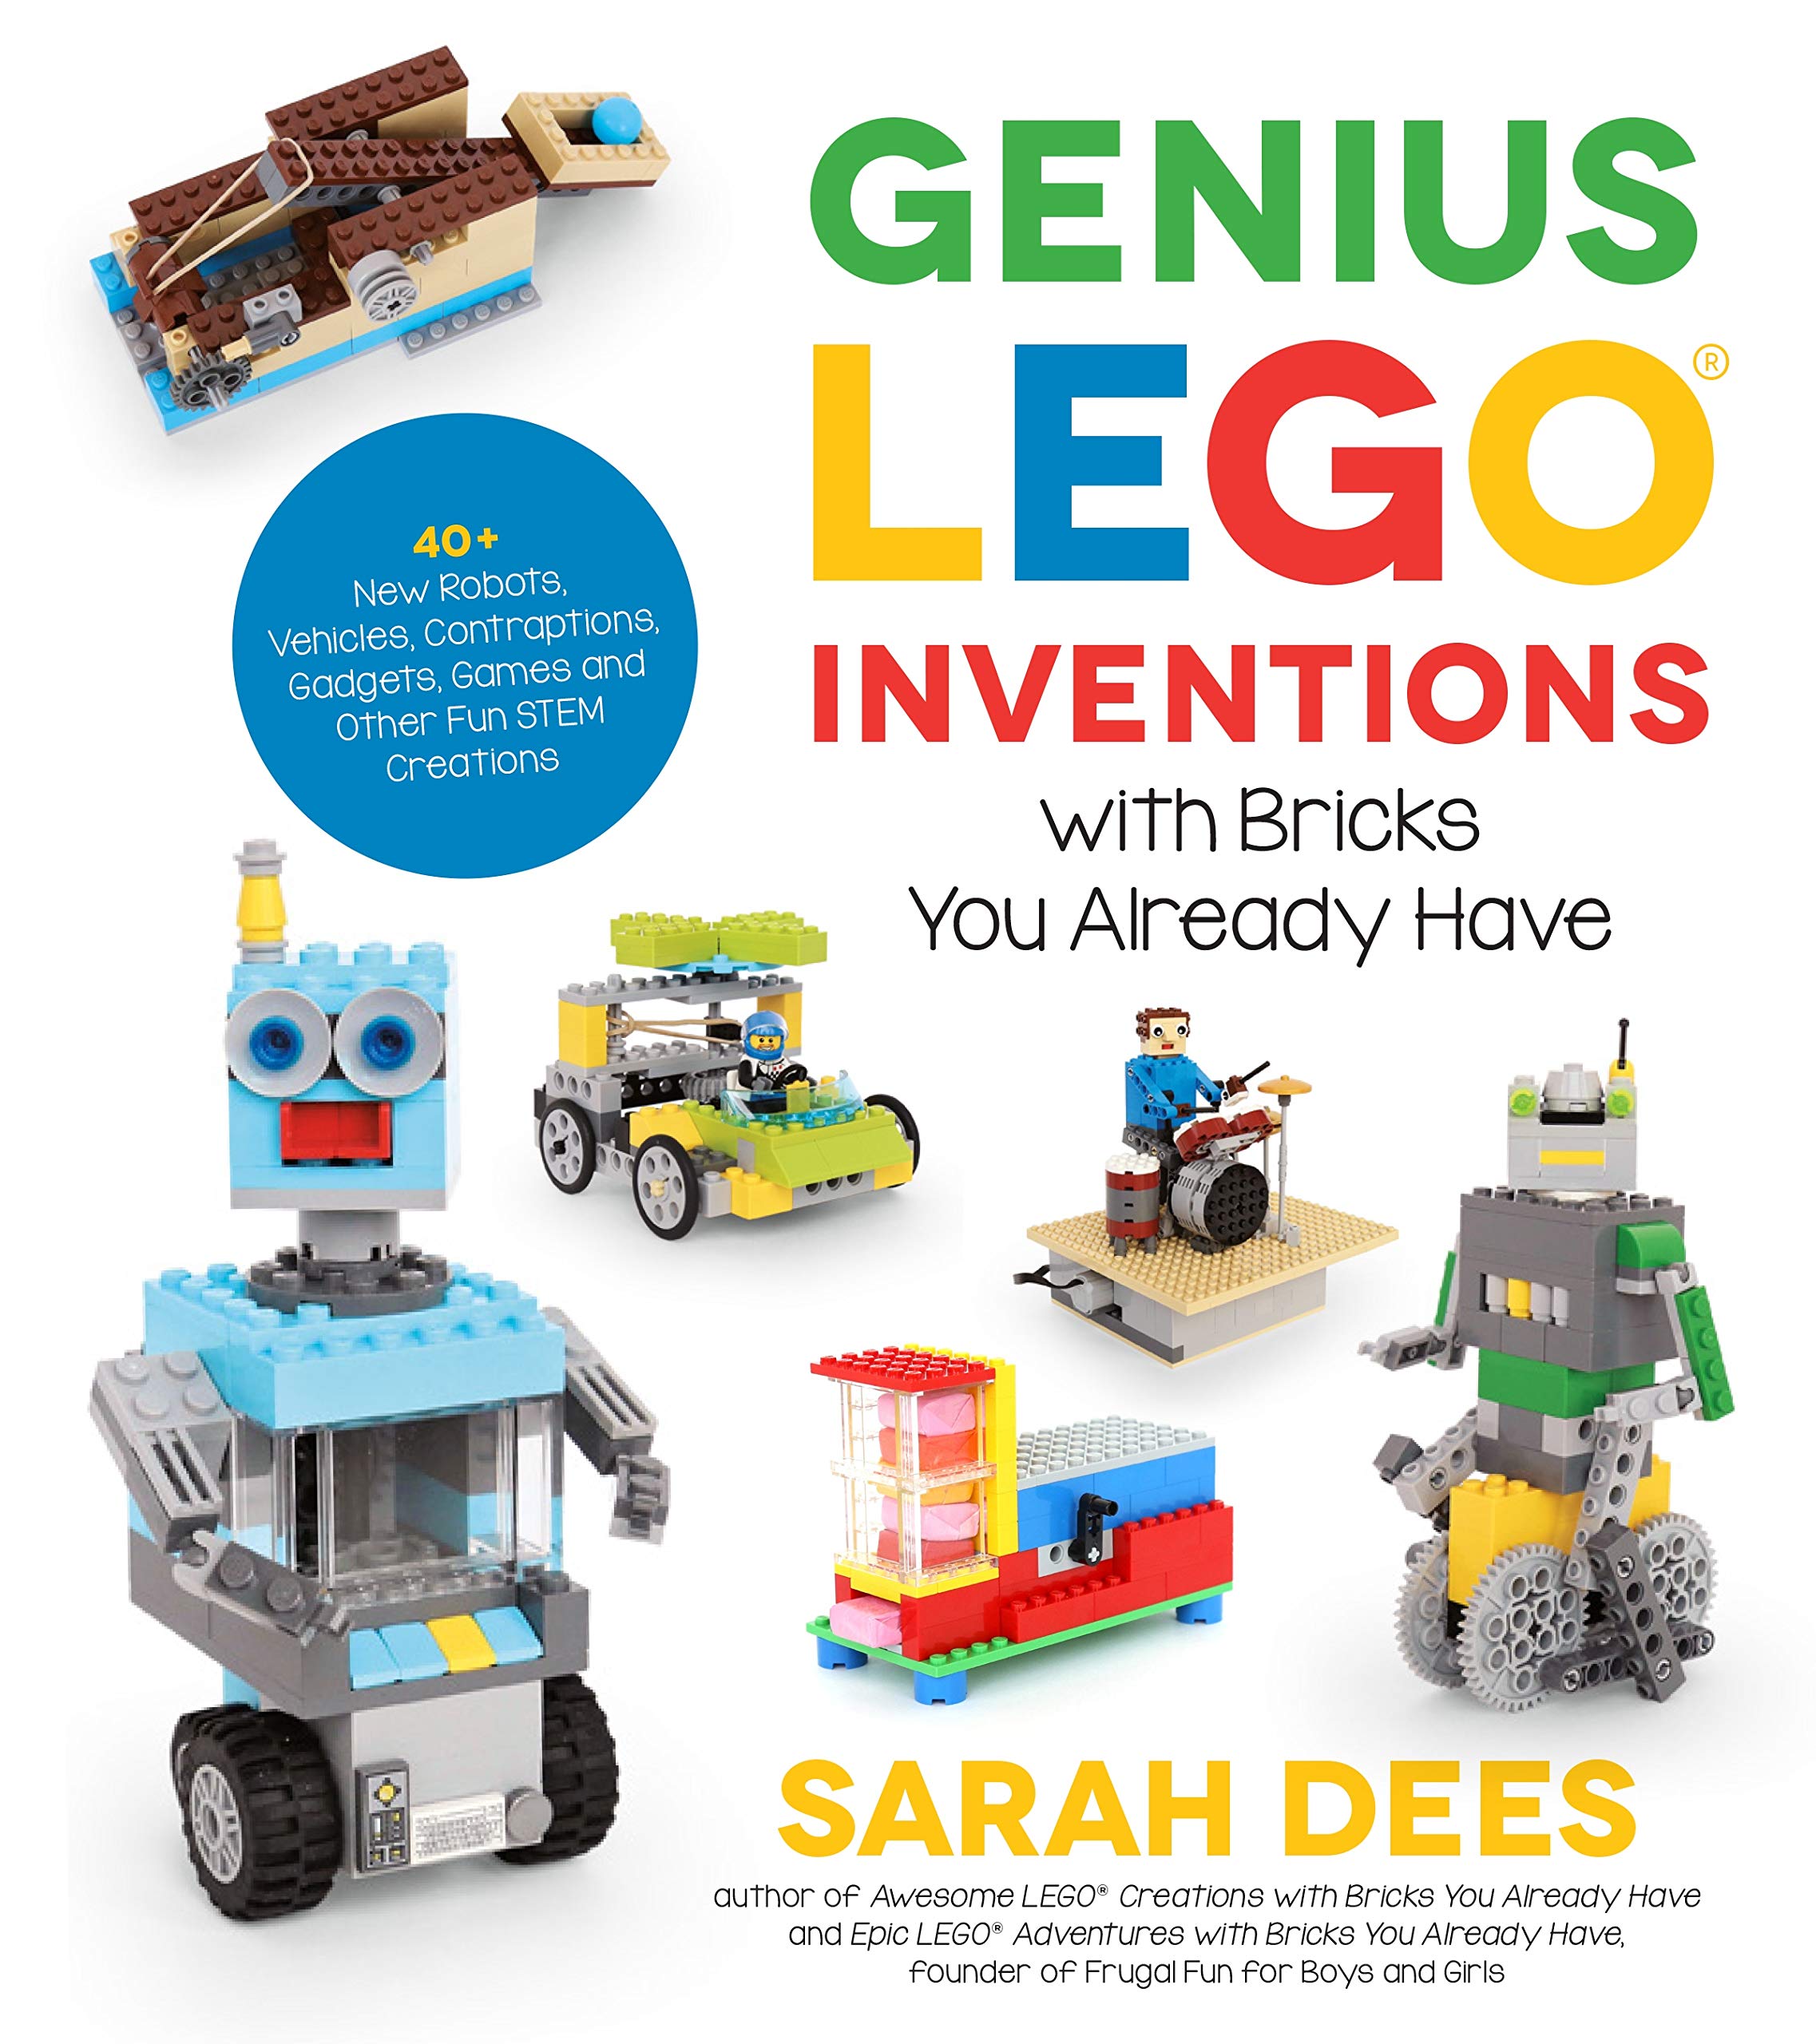
If your kids love LEGO® machines like this, you’ll definitely want to grab our newest LEGO® book! Genius LEGO Inventions with Bricks You Already Have is full of 40 awesome inventions to build, with step-by-step instructions. Kids will design their own robots (with cool moving parts!), a transformer, a working crane, a marble spiral, a drummer that really plays the drums, a motorized knight duel, a basketball game, and more.
LEGO® is a trademark of the LEGO® group of companies which does not support, authorize, or endorse this site.
2 Comments
sherri Apr 18, 2020
I may have posted comments three times in my life, I cite this so you truly understand what an inspiration you are to me! Being a parent is a difficult task, this collection of amazing, fun, creative stem activities, your web site, is what I have been searching for! I was having trouble sleeping, we are over a month now Quarantined in Boston, my daughter has Been doing her school via web cameras etc., I need more to keep us busy and adding an activity that is so few supplies with amazing educational opportunities (metaphor... like hiding the vegetables in the cupcakes) I can not sleep now only because I can't wait to start building and exploring these activities with my own daughter!
I Truely want to Thankyou Sarah for taking even more of your precious time, I am one of five children in a span of only six years🥴. That you still took time to document and share all of the information and projects is an amazing feat in itself!
You are a true inspiration!! And I thankyou!
Have a Blessed Day
Julisa May 26, 2020
Can you make your instructions printable? I'm watching my boys work together to put together their latest kiwi crate. I'm loving that they can read the instructions and work together. I'd love to set them free on something like this too, with some printed instructions. Thanks. Love the ideas you out out there.
Post a Comment