
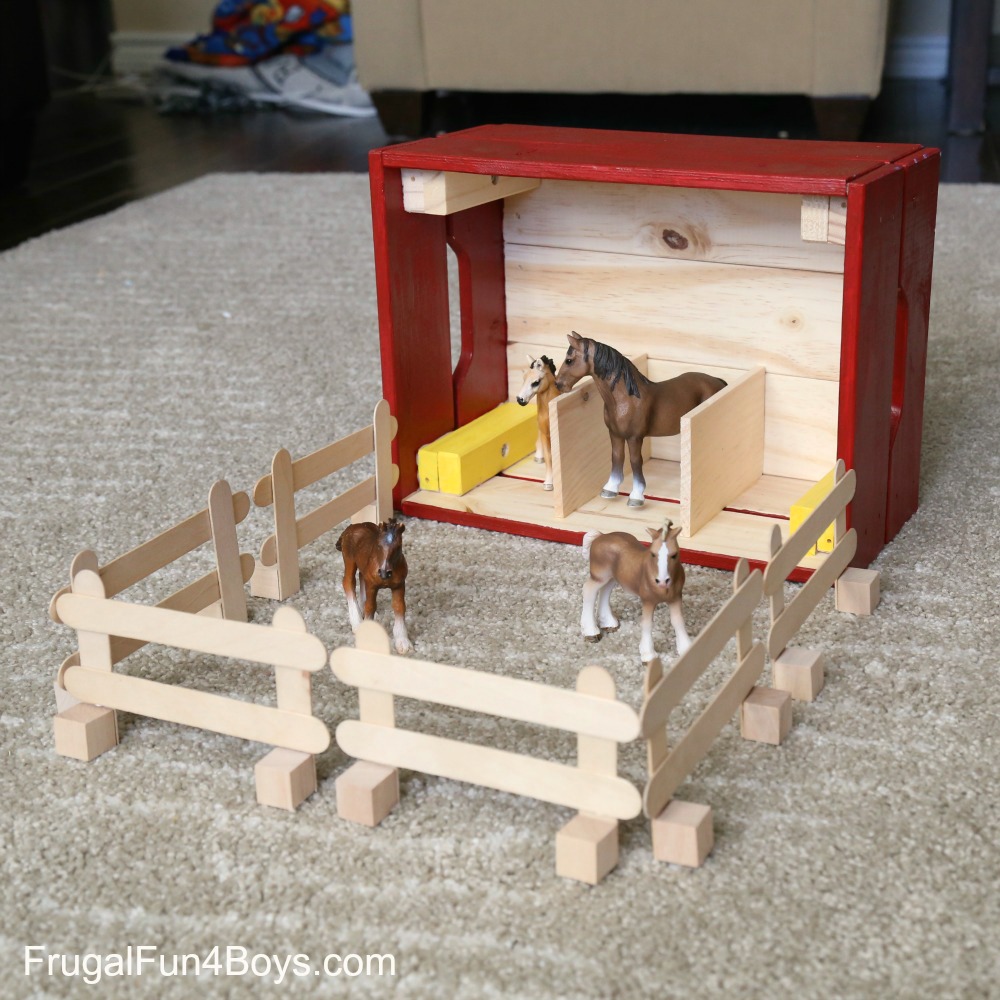
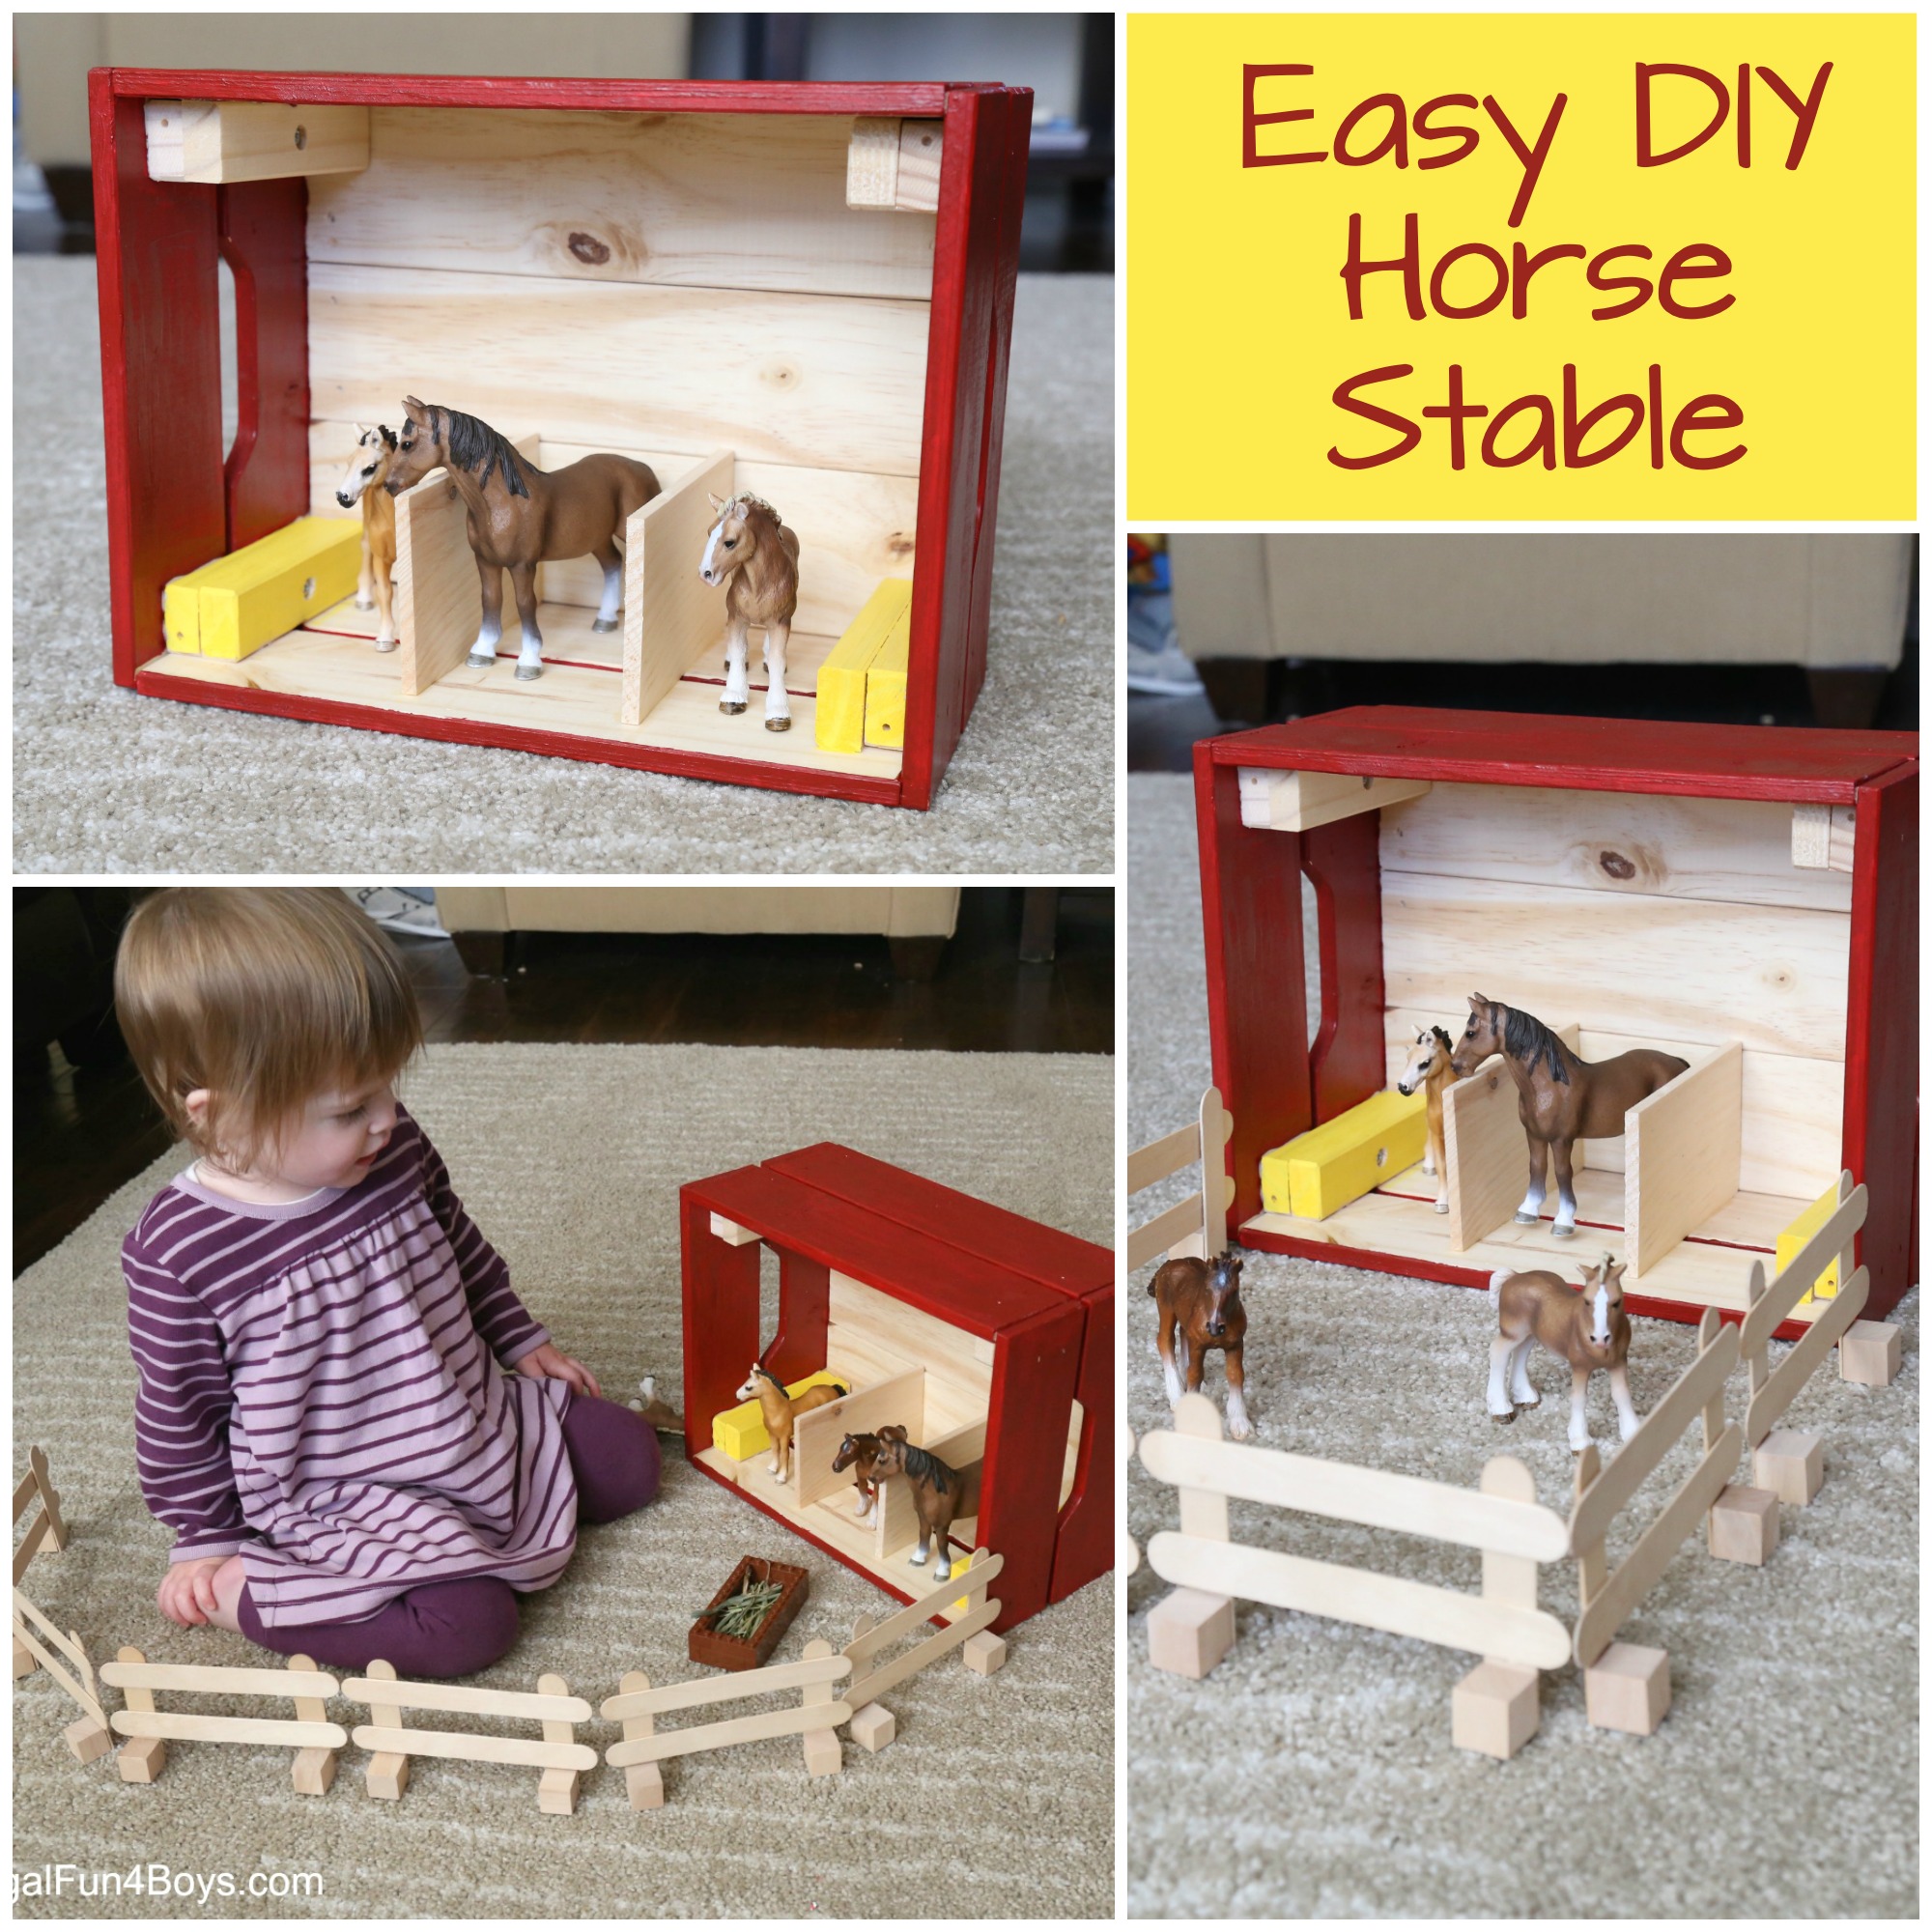
Here’s a fun (and easy) IKEA hack – Turn a wood crate into an adorable stable for toy horses!
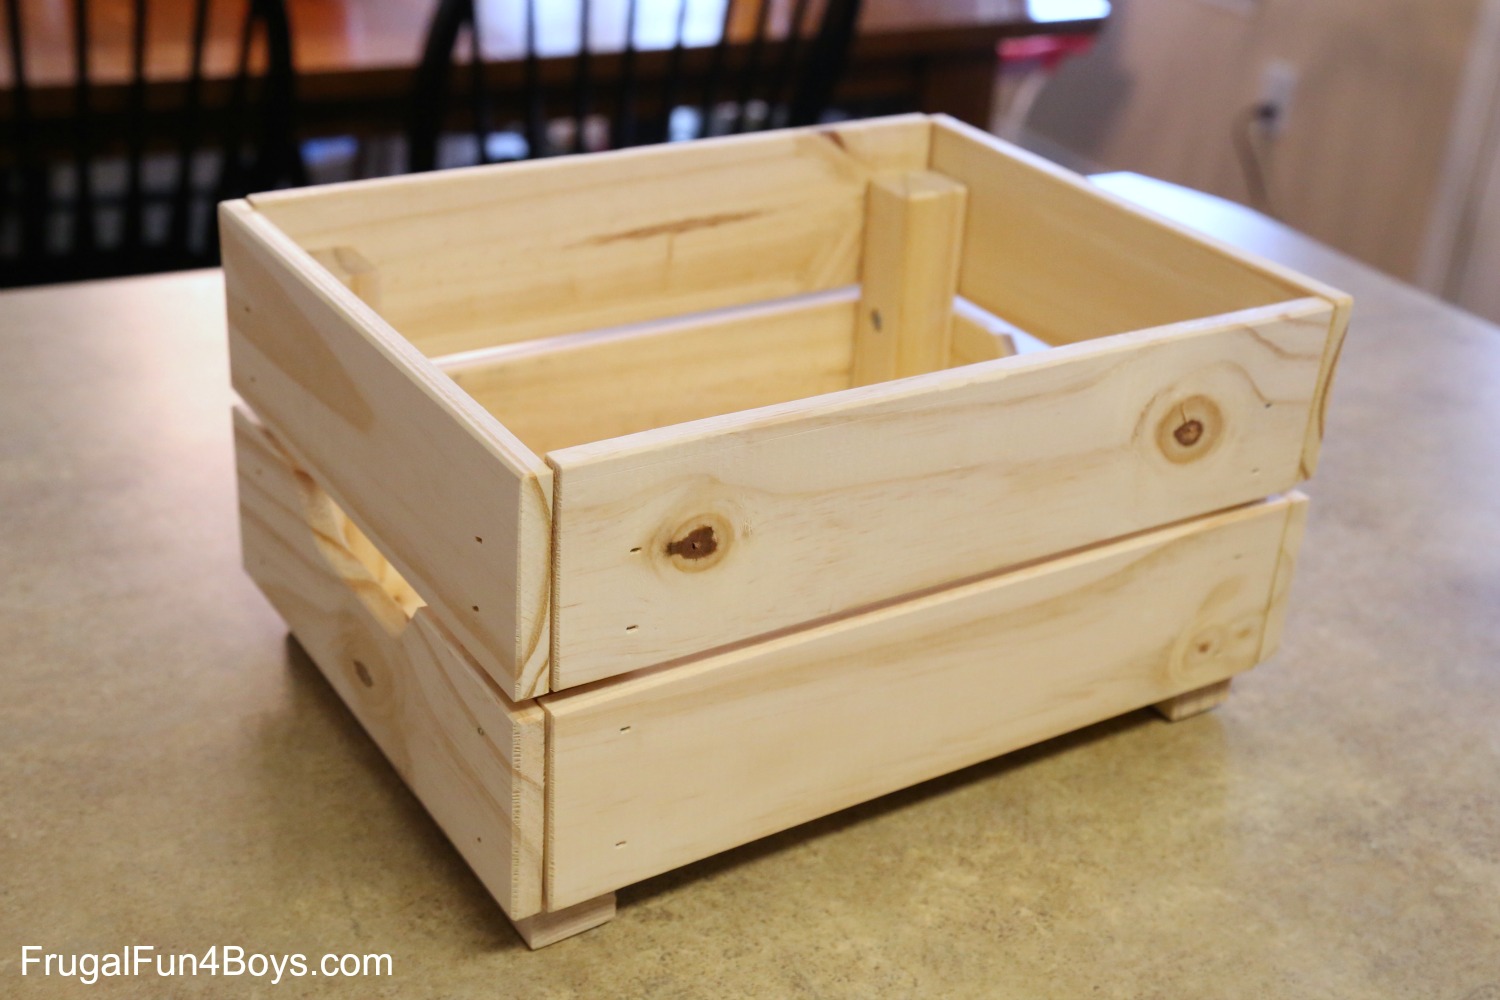
A couple weeks ago we went to IKEA in search of toy organization and furniture for our game room. I didn’t buy any furniture (yet!) but while I was there I picked up a few organization items including these Knagglig wooden boxes. These are pine crates that come in two sizes – a large one for $9.99 and a small one for $4.99. You have to assemble them, of course, but they are sturdy and they stack together, and they just have lots of potential!
We assembled our crates (one large and one small), and they had been sitting out on the table waiting for just the right inspiration. Then Janie (21 months) found a toy “horsey” that she wanted at Walmart last weekend, and we were all talking about how we could make her a stable when suddenly inspiration struck – the IKEA crates!
This post contains Amazon affiliate links.
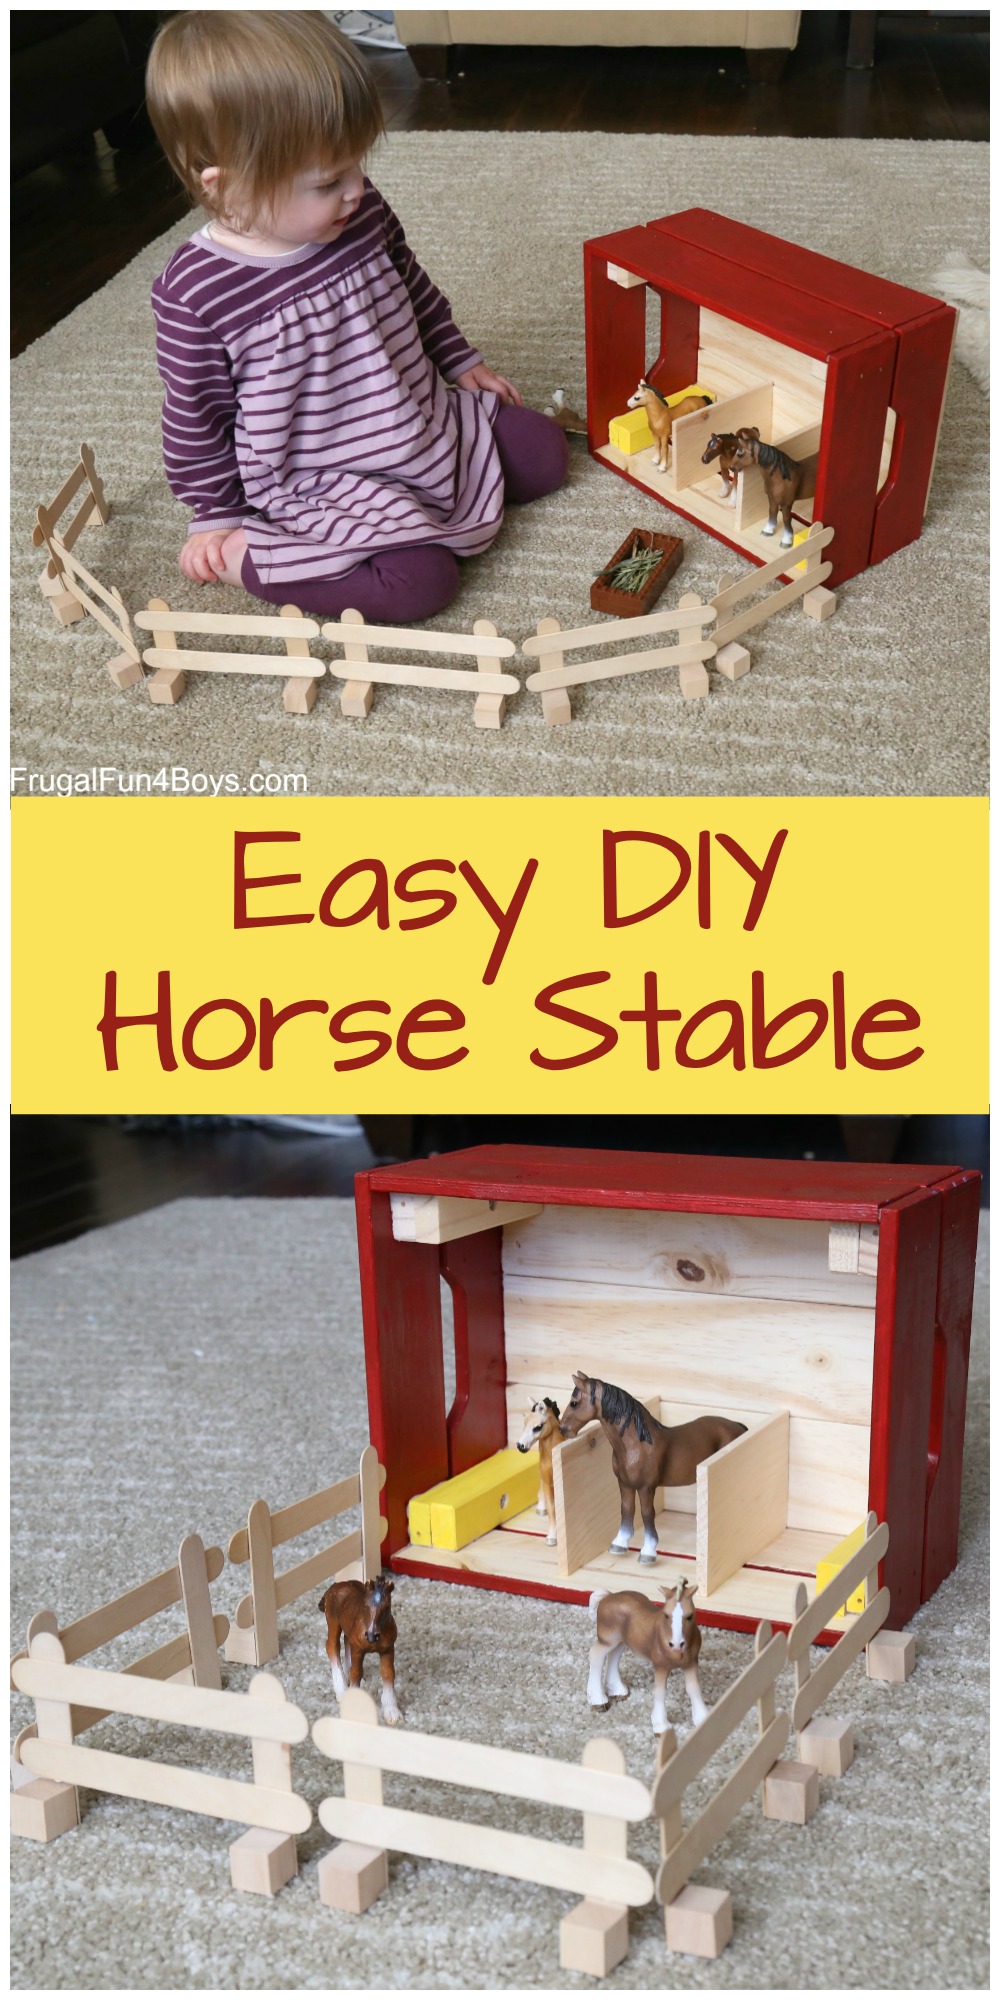
We used the small crate to make this horse stable complete with a craft stick fence. I put the finishing touches on the fence and had it waiting for her when she woke up from her nap.
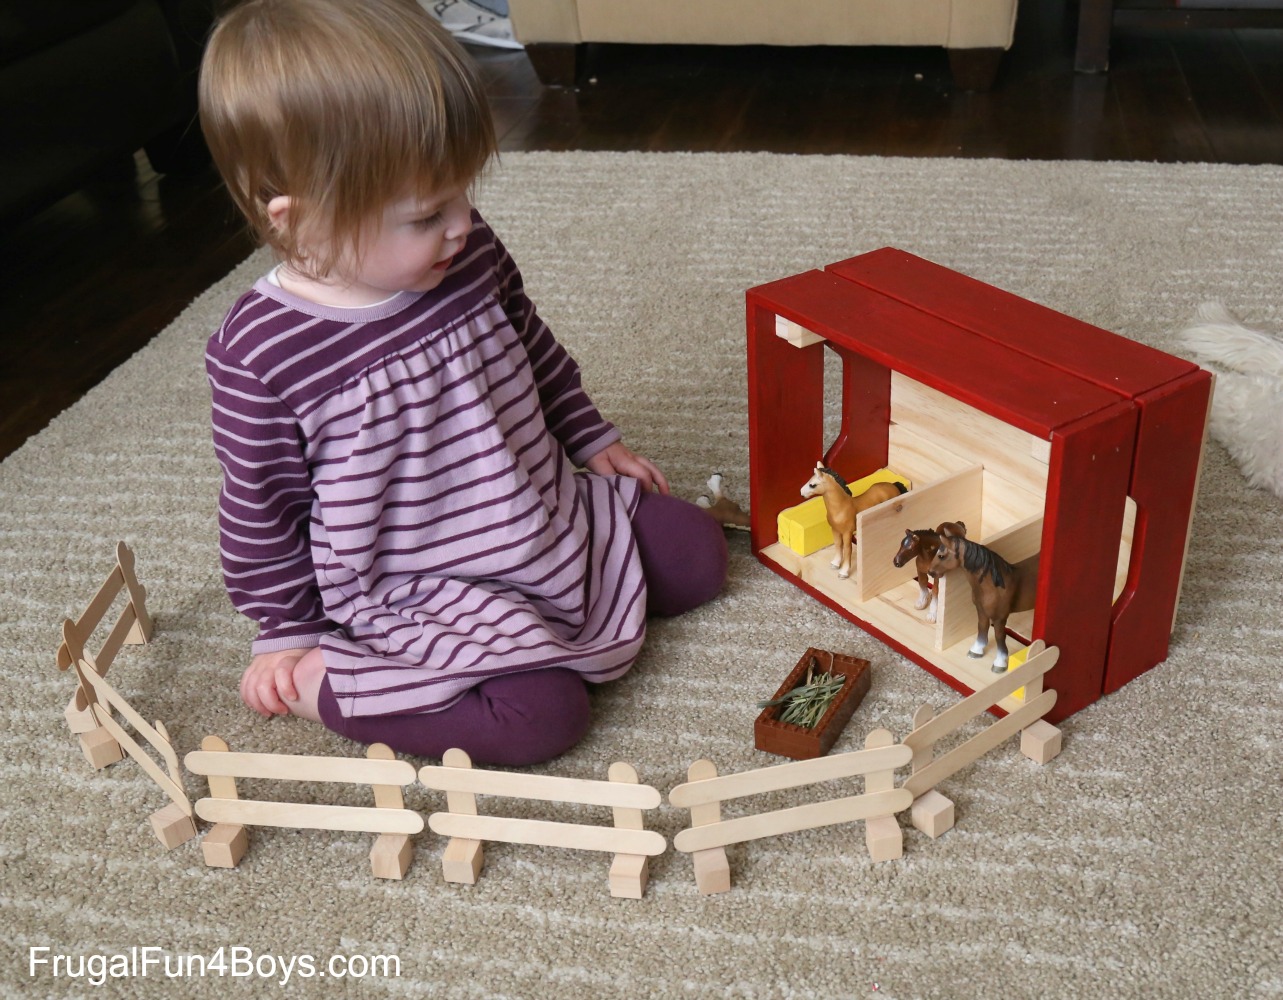
We used Legos (of course!) to build a feeding trough for the horses, and we put in some of our guinea pigs’ real hay.
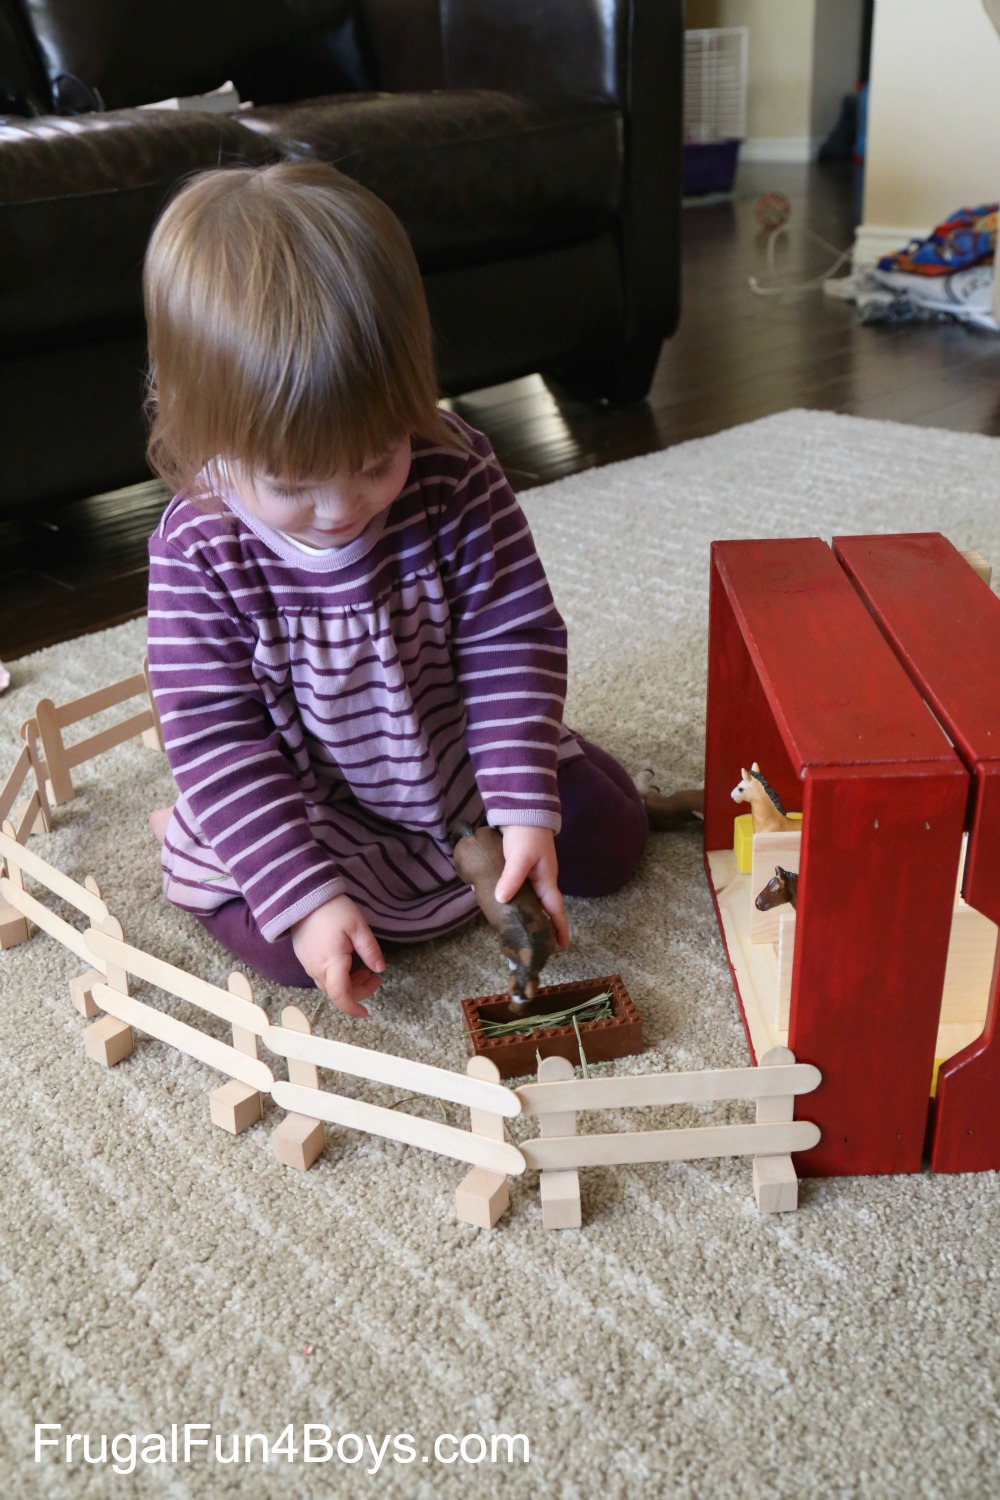
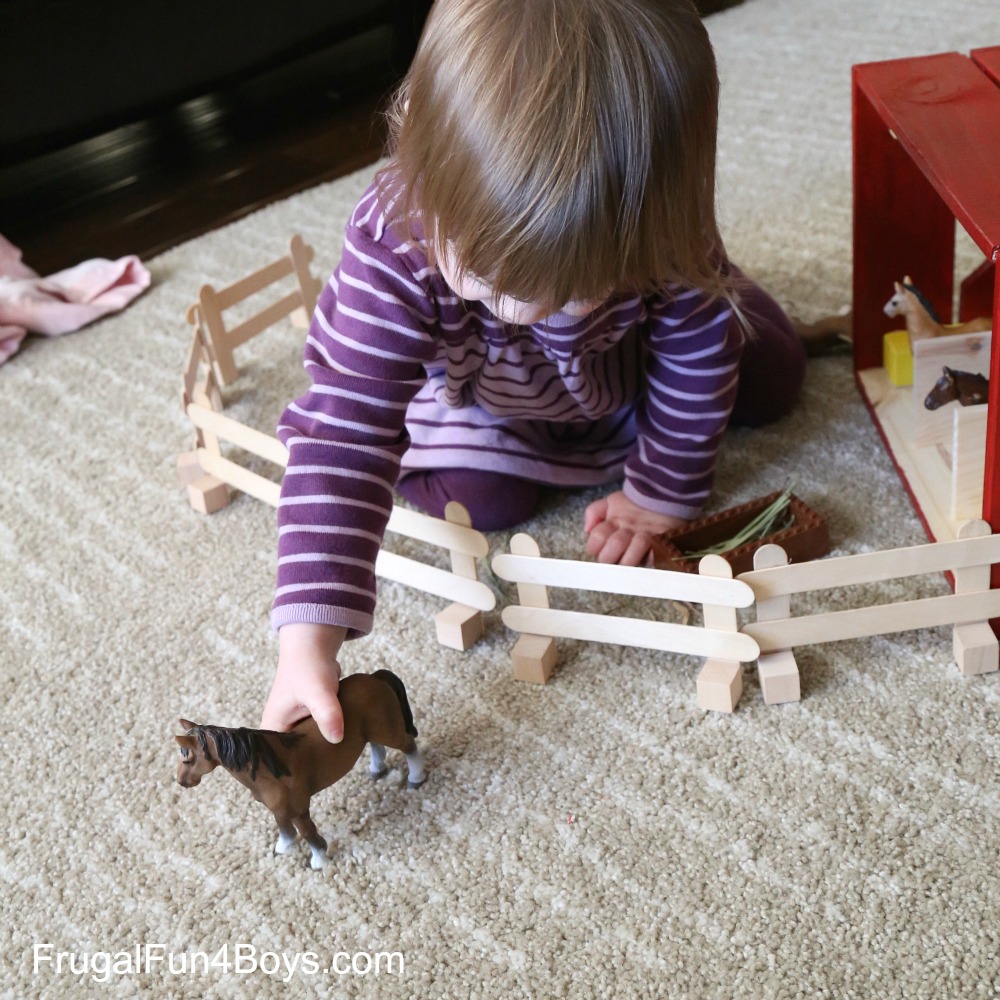
But the grass was greener on the other side of the fence, of course. (This photo cracks me up!)
To make the horse stable, you will need:
- IKEA knagglig small box
- Red acrylic paint
- Yellow acrylic paint
- Spray on clear coat (I used Krylon matte finish)
- Wood glue
- Craft wood – I bought it at Michael’s. The pieces of wood are 3 inches wide. I’m not sure how long they were, maybe 8 inches? We cut them down with a saw to fit the box.
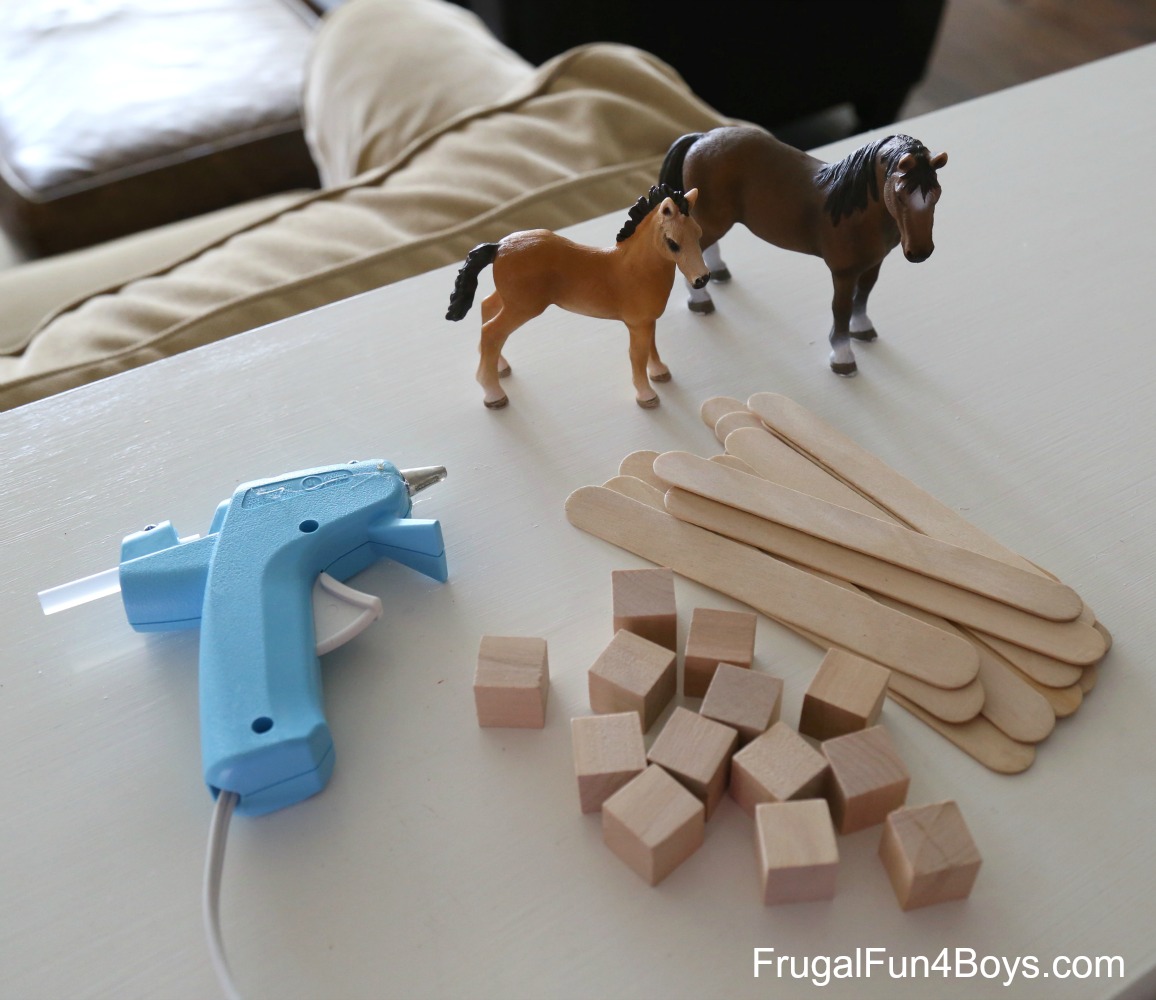
- Jumbo craft sticks
- Wooden cubes – 3/4 inch (These are cheaper at Michael’s or Hobby Lobby and you don’t have to get so many. But if you order this 100 pack, I have other ideas for things to do with them!)
- Hot glue gun
Here are the horses pictured: Schleich Tennessee Walker Mare, Schleich Tennessee Walker Yearling, and Schleich Clydesdale Foal
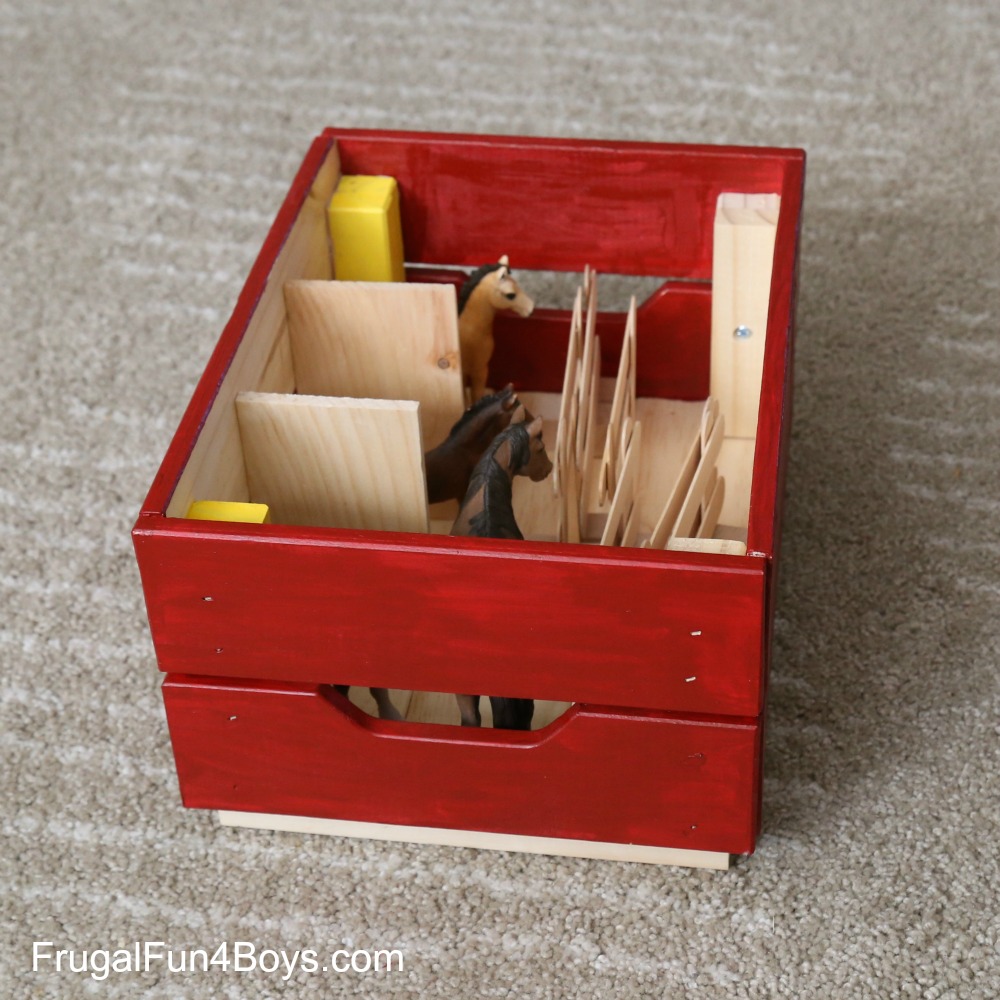
This is what the assembled box looks like:
I painted the outside of the box red, as well as the sides on the inside. I left the bottom of the box unpainted, as well as the top, bottom, and back of the box on the inside. The box has rectangular wood pieces in each corner to hold it together, so I painted those yellow to look like bales of hay.
Then my husband cut the craft wood to the right length with a saw.
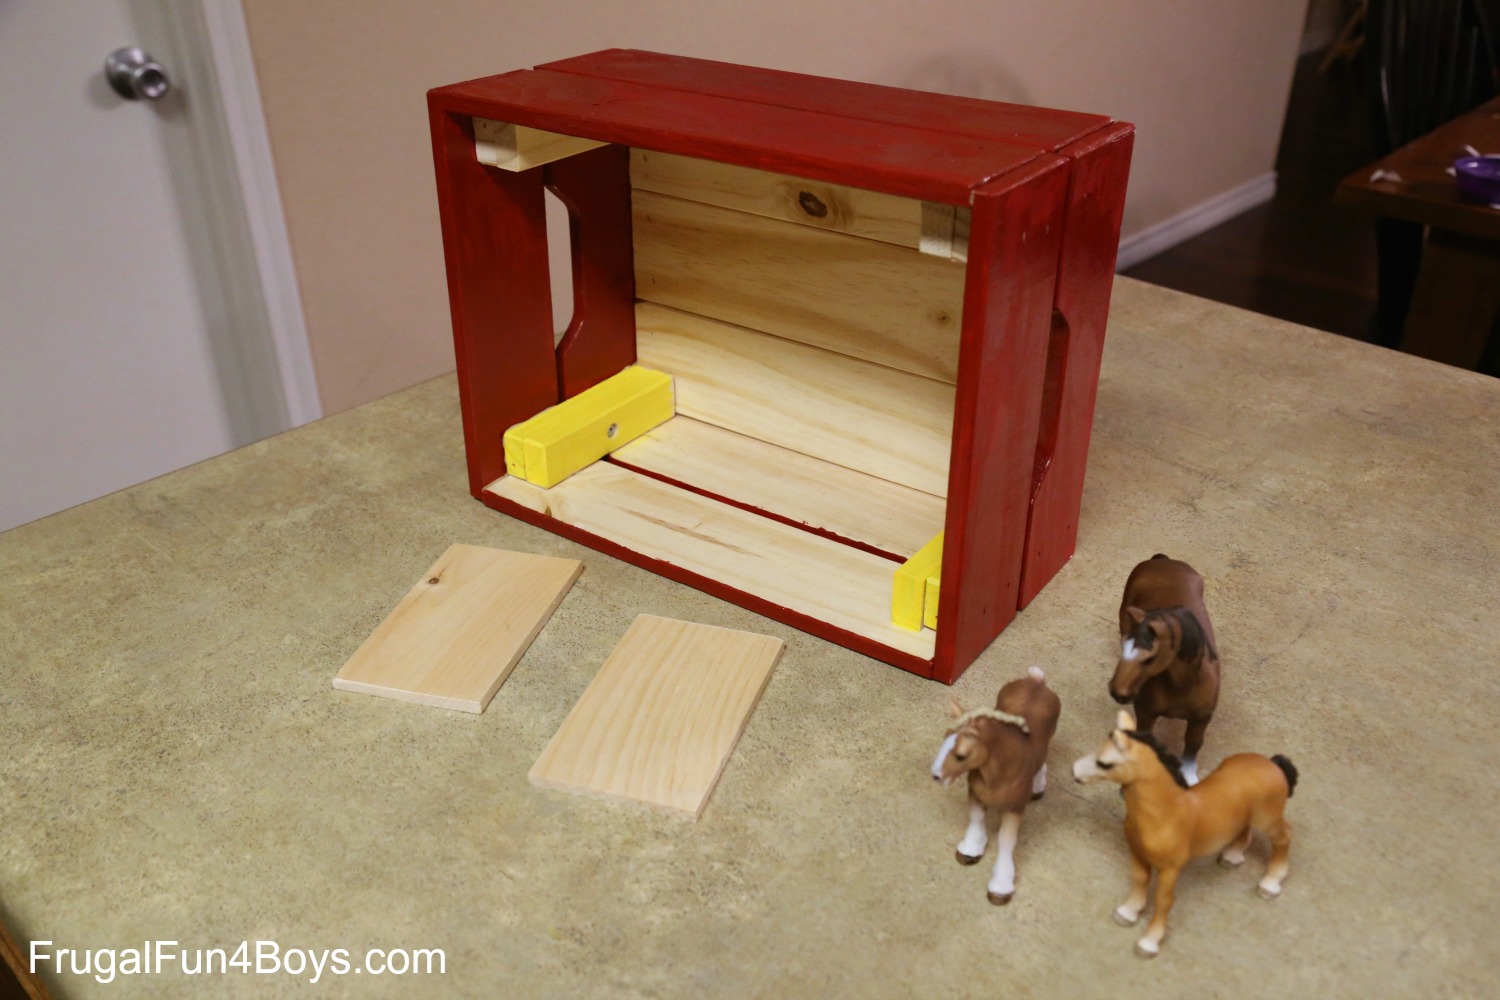
I glued the craft wood in place with some wood glue and let it dry. Then I sprayed the box with Krylon brand matte finish spray. Acrylic paint is sort of sticky when it dries, and the spray makes it much more durable.
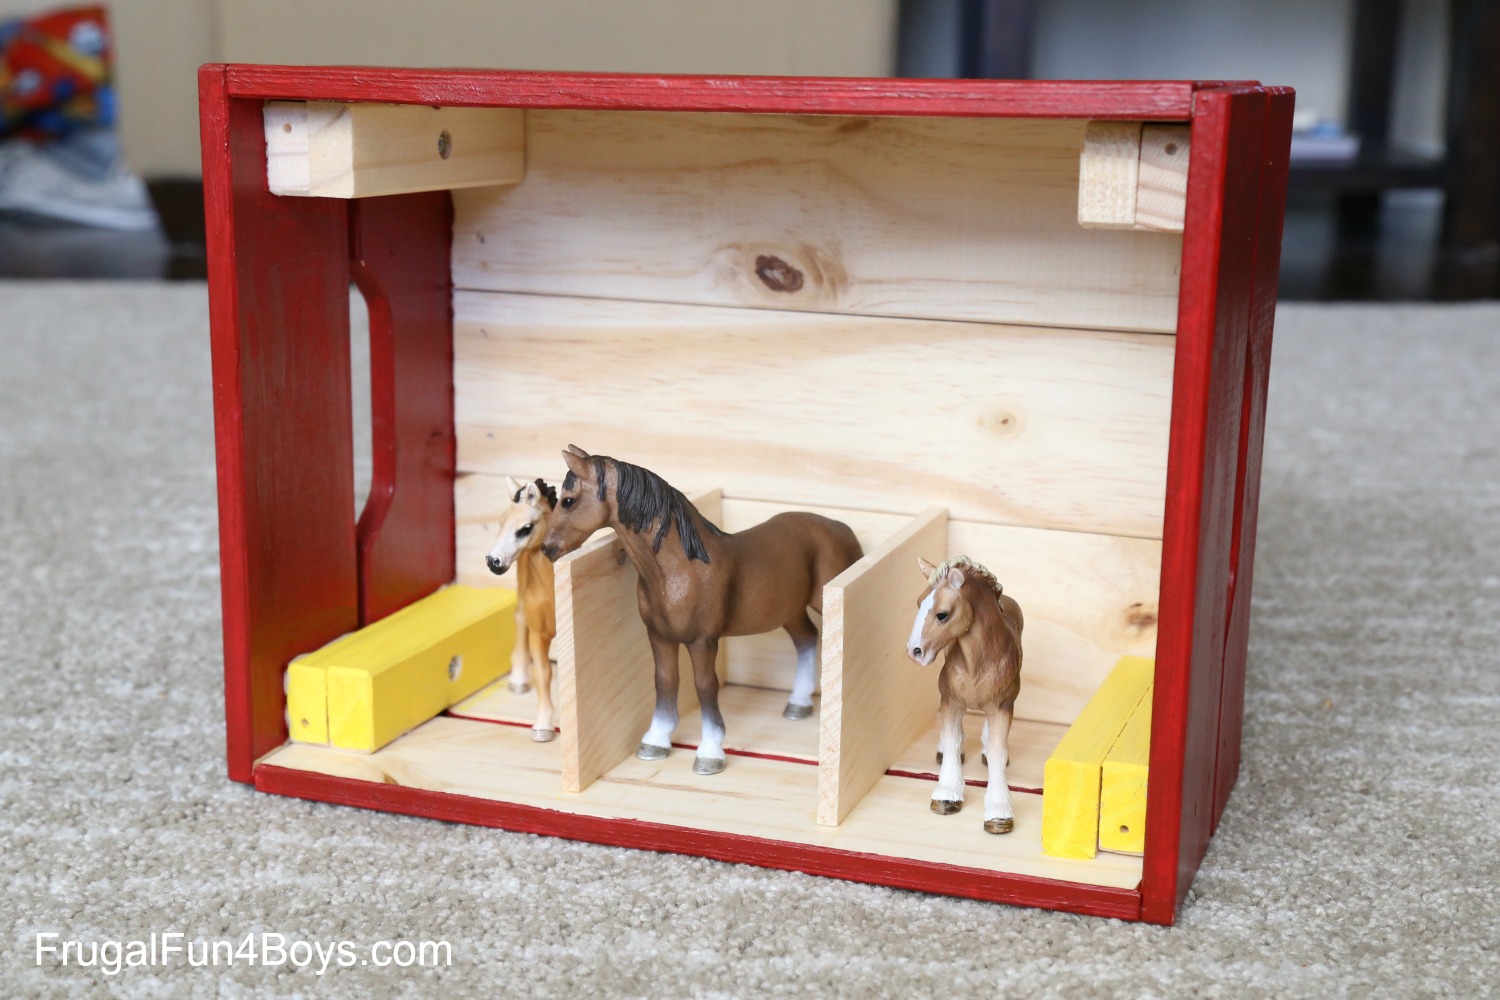
For the fence sections, I used craft sticks, wood cubes (3/4 inch square), and hot glue. I cut the craft sticks down to a better length with scissors.
The completed stable is perfect for imaginative play! Add other farm animals, etc. Lots of possibilities!
Everything fits inside the box for easy storage.
This would make a great gift, and it was inexpensive to put together! I already had the paint, the craft sticks, and the wooden cubes, so all we bought was the box, the craft wood, and the horses. I also bought the clear coat spray, but that is something that we use often anyway (Awana boats and Grand Prix cars!).
2 Comments
S Palmer Apr 20, 2018
Very good idea!
Gina Oct 4, 2018
I just made this for my daughter and she loves it. Thank you for sharing your idea!
Post a Comment