
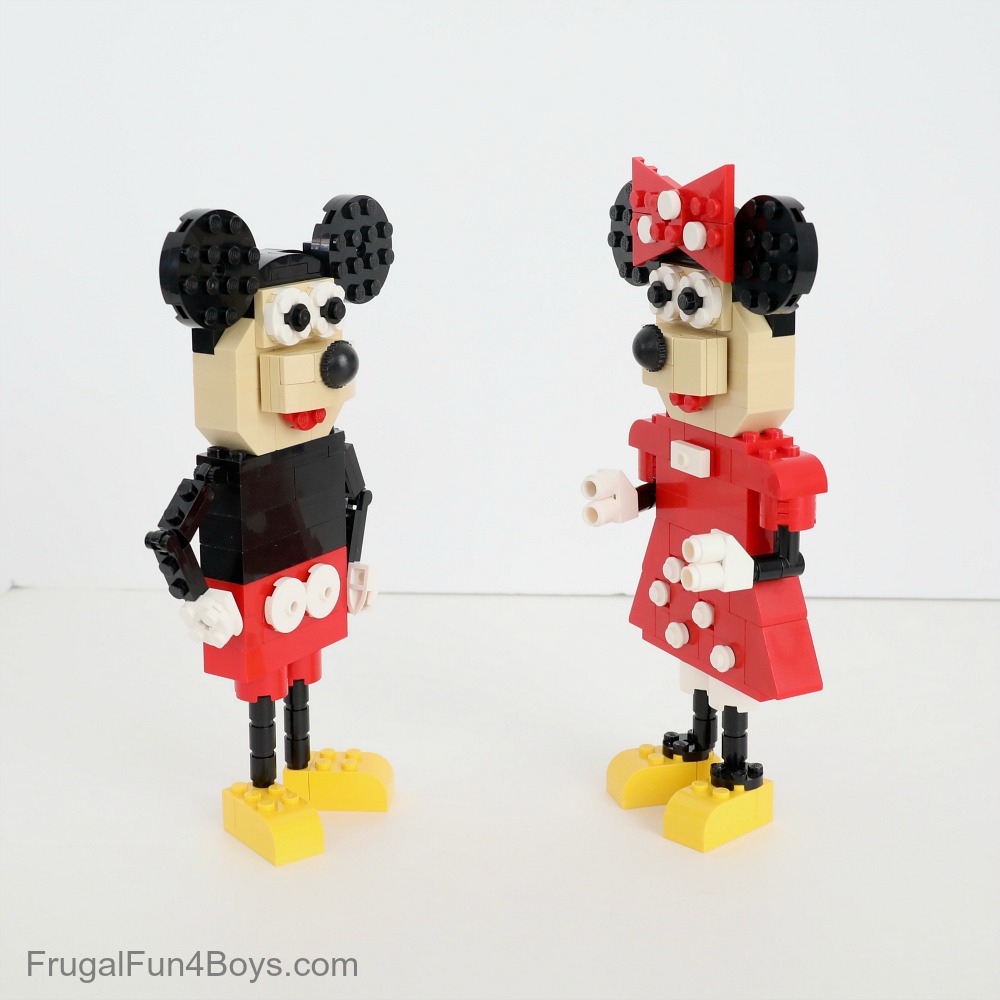
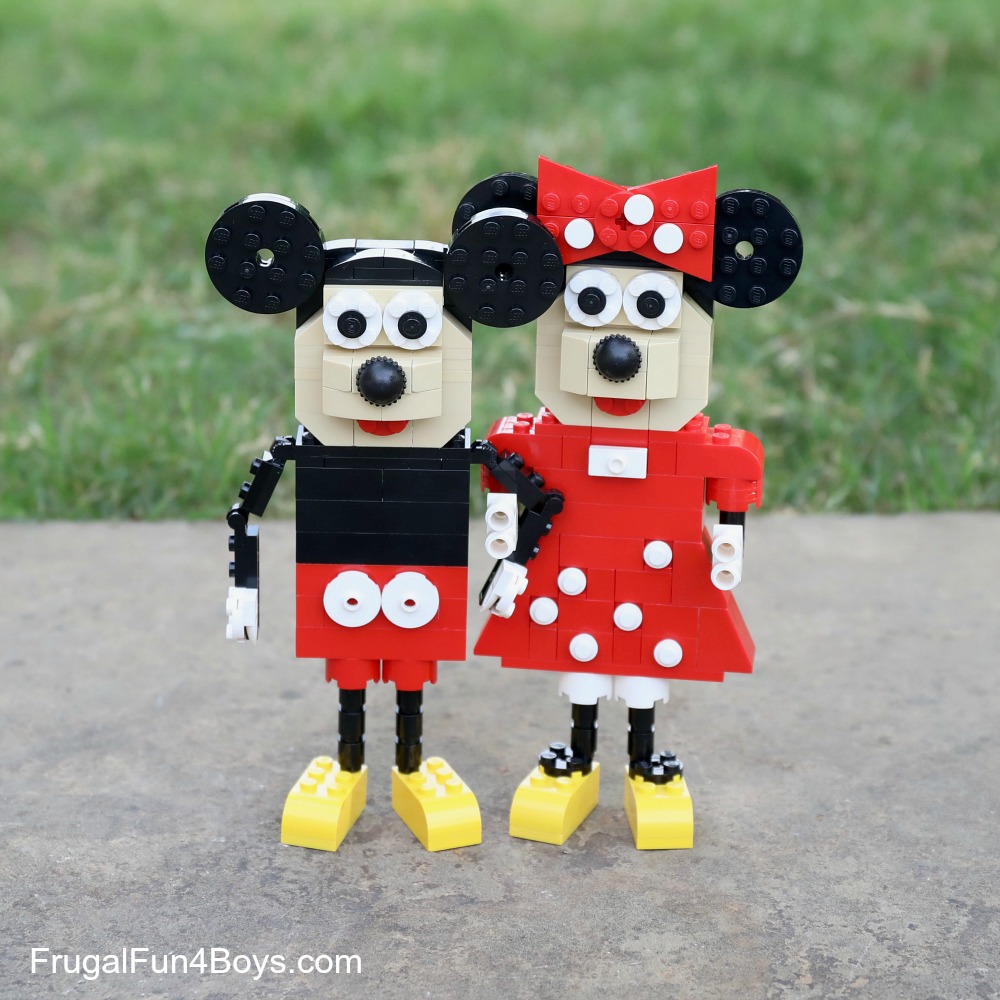
Today we’re going to show you how to build your own adorable Mickey and Minnie Mouse characters out of LEGO bricks! These iconic mice are so fun to construct and display, and you just might be inspired to create more characters in the Disney line-up!
We worked to keep this project do-able for kids, and while you may have to order a few things to make your Mickey and Minnie just like ours, the bricks we used are not rare.
The noses on Mickey and Minnie are actually “bad guy” hats from City Police sets – ha!

We debated on whether to make Minnie’s dress pink or red, but we decided that red LEGO® bricks are in much greater supply. I also think that red is more of a classic look for Minnie Mouse.
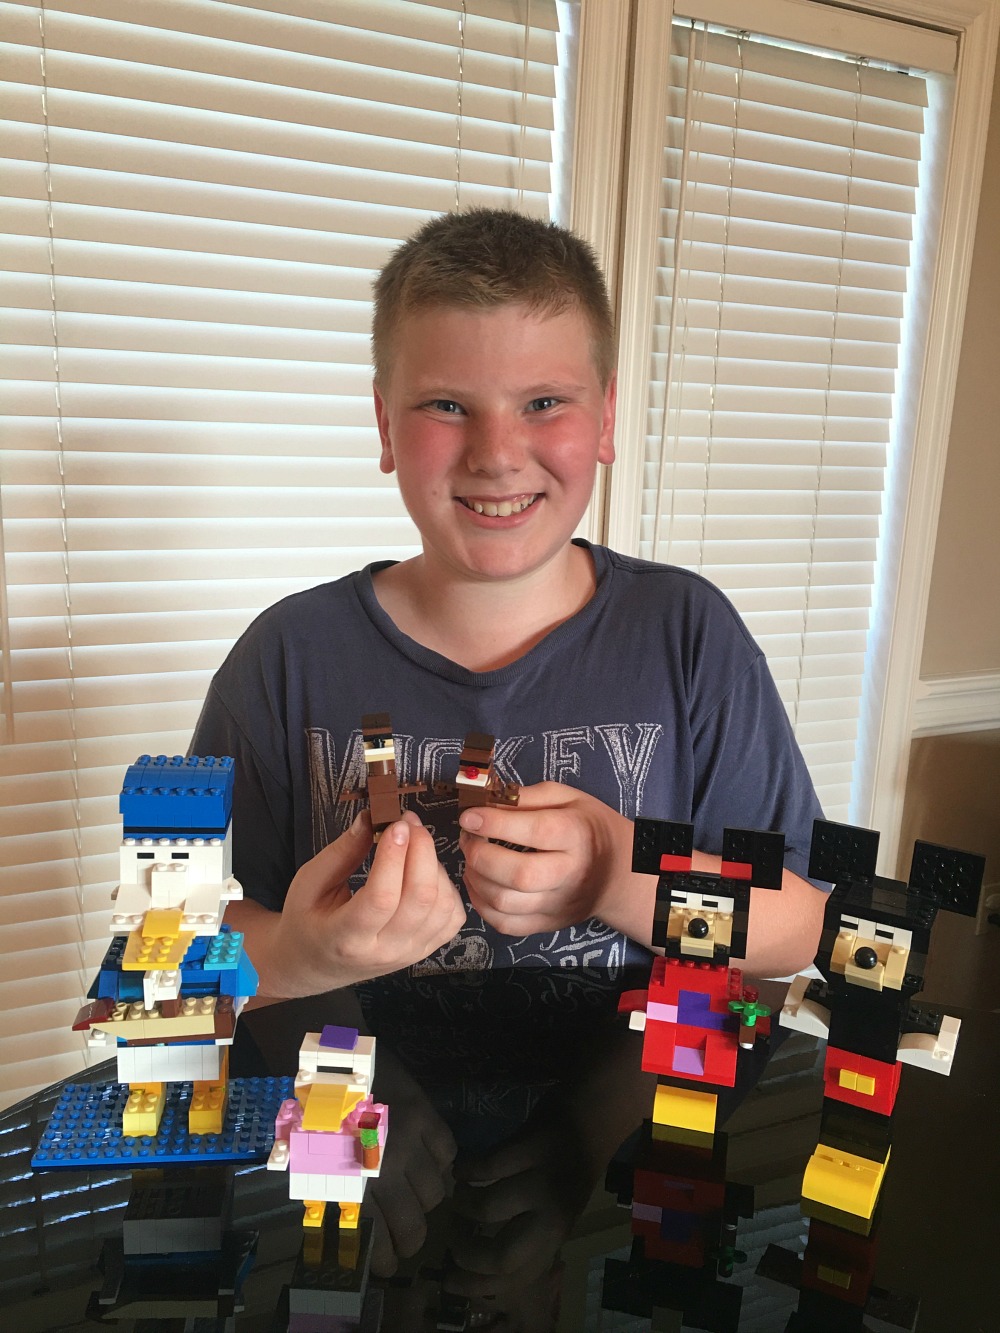
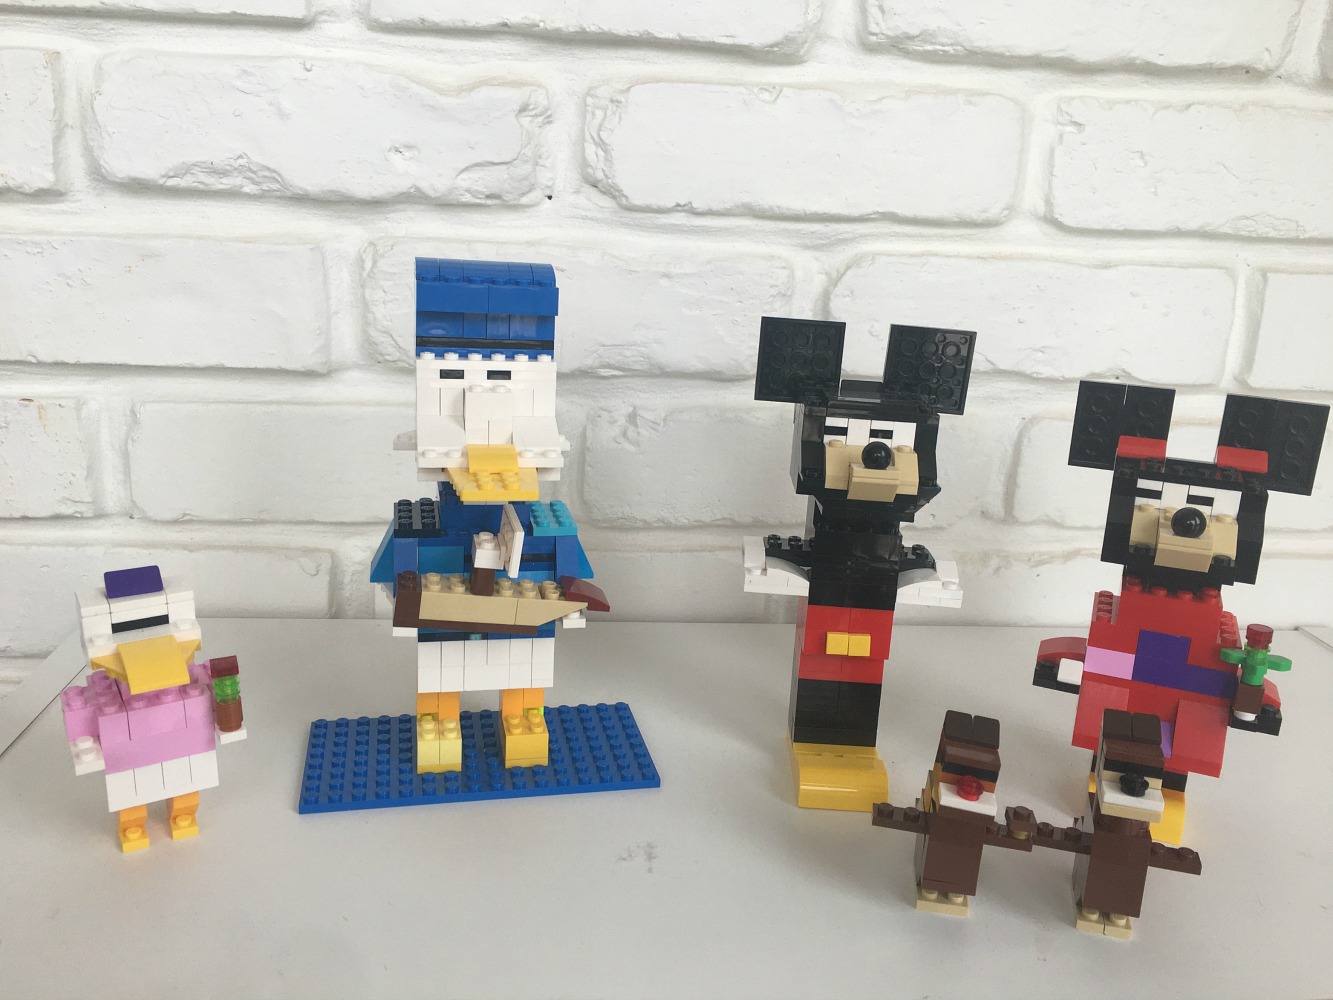
The inspiration for this idea came from a good friend of ours. Isaac is 10 years old, and he sent us a photo of his Disney creations! Look how cute these are! Mickey, Minnie, Donald, Daisy, and Chip and Dale. I’ll share another photo of Isaac’s Disney characters at the bottom of the post.
Minnie and Mickey just make me smile so much!
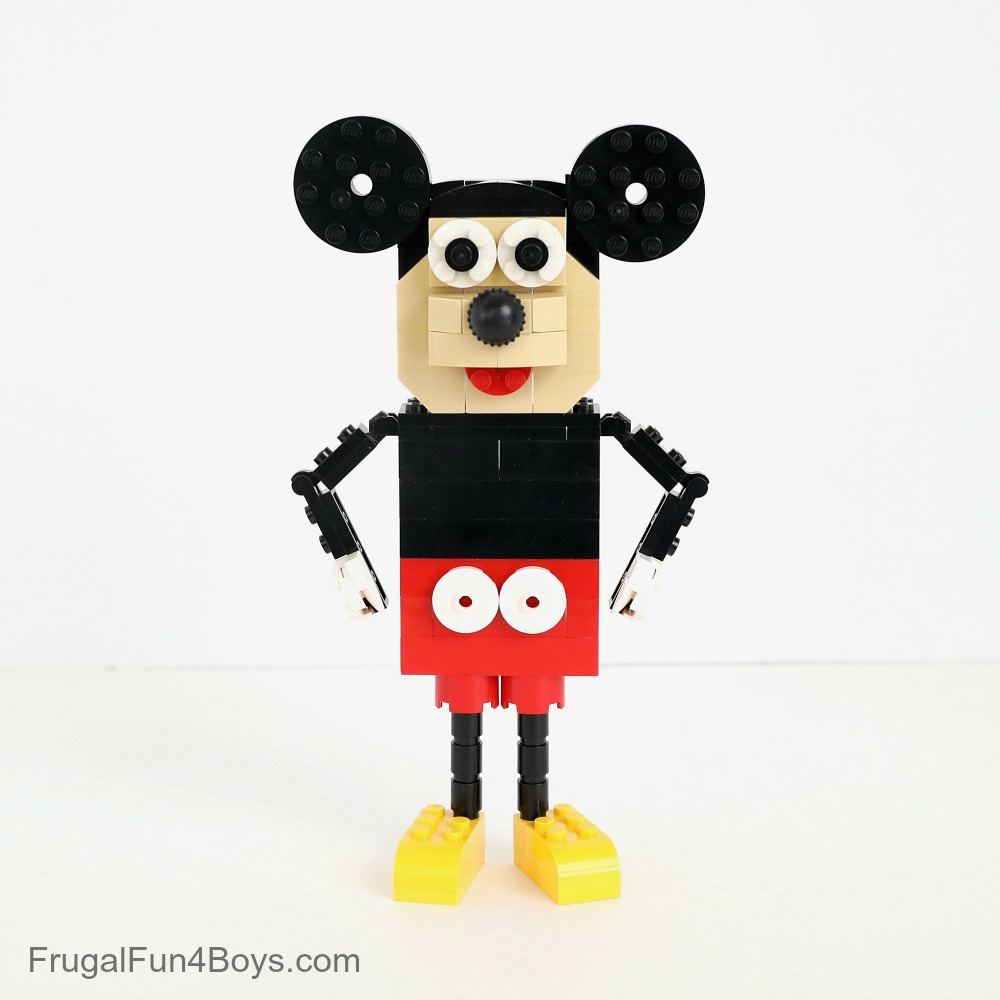
Ready to build your own LEGO® Mickey and Minnie Mouse?
I have full instructions for Mickey Mouse. Minnie’s head is the same, so you can just go through the instructions again to build another head. I’ll show the modifications needed to attach her bow, plus close-up views of her dress and instructions for her hands.
Step 1: Start with a 2 x 6 tan brick, a 2 x 2 tan brick, and two 2 x 2 tan inverted slopes.
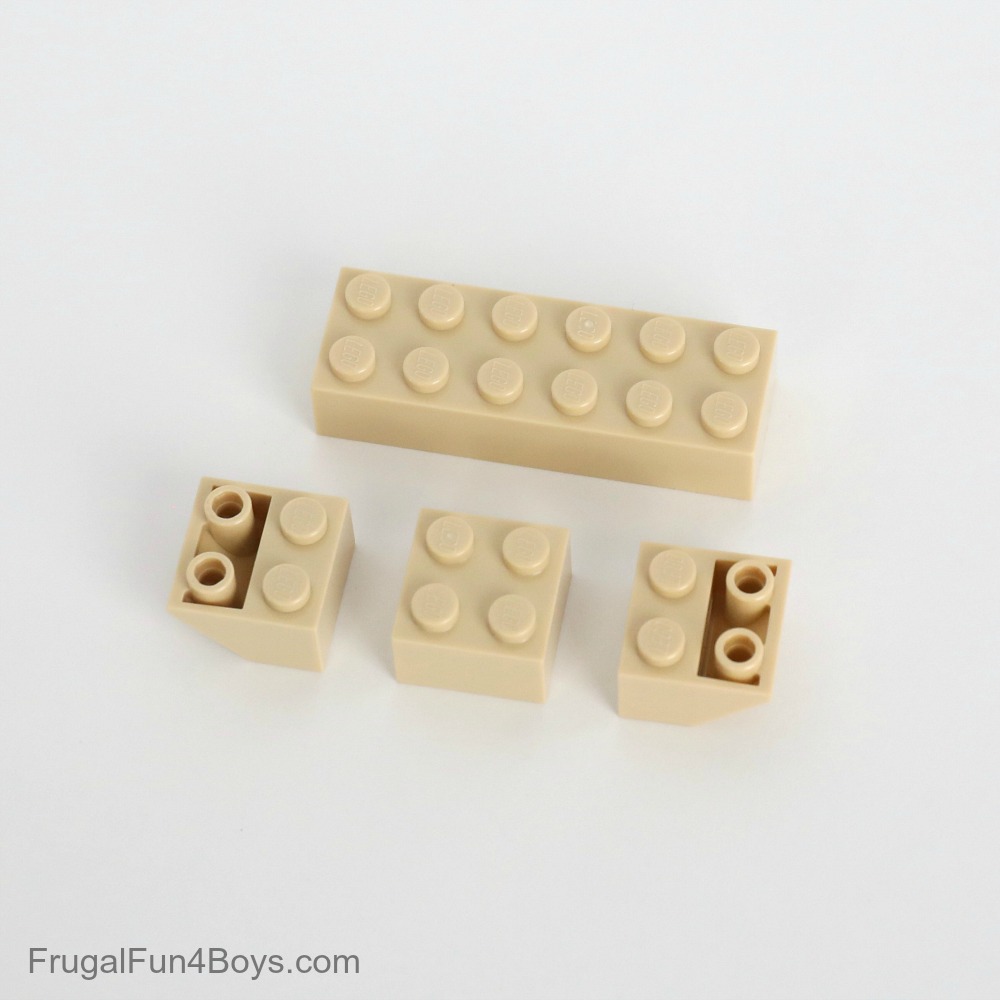
Step 2: Attach the smaller bricks by placing the 2 x 6 brick on top. Then collect the pieces shown.
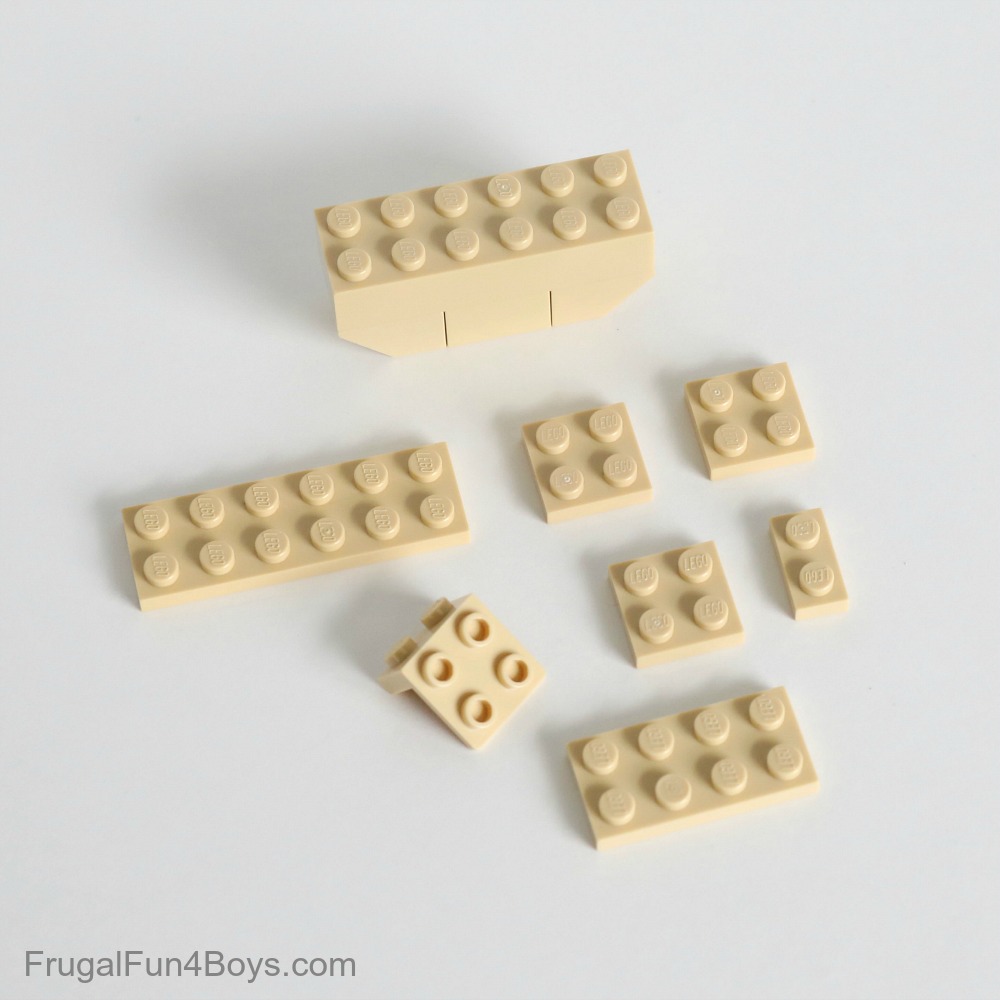
Step 3: Add two layers of plates. I used a 2 x 6 plate, a 2 x 4 plate, and a 2 x 2 plate, but you can just use two 2 x 6 plates if you have them.
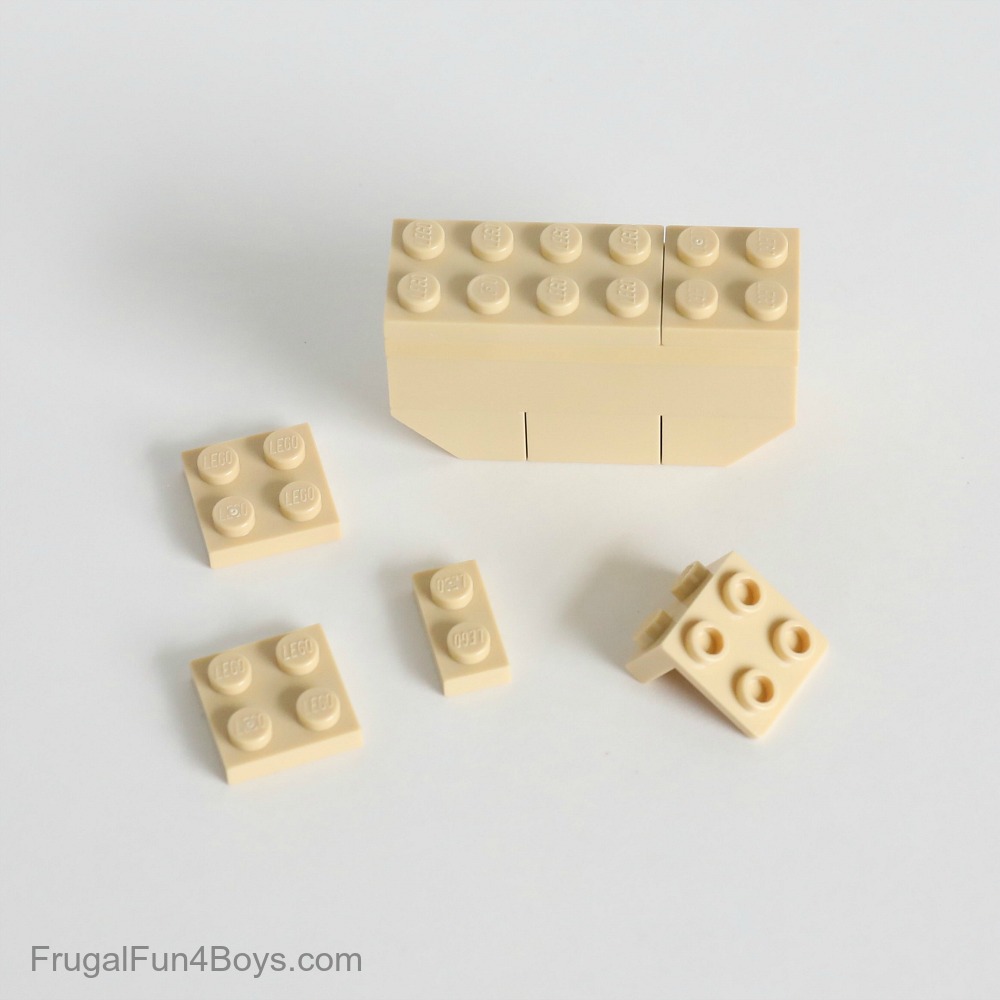
Step 4: Add the bracket to the front of the face, and then place two 2 x 2 plates and a 1 x 2 plate around it. Then find the bricks shown. The two black 1 x 1 bricks have a stud on one side.
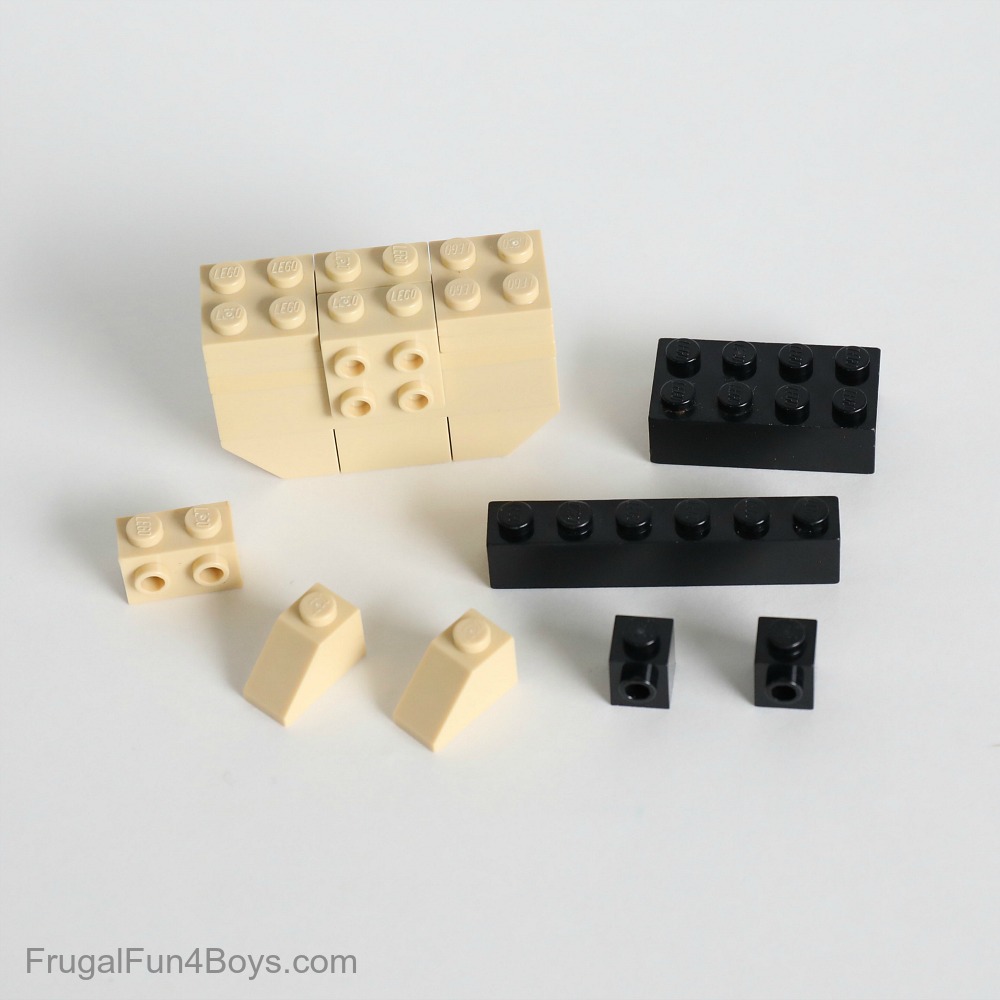
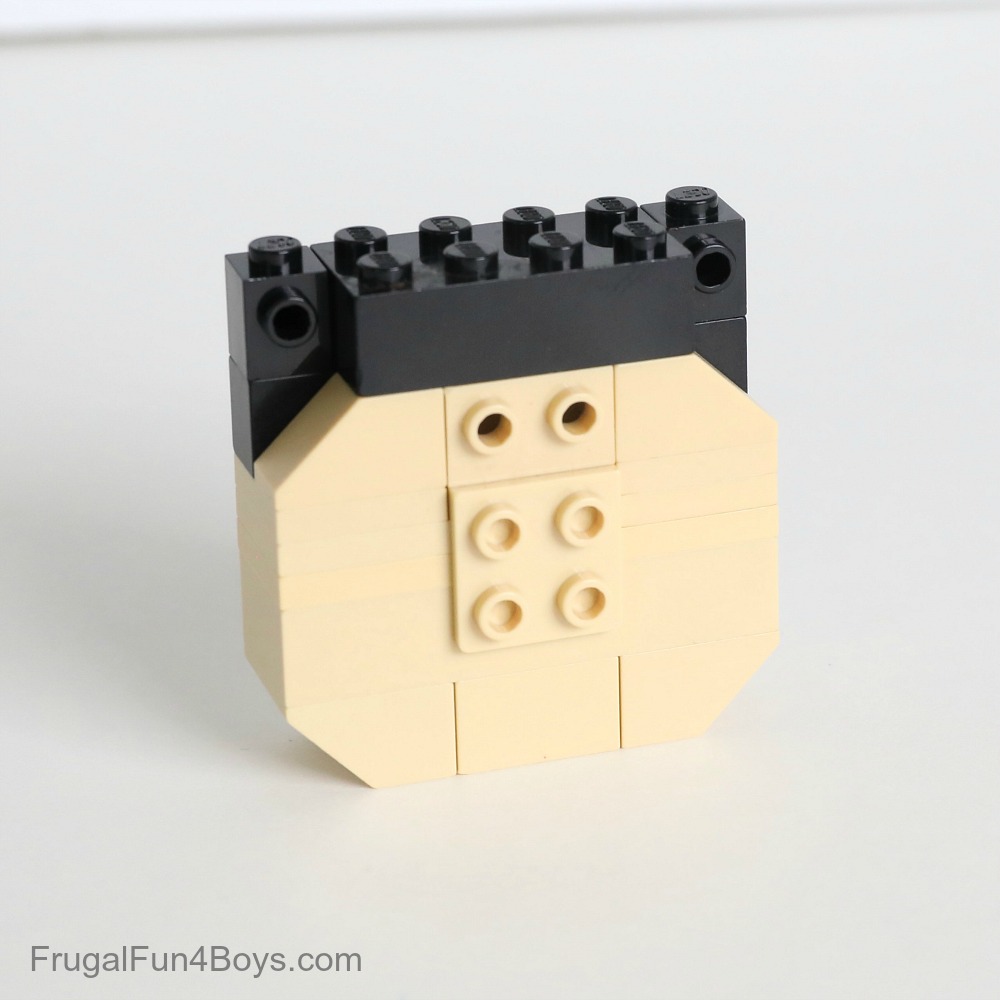
Step 5: Add a 1 x 2 tan brick with two studs on the side just above the bracket. Then place a 1 x 6 black brick behind it. If you don’t have the 1 x 2 tan brick with 2 studs on the side, just use two 1 x 1’s.
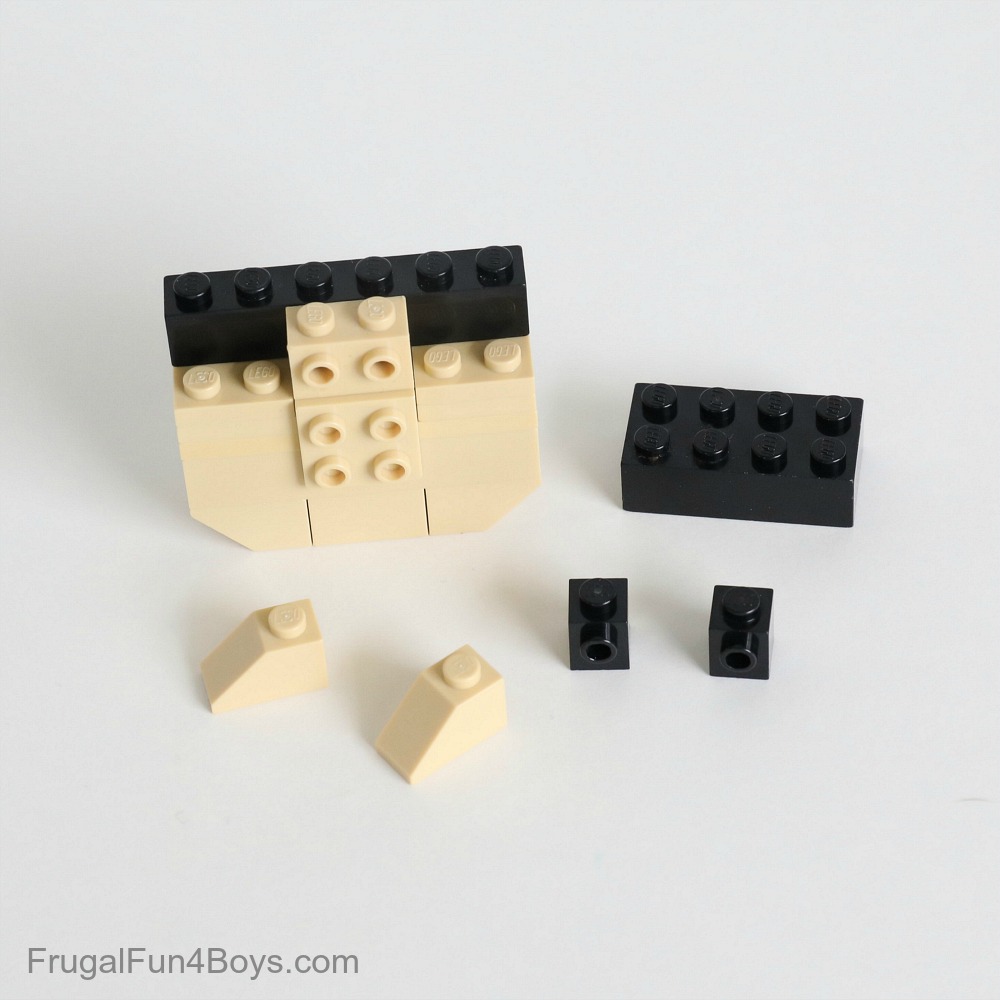
Step 6: Place a 1 x 2 tan slope on each side of the head, and then add the 2 x 4 black brick. Put a 1 x 1 black brick with a stud on the side on each side of the head. These will hold Mickey’s ears.
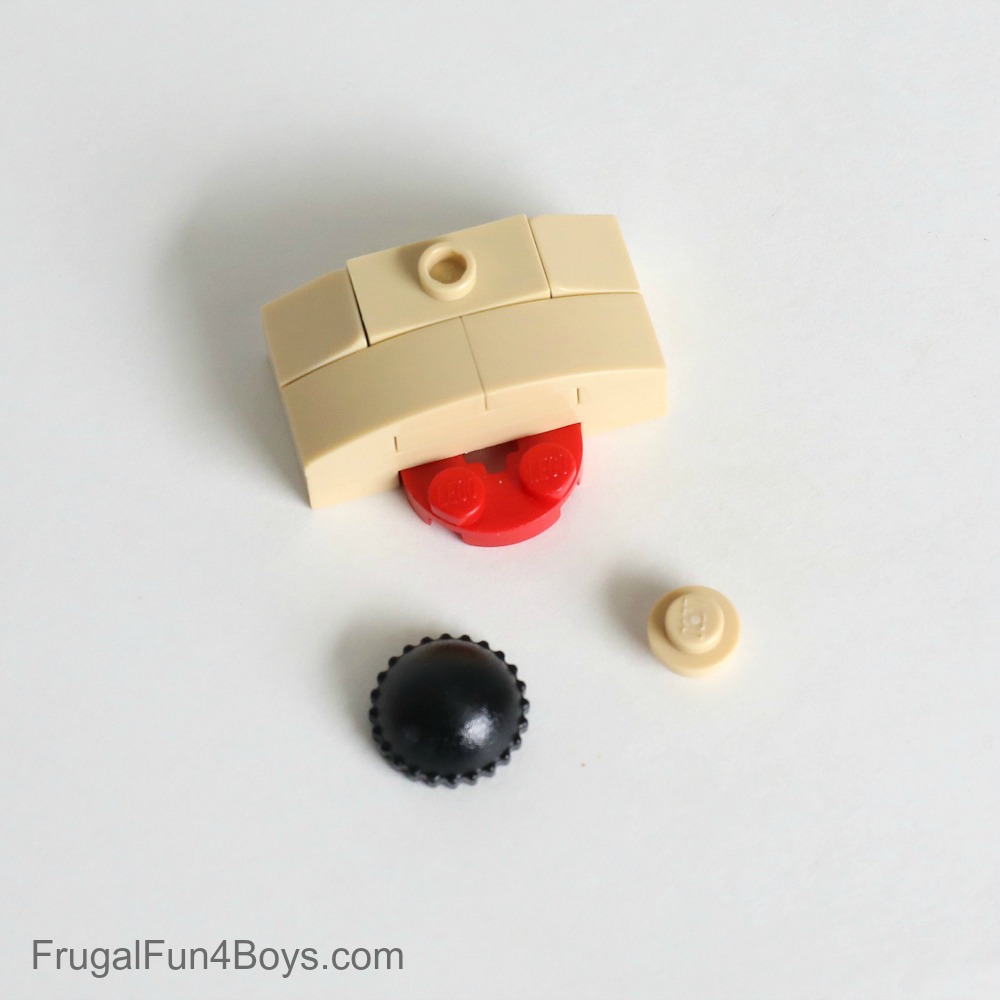
Step 7: Gather the pieces shown for building Mickey’s nose. That black piece is a “bad guy” hat for a minifigure.

Step 8: Turn a 2 x 4 tan plate upside down. Add three 1 x 2 tan plates and a 2 x 2 red round plate.
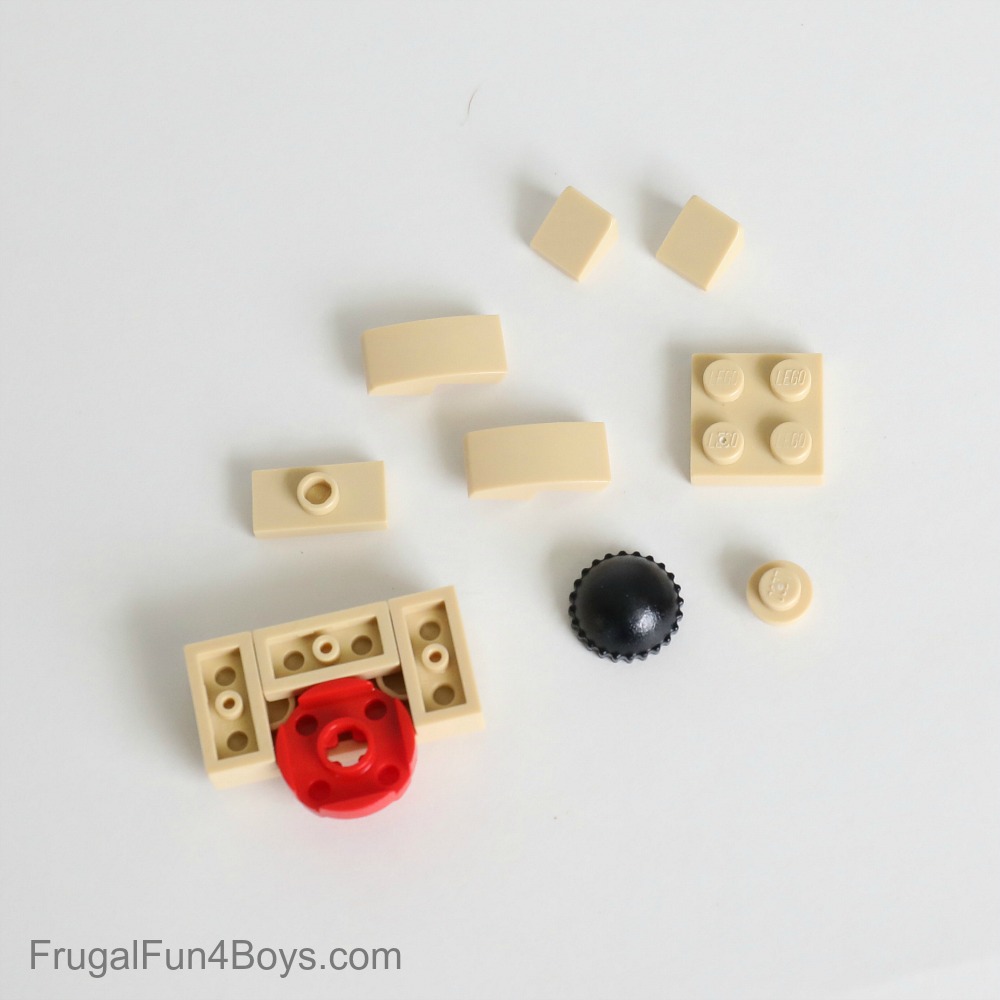
Step 9: Flip it over, and add a 2 x 2 tan plate.
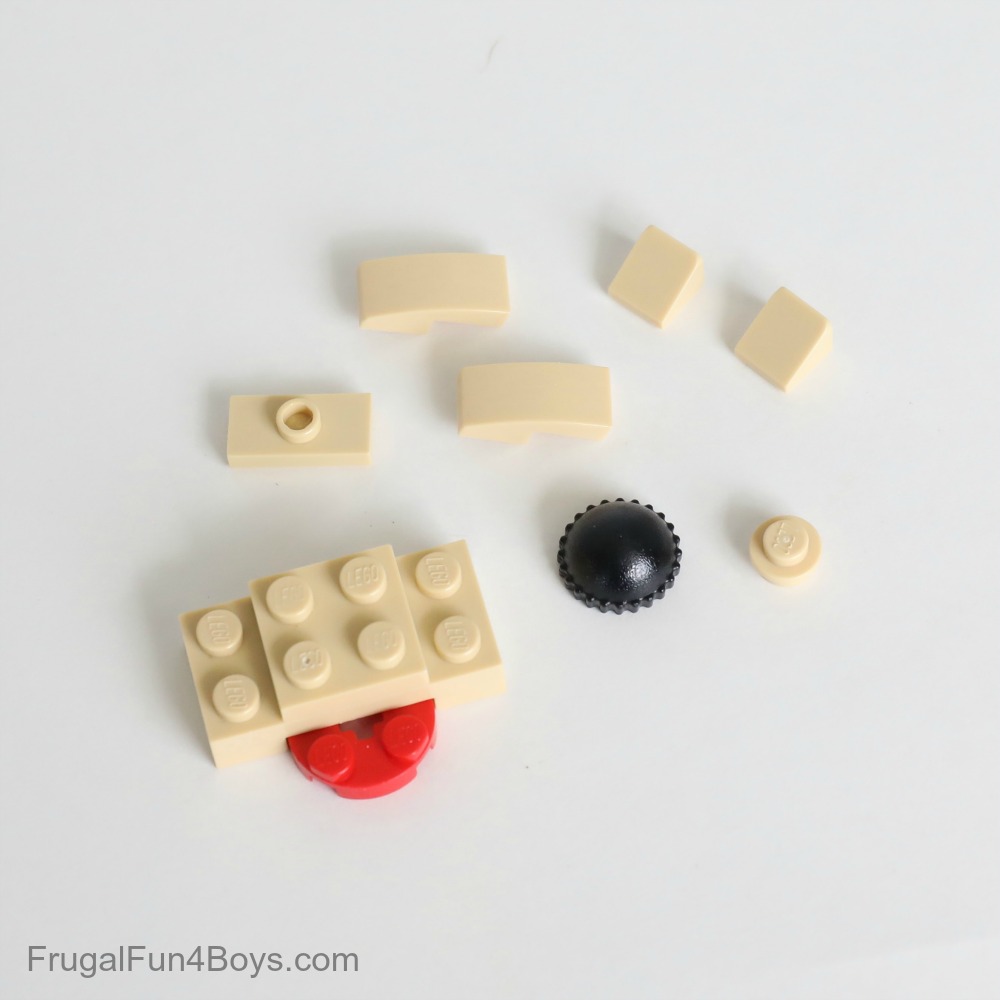
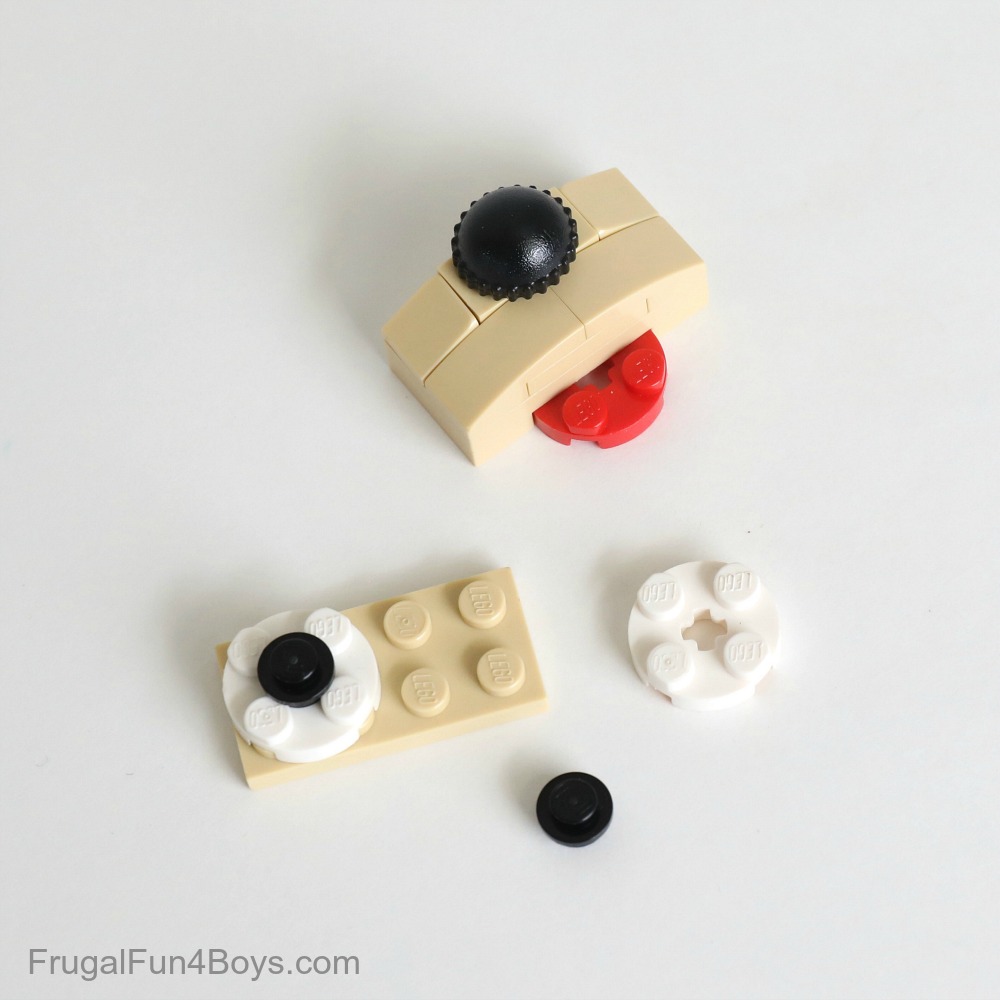
Step 10: Add two 1 x 1 tans slopes and a 1 x 2 plate with one stud on top. Just above the mouth, add two 1 x 2 tan curved slopes.
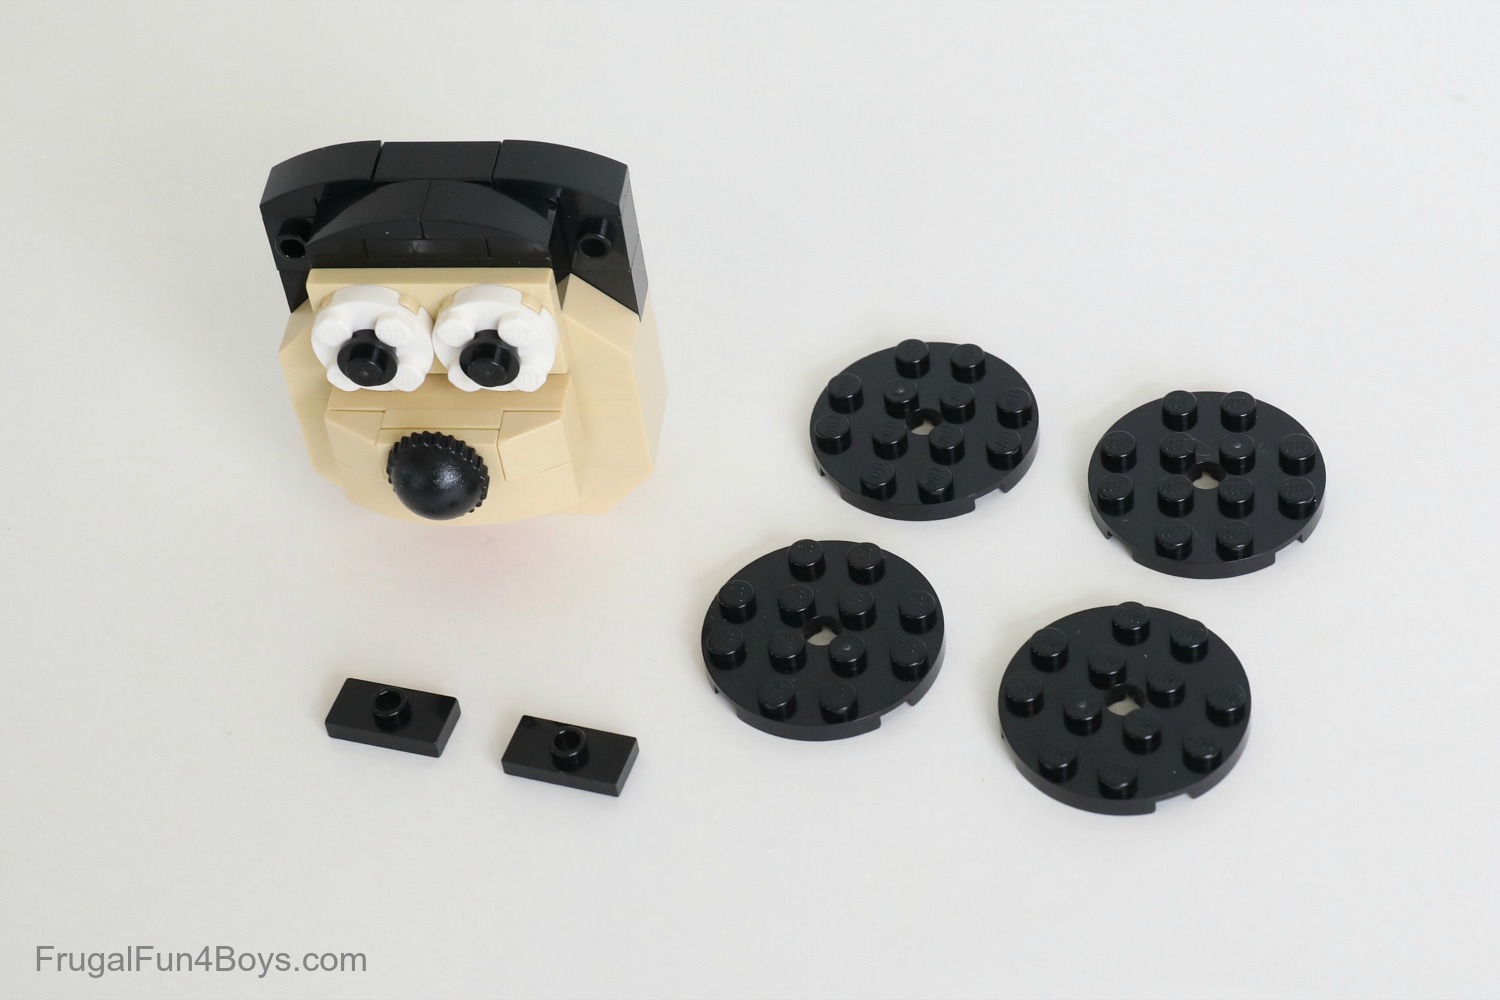
Step 11: Put the 1 x 1 tan round plate on top of the 1 x 2 plate with one stud (jumper plate). Then add the nose. Next, build the eyes. Grab a 2 x 4 tan plate. Use a 2 x 2 white round plate and a 1 x 1 black round plate for each eye.
Step 12: Find the bricks shown for building the top of Mickey’s head. This will make it a little more rounded.
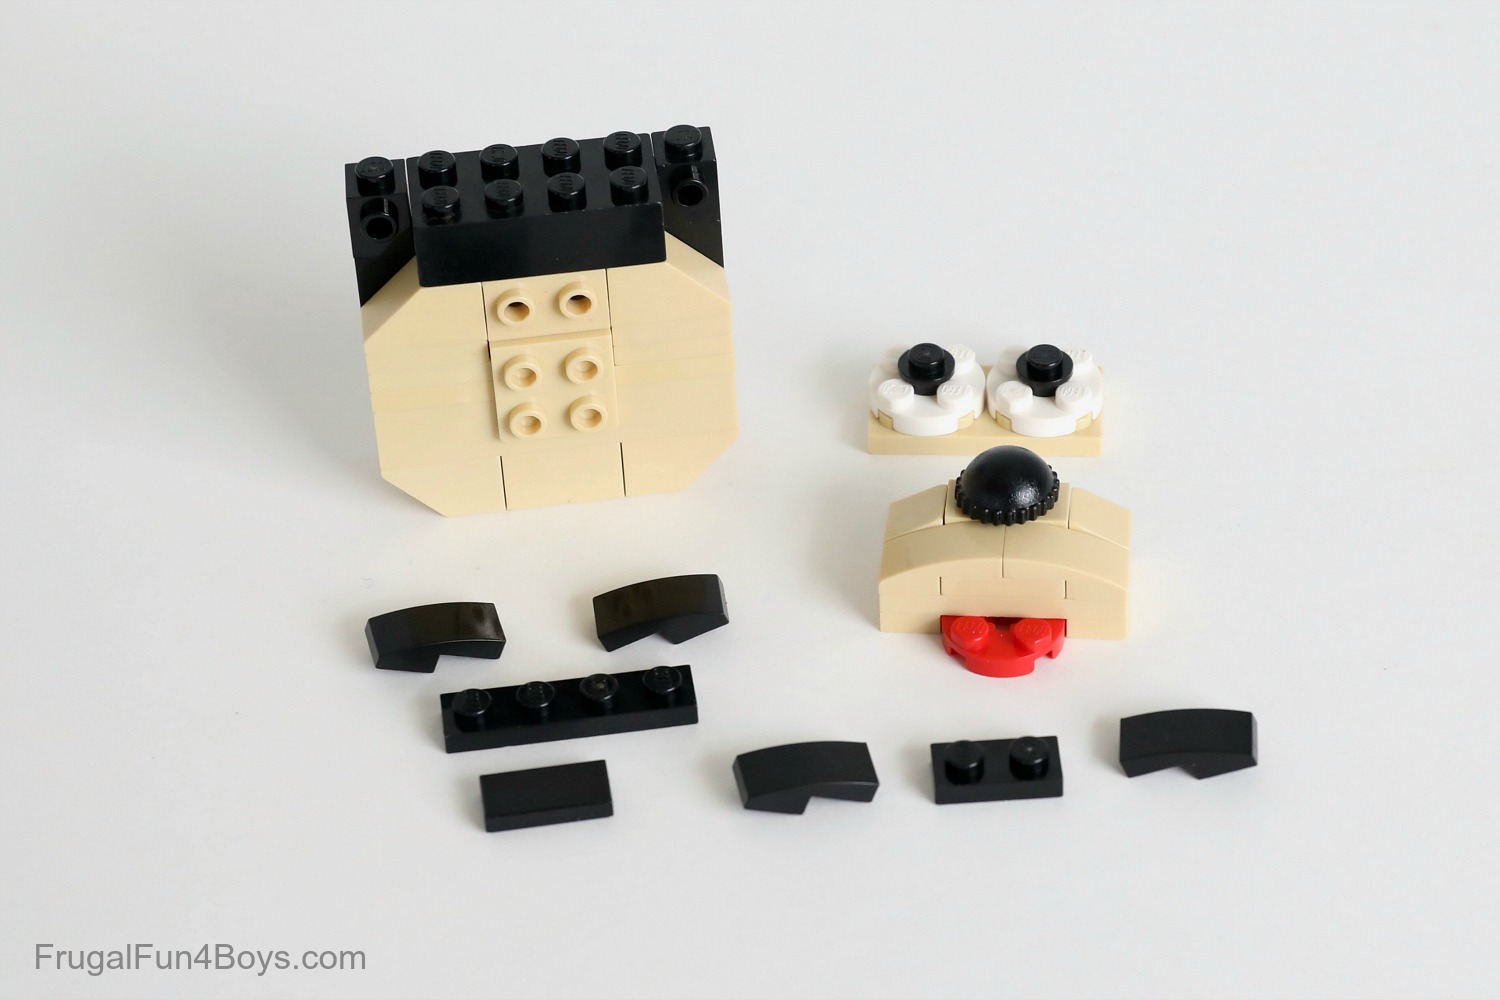
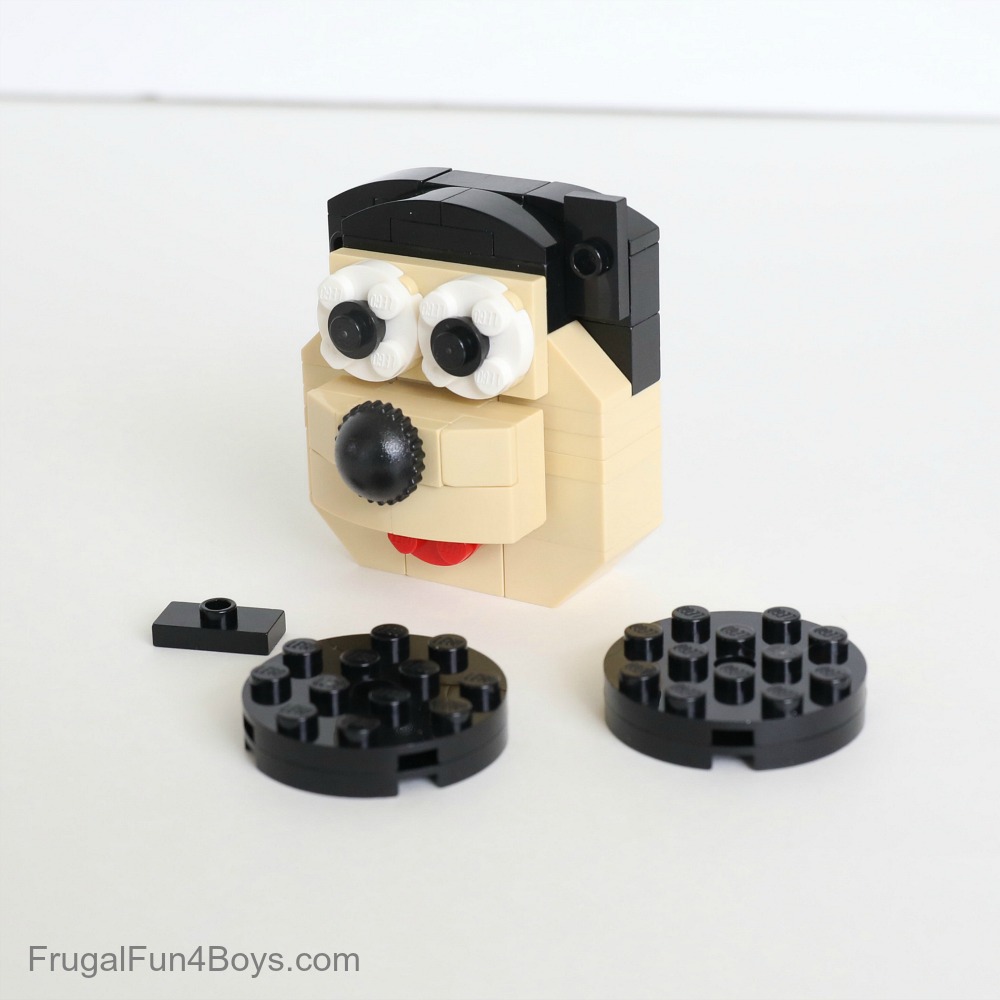
Step 13: Attach a 1 x 4 black plate in the center of the back of the head. Then add two 1 x 2 curved slopes and a 1 x 2 black tile.
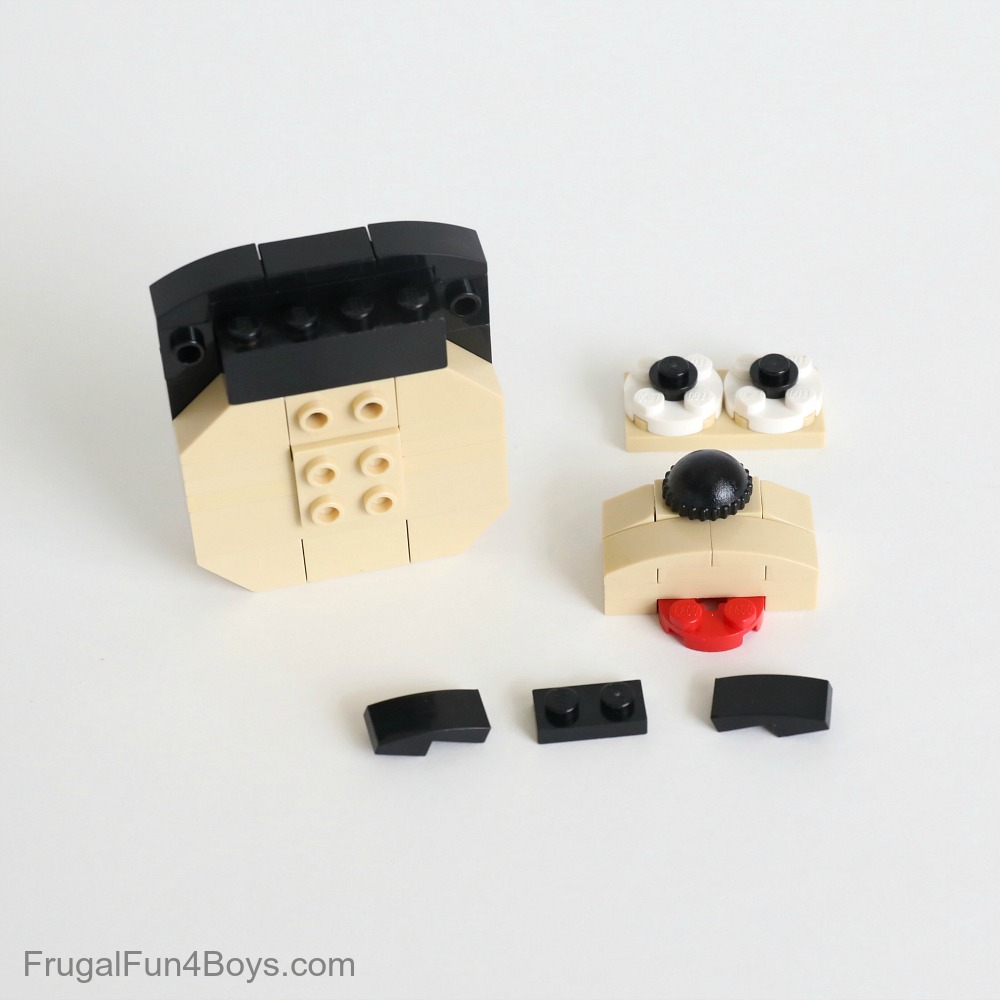
Step 14: Add a 1 x 2 black plate and two 1 x 2 black curved slopes on the front of the head. Then find two black 1 x 2 plates with one stud on top (jumper plates) and four 4 x 4 black round plates for the ears.
It will definitely work to use only one round plate for each ear. We just like the look better with two. You can always order these from Brick Link if needed.
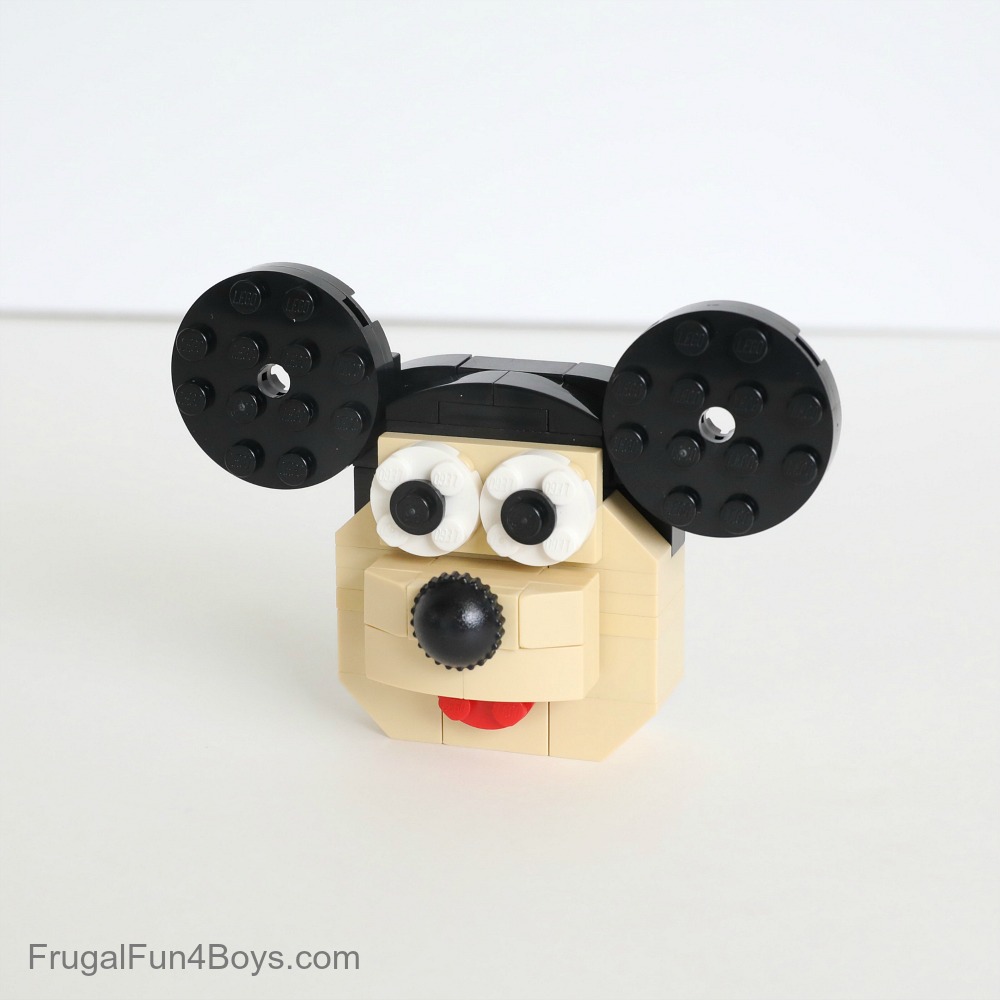
Step 15: Attach a 1 x 2 plate with one stud on top (jumper plate) to the 1 x 1 brick with a stud on the side. Do this on each side of the head.
Step 16: Attach the ears to the jumper plates.
Step 17: Now it’s time to build Mickey’s body. The body is three layers of red bricks, and then three layers of black bricks. Use a 1 x 4 red brick with 4 studs on the side in the middle red layer.
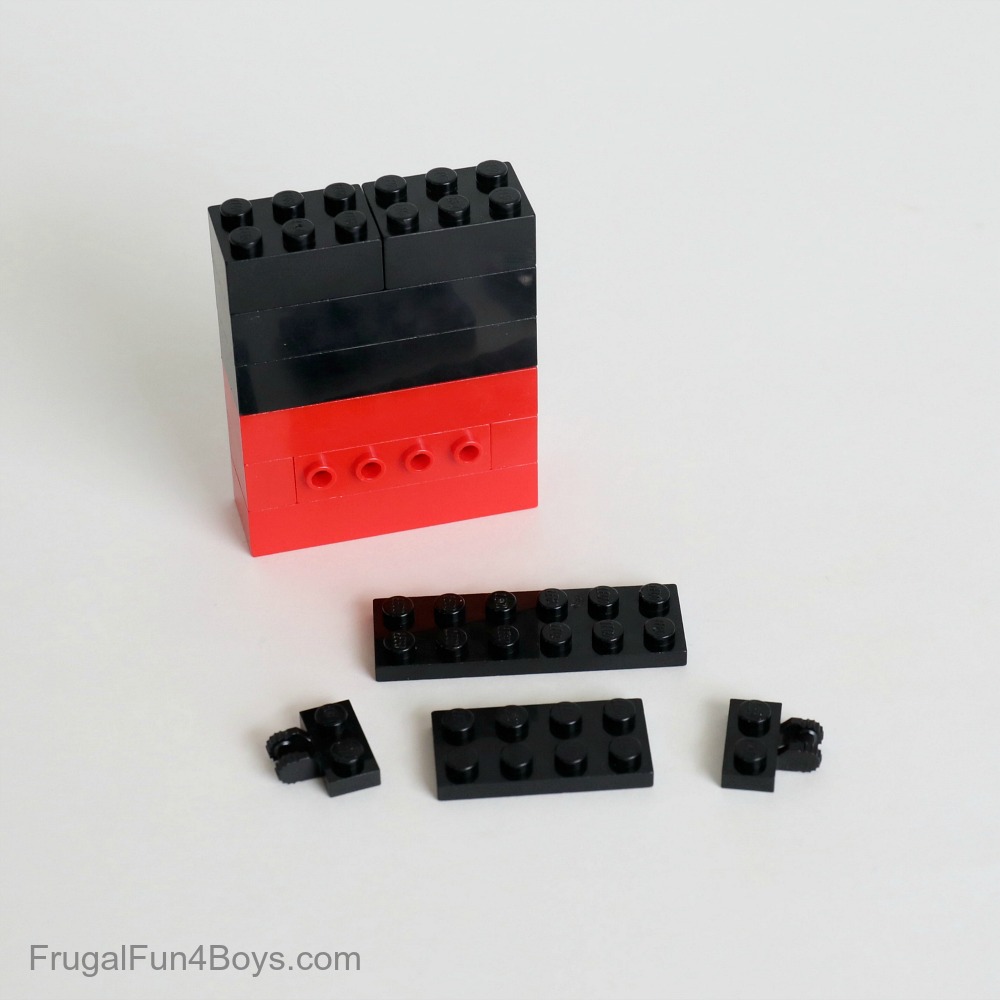
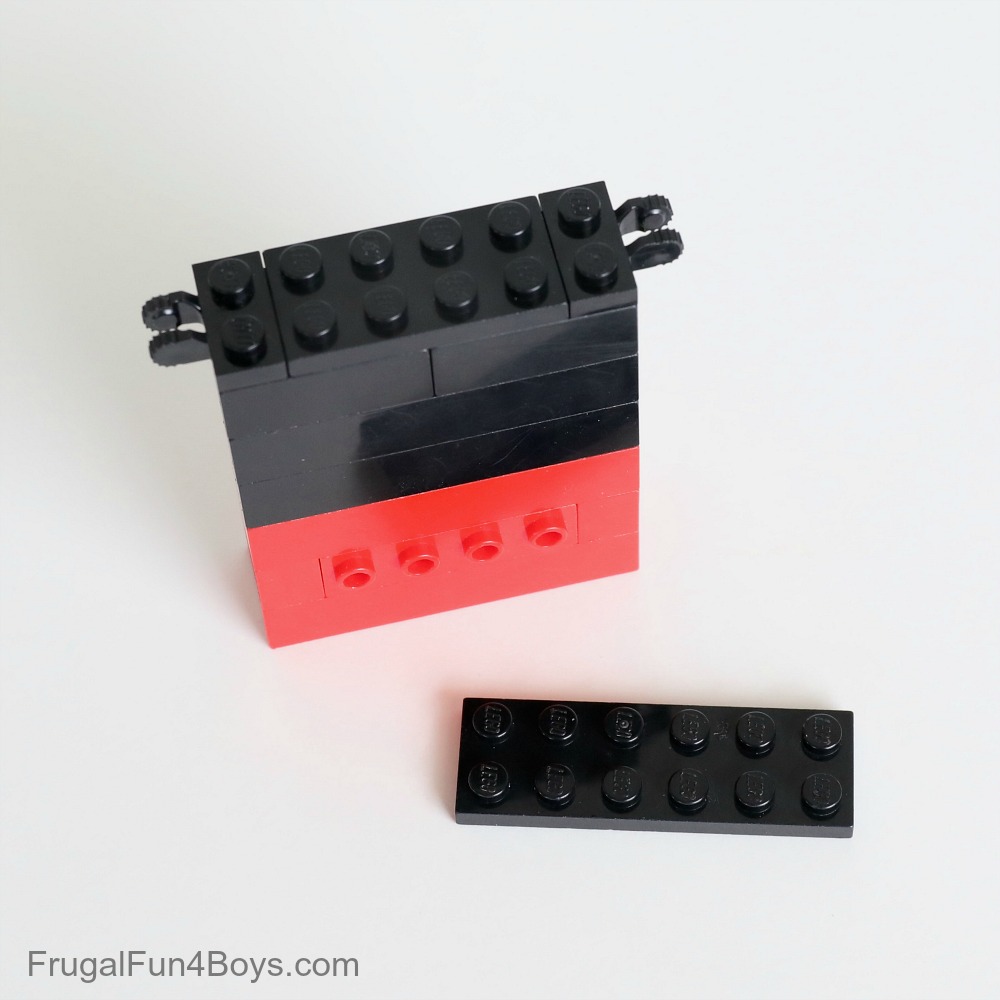
Step 18: Attach a 2 x 4 black plate to the top of Mickey’s body. Then add a 1 x 2 black plate (with two fingers on the side) to each side of the body. These will hold the arms.
Then attach a 2 x 6 black plate on top of this.
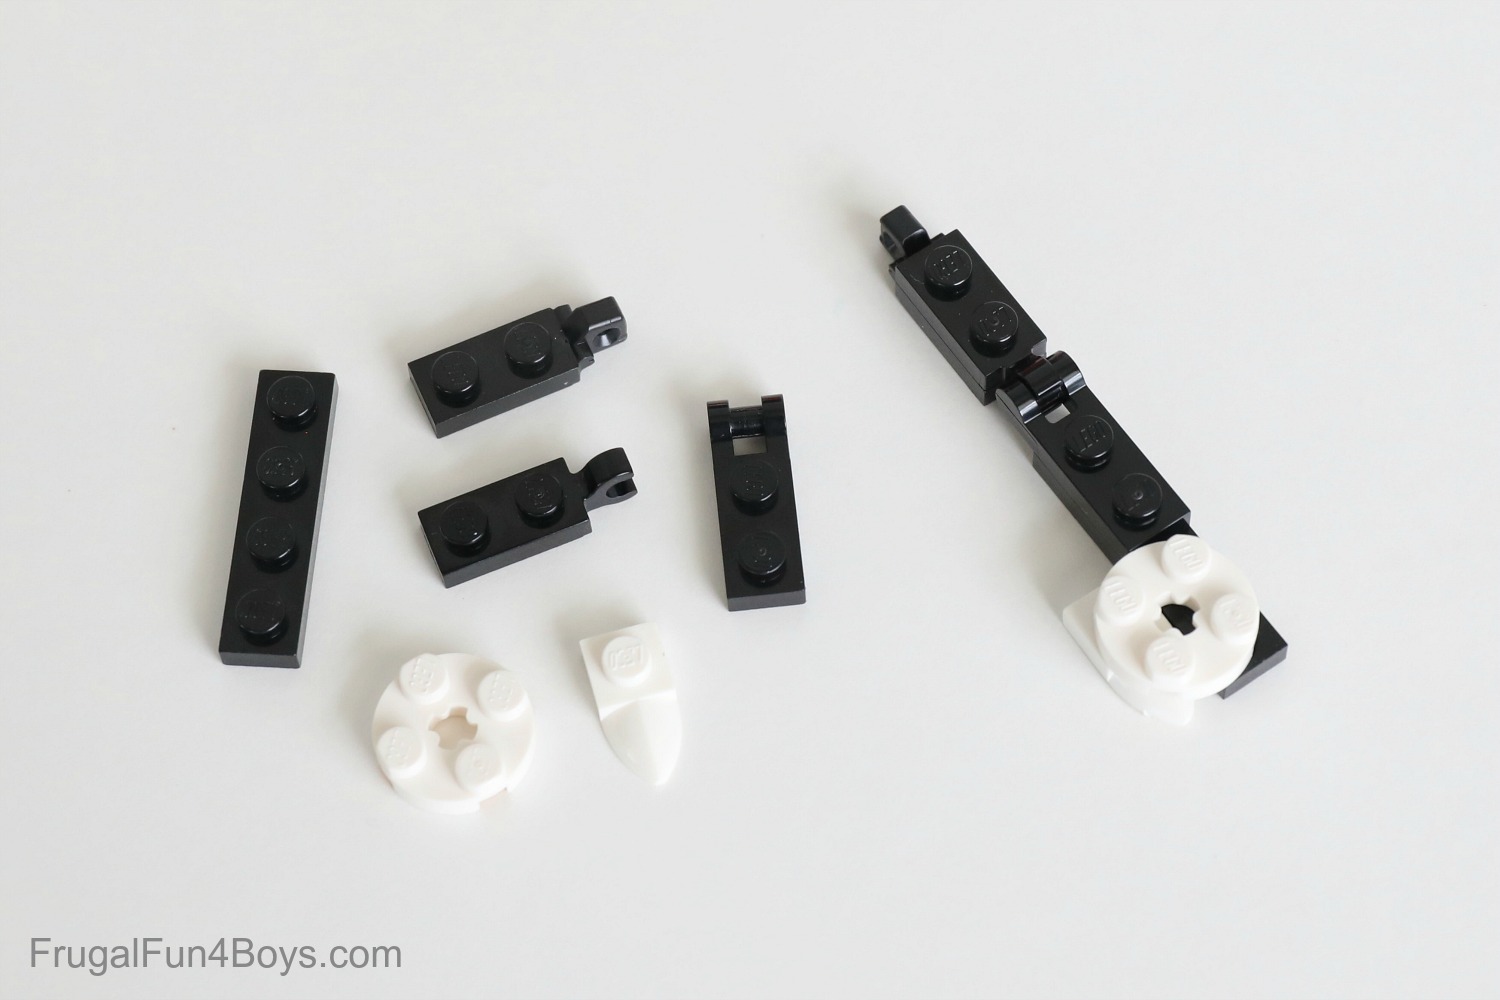
Step 19: Build Mickey’s arms. Hands are very hard to design at this scale. Build different hands if you prefer! Each arm has a 1 x 2 black plate with one finger, a 1 x 2 plate plate with a clip, a 1 x 2 black plate with a handle, and a 1 x 4 black plate. Then, each hand is made from a 2 x 2 white round plate and a 1 x 1 white plate with claw.
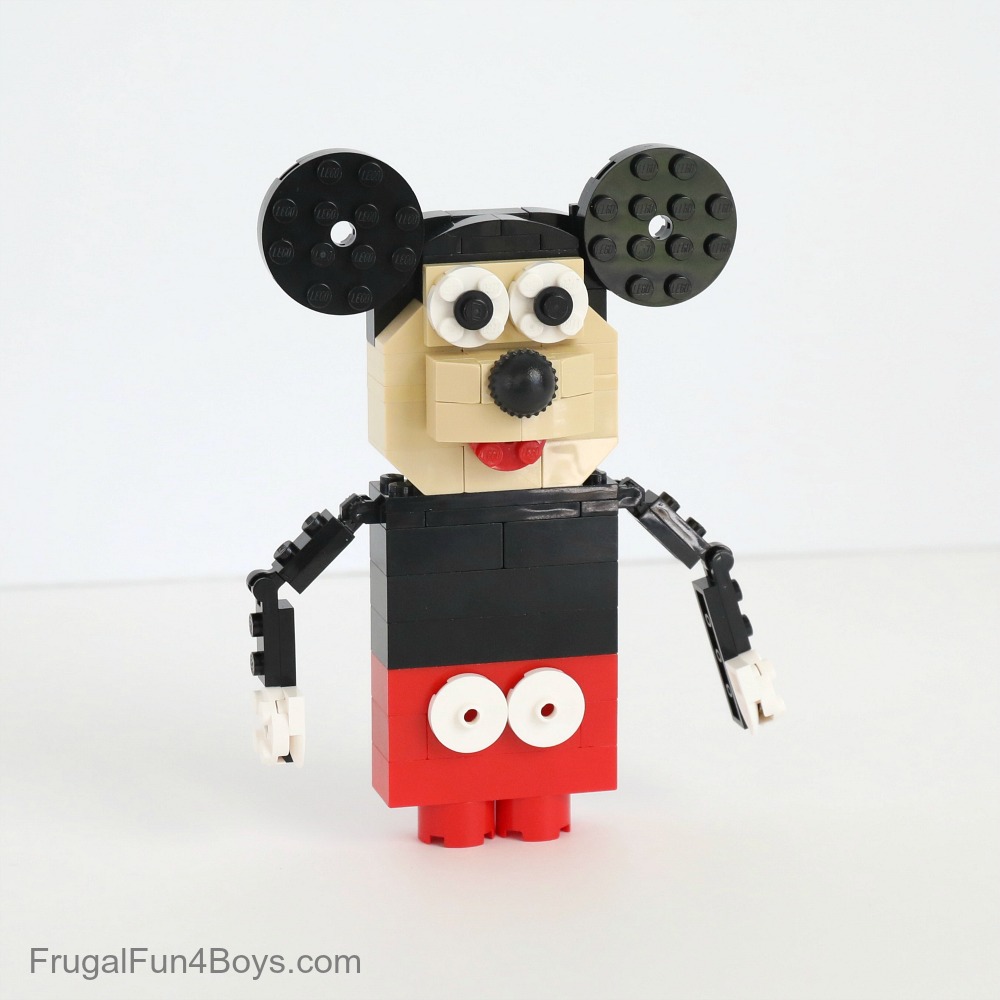
Step 20: Attach the arms to each shoulder. Then give Mickey’s pants some buttons. We used 2 x 2 white round tiles with a hole in the center, but you can also use regular round tiles or round plates.
Build the pant legs by adding two 2 x 2 red round bricks under Mickey’s body.
Step 21: Build Mickey’s legs and shoes. Each leg is made from three 1 x 1 black round bricks. Build the shoes with a 2 x 3 yellow brick with a curved end, a 1 x 2 brick, and a 2 x 4 plate.
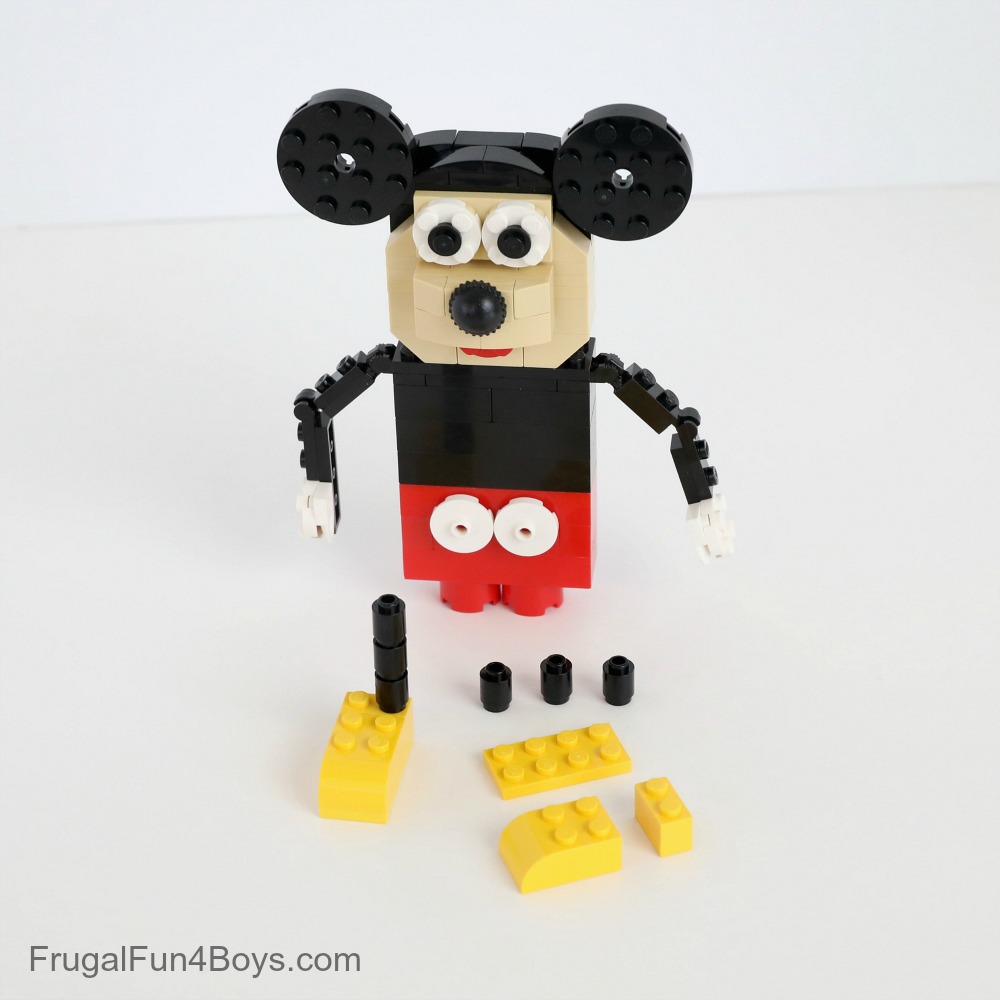
Attach Mickey’s legs, and he’s all done!
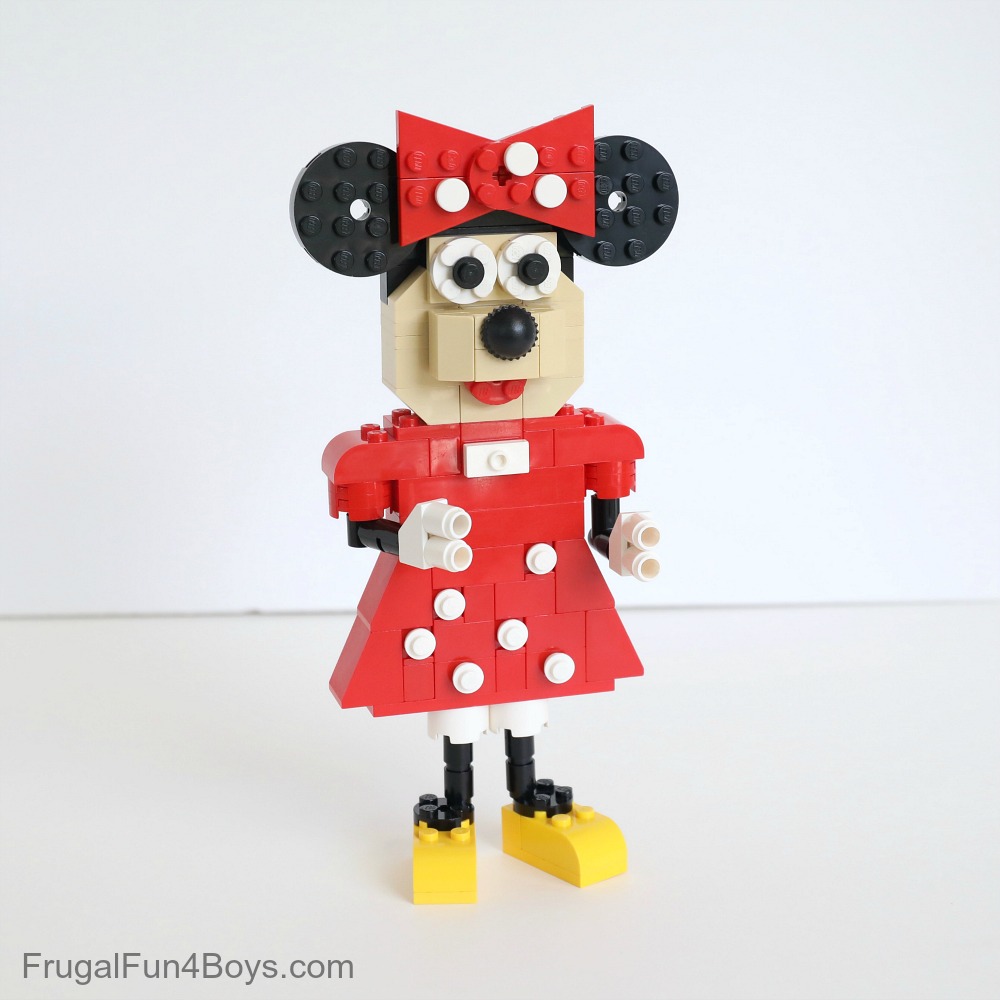
How to Build Minnie Mouse
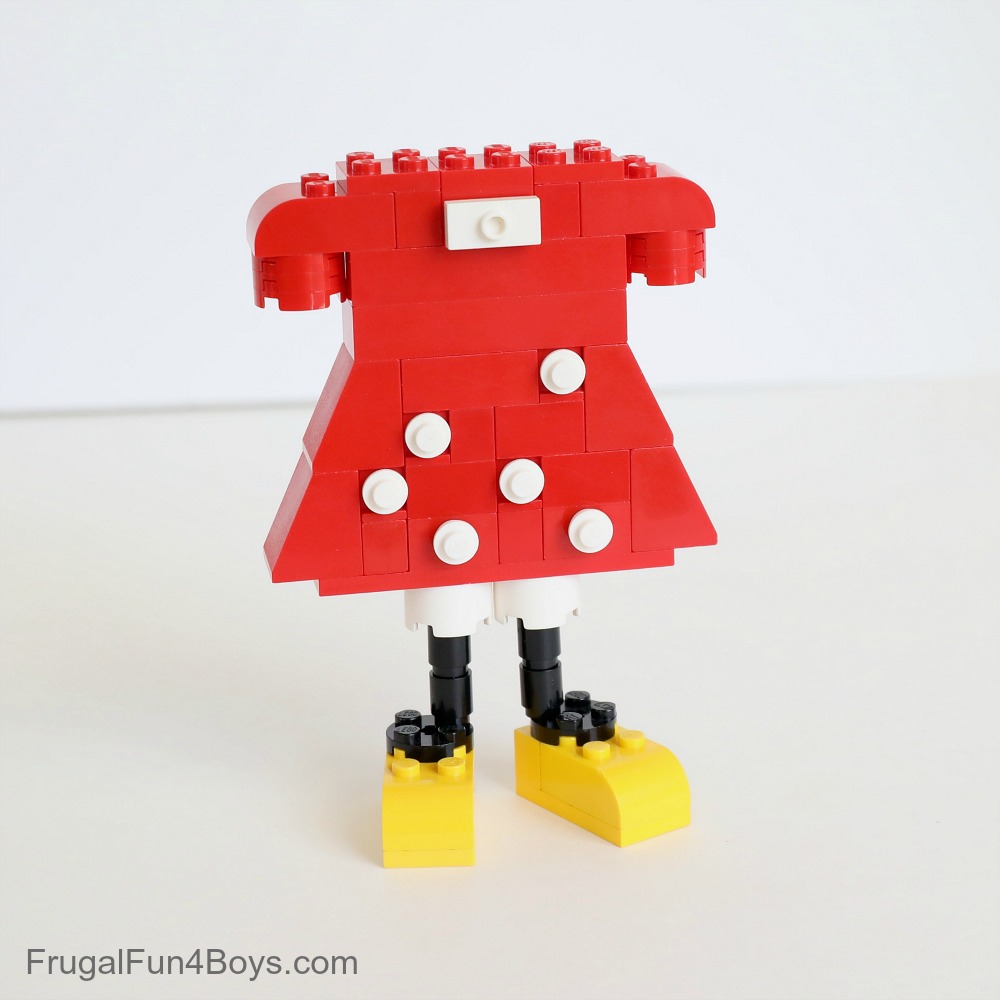
Minnie is VERY similar to Mickey. Her head is the same, except for adding the bow. Her shoes are the same, except that we added a 2 x 2 black round plate on top of each one. And then the dress is different, obviously.
I put a 1 x 2 – 1 x 2 bracket on top of Minnie’s head to hold the bow. The two 1 x 2 black curved slopes in the photo go on top of the bow.
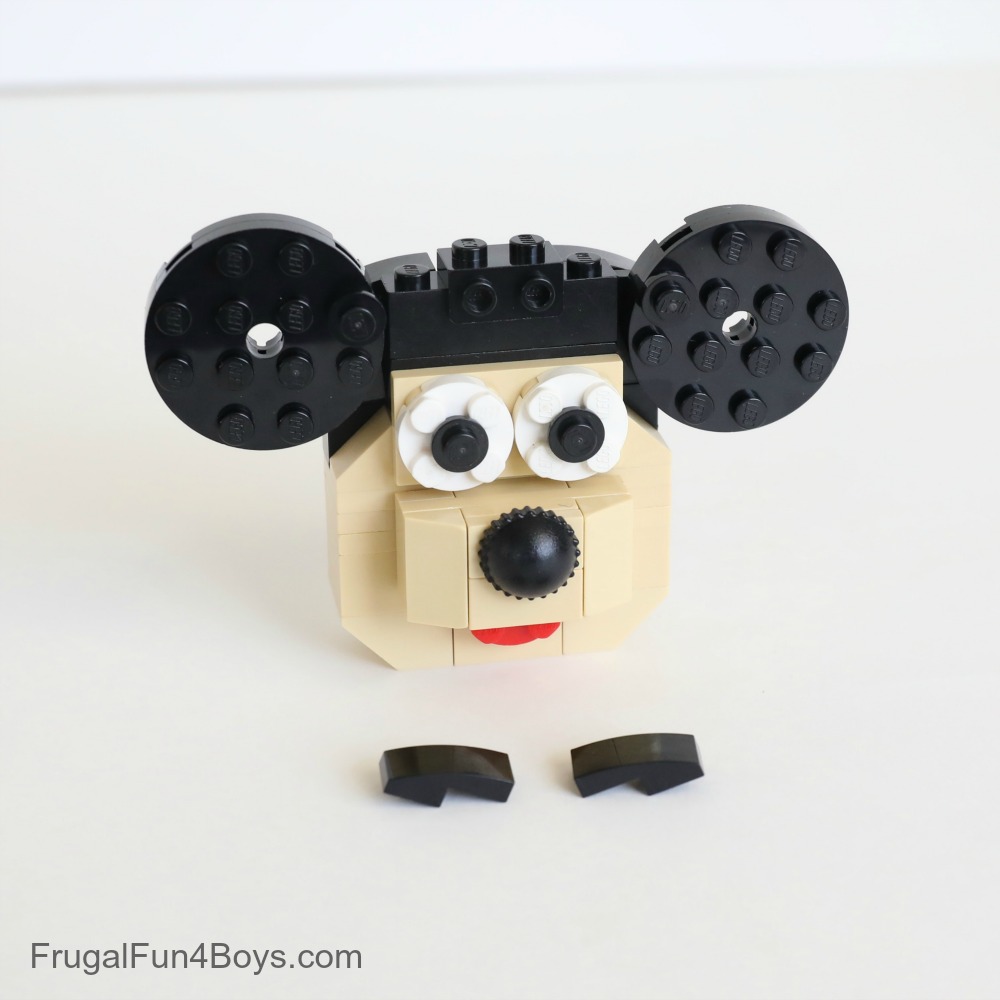
I also placed a 1 x 1 black round plate on each ear, so that the bow attaches to the ears as well as the head. They are hard to see in the photo below, but they are there… this is why I only build in black when I HAVE to. It’s very hard to photograph!
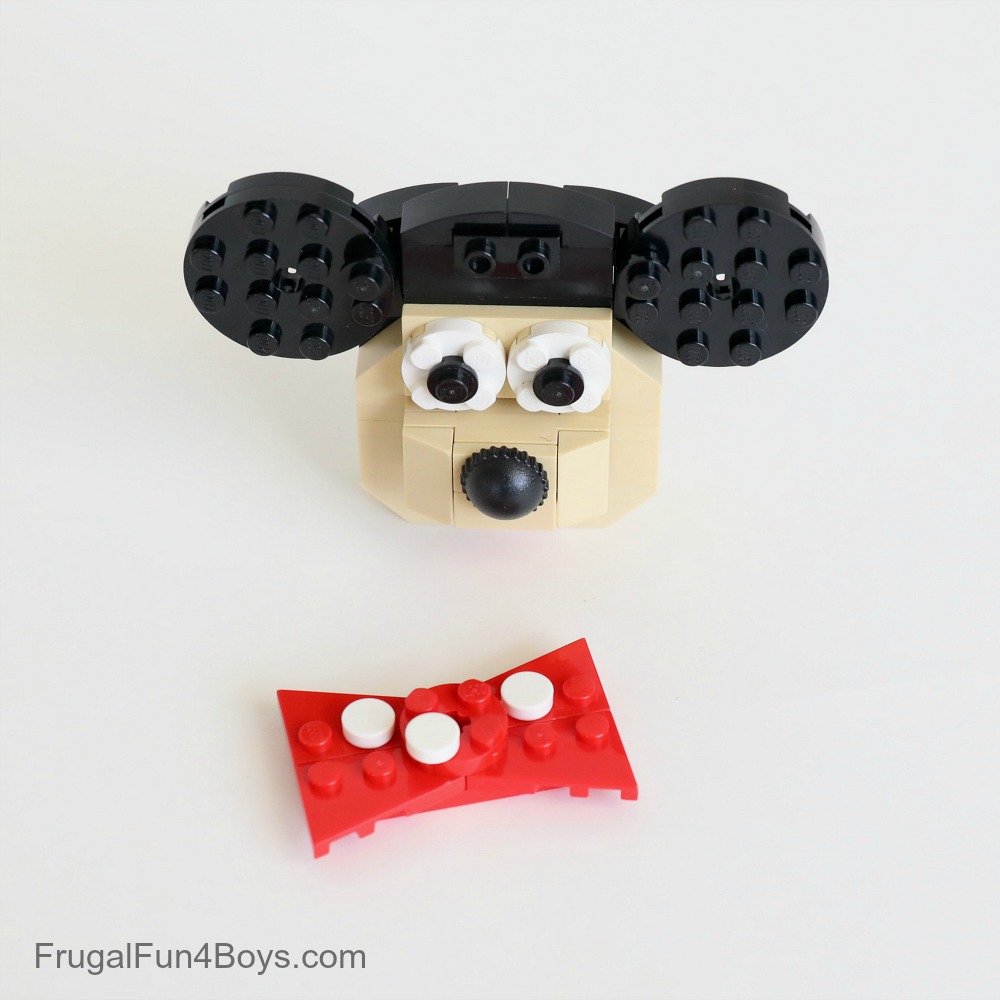
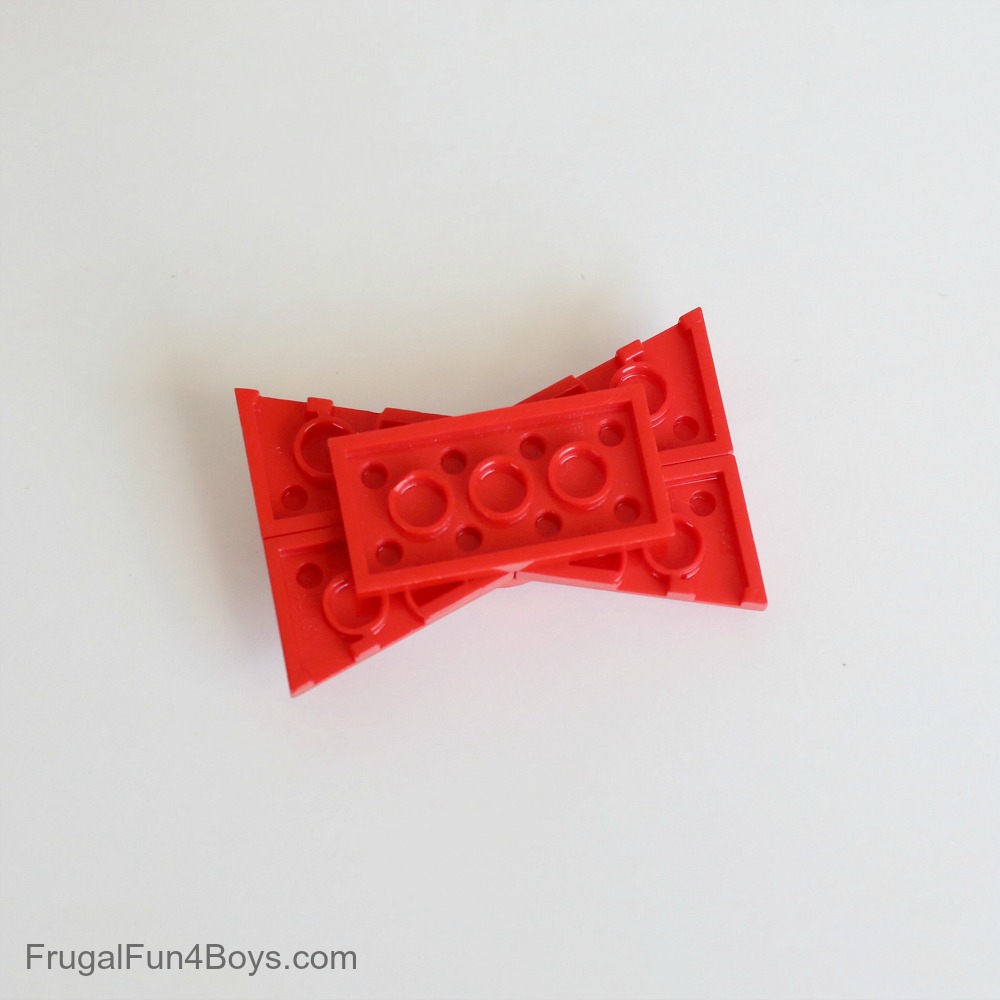
The bow is made up of four 2 x 3 red wedge plates, two with left orientation and two with right orientation. A 2 x 4 plate holds them together on the back of the bow, and there is a 2 x 2 red round plate on the front.
Sooo cute! I was hesitant at first about trying to make Minnie Mouse. There’s not a way to build her cute eyelashes and make her face look more girly, but the bow really does it!

Here’s a close-up of Minnie’s dress. I worked in plenty of 1 x 1 bricks with a stud on the side to hold the spots. I also used a few 1 x 2 Technic bricks (with a hole) and inserted a blue half pin into the holes to hold the white spots.
Build sleeves by attaching two 2 x 2 red round plates under each shoulder.
Then build some arms and hands for Minnie. These are the pieces I used for Minnie’s left arm.
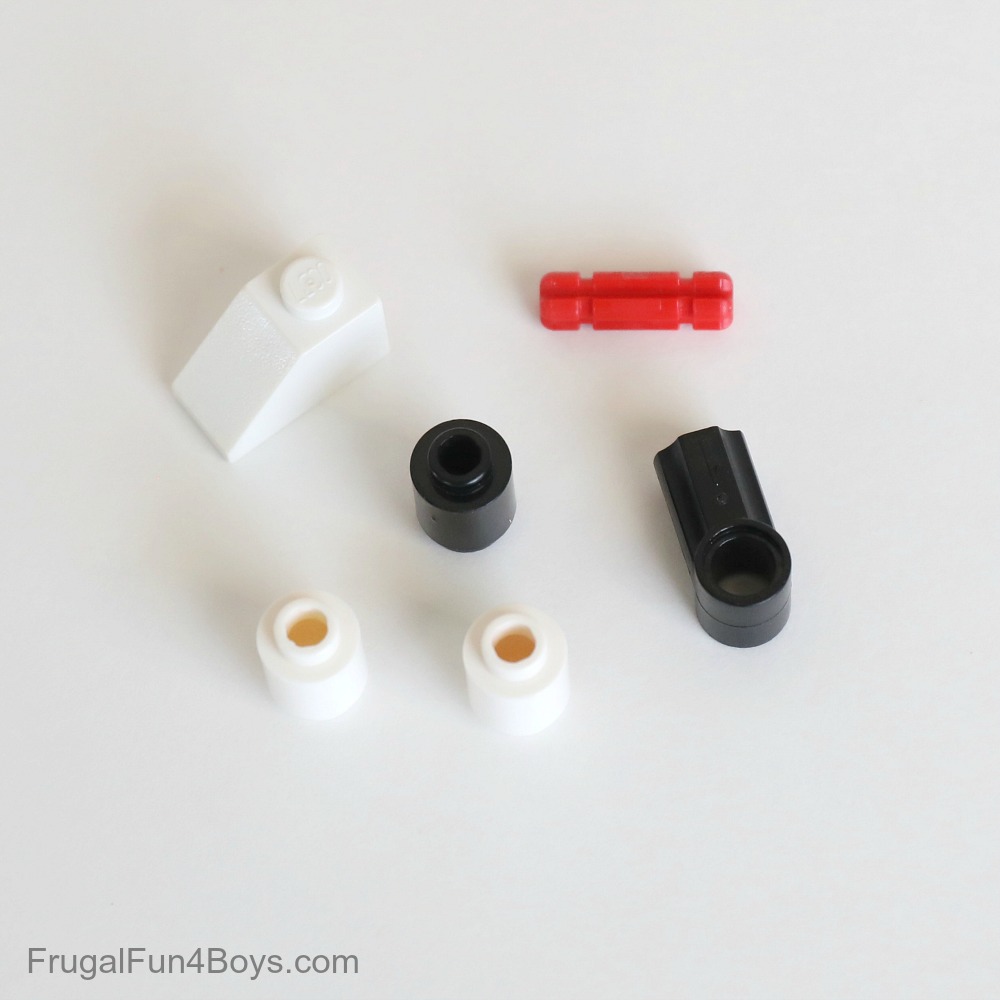
We did two different arm designs so that she can rotate her right arm. Both arms need an axle at the top so that the axle can slide into Minnie’s sleeves (the two red 2 x 2 round plates).
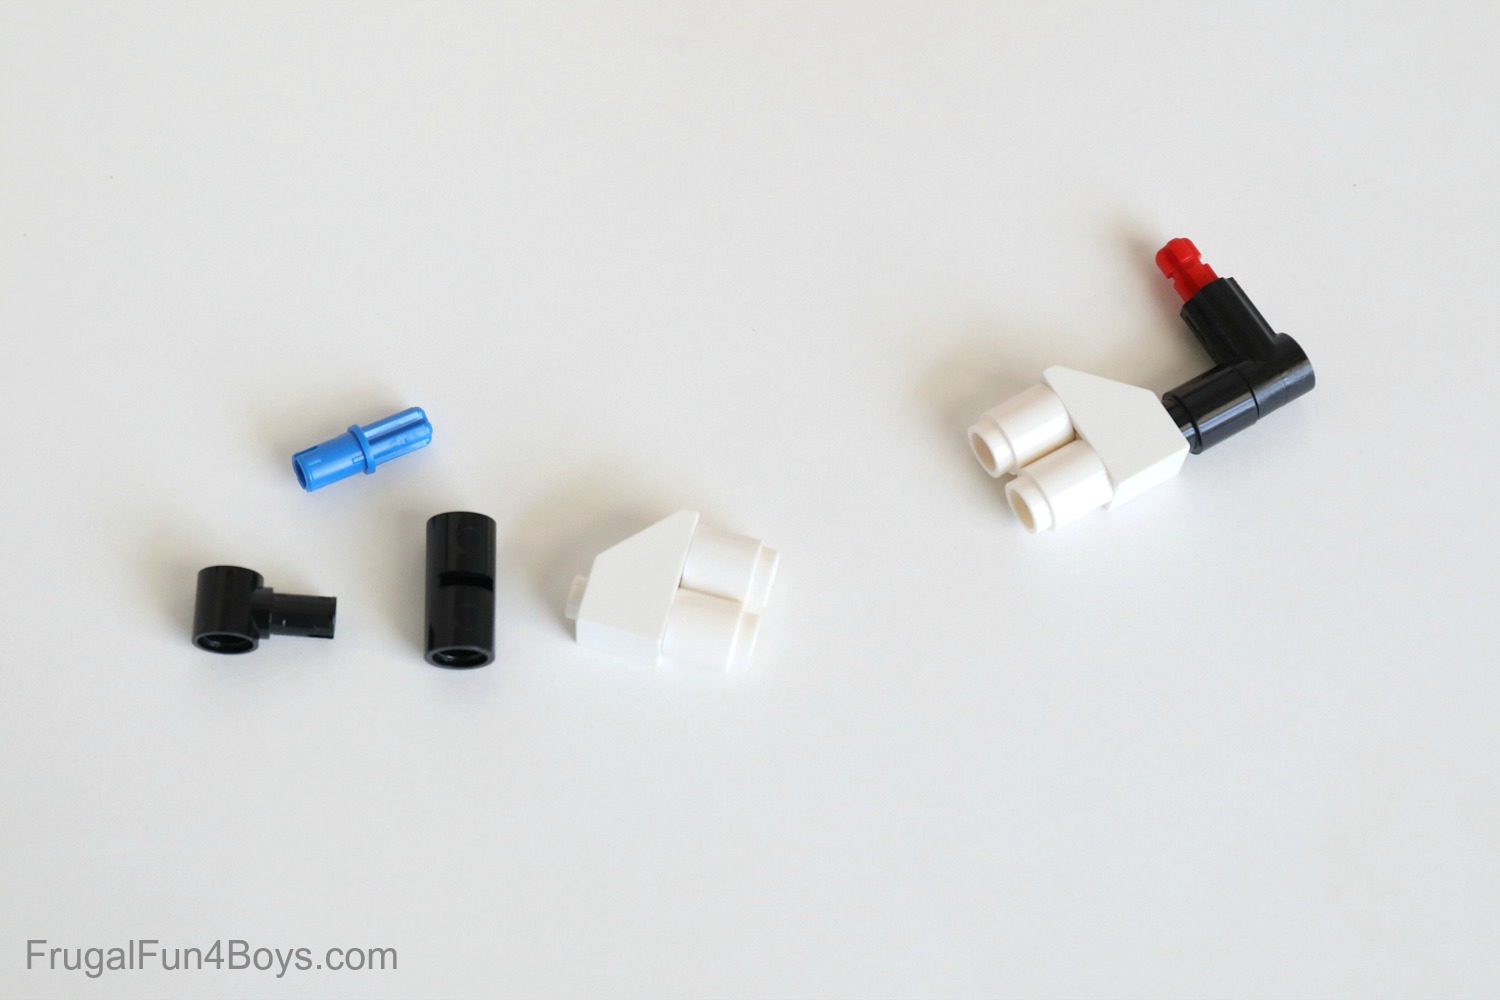
Here are the completed arms.
The pieces used for the arms are:
Left arm:
1 – black Technic axle and pin connector #1
1 – red axle pin
1 – 1 x 1 black round brick
1 – 1 x 2 white slope
2 – 1 x 1 white round bricks
Right arm:
1 – black Technic pin with friction ridges and pin hole
1 – blue axle pin
1 – black Technic pin connector, round, 2 studs long with slot
1 – 1 x 2 white slope
2 – 1 x 1 white round bricks

Then it’s time to put Minnie together!
Have fun building! Here’s another look at our friend Isaac’s Disney creations. Maybe your kids will be inspired to build several characters!
0 Comments
Post a Comment