
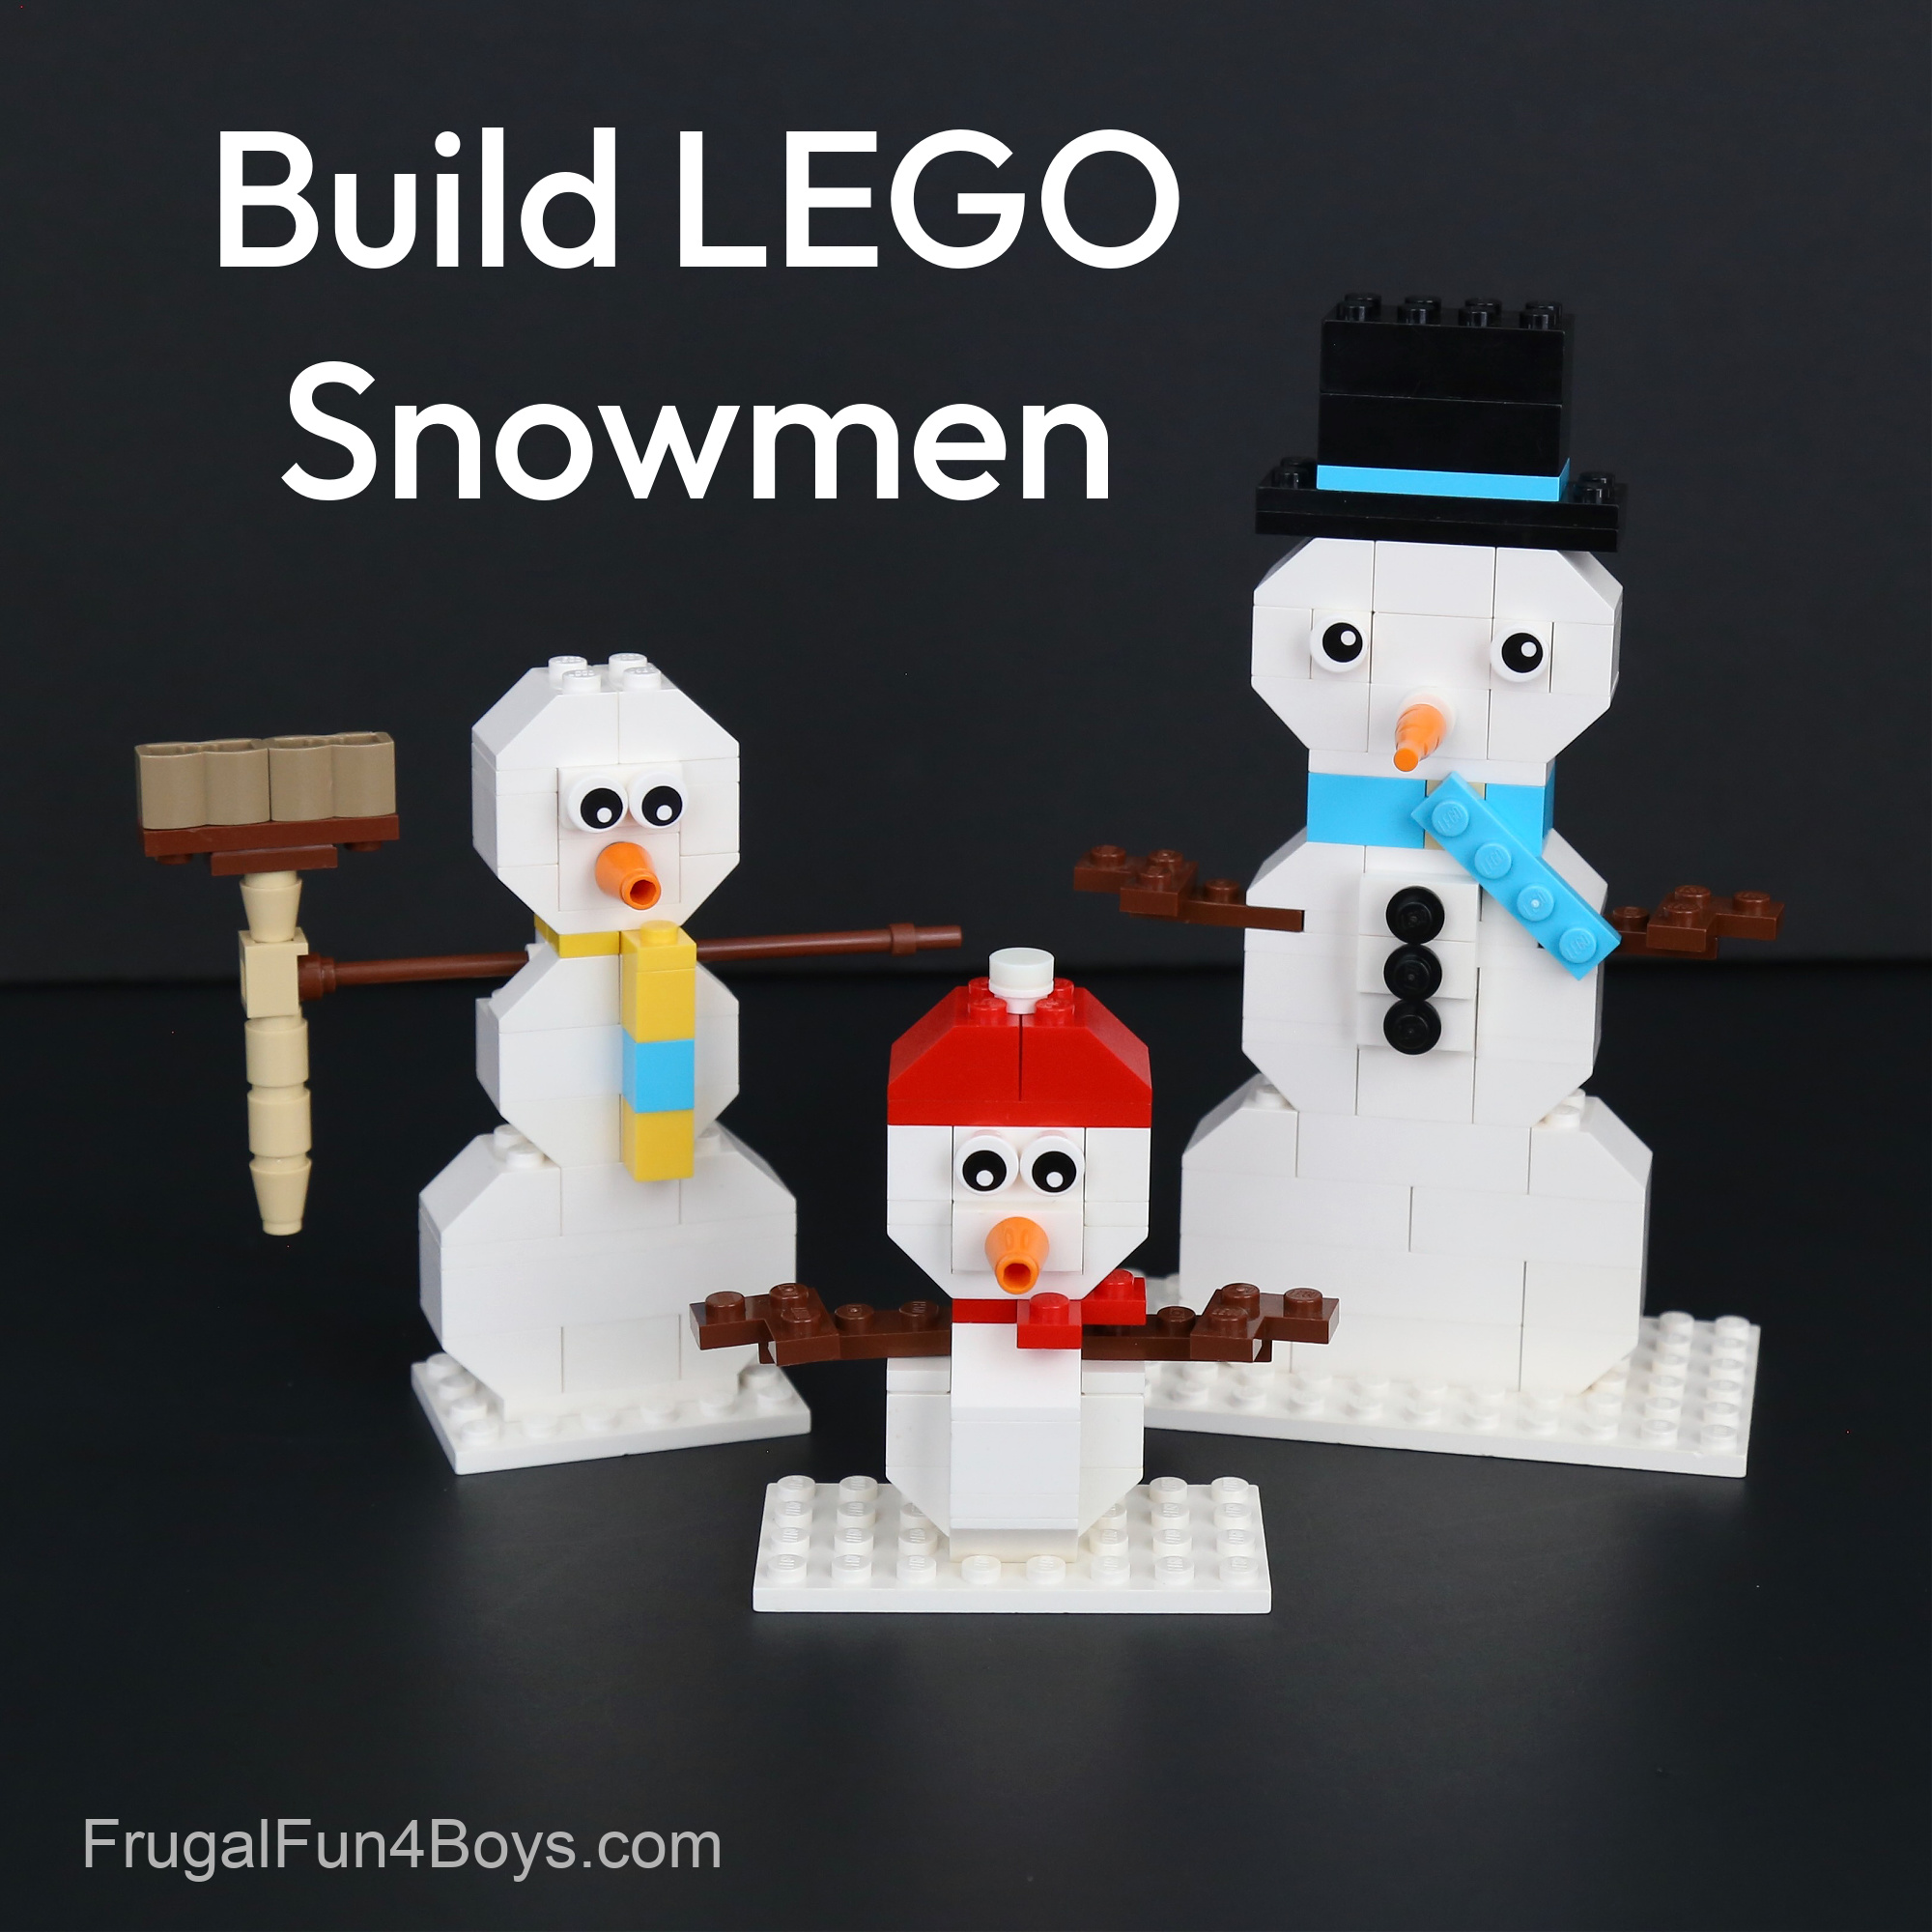
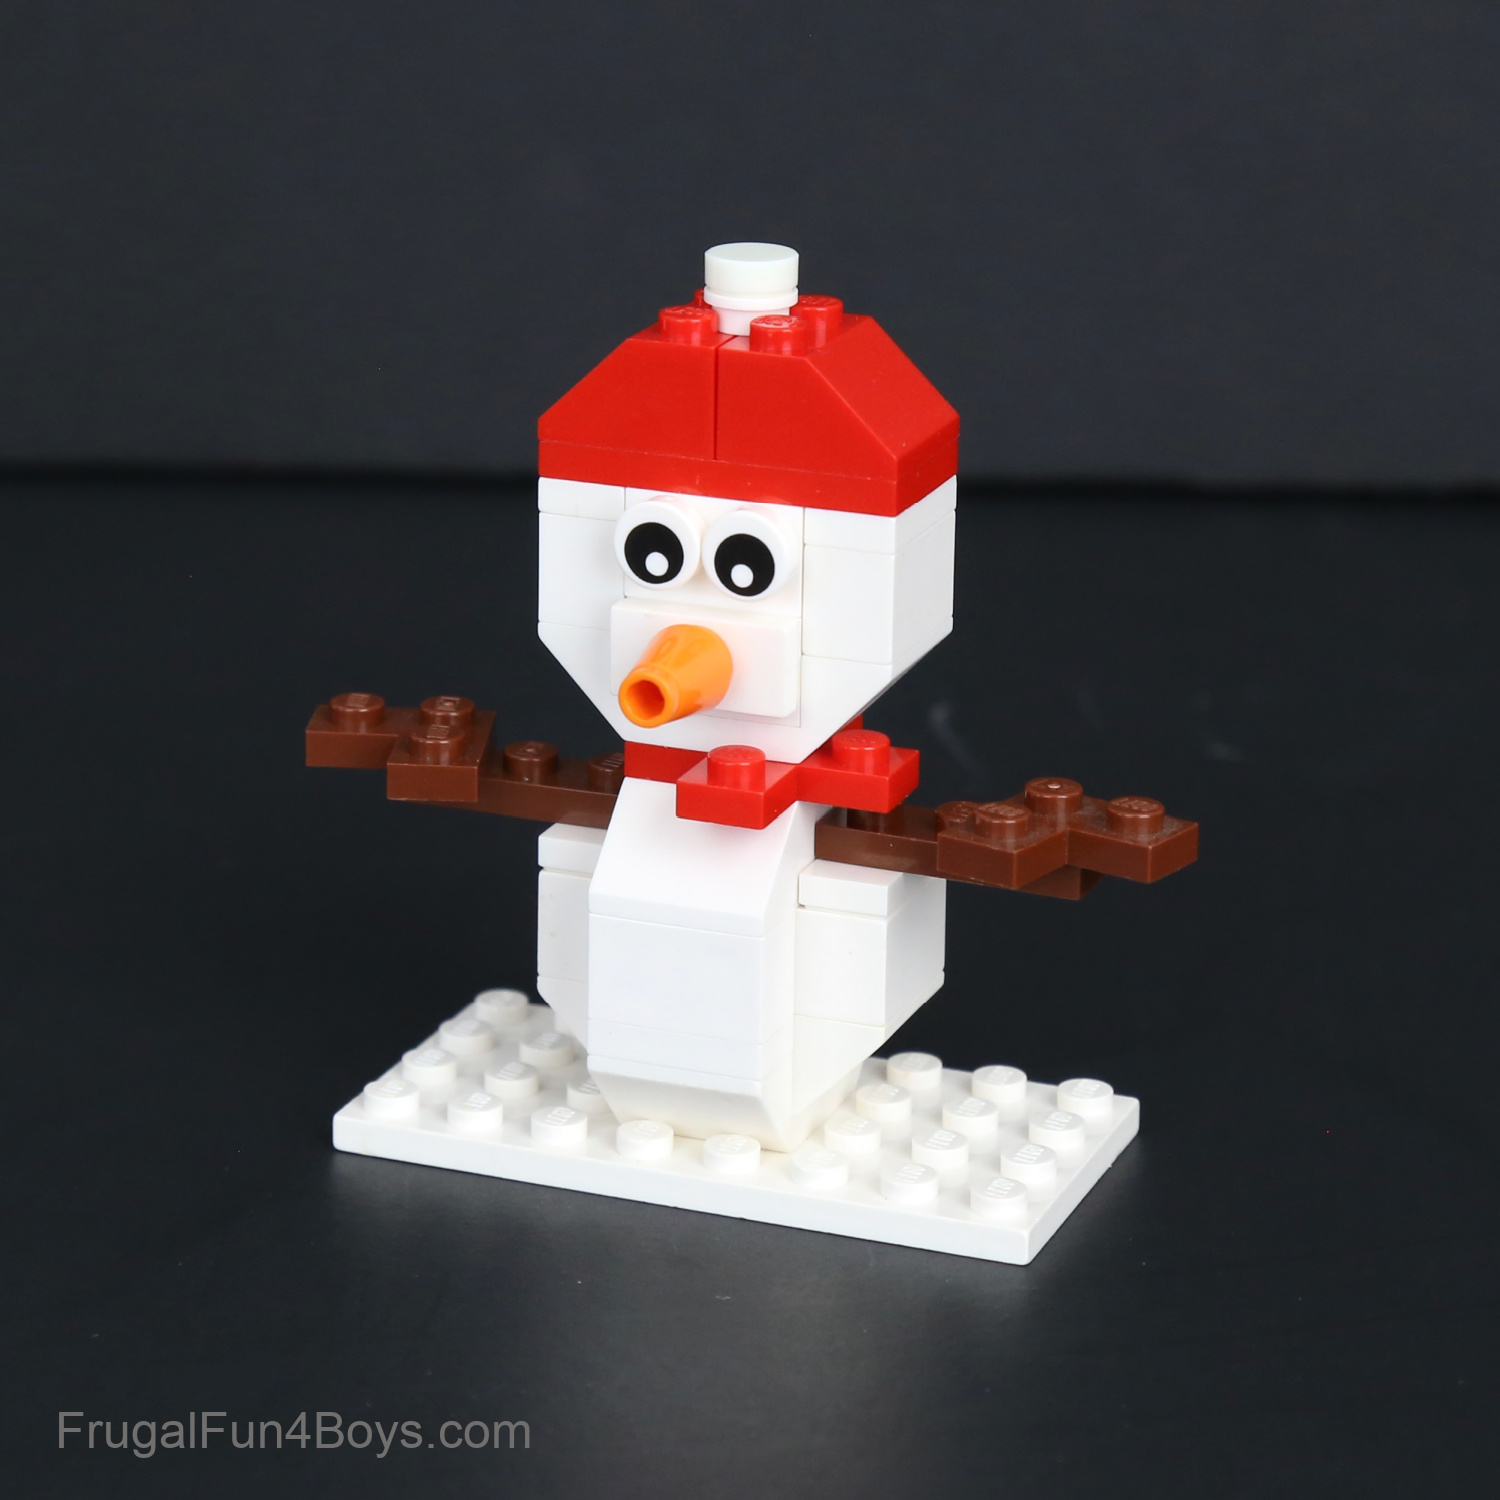
How to Build a LEGO® Snowman
Here’s a fun winter LEGO challenge that kids will love! Build some adorable snowmen out of the bricks you have. We’ve got instructions for building two different LEGO snowmen, and then we’ll show you a third version that is easy to figure out from the photo.
This LEGO snowman idea is perfect for Christmas time, but also for anytime during the winter. Snowmen aren’t ONLY for Christmas! We keep our snowmen decorations out in January as well.
This snowman was originally part of our Five Lego Christmas Projects, and then we updated the project with new snowmen and instructions in January 2023.
I built two of these snowmen, and my 13 year old son built the third. I can’t decide which one is my favorite! They definitely look cute all together. Right now they are all sitting on the counter in our kitchen. 😁
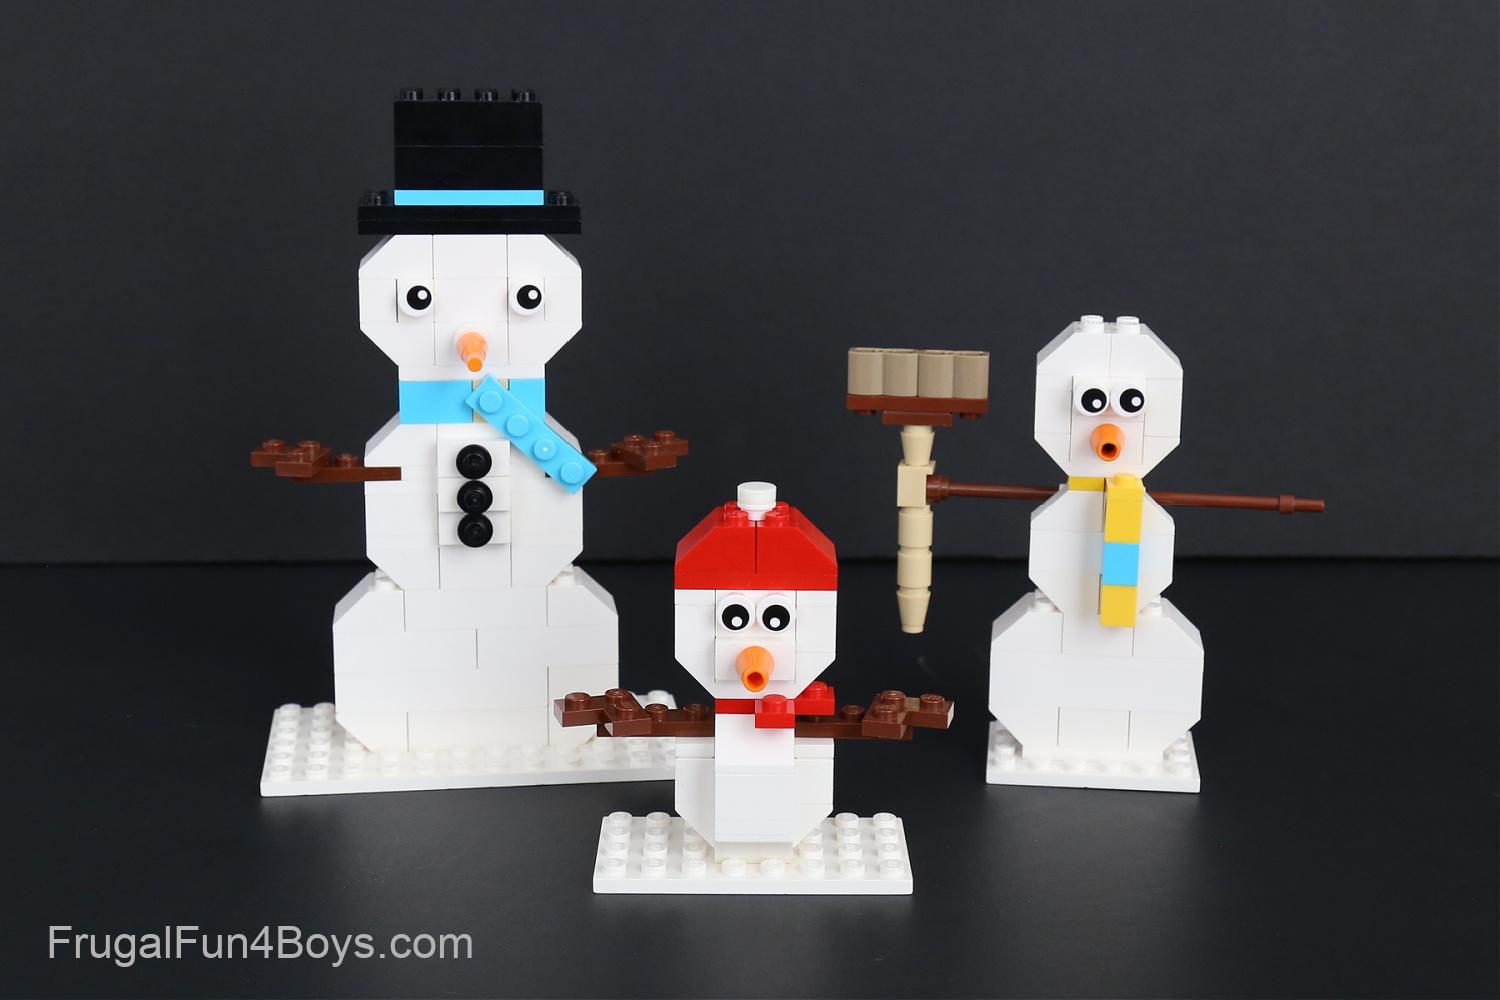
We’ve got a tall snowman and a little snowman and a medium-sized snowman holding a broom. The tall one has a LEGO carrot nose, but the other two have orange cone noses. Either option works great for any of the snowmen!
As always, feel free to modify these designs and create whatever you want!
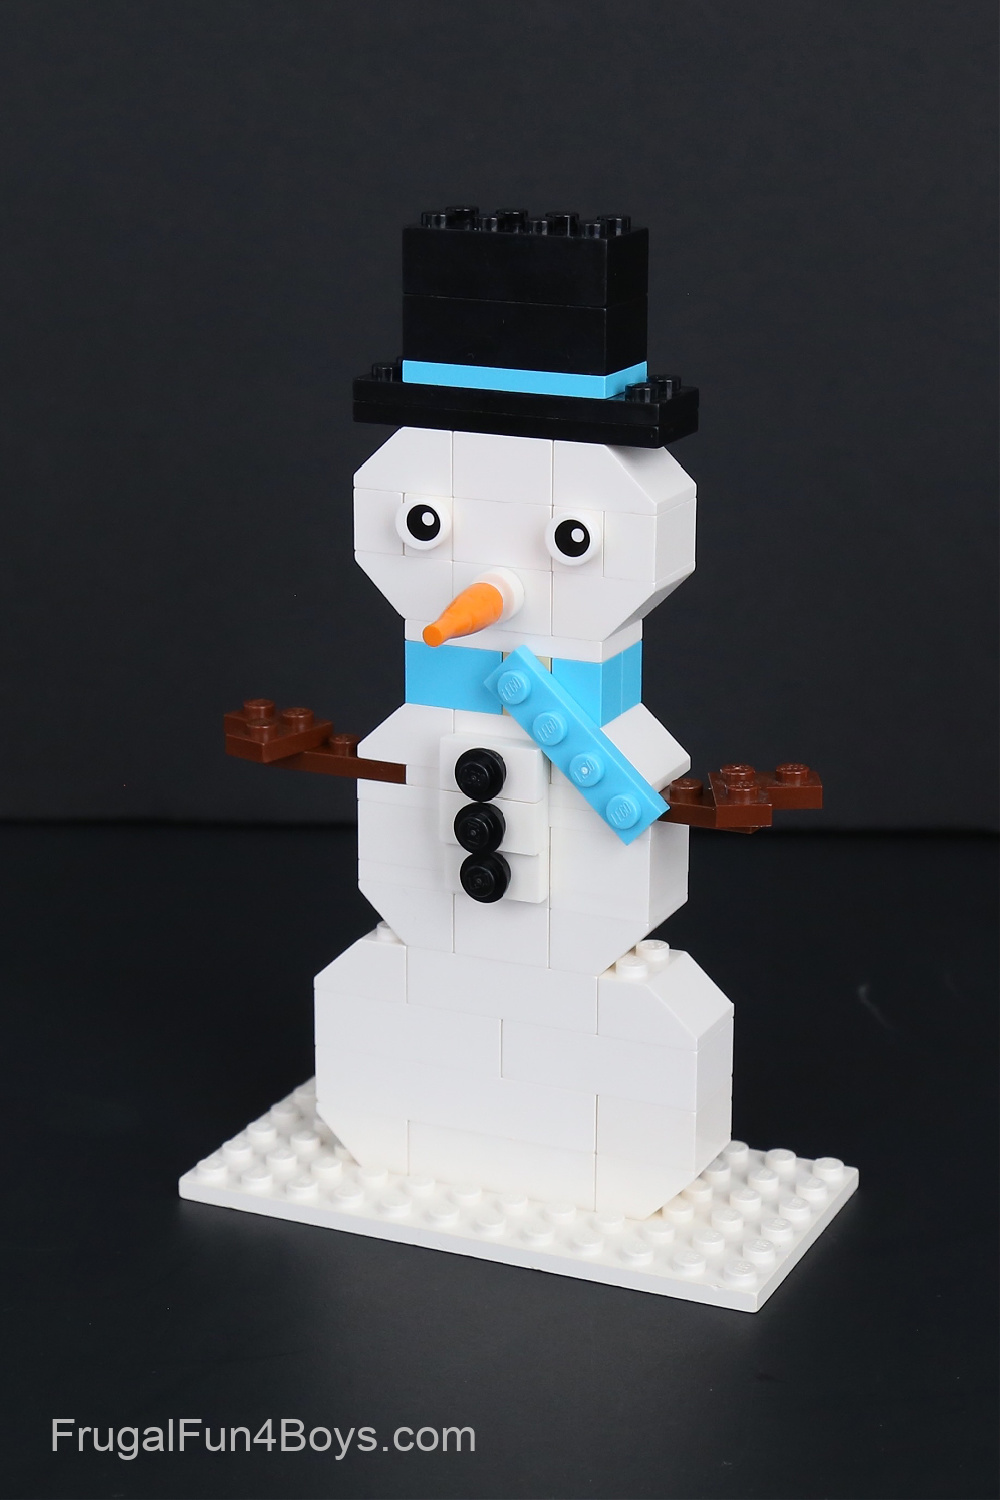
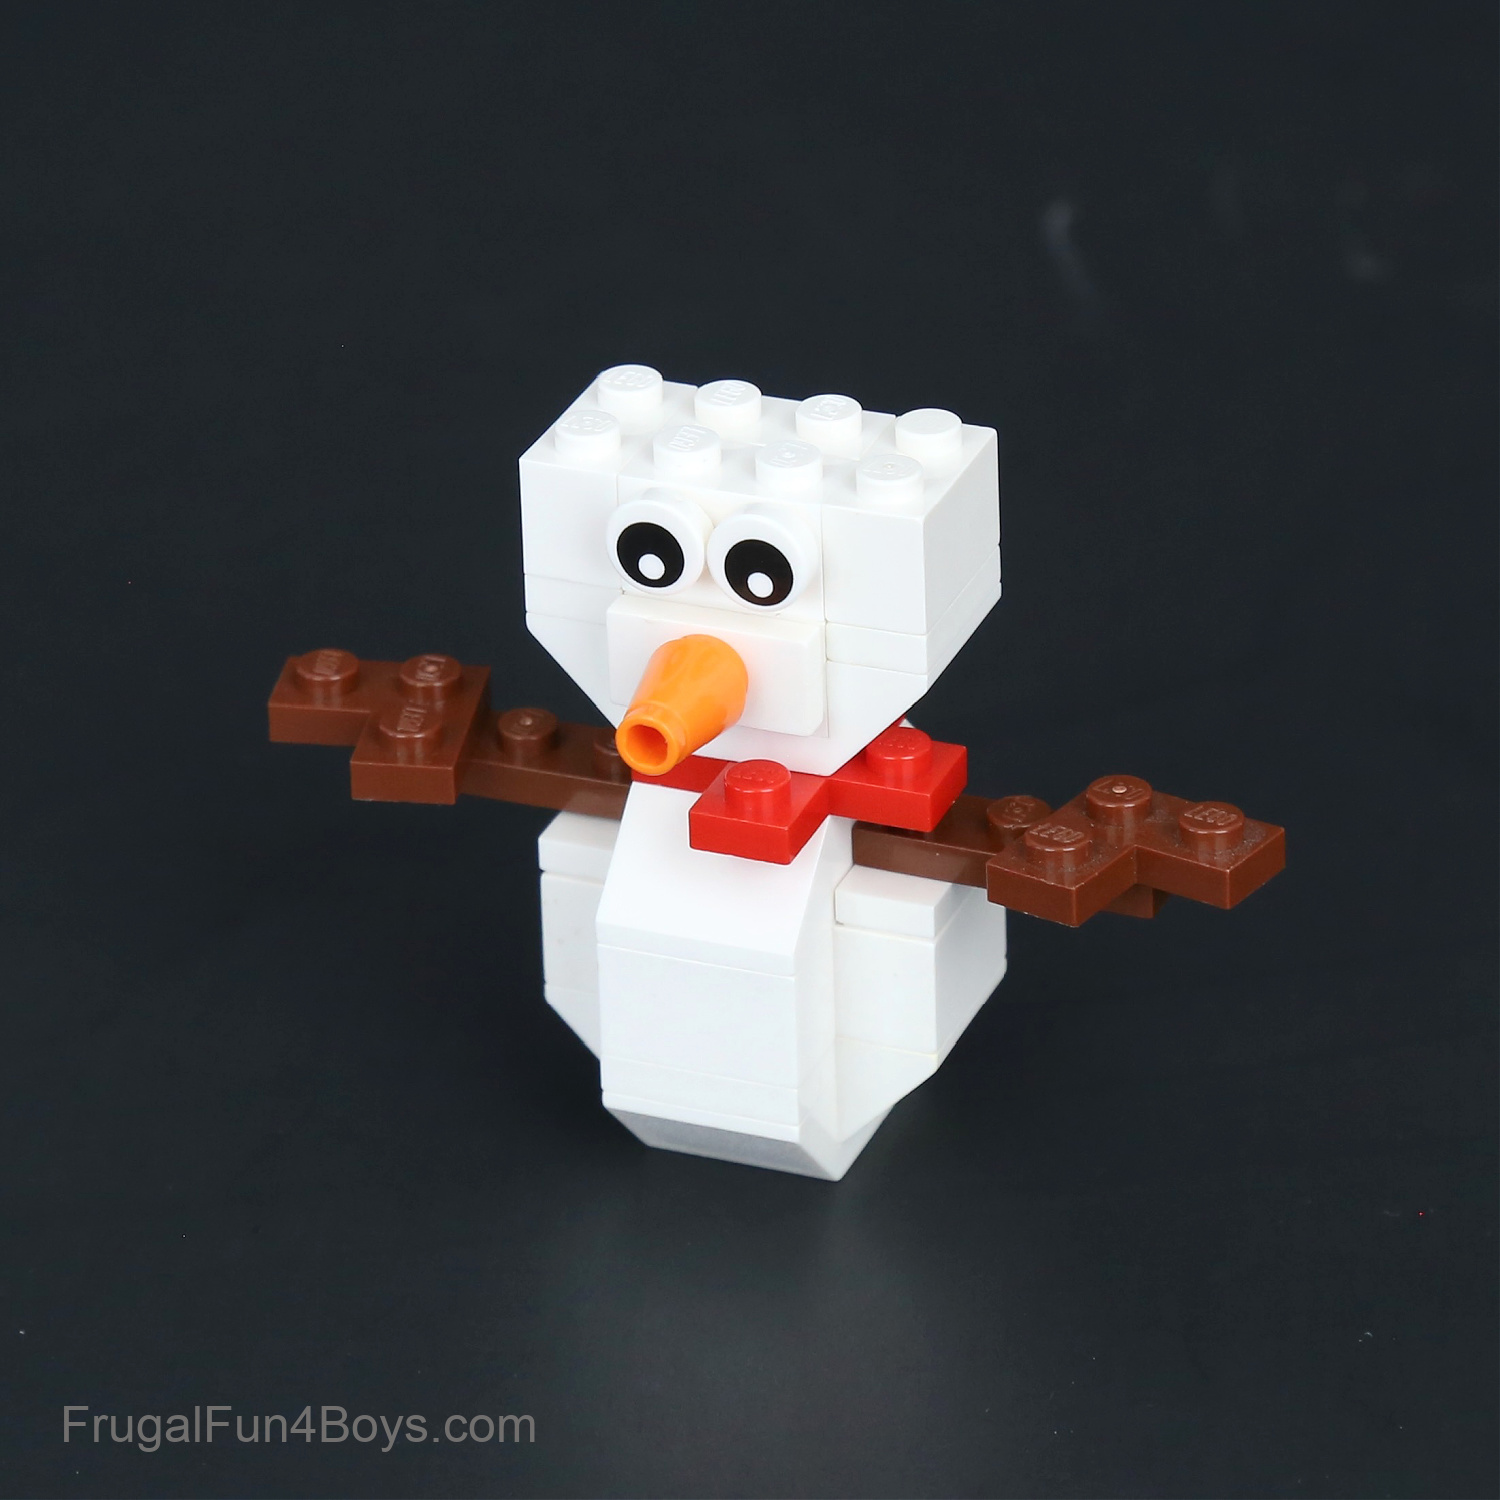
How to Build the Tall LEGO Snowman:
Throughout the instructions, you can find links to some of the key pieces on Brick Link.
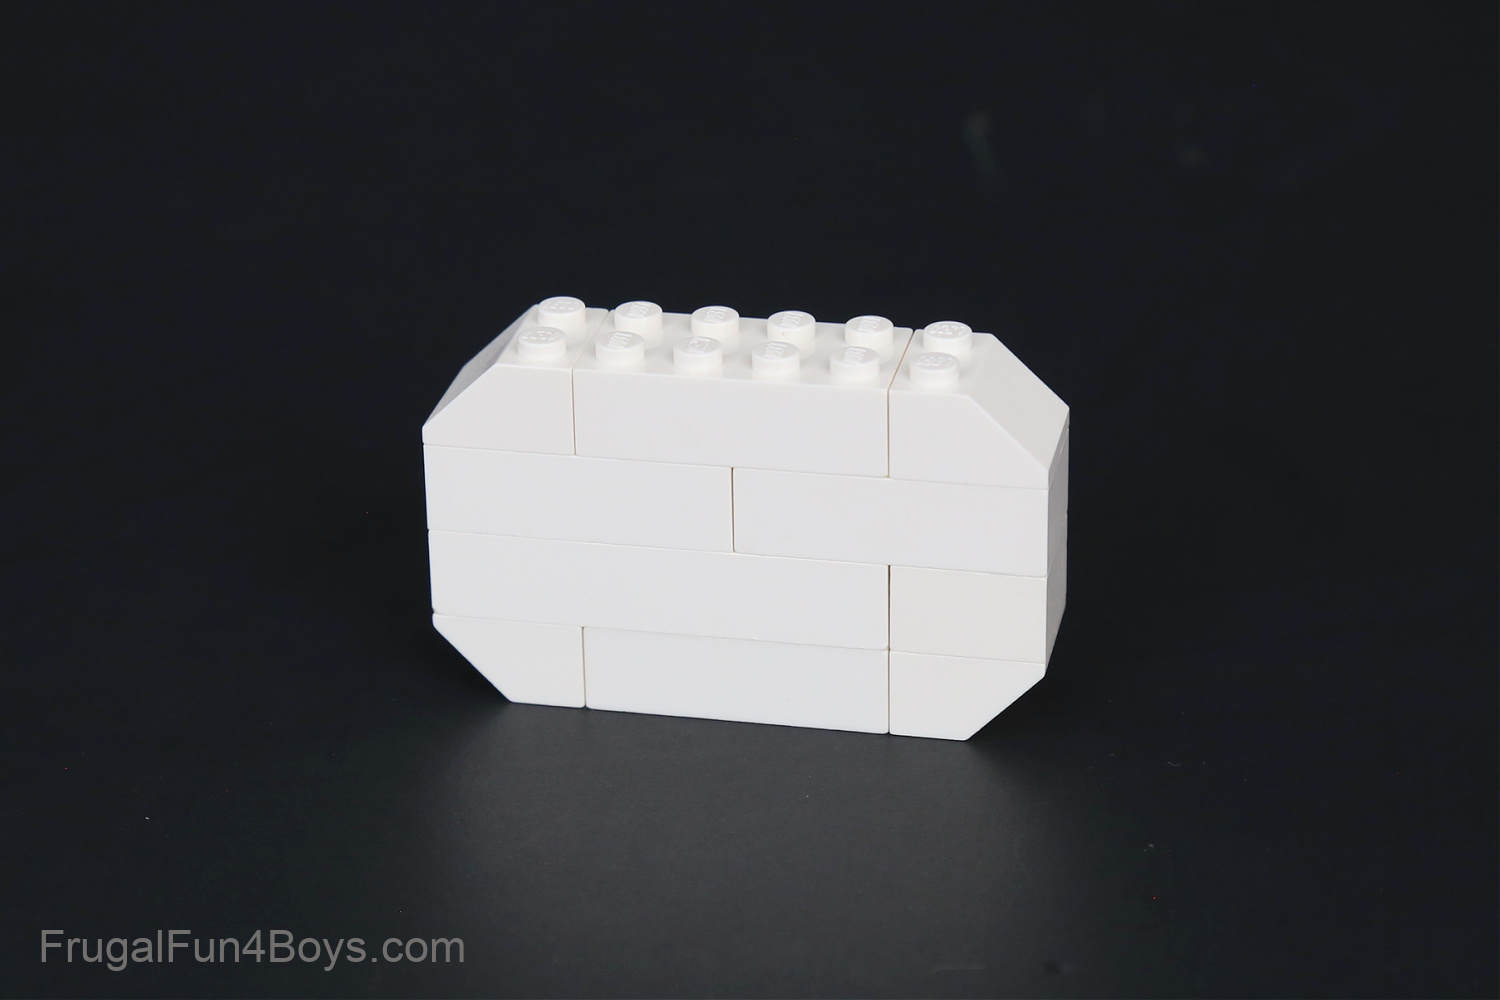
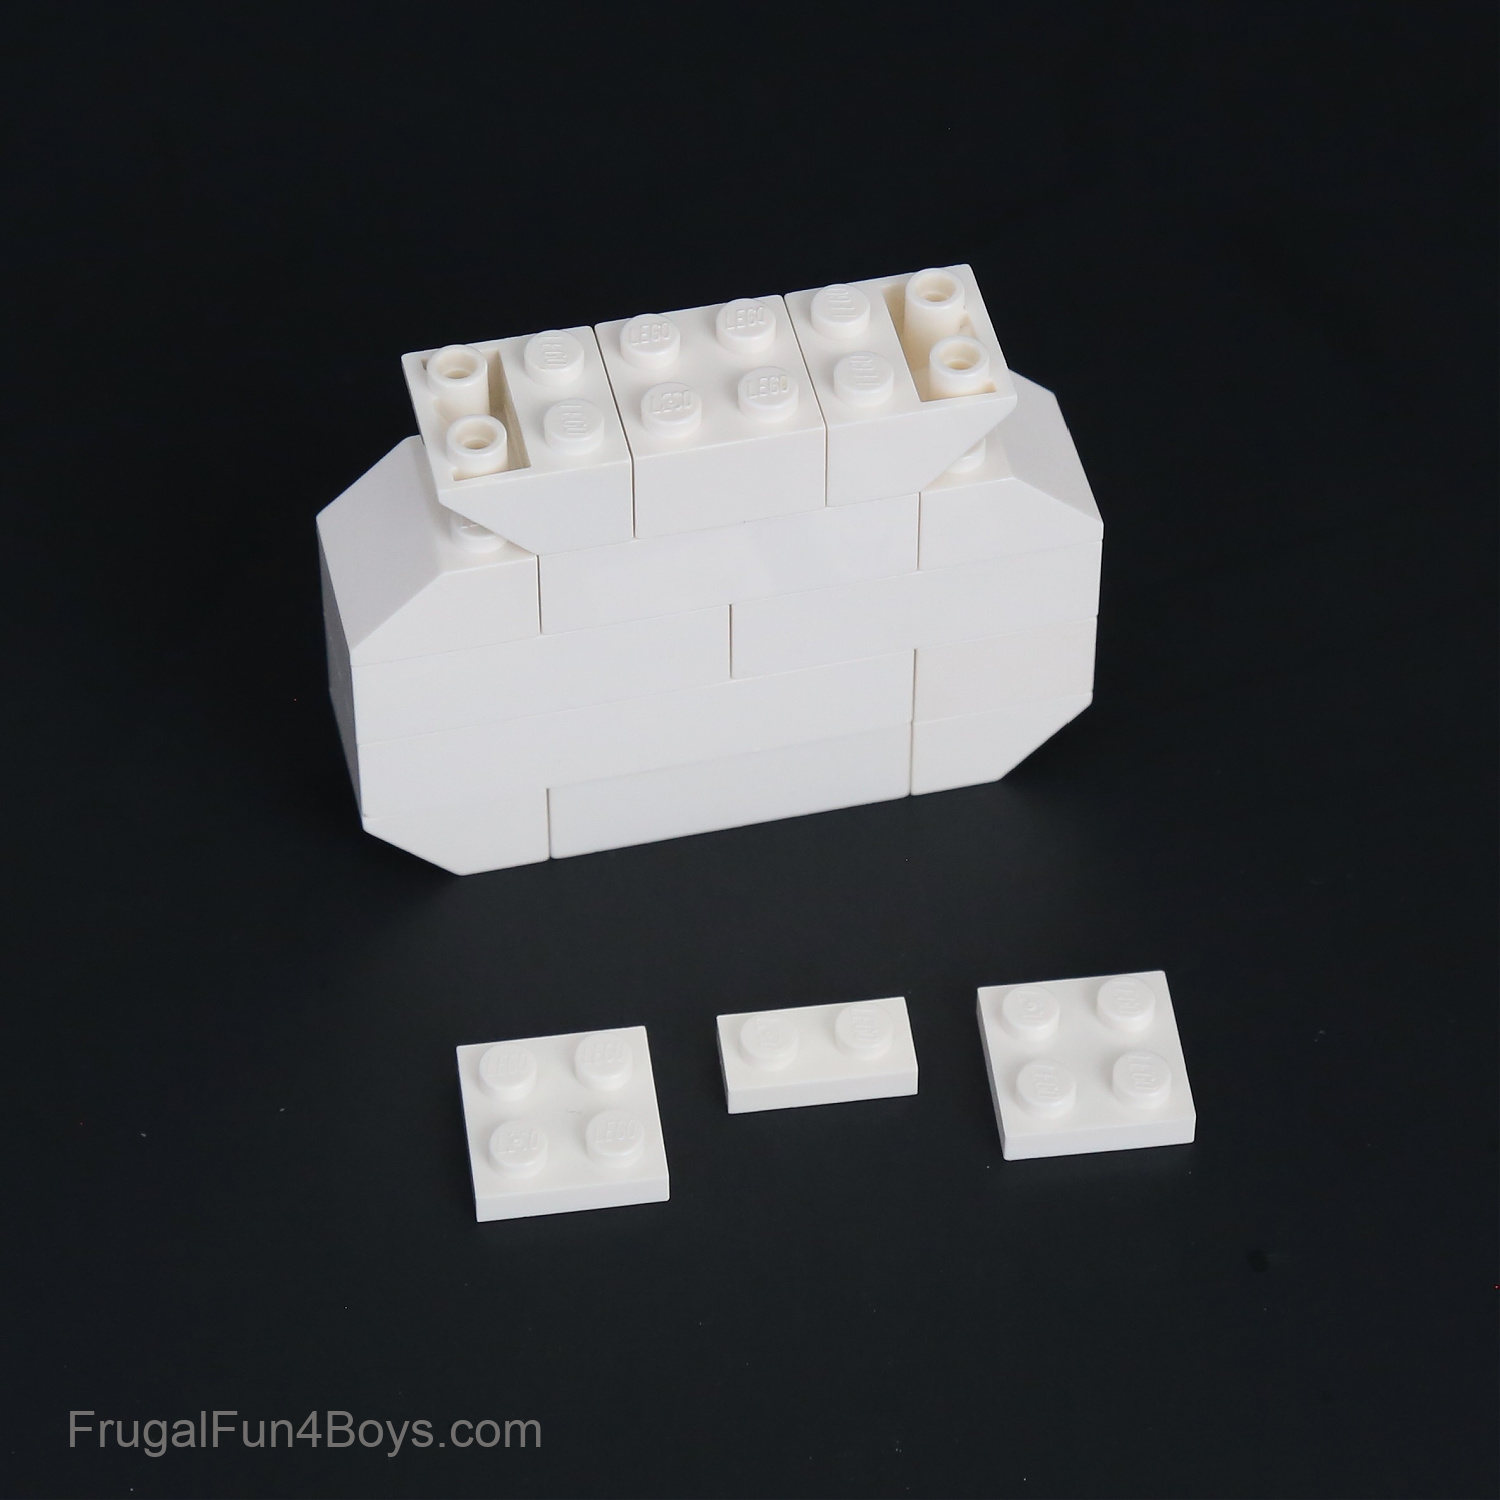
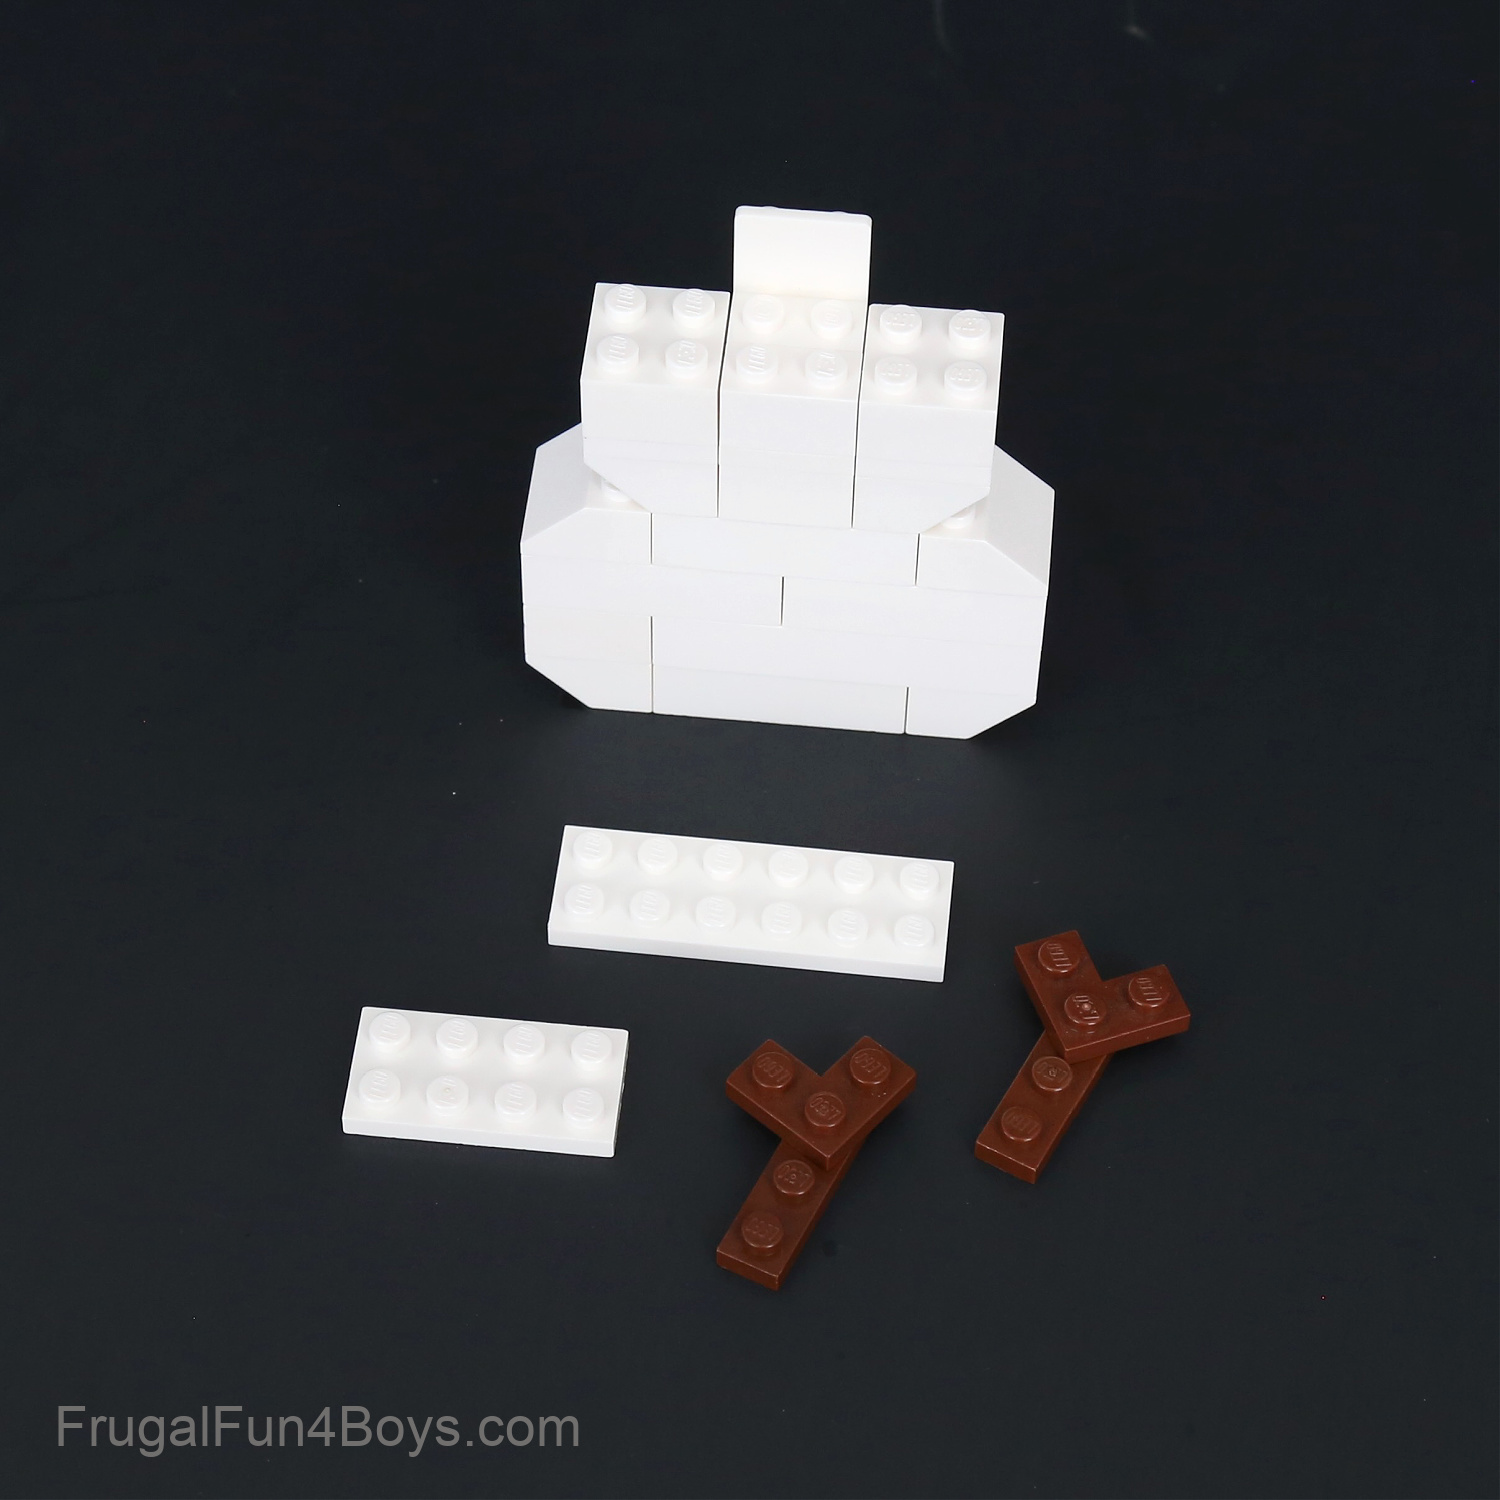
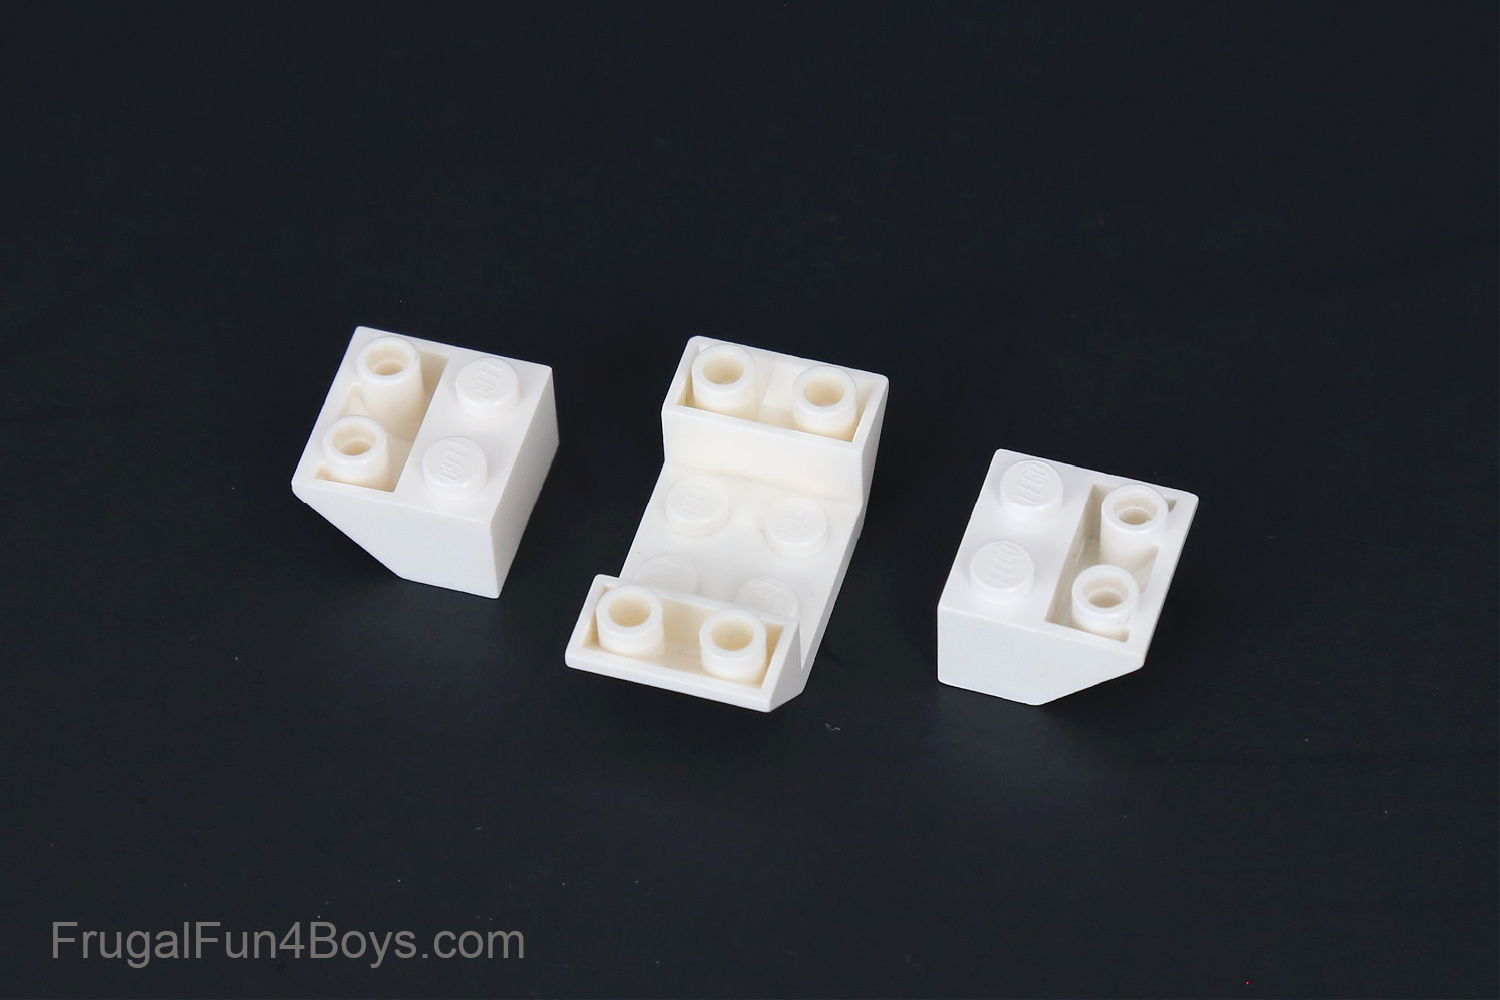
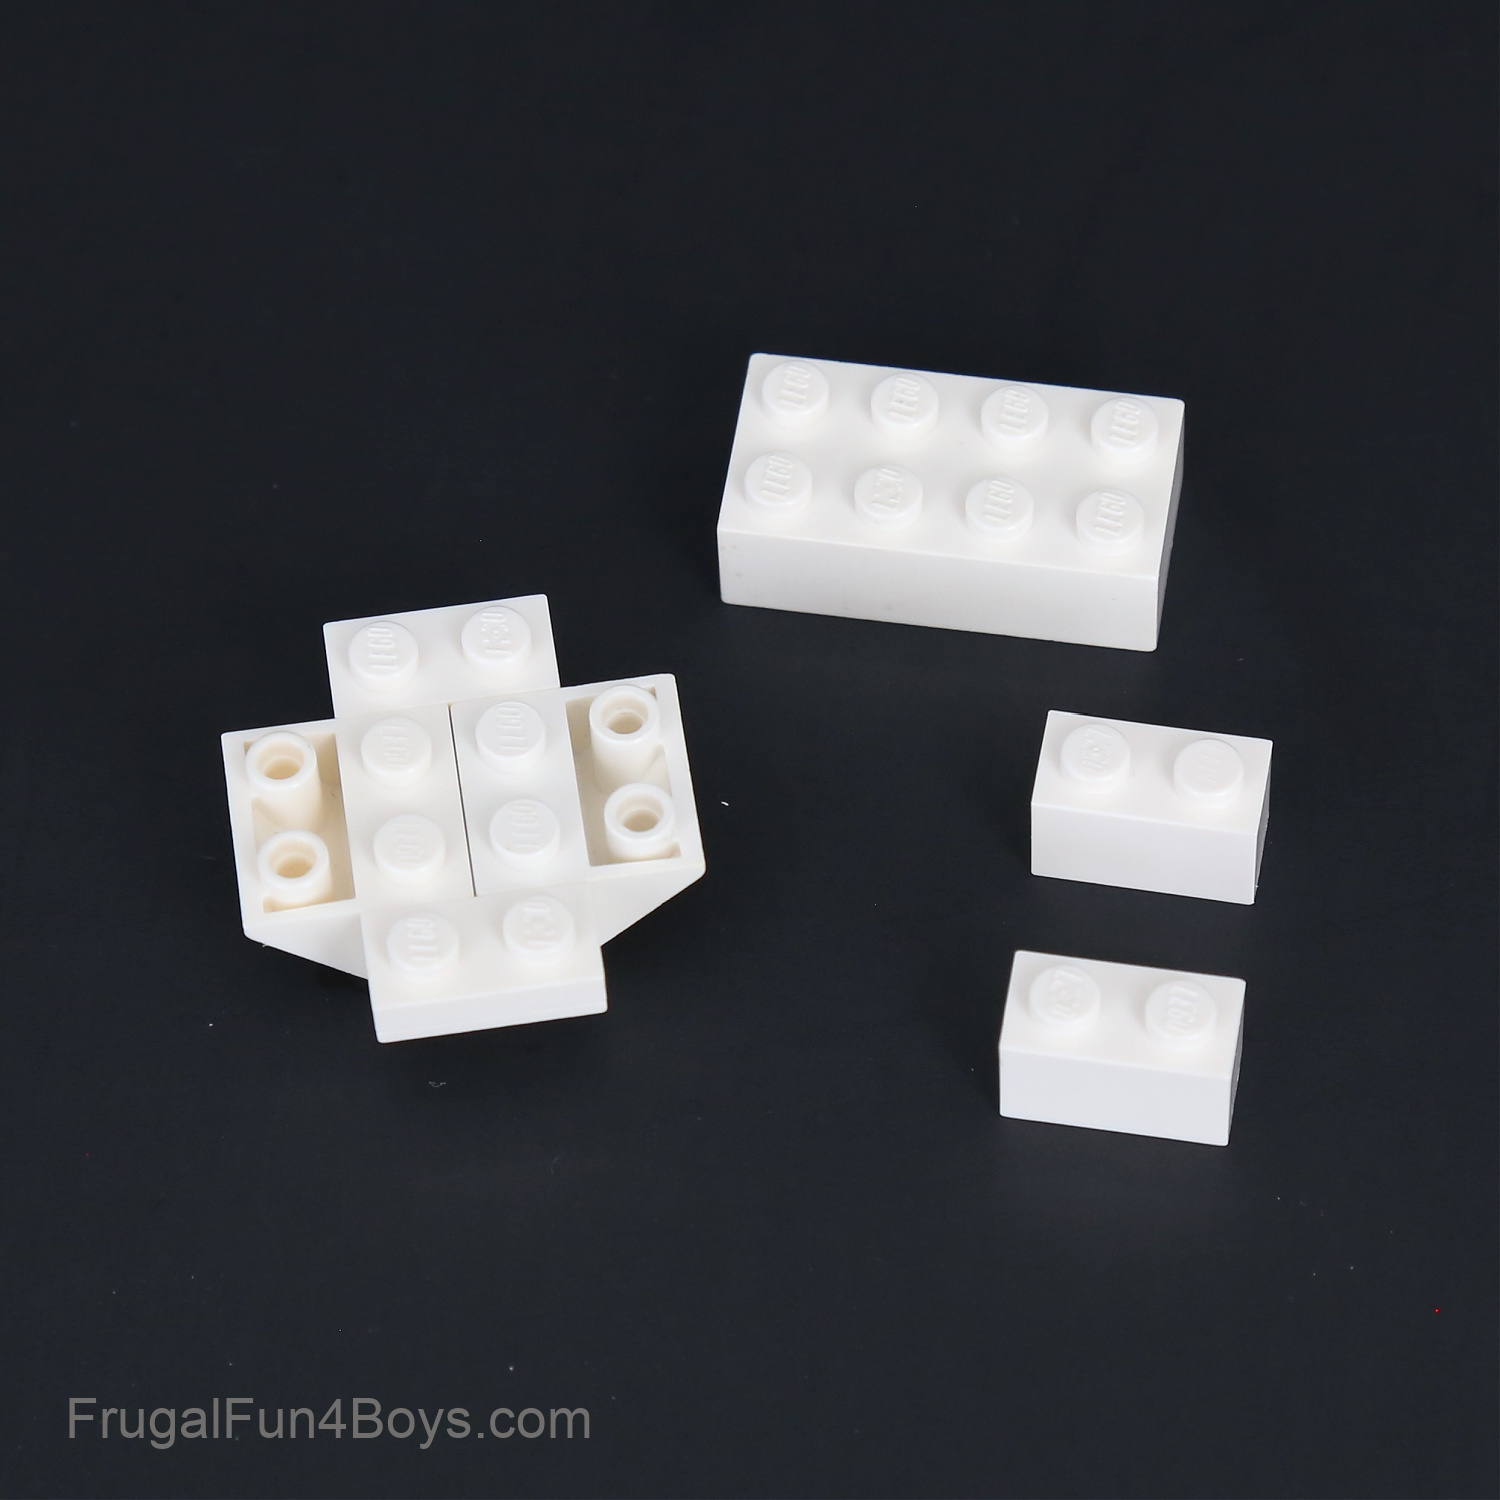
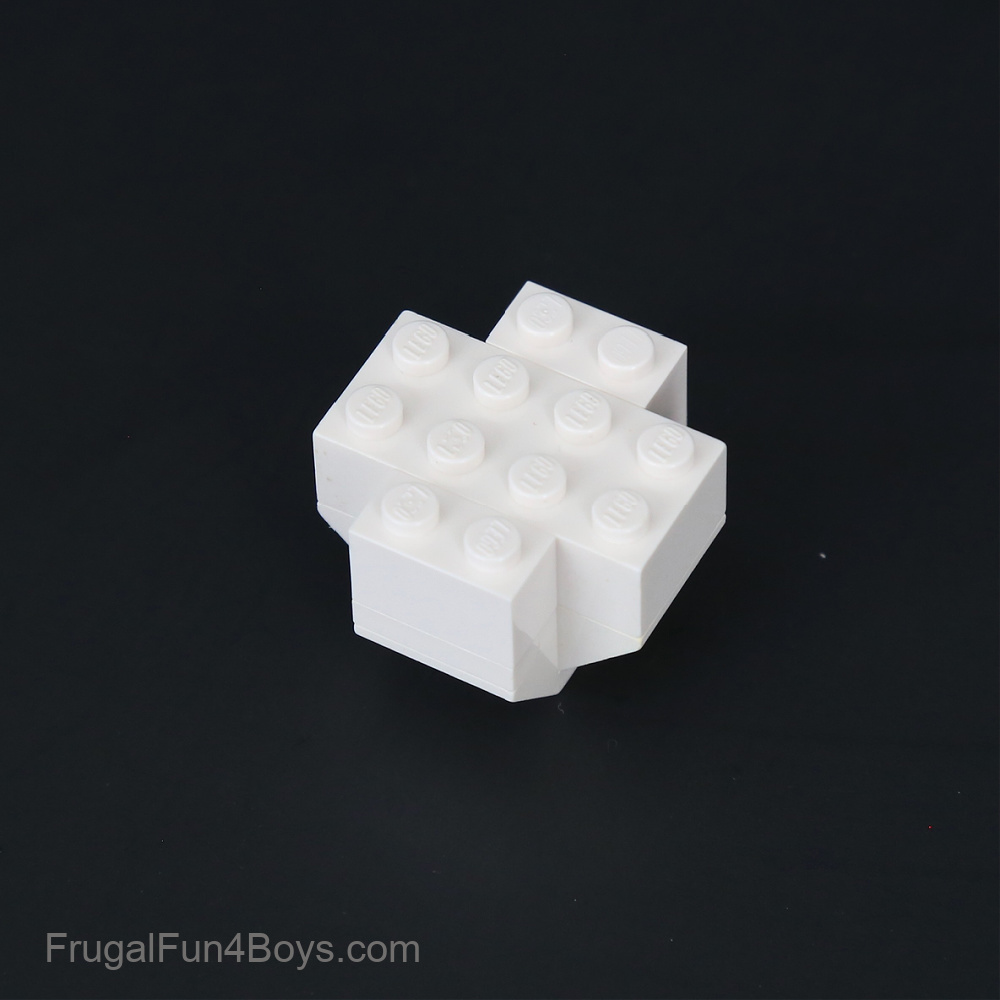
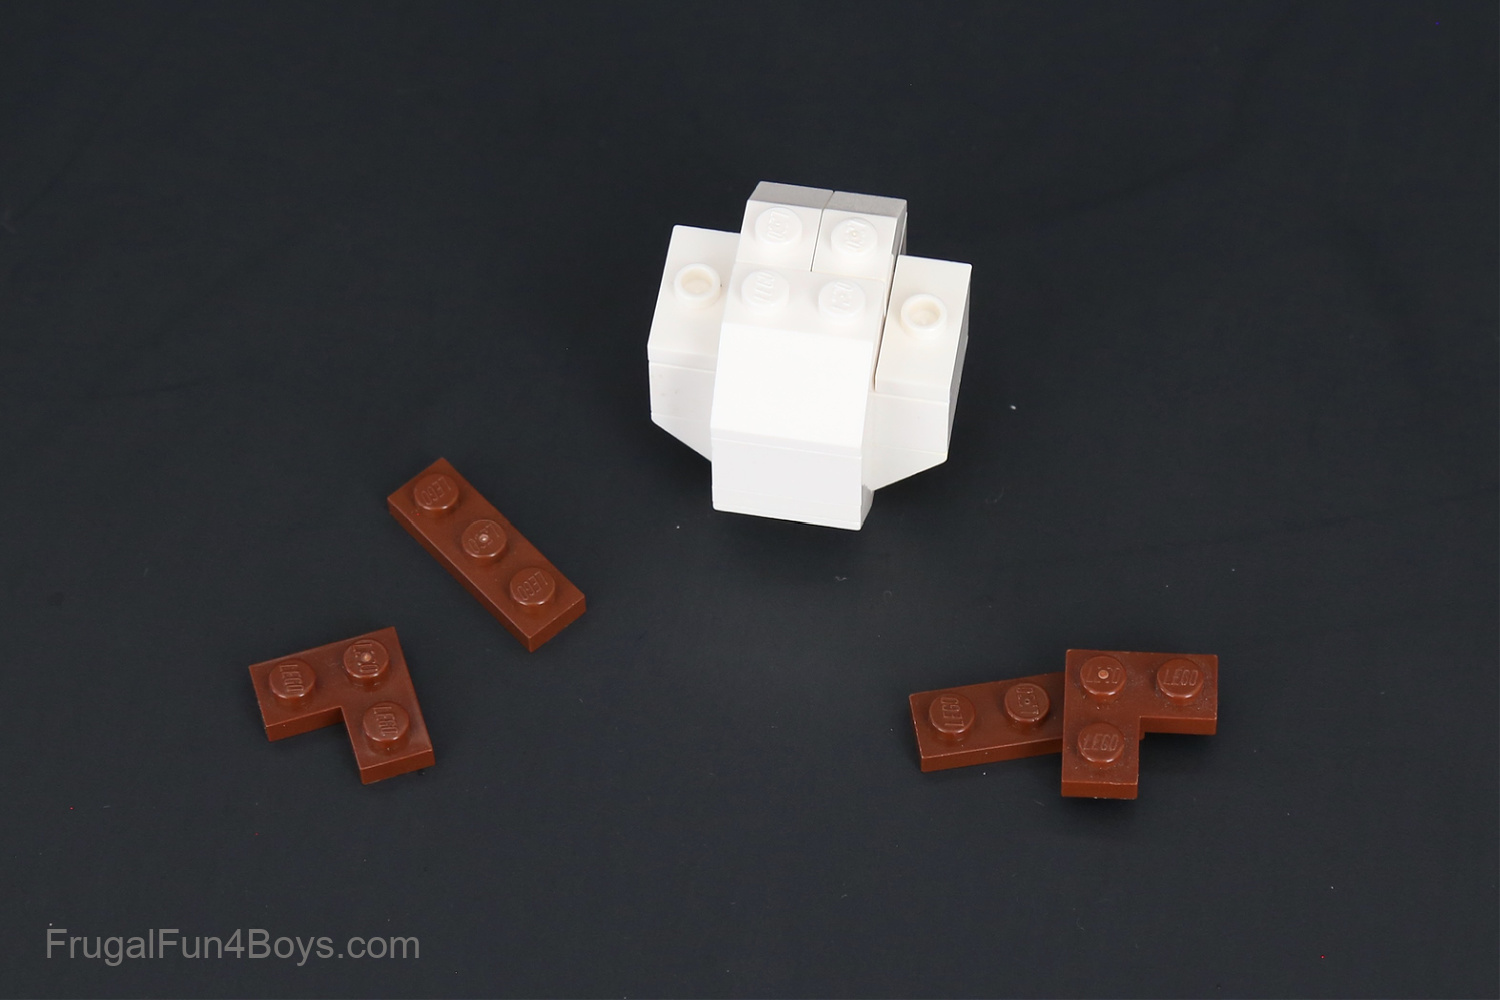
Step 1: Build the base of the snowman’s body. This is pretty straightforward. I used two 2 x 2 inverted slopes, two 2 x 2 slopes, four 2 x 4 bricks, a 1 x 6 brick, and a 2 x 2 brick.
Step 2: Add two 2 x 2 white inverted slopes and a 2 x 2 white brick to the snowman’s body. Then find a 1 x 2 white plate and two 2 x 2 white plates.
Step 3: Add the three white plates to the body as shown. Then find two 2 x 2 bricks, a 1 x 2 brick, a 1 x 2 brick with two studs on the side, and a 1 x 2 – 2 x 2 bracket (inverted).
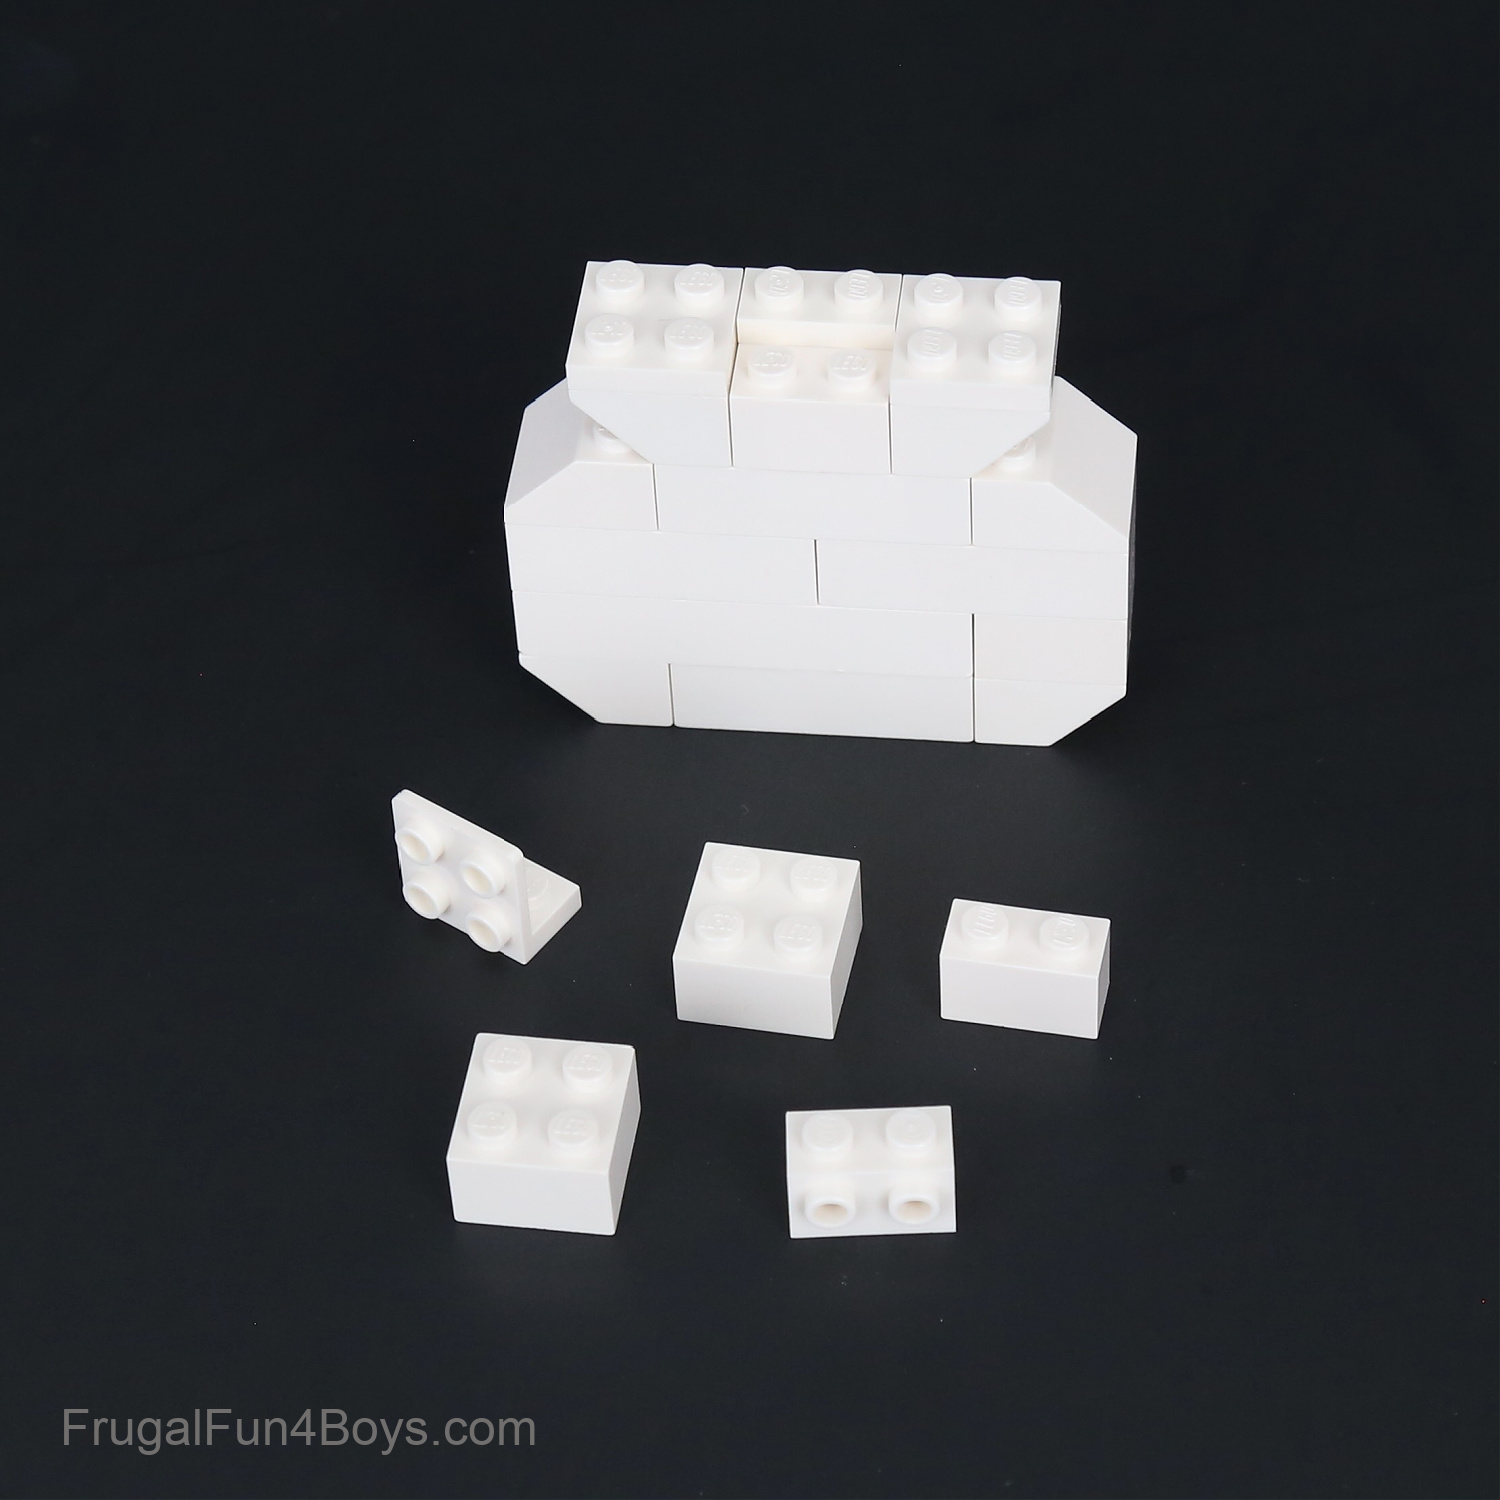
Step 4: Add a 2 x 2 white brick on each side of the snowman. Then place a 1 x 2 brick on the back and a 1 x 2 brick with two studs on the front.
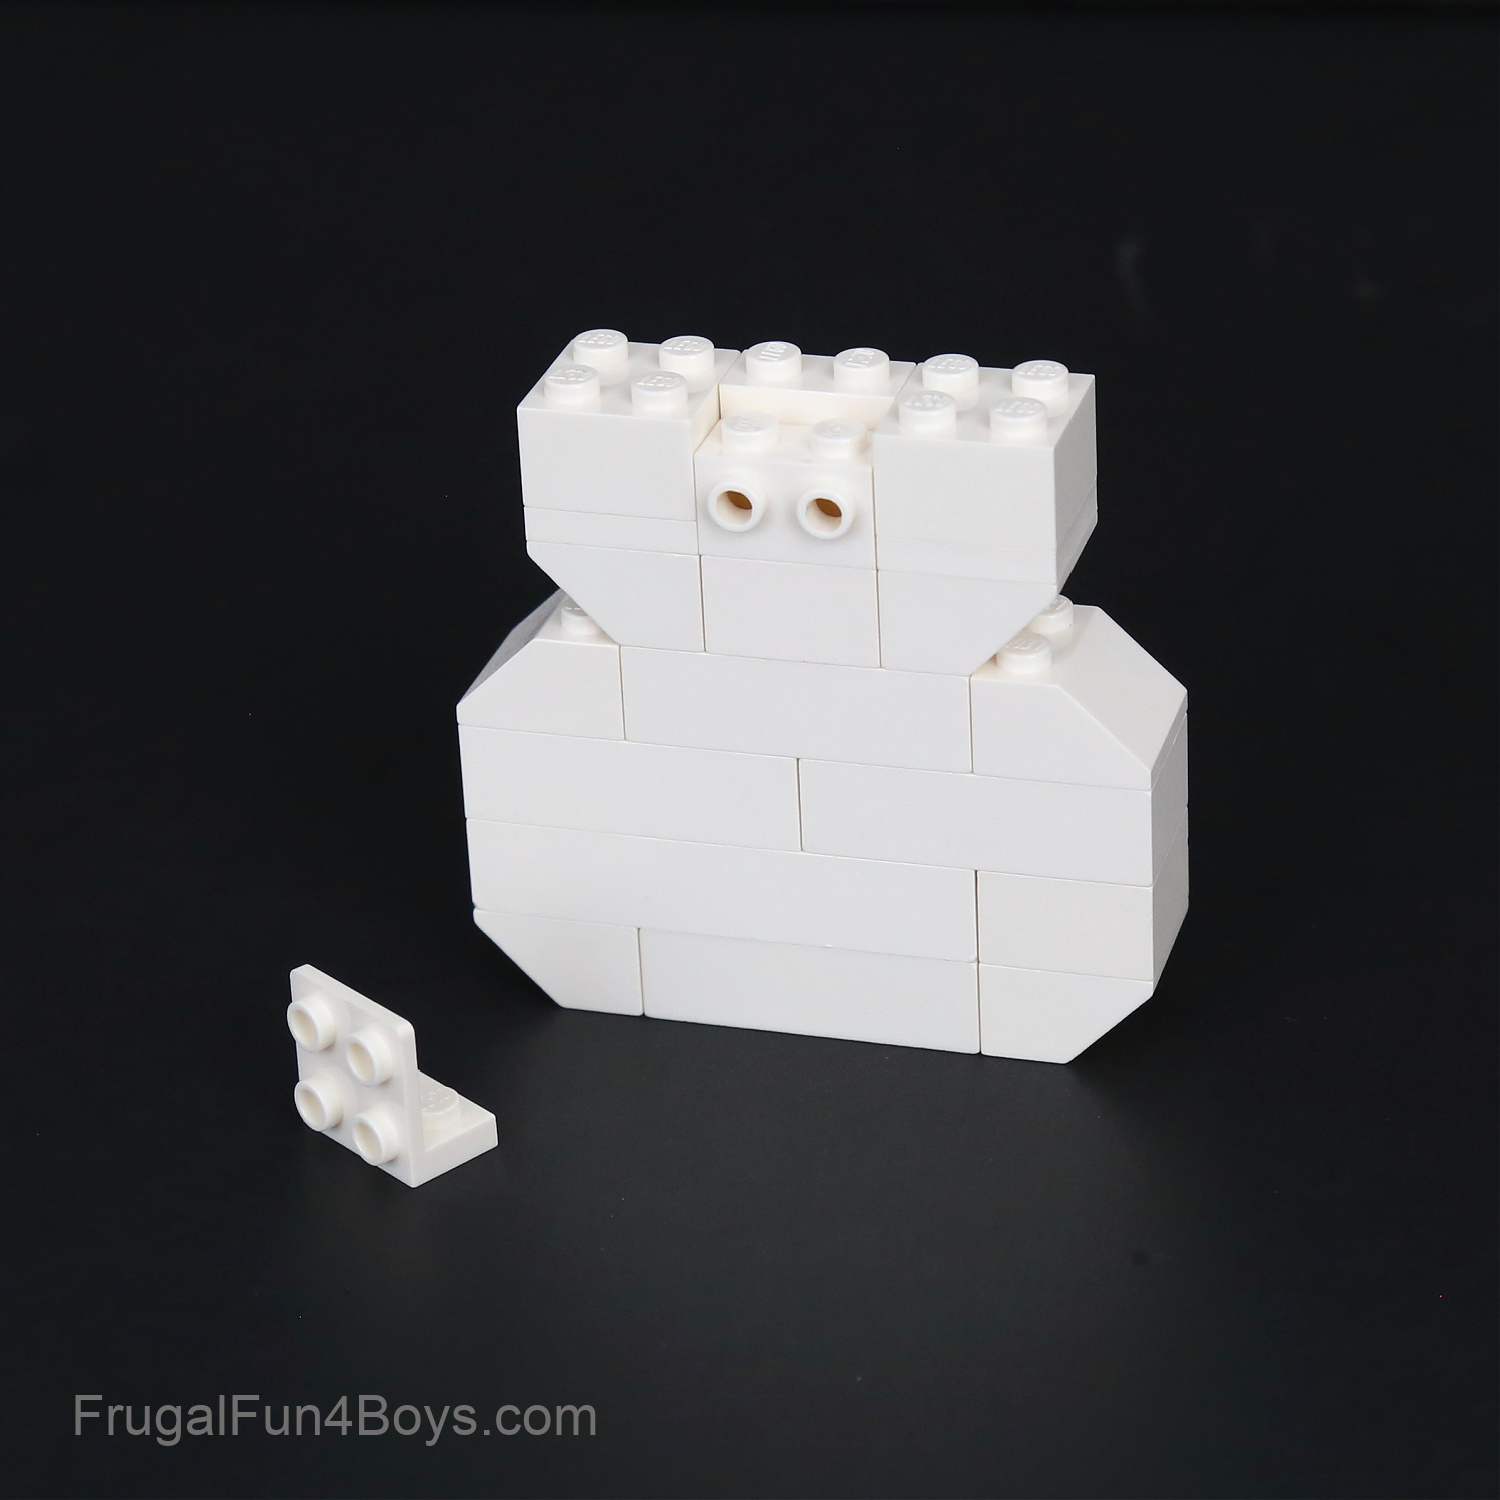
Step 5: Attach the bracket as shown.
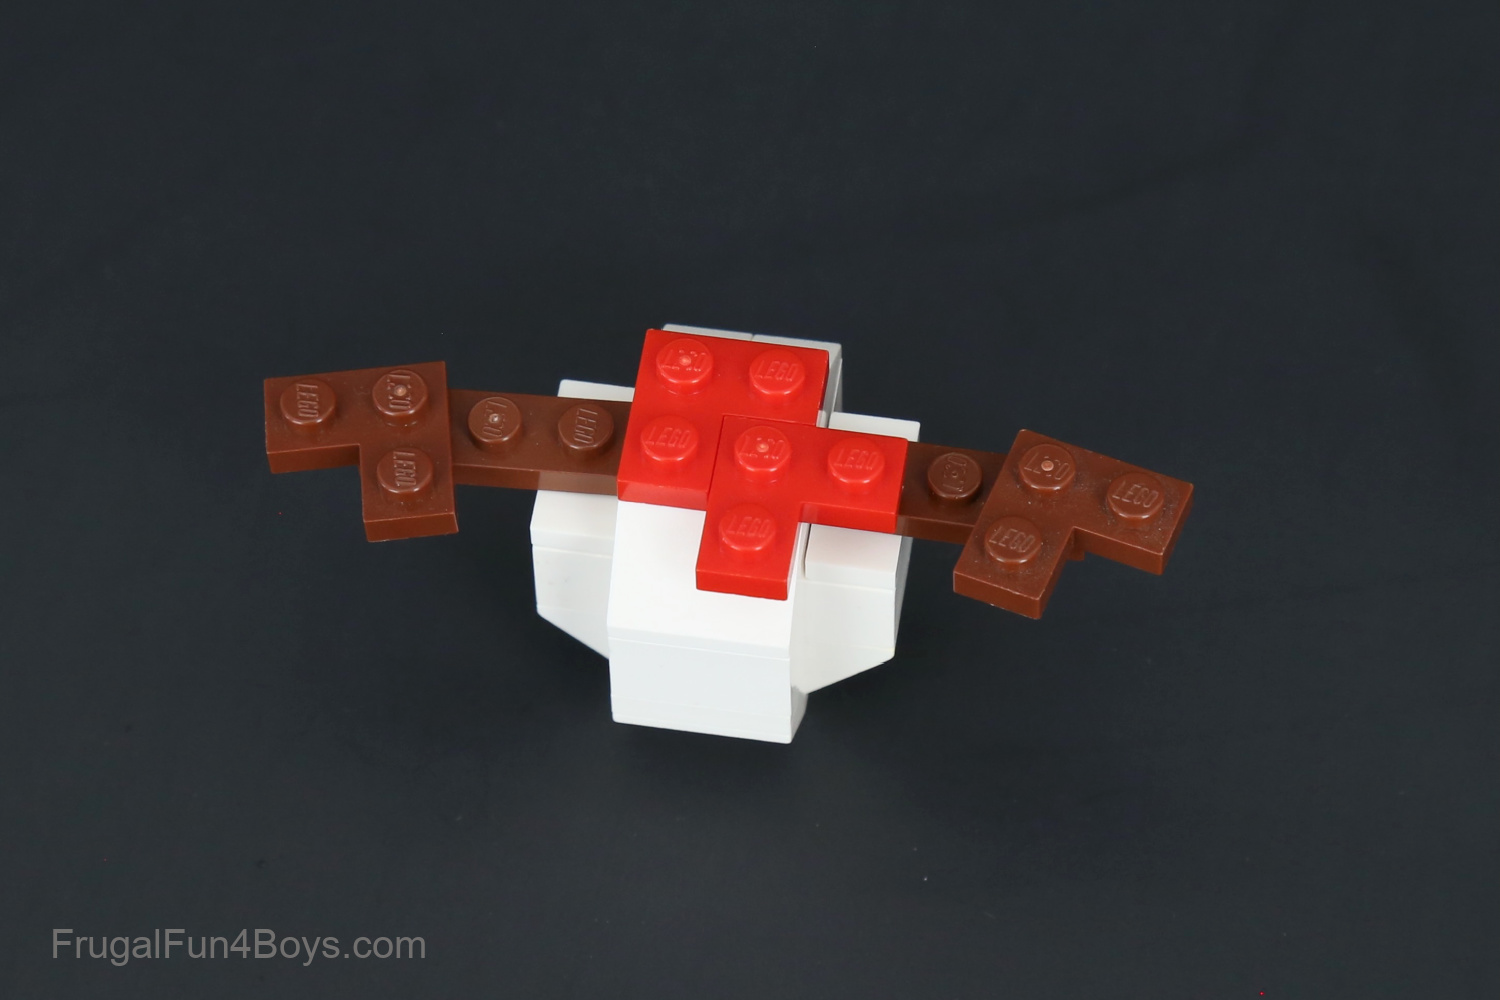
Step 6: Turn the snowman around to the back. Find a 2 x 6 white plate and a 2 x 4 white plate. Build stick arms with 1 x 3 brown plates and 2 x 2 brown corner plates.
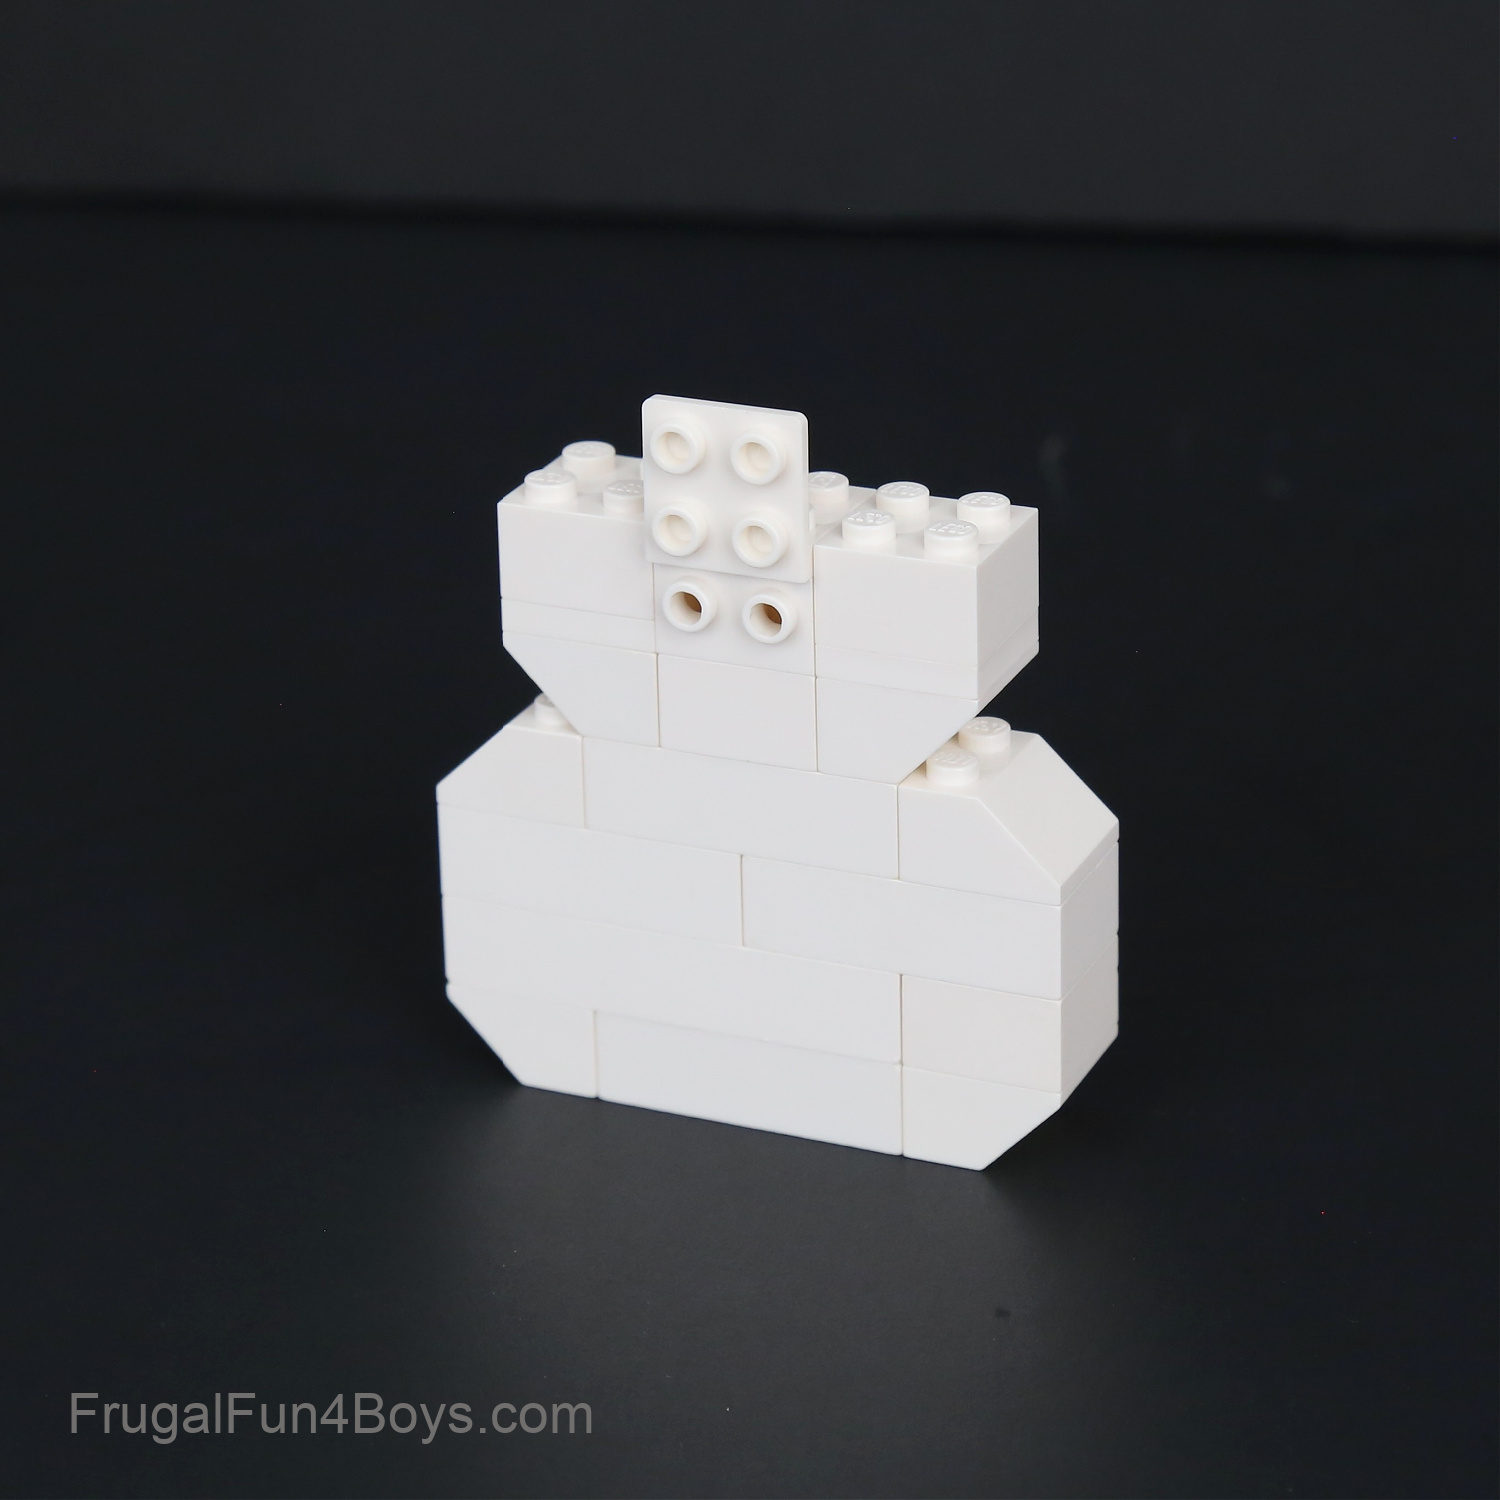
Step 7: Place the 2 x 6 plate on the body. On top of it, add the 2 x 4 plate and the arms.
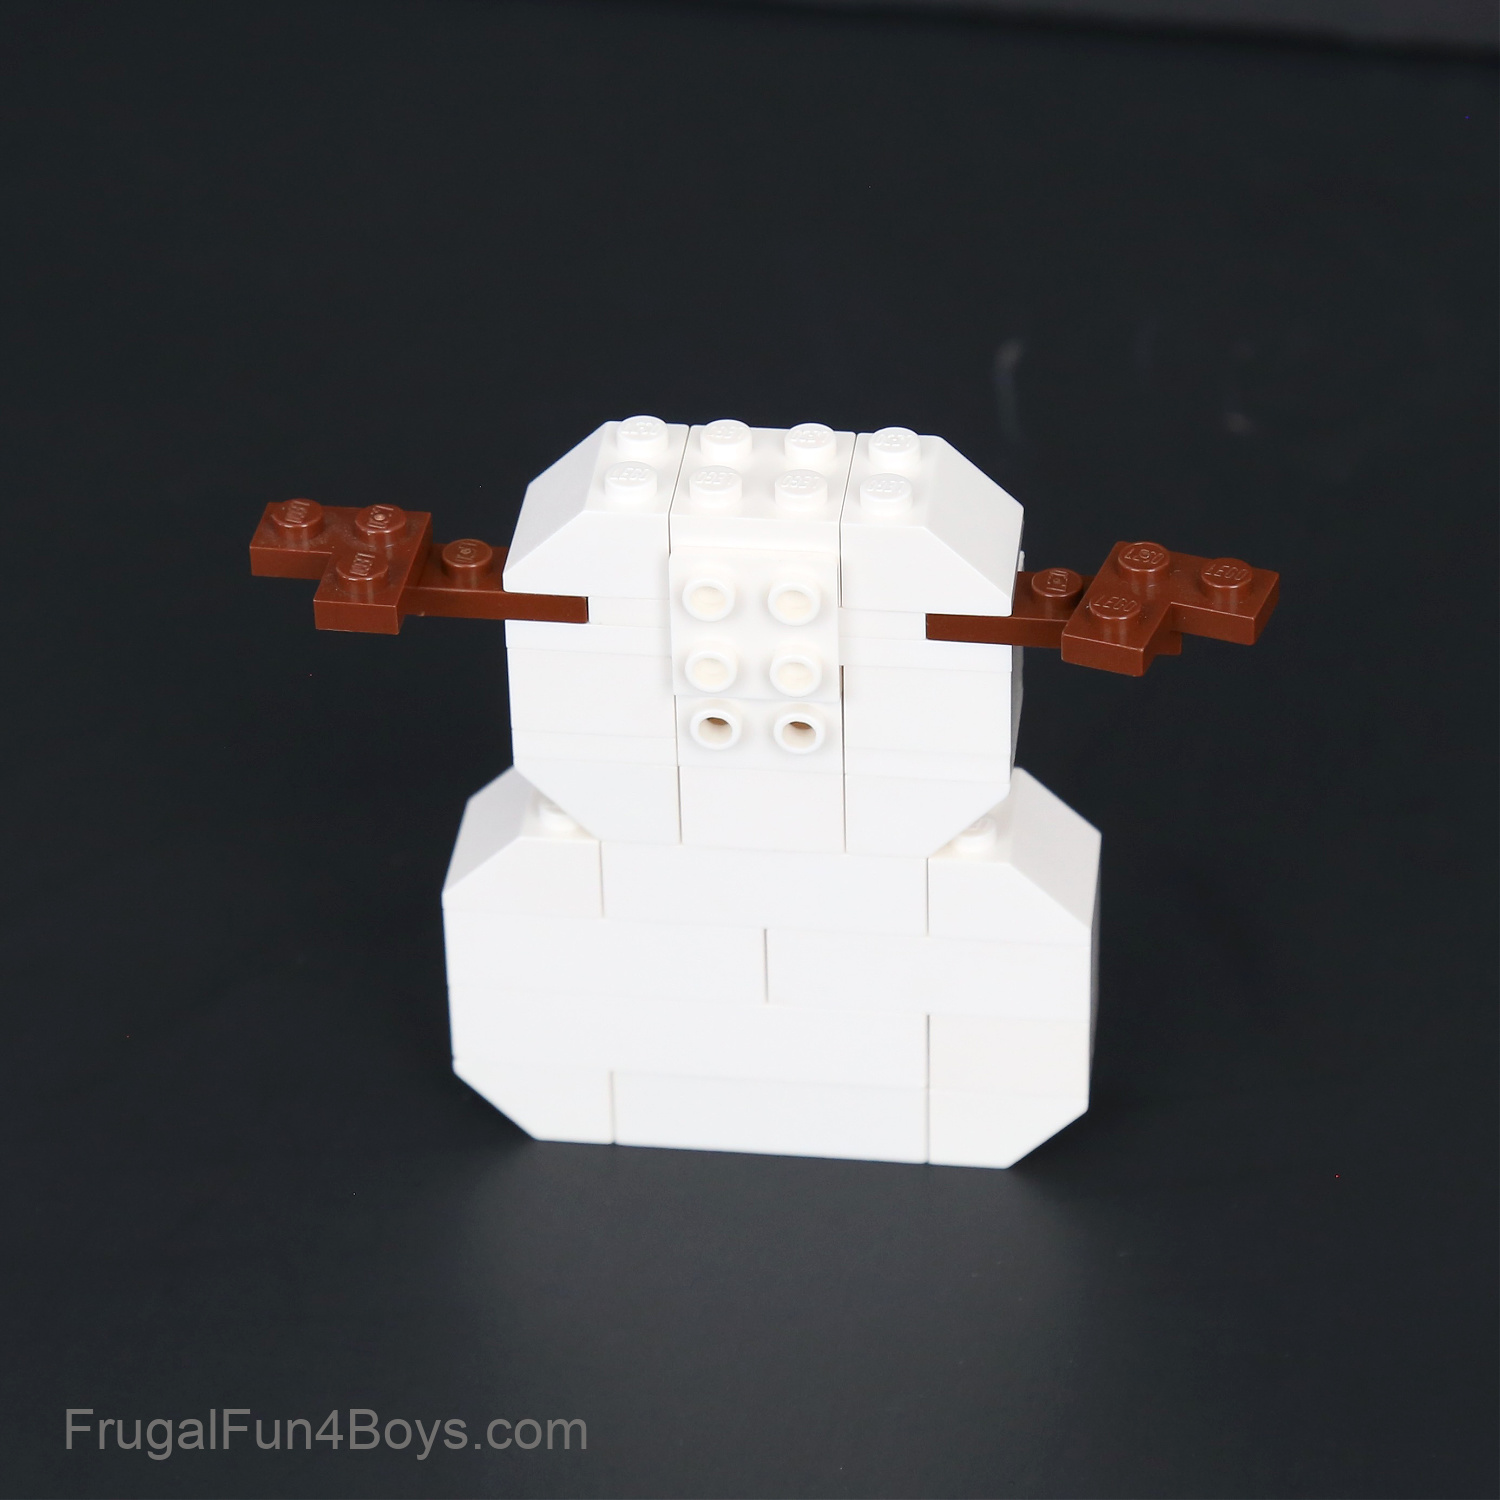
Step 8: Turn the snowman back around to the front. Add two 2 x 2 slopes and a 2 x 2 brick.
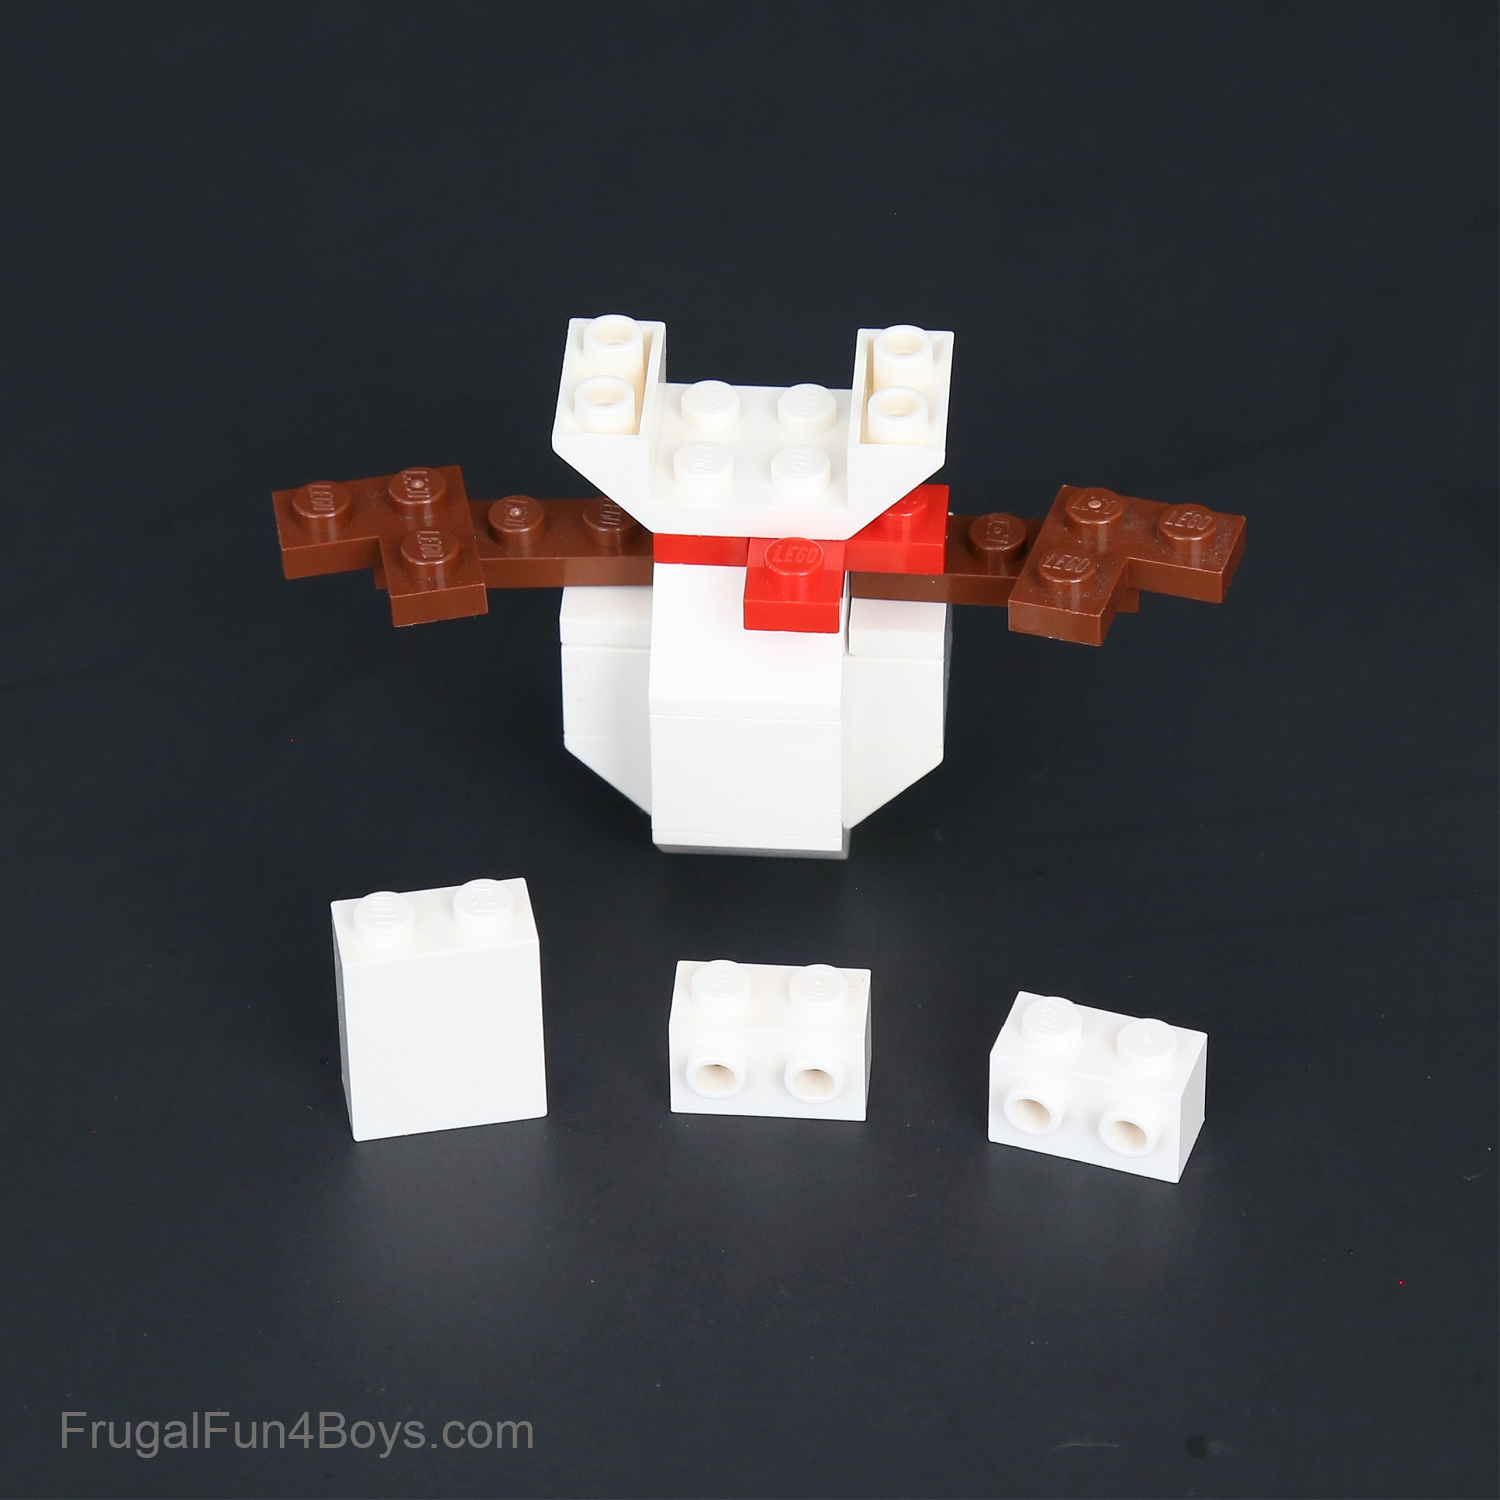
Step 9: Build a scarf for the snowman. Add a 1 x 4 brick, a 1 x 2 brick, and a 1 x 1 brick in any color. Then add a 1 x 1 brick with one stud on the side.
Find three 1 x 2 white jumper plates and three 1 x 1 black round plates.
Step 10: Build the snowman’s head. Add a 2 x 4 white plate, two 2 x 2 white inverted slopes, a 1 x 2 white Technic brick (with a hole), and a 1 x 2 white brick.
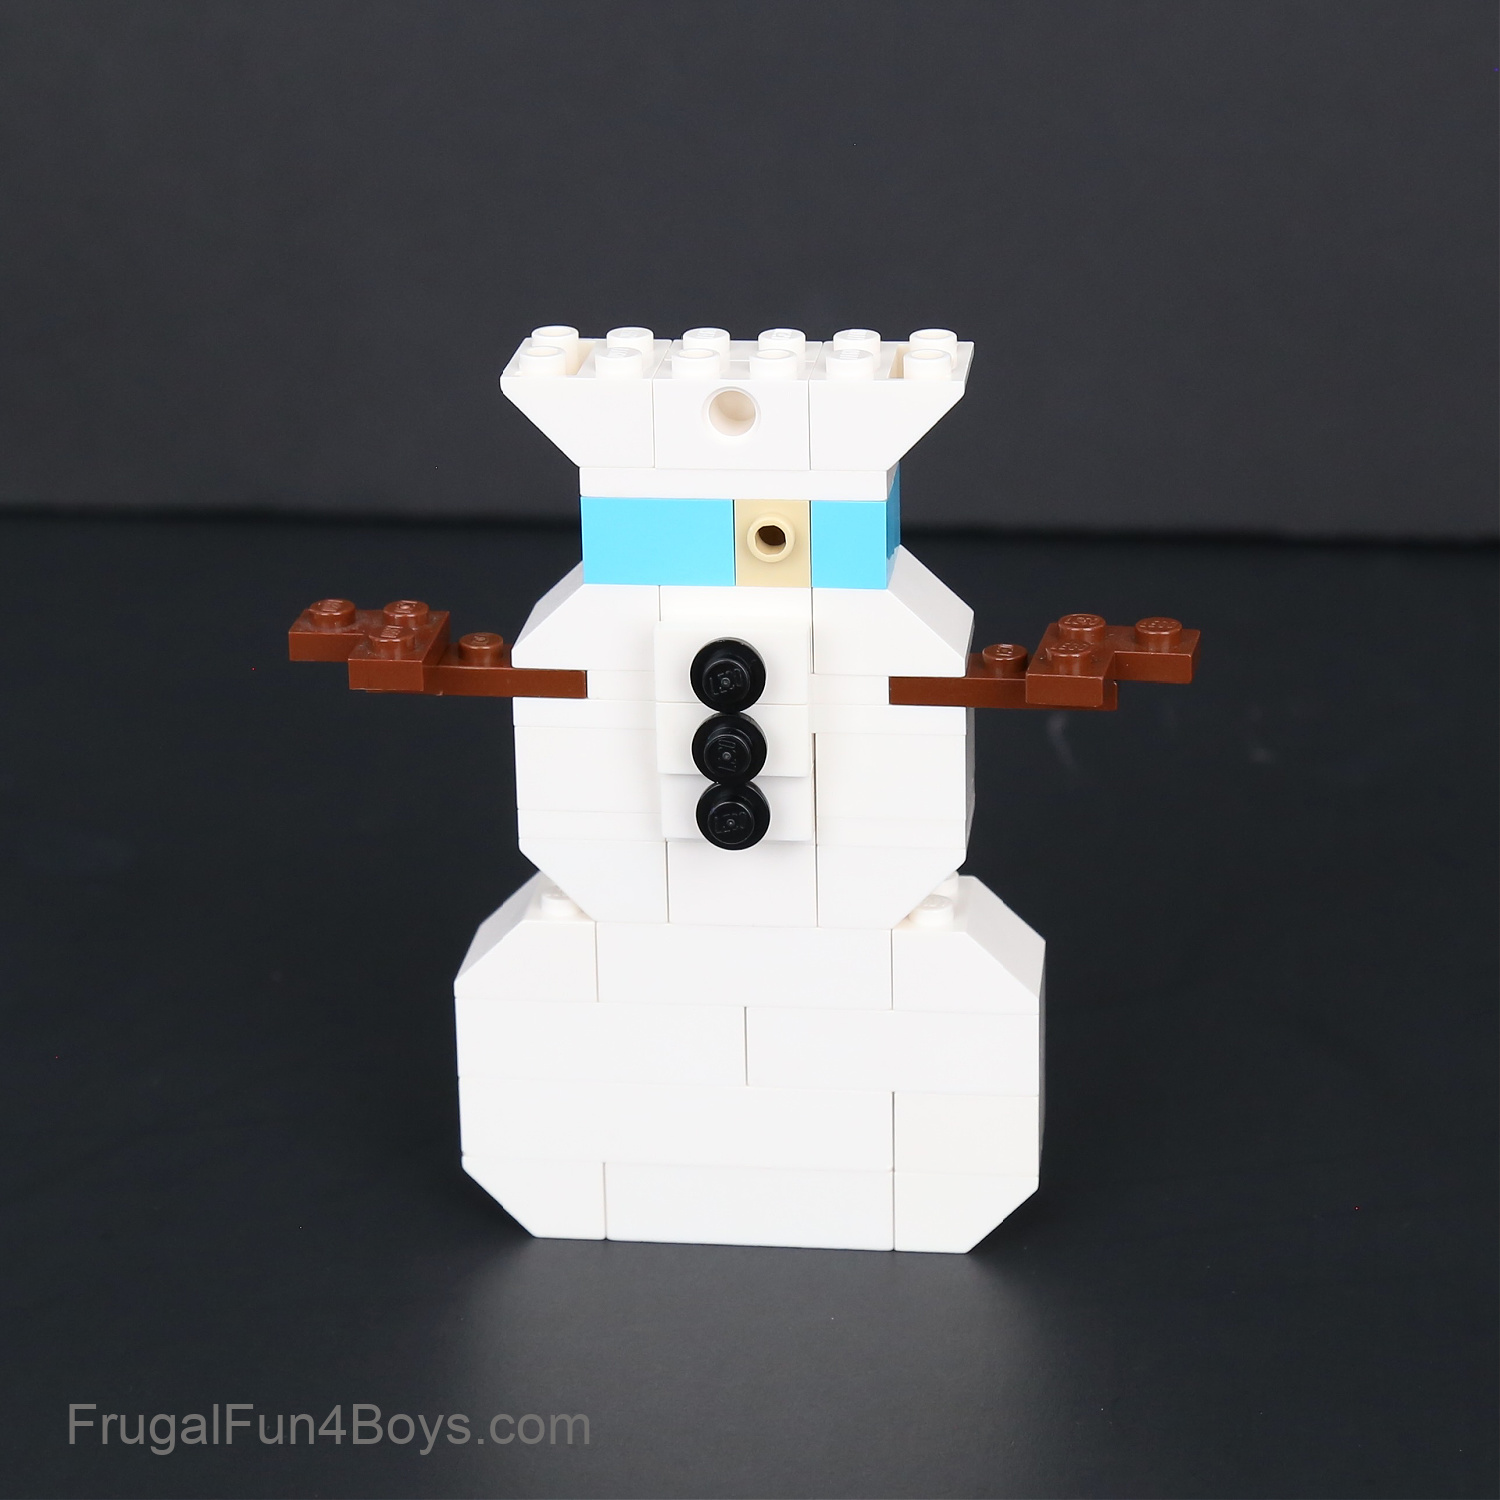
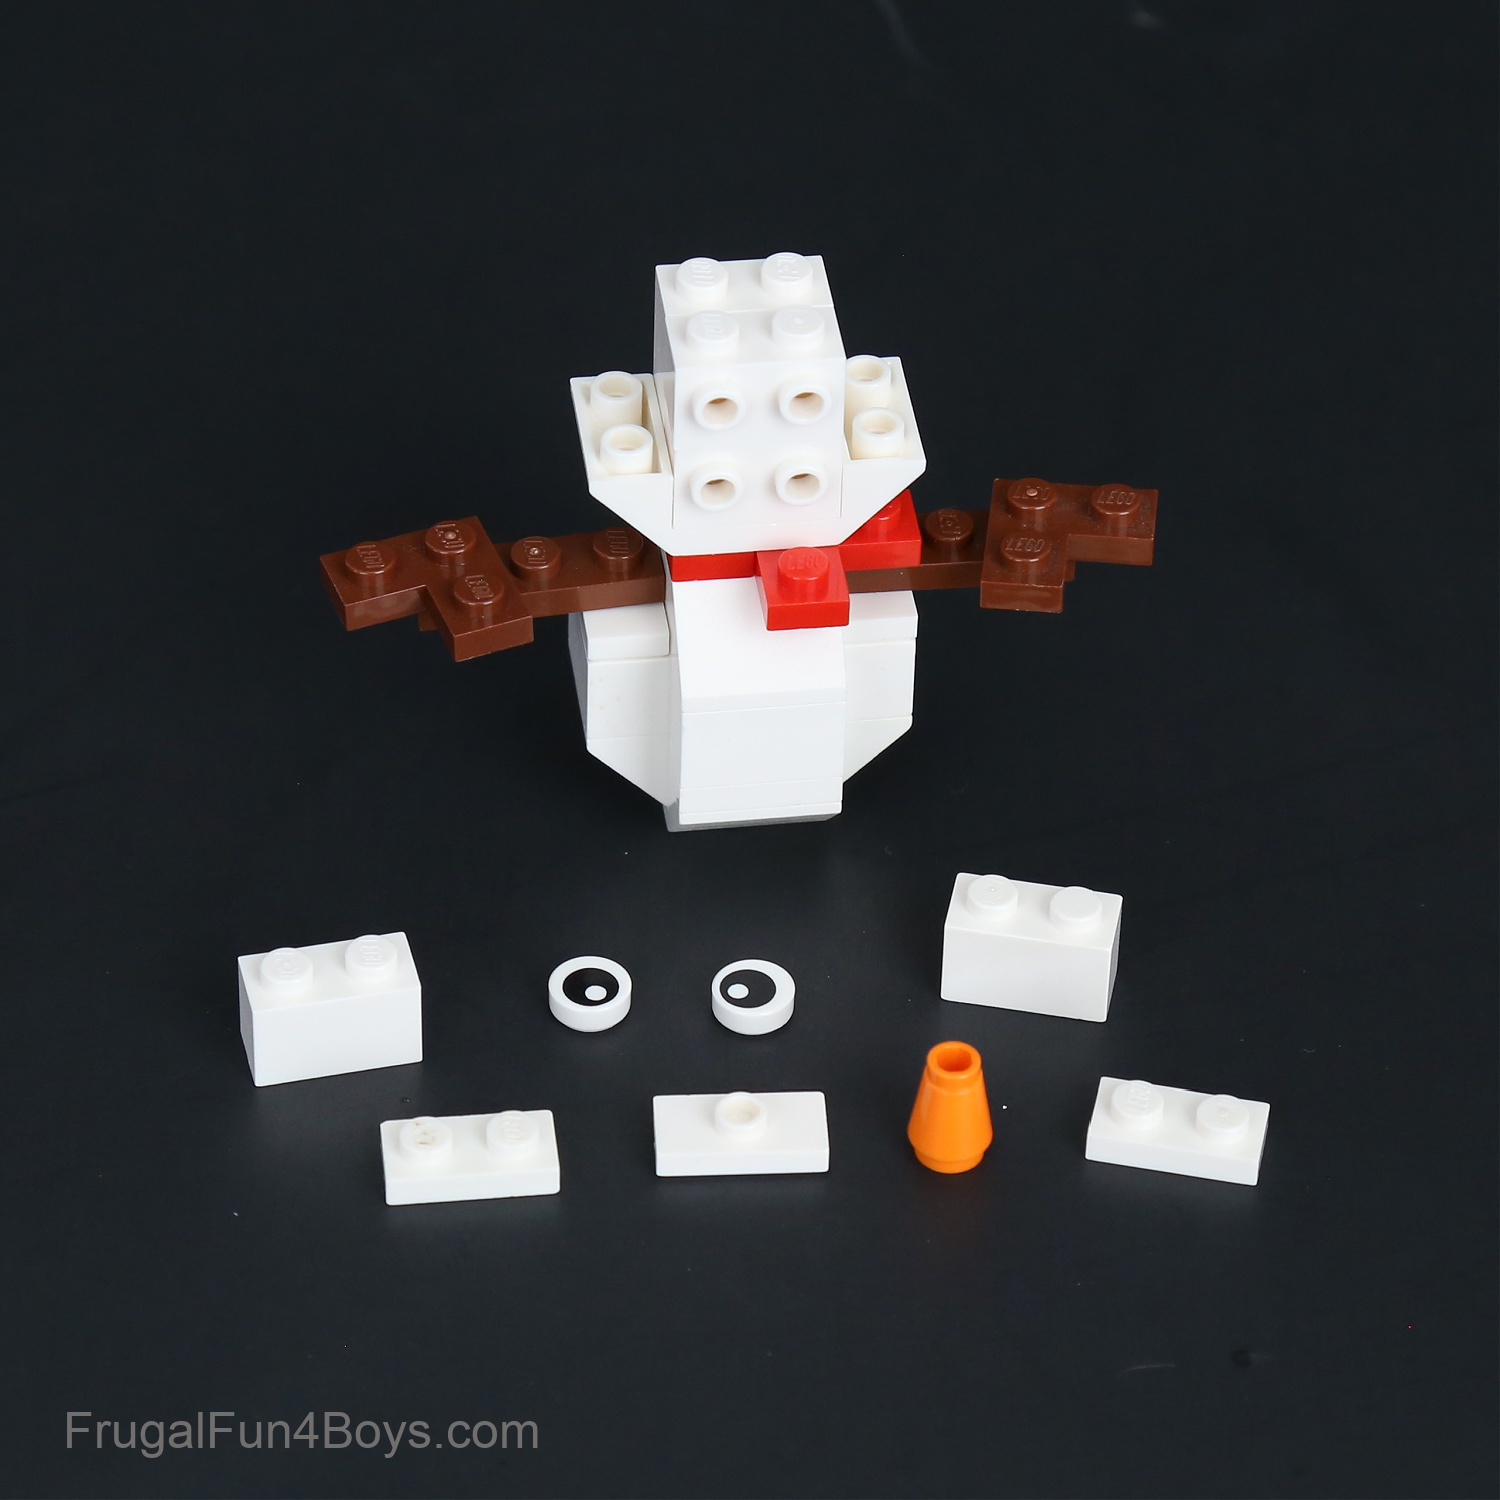
Step 11: Add two 1 x 1 white bricks with one stud on the side, and attach the eyes. Fill in around the eyes with white bricks.
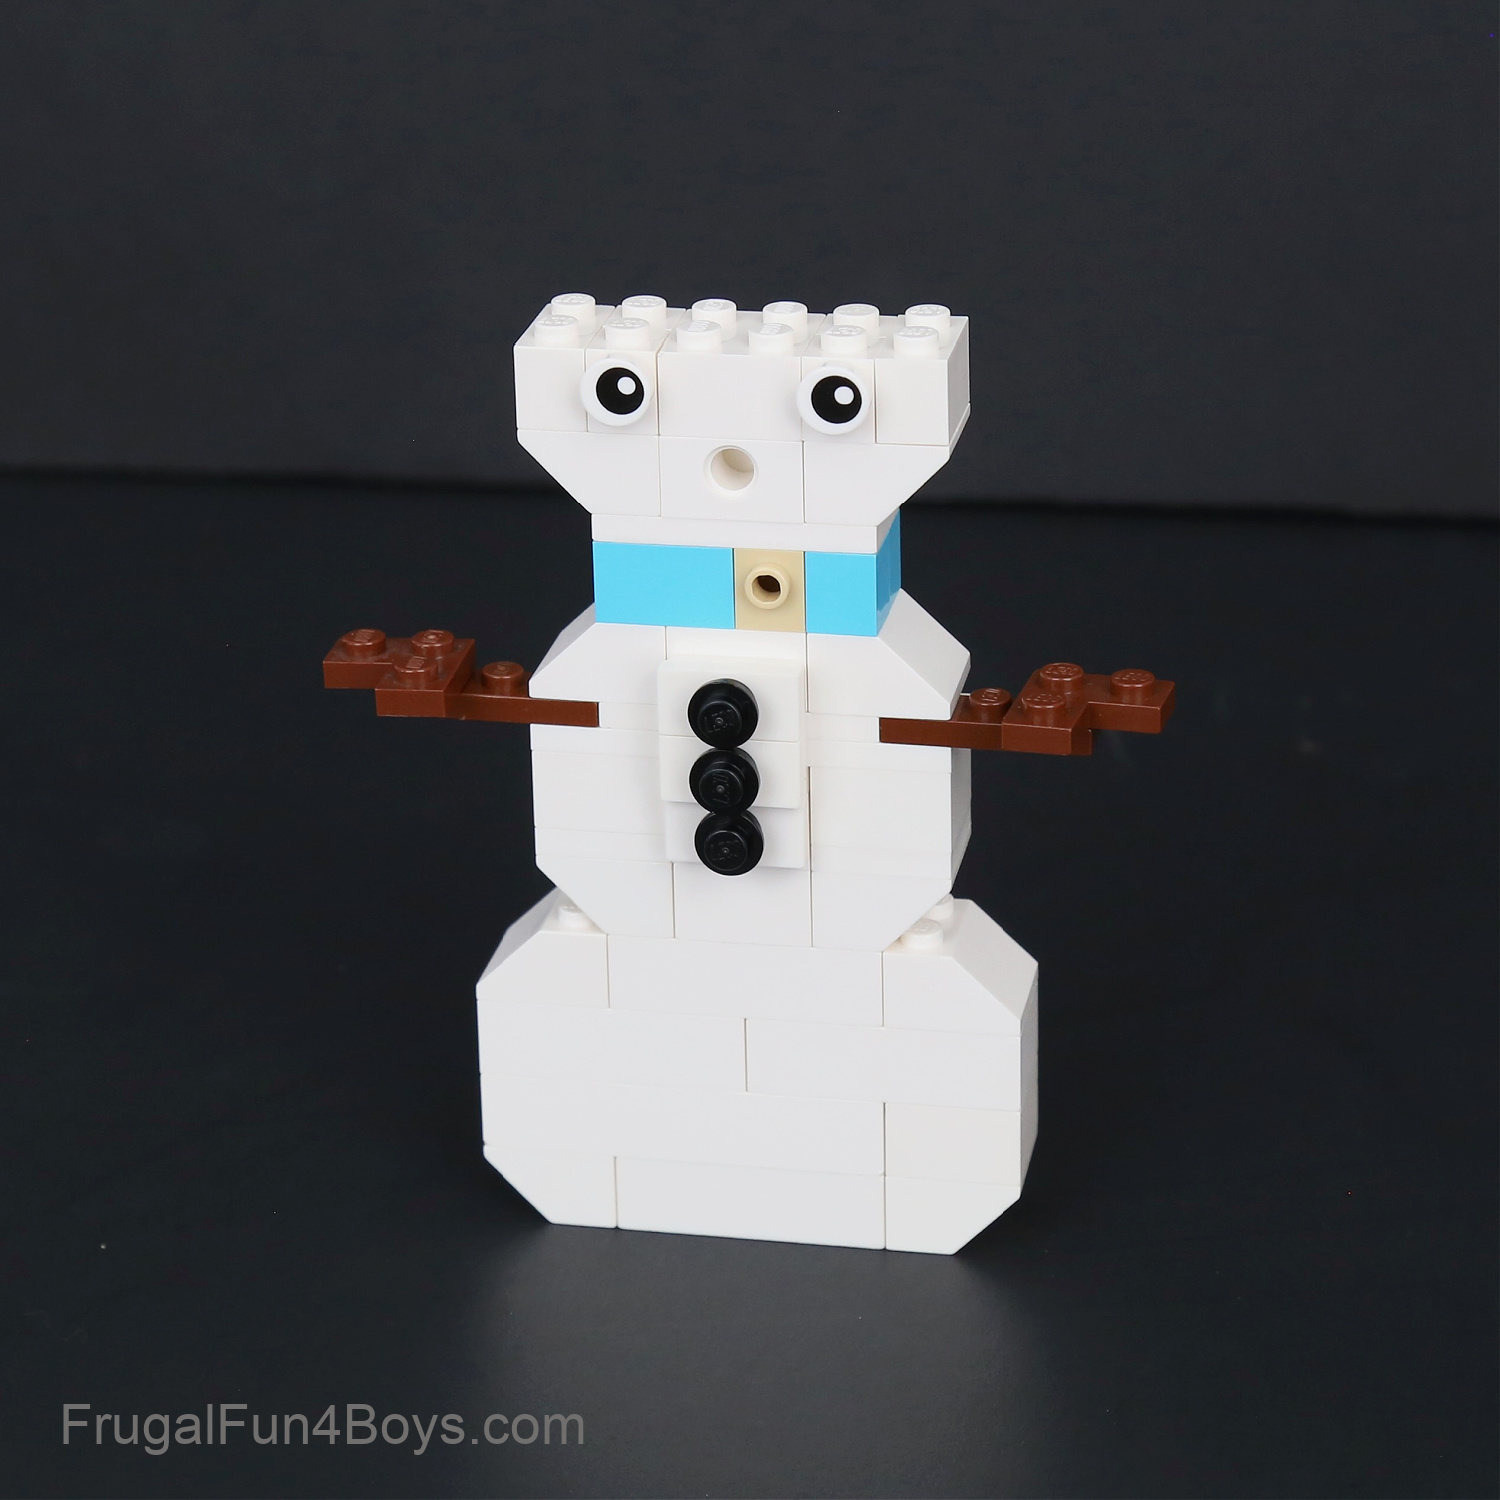
Step 12: Grab a 1 x 4 plate to finish the scarf.
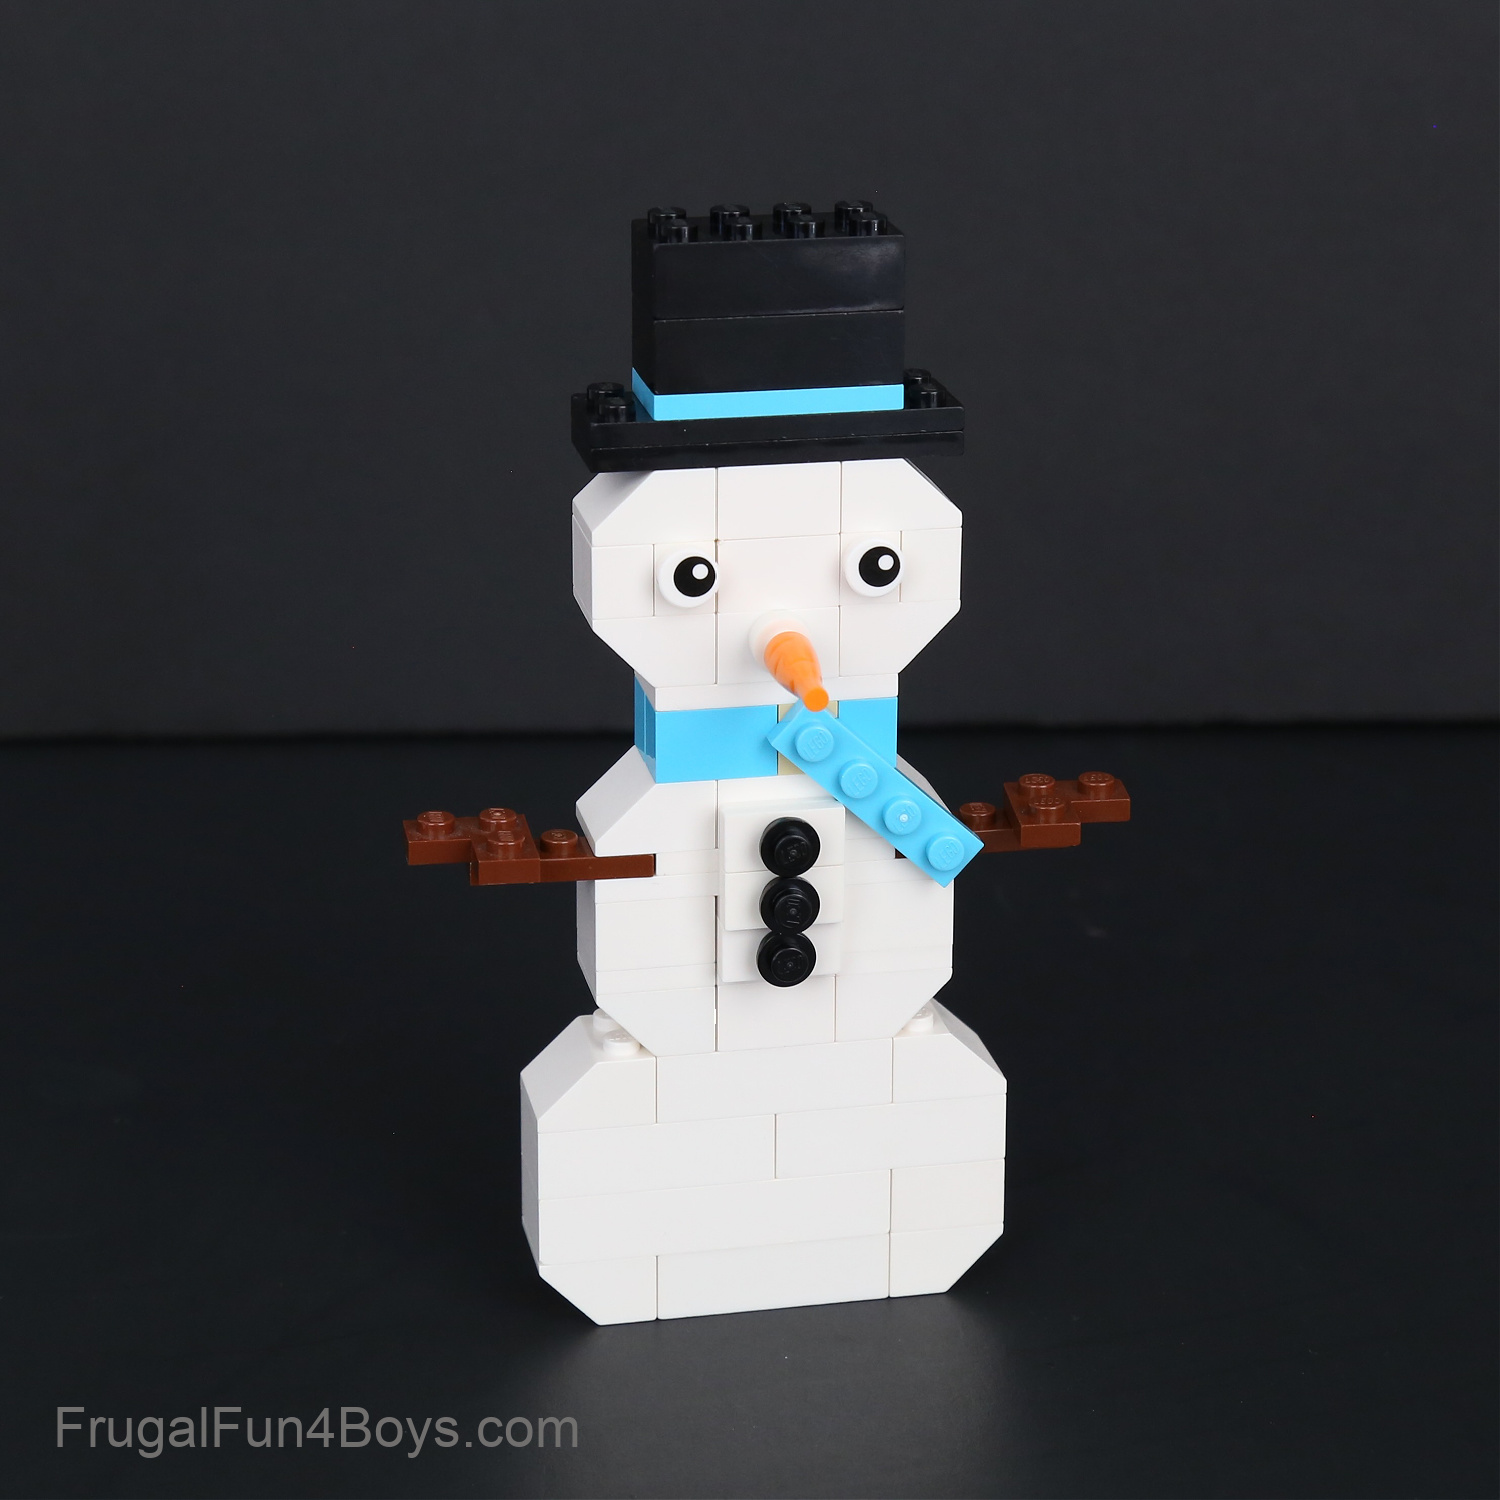
For the nose, we used the three pieces shown. The blue half-length pin and the white 1 x 1 round tile with a bar will attach the carrot to the face.
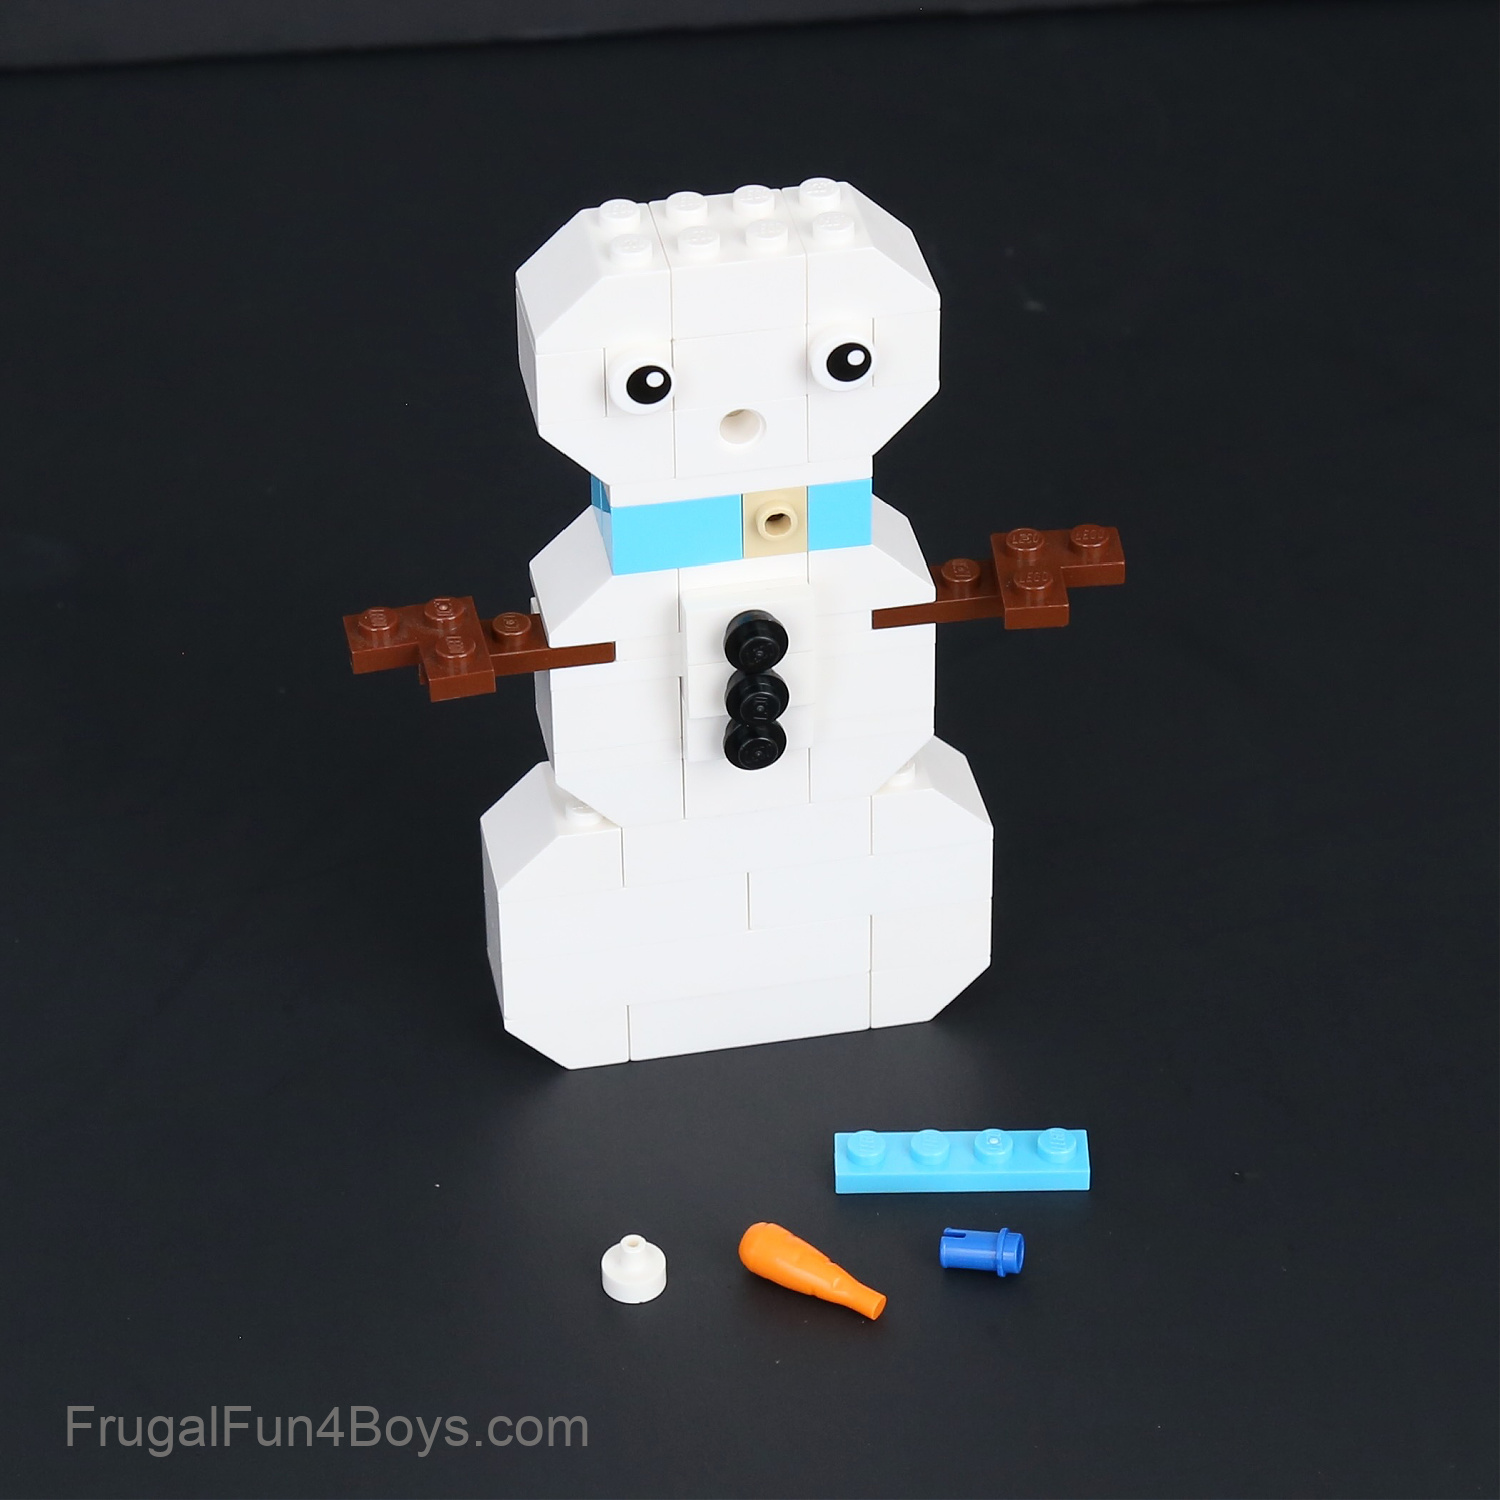
Step 13: Insert the blue pin into the Technic brick. Then add the 1 x 1 white round tile. Attach the carrot to the bar on the tile.
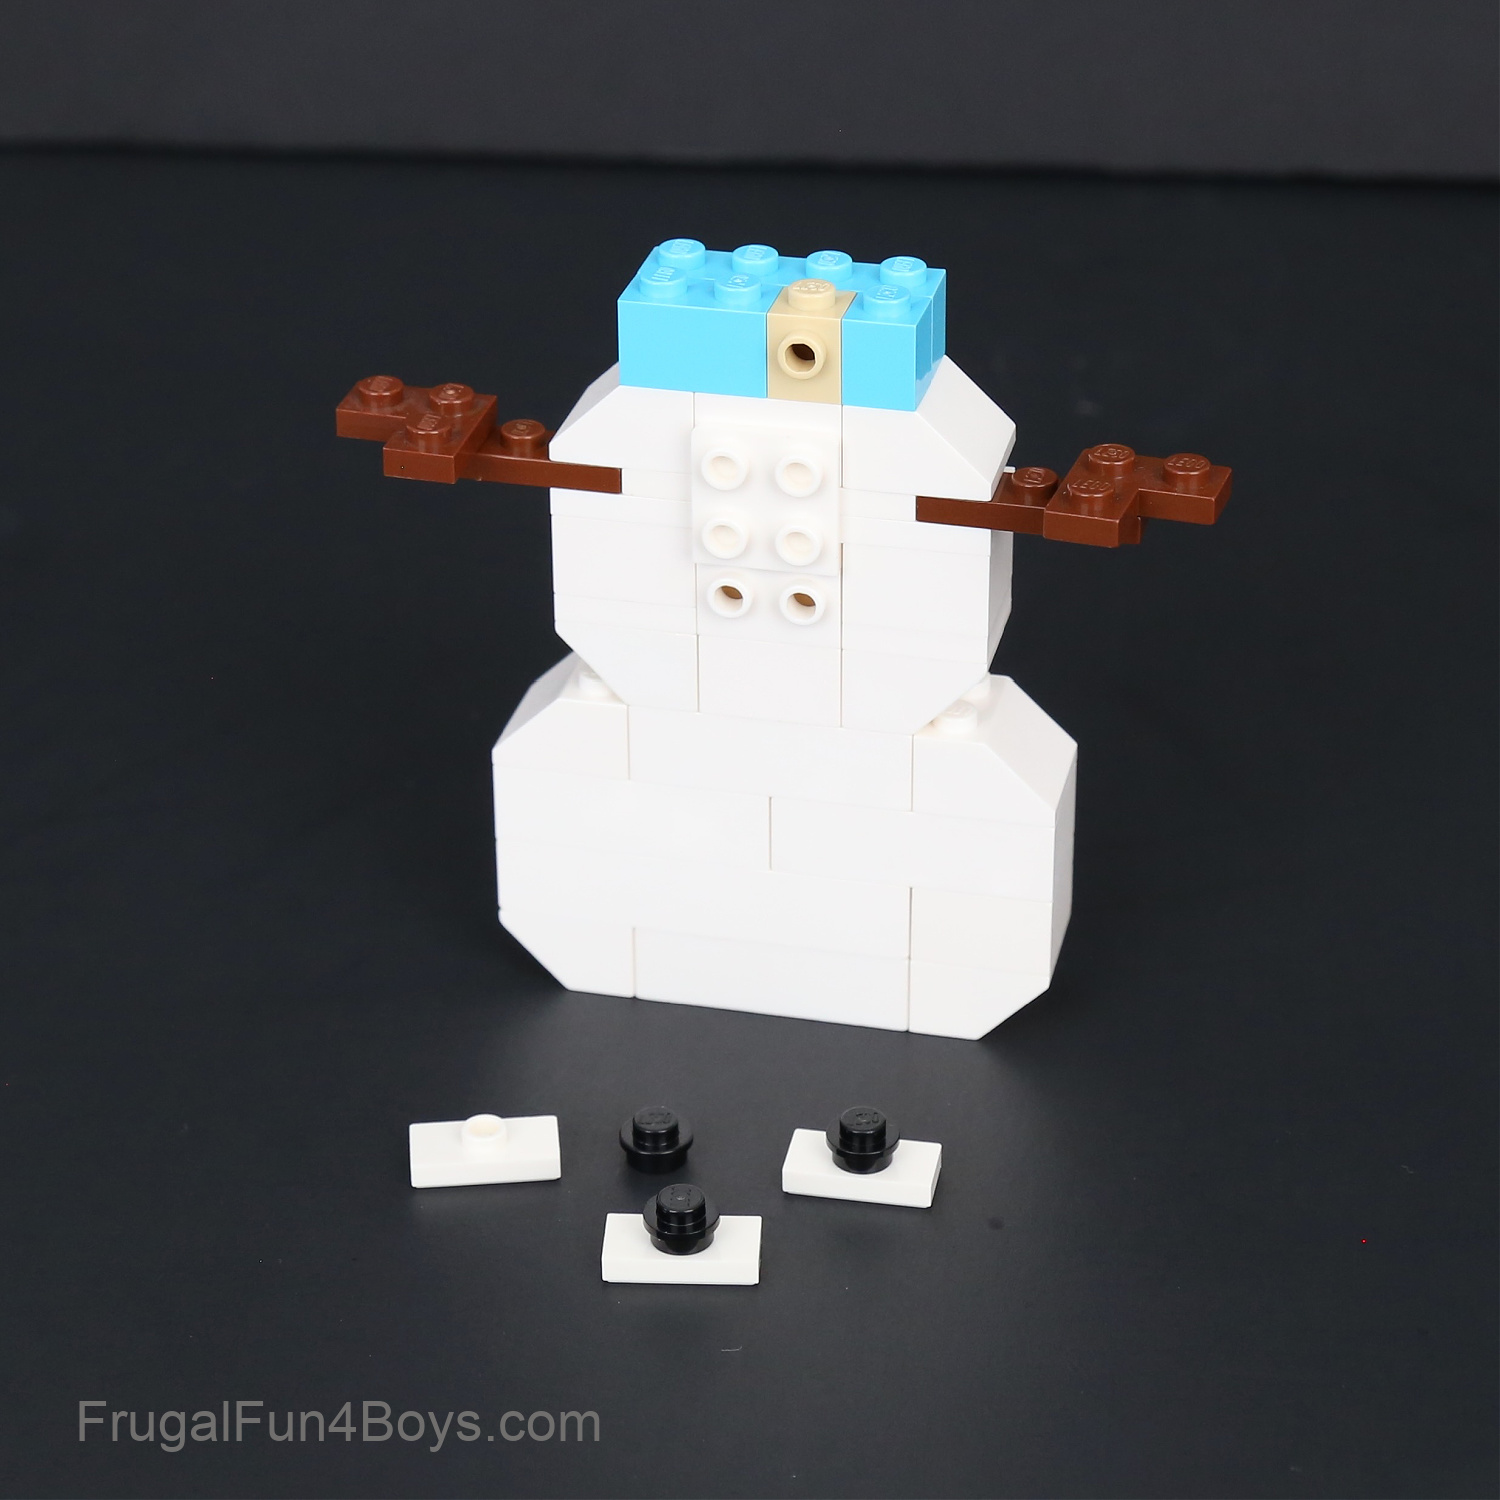
Create a hat for the snowman, and then he’s all finished! My hat is built from two 2 x 6 black plates, one 2 x 4 medium azure plate, and two 2 x 4 black bricks.
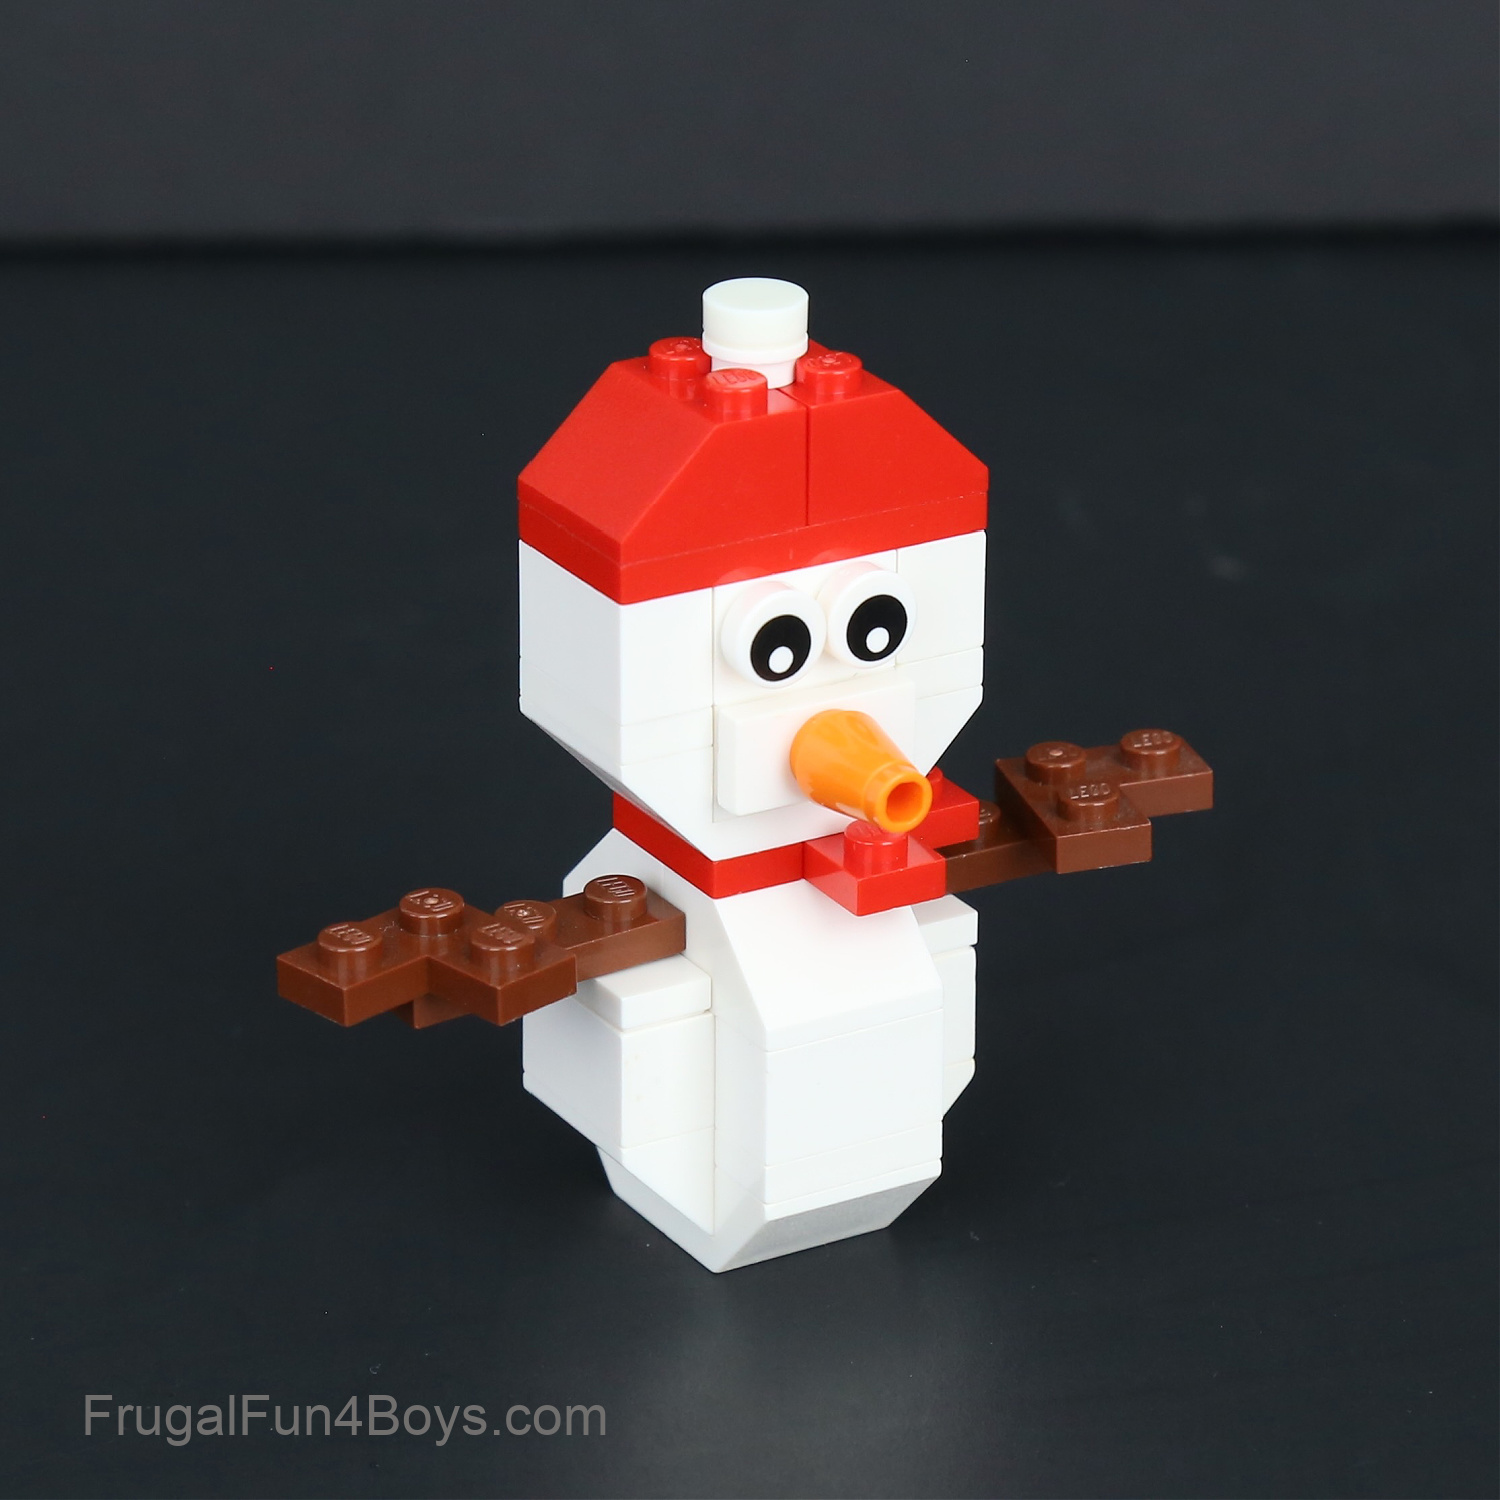
How to Build the Little LEGO Snowman:
Step 1: Grab two 2 x 2 white inverted slopes and a 2 x 4 double inverted slope.
Step 2: Attach the two 2 x 2 inverted slopes to the 2 x 4 inverted slope as shown. Then find a 2 x 4 white brick, two 1 x 2 white bricks, and two 1 x 2 white plates.

Step 3: Add one 1 x 2 white plate on each side of the snowman’s body.
Step 4: Place a 2 x 4 white brick in the center of the body. Then add a 1 x 2 white brick on the front and another on the back.
Step 5: Add two 2 x 2 white slopes to the body. (Pictured is one 2 x 2 and two 1 x 2 slopes.) Then place a 1 x 2 white plate with one stud (jumper plate) on each side.
Build little stick arms for the snowman with 1 x 3 brown plates and 2 x 2 brown corner plates.
Step 6: Attach the arms to the stud on each jumper plate. Give the snowman a scarf by adding two 2 x 2 red corner plates to the body.
Step 7: Add another 2 x 4 double inverted slope for the snowman’s head. Then find a 1 x 2 white brick (two studs high) and two 1 x 2 white bricks with two studs on the side.
Step 8: Place the white bricks on the snowman’s head as shown. Then find two 1 x 2 white bricks, two 1 x 2 white plates, a 1 x 2 white jumper plate, two eyes, and a 1 x 1 orange cone.
Step 9: Place one 1 x 2 white plate and one 1 x 2 white brick on each side of the head. Then attach the eyes. Use the 1 x 2 white jumper plate to center the nose on the face.
Step 10: Finish up the snowman by adding a hat! This hat is a 2 x 4 red plate, two 2 x 2 red slopes, a 1 x 1 white round plate, and a 1 x 1 white round tile.
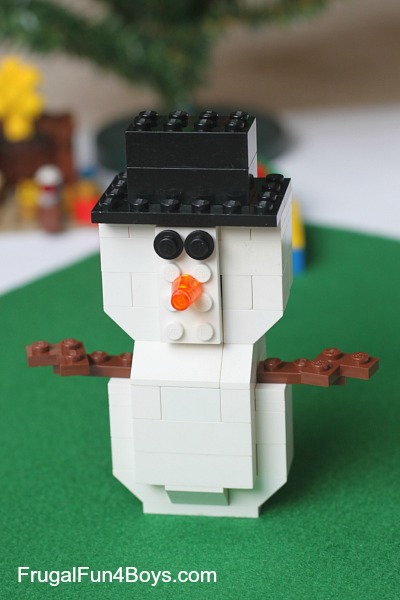
Now see if you can use this photo to build a snowman with a broom! The design of the body is very similar to the tall snowman. His arms are LEGO bars which are inserted into bricks with a stud on the side (open stud). So cute! We didn’t give him a hat, but you can always add one if you want!

This was our original LEGO snowman. I like the updated ones better, but I’m leaving this photo here in case you want to use this design.
Need more winter LEGO building ideas?
Try making some LEGO Snowflakes! It’s amazing how many different designs you can create.

LEGO® is a trademark of the LEGO® group of companies which does not sponsor. authorize, or endorse this site.
3 Comments
Renee P. Dec 11, 2014
Thanks for these instructions! We had fun making this on a rainy day. A robust collection of Legos is required if you want all of the exact parts. We had to make due with a few random non-white pieces; we just shoved them in the back. I can't wait to try some other things, like the nativity!
Your blog looks like a lot of fun, just up our alley (two boys, ages 4 & 6).
Jemima Dec 8, 2015
This is a fantastic activity but why is it for boys?
Lisa Dec 17, 2015
I thought similar, but assume it's based on her family world view where she has boys so activities are for boys, and may have some suitable for girls as well?
Erin Dec 2, 2020
Thank you for these! It was just what I needed to help jumpstart the boys into creating their own Christmas builds. The challenge of handing them only the pictures of the final builds was perfect for us.
Post a Comment