
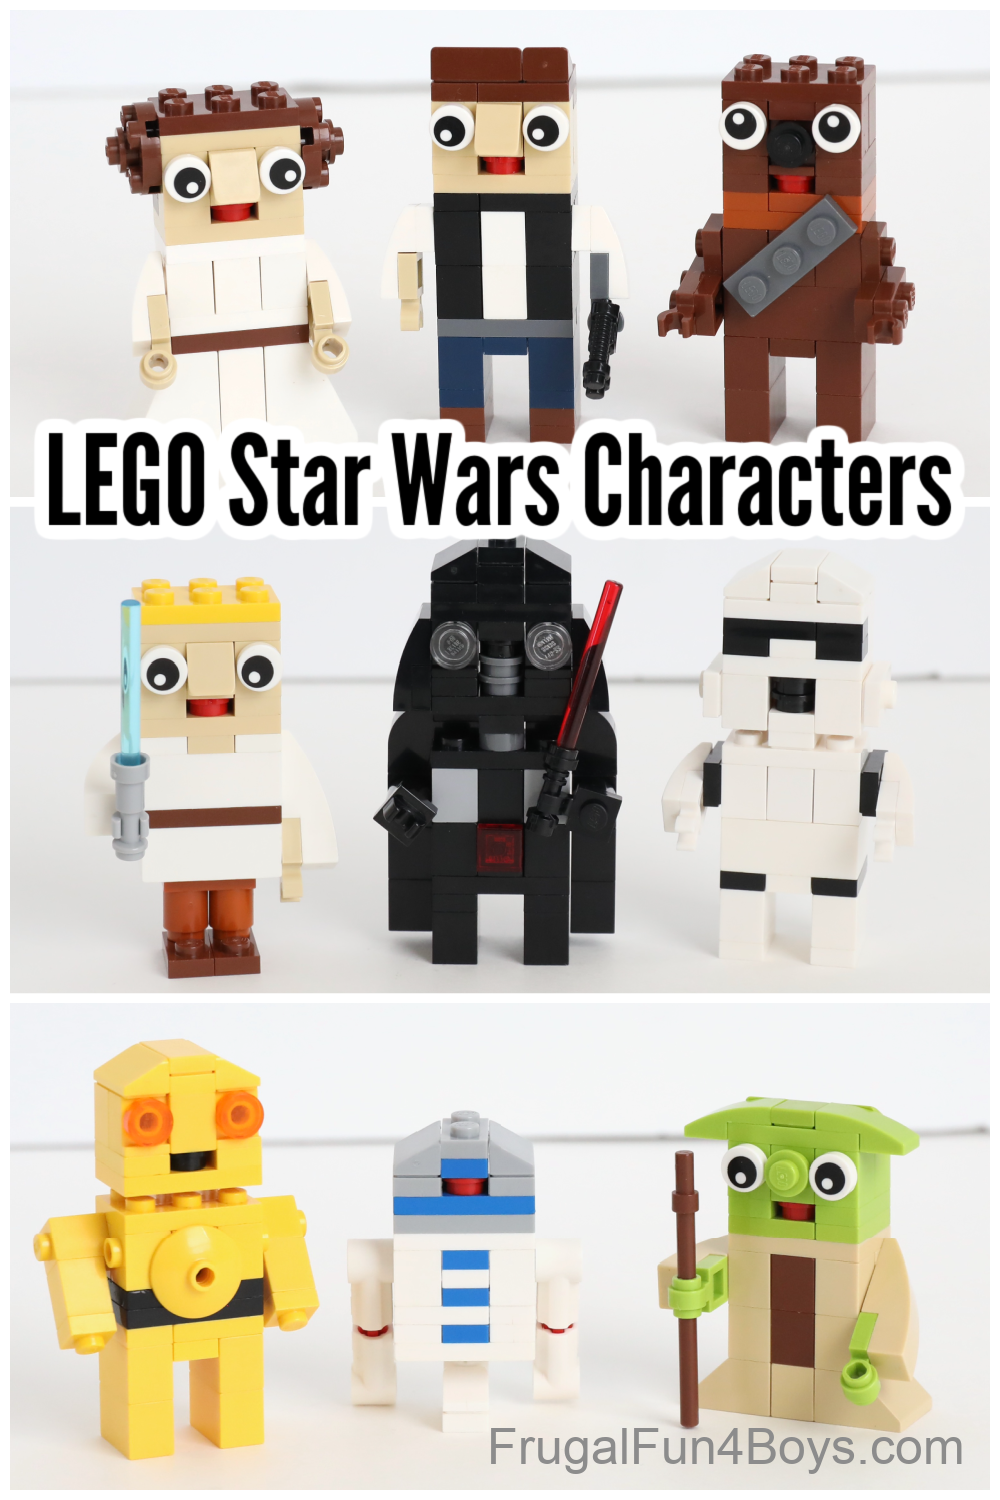
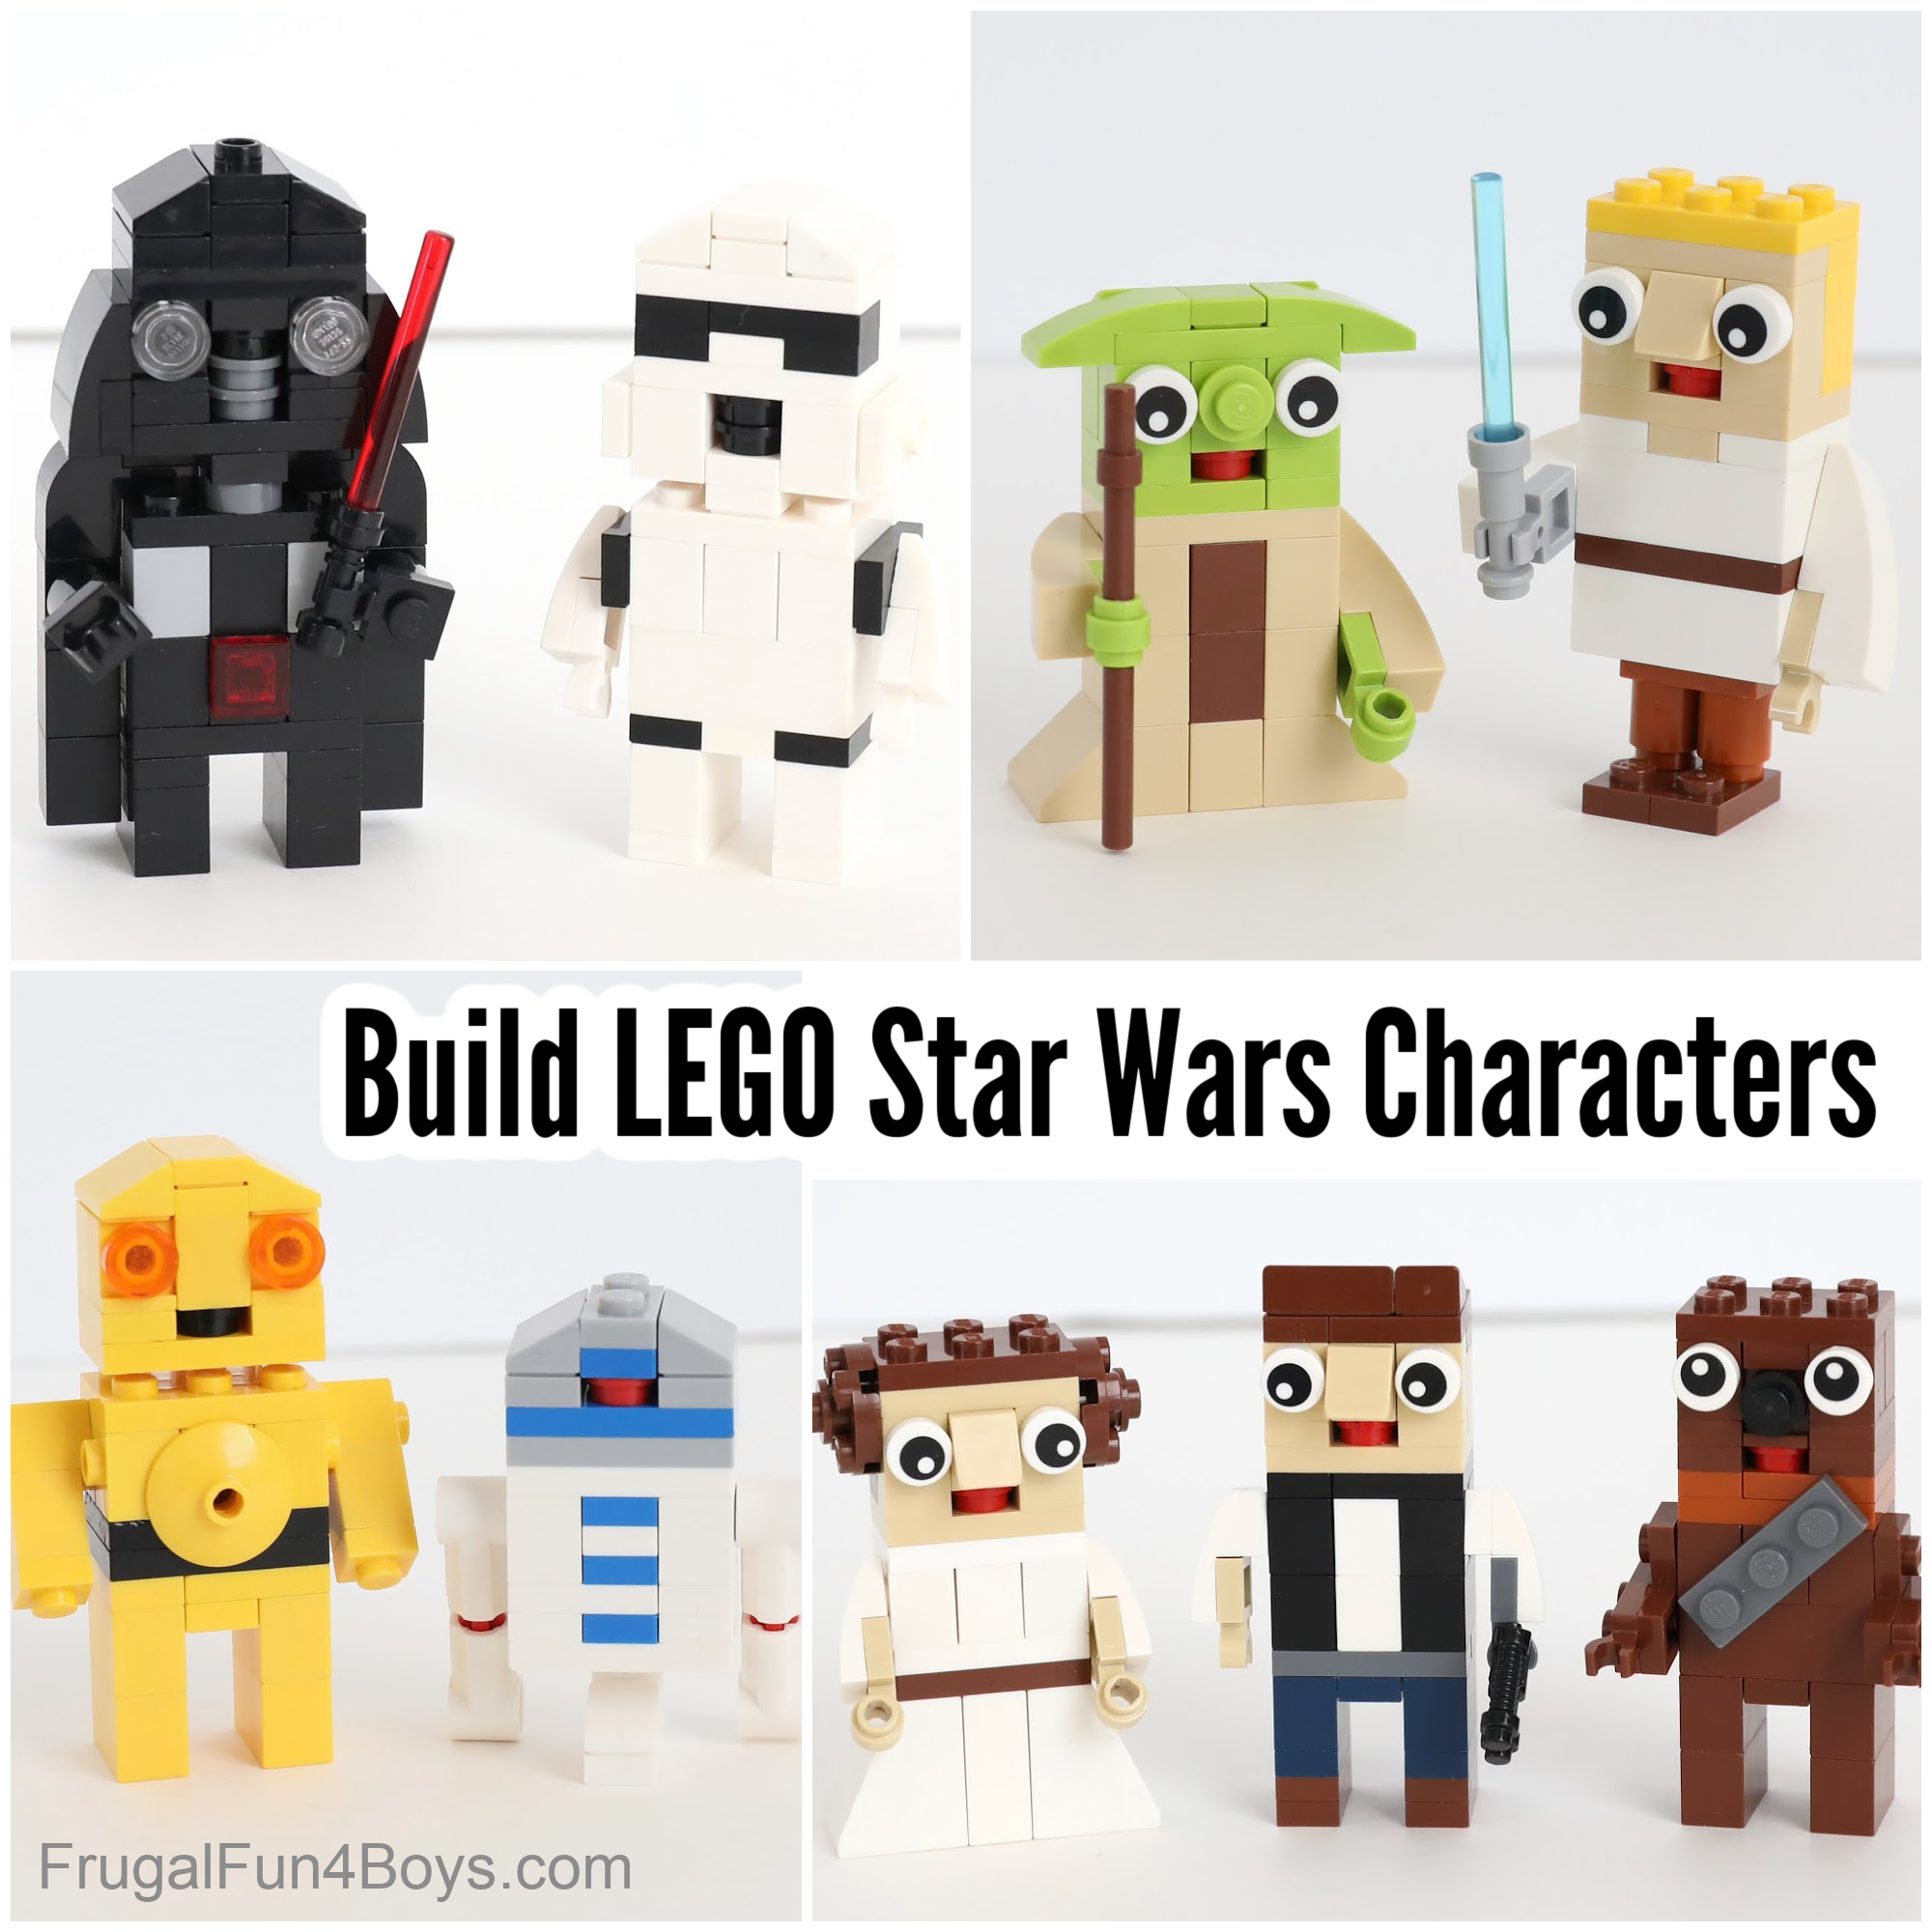
Here’s a fun new LEGO building idea! Build your favorite Star Wars characters out of LEGO bricks. This is not a set, but a project for you to build with the bricks you have. I’ll also include links to order some of the key pieces on Brick Link in case there are things you need. These Star Wars guys are so fun to build and display!
A couple months ago, we posted some similar LEGO Marvel Mini Characters, designed by my 11 year old son. Recently, we had some sickness run through our house. When I was finally feeling better enough to want to be creative again, I told him, “Let’s go come up with a new LEGO project!” He suggested Star Wars characters, which ended up being a GREAT idea! We had a lot of fun with this. He built Han Solo, Chewbacca, C3P0, and Darth Vader. I built Luke Skywalker, Princess Leia, R2-D2, and Yoda, and we worked together on the Storm Trooper.
Let’s get started building!
I have full instructions for Han Solo, and then from there I have a couple photos of each character. Once you’ve built one, the rest are quite easy. C3P0 and the Storm Trooper have some additional instructions since those are a little more complicated.

It’s really hard to choose a favorite! Once you build one or two, you’ll want to build them all.
At this scale, the characters aren’t going to look EXACTLY like the real thing, but I think they’re close enough! Feel free to make your own modifications though.
Han Solo
Step 1: Grab a 2 x 3 tan plate. Add two 1 x 1 tan plates and a 1 x 1 red round plate for the mouth. We had used a red flower for this one – ha! Either one works just fine.

Step 2: Then add a 1 x 3 brown brick. Find three 1 x 1 tan bricks with a stud on the side, a 1 x 1 tan slope (30 degree), and two eyes.
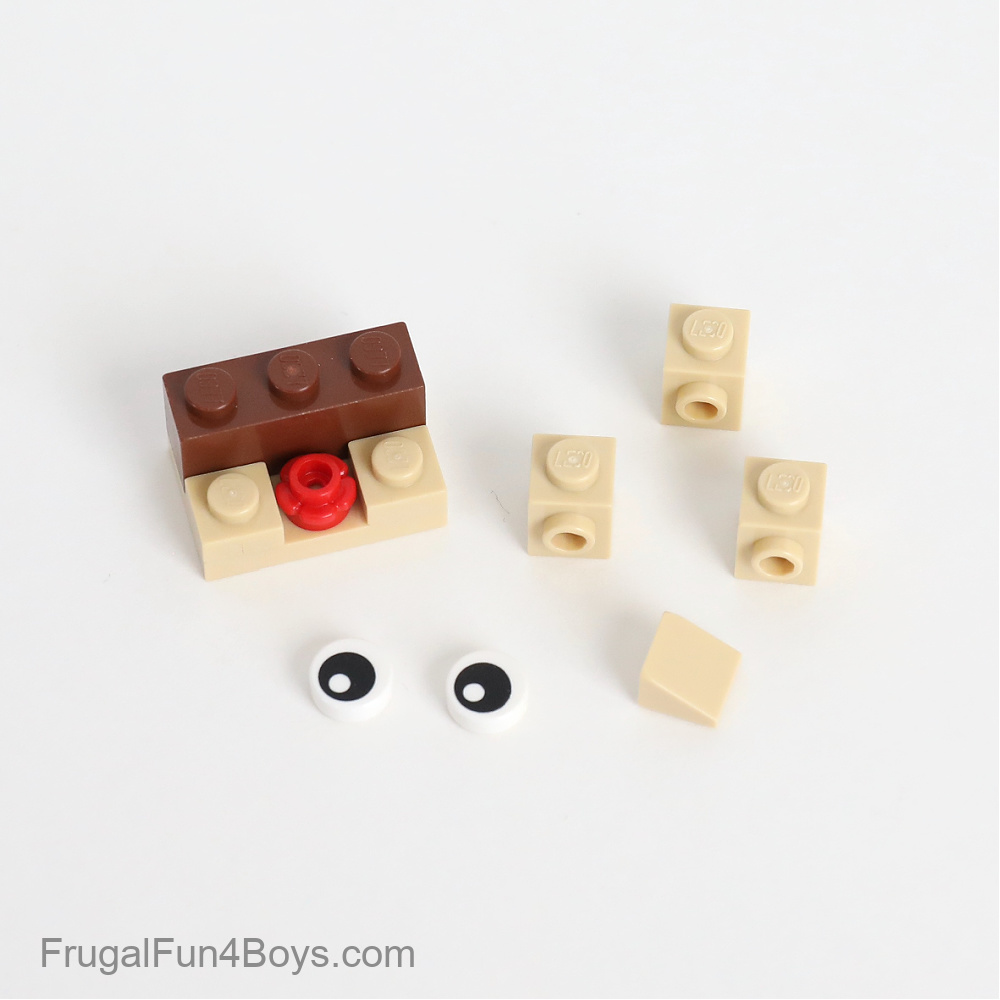
Step 3: Add all three 1 x 1 bricks with a stud on the side on the front of the face. Then add the eyes and nose. Another option is to use a 1 x 2 tan slope for the nose in place of the 1 x 1 brick with a stud on the side and 1 x 1 slope.

Step 4: Gather the pieces for the hair. You’ll need a 2 x 2 brown plate, a 1 x 2 brown plate, a 1 x 3 brown plate, a 1 x 2 slope (30 degree) and a 1 x 1 slope (30 degree).

Step 5: Add the 1 x 3 brown plate to the head. Then add the 2 x 2 plate and 1 x 2 plate. Place the slopes on top.

Step 6: Start building the body. Grab a 2 x 3 dark gray plate. Add two 1 x 2 black bricks, a 1 x 1 black brick, and a 1 x 1 white brick.
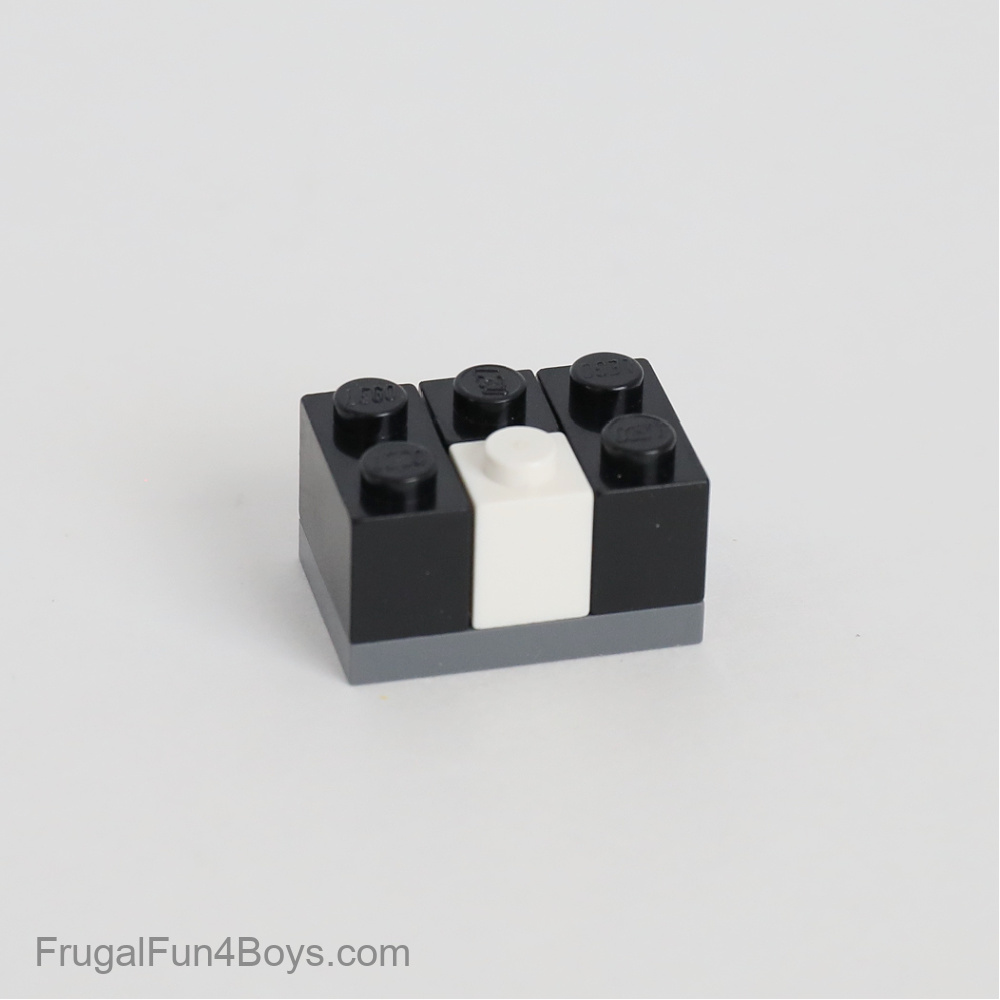
Step 7: Add a 1 x 3 black brick, two 1 x 1 black bricks with a stud on the side, and a 1 x 1 white brick. Then find a 2 x 2 black plate to put on top.

Step 8: Add the 2 x 3 black plate to the top of the body. Then attach the head. Build legs by adding a 1 x 2 dark blue brick and a 1 x 2 dark blue plate on each side. Place a 1 x 2 dark blue plate in the center. Build shoes by adding two 1 x 2 brown plates on each side.

Step 9: Give Han Solo some arms! Each arm is a 1 x 2 white curved slope and a 1 x 1 white plate. Add 1 x 1 plates with a clip for the hands. It’s great if these are tan, but we didn’t have any tan plates with a horizontal clip. If you want him to hold his blaster, he’ll need a hand like the dark gray one shown in the picture.

Give Han Solo a blaster, and he is ready to go!

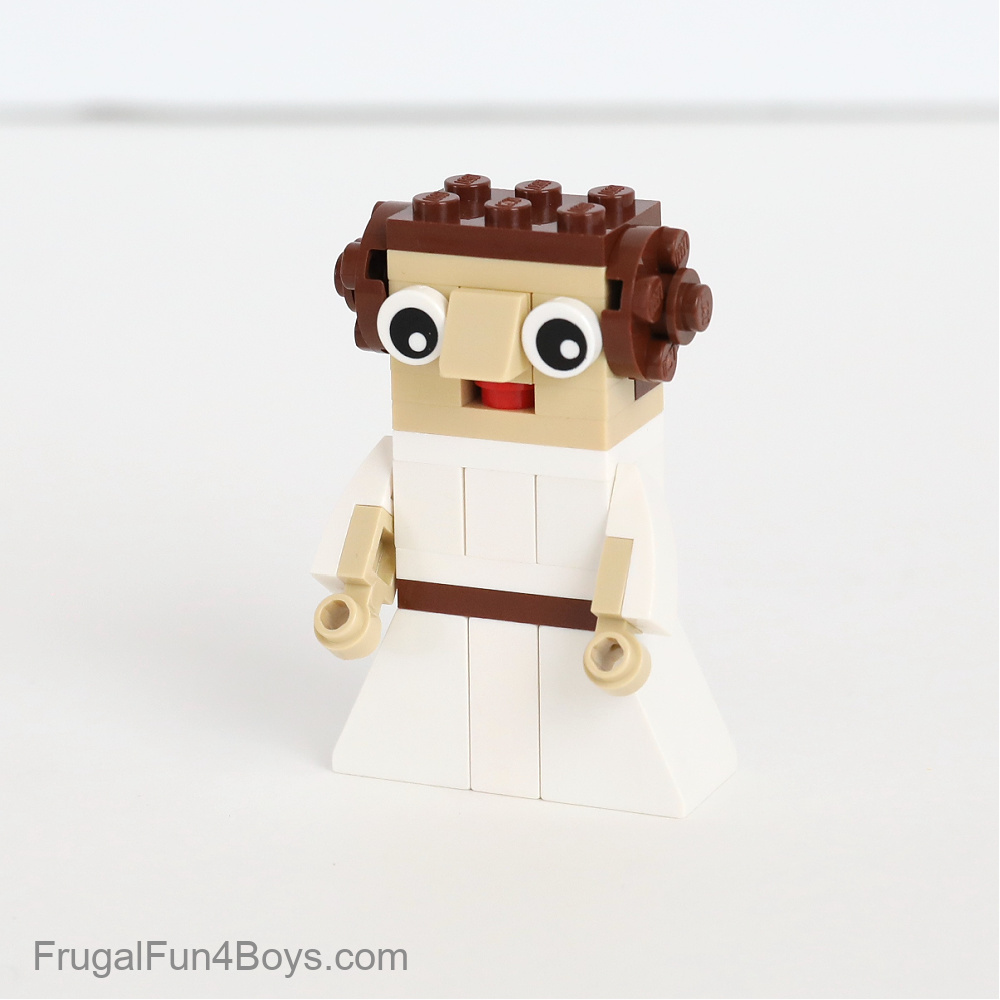
Princess Leia
Princess Leia has basically the same head as Han. Her hair is built with a 2 x 2 brown round plate and a 1 x 1 brown round plate on each side. Attach the hair to brown 1 x 1 bricks with a stud on the side.
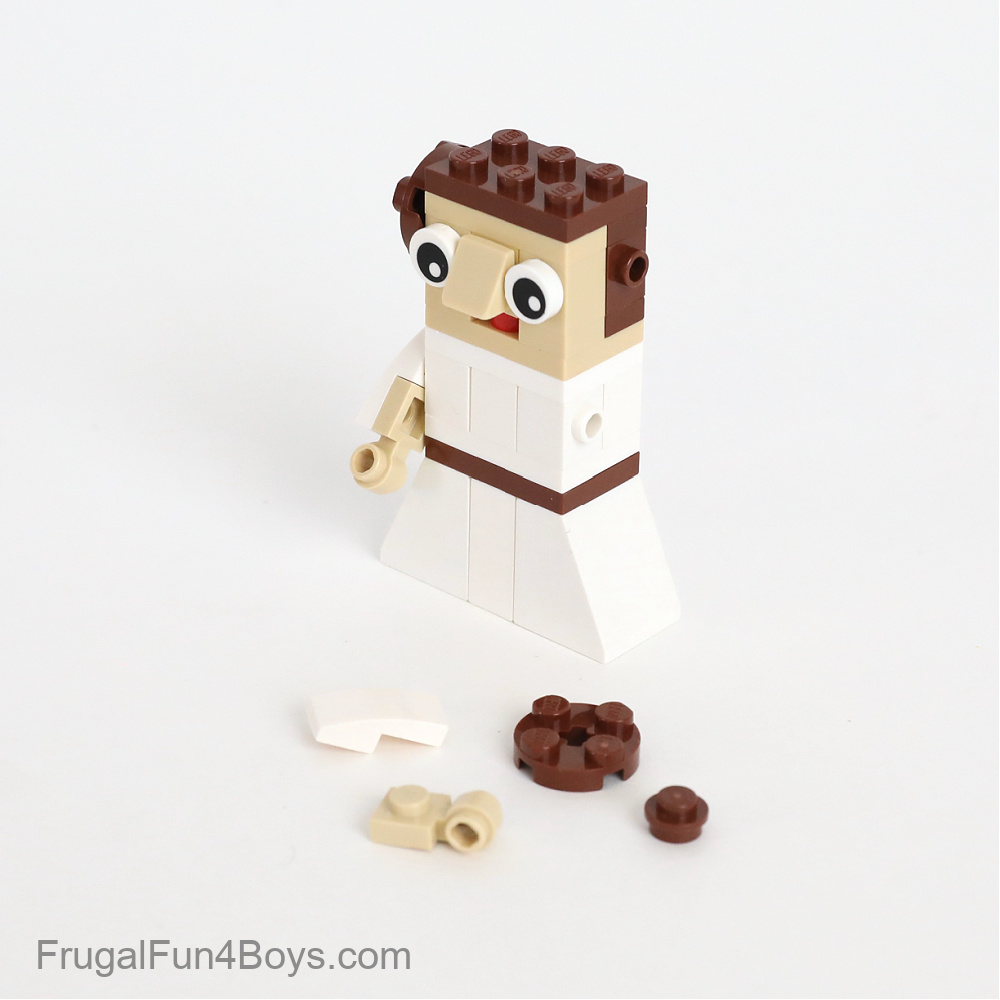
We used 1 x 1 tan plates with a light attachment for Princess Leia’s hands. Substitute with plates that have clips if you prefer.
Chewbacca
Chewbacca was challenging to build on this tiny scale, but I think my son did a great job!
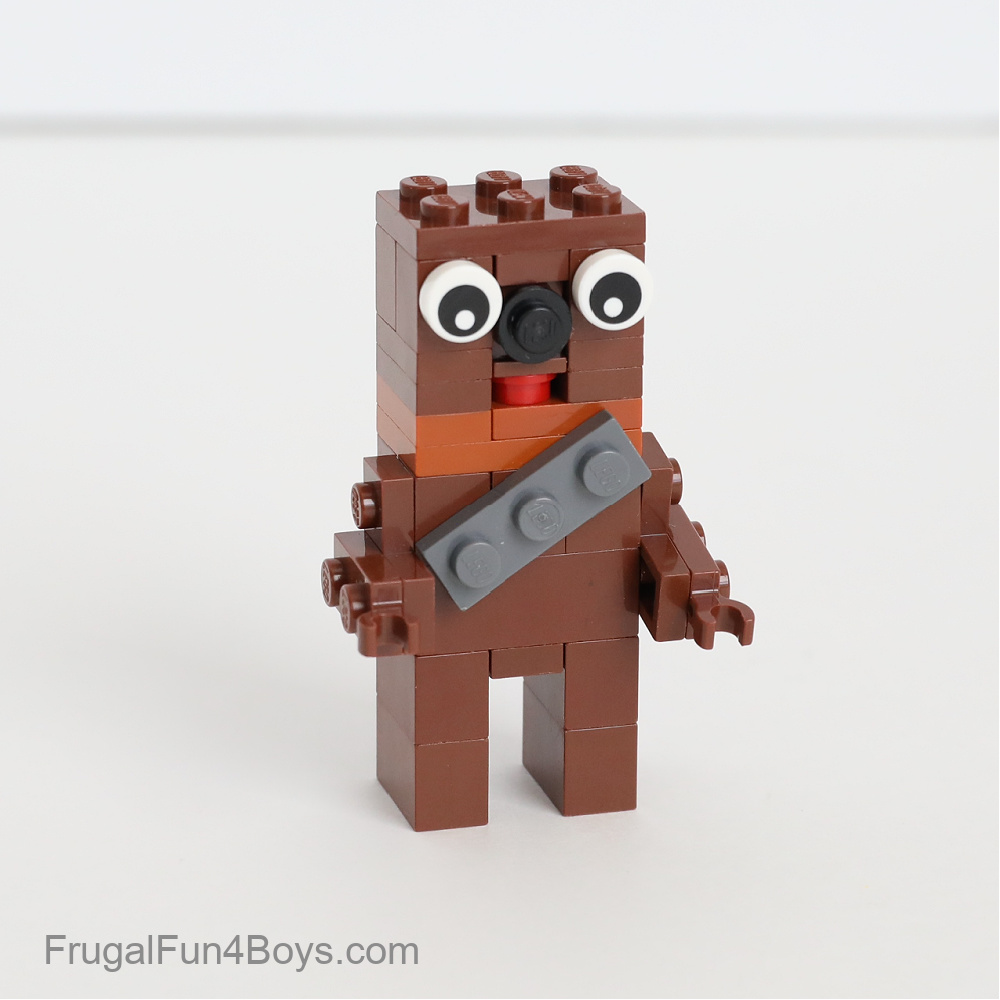
For Chewie’s arms, we would recommend using brown 2 x 2 corner plates and 1 x 2 plates with a clip on the end. But you can modify the design with what you have.
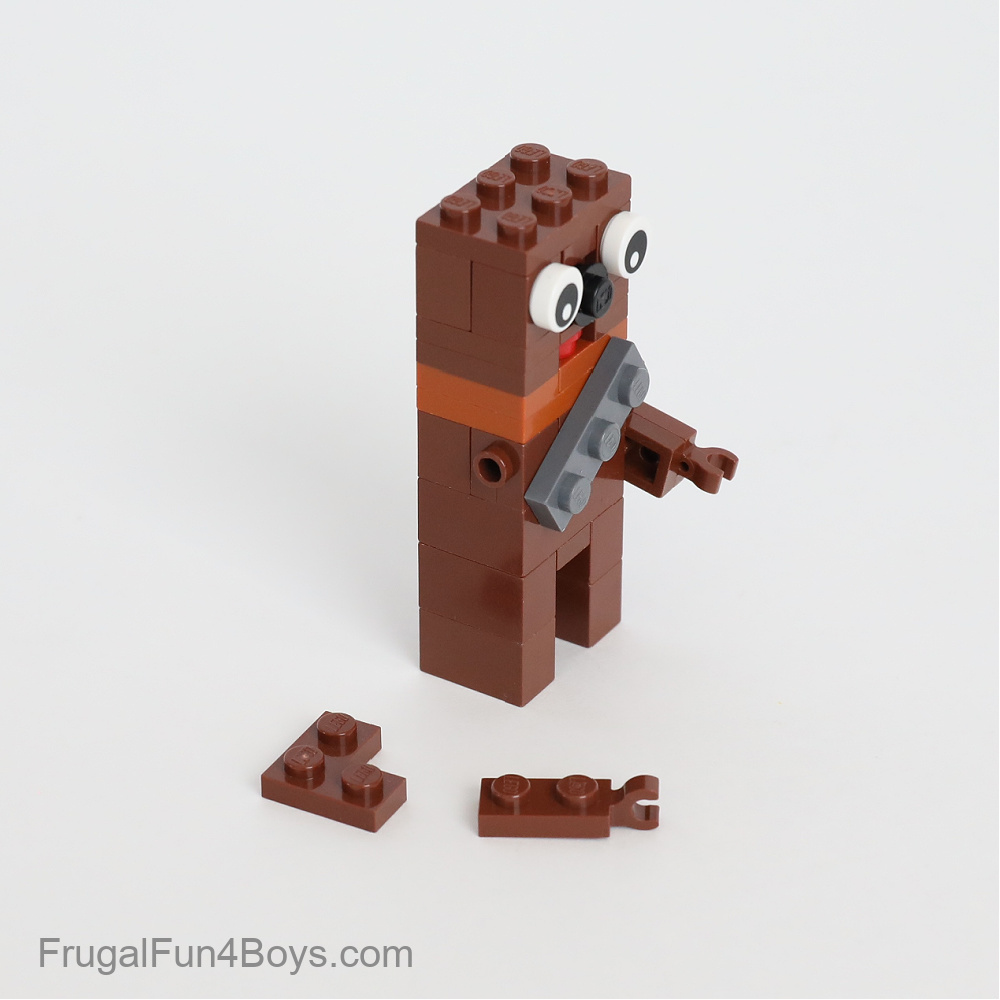
Make Chewie’s bandolier by attaching a 1 x 3 dark gray plate to a brick with a stud on the side on the front of his body.

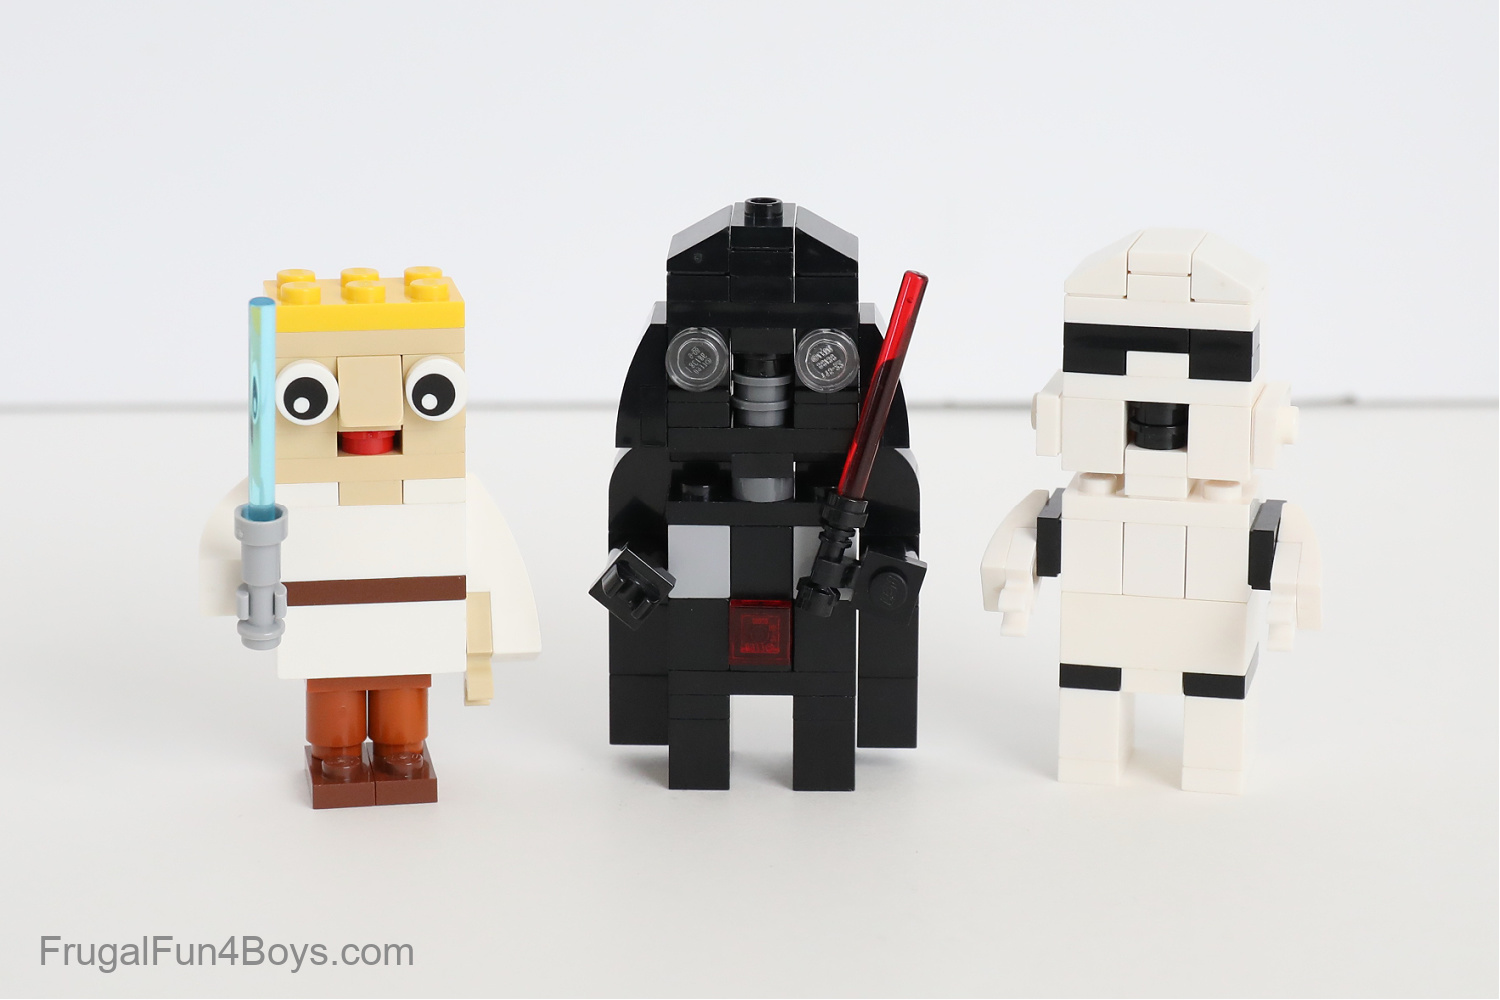
Luke Skywalker
Build Luke’s head using the instructions for Han above. Luke and Leia both have a 1 x 3 tan plate above the eyes, however. This means that you also need to add an extra 1 x 3 plate in the hair color.

He looks great holding a minifigure lightsaber!

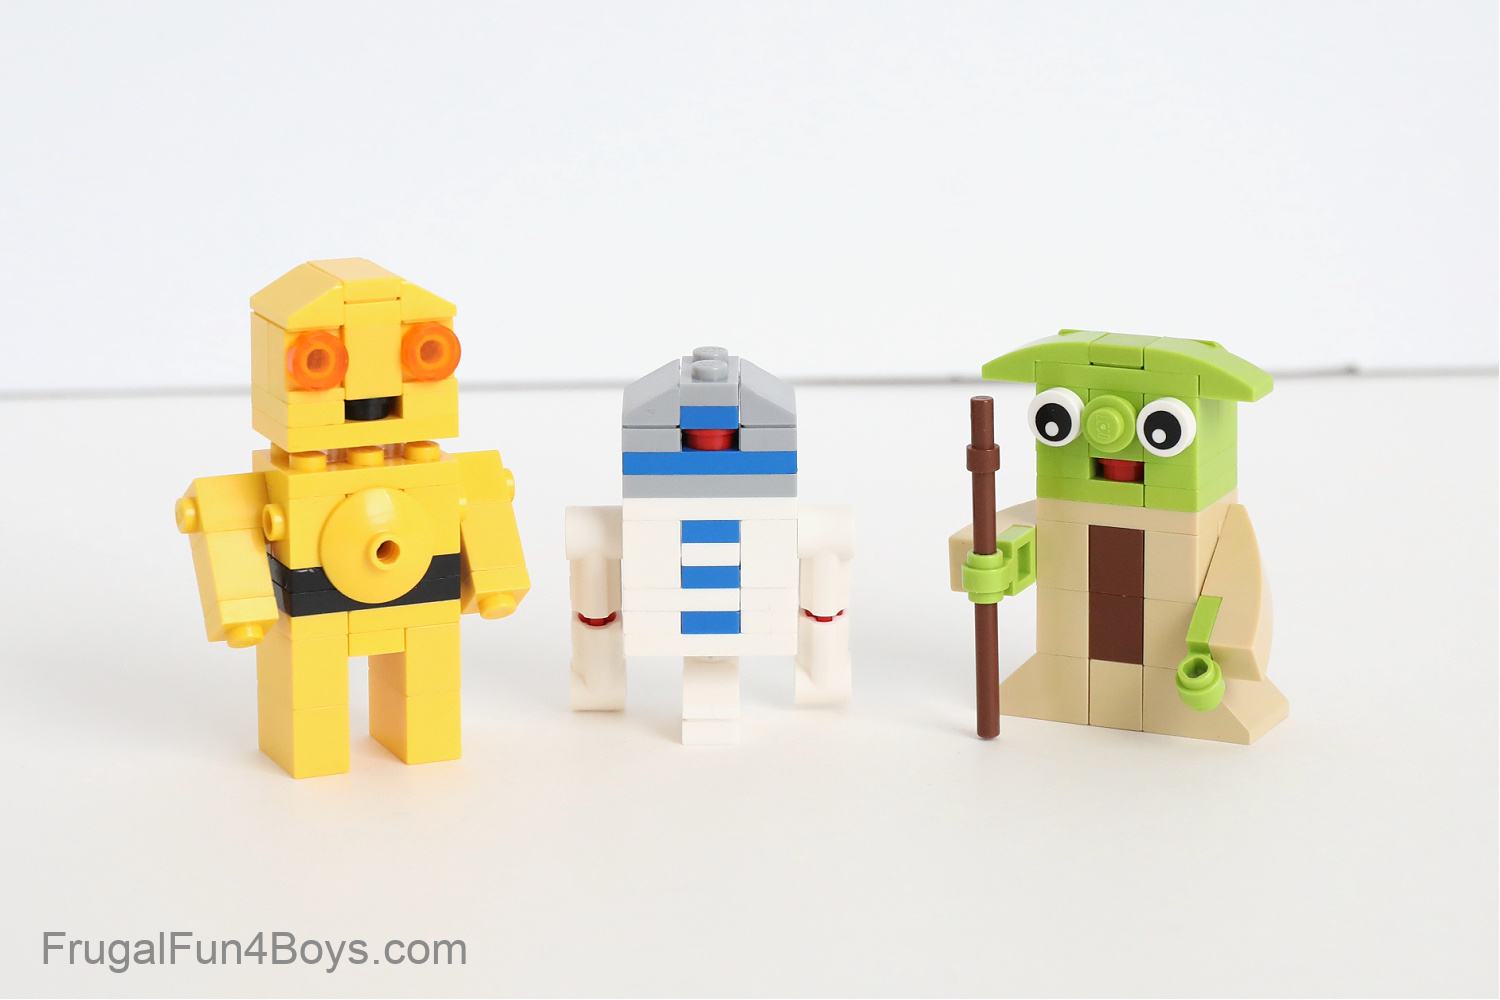
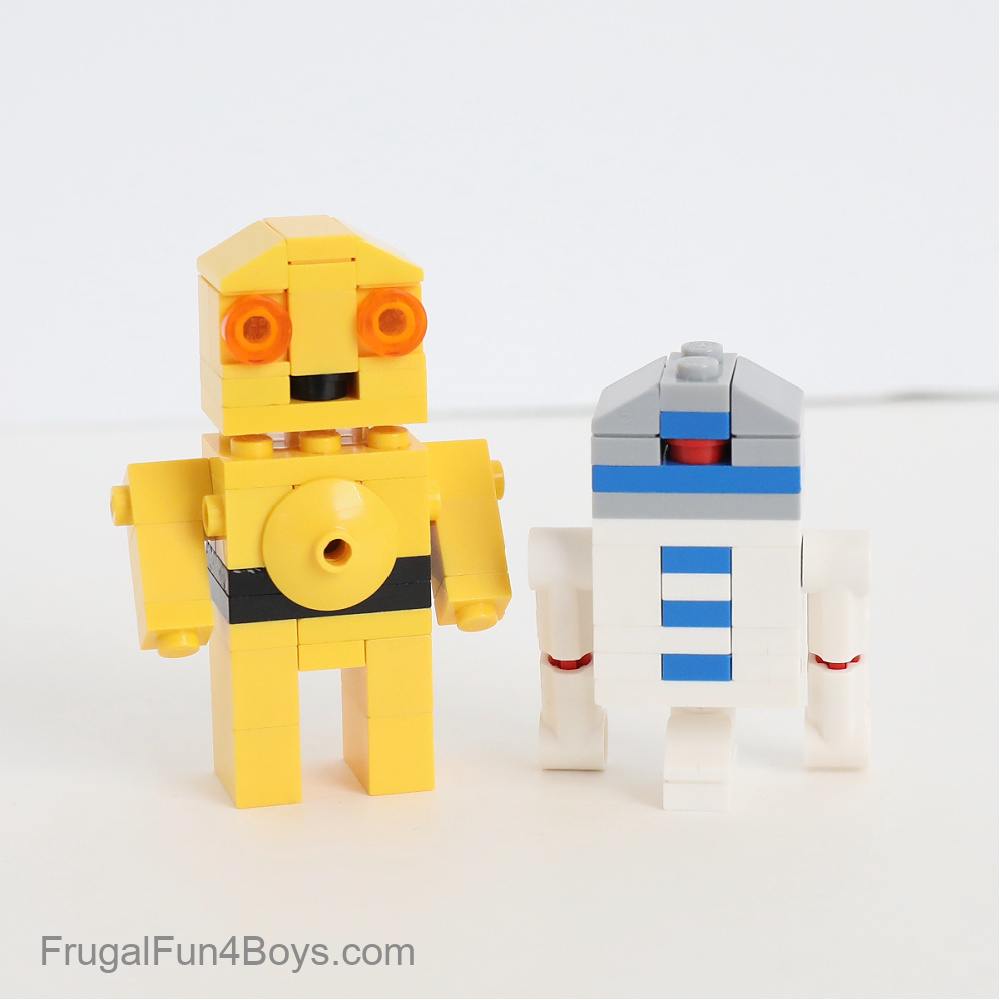
R2-D2
This tiny R2-D2 is just so cute! Like the other characters, his body is 2 studs by 3 studs.
Build a 1 x 2 white Technic brick into each side of his body so that you can attach his legs.

For the legs you’ll need four Technic axle and pin connectors (type #1), two red axles (2 studs long, notched), and two black Technic pins. If you have the black version of the red pins, that would be even better!

Use the red axles to connect the two white Technic axle and pin connectors. Don’t push them in all the way, or the legs won’t be quite the right length.
Build the single front leg with a 1 x 2 white plate, a 1 x 1 white round brick, and a 1 x 1 white slope (30 degree).

Then attach the front leg, and R2-D2 is complete!

C3P0
C3P0 is definitely one of my favorites! Owen built this one.
This is what his body looks like. You can create a neck by adding two 1 x 1 clear round plates to the top of the body.

Attach a 2 x 2 yellow dish to a brick with a stud on the side on the front of C3P0’s body. The head is very similar to Han Solo’s head. Use two 1 x 2 slopes (30 degree) with a 1 x 2 yellow plate and a 1 x 2 yellow tile in between them.
Gather the pieces for the arms. Each arm is a 1 x 1 yellow brick, a 1 x 1 yellow brick with a stud on the side, and a 1 x 1 yellow plate.

Build the arms and attach them to the body. So cute!

Yoda
Yoda has a 1 x 1 round plate instead of a 1 x 1 slope for the nose. If you use a 1 x 1 plate with a light attachment, you can easily slide his staff through the ring!

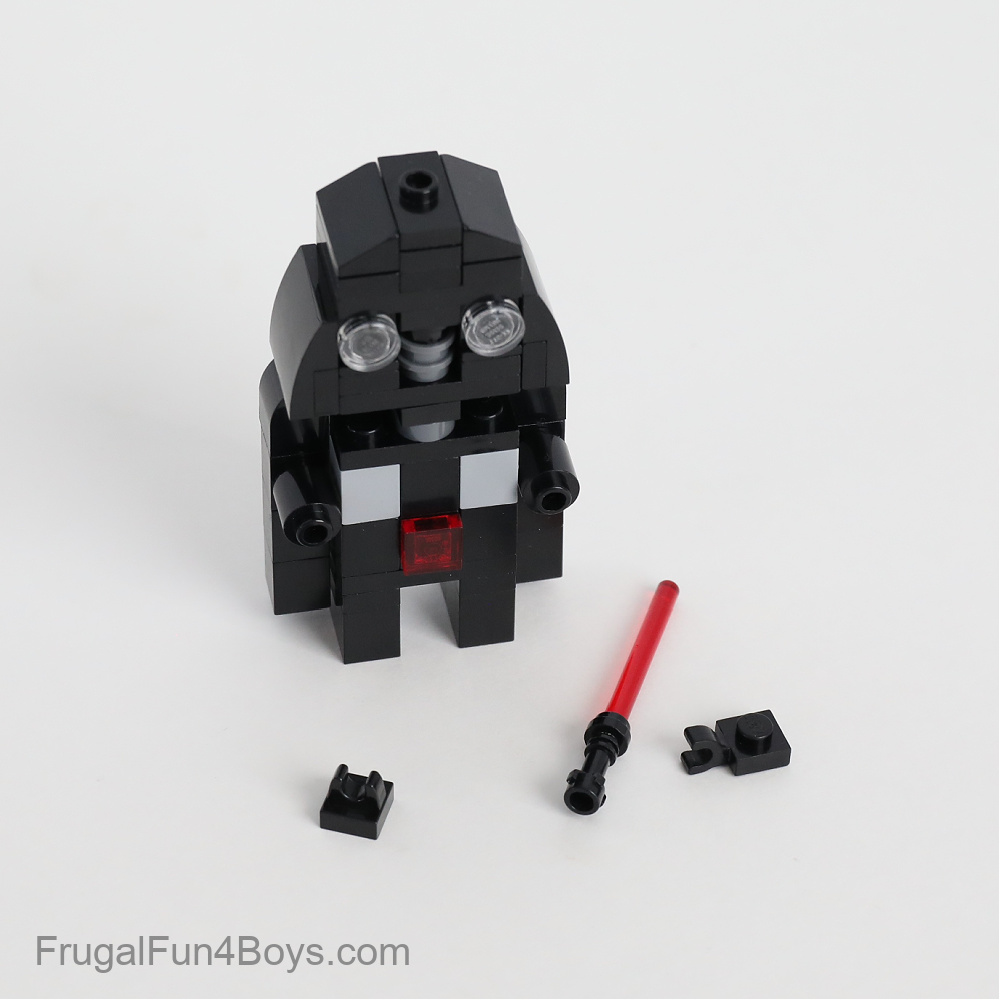
Darth Vader
We were afraid that Darth Vader might be the hardest character to build. Owen tackled this one, and it turned out great!
Darth Vader’s body is only two studs deep. The cape runs along the sides of the body.

The arms are attached to the cape. Each 1 x 1 round brick is attached to a 1 x 1 brick with a stud on the side.
Storm Trooper
Last, but not least, let’s build a Storm Trooper! The helmet is a little tricky, so here are some instructions for this one.
Start with a 2 x 3 white plate. Add a 1 x 3 white brick. Then in front of that add a 1 x 1 black plate, a 1 x 1 white plate, and another 1 x 1 black plate. Place a 1 x 3 black plate on top of those.

Place a 1 x 3 white plate on top of the black plate. Then add two 1 x 2 slopes (30 degree), a 1 x 2 plate, and a 1 x 2 tile to the head.
Getting the right shape for the Storm Trooper’s head was a challenge! The pieces below helped. Use a 1 x 2 white plate with one stud on top to connect two 1 x 1 white bricks with a stud on the side. Then make a second one of these.

Then attach those under the eyes. Grab two 1 x 1 black round plates, a 1 x 2 white plate, and two 1 x 1 white plates.

Place the white plates and black round plates on top of the 1 x 2 white plate as shown.

Attach this to the underside of the head.

Then build the Storm Trooper’s body. It’s very similar to all the others! He has two 1 x 1 white bricks with a stud on the side on each side of his body to hold the black jumper plate (plate with one stud on top).
There is a 1 x 2 white jumper plate (plate with one stud on top) under the head.
Grab a 1 x 2 white curved slope and a 1 x 1 white plate with a clip for each arm.

Add the arms, and the Storm Trooper is complete!

Have fun building!
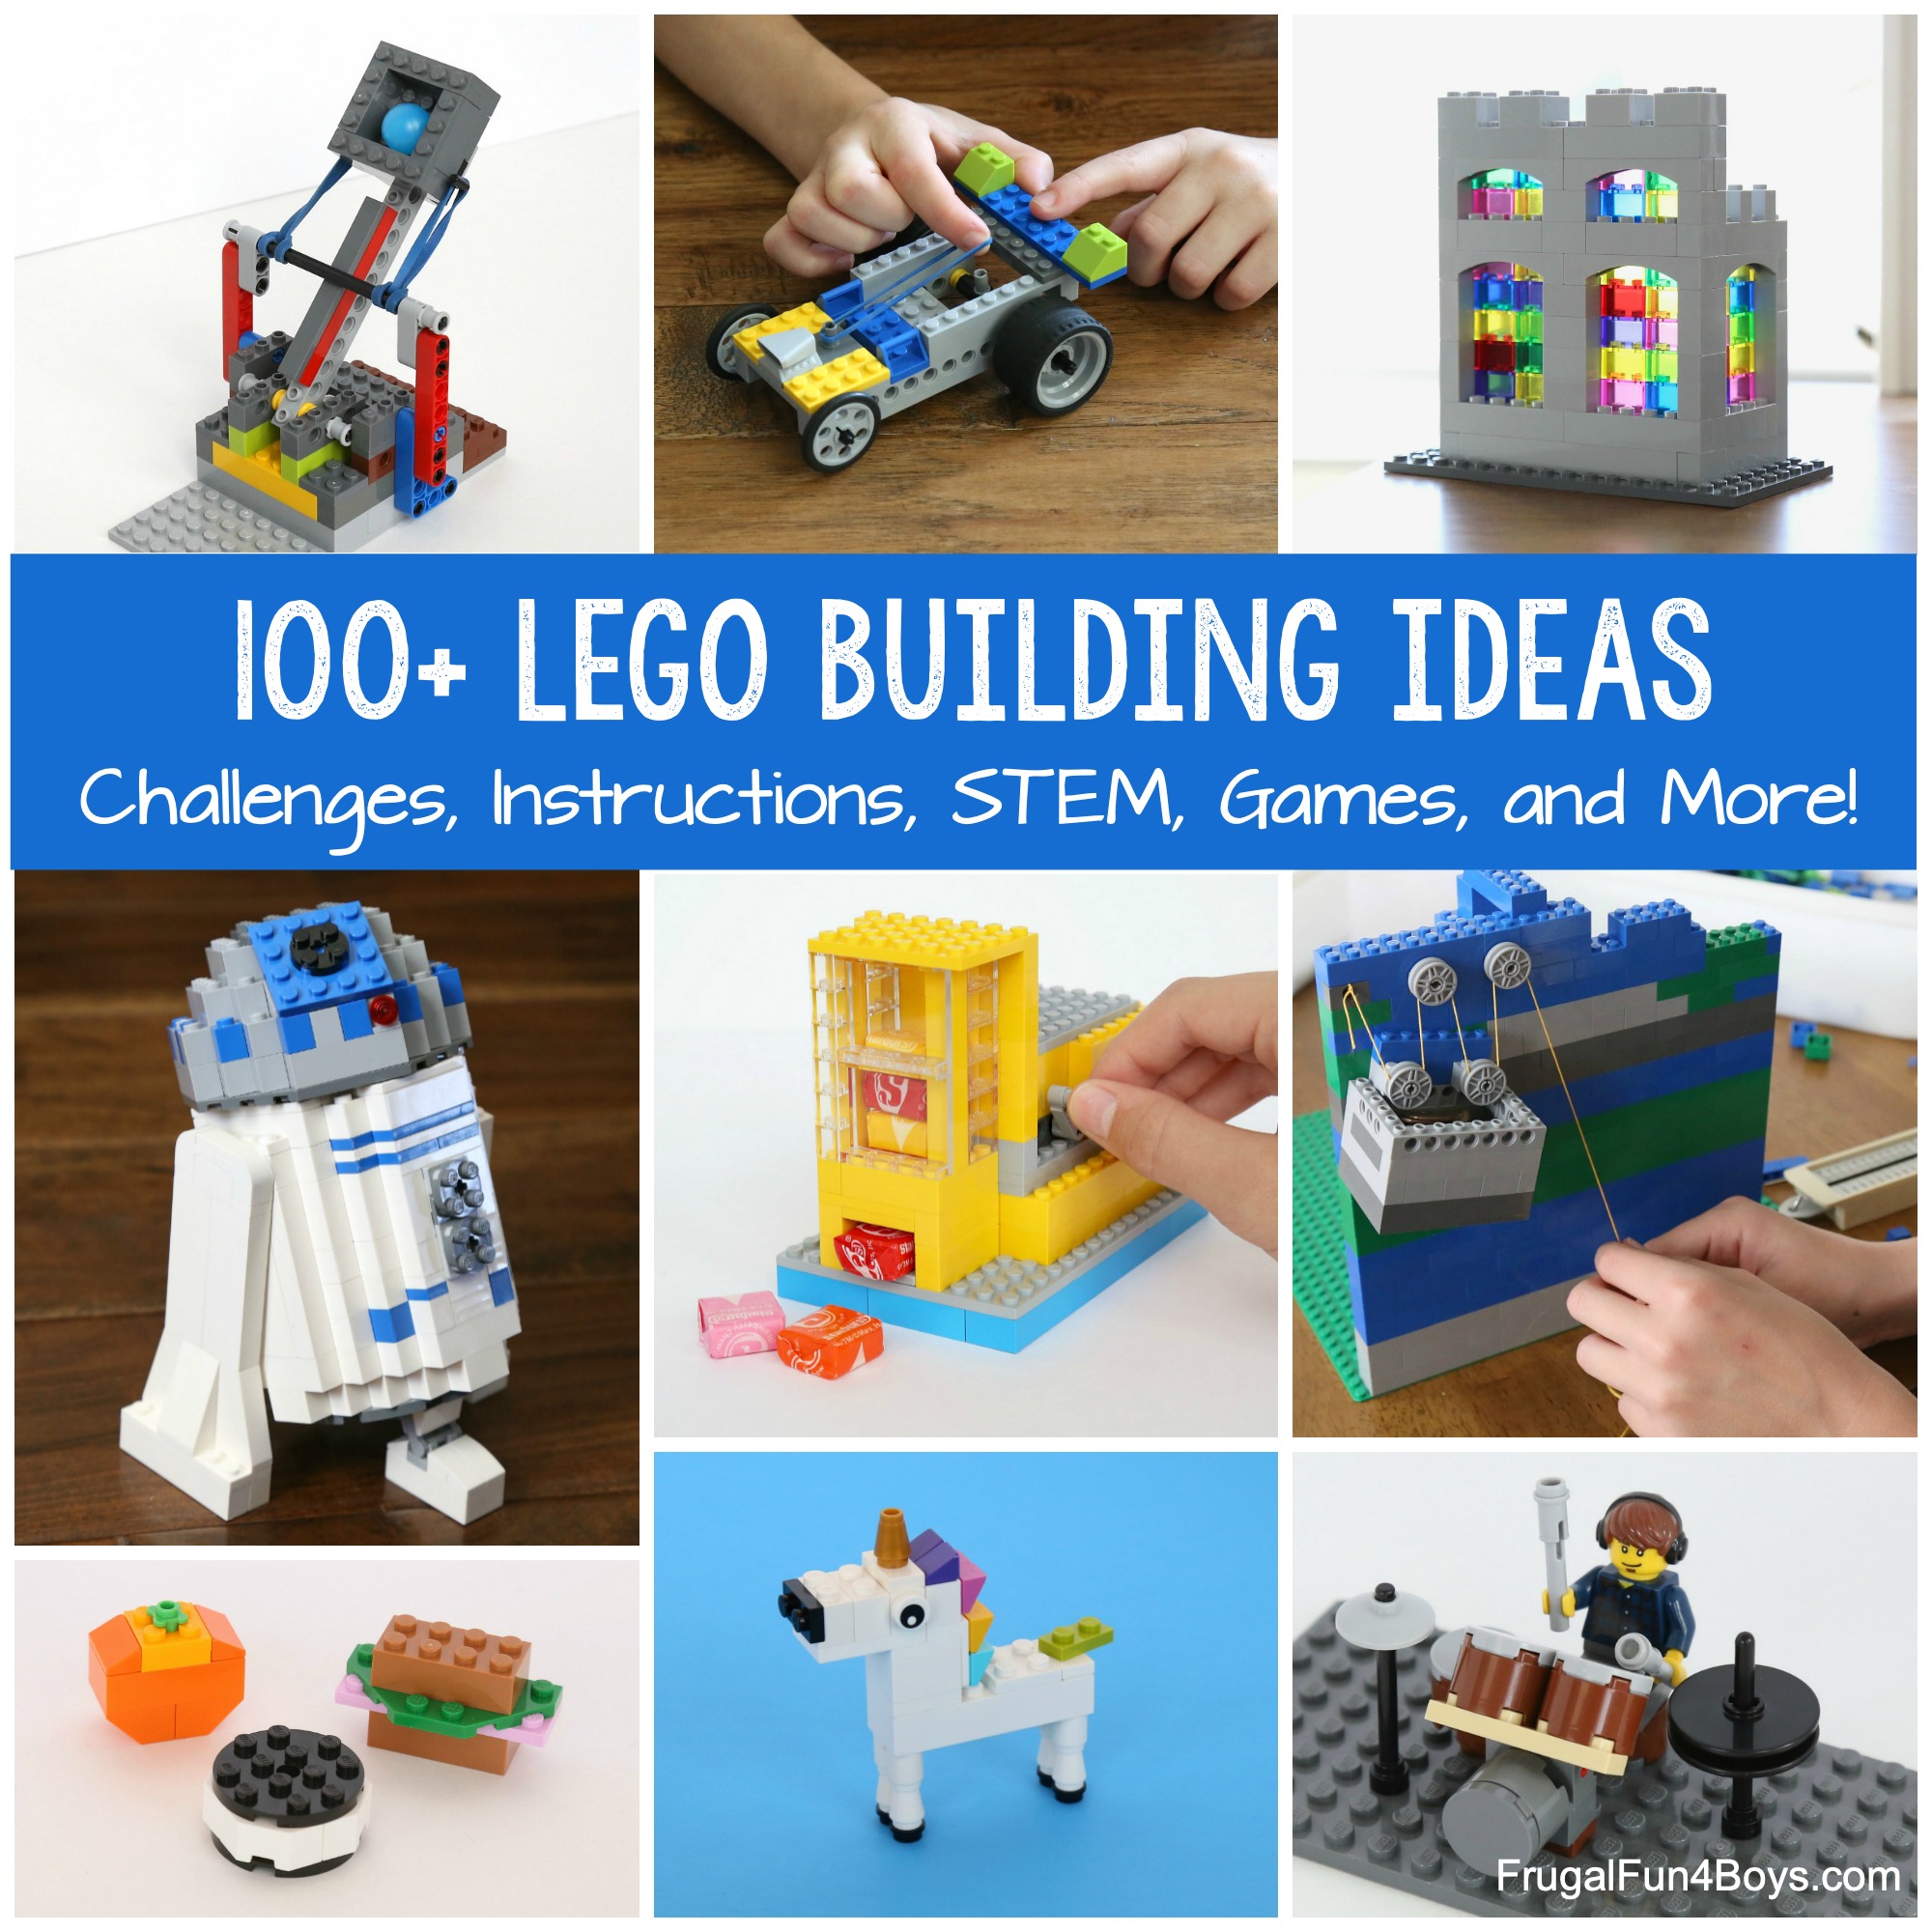
If you like LEGO projects, we’ve got tons!
Here’s a collection of more than 100 LEGO Building Ideas that kids will love.
1 Comments
Saanil Sep 19, 2021
Where can I find the instructions for Darth Vader
Post a Comment