
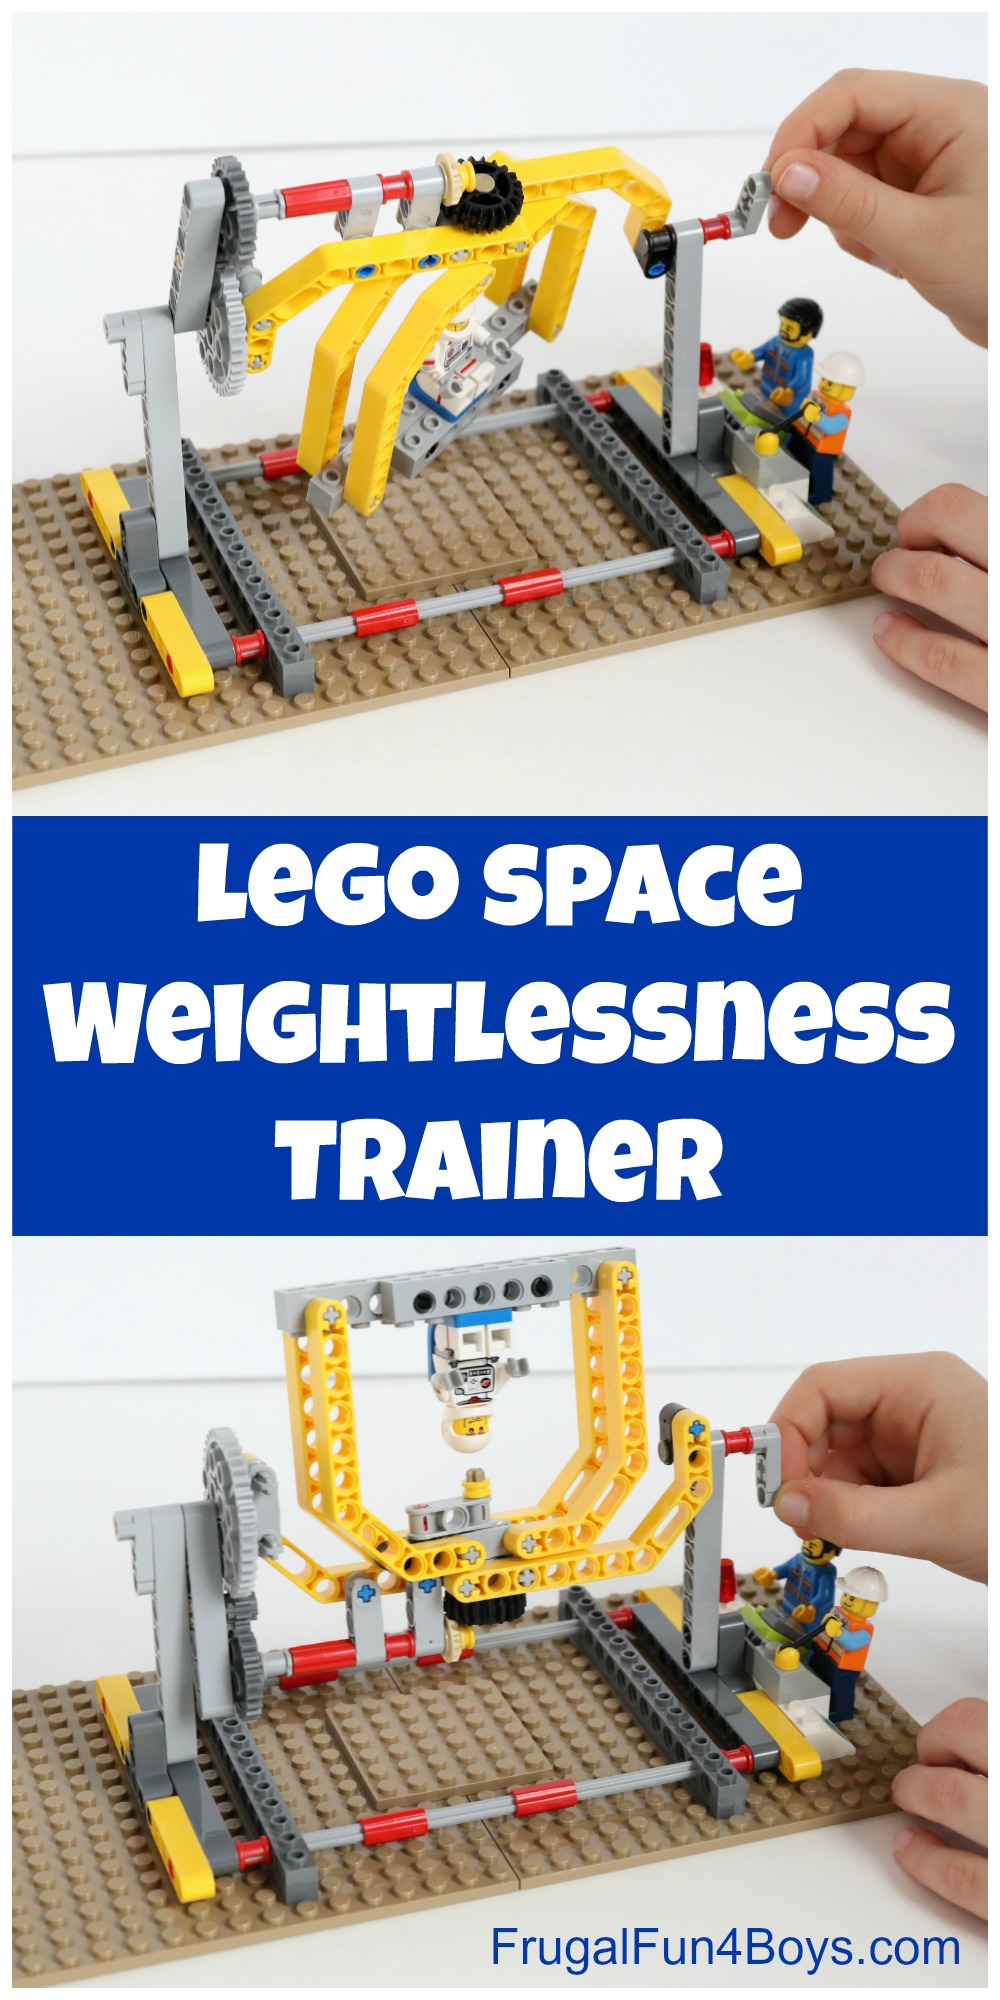
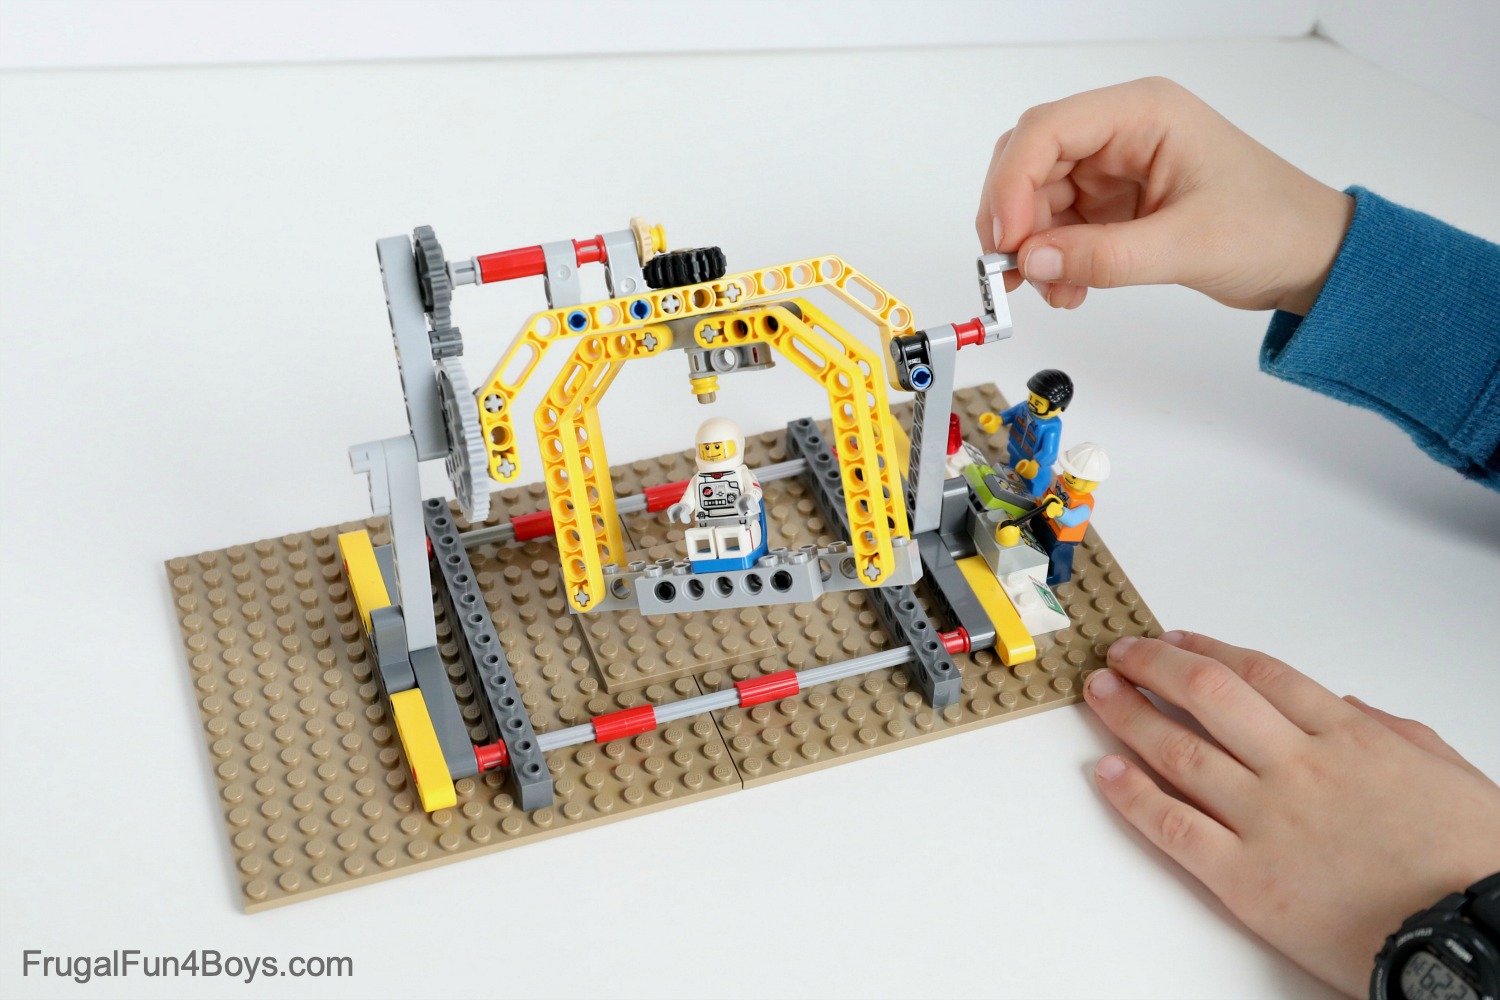
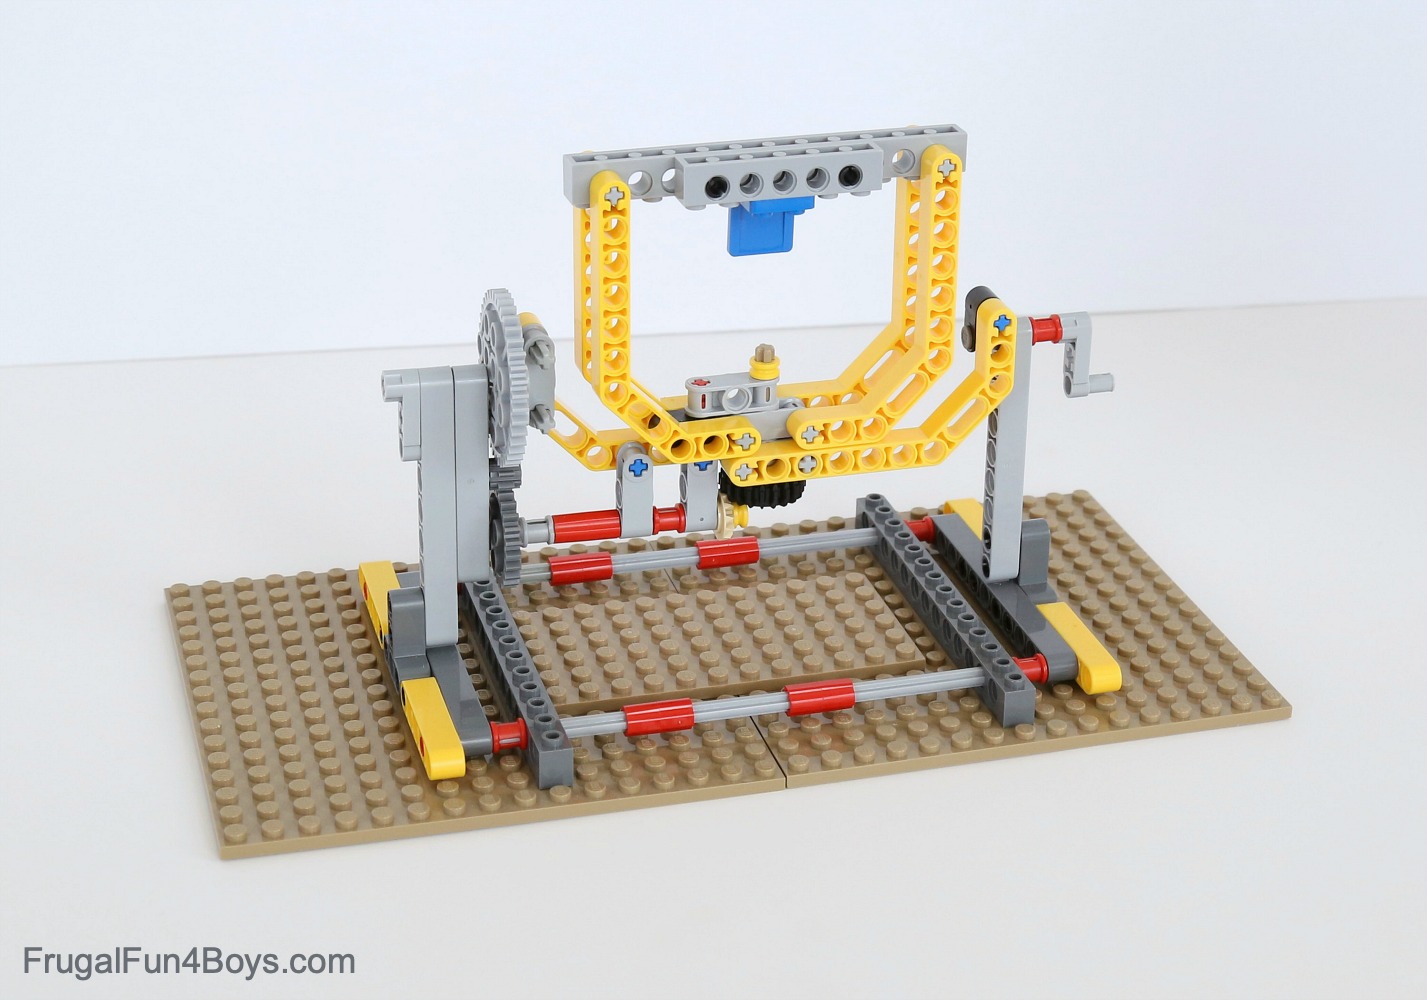
This neat little LEGO® space contraption is so much fun to build and play with! Remember the weightlessness training machine that was a part of NASA space camp in the 80’s? We patterned this fun LEGO® machine after the real NASA multi-axis trainer that spins an astronaut-in-training on more than one plane.
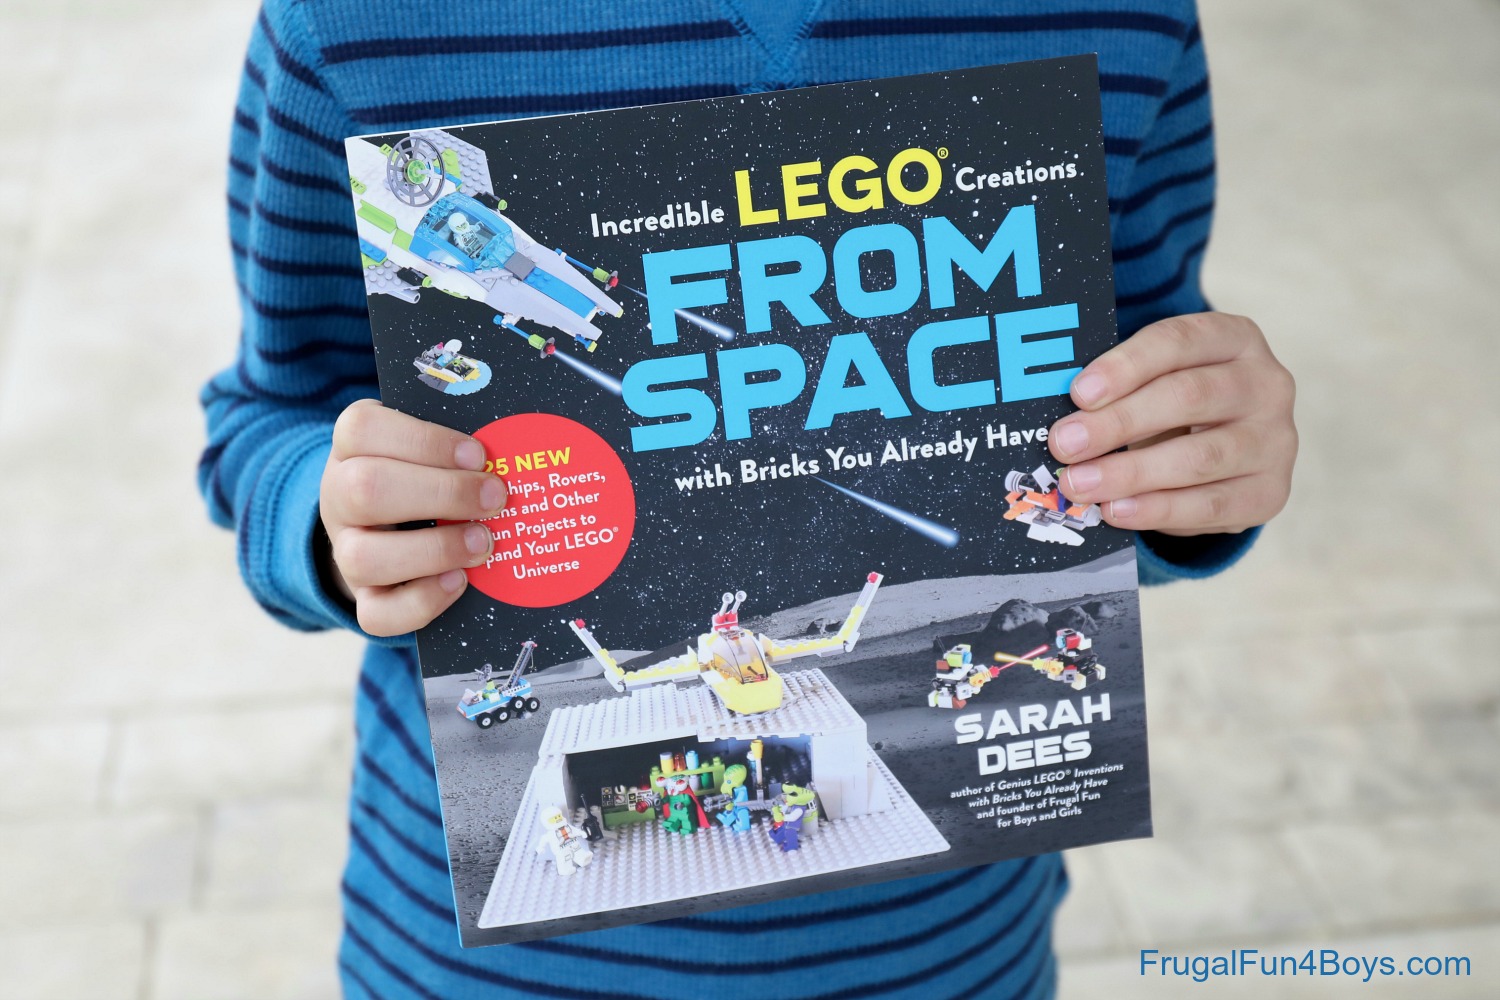
You can find this project (plus 24 more!) in our newest LEGO® idea book – Incredible LEGO Creations from Space!
This project was designed by my 16 year old son after I told him what I wanted and showed him a few photos of the real thing. He’s definitely an engineer at heart and plans to make that his career path. At first, he wasn’t sure if he could build one crank that would spin the passenger in two directions, but he did it! It’s an awesome design.
This post contains Amazon affiliate links, which means that I will earn from qualifying purchases at no additional cost to you.
This space weightlessness machine does require several Technic pieces. None of them are rare pieces, so if you have a decent Technic collection, you should be able to find the right parts. You can also order individual bricks from LEGO’s Pick-A-Brick or from Brick Link.
Make it a CHALLENGE! Build this weightlessness training machine, and then construct a whole LEGO space training facility! Challenge your kids to see what other equipment they can invent.
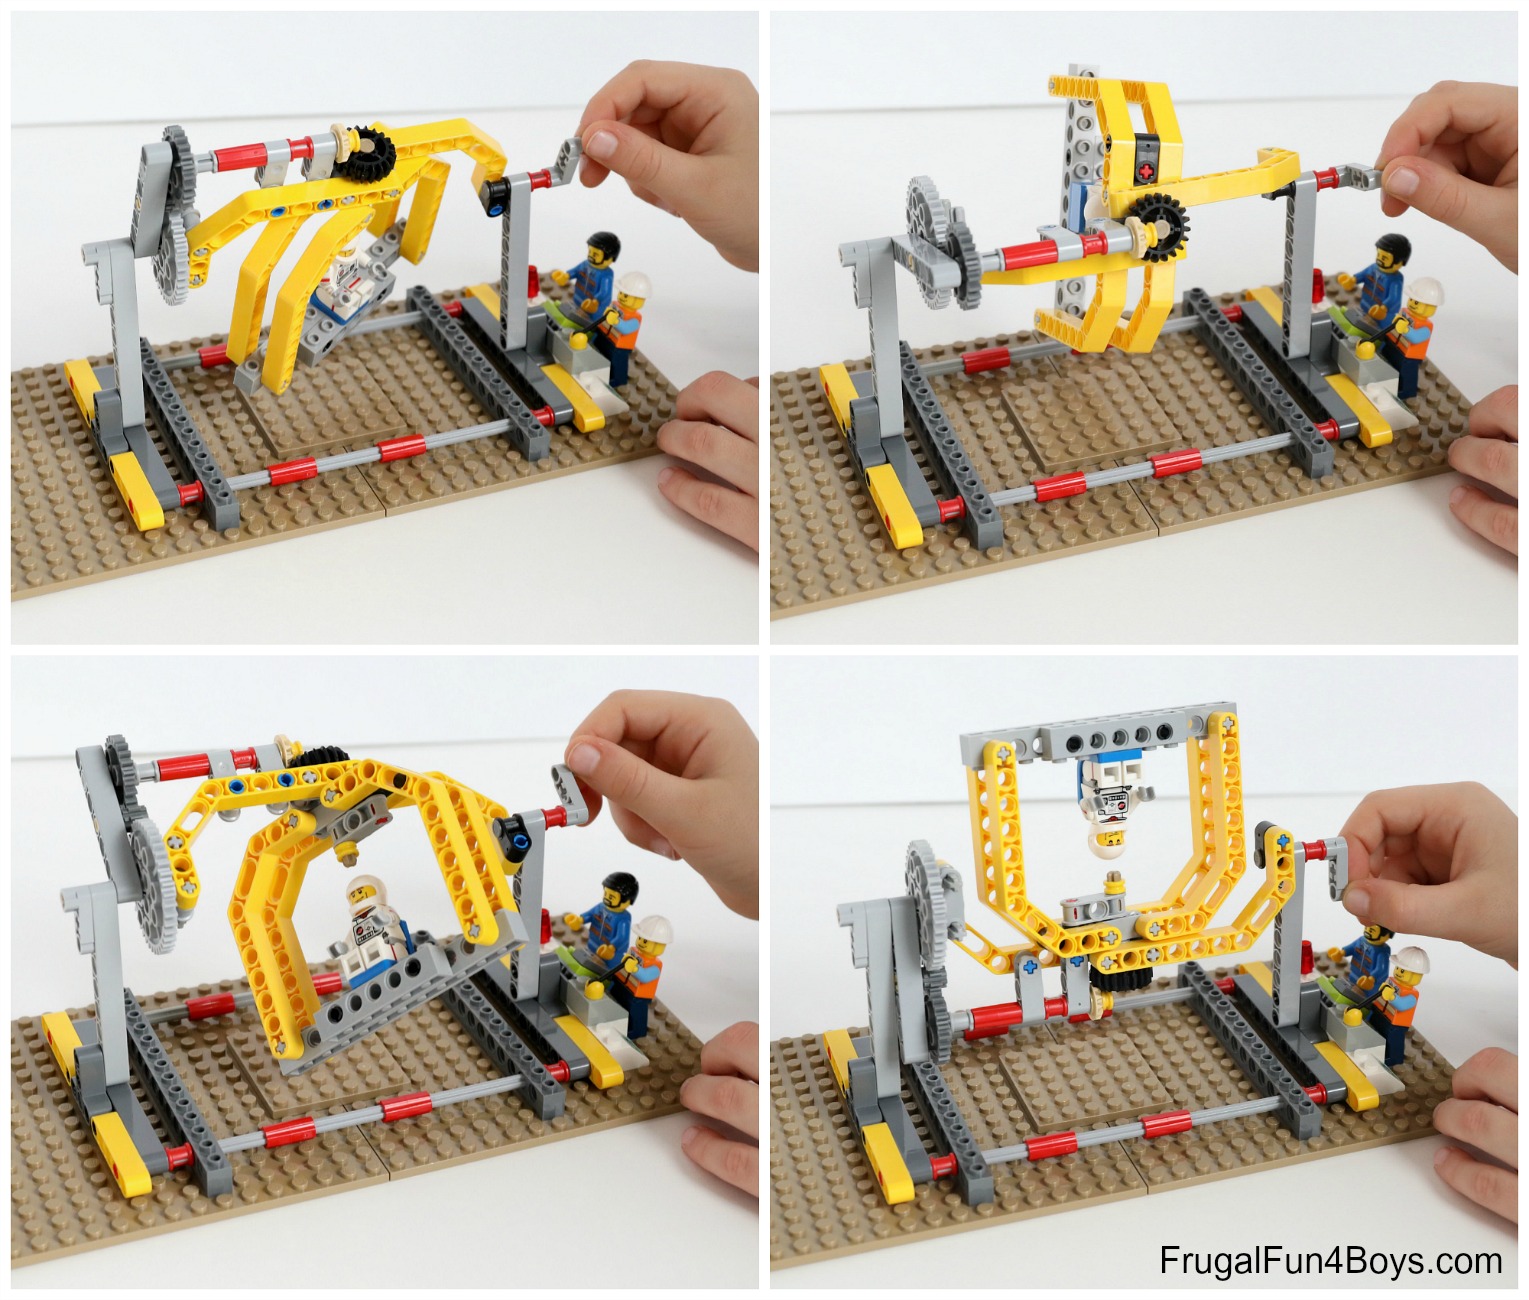
Want to see this LEGO® machine in action? Here’s a video demonstration so that you can see how it moves.
Ready to build your own weightlessness machine? Follow the instructions below. Also, if you prefer instructions in a printable format, you can find this project plus a complete parts list in Incredible LEGO Creations from Space. You’ll also find 24 more spaceships, aliens, rovers, and space projects to build! Each project has a parts list and complete instructions.
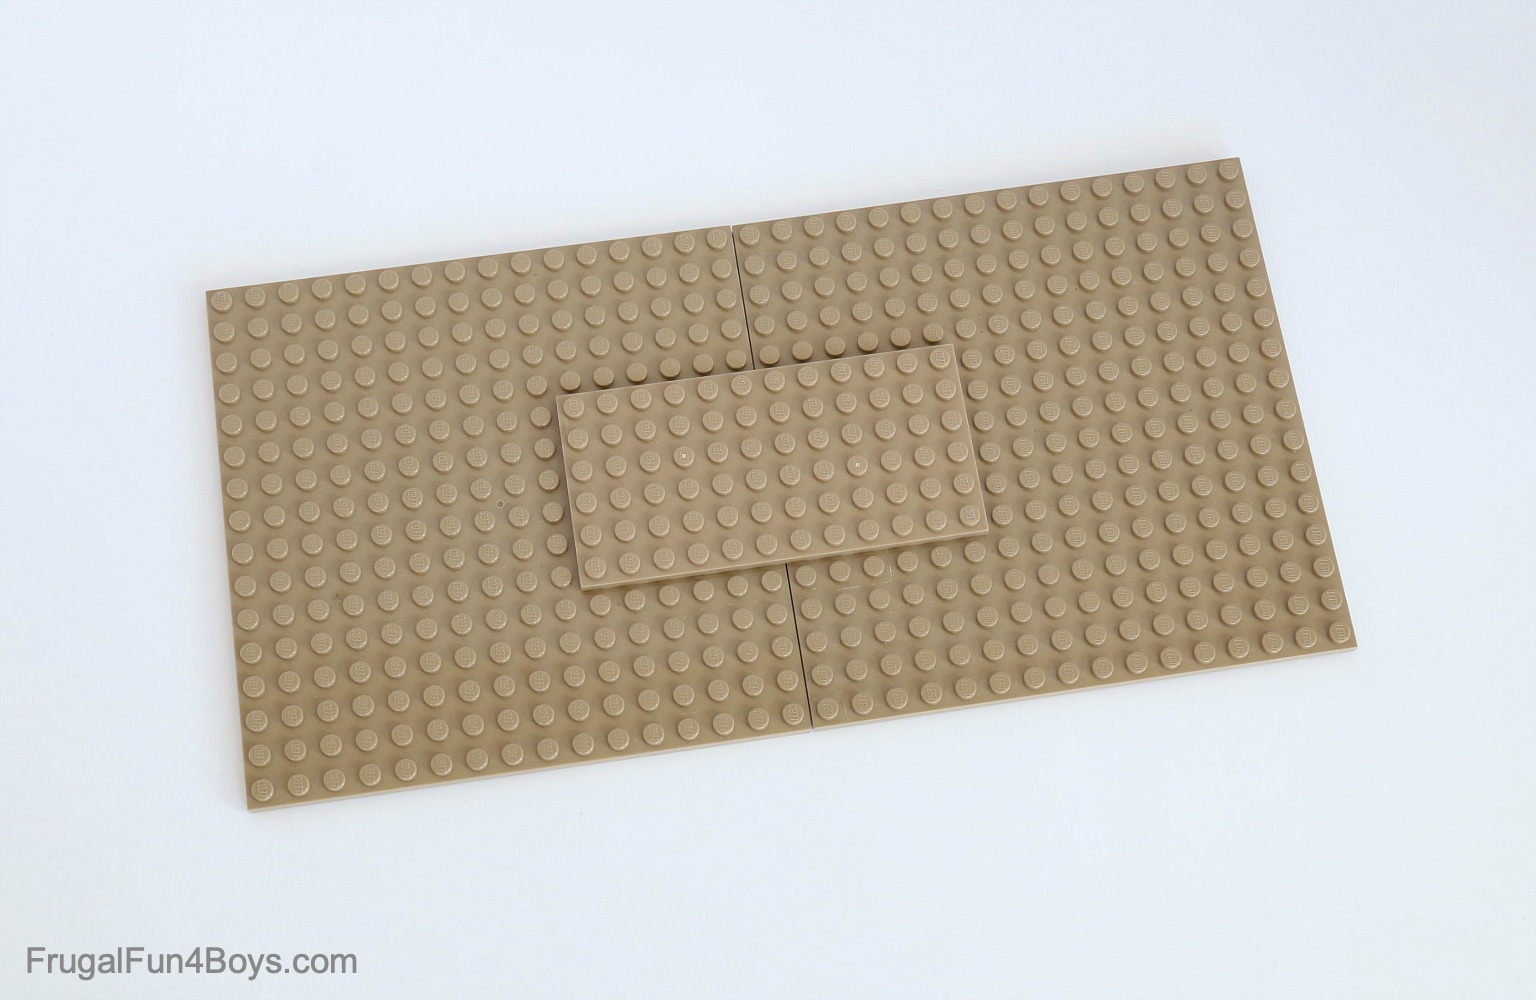
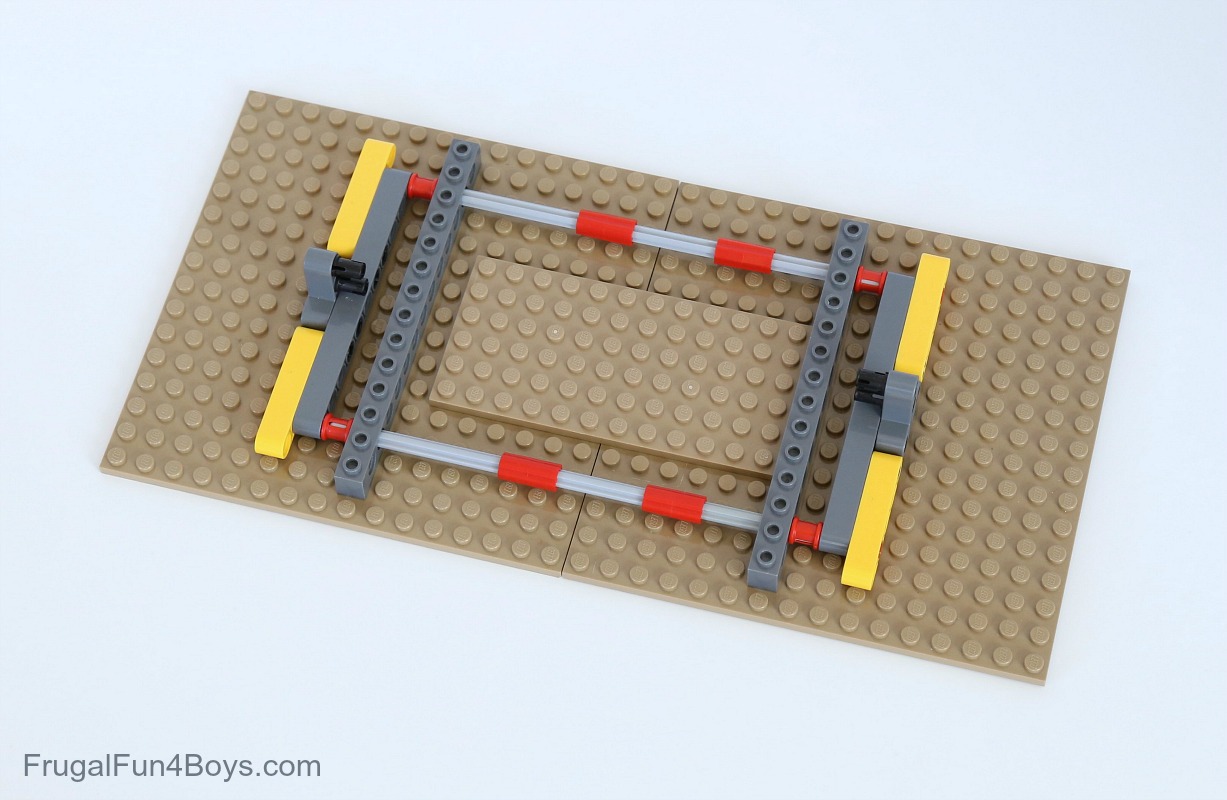
Step 1: Use a 6 x 12 plate (or any other size that works) to attach two 16 x 16 plates. Or, use a 32 x 32 baseplate.
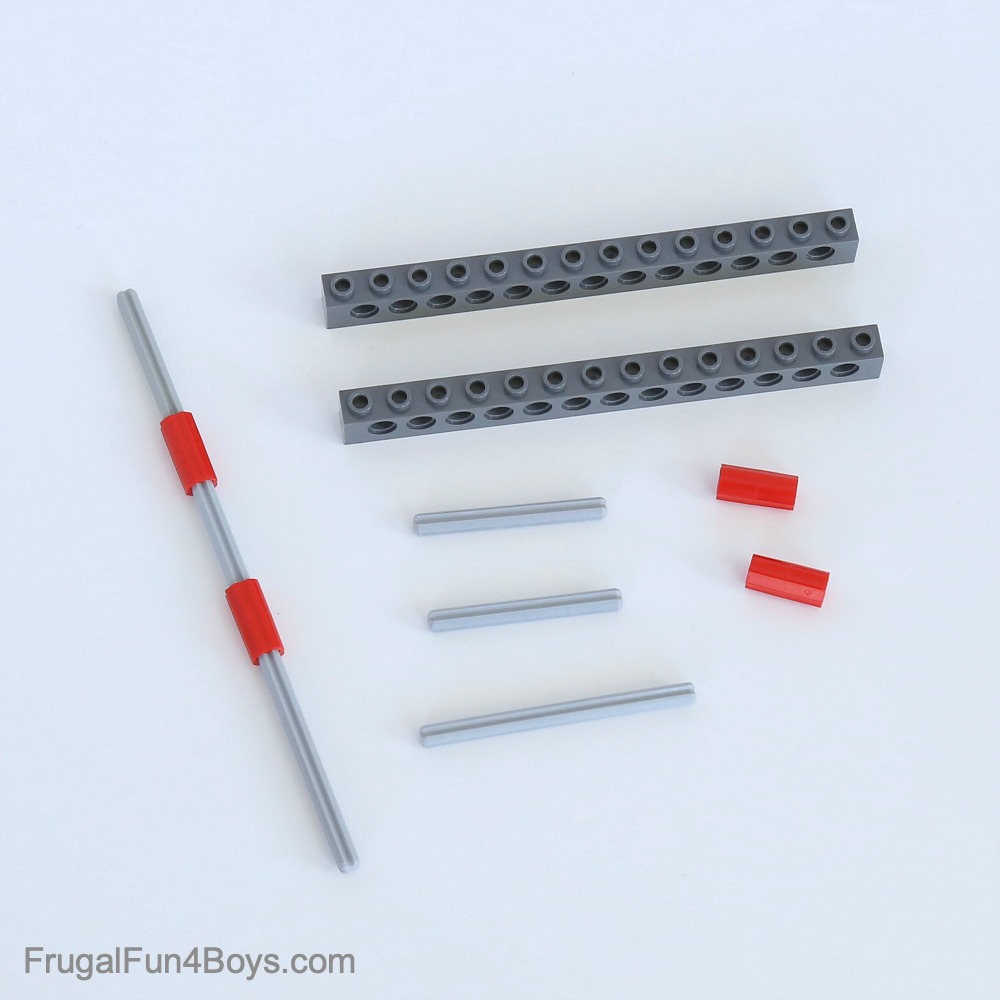
Step 2: Find two 1 x 14 Technic bricks. Use two Technic connectors to attach two axles (5 studs long). Make two of these.
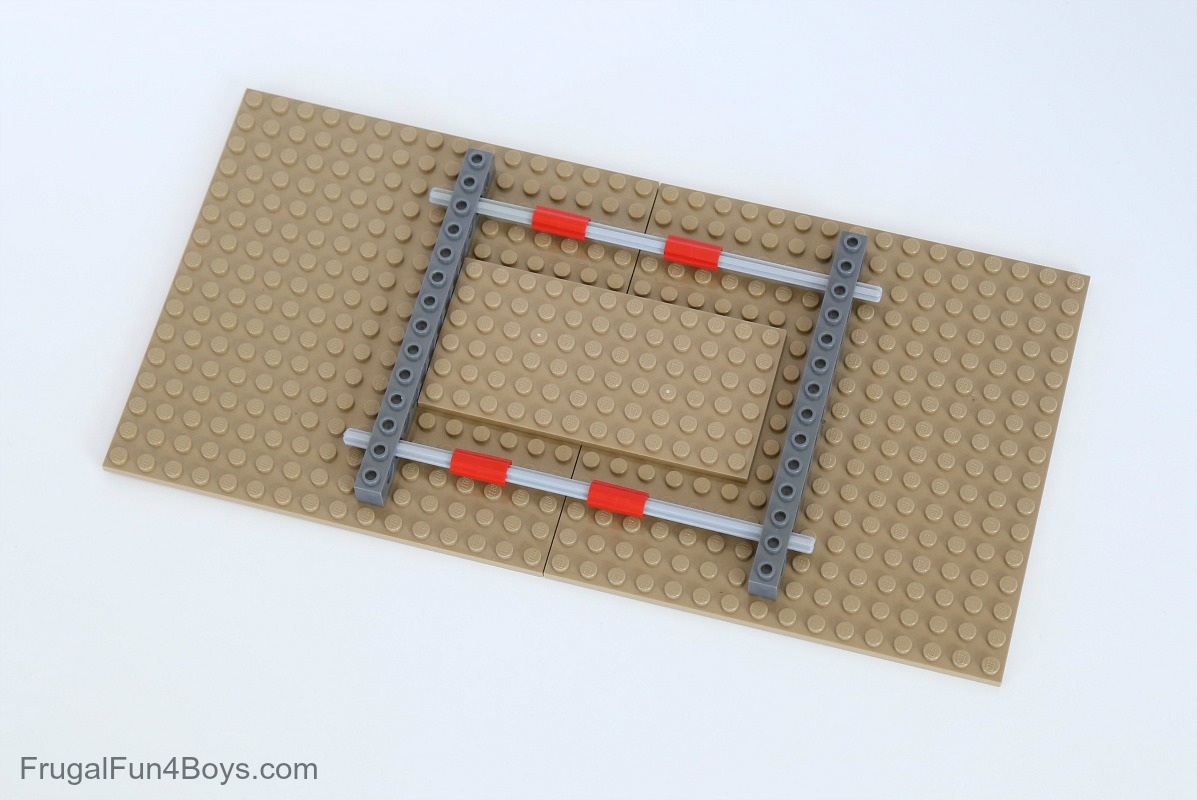
Step 3: Slide the axles through the second to last hole in each Technic brick. Then attach the Technic bricks to the base.
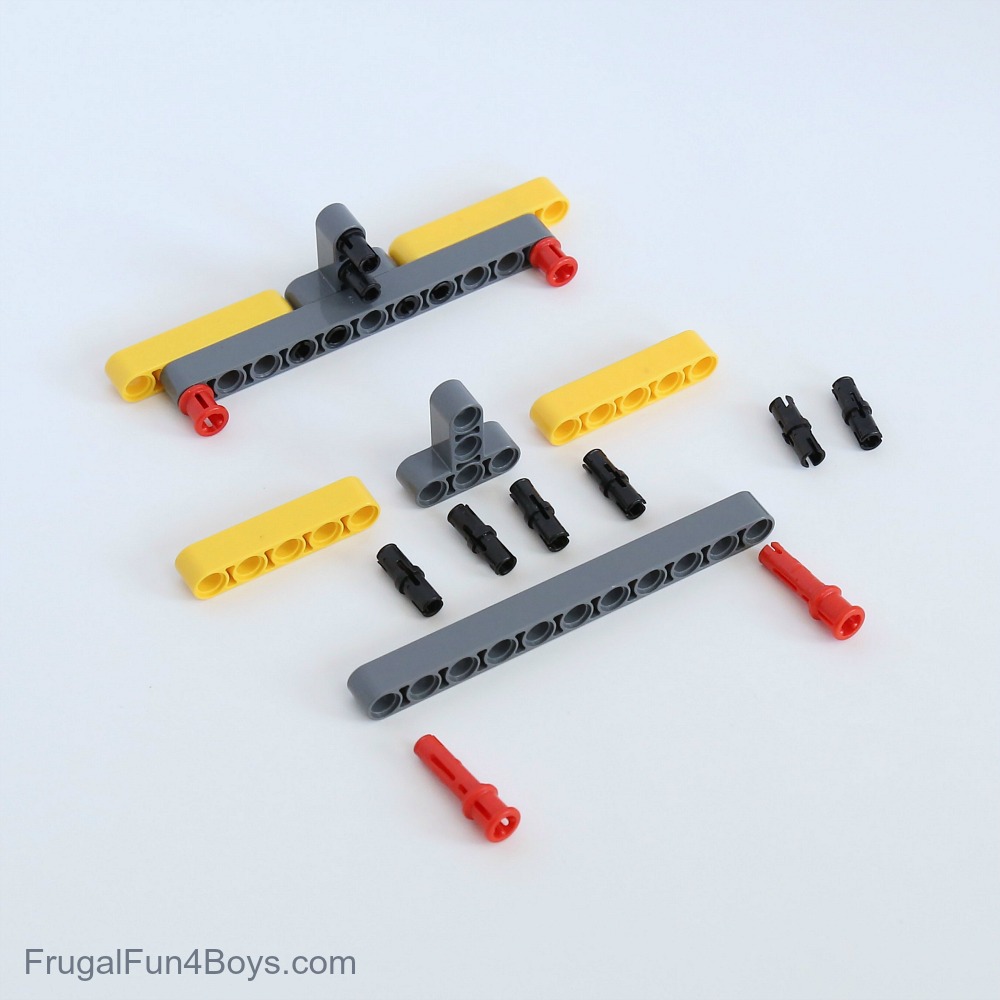
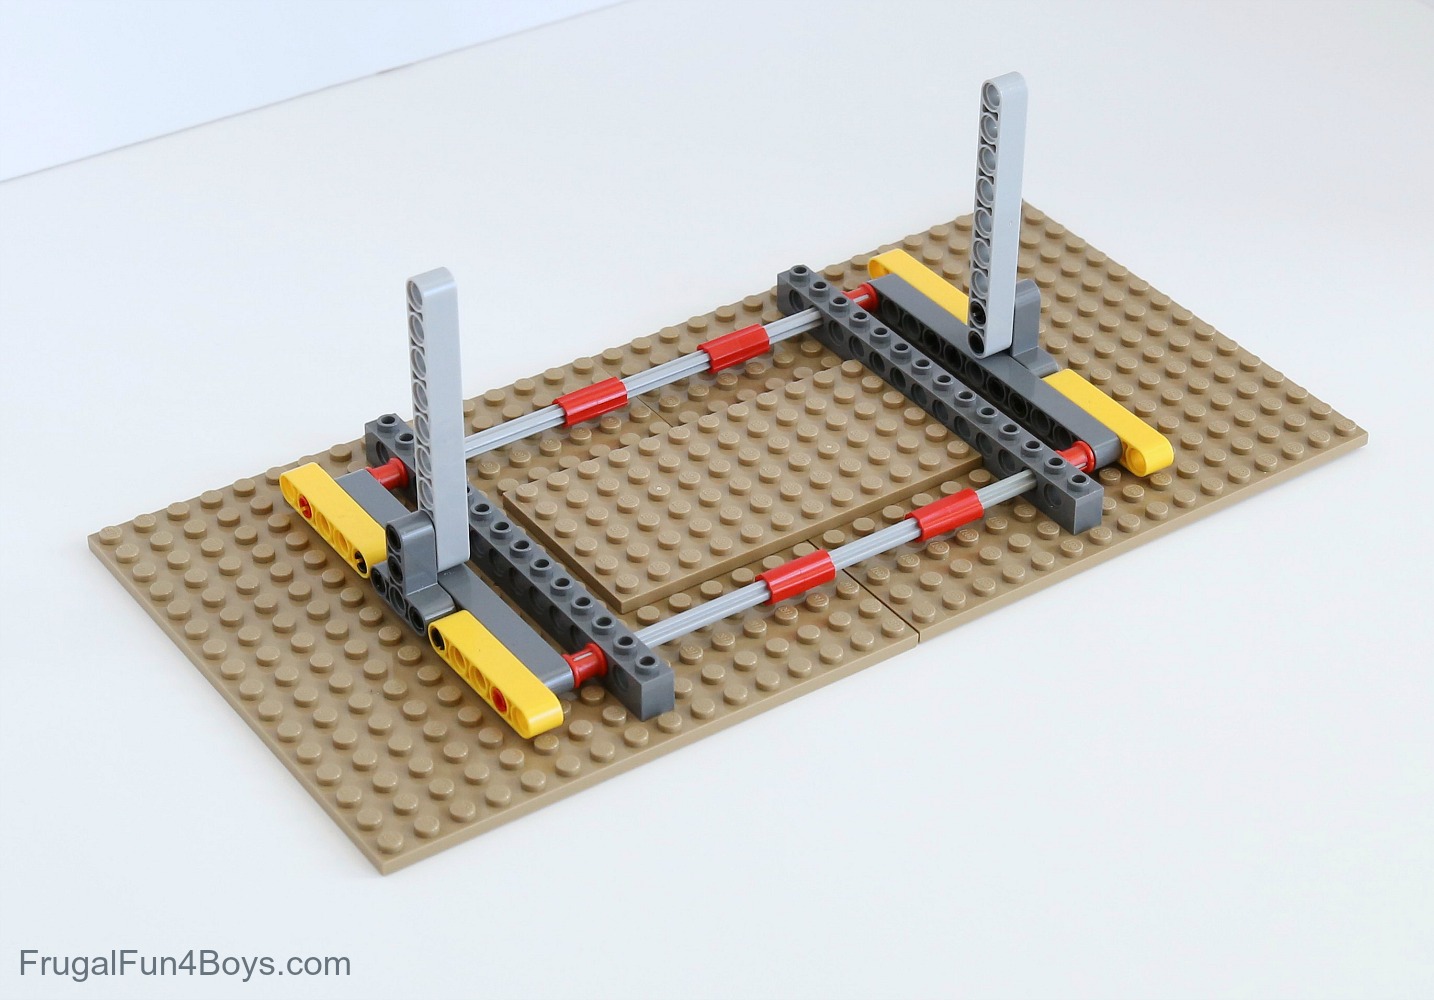
Step 4: Find a total of 12 black pins and 4 red pins that have a bush on the end. Use these to connect the liftarms shown. You’ll need two identical liftarm assemblies.
Step 5: Attach the liftarm assemblies to the axles on the base. The axles will fit inside the red bushes.
Step 6: Attach a 1 x 9 Technic liftarm on each side by sliding it onto the black pins.
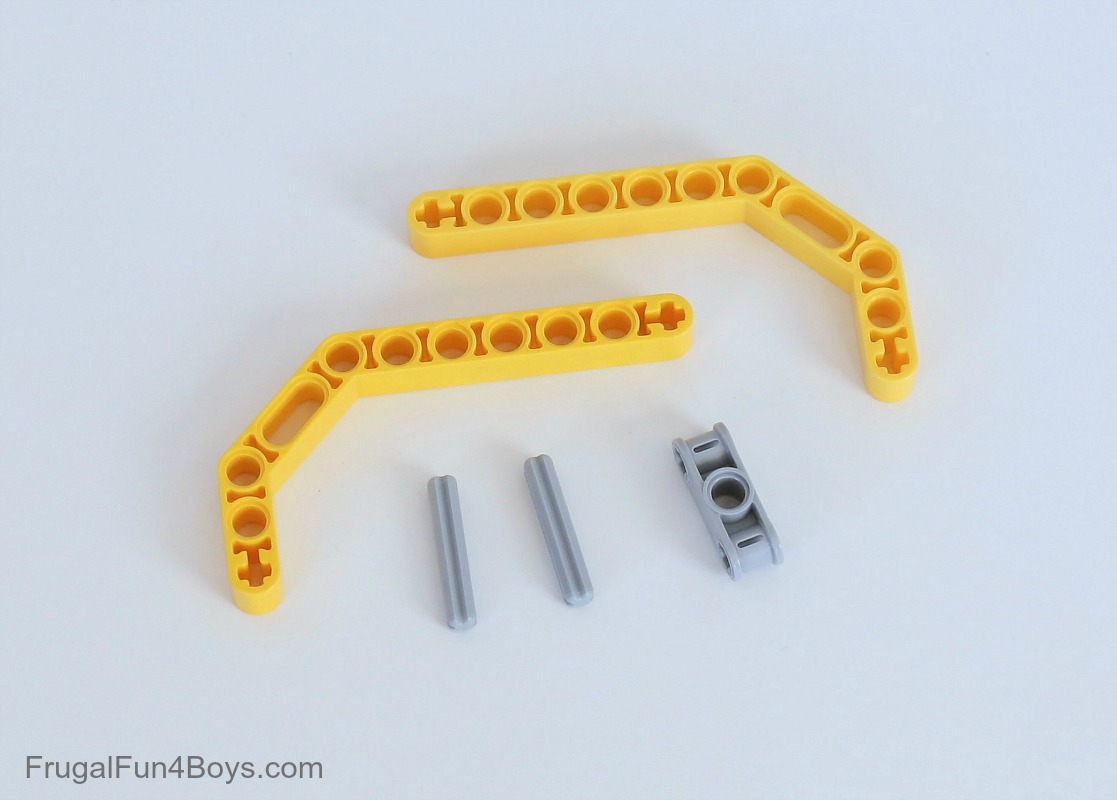
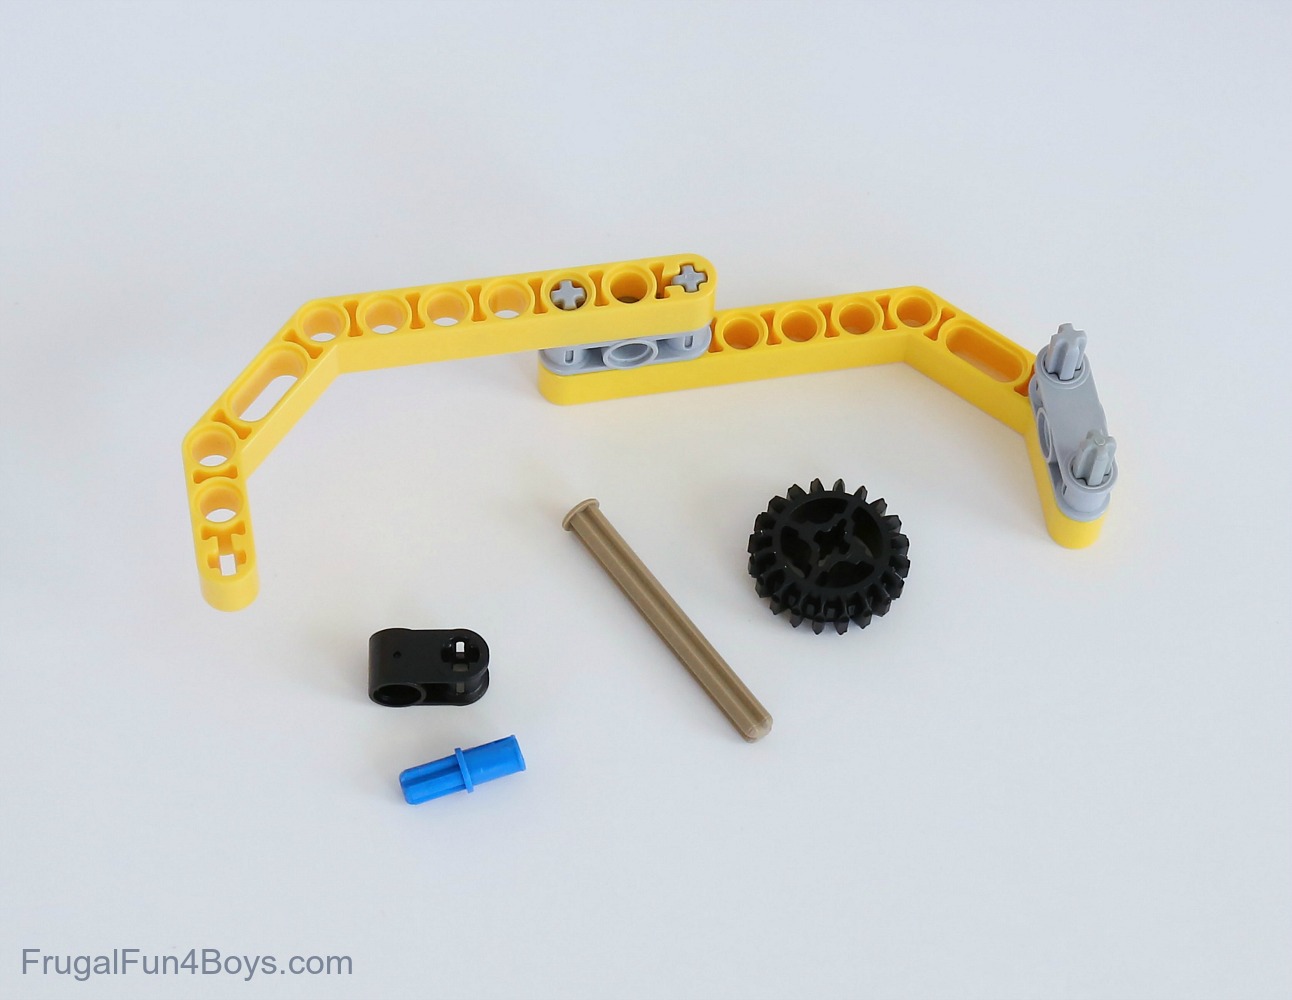
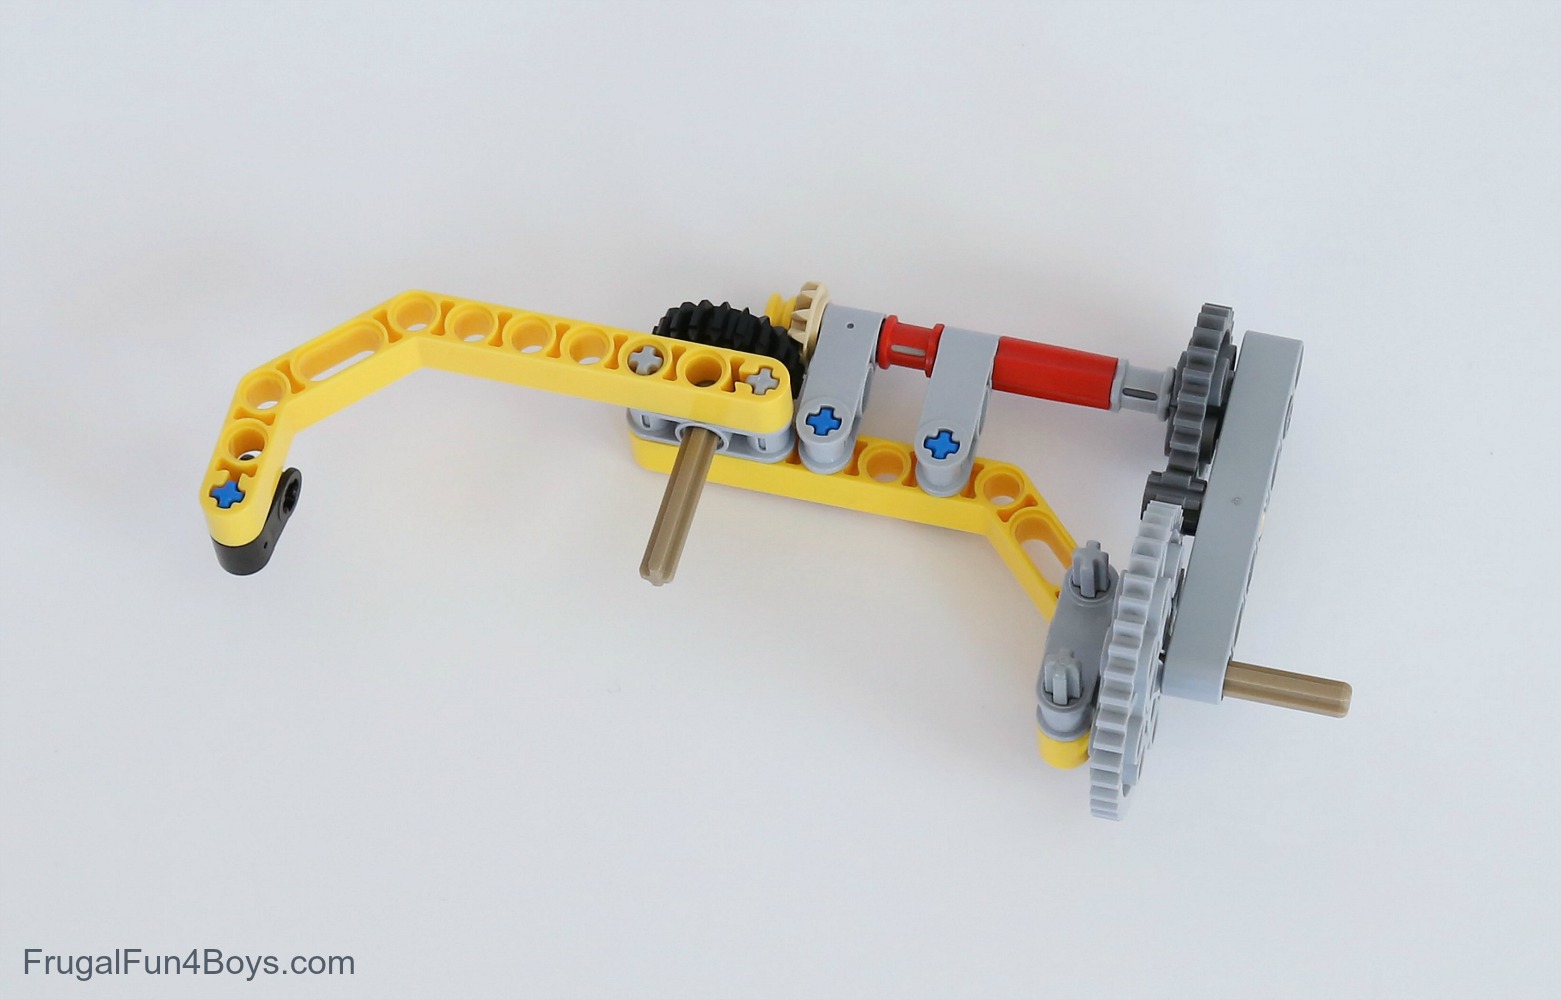
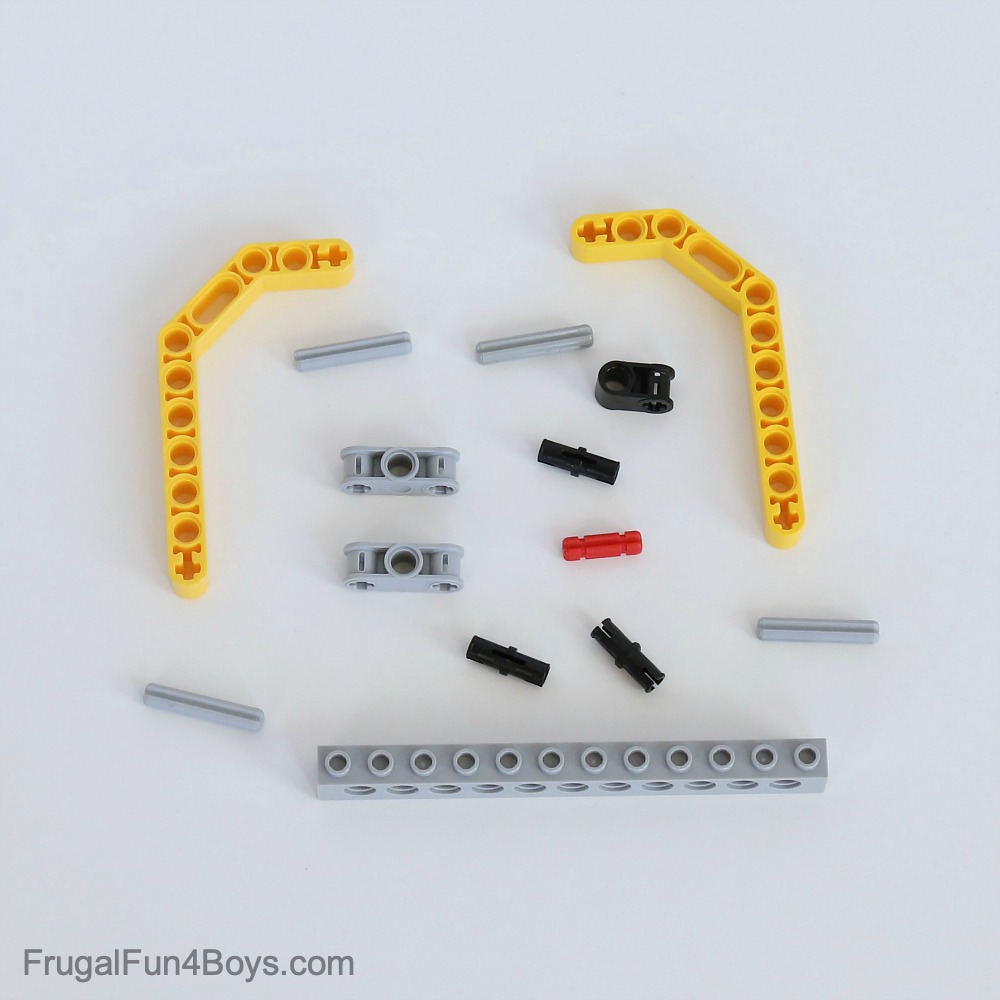
Step 7: Find two 1 x 11.5 yellow liftarms (double bent), an axle and pin connector (perpendicular, 3 studs long with a center pin hole) and two axles (3 studs long).
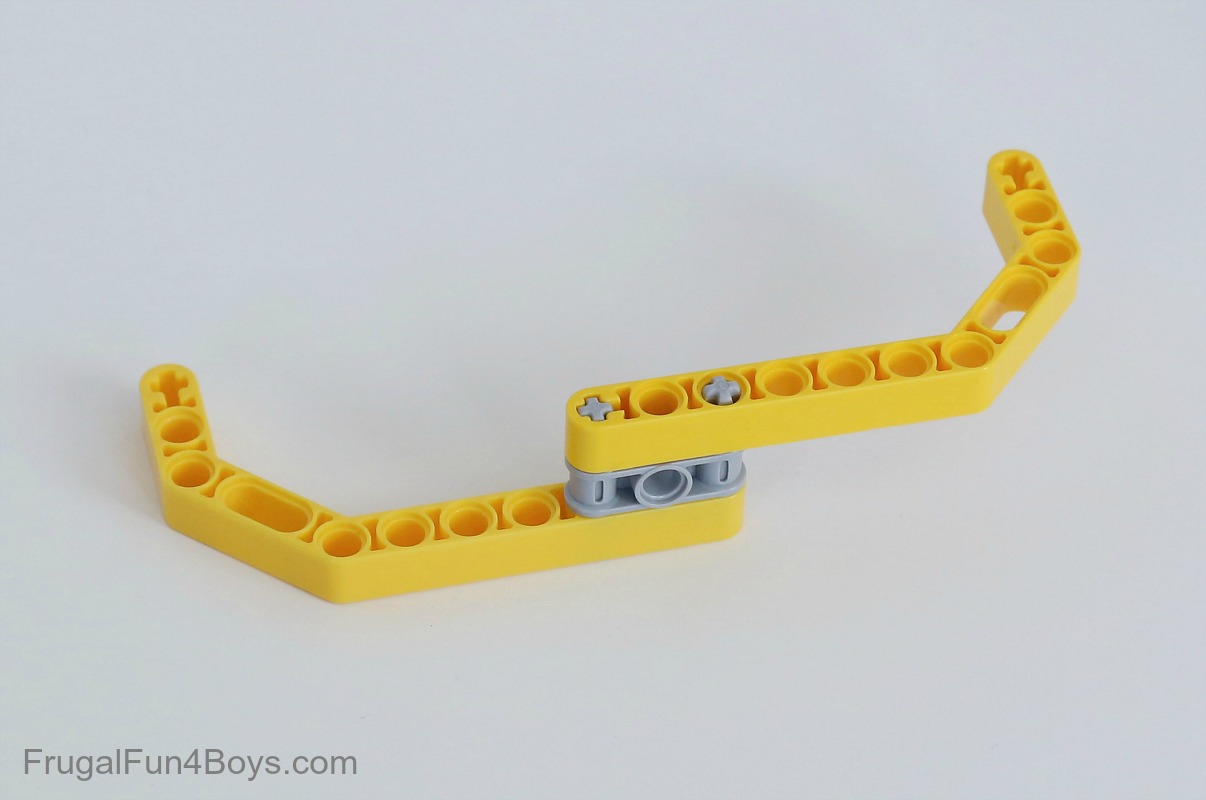
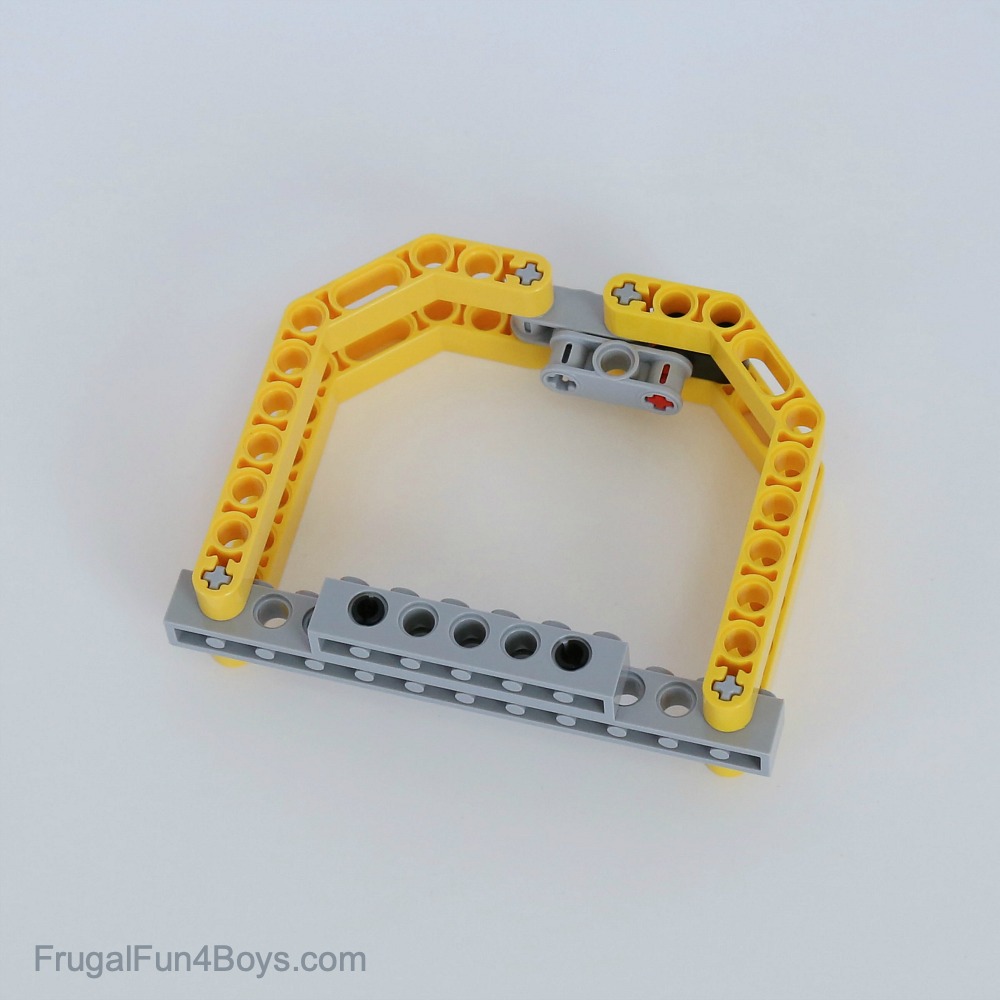
Step 8: Use the axles to attach the liftarms as shown.
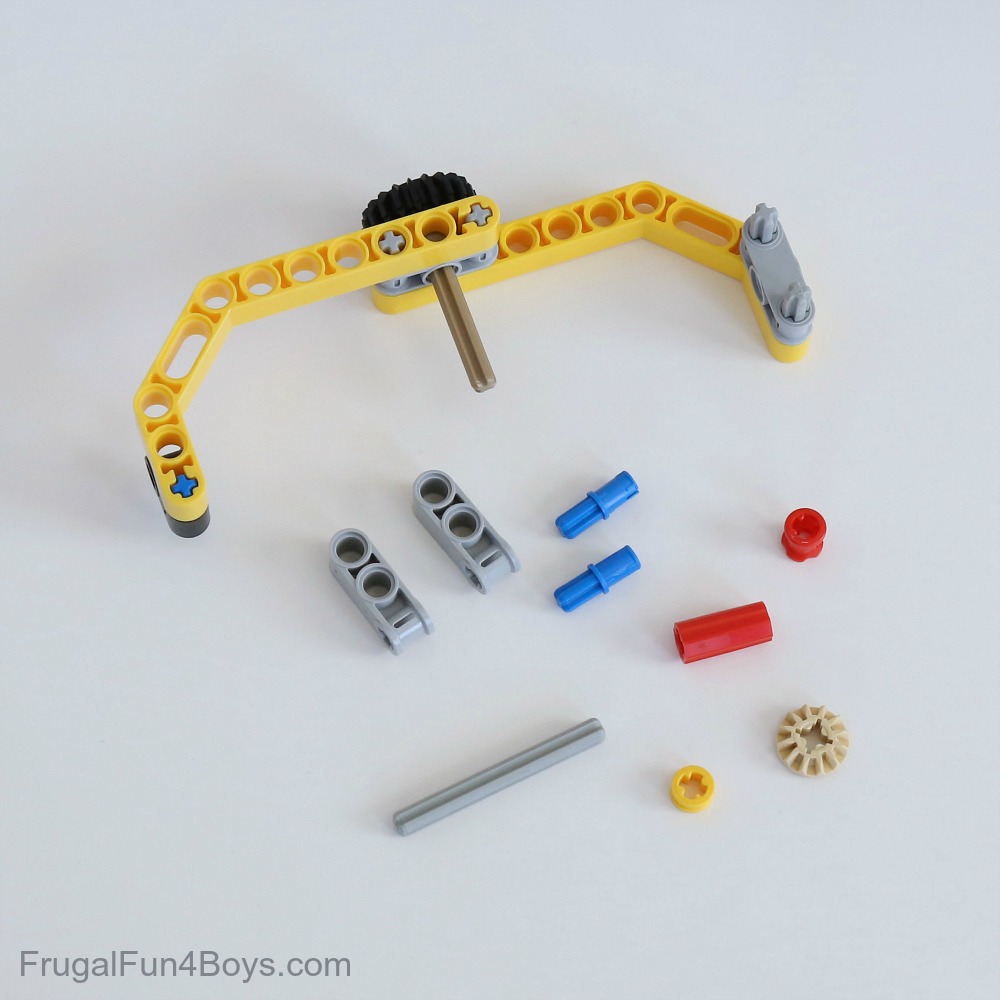
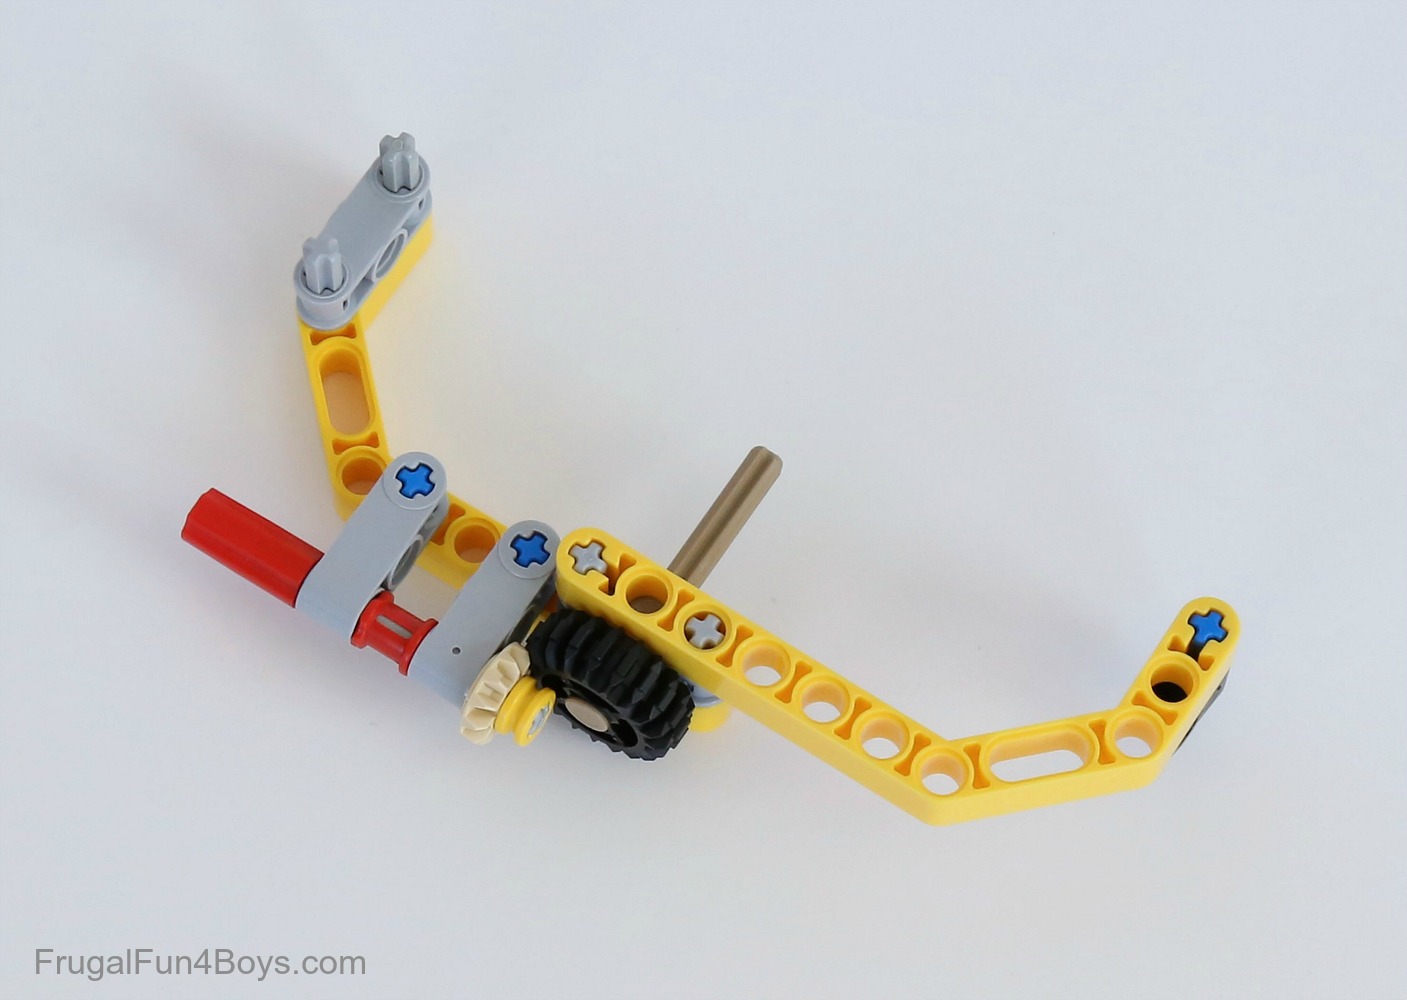
Step 9: Use two more axles (3 studs long) to attach another axle and pin connector. Then find a blue axle pin, a black axle and pin connector (perpendicular), a 20-tooth Technic bevel gear and an axle (5 studs long with a stop).
Step 10: Slide the axle through the gear, and insert this in the top of the frame. Then use the blue axle pin to attach the black axle and pin connector to the side of the frame. Gather the pieces shown.
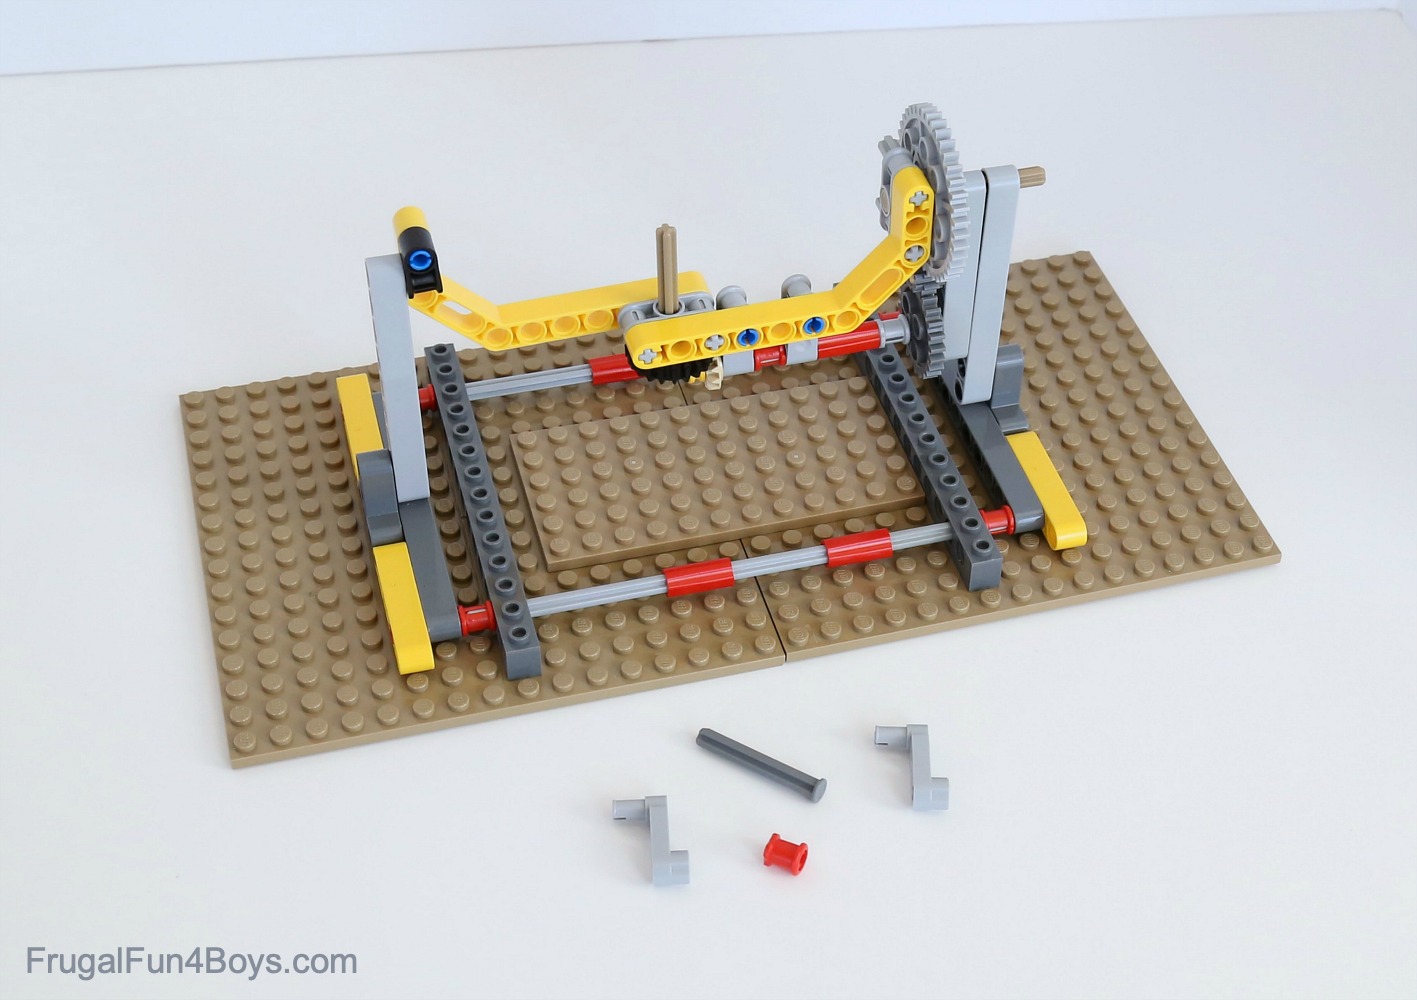
Step 11: Use the two blue axle pins to attach two axle and pin connectors (3 studs long with two pinholes) to the frame as shown.
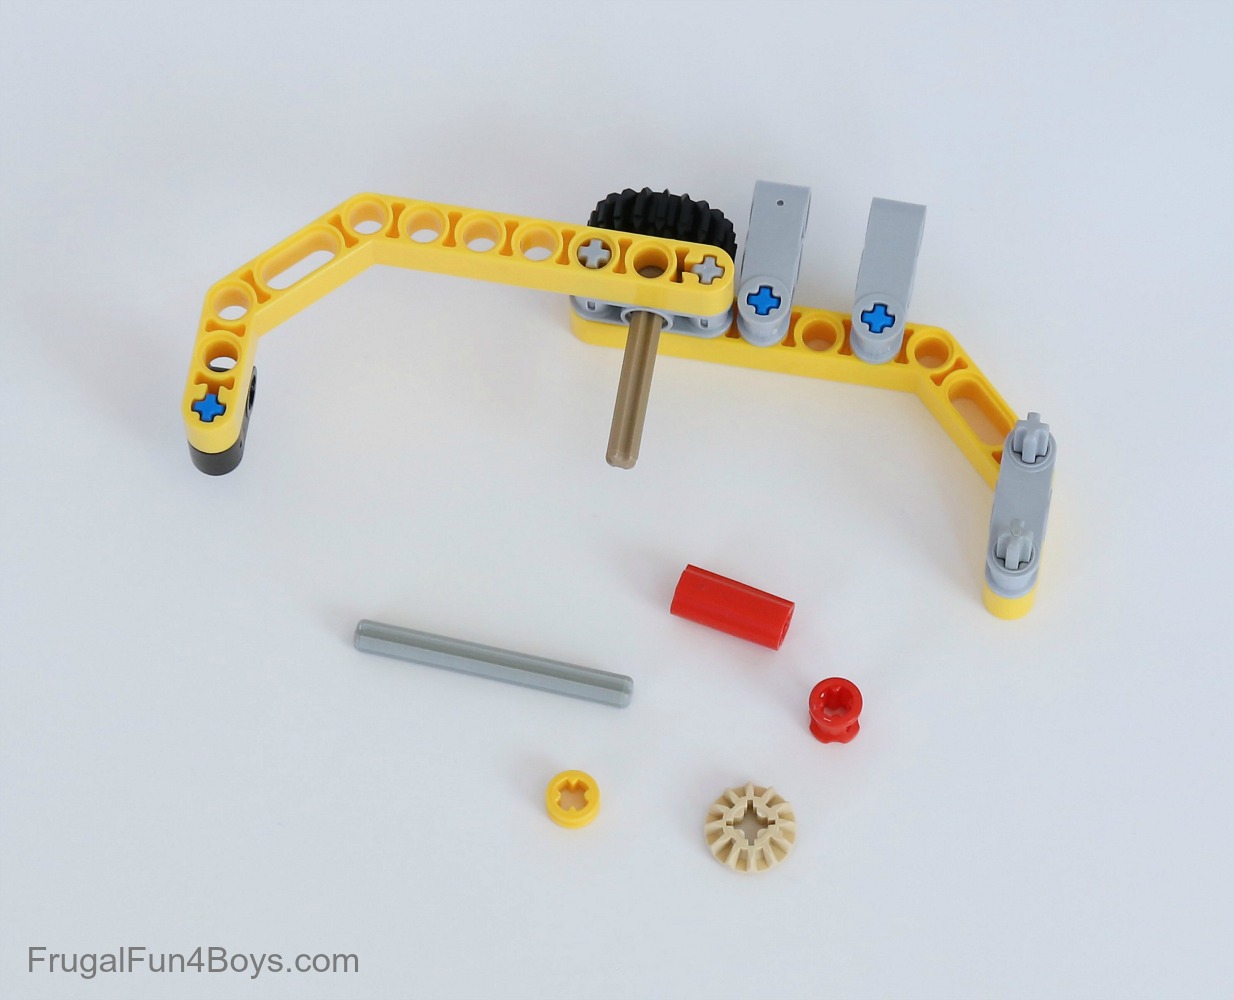
Step 12: Slide an axle and a red Technic bush through the axle and pin connectors that you added in step 11.
Step 13: Slide a red connector onto the exposed axle on the outside of the frame. Add a tan 12-tooth bevel gear on the axle on the other side so that it meshes with the 20-tooth gear. Secure it with a yellow bush (1/2 length).
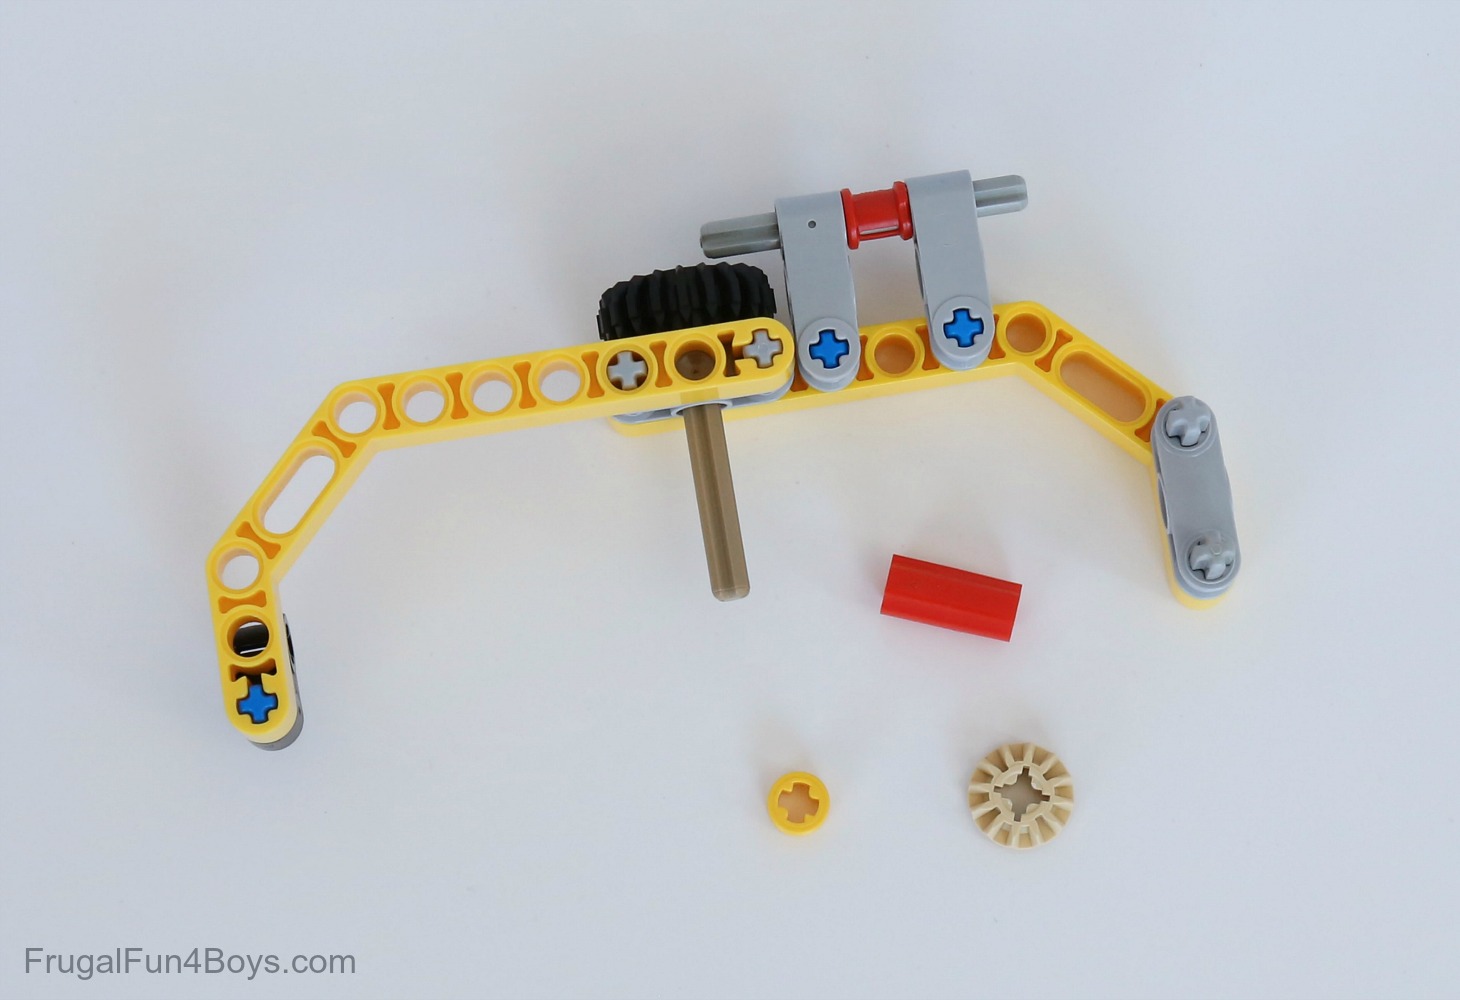
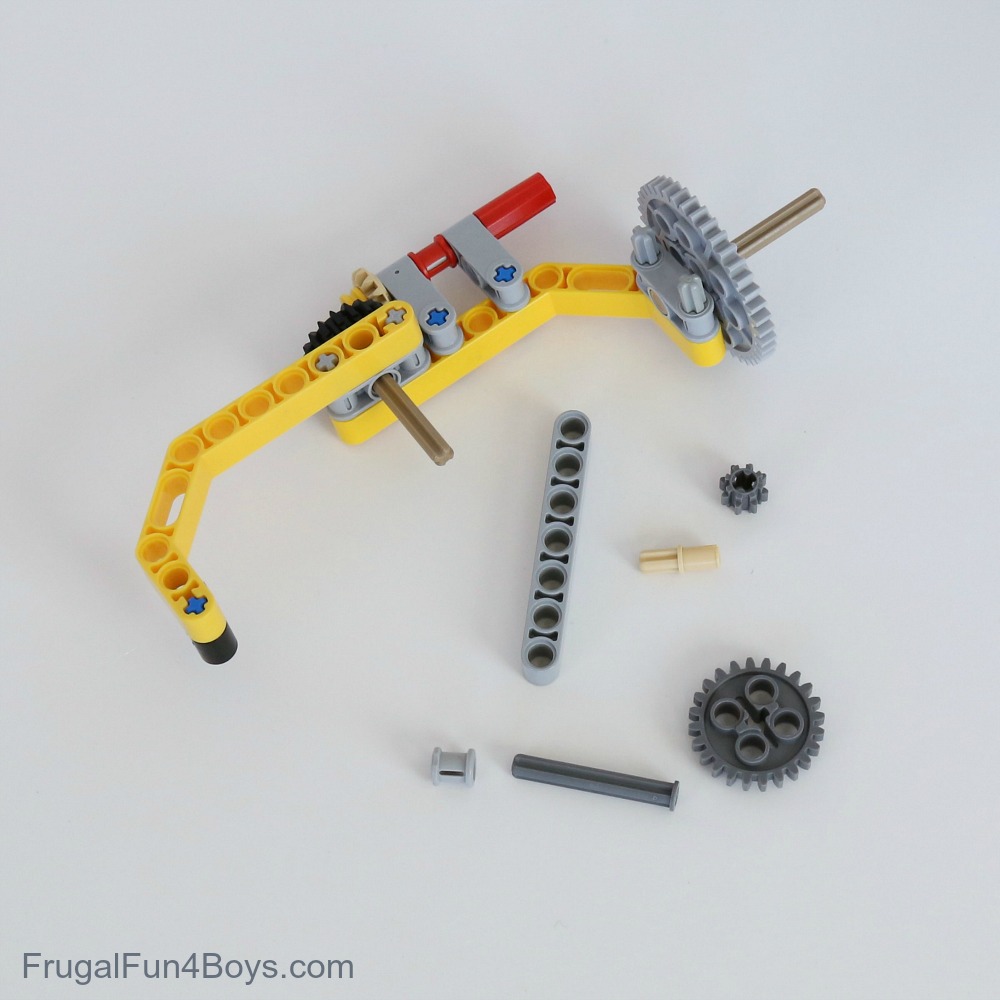
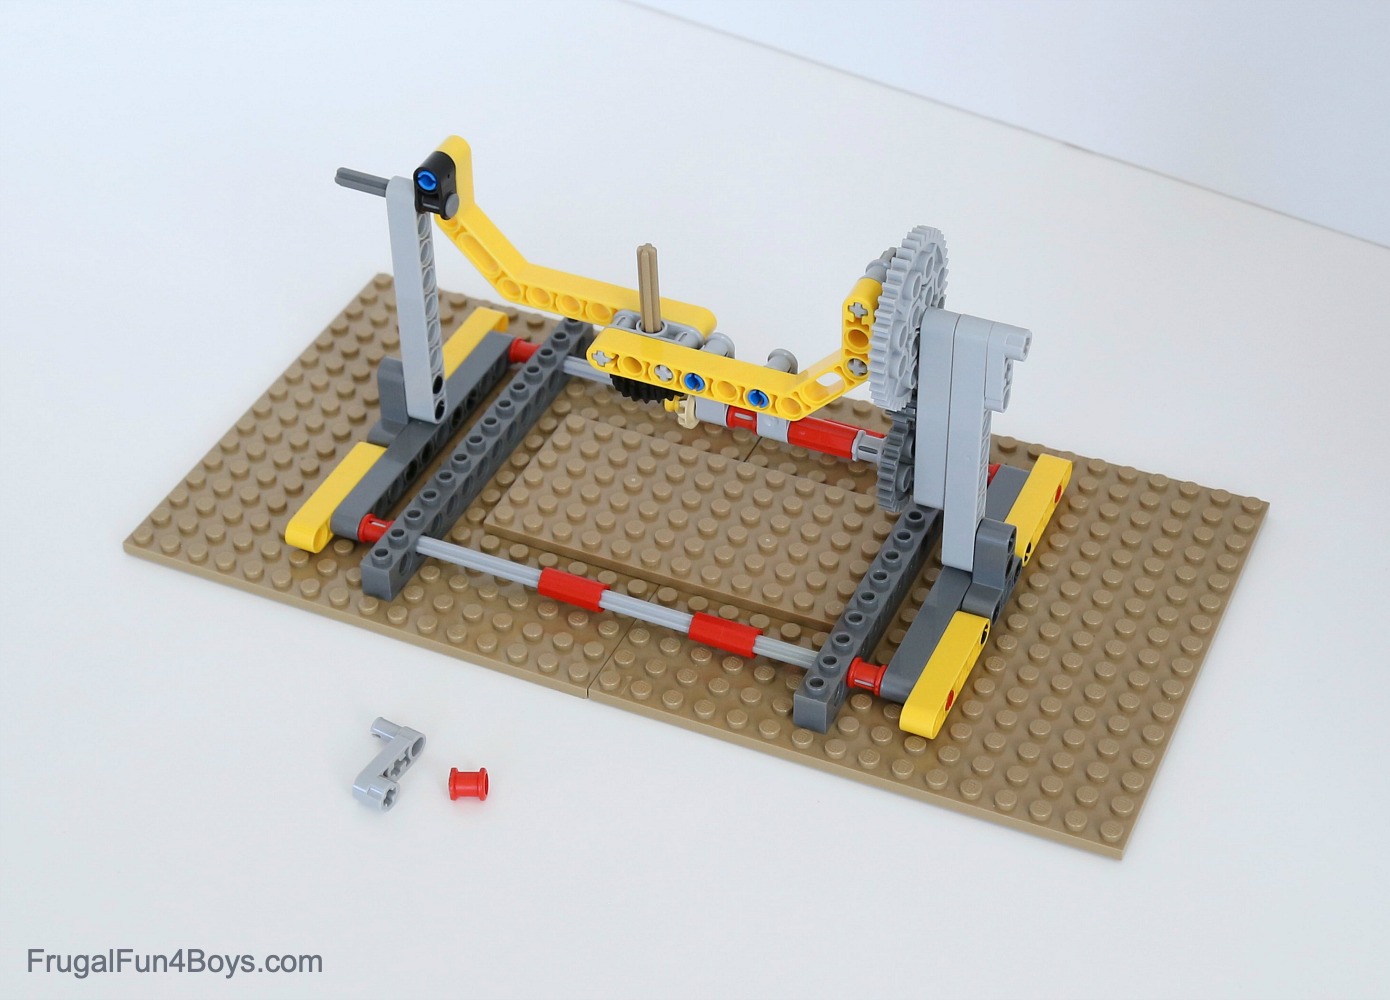
Step 14: Gather the pieces shown. You’ll need a 40-tooth gear, a 24-tooth gear, an 8-tooth gear, a tan axle pin, a dark tan axle (5 studs long with a stop), a dark gray axle (4 studs long with a stop), a light gray bush, and a 1 x 7 light gray liftarm.

Step 15: Use the 5 stud long dark tan axle to attach the 40-tooth gear to the frame. Slide the axle through the center pinhole in the axle and pin connector and then through the gear.
Step 16: Slide the dark gray axle (4 studs long with a stop) and the tan axle pin into the second and fourth holes in the liftarm.
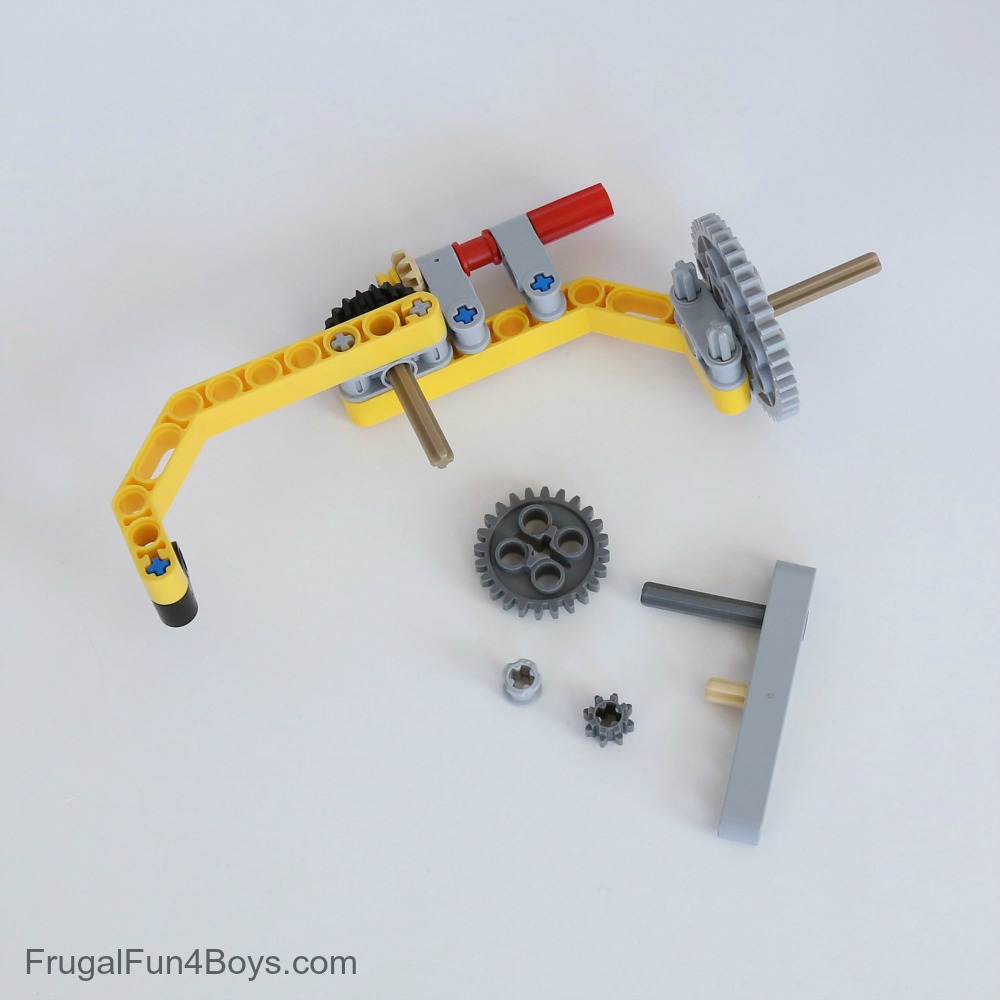
Step 17: Slide the 24-tooth gear and the light gray bush onto the axle. Slide the 8-tooth gear onto the axle pin.
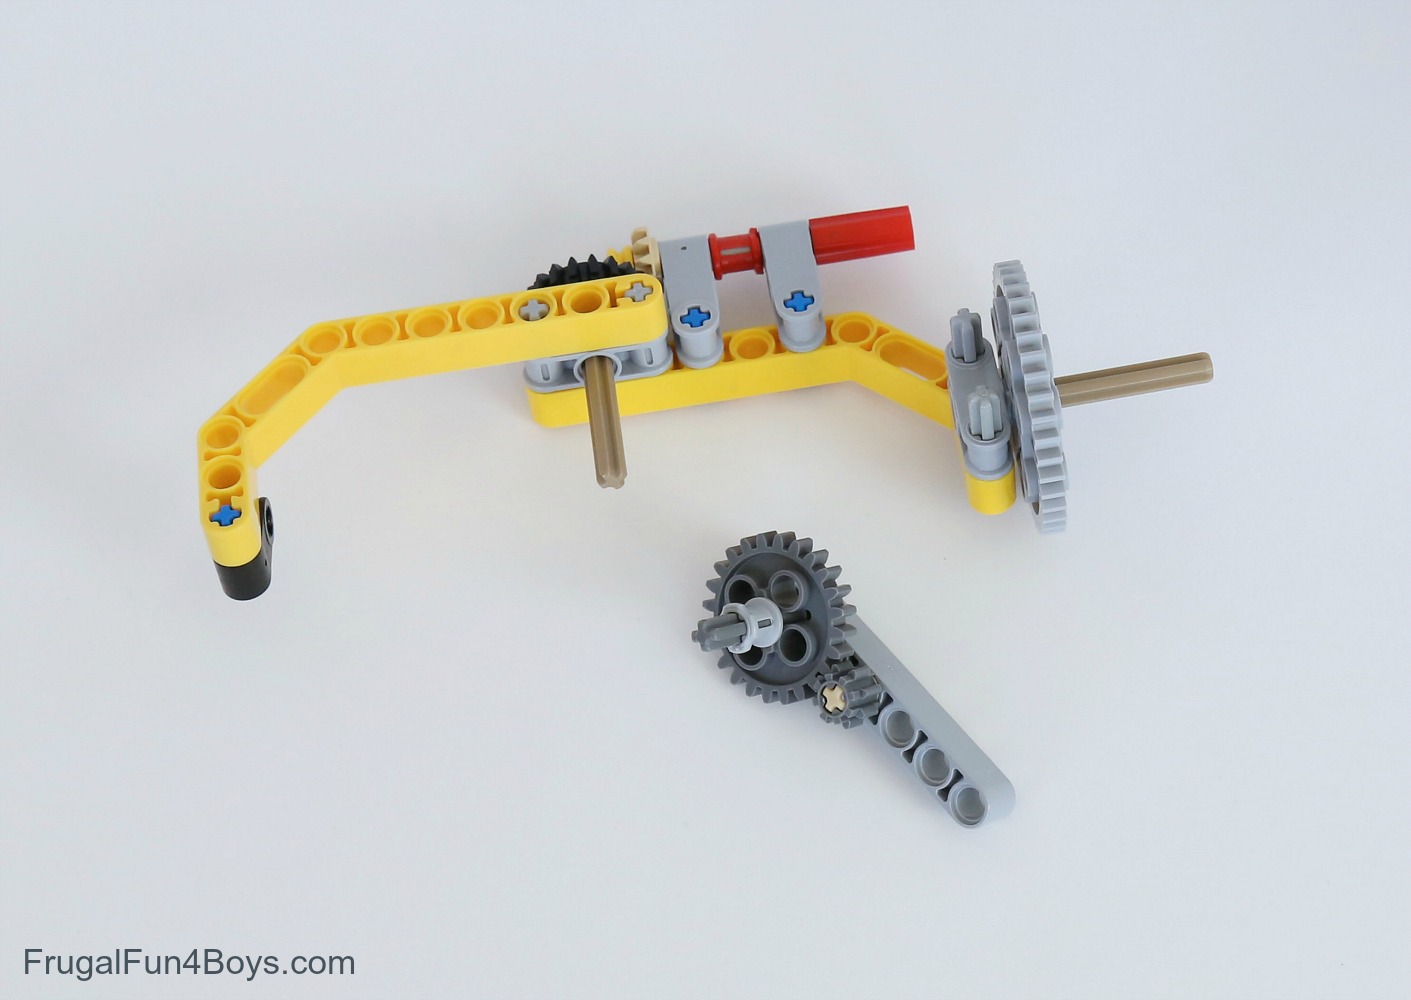
Step 18: Slide the liftarm onto the dark tan axle that you added in step 15. Slide the axle into the red connector at the top of the frame.
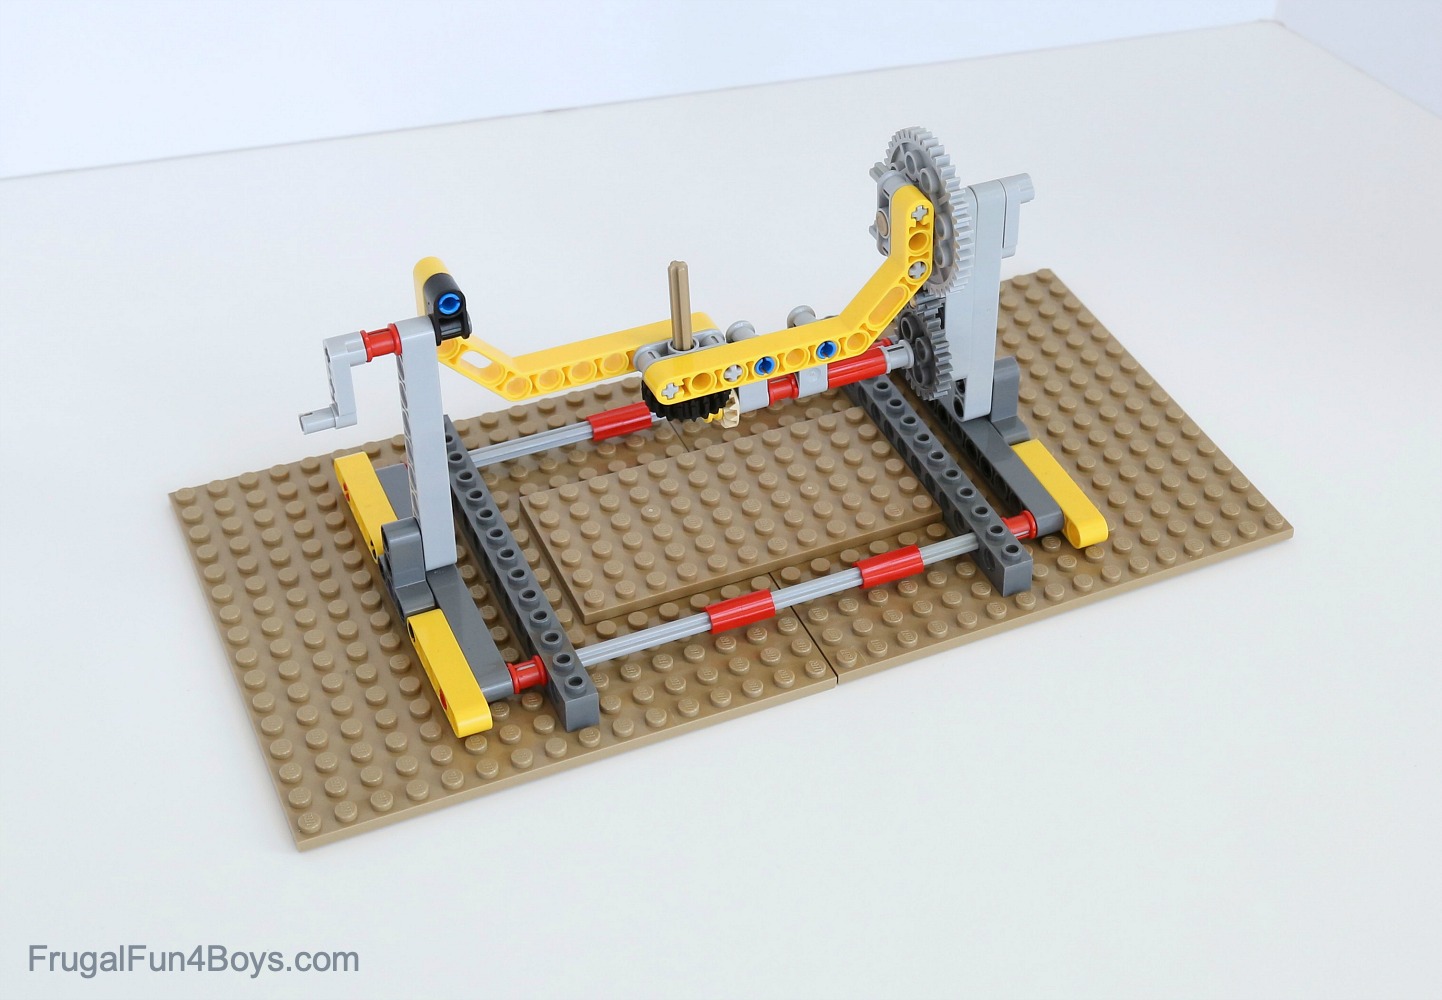
Step 19: Add the mechanism to the main frame by sliding the dark tan axle into the liftarm on the right. The left side is not yet attached. Find a dark gray axle (4 studs long with a stop), a red Technic bush, and two 1 x 3 liftarms (with two axle holes and a pin/crank).
Step 20: Attach one of the 1 x 3 liftarms on the right side. Slide the axle (4 studs long with a stop) through the black axle and pin connector and the light gray liftarm on the left side.
Step 21: Slide the red Technic bush and the other 1 x 3 liftarm onto the axle. Now you have a crank for turning the mechanism.
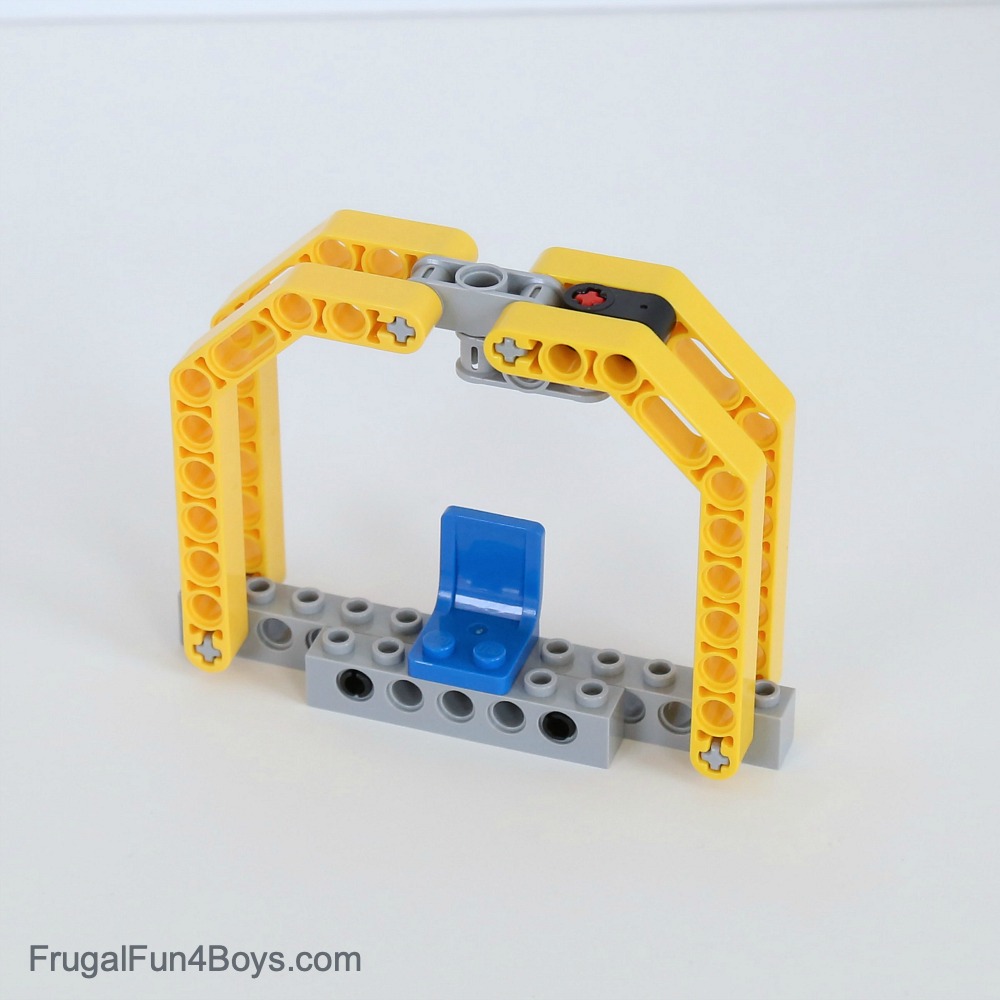
Step 22: Gather the bricks shown for building the chair that the astronaut will sit in.
Step 23: Use two axles (3 studs long) to attach a 1 x 12 Technic brick to the bottoms of two 1 x 11.5 liftarms (double bent). Use two more axles (3 studs long) to connect the tops of the liftarms with an axle and pin connector (3 studs long with a center pin hole).

Step 24: Insert two black pins into the Technic brick as shown. Connect a black axle and pin connector and a light gray axle and pin connector (3 studs long with a center pin hole) using a red axle (2 studs long). Then attach these to the frame by inserting a black pin into the black axle and pin connector and into the frame.

Step 25: Slide two more 1 x 11.5 liftarms (double bent) onto the axles. Use the black pins on the bottom of the frame to attach a 1 x 6 Technic brick.
Step 26: Attach a chair to the frame.
Step 27: Attach the chair frame to the dark tan axle that is hanging down from the 20-tooth bevel gear. Secure it with a yellow Technic bush (1/2 length). Then your weightless training machine is complete!
Have fun building!

0 Comments
Post a Comment