
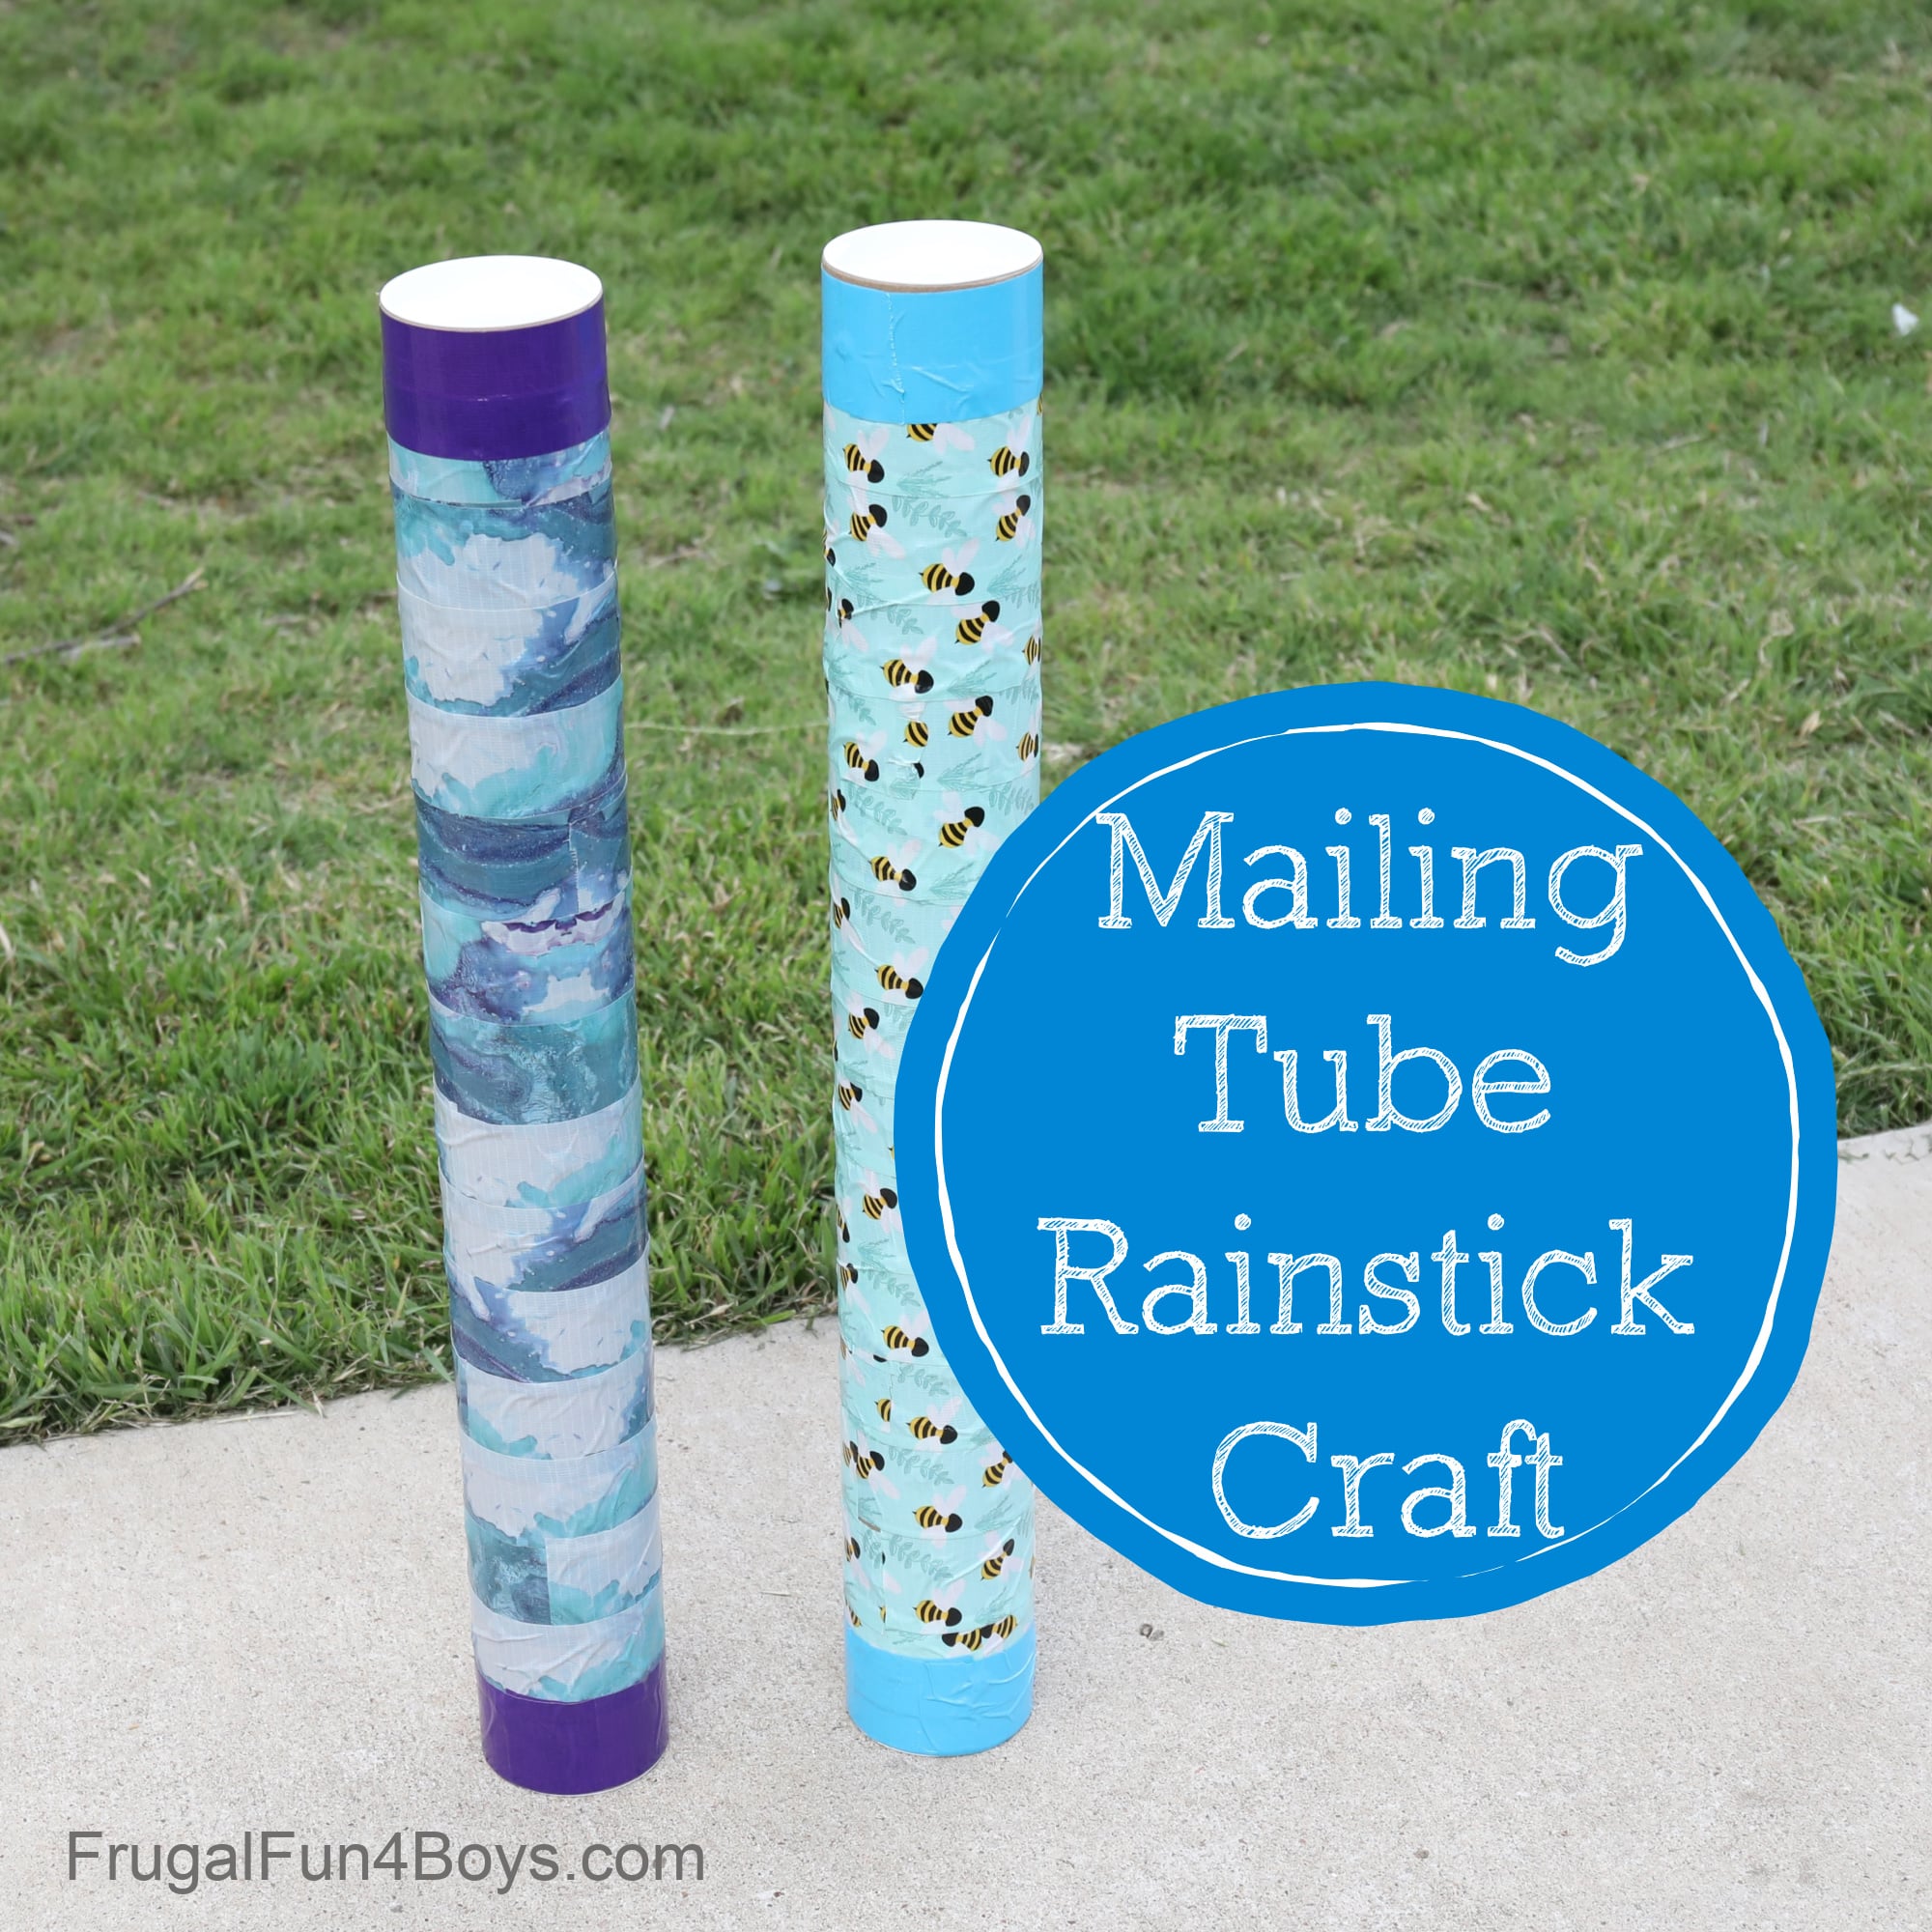
Make your own rainstick craft! This mailing tube rainstick is easy to make, and the sound is so satisfying.
A rainstick makes a great musical instrument! Or make one as part of a rainforest unit. Traditional rainsticks originated in Chile and Argentina, although similar instruments also originated in parts of Africa. Rainsticks in Chile were made from dried out cacti filled with small pebbles and stones.
While it would be fun to used a dried cactus, we’re going to make our rainstick out of a mailing tube and dried beans!
This craft is really great for a wide range of ages. Make one for your preschooler, and she’ll have a blast exploring the sound it makes! Or, do this project with older kids who will love the process of making it themselves. I’d recommend this rainstick craft for ages 8+ if you’re going to have them make it themselves.
This post was originally published in April 2011 and updated in April 2026.
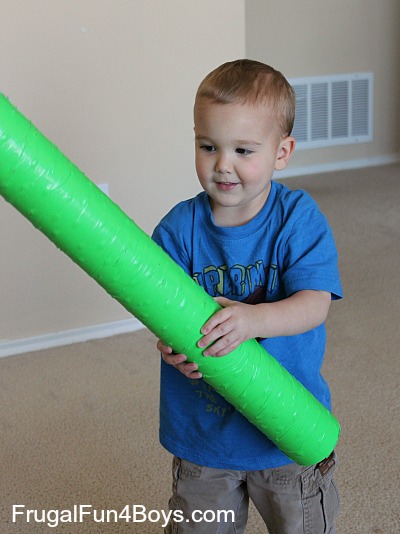
A rainstick is so fun for toddlers to explore! This is our original mailing tube rainstick that we made in 2011! The child in the picture is now 14 and helped me make the updated version.
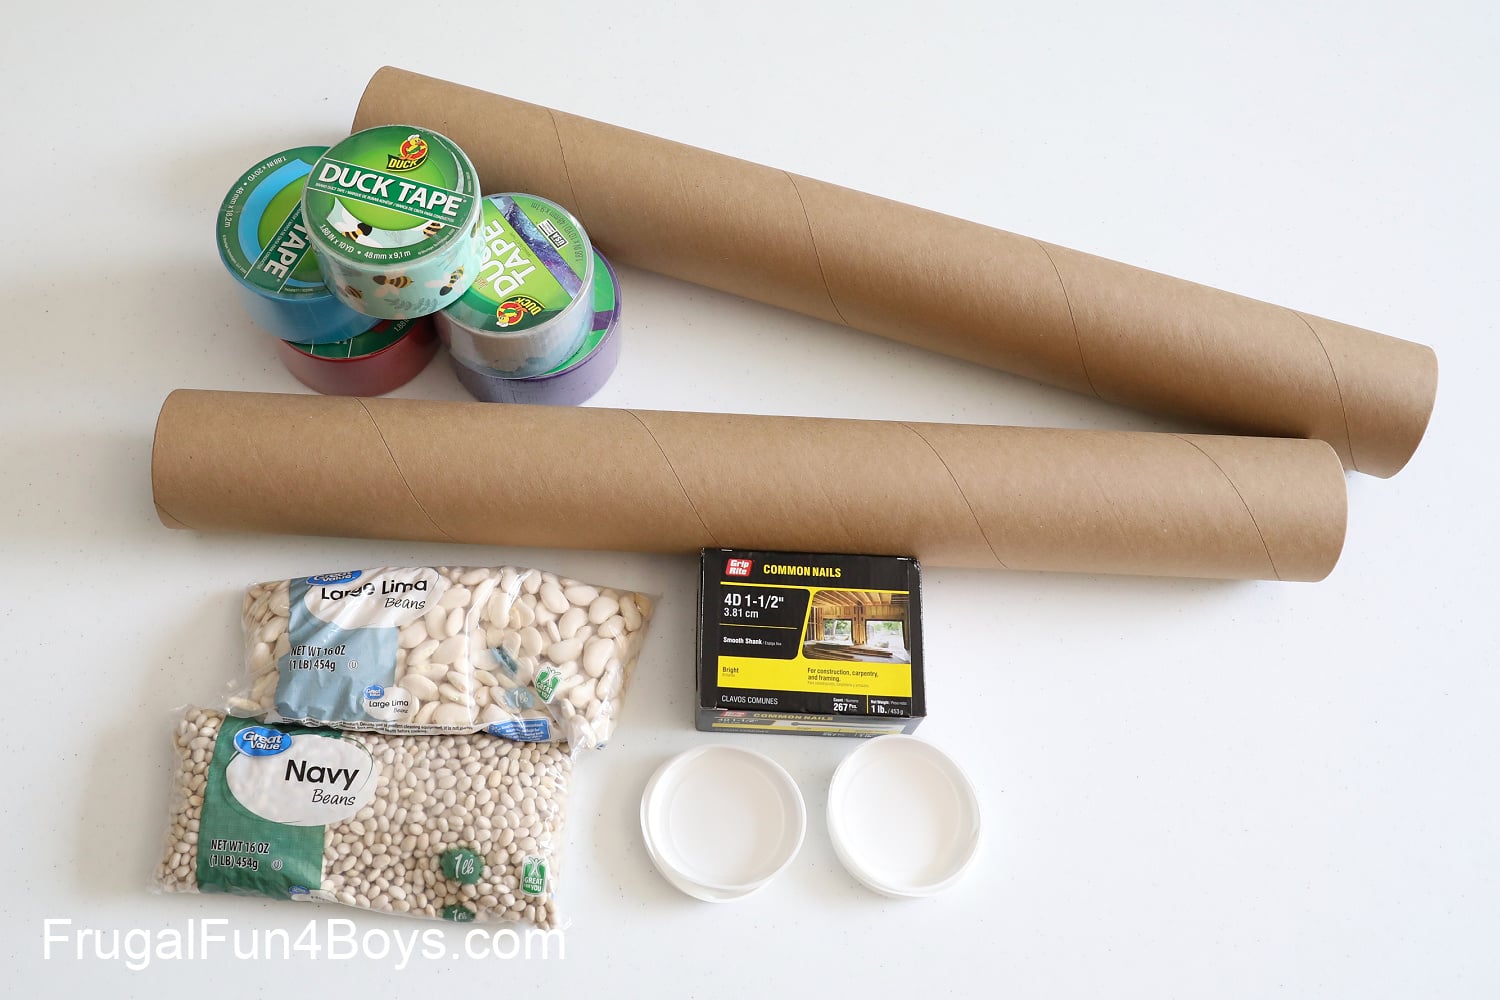
Supplies Needed for a Rainstick:
- A heavy cardboard mailing tube – we ordered these mailing tubes from Amazon
- Nails
- A hammer
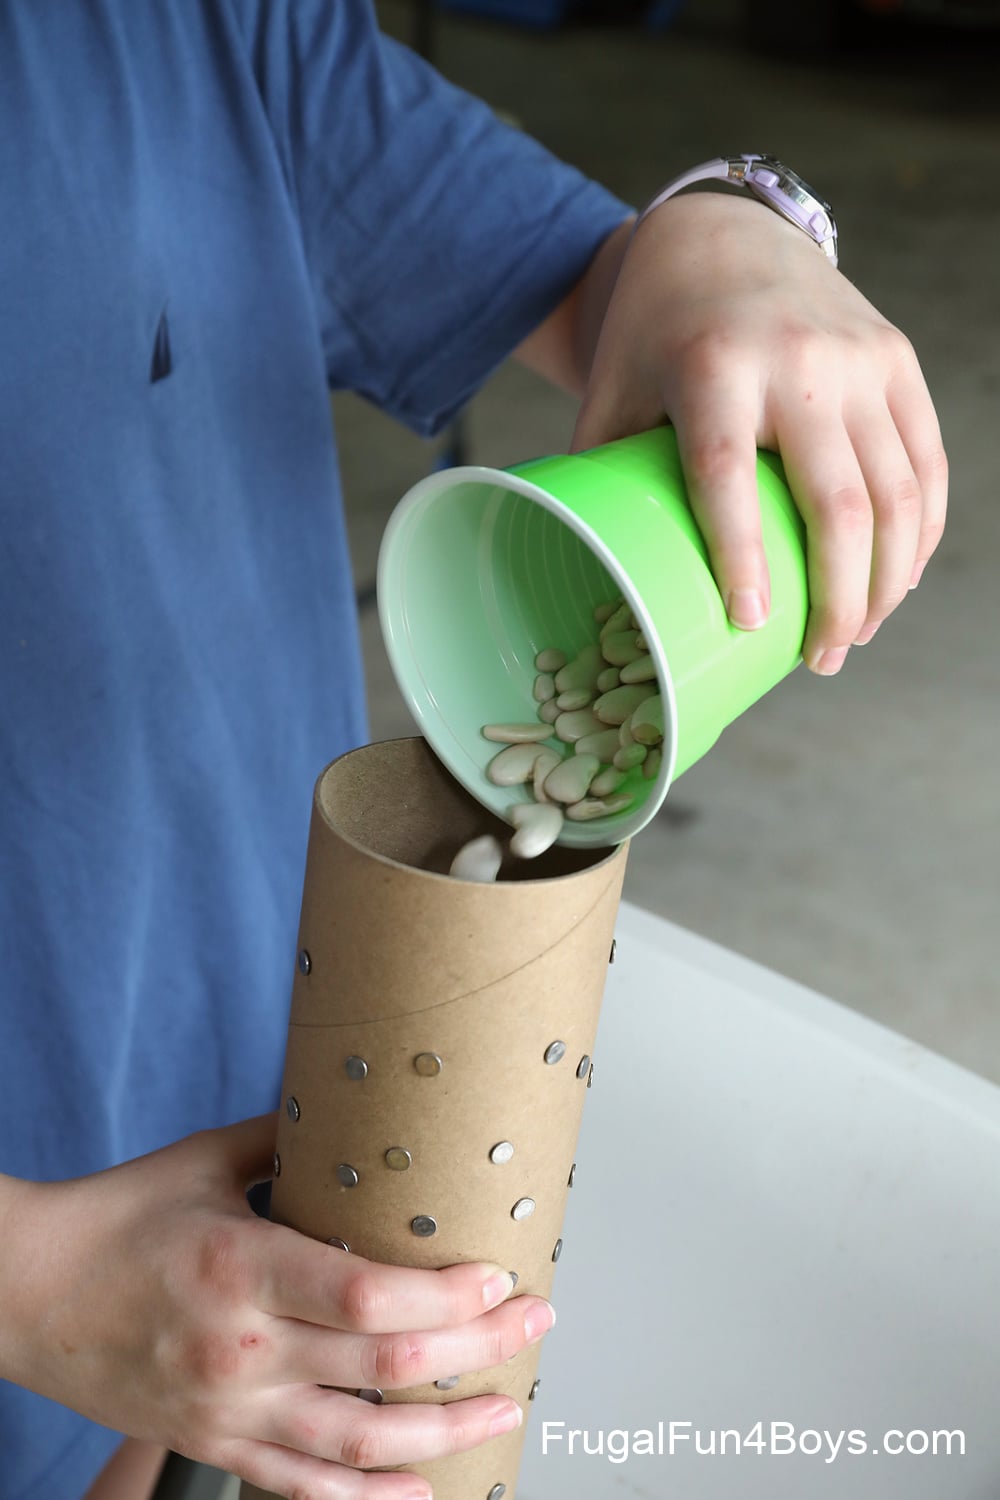
- Dried beans – we used lima beans and navy beans
- Duct tape
A couple notes about the supplies:
The mailing tubes we used were 3″ x 24″. I love this size, but smaller would have been okay too!
If you’re doing this craft with a group, I’d go with the 2″ x 15″ mailing tubes, which cost a lot less per tube.
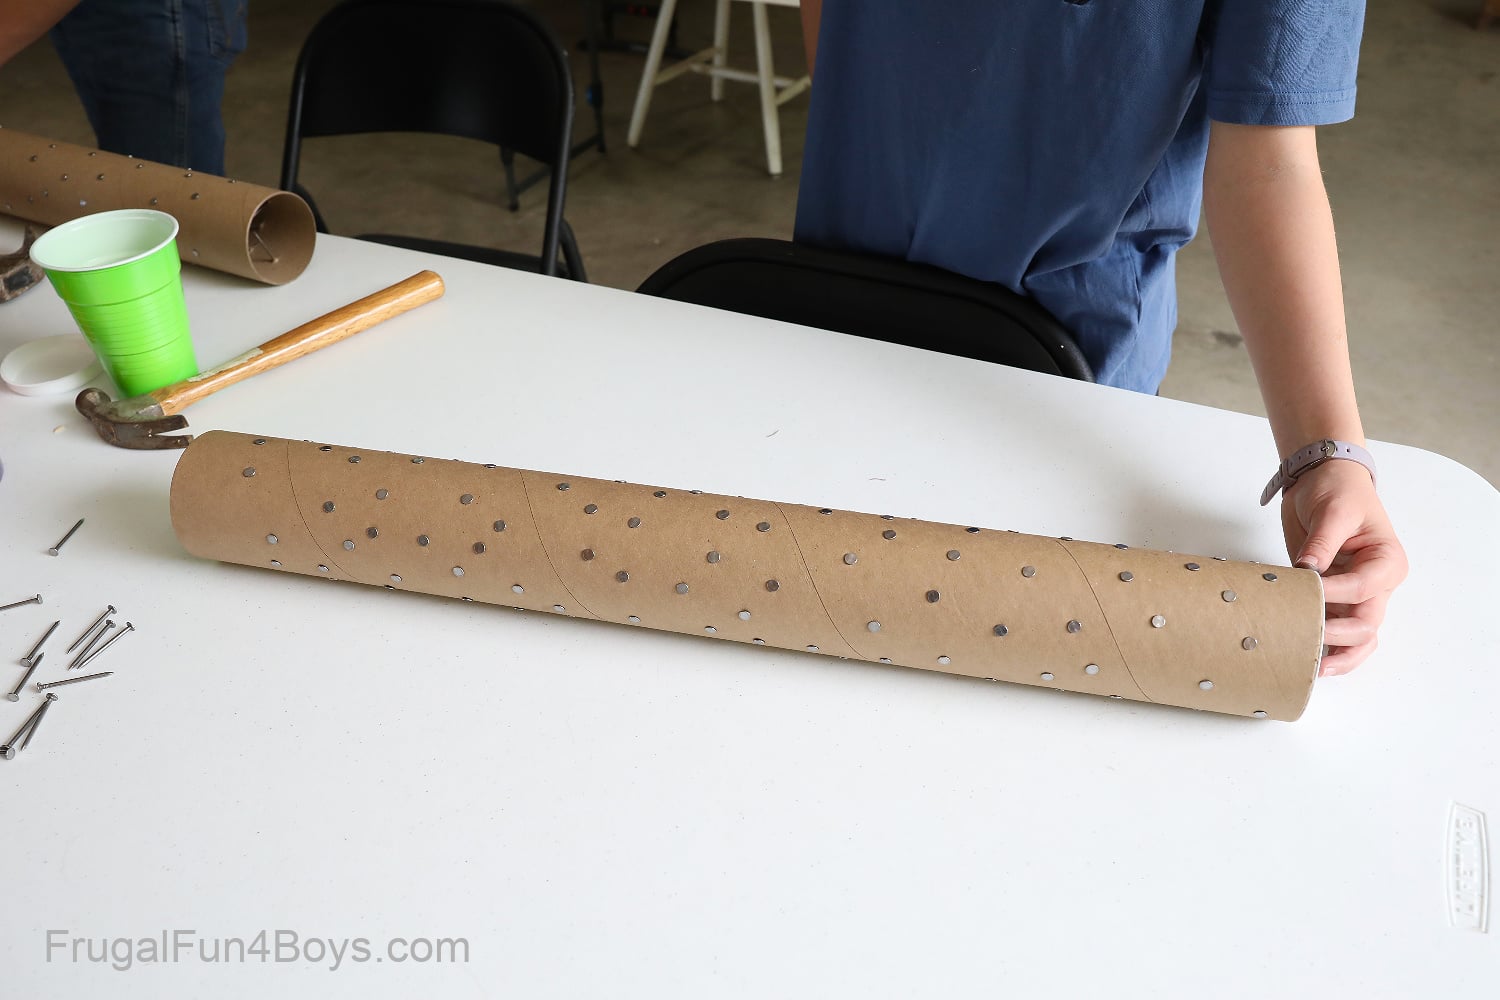
It’s best if your nails have a wide head. Make sure that your nails are shorter than the diameter of your tubes. We used 1.5″ nails for our 3″ tubes.
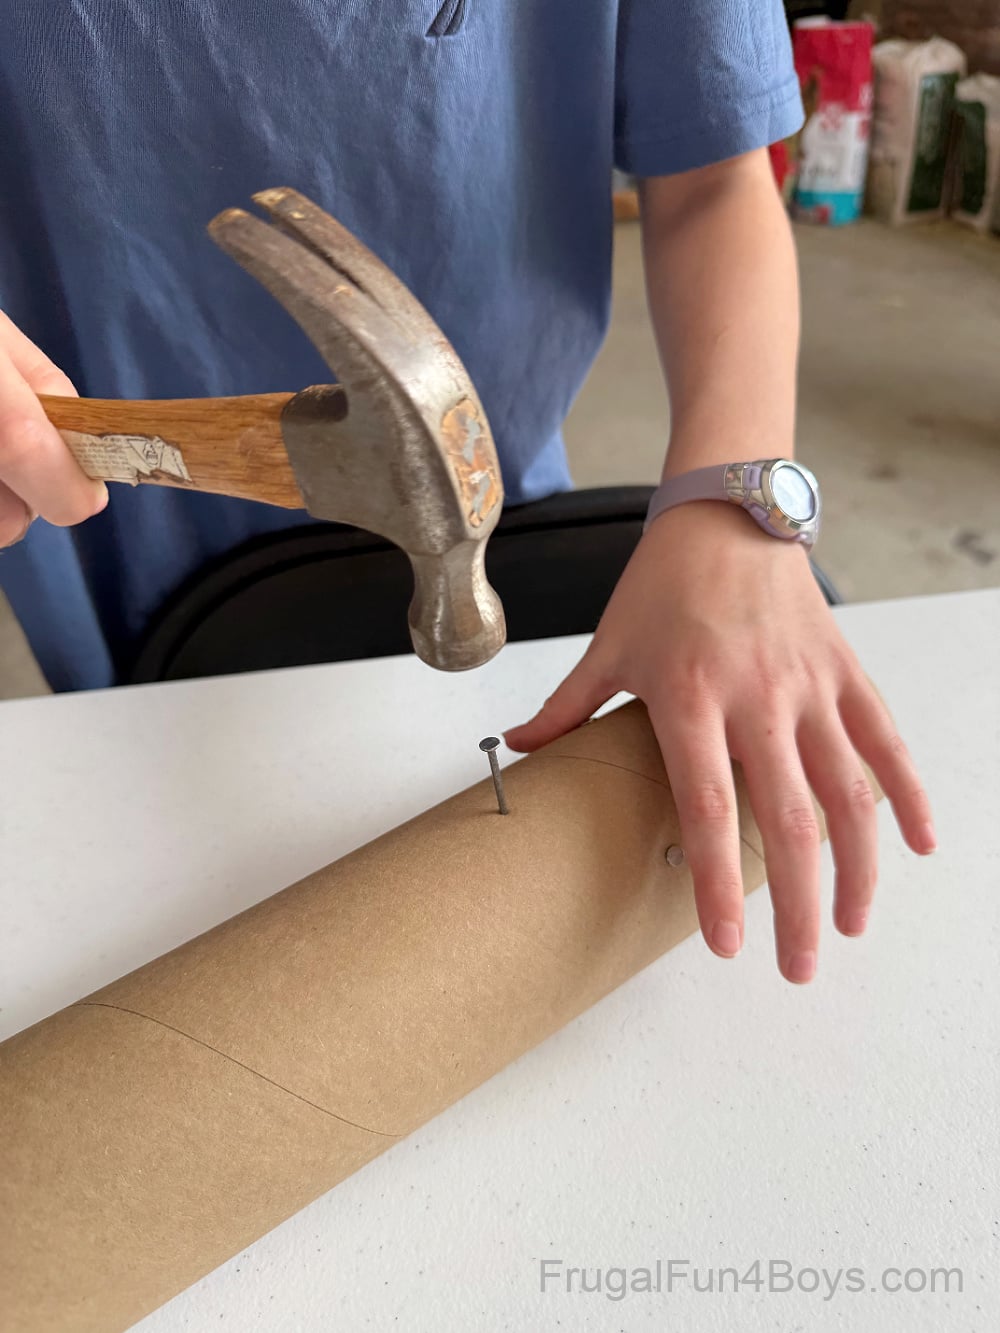
Step 1: Hammer nails into the mailing tube.
Hammering the nails is great fun! It’s not difficult to drive them into the cardboard, but definitely very satisfying. My 12 and 14 year olds enjoyed this part of the process.
You’re going to need LOTS of nails! We made two rainsticks and used one whole 1 lb pack of nails plus about 1/4 of another pack.
The inside looks pretty scary! You don’t want young kids sticking their fingers in there.
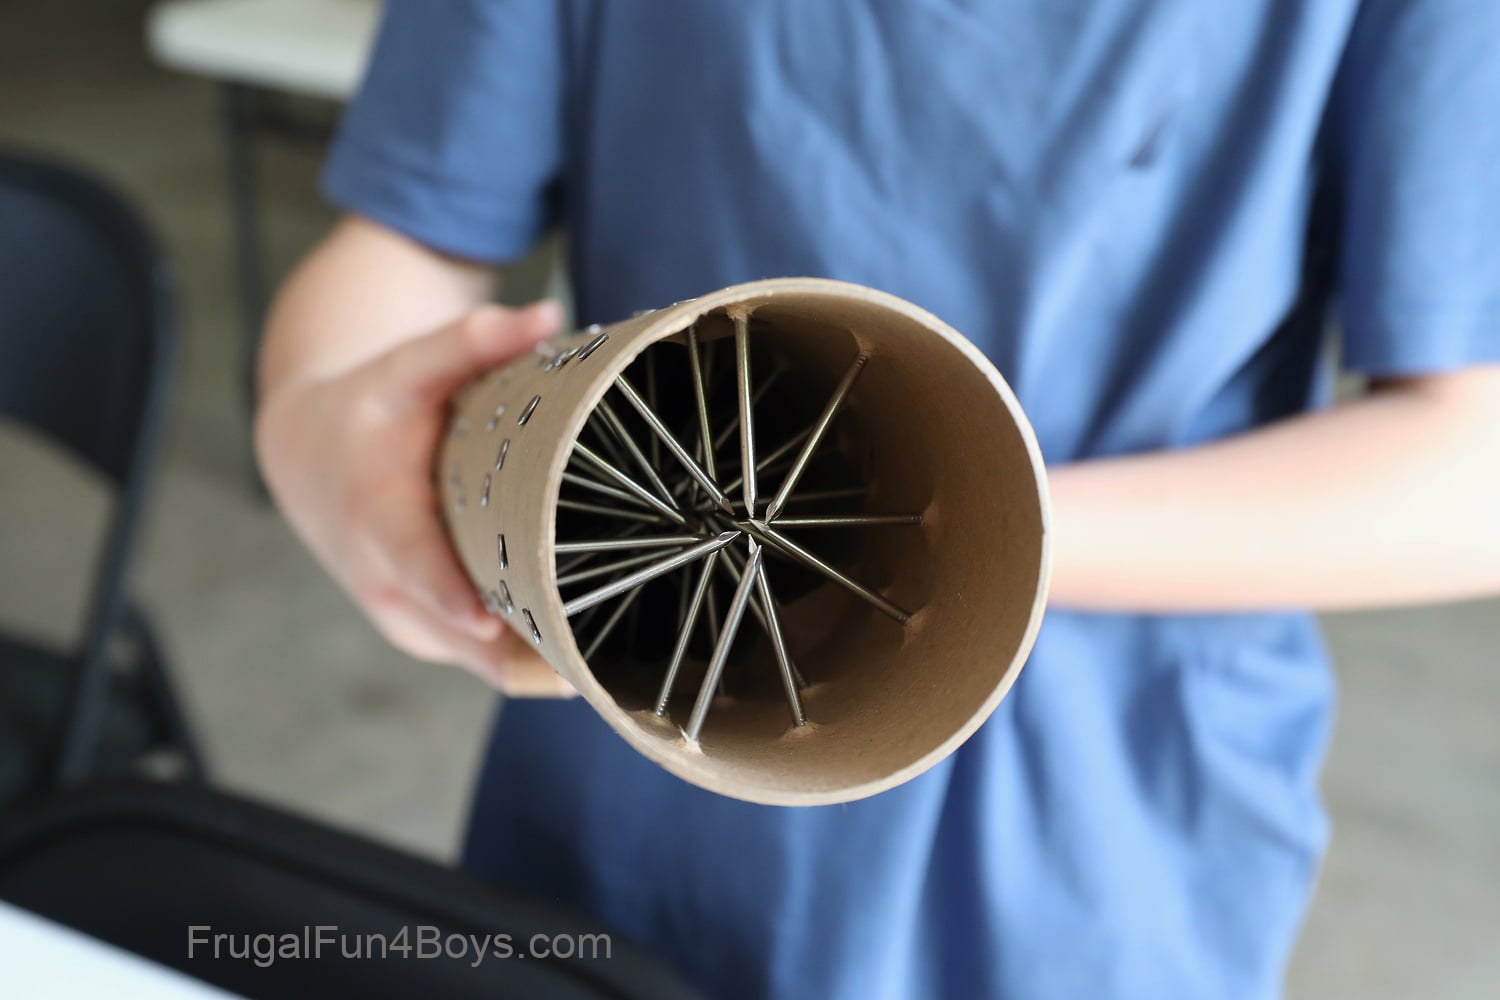
It takes a lot of nails to keep the beans from dropping quickly through the tube. The slower they fall, the better the rainstick sound will be.
Step 2: Fill your tube with beans/pebbles/etc. Experiment with different amounts if necessary to see what gives the best sound.
We found that the larger beans fall more slowly, but it sounds nice to have mix of large and small beans.
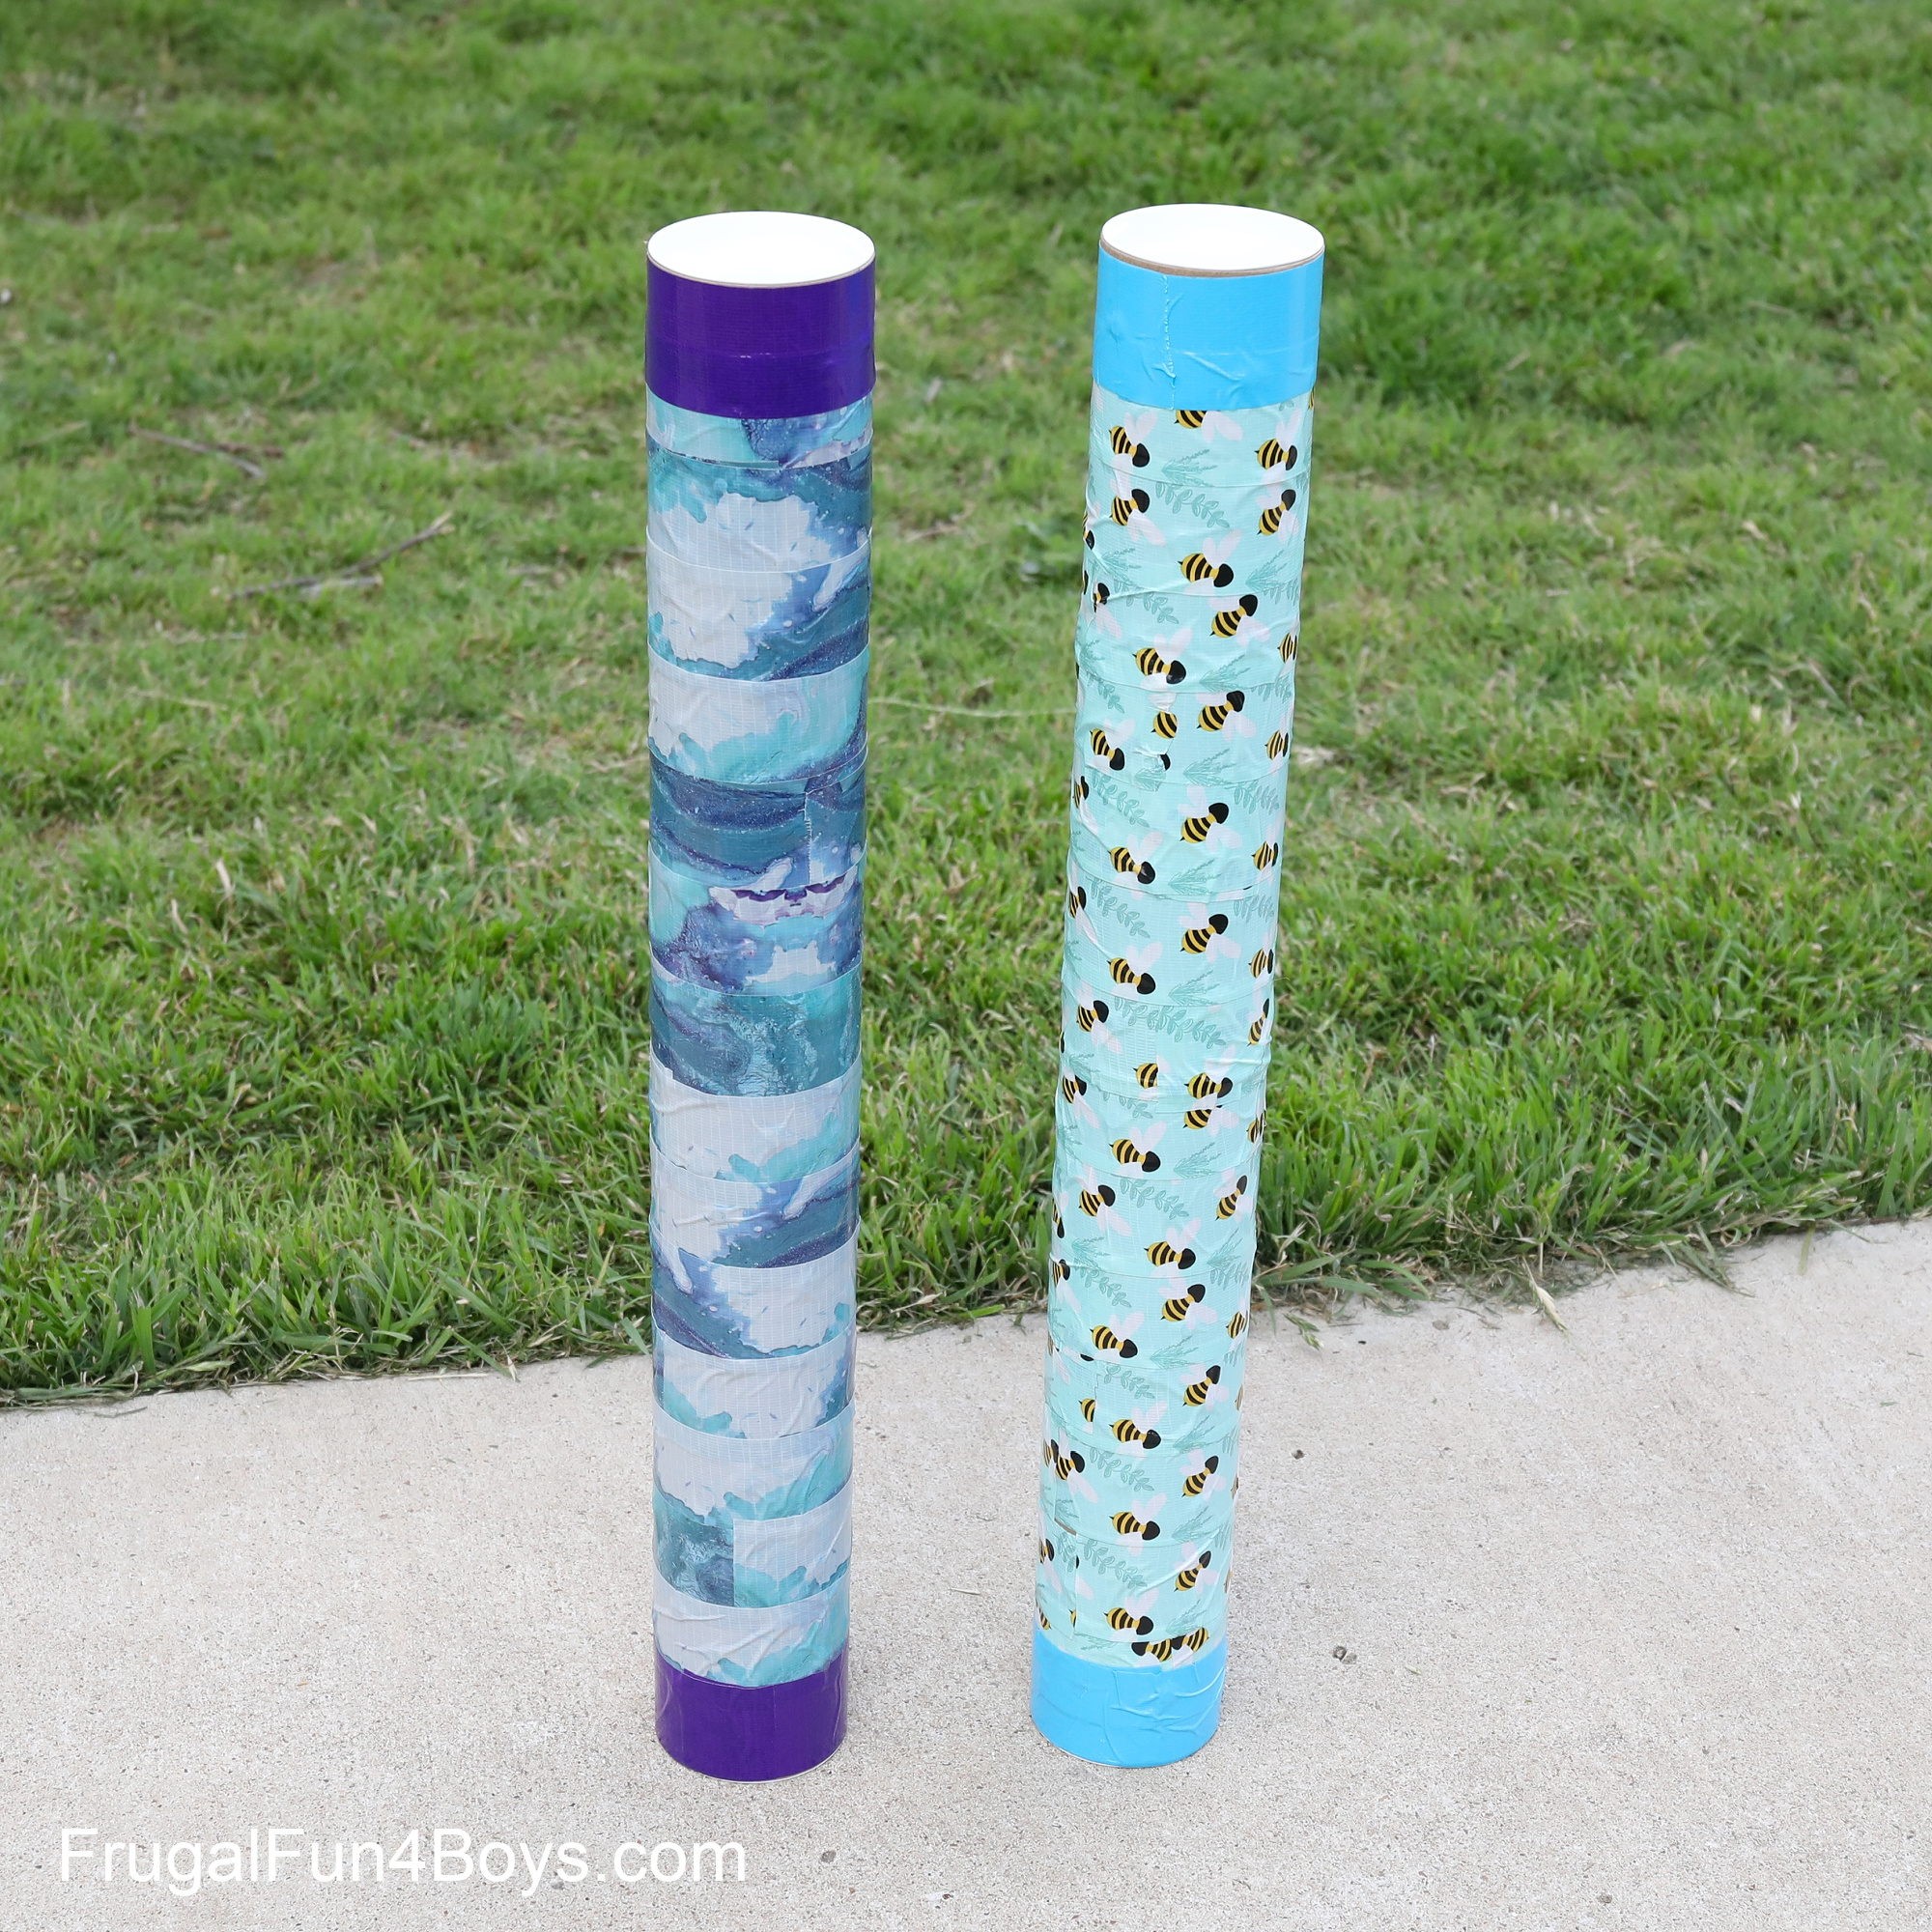
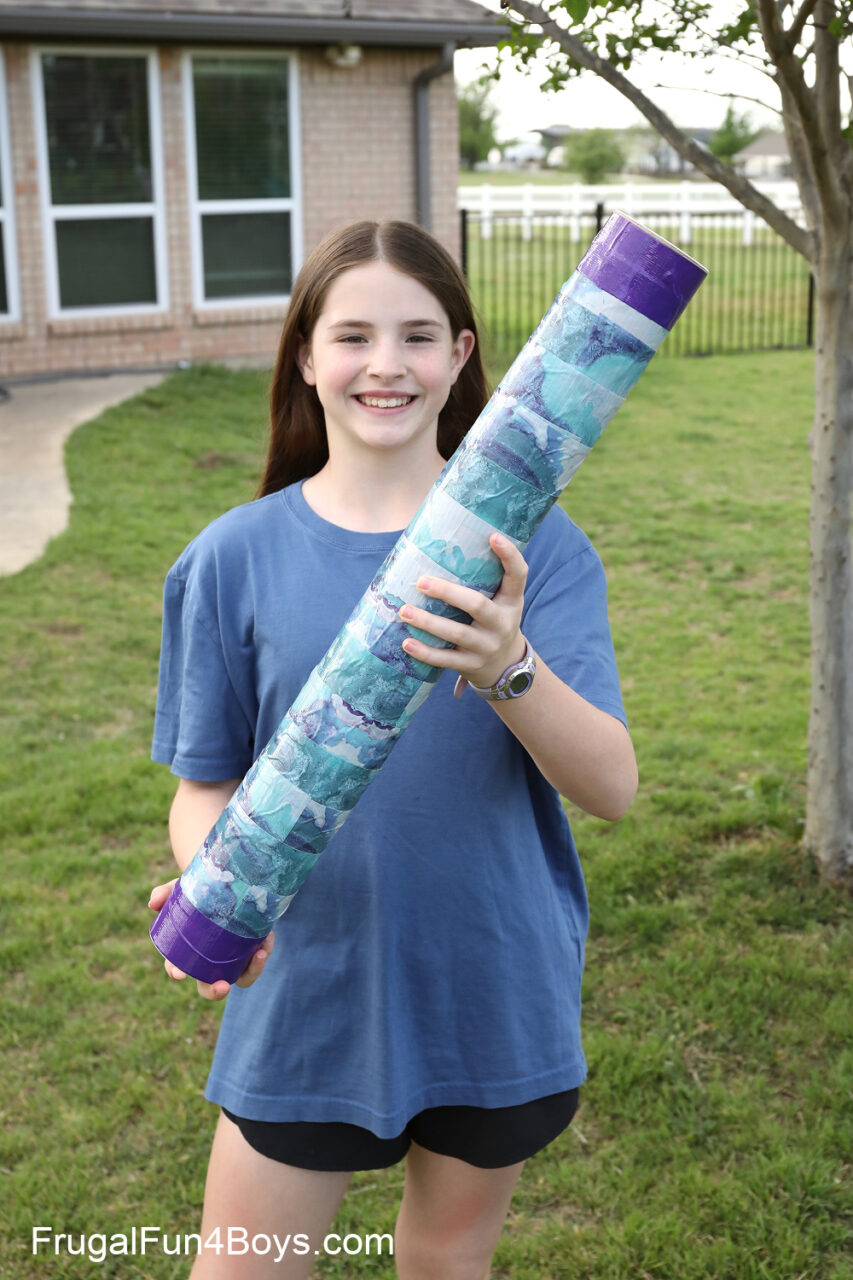
Step 3: Cover your rainstick with duct tape to cover all those nail heads.
If small children will be using the rainsticks, be sure to tape the lids on so that the beans don’t spill and kids don’t poke themselves on the nails.
There’s something attractive about the sound of a rainstick – this is one noise-making toy that I can stand to listen to (over and over)! Have fun!
4 Comments
Deborah Apr 14, 2011
I love that it is so tall!! Full body rain:)
michele Aug 25, 2015
What do u put in the ends
Sarah Aug 25, 2015
The mailing tube came with caps on both ends. Then we taped them shut.
Linda Jan 5, 2012
These look neat. Any ideas if of what to use if you don't have mailing tubes?
Karin Jan 27, 2012
You could use wrapping paper tube rolls as well.
Sharon Apr 5, 2013
Tried this with my grandkids last night and they had fun hammering all the nails. Hint: The more nails they hammered the better the results.
Sarah Apr 5, 2013
That is definitely true. We used a LOT of nails for ours! I'm glad they had fun!
Post a Comment