
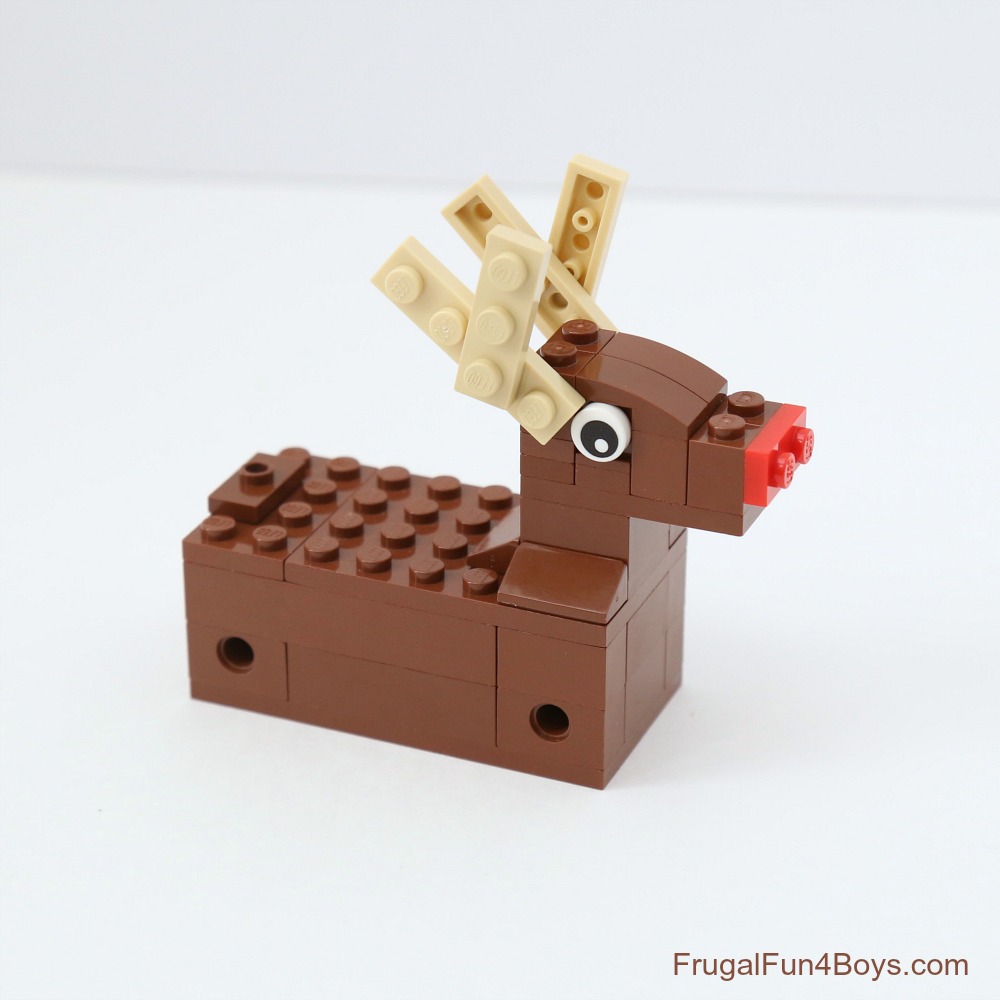
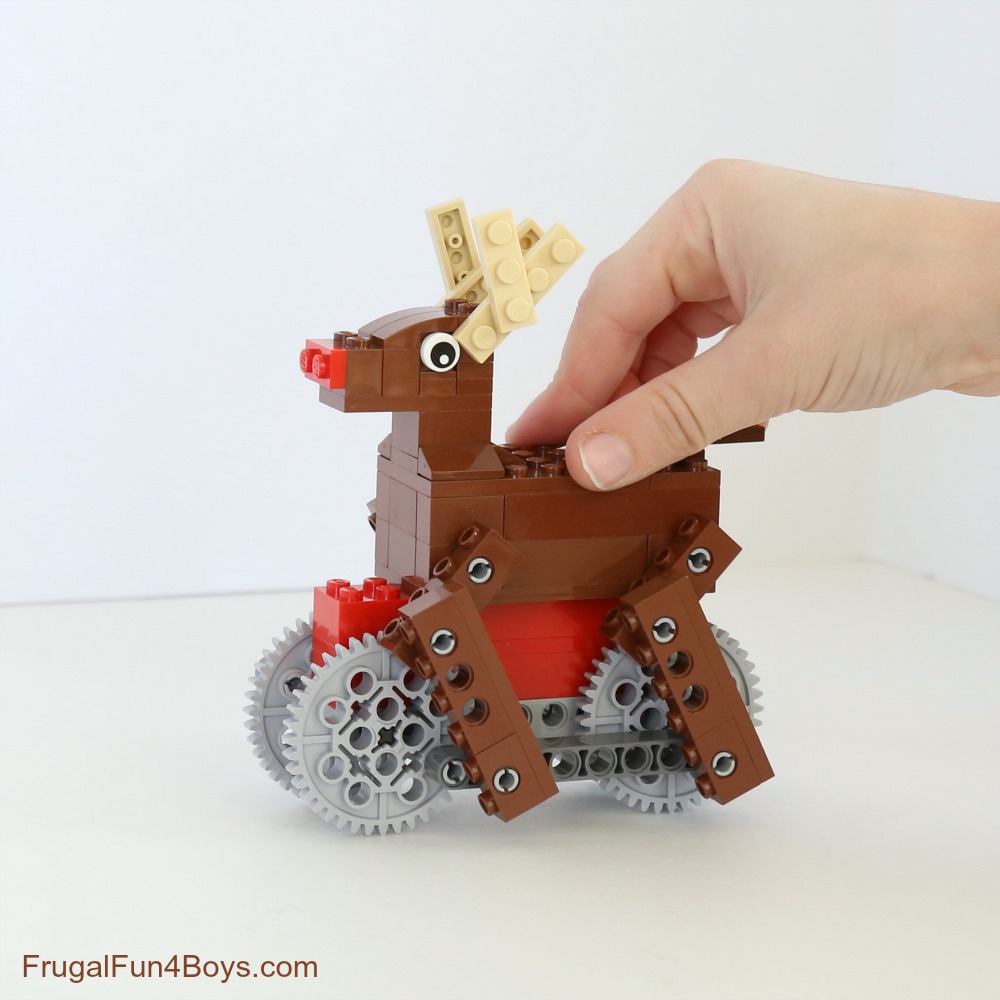
Here’s a fun Christmas LEGO® building project! Build a Rudolph the Red-Nosed Reindeer whose feet run along when you push him! I’m calling him “Run, Run, Rudolph,” LOL. This is a neat little mechanical project that is not difficult to build.
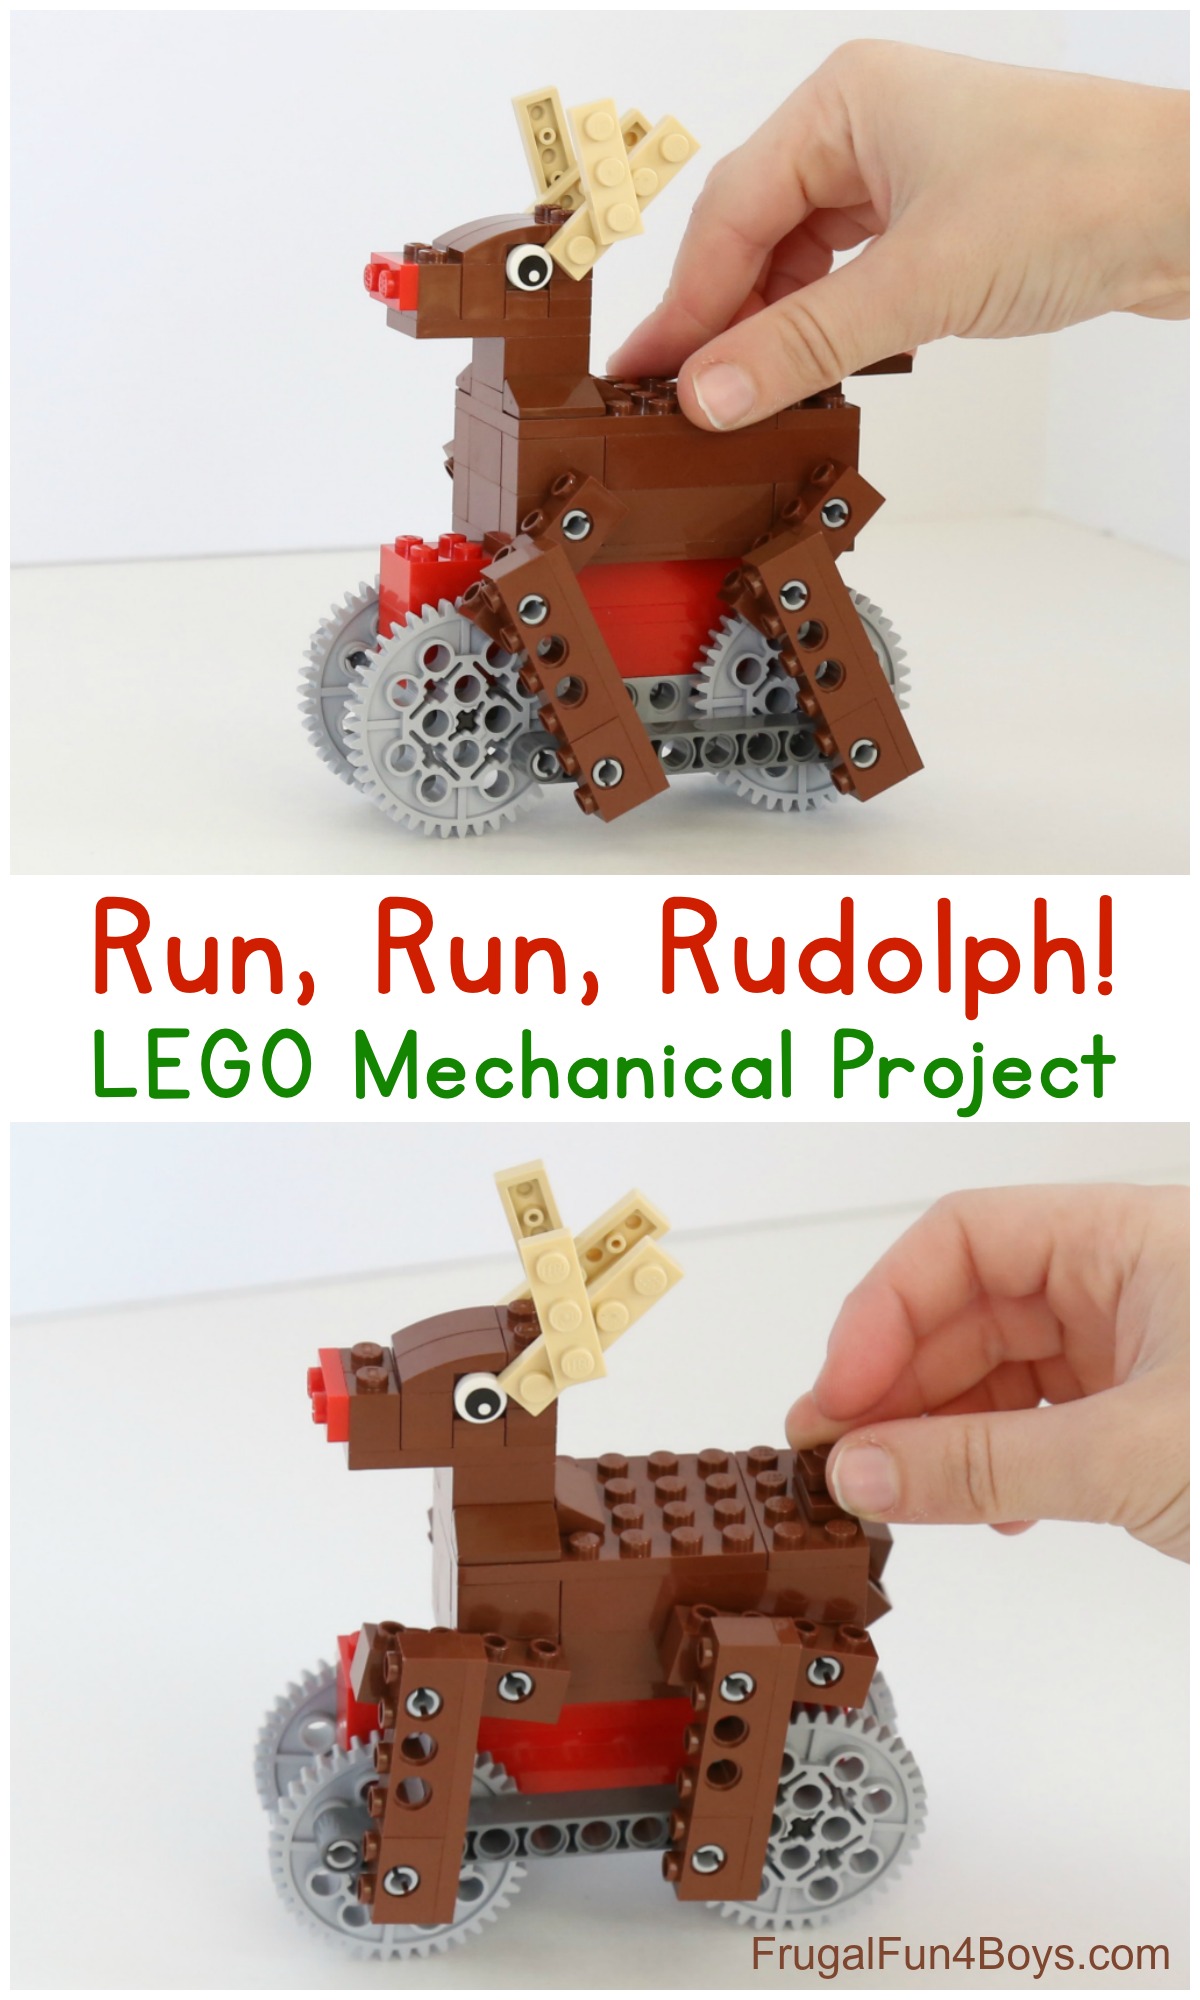
The key to making this little reindeer move is to build his leg joints with gray connector pins that do not have any friction ridges. As you push the reindeer, the gears turn. The dark gray Technic liftarm moves up and down in a circular motion as the gears turn, bringing the reindeer’s legs along with it.
Ready to build one?
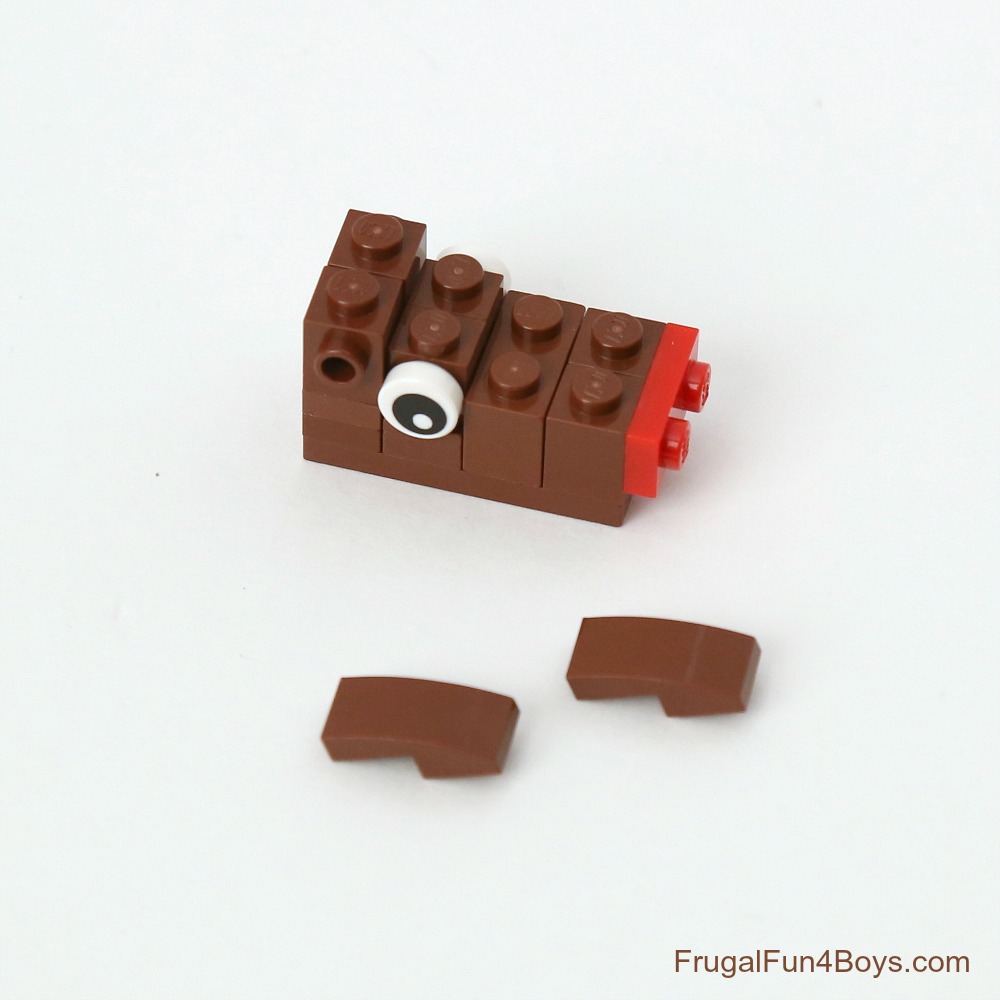
Step 1: Gather the bricks shown for building Rudolph’s head.
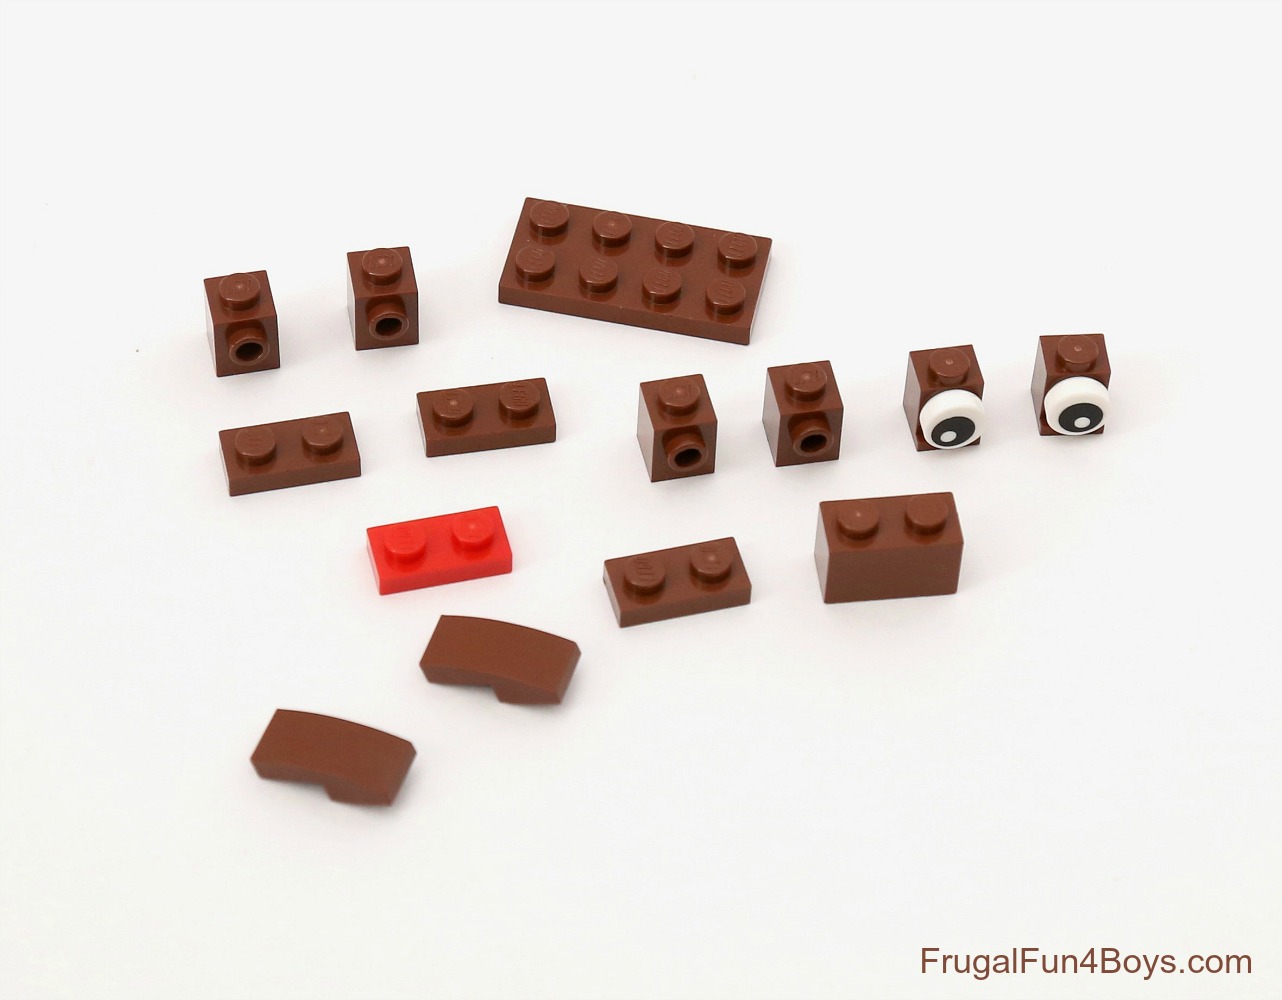
Step 2: Place two 1 x 1 bricks with a stud on the side and a 1 x 2 brick on top of a 2 x 4 plate.
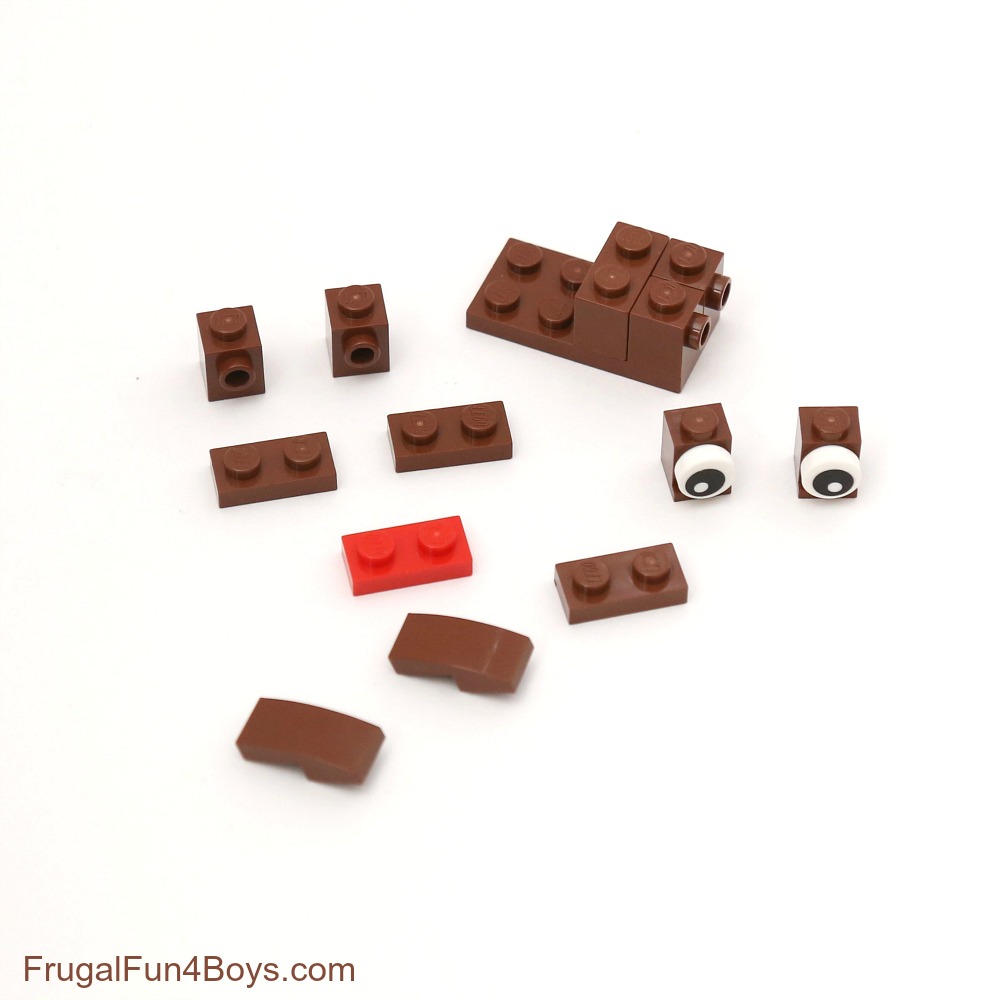
Step 3: Put a 1 x 2 plate under the eyes. Put two 1 x 2 plates under the two 1 x 1 bricks at the back of the head. Attach the 1 x 2 red plate as the nose.
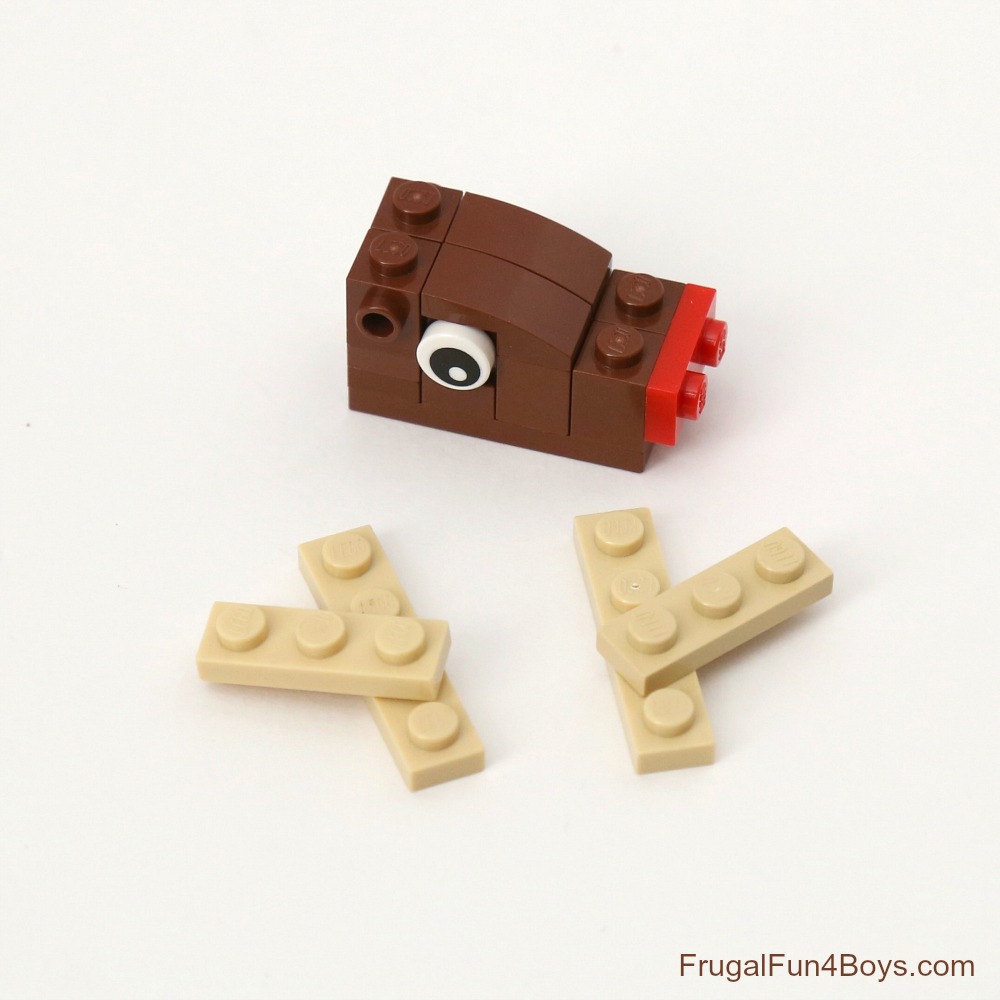
Step 4: Finish up the head by adding two 1 x 2 curved slopes. Build the antlers with a 1 x 4 tan plate and a 1 x 3 tan plate in each one.
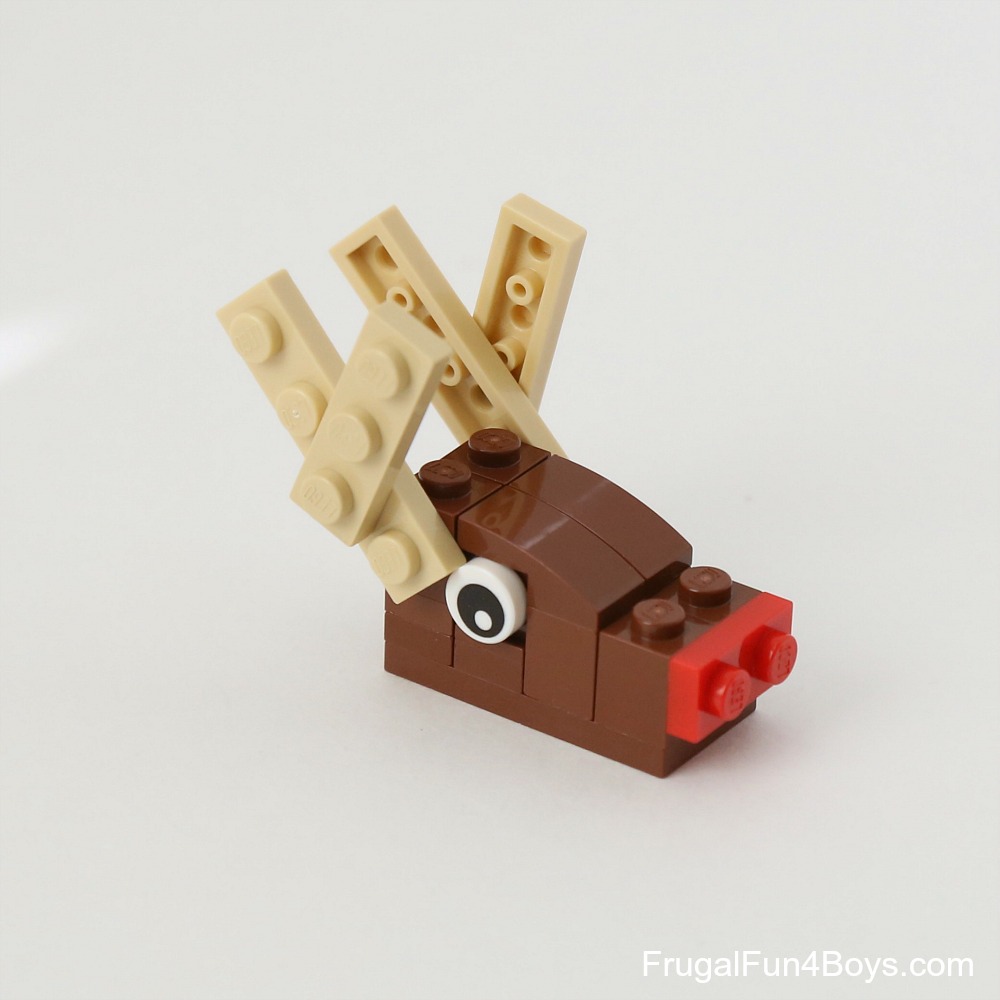
Step 5: Attach the antlers to the side of the head.
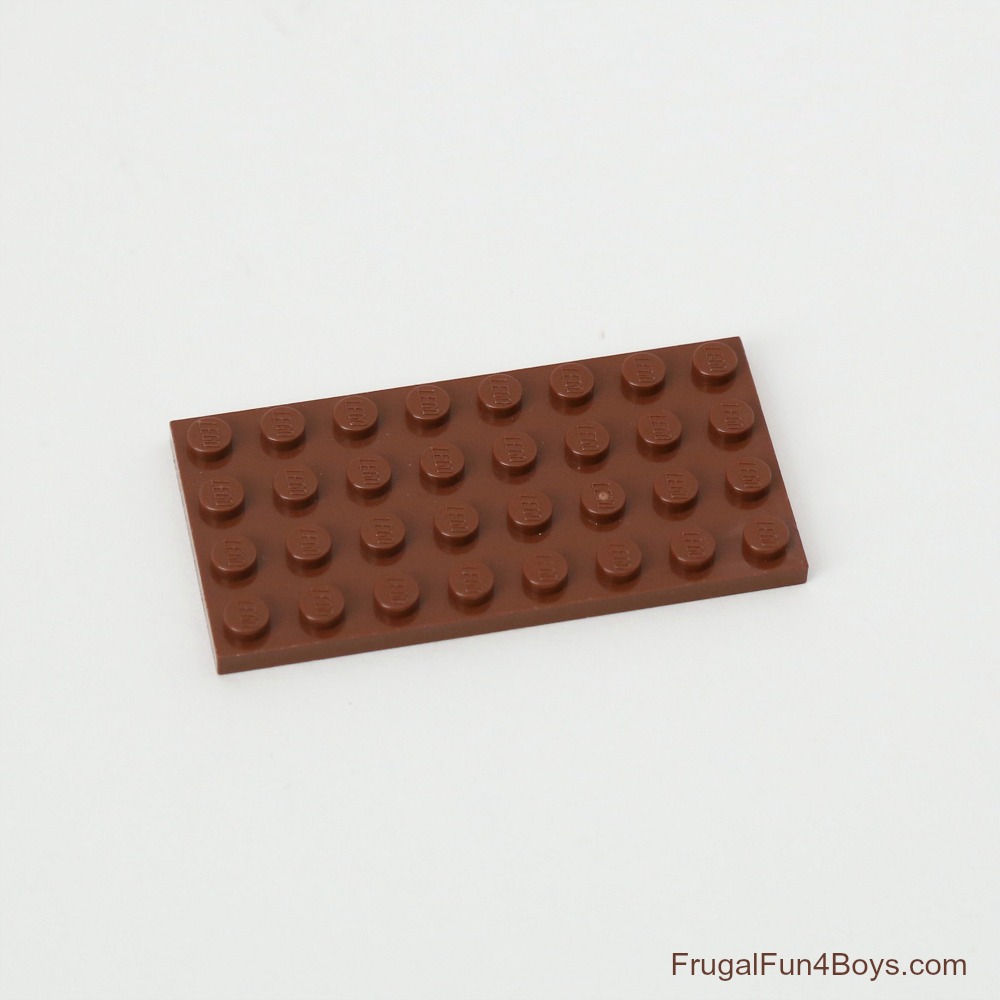
Step 6: Grab a 4 x 8 plate for the body.
Step 7: Place a 1 x 2 Technic brick on each corner of the 4 x 8 plate. Then add two 2 x 4 bricks and two 1 x 4 bricks.
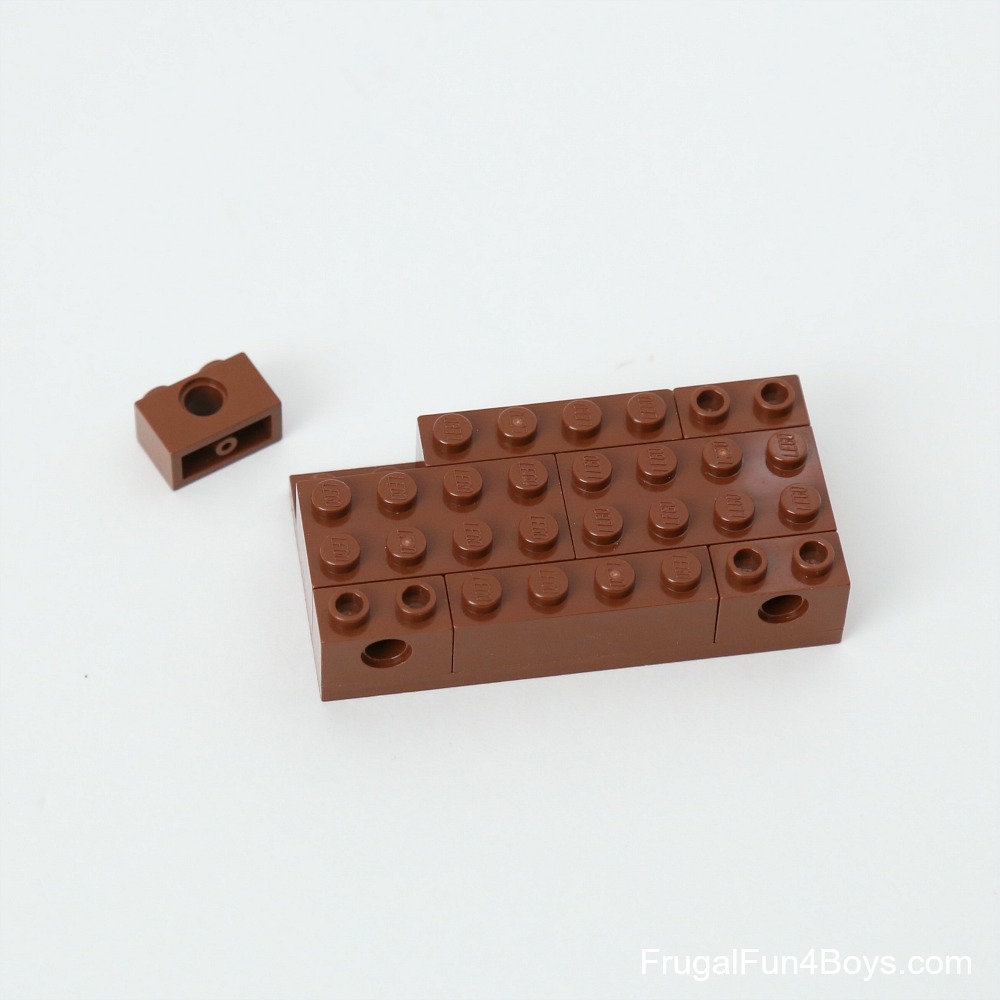
Step 8: Add another layer – I used two 2 x 6 bricks, two 1 x 2 bricks, and a 2 x 2 brick.

Step 9: Add another layer of plates. I used a 2 x 4 plate and a 4 x 6 plate, but another 4 x 8 plate. Then add a 1 x 2 plate with one stud on top to hold the tail. At the other end, add a 2 x 2 plate and three 1 x 2 slopes.

Step 10: Attach Rudolph’s head to his body.
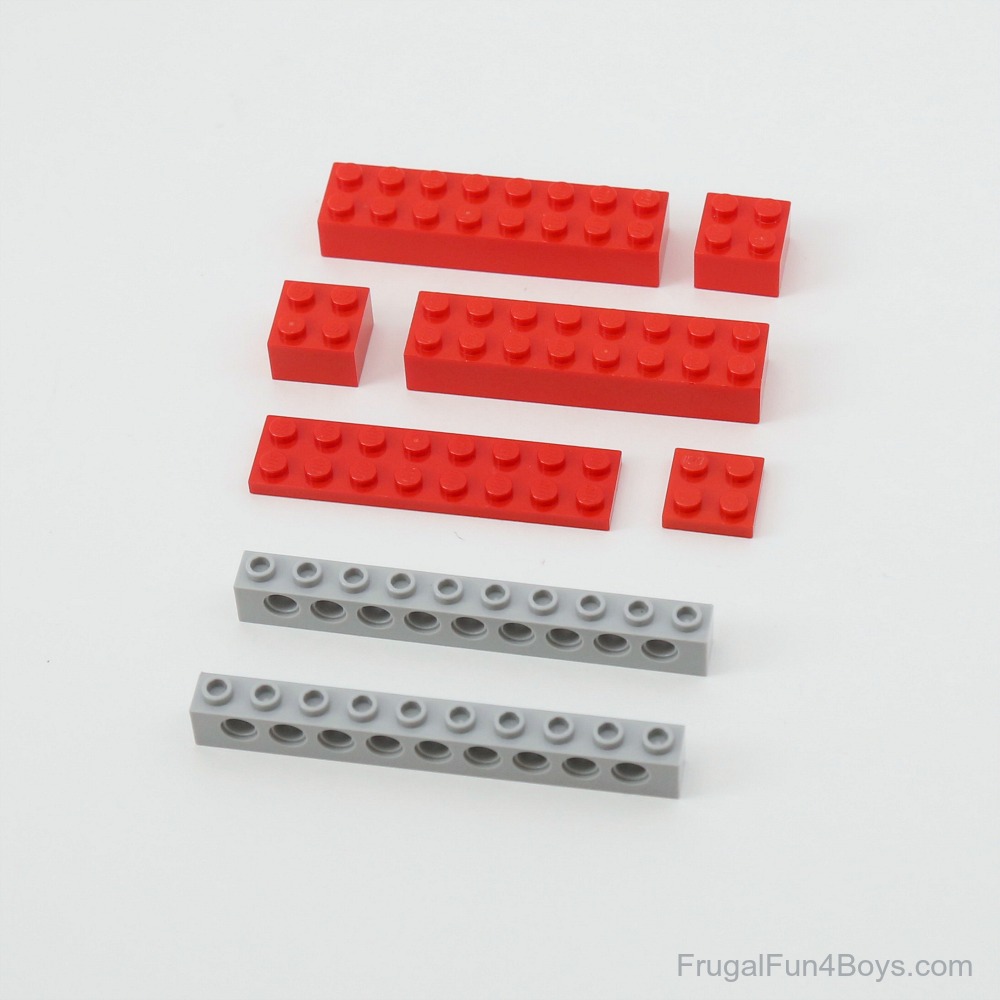
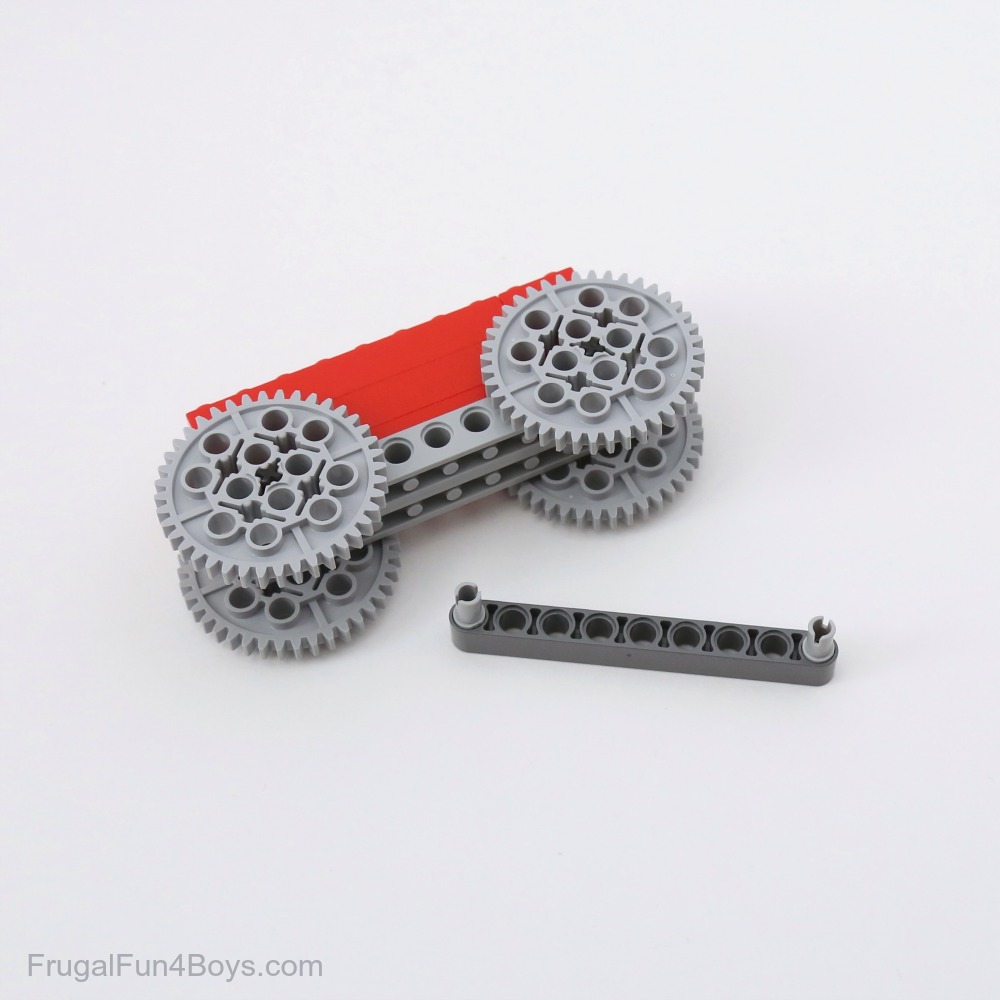
Step 11: Gather the bricks shown for building the base.
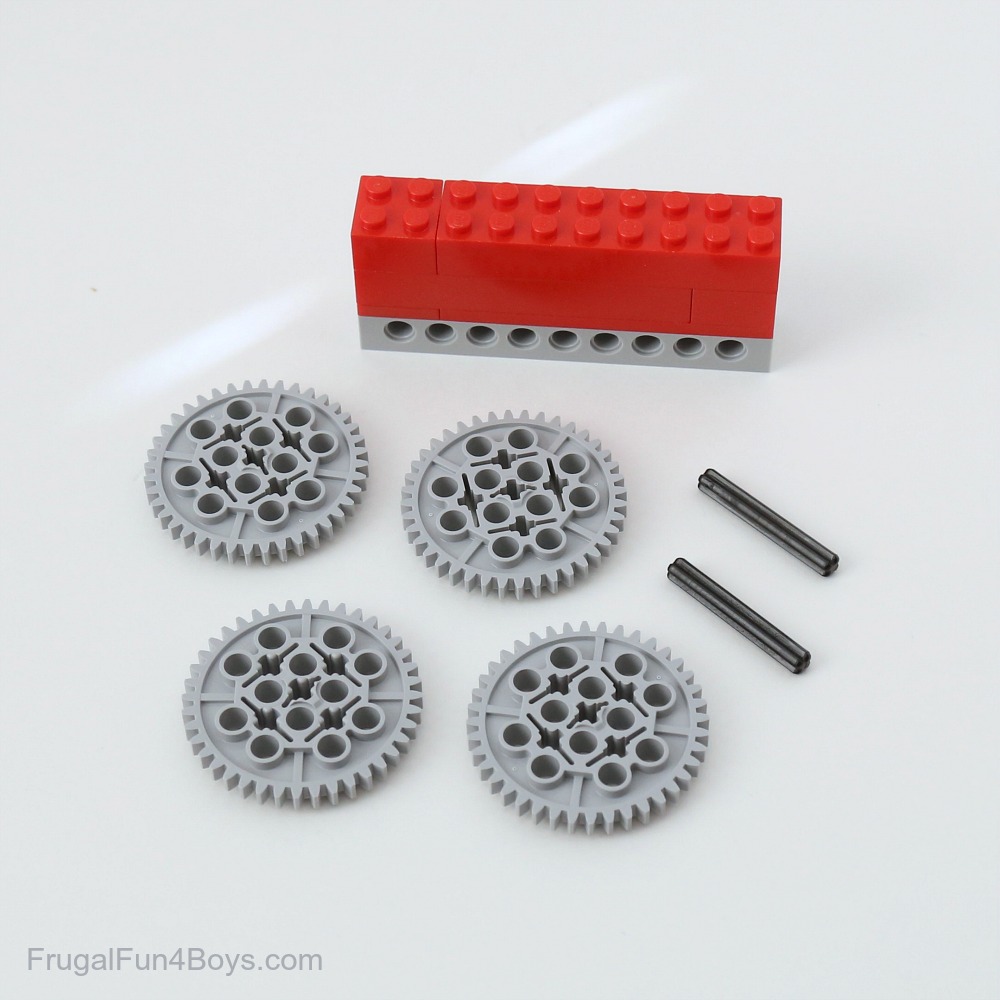
Step 12: Stack all the bricks as shown, and then find four 40 tooth gears. These are not the most common gears. I tried quite hard to get this project to work with 24 tooth gears, but it just wouldn’t work! You can order the gears on Brick Link if needed. You’ll also need two axles that are 4 studs long.
Step 13: Find two 1 x 9 liftarms and four gray pins.
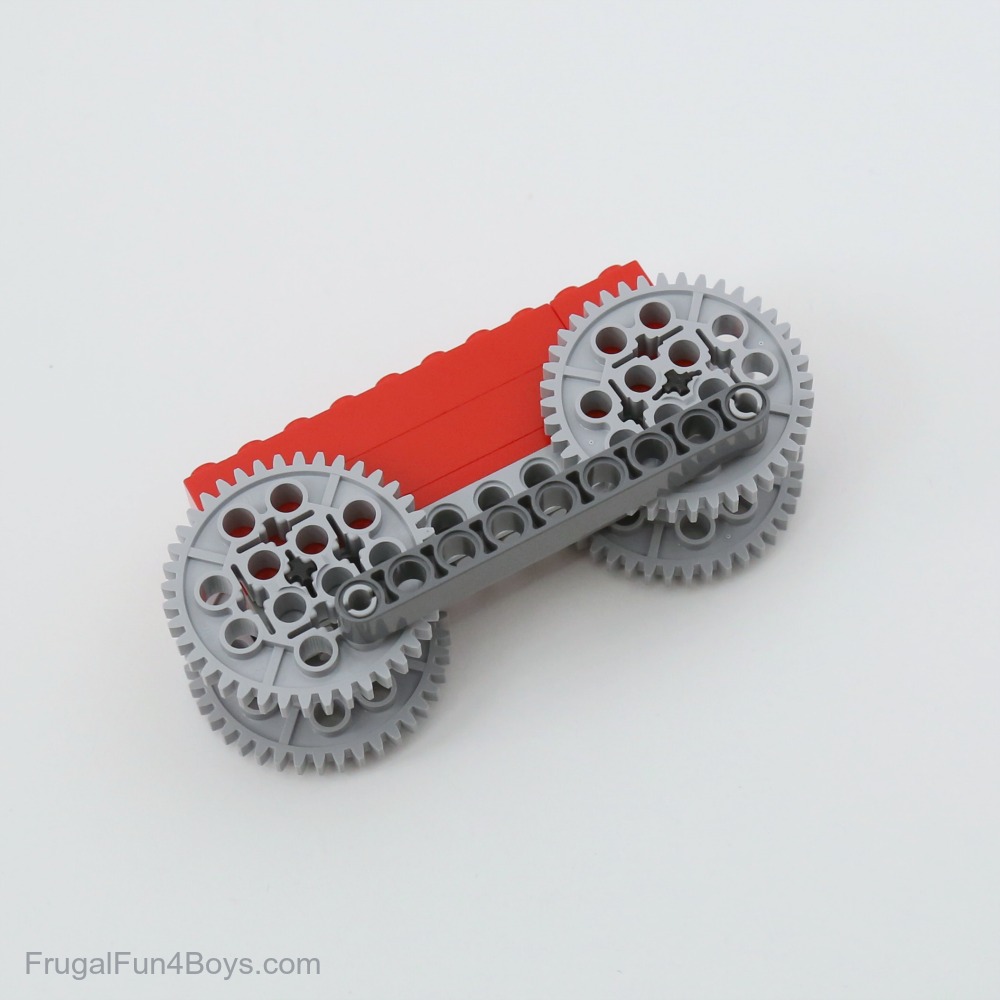
Step 14: Attach one liftarm on each side. Make sure that the liftarms are connected to corresponding holes on each gear. You’ll also want the liftarm on one side to be up while the other is down so that Rudolph will alternate his legs when he “runs!”
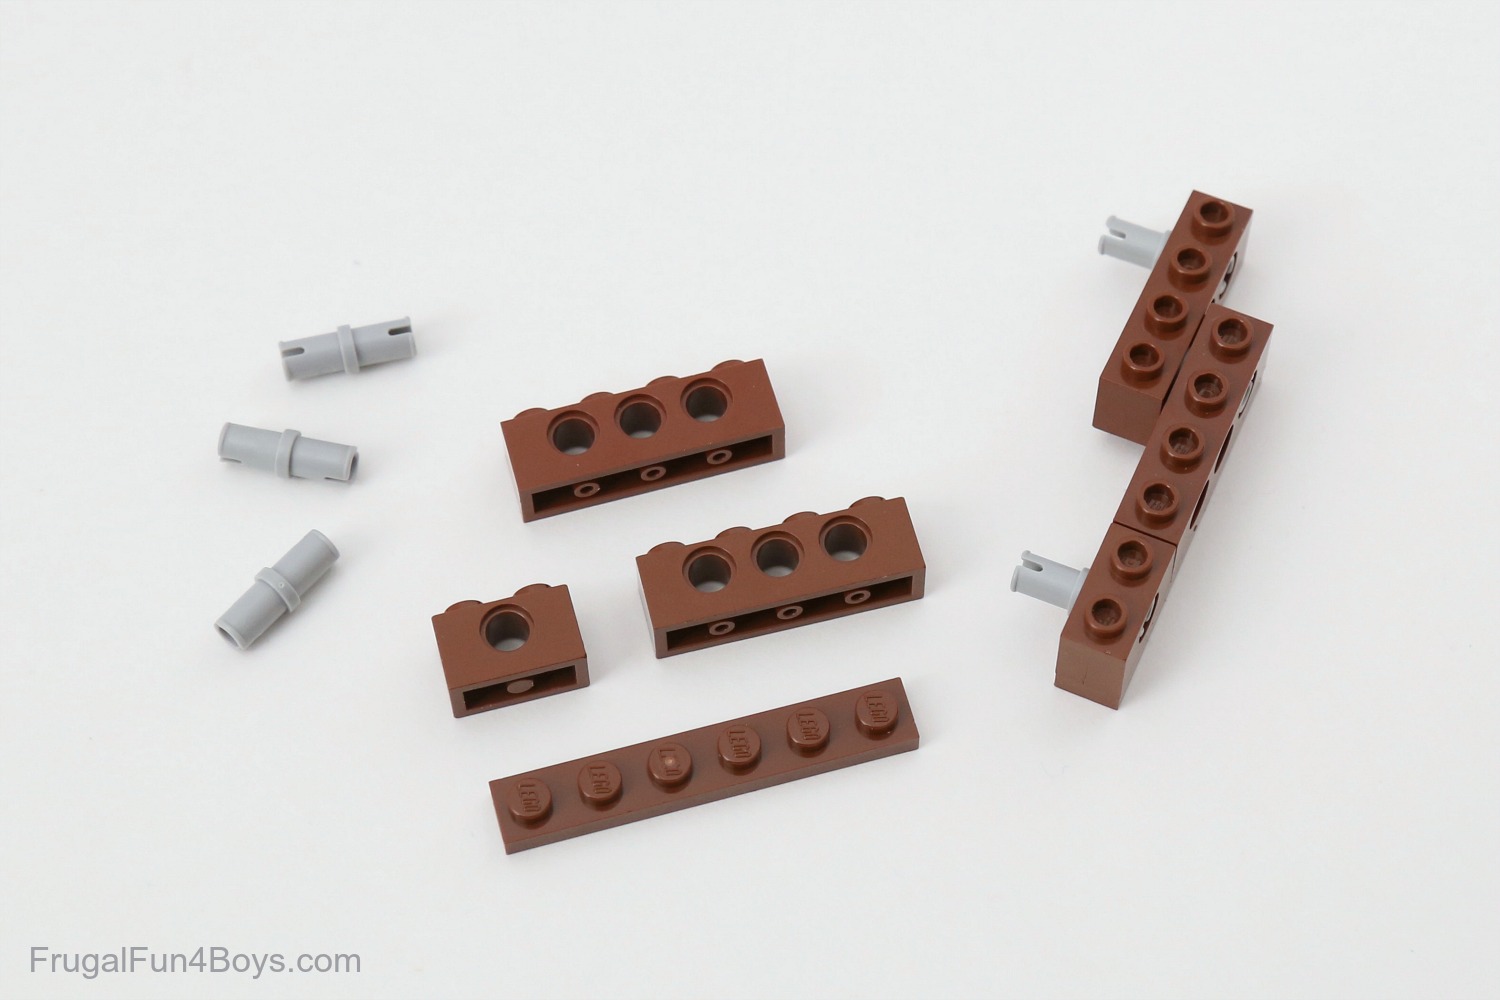
Step 15: Build Rudolph’s legs. You’ll need two 1 x 4 Technic bricks, one 1 x 2 Technic brick, one 1 x 6 plate, and three gray pins for each leg. LEGO® doesn’t make a 1 x 6 Technic brick in brown, so I had to get creative.
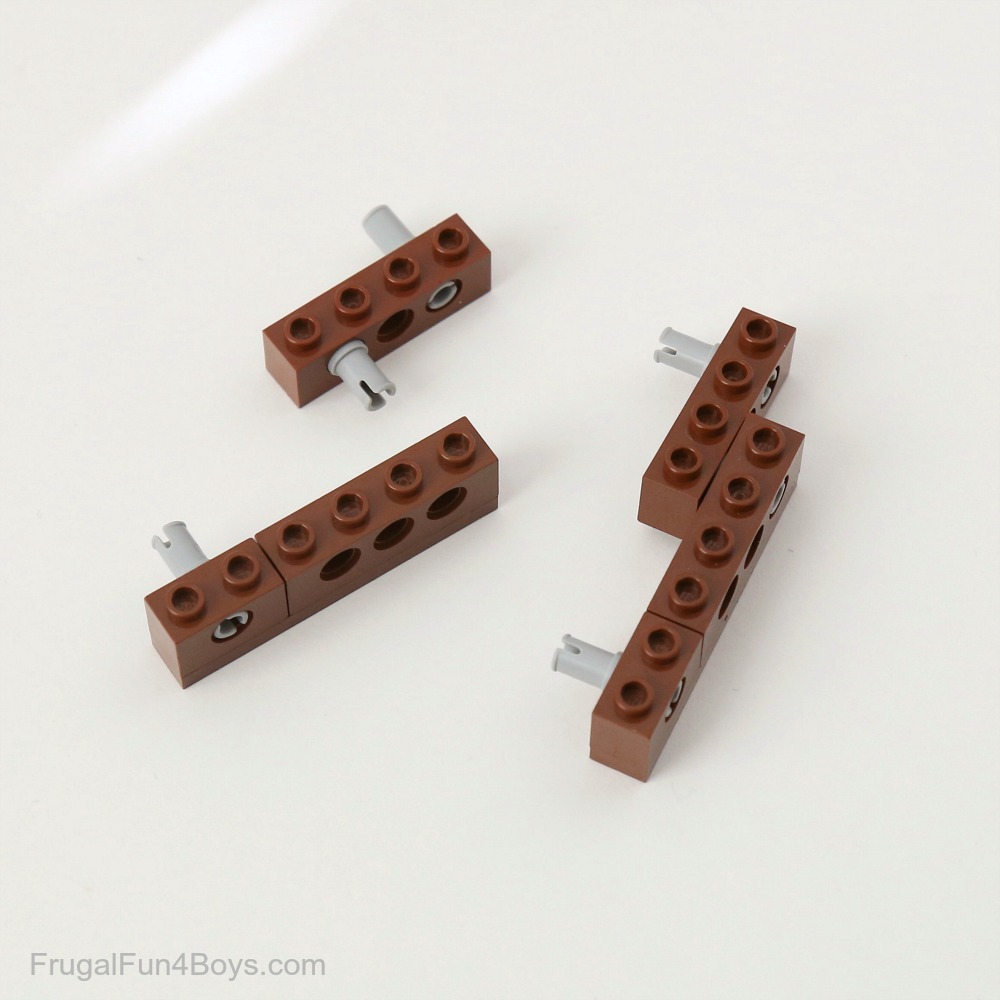
Step 16: Make two legs for one side of the body, and then make two more that are mirror images for the other side.
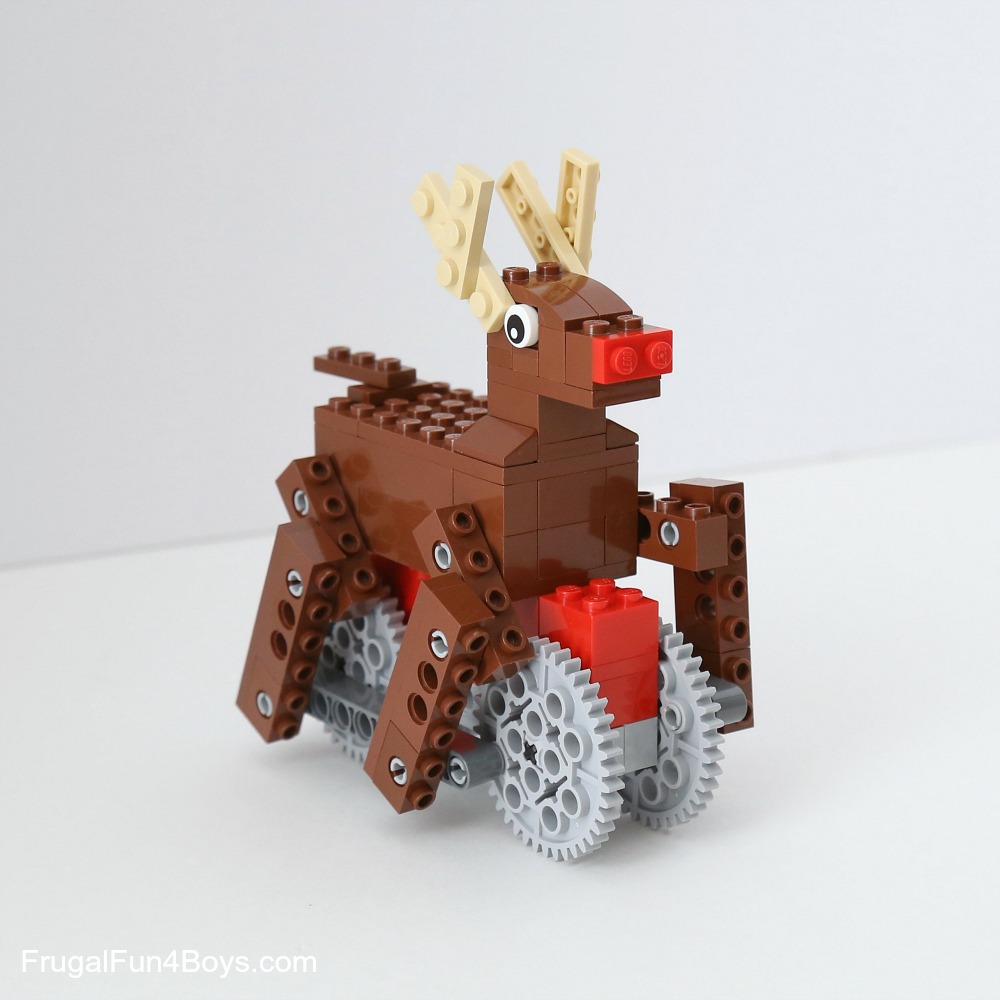
Step 17: Attach the legs to Rudolph’s body and to the dark gray liftarm on the gears. Then Rudolph is ready to run!
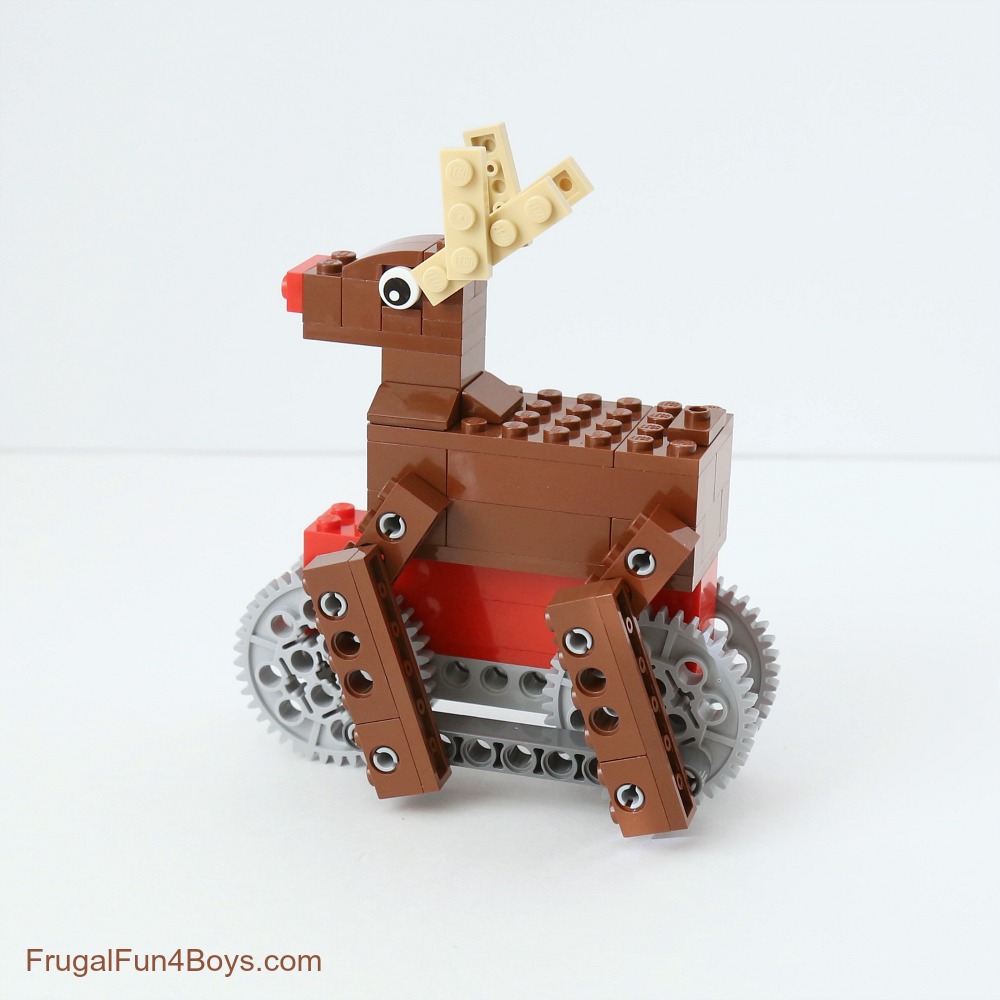
Push him along and watch his legs go!
0 Comments
Post a Comment