
Make SQUARE BUBBLES with this awesome science activity! This bubble science experiment is fun for elementary aged kids up through middle school. Honestly, I had a blast with this as an adult!
We’re going to do something different and start with the SCIENCE EXPLANATION on this one.
How Soap Bubbles Form:
A soap bubble is comprised of a film of soap molecules and water molecules, with air in the center. You can blow bubbles in water with a straw, but the bubbles will pop the moment they touch the air. There’s nothing holding them together! That’s where the soap comes in. Soap is a surfactant, and it lowers the surface tension of water. Without soap, you could not blow water into a bubble because the water molecules want to stick together so badly! Soap reduces that attraction between water molecules and lets it spread out.
Soap molecules also have two ends – a “water loving” (hydrophilic) end that is attracted to water and a “water hating” (hydrophobic) end that wants to get as far away from water as possible. Because of this, the soap and water molecules create a very thin water sandwich with water in the middle and soap molecules forming the “bread” of the sandwich. That’s your bubble!
Normally, when you blow a bubble, it naturally forms a circle. But we’re going to show you some cool ways to make square and even triangular bubbles!
This post contains Amazon affiliate links.
How to Blow Square Bubbles:
Supplies Needed for Square Bubbles:
- Plastic straws
- Pipe cleaners
- Scissors
- Water
- Dish soap – I recommend using Dawn liquid dish soap (washing up liquid, for my UK friends!)
- Glycerin – optional, but it does make stronger bubbles
- A container to hold your bubble solution
- A dropper – like these disposable pipettes from Amazon
Bubble Solution Instructions:

Mix 1 gallon of water with 1/4 cup of dish soap and 3 T of glycerin. Stir it well and let it sit. If you need to use it right away, that’s fine, but it will work even better after sitting for several hours or even a day or two.
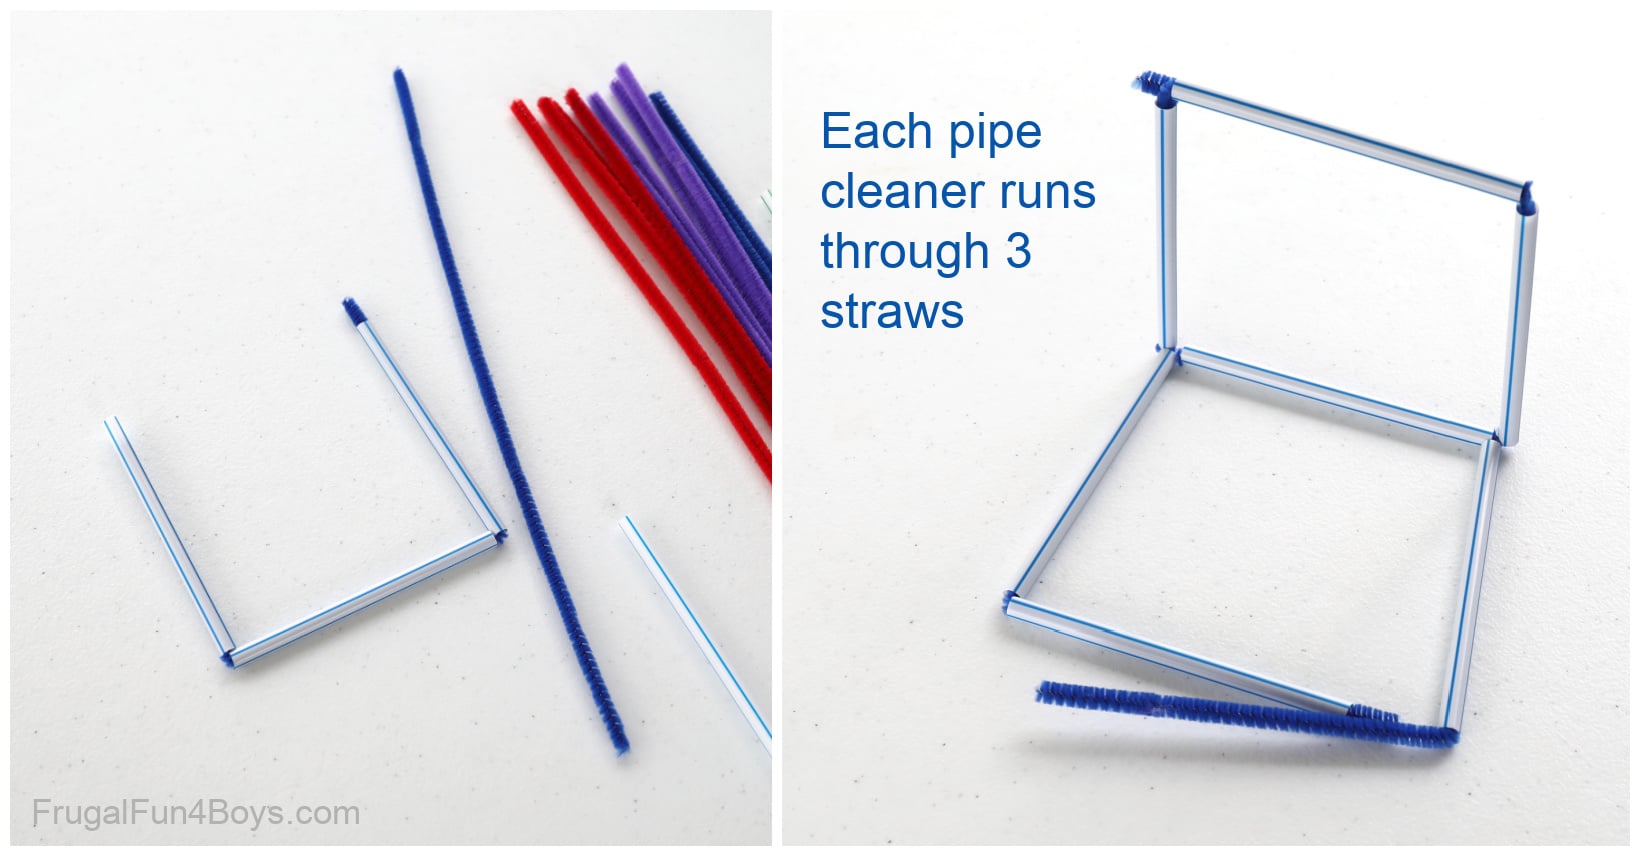
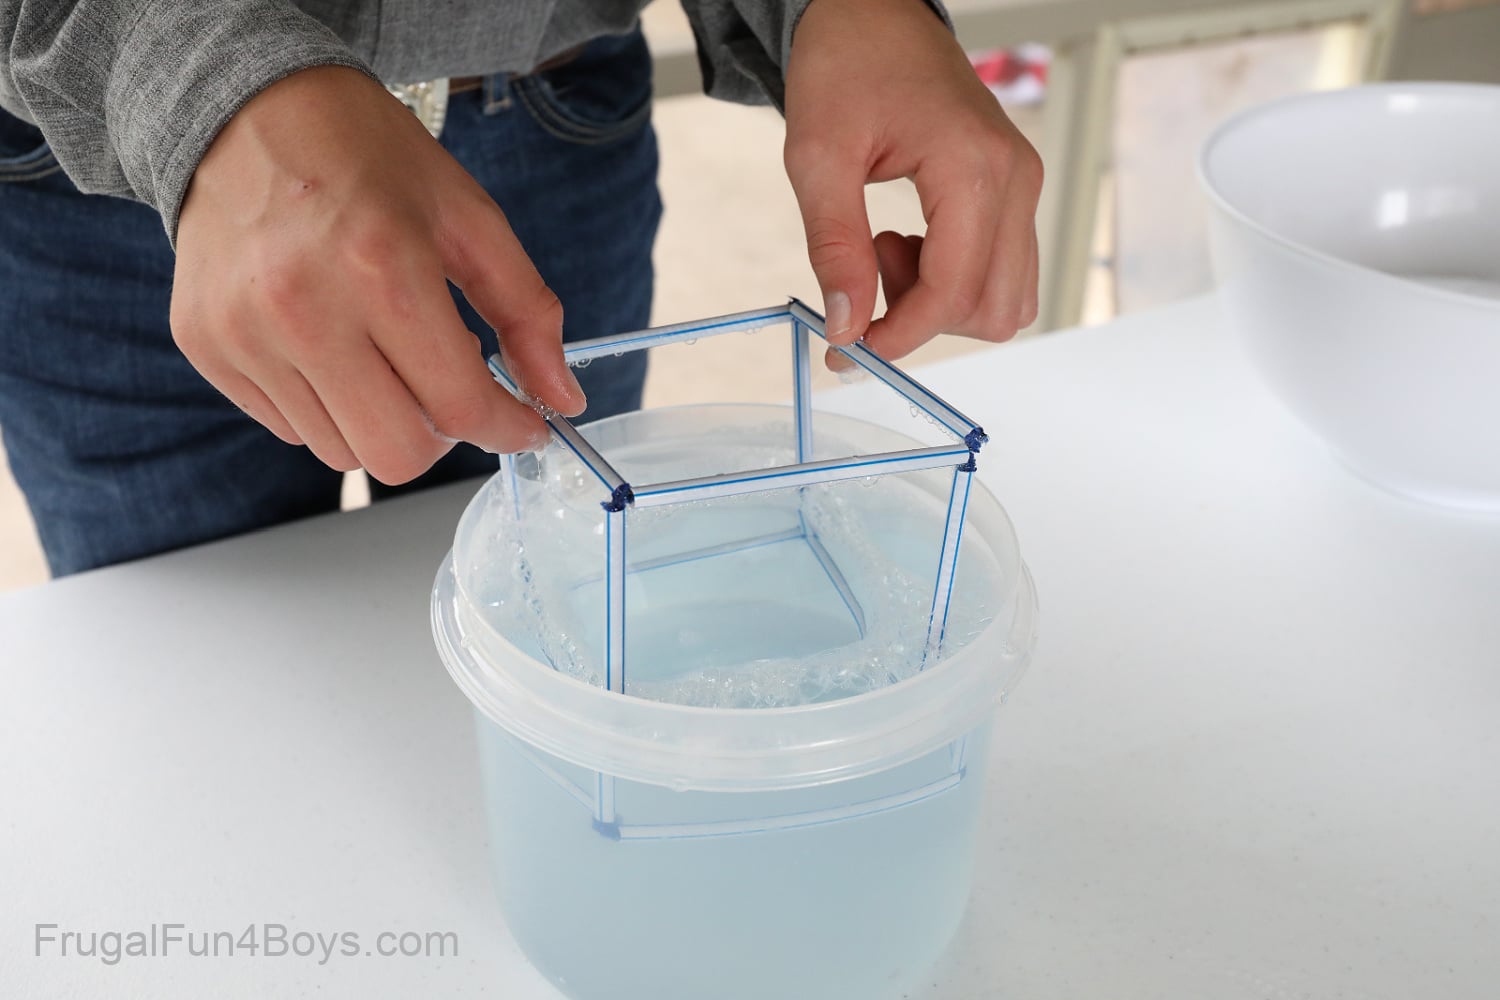
Bubble Frame Instructions:
Now it’s time to build a cube out of straws and pipe cleaners.
Cut 12 straw segments that are all equal in length. As you choose the size for your cube, keep in mind that it’s best if you can submerge the entire cube in your container of bubble solution.
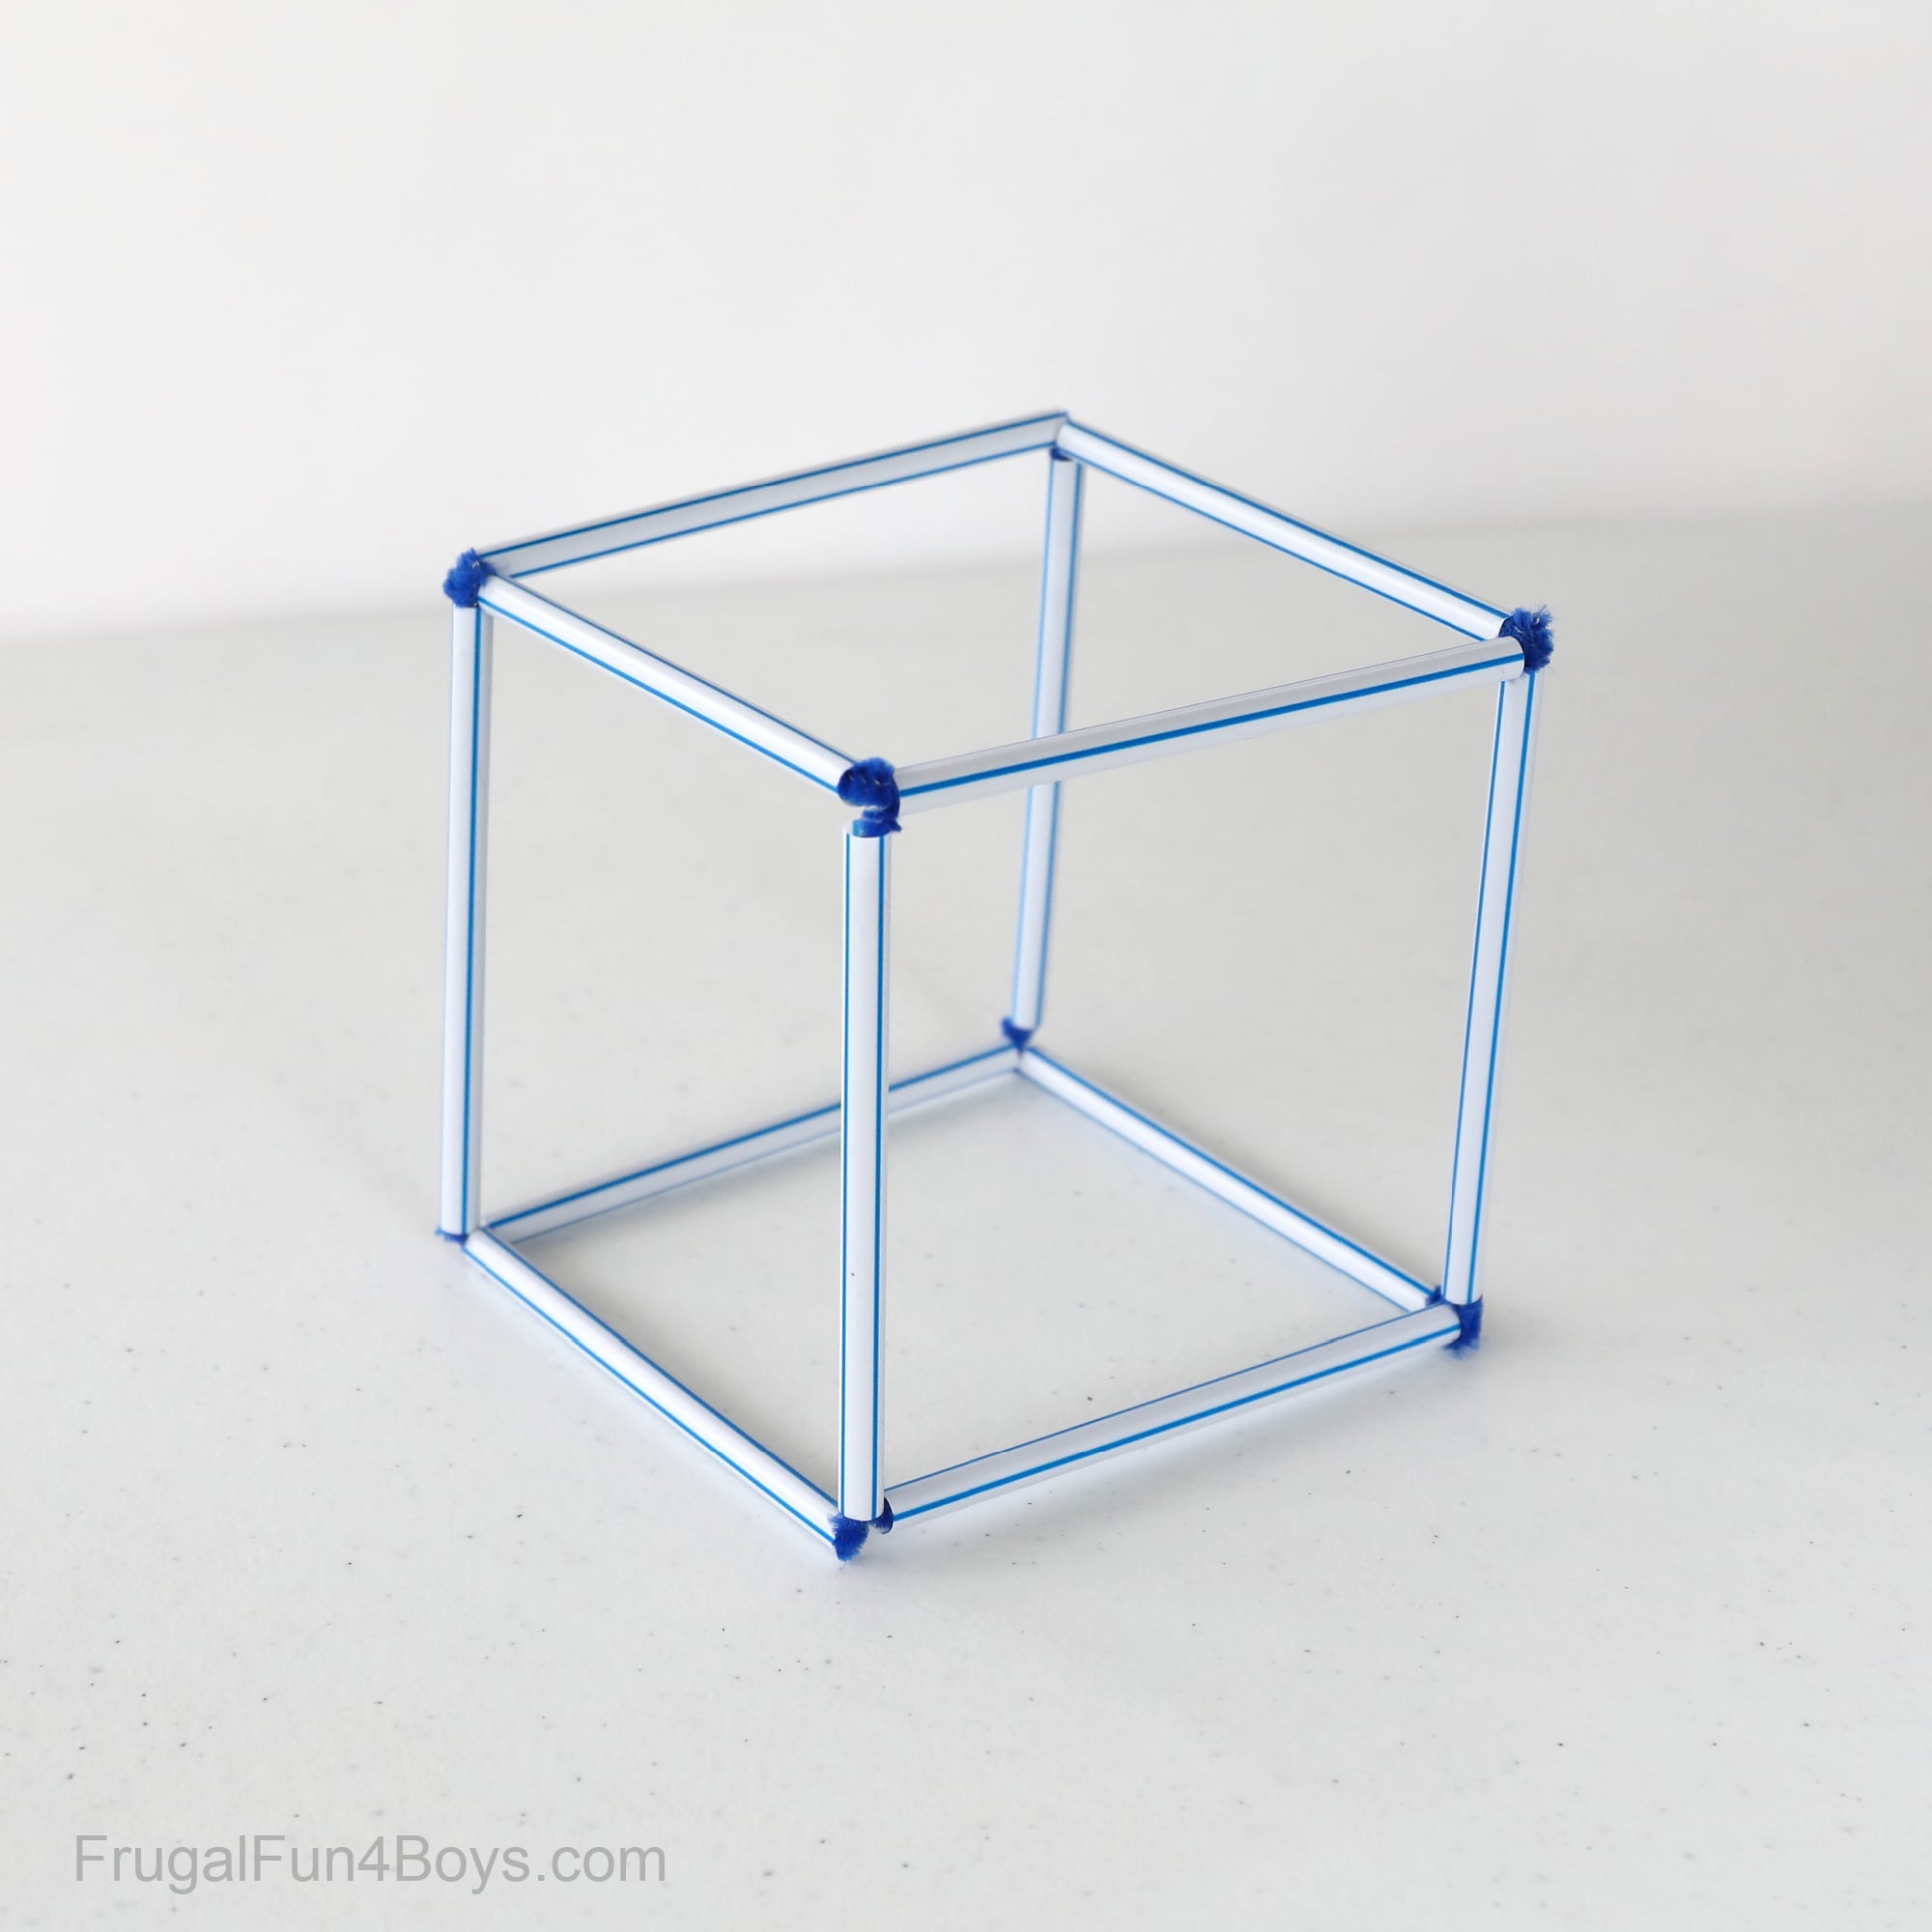
Here’s what your completed cube should look like.
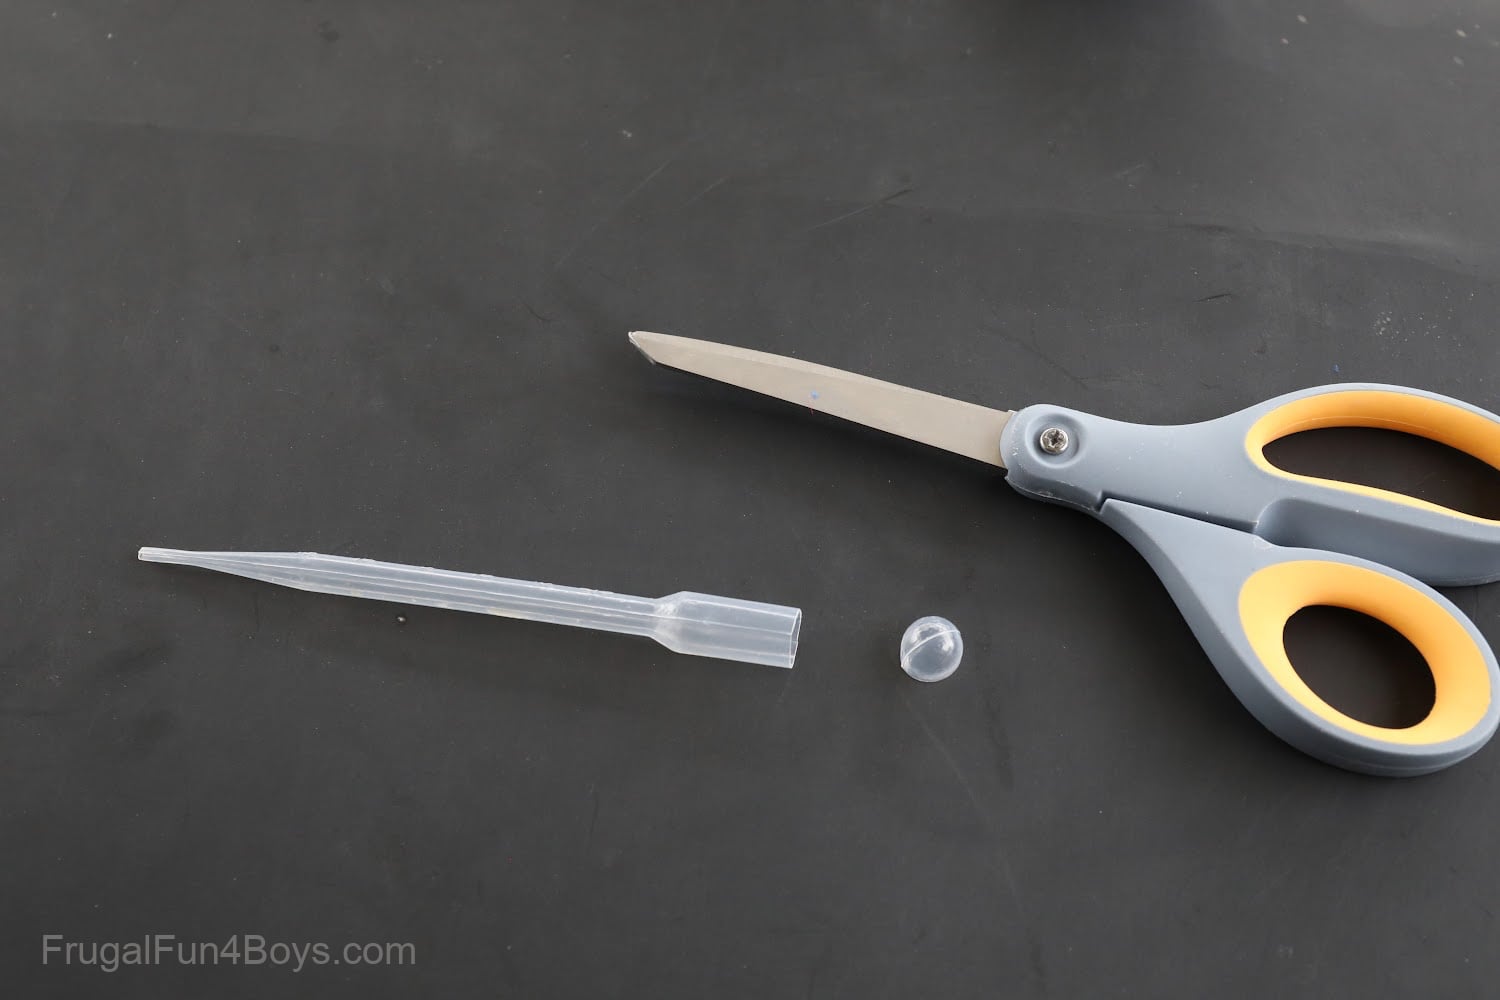
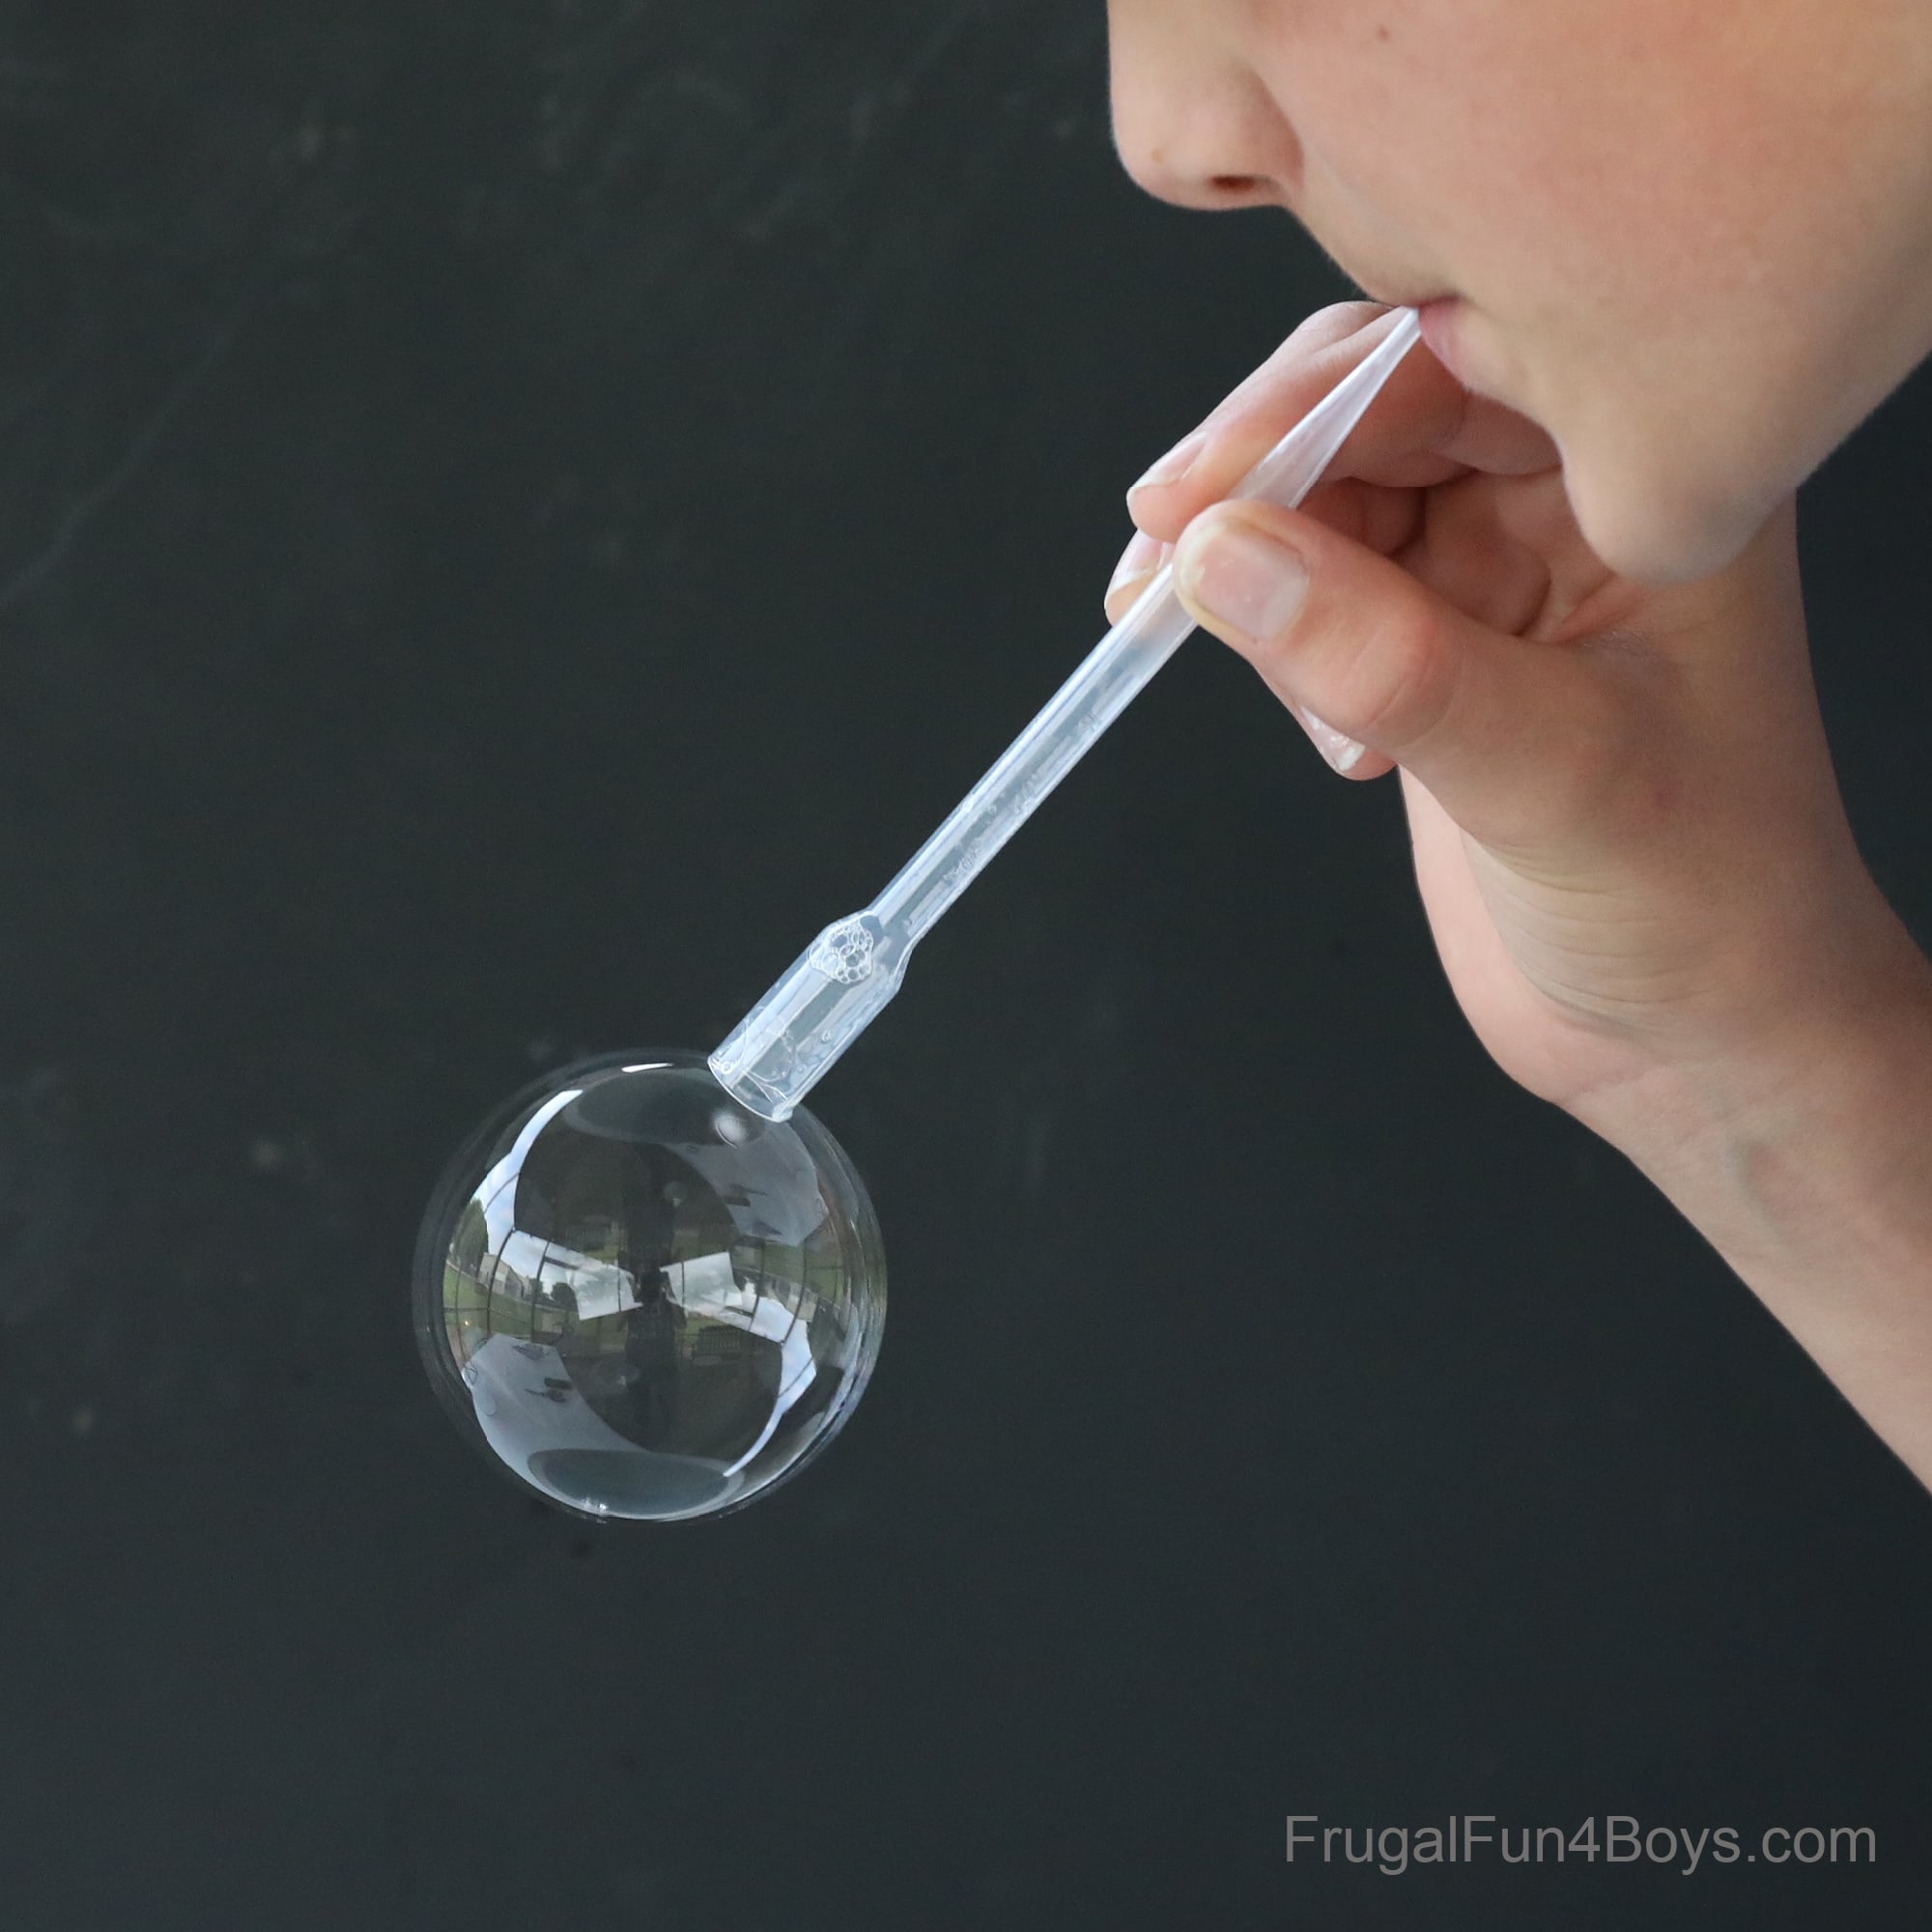
Now you just need one more thing! A dropper.
We bought these disposable pipettes from Amazon – I bought the 200 pack several years ago, and we’ve used them for tons of science experiments.
Use scissors to cut the end off your pipette, and now you have a handy bubble blower!
See, it works like this.
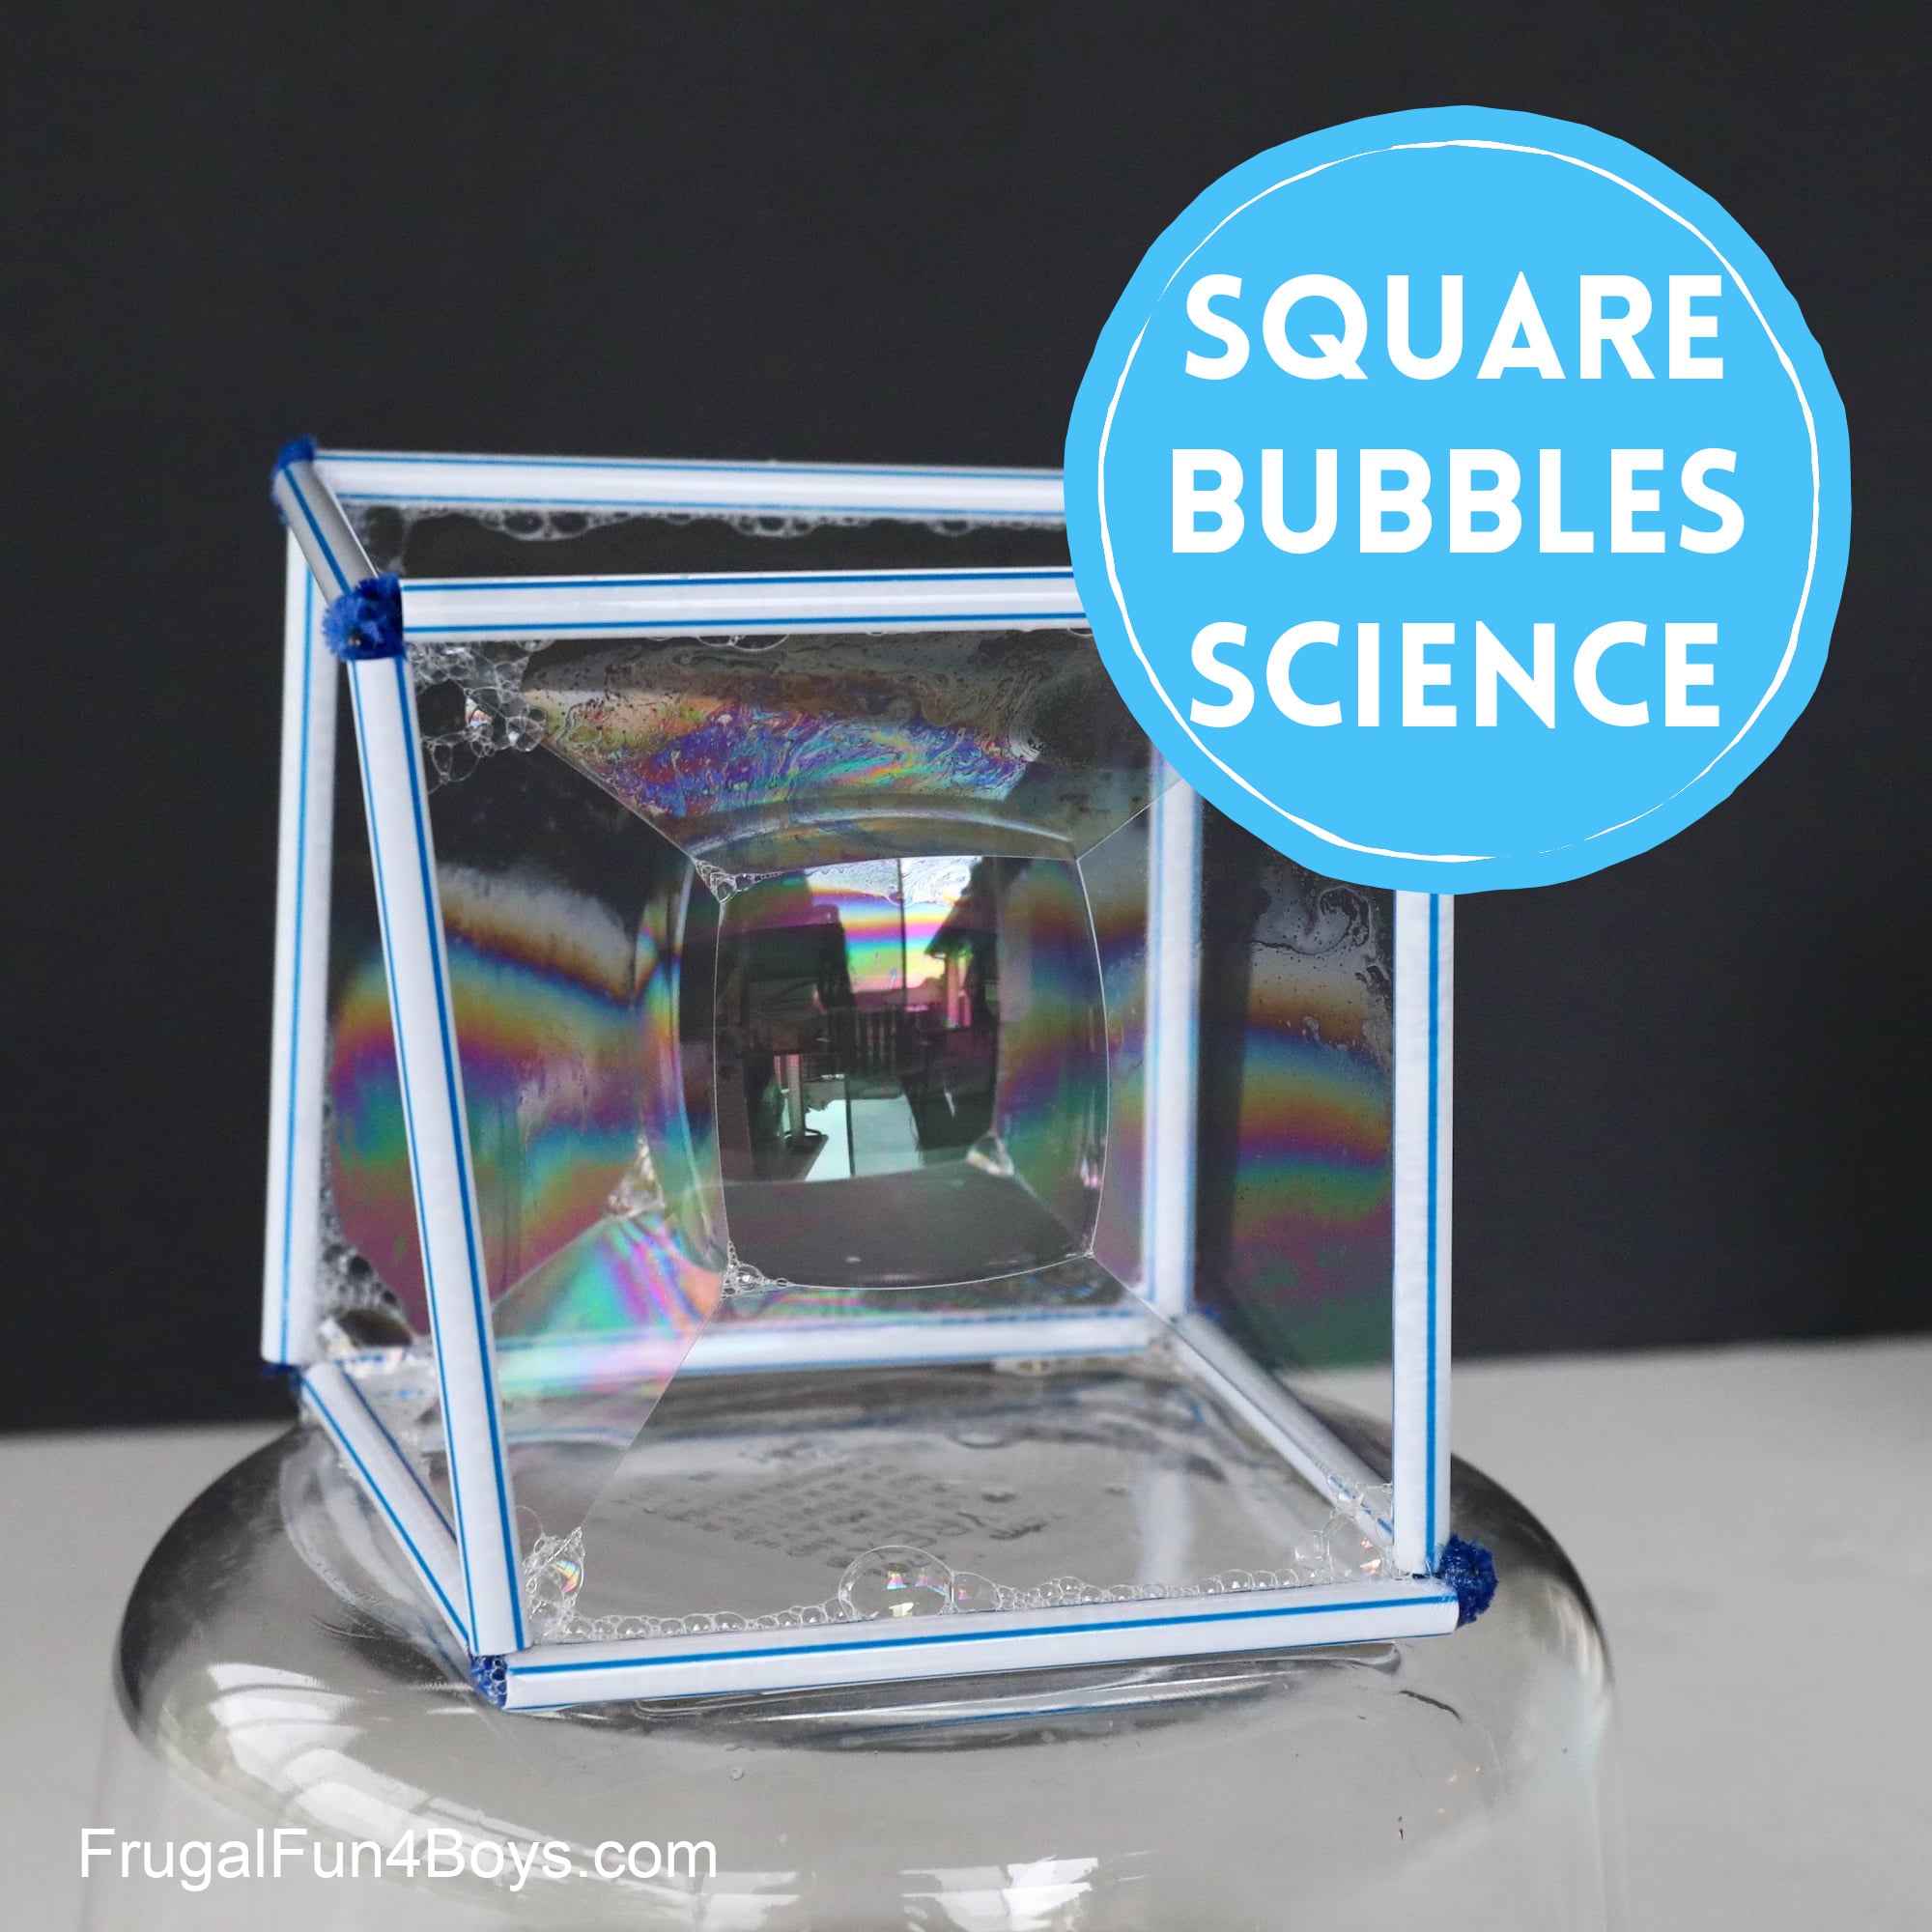
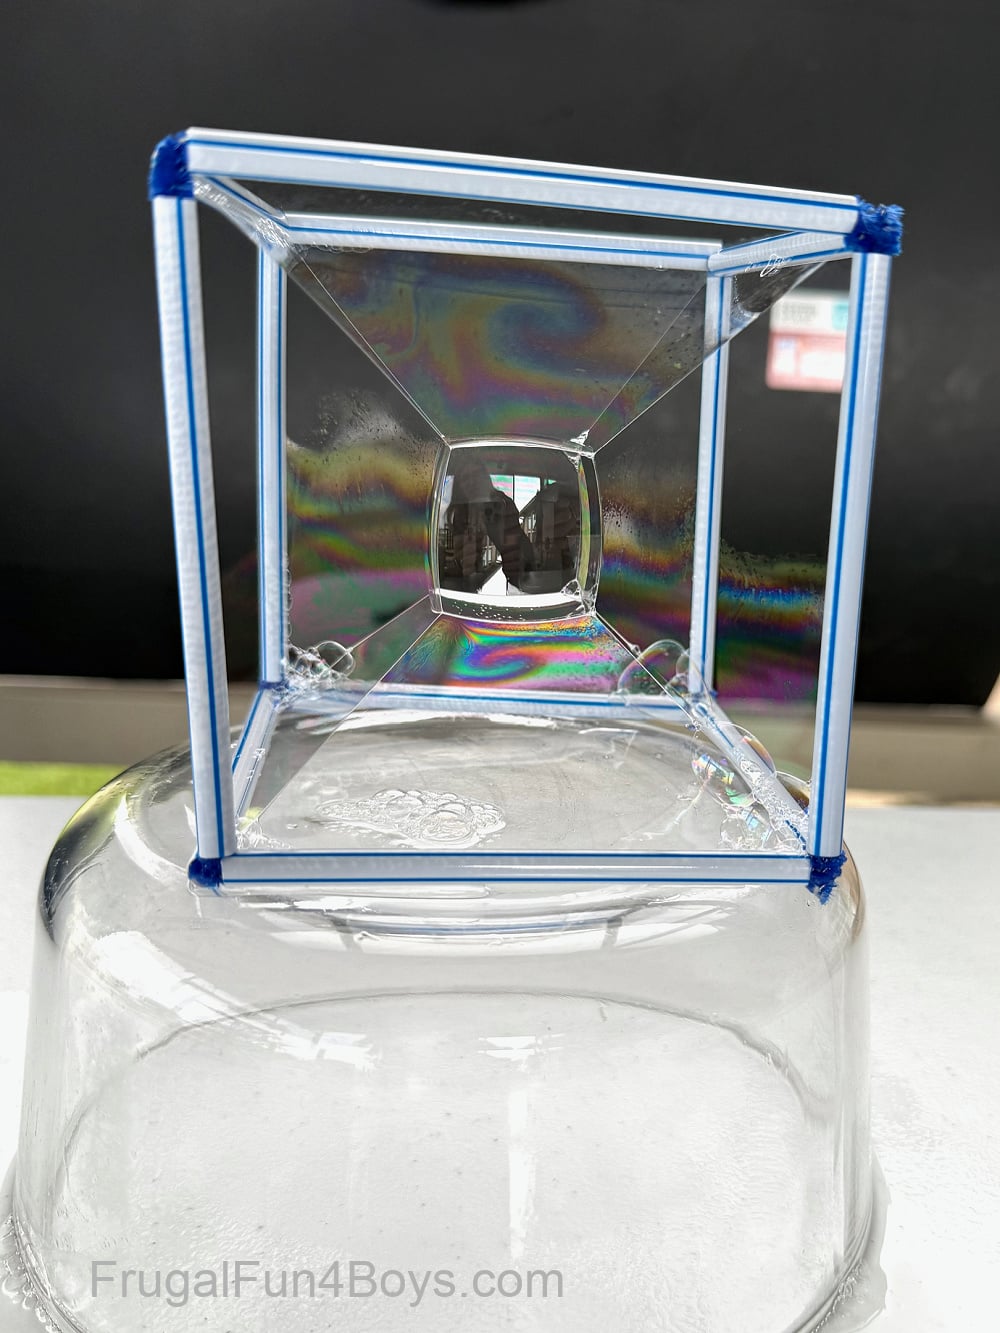
Ok, now it’s time to make square bubbles!
Did your cube into the bubble solution, and then lift it back out.
Your cube should look like this when you pull it out of the bubble solution.
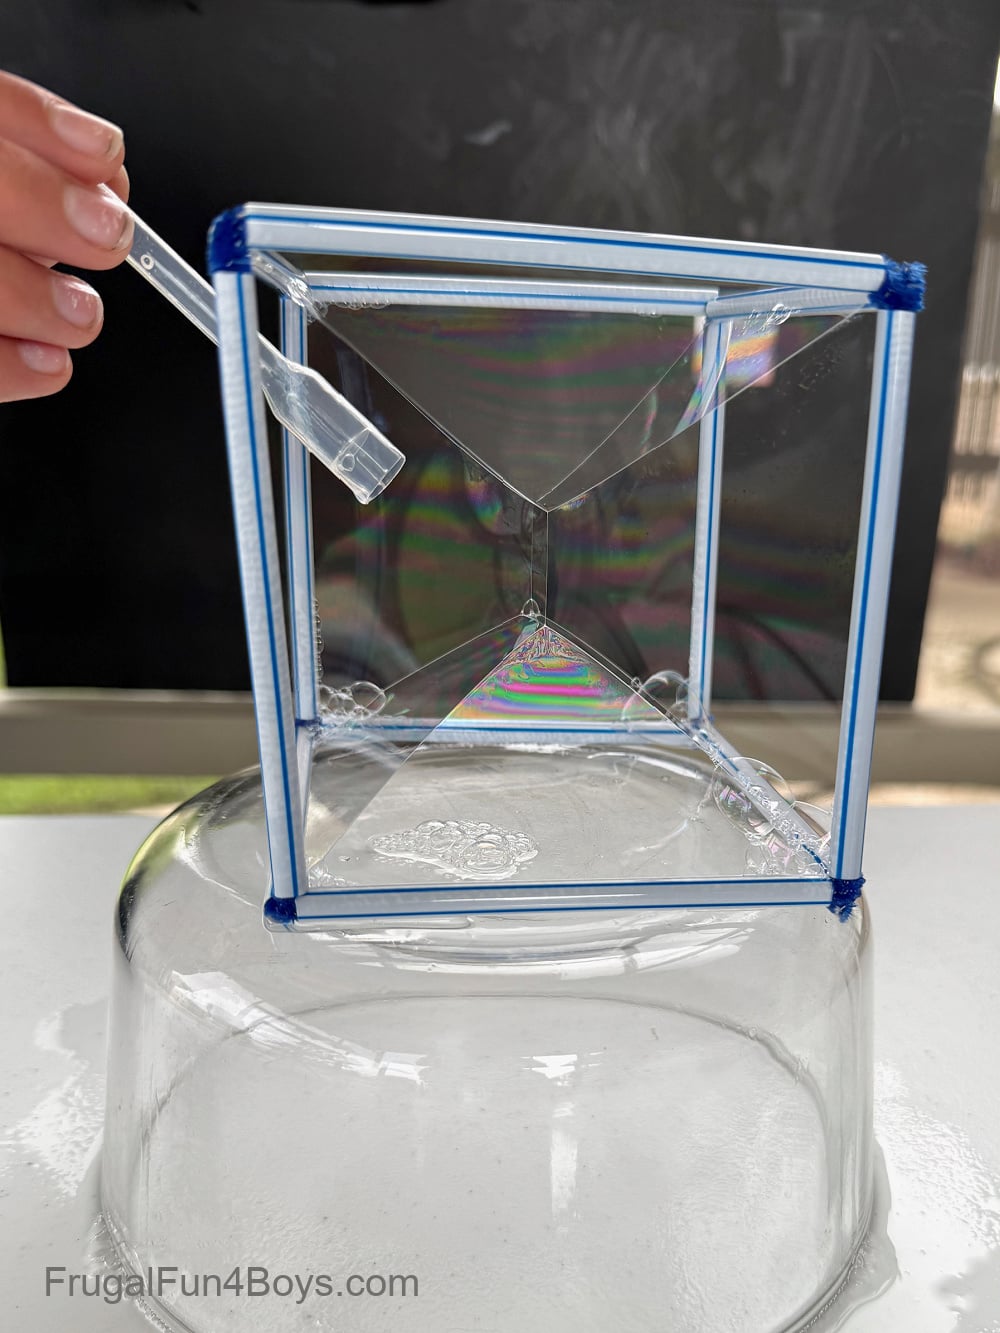
You should have a film of bubble solution covering each side of the cube. If you’re not seeing this shape, try to figure out which side does not have a bubble film over it and then stick your cube back in the bubble solution.
Once you get it looking like the picture above, it’s time to add another bubble with your handy pipette bubble blower!
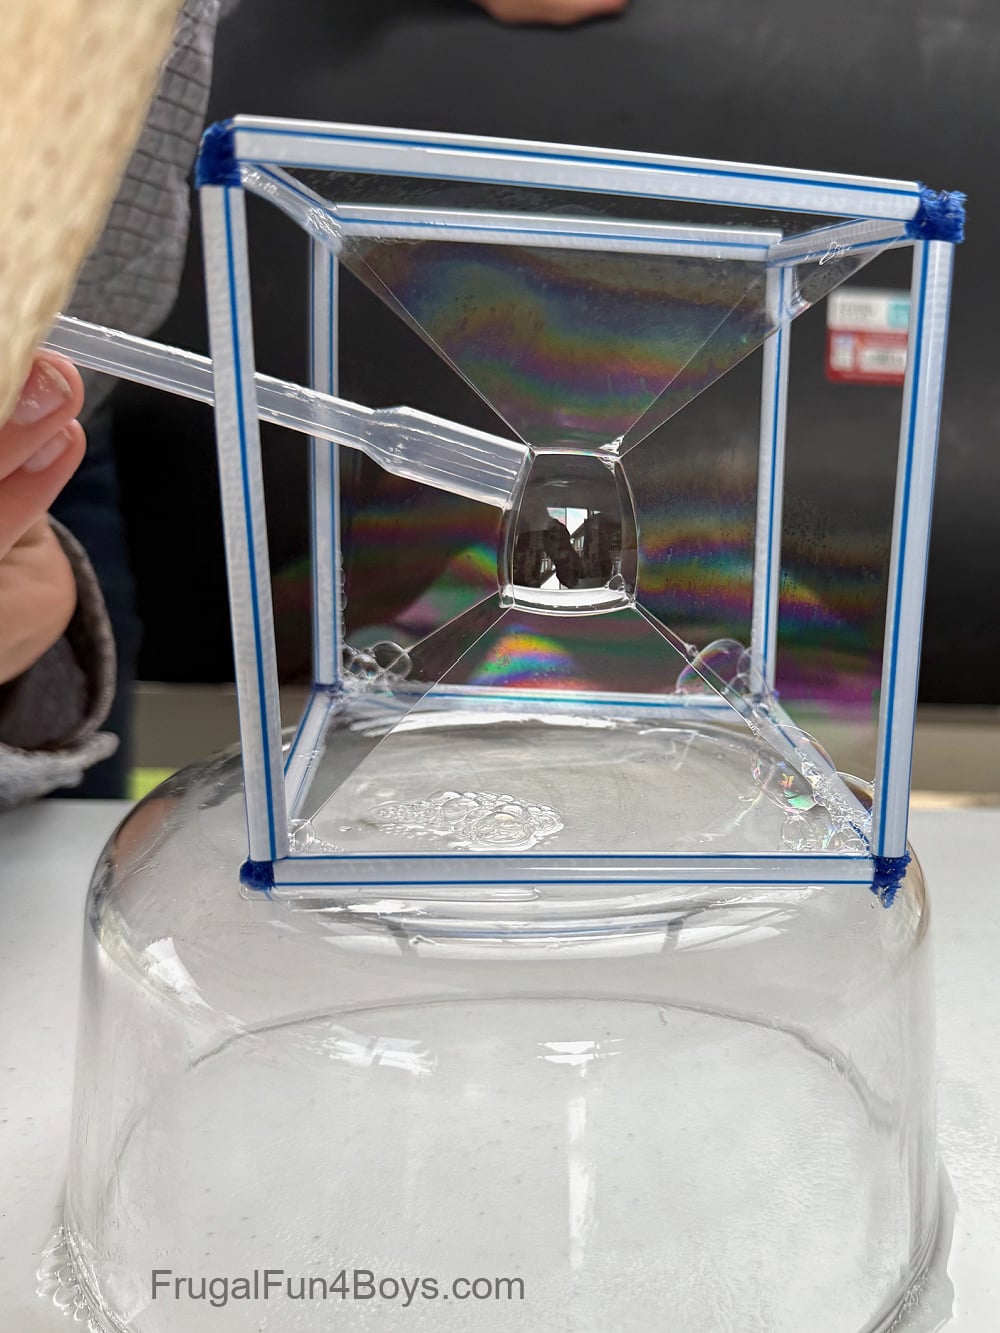
Simply blow a bubble in the center, and it will form a square!
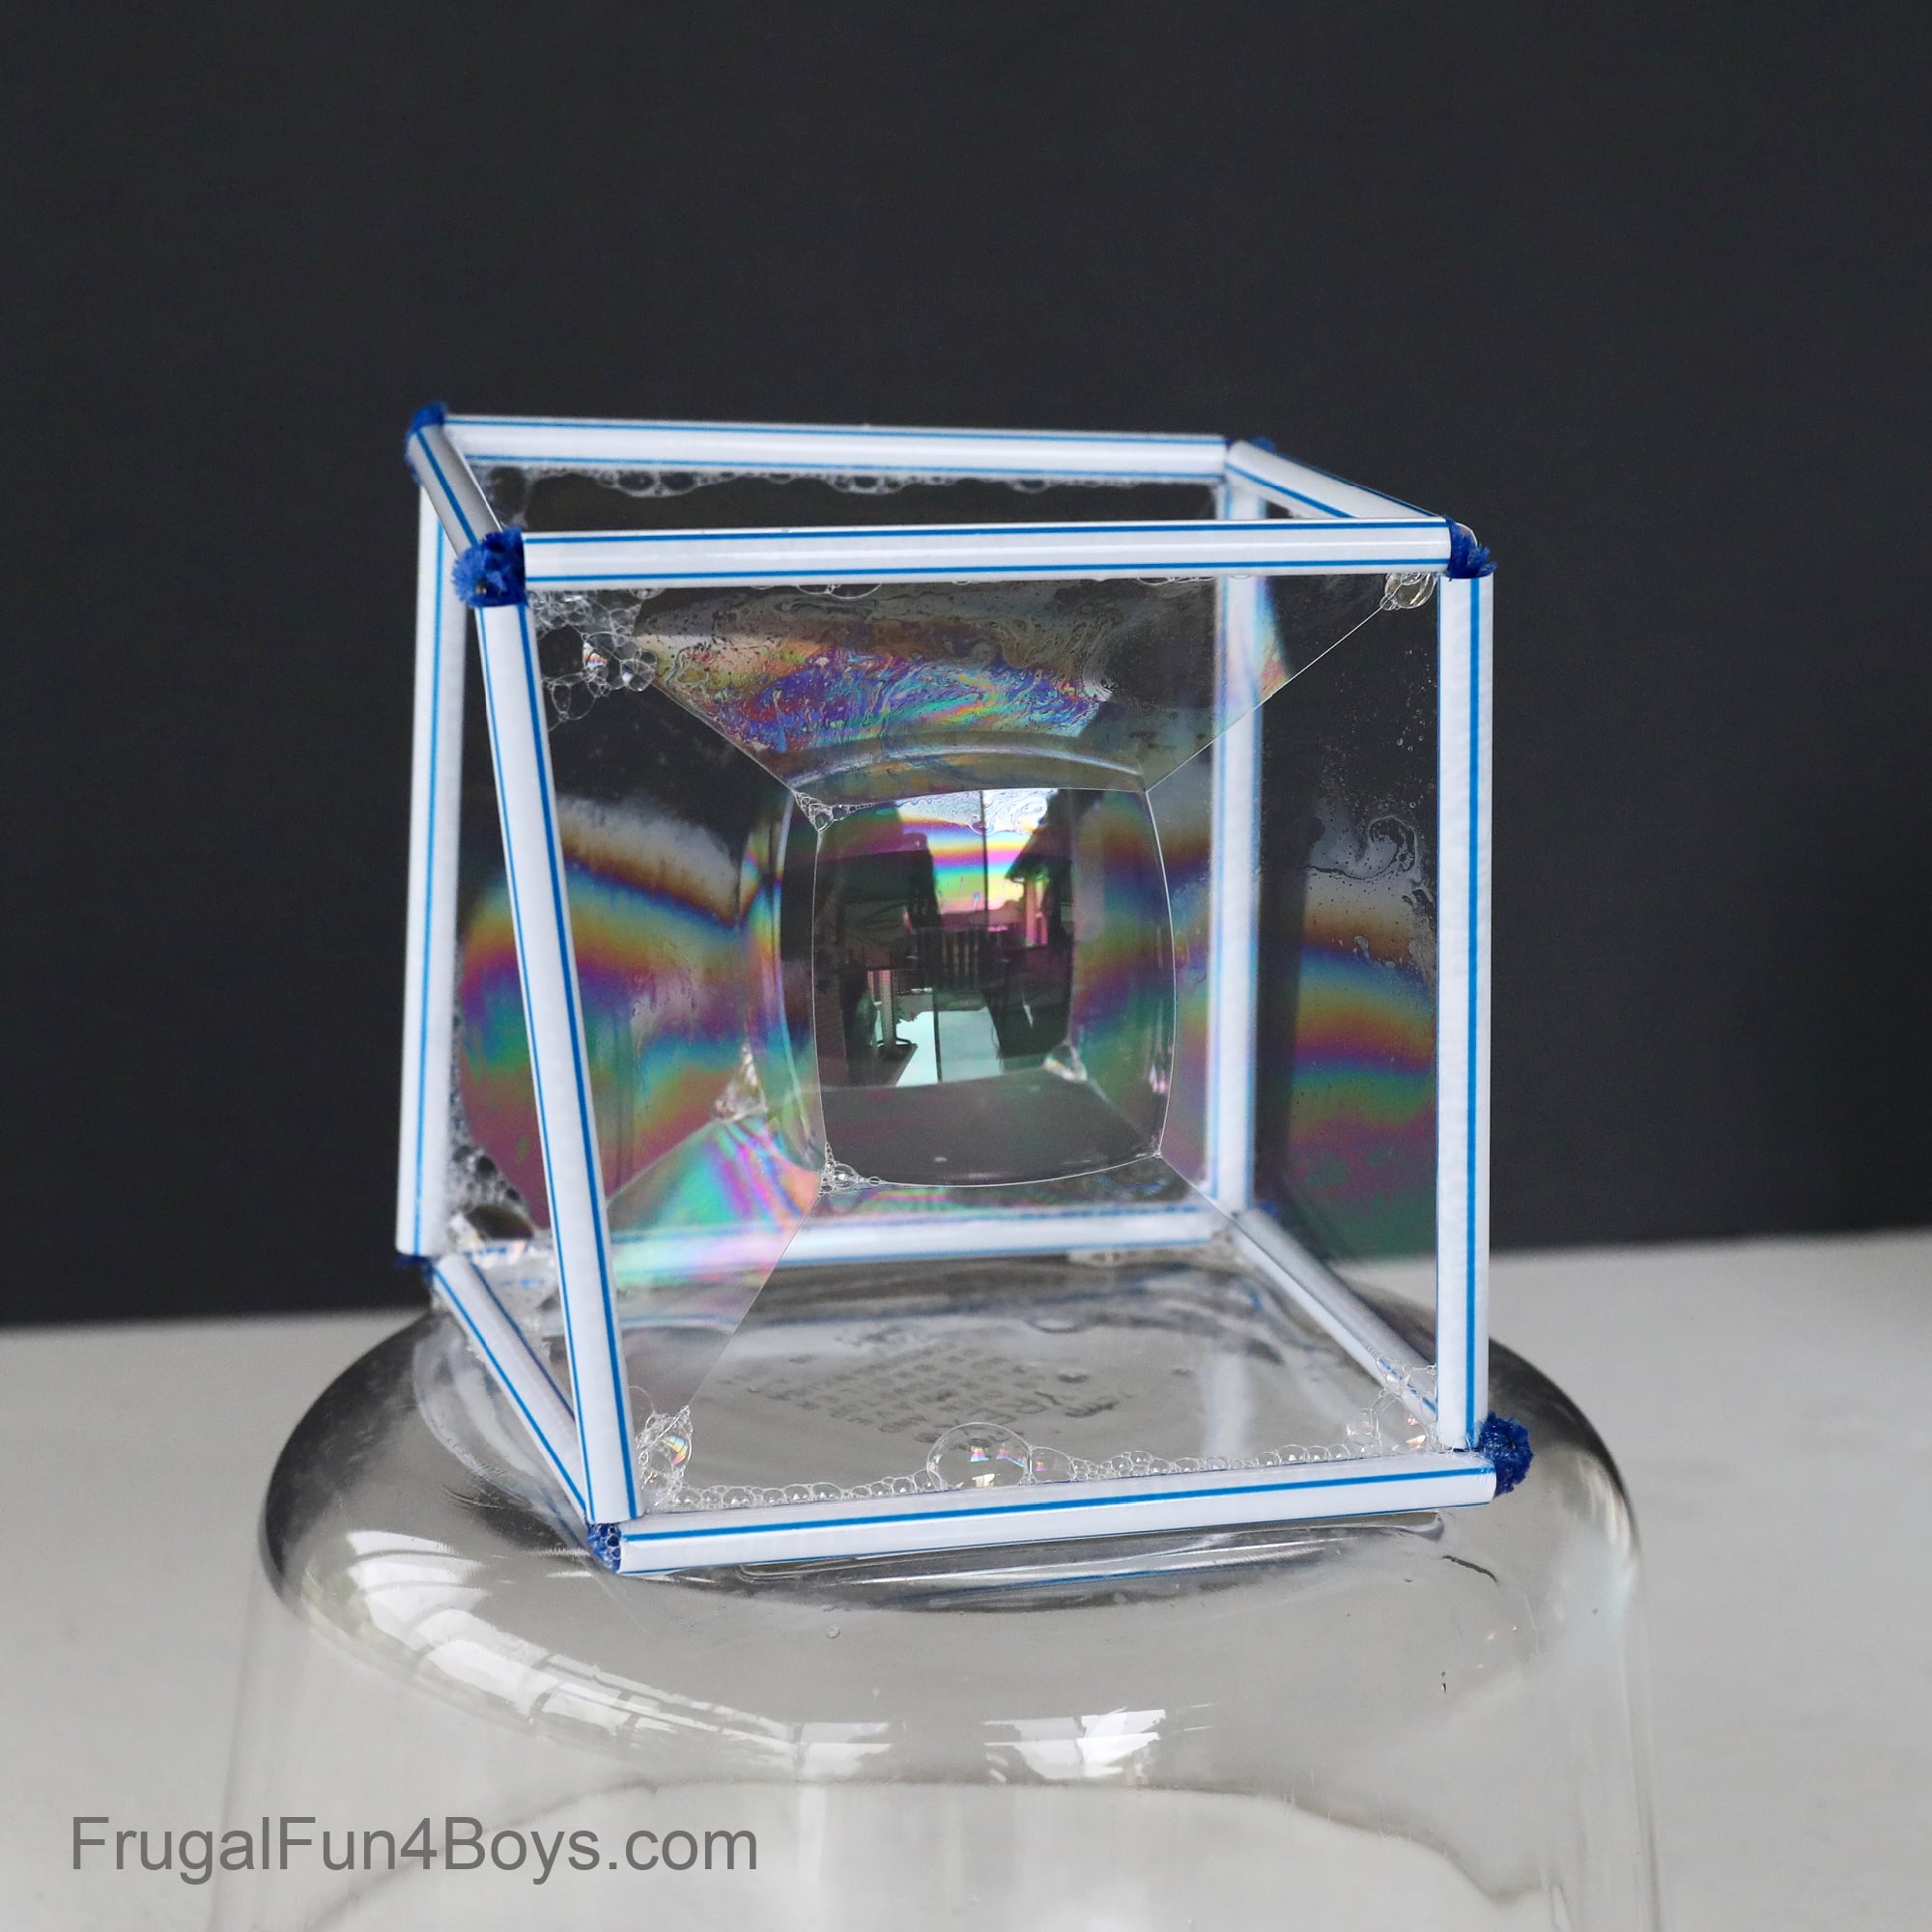
Here’s a picture with my phone camera instead of my big professional DSLR. The phone makes the lines even sharper!
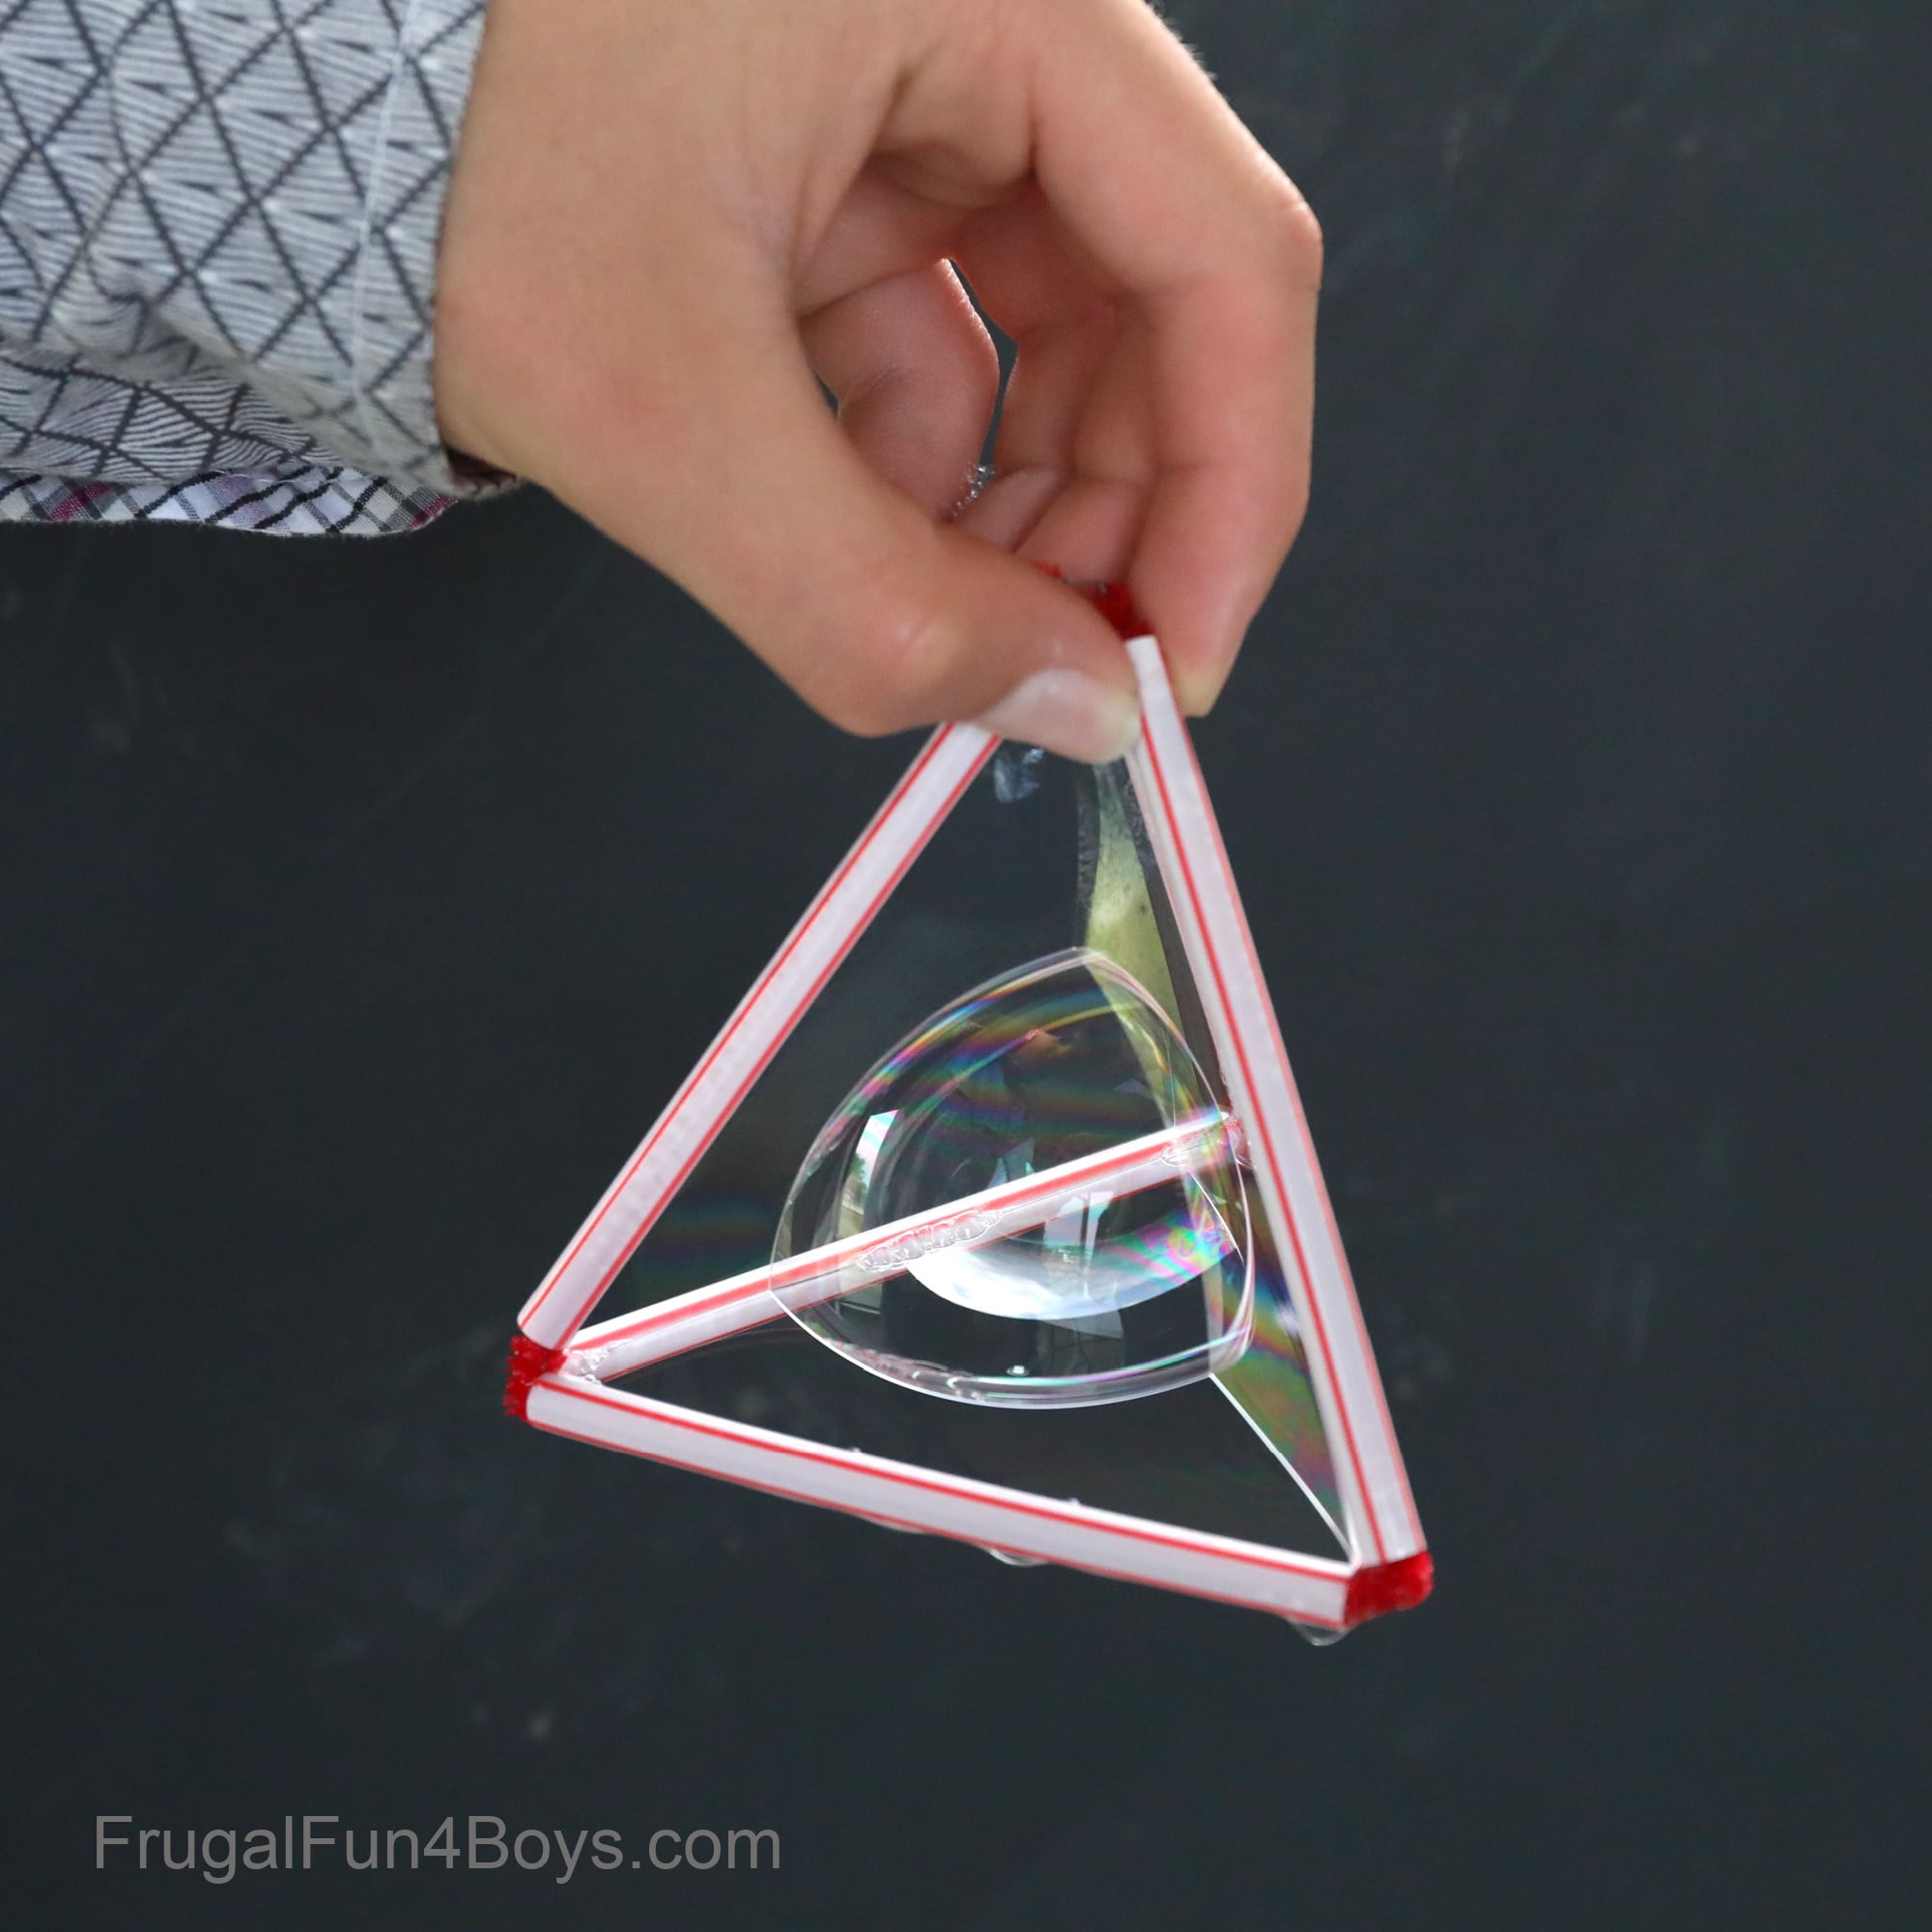
After having so much fun with square bubbles, we decided to try a triangle!
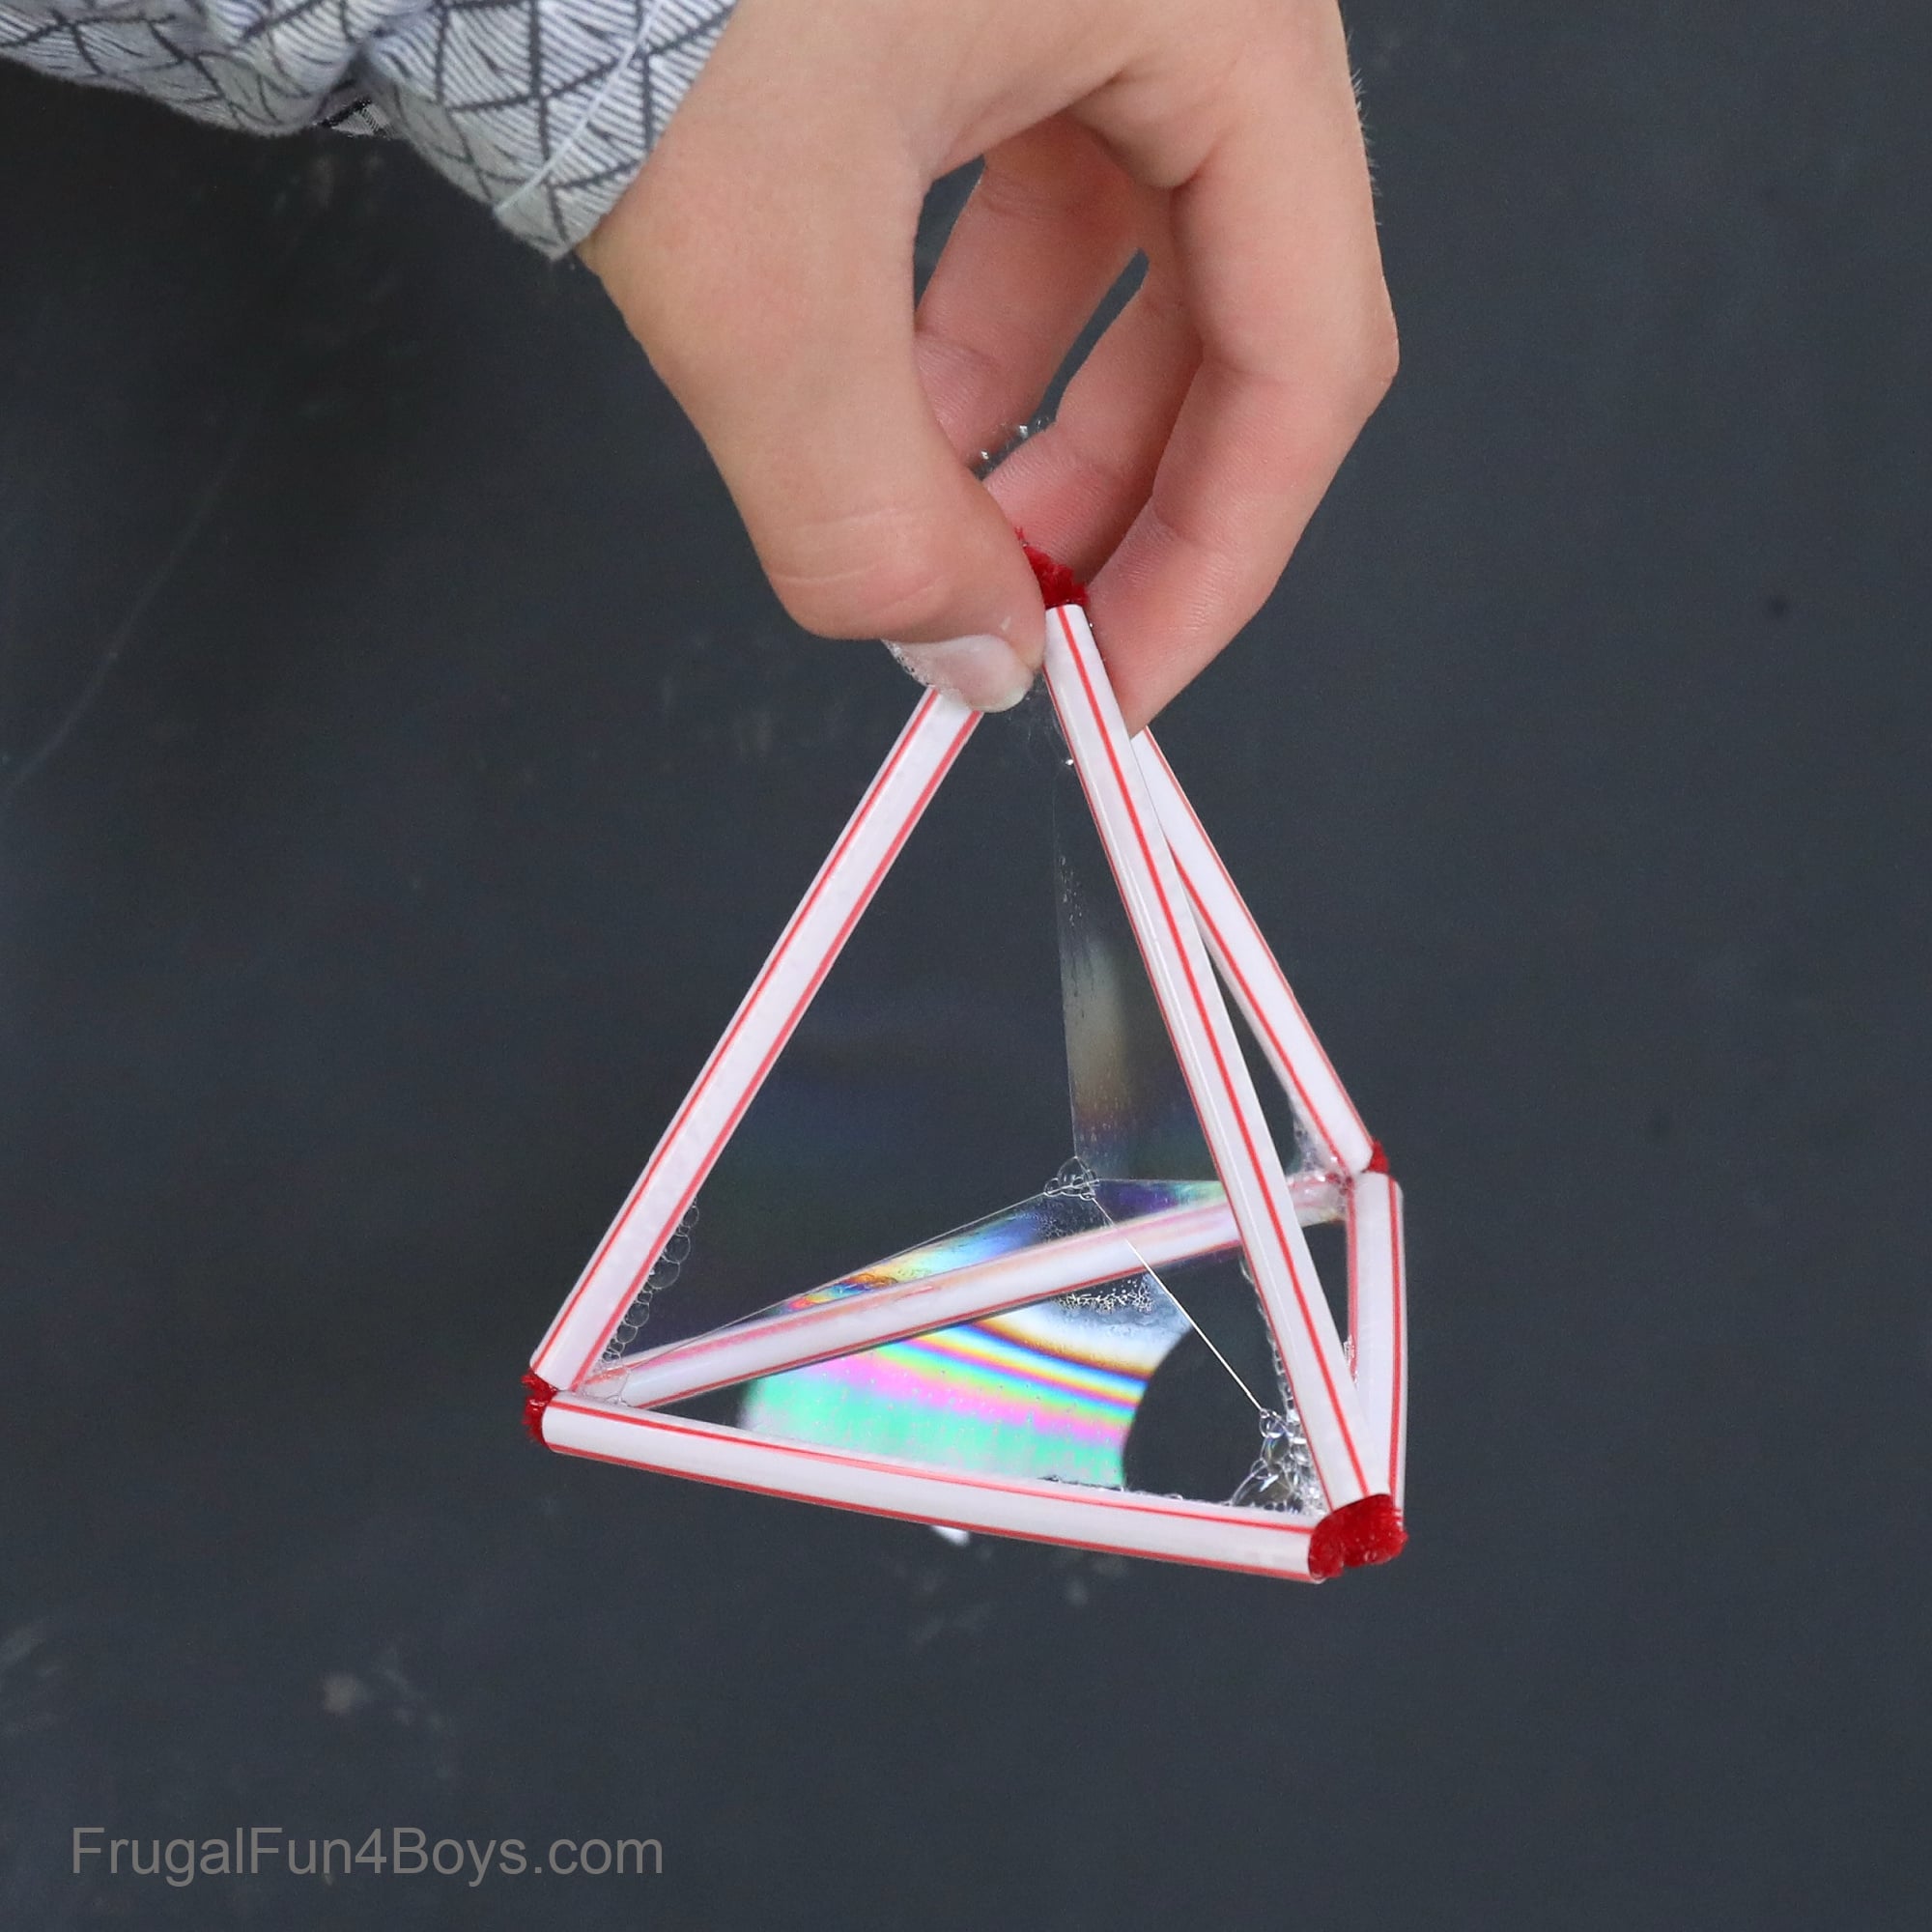
It’s so awesome to see perfectly straight lines inside the triangle!
Now blow a bubble into the center…
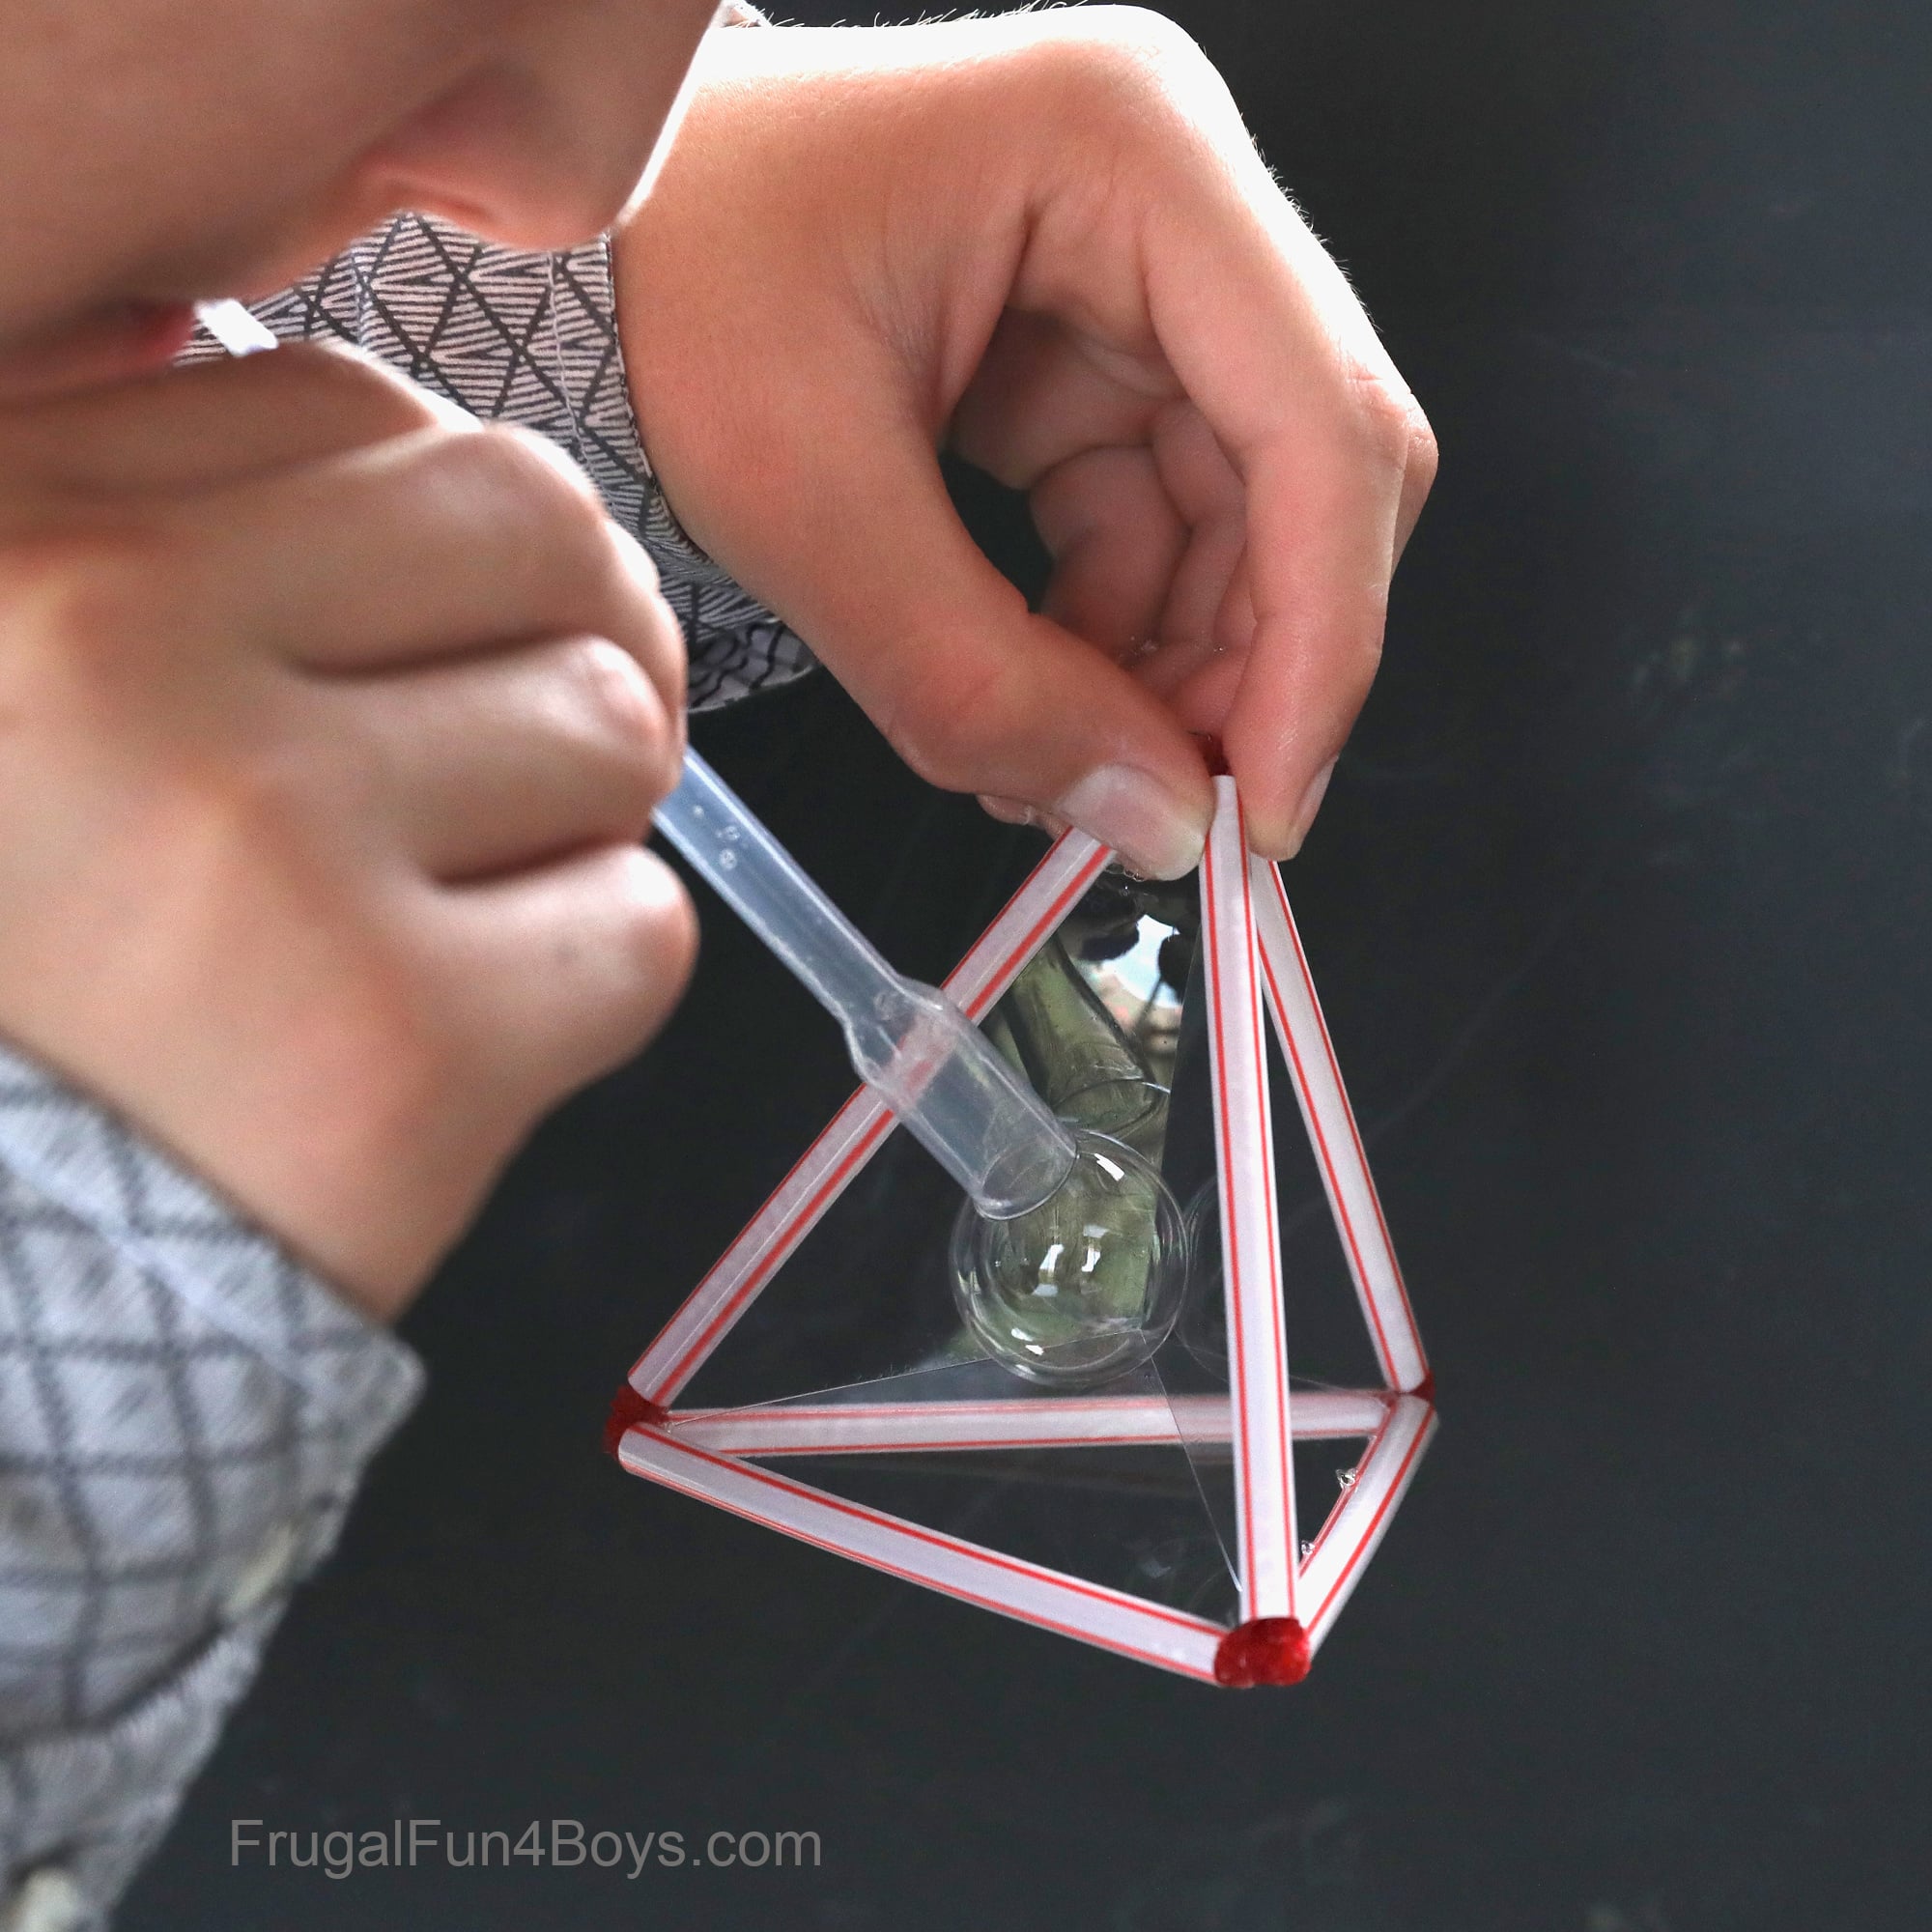
And then it looks like this!
Want more fun with bubbles?
Use the same bubble solution recipe to make GIANT BUBBLES!

1 Comments
Janette Apr 21, 2026
This square bubble project will be a hit with my grandkids! Thank you for your unique & fascinating posts!
Post a Comment