
Last week, one of Aidan’s history lessons was about advancements in bridge building during the 1800’s. We are reading Landmark History of the American People as part of Sonlight Core E. I thought it would be fun to do a bridge building challenge to go along with our study of bridges. I found this idea to build a bridge with straws and straight pins and thought it was worth a try!
The challenge: Build a bridge out of straws and straight pins that can support the weight of 100 pennies in a small cup.
Before building, Dad and Aidan looked at different types of bridge designs on this site. (This is another activity idea for a popsicle stick bridge, but if you scroll down a couple pages, there is information about different types of bridges.)
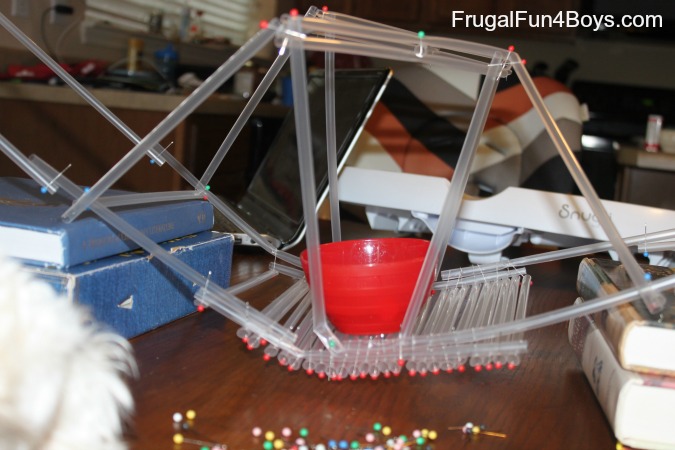
Then it was time to build! Aidan decided to attempt a suspension bridge.
Note: The straight pins will be sticking out of the straws, so this is not for young kids. Aidan is 9 1/2, and he did fine with it. You know your child – they need to be able to handle pins and remember not to touch the ends in order to do this activity. That being said, I think that straight pins are an excellent way to hold the straws together! It was easy to create a strong connection. Tape or glue would have been a disaster!
The bridge started to take shape pretty quickly!

Aidan put the bridge across a couple stacks of books to test it out. Unfortunately, his first attempt was not successful.
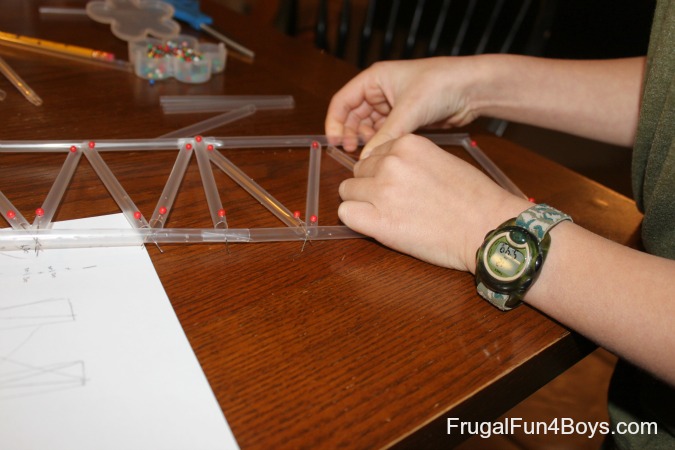
Dad showed him how all of the weight of his bridge was resting on just one straw on each side of the bridge. It was too much for those straws to bear, and the bridge collapsed. Jordan suggested that they try another design with triangles for additional strength.
To make this design, they needed to cut some of the straws in half. Aidan was all ready to just eyeball it (while cutting 5 straws at a time), but Dad made him get out the ruler! A straw was 8 3/4 inches long. Aidan has been learning about equivalent fractions in math, so Jordan helped him convert 3/4 to 6/8 so that they could figure out half. Then Aidan measured segments that were 4 3/8 inches long. Isn’t math useful? 🙂

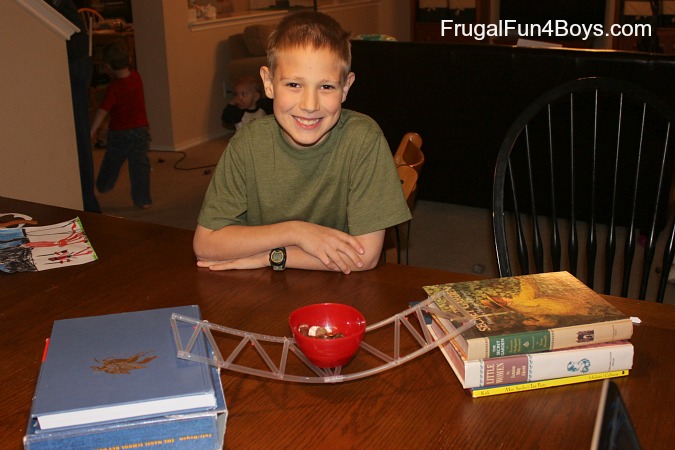
I was amazed at how strong this design was, even with cheap straws. We could see why this design is often used in construction.
Once it was done, Aidan was ready to test it out. This bridge worked!
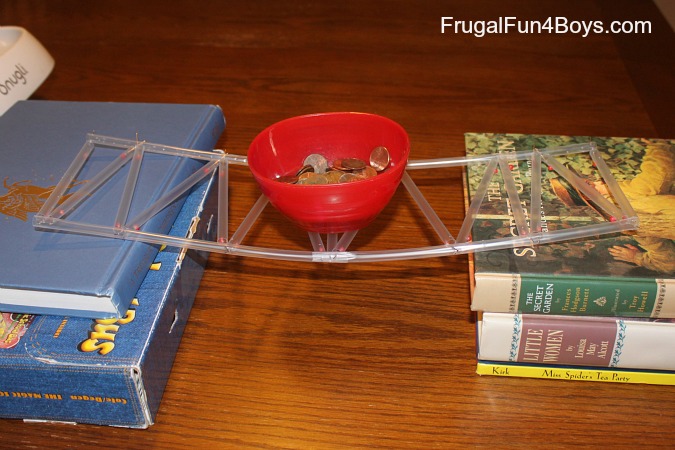
We moved the books farther apart, and the bridge still held even though it sagged a little.
If you do this activity, I would recommend not letting your kids see our finished product. Let them explore and see what they can create, and then step in where needed. The PBS site where I got the activity recommended that once you have a working design, try cutting away some of the straws and see which ones are truly necessary and which ones aren’t. Great idea!
8 Comments
Deborah Jan 9, 2013
This is so cool. I love this idea. Thanks for sharing!
thebargainbabe Jan 9, 2013
my 9 yr old will love this!! I will give him the supplies this week. :)
Ger Nov 1, 2014
Love this idea,such fun and will try it out with my class this week.Thanks so much
{Lester|Leonard|Larry|Derek|Michael|Ryan|Elsie|Roger|Hector|Carl|Dave|Clinton|Jacob|Glenda|Daniel|Brett|Mitchell|Greg|Gretchen|Luis|Clyde|Antonio|Wayne|Travis|Corey|Jim|Jeremy|Mathew|Jeff|Gary|Evan|Joel|Jay|Henry|Rick|Jean|Harry|Stephen|Jennifer|Oscar|Kel Sep 2, 2015
Good article! Thanks and we want more! Added to FeedBurner as well.
raw steroid powders Dec 1, 2017
Half of the cyclists rawsteroidpowders.cabanova.com did more or less classical interval training: cycling for 4.5 minutes as fast as they could and then 2.5 minutes cycling gently to recover. They repeated this cycle until the 40 minutes were up. [LI]
Ryan Van Wagenen Jul 6, 2018
Thhis blog was... how do I say it? Relevant!!
Finally I have found something thjat helpe
me. Thank you!
margaret ville Jul 7, 2018
Its like you rad myy mind! You seem too know a lot about this, like you wrote the book iin it oor something.
I think that you could do with a few pics to drive the
message home a bit, but other than that, this is wonderful blog.
A fantastic read. I will definitely be back.
Tre Ver Residence Jul 7, 2018
We're a group of volpunteers and starting a new
scheme in our community. Your site provided us with valuable info to work on.
You've done a formidable job and our whole community will be grateful to
you.
Post a Comment