
How to make Perler bead Minions!
This post contains Amazon affiliate links, which means that if you make a purchase through the links, I will earn a small percentage of the sale at no additional cost to you.
This past week, we discovered crafting with Perler beads. My 8 year old has been wanting to try these for a while, so we finally did it! (They are also called Hama beads or melty beads.) Perler bead crafts develop some serious fine motor skills, let me tell you. Placing the tiny beads was more challenging that we all thought it was going to be, but even my 6 year old stuck with it and made some really fun designs.
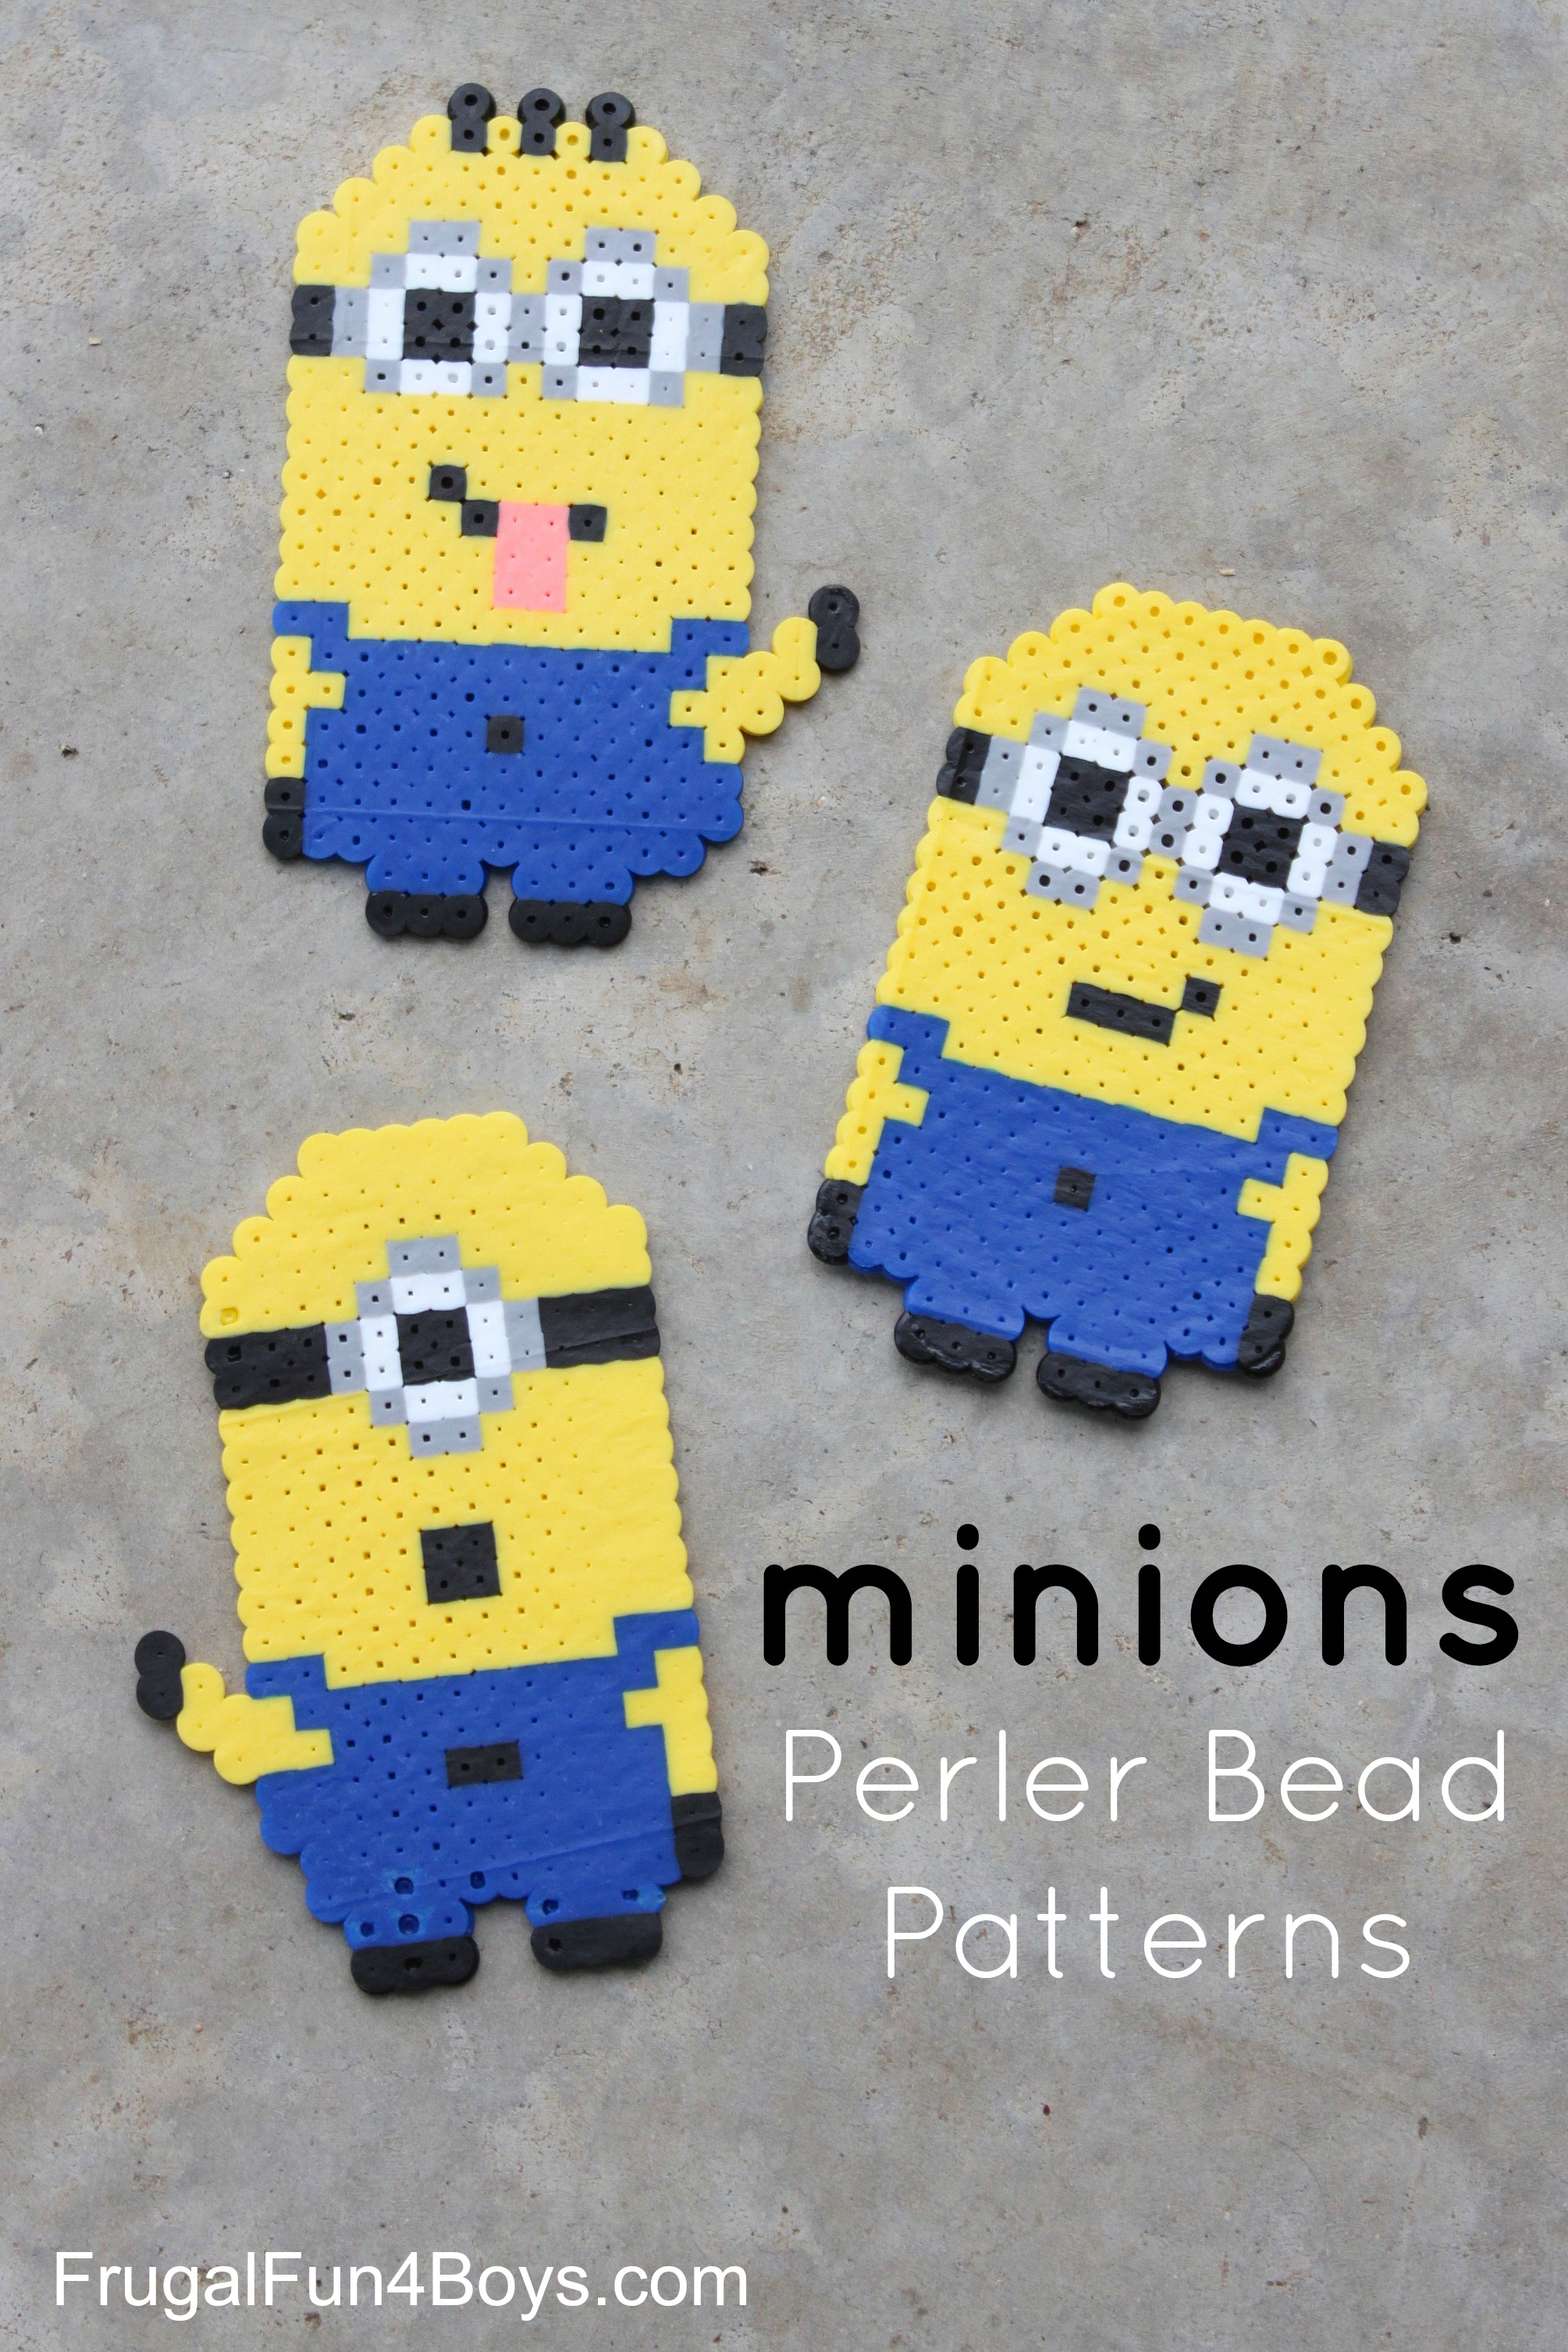
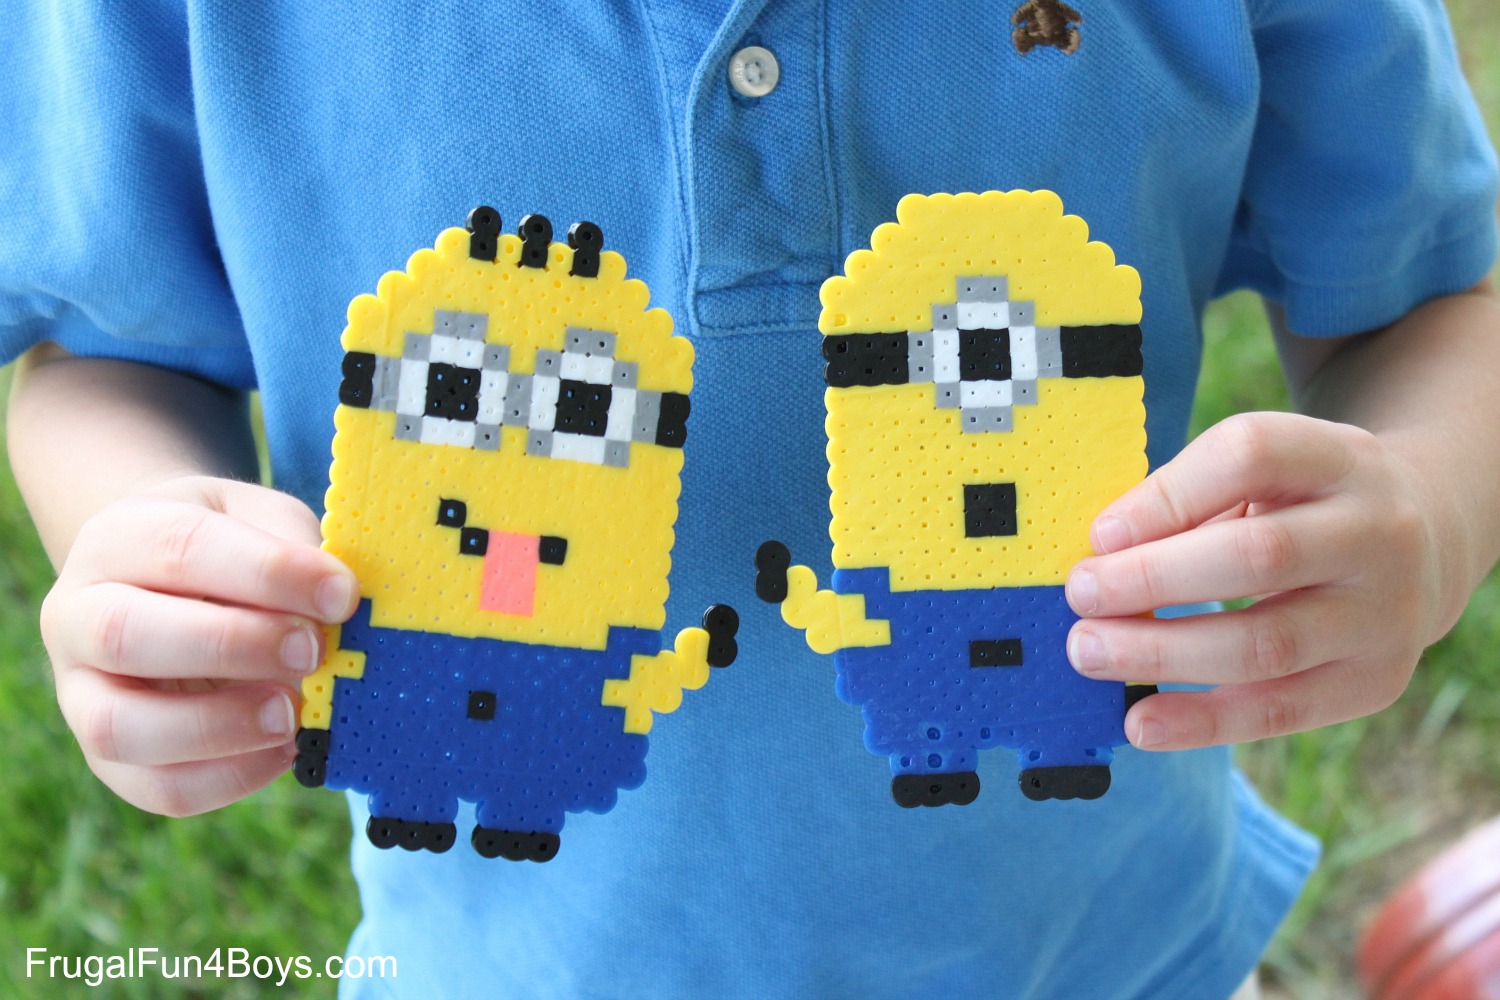
One of our favorite projects was MINIONS!
We are all a little minion-obsessed over here at the moment…
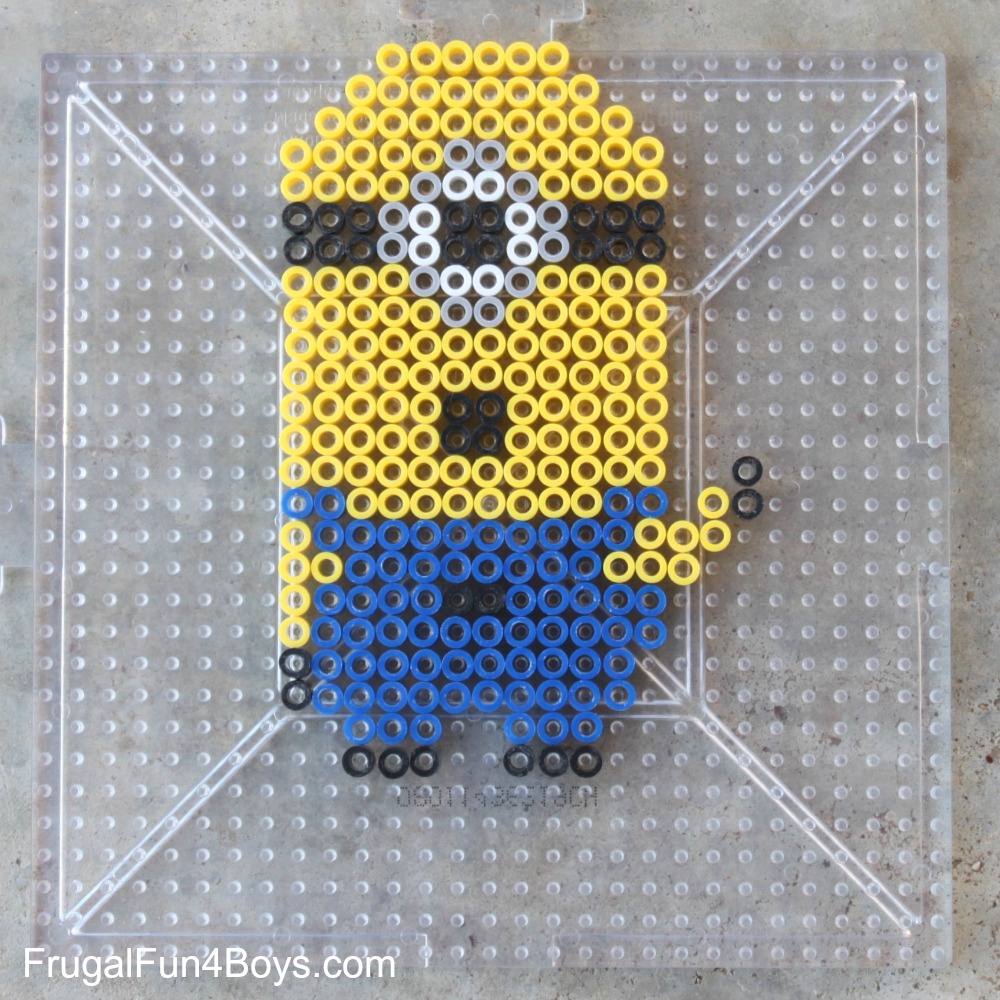
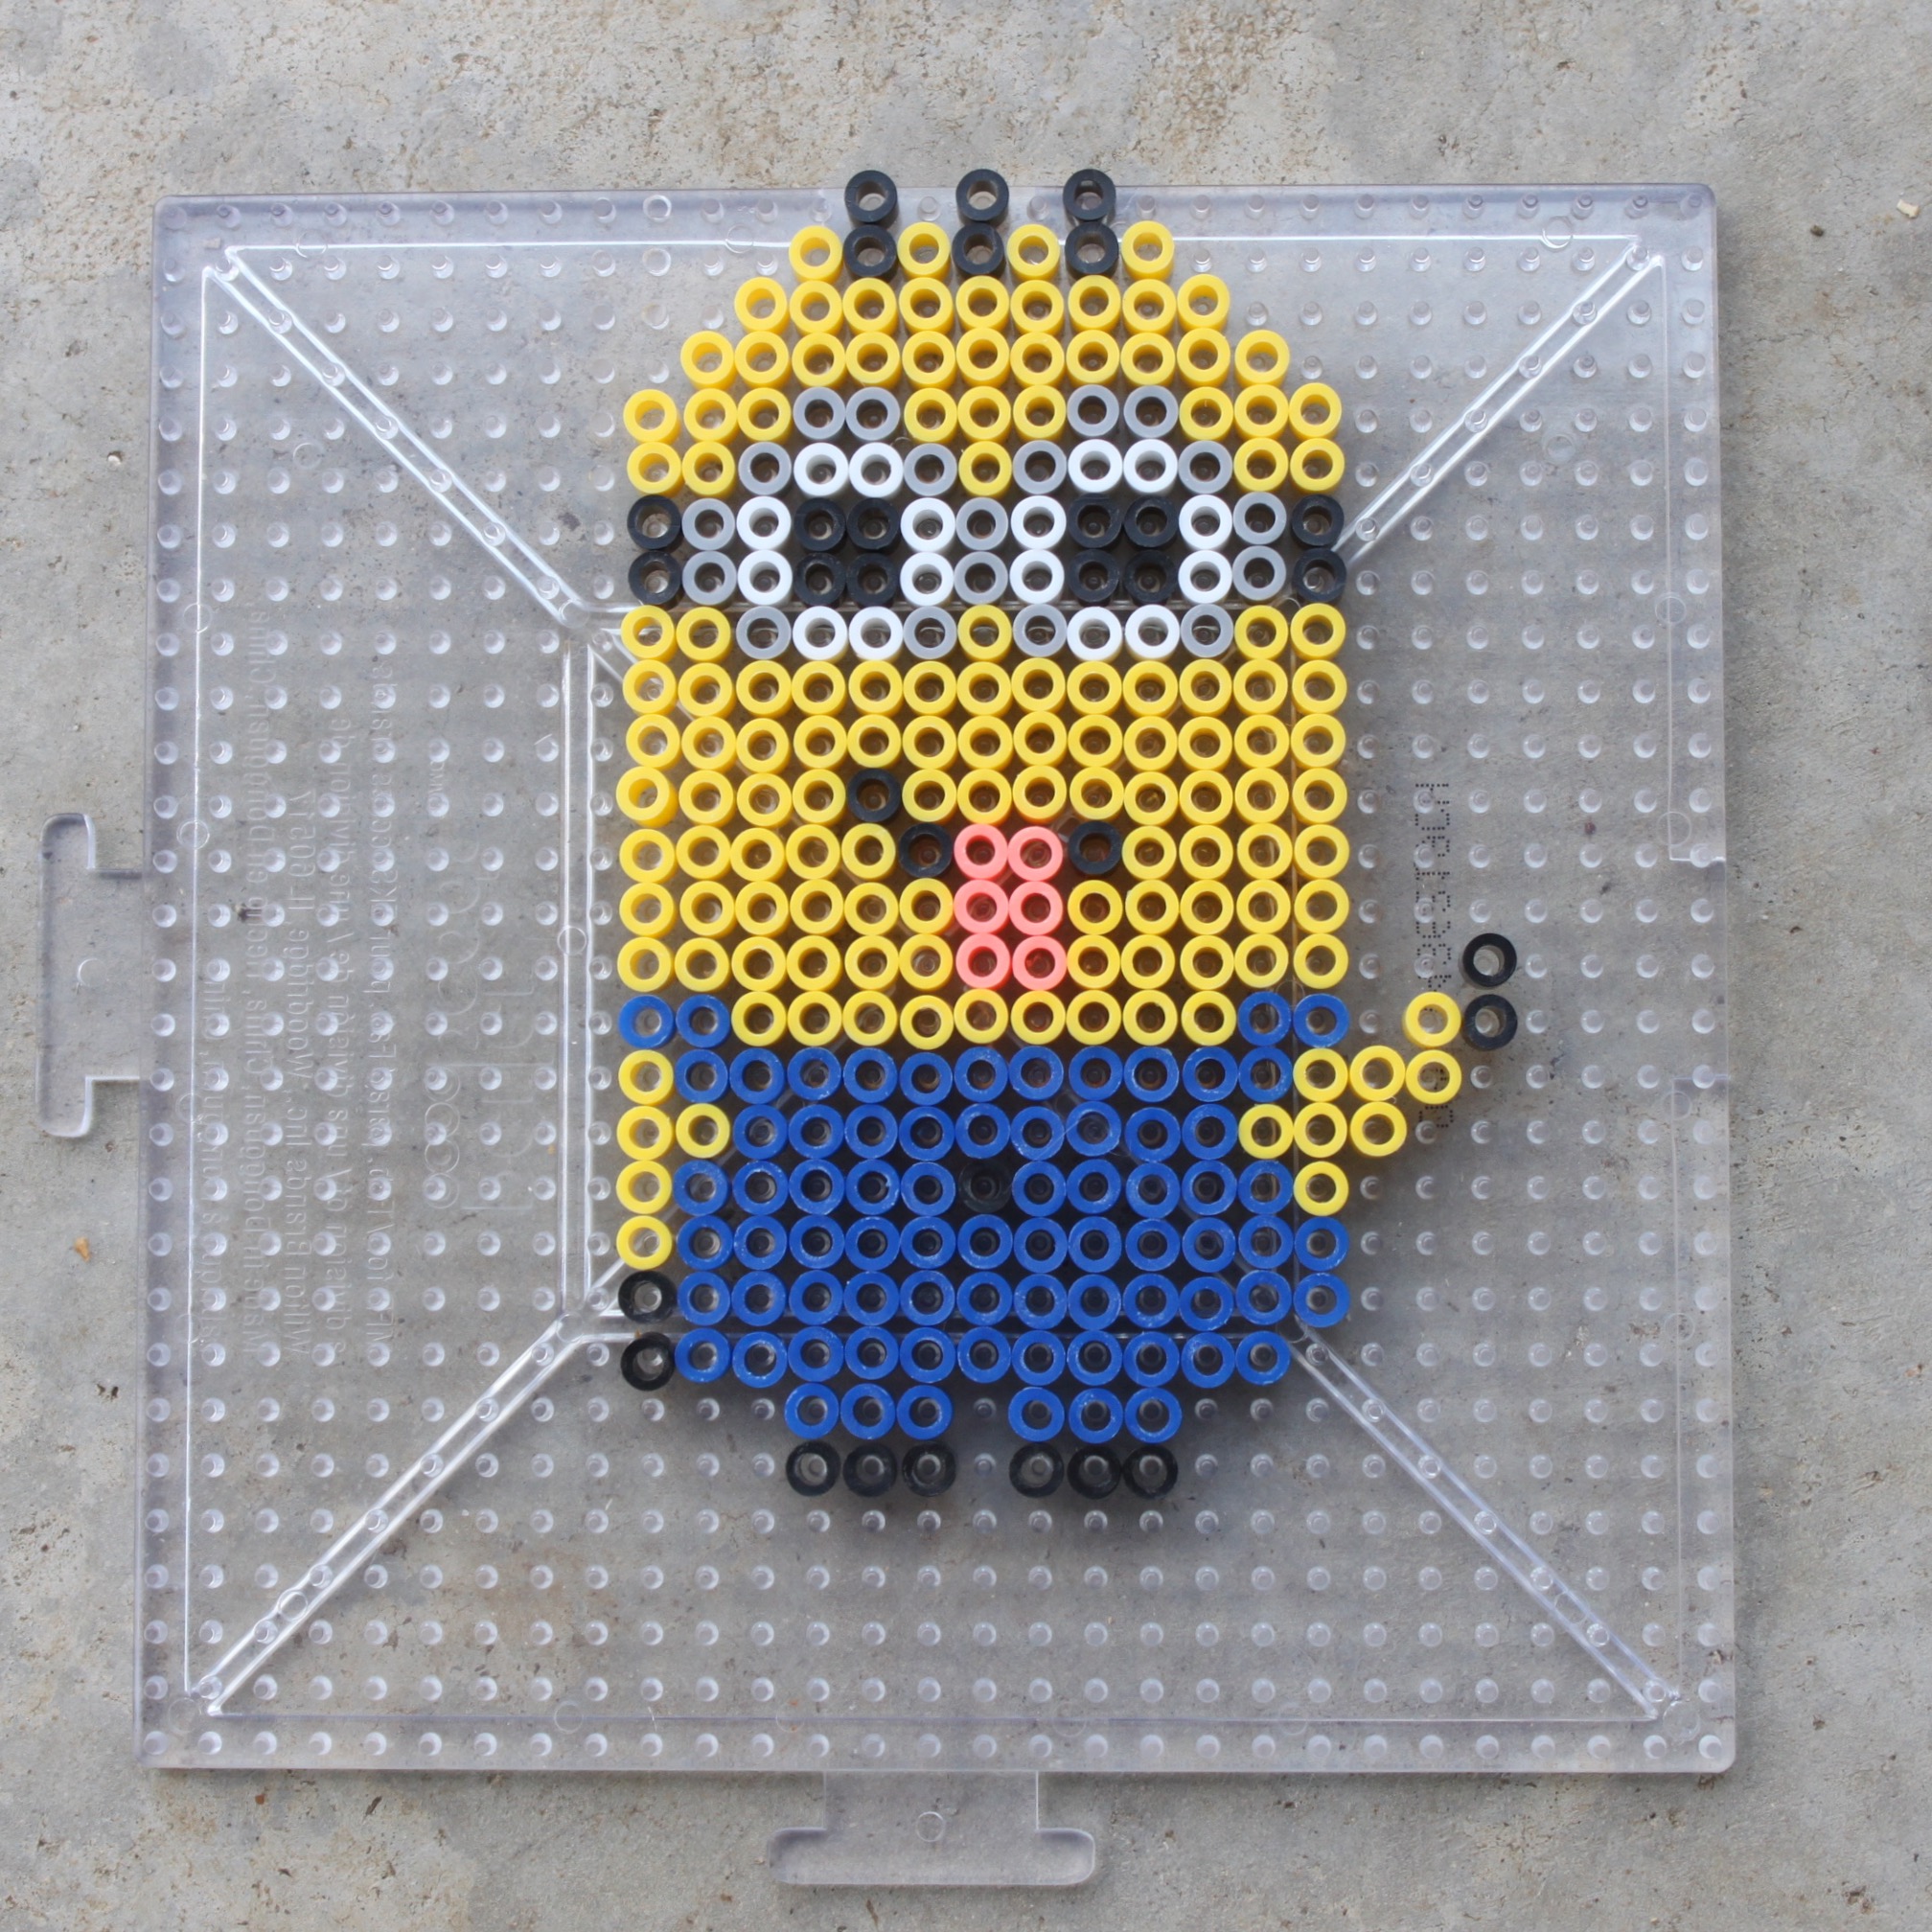
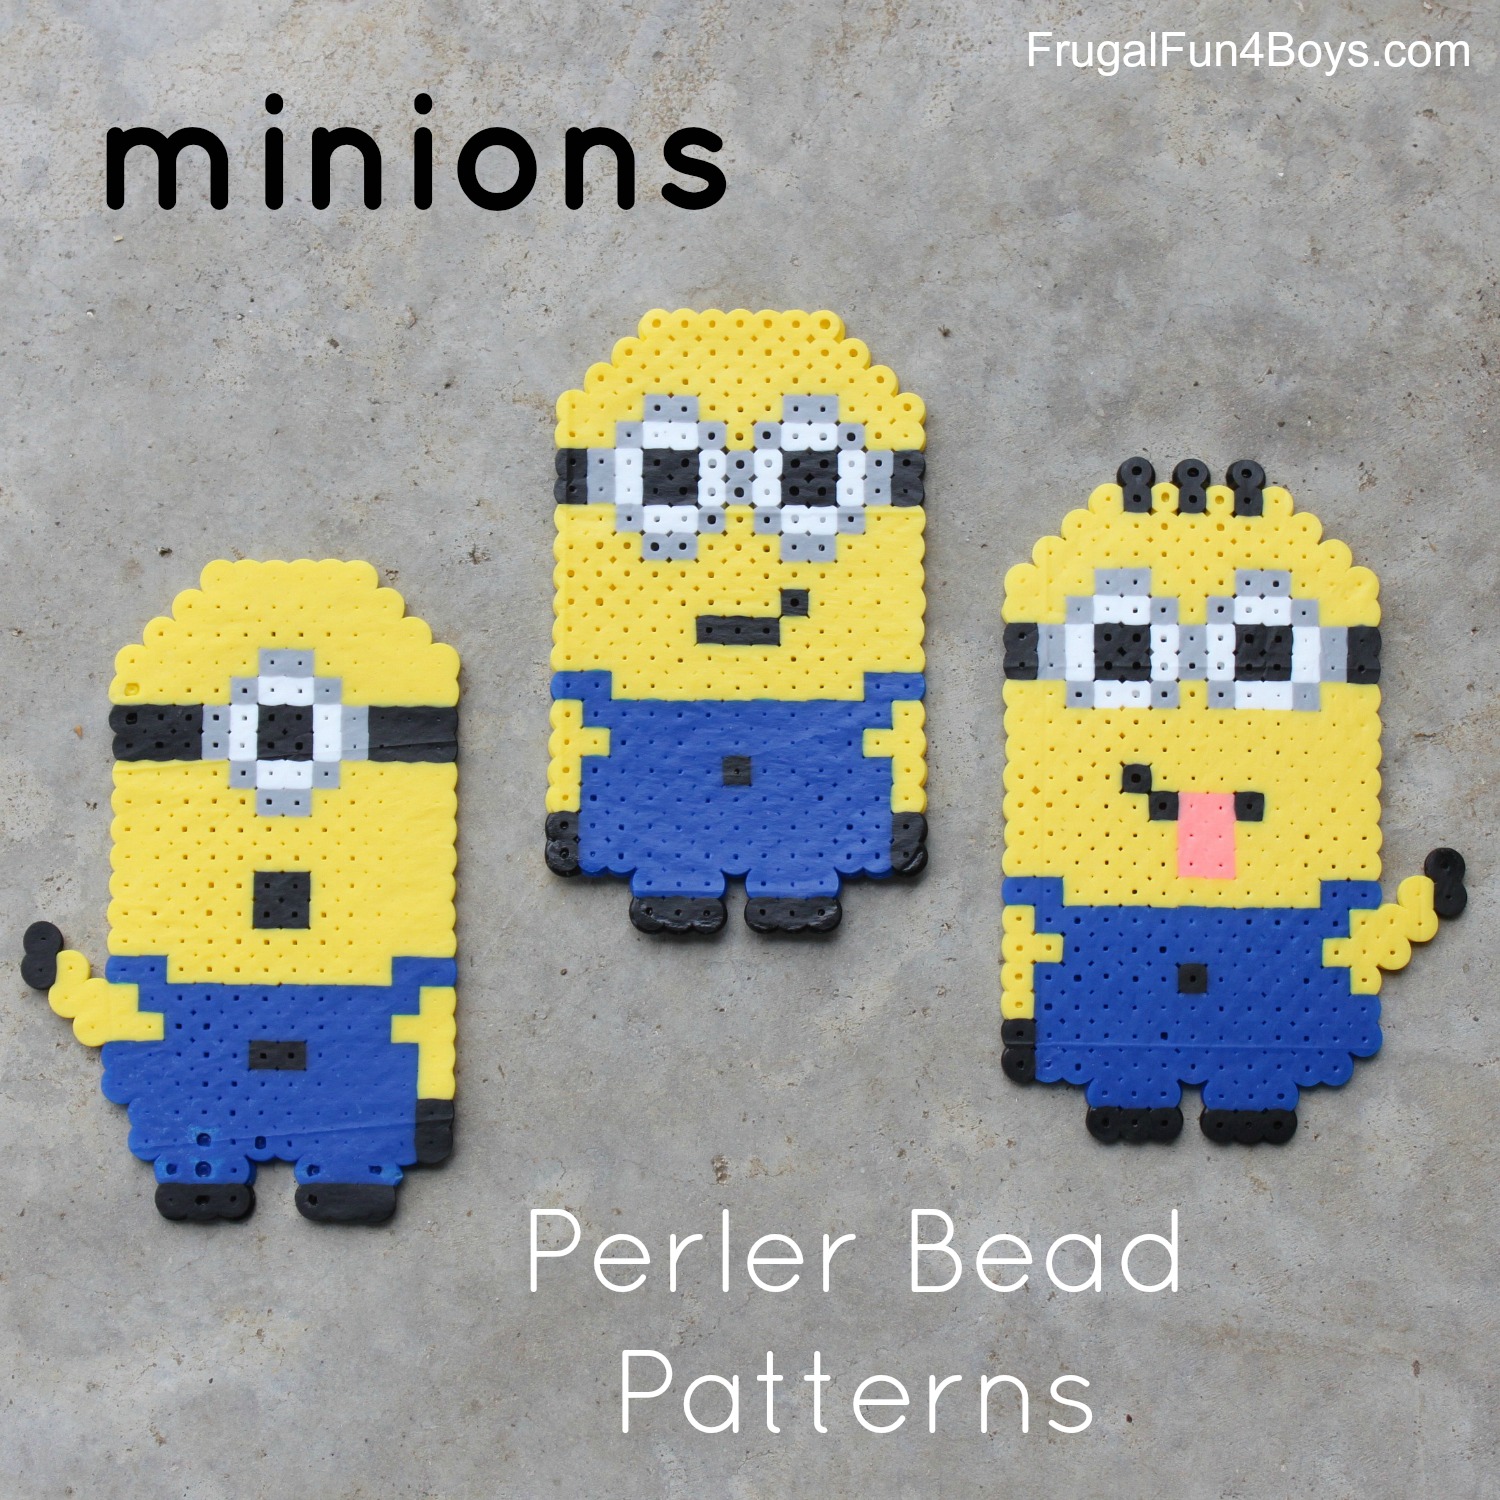
We started with this minion design and then adapted it.
I forgot to take a photo of the two-eyed minion (with no tongue), but here are the other two:
The minion below has an error! I realized that there should be two gray beads under the eye to make the bottom of the goggles. This one was my fault! (But it took me a couple days to notice, and the boys didn’t notice! I actually kind of like this shape for the eyes…)
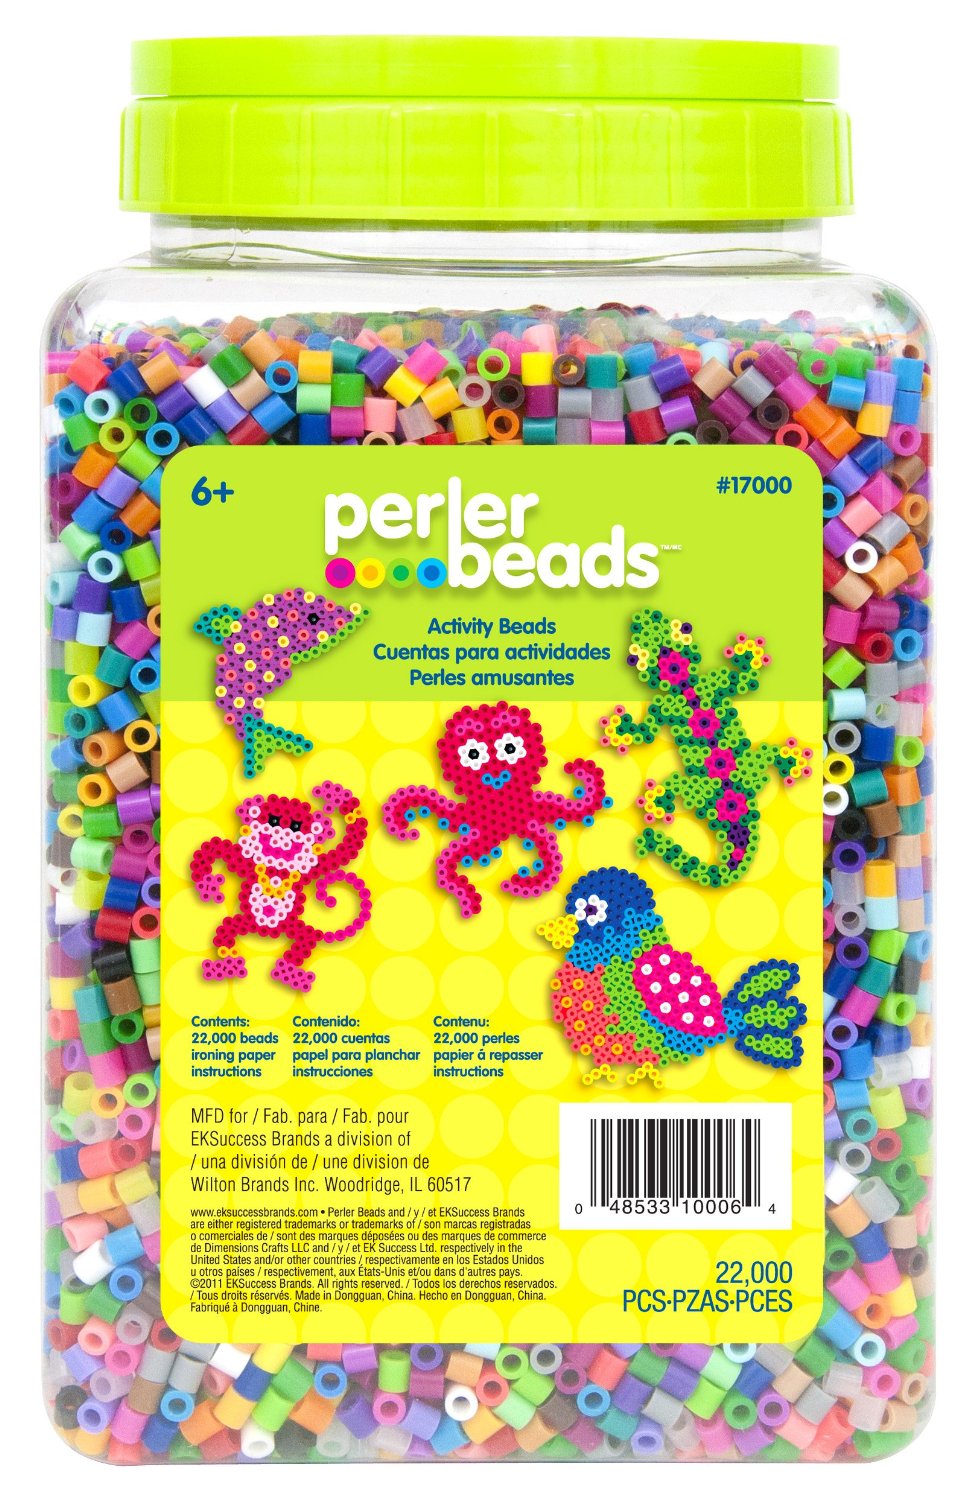
We bought a large tub of Perler beads at Hobby Lobby with a 40% off coupon. That was a great way to get started, but we quickly ran out of yellow and blue.
On Amazon, you can order single color packs – here are links for yellow, black, and dark blue. If you’re going to make several minions, you’ll probably want to order a the single color packs.
If you’re just getting started and want to make a variety of crafts, this large jar of mixed colors is a good way to go. We paid $8.60 for 11,000 at Hobby Lobby (with a coupon), so this is a good price! Currently showing $14.65 for 22,000.
For reference, we made three minions with the 11,000 bead jar and then ran out of blue and yellow.
In addition to the beads, you’ll also need base plates to build on. We used these square base plates.
It says on the package that you can connect the base plates to make large designs, and you can… But I ran into trouble trying to iron large designs! Aidan made a large Avengers logo on 4 plates, and parts of it simply refused to melt. I had trouble getting all the plates to sit flat on the ironing board. *IF* we try it again, I might put towels down on our kitchen island and iron on top of that.
Have fun crafting! We’ll be back later this week with more boy-approved Perler bead designs!
2 Comments
Tina Wallace Nov 29, 2018
Where is the pattern
San Feb 5, 2020
I was reading how you had difficulty melting the larger ones. I have seen in other places that if you first cover the beads with masking tape, you can turn it out onto cardboard, then iron it. I would think that when you turn it back over, you remove the tape before ironing. Happy Perling!
Post a Comment