
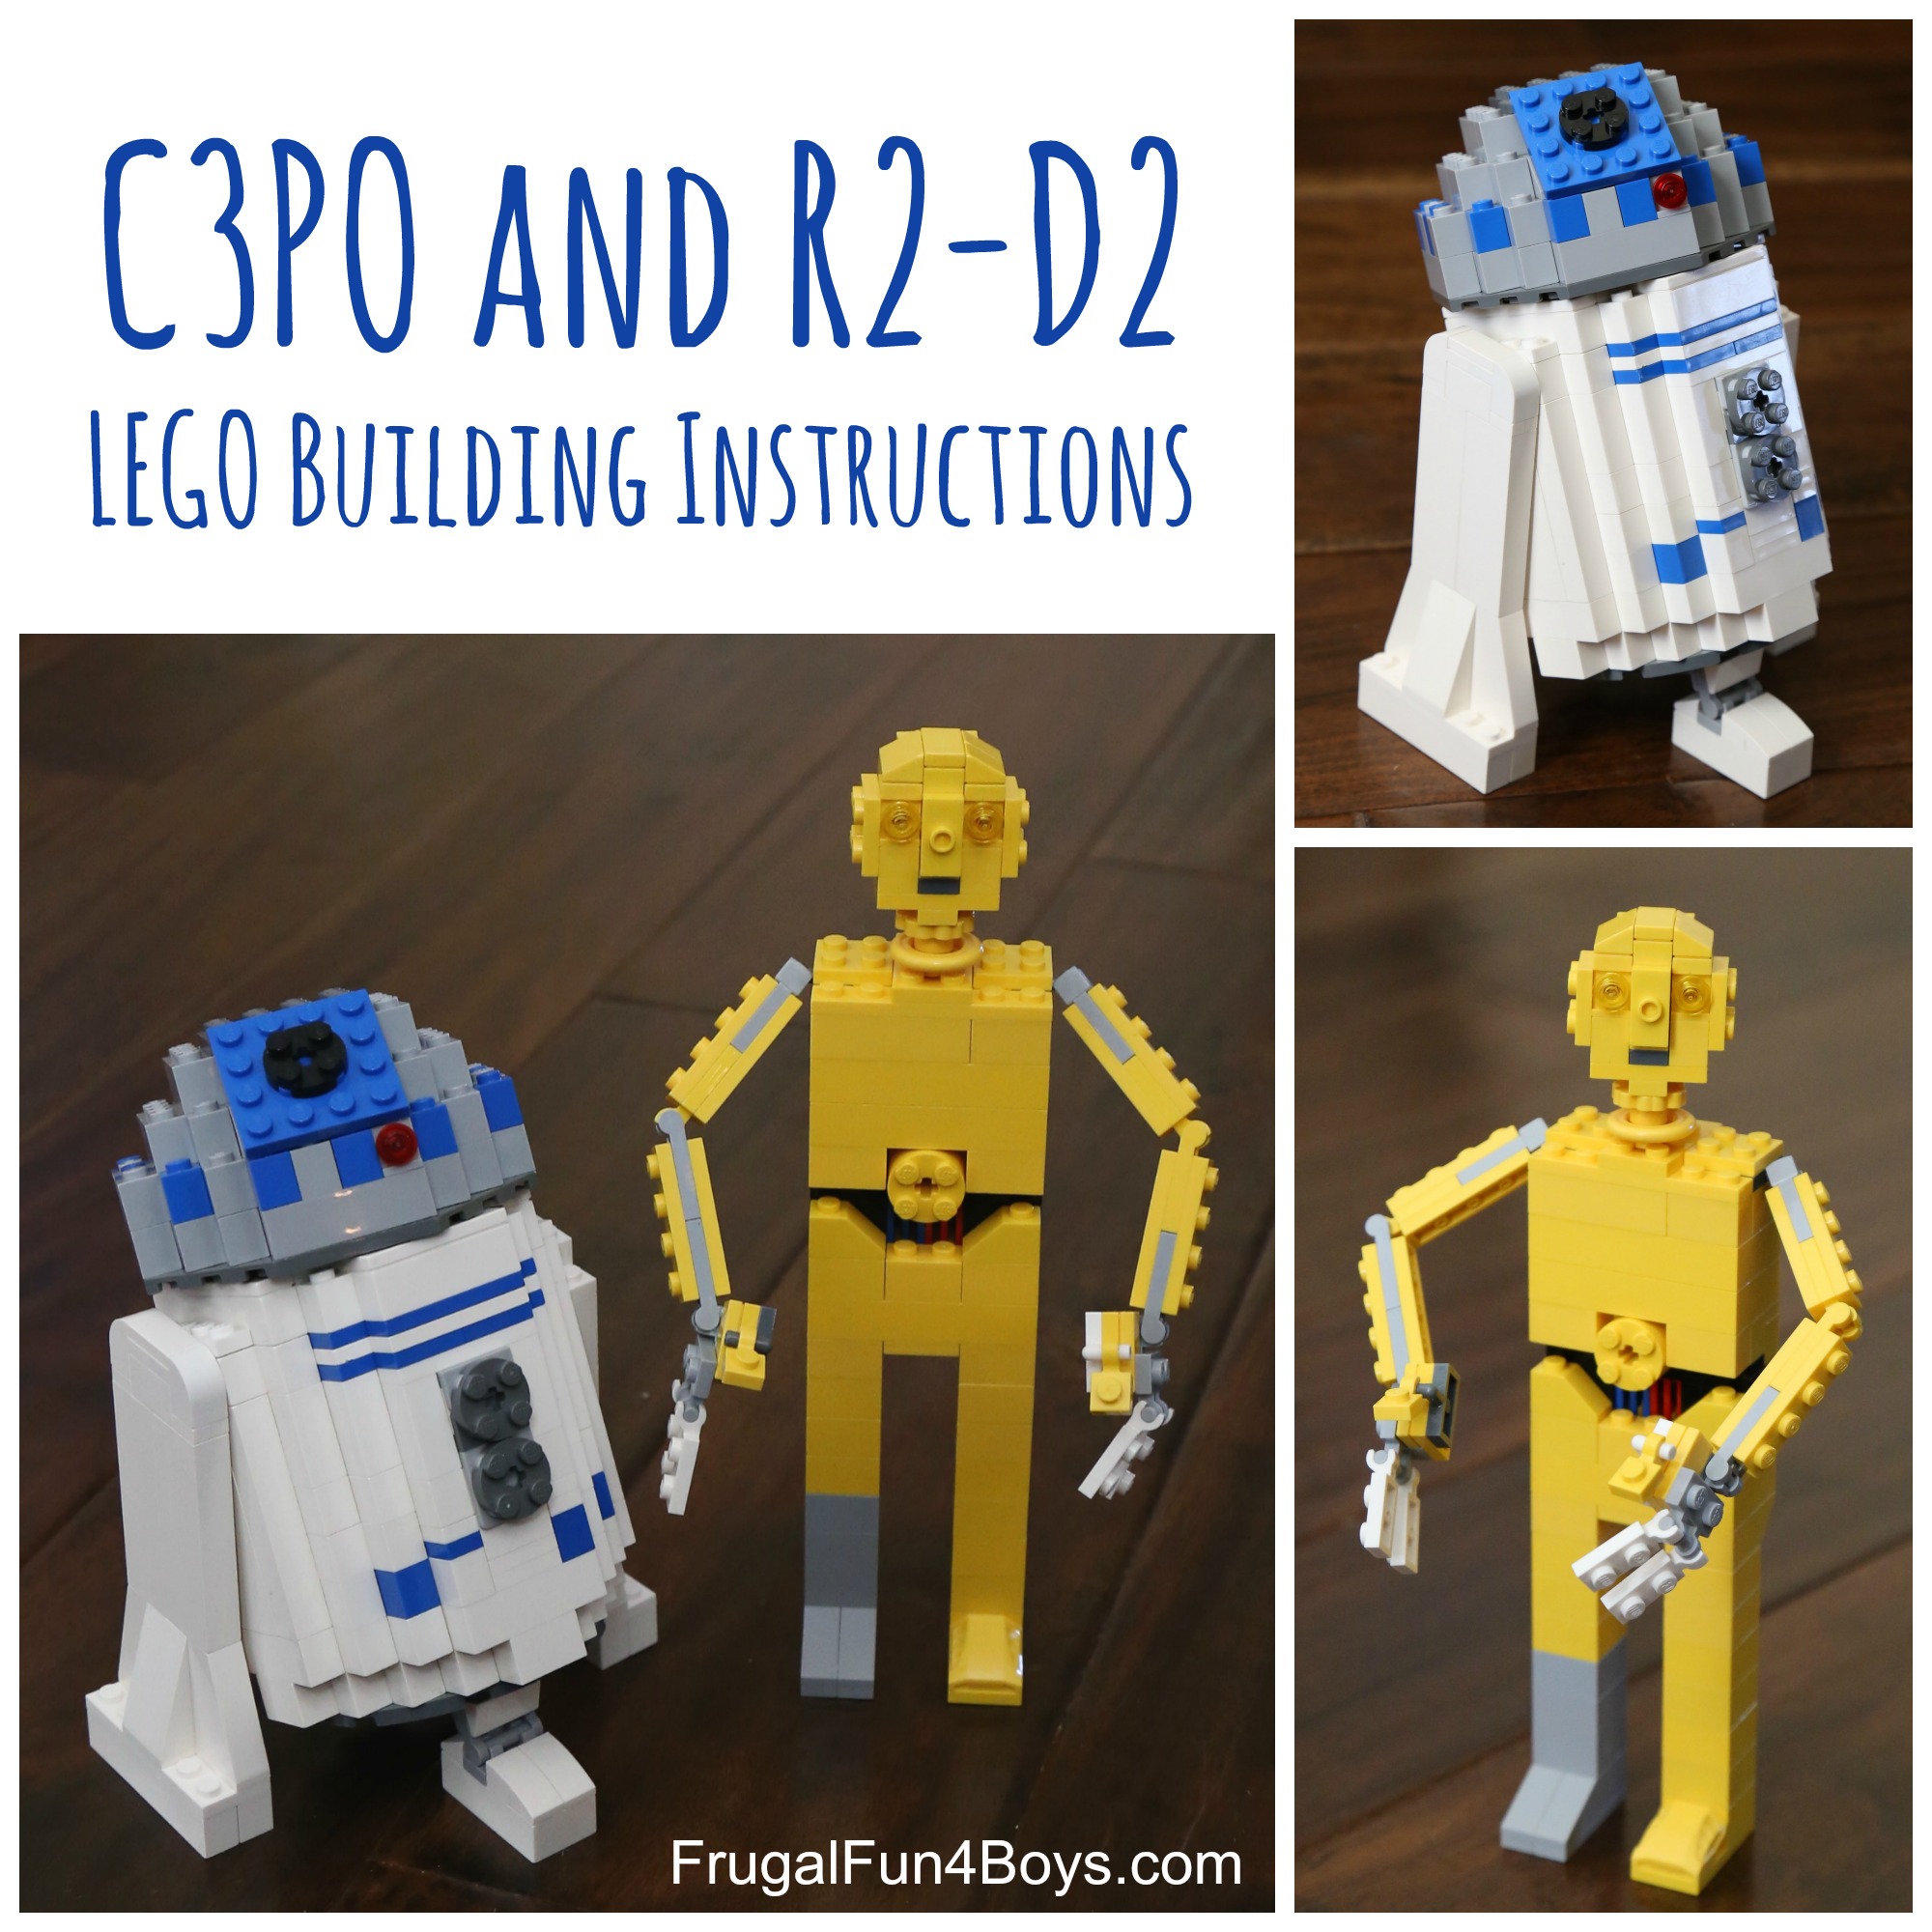
The other day we posted instructions for making a LEGO® R2-D2, and I said that Aidan was working on a C3Po design. Well, he managed to come up with one!
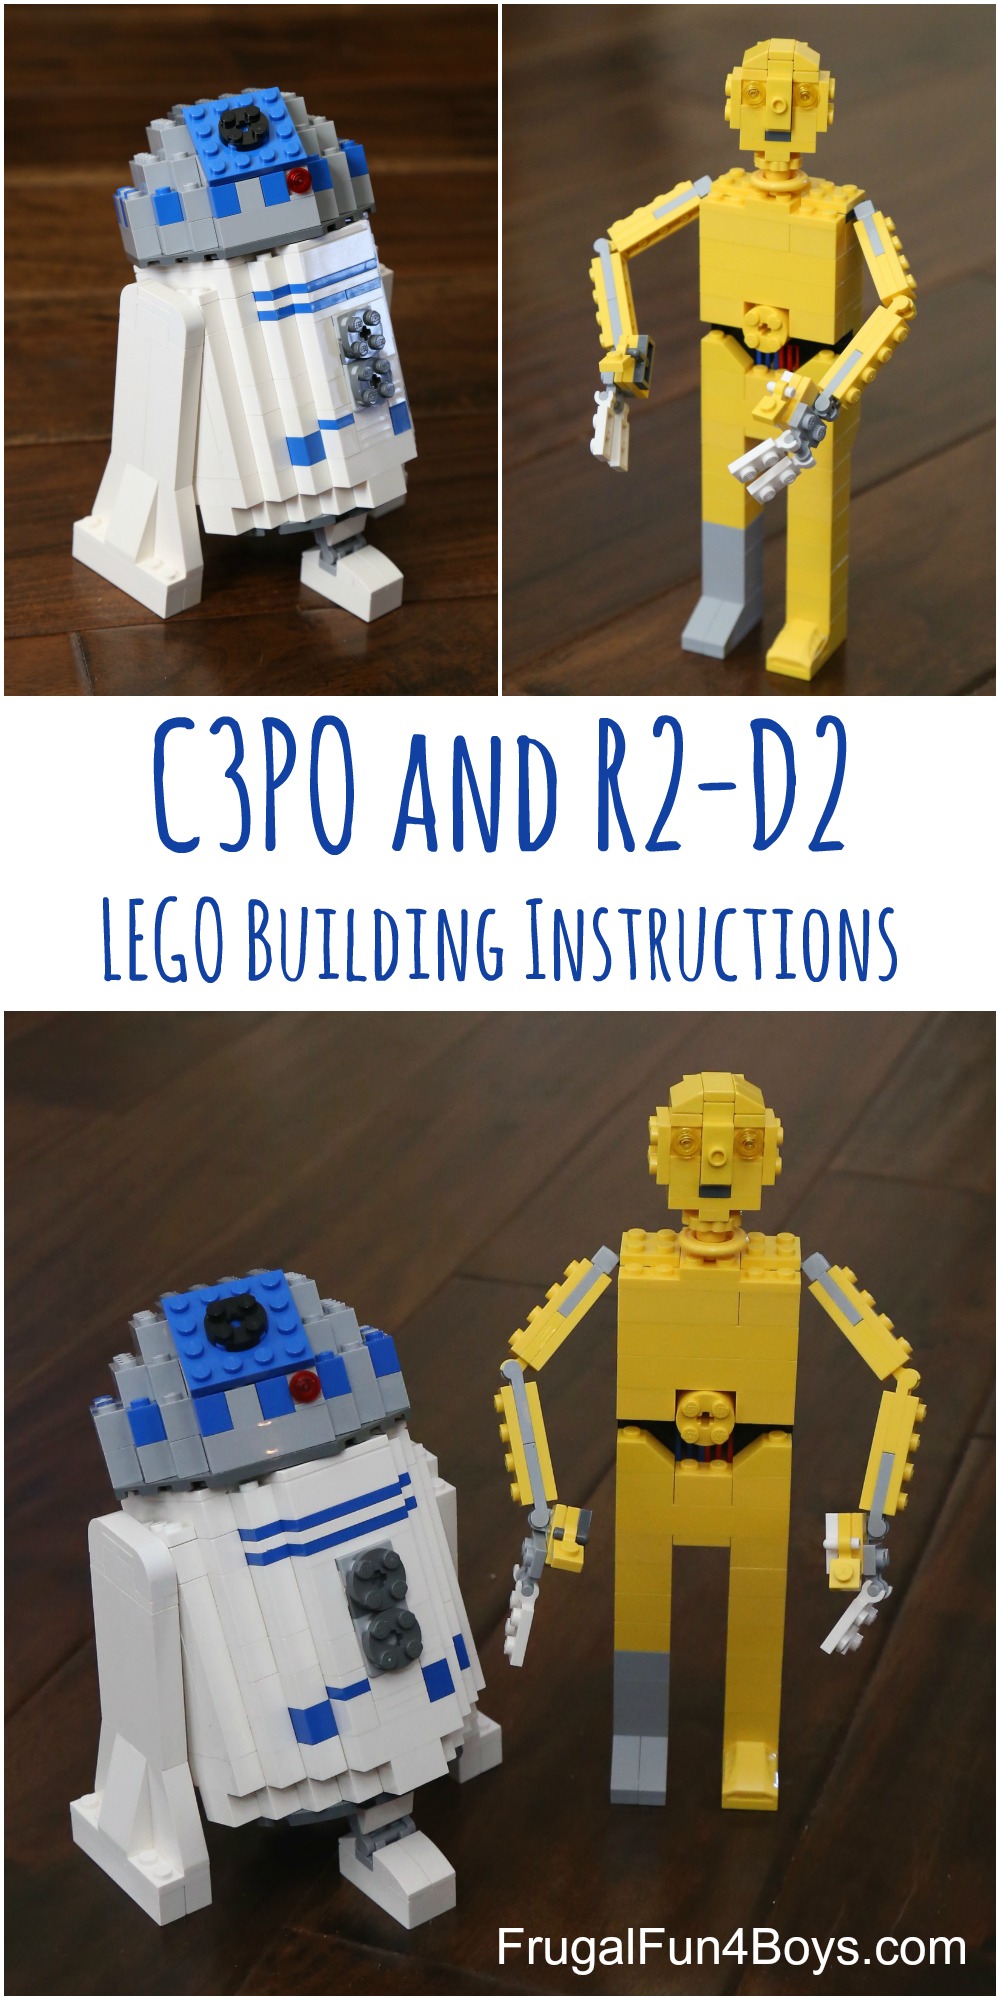
This C3PO is not the right scale compared to the R2-D2, but it was the closest we could get with the amount of yellow pieces that we have. And considering that we have a fairly large LEGO® collection, we didn’t want to go bigger and make this project unattainable for most kids’ LEGO® collections. Hopefully this C3PO will be a fun project to build!

“We’re doomed!” 🙂

You can see how to build the R2-D2 here: R2-D2 Building Instructions
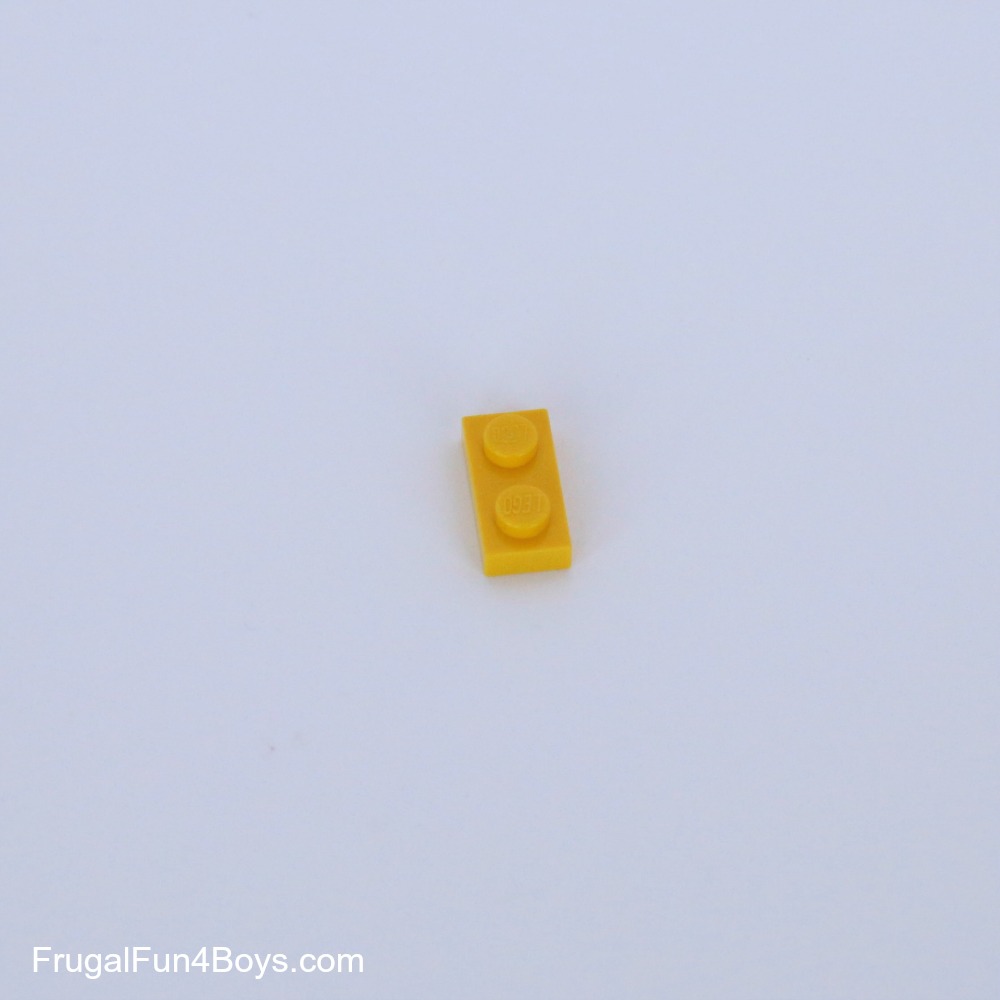
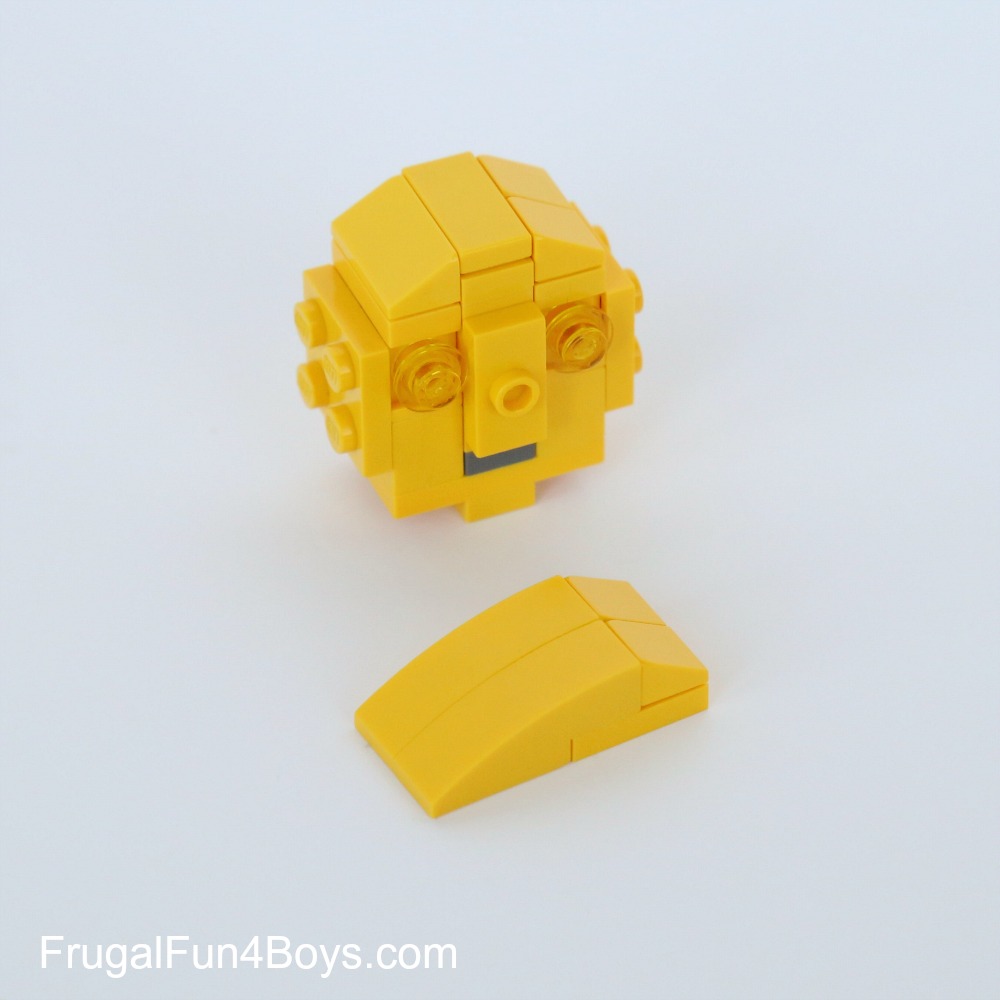
Step 1: Build the head. Start with a 1 x 2 yellow plate.
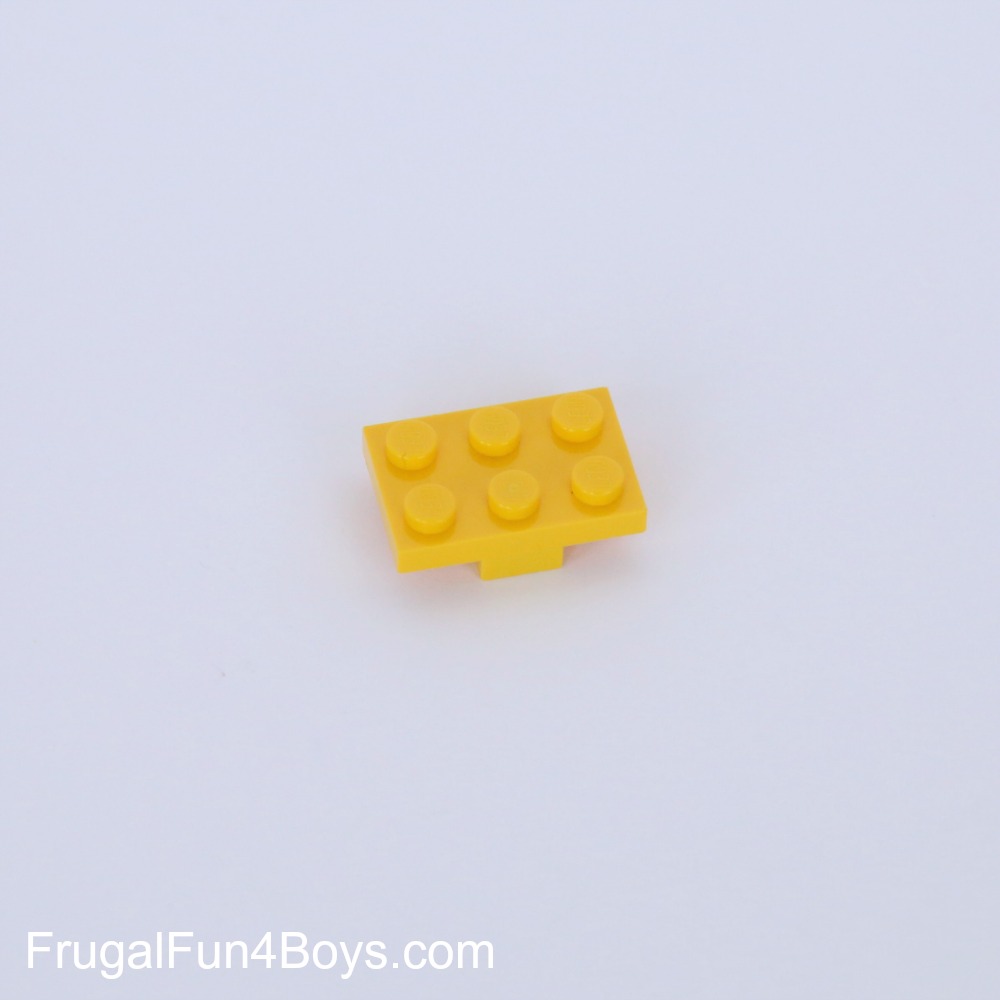
Step 2: Attach a 2 x 3 yellow plate so that it is centered.
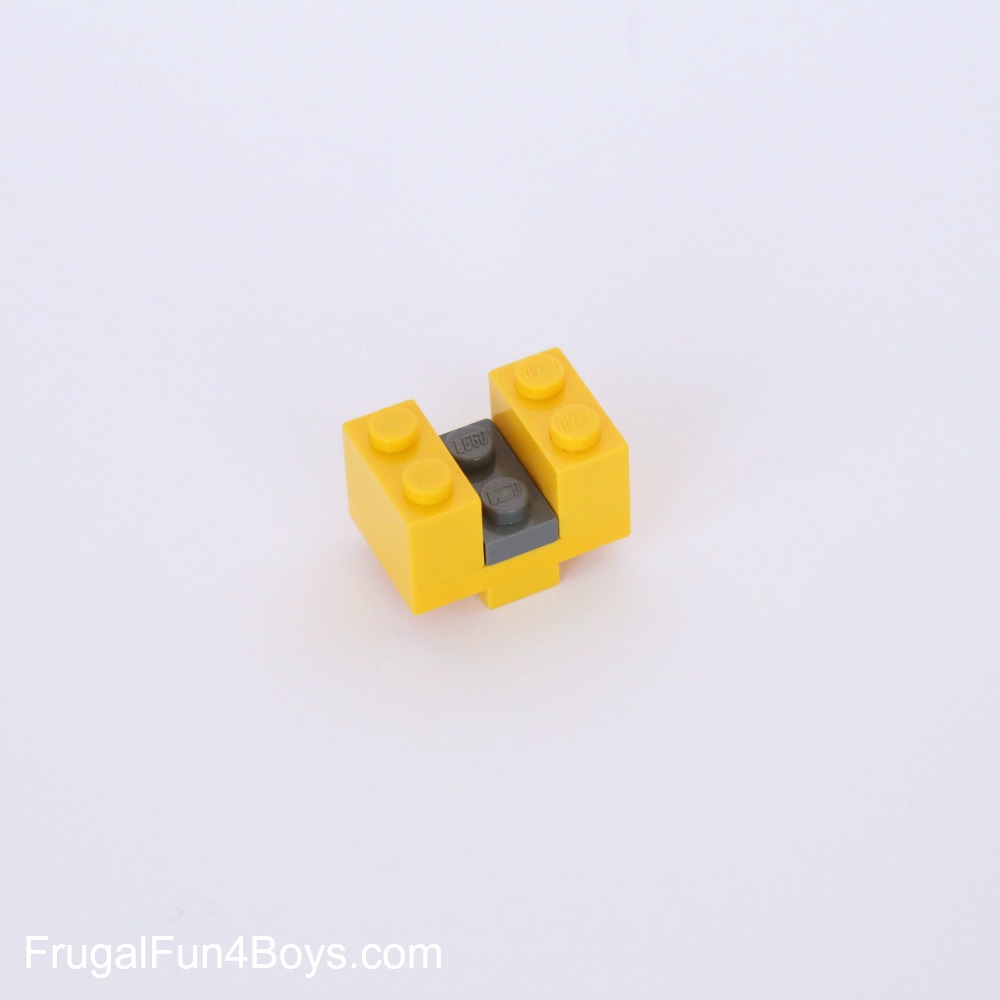
Step 3: Add two 1 x 2 yellow bricks and a 1 x 2 dark gray plate.
Step 4: There are 6 bricks added in this step, plus the eyes. Add a 1 x 1 with a stud on the front on top of the gray piece. Add a 1 x 1 brick behind that. Add two 1 x 1 bricks to hold the eyes. These can either be headlights or 1 x 1 bricks with a stud on the side. Add two 1 x 1 bricks with a stud on the side behind those, and the studs should face the sides of the head.
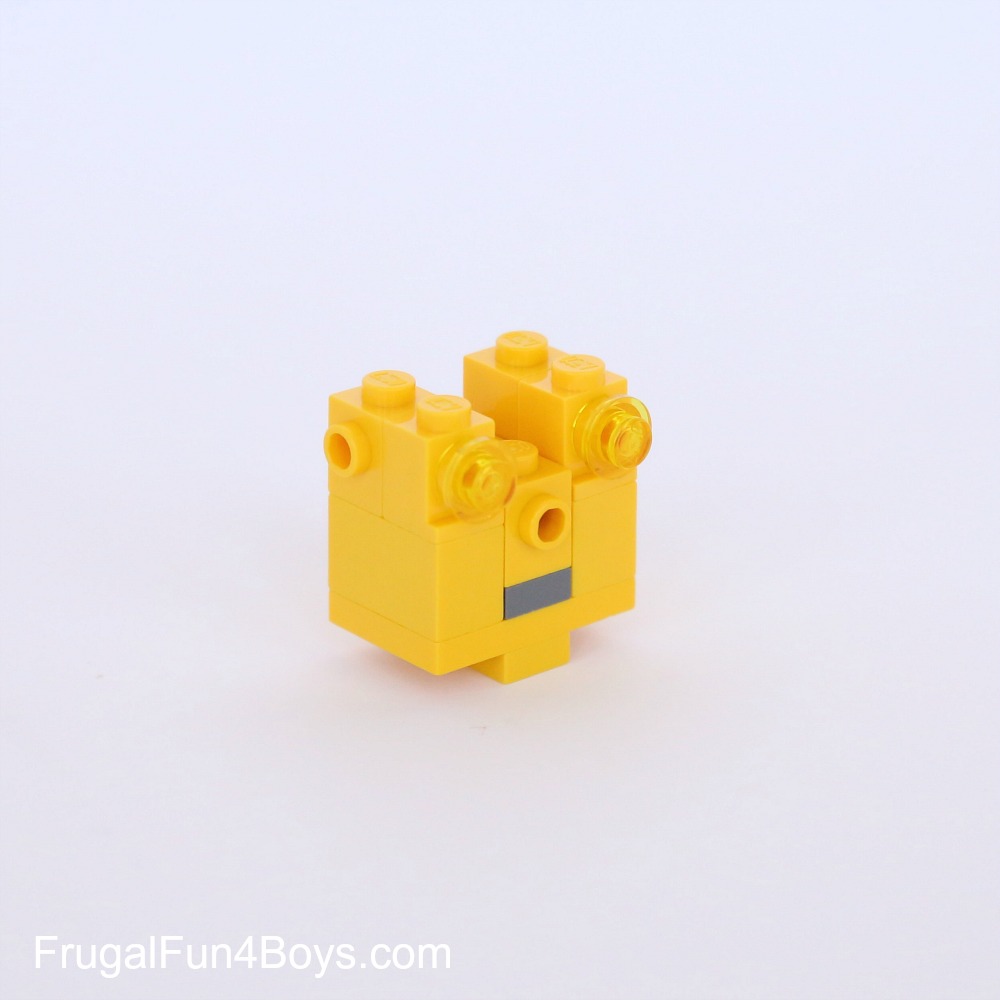
Step 5: Add a 1 x 1 brick and a 1 x 1 brick with a stud on the side, both between the eyes.

The brick with the stud on the side has the stud facing the back of the head.
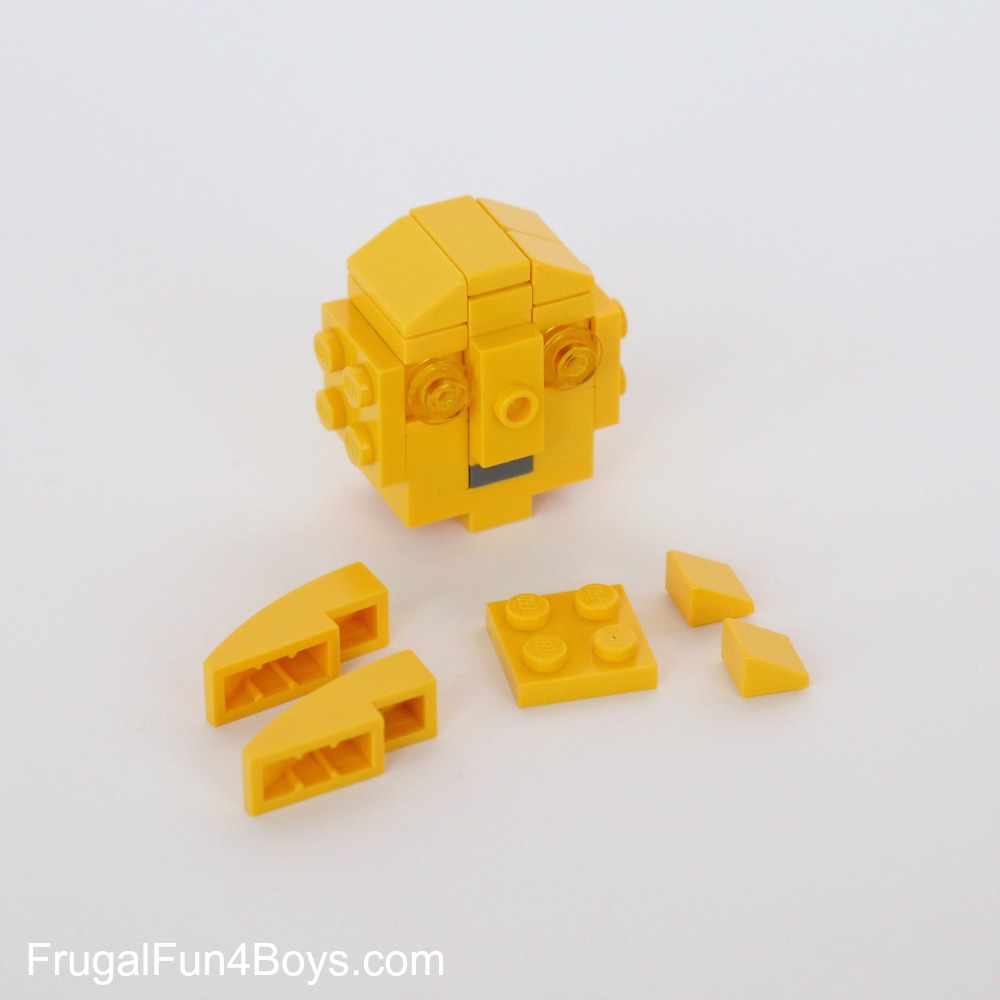
Step 6: Use the bricks shown in step 5 to complete the top of the head.
Step 7: Place two 2 x 2 plates on the sides of the head, and add a 1 x 2 plate with one stud on top for the nose.

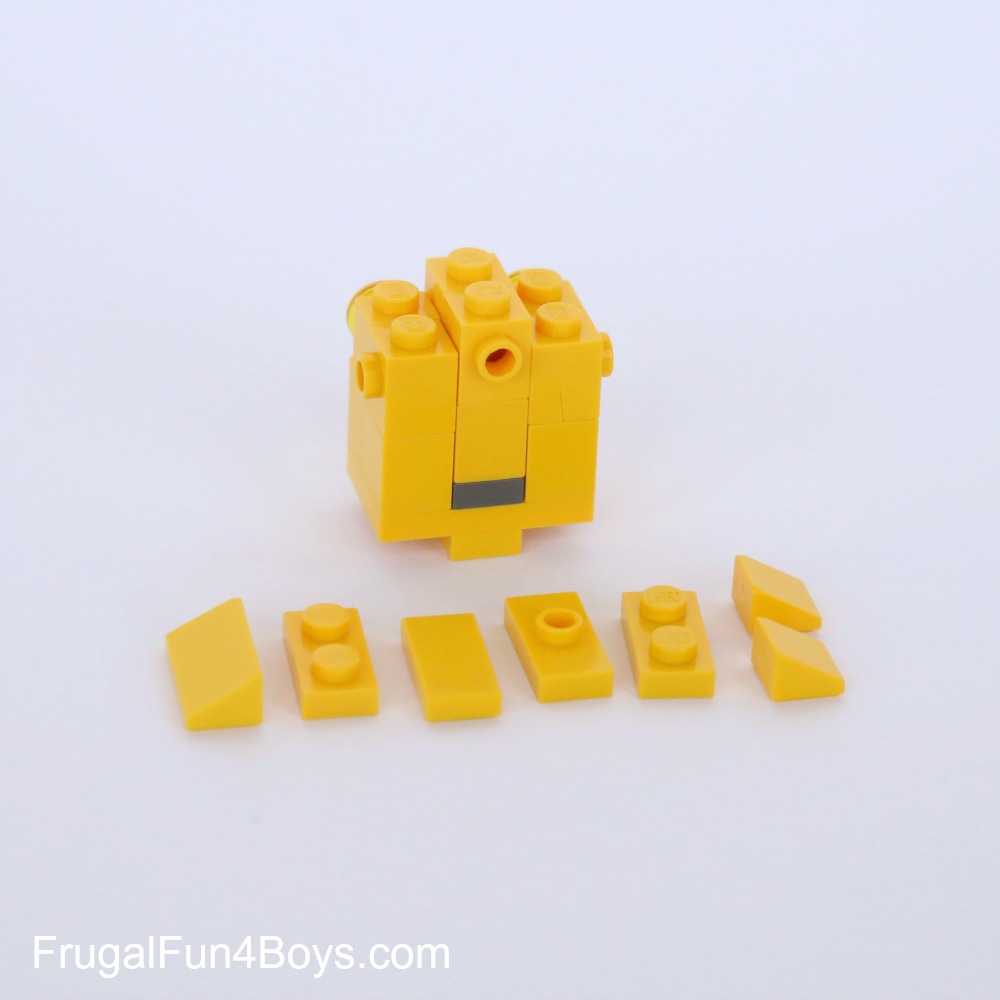
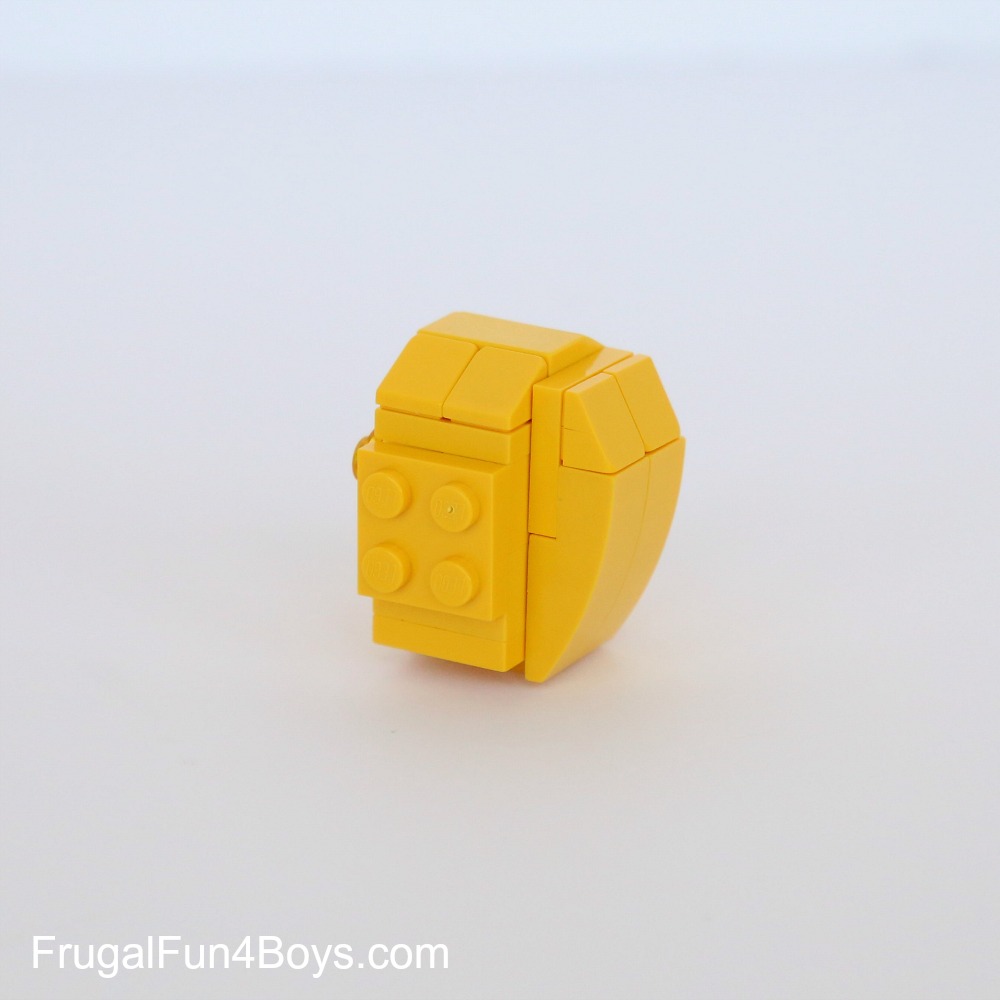
Step 8: Gather the bricks shown for the back of the head.
Step 9: Assemble them as shown.
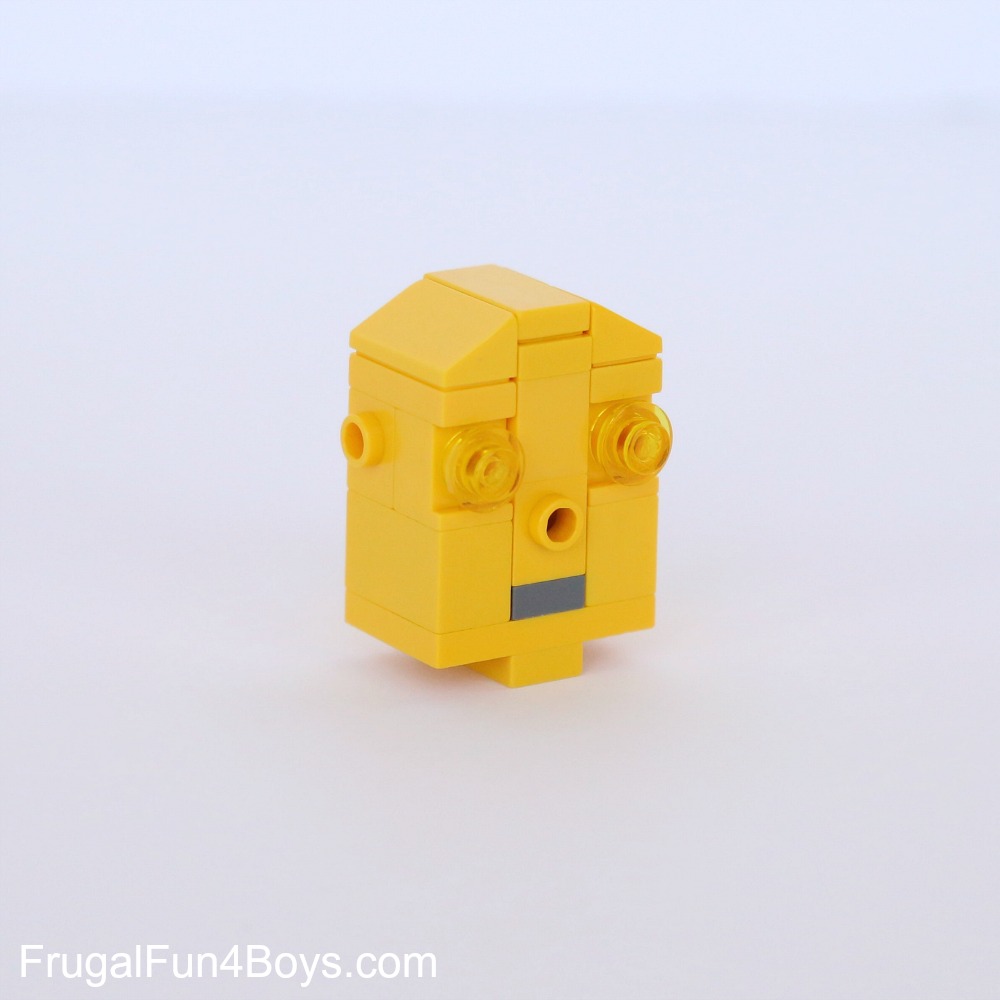
Step 10: Attach this to the back of the head with the one stud that faces out (on the back of the head).
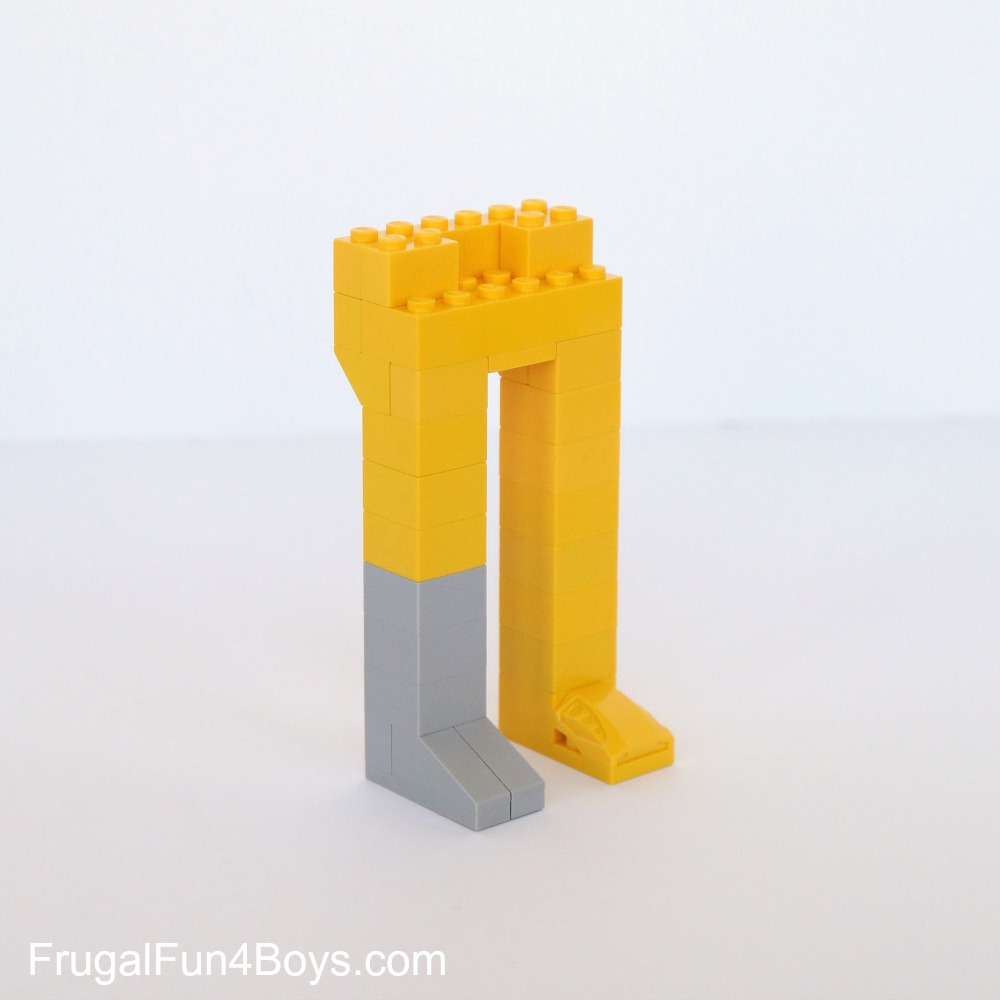
Step 11: Build the legs and feet. The base of the torso should be 3 studs deep.
Step 12: Gather the pieces shown for C3PO’s waist. The 1 x 2 black brick shown below has two studs on the side.

Step 13: Add a 2 x 2 brick on each side of the body and a 1 x 2 with two studs on the side in the middle.
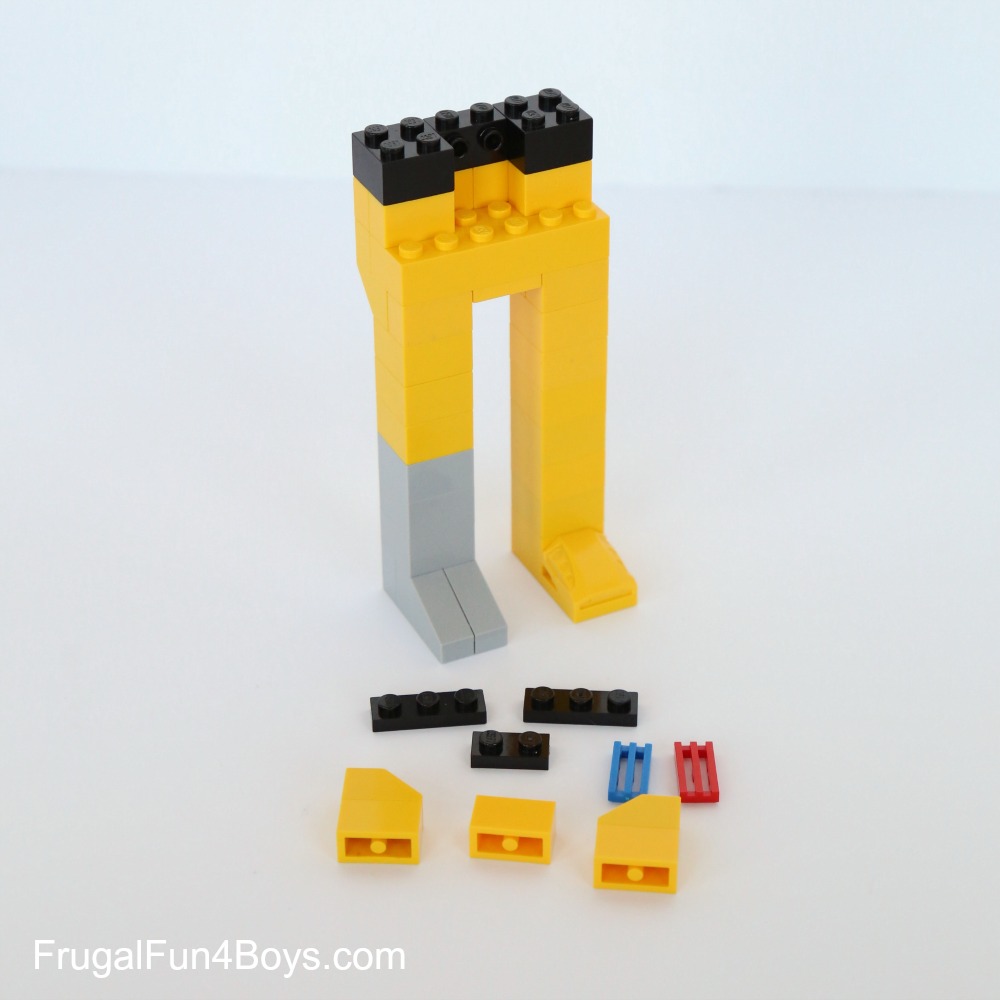
Step 14: Attach the 1 x 2 black plate (shown above) to the 1 x 2 brick with two studs on the side. Then attach the blue and red grill pieces. These will be the wires in C3PO’s body.
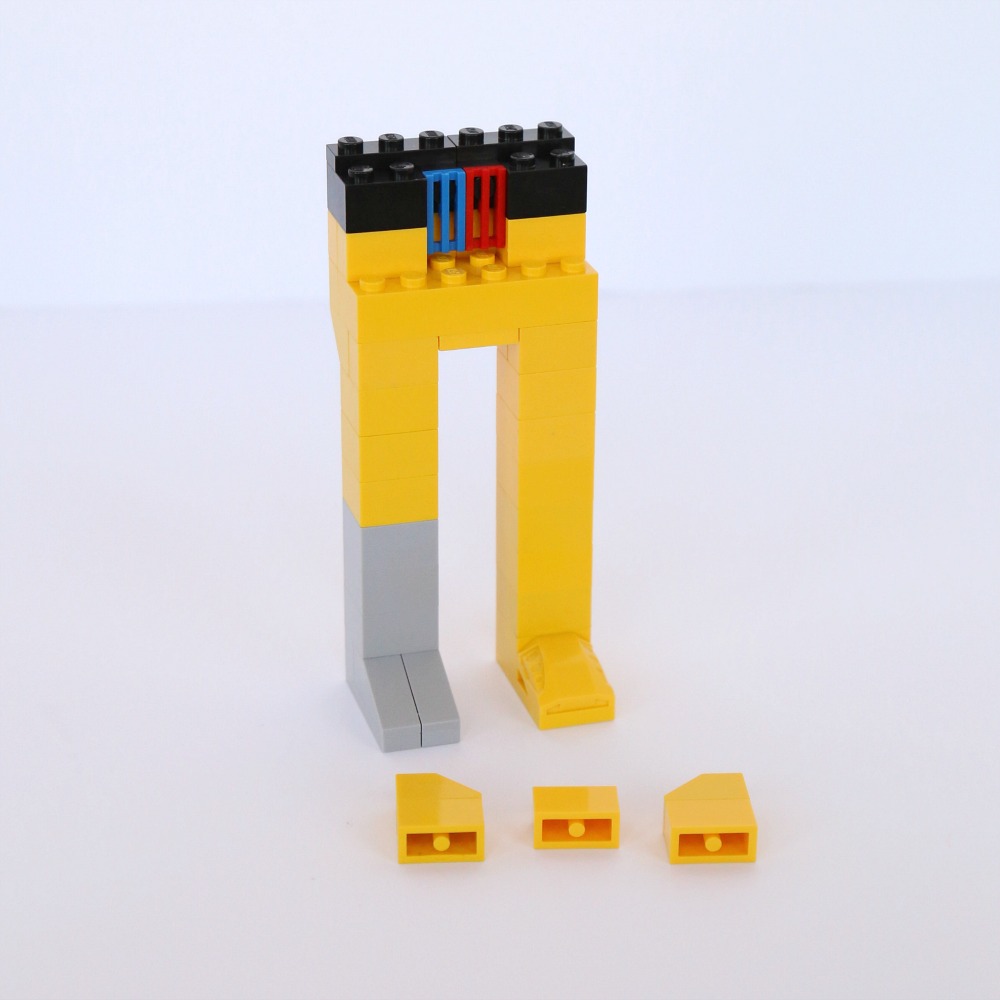
Step 15: Add yellow bricks in front of the waist as shown. Place a row of black plates (we used two 1 x 3 plates) on the body.
Step 16: Add two layers of black plates to the front of the torso. Then add two 1 x 2 bricks and two 1 x 1 bricks with a stud on the side. Add bricks to make the back row of studs match in height.
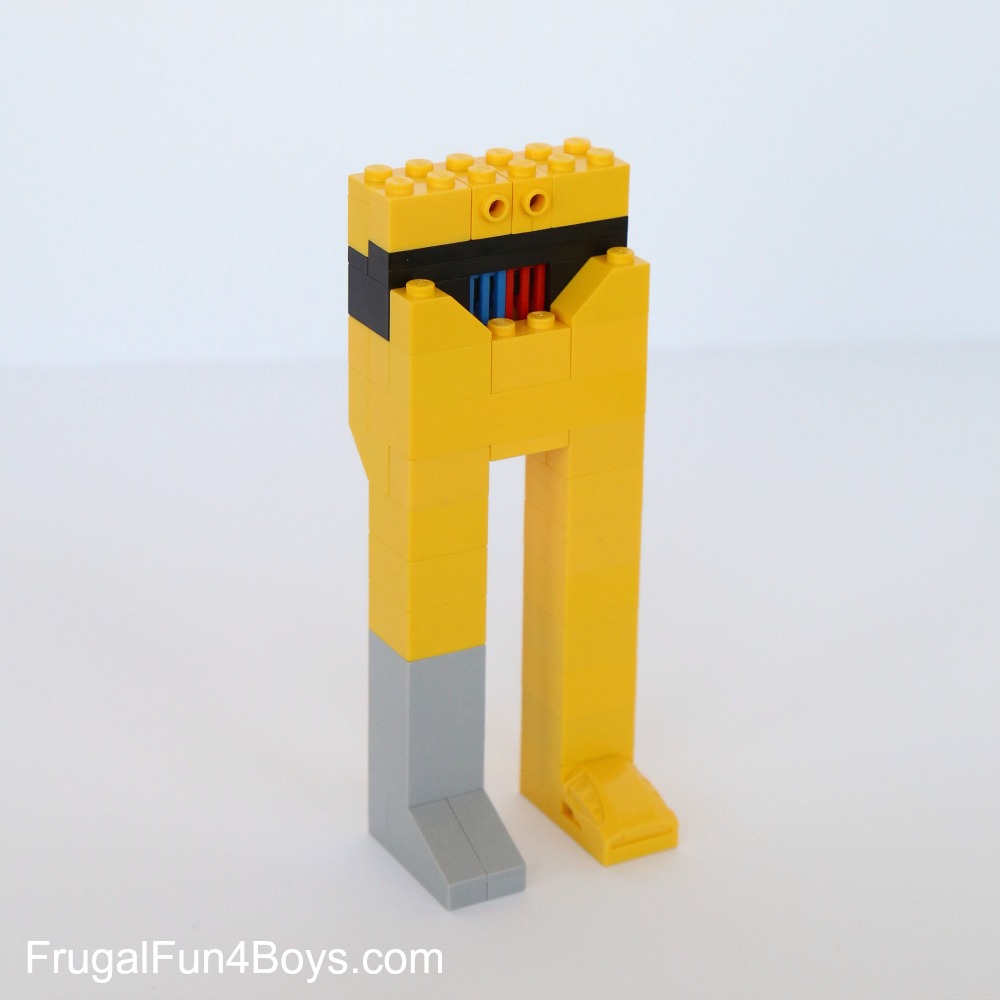

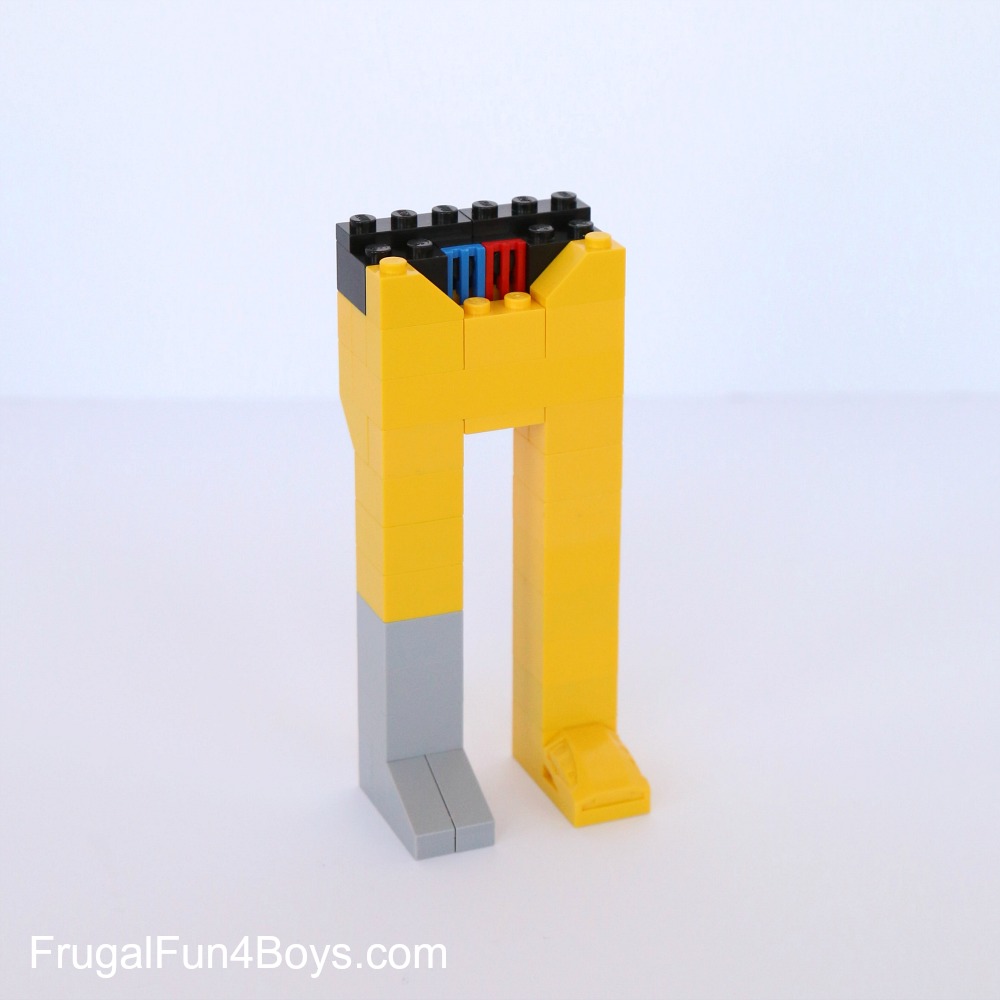
Step 17: Place a 2 x 2 round brick on the studs above the waist. Build up the body, and add two 2 x 2 plates with a ball joint on the shoulders.
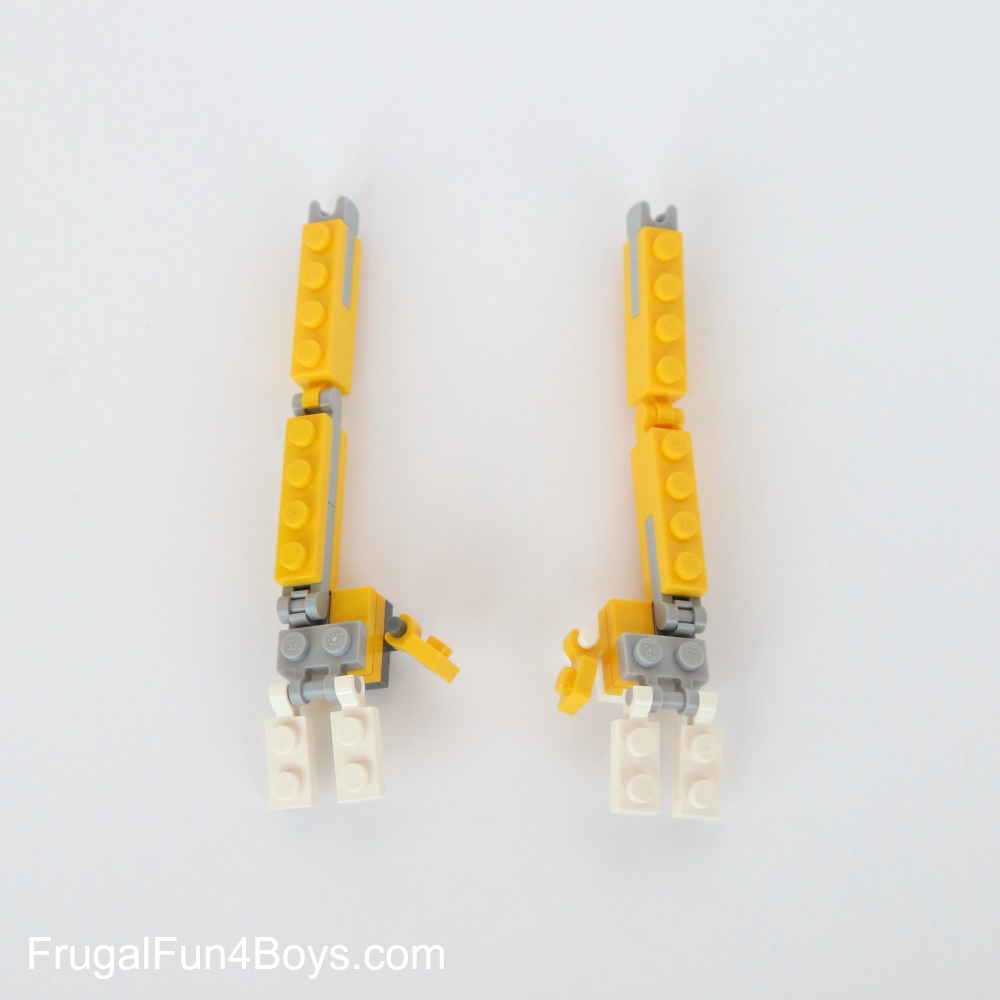
Step 18: Build the arms. Aidan used only two fingers, and ever so the hands were kind of big. The shoulders have ball sockets, and then he used clips for the rest of the moving parts.
Assemble all the parts, and C3PO is ready to go!
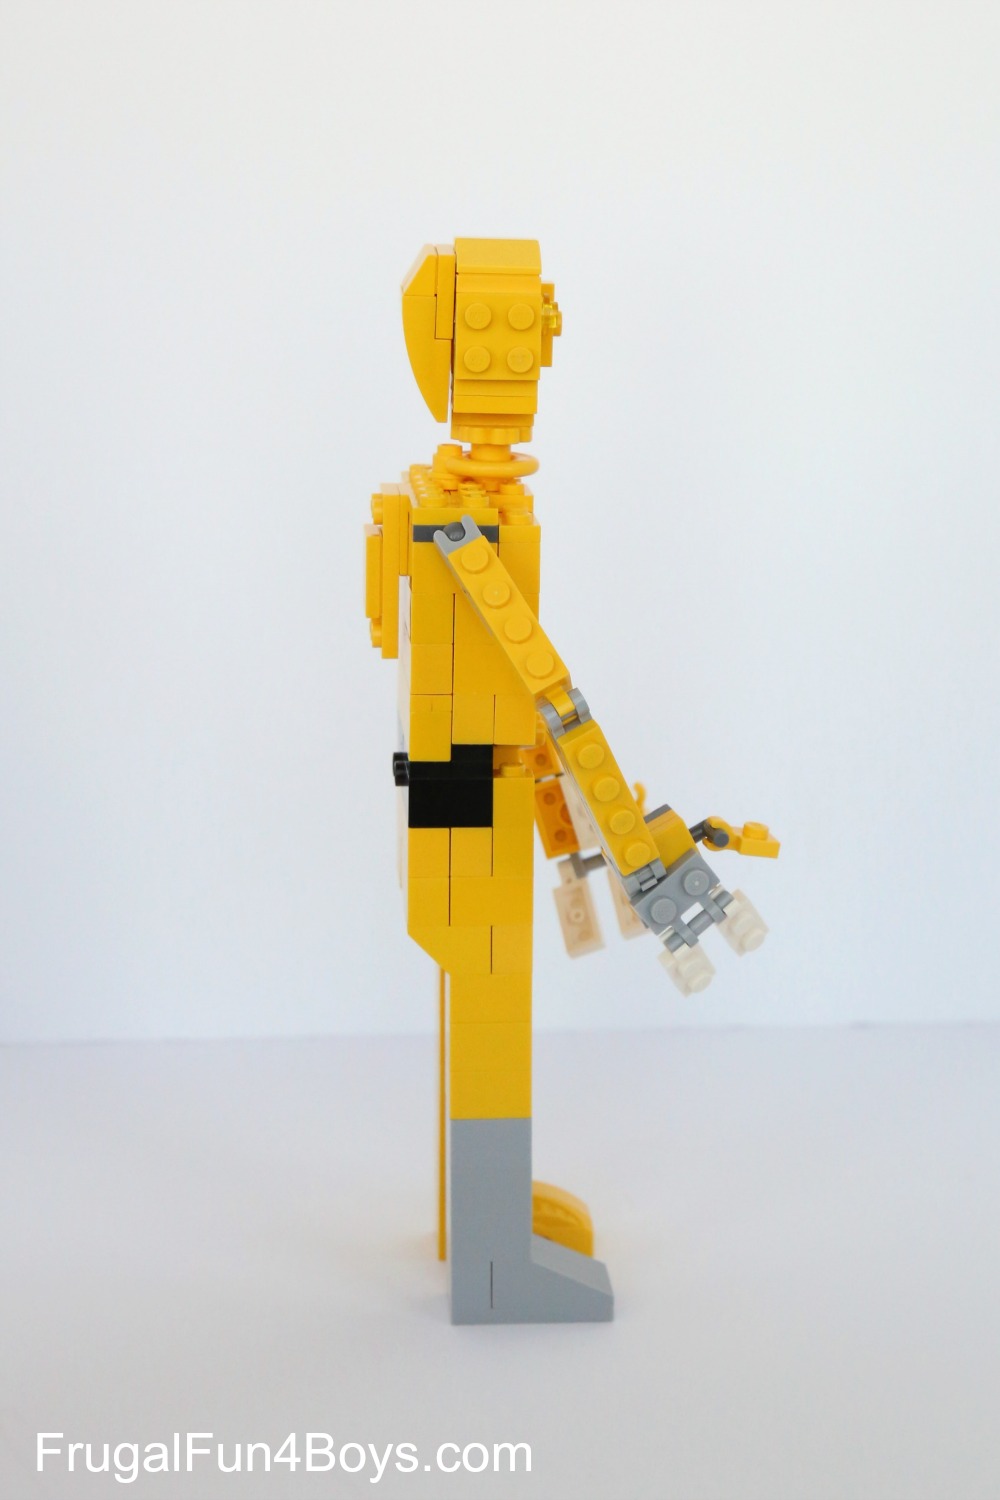
Aidan used a ring piece with a hole in it for C3PO’s neck. He has a flower piece right under the head and then a 1 x 1 round brick. But really you can use whatever you have!

Here’s a side view. Add the details to his back by attaching a bracket to the top of the body.
This C3PO was inspired by the one by DanSto, although modified and greatly simplified. His C3PO and R2-D2 are truly amazing!

Our instructions for R2-D2 are in a separate post here: LEGO R2-D2
Have fun building! If you need more LEGO® ideas, you can find a huge list of fun building projects in this post:
75+ LEGO Building Ideas for Kids
LEGO® is a trademark of the LEGO® group of companies which does no sponsor, authorize, or endorse this site.
2 Comments
Sam Jan 14, 2016
My son is so excited thank you.
mammaalcubo Jan 26, 2016
Amazing! We'll try to build our own Star Wars robots as soon as possible!
I've shared your post on my Facebook page :-)
Post a Comment