
Here are some building instructions for making a cute little LEGO® Lizard!
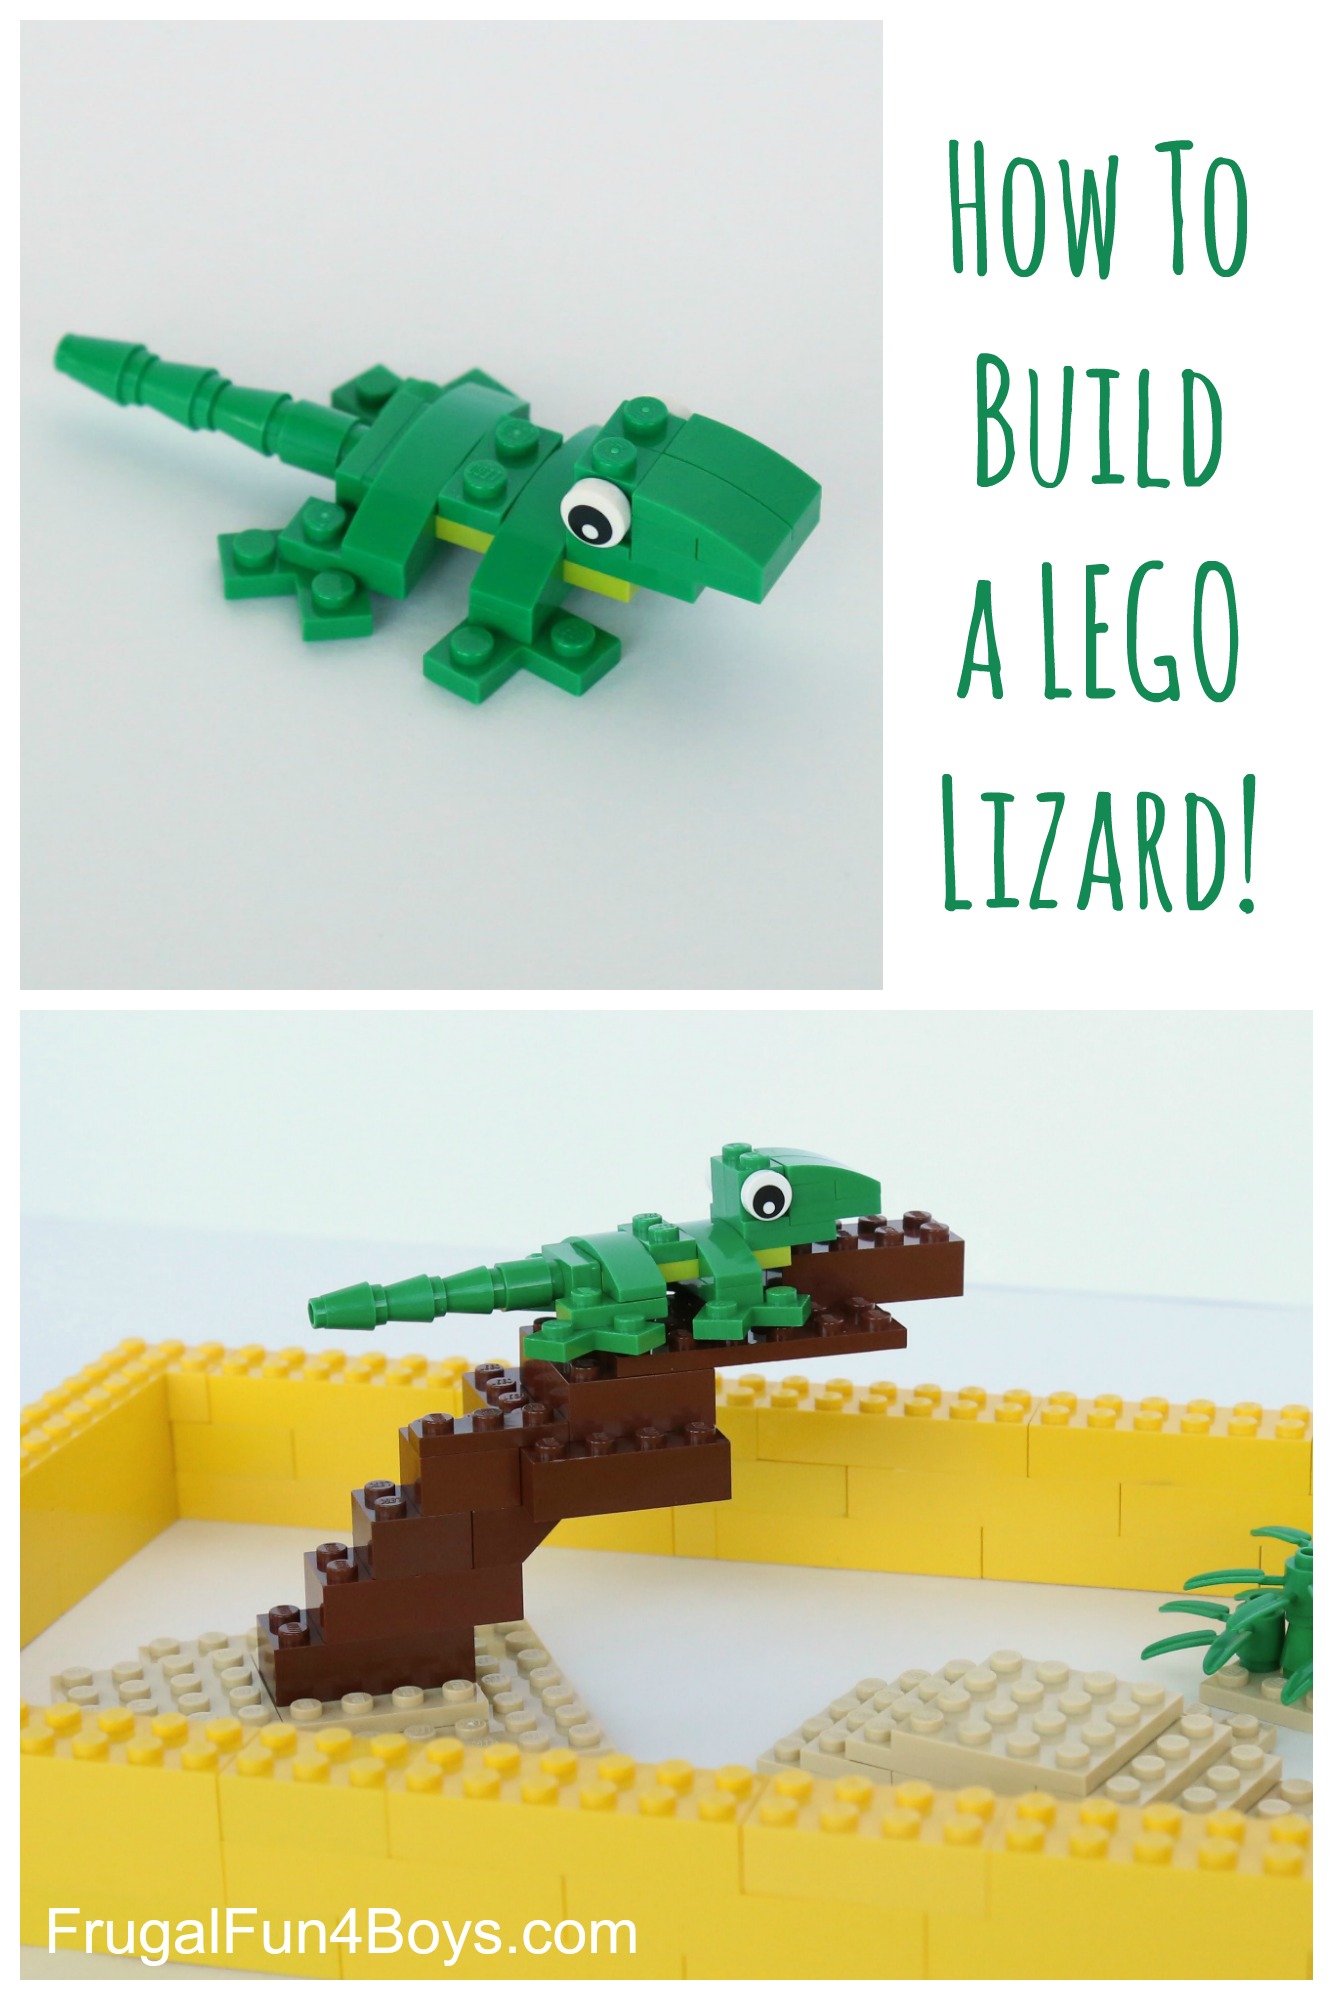
My 9 year old son designed this LEGO® lizard, and I thought he did a great job! Here’s how to build it:
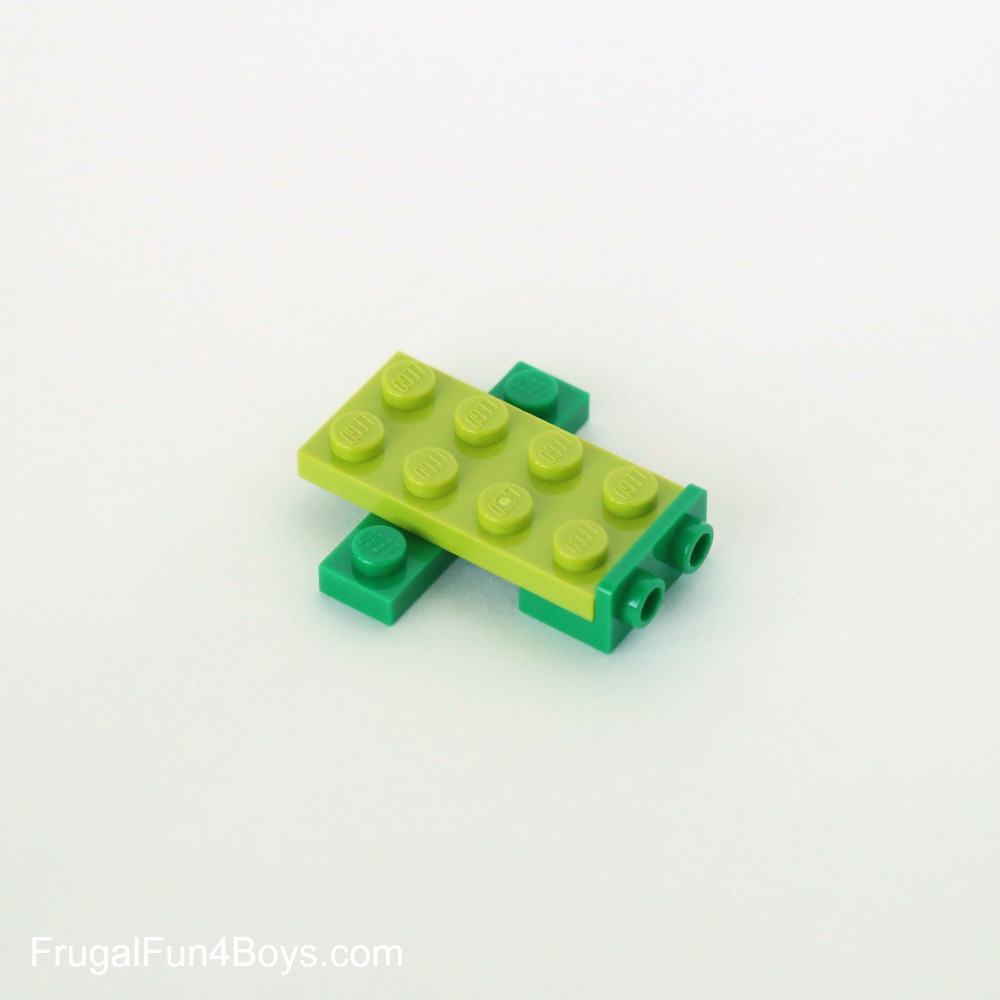
Step 1: Start with a 1 x 2 – 1 x 2 inverted bracket (green), a 2 x 4 lime green plate, and a 1 x 4 green plate.
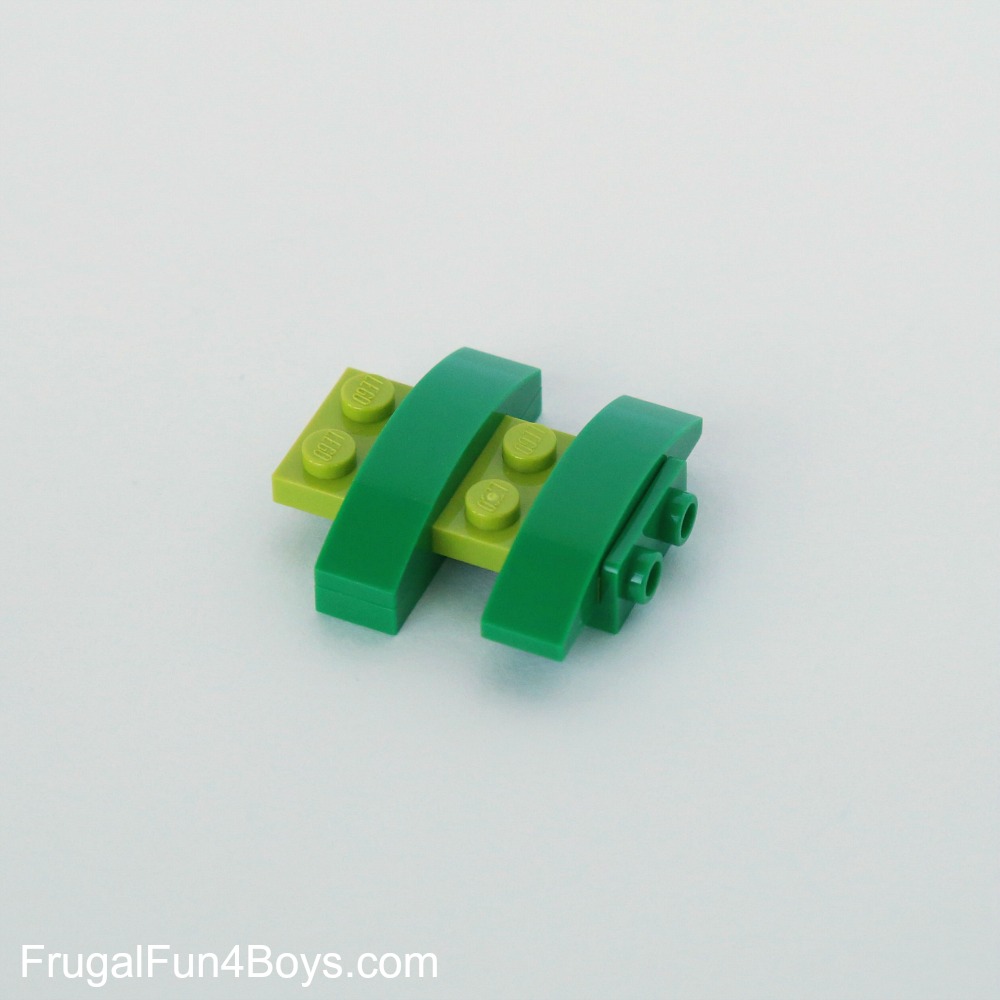
Step 2: Add two 1 x 4 green curved bricks.
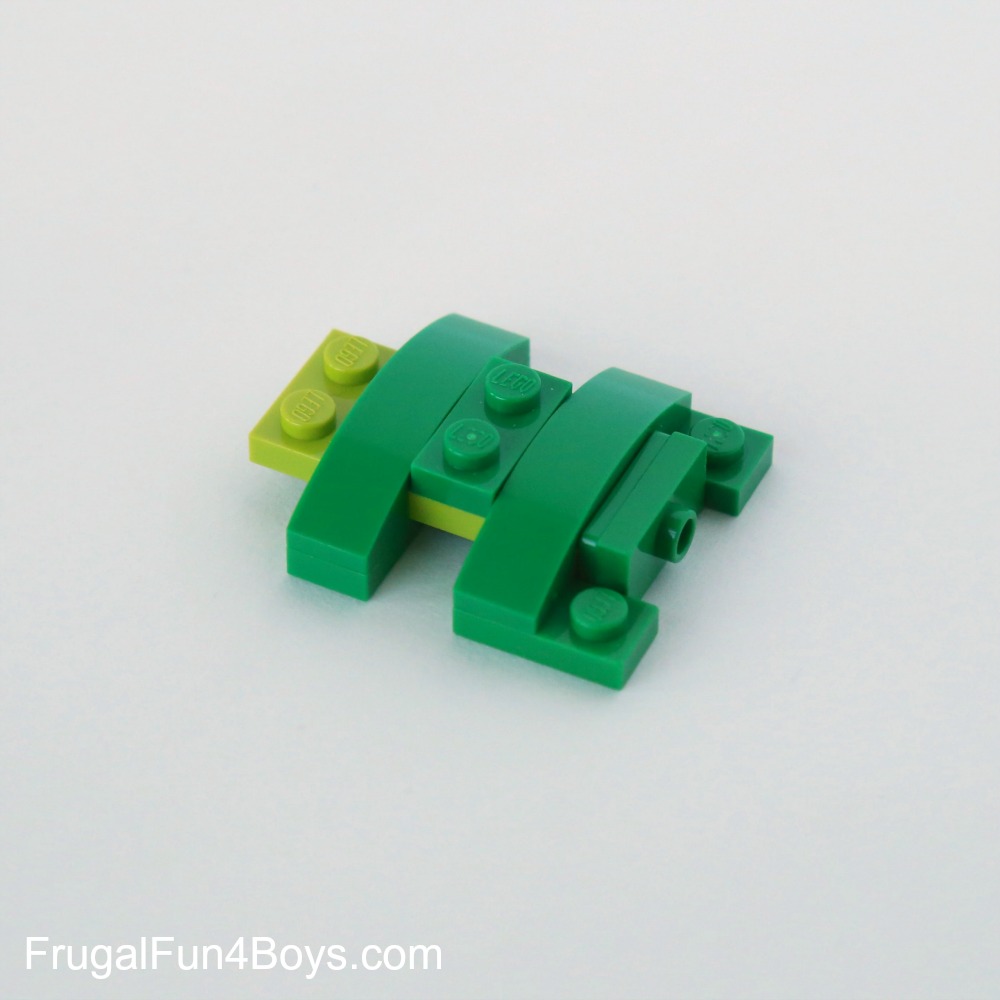
Step 3: Attach a 1 x 2 plate with one stud on top to the green bracket. Add three 1 x 2 green plates.
Step 4: Add a 2 x 2 green plate to the body. Then gather the pieces shown. The tail is a round 1 x 1 brick and then three 1 x 1 cones.
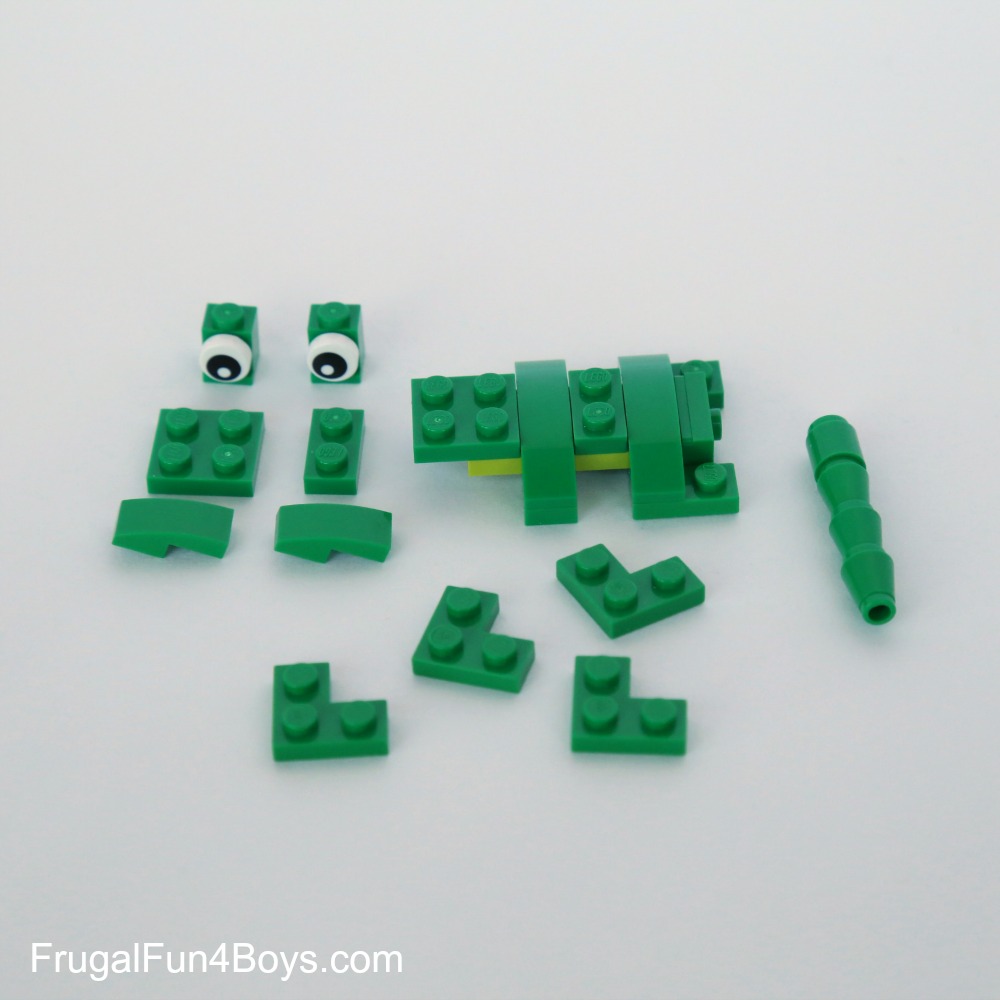
Step 5: Add the 1 x 1 bricks with eyes, another 2 x 2 green plate, and a 1 x 2 green plate to the face.

Step 6: Add the two 1 x 2 curved slopes to the face, the feet, and the tail.
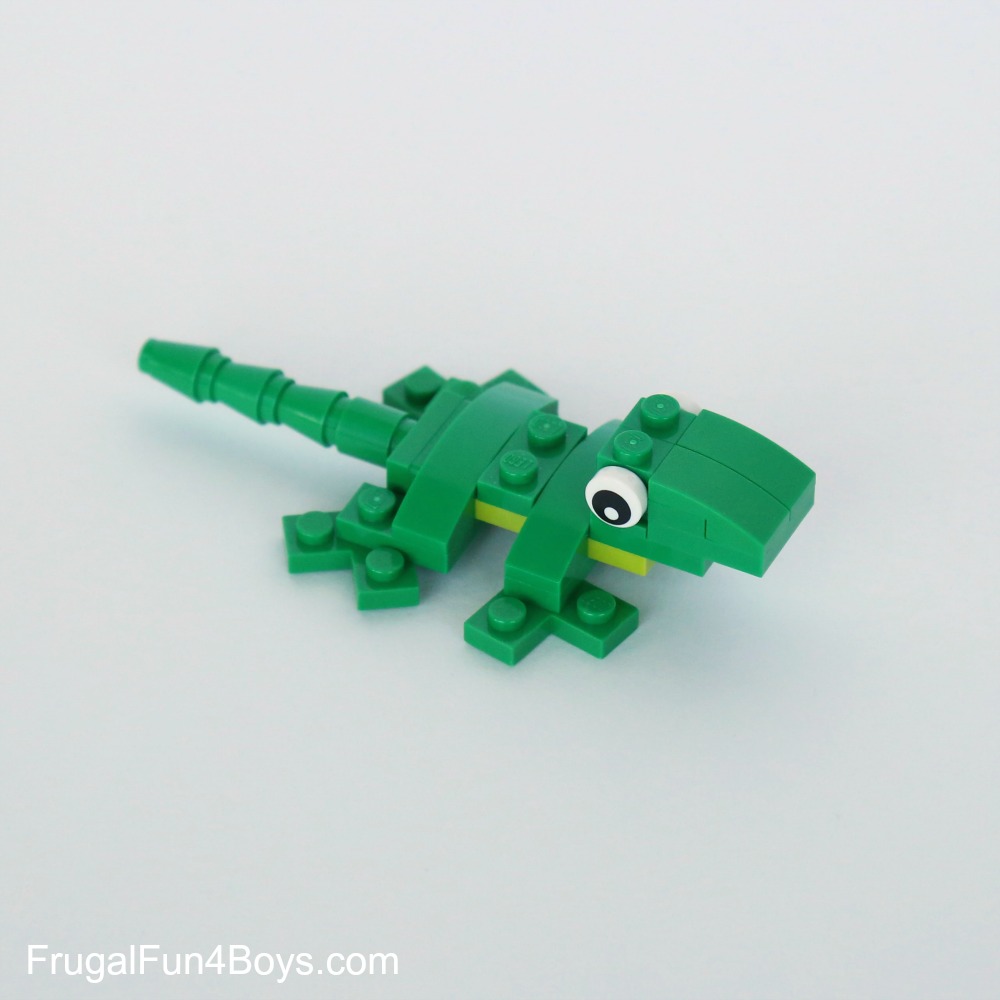
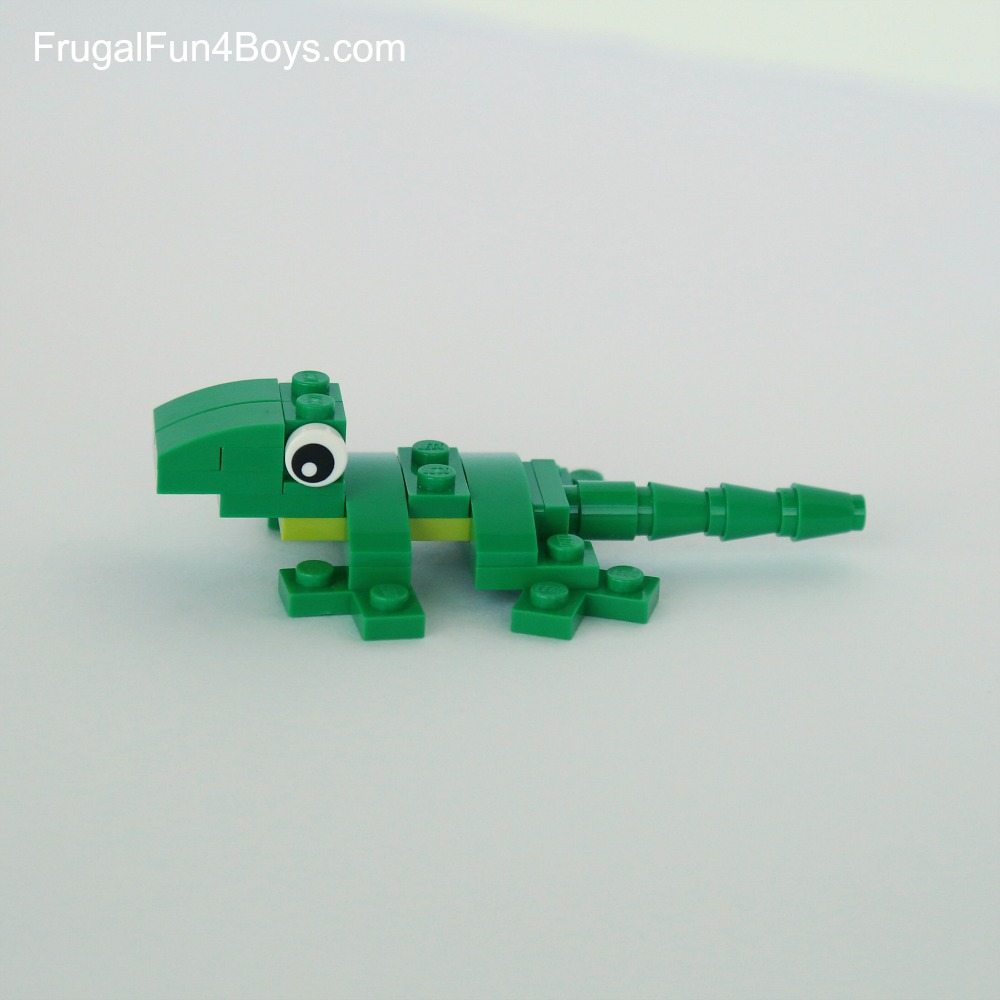
Soooooo cute!
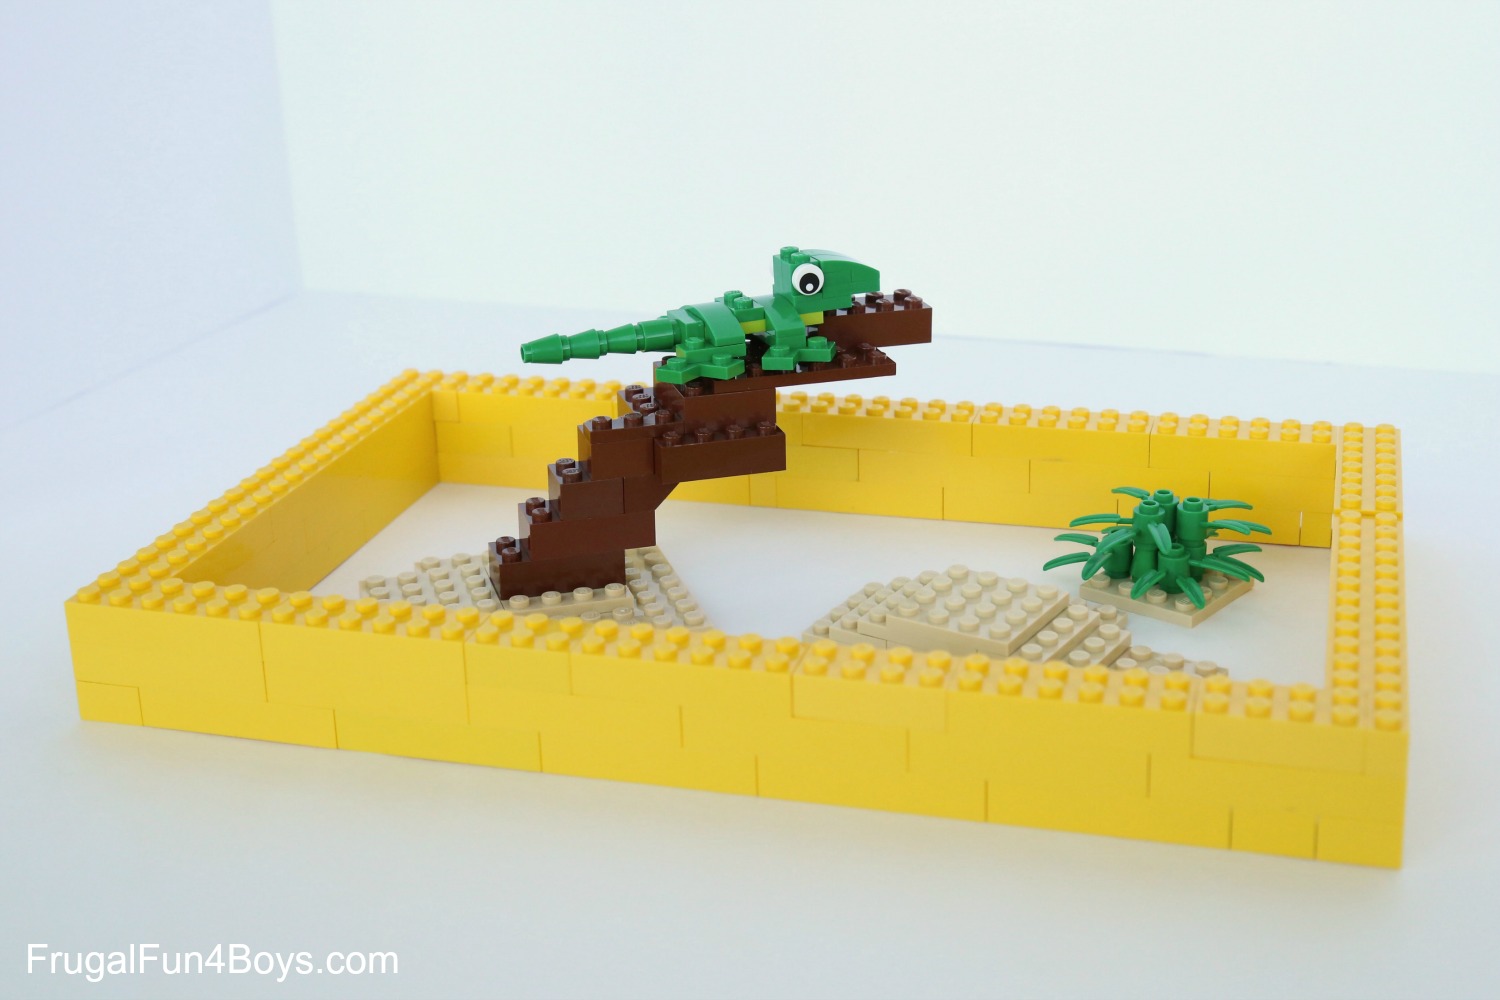
Gresham built a cage for his lizard with a basking spot. He was trying to build little LEGO® flies to feed the lizard, but couldn’t get them quite right. We’ll add photos if we figure them out!
See all of our LEGO® pets building instructions here: LEGO Pets!
LEGO® is a trademark of the LEGO® group of companies which does not sponsor, authorize, or endorse this site.
3 Comments
Sarah S. Mar 17, 2016
Sweet!! I love it! He's very creative.
biff Nov 22, 2017
wtf m8
Kristi Jeffords Jun 26, 2018
Hello! I love your Lego creations! I'm a children's librarian who runs a lego club as part of my programming. I would love to have some of your wonderful ideas on PDFs so I can do take home sheets for my club members. Have you ever thought of making these available in PDF through your blog? I think they'd be a great addition to your books! (I'd buy them!!) Thanks!
Tina Mar 3, 2019
I agree with this! Curious if there are PDFs also! :)
Education with Care Jan 25, 2021
Very clever young man♥️
Post a Comment