
Here’s a fun paracord project for kids – make paracord snakes! This would be a great craft project for a summer camp or nature club. Or make them on a rainy day! The completed snakes are fun to play with.
This is an easy project for beginners. It may take a little while to learn the technique, but most kids ages 8+ will be able to master this. 8-11 year olds will likely need help figuring out the steps, while teens can master it on their own. Adult help will be needed to fuse the paracord since it involves a lighter.
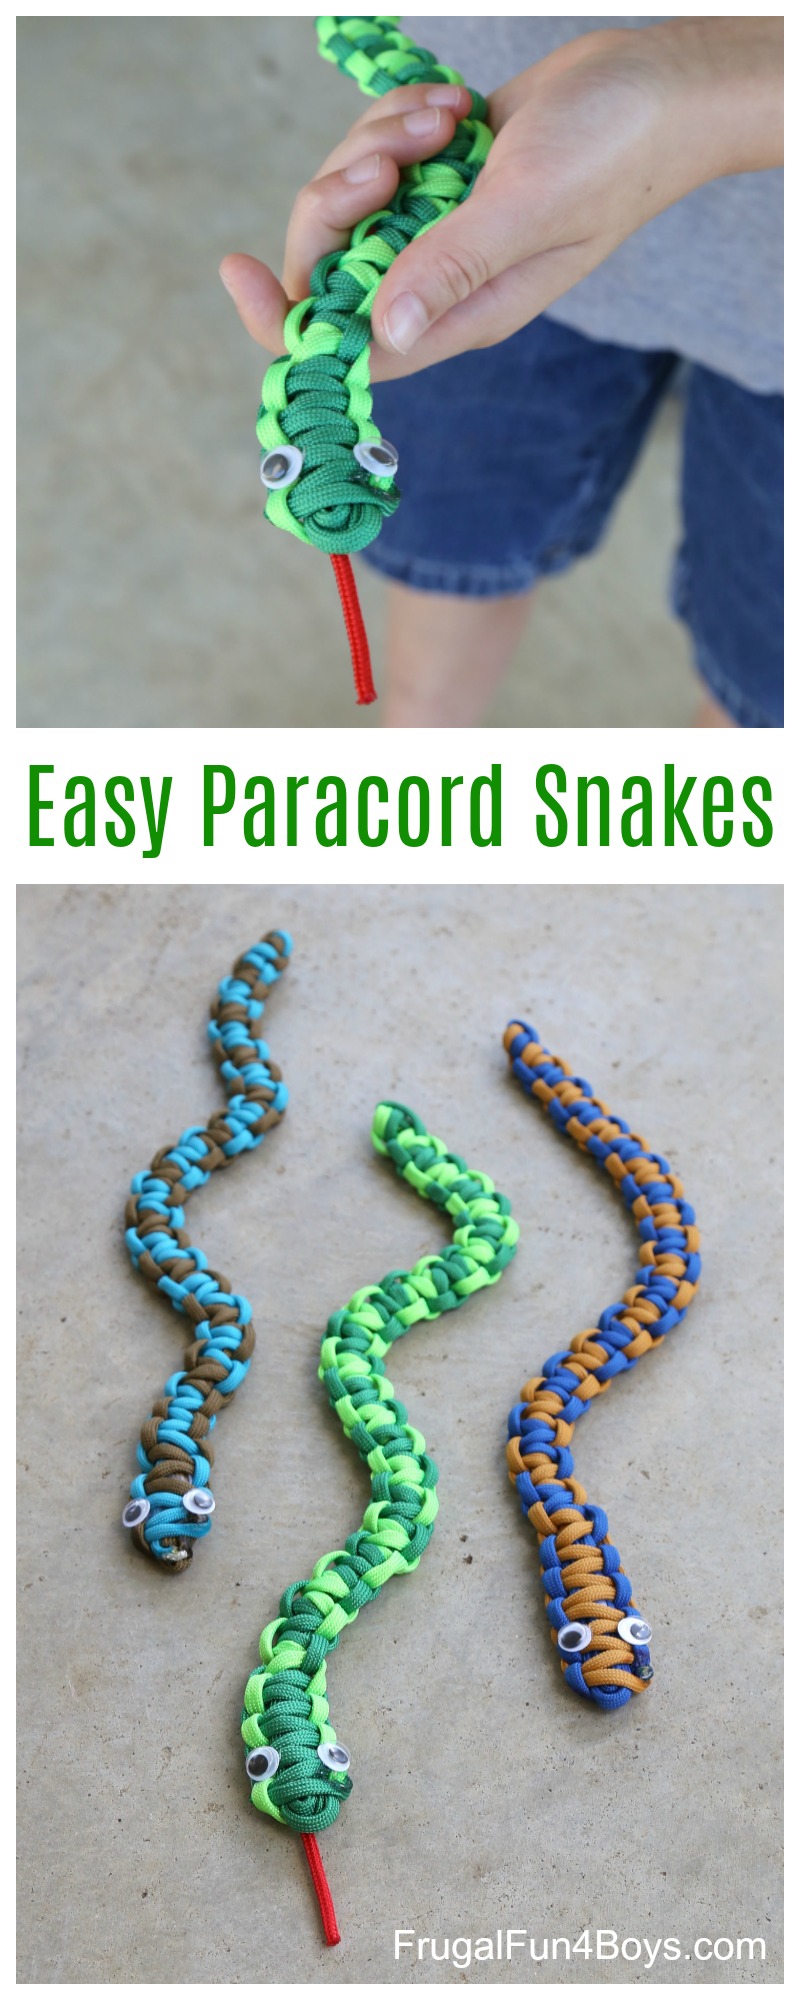
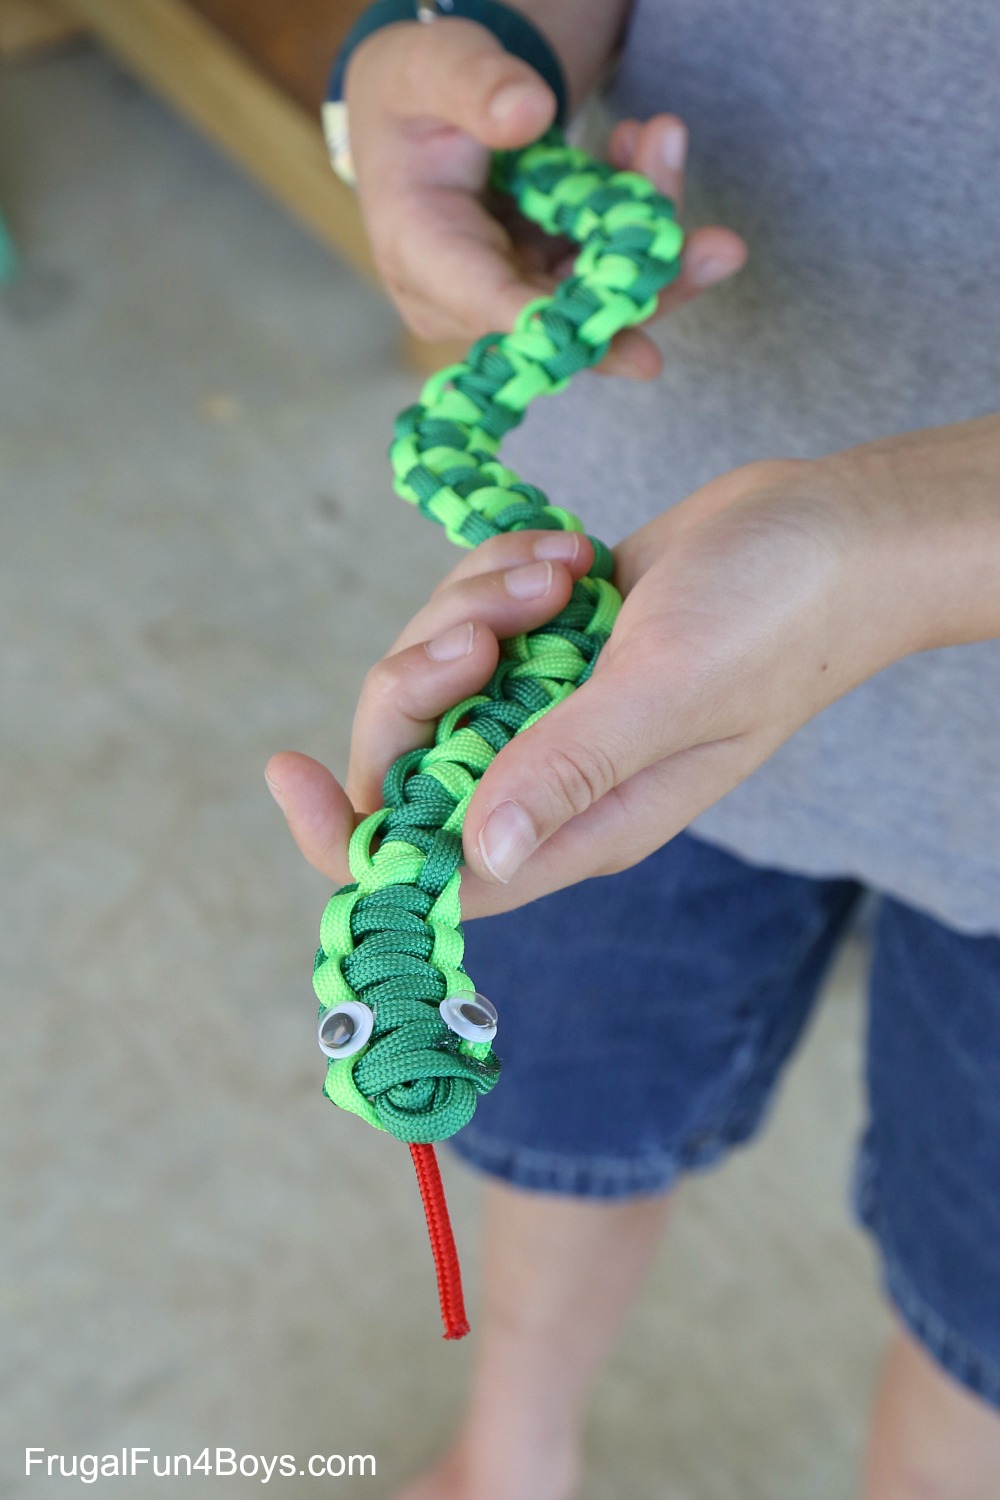
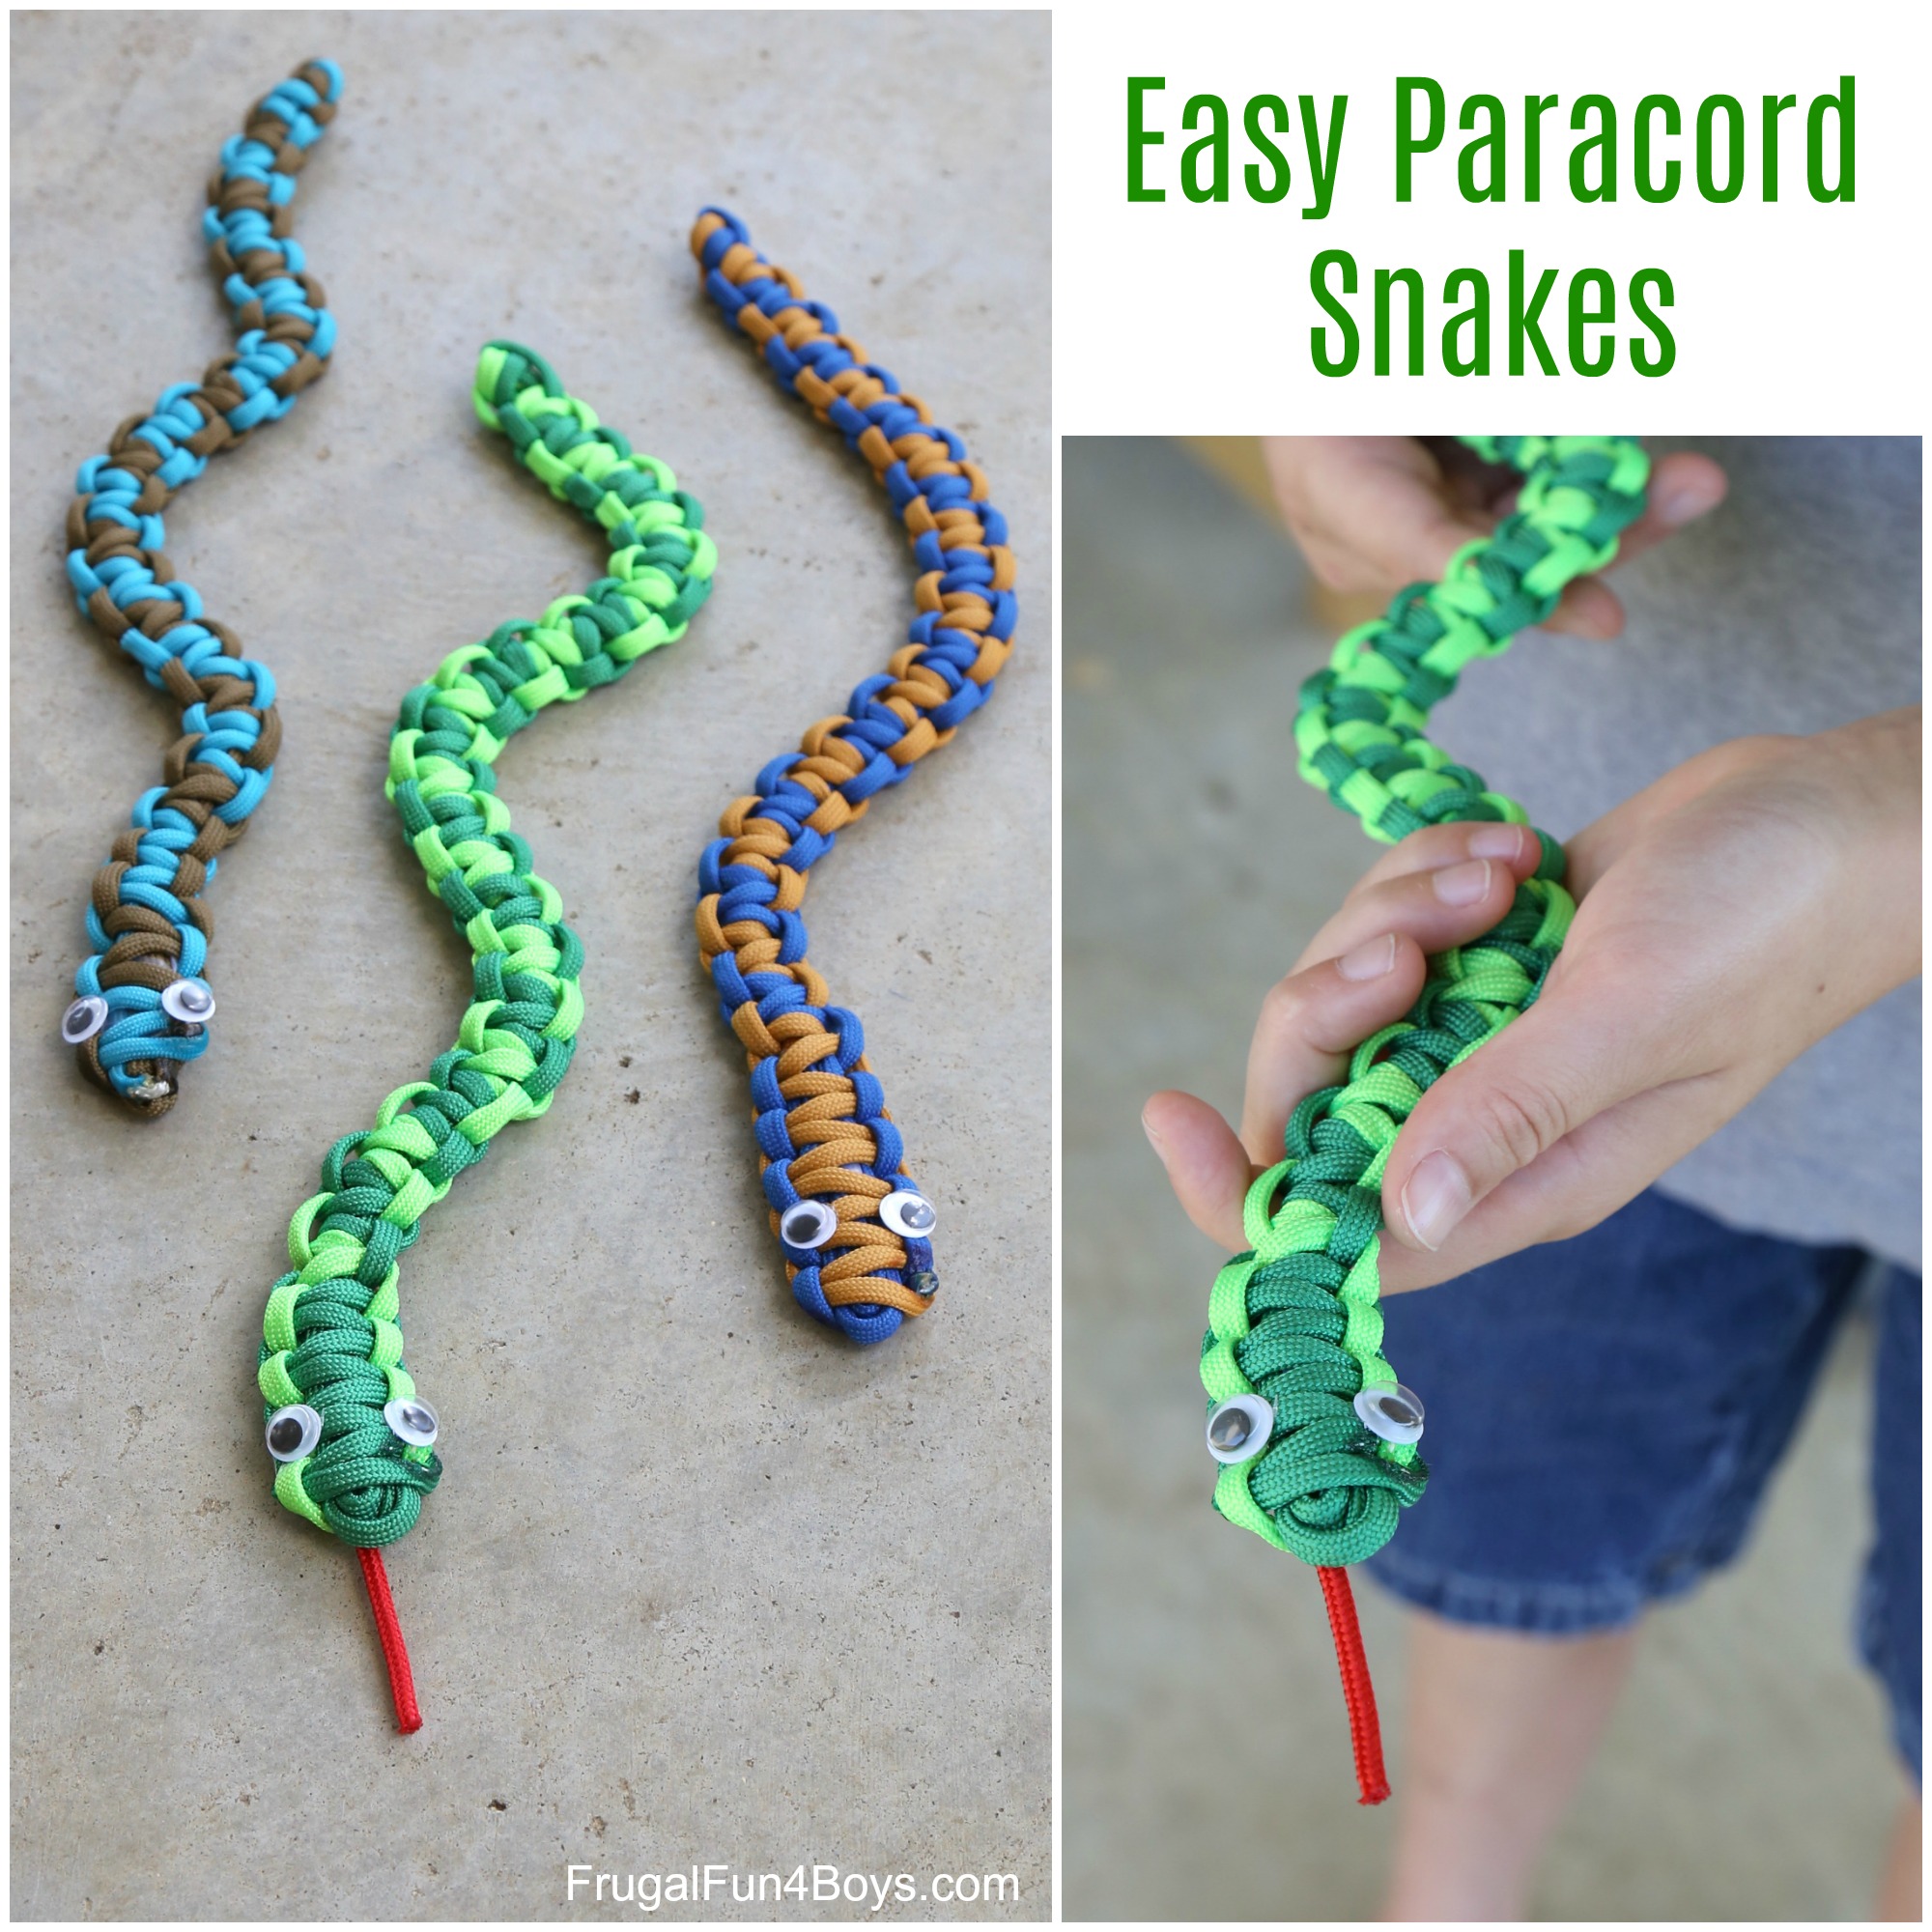
The snakes are flexible, so you can pose them to look like they are slithering. I love all the different colors of paracord! We also made a black and turquoise snake that didn’t make it into the pictures. I still want to make a purple and neon green one.
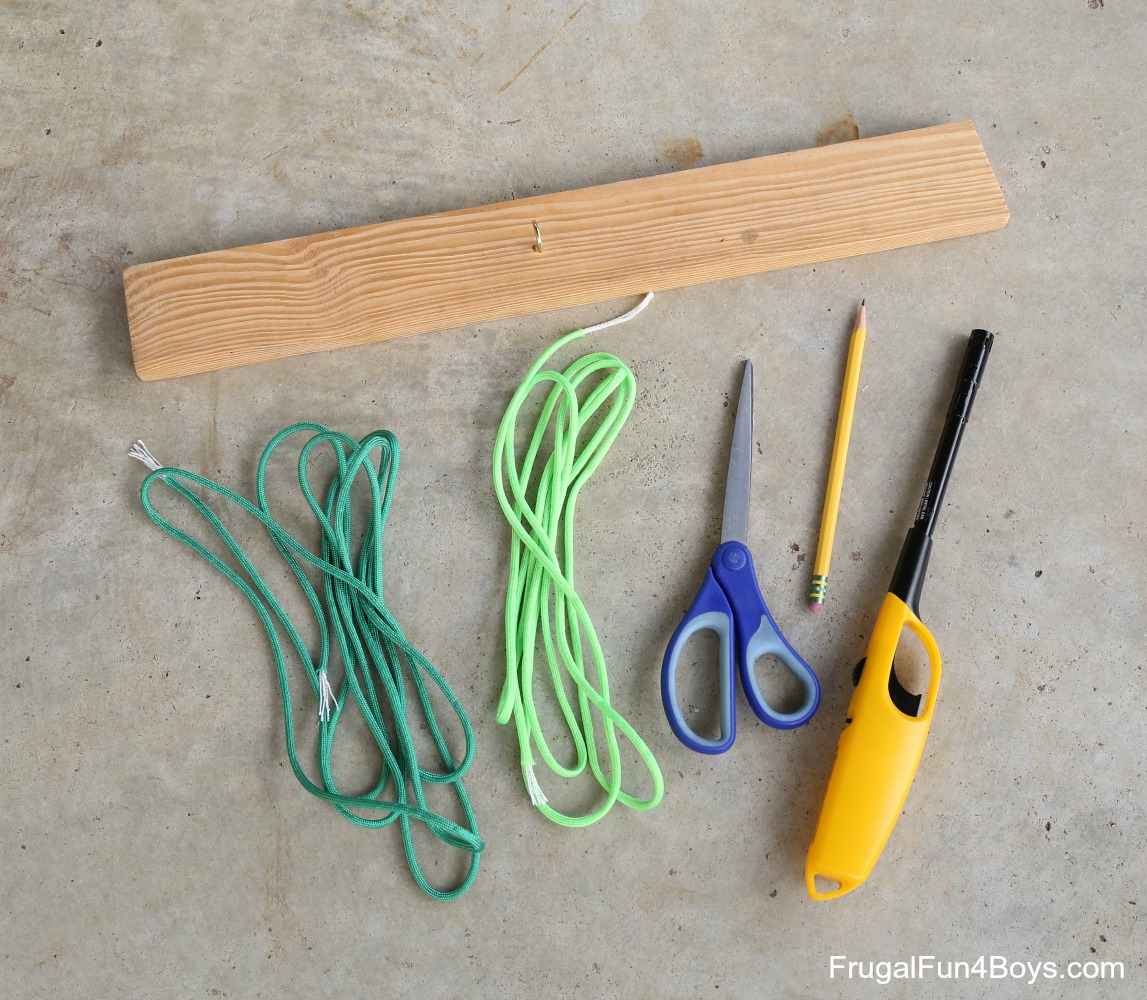
Ready to make one? Here’s what you’ll need:
- Paracord – two 8 foot lengths of paracord for each snake.
- Scissors
- Ruler
- Pencil
- Lighter
- Googly eyes
- Clear tape
- Hot glue or strong craft glue, like E6000
My husband put a hook into a piece of scrap wood to make something to attach the snakes to while working. It worked great!
The design we used for the snakes came from Bored Paracord on YouTube.
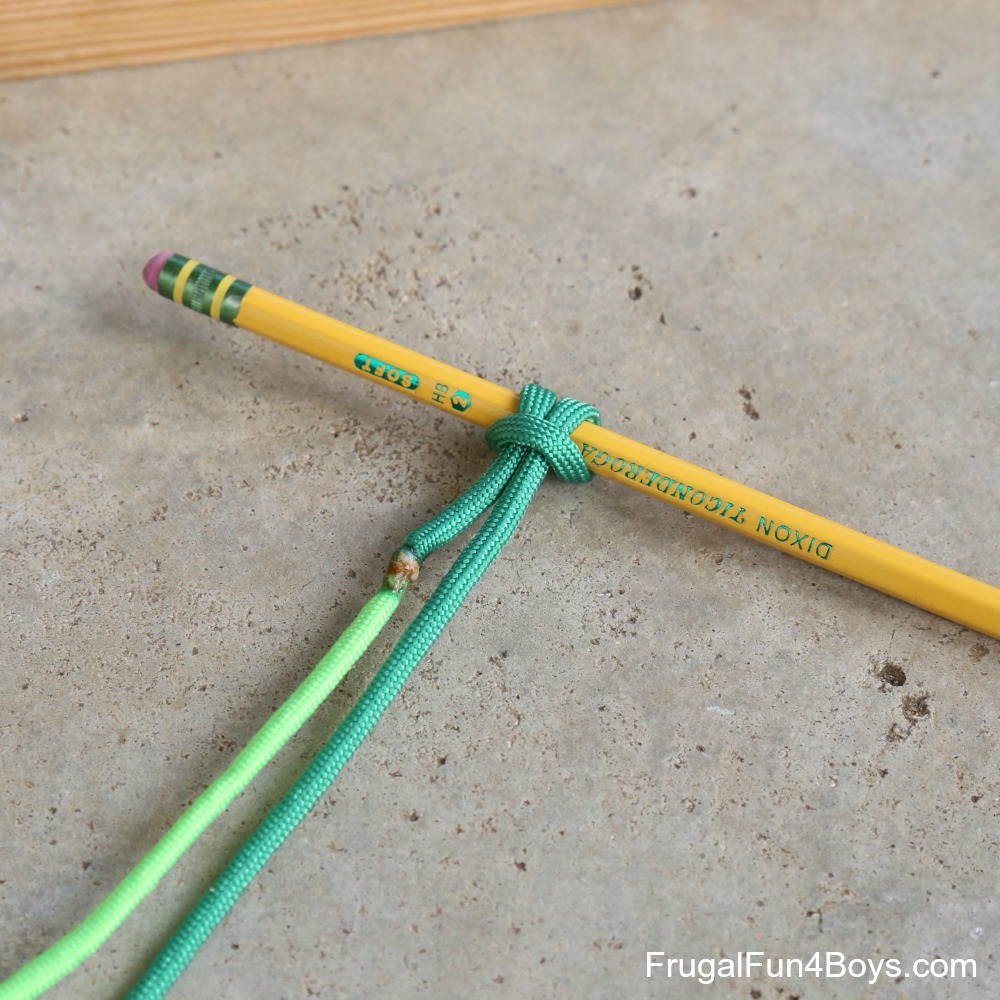
To get started, fuse your two sections of paracord together by melting the ends with the lighter and sticking them together. Caution – the paracord gets very hot and stays hot for a few minutes! Definitely an adult job, but it’s not hard to do. In the photo below, my seam turned out sort of brown because I had too much of the white center strands hanging out and they burned. It still worked fine though.
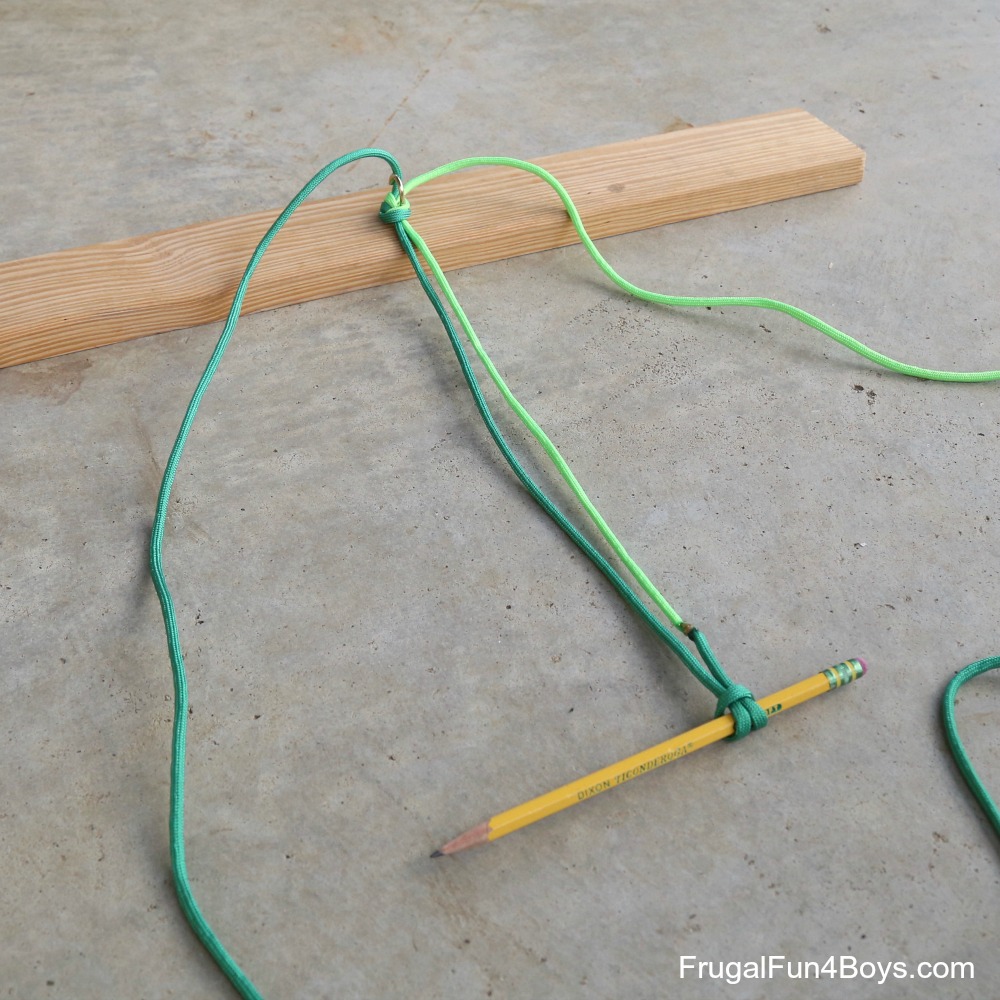
Then attach your paracord to the pencil like you are putting on a luggage tag.
Position the seam between the two colors off to one side. You don’t want it to be exactly in the center because this end will be the snake’s mouth. One of mine looks kind of funny because of the seam.
Tie both strands of paracord around the hook, or find something else to tie it to. The distance between the hook and the pencil should be 12-13 inches. It doesn’t have to be exact, but don’t make it longer than 13 inches or you’ll run out of paracord. The finished snake will be just slightly longer than this – you’ll see why below.
Step 1: Start with the basic paracord knot, called the cobra. Start with the dark green strand and make an L shape. Then weave the light green strand under and through the other side.
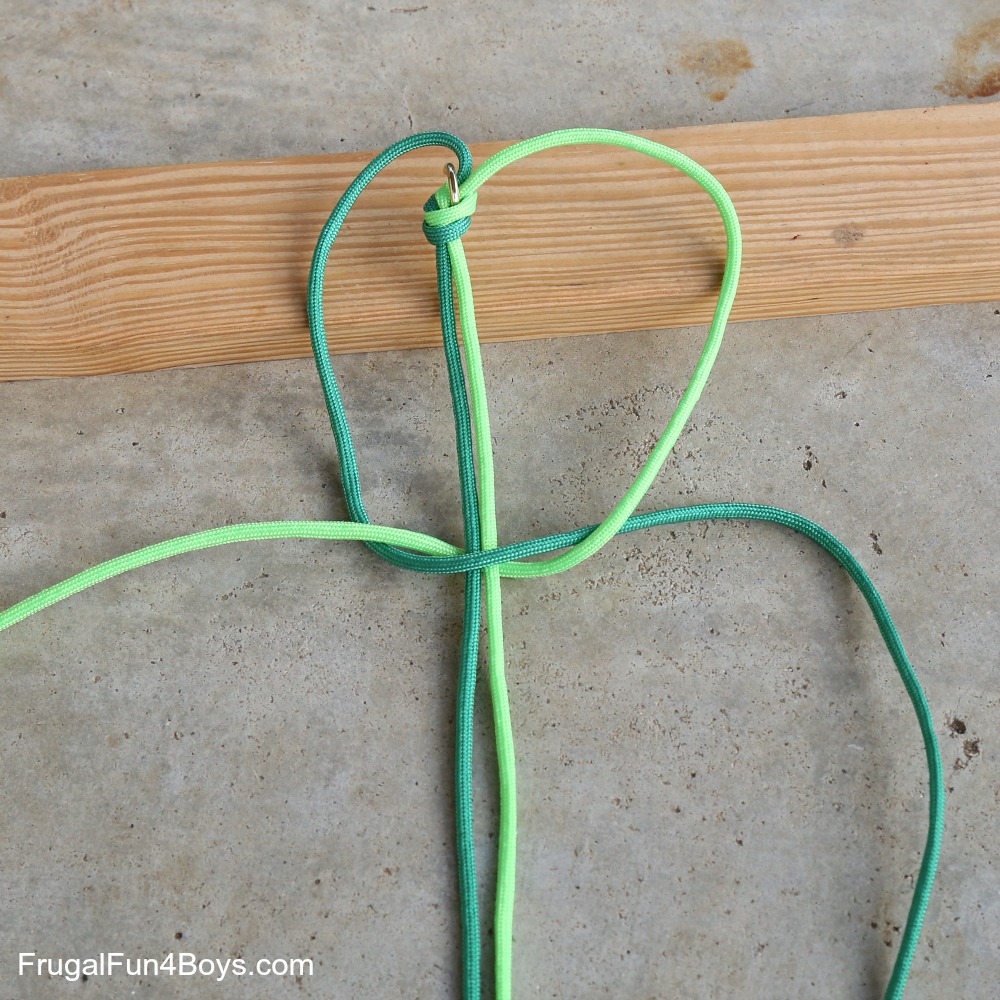
Pull both strands to tighten.
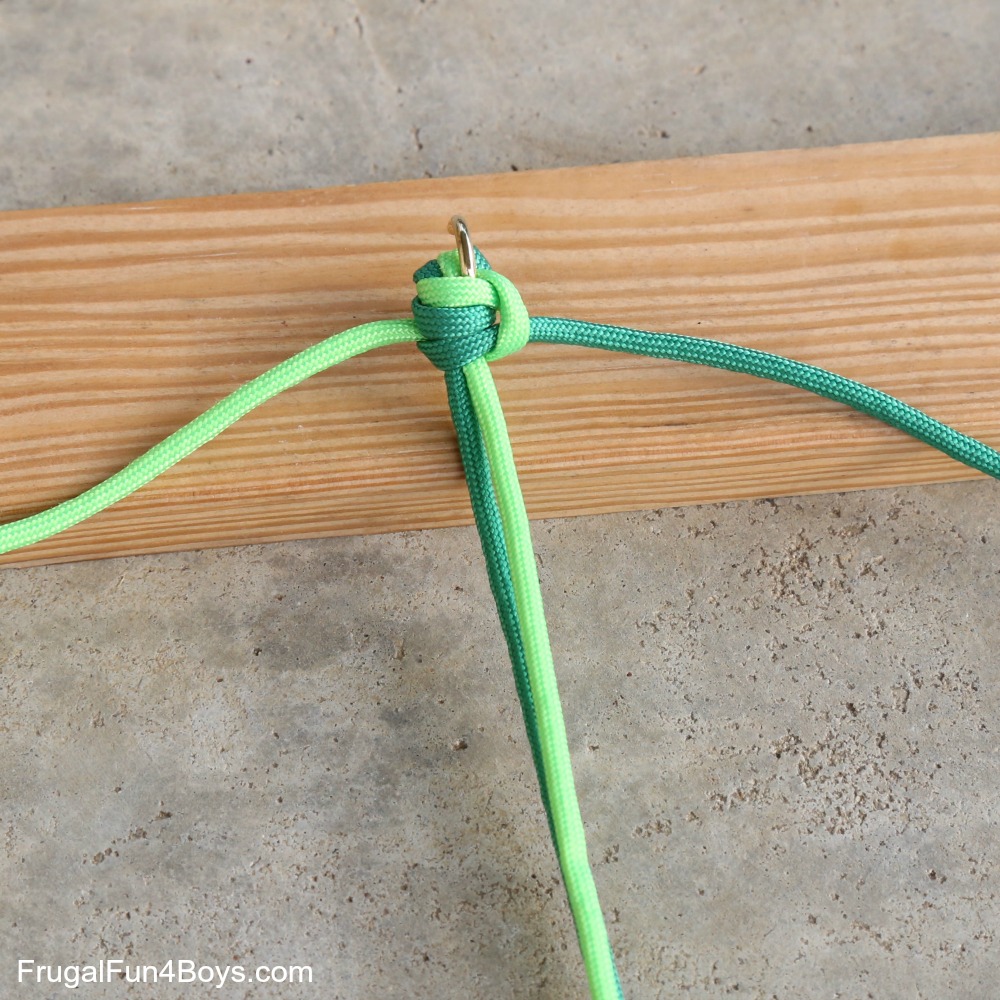
Step 2: Start again on the left side. Go under the center strands, and then through.
Pull the strand to tighten.

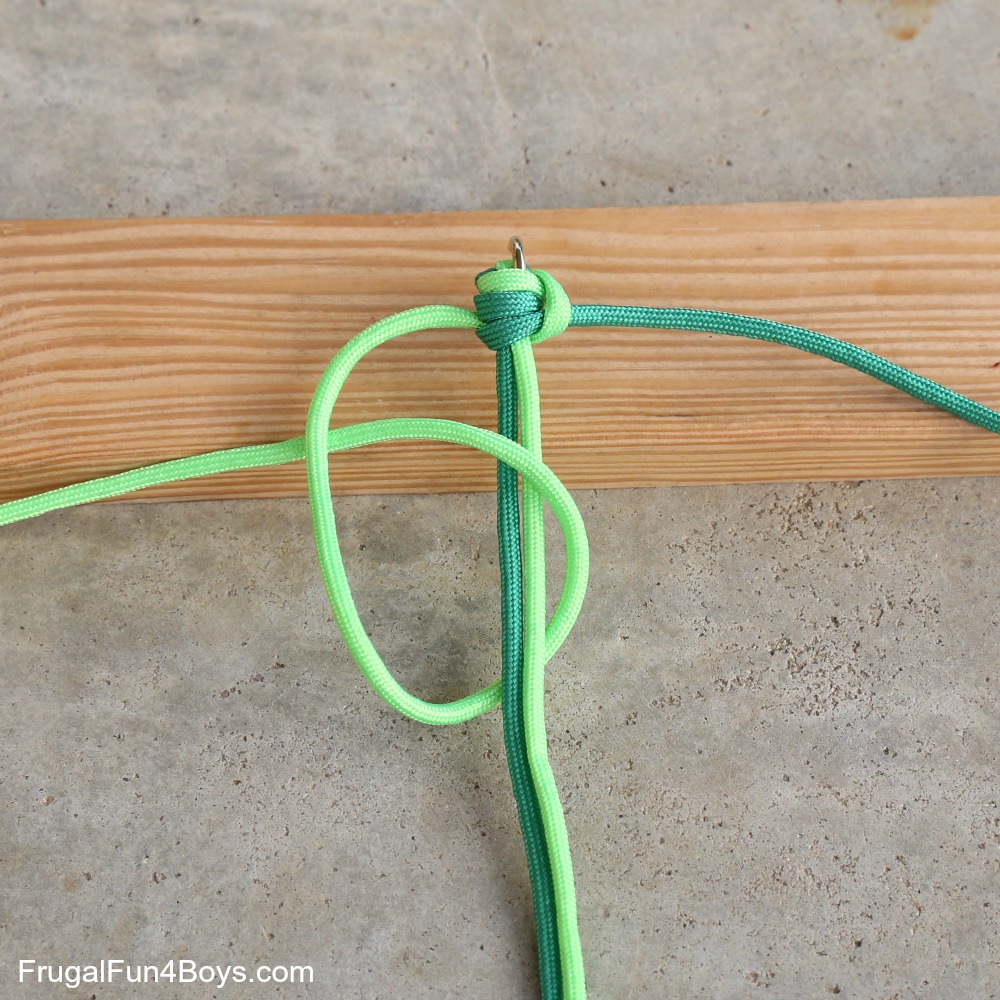
Step 3: Now go to the right side. This time go over the two center strands, then under and through.
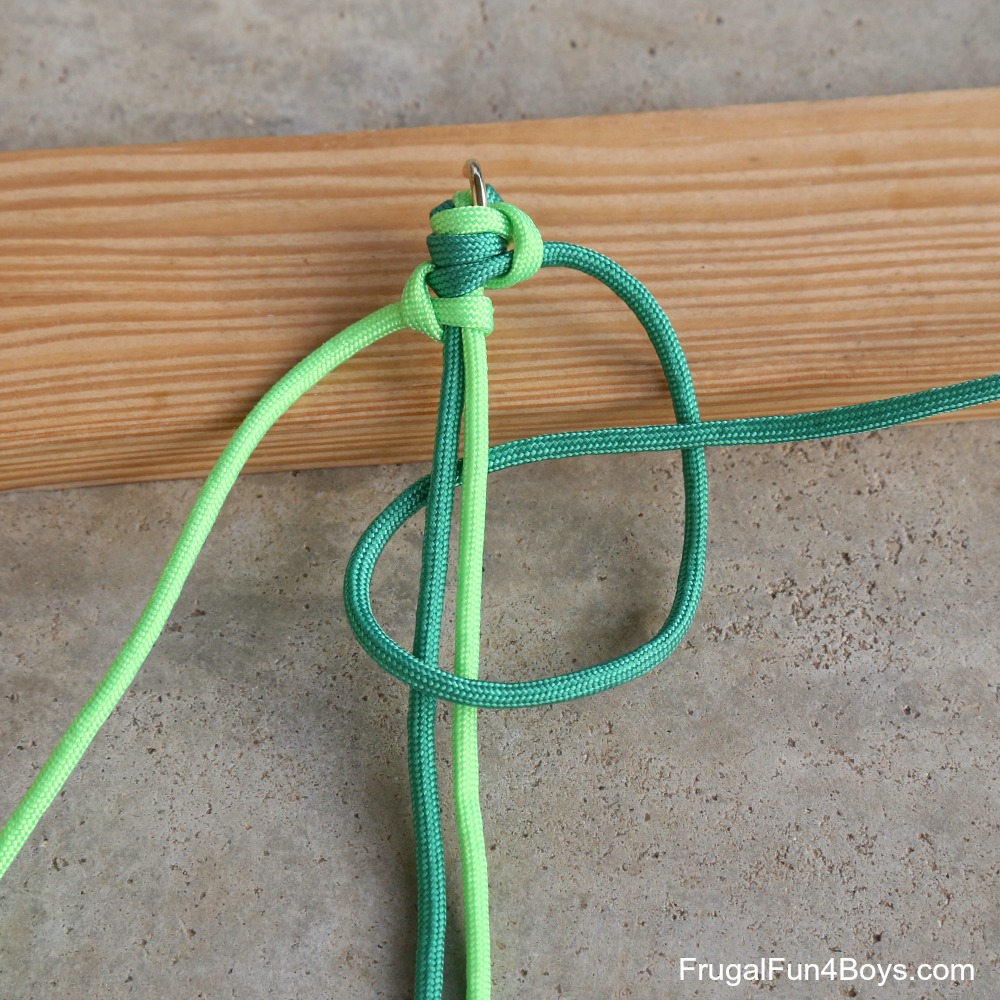
Pull the strand to tighten.
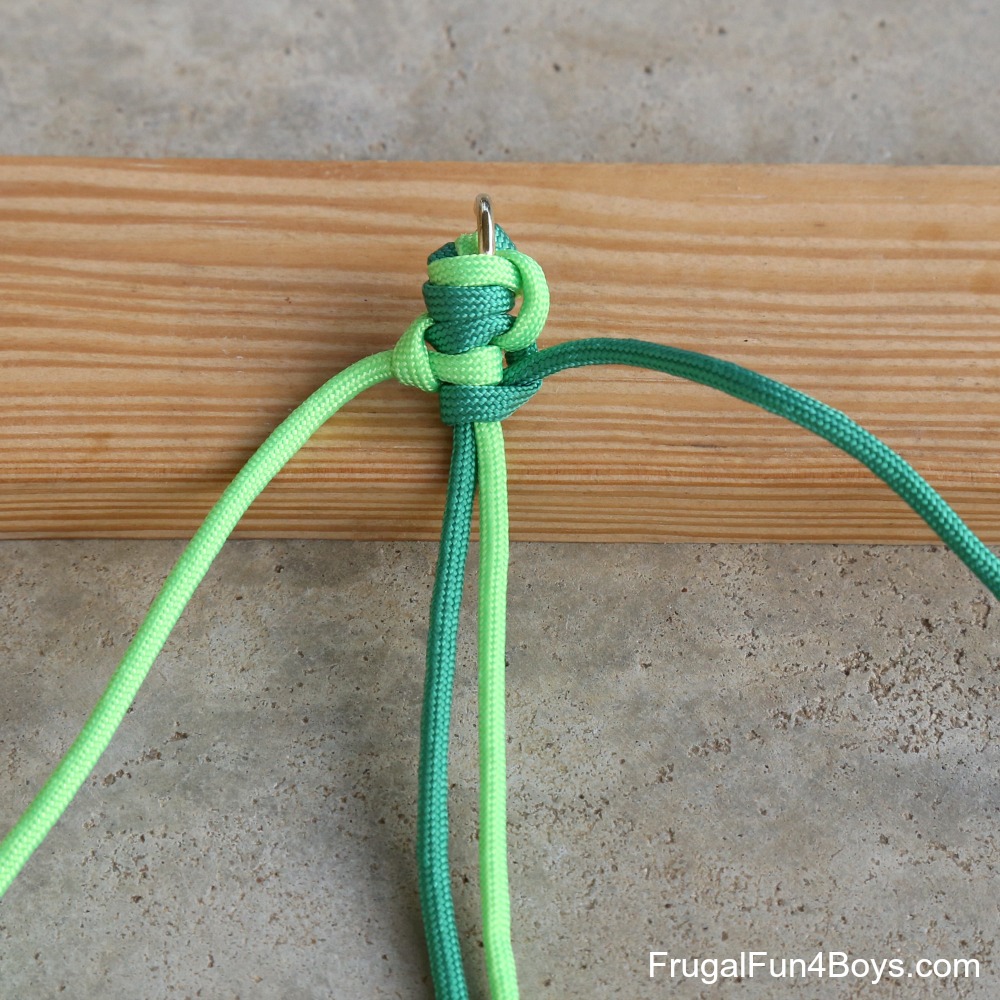
Then, repeat steps 1-3! Soon you’ll see the pattern starting the develop.
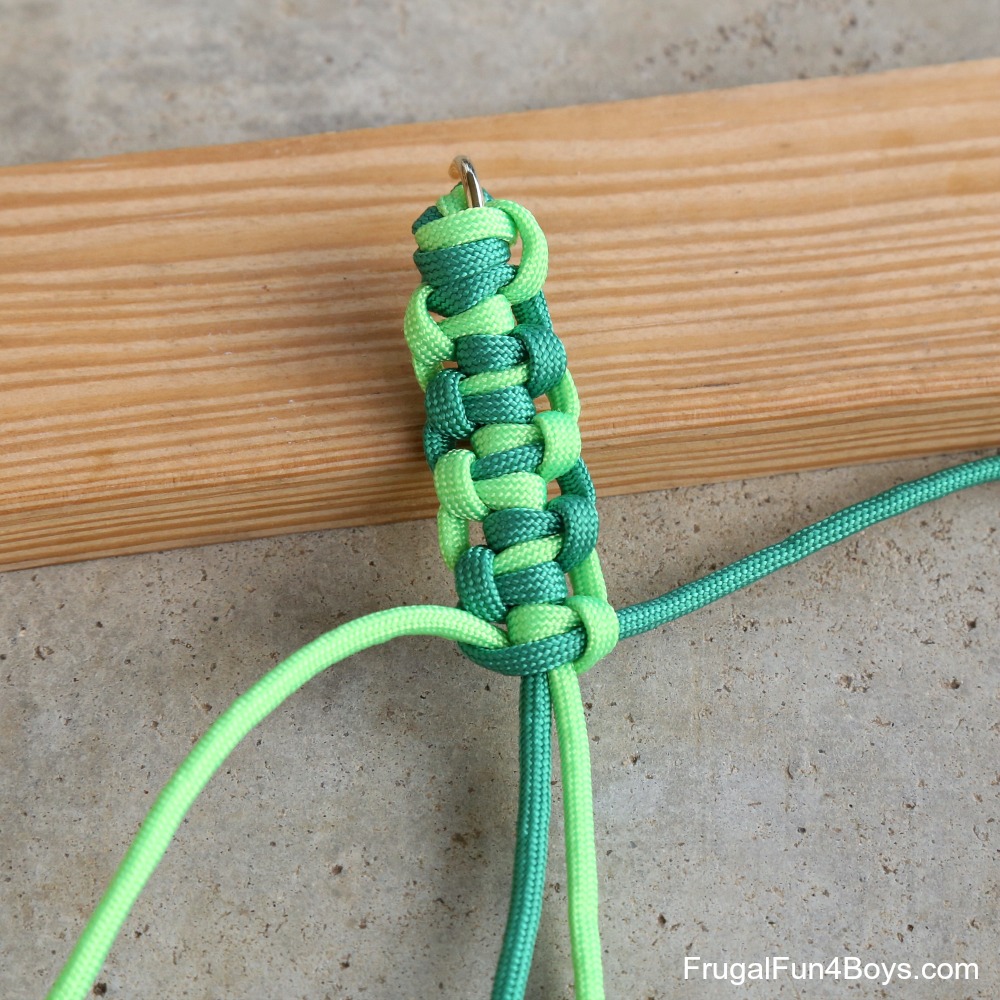
Proceed until you get almost all the way down to the pencil.
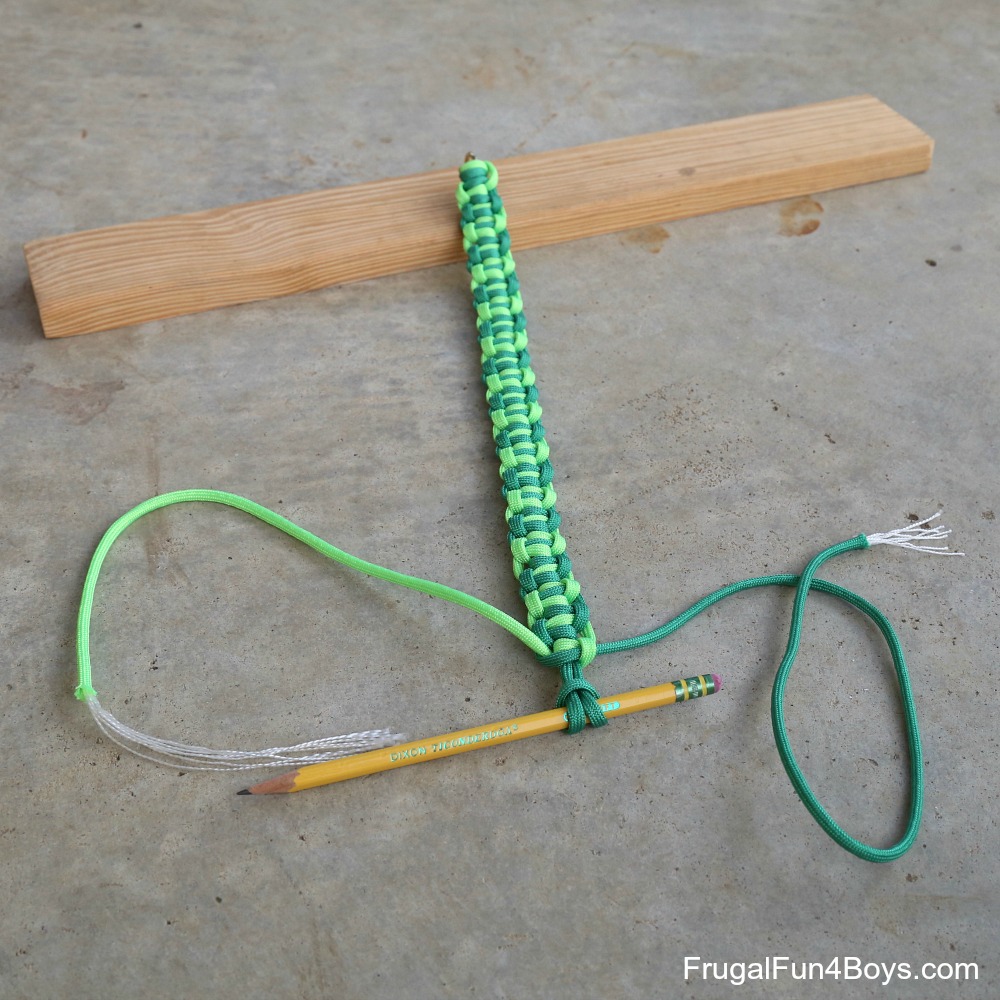
Remove the pencil and unfold the bottom loop. This will be the snake’s head.
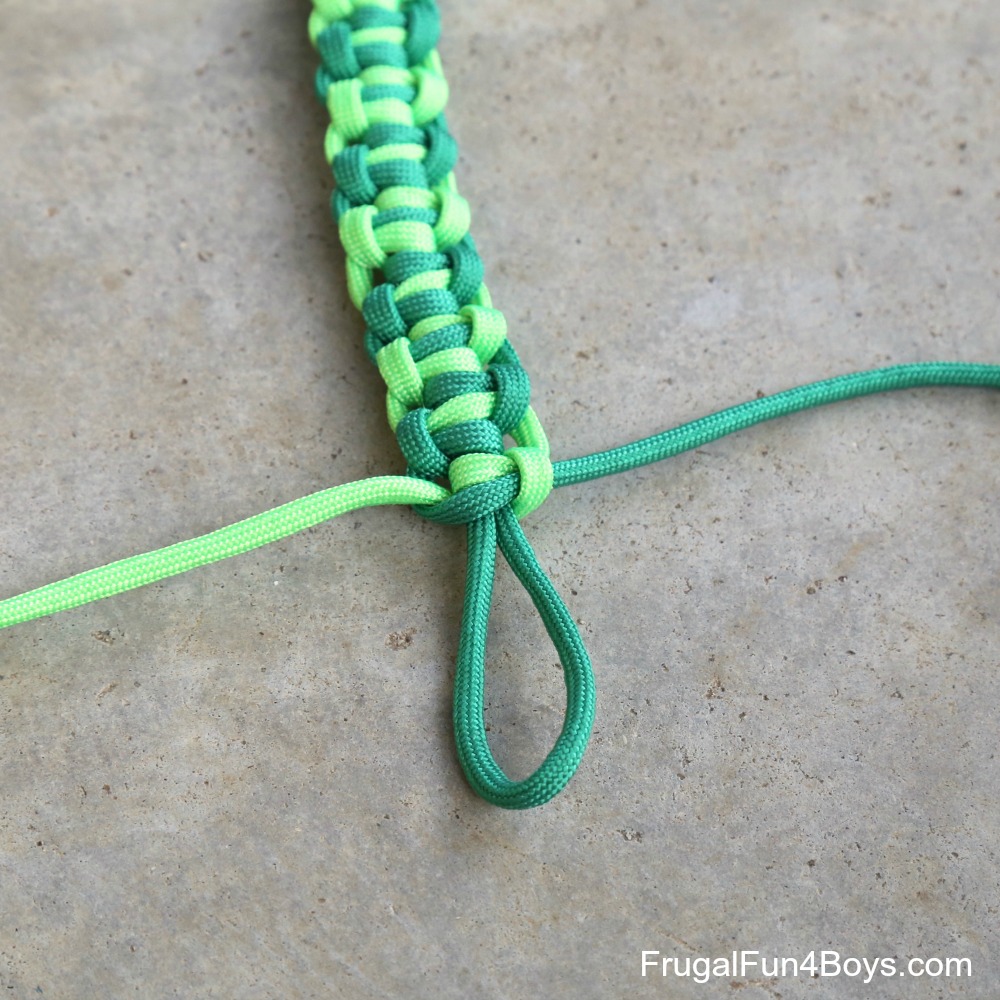
Cut a small piece of paracord from either color. I didn’t measure – maybe 6 inches long? Fold it over and put a small piece of tape around it to make it easier to work with. Set it inside the loop. This will bulk up the core for this part of the snake, making the head larger than the body.
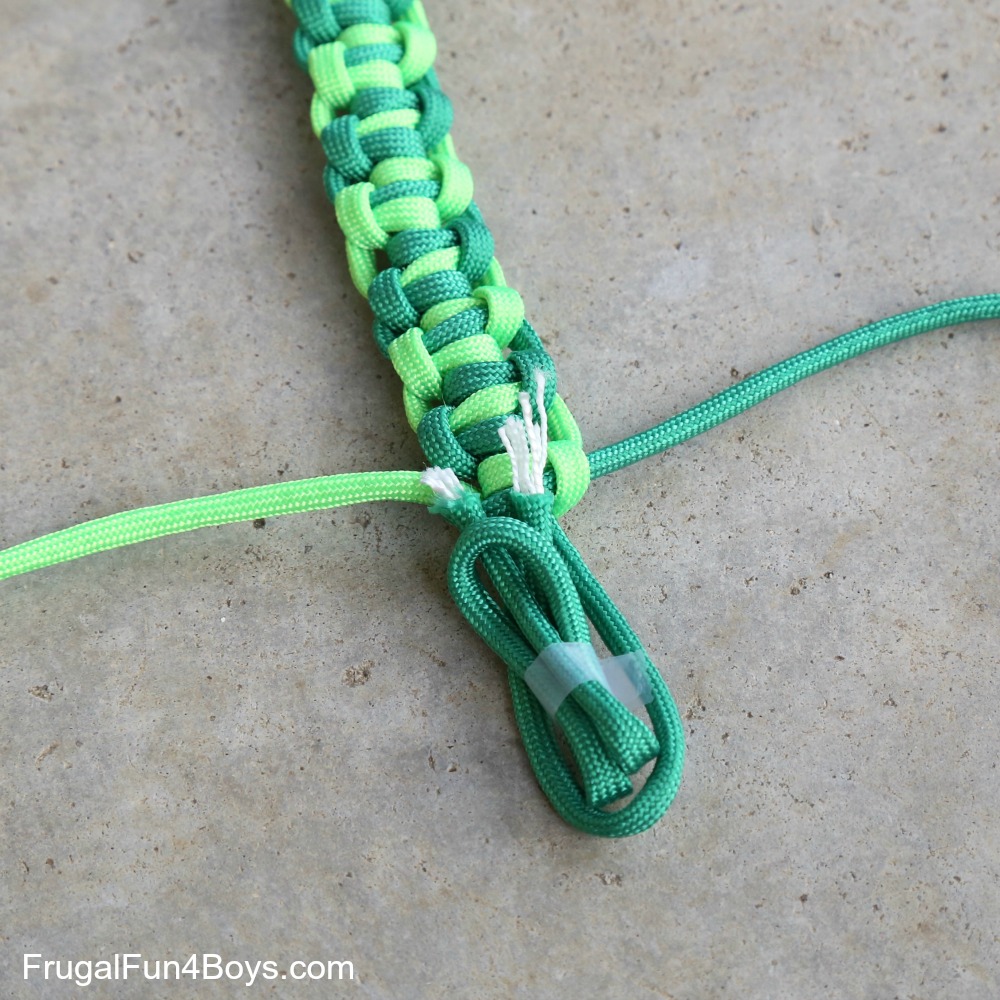
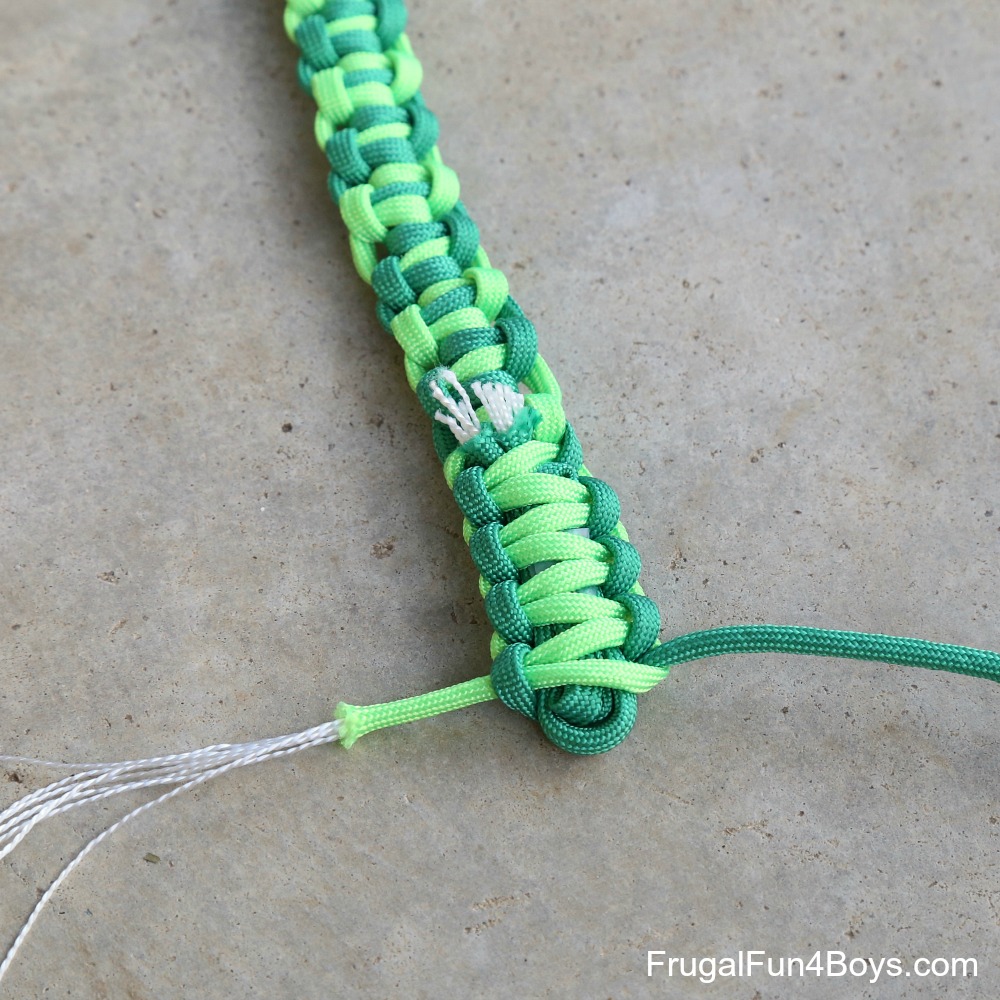
Now make knots using the cobra style from step 1. You’ll want to alternate sides as you start each knot, otherwise the snake will start to twist.
Use a lighter to fuse the ends that are sticking out on the neck. (Do snakes have necks??) Then cut the two remaining strands and fuse those ends as well.
If you want to see the snake body design on video, head over to YouTube and watch the Bored Paracord tutorial. This is for a bracelet, but it’s the pattern we used. Cool design!
To see the cobra design (the head), check out this post on Instructables.
Pick your sides!
We chose to make this side the underside of our snakes. The pattern is different on either side! We ended up liking the underside best because it has stripes like snakes. But you can go either way! Decide which side should be “up,” and use hot glue to attach the eyes.

We experimented a little with the eyes – I made one snake with bead eyes by threading pony beads onto the paracord in the head. None of us liked the bead eyes as well as the googly eyes. I ended up taking the beads back off, but I wish I had taken a picture first. It’s definitely an option, and more in the “spirit of paracord” than gluing on googly ones.
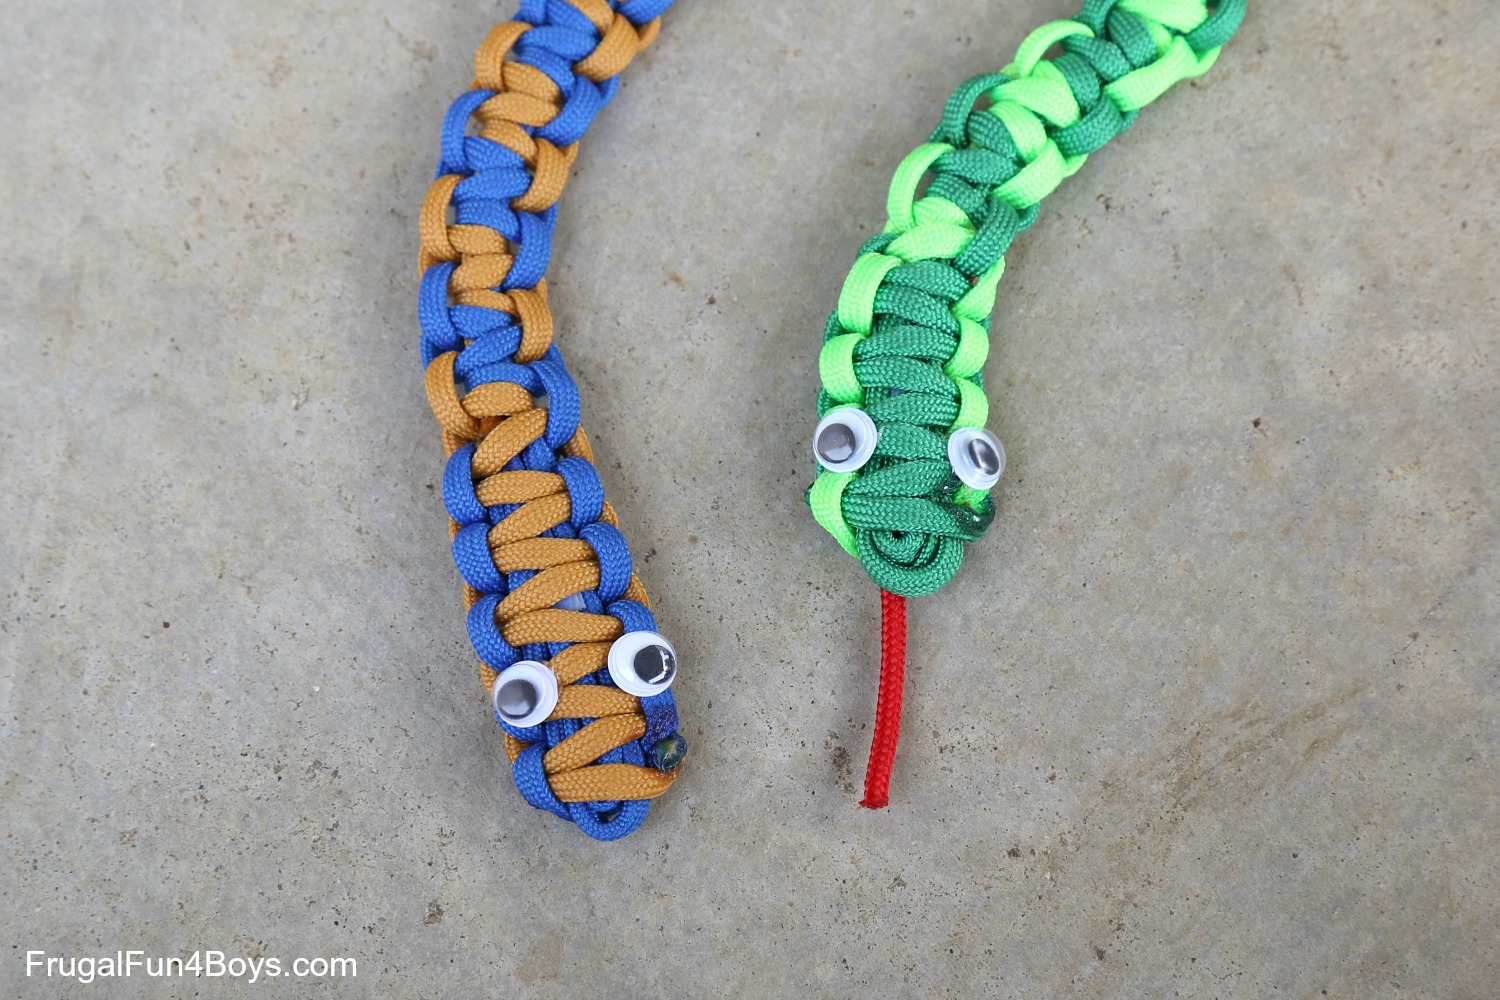
For the tongue, I wove a short strand of red paracord through the underside of the head. You can fuse the end to the underside of the snake’s head, or just leave it held in place by tension.
Have fun crafting!
6 Comments
W.r.grotheer Jun 27, 2017
Looks like an easy to do job. I will try it. Thank you for the nice idea.
Colin cooper Jul 7, 2017
Great idea
Anonymous Dec 19, 2017
Just for the record, the first paracord weave that's used is called the single genoese weave :)
UIrim8gamer Apr 6, 2020
This was very helpful, I found a new hobby.
Debi Nov 14, 2020
Practicing for a grandchild visit. All went well until I reached the head. Did snip the two cords and attempt to fuse together but not sure I got this part right... it will leave a lump on one side - right? And am afraid it will still unravel.
Sarah Nov 16, 2020
It's hard to say without seeing it, but I think it will be okay! If you truly get it fused, it won't unravel.
Pokeysan Nov 5, 2024
Love this idea. I expanded upon it and fed craft wire through the body before tying knots and did one piece of red cord wrapped around part of the loops at the end of the head for the tongue. Wish I could share a pic. Turned out awesome.
Post a Comment