
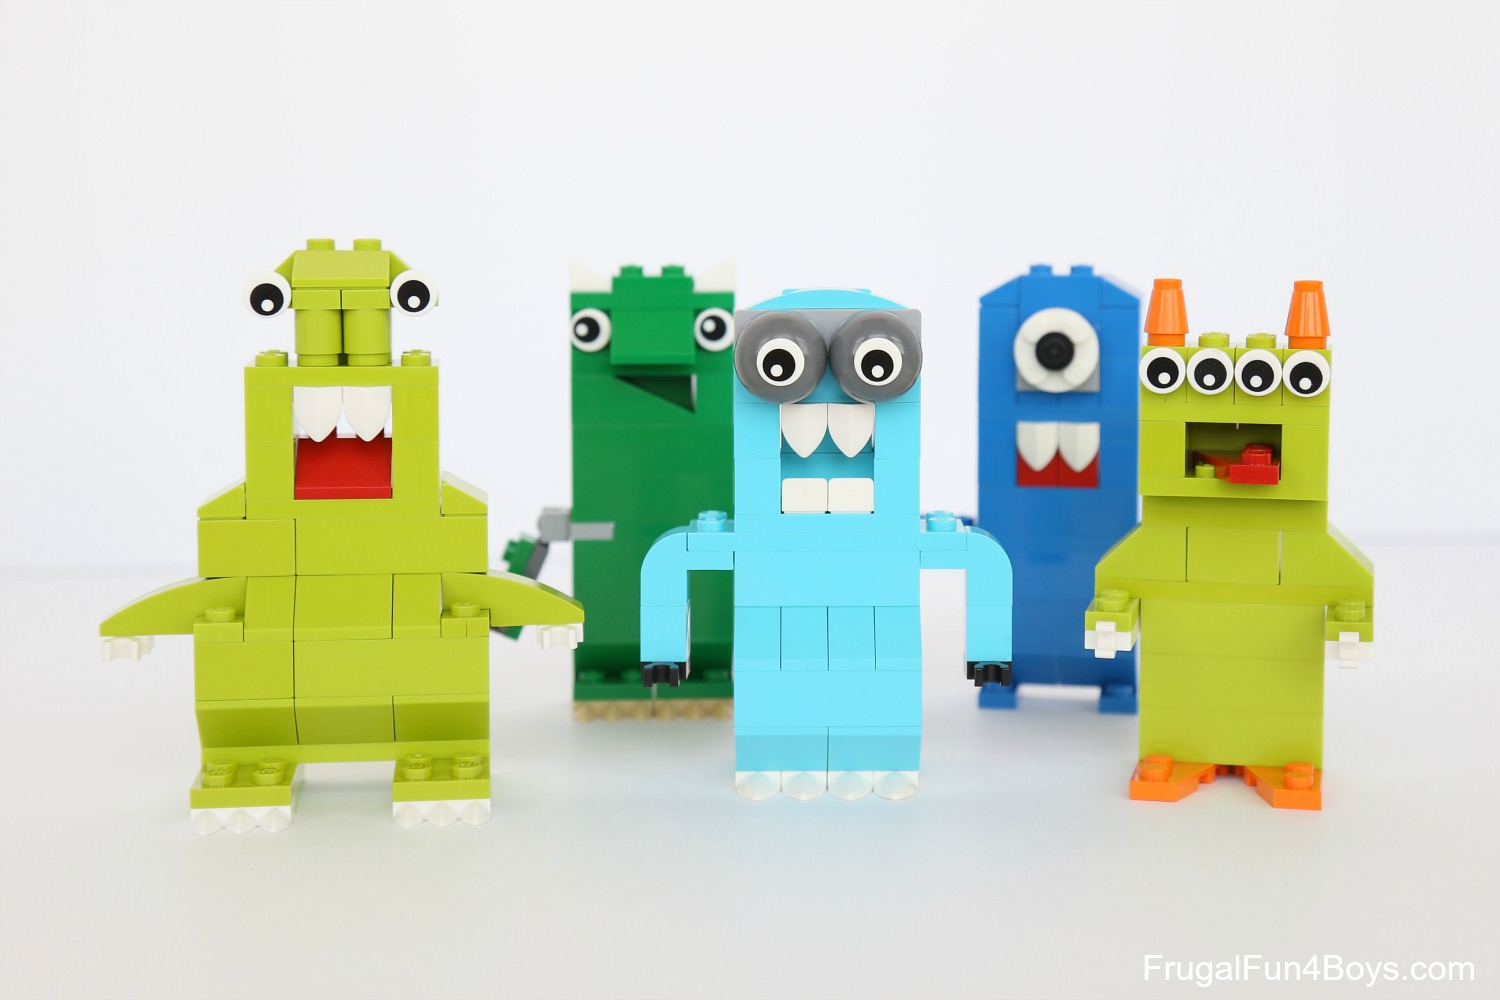
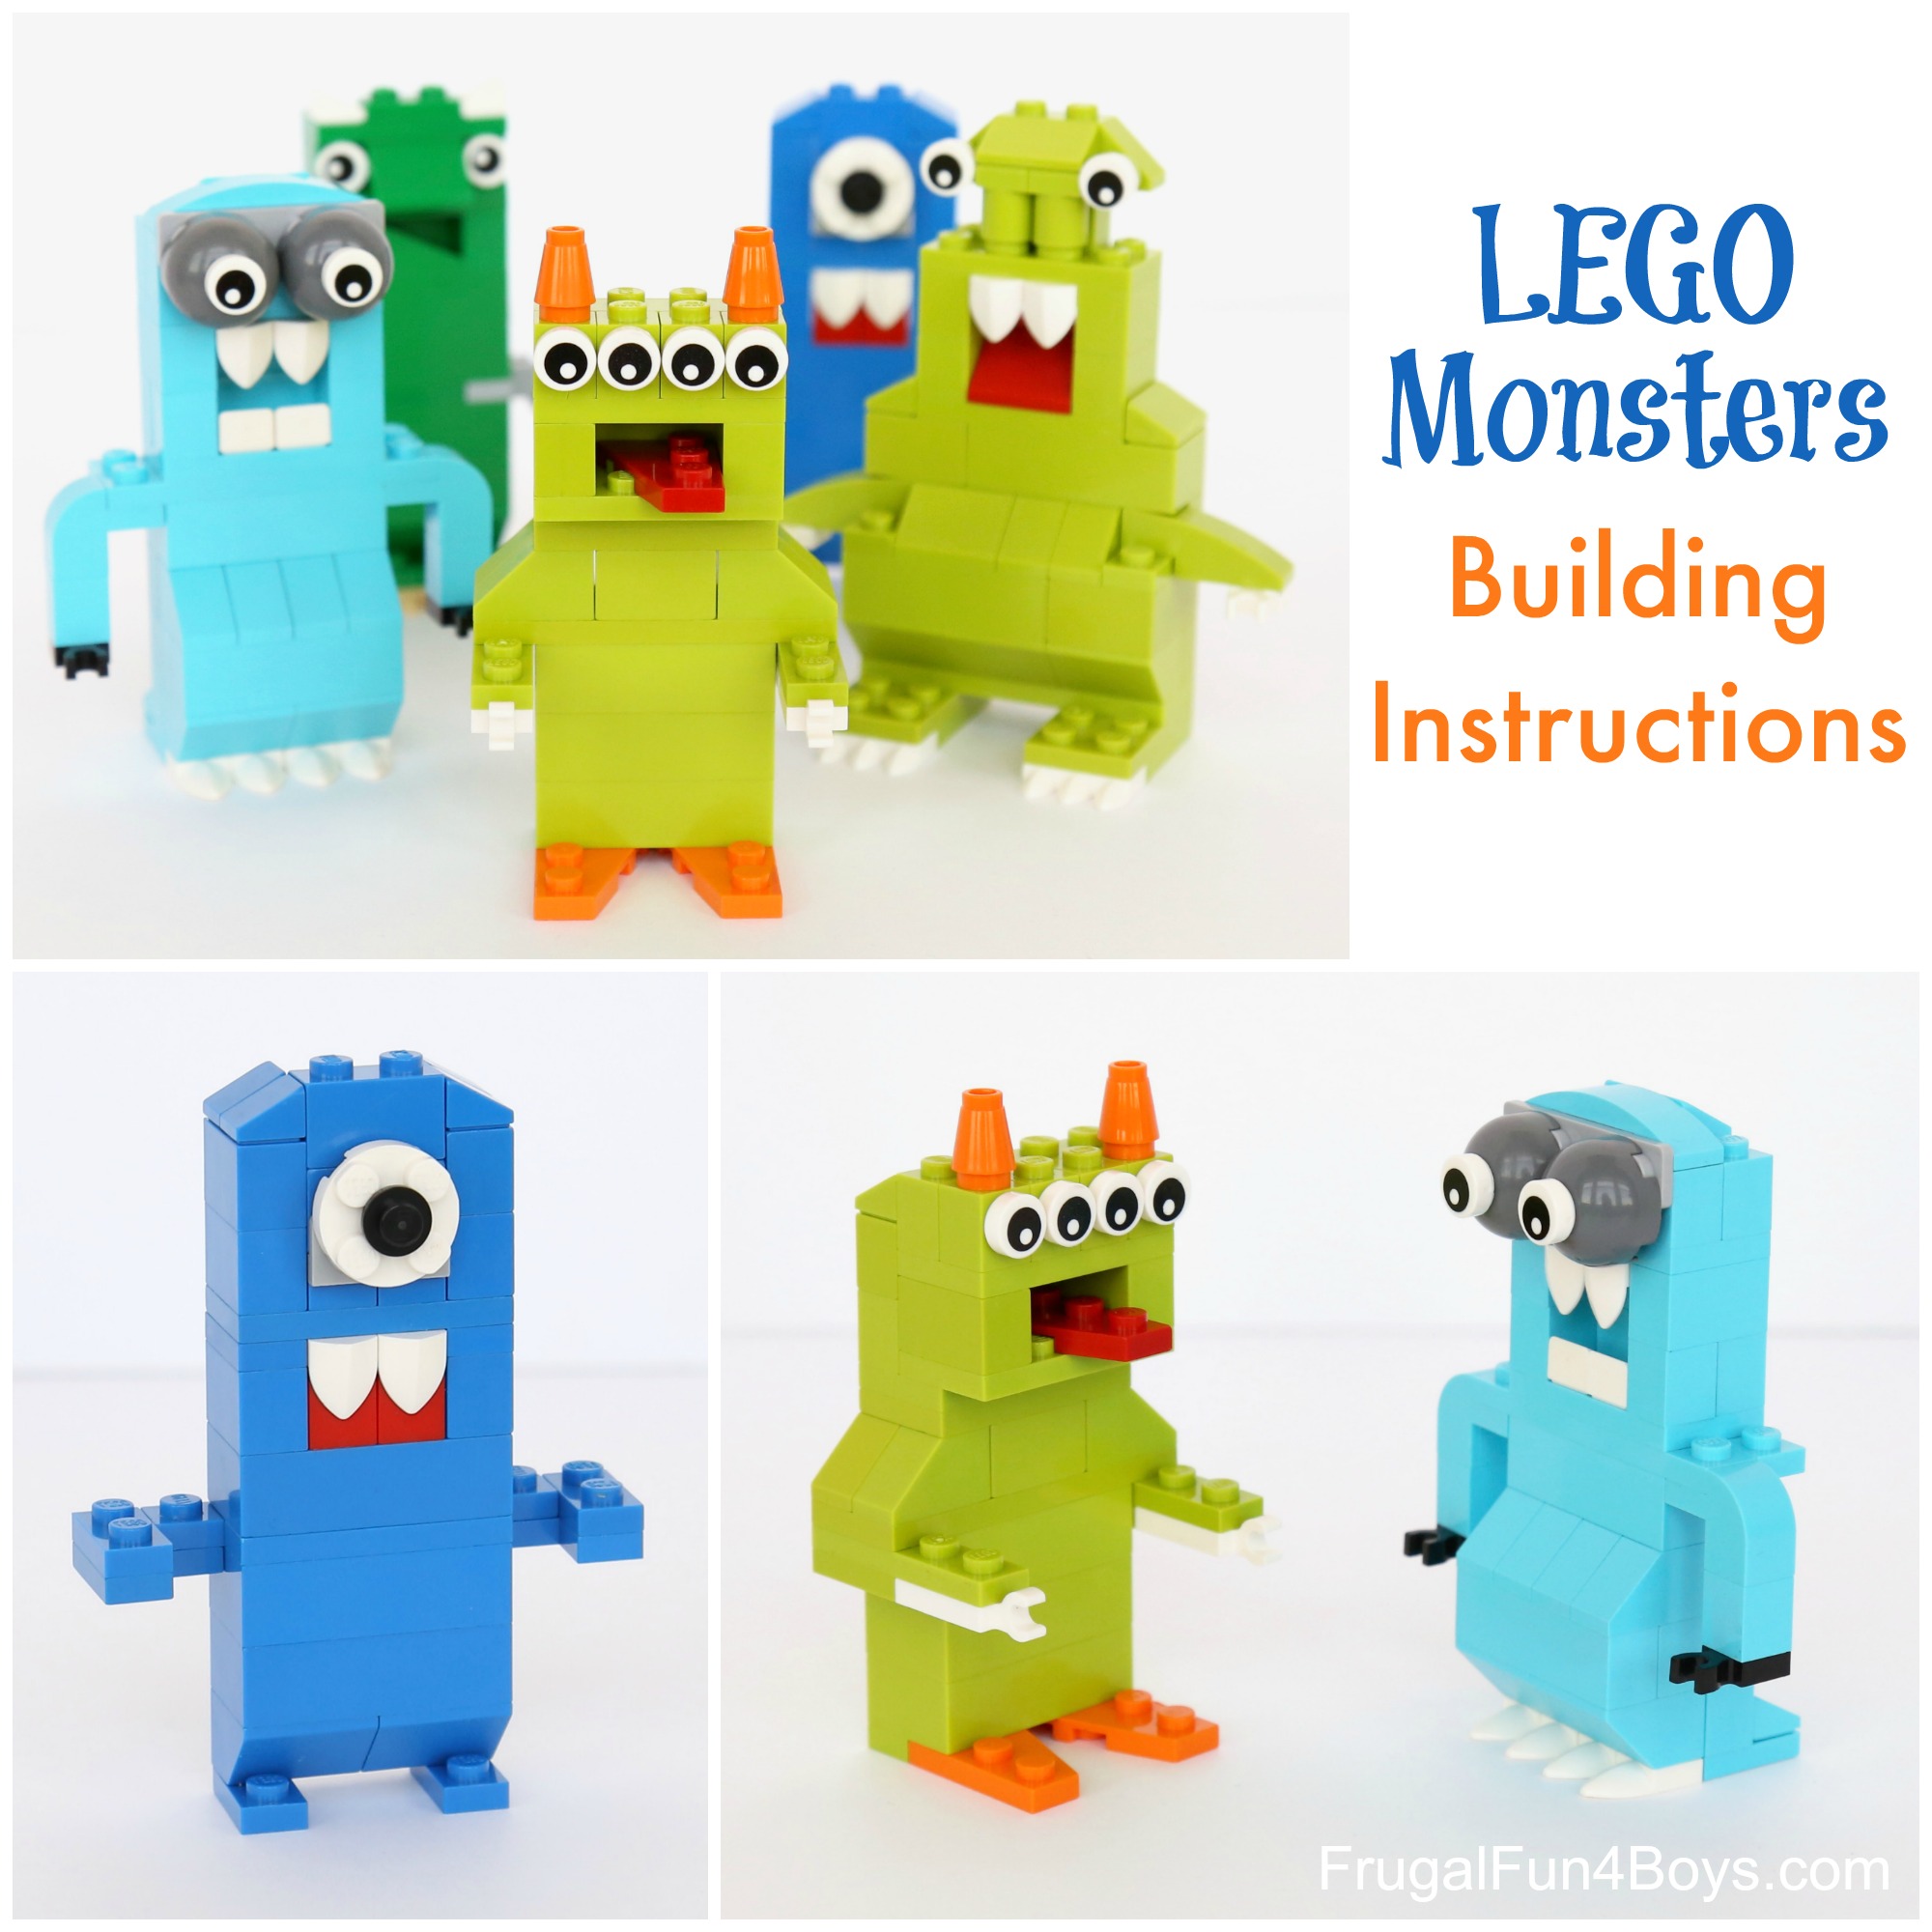
Here’s a fun LEGO® building challenge! Create silly monsters. We’ve got building instructions for two of the monsters in the post, which should jump start all kinds of creative constructions.
The great part is that kids can build these monsters however they want with whatever pieces they have on hand. Great challenge for a LEGO® club!
This post contains Amazon affiliate links.

We have been on a LEGO® kick lately since we’re so excited about the fact that our second LEGO® project book is releasing very soon! This monster challenge is enjoyable for kids of all ages. The boys and I were making each other laugh out loud with our monster creations!
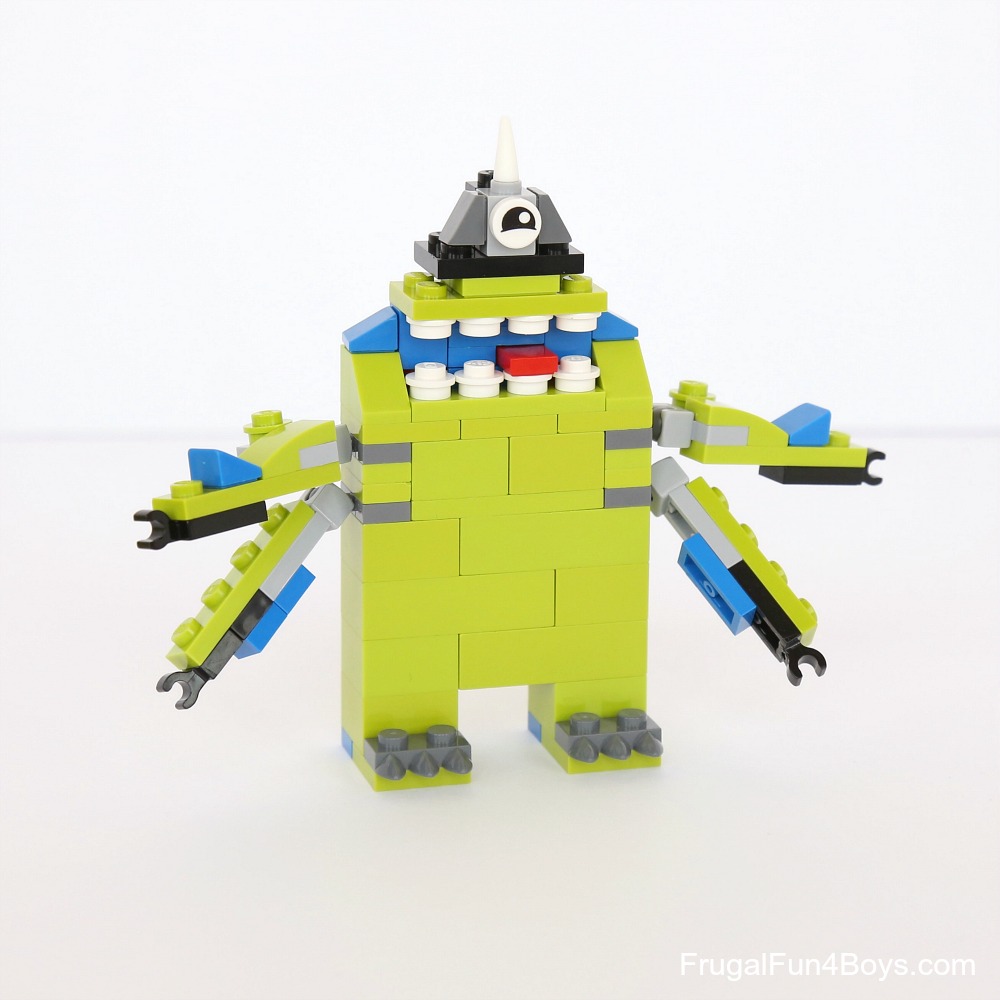
The monster below was created by my 10 year old. The extra arms give it a silly “Monsters, Inc.” type of look.
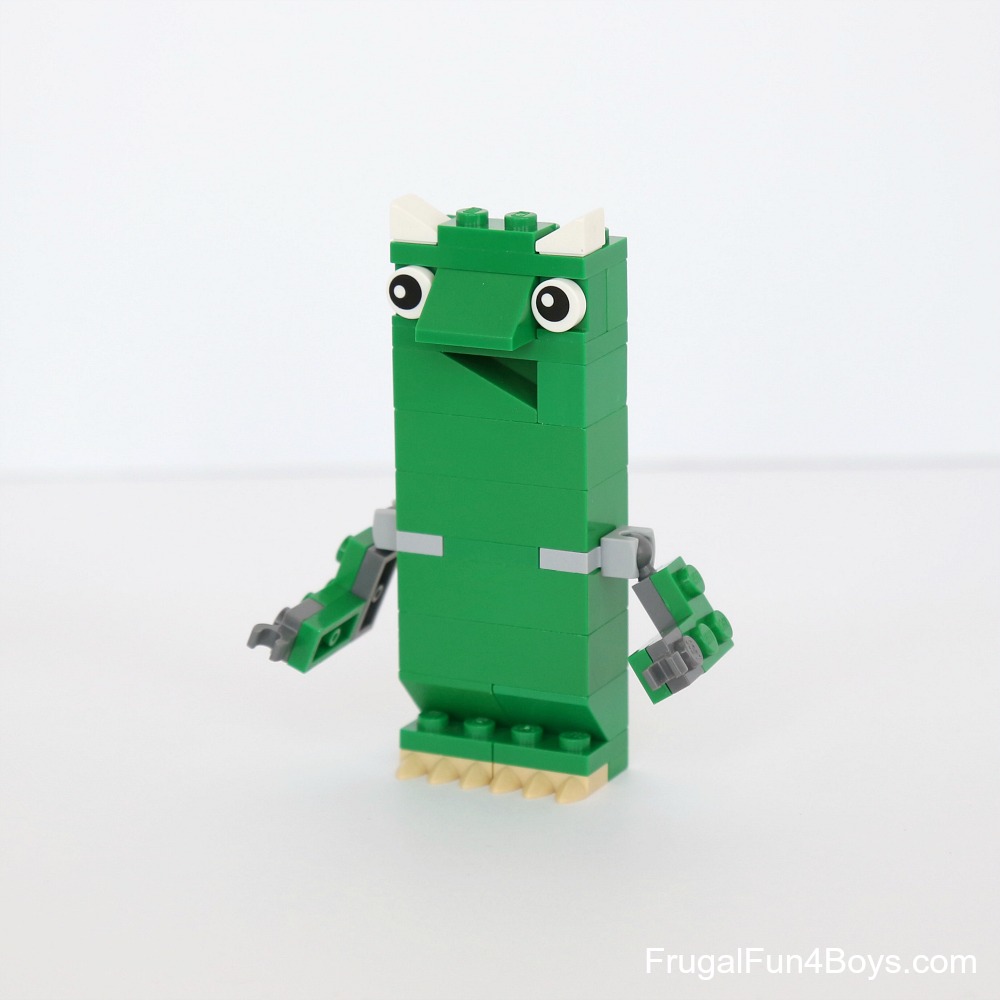
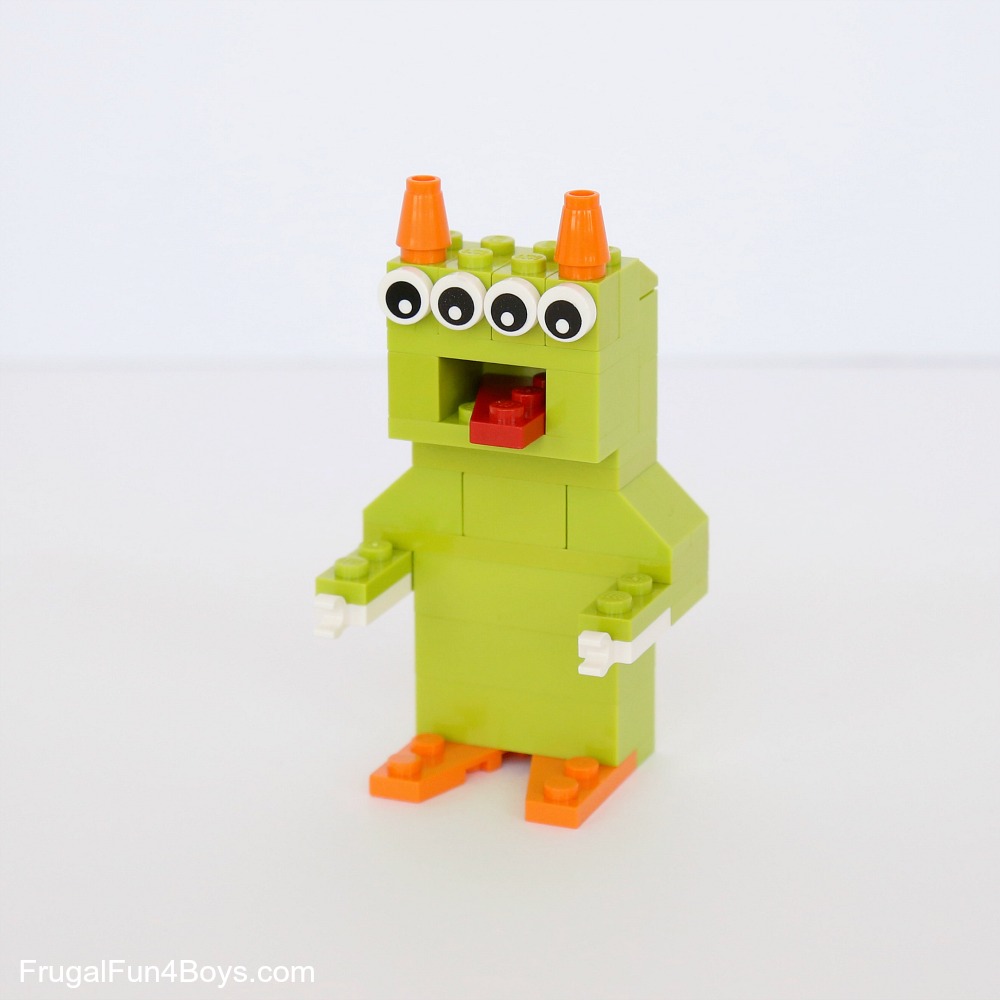
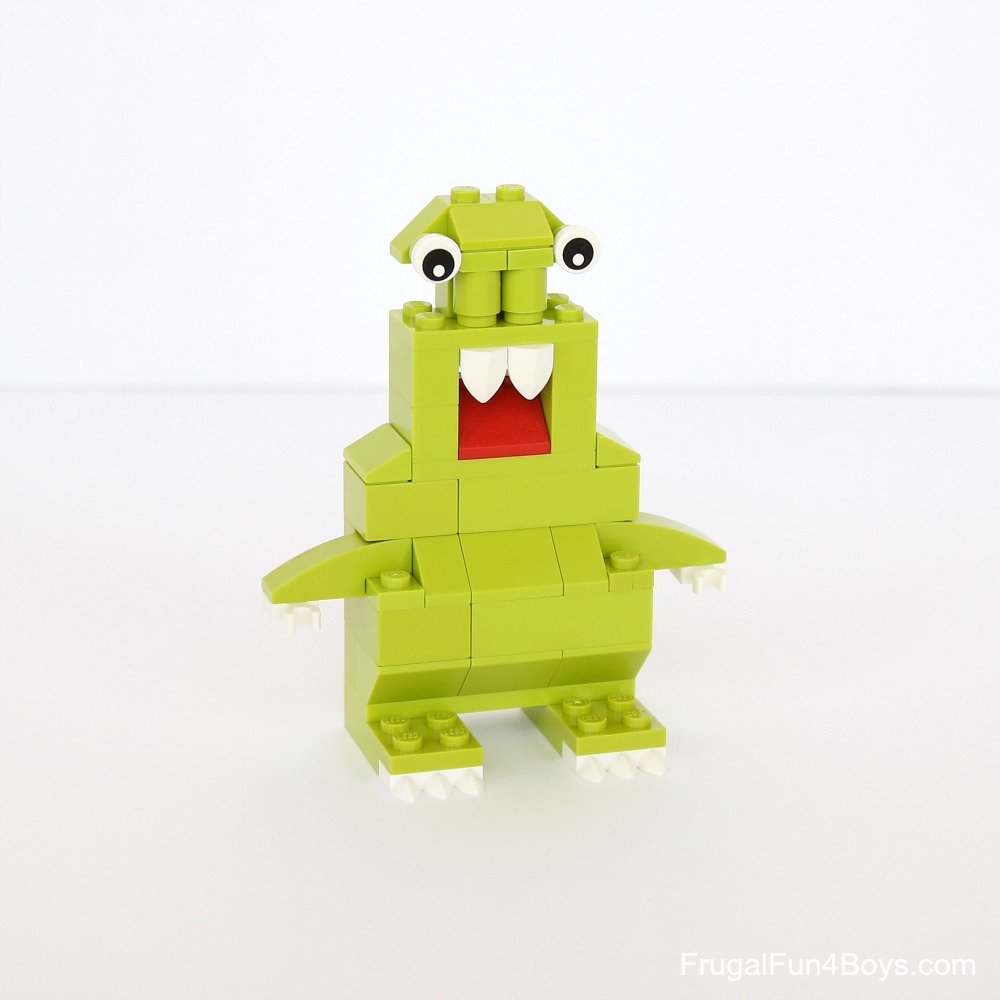
This green monster has such a goofy lopsided smile. Make the open mouth by using a 1 x 3 slope brick.
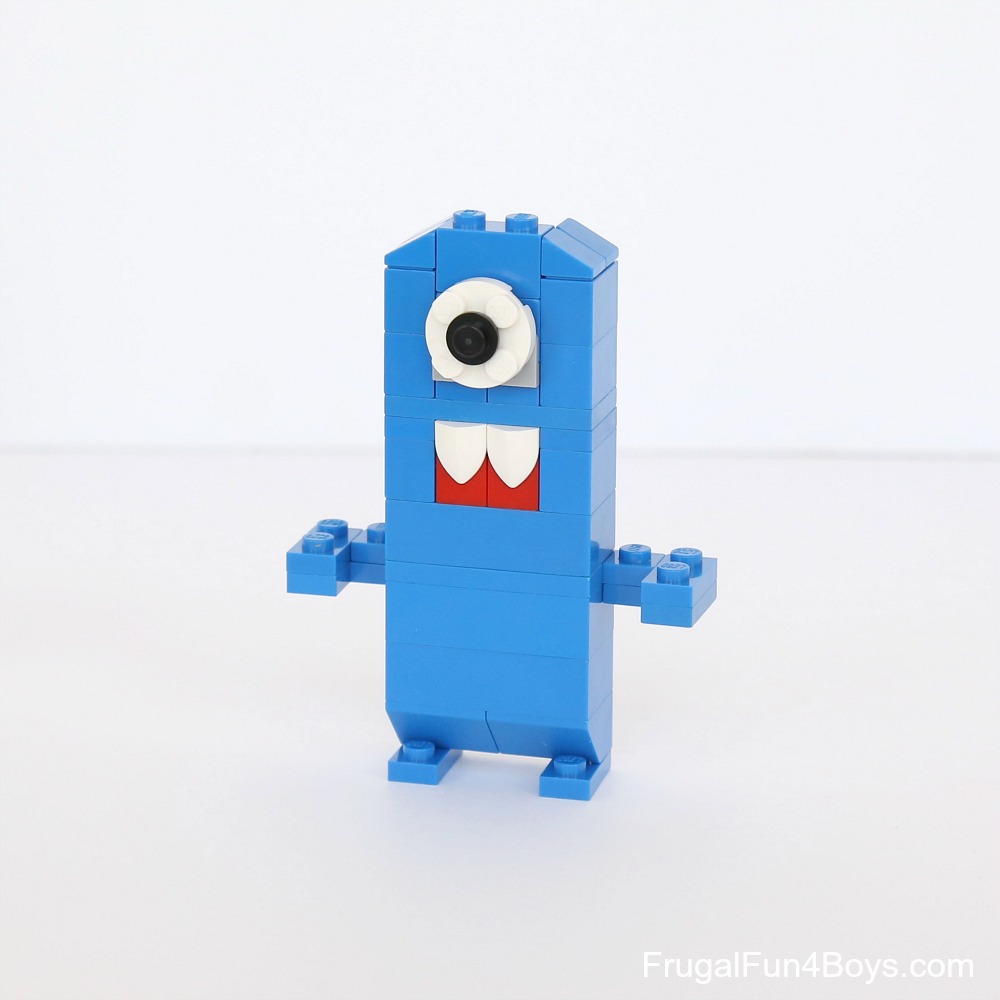
For this monster, we used a 2 x 2 white round plate and a 1 x 1 black round plate for the eye. It’s attached to the body with a light gray bracket.
These two are my favorites out of all them! The tongue sticking out just makes me smile.

Here’s a close-up shot of the green monster, and then we’ll get on with step-by-step instructions for the funny light blue monster.
The tongue is a 2 x 3 wedge plate.
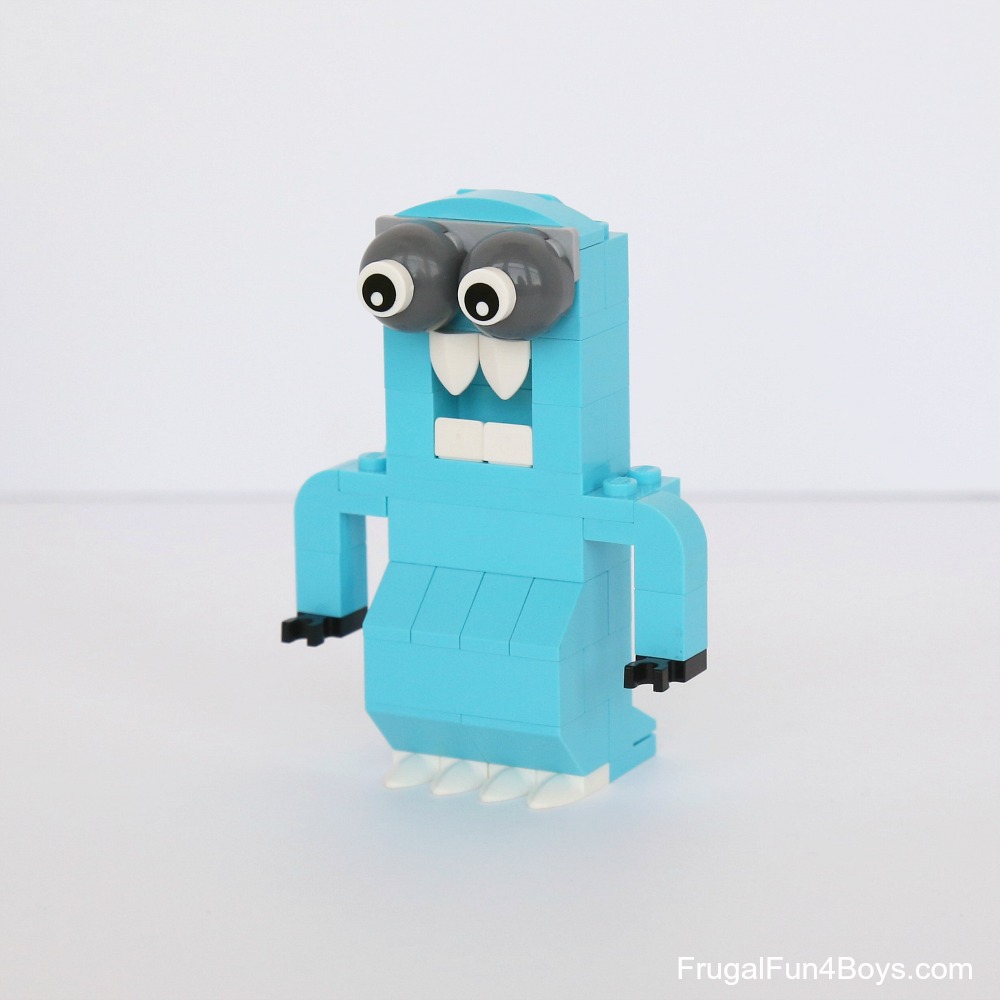
How to Build the Light Blue Monster
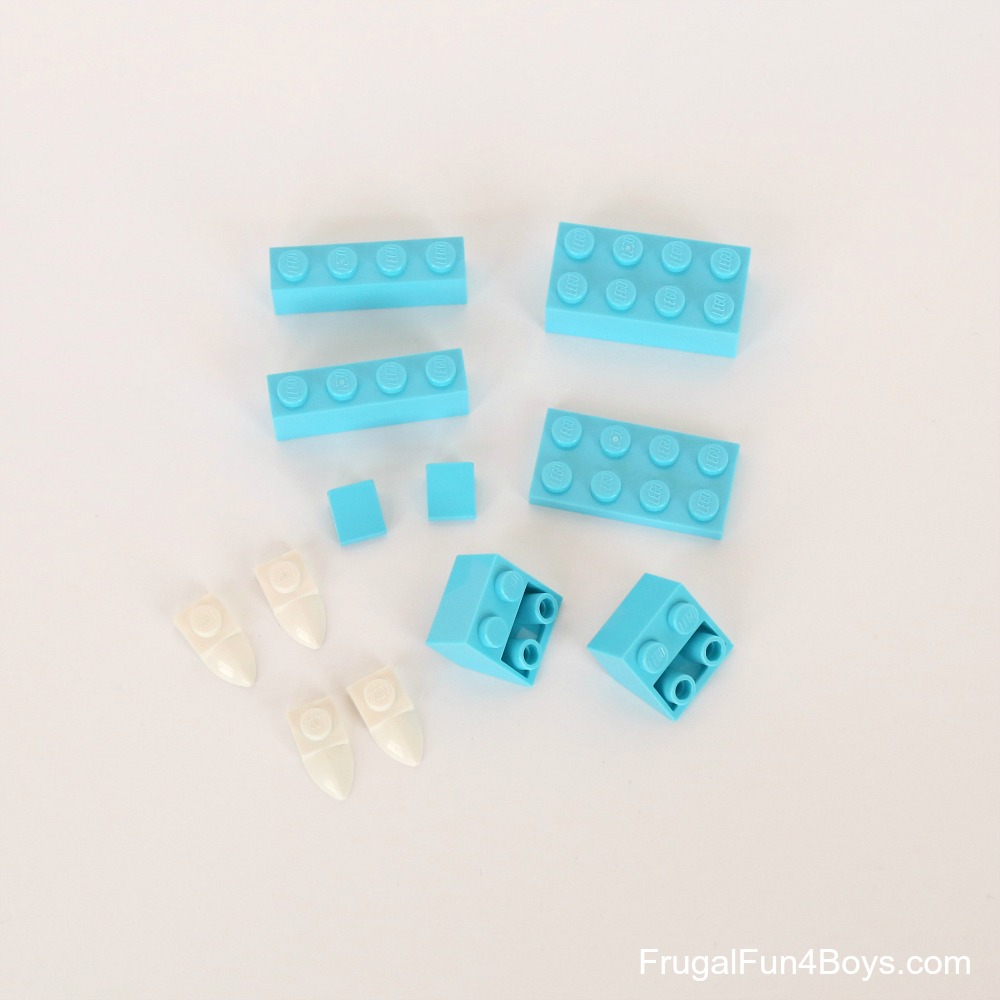
Step 1: Gather the bricks shown for building the bottom of the blue monster.
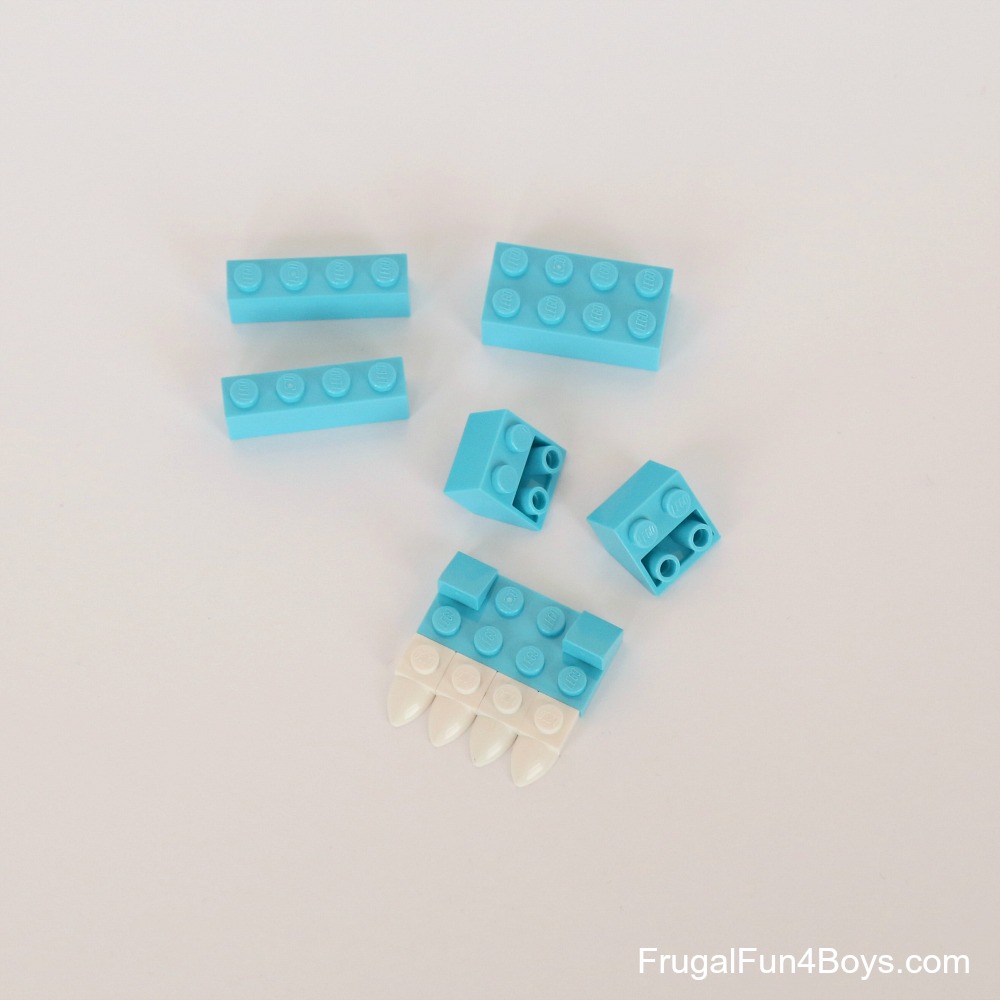
Step 2: Attach two 1 x 1 slopes to the 2 x 4 plate. Then line up 4 claws as shown.
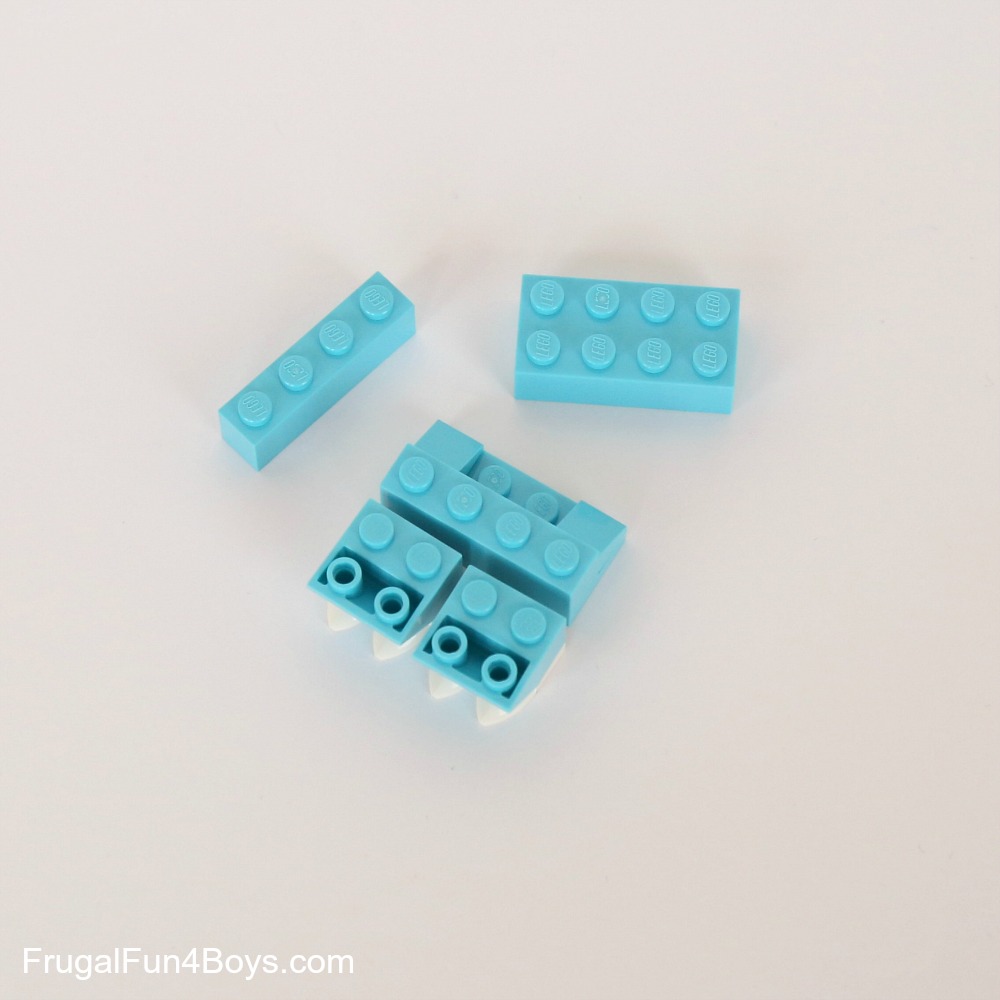
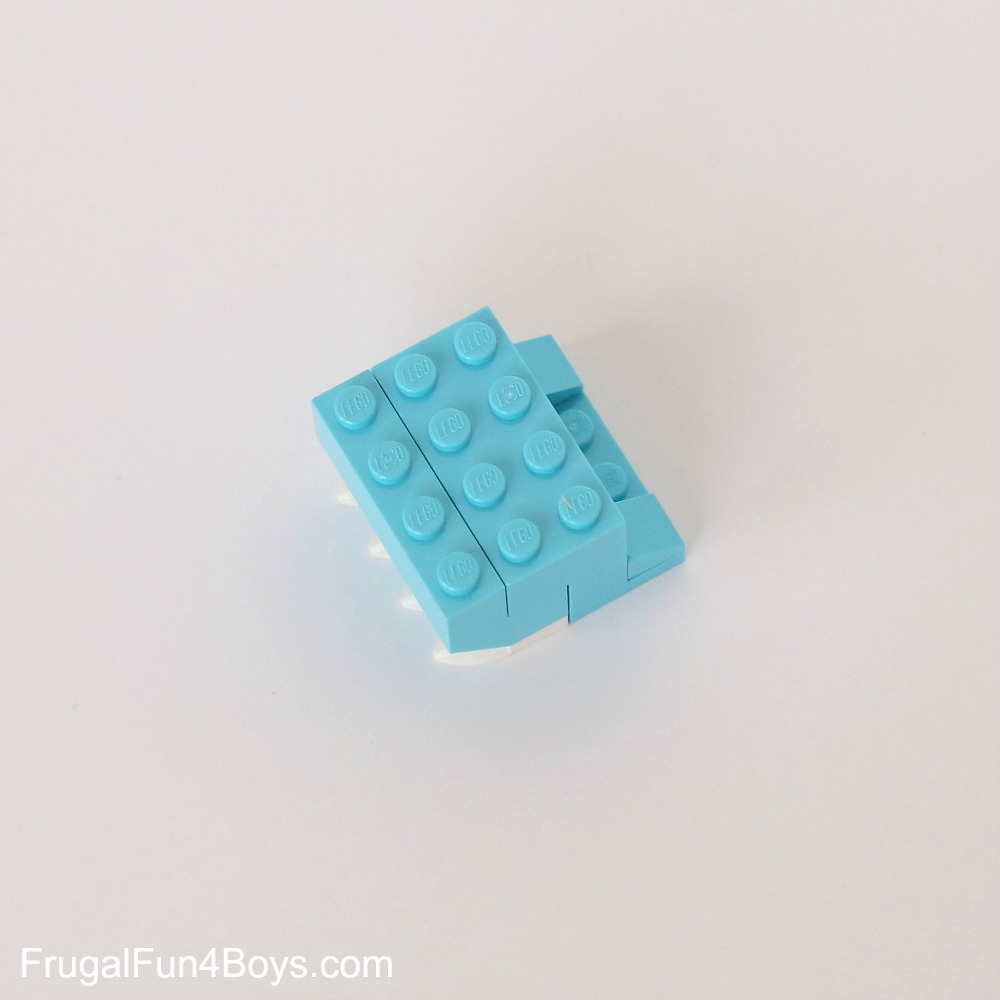
Step 3: Attach two 2 x 2 inverted slopes to the claws, and attach a 1 x 4 brick to the 2 x 4 plate.
Step 4: Join the two sections with a 2 x 4 brick and a 1 x 4 brick.
Step 5: Add four 1 x 2 slopes and a 1 x 4 brick.
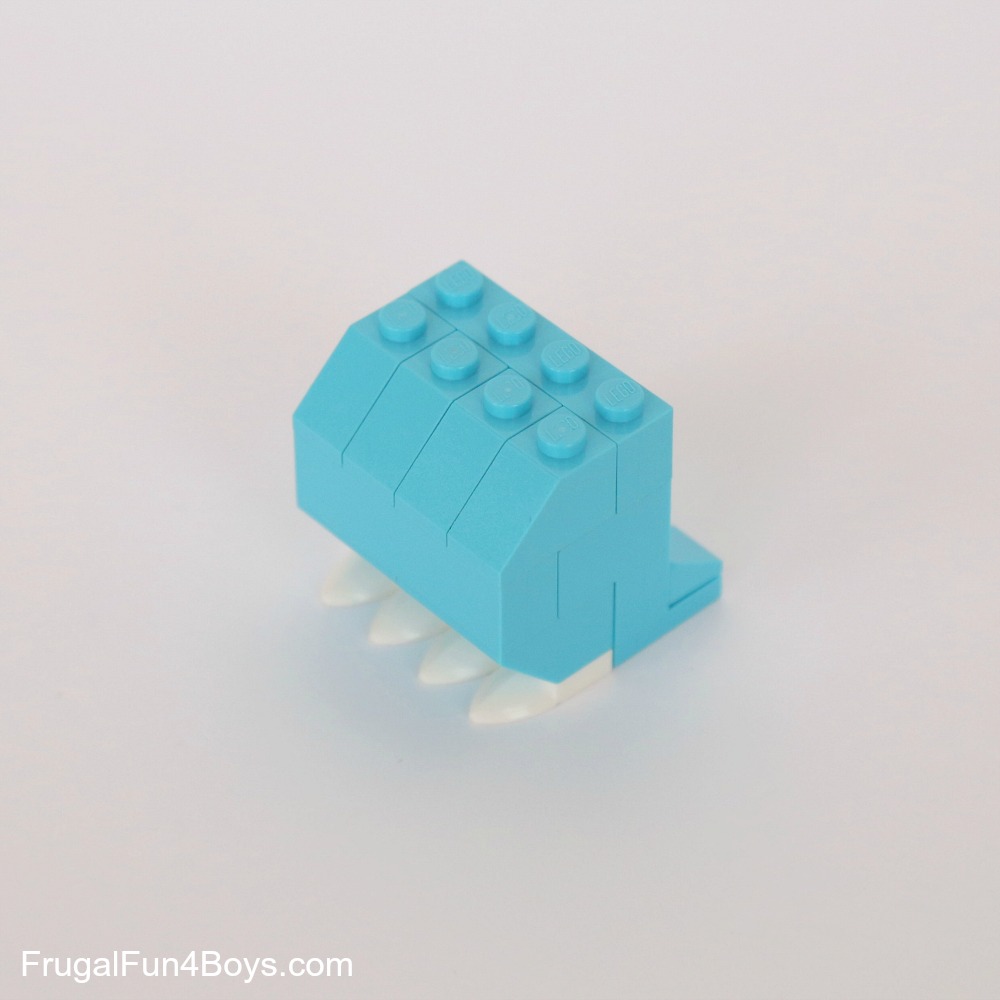
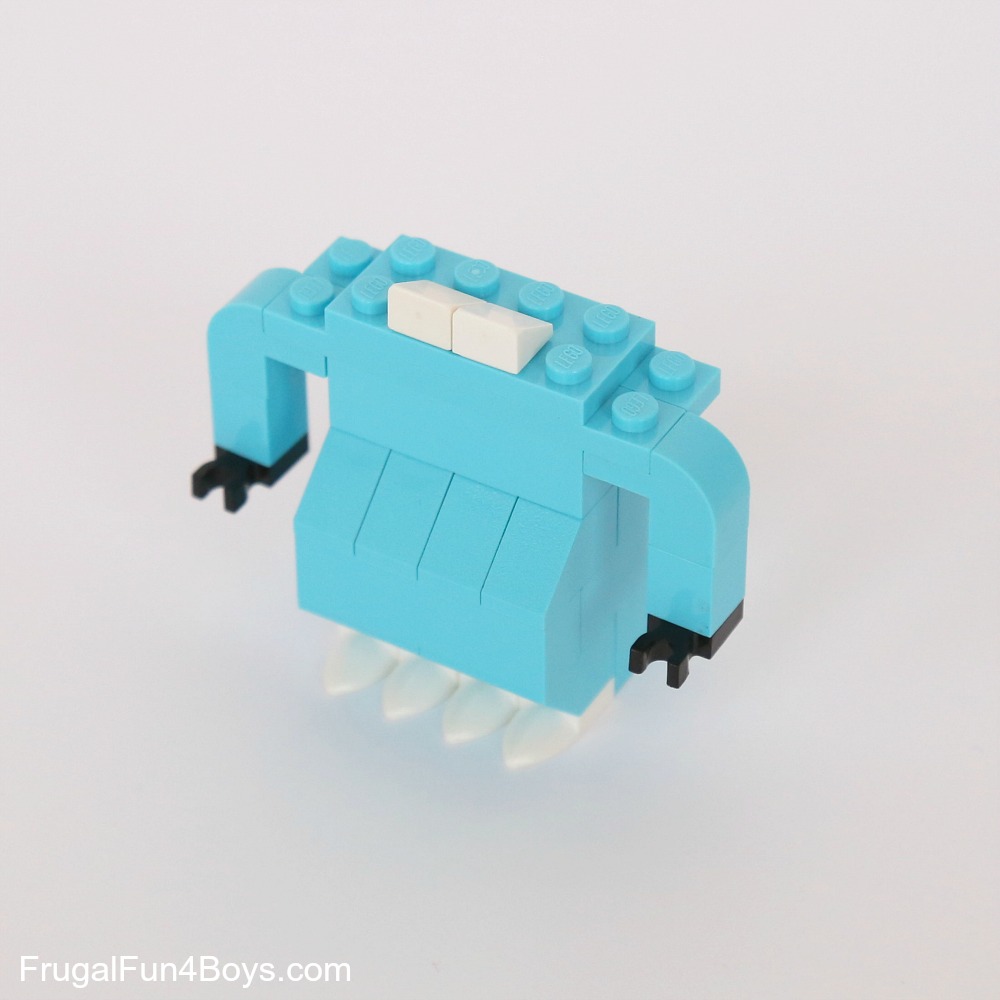
Step 6: Add another 2 x 4 brick. Then add two 1 x 6 plates (a 2 x 6 would be better). These bricks will hold the arms.
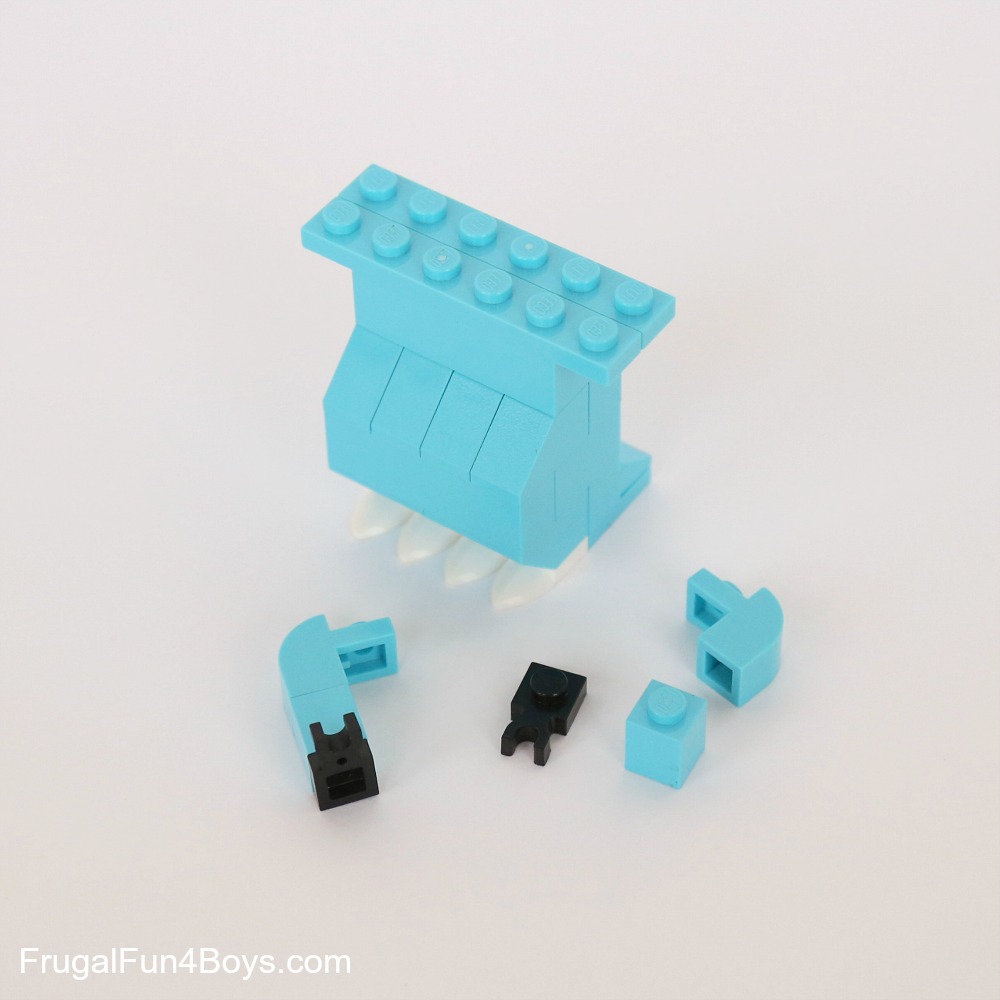
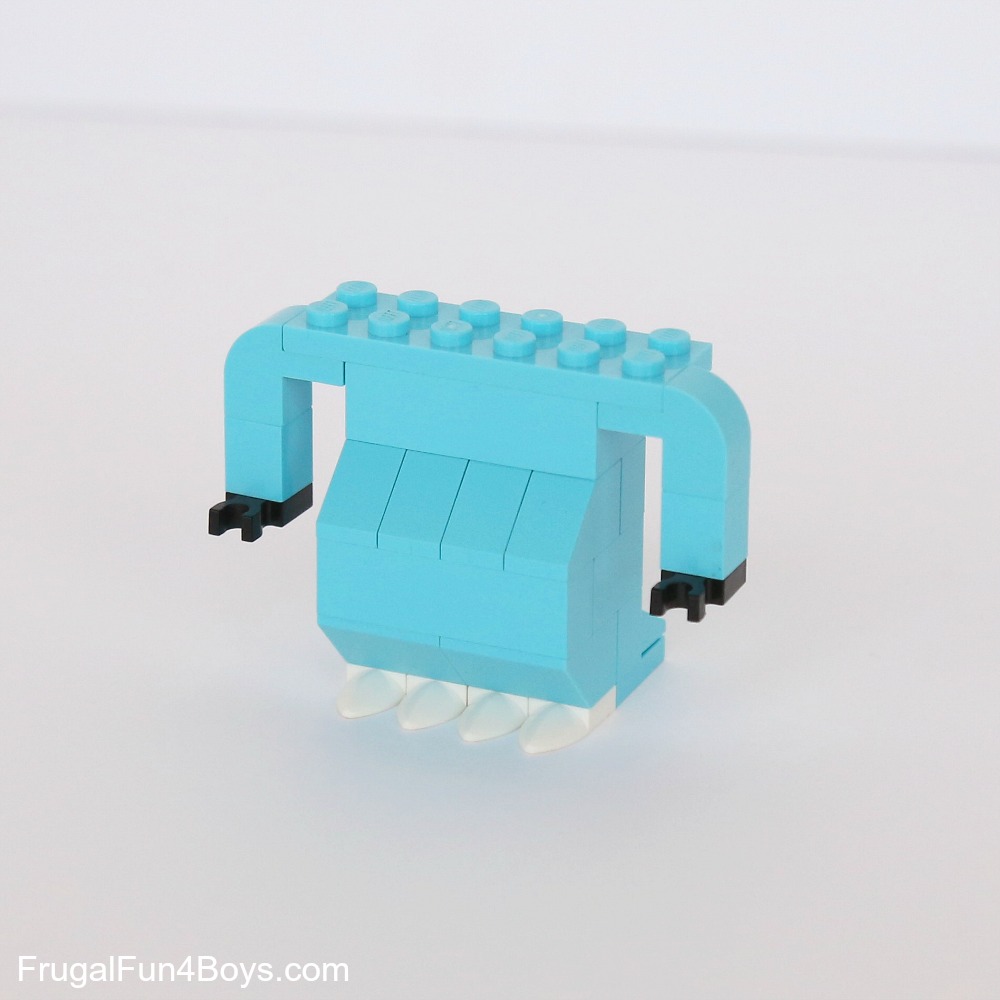
Step 7: Add two 1 x 2 bricks with a curved top (this is the correct brick on Brick Link), one on each side. Then add a 1 x 1 brick to each arm and a 1 x 1 black plate with a clip on each side as the hands.
Step 8: Add a 2 x 4 plate and two 1 x 1 white slopes.
Step 9: Build up the head with two layers of bricks. Attach two 1 x 1 plates with a vertical tooth to the underside of a 2 x 4 plate.
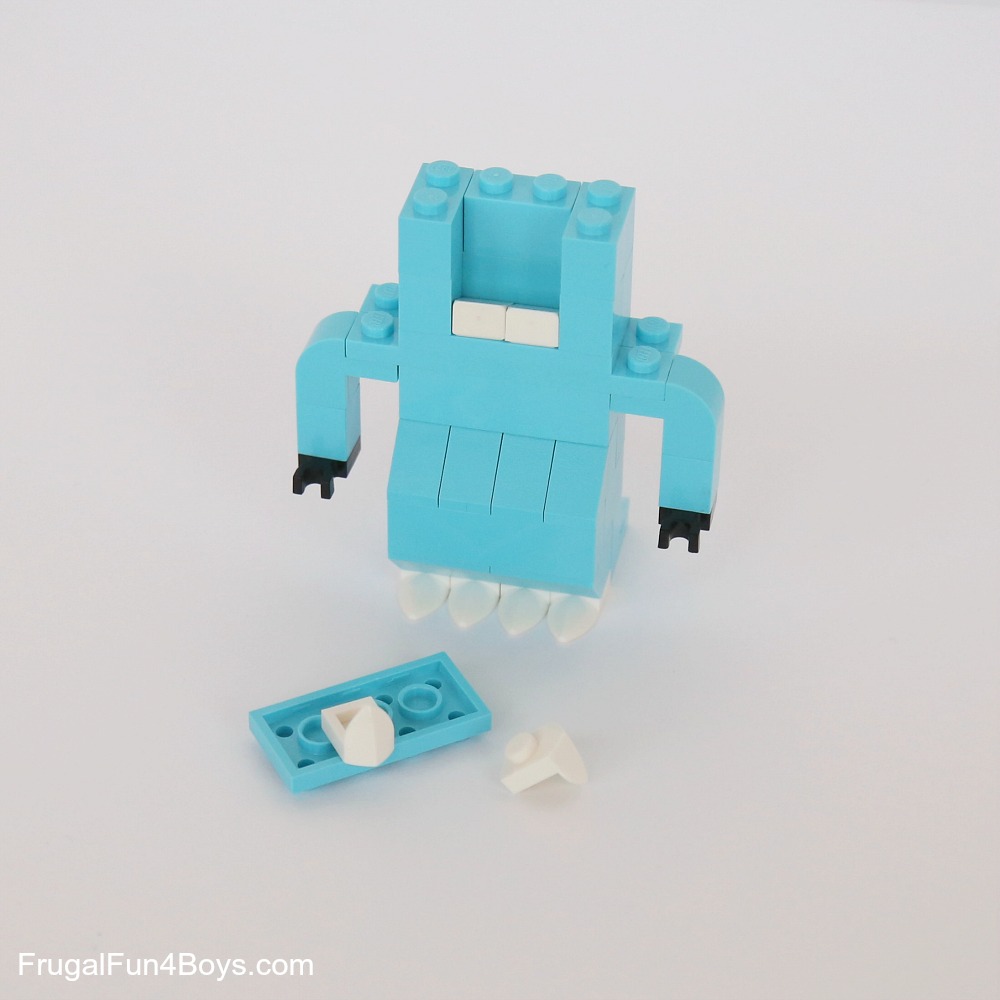
Step 10: Then attach this to the top of the mouth.
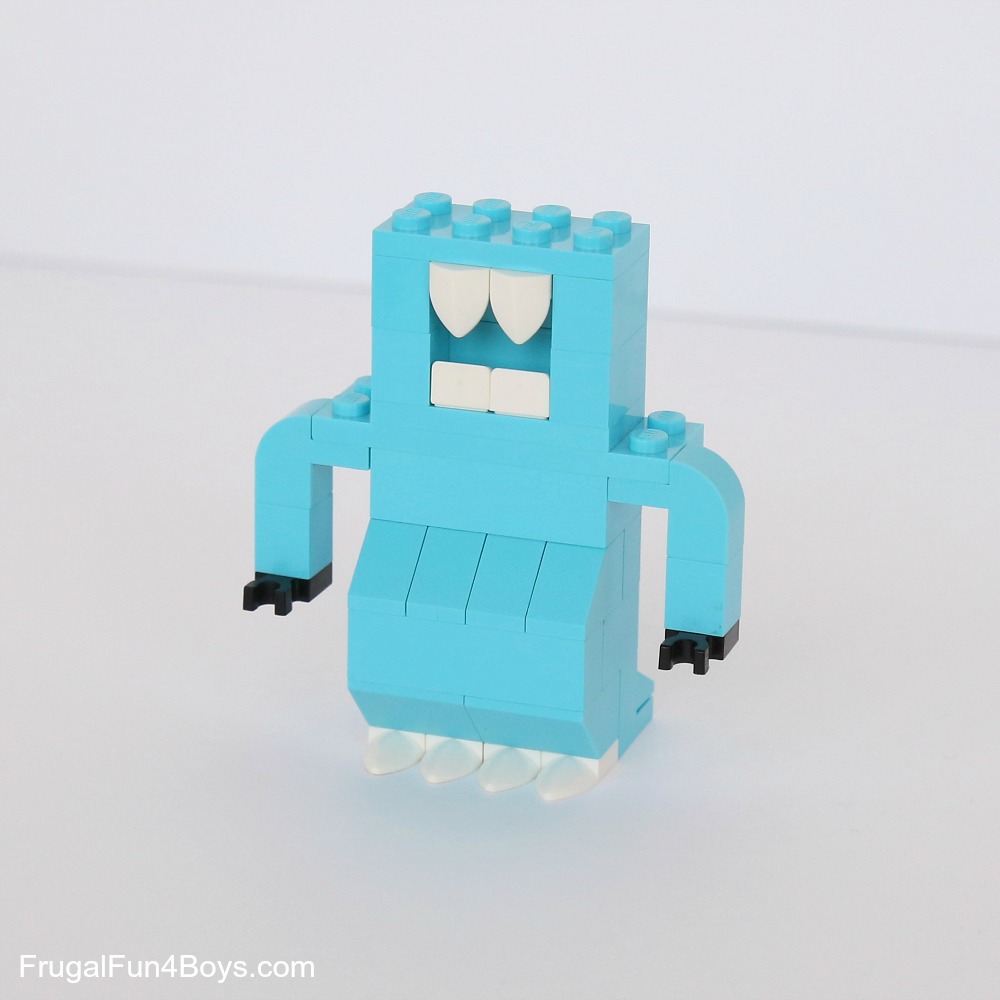
Step 11: Attach a 2 x 4 brick on top, and then add a 1 x 2 – 1 x 4 bracket.
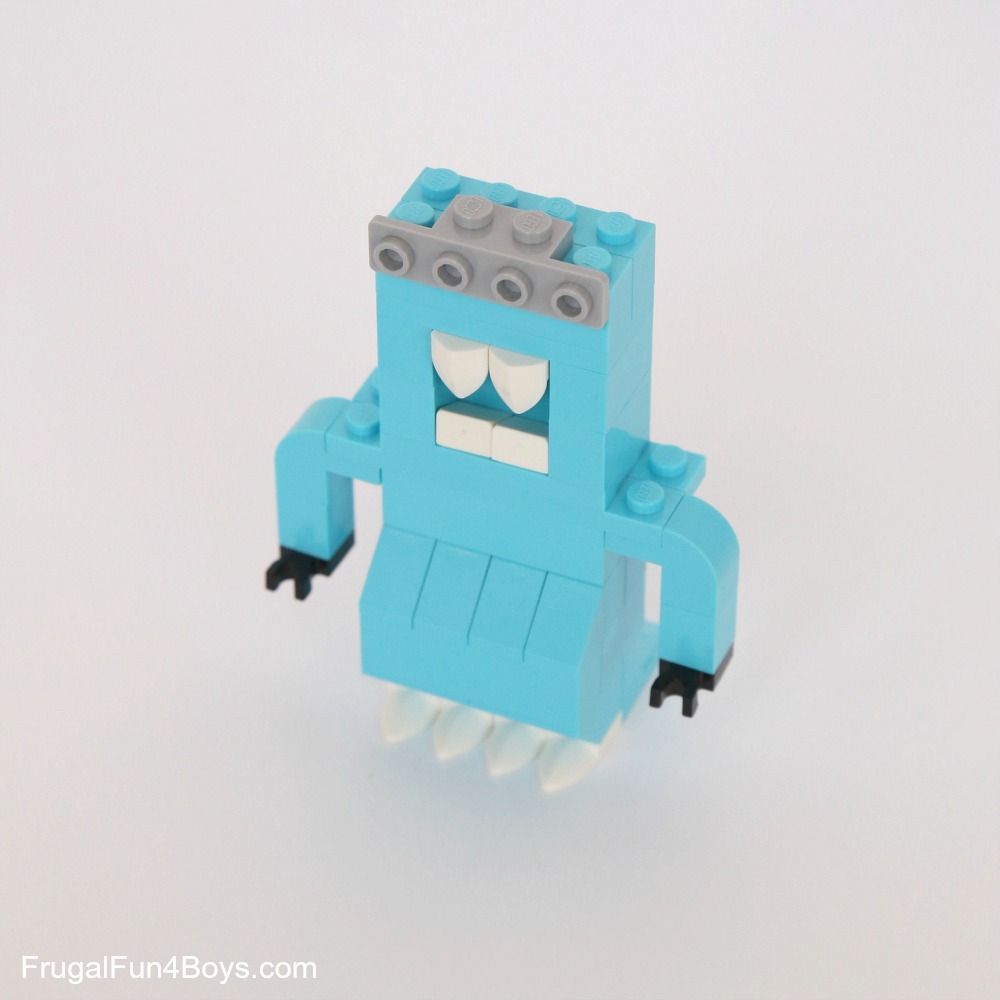
Step 12: Use the bracket to hold two 2 x 2 dome bricks. Attach the eyes to those.
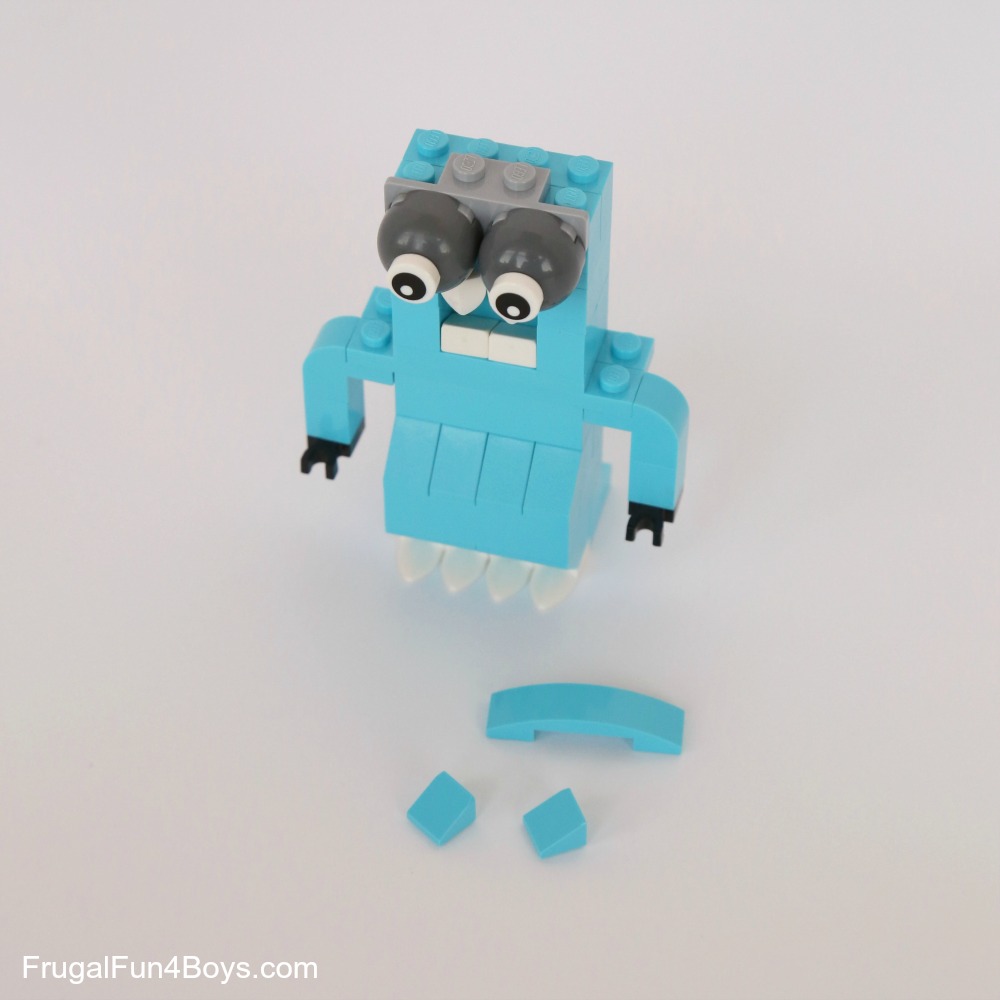
Step 13: Attach a 1 x 4 curved slope and two 1 x 1 slopes to the head, and the monster is done!
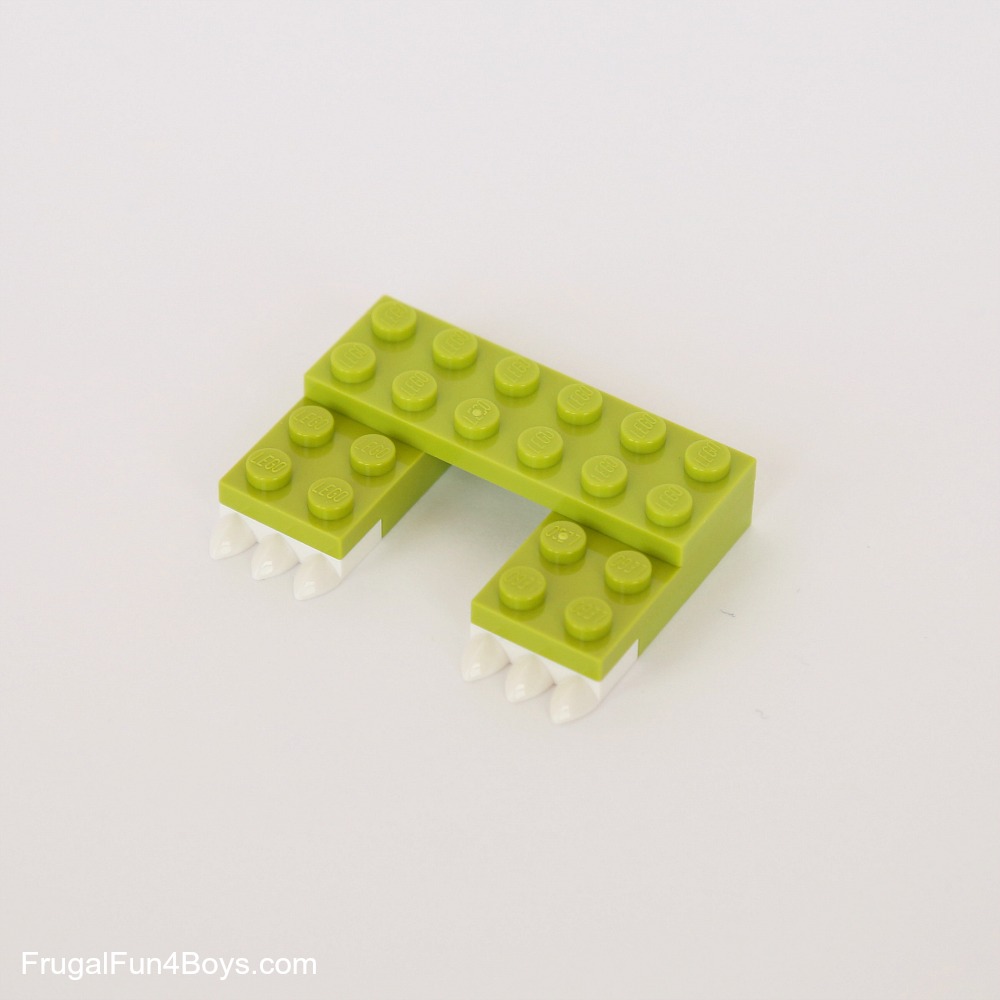
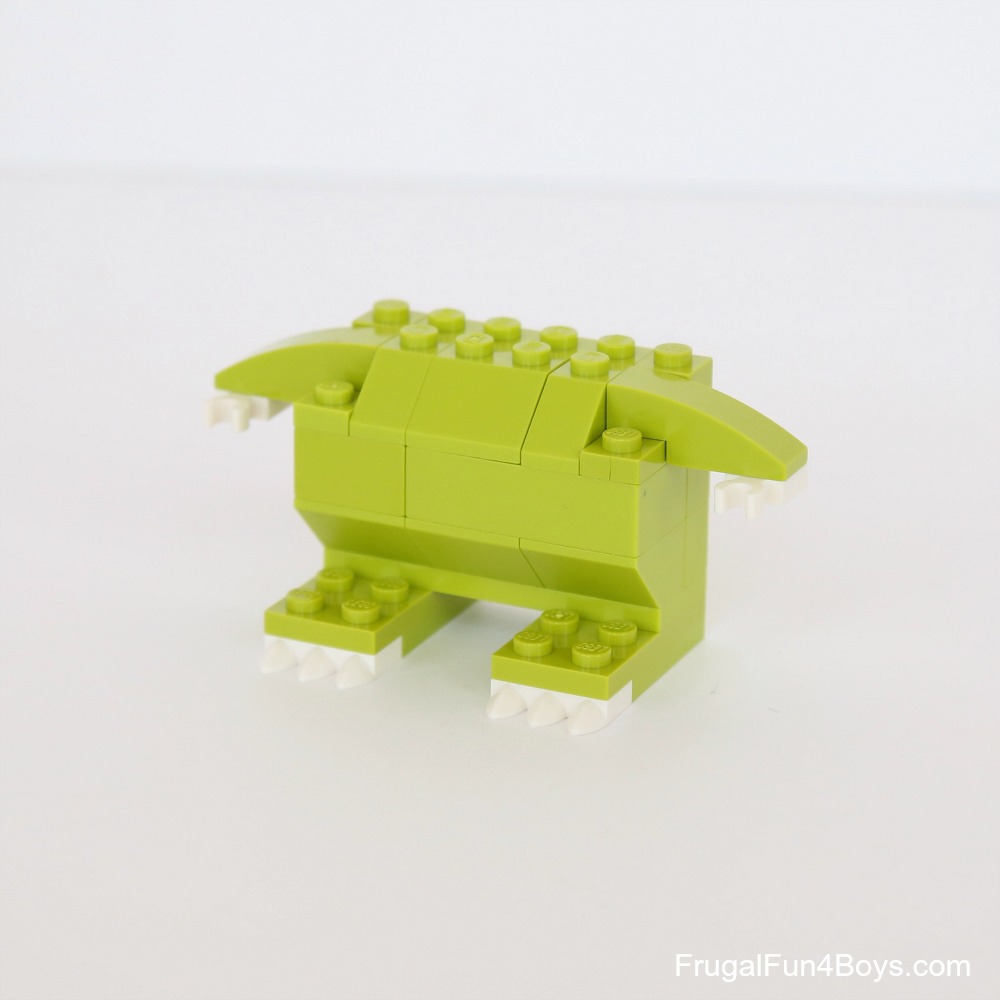
How to Build the Goofy Green Monster
This one is the green monster on the far right in the first picture at the top of the post.
Step 1: Build the feet. Each foot has a 2 x 3 plate, a 1 x 2 plate with 3 claws, and a 2 x 4 plate. Join them with a 2 x 6 plate.
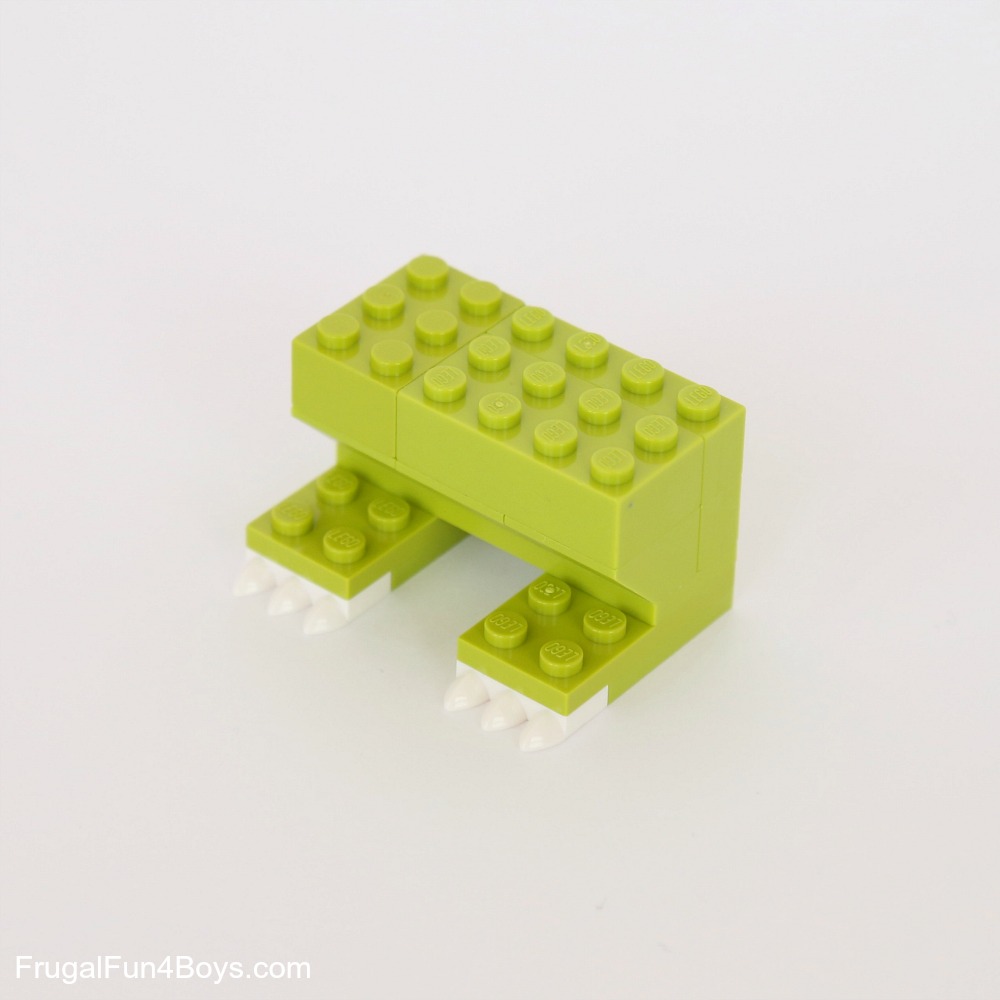
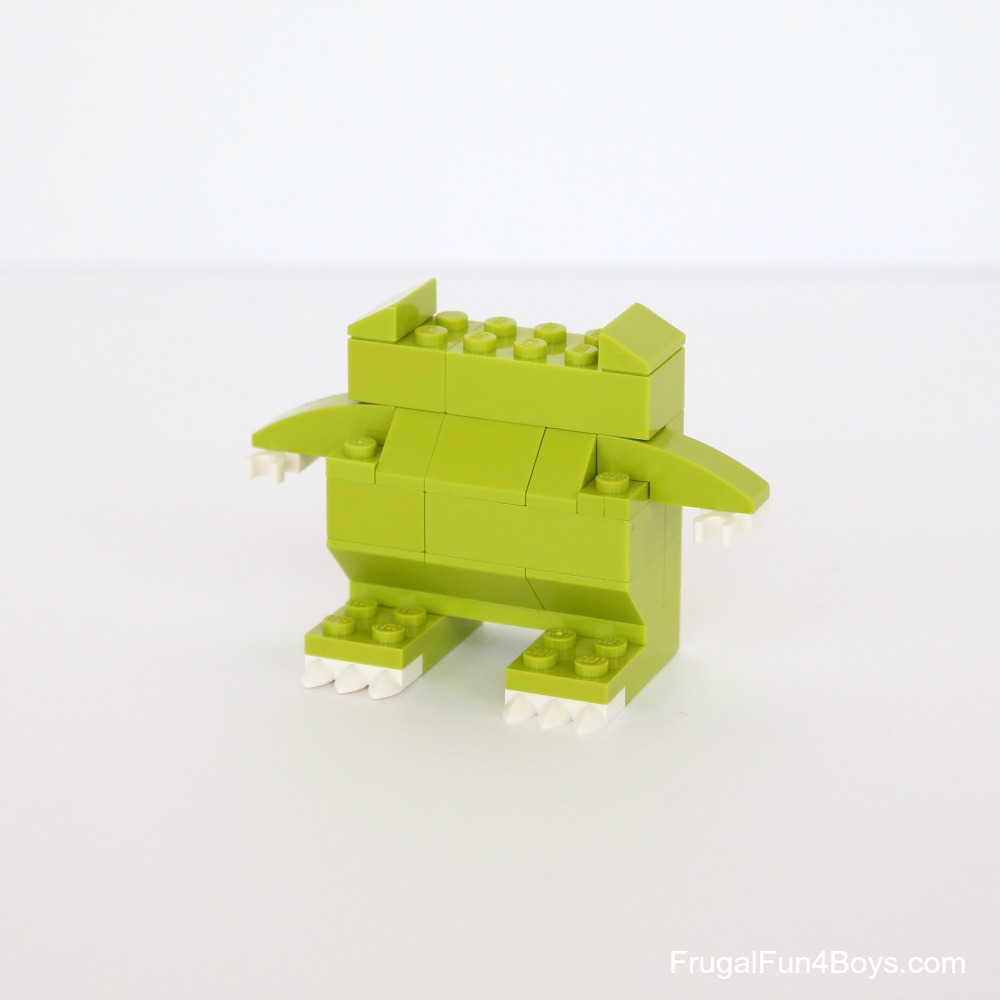
Step 2: Add three 2 x 2 inverted slopes and a 1 x 6 brick. Then put a layer of bricks on top of that.
Step 3: I used 1 x 3 curved slope bricks for the arms, and then 1 x 1 plates with a clip for the hands. Use slope bricks and regular bricks to add a layer between the arms.
Step 4: Add a 2 x 4 brick and a 2 x 2 brick. Then put a 1 x 2 slope on each side.
Step 5: Add a 2 x 2 red slope for the tongue. Then put two 1 x 2 bricks on each side of the head.
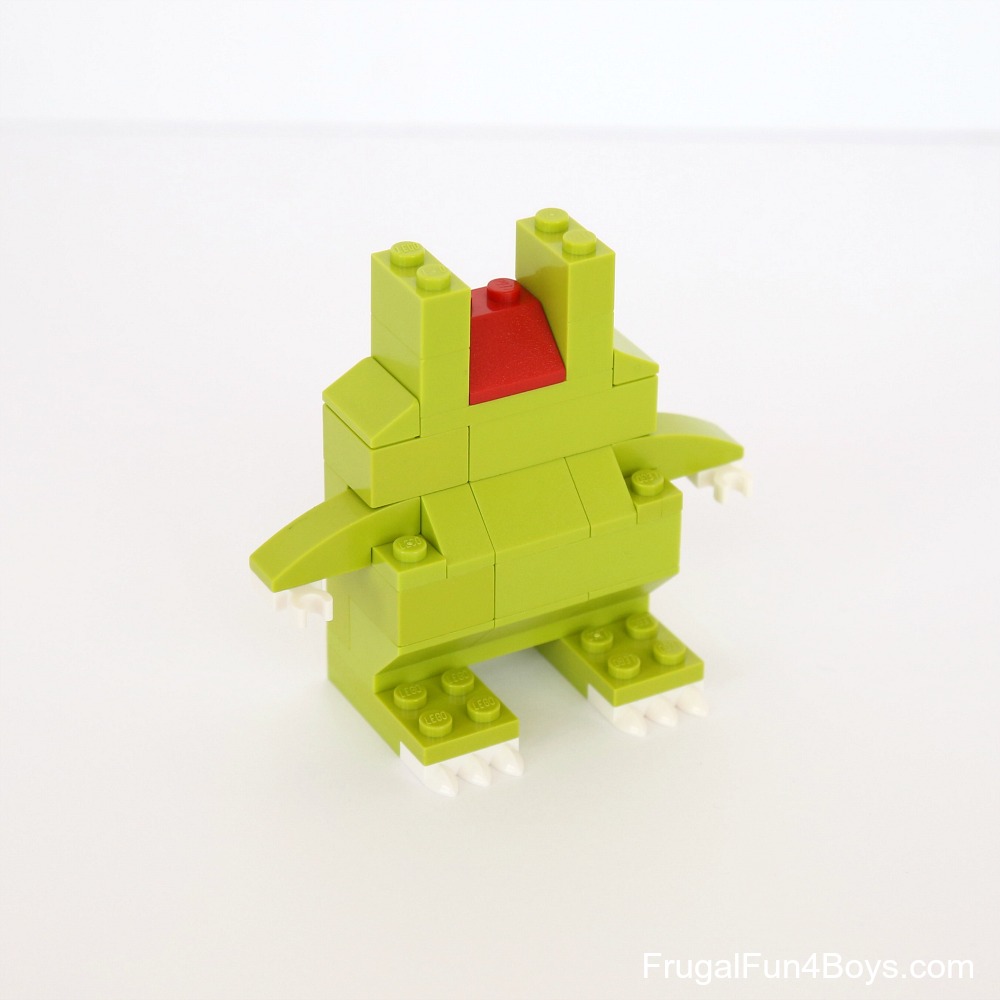
Step 6: Build the top of the mouth with a 2 x 4 plate and two 1 x 1 plates with a vertical tooth. Add two 1 x 1 round bricks and a 1 x 2 brick.
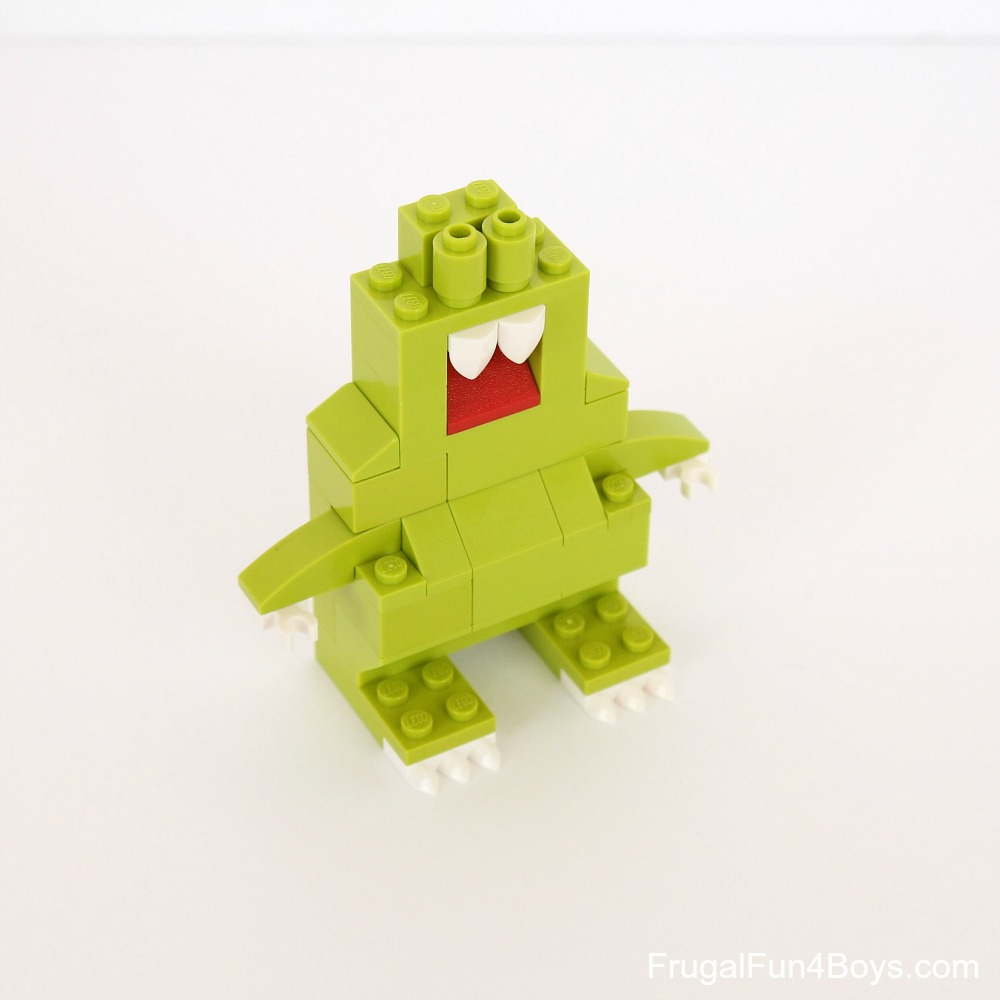
Step 7: Add two 1 x 1 plates with a clip light to hold the eyes. Then add two 1 x 2 slopes.

Step 8: Add eyes, and a 1 x 2 slope between the eyes. Your goofy monster is complete!
Have fun building!
These silly monsters are fun to make for Halloween! Here are more fun Halloween LEGO projects:
If you prefer to hand your kids print instructions, check out our LEGO® project books!
Epic LEGO Adventures with Bricks You Already Have
Awesome LEGO Creations with Bricks You Already Have
2 Comments
Karen@LightlyFrayed Dec 9, 2017
You and your boys do the most inspiring projects! I have four boys of my own and wish we had you as a resource back when we were homeschooling.
As a blogger myself, I can appreciate how much time it takes to create the projects, photograph them, edit the photos and upload into a detailed step-by-step post. And you do it all with excellence.
I have been enjoying your posts for a long time now and thought I should take a moment to say thanks. I recently shared your idea for making a lego Advent calendar on my facebook group.
Keep up the great work!
Jill Sep 17, 2018
These projects are adorable! Are the monsters in one of the books, please?
Sarah Sep 22, 2018
They are not! The content in the books does not overlap much with the content on the website, which was done on purpose. I wanted the books to be new, original content so it's worth it to purchase them!
Post a Comment