
Decorating for fall is one of our favorite things, and I’m planning to add this apple basket craft to our fall tiered tray! It’s so adorable. When I get the tray completed, I’ll post a picture.
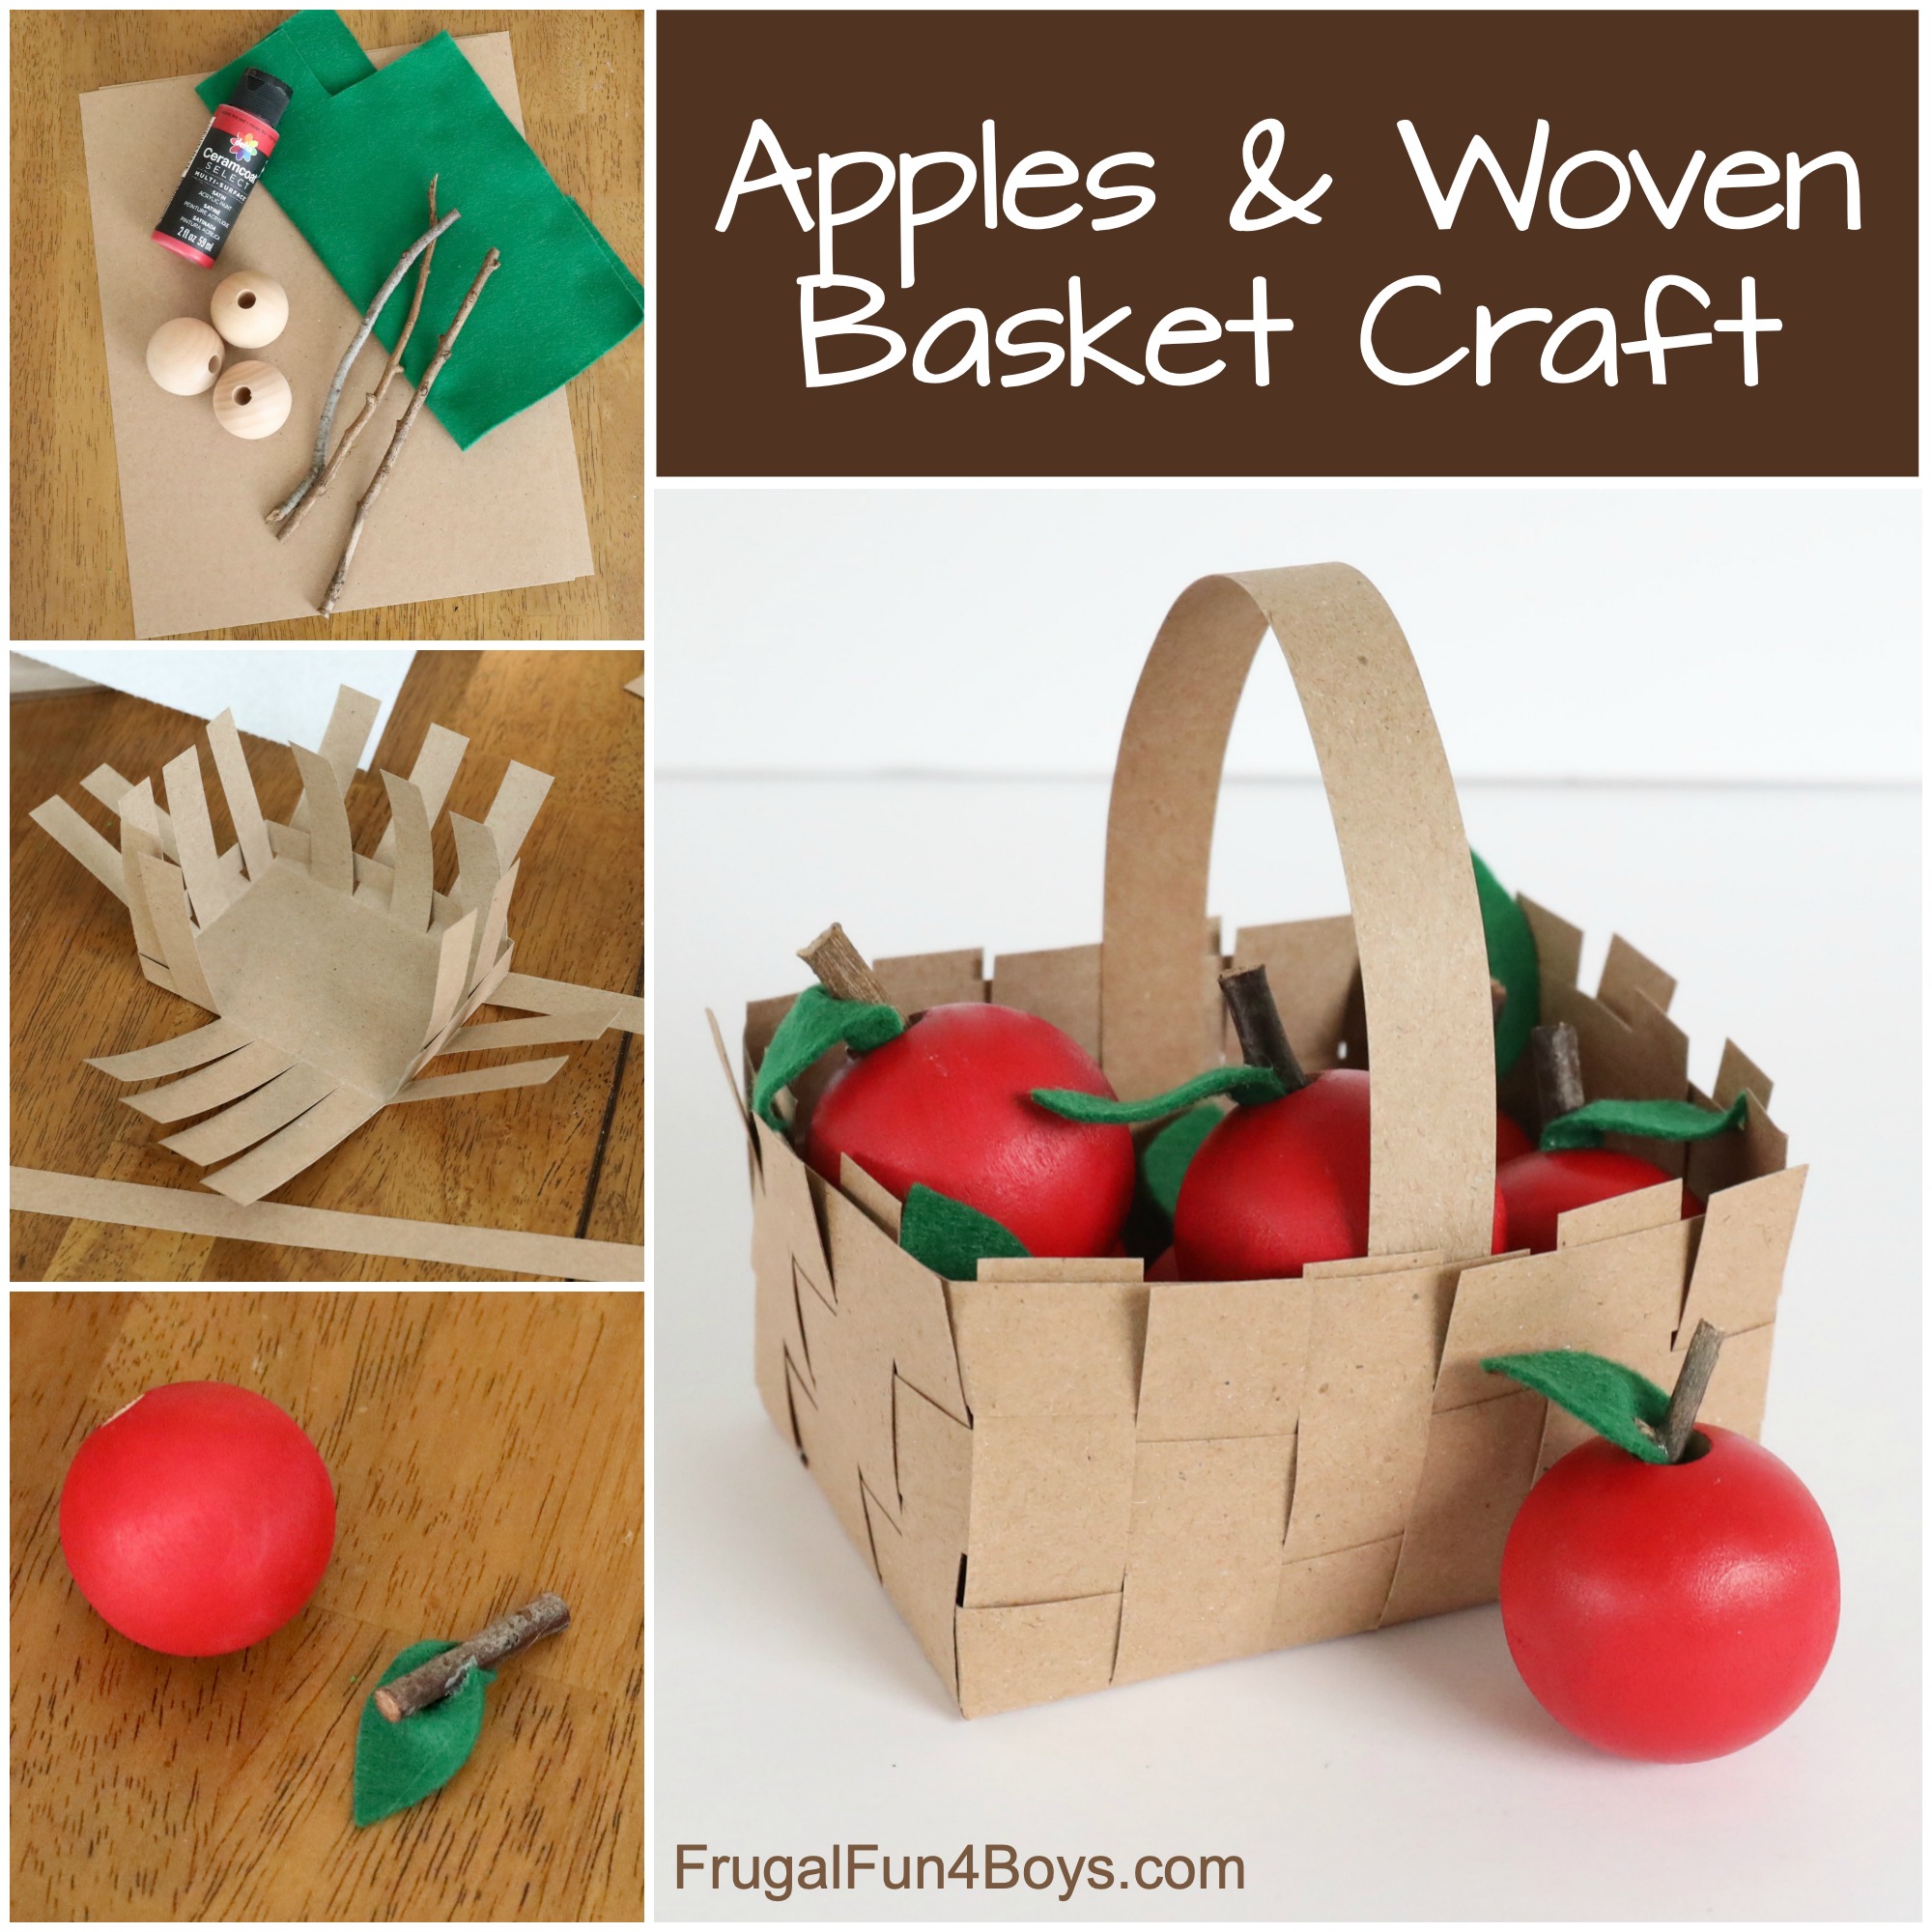
The materials needed for this apple basket craft are so simple, and it’s quite easy to make. The apples are made from wood balls (called dowel caps) that I found at the craft store, and the basket is woven from card stock.
I would recommend this project for either kids or adults (because I had fun making this!). Younger kids will need help with the gluing and with weaving the basket, but bigger kids and tweens will be able to make the whole thing on their own.
My 6 year old really enjoyed learning how to weave a basket! She is storing treasures in hers.
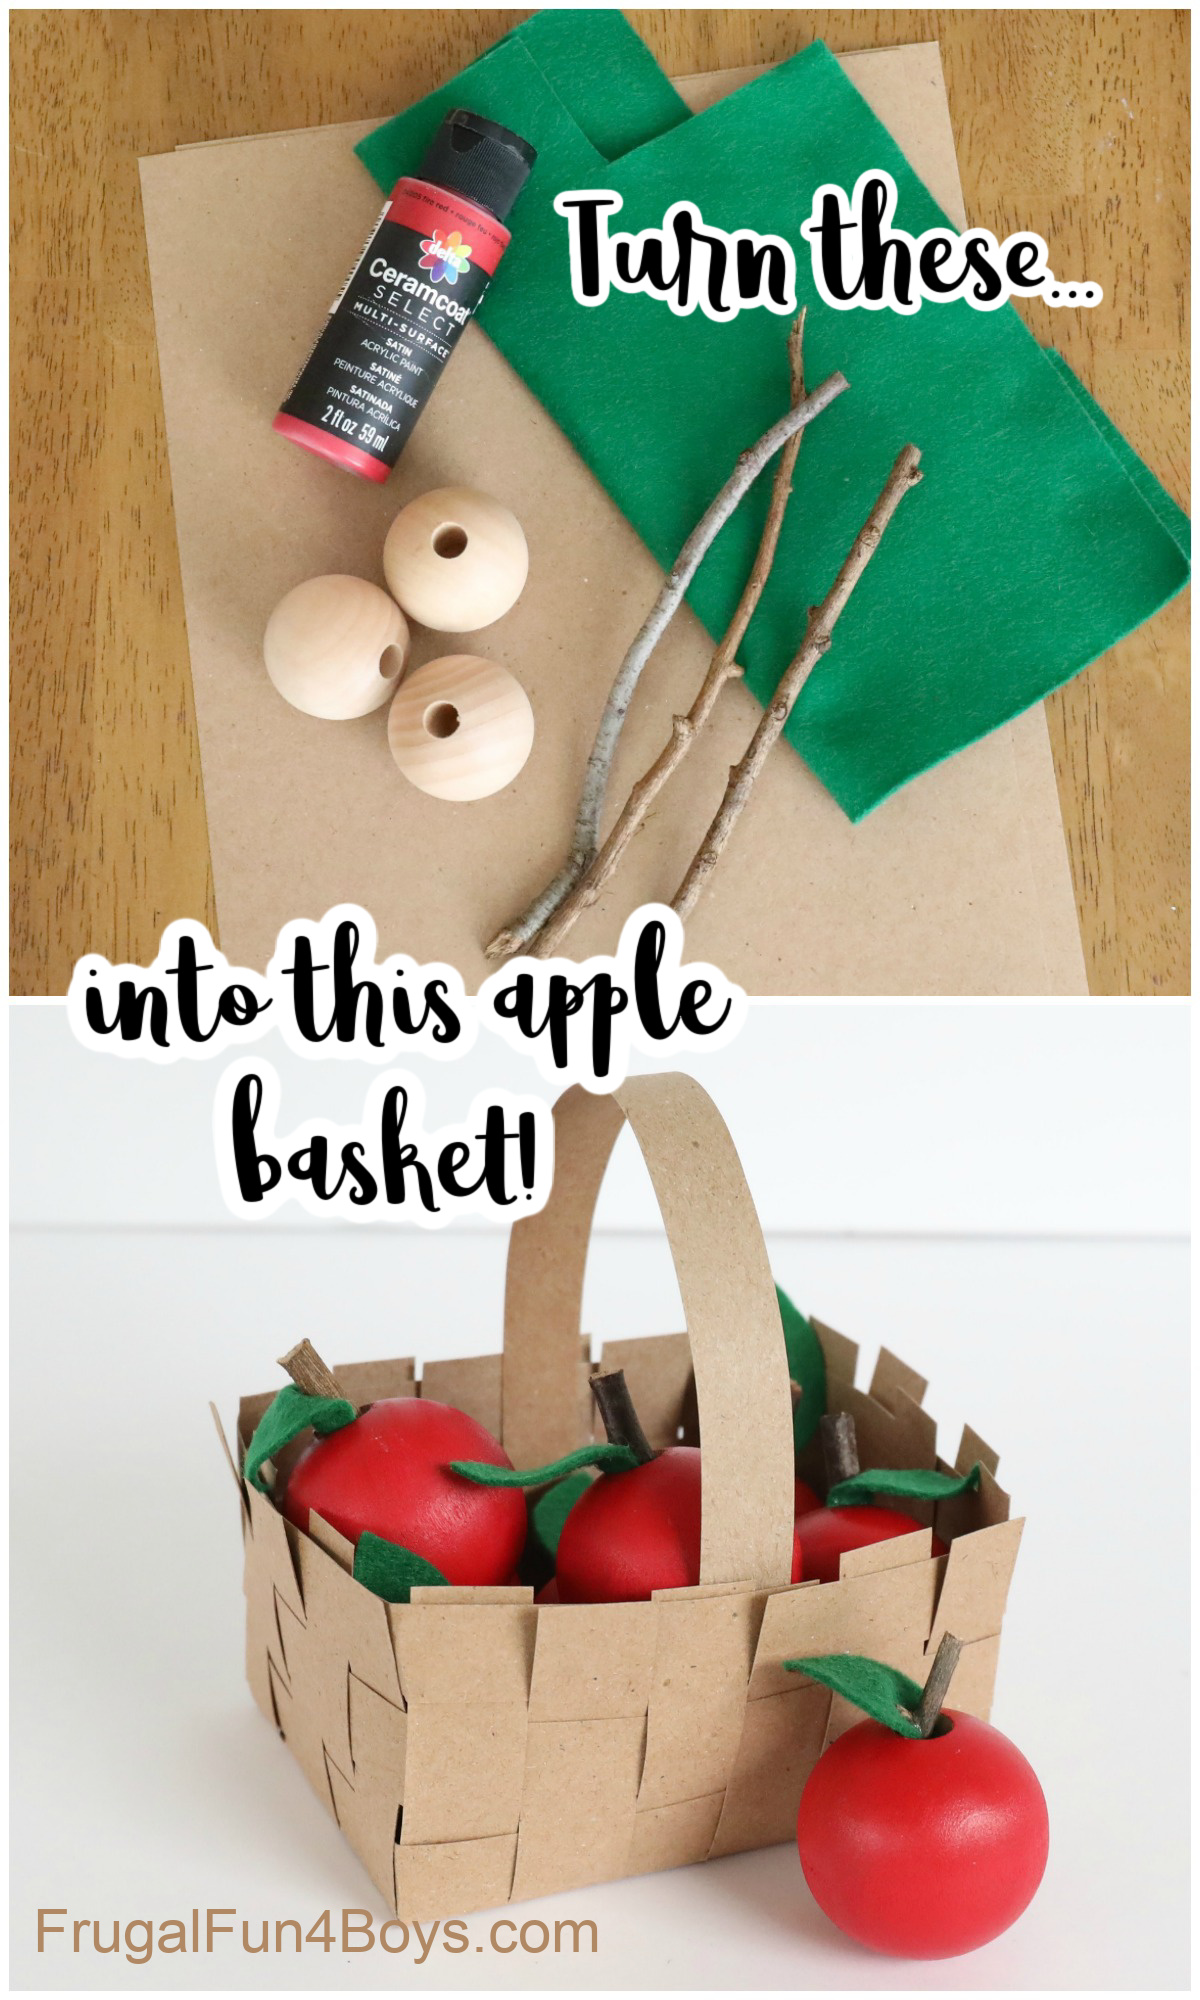
The apples are just so cute! The stems are real sticks.

The paper basket also makes a great treat basket. If you don’t feel like making the apples, the basket is fun for holding caramels, candy pumpkins, etc.

Ready to make one? Supplies Needed:
- Card stock – I got this brown bag color at Hobby Lobby
- Scotch tape or similar
- Wood dowel caps – found these at Hobby Lobby, they are 1.5″ with a 3/8″ hole
- Red acrylic paint
- Green felt
- A few real sticks
- Hot glue gun
- Scissors
Here’s a photo of the dowel caps I used. There were 8 in the pack, and I used all 8 to fill the basket.

Paint the wooden dowel caps red and let them dry. While the paint is drying, cut out leaves from green felt. Cut your sticks into small pieces for the apple stem.
The holes in our dowel caps did not go all the way through. I cut the stems so that they would touch the bottom of the hole and then stick out a little at the top.

Hot glue the leaf to the stem.

Then put a little glue on the bottom of the stem and insert it into the hole. The glue should hold it securely.
Aren’t the apples SO CUTE?!

Now make a basket to hold them!
This cute basket is really easy to make with an 8.5″ x 11″ piece of card stock.
First, fold your card stock into thirds, both ways, so that you end up with 9 rectangles.

Then cut out all four corners.

Fold up the 4 flaps. You’ll need to trim the two ends so that their height matches the height of the sides.

Now cut each flap into strips.
Cut a second piece of card stock into strips lengthwise. We didn’t measure our strips, so they aren’t perfectly equal, and that’s totally okay!

Grab one of your strips, and weave it through the strips on the basket.
The strips do not go all the way around. When you run out of strip, just tape it in place. Then start another one!

Keep adding strips until you basket is three rows highs. Tape the ends to secure them. Then trim off any excess strips that are sticking up.
We left the top edge of our basket unfinished. If you want to, you can glue down the end of each strip.
Add another strip to make a handle. Tape it in place.
And that’s all there is to it!

Fill your basket with your wood apples, or fill it with candy.

Need more fall craft ideas? We’ve got lots!
Make some adorable Wood Slice Owls using wood slices and buttons.
These 3D Paper Pumpkins are fabulous for fall decor.
Grow some Borax Crystal Fall Leaves. Kids will love this beautiful science project!
1 Comments
Maranda Sep 16, 2020
These are adorable and will be perfect for our “Apple” party! (We plan to do Apple pie play doh, taste test different variety’s of apples, make mini pies) so this will be a great addition that’s not just food lol
Post a Comment