
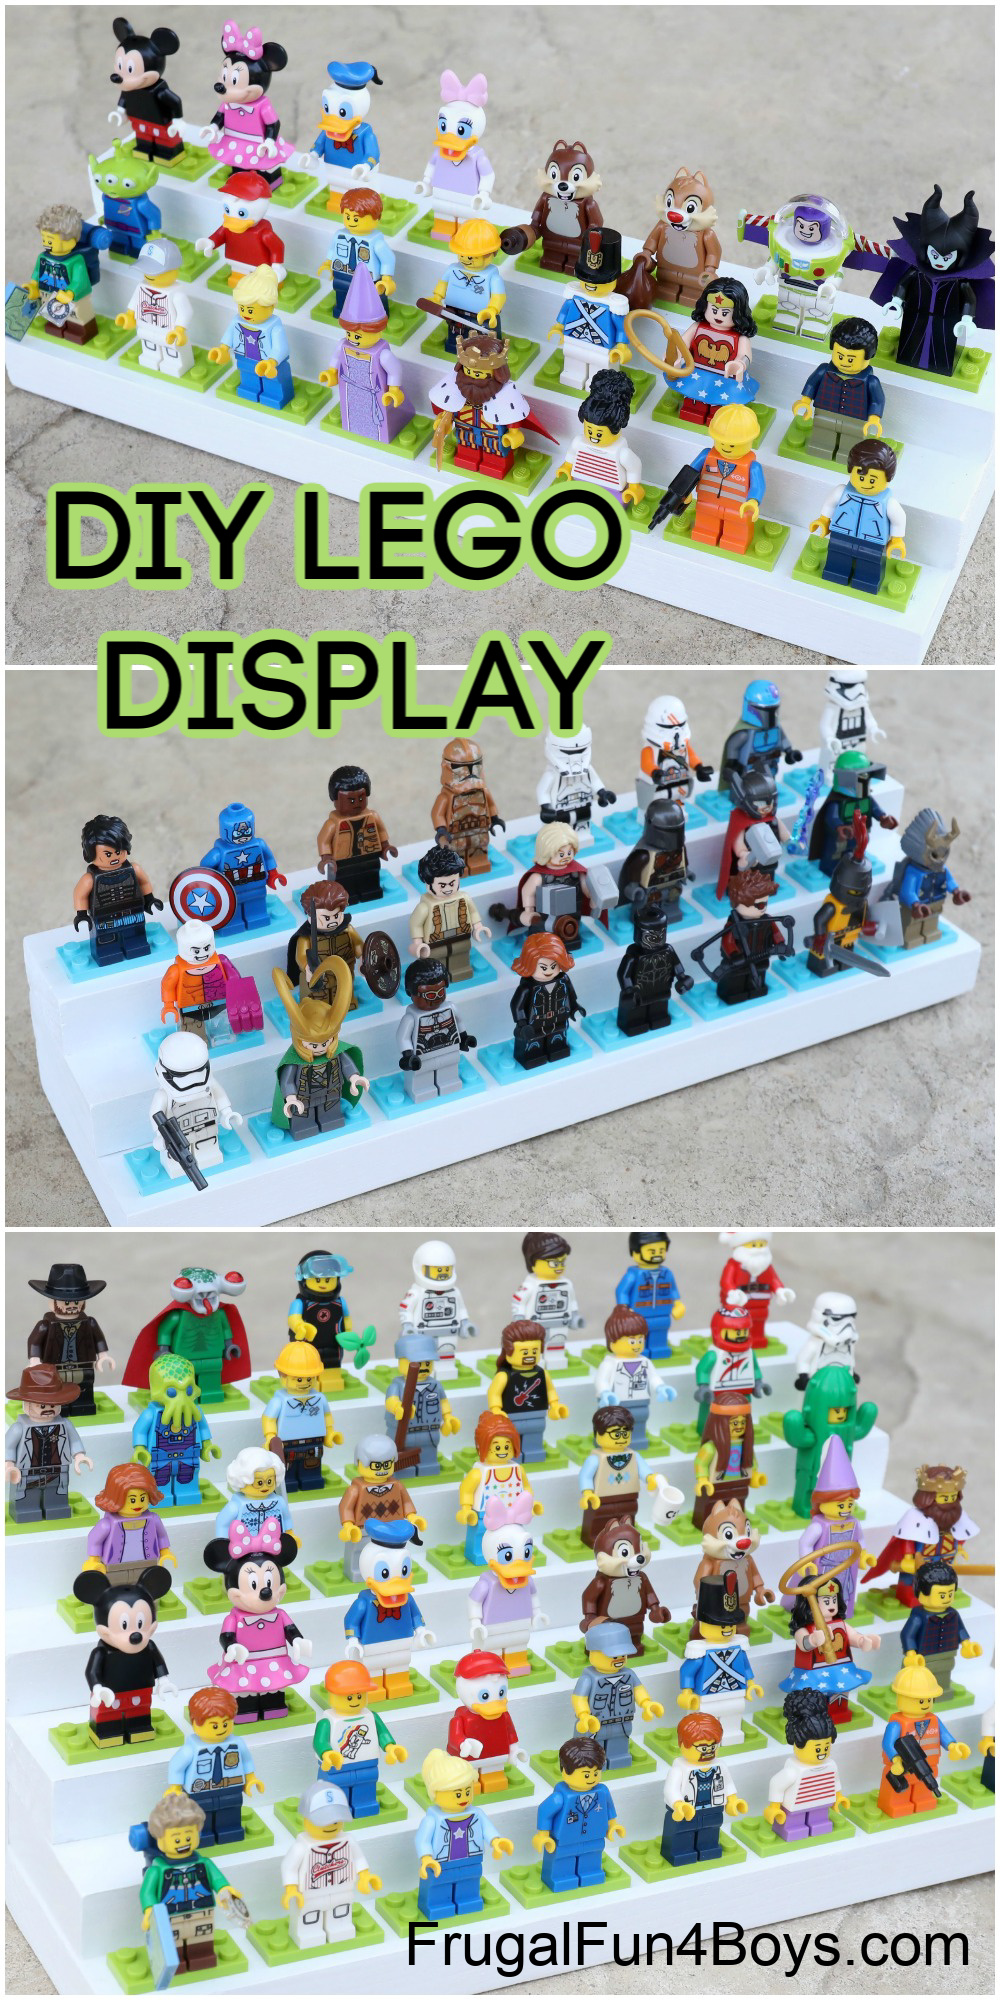
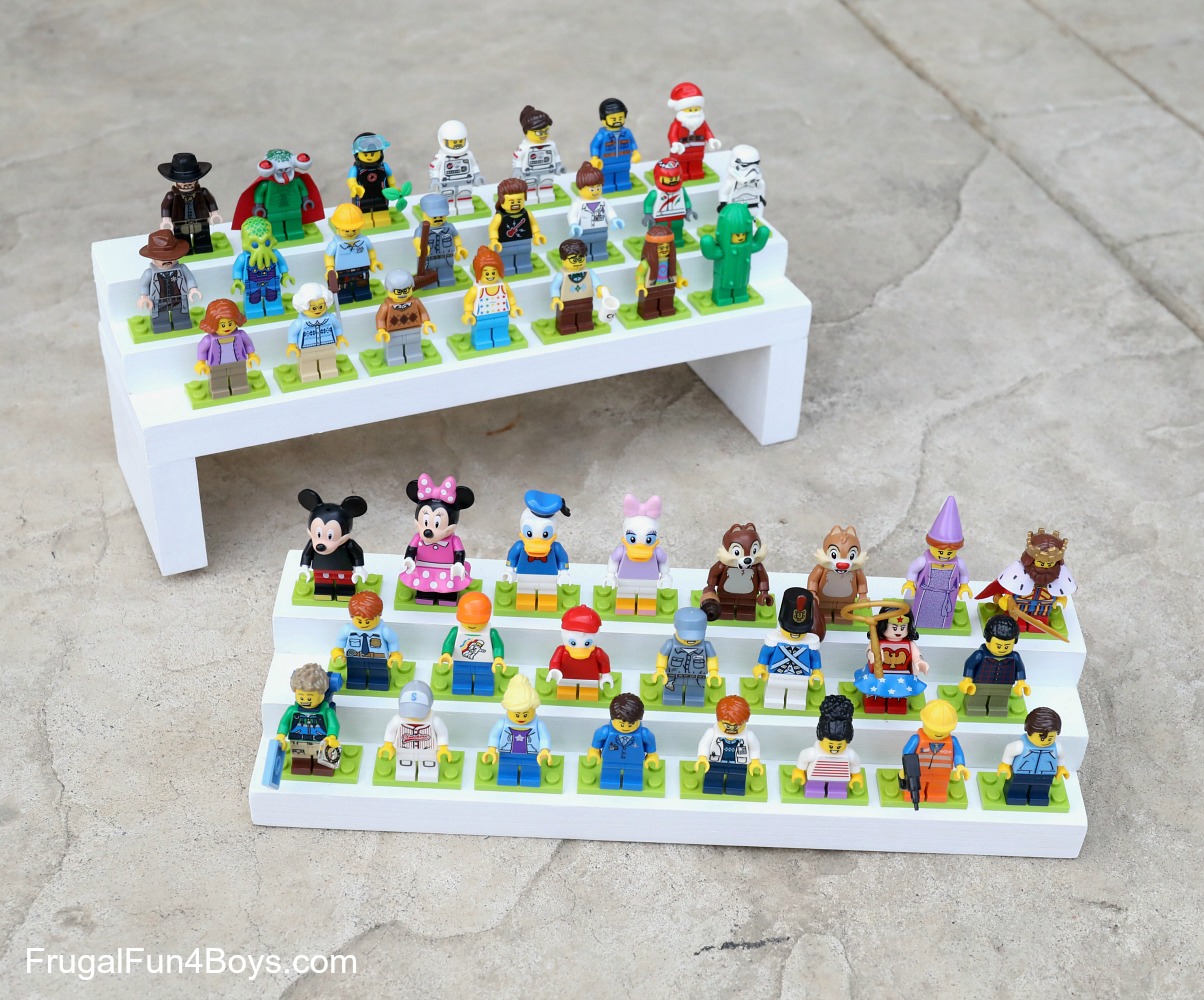
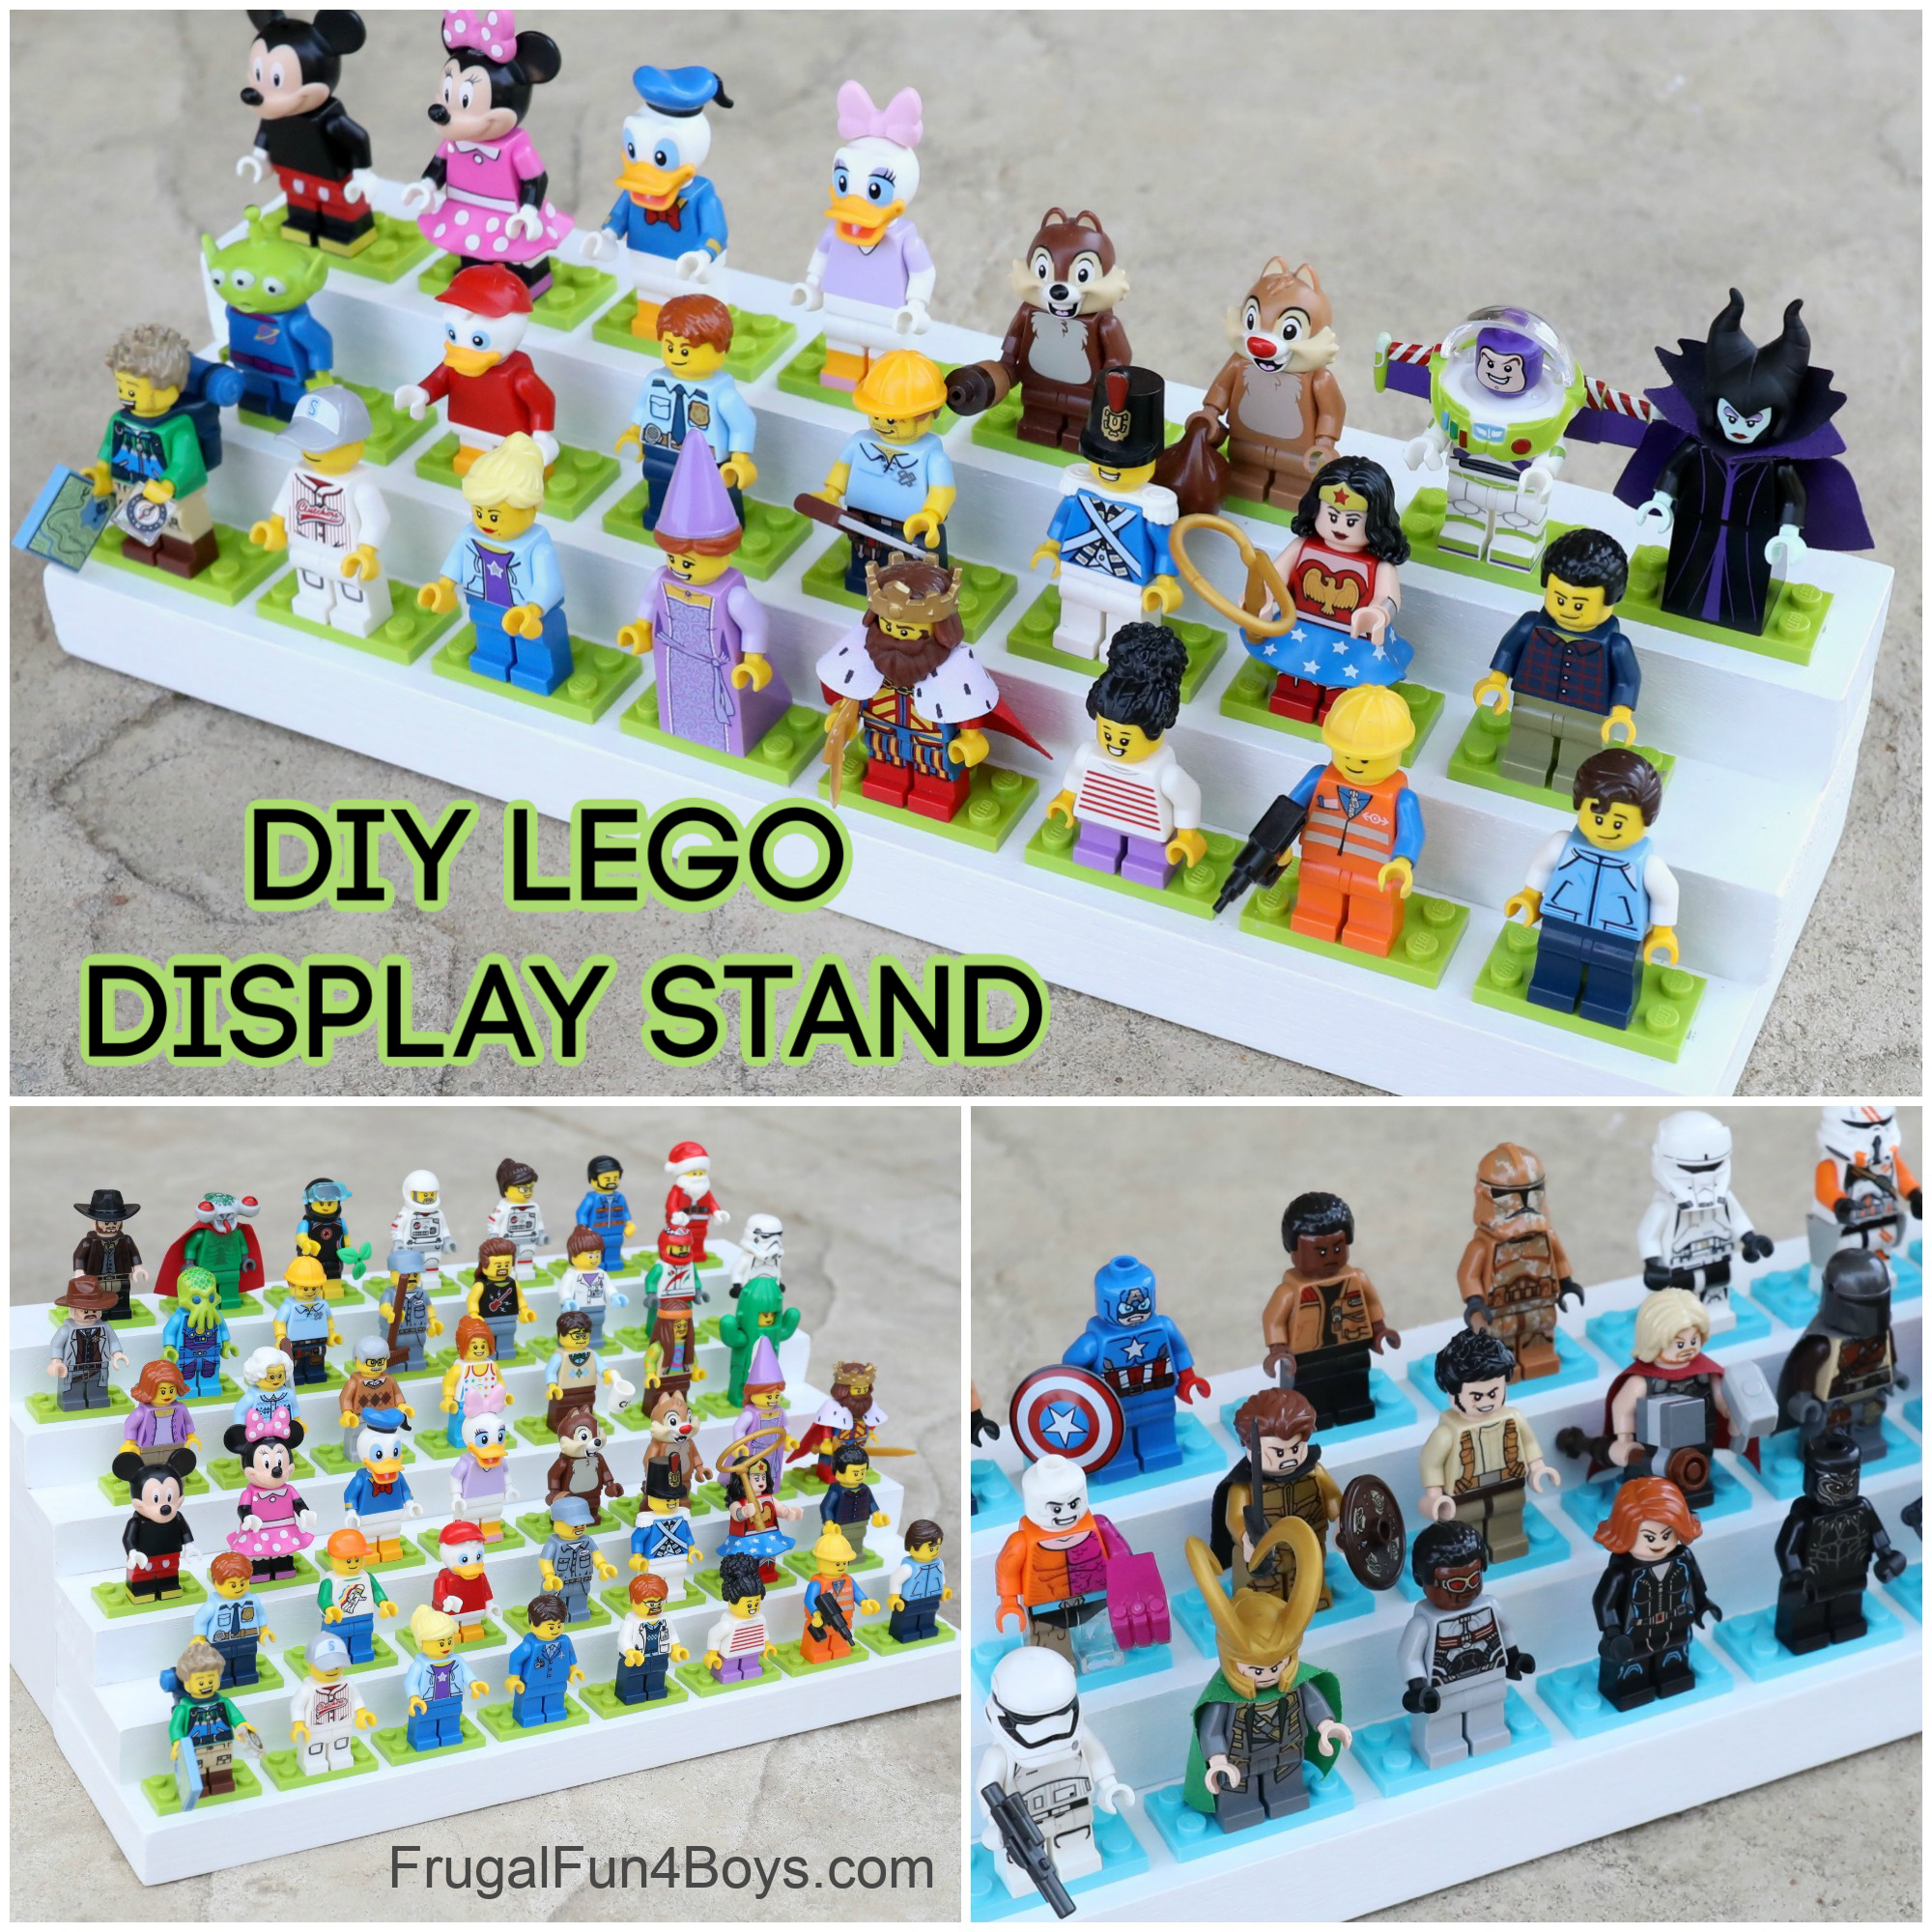
Make your own LEGO minifigure display stand! This display stand looks awesome, and it’s easy to switch out the figures being displayed. It’s also a great beginning woodworking project for kids.
You can make this project with only 3 cuts! I’ll explain what to purchase below, but it’s a super simple project thanks to some boards from the home improvement store. The project will require adult help and supervision, but kids will enjoy helping with the sanding and painting.
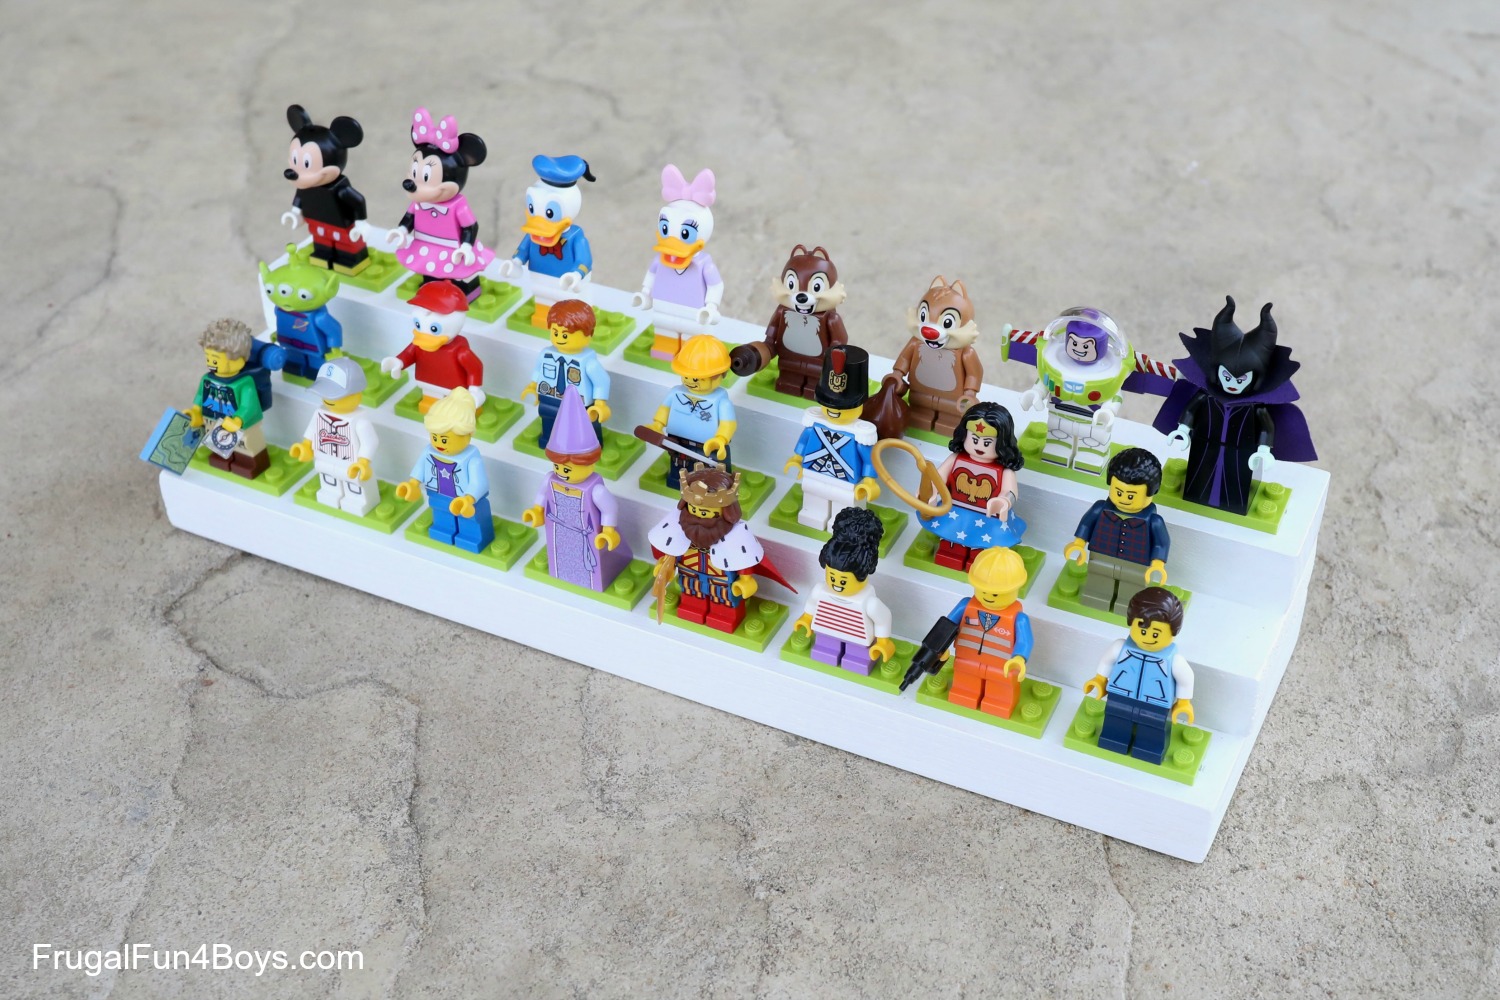
We’ll show you how to make two versions of this cool minifigure display stand. The basic version holds 23 minifigures, but you can easily expand it to 55. Make two of those, and you’ll have display space for 110 minifigures!
Also, we’ve got an IKEA Frame Minifigure Display if that’s more up your alley. That one hangs on the wall.
This minifigure display stand is just three pieces of wood!
Attach your three pieces with either wood glue or nails, or both. I’ll discuss the options below.
Now, as I was planning out this project, I knew that I have more than 23 minifigures. Like, me personally ’cause I was making it for me. My kids have way more minifigures than I do! So I knew that I would need to at least double (or more) this display stand. And I figured that as soon as I posted this, some of you would comment, “Hey, we own WAY more LEGO guys than that!” So here’s how you can make it BIGGER AND BETTER!
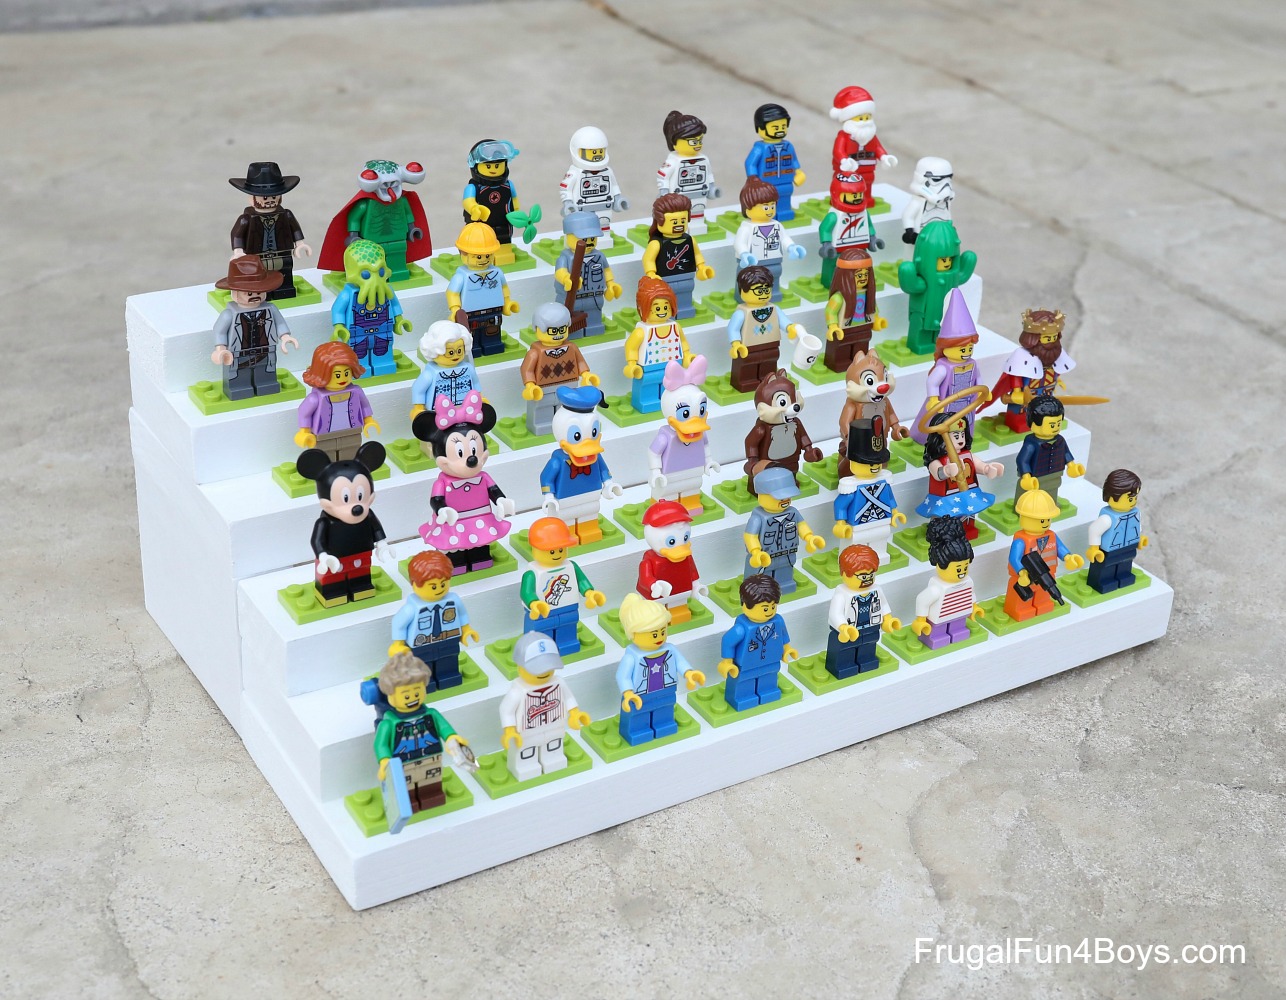
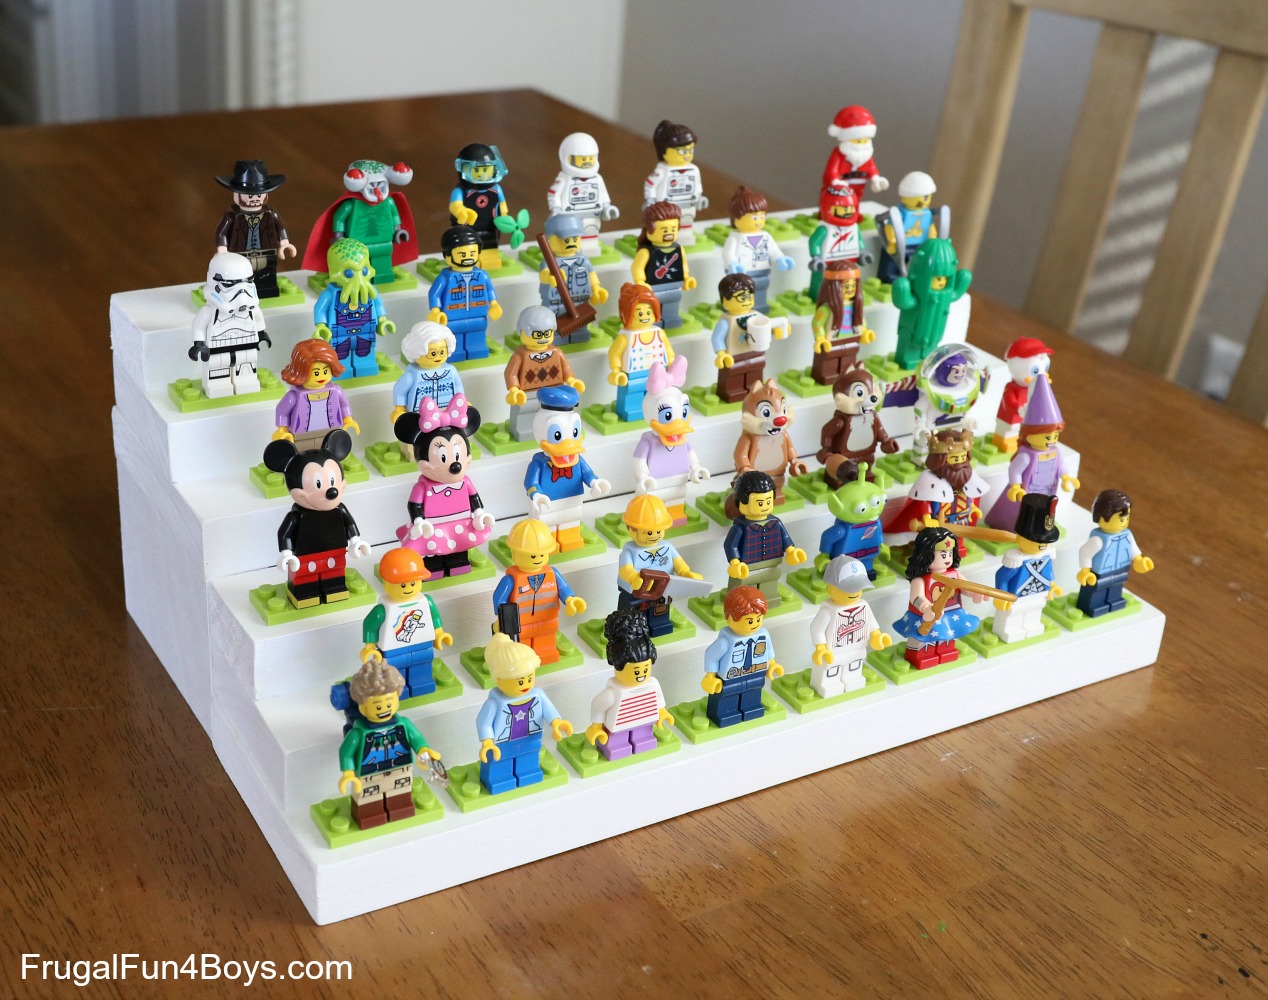
This double display stand holds 55 minifigures in a small space! It’s just two of the basic display stands, but the one in back is on risers. Cool, huh?
Alright, are you ready to build one? Or two? Or more?
Supplies Needed:
- Poplar Boards – we bought ours at Lowe’s. I bought two 3/4″ x 1 1/2″ x 24″ boards, two 3/4″ x 2 1/2″ x 24″ boards, two 3/4″ x 3 1/2″ x 24.” This was enough to make four display stands. Note that these are the ACTUAL measurements of the boards. If you’ve worked with wood before, you’ll know that a 2 x 4 is not actually 2″ x 4.” What I’ve listed are the true measurements, and these were also listed on stickers on the boards. You’ll need an extra 3/4″ x 3 1/2″ x 24″ board if you plan to cut risers.
- Sand paper
- Wood glue
- Hammer and nails, or nail gun
- Paint – I used white acrylic
- Polyurethane spray
- LEGO® 2 x 4 plates – 23 per stand, 22 per stand on risers (more on that below). I would recommend ordering these from Brick Link.
- Glue – E6000 glue or super glue
First, let’s talk about the wood. You can seriously make this with whatever scraps you have around! It doesn’t have to look just like ours.
Here are the pieces I used:
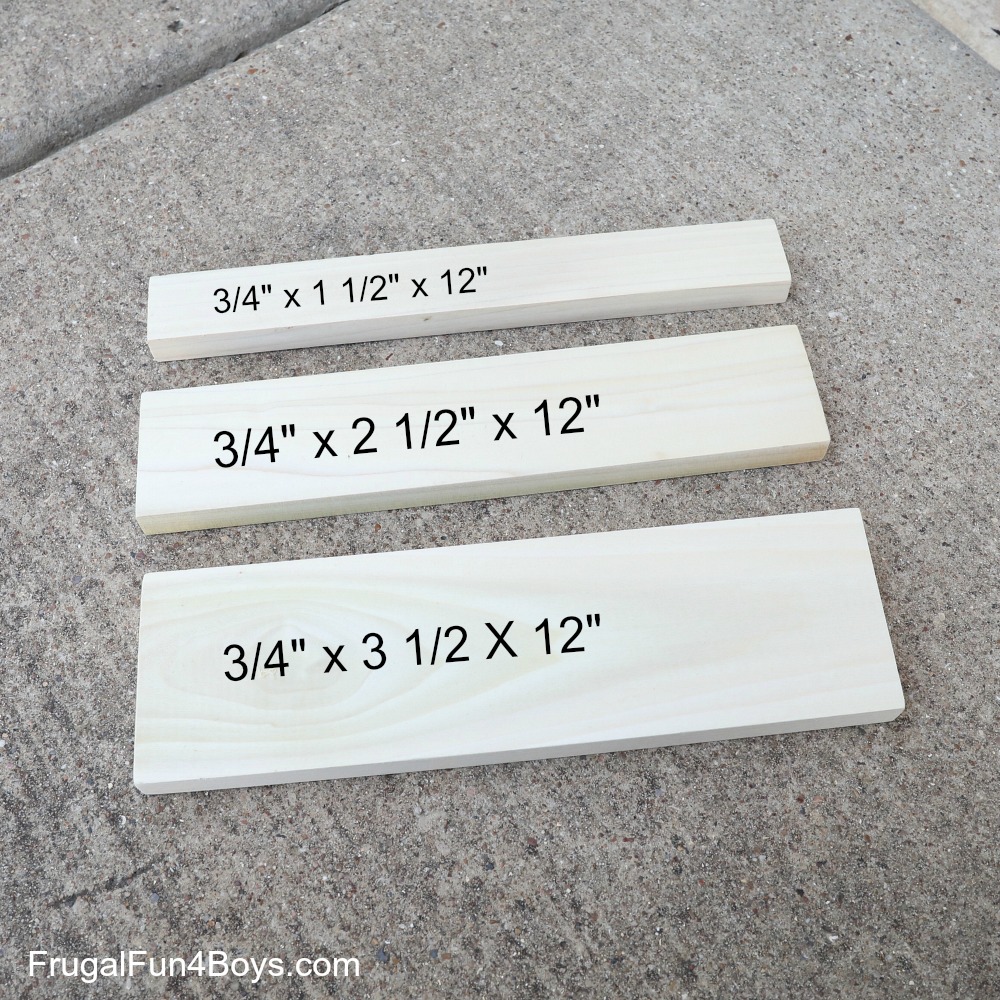
My son cut them for me from 24″ boards. All he had to was make 3 cuts! That was it!
After cutting your boards, sand them well.
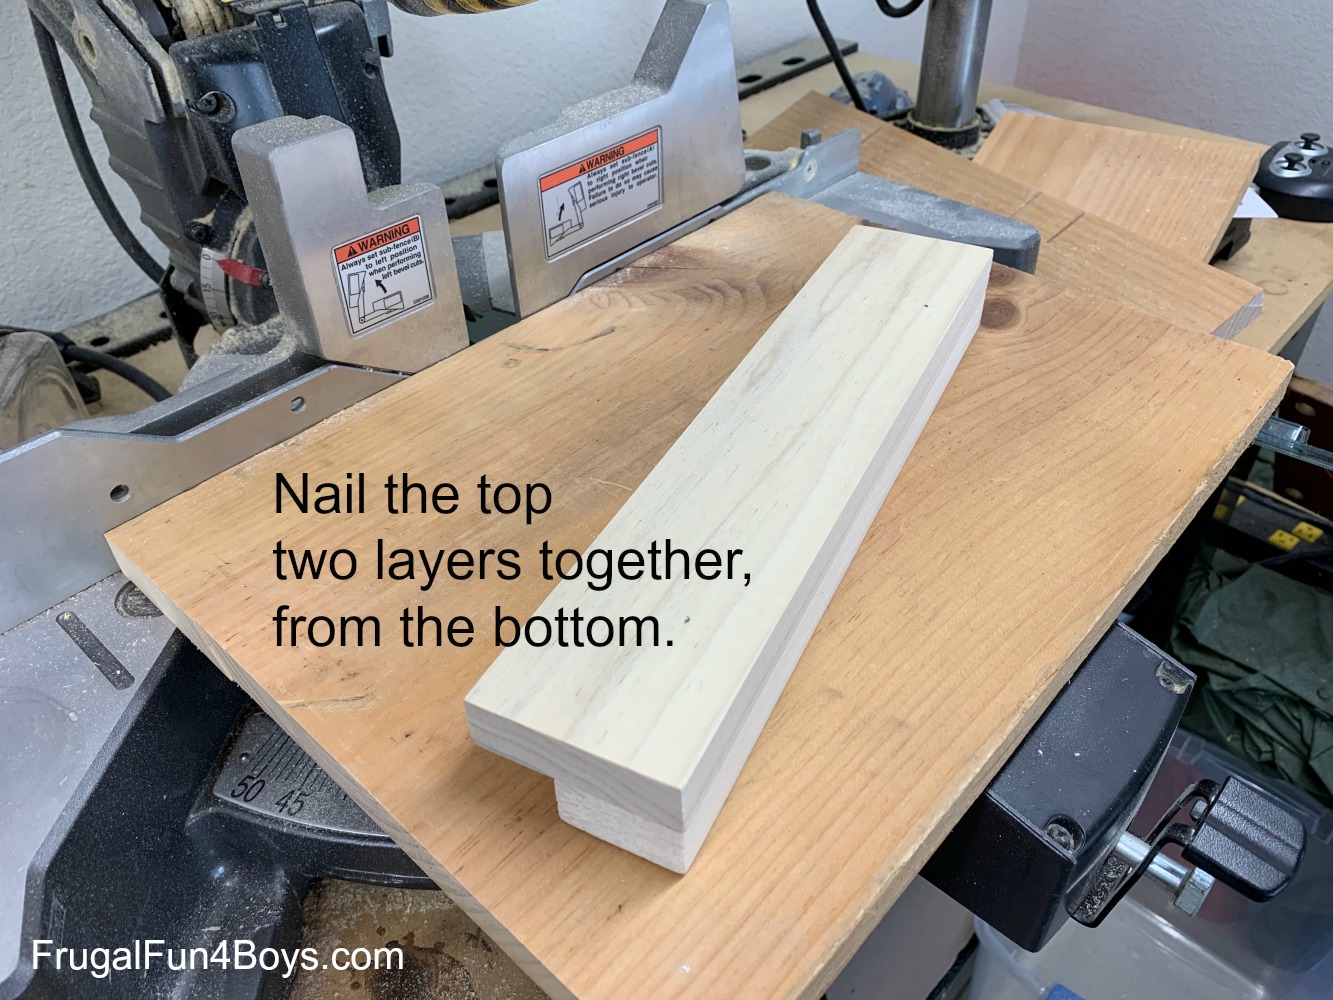
Then you’ll need to assemble your boards.
I decided to use wood glue PLUS nails. We had originally purchased wood screws, but decided that we didn’t want to risk splitting the boards. My dad came over with his nail gun, and that ended up being SO easy. (Especially since I didn’t do any of the work!)
If you don’t have a nail gun, there are other options.
Glue Only: I really think that you can assemble these with only wood glue. However, if your boards are warped (most are not completely flat) it might be more difficult. Clamping the wood while it dries would help.
Glue + Hammer and Nails: If you want your child to help with the construction, you can totally do a hammer and nails. I do think it will be hard to get the boards to line up precisely with this method. If you’re going for perfection, I’d go with the nail gun route.
Start by attaching the top two layers. Apply a line of glue, and then insert nails from the bottom. Then repeat this process to attach the bottom board.
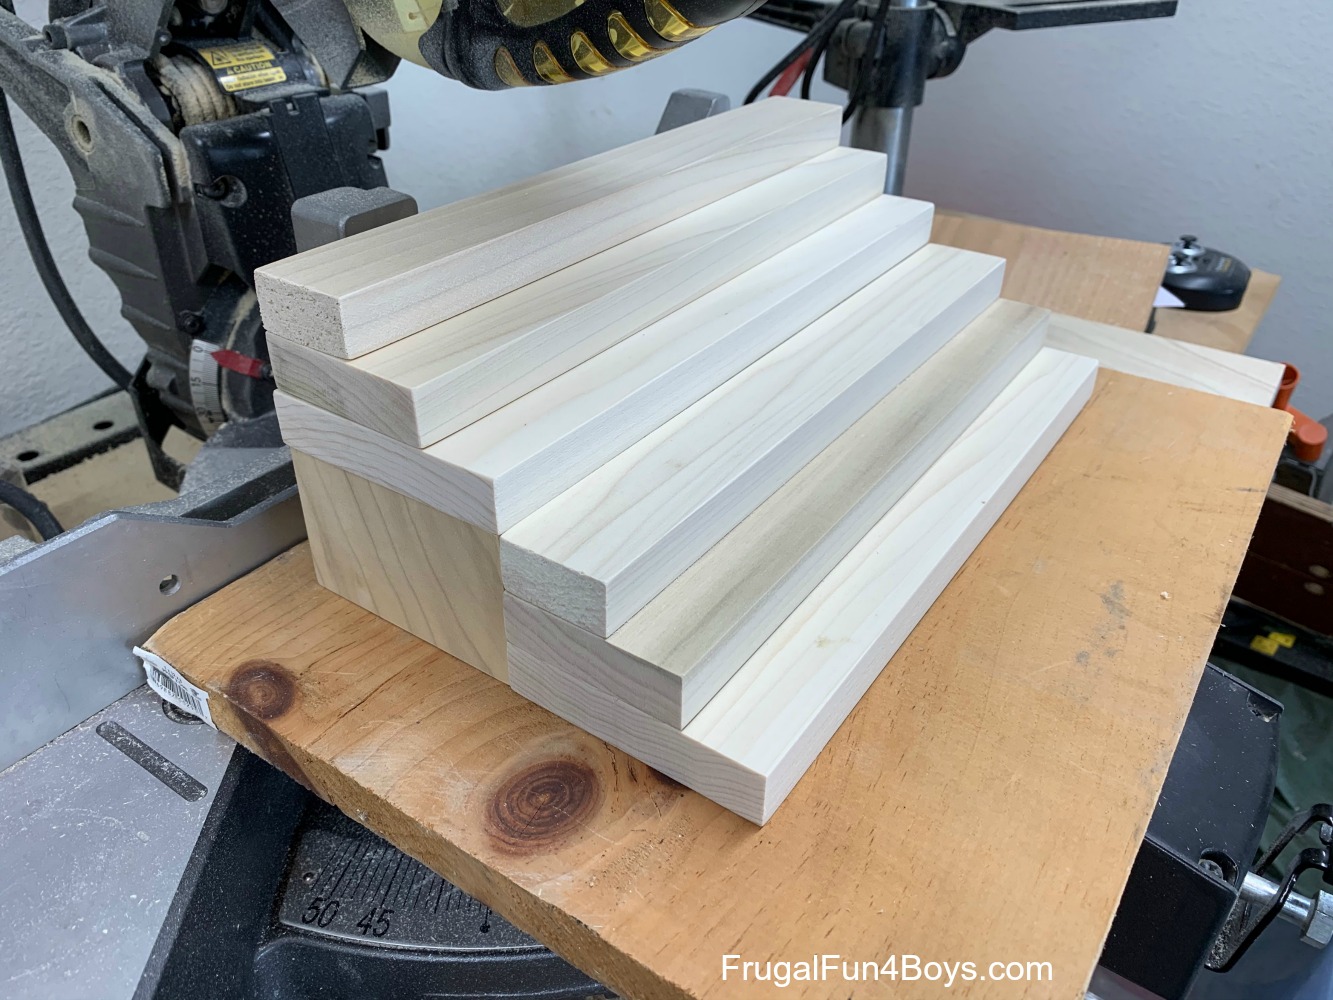
We built risers by cutting two 2 1/2″ pieces from one of our 3 1/2″ boards. I attached the risers with wood glue only.

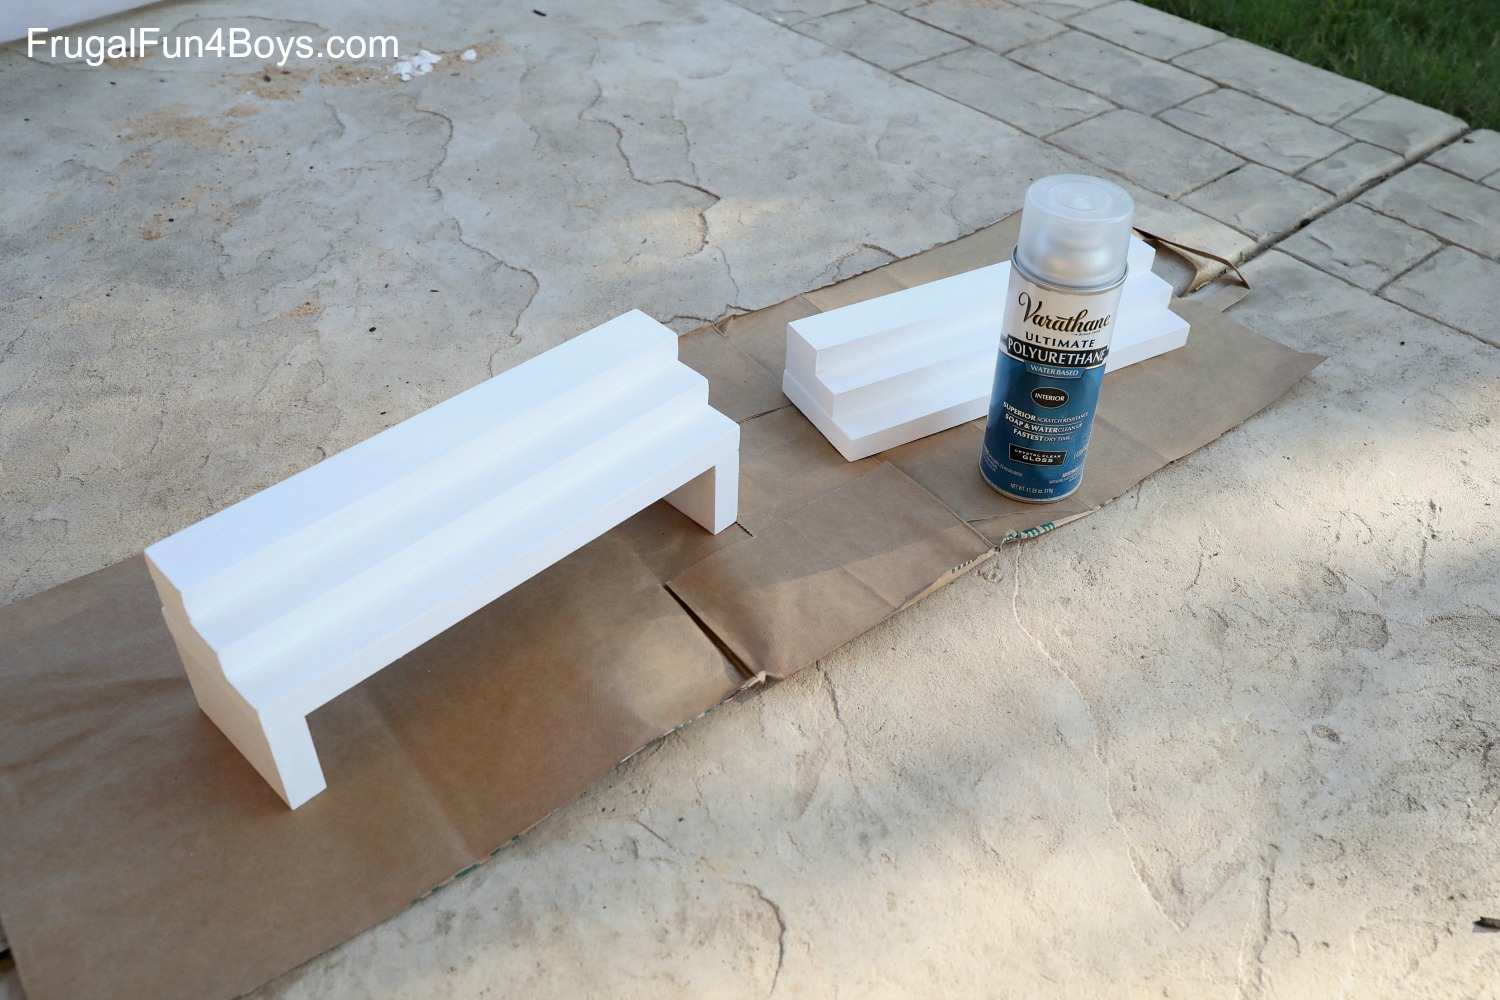
Here’s how the completed display looked.
Then, I painted it white with acrylic paint. When it was dry, I sprayed the pieces with polyurethane spray to seal it.
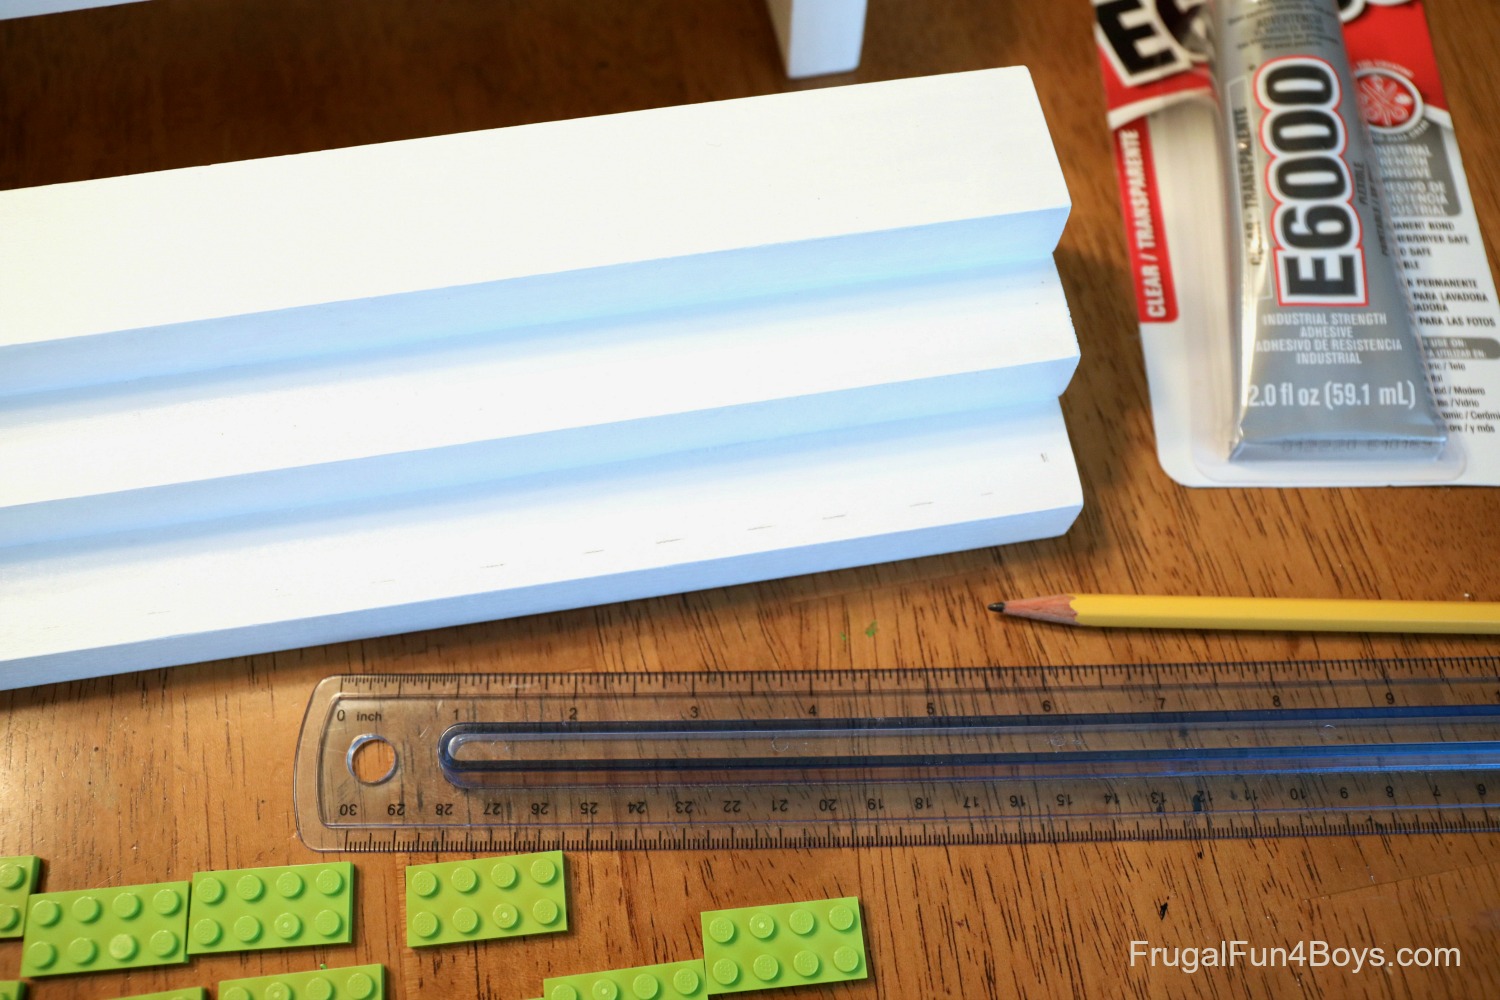
Then it’s time to attach the LEGO® plates.
Kids can sand, hammer, and paint, but gluing the LEGO plates is probably an adult job! Even if you don’t care about perfection in the spacing, you’re going to need to use a strong glue that will have fumes.
Before gluing, you’ll want to plan out the spacing in pencil first! I marked 1/4 inch from the edge on both sides. The edge plates lined up with these marks. Then each 2 x 4 plate needed to be 0.19 inches apart. That was hard to measure, so I drew a dashed straight line across the board so that I could line up the front edge of each plate. Then I just estimated the spacing between boards. (I did have a ruler handy to check.)
I sampled two types of glue so that I would know what to recommend, E6000 glue and Gorilla Super Glue.
Here are my thoughts:
E6000: This glue is very strong, and you’ll want to have good ventilation. I set up a fan on the table where I was working, and opened the back door. The upside to this glue is that it does not dry right away. You’ll have plenty of time to “adjust” your pieces! But the downside is that you’ll need to leave it alone for 12-24 hours while the glue fully sets.
Super Glue: Also stinky. Good ventilation needed. The benefit of Super Glue is that it’s stronger overall and bonds instantly. But the downside is that it bonds instantly. You have to be very precise the first time, and I almost glued two fingers together.
Overall, I prefer the E6000 glue because it’s easier to get the bricks lined up straight and properly spaced.
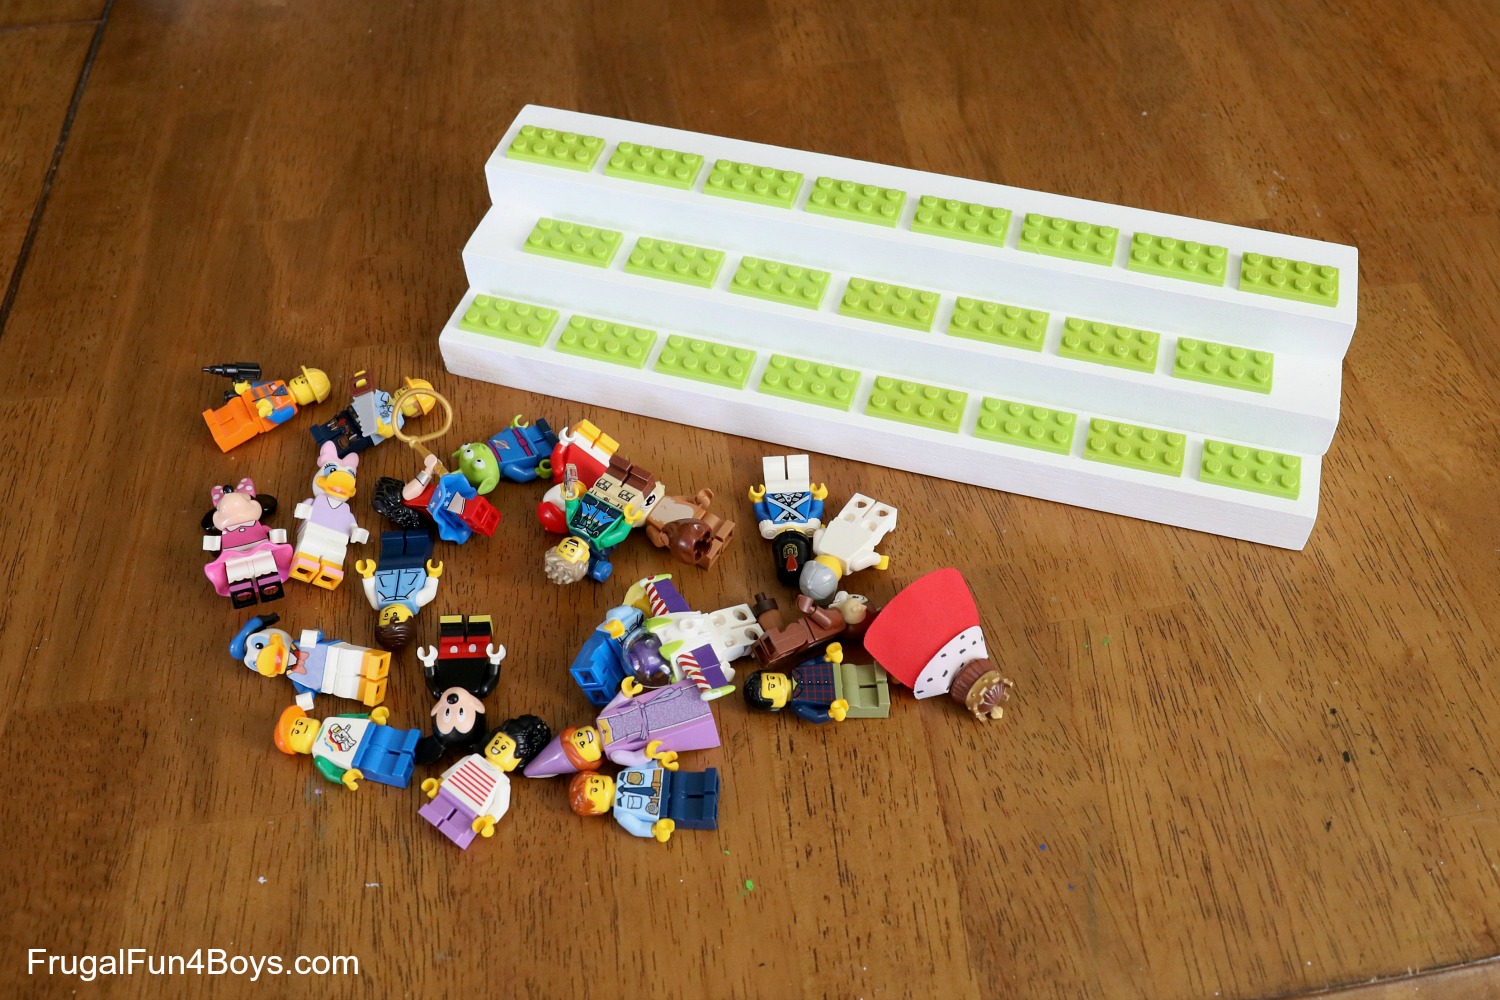
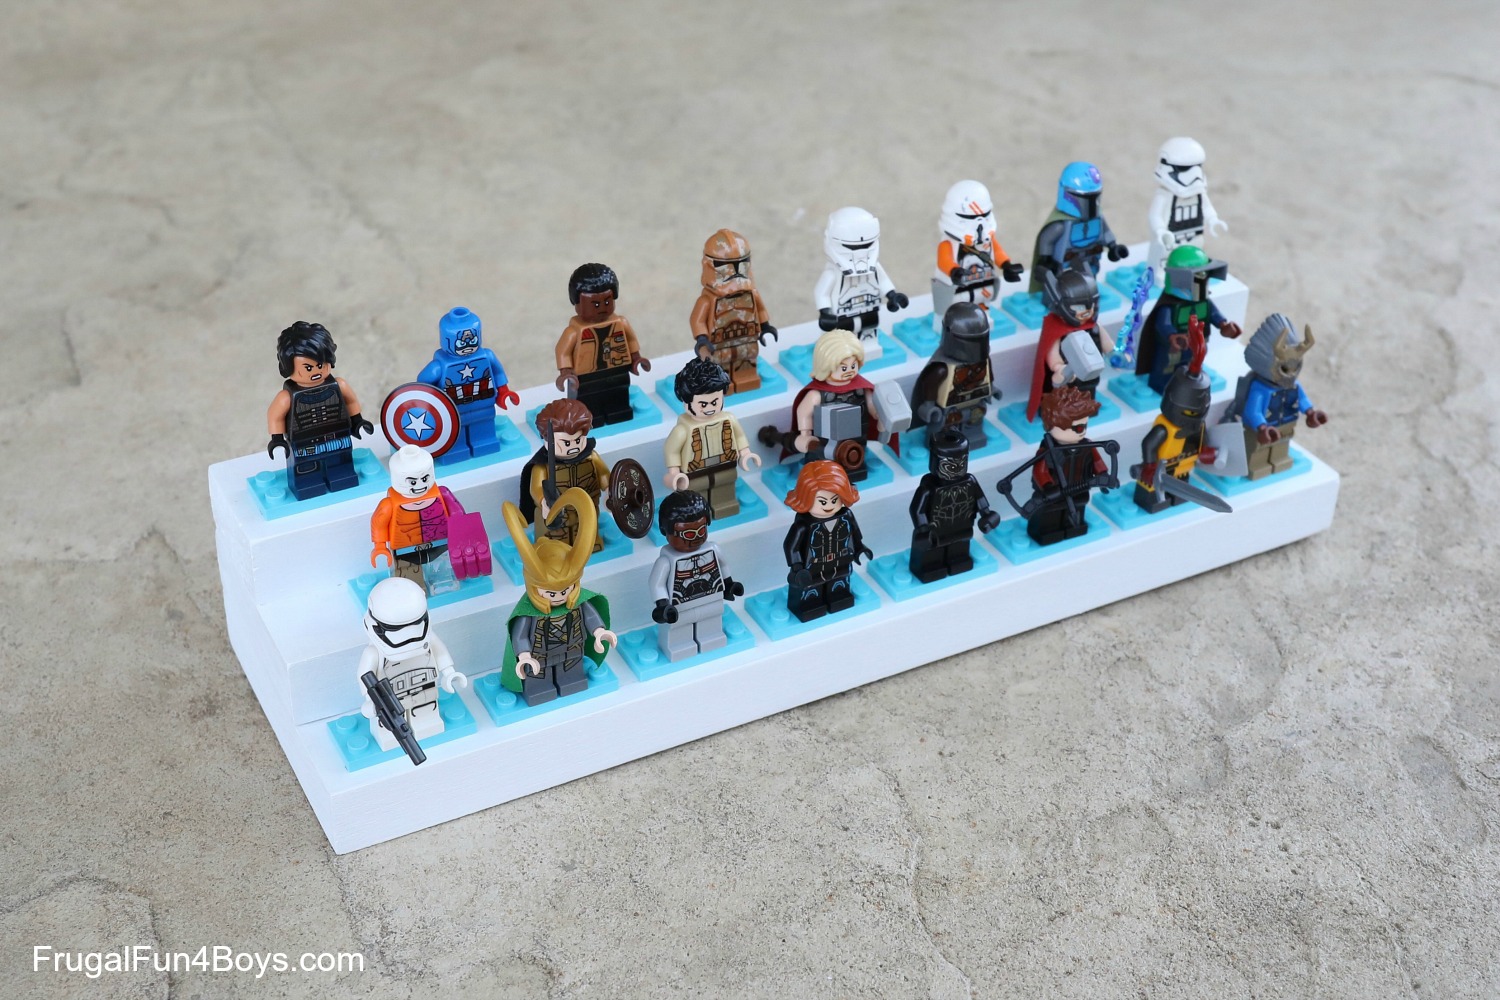
Once your LEGO® minifigure display stand is complete, it’s time to load it up with figures!
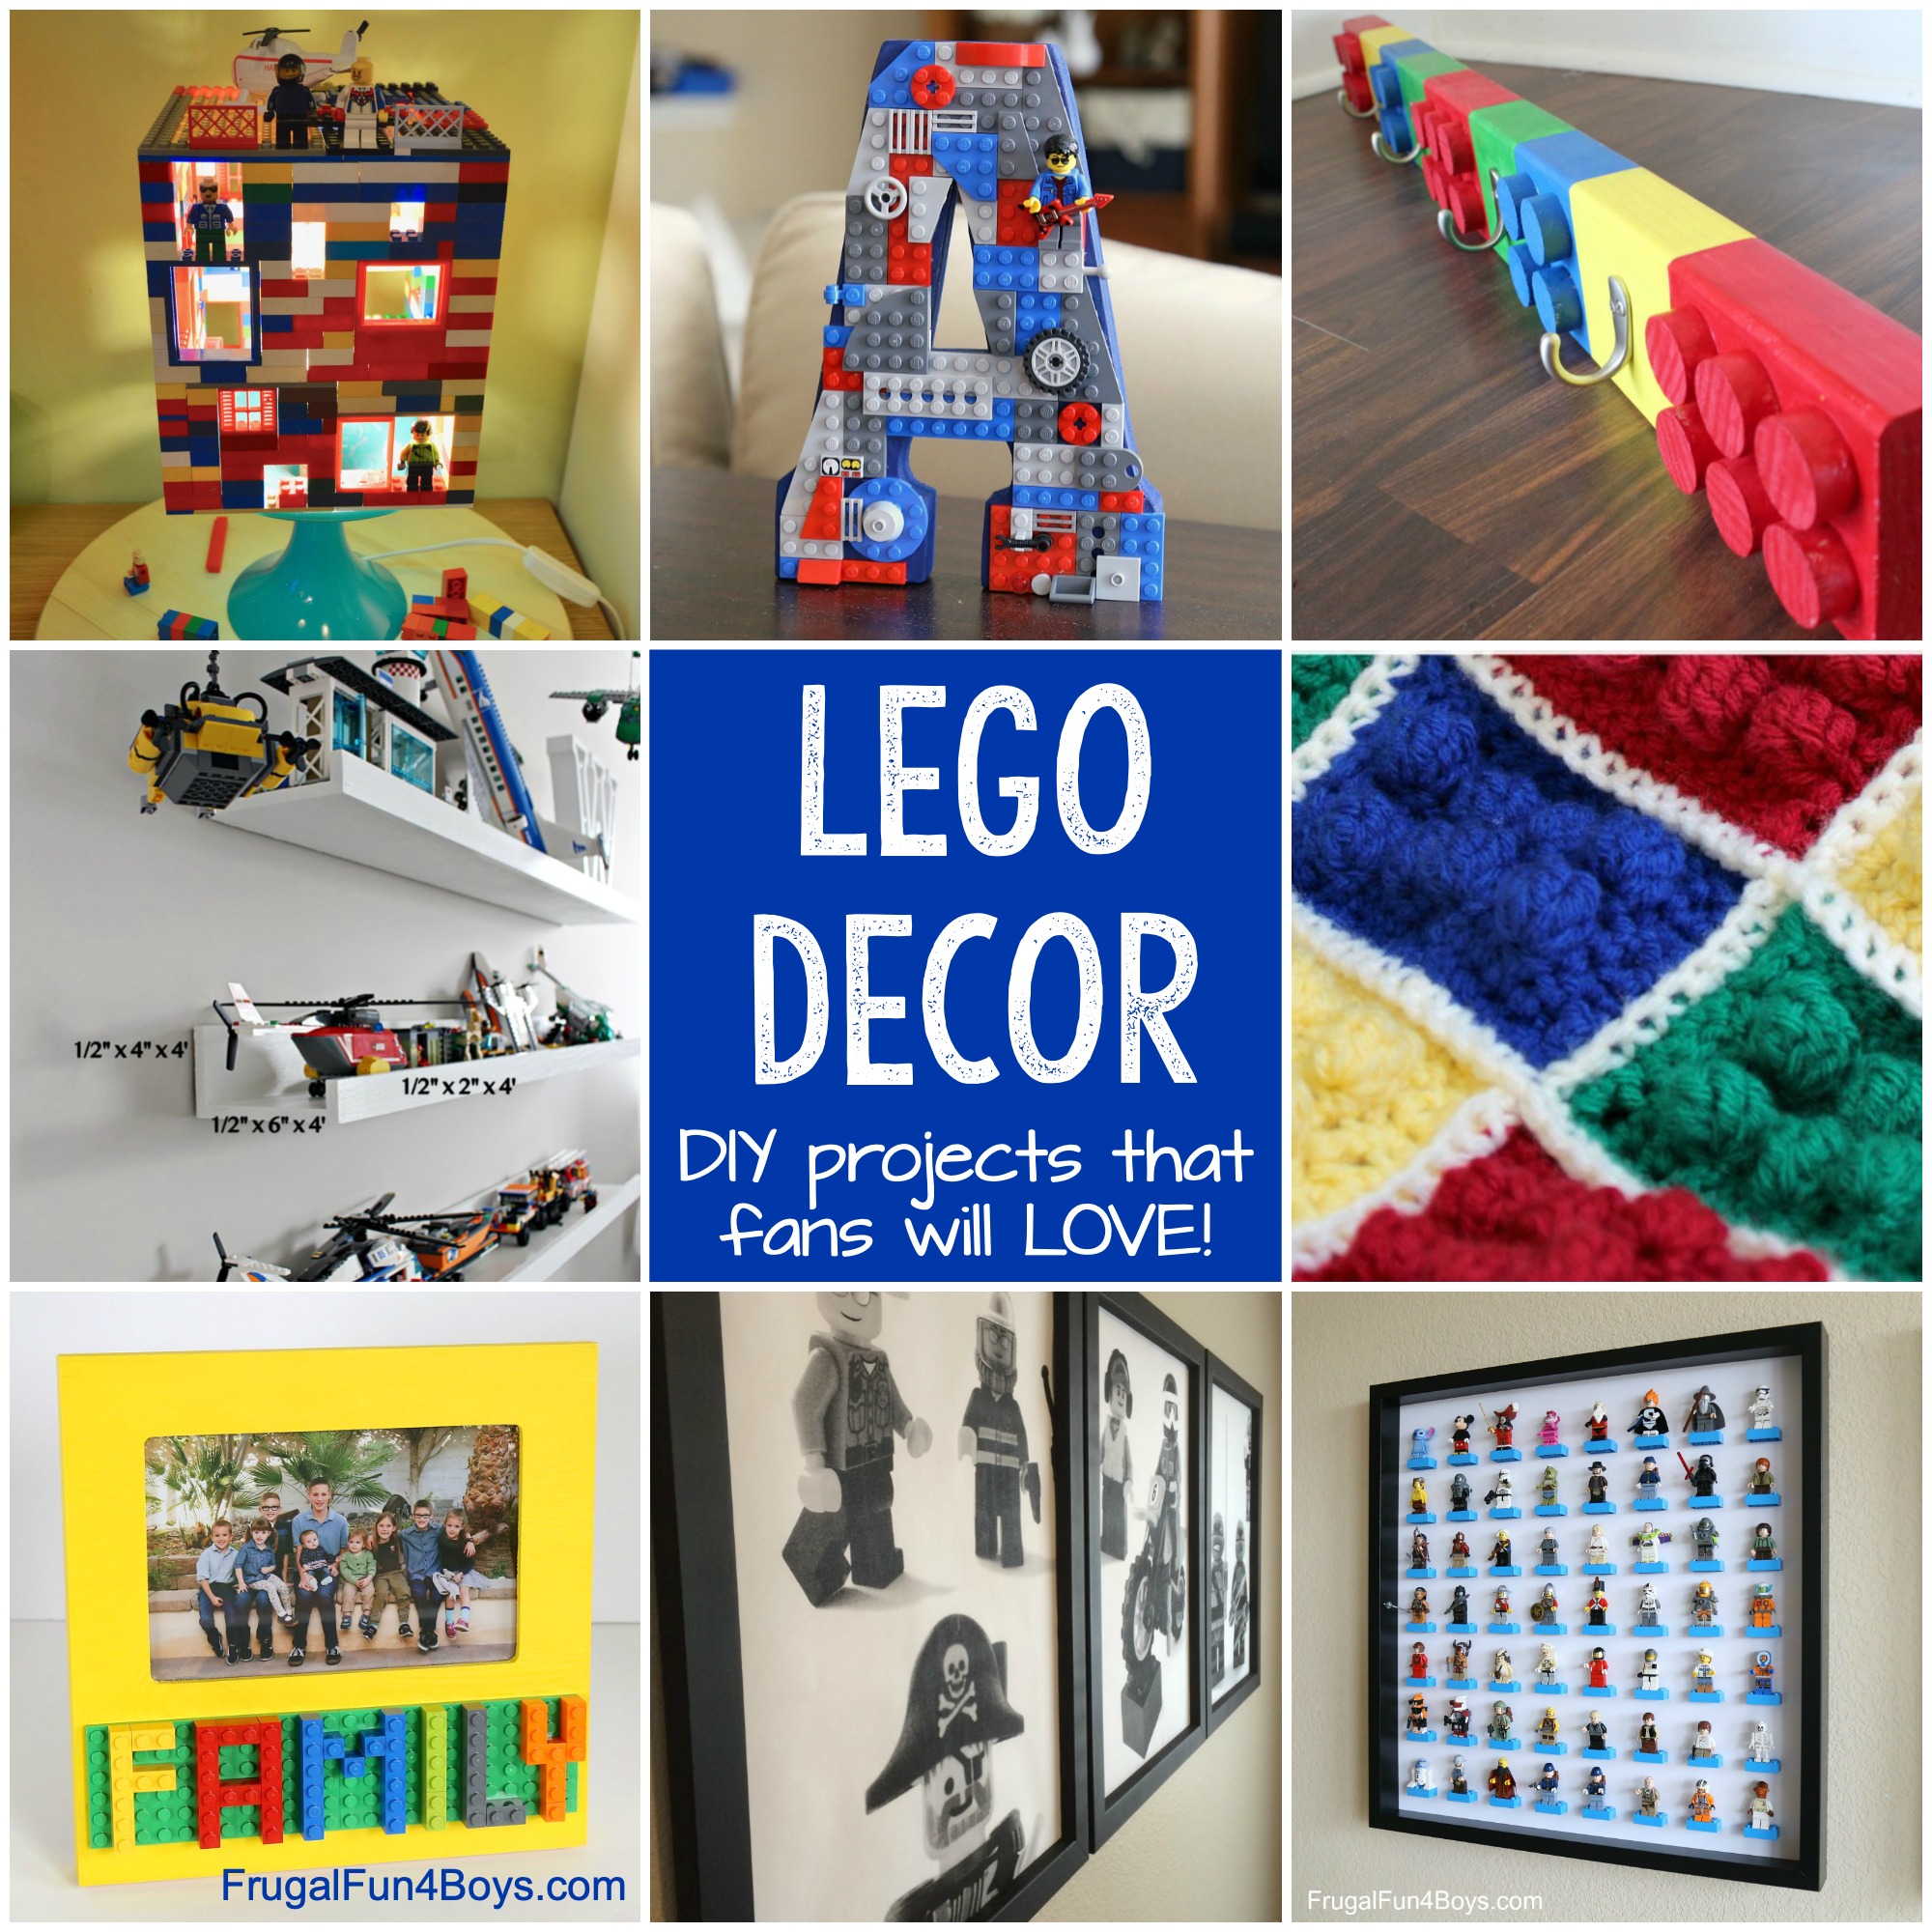
For more minifigure display options, check out our IKEA Frame Minifigure Display.
There are also a lot of fun LEGO ideas in this post: The Best LEGO Crafts and Decor
2 Comments
Brian M. Jun 20, 2020
The three-tier model looks very effective and attractive. Amazing how quickly you could fill this display.
Elizabeth Riggs Jun 24, 2020
mini figs just make you smile -don't they?
Sarah Jun 28, 2020
Yes! :-)
Post a Comment