
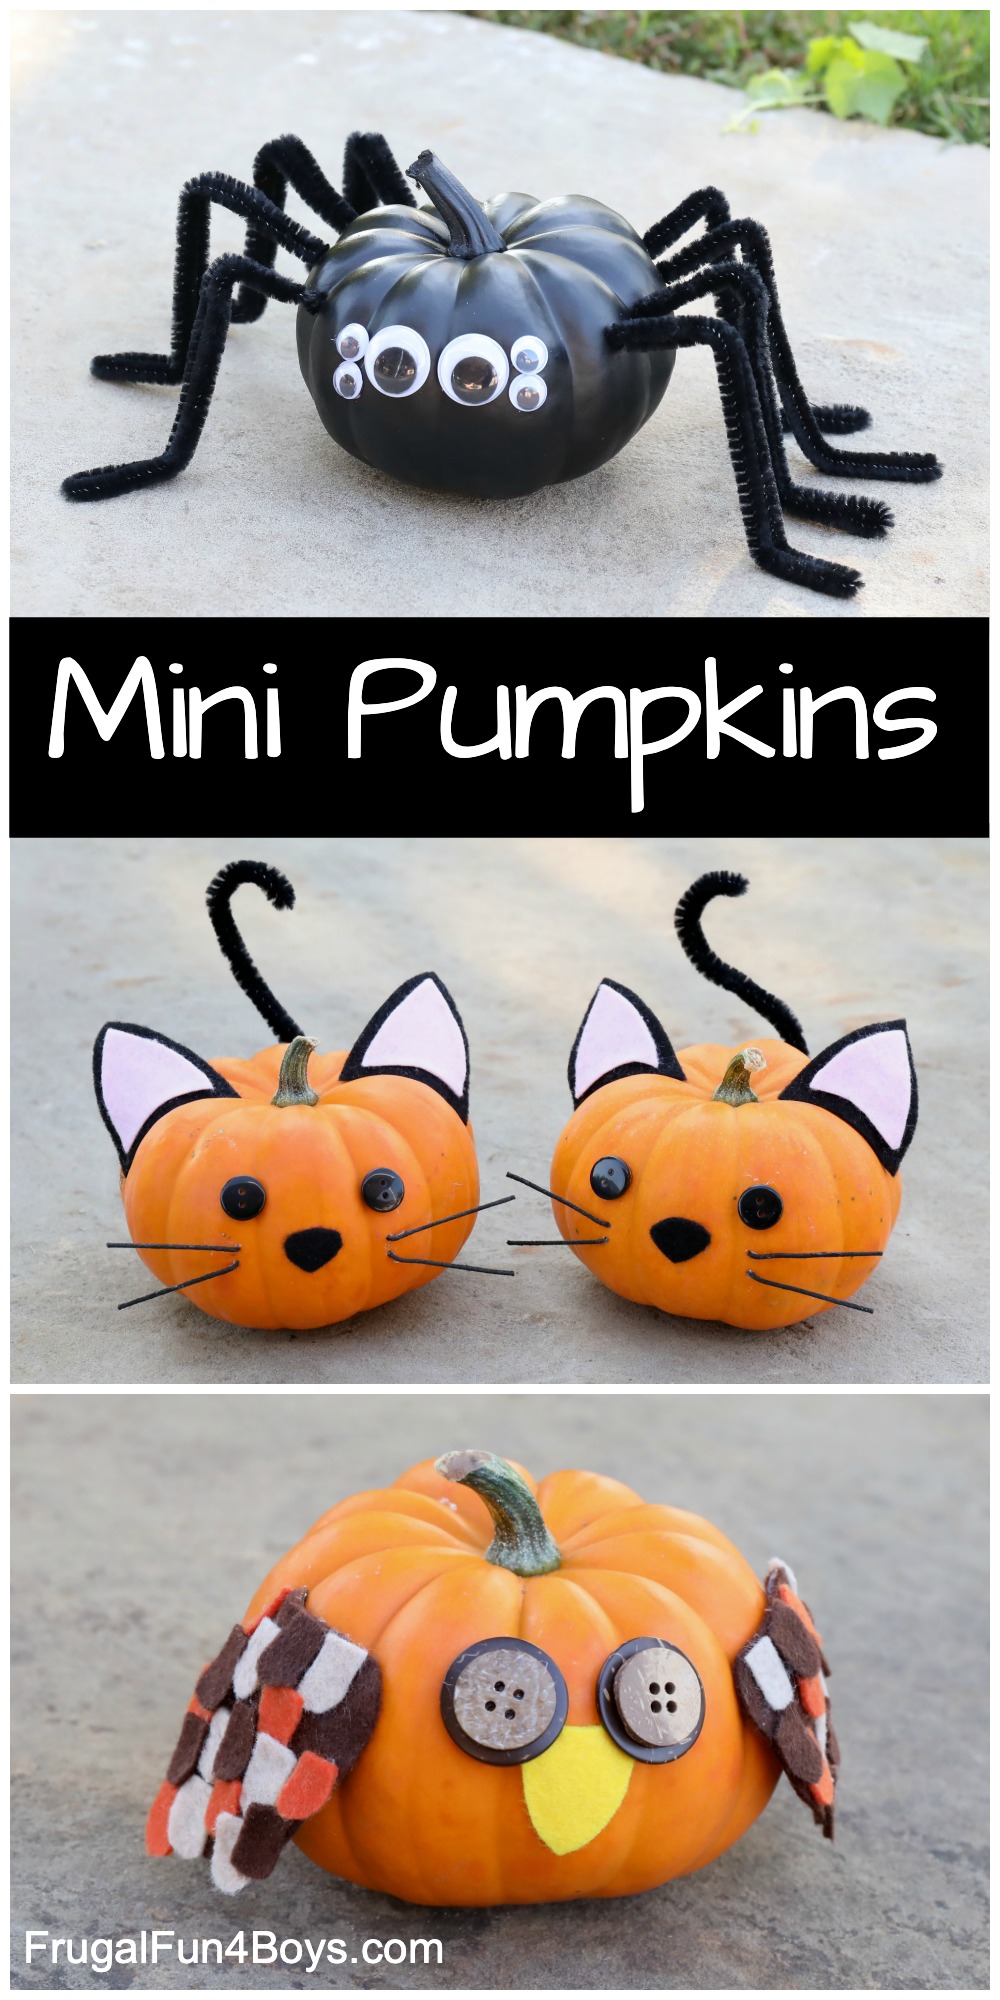
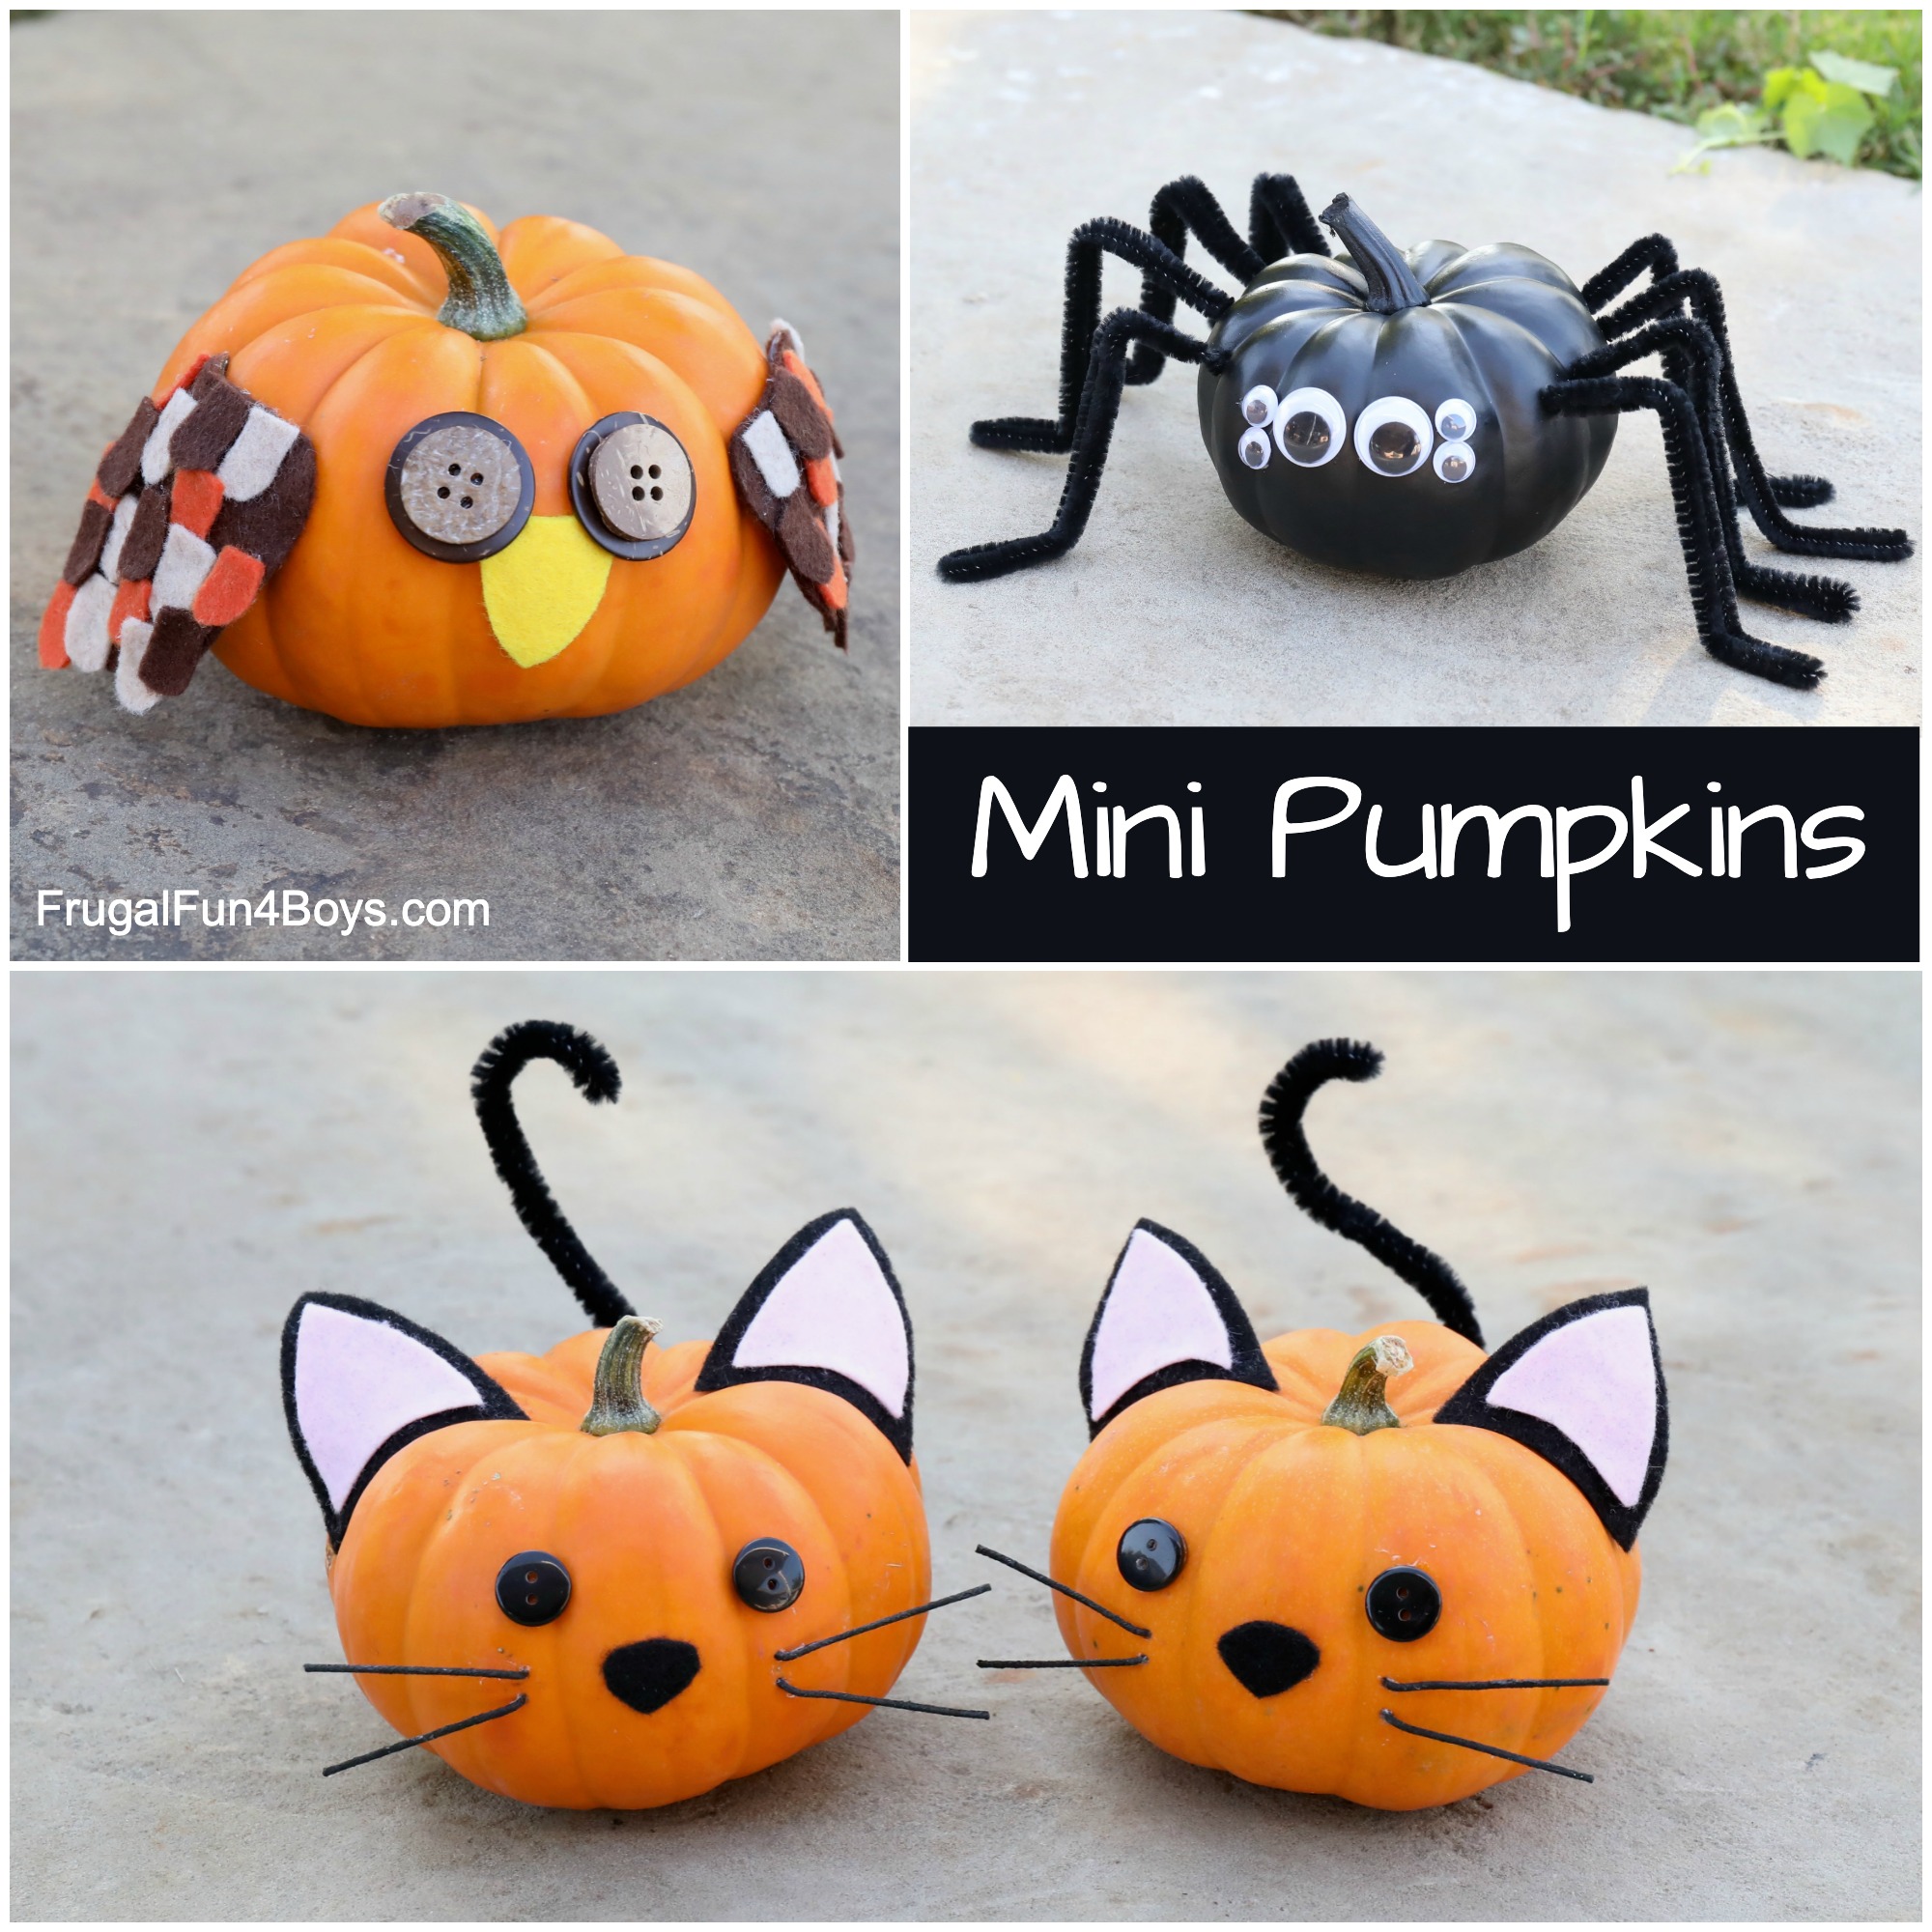
Turn pumpkins into adorable cats, cute little owls, and spiders with lots of eyes! These pumpkin decorating ideas are easy and fun. They also don’t involve cutting into the pumpkin, so these decorated pumpkins will last a long time. Fun craft to do with kids!
I guess these are technically gourds and not pumpkins, but they are the ones that look like little pumpkins.
These cute little pumpkins were ALMOST a craft fail… but I persevered and found a solution. And I’m so happy to show you this craft!
The problem is that pumpkins and gourds can be a difficult surface to paint or glue on because of their waxy skin. Be sure to pay attention to the tips in this post!
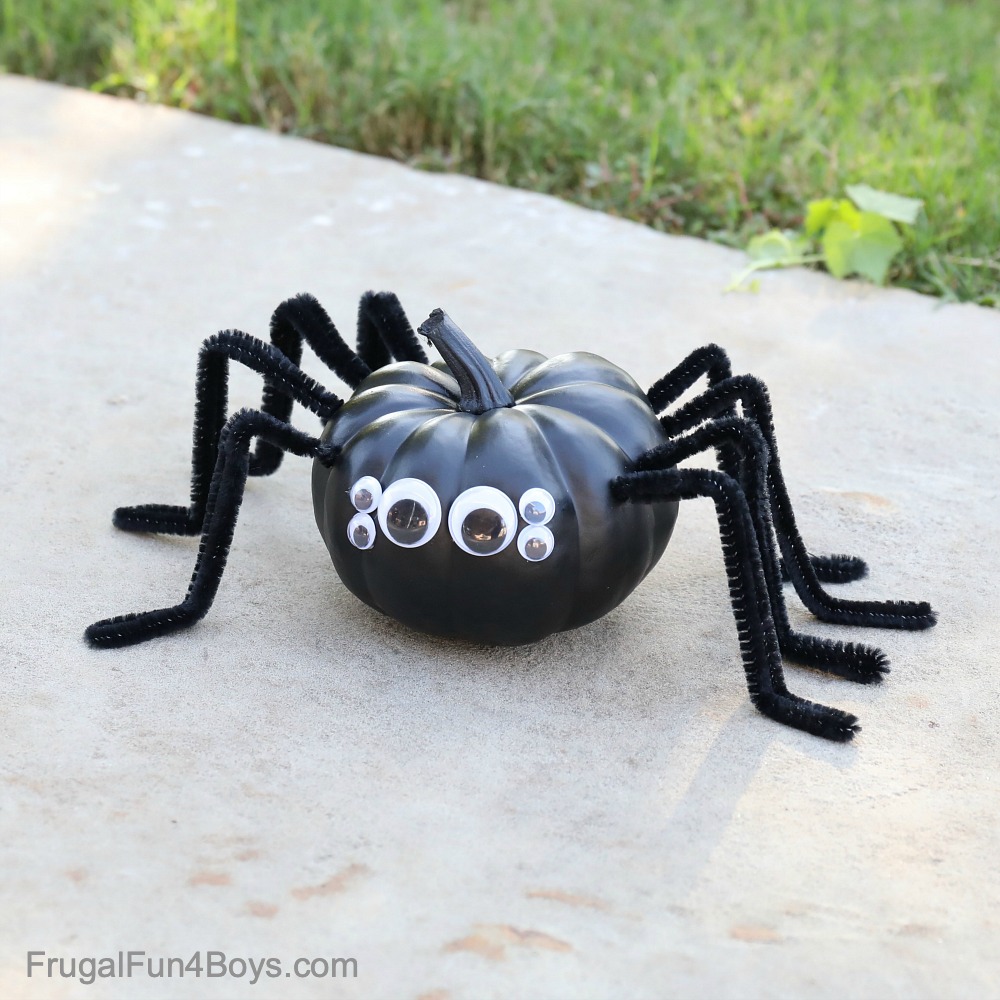
SPIDER
The spider might be my favorite of these pumpkin decorating ideas because he just looks so cute with his long legs! But I also love the cats… so hard to choose.
Anyway, the key to success with these spiders is to insert the legs into the pumpkin. DON’T try gluing them on… they’ll fall off and take the paint with them no matter what type of glue you use. TRUST ME on this one!
Step 1: Paint the pumpkin/gourd black.
Tips: Spray your pumpkin with a clear sealant before painting AND after painting. This will help the paint stick. You can use either acrylic paint or spray paint, but I found that spray paint is less likely to flake than acrylic paint.
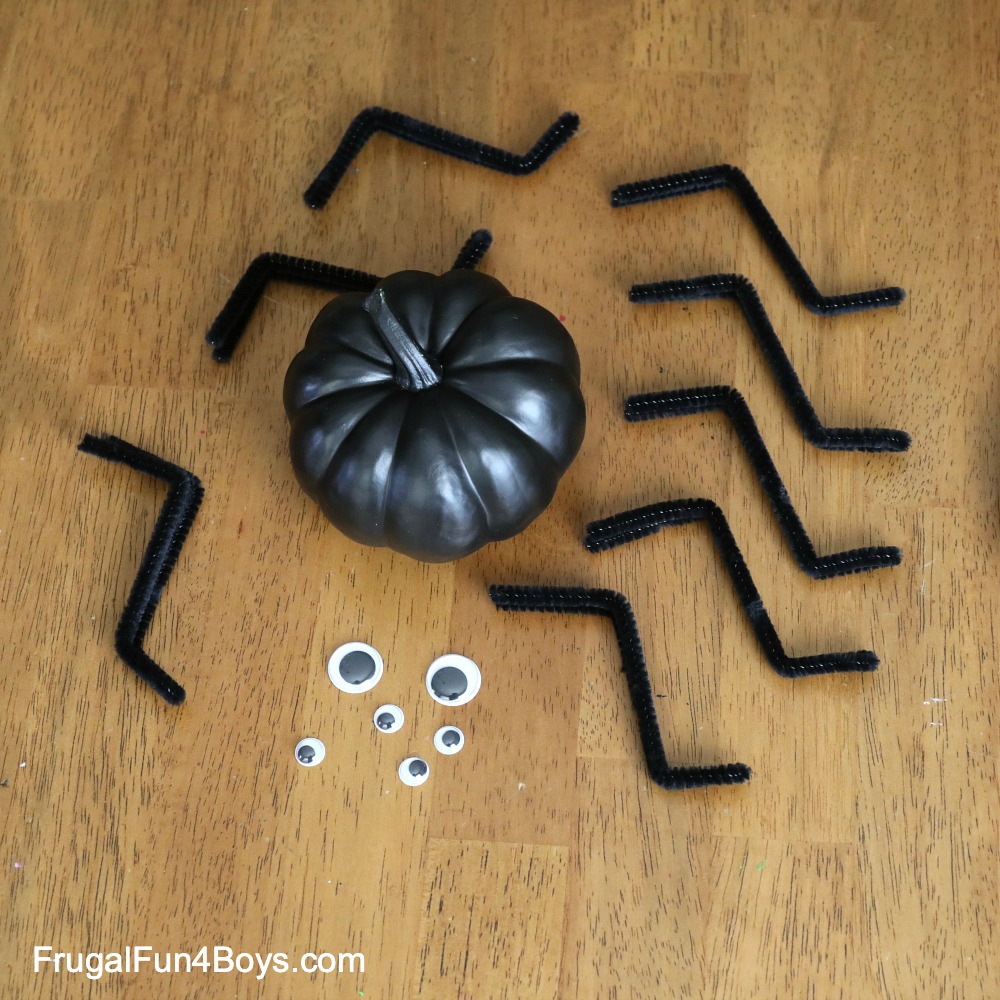
Step 2: Bend 8 black pipe cleaners into legs.
I folded each pipe cleaner in half first before making the leg shape.
Step 3: Glue on the eyes with hot glue.
Step 4: Use a drill or screw driver to make holes for each leg.
The gourds are soft enough that I just poked a hole with a small screw driver. The folded part of the pipe cleaner is the foot. I twisted the other two ends together before inserting them into the pumpkin.
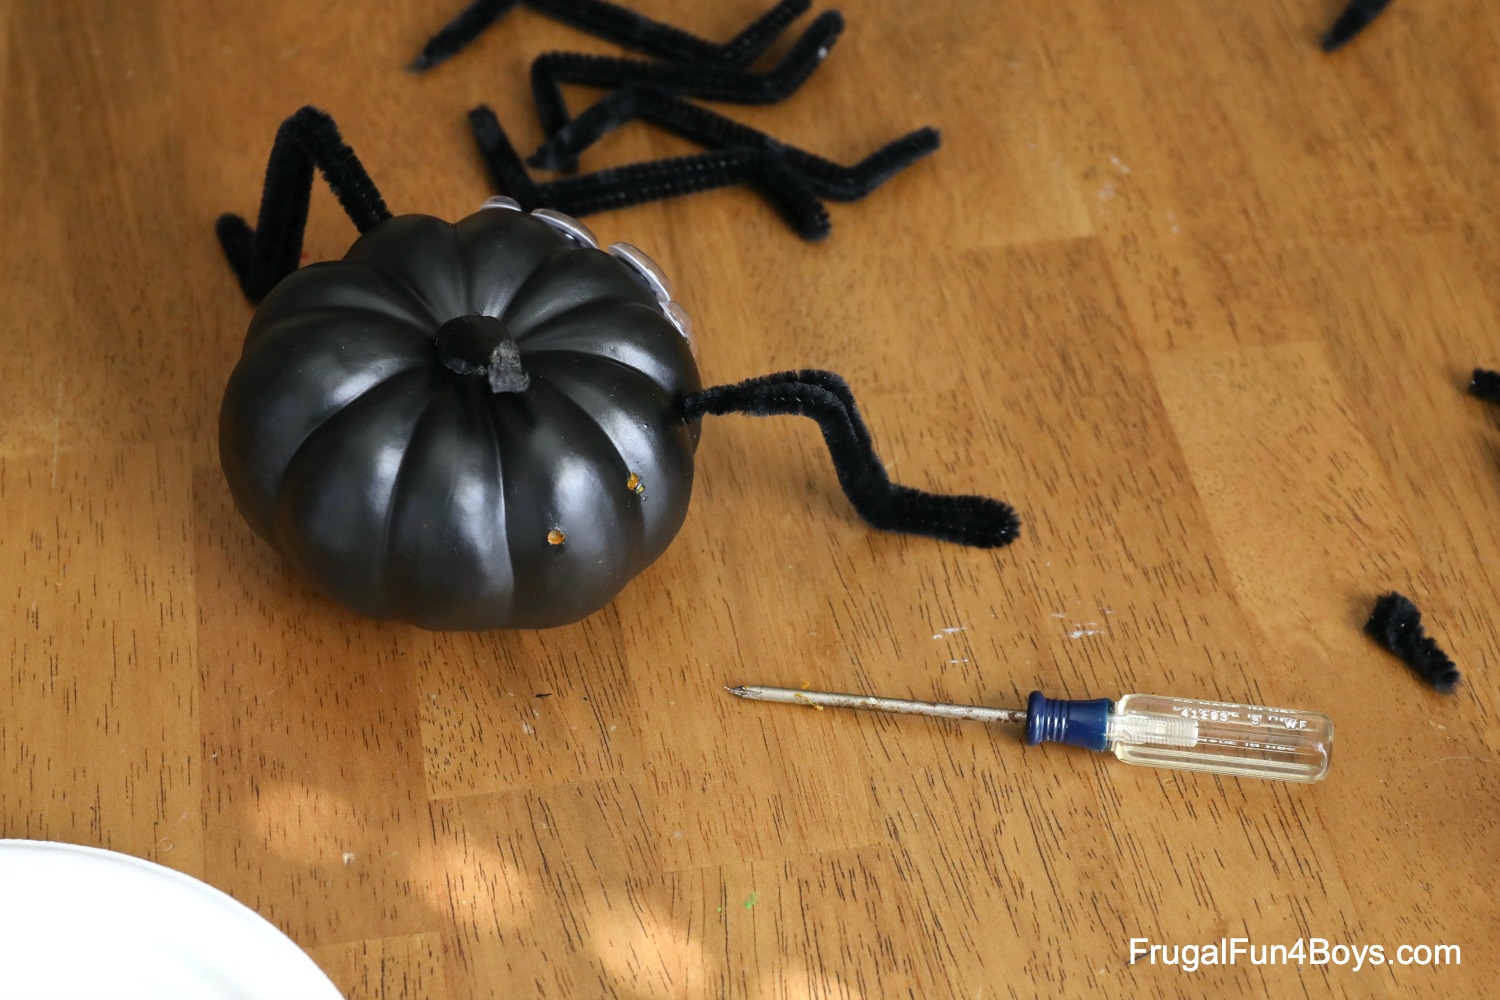
Note: Your pumpkin/gourd will ooze a little after you make the hole. We wiped ours with a napkin before inserting the leg. After the leg was in place, our pumpkins did not ooze any more.
CATS
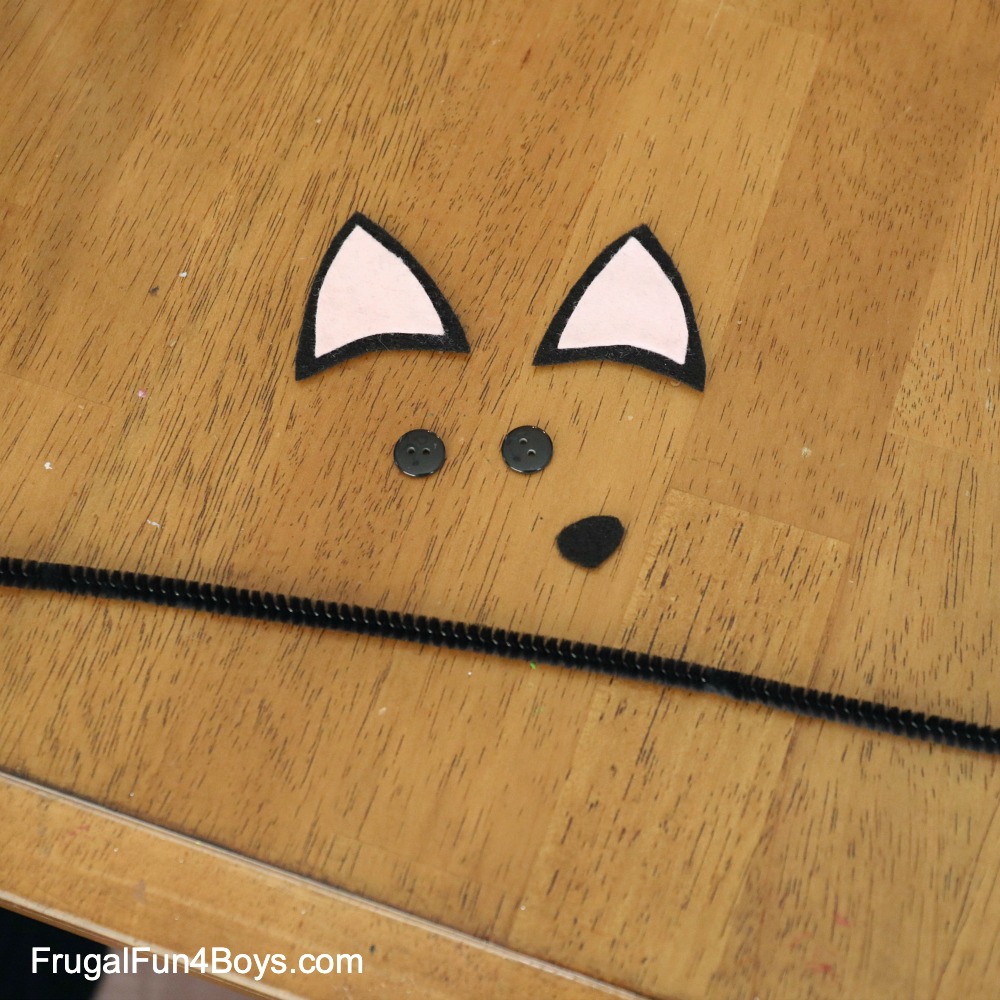
For each cat, you’ll need black felt, pink felt, two black buttons, and one black pipe cleaner.
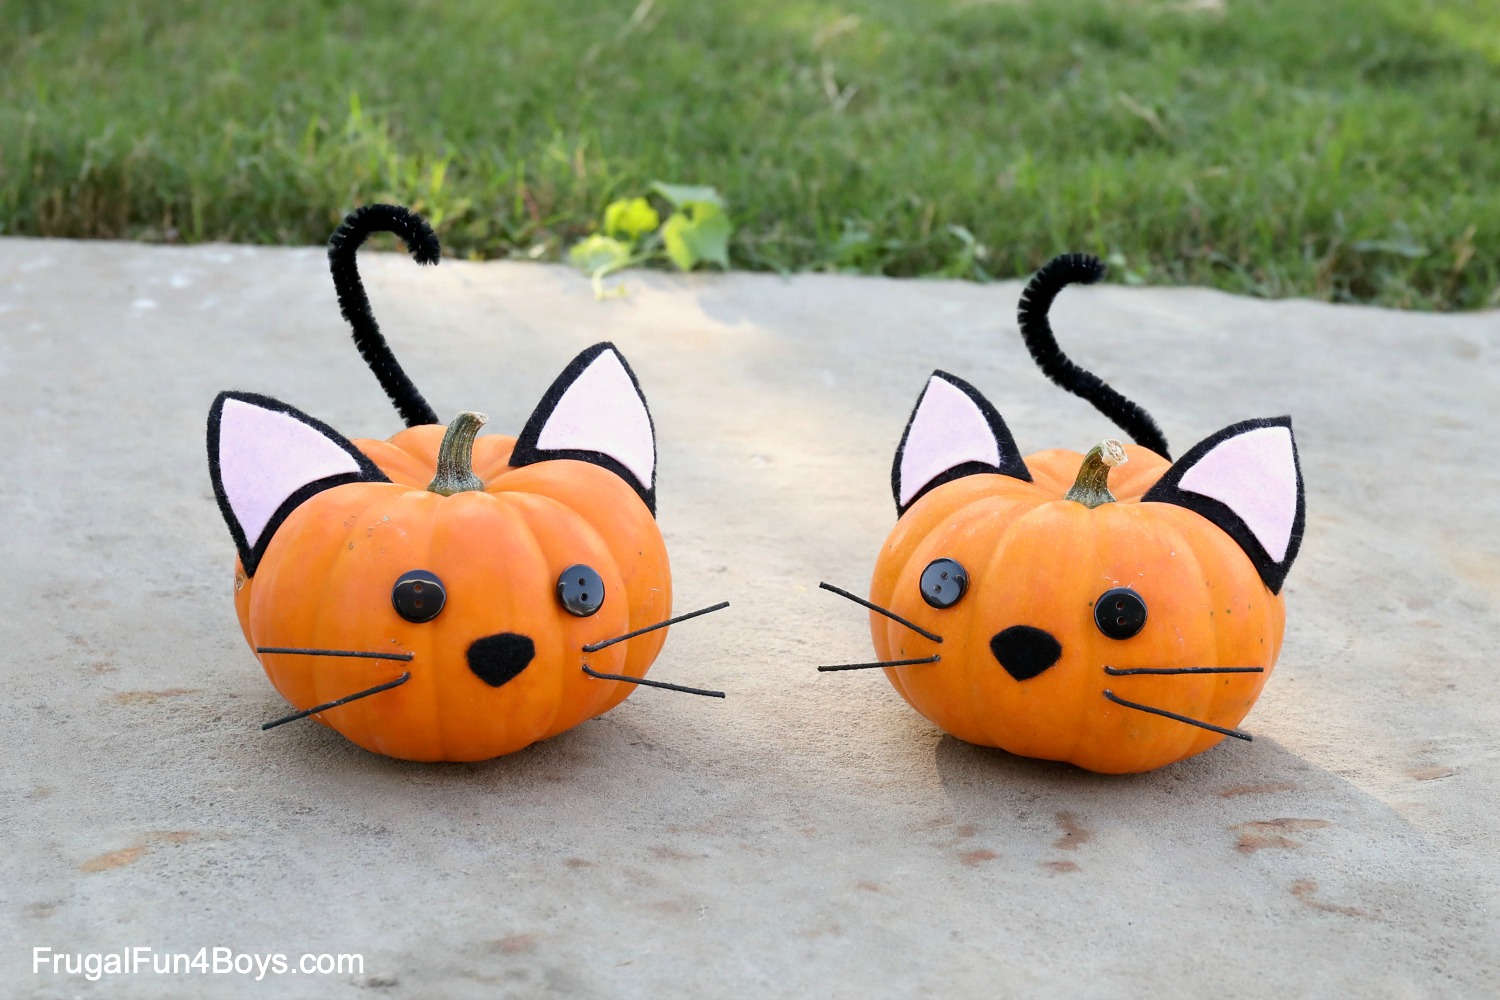
We also used green floral wire for the whiskers. Paint it black with acrylic paint.
Step 1: Cut out ears from black and pink felt. Cut out a nose. Use hot glue to attach the two ear pieces together.
Make the bottom edge of the ears rounded.
Step 2: Glue on the eyes and ears.
Tip: Glue the ears along the natural curves in the pumpkin.
Step 3: Cut whiskers from floral wire and paint them black.
Step 4: Insert the whiskers into the pumpkin.
Gluing on the whiskers proved to be a waste of time. We tried hot glue and E6000 glue, and neither would stick for very long.
So I tried bending the end of the whiskers at a 90 degree angle. I made a tiny hole with a drill bit that I held in my hand and inserted the wire. No drill, just the bit. I think a drill would be too powerful and would make more hole than what you need!
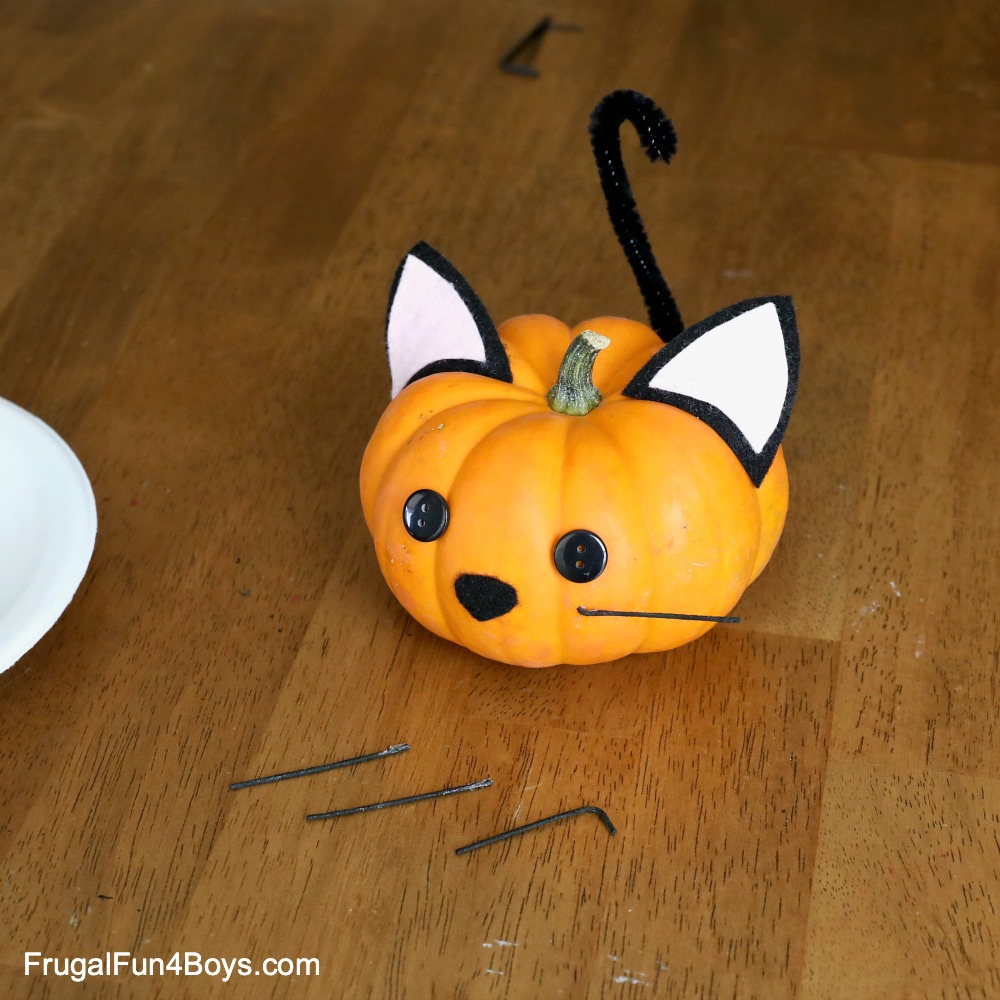
The pumpkin will ooze a bit even after you put the whiskers in, but just wipe it and it will quickly stop oozing.
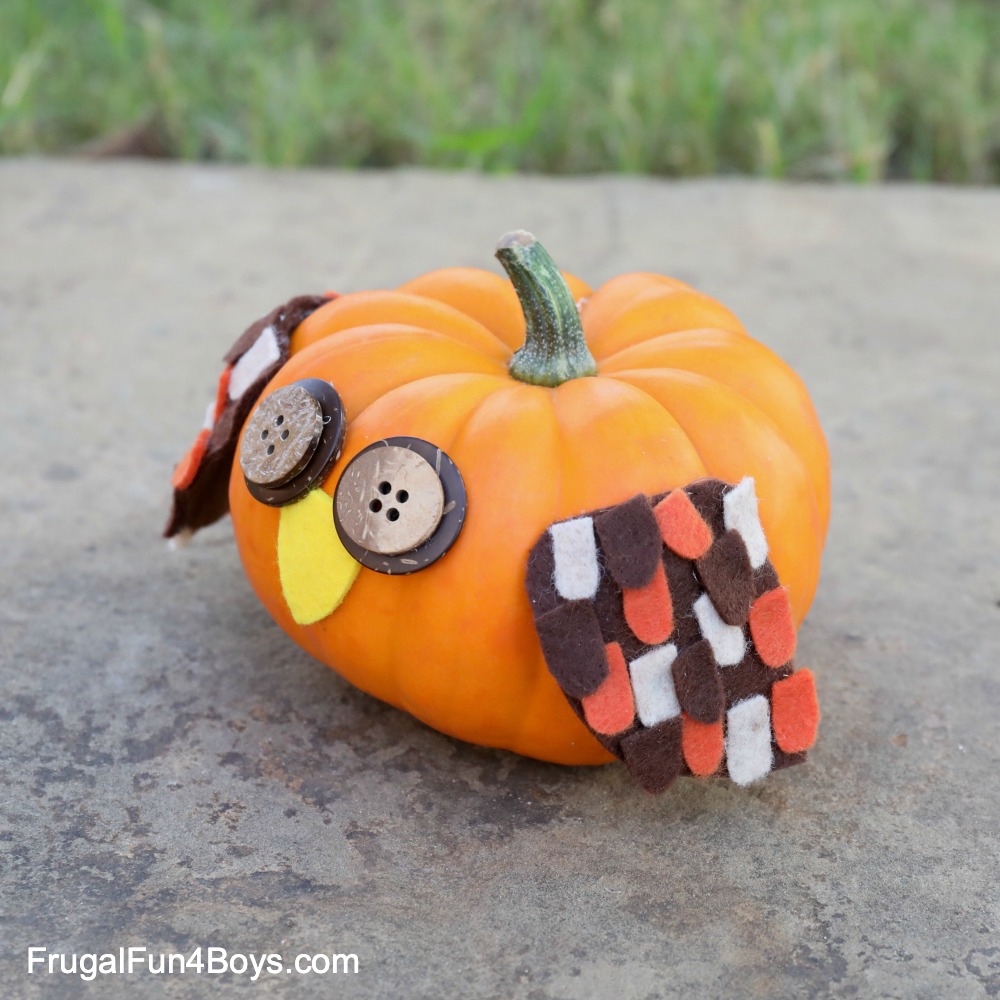
OWL
Step 1: Layer two sizes of buttons to make the cute eyes on this owl.
Use hot glue to attach them to each other, and then glue them to the pumpkin.
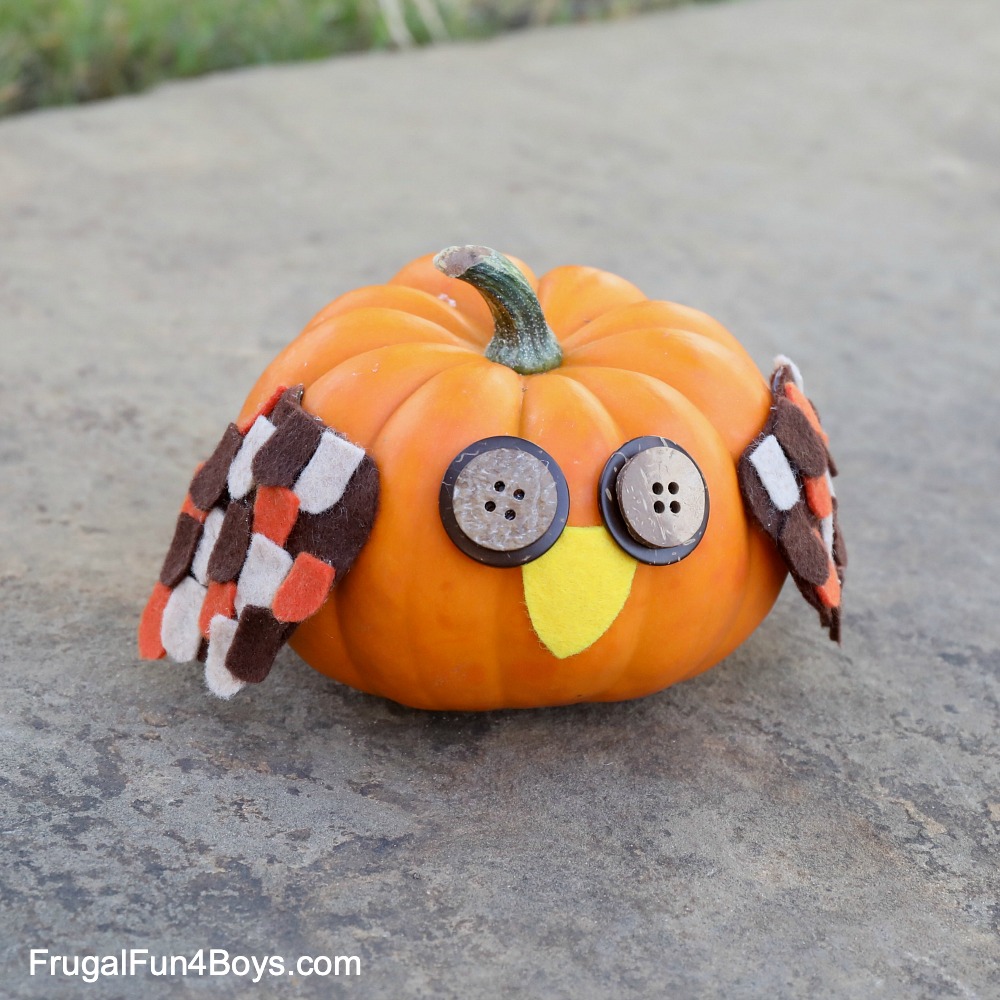
Step 2: Cut out the wing shape from brown felt.
Then add feathers cut from brown, tan, and orange felt. You can hot glue them in place. If you’re making these with young kids, Tacky Glue is a better option.
And that’s all there is to it! Your pumpkins will look fabulous on display this October!
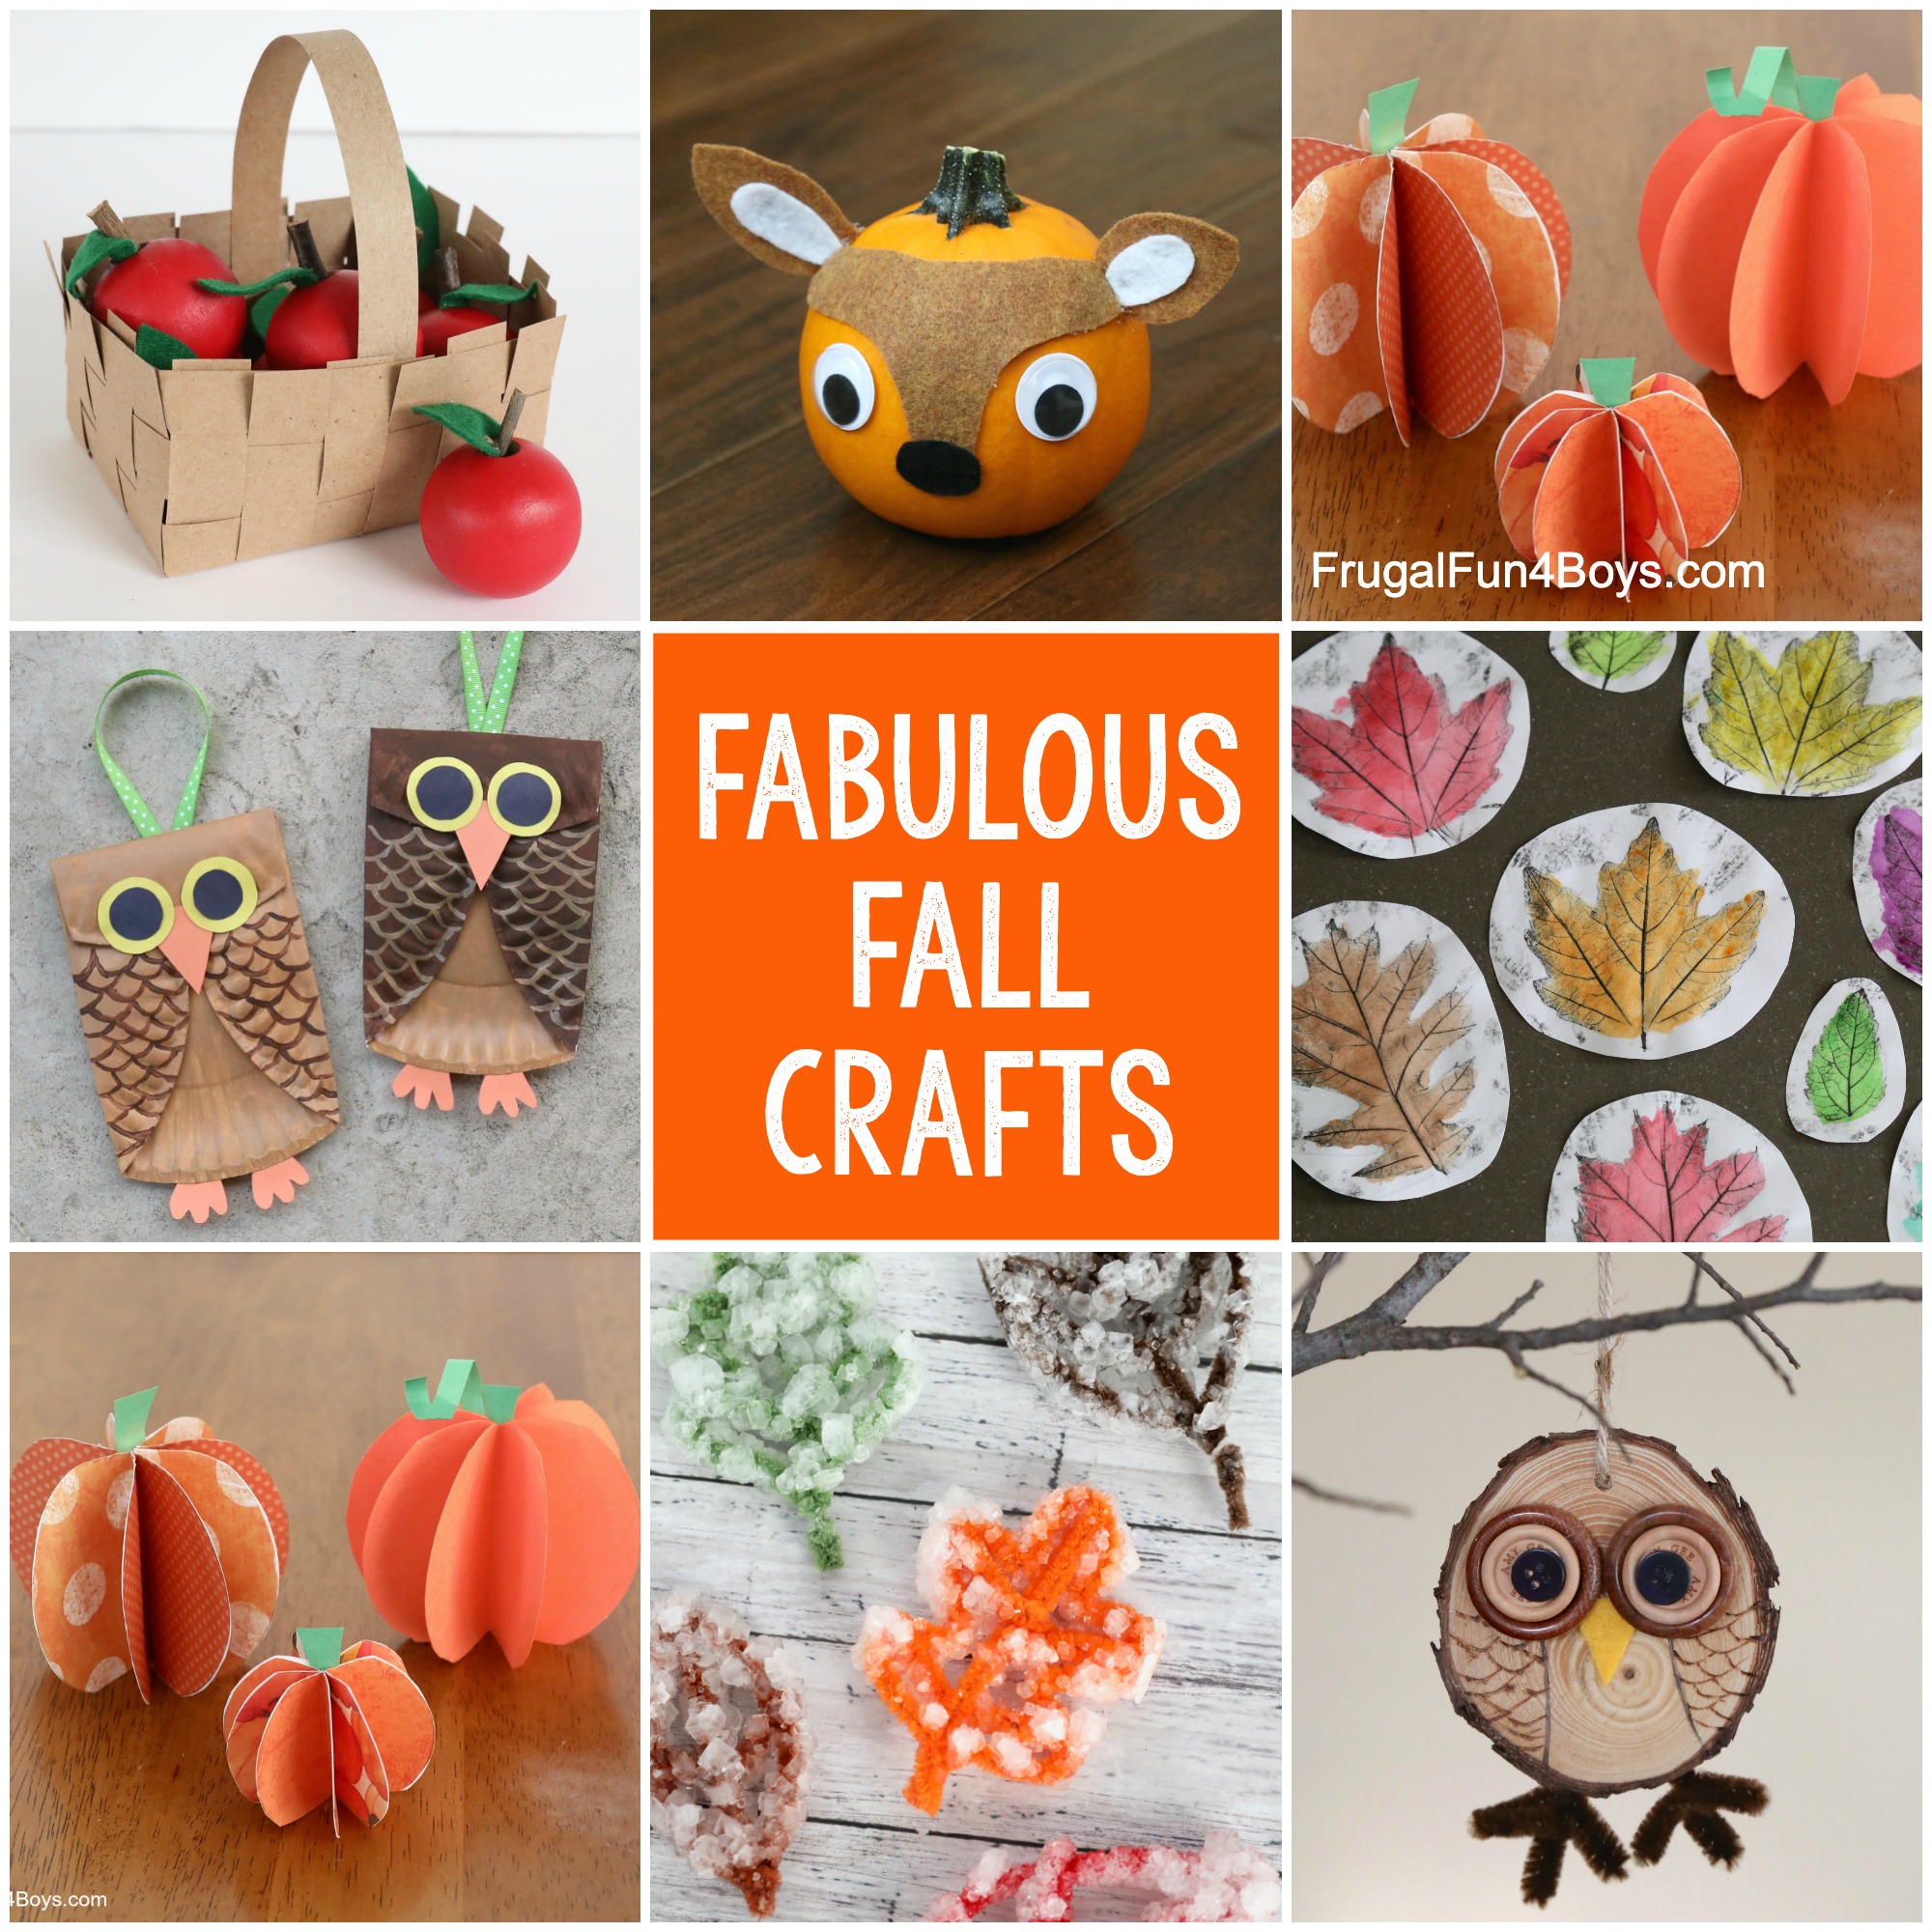
Looking for more Fall Crafts?
Here’s a collection of Fabulous Fall Crafts for Kids!
3 Comments
Barbara Jones Oct 11, 2020
I saved all the ideas you had in this email. They are all so cute. Thank you.
Peg Oct 22, 2020
I have saved all of your posts. As a grandma, these crafts and Lego ideas have really been a hit. Thank you so much.
Dallas Oct 12, 2022
Going to do most of these ideas in the next couple of weeks! Thanks for the inspiration!
Post a Comment