
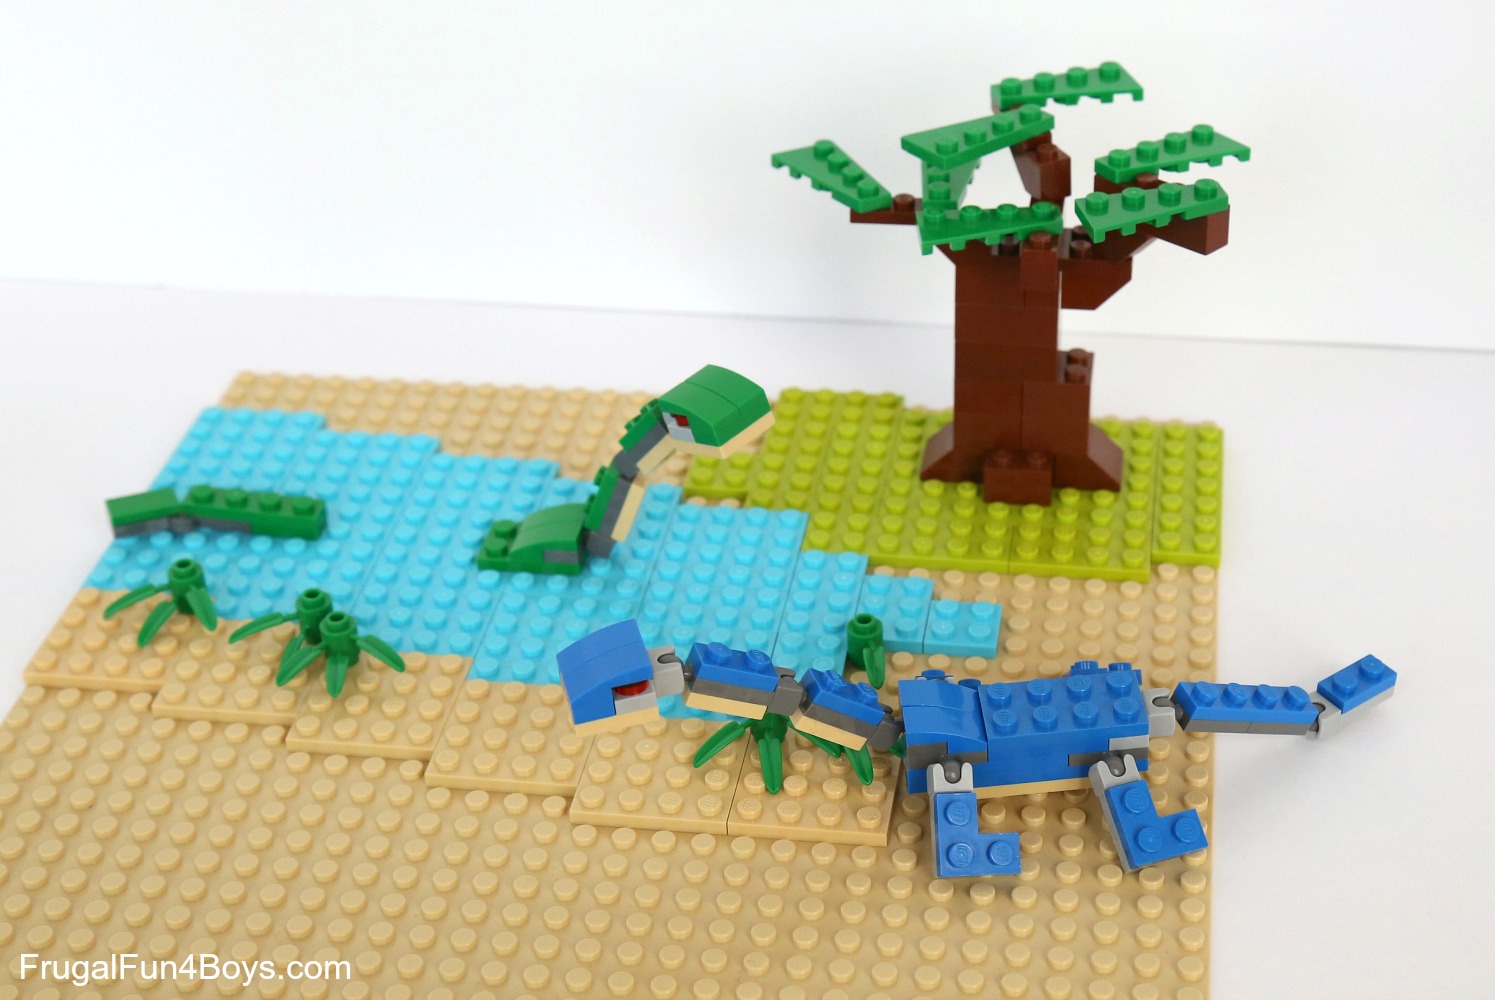
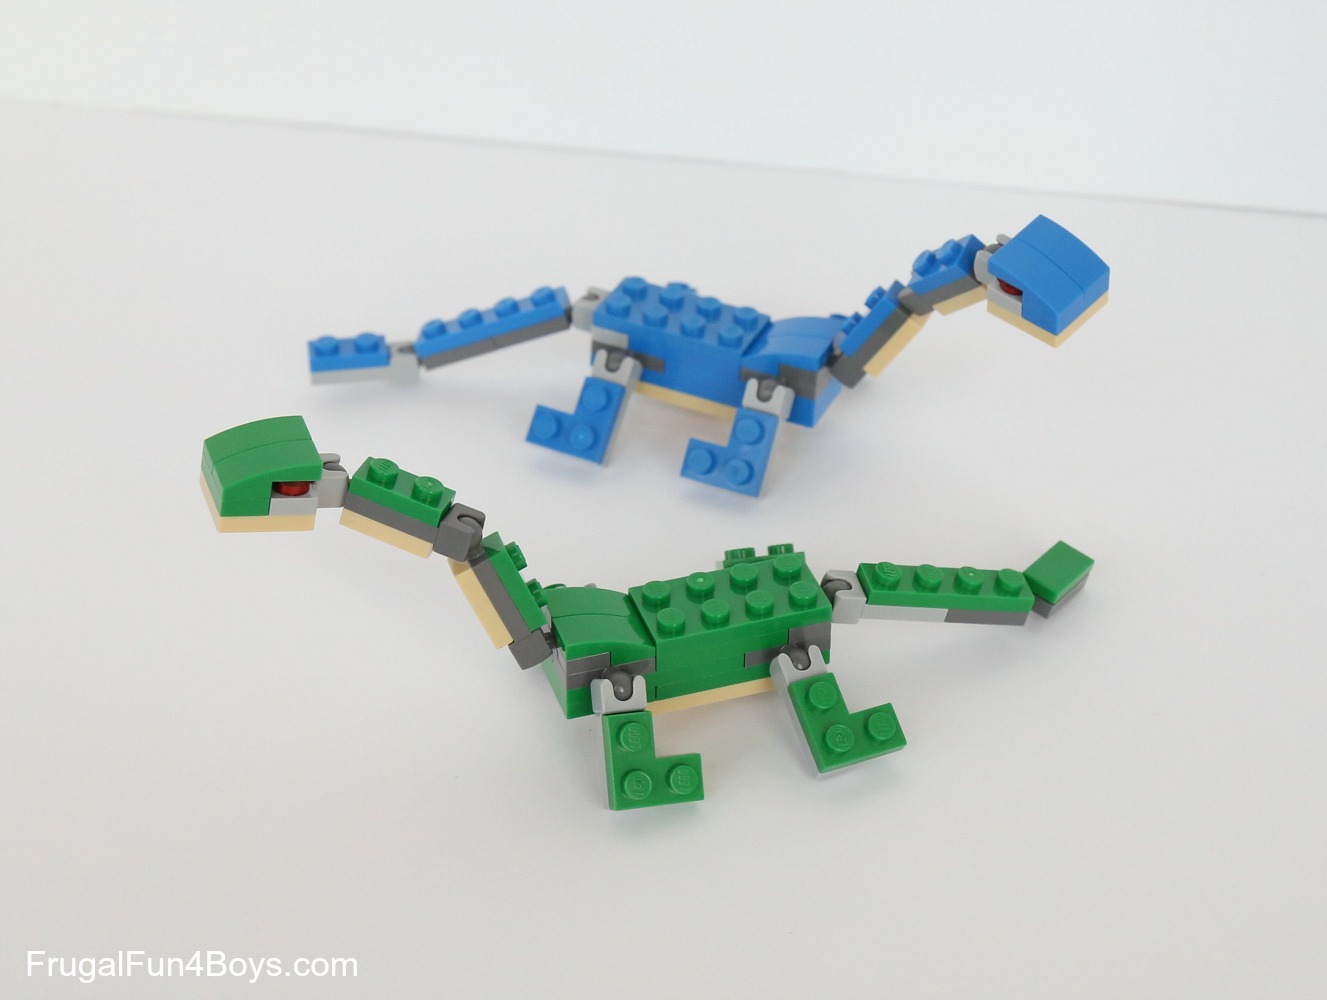
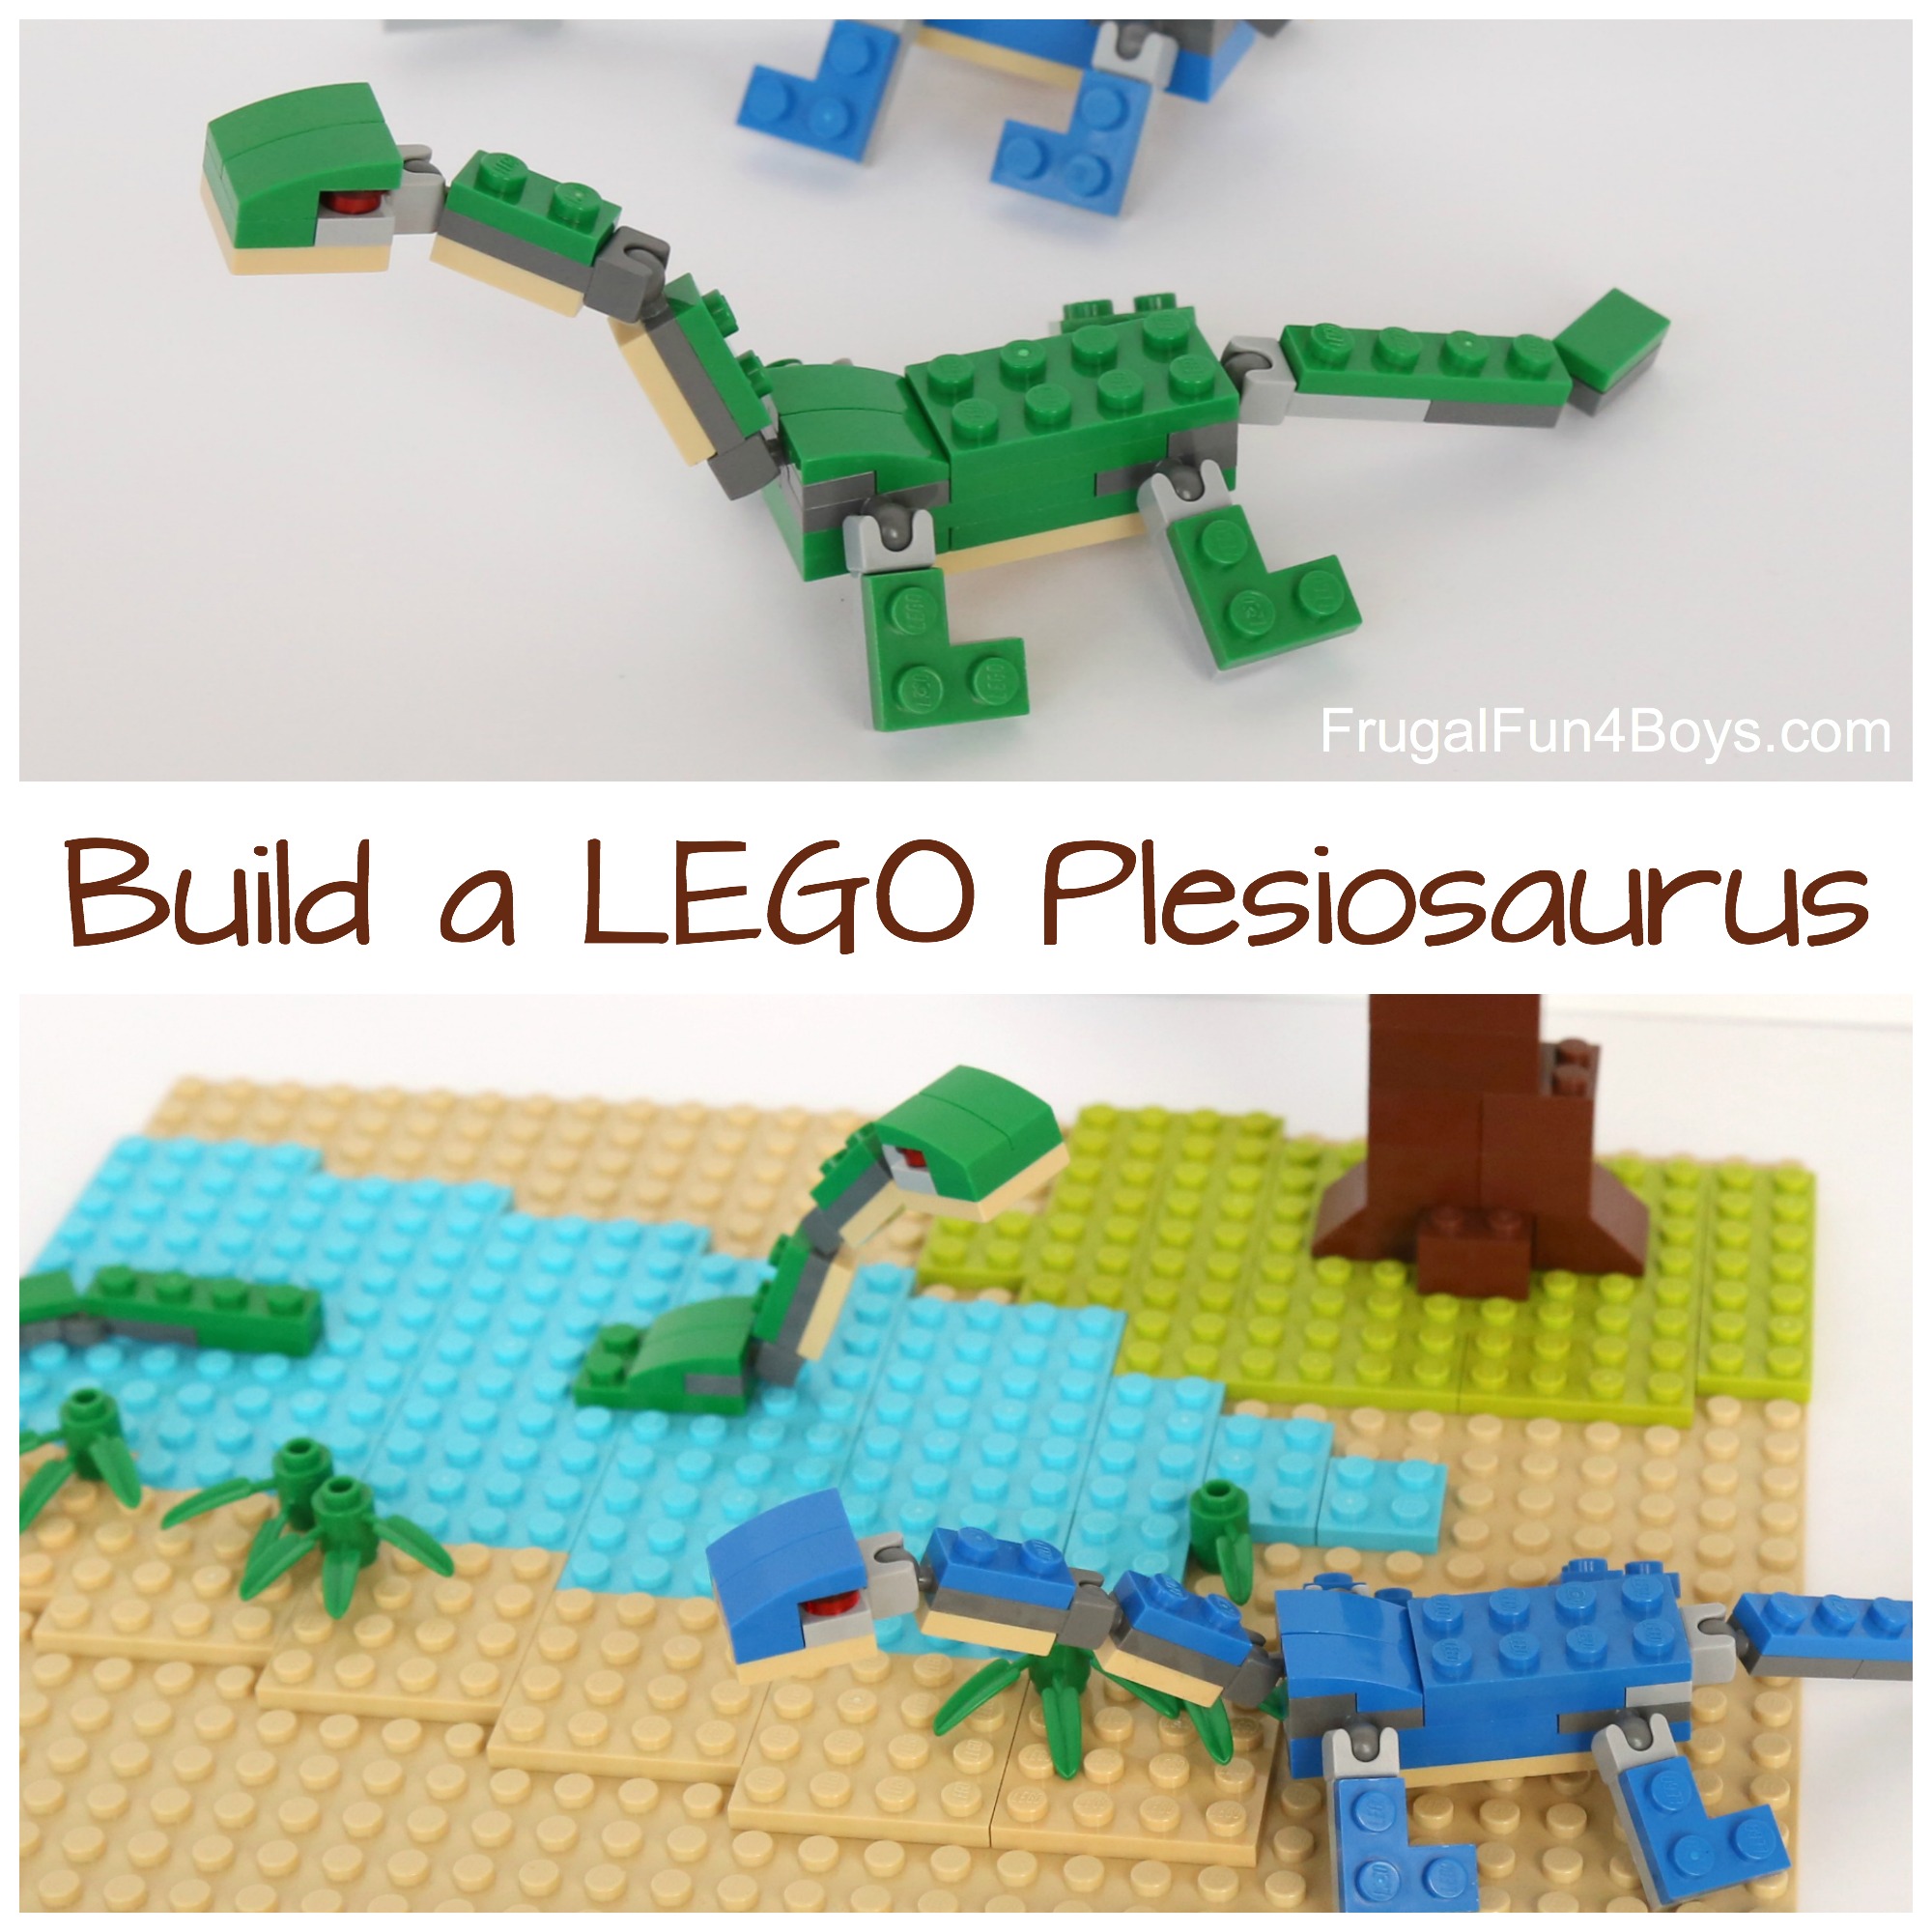
Here’s a fun new LEGO® project – build a water dinosaur, or plesiosaur! Well, technically they aren’t actually dinosaurs – just very large marine reptiles that are now extinct. The definition of a dinosaur includes leg bones that support the animal walking on land. But still, these LEGO® marine reptiles are fun to build! Have fun creating a whole prehistoric scene!
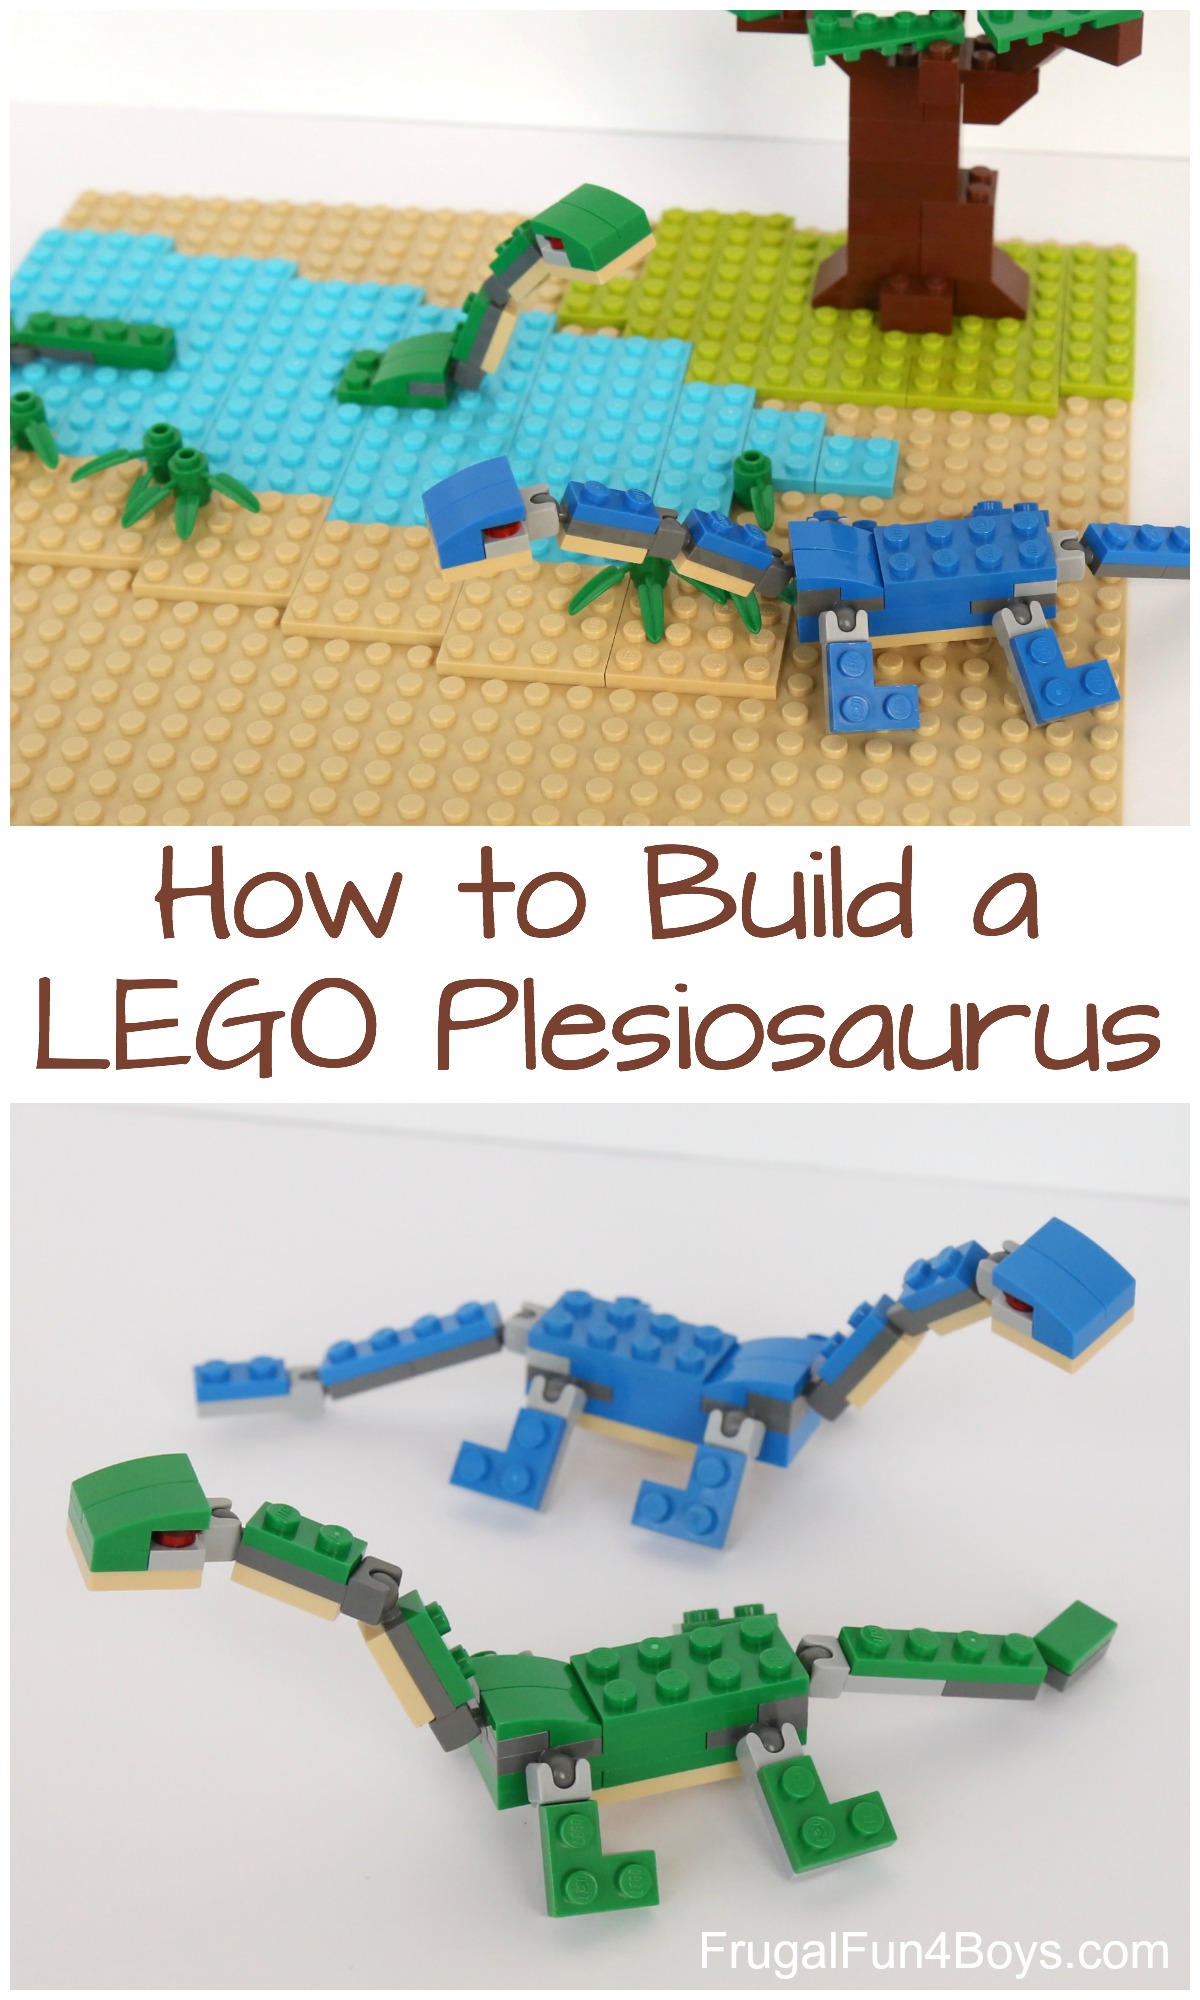
This project was created by Owen, my 9 year old. I didn’t even have to do anything to “fix it up a little!” He has been having so much fun building these reptiles in different colors and building scenes for them.
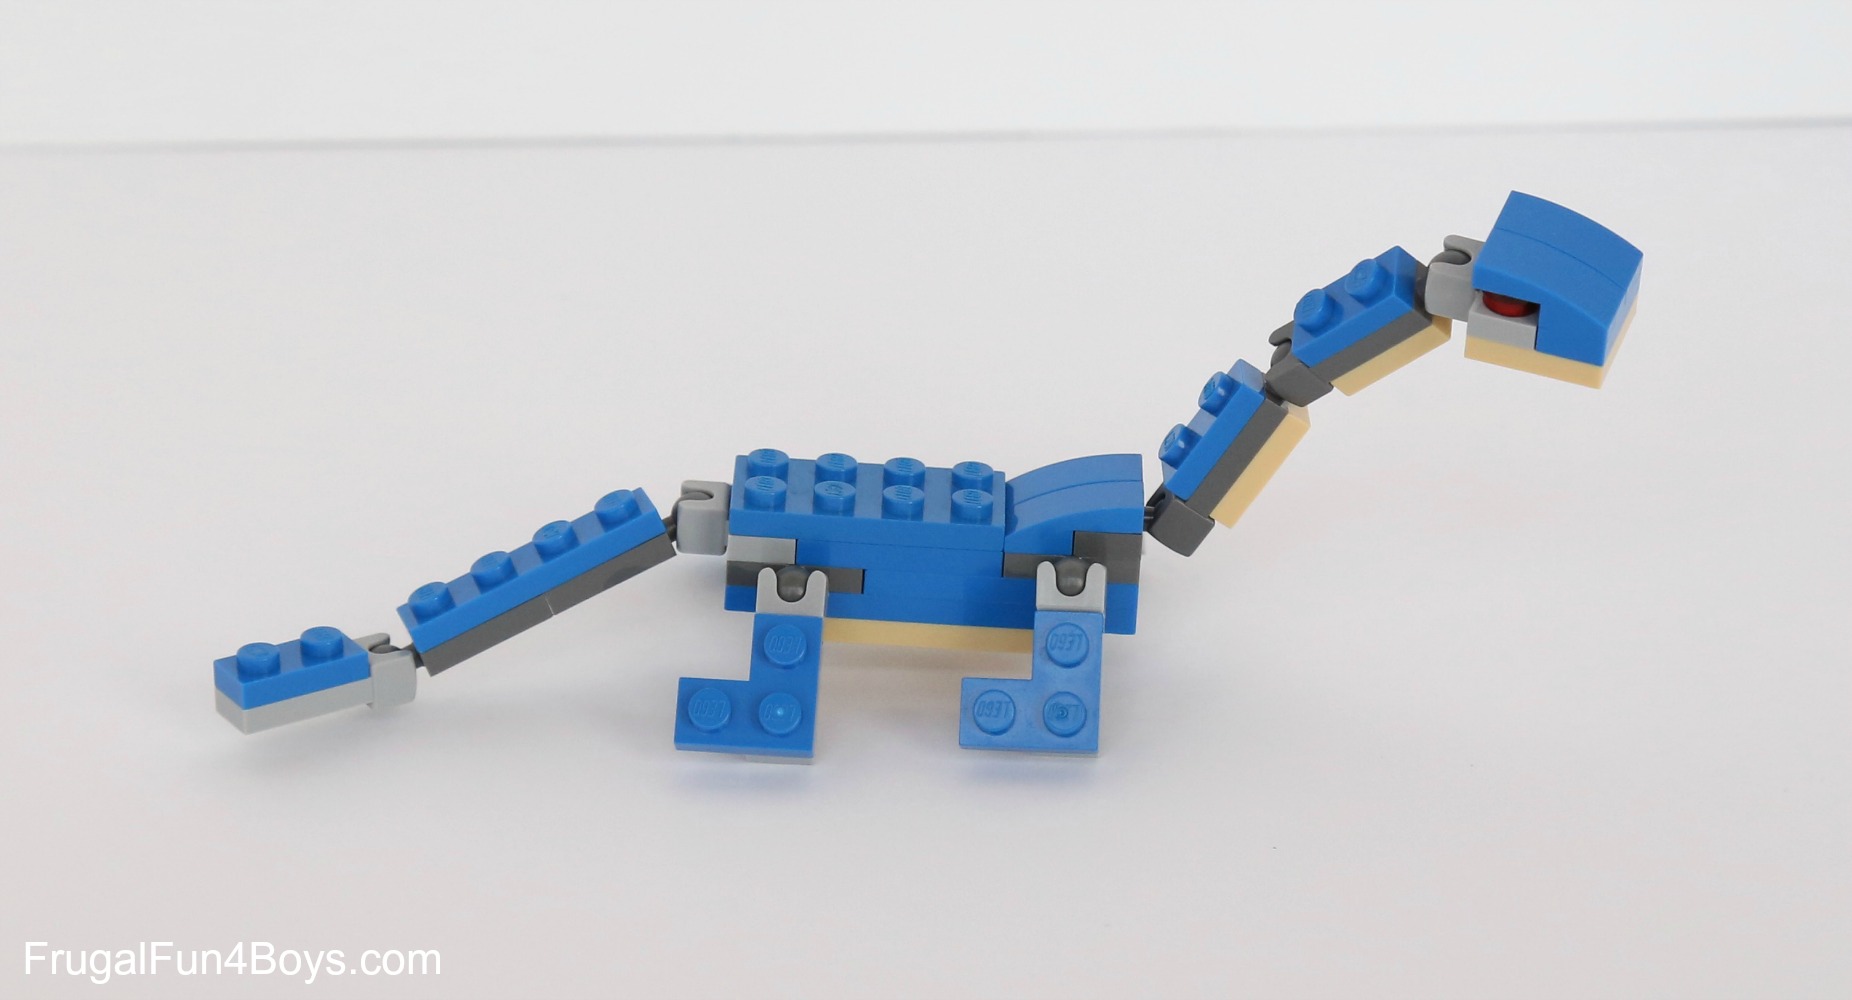
You can make the plesiosaurs look like they are swimming by removing their heads and tails and attaching those to the water.
We also have 5 LEGO Dinosaurs to Build, so head over there once you’ve built your plesiosaur! There are instructions for a T-Rex, ankylosaurus, long necked dinosaur, and more.
This post contains Amazon affiliate links.
Ready to build one? Here are the building instructions!
See notes at the bottom of the instructions about where to find the bricks if you don’t have them already.
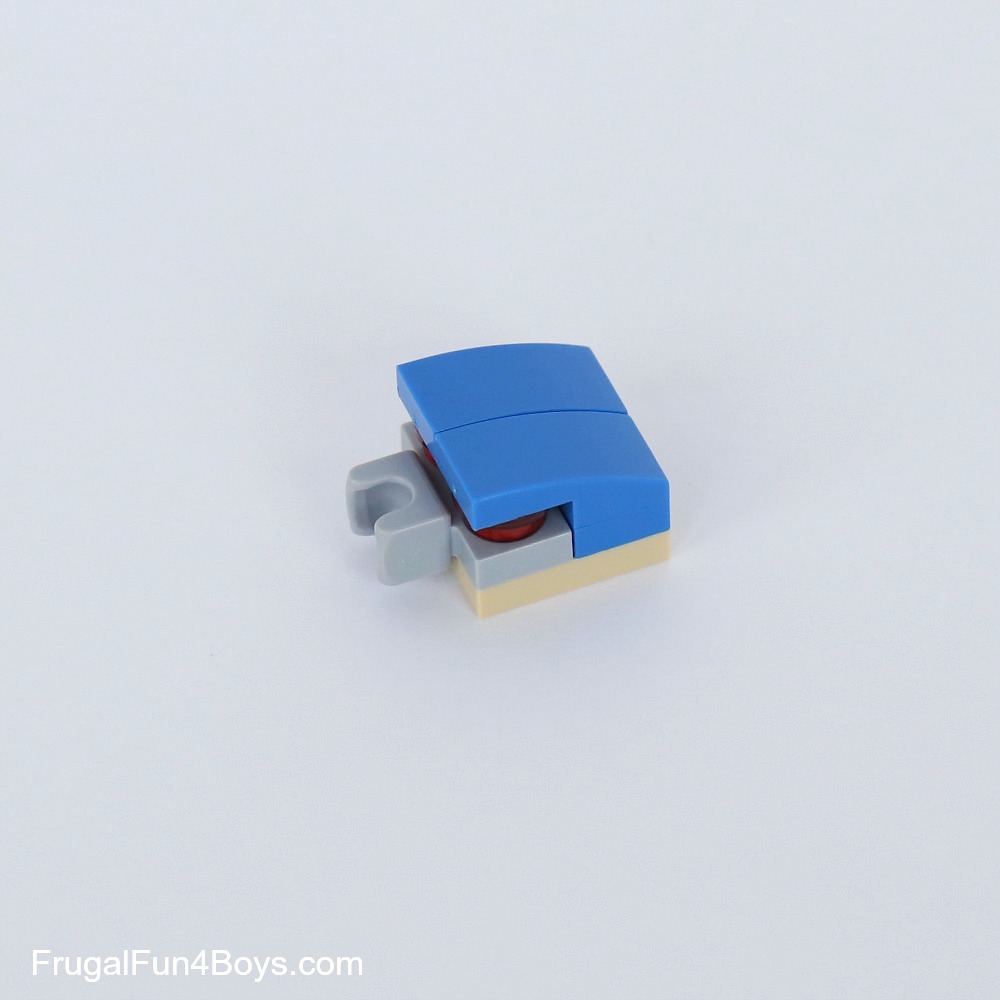
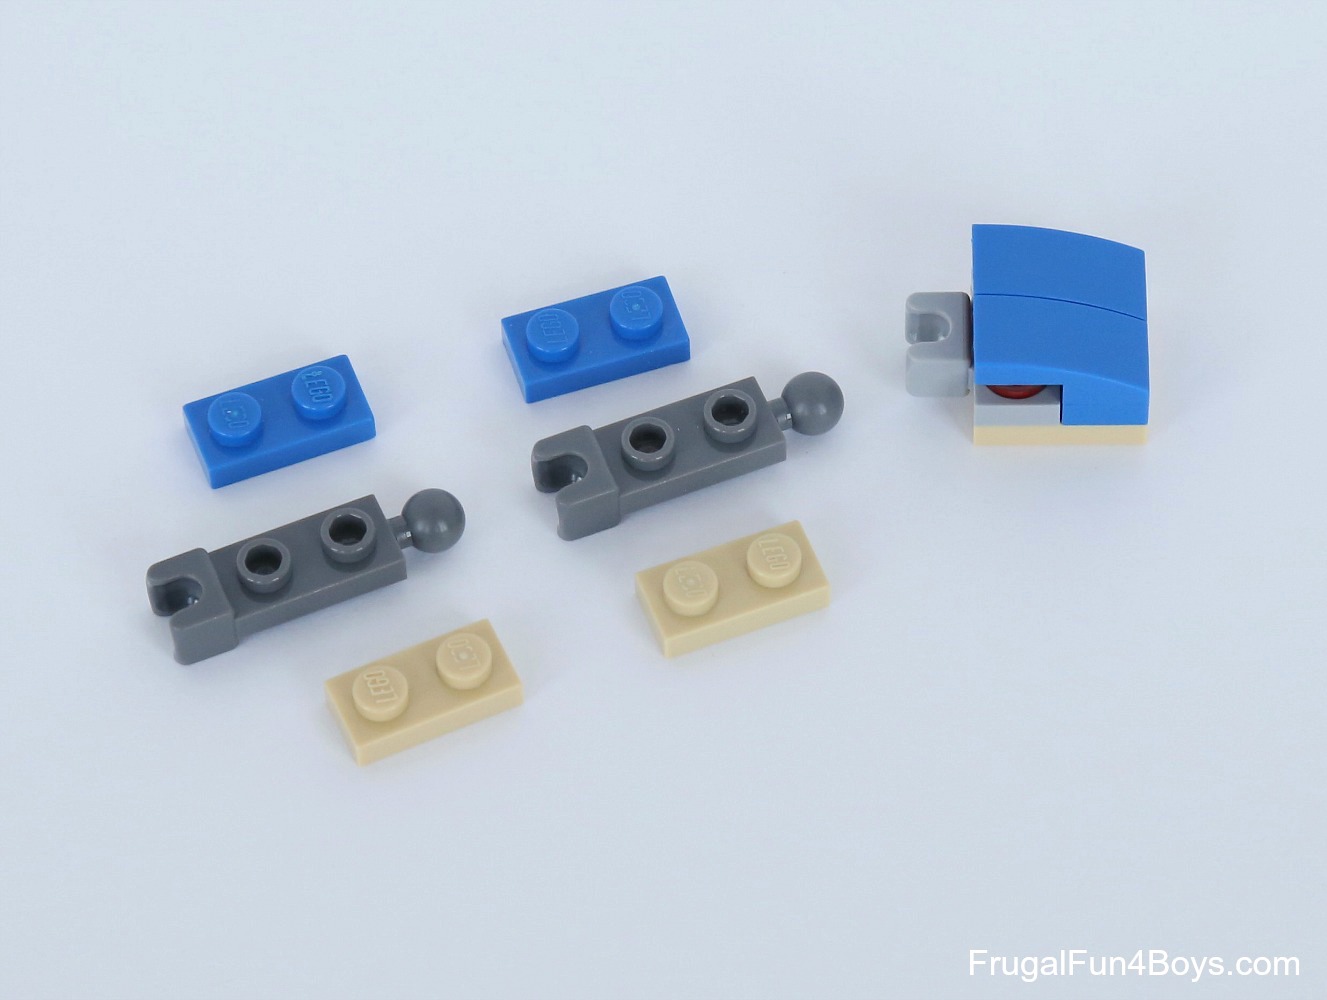
Step 1: Grab the bricks shown for building the plesiosaurus’ head.
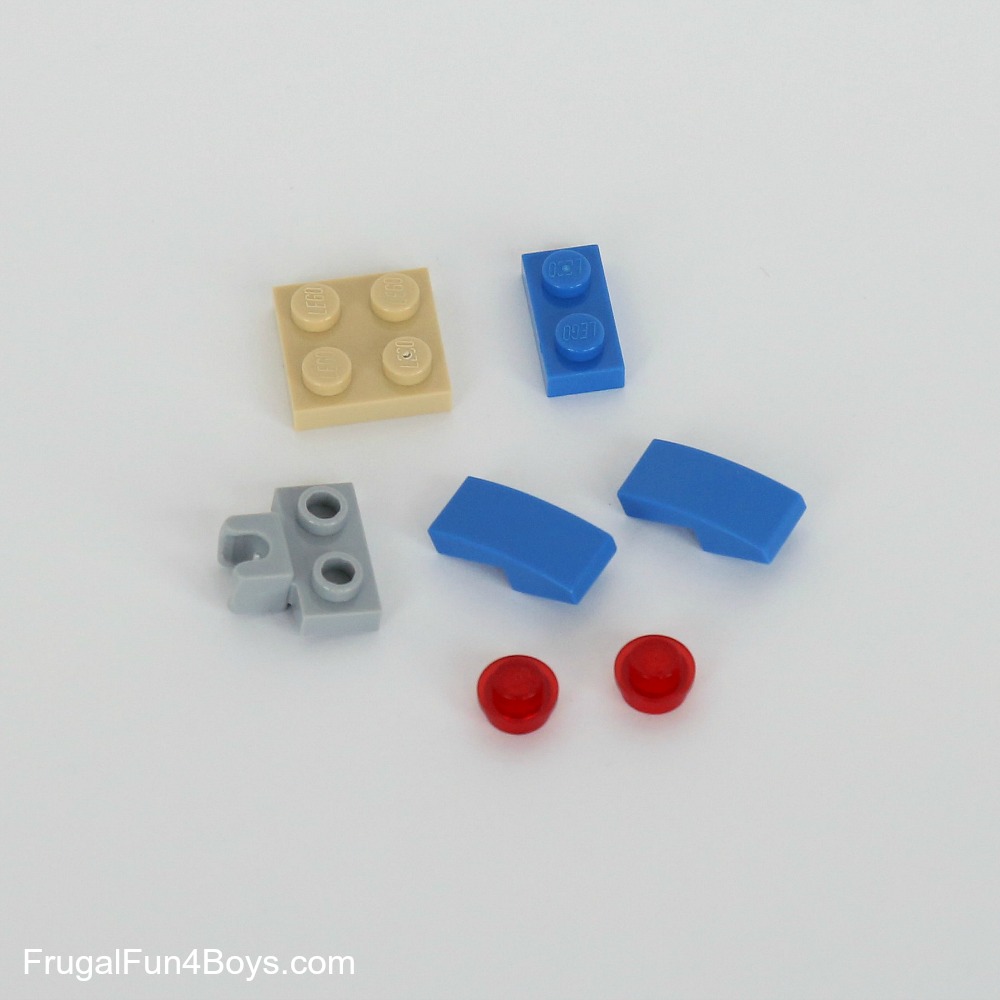
Step 2: Attach the 1 x 2 light gray plate with a socket and the 1 x 2 blue plate to the 2 x 2 tan plate.
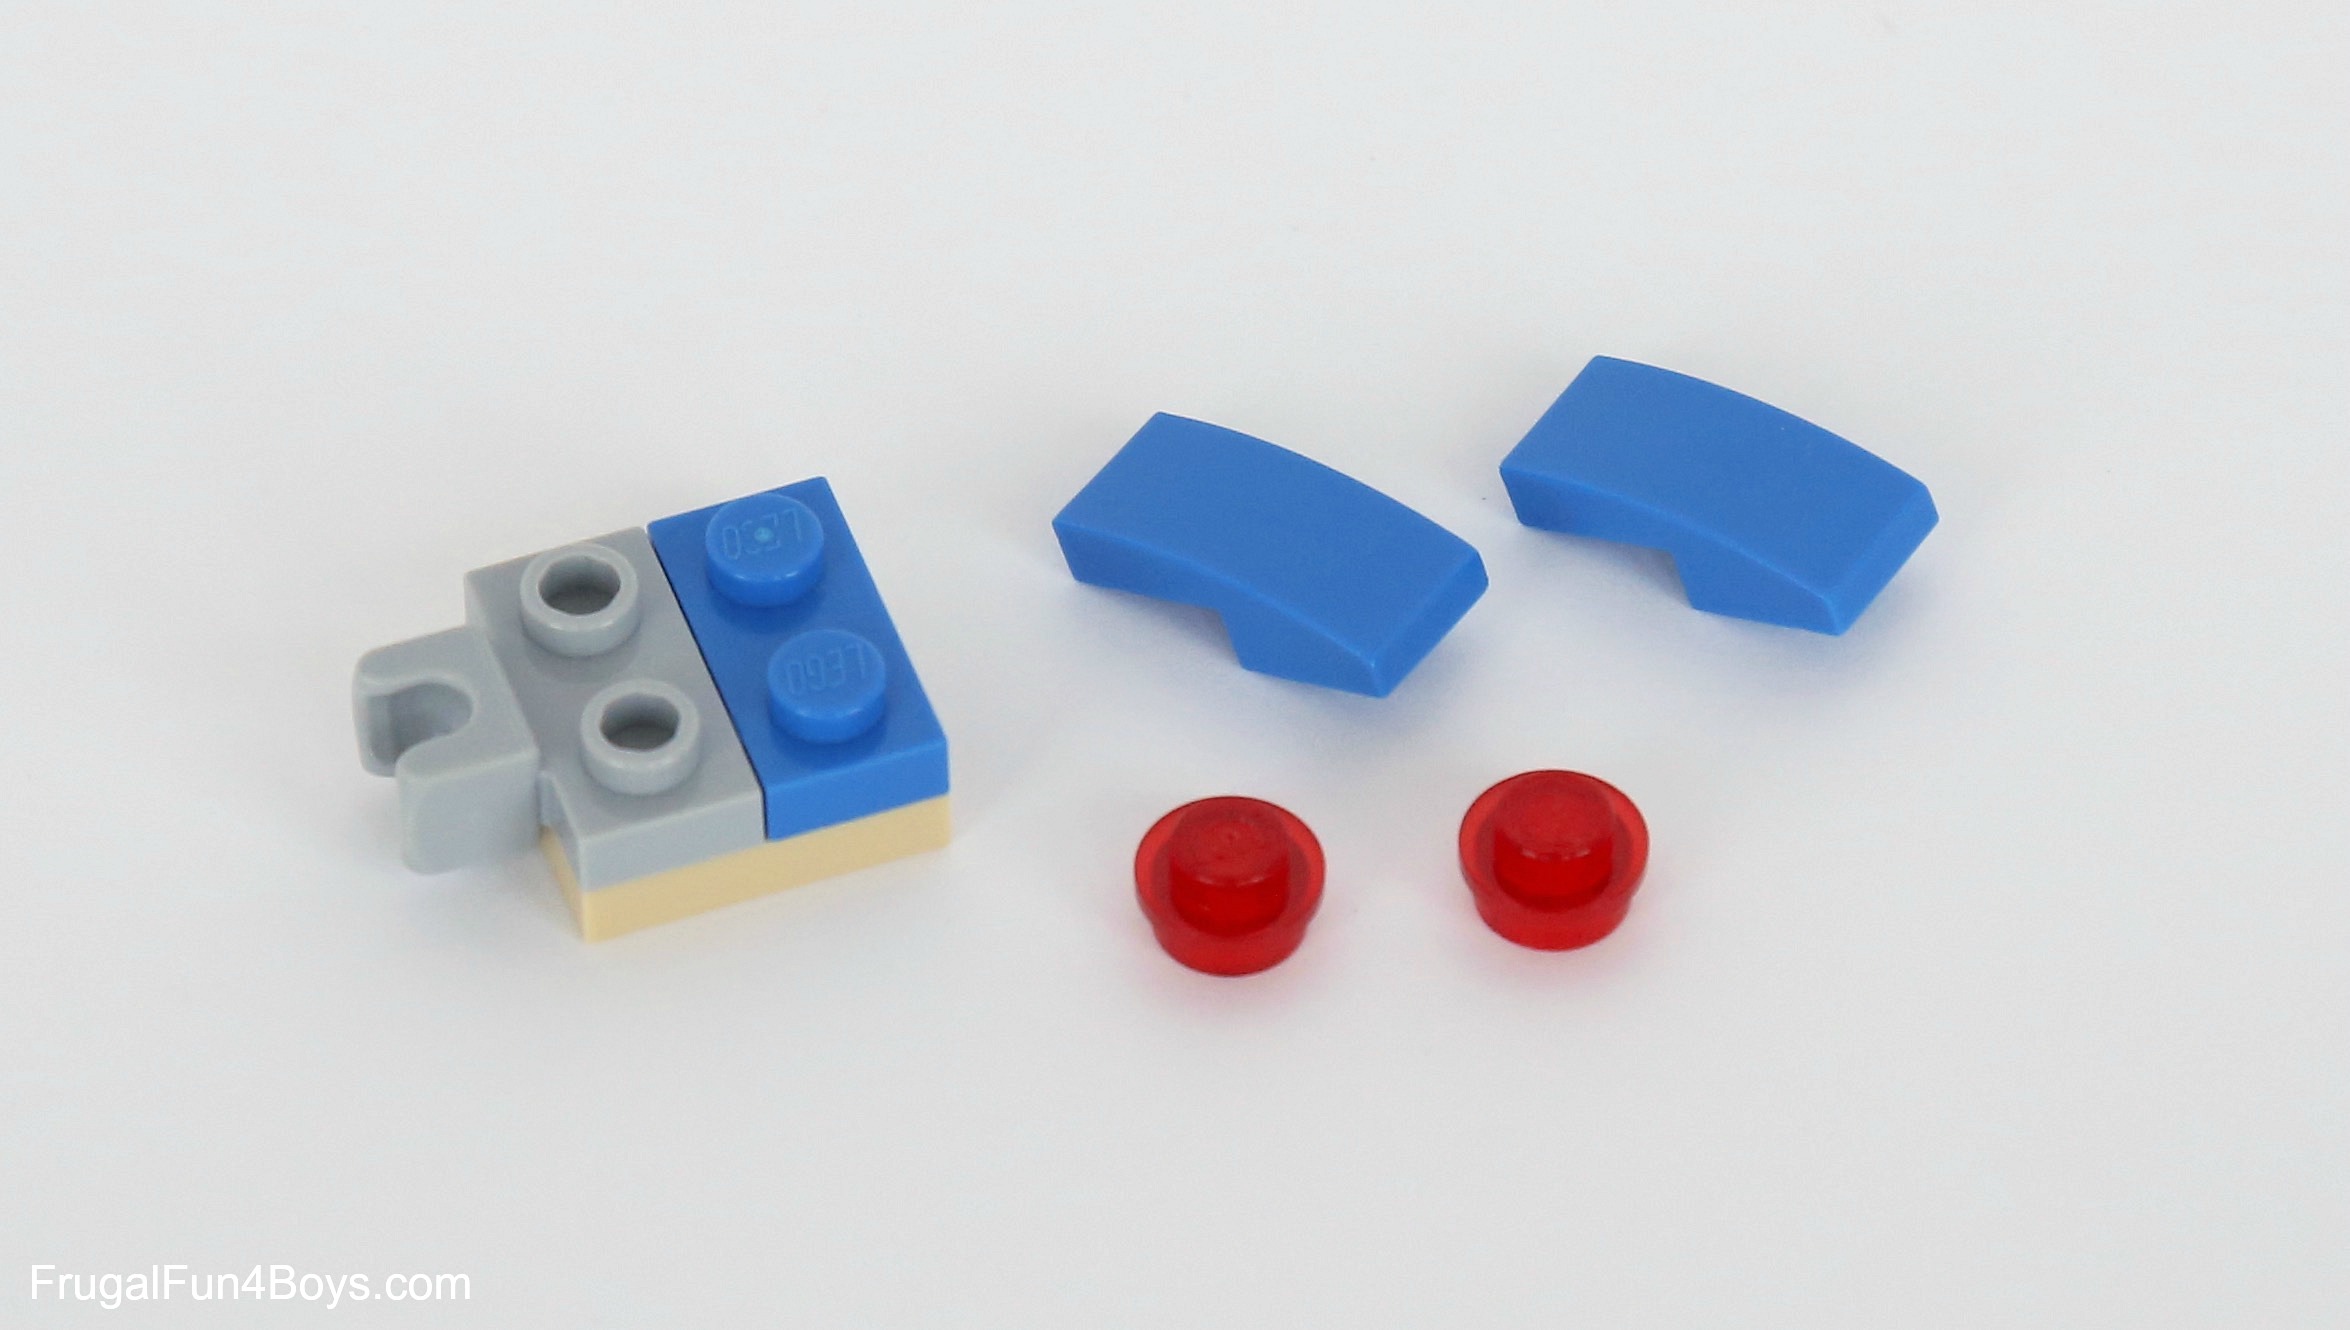
Step 3: Attach the 1 x 1 red round plates as eyes, and then add the 1 x 2 curved slopes. The eyes can be any color, really.
Step 4: Grab the bricks shown for building the plesiosaurus’s neck.
Step 5: Assemble the neck as shown and attach it to the head.

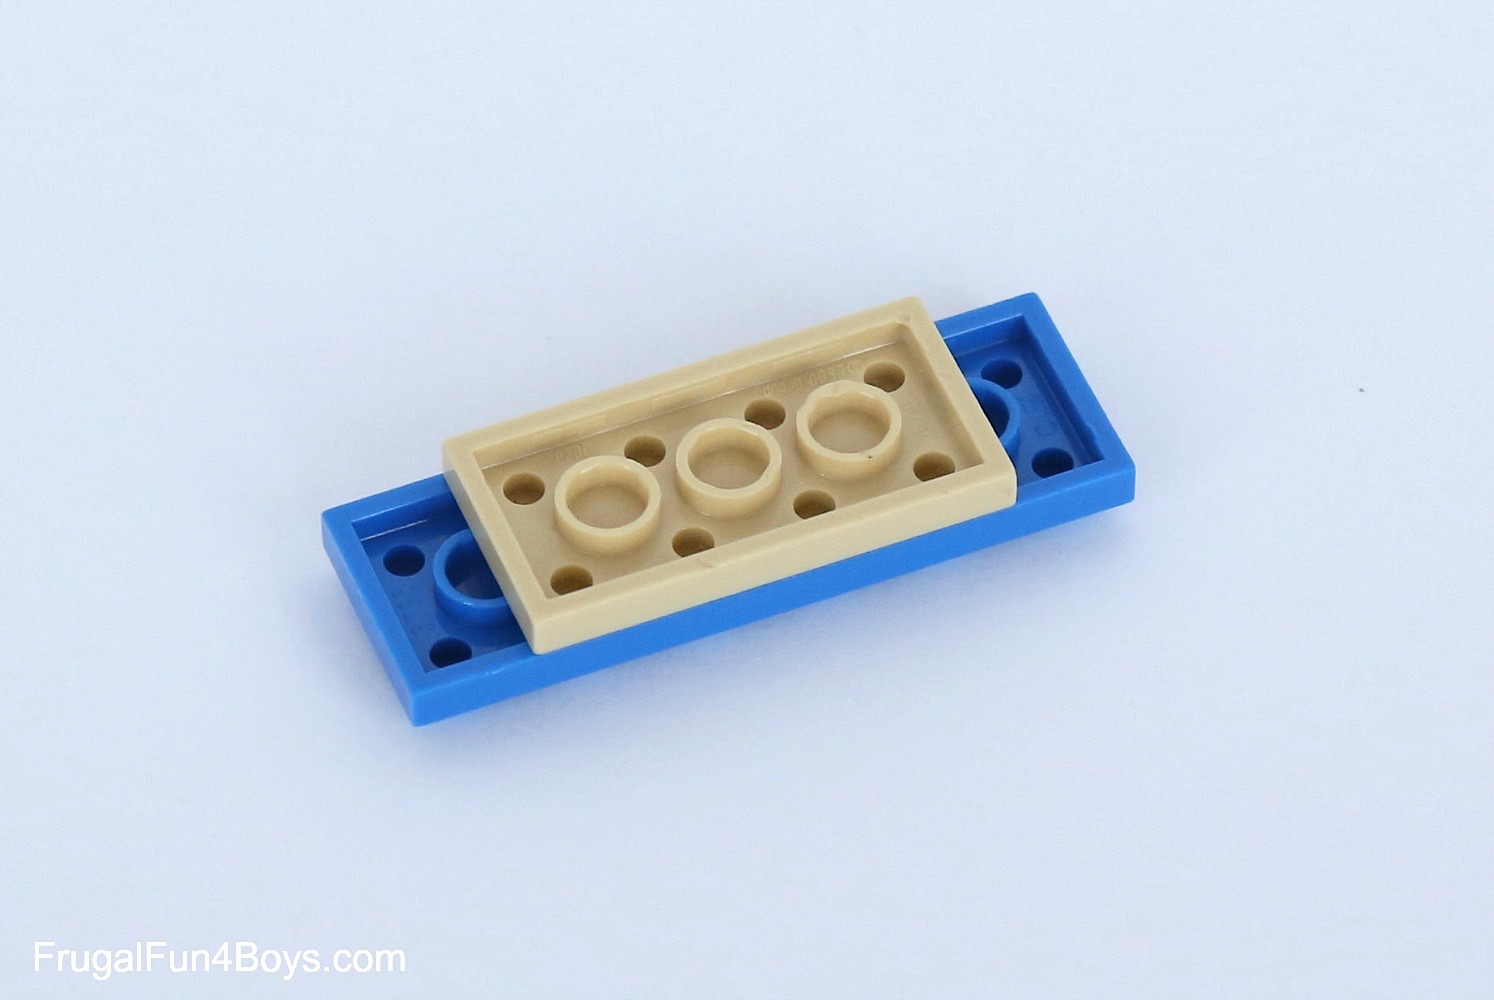
Step 6: Start building the body. Attach a 2 x 4 tan plate to the underside of a 2 x 6 blue plate.
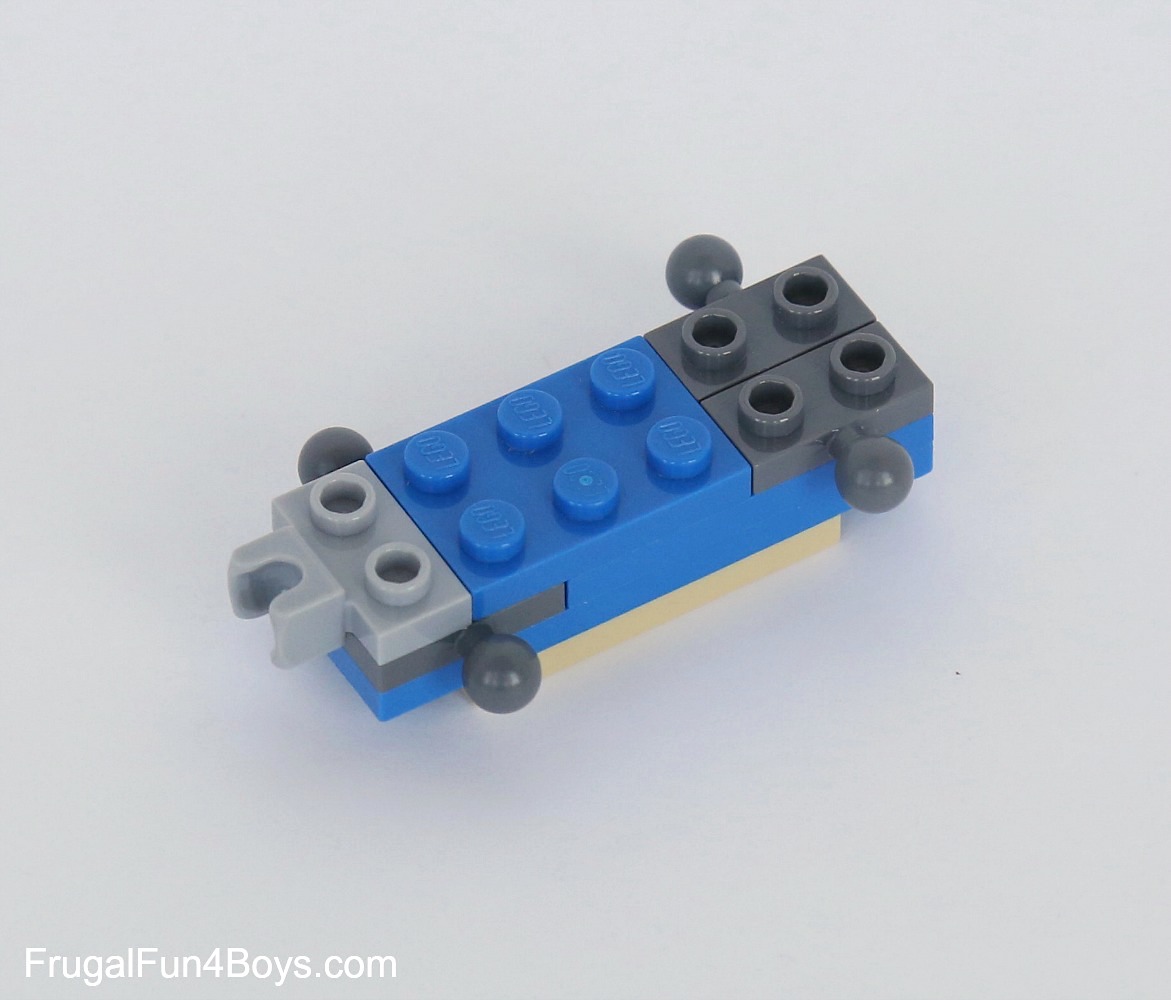
Step 7: Turn it over and add a 2 x 4 blue plate and two 1 x 2 dark gray plates with a ball on the side.

Step 8: Then add a 1 x 2 light gray plate with a socket, a 2 x 3 blue plate, and two 1 x 2 dark gray plates with a ball on the side.
Step 9: Finish up the body with a 2 x 4 blue plate, two 1 x 2 blue curved slopes, and one final 1 x 2 dark gray plate with a ball on the side (under the curved slopes).
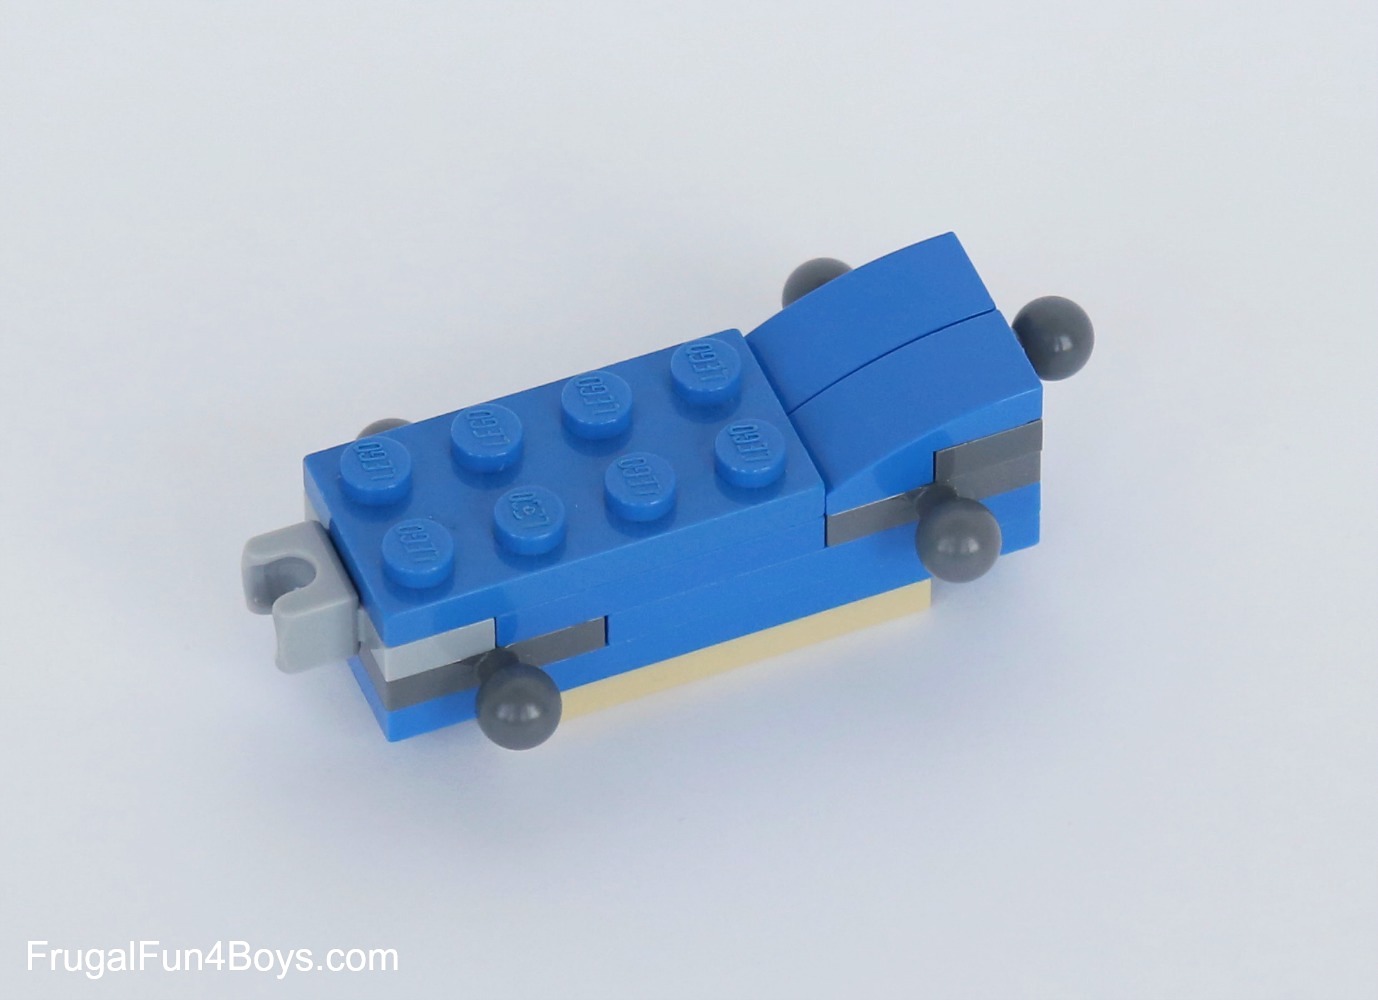
Step 10: Attach the head to the body. Then build the feet. Each foot is a 1 x 2 light gray plate with a socket on the end and a 2 x 2 blue corner plate.
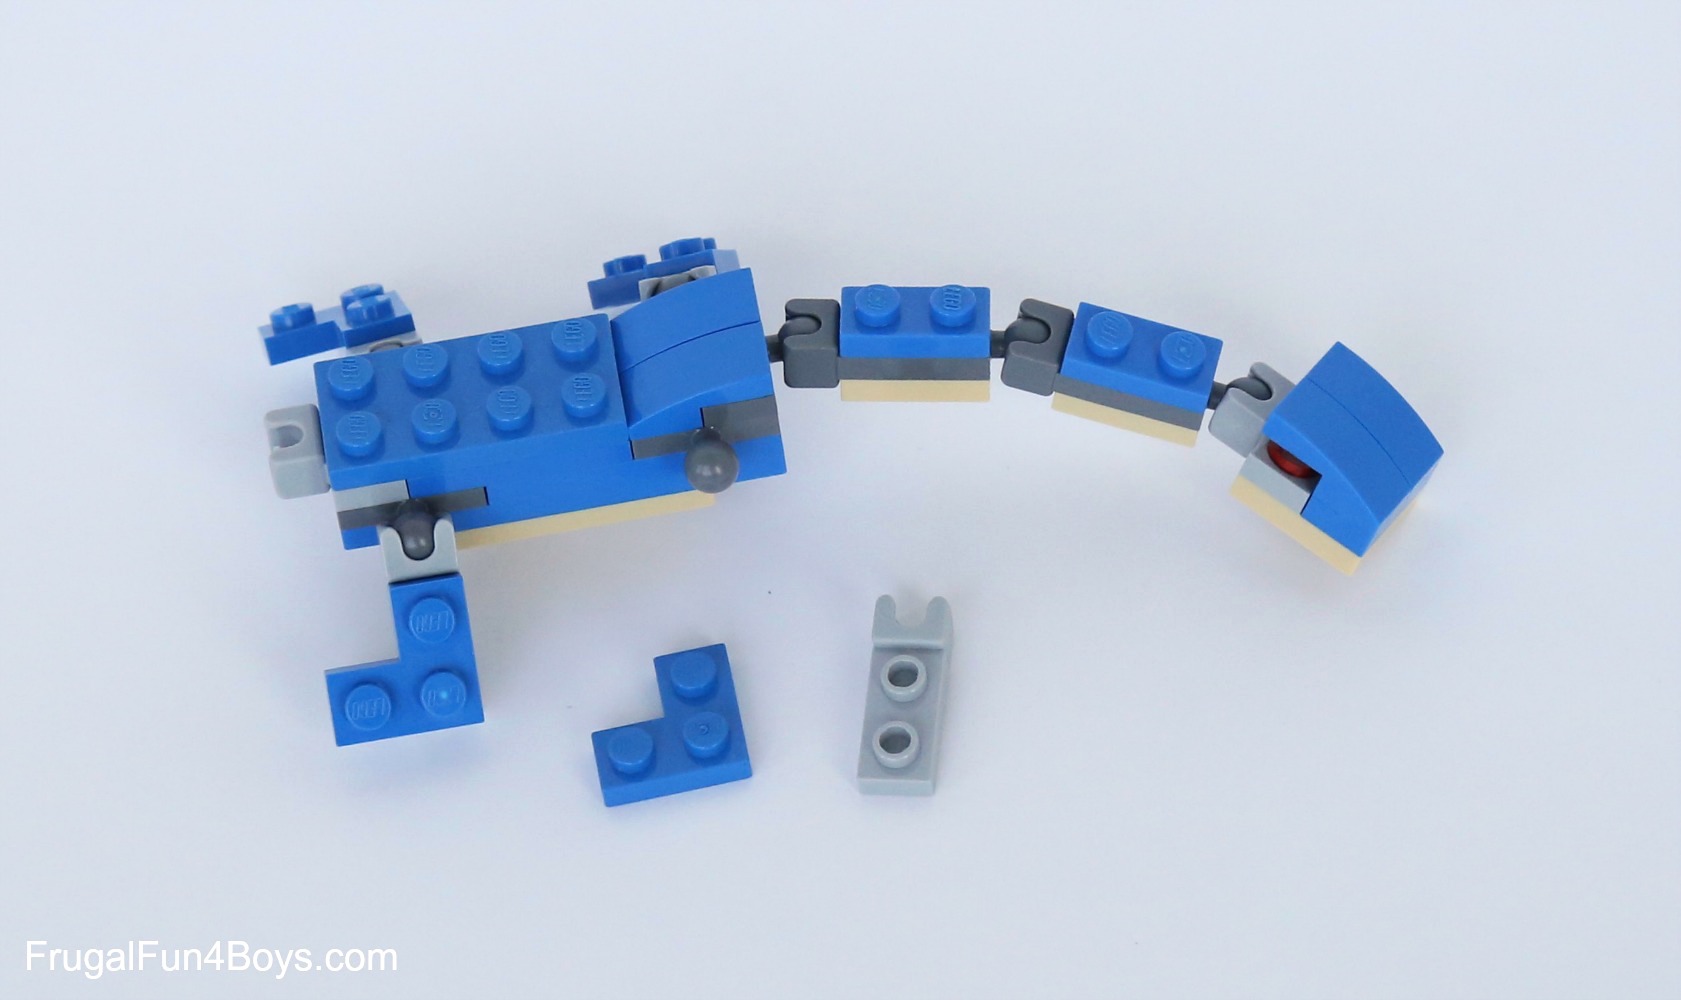
Step 11: Grab the bricks shown for building the tail.
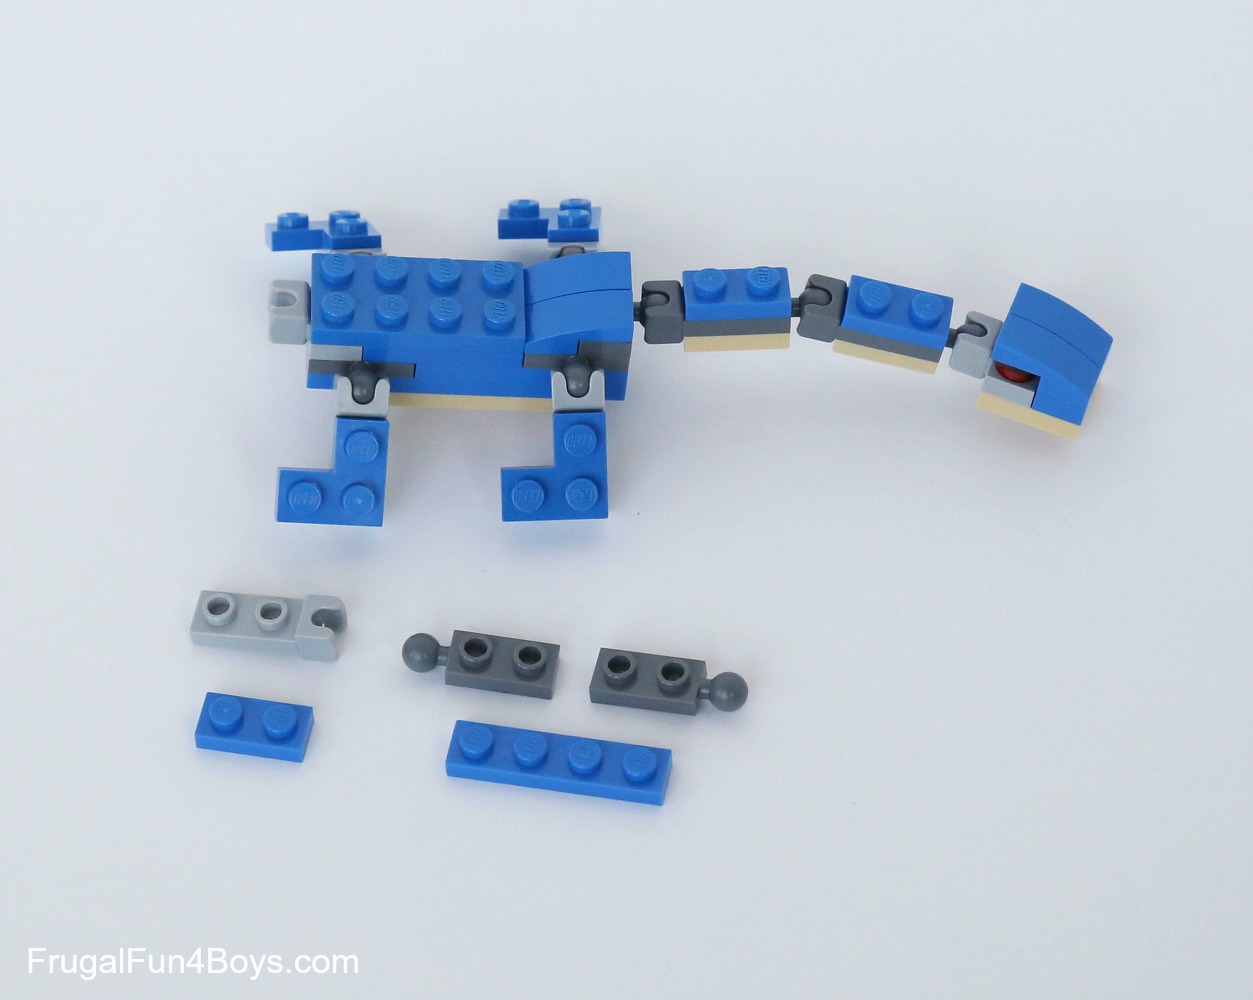
Step 12: Assemble the tail and attach it to the body. Your plesiosaurus is complete!
Try building them in green, lime green, or brown as well as blue.
Don’t have all the bricks you need? Here’s how to order.
I totally recommend Brick Link for ordering individual LEGO® bricks. You can also order from Pick-A-Brick on Lego.com, but I prefer Brick Link because it’s faster.
For this project, you may need more of the joint pieces. I totally recommend stocking up on those! My boys build with them all the time to make all kinds of jointed animals, robots, and more. Here are some links to the parts on Brick Link:
1 x 2 plate with a socket on the side
1 x 2 plate with a socket on the end
1 x 2 plate with a socket on the end and a ball on the other end
1 x 2 plate with a ball on the side
1 x 2 plate with a ball on the end
Need more LEGO® ideas?
Check out our LEGO® books! They will inspire hours of creative building!
Epic LEGO® Adventures with Bricks You Already Have – 5 crazy and silly adventure stories to read, with step-vy-step instructions for building the projects in the stories (37 projects).
Awesome LEGO Creations with Bricks You Already Have – 50 new ideas to build including all kinds of vehicles, robots, dragons, animals, games, and more.
Have fun building!
1 Comments
Kitty B Jun 16, 2021
Excited to do these with my daughter today!
Post a Comment