
Keep ice from melting! This is a fun science experiment for winter, but it works any time of the year. One of the reasons that I love science education is that it’s a total blast when kids make discoveries on their own and get completely excited about it! Kids will be amazed at how long they can keep ice from melting using just some supplies from around the house. This science experiment is not hard to do, and I can guarantee you’ll get some great results. (I know it’s not fun when the experiment turns out NOTHING like the book said it would!)
Experiment: What is the best material to keep an ice cube from melting?
I would recommend this experiment for:
- Kindergarten and First Grade with the teacher doing the recording
- Second through Fourth Grade with the printable recording sheet for kids
In this science experiment, kids will:
- Learn about how heat is transferred from one material to another.
- Learn about the states of matter.
- Explore different materials to find out which provides the best insulation.
- Learn about what it means for materials to conduct heat.
- Consider possible sources of error in experiments.
Background Information about Heat
You can introduce this project to kids by explaining that heat energy is lost or transferred in three ways – by conduction (objects touching each other), convection (movement of a group of molecules, such as a warm current of air rising), or radiation (electromagnetic waves). Ice melts when you take it out of the freezer – but why? It’s because the air in the room is warmer than the melting point of ice. Heat from the air is transferred to the molecules in the ice causing them to gain energy and causing the ice to change to liquid water.
If we want to keep ice from melting, we need to insulate it. We need to keep warm gases (warm air) or warm solids (the table top, etc.) or warm liquids from touching it. We also need to keep it away from radiation – like not microwaving it!
Metal does not provide good insulation. Why? Because metal is a strong conductor of heat. If you set a metal spoon on a hot stove, it will quickly become too hot to touch. Metal will easily pick up the heat from the air in the room and transfer it to the ice. We need to find materials that are good insulators and put those around the ice to keep it from melting.
Gather Your Materials
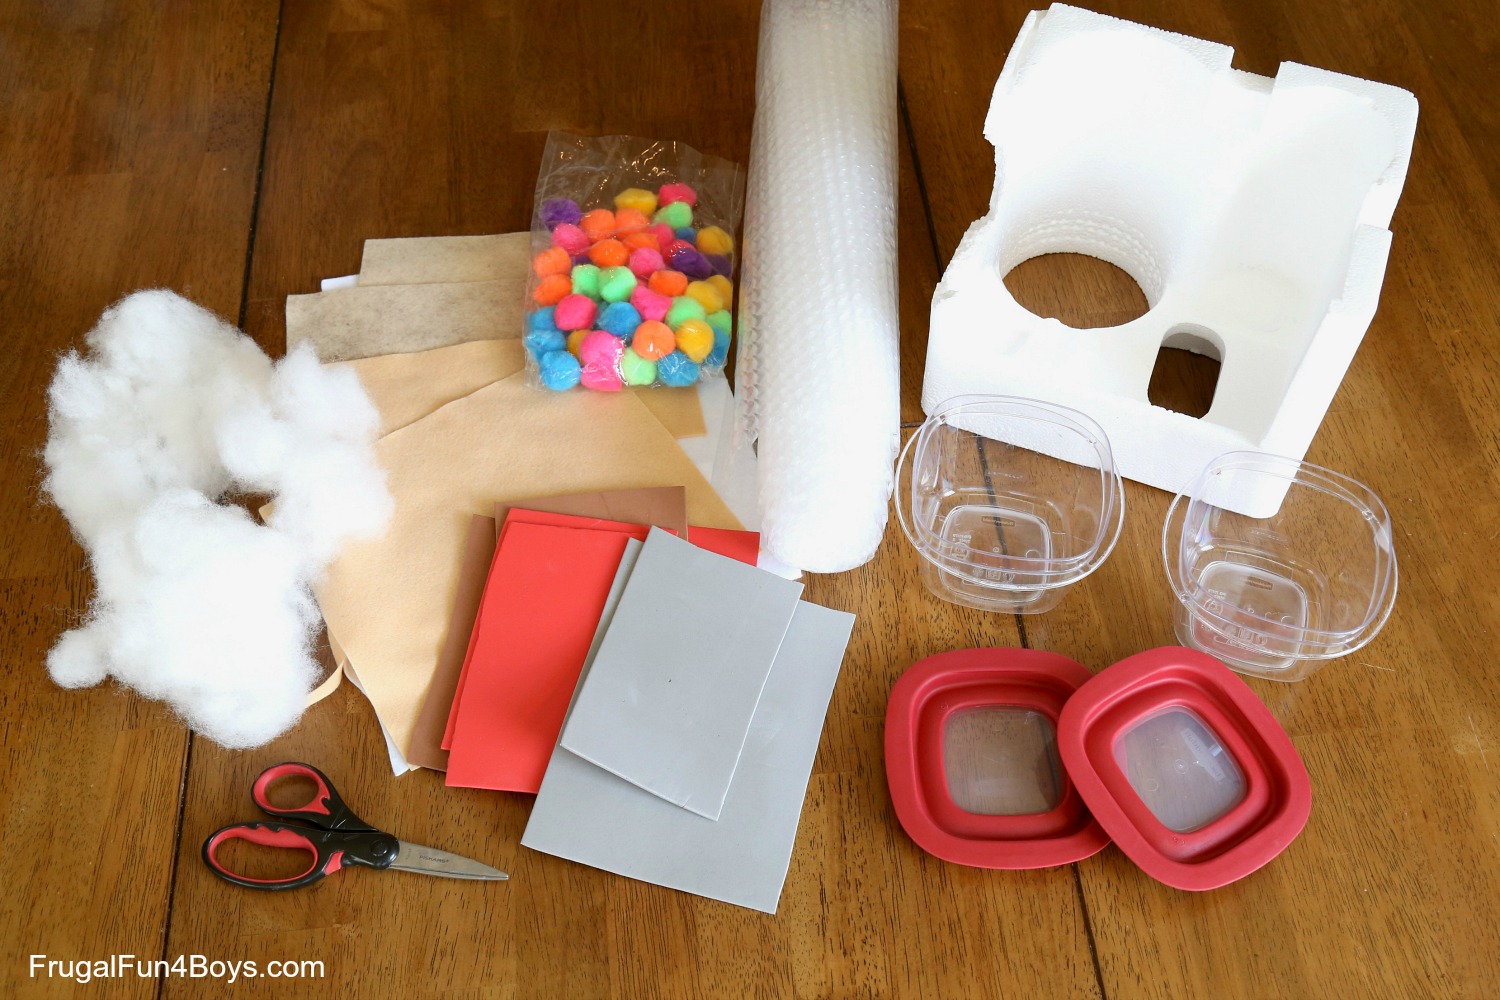
Gather items from around the house that might make good insulators.
Suggestions:
- Styrofoam from packaging
- Bubble wrap
- Fiber fill stuffing
- Packing peanuts
- Felt or other fabric
- Craft foam
- Pom pom balls or cotton balls
- Straw or hay
- Small towels
- Wood shavings
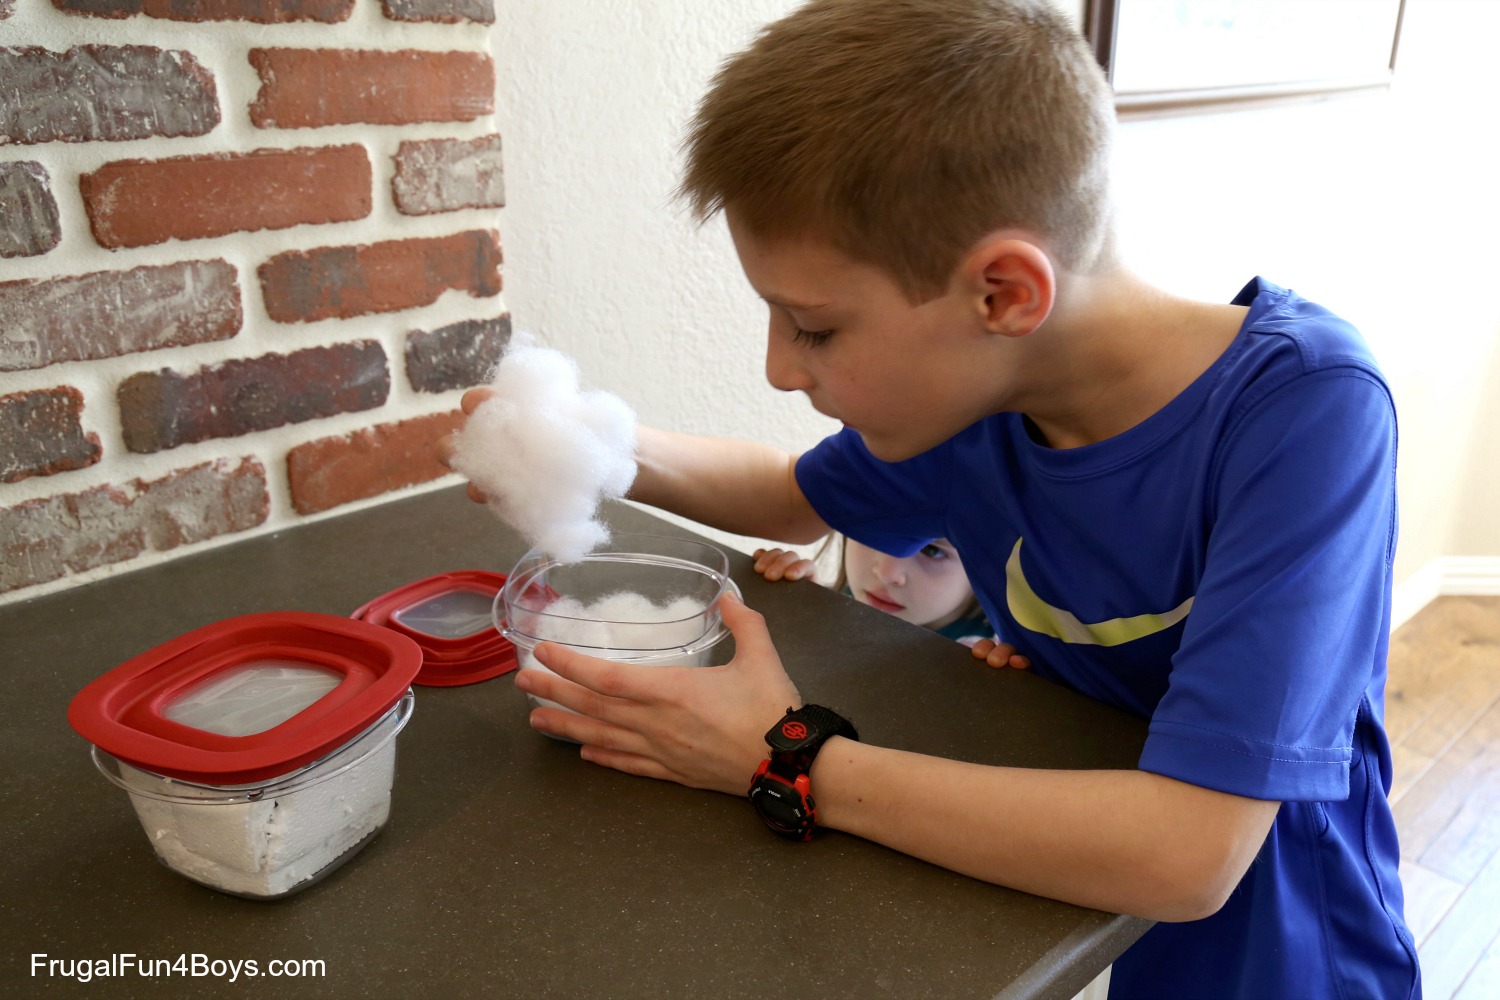
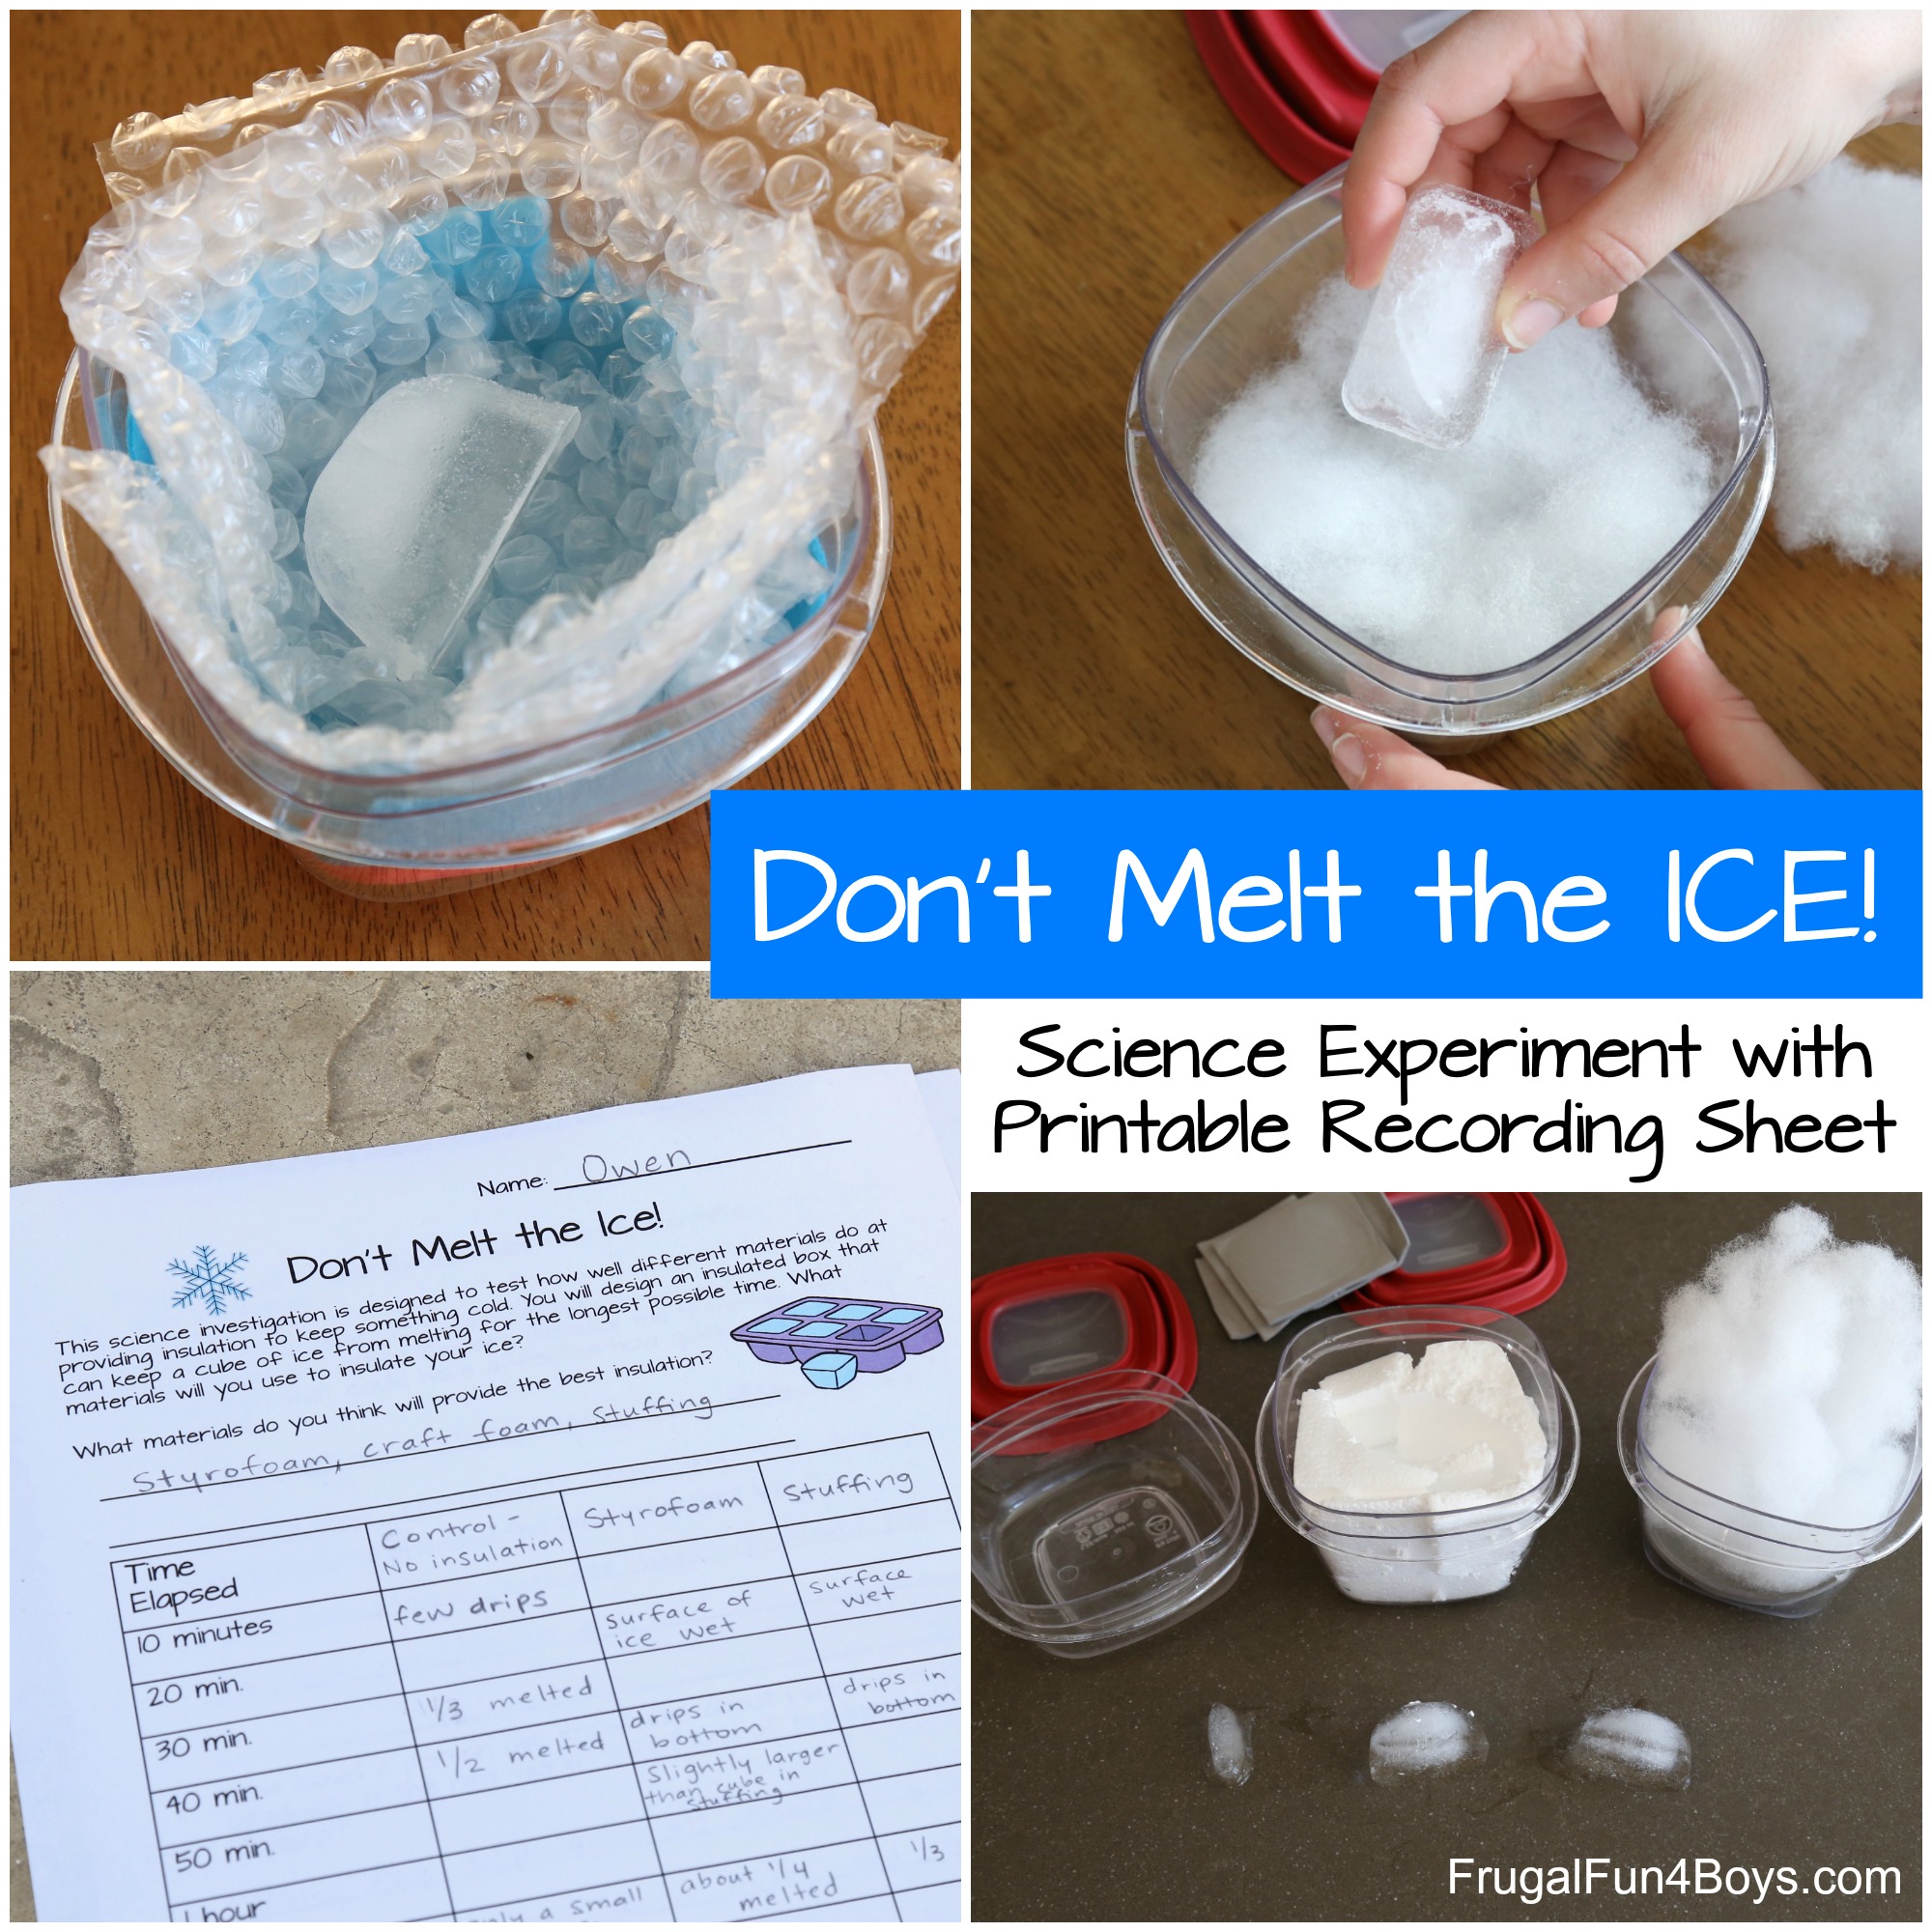
We chose to use square plastic food containers as our insulated boxes. They work well because they don’t leak!
Create an Insulated Box for your Ice Cube
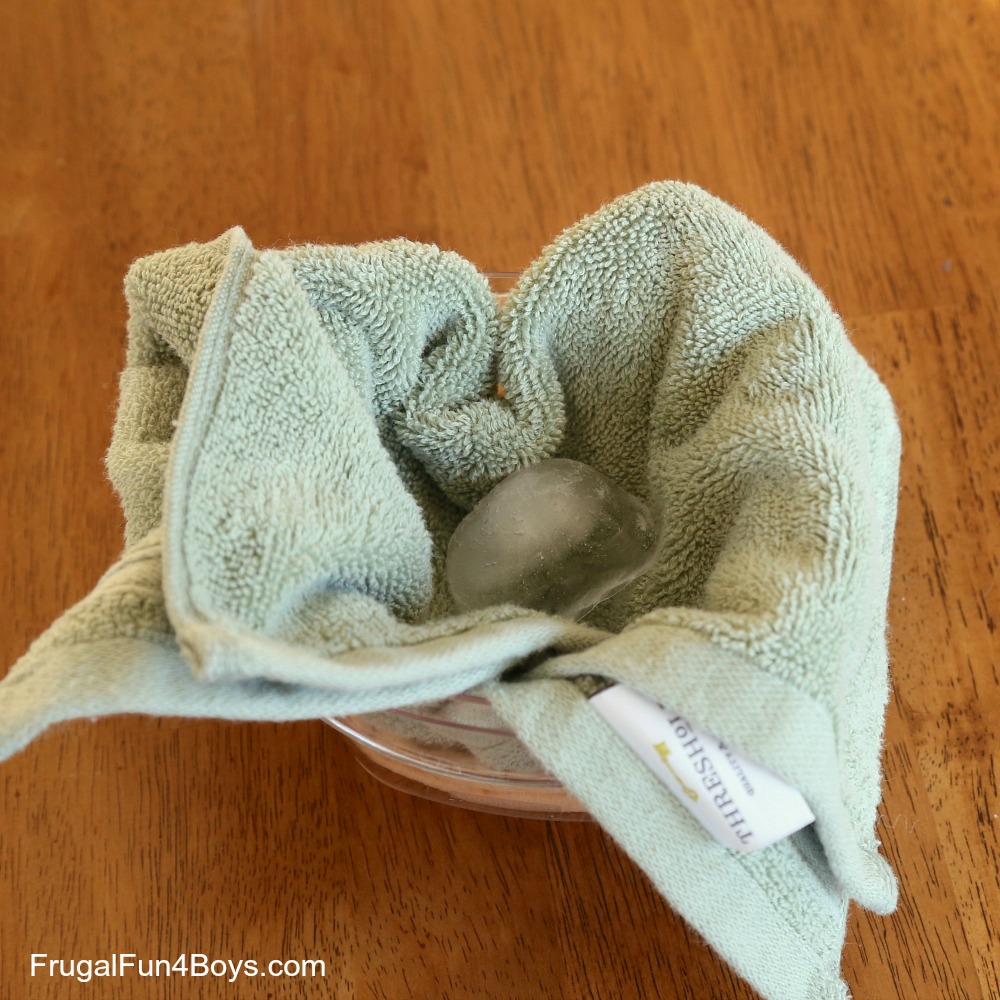
Let the kids decide what materials, or combination of materials, they want to use to insulate their ice cube. Maybe a layer of felt around the edge of the container, and then bubble wrap on the inside?

Or maybe a small towel?
Or maybe a combination of bubble wrap and pom pom balls?

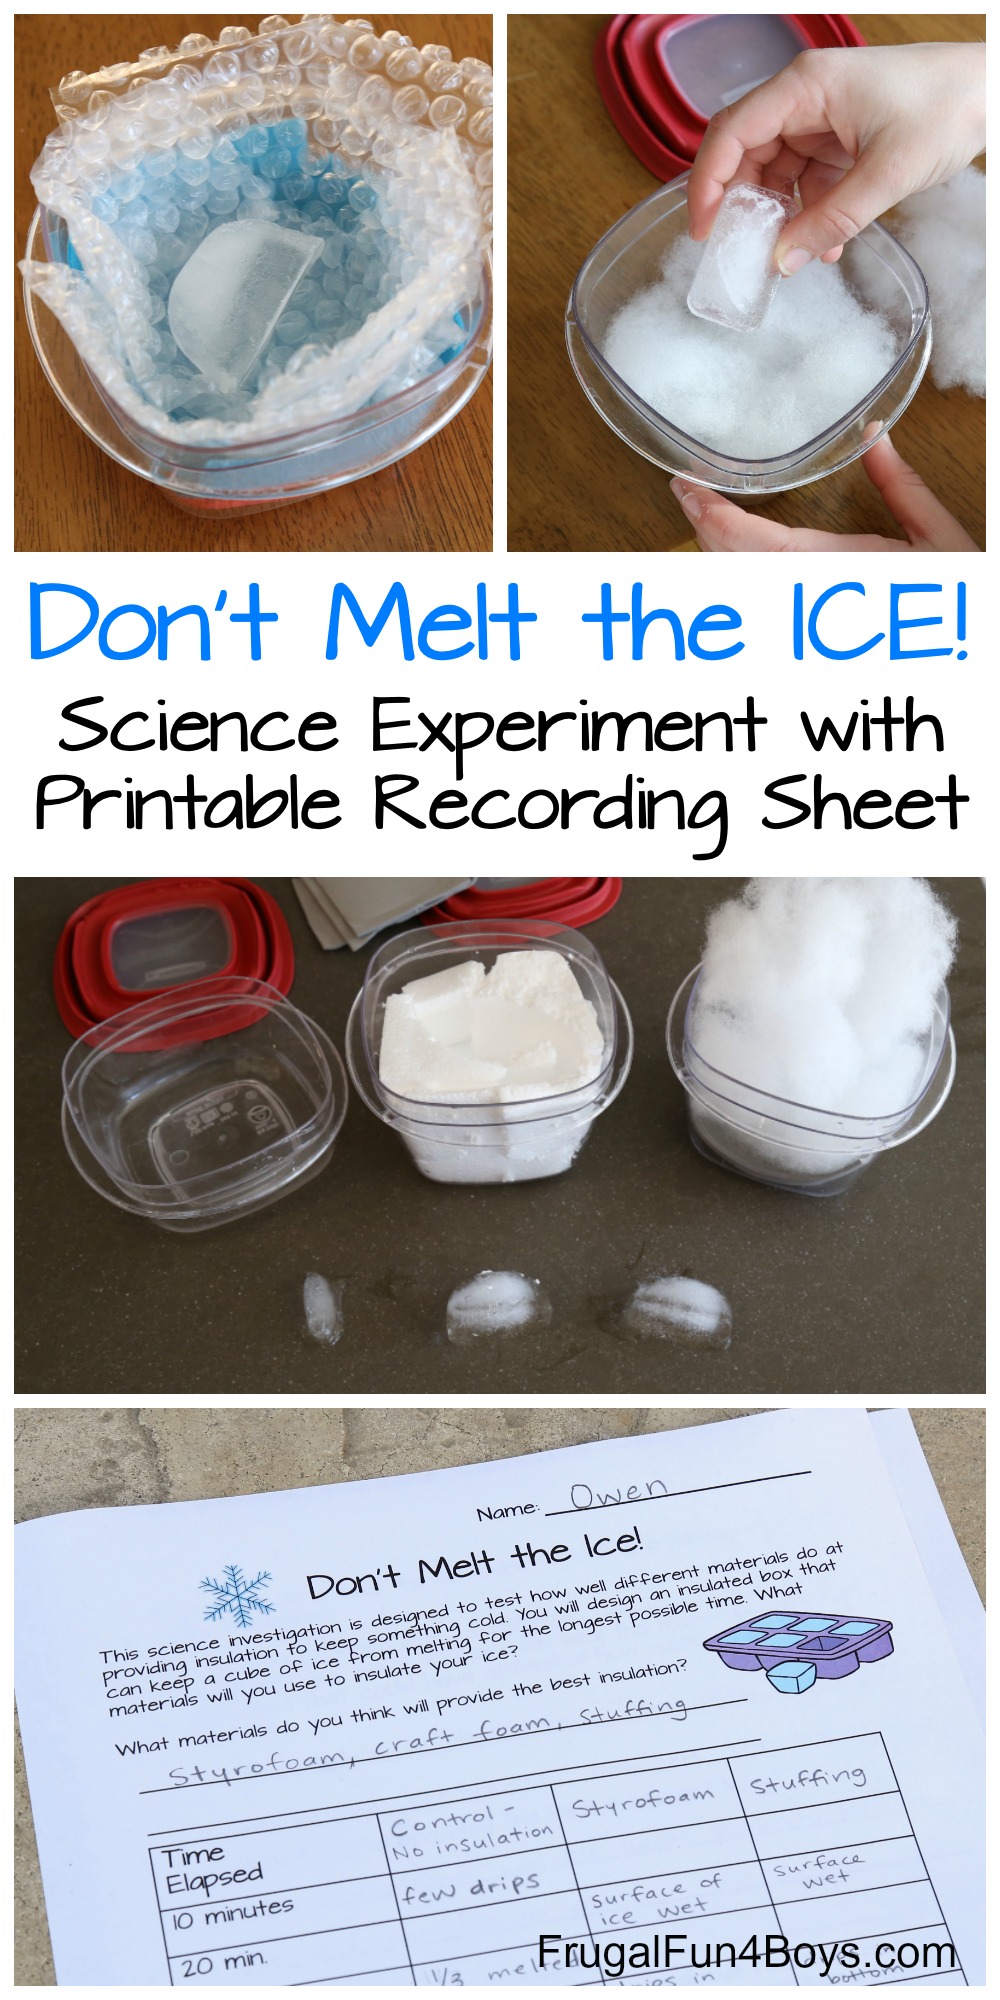
My boys decided to test styrofoam from a remote controlled car package against a layer of craft foam and then lots of fiber fill stuffing.
Procedure: Set your insulated boxes in an area away from sunlight or another direct heat source. Check on the ice cubes every 10 min. and record the amount of melting.
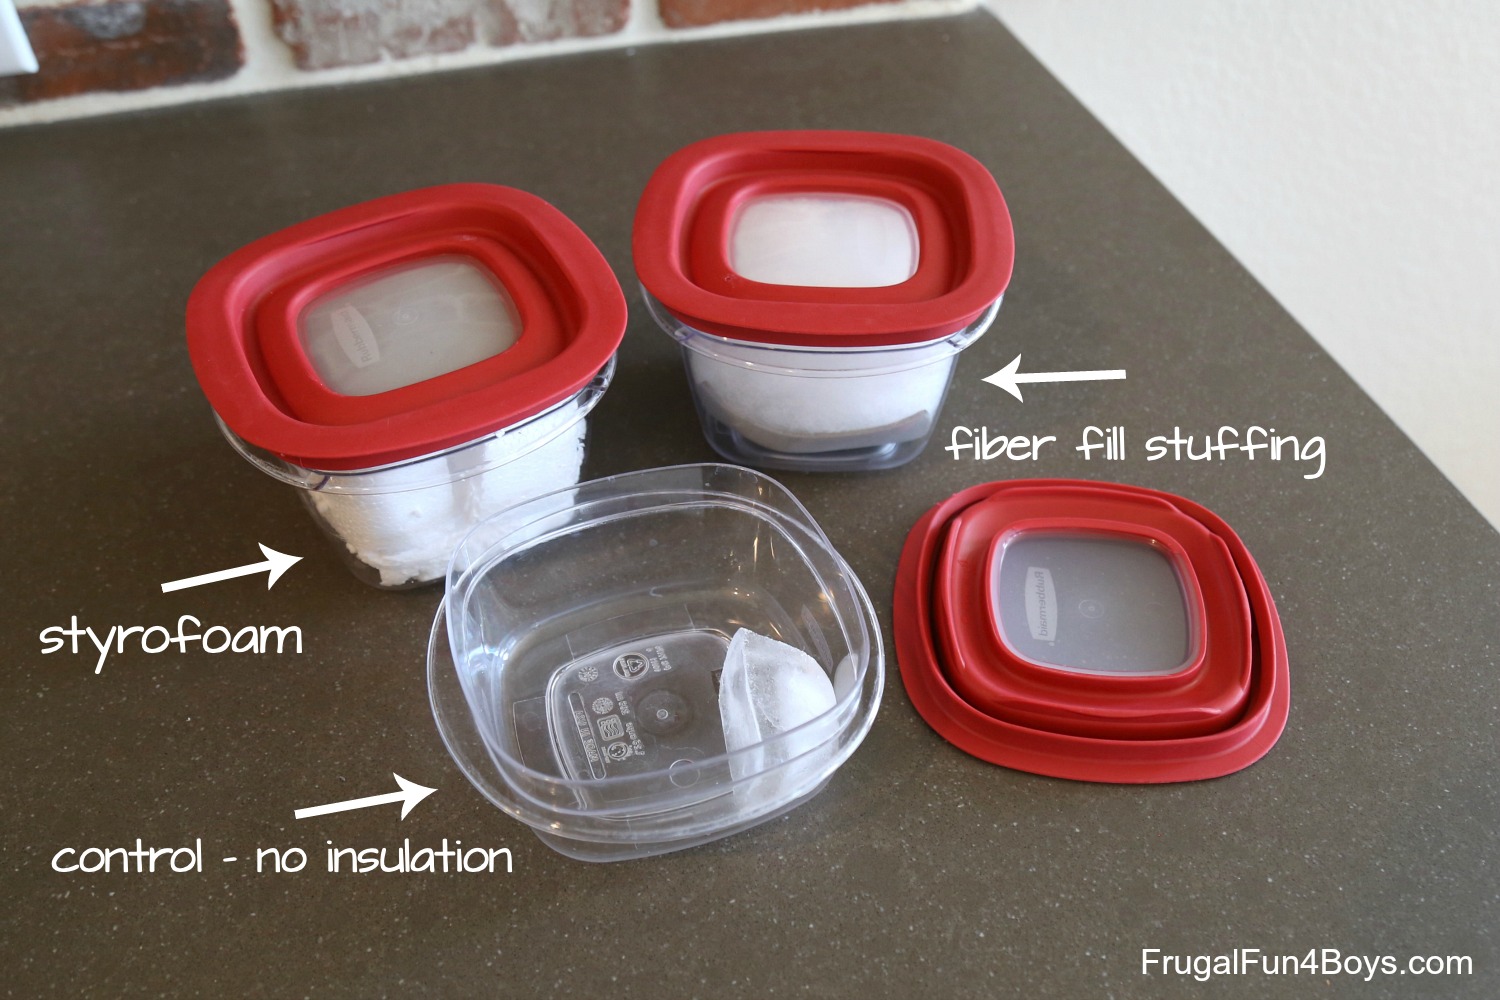
You’ll definitely want to have a plain box with no insulation to use as a control.
Our control ice cube was in a slightly smaller container, but I decided that was okay. We only tested two materials because we only had two plastic containers that were the same size. If you’re doing this with a class, make sure that you have several containers of identical sizes!
Record your Results
There is a printable recording sheet at the bottom of this post if you’d like to use it!
Fill in the top row of the chart with the materials you are testing. There is space for a control and then two types of insulation.
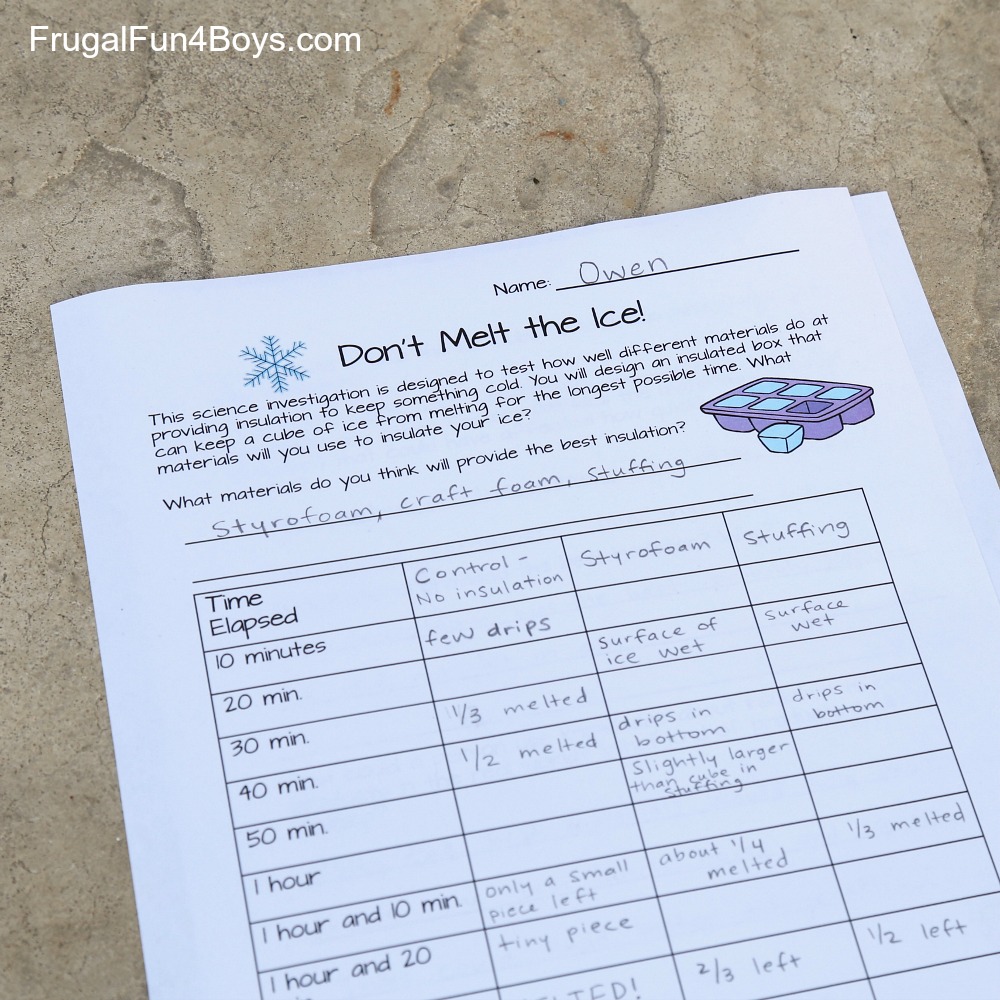
I wasn’t sure how often to check on the ice, but after performing this experiment, I think that checking in 10 minute intervals is perfect. The more you open the containers, the faster the ice will melt. So you don’t want to check too often! But there was noticeable change after the 10 minute intervals, so I wouldn’t want to go longer. A cube could melt completely and you would miss it!
Here’s a peak at our ice cubes at the 1 hour and 10 minute mark. The control ice cube was WAY smaller than the other two! It’s hard to tell from this photo, but the ice cube in the stuffing was noticeably smaller than the ice cube in the styrofoam.
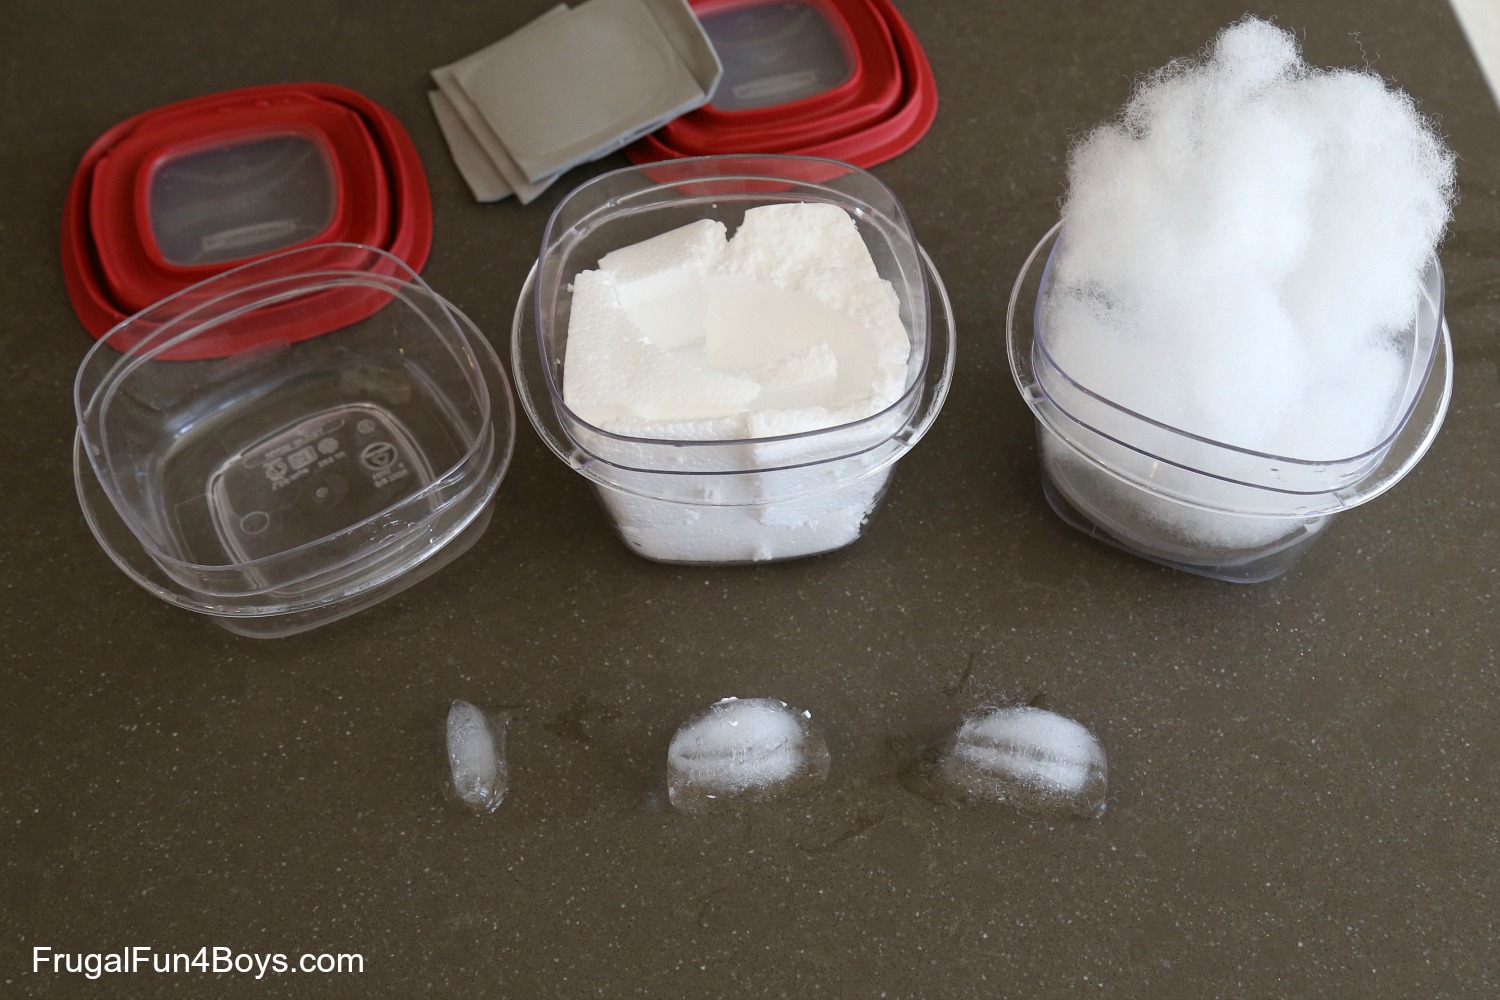
Note: I wouldn’t recommend taking the ice cubes out of the container because it will speed up the melting! We just did it to be able to show you that this experiment does work. Kids will need to touch them some to observe them, but excessive handling will melt them, obviously!
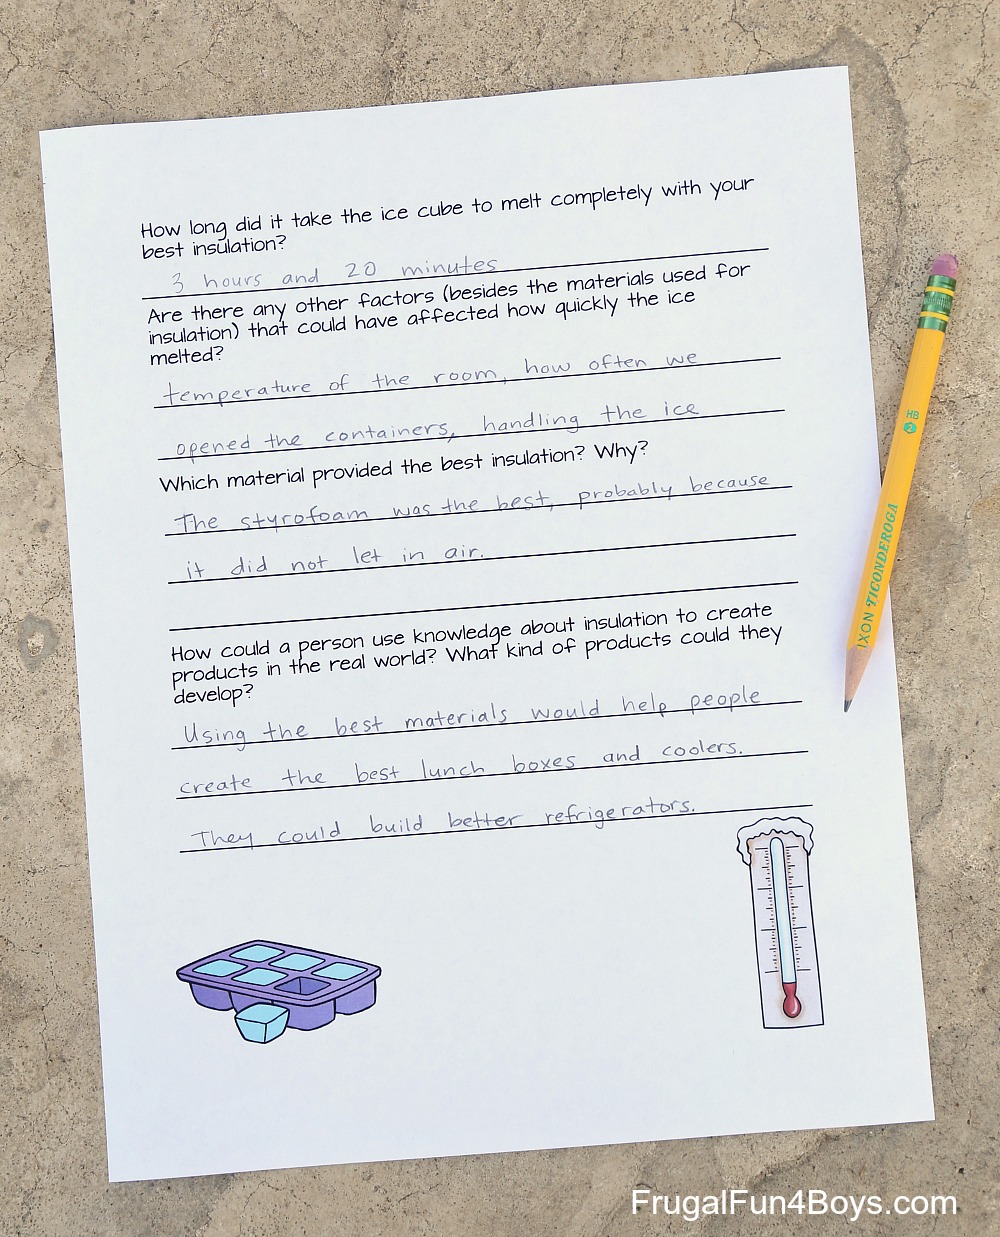
The second page of the recording sheet has some follow up questions to answer.
Our longest lasting ice cube (in styrofoam) lasted for 3 hours and 20 minutes! The control ice cube only lasted an hour and 30 minutes.
Ready to print your recording sheet? Click the link below. The file will open and you can either save or print from there.
CLICK HERE: Don’t Melt the Ice Science Experiment
Want more science experiment ideas?
- Science Experiments with Hot Wheels Cars
- Make Hot Ice – Use baking soda and vinegar to make some “ice” that crystallizes instantly!
- Bouncy Ball Science – If you put the ball in the freezer (or hot water) will it bounce as high?
5 Comments
Annette Peterson Jan 18, 2019
Love this! I plan to do this with my 2nd graders. Thank you so much for sharing!
Brianna Buckley Mar 16, 2019
This thing really worked.
Thanks for the idea!
Rock salt alternatives Mar 20, 2019
Winter is notorious for being the most common time of year for car accidents due to the darker mornings and evenings, coupled with the poor weather and road conditions.
Iryna A Faulk Jan 2, 2020
Very cool idea. We did it with my son ( he is 9.5) and he loved it. We followed the scientific method steps to work on our experiment. I think I will use it for my ABE students as well.
Adorah Jan 15, 2021
this is so cool and it works thanks for the idea.
Post a Comment