
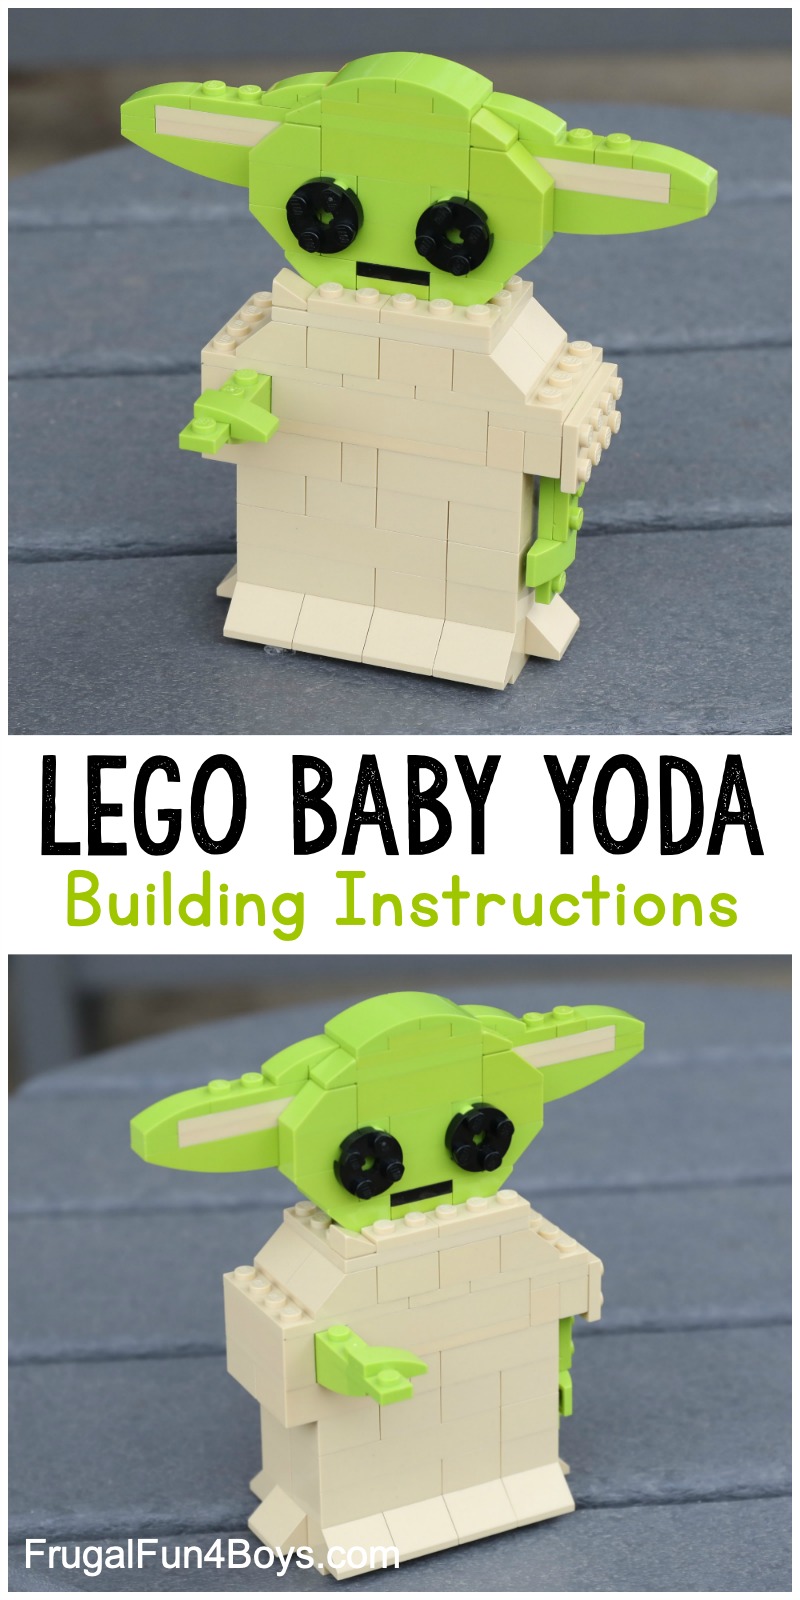
Here’s a fun new LEGO® building challenge that kids will love – build Baby Yoda! Who else thinks Baby Yoda is just totally adorable? Baby Yoda, or “The Child” from the new The Mandalorian TV series is just TOO CUTE. So let’s build one out of LEGO® bricks!
I designed this LEGO® version to be realistic for kids to build, difficulty-wise. You may not have the right color bricks, however, so I’m including a parts list in case you want to order the pieces you need. As with all our LEGO® projects, however, encourage kids to make substitutions if they don’t have the exact bricks shown. They may want to modify the design or use different colors.
This project also has LOTS of steps… I tried to be as thorough as possible so that kids will be able to see how to make this.
A couple notes before we begin… I tried VERY hard to give Baby Yoda three fingers, but it just wasn’t possible with the scale of this project. And I didn’t want to make the project any larger. So, sorry about that. If your kids figure out a way to do three fingers, let me know! Also, it might be fun for kids to build Baby Yoda’s cradle thing that he rides around in. I would recommend removing the bottom of his body in order to put him in a cradle.

Ready to build your own LEGO® Baby Yoda?
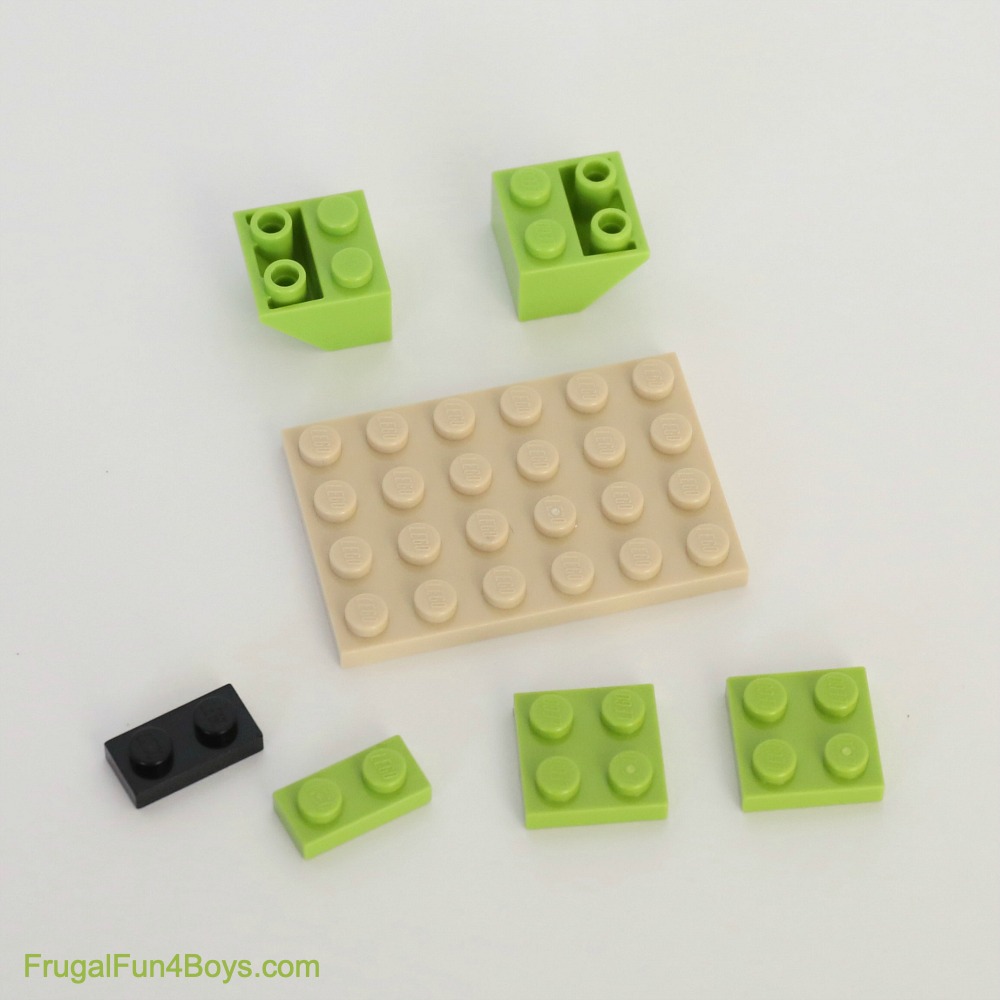
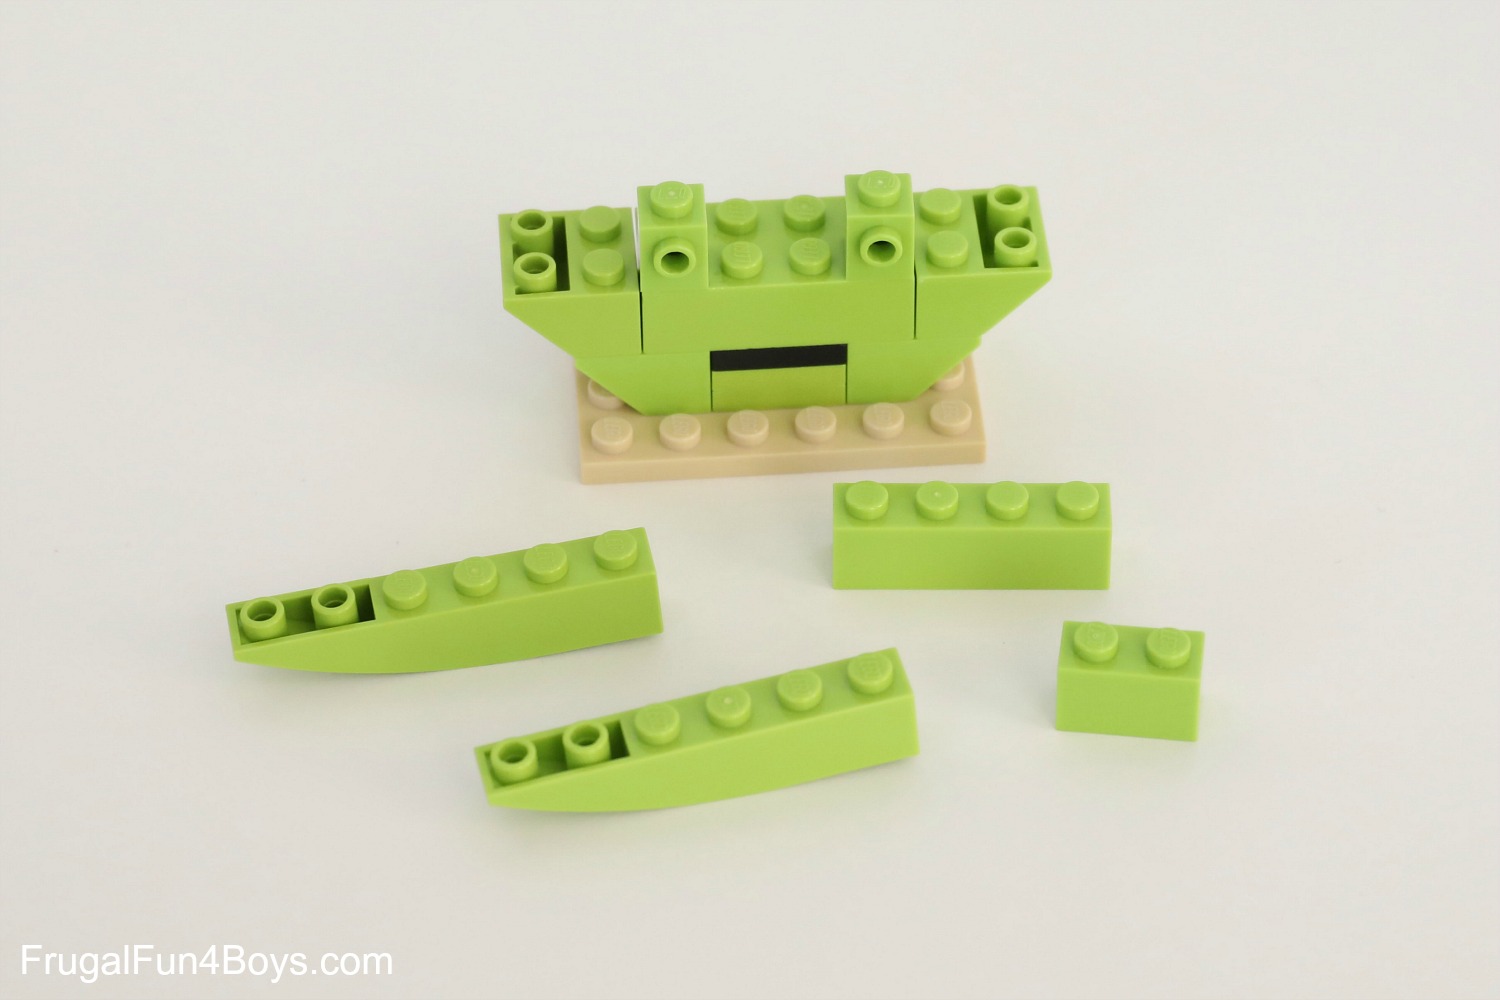
Step 1: Gather the bricks shown for beginning the head.
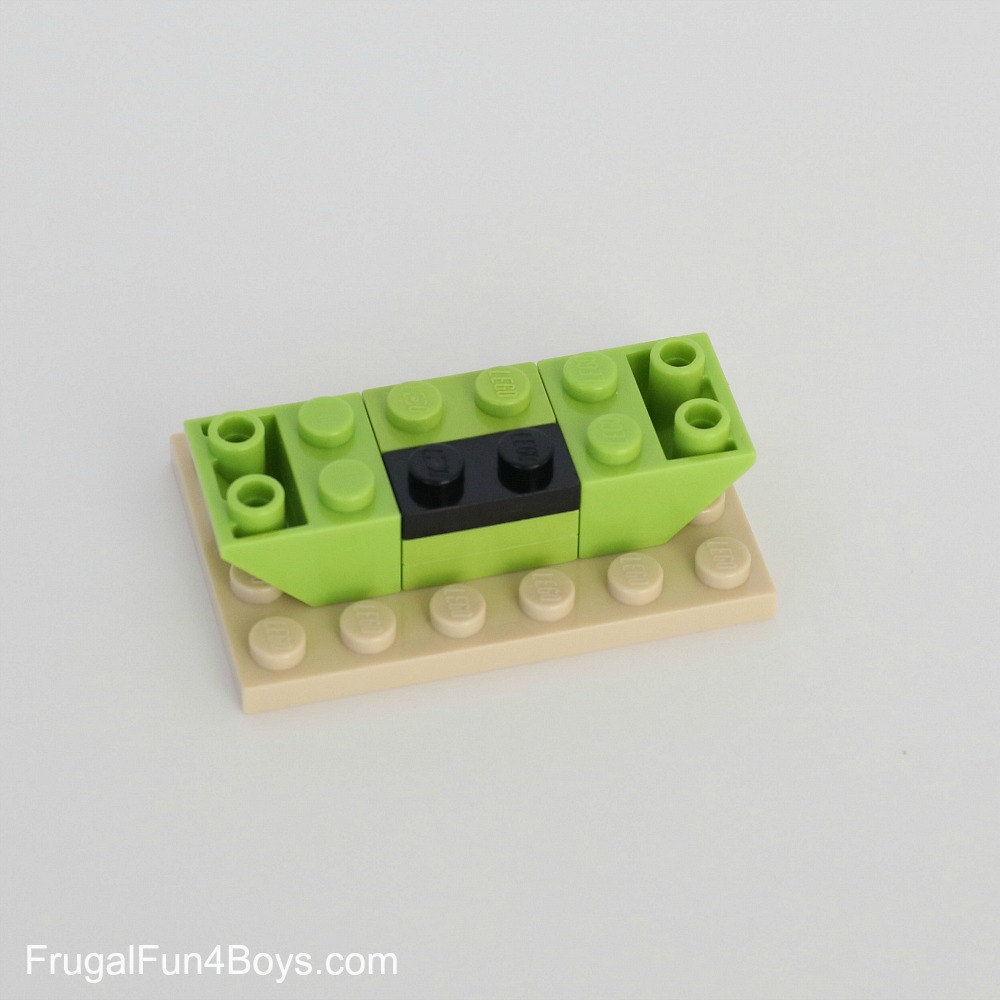
Step 2: Attach the two 2 x 2 inverted slopes to a 4 x 6 tan plate. Place two 2 x 2 lime green plates in between them. Then add a 1 x 2 black plate to be the mouth, and put a 1 x 2 lime green plate behind that.
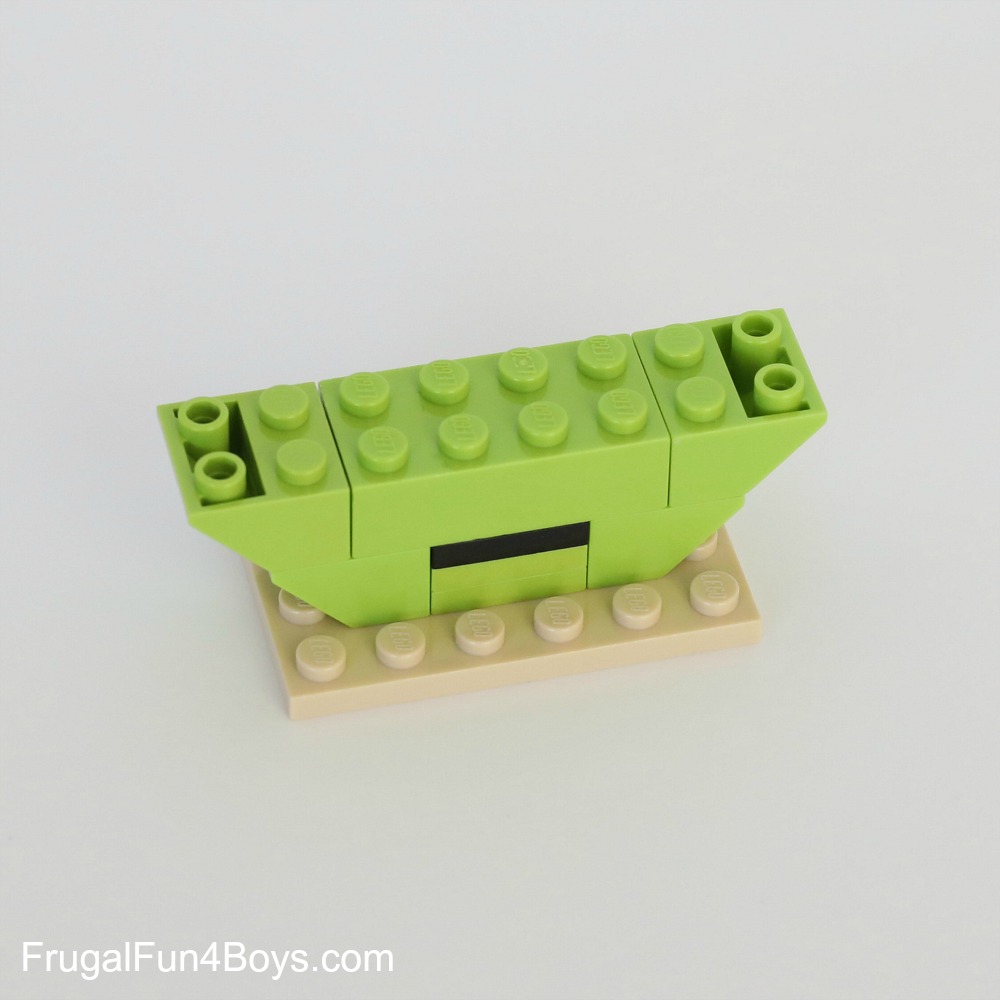
Step 3: Add a 2 x 4 lime green brick and two more 2 x 2 inverted slopes.
Step 4: Attach two 1 x 1 lime green bricks with a stud on the side. These will hold the eyes. Then find two 1 x 6 inverted curved slopes, a 1 x 4 brick, and a 1 x 2 brick.
Step 5: The inverted curved slope bricks will be the ears. Add the 1 x 4 brick and 1 x 2 brick to the center of the head as shown.
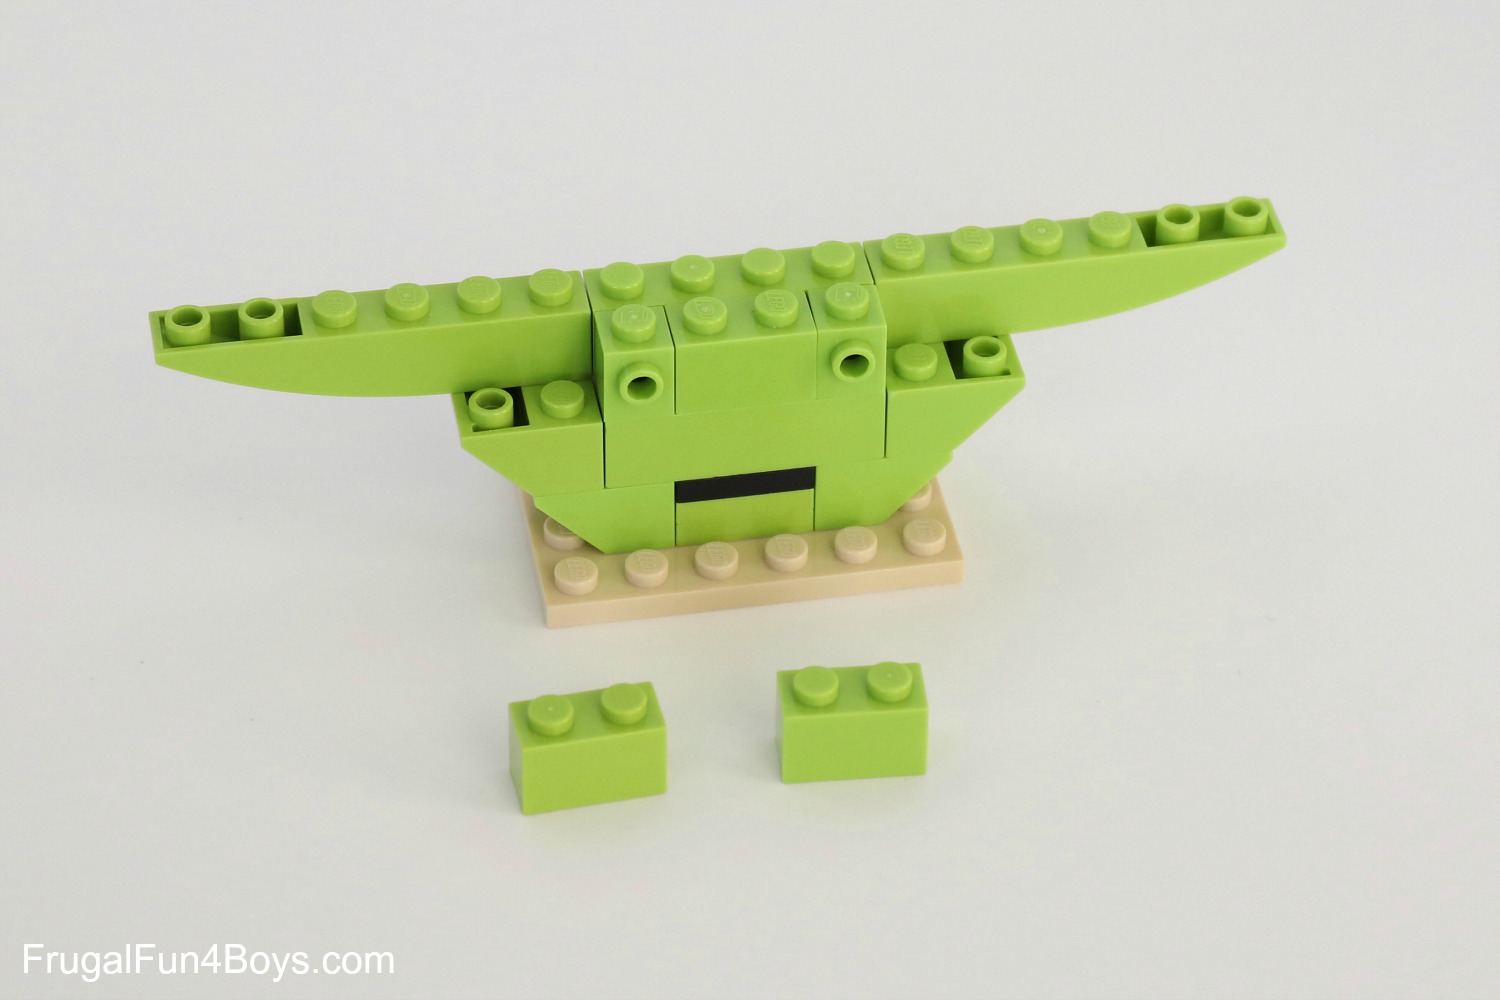
Step 6: Add a 2 x 4 lime green brick and two 1 x 1 lime green bricks to the center of the head. Then place a 1 x 4 tan plate and a 1 x 1 lime green plate on each ear.
Step 7: Add another 1 x 4 tan plate to each ear. Then place a 1 x 3 lime green plate on top of each one. (The right side of the photo shows a 1 x 2 plate and a 1 x 1 plate – I could only find one 1 x 3 so I made a substitution. But if you’re ordering bricks for this… get two 1 x 3 plates.)
Step 8: Place a 1 x 2 lime green curved slope on the end of each ear. Then gather the bricks shown.
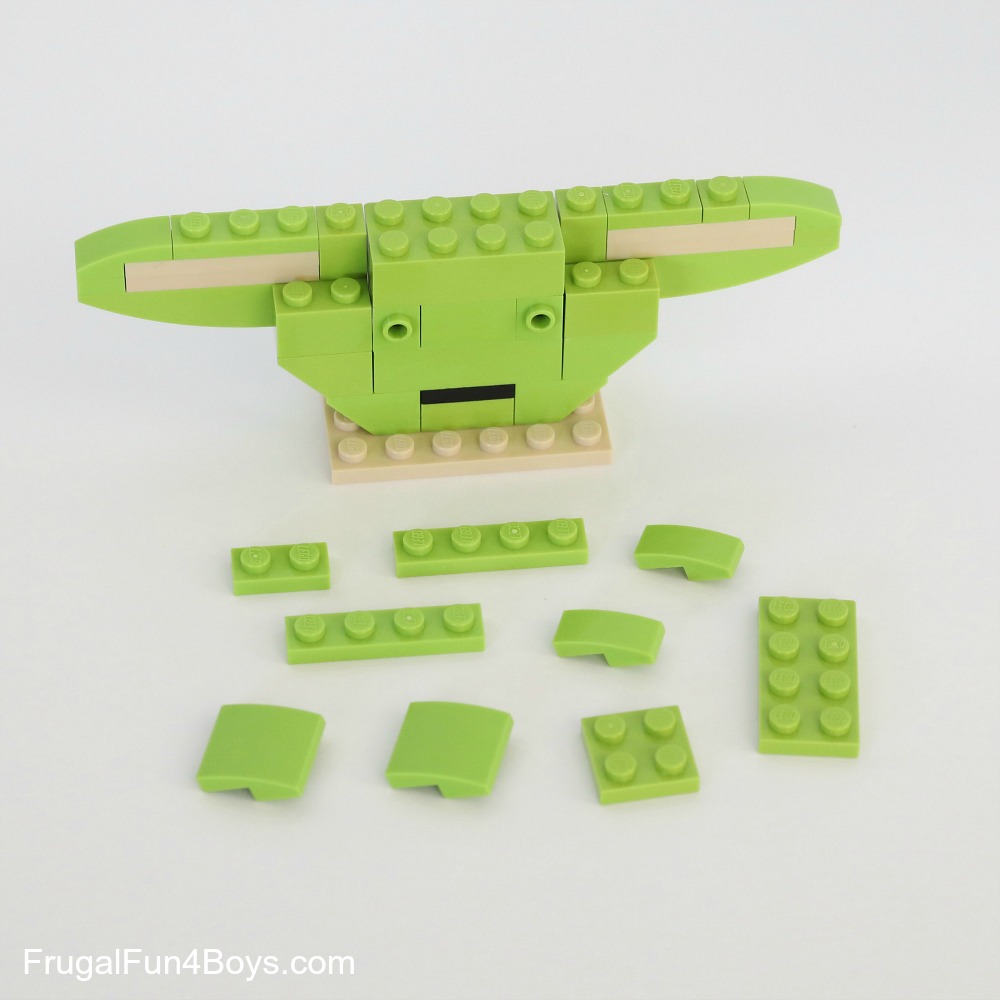
Step 9: Add a layer of plates on top of the head. I used two 1 x 4 plates and a 1 x 2 plate.
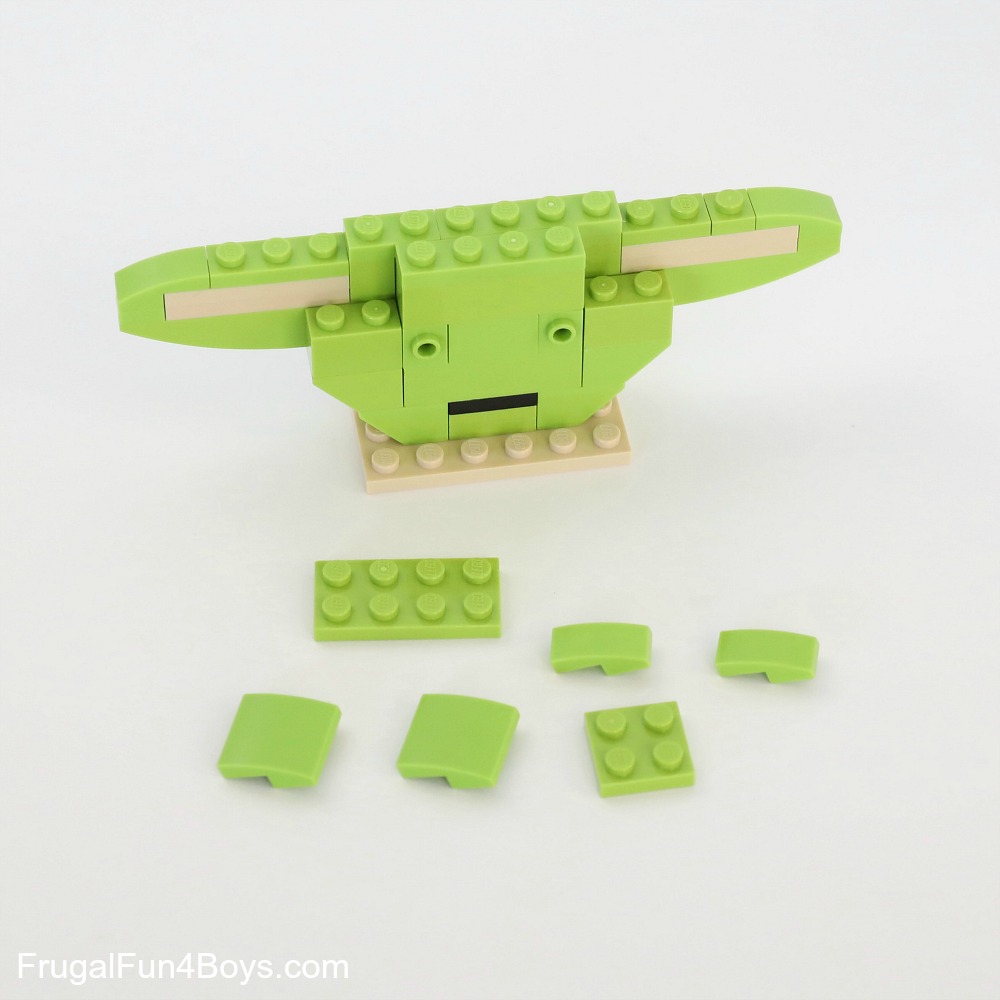
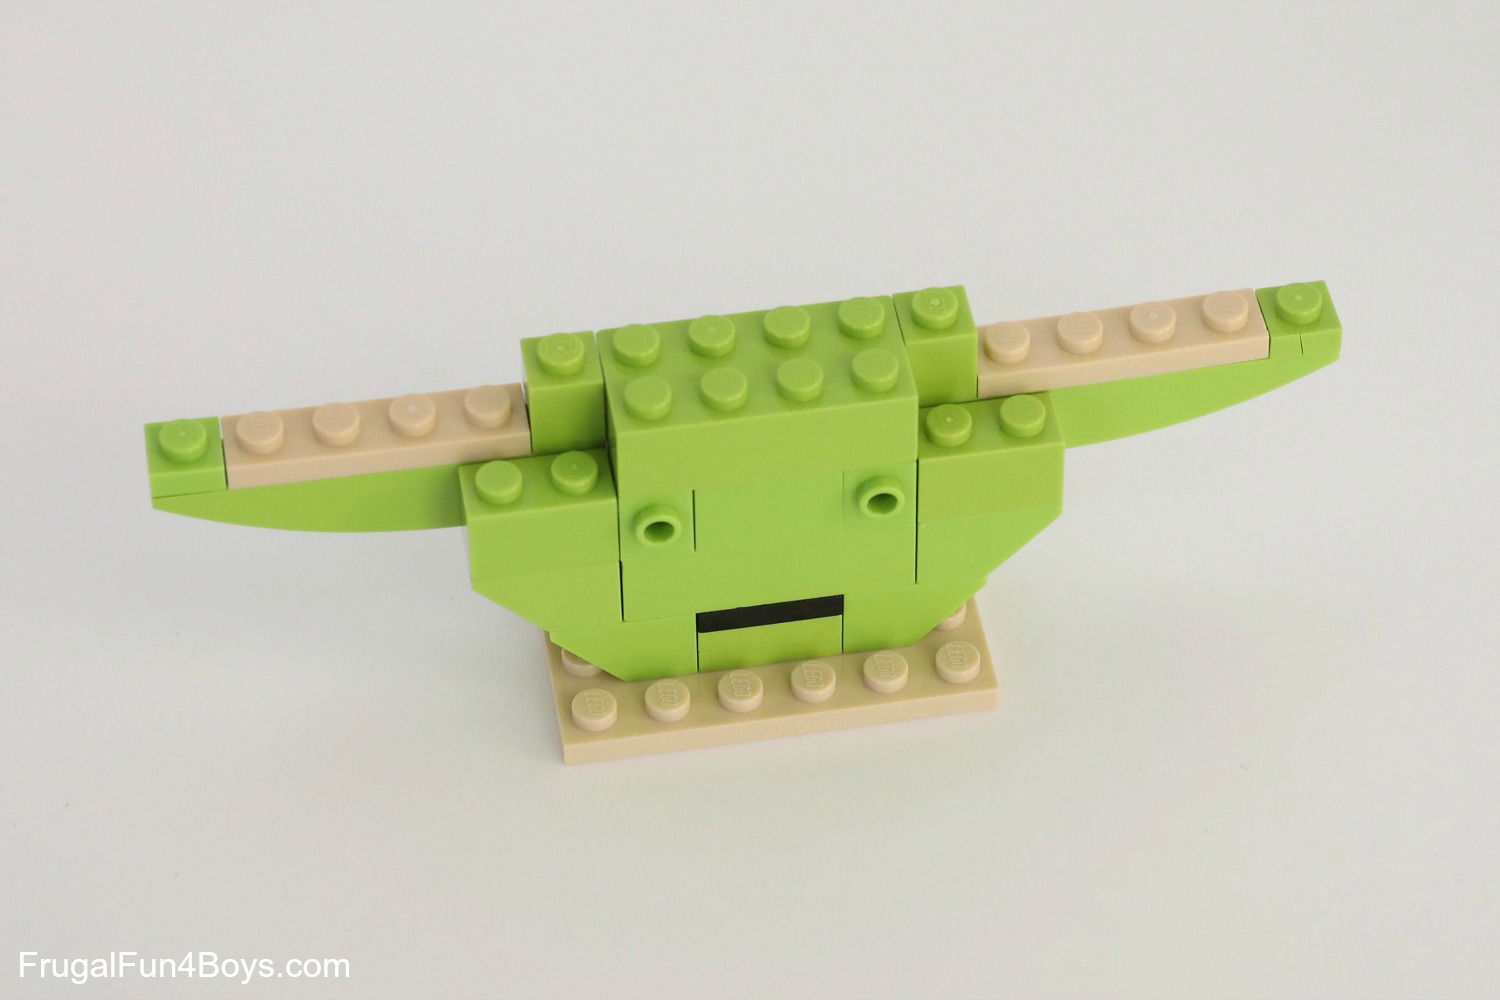
Step 10: Place a 2 x 4 lime green plate on the center of the head, and attach a 1 x 2 lime green curved slope on each side.
Step 11: Finish up the top of the head by attaching a 2 x 2 lime green plate and then two 2 x 2 curved slopes on top of that. Then find two 1 x 2 slopes and two 1 x 1 slopes (30 degree).
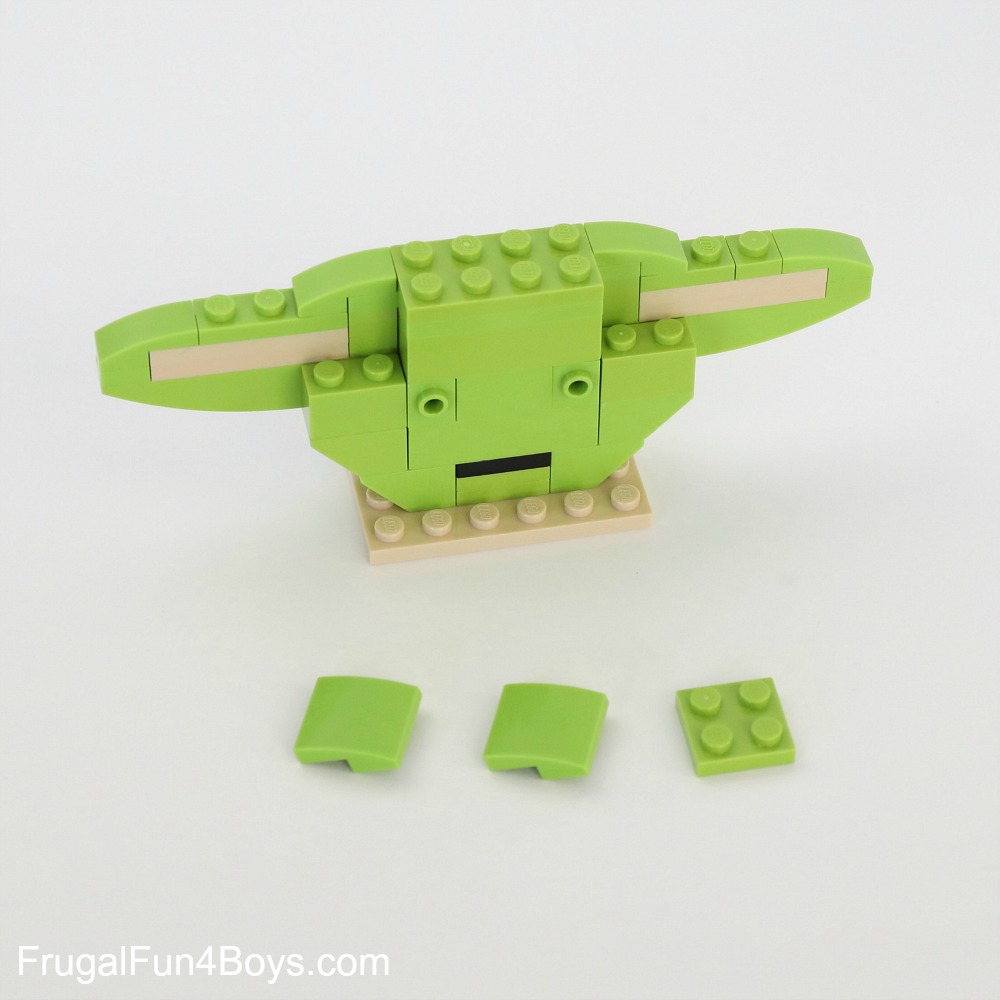
Step 12: Place one 1 x 2 slope and one 1 x 1 slope on each side of the face. Then find two 2 x 2 black round plates for the eyes.

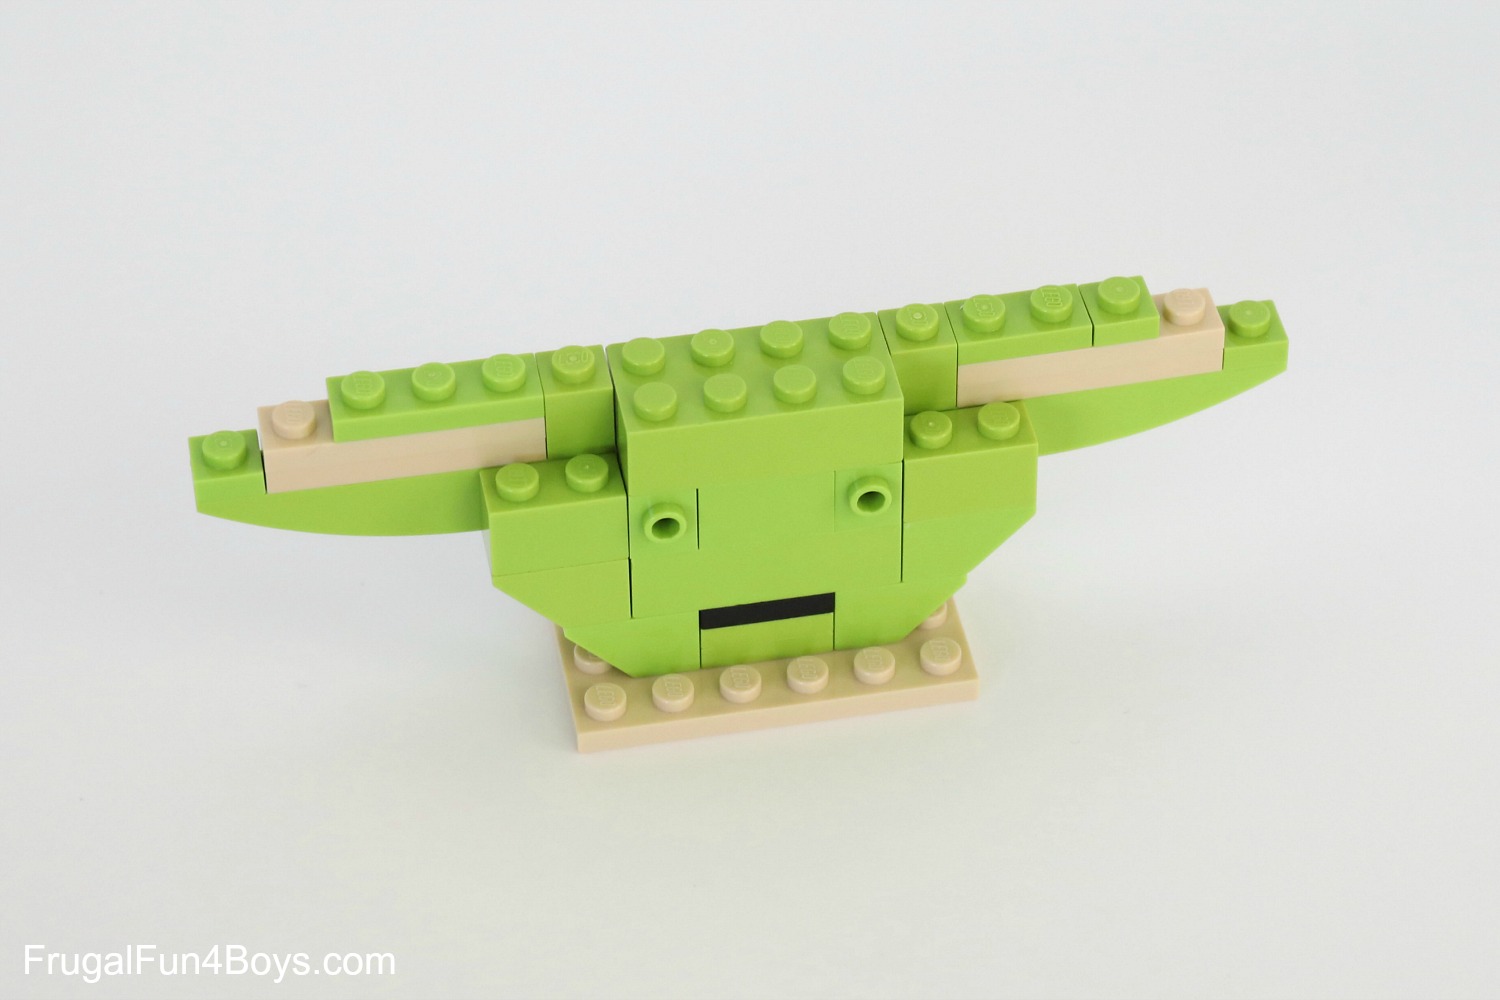
Step 13: Attach the eyes to the studs on the front of the face. Grab the bricks shown.
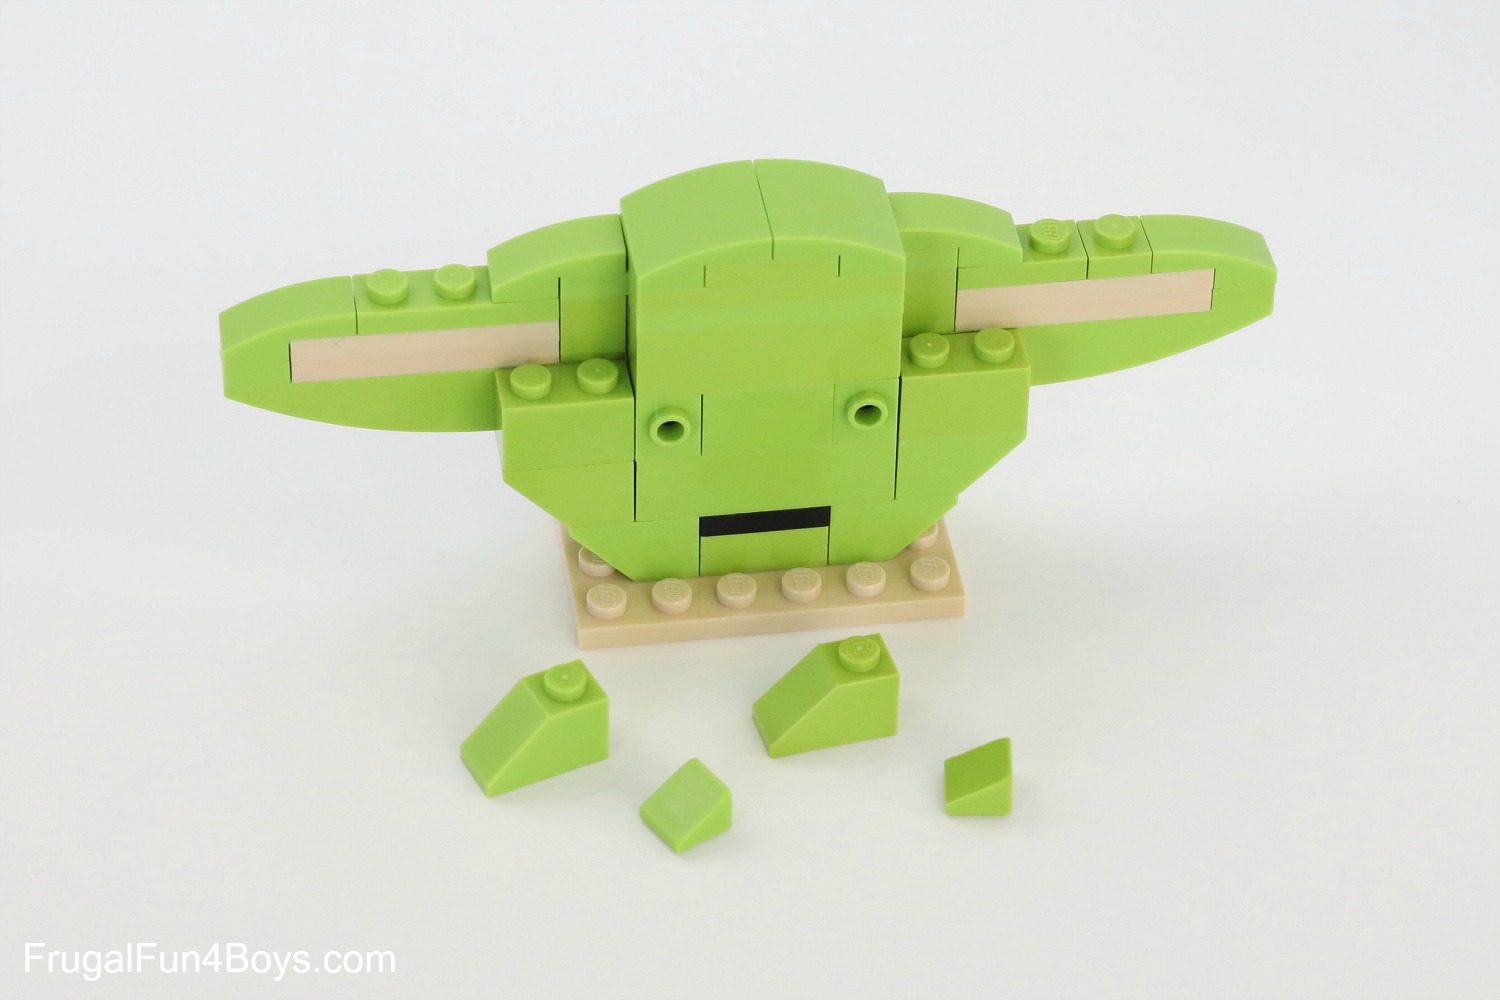
Step 14: Add a 1 x 2 tan plate, a 1 x 2 tan plate, and a 1 x 1 tan slope to Baby Yoda’s body in front of the head. This will look like the clothing he is wrapped in.
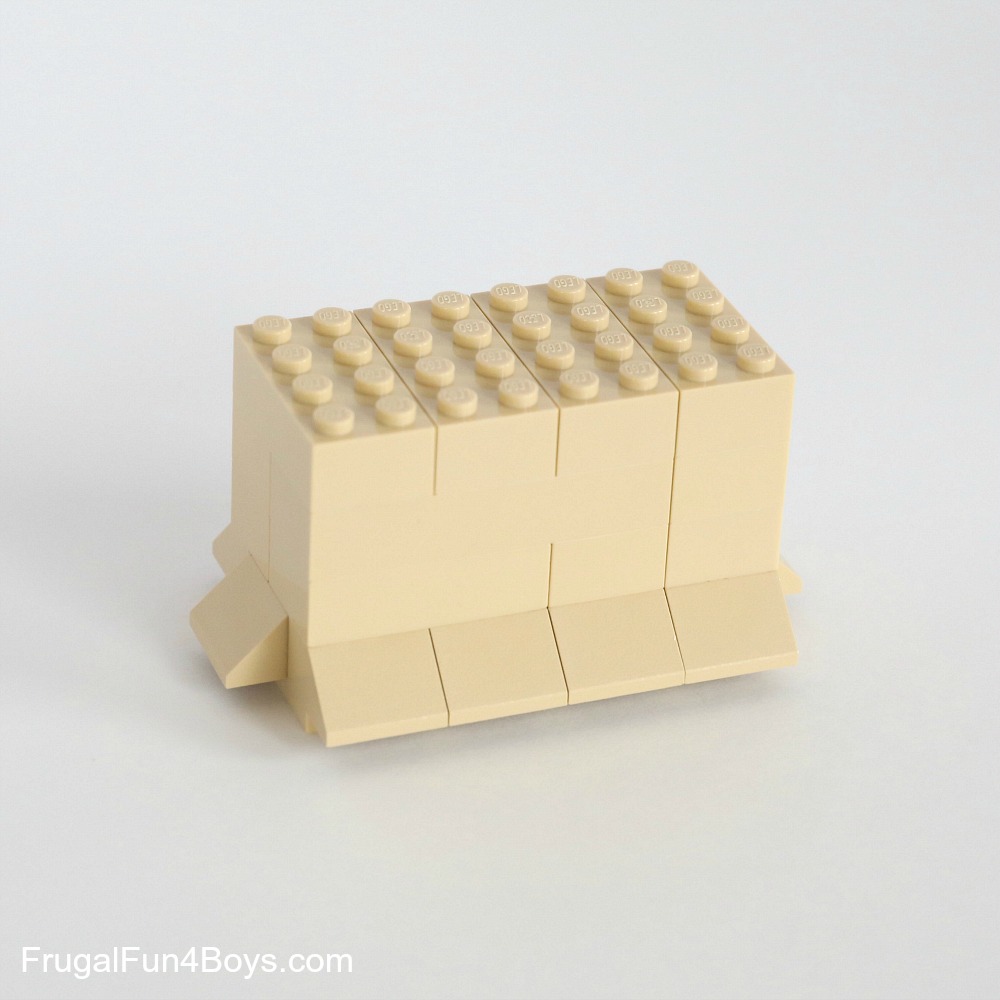
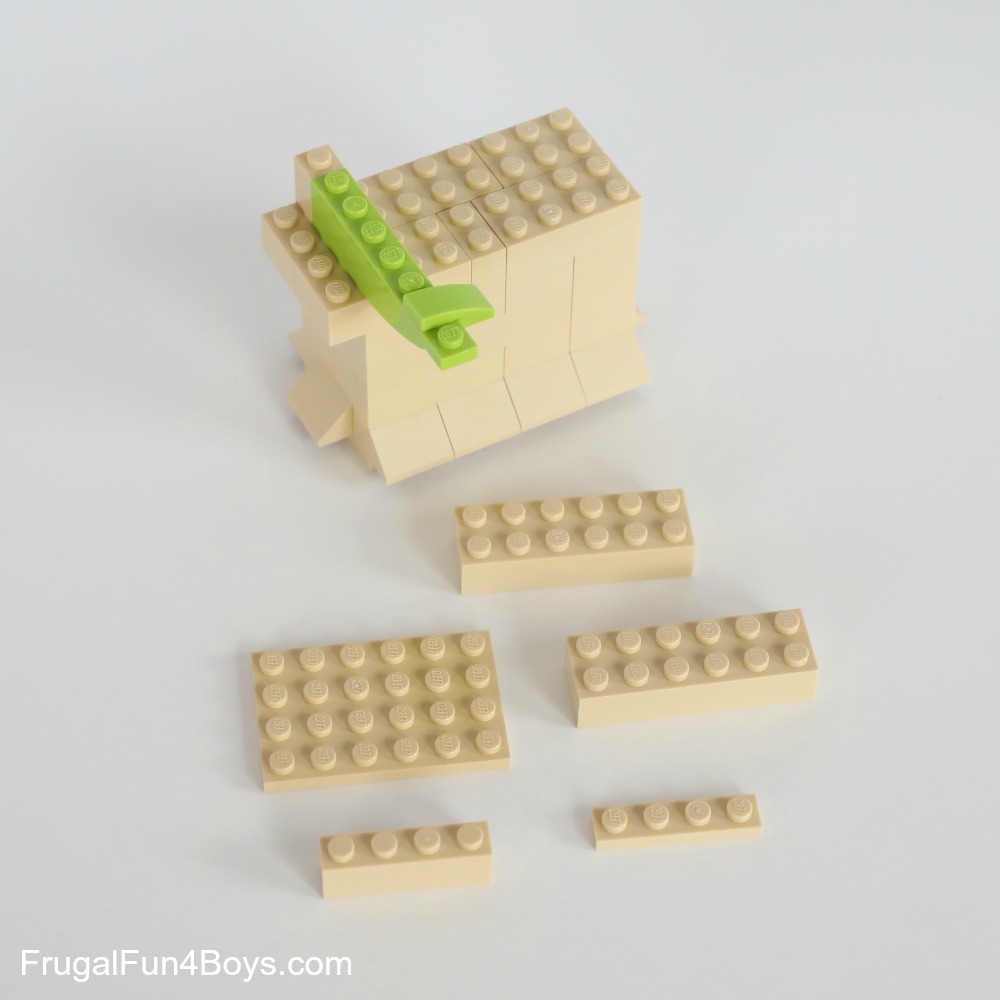
Step 15: Now we’ll build the body starting from the bottom up. Find a 4 x 8 tan plate and the bricks shown. You may not have that many slopes – feel free to substitute regular bricks.
Step 16: Attach the bricks and slopes to the 4 x 8 plate. The slopes will hang off by one stud all the way around.
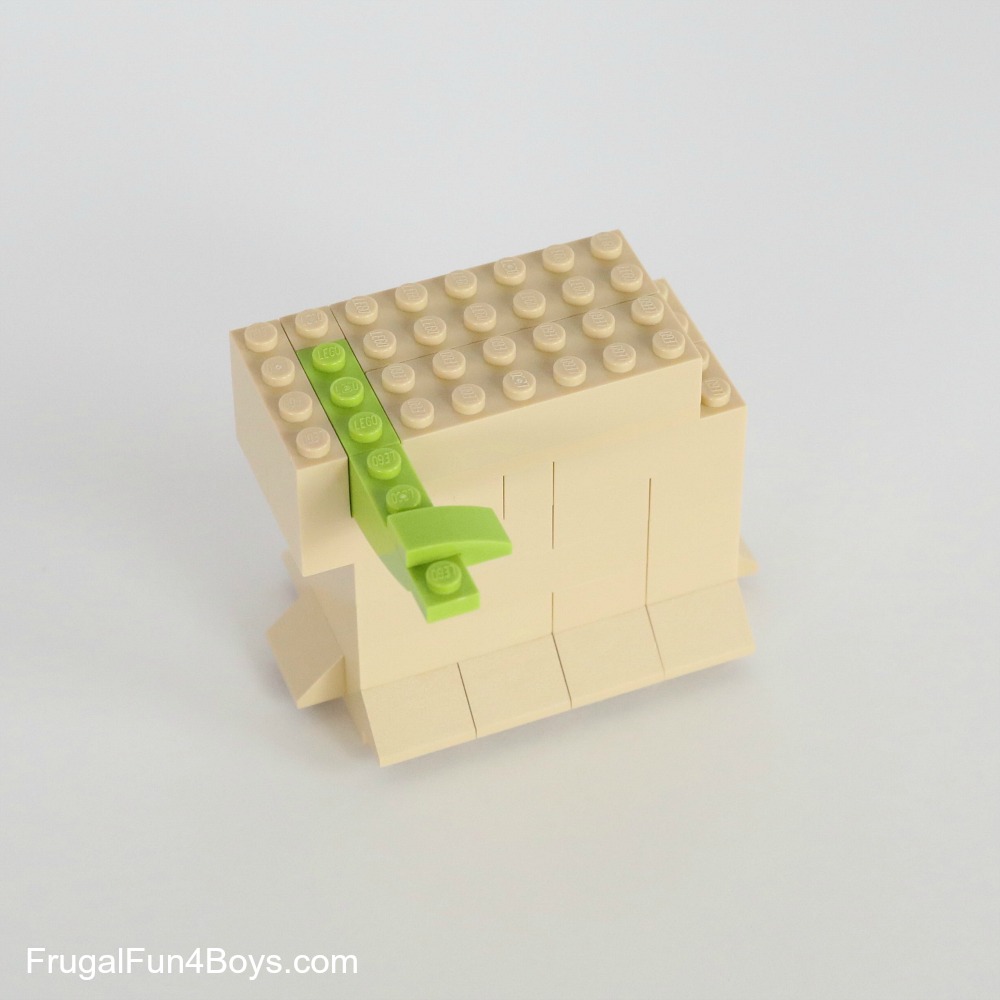
Step 17: Then add three layers of bricks. (Sorry this photo is weird – the camera didn’t have the right focal point!)
Step 18: Add one more layer of bricks, but this time the bricks should hang off on the left side by one row of studs.
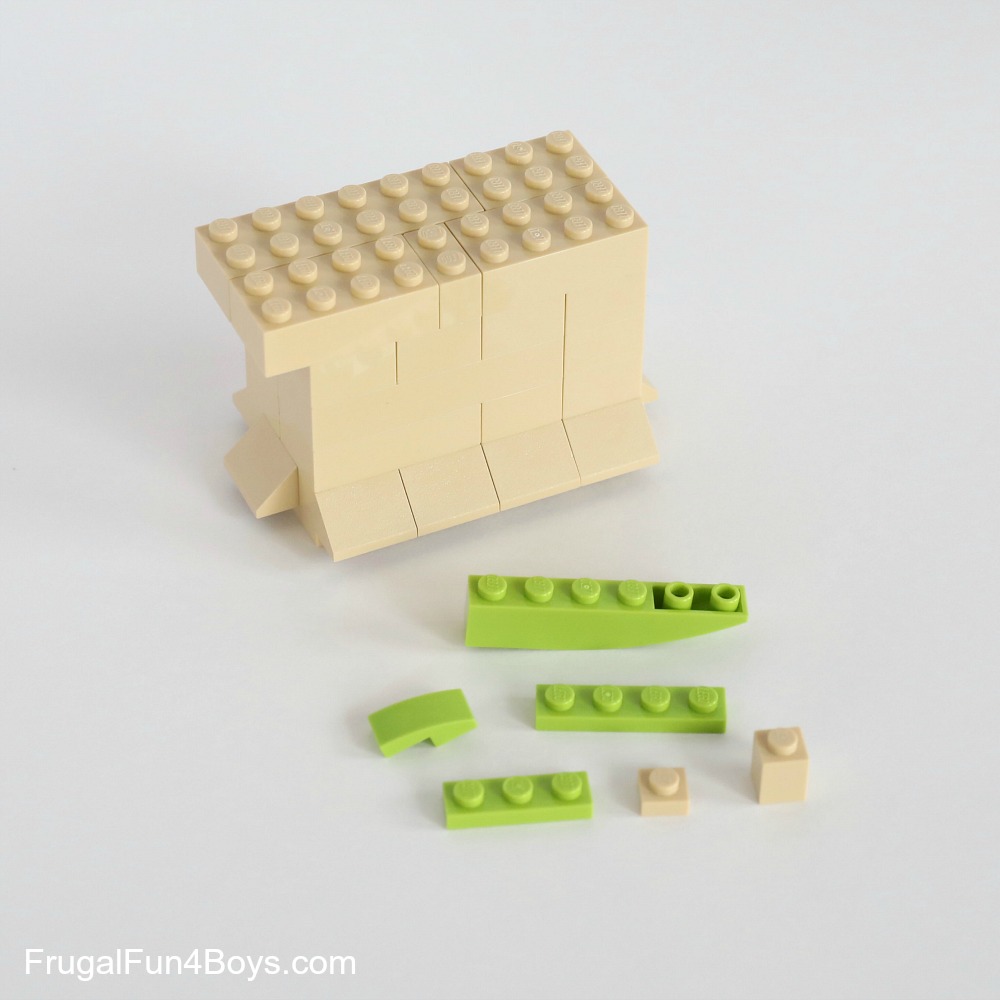
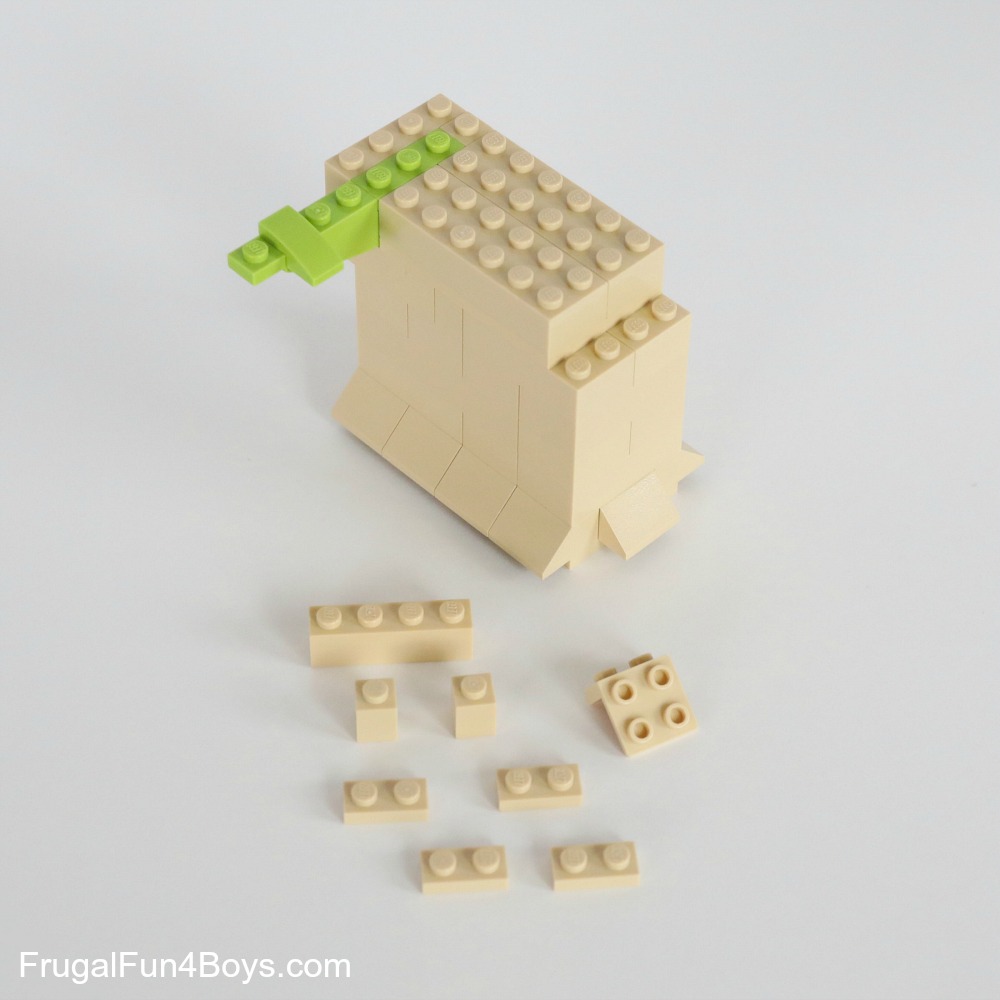
Step 19: Now we’ll build Baby Yoda’s “the Force” arm. Use a 1 x 6 inverted curved slope, but if you don’t have one of those, substitute a regular brick. Add a 1 x 1 tan brick behind the arm.
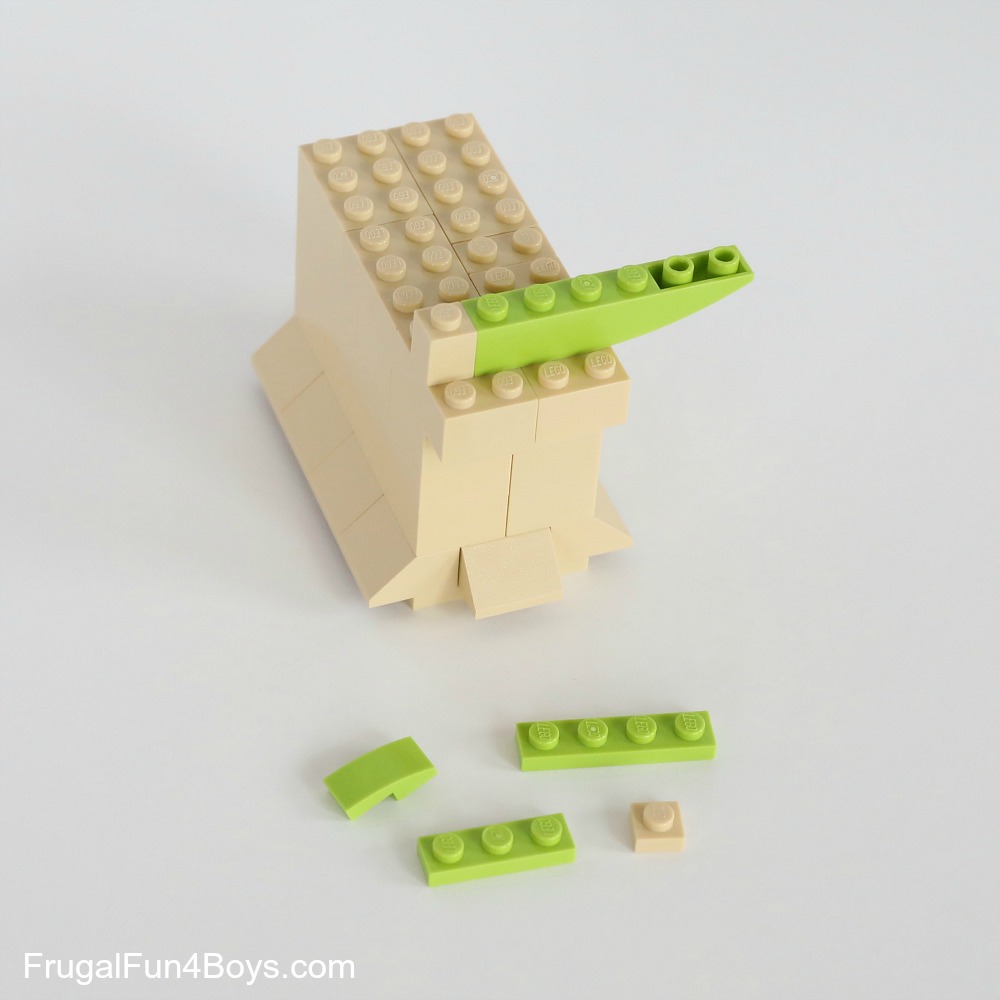
Step 20: Place a 1 x 1 tan plate on top of the brick. Add a 1 x 3 lime green plate, a 1 x 4 lime green plate, and a 1 x 2 lime green curved slope.
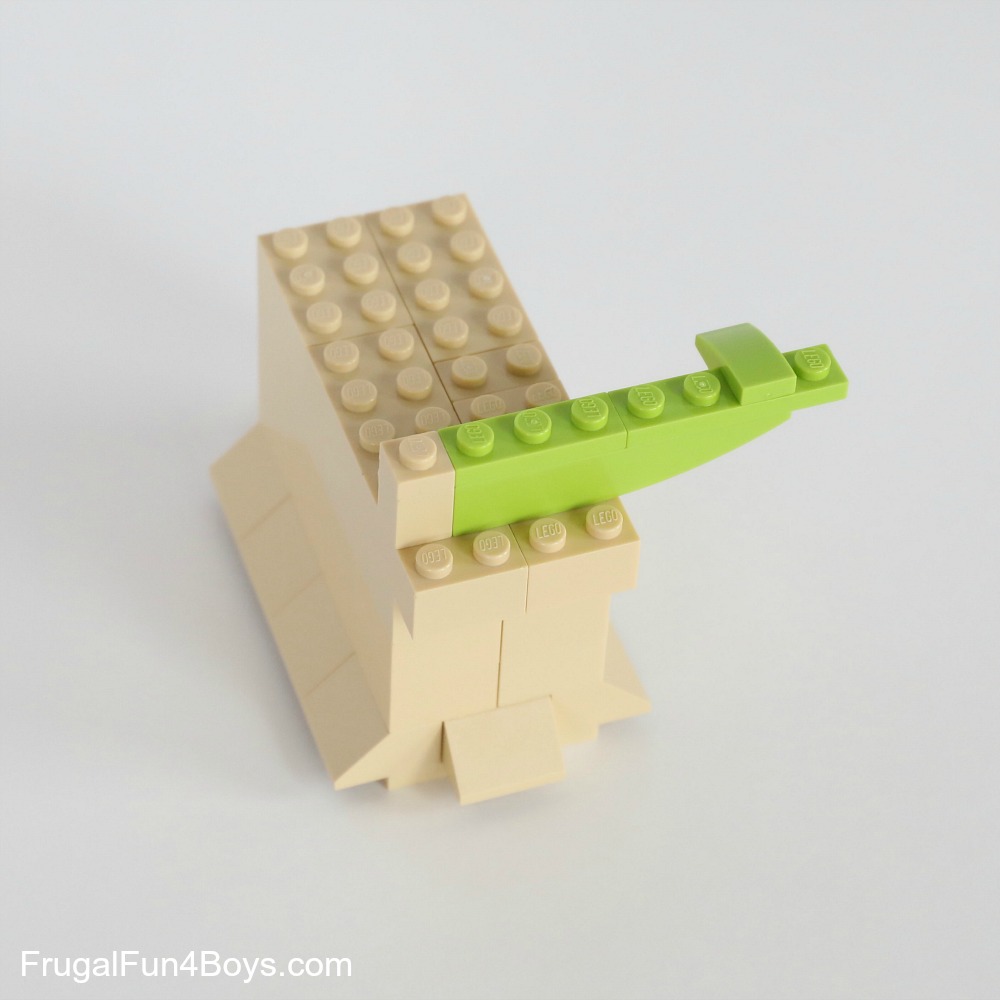
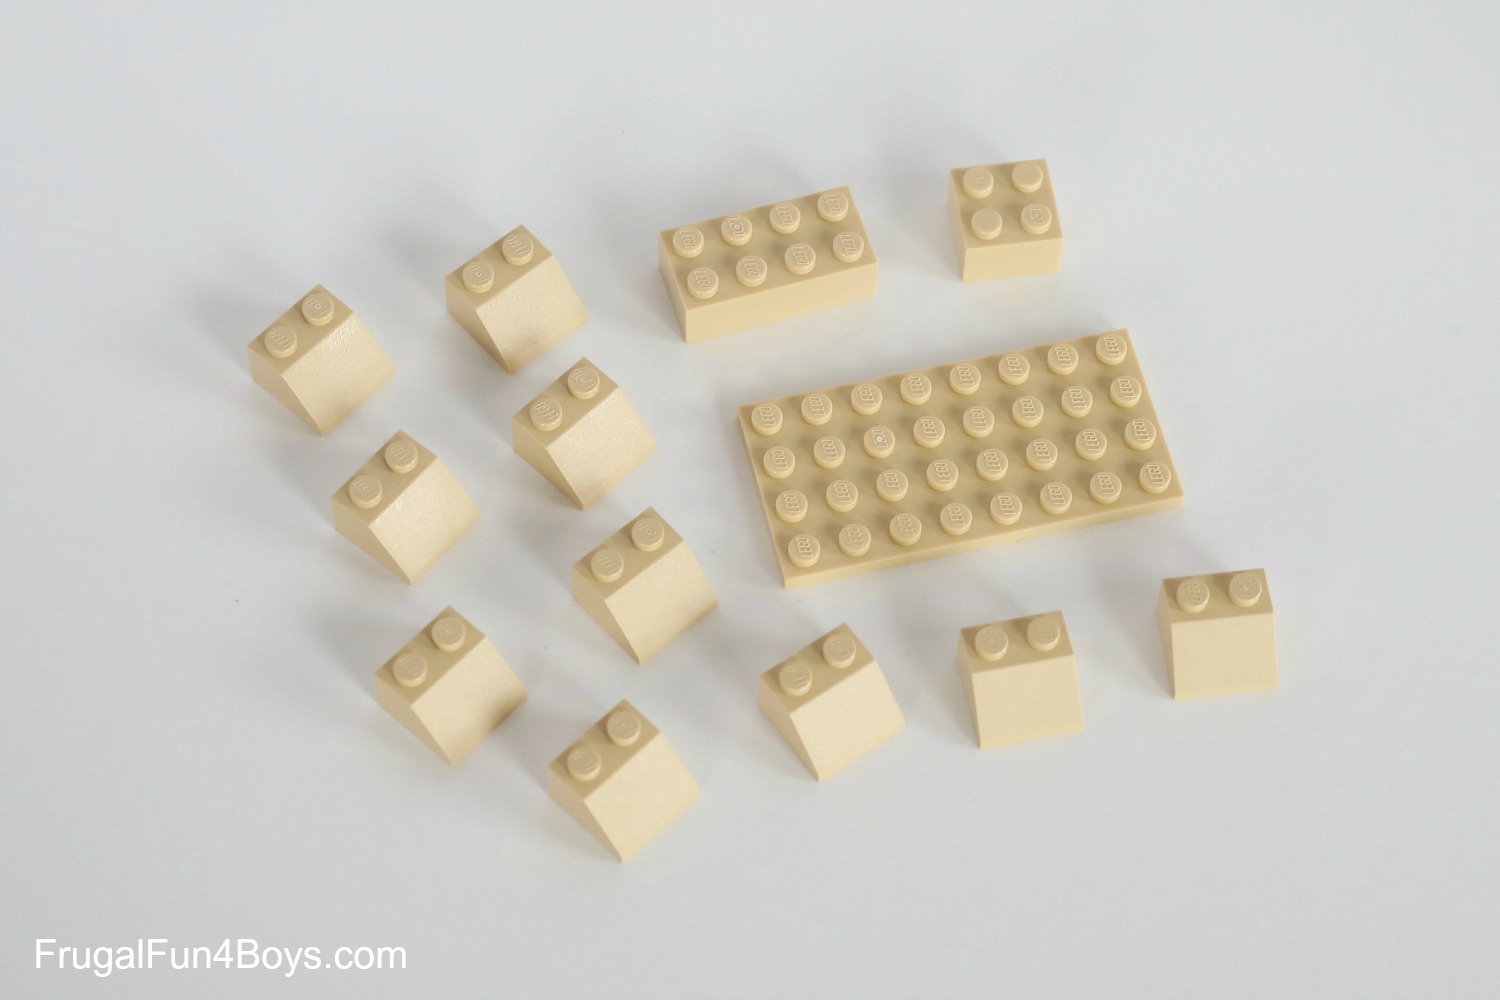
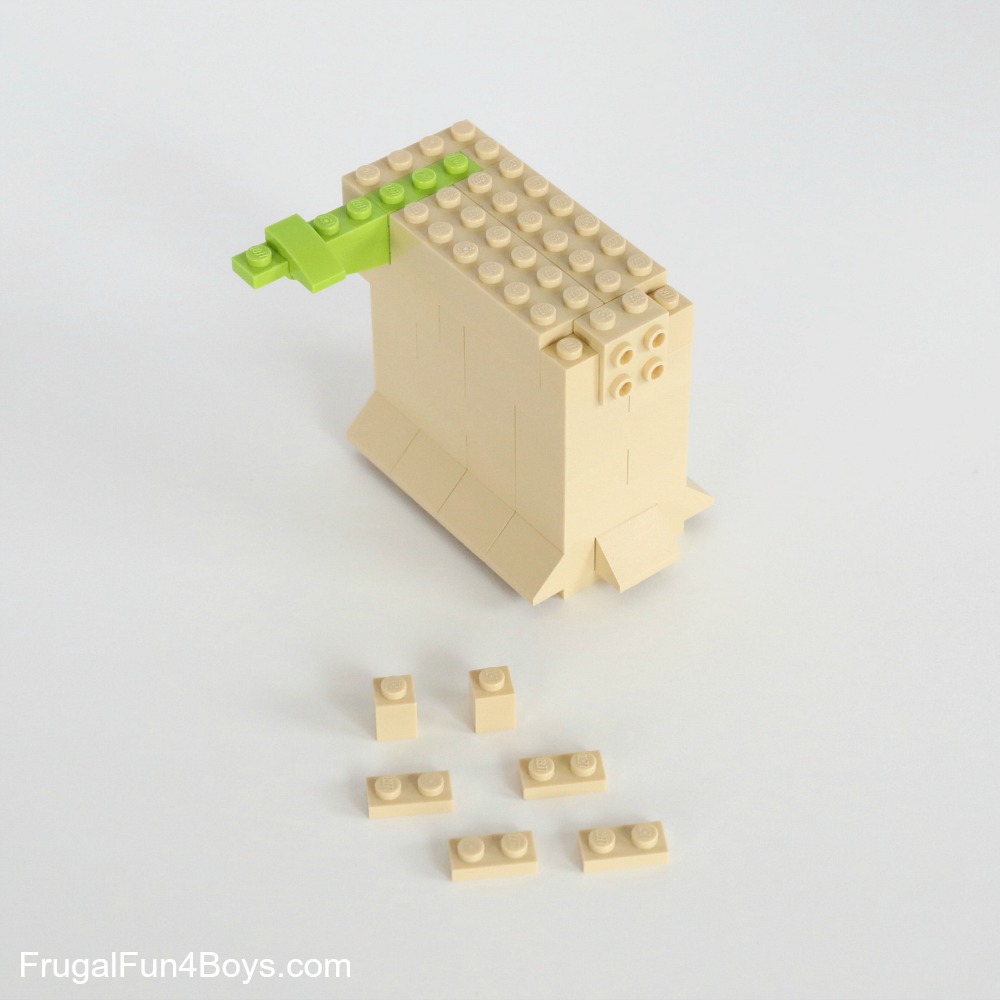
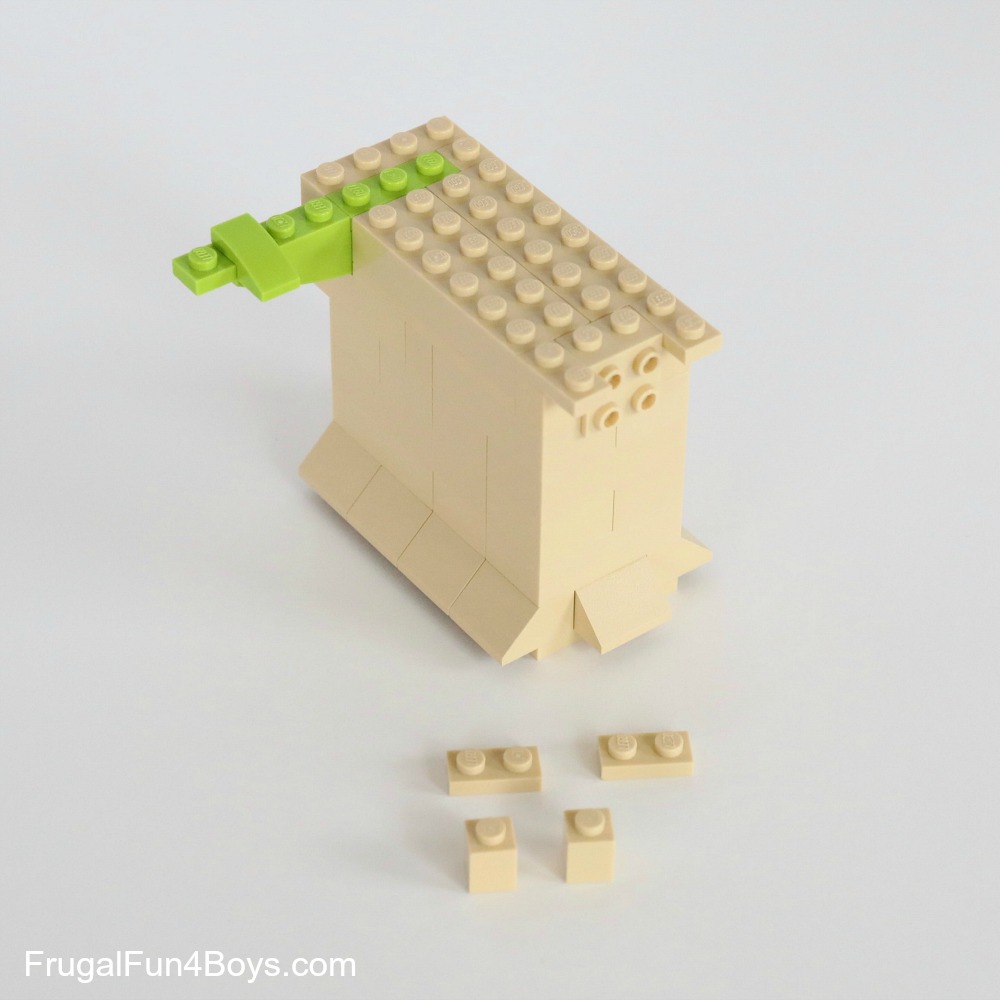
Step 21: Gather the bricks shown for filling in the body.
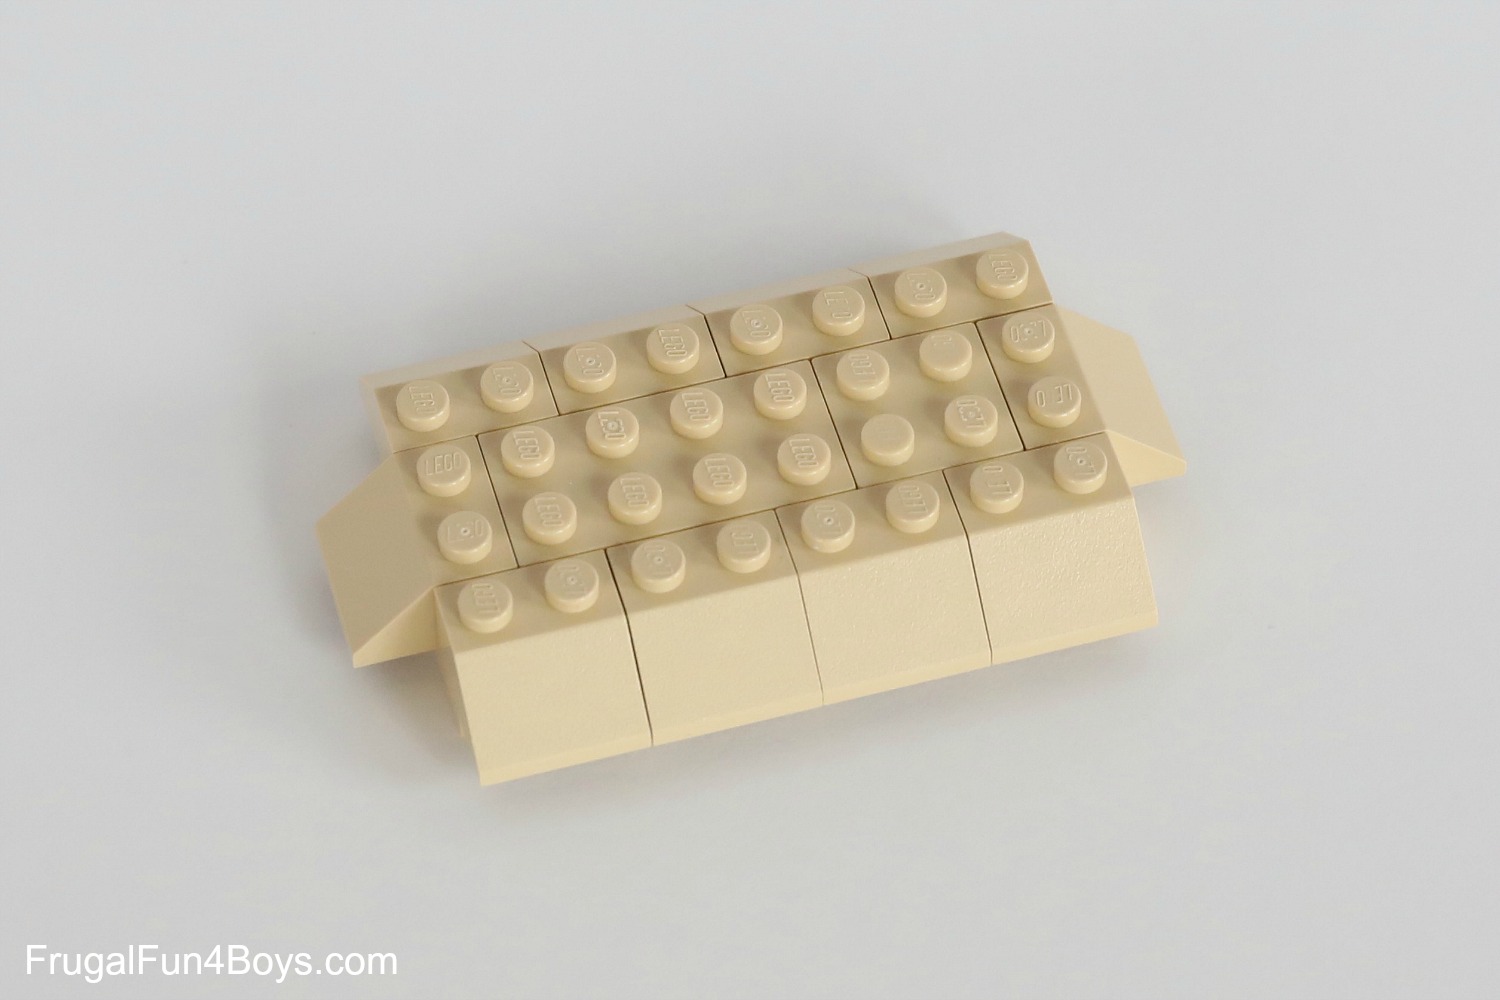
Step 22: Attach the plates and then the bricks to fill in the body.
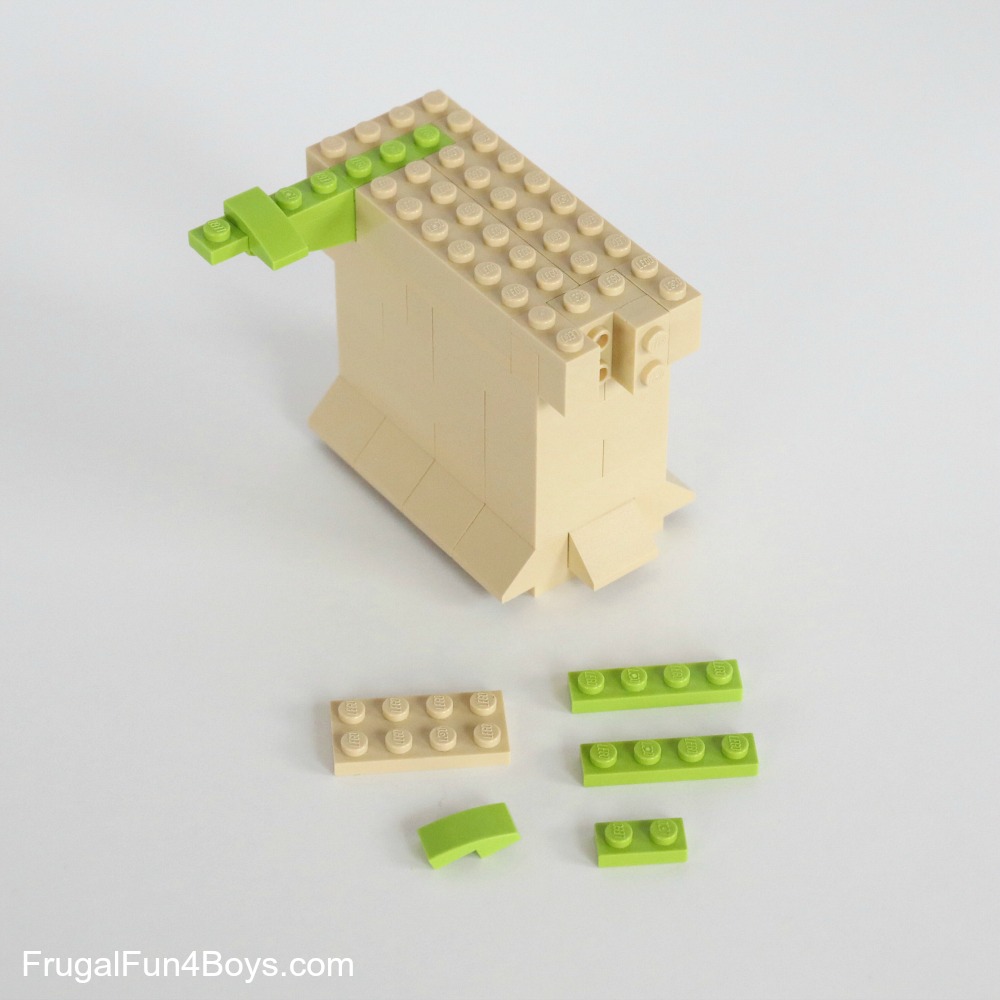
Step 23: Now we’ll work on the other arm. Gather the bricks shown.
Step 24: Place a 1 x 4 brick on the side of Baby Yoda, and then add a 1 x 2 – 2 x 2 bracket.
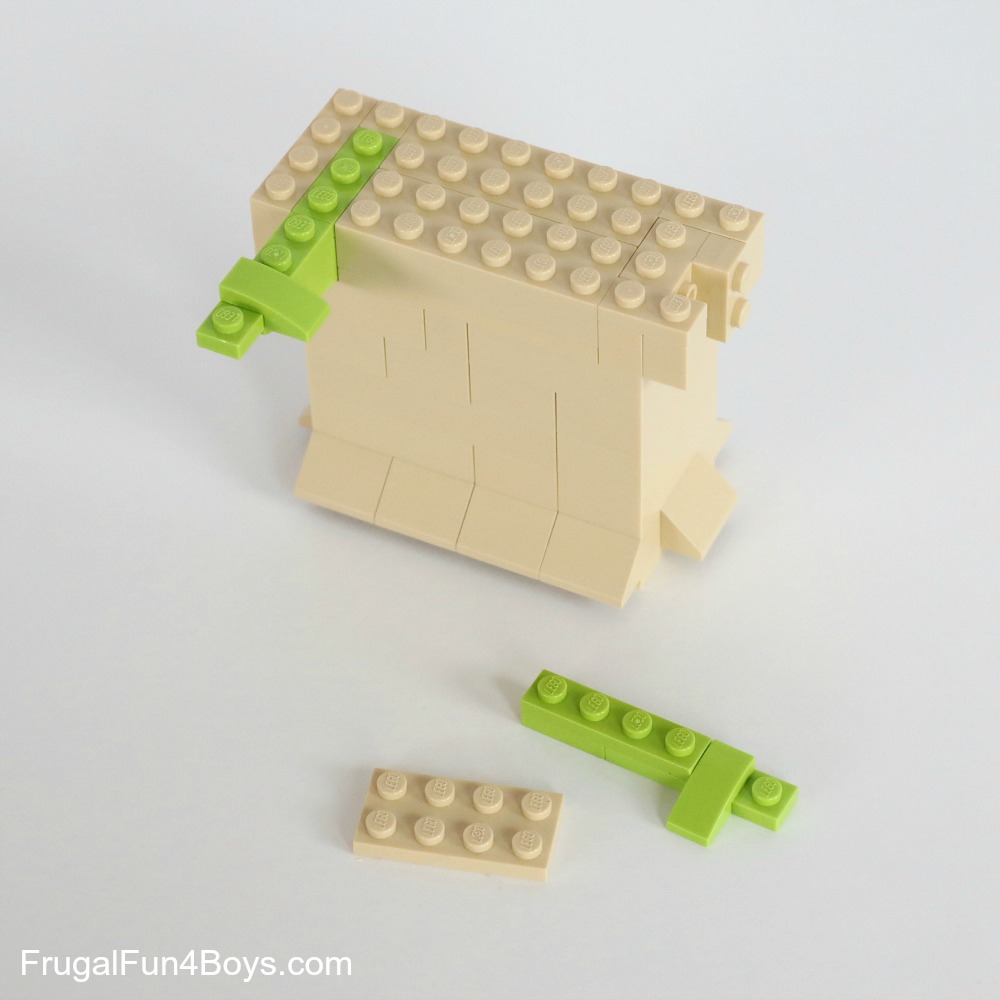
Step 25: Place a 1 x 2 plate on either side of the bracket.
Step 26: Attach a 1 x 1 brick under each 1 x 2 plate. The stack two 1 x 2 plates and attach them to the right side of the bracket.
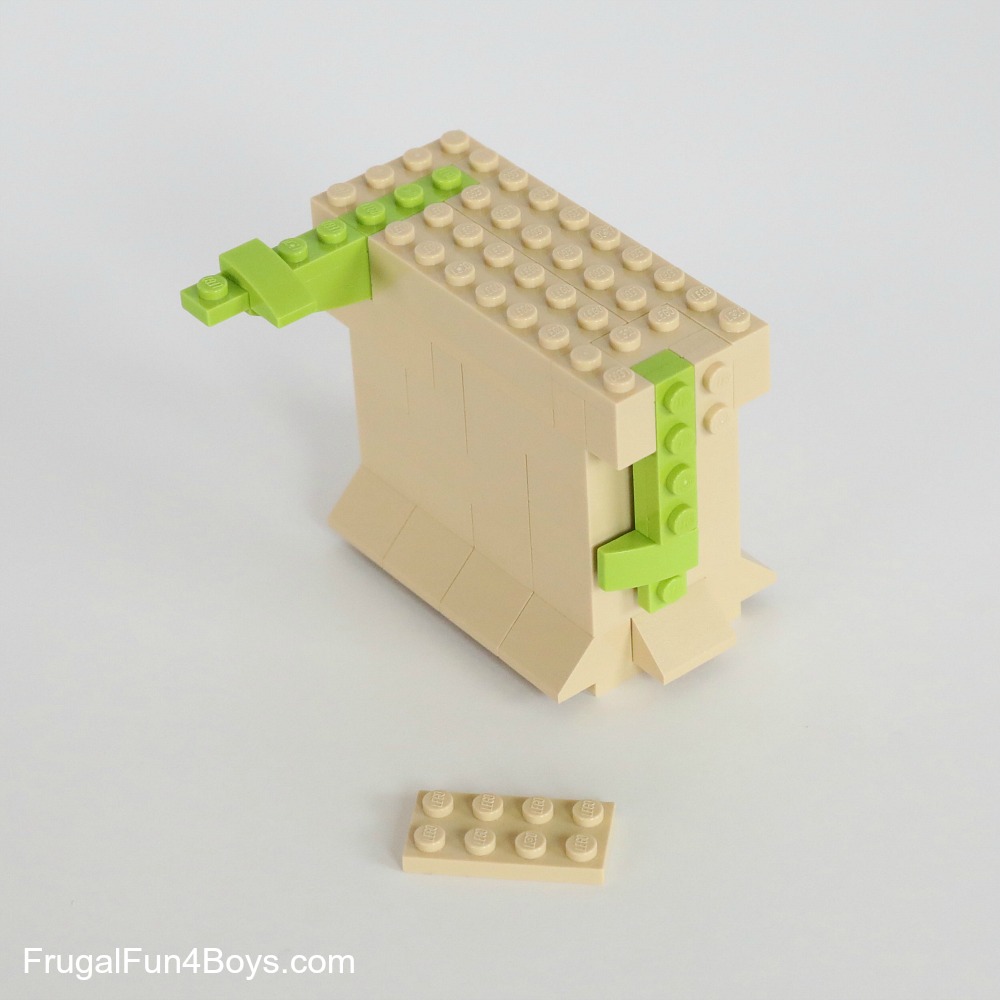
Step 27: Build the arm. Use a 1 x 4 lime green plate to connect a 1 x 2 plate and a 1 x 4 plate. Then add a 1 x 2 curved slope.
Step 28: Attach the arm to the tan bracket.
Step 29: Cover the top of the arm by attaching a 2 x 4 tan plate.
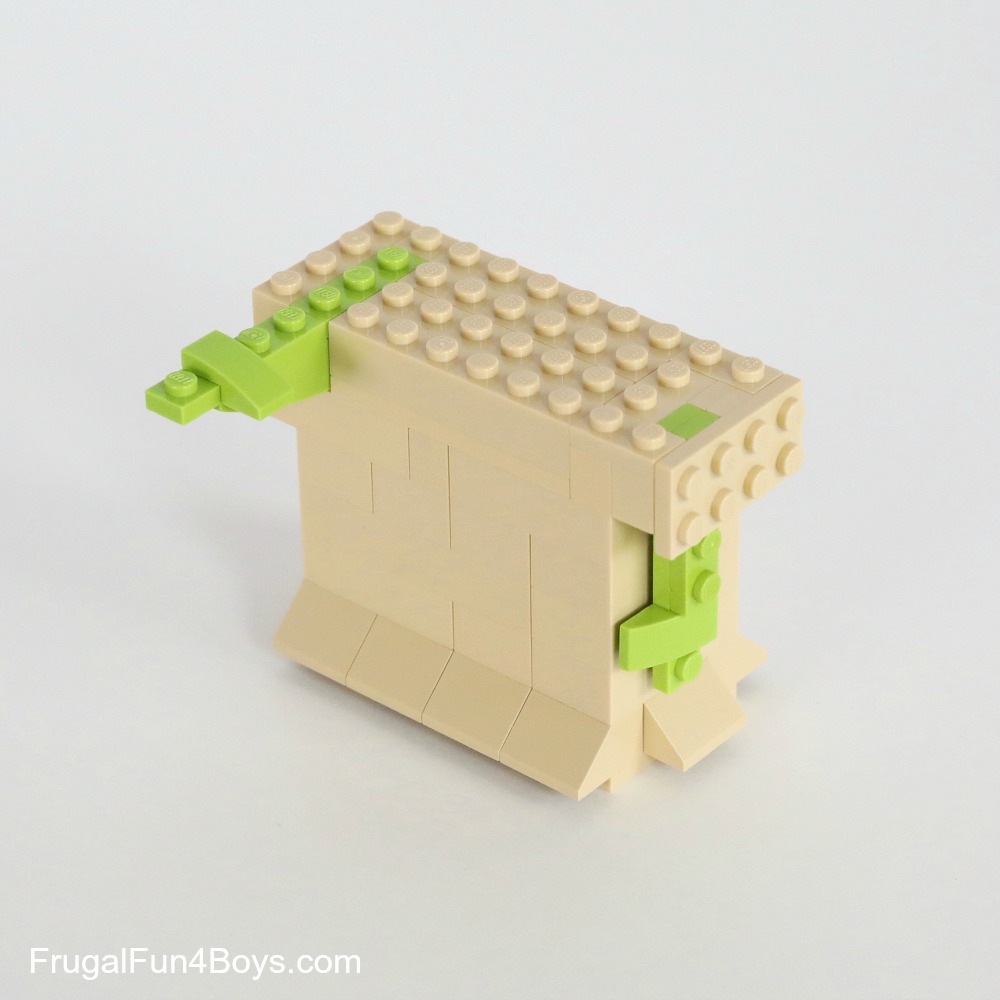
Step 30: Cover the body with plates. I used two 4 x 4 plates and a 2 x 4 plate. Then find the bricks shown.
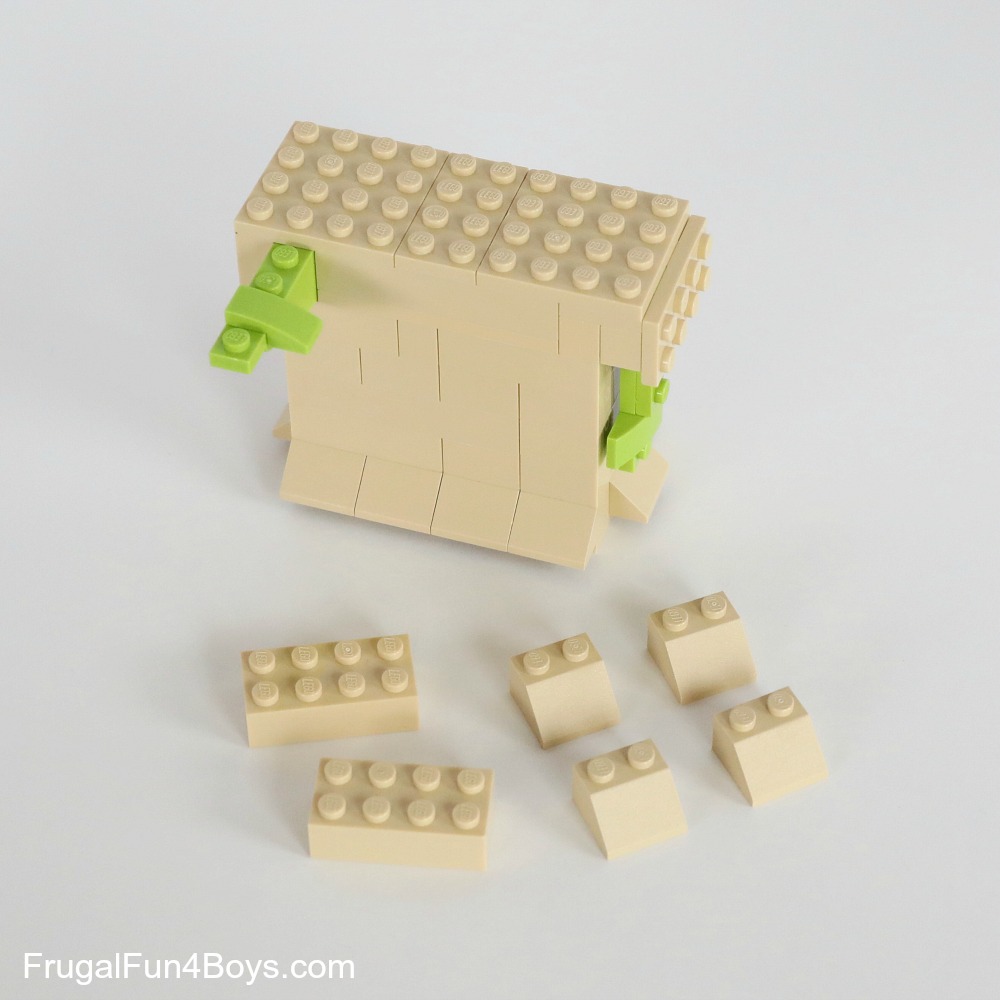
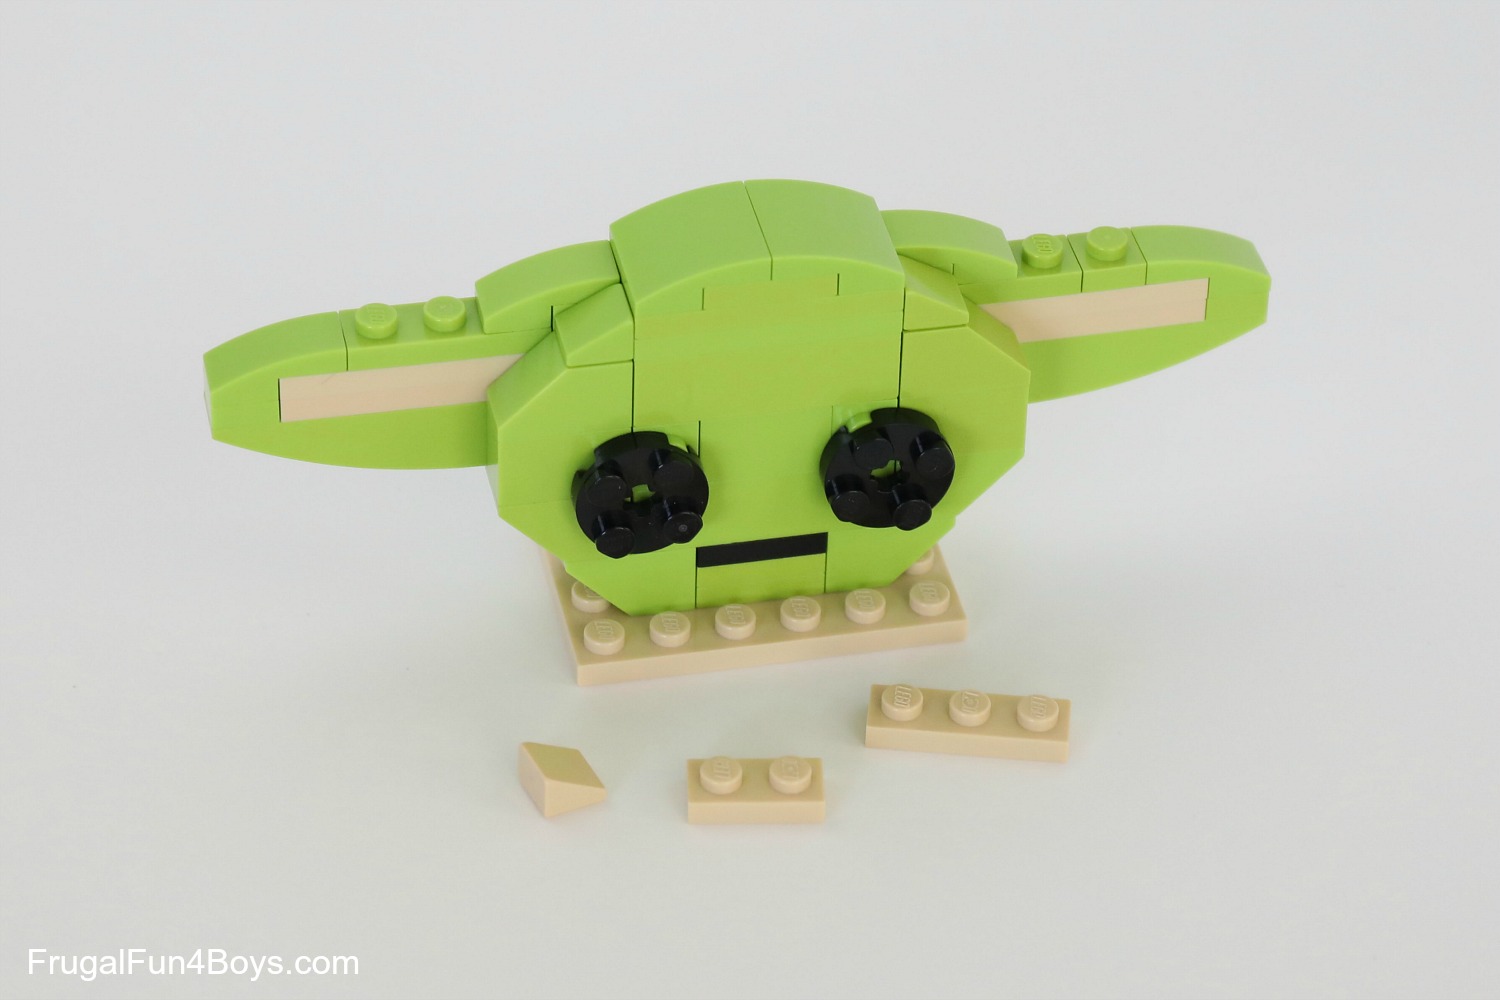
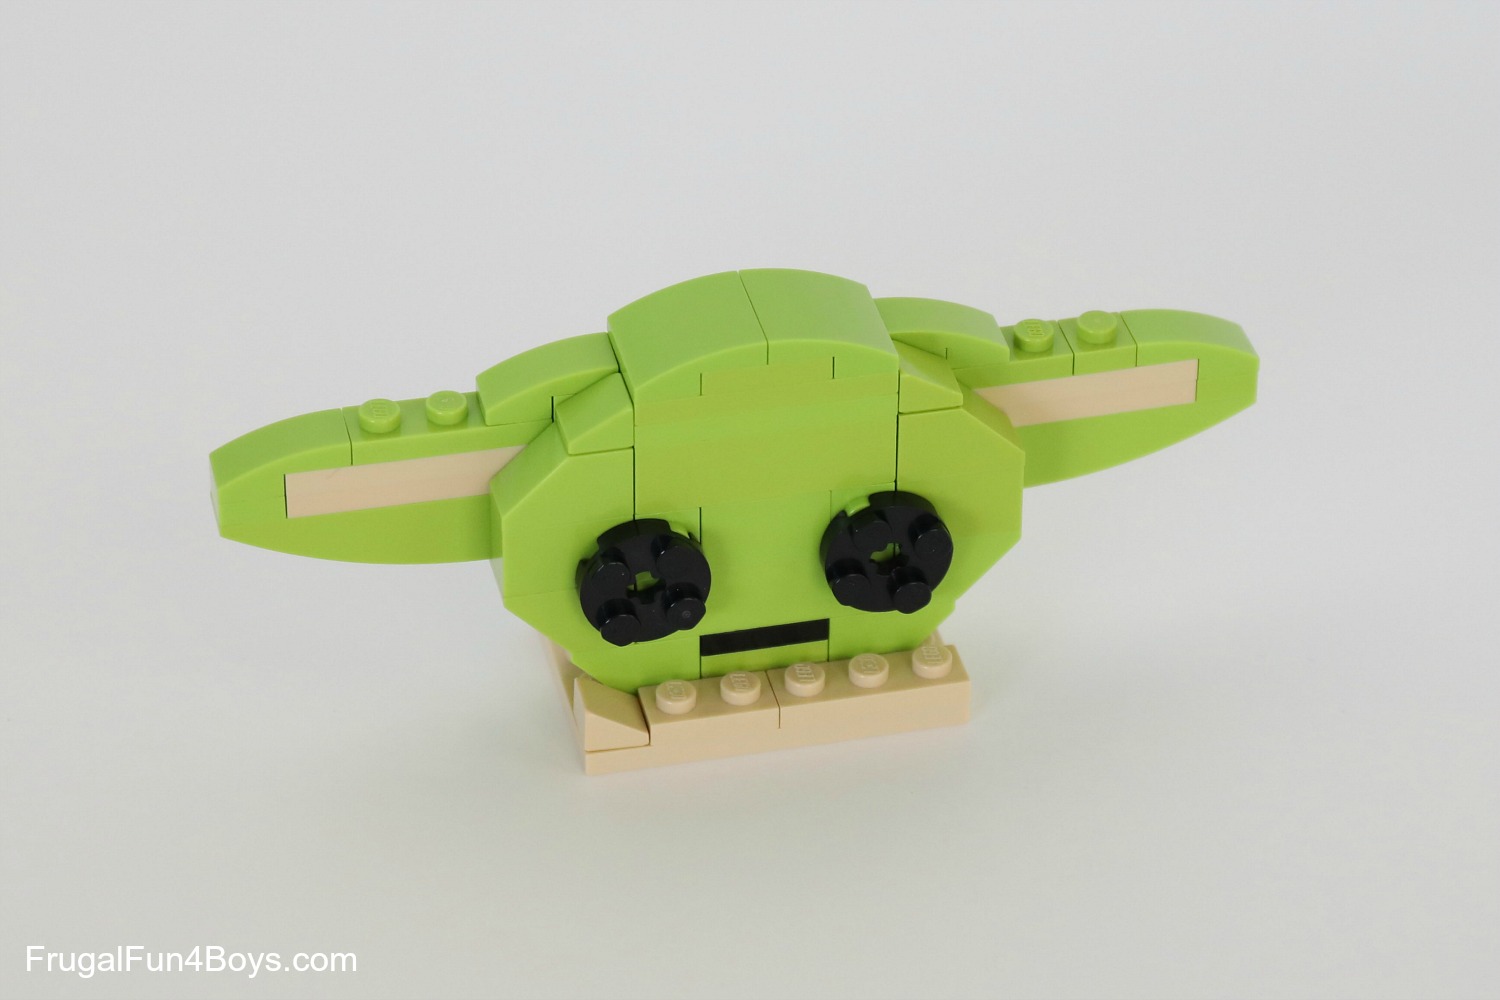
Step 31: Use the bricks to finish up the body. Then grab Baby Yoda’s head, and you’re ready to assemble him.
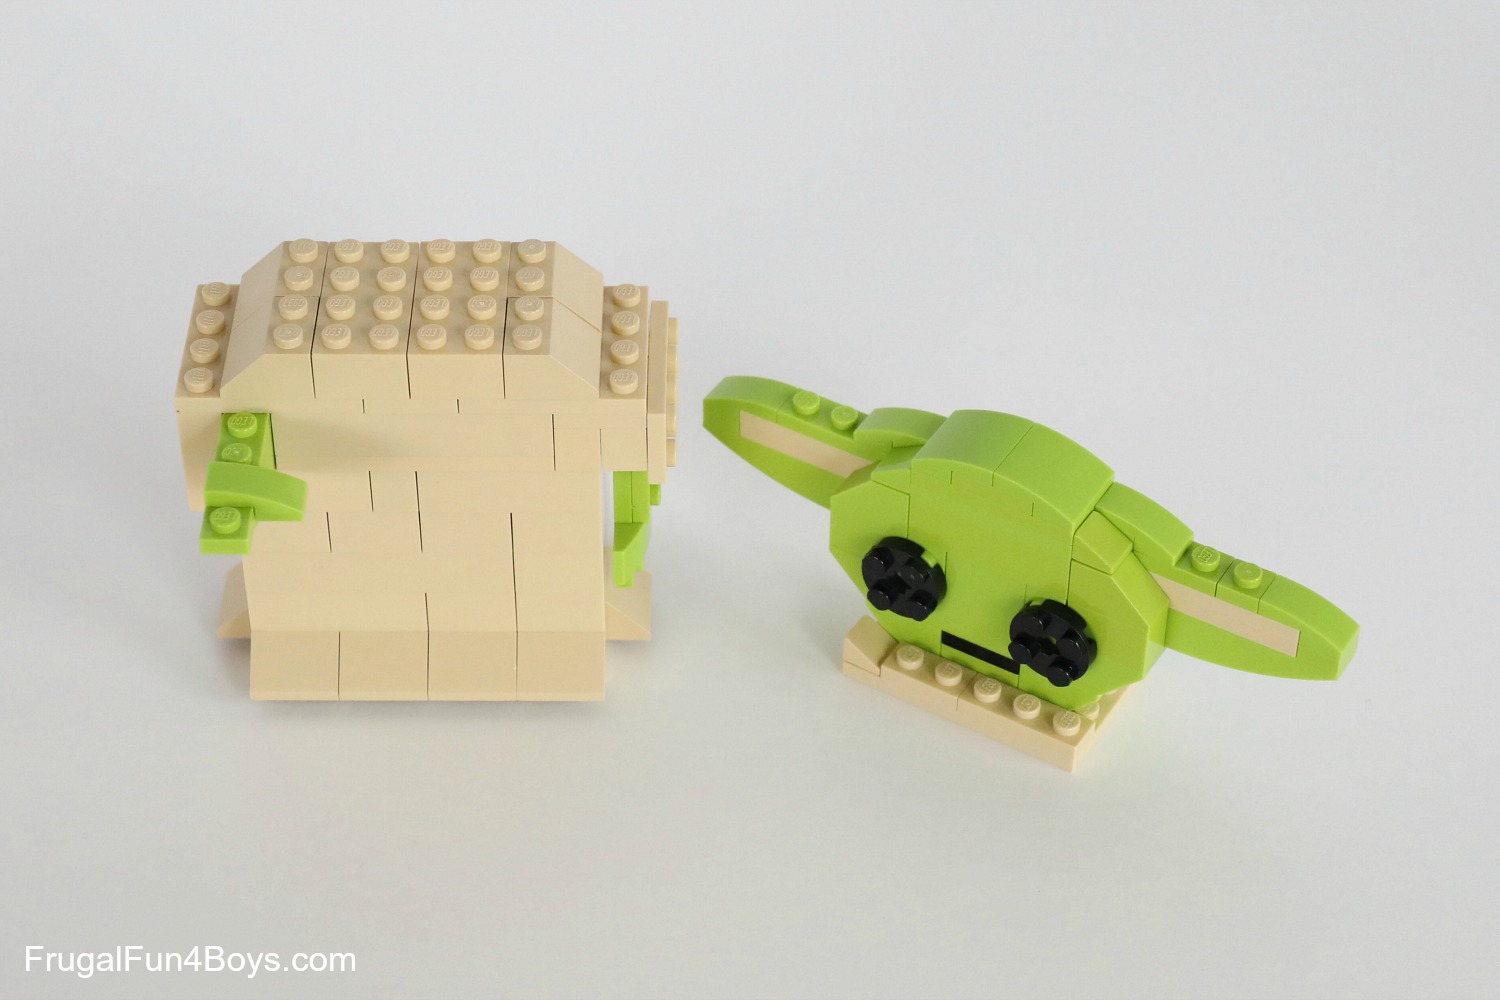
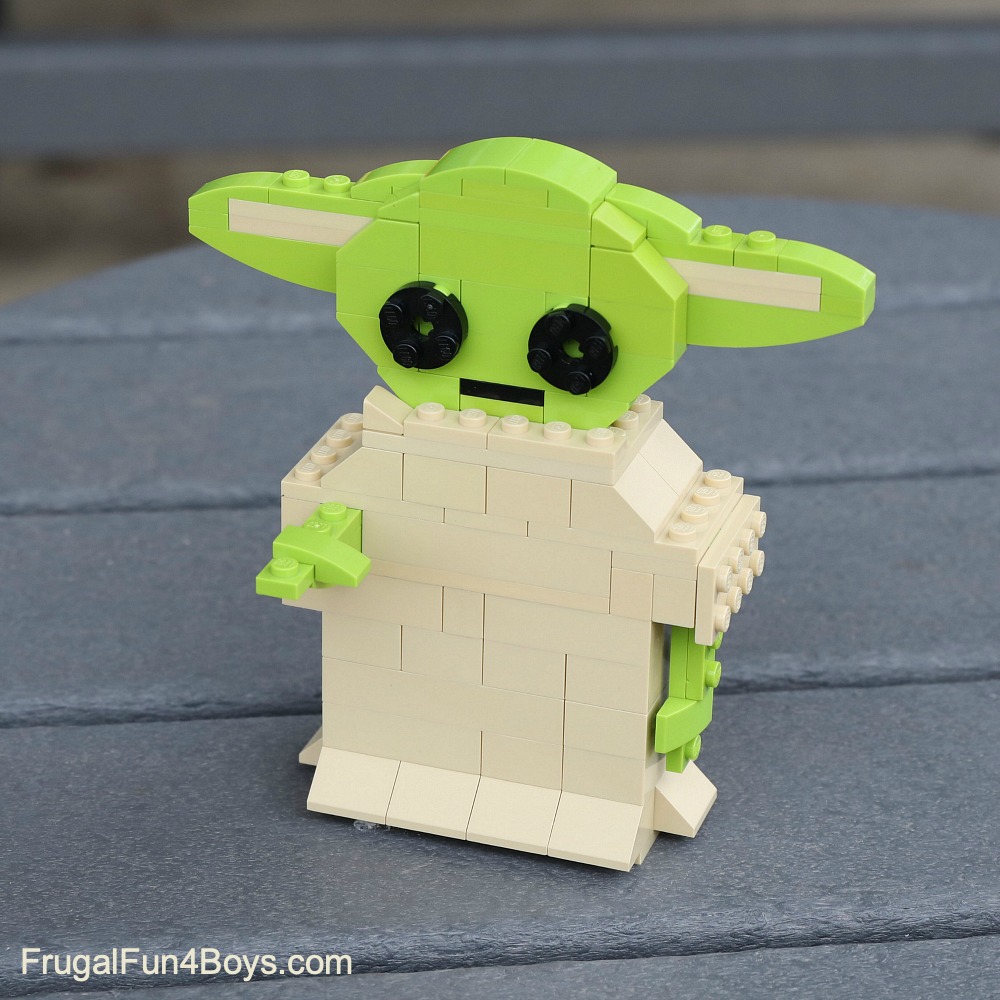
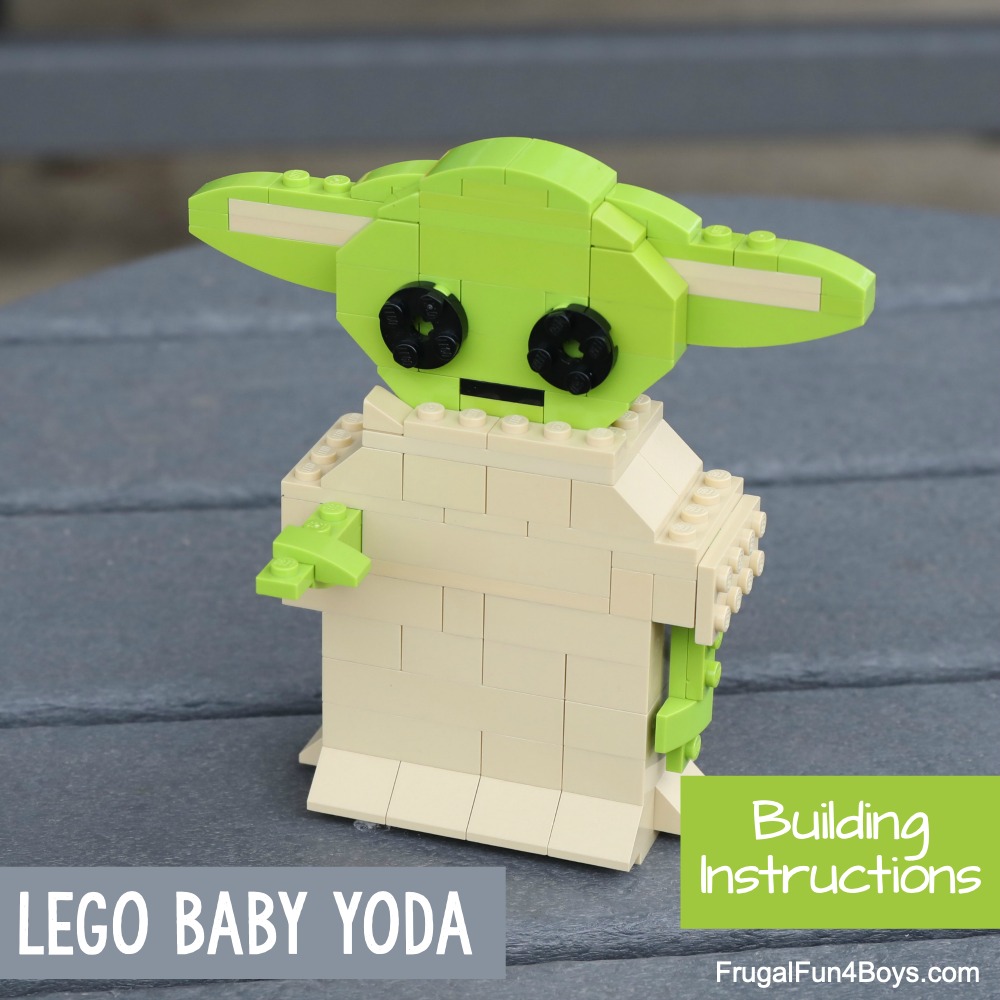
Attach the head to the body, and Baby Yoda is complete! SOOO CUTE!

Display Baby Yoda on a desk, or build him a cradle to ride in! A fun project to work on while you watch episodes of The Mandalorian.
Need a parts list for Baby Yoda? Scroll down to the bottom.
Need more LEGO building ideas? We’ve got so many projects you’ll want to check out!
Build some Spinning LEGO Nerf Targets – SO much fun!
Kids will enjoy these LEGO Superhero Building Cards.
How to build a LEGO C3P0 and R2-D2.
Or your can browse all our LEGO building ideas here!
PARTS LIST:
TAN BRICKS:
13 – 2 x 4 bricks
5 – 2 x 6 bricks
2 – 1 x 4 bricks
1 – 2 x 3 brick
3 – 2 x 2 bricks
1 – 1 x 2 brick
3 – 1 x 1 bricks
2 – 4 x 6 plates
1 – 4 x 8 plate
2 – 4 x 4 plates
2 – 2 x 4 plates
5 – 1 x 4 plates
1 – 1 x 3 plate
5 – 1 x 2 plates
1 – 1 x 1 plate
1 – 1 x 1 slope (30 degree)
1 – 1 x 2 – 2 x 2 bracket
14 – 2 x 2 slopes
LIME GREEN BRICKS:
2 – 2 x 4 bricks
1 – 1 x 4 brick
3 – 1 x 2 bricks
2 – 1 x 1 bricks
2 – 1 x 1 bricks with a stud on the side
2 – 1 x 2 slopes
4 – 2 x 2 inverted slopes
5 – 1 x 4 plates
3 – 1 x 3 plates
3 – 1 x 2 plates
2 – 1 x 1 plates
3 – 2 x 2 plates
1 – 2 x 4 plate
2 – 1 x 1 slopes (30 degree)
6 – 1 x 2 curved slopes
2 – 2 x 2 curved slopes
3 – 1 x 6 inverted curved slopes
BLACK BRICKS
2 – 2 x 2 round plates
1 – 1 x 2 plate
5 Comments
Phyllis White Jan 14, 2020
Great idea! Thank you so much! My grandson will love!
Noah Fulkerson Jan 20, 2020
Cute so cute
logan May 19, 2020
he is soooooo cute!!!!!!!!!!!!!!! i love frugal fun 4 boy and girls
Rachel Dec 31, 2020
This is the best, well put together instructions and part list!! I can't even imagine the time it took to do this. You did all the hard work for us. I so appreciate you.
amelia Jan 6, 2021
i can't Thank You enough for all your ideas and great instructions!!! (i love the printable direction cards for gifts. ) of course my grandsons Love Anything LEGO!!! may your family be Blessed through the new year...!
Post a Comment