
I’m so excited to share this project with you, because this DIY LEGO® sign is so easy to make, and it looks so good! The sign looks like it came from a boutique store, but costs so much less.
If you’re going to have LEGO® bricks in the house, your kids’ building area might as well look cute, right? It’s amazing how much more pleasant cluttery things (like LEGO®) can look with some organization and some cute decor.
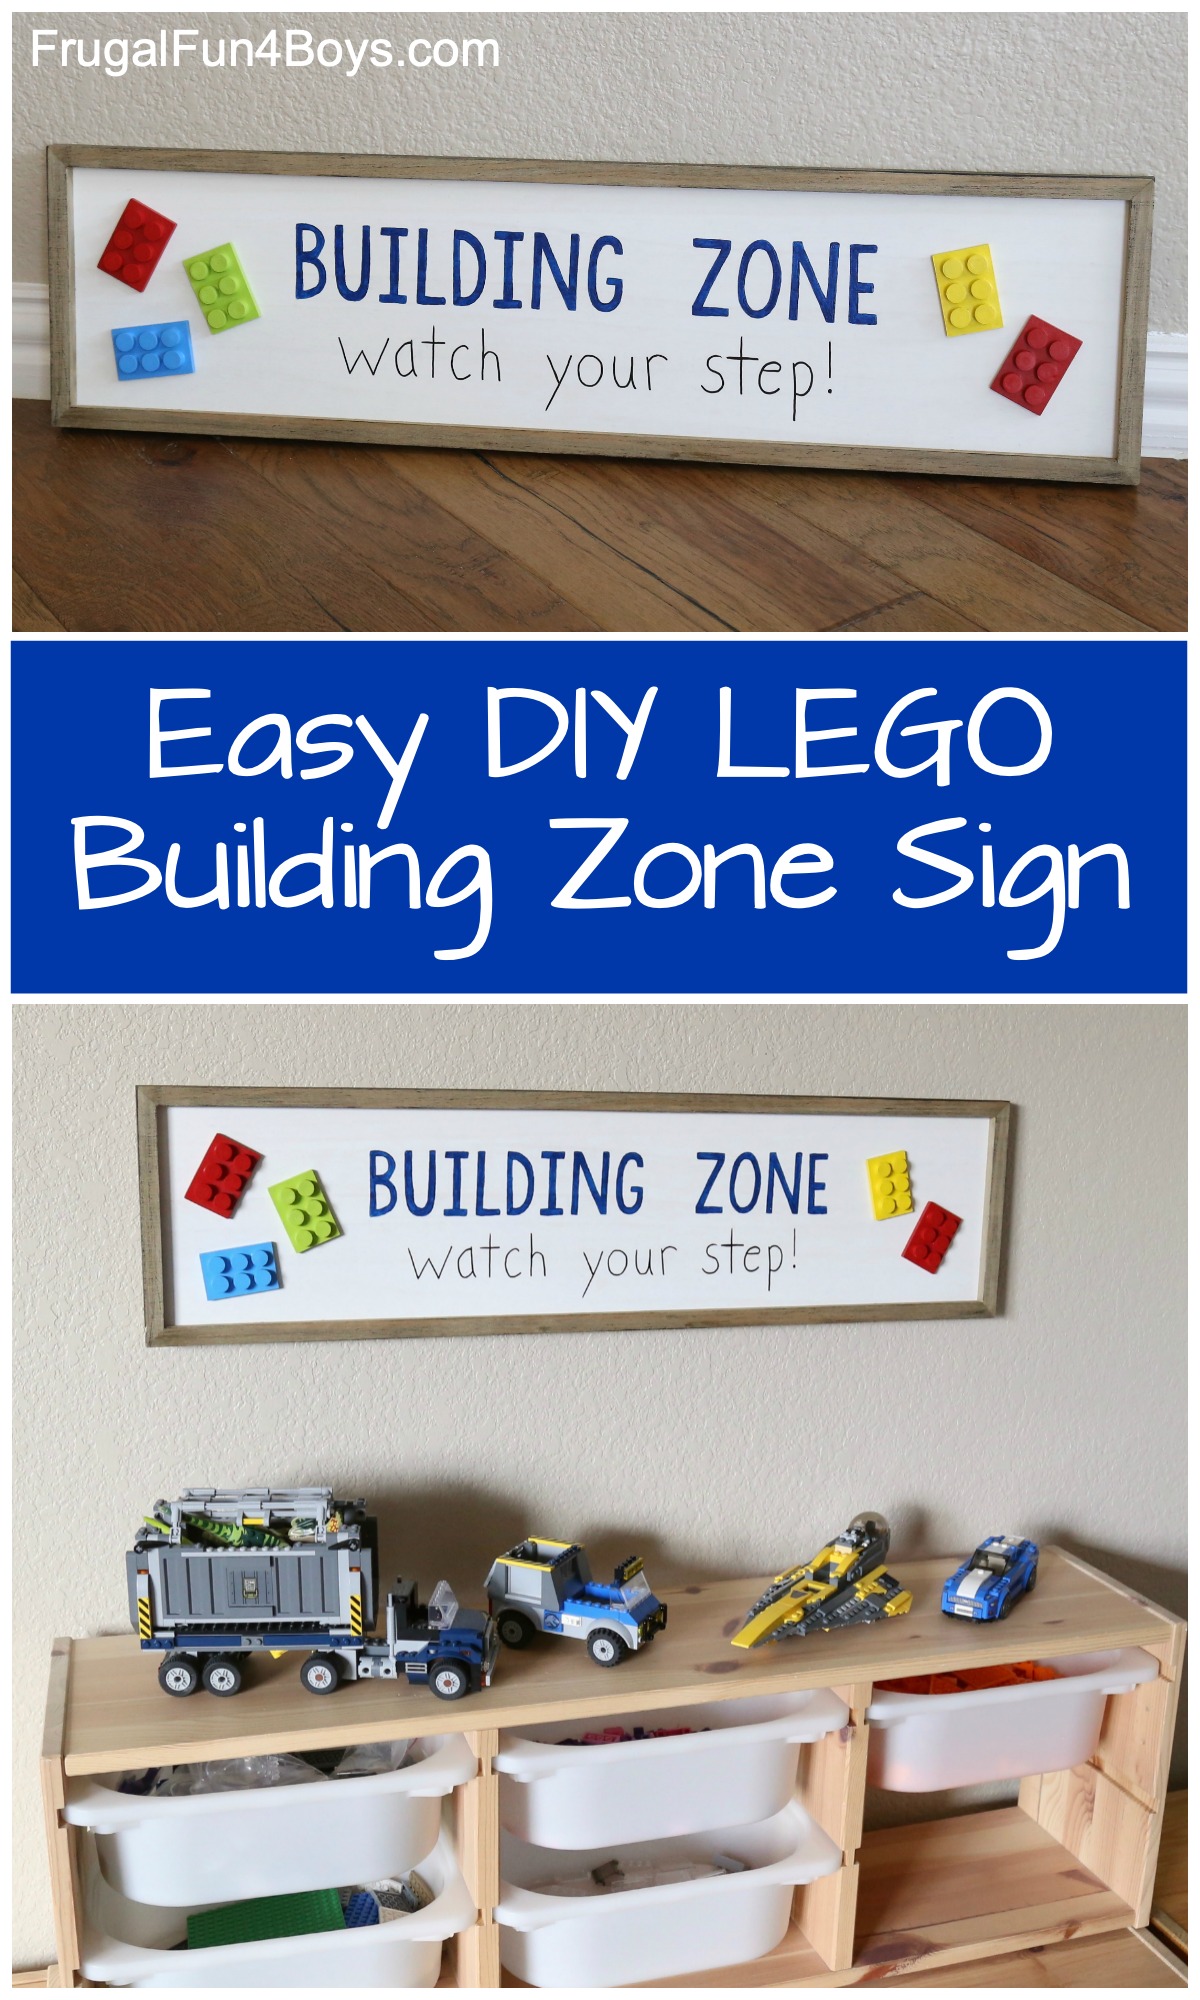
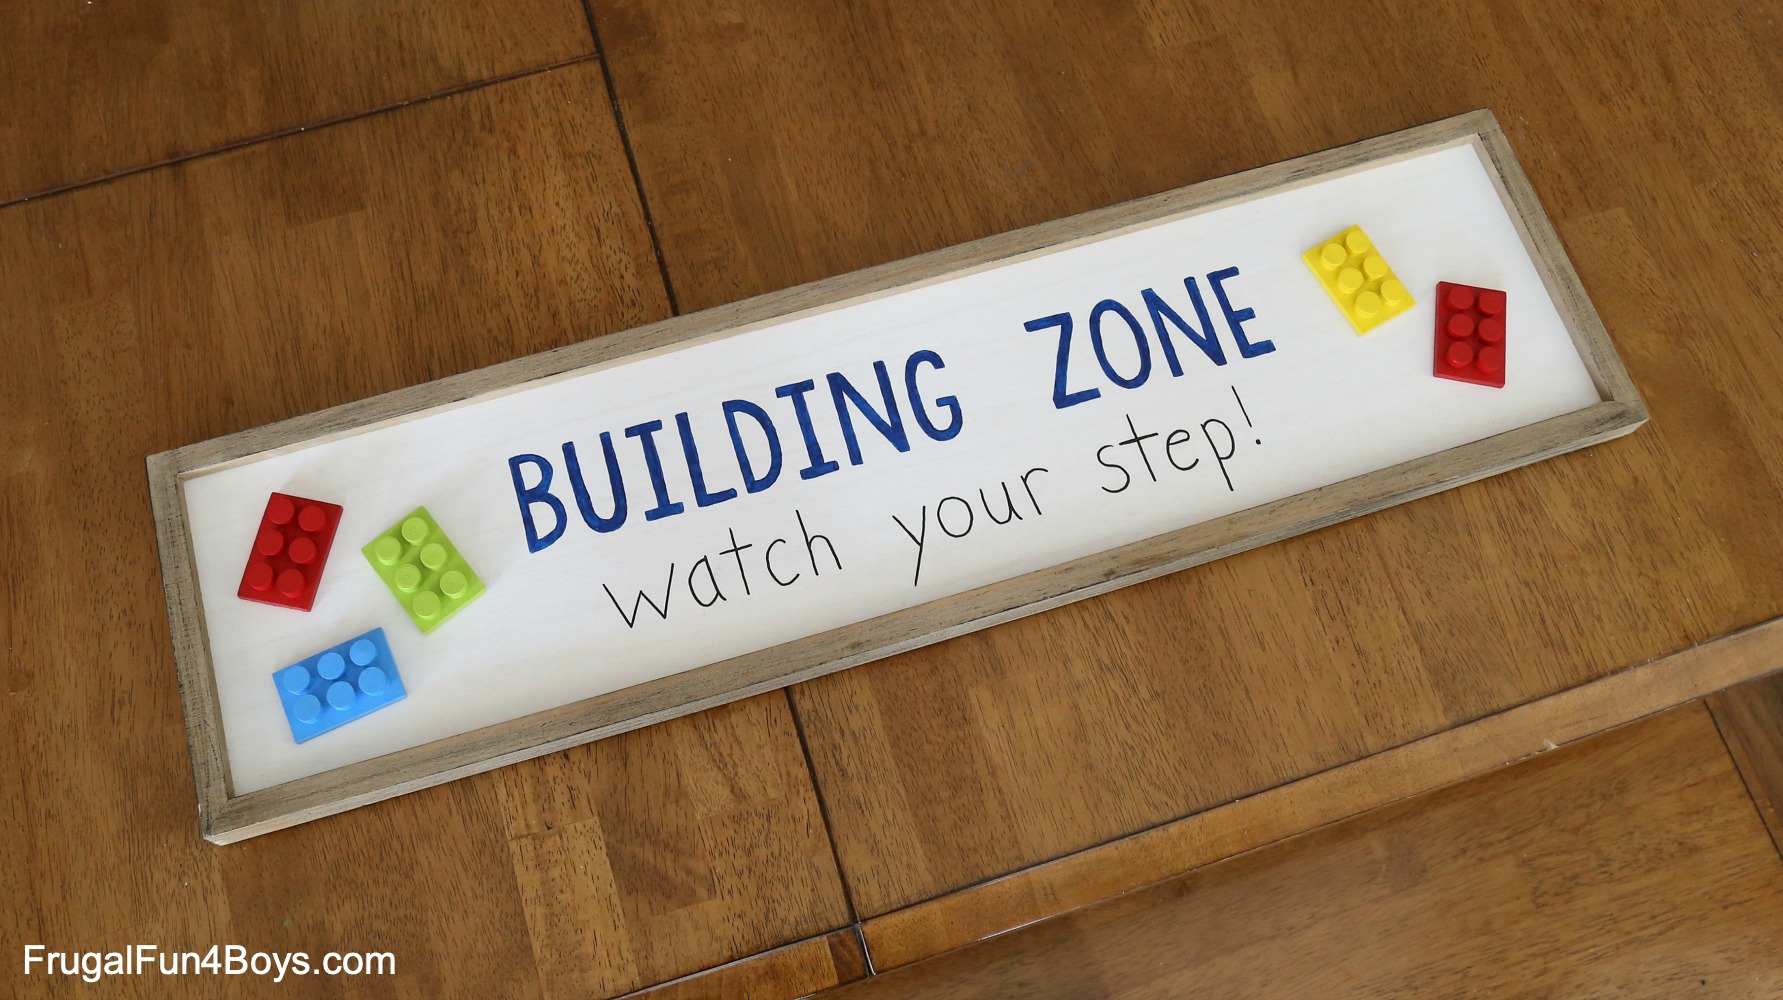
The key to making this sign is to start with a blank wooden sign from the craft store. I purchased mine at Hobby Lobby. It came already painted and prepped for decorating!
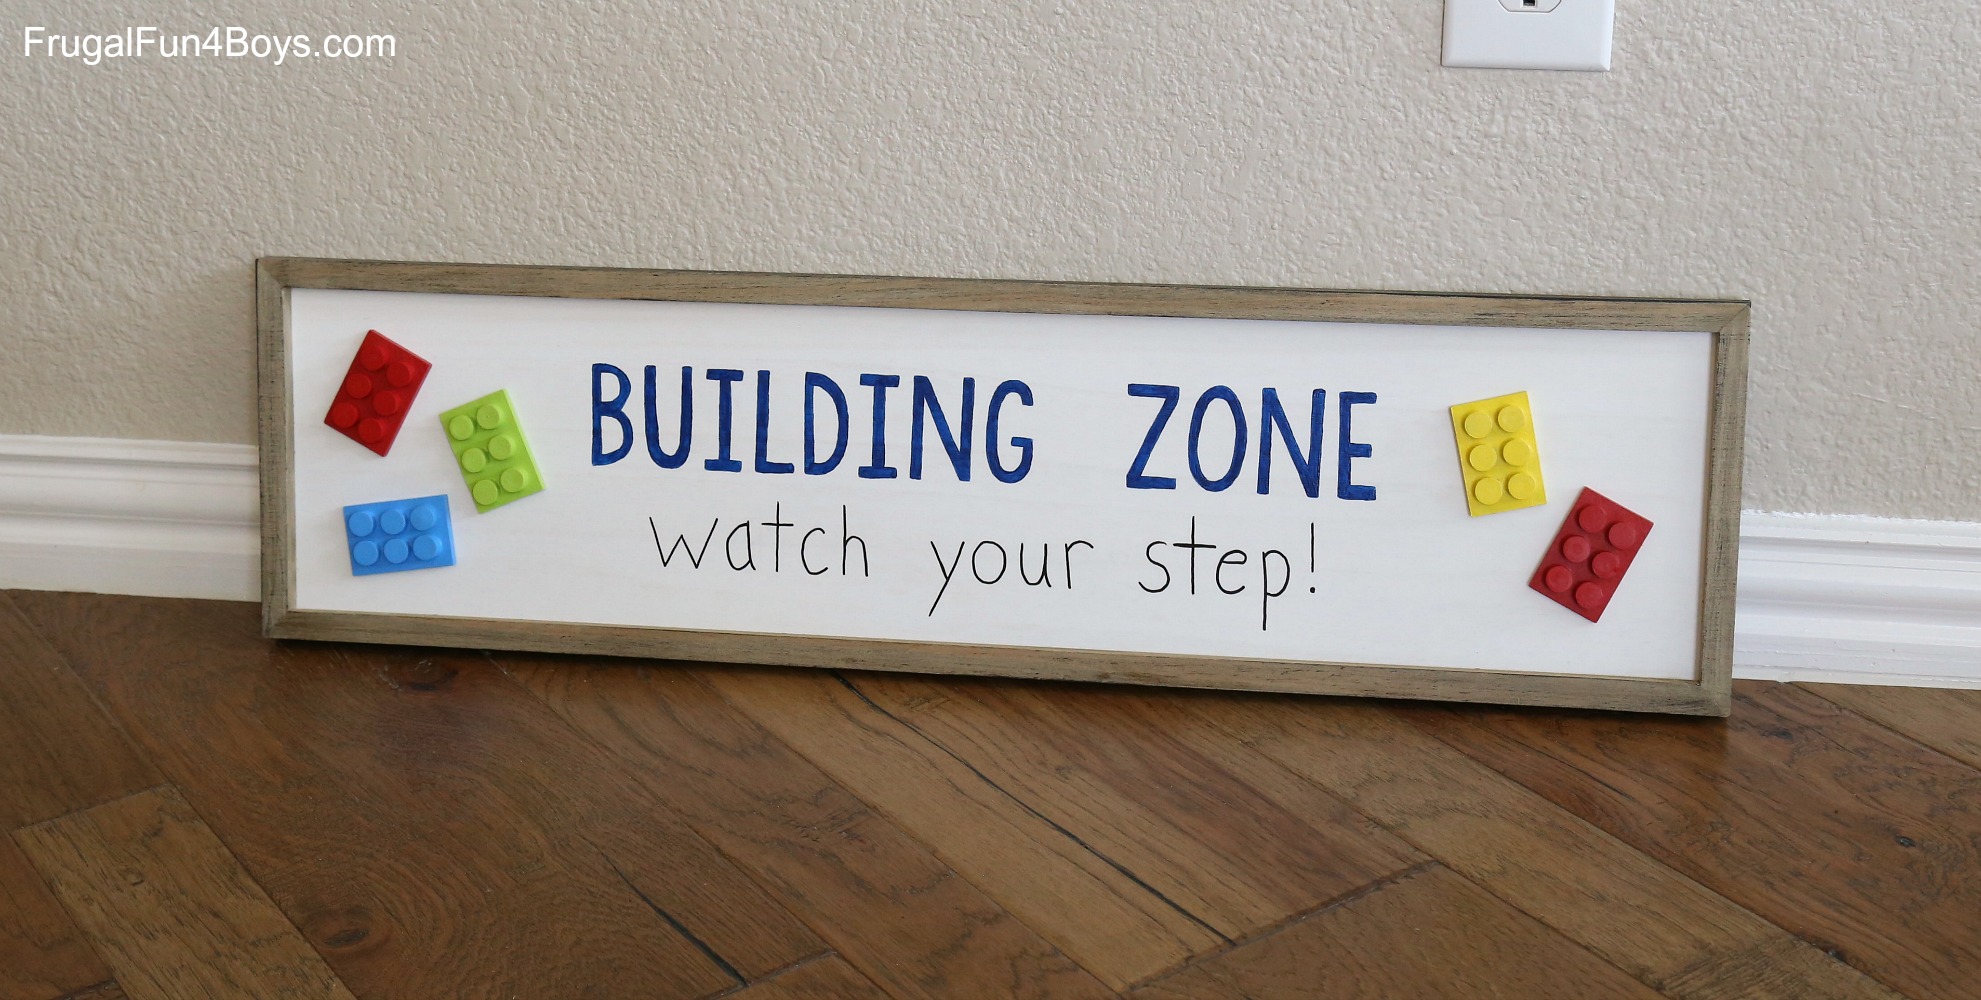
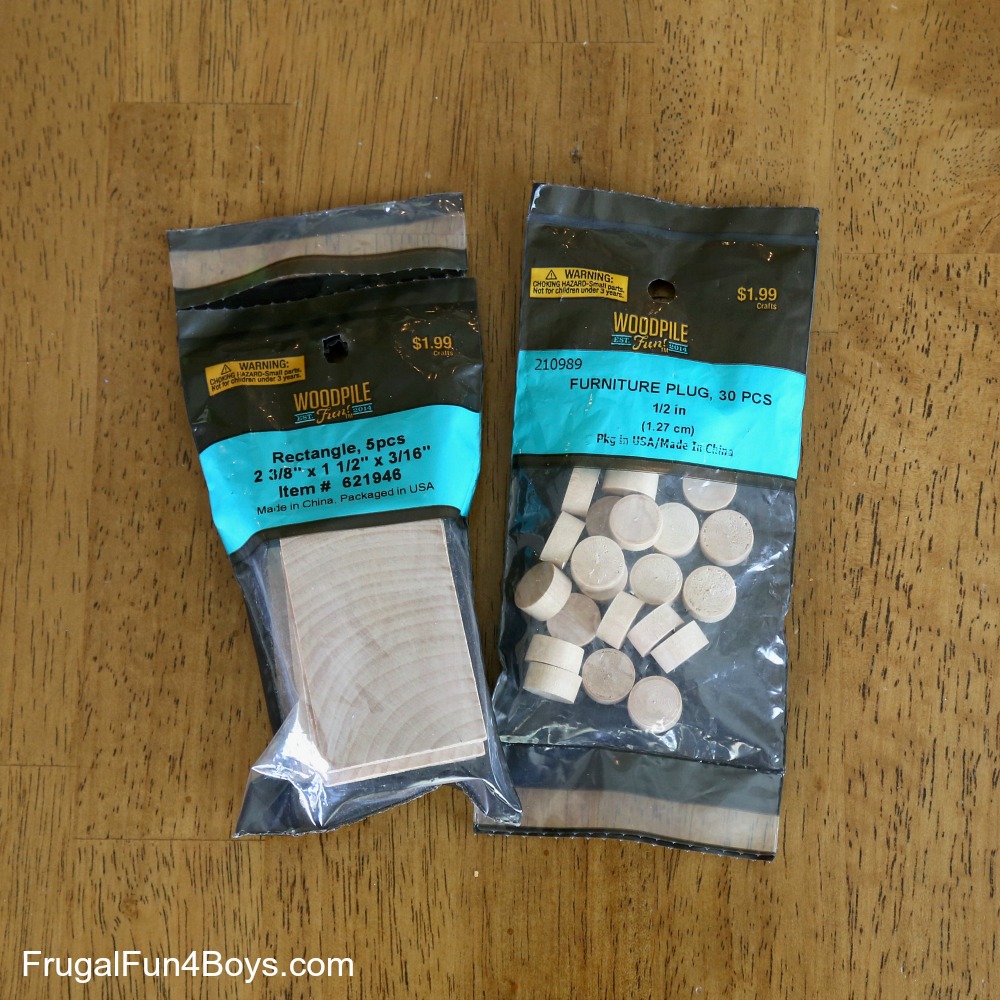
Then, create little wooden bricks out of materials from the wood crafts aisle. I’ll show you what I bought to make these down below. SO CUTE.
Ready to make your own Building Zone sign?
Supplies Needed:
- Blank sign – I bought mine at Hobby Lobby. They had several options! They had another rectangle option that was shorter and wider, but I liked the shape of this one.
- Wood rectangles – 2 3/8 by 1 1/2 inches
- Small wood circles
- Acrylic paint and brushes
- Wood glue
- Card stock for printing the words
- X-Acto knife
- Paint pens
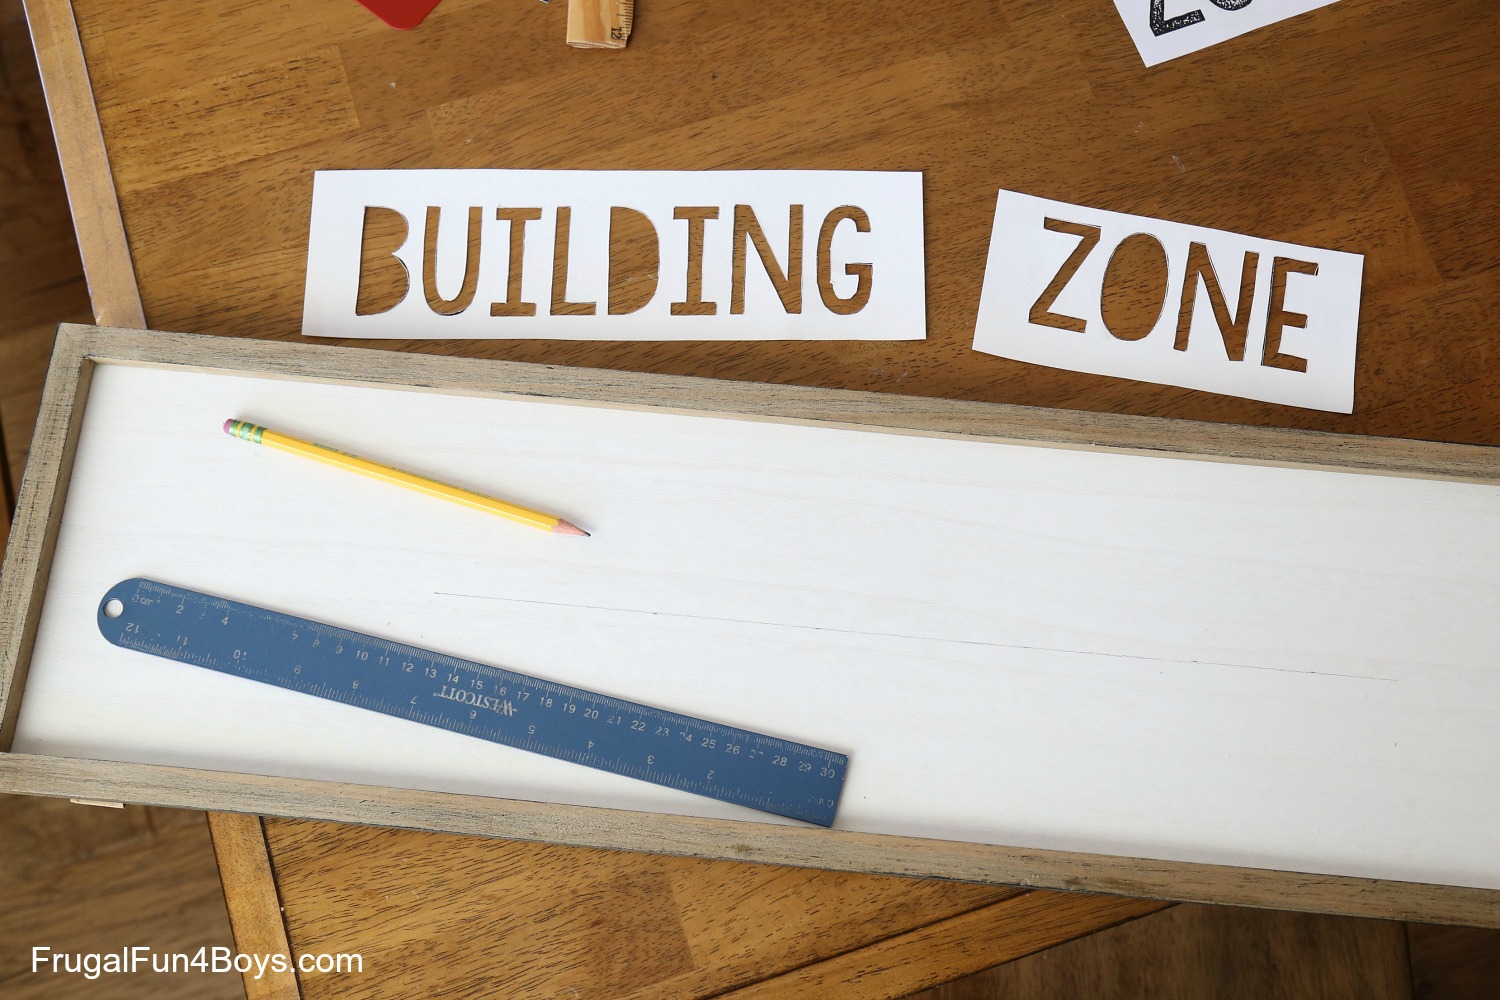
Step 1: Transfer the “Building Zone” letters onto your sign.
Option 1 – Stencils. I originally planned to use stencils. However, the stencils I bought did not fit on the sign. The letters were a good height for the sign, but when I measured out the width needed to spell Building Zone, it would not fit. The other downside to stencils is that you have to plan out the spacing for each letter. Also, unless you are really super careful, paint can bleed through under the stencils.
Option 2 – Print the words on card stock and create a template. I chose to print the words on card stock and then cut out each letter with an X-Acto knife to make my own stencil. The downside was that it took awhile (maybe 40 min.) to cut out the letters. The upside was that I did not have to figure out the spacing, so that saved me time.
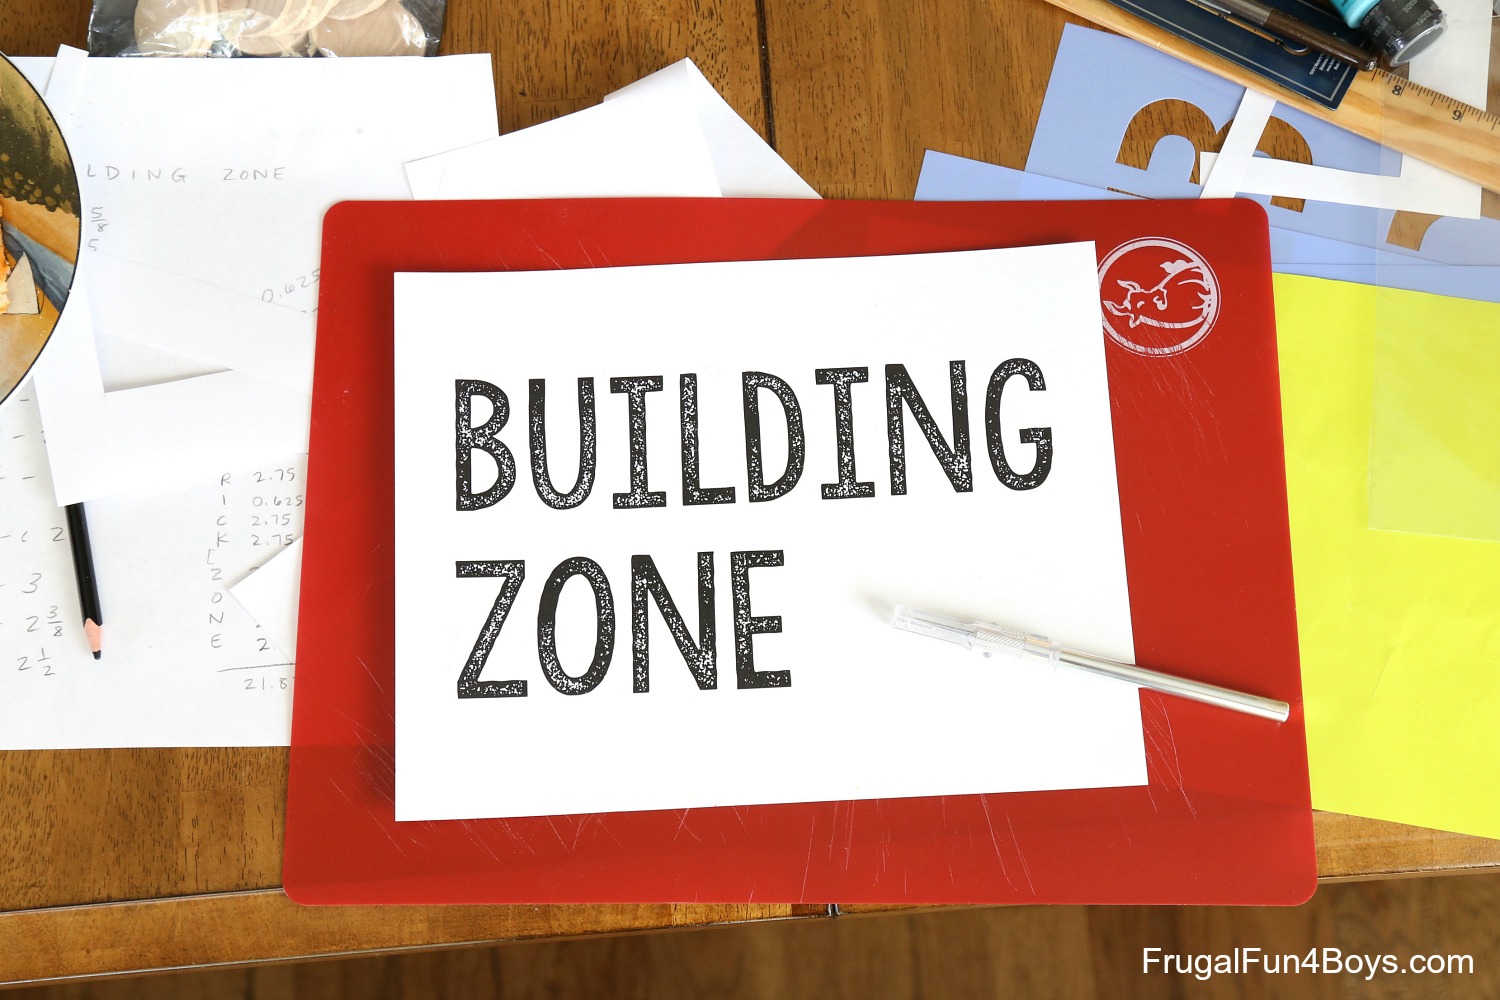
After I cut out the letters, I simply traced the words onto the sign with a pencil. I drew a straight line on the sign with a ruler first, and I measured the overall width of the words and made sure they were centered.
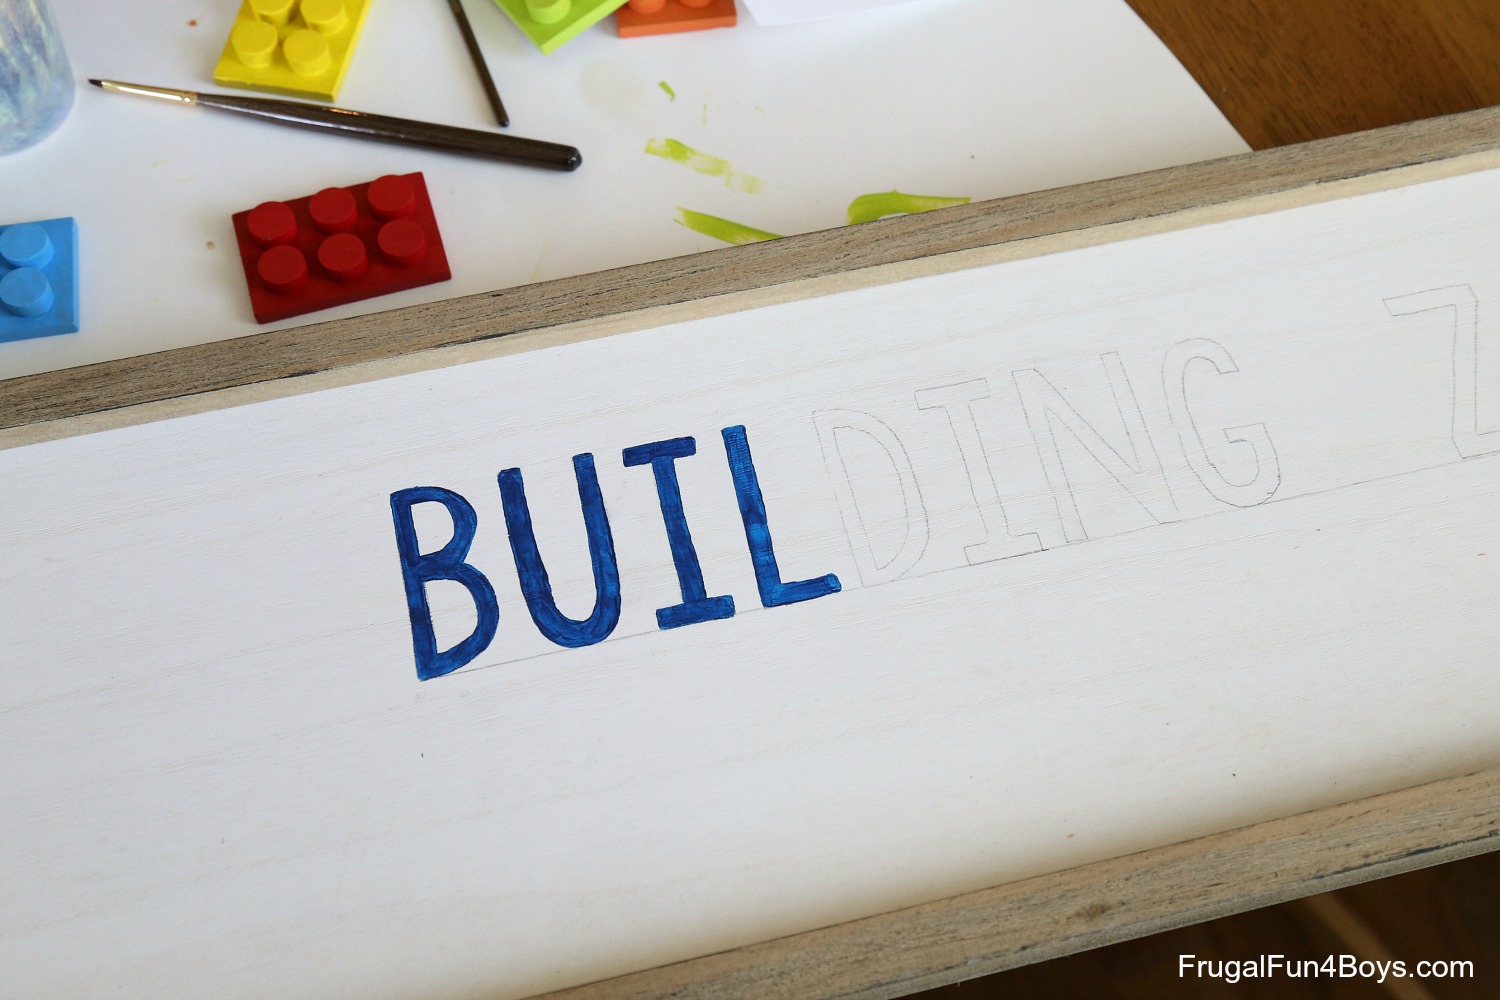
Step 2: Paint the Letters. I used acrylic paint and a brush to fill in the letters. Shortly after this, I purchased Sharpie paint pens in several colors to use for our Doodle Rocks. If I had it to do over, I’d use a paint pen for the letters!
Step 3: Write “watch your step!” with a paint pen.
I highly recommend writing it in pencil first!

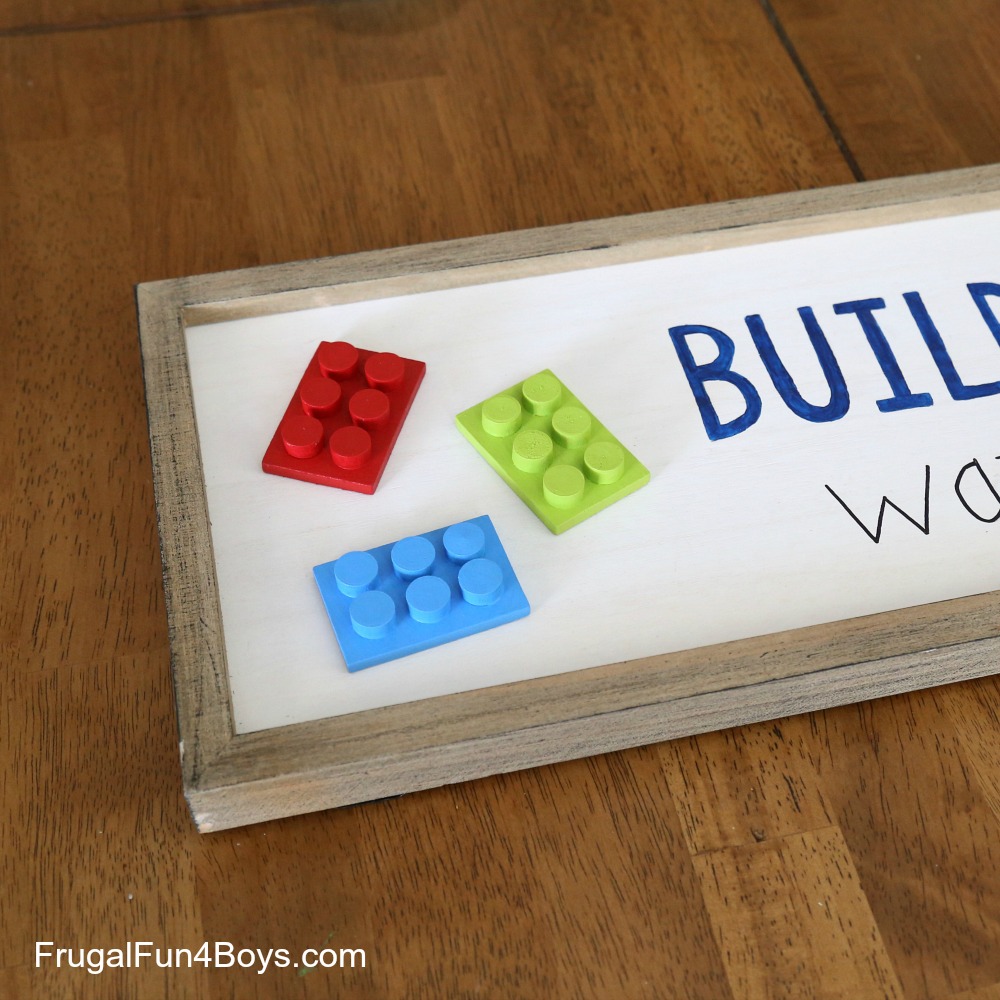
Step 4: Make little adorable wood LEGO bricks.
I found these wood rectangles and wood circles (called “furniture plugs”) in the wood crafts aisle at Hobby Lobby.
Glue 6 little circles onto each rectangle. Use a tiny bit of wood glue for each circle. After the glue is dry, paint the bricks with fun colors of acrylic paint.
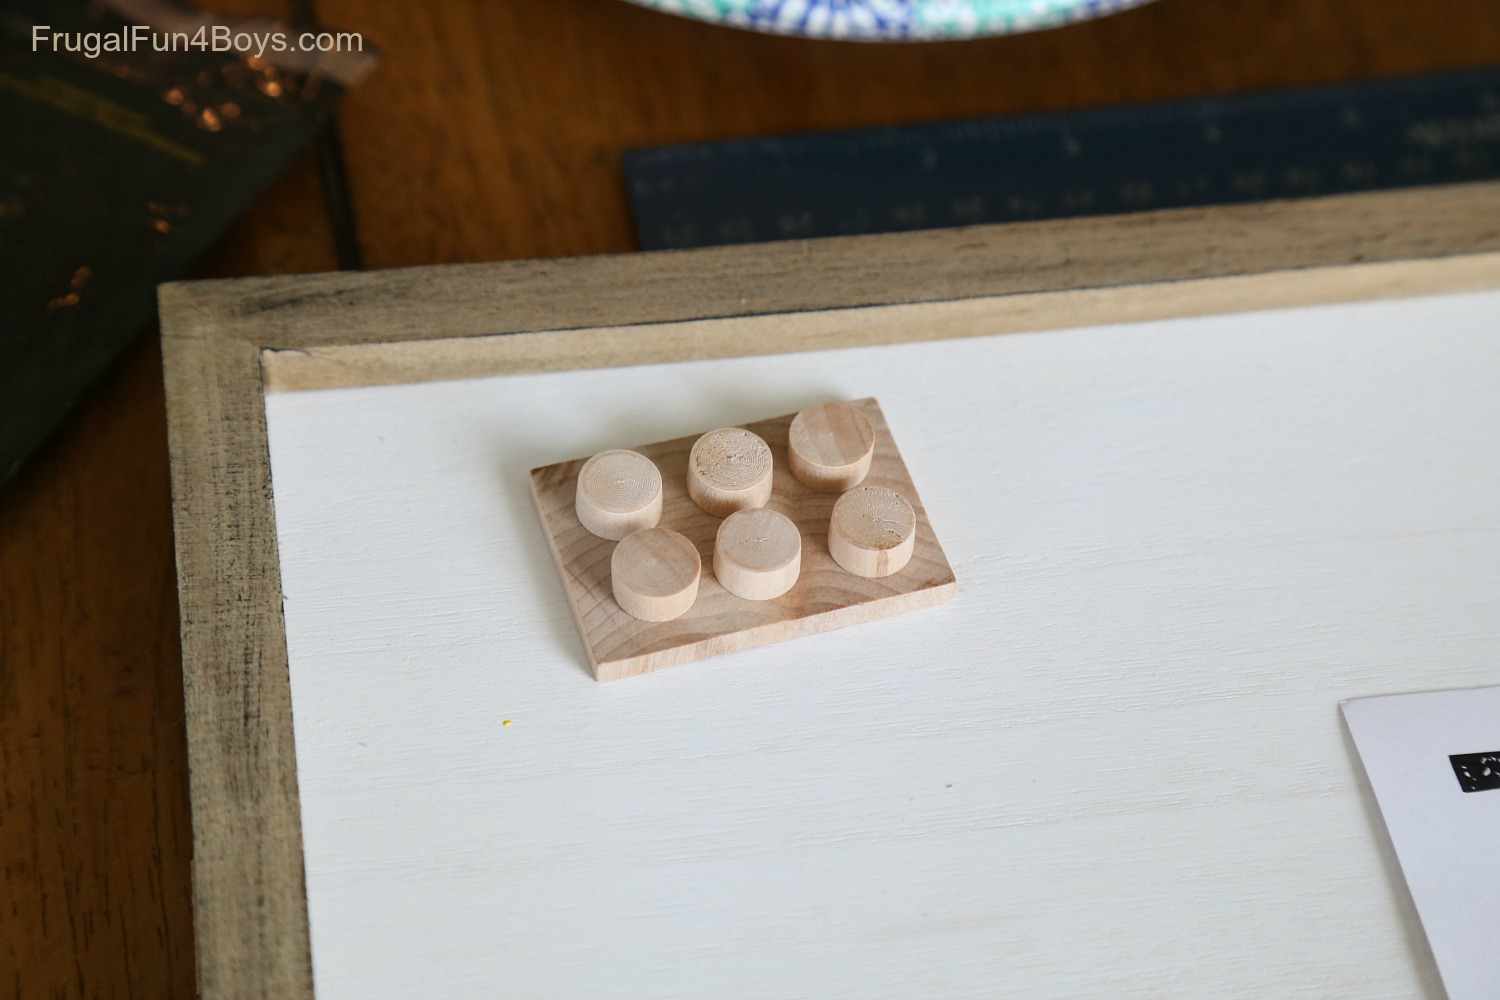
Then glue the completed wood LEGO bricks to the sign with wood glue.
Find somewhere cute to hang your finished sign! Place it in a bedroom, in the playroom, etc.
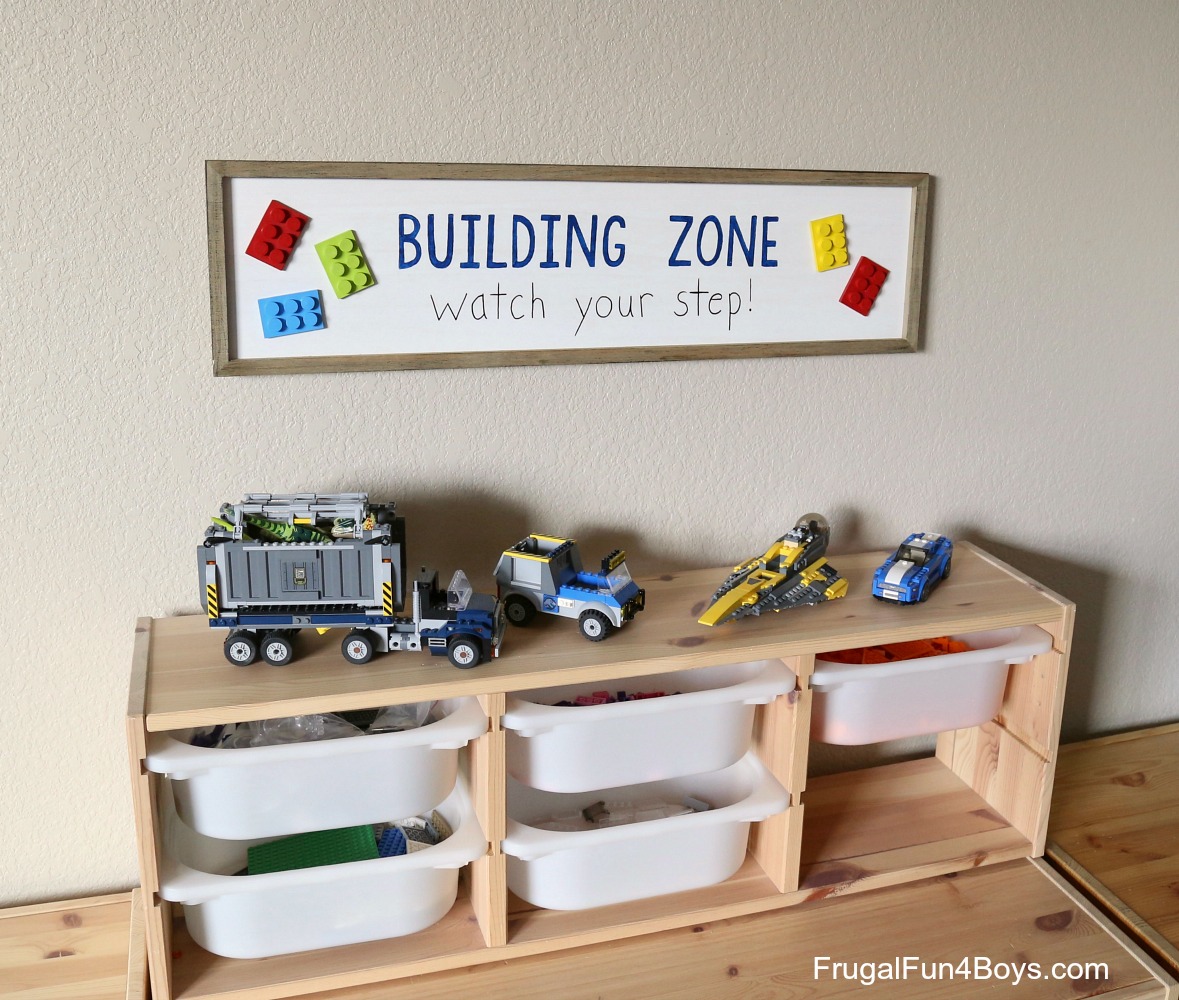
Half of our game room is our LEGO® building zone. We love the IKEA Trofast storage – it works so well for LEGO®! I love the fact that the bins are open on the top, so when we find a few pieces left out on the floor (because they NEVER get picked up all the way!) we can just toss them in a bin.
You can read all about our organization system here – LEGO® Storage and Organization.
One new addition to our LEGO® area in this house is the large white shelf. It’s also from IKEA, and I use it to store bricks that I have purchased for our LEGO books. The shelves store book projects and blog projects, and Owen has a shelf for some of his sets.
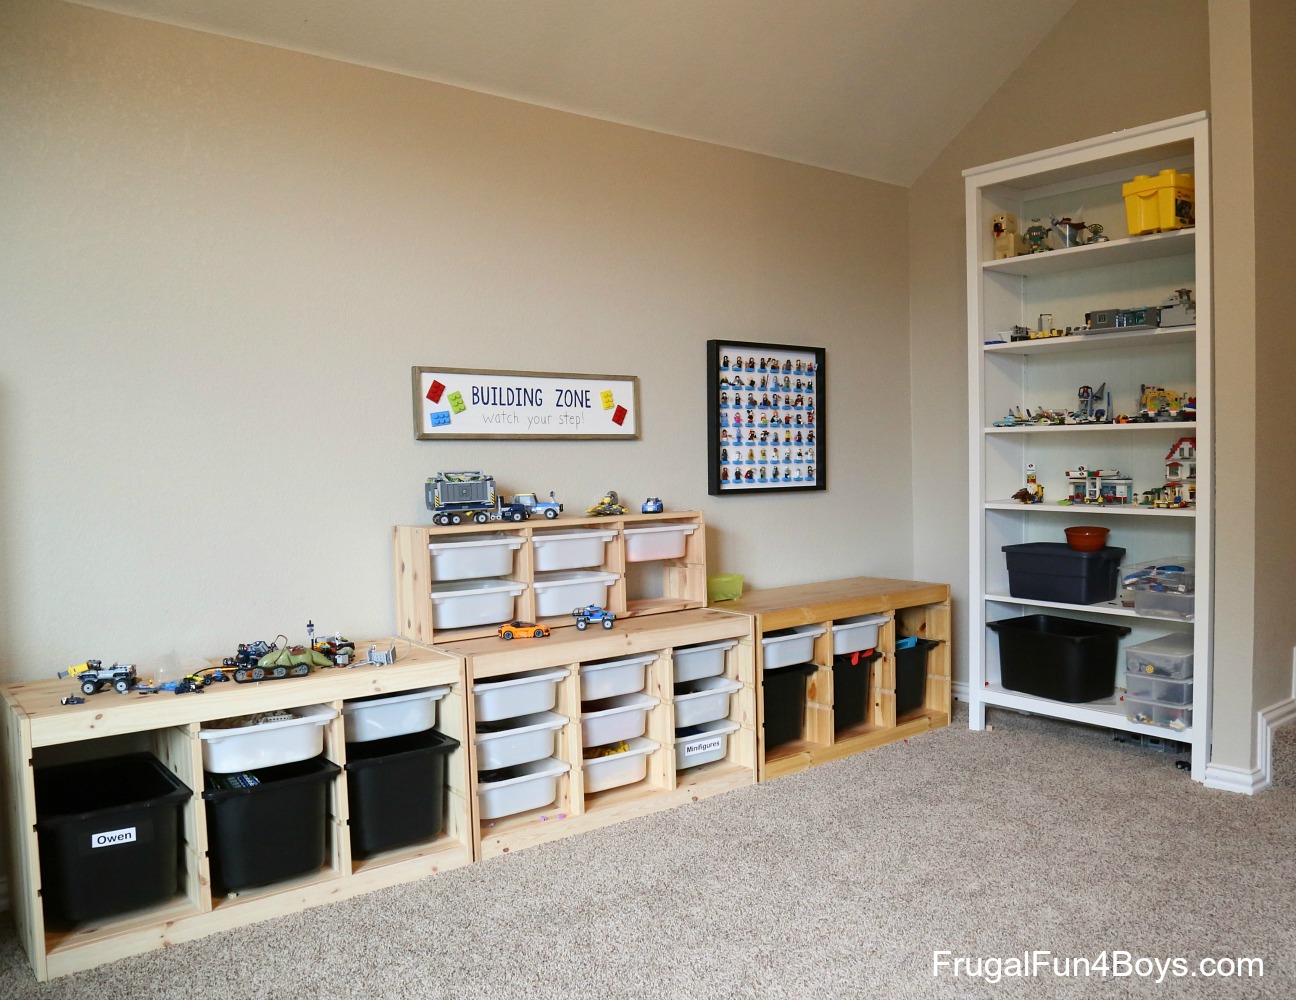
On the bottom shelf, you can see three IKEA Glis boxes. I have one for minifigures (mine, ha ha) and two for Technic elements. The boys also have their own Glis boxes for organizing minifigures and accessories.
You can also see one of our LEGO® Minifigure Display frames. These are awesome.
Have fun crafting LEGO Decor!

0 Comments
Post a Comment