
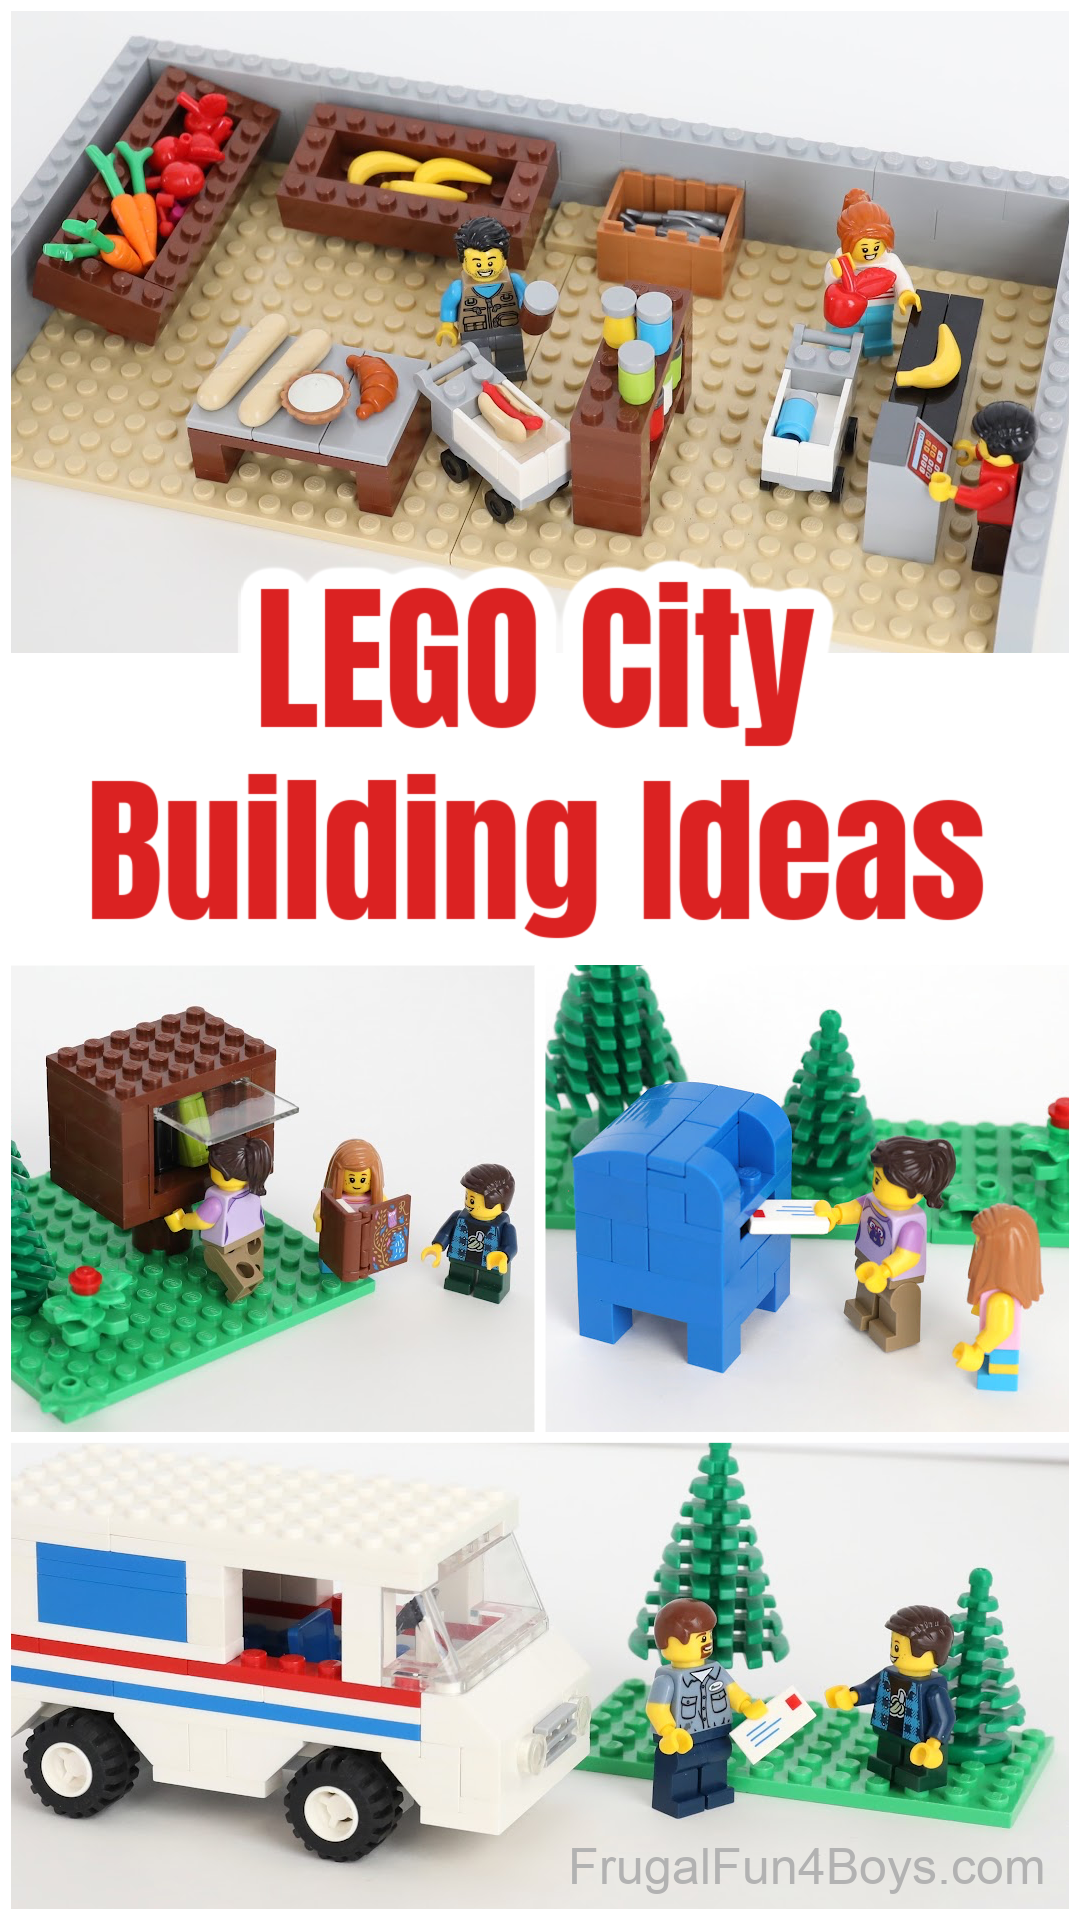
Here are some cool LEGO builds that you can add to your city or town! You don’t have to have a large LEGO city in order to use these ideas, though. They’re the perfect addition to a city set or two, or you can play with them on their own.
The inspiration for this collection of ideas started back a few months ago when we celebrated my 10 year old’s birthday. Because of sickness and winter weather, we weren’t able to plan a fun outing on his birthday. I suggested we all work together to build a LEGO city, and we ended up having so much fun! I designed this grocery store and shopping cart for our city, and then we came up with more ideas from there.
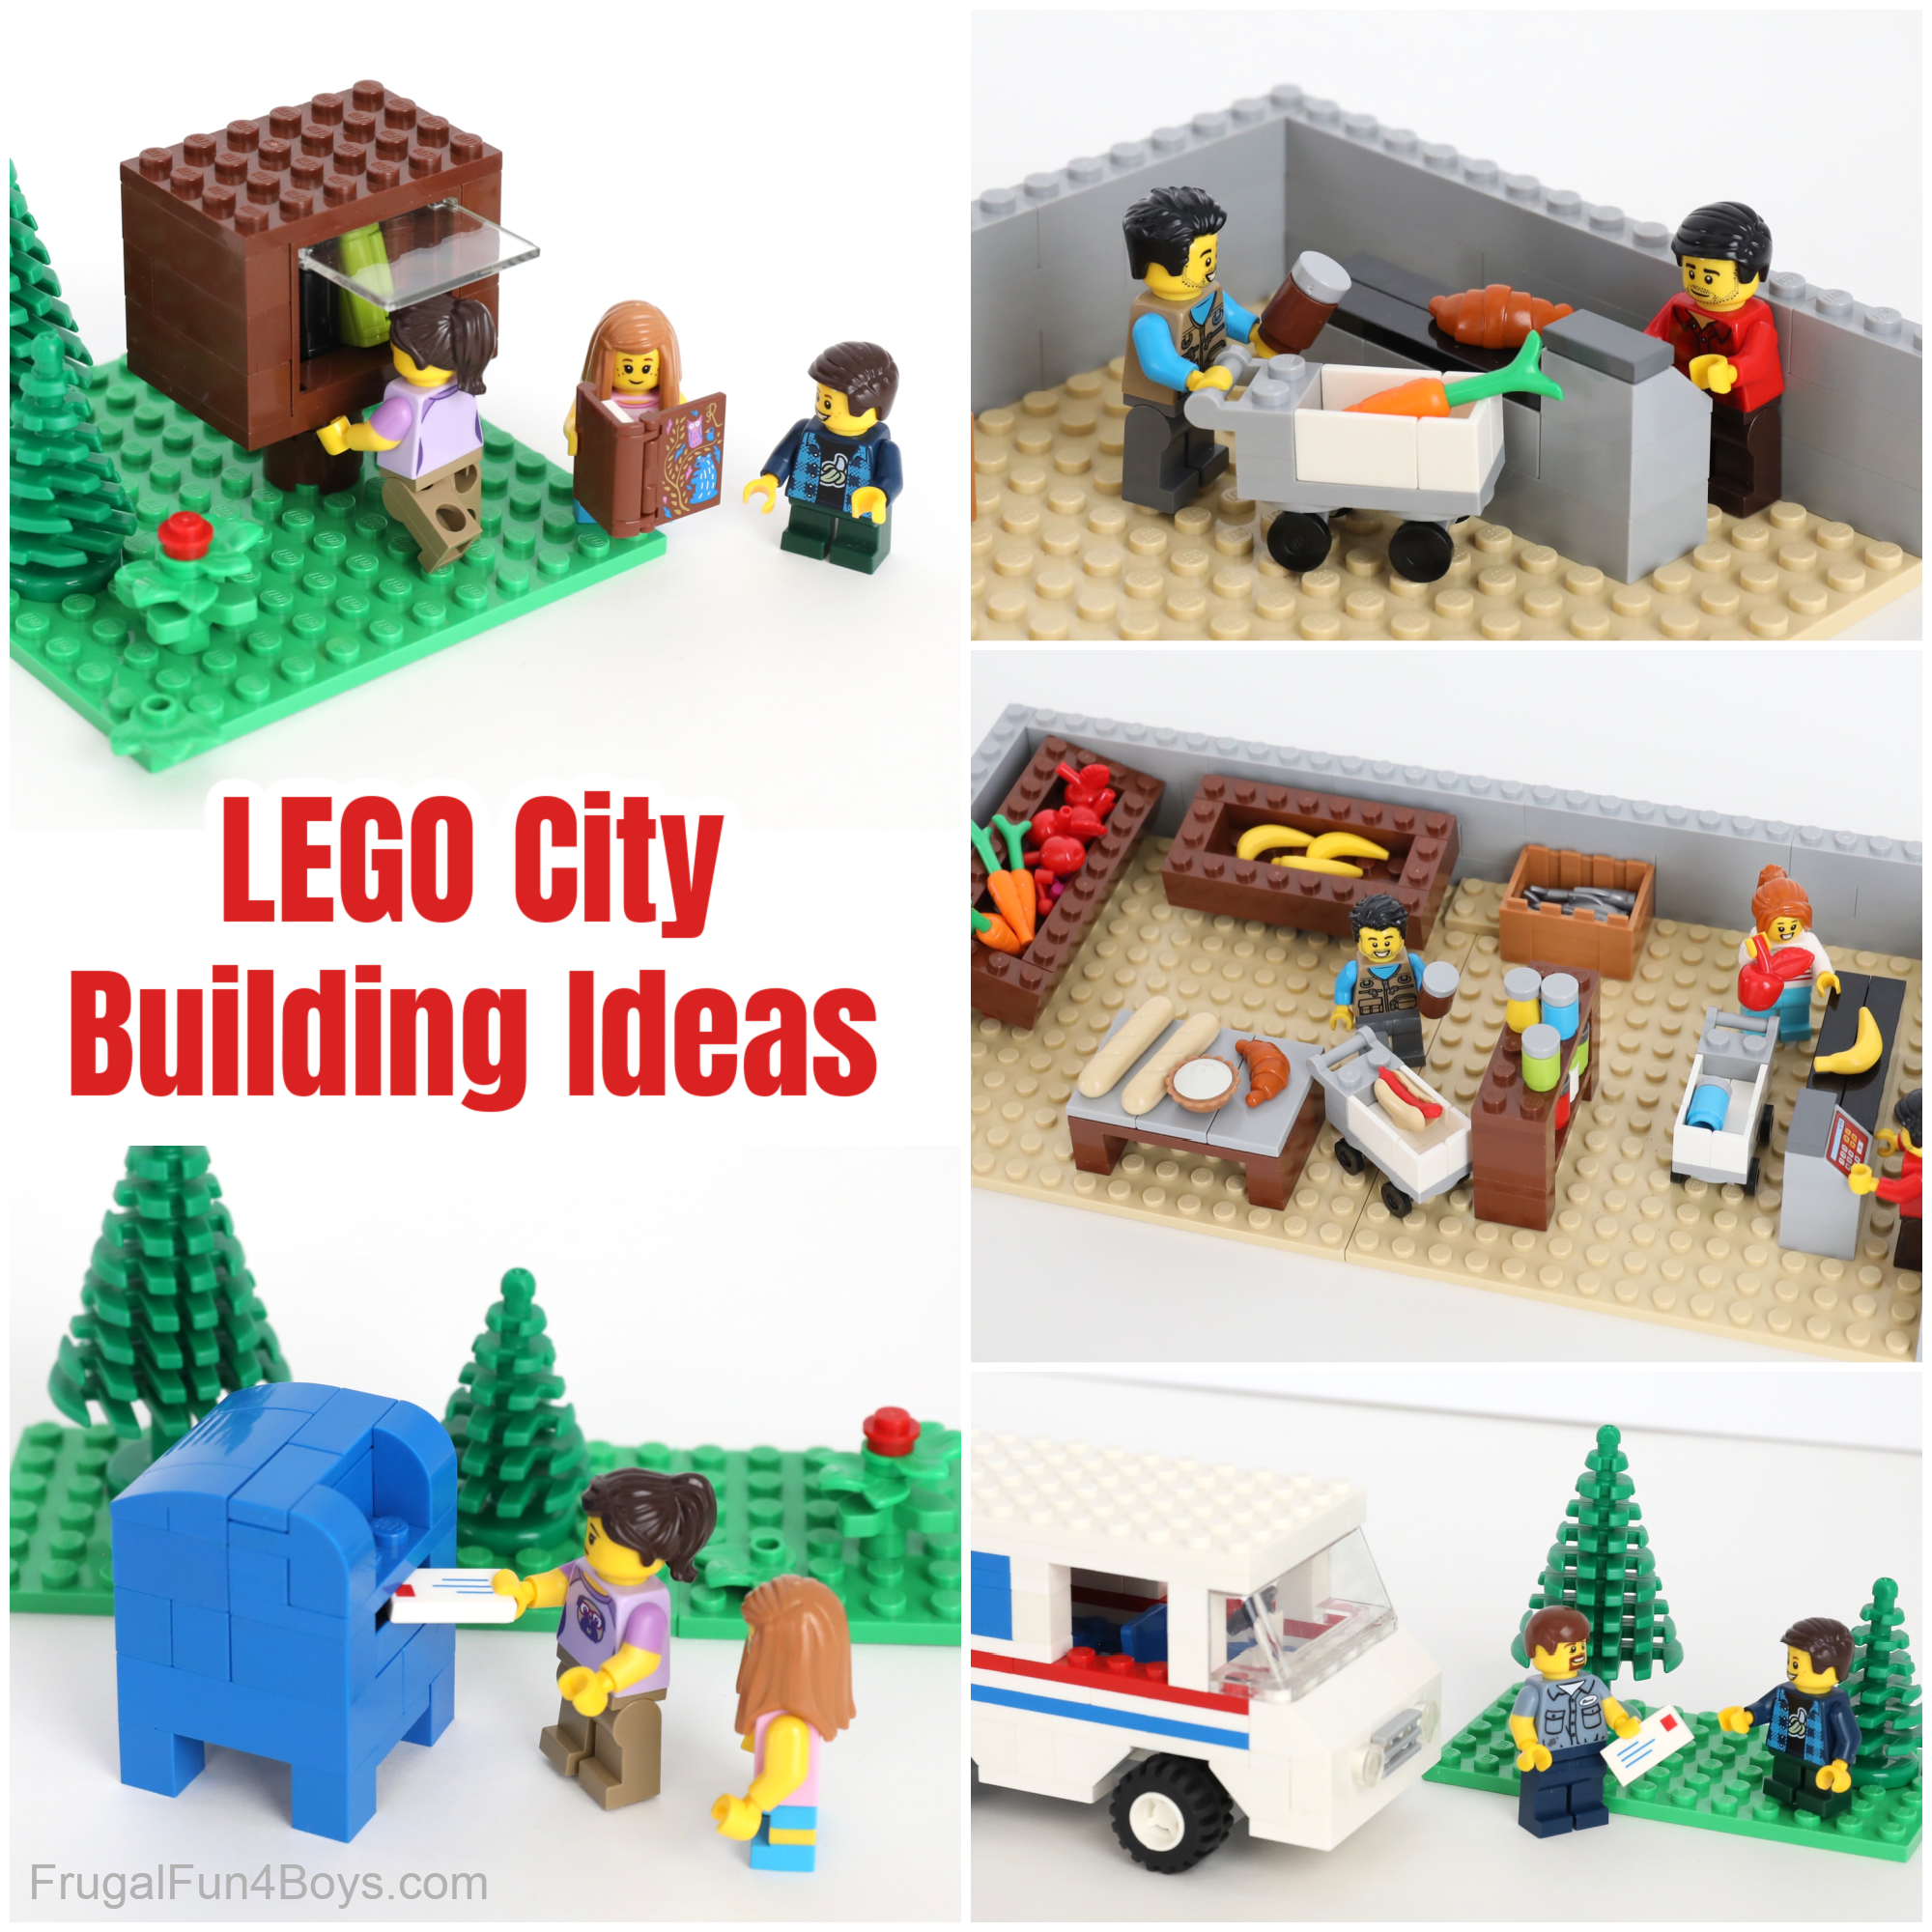
In this post we’ll show you how to build:
- A grocery store and shopping cart
- A free little library
- A mail truck and mailbox
Let me know if you enjoy these ideas because we can certainly add more!
Throughout the instructions, I’ll link to some of the key bricks on Brick Link. We love Brick Link as a way to order individual LEGO pieces. You can also order individual bricks from Lego.com.
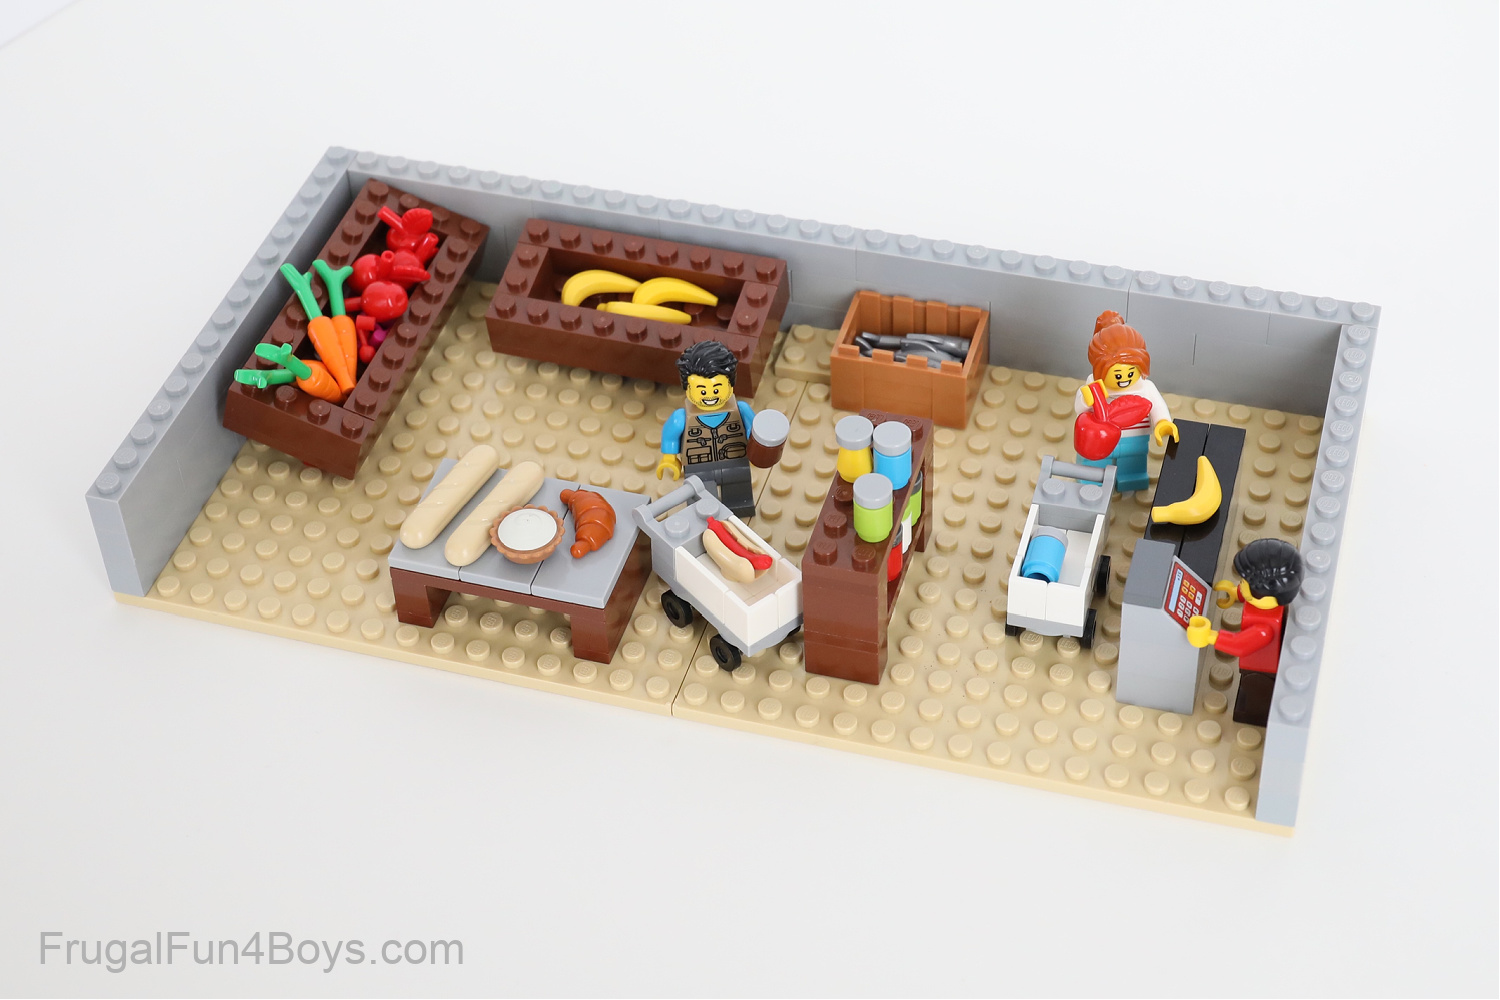
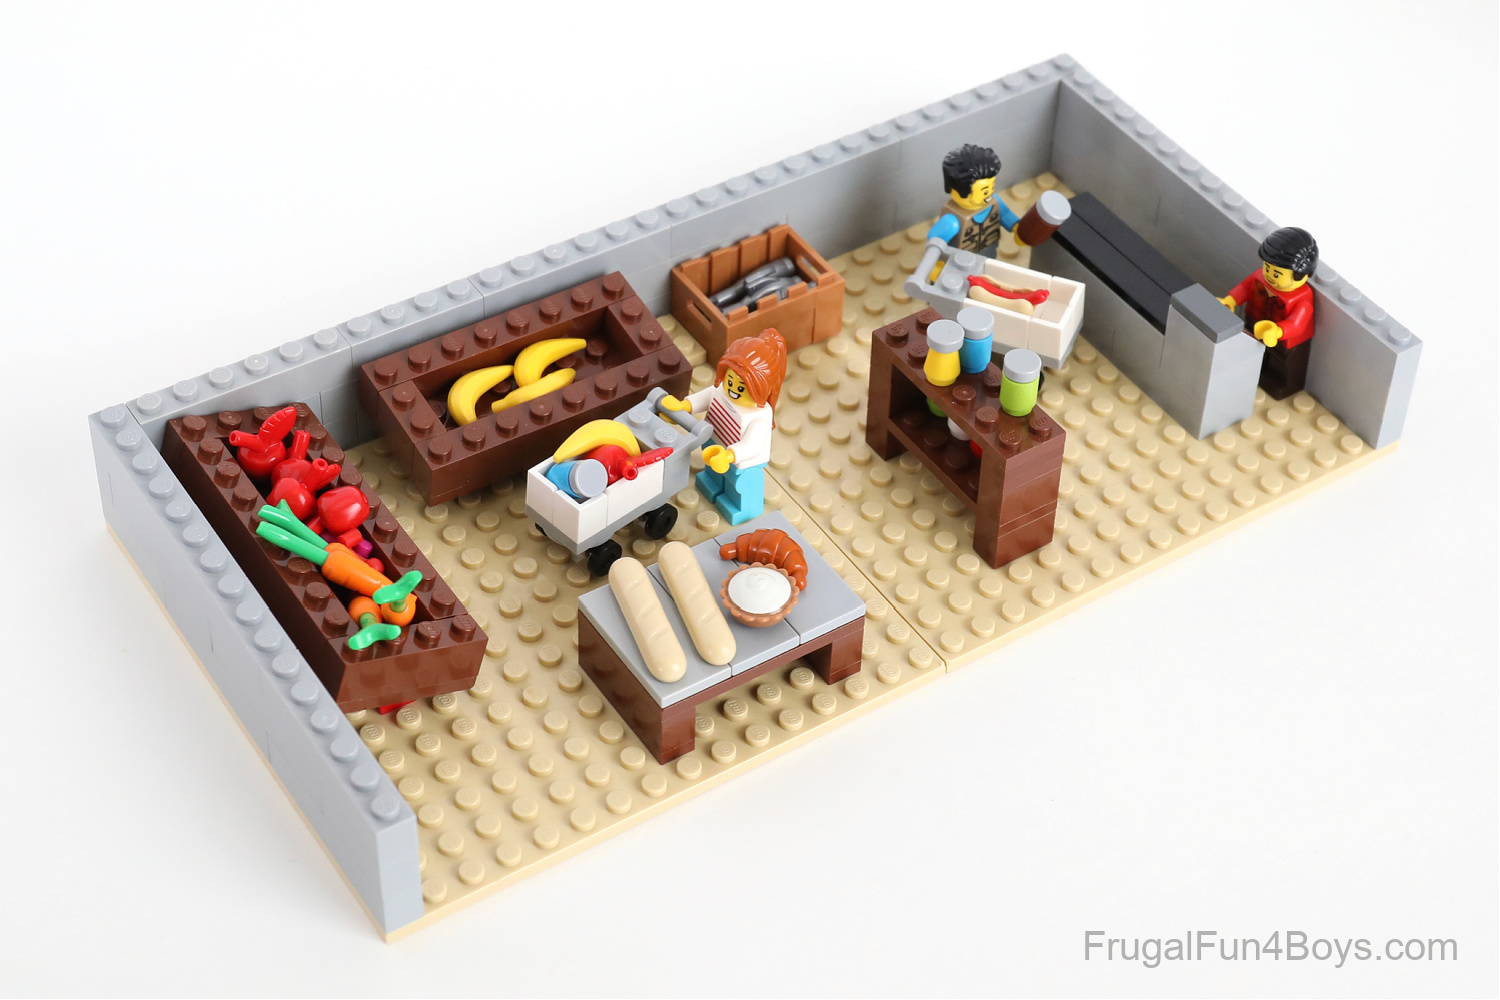
GROCERY STORE
My 7 year old has been playing with this grocery store ever since I built it! Kids can customize this setup with whatever bricks they have. There are a lot of sets that come with various food items, so hopefully they’ll have something to put in the store.
The store is built on two 16 x 16 plates. I chose not to make the walls very high so that everything inside is easy to play with.
It takes just a few pieces to make a really cute shopping cart!
Here’s how I made the produce shelves.
One is made with a 4 x 10 brown plate, and the other is a 4 x 8 brown plate. Add a row of bricks around the perimeter. Then find two 1 x 2 hinge bricks with a 2 x 2 hinge plate for each shelf.

Attach the hinge plates to the bottom of the produce shelf.
Now you can attach the hinge bricks to the floor of the grocery store, and tilt the produce shelves to display the food.

Fill the bins with LEGO apples, carrots, bananas, cherries, etc.

Build a shelf for canned goods. I used 2 x 6 brown plates. In between the shelves, I have a 1 x 2 brick and two 1 x 2 plates on each side. Build cans and/or bottles out of 1 x 1 round bricks with a 1 x 1 round tile on top.

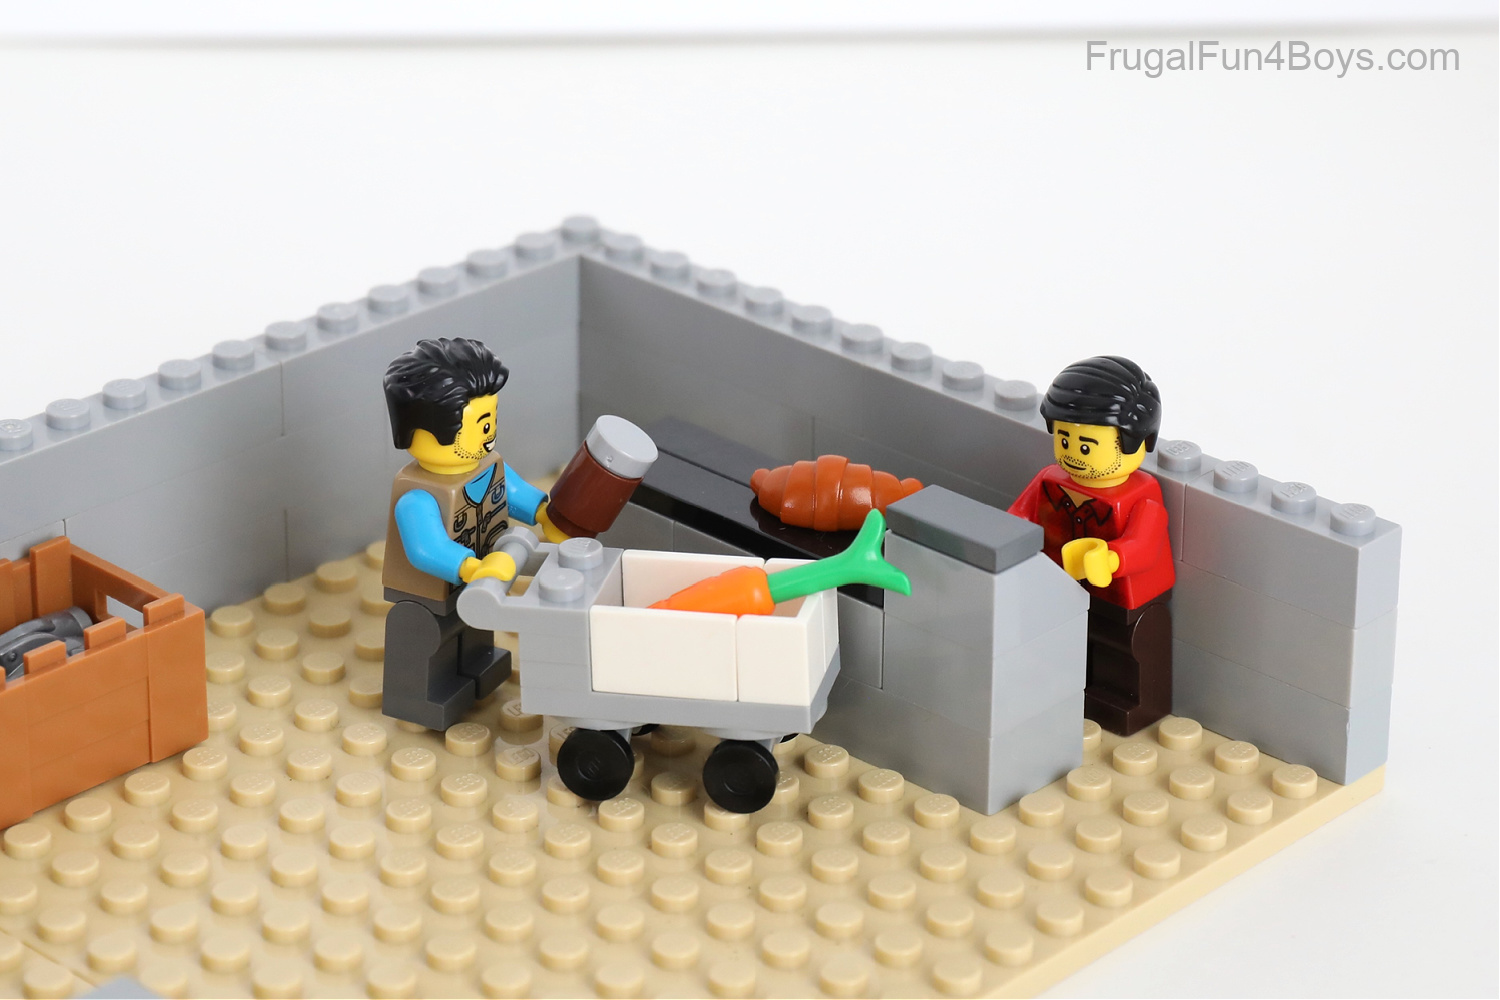
The checkout is very simple, and so fun. Use black tiles for a conveyor belt, and then add a cash register if you have one. This particular cash register came from one of Janie’s Friends sets.

Here’s how to build the shopping cart. You’ll need a set of these pieces for each cart you want to make.

Attach two 1 x 2 x 1 white panels and two 1 x 1 x 1 white corner panels to a 2 x 4 light gray plate. You can use light gray panels if you prefer! I liked the contrast of the gray and white. I thought it made it look more like a shopping cart and less like a wagon.

Add two 1 x 2 light gray plates and a 1 x 2 light gray plate with a handle on the side. Then attach two 2 x 2 light gray plates with wheel holders and skateboard wheels.
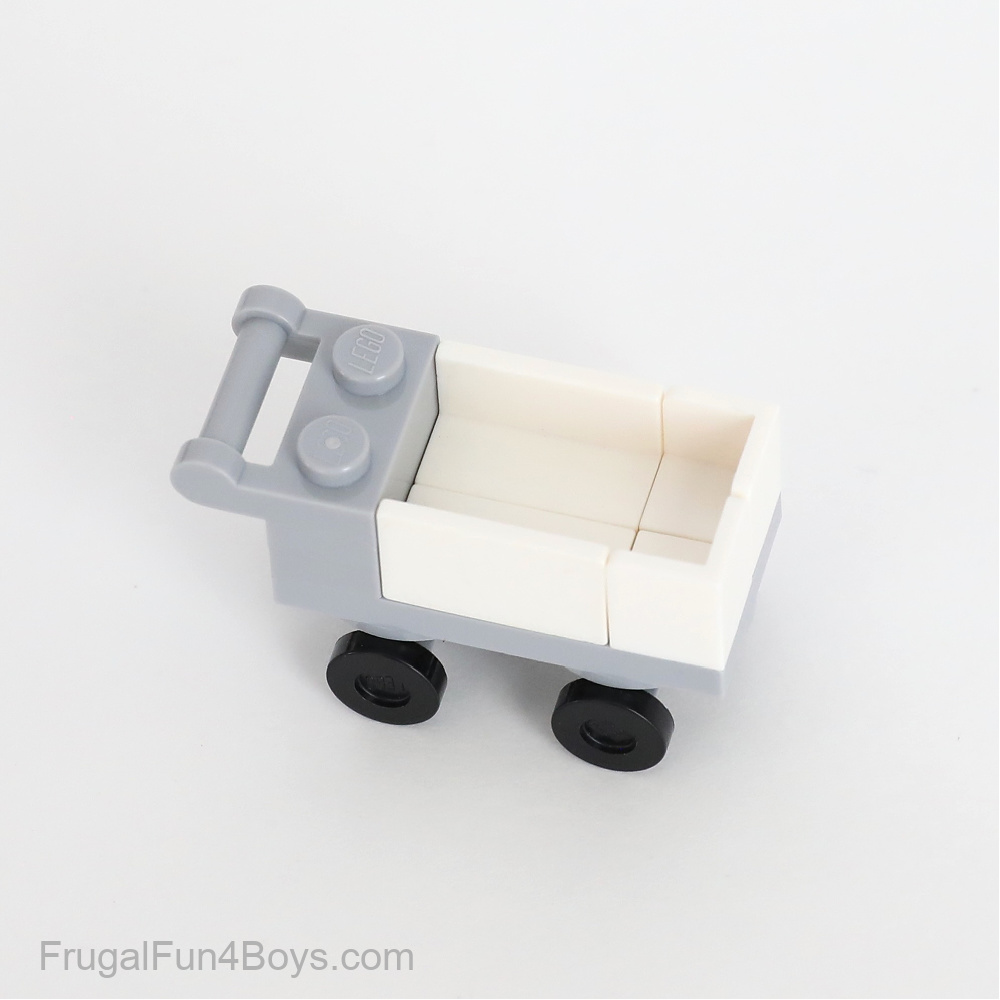
The finished shopping cart is so cute! Minifigures can’t have both hands attached at one time, but they can push the cart with one hand.

Beyond that, the store has a table for baked goods and a bin for fish. Kids can really get creative with this and build their store however they want! Hopefully this will provide a good launching point.
FREE LITTLE LIBRARY
We’ve been seeing free little libraries pop up all over town! Such a nice idea for the community, and it’s fun to make a simple LEGO version for your city.
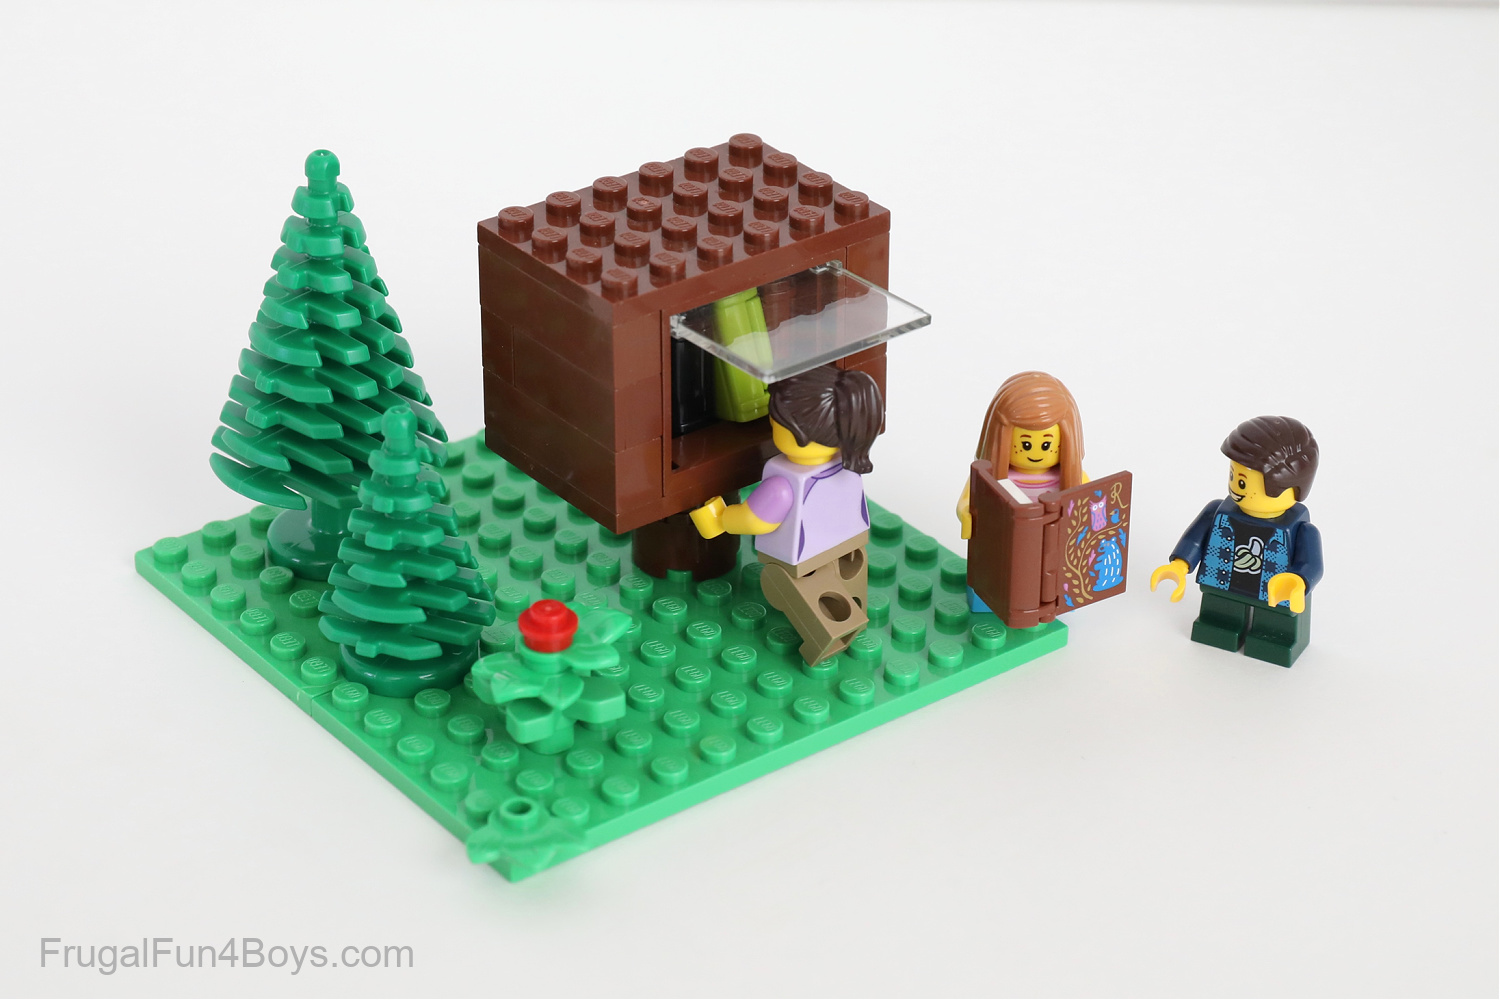
LEGO people can find a book to borrow, and then contribute a book or two back to the library!
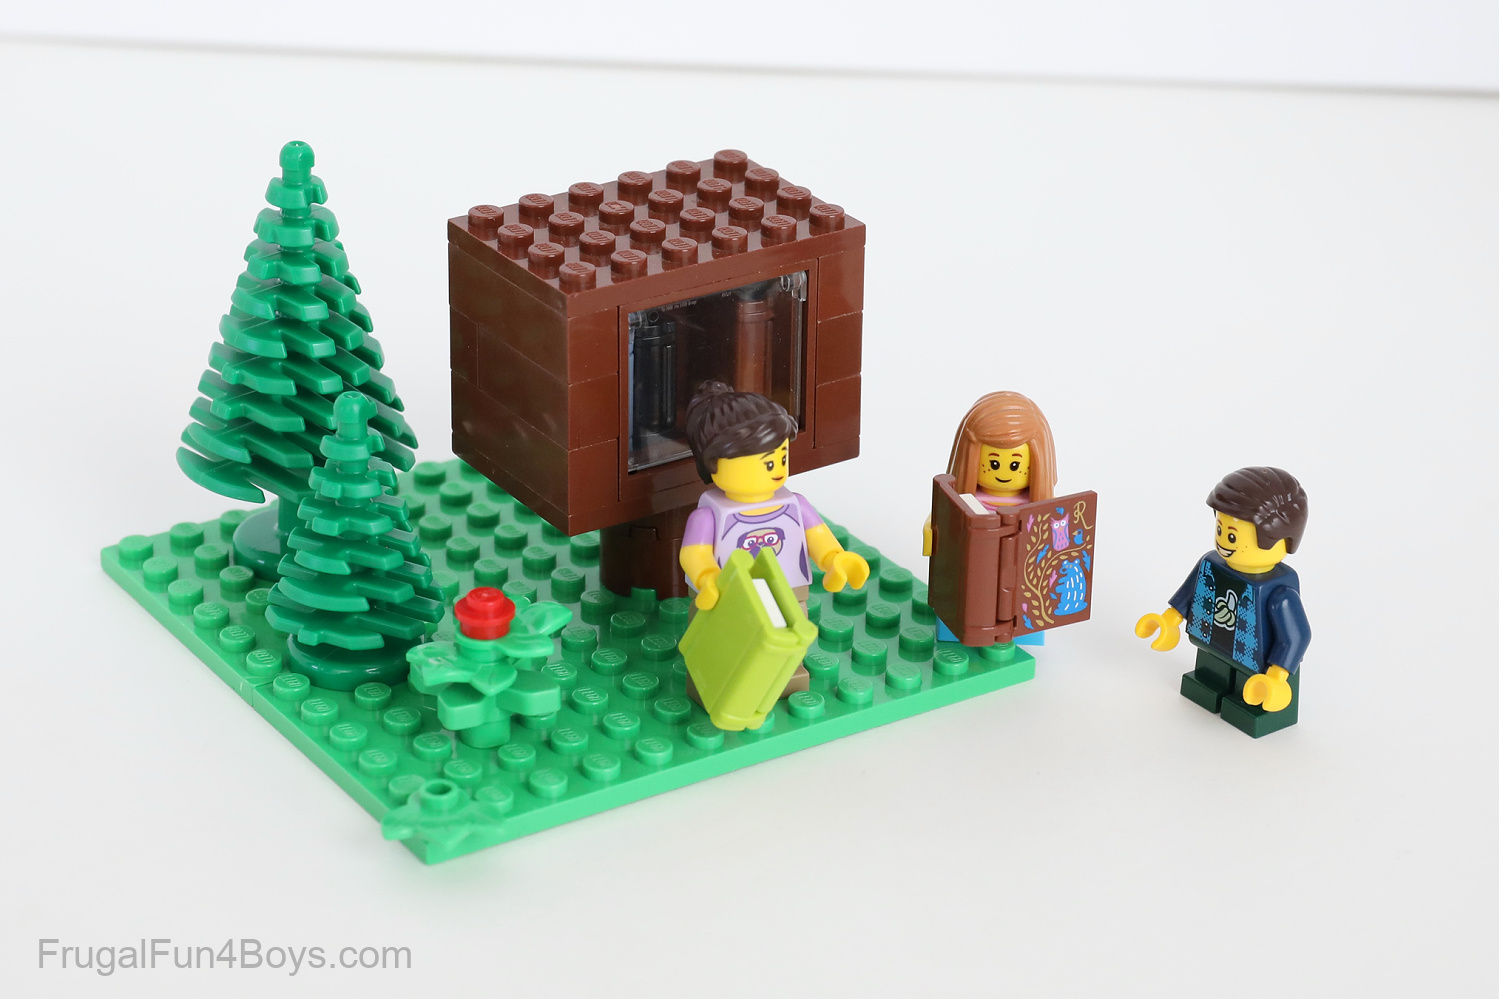
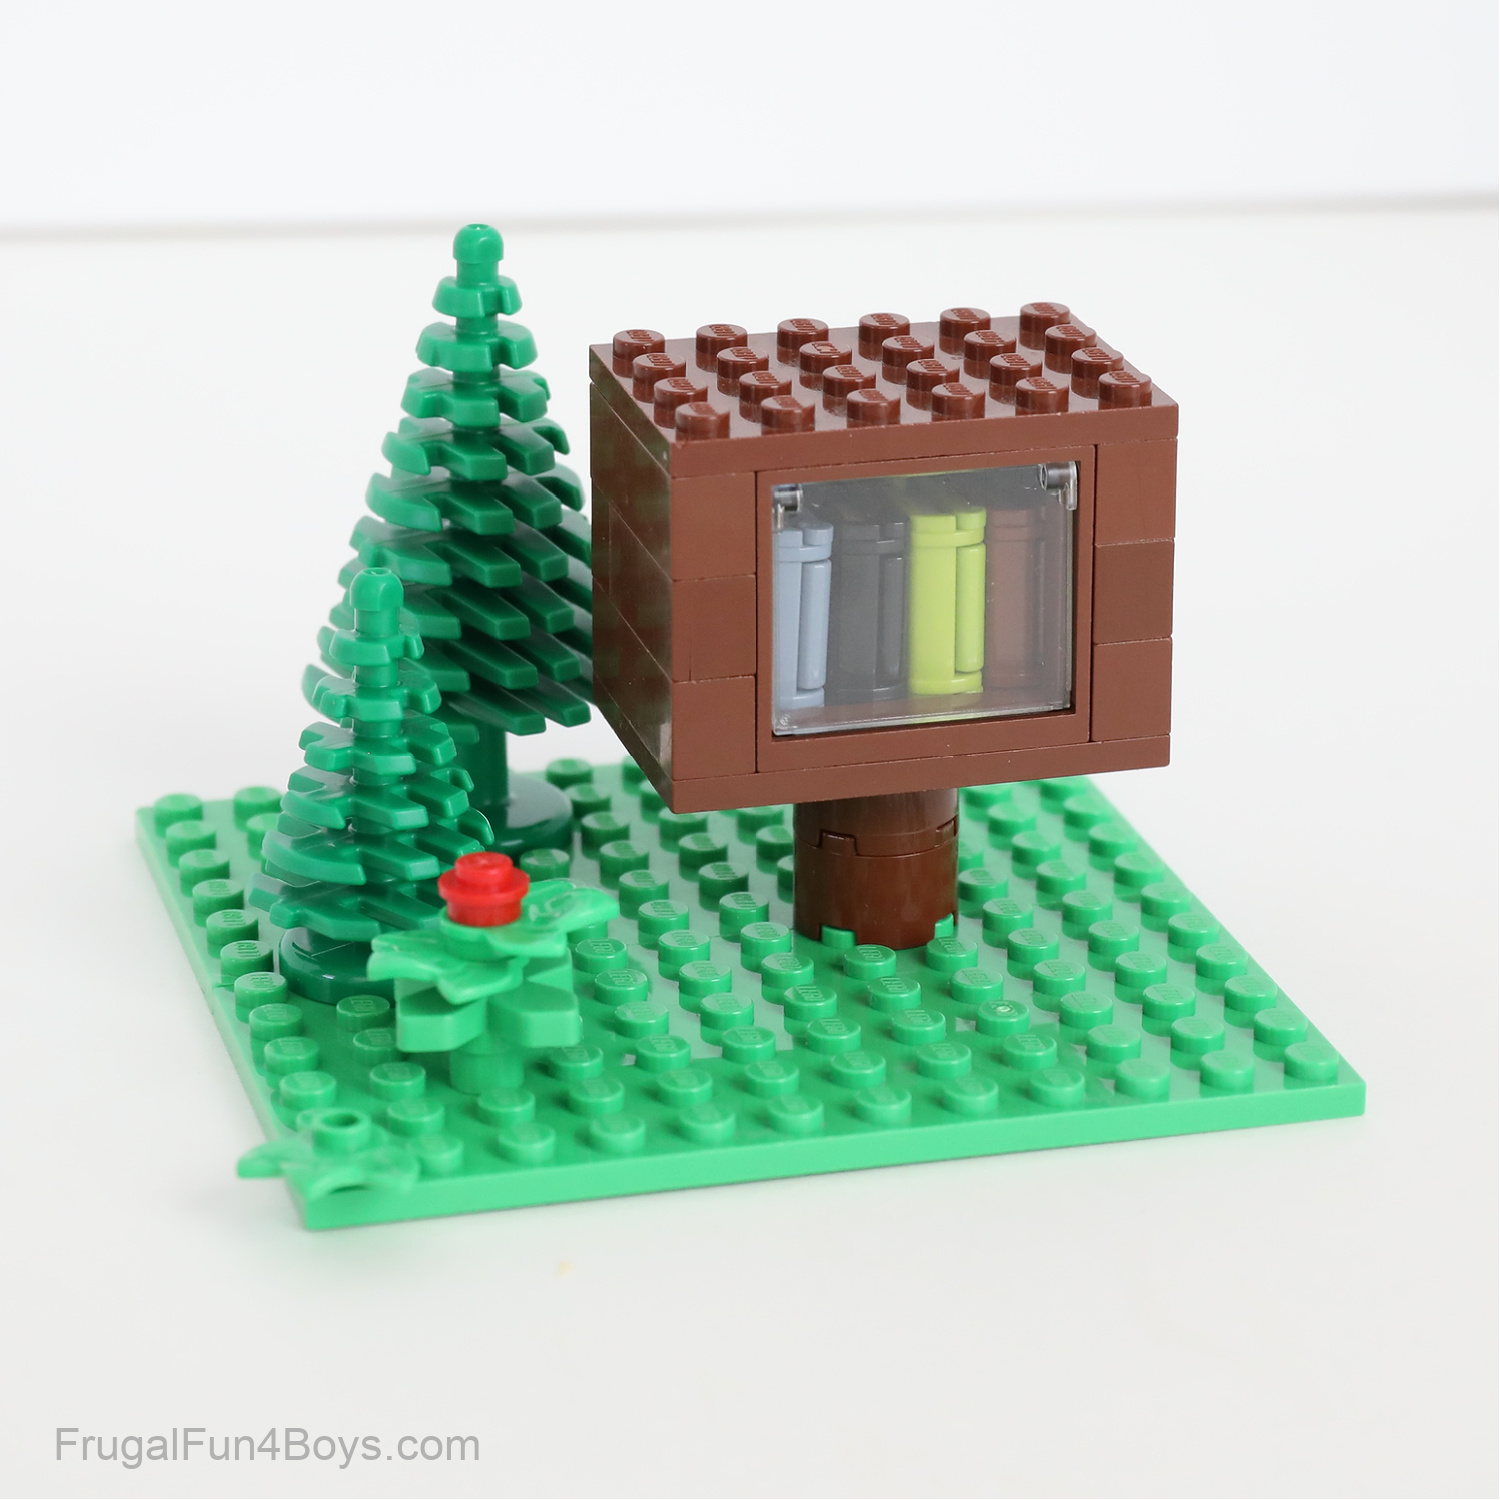
The design for the free little library is very simple. Mine is a 4 x 6 brown plate, then three rows of bricks, and then another 4 x 6 brown plate on top. I used a 1 x 4 x 3 window frame with a clear window that opens and closes, but any type of 1 x 4 window will work!
We filled our library with LEGO books that have come in all sorts of sets. Janie has a couple that came with Disney princess sets, and then one came with a Harry Potter set, etc.

The library is perched on top of two 2 x 2 brown round bricks.
MAIL TRUCK AND MAILBOX
Build a classic mailbox and a United States style mail truck. The mail truck can hold a box full of letters! We gathered up all the letters we’ve collected from different sets and found 4. I’m sure we actually own more than that though…
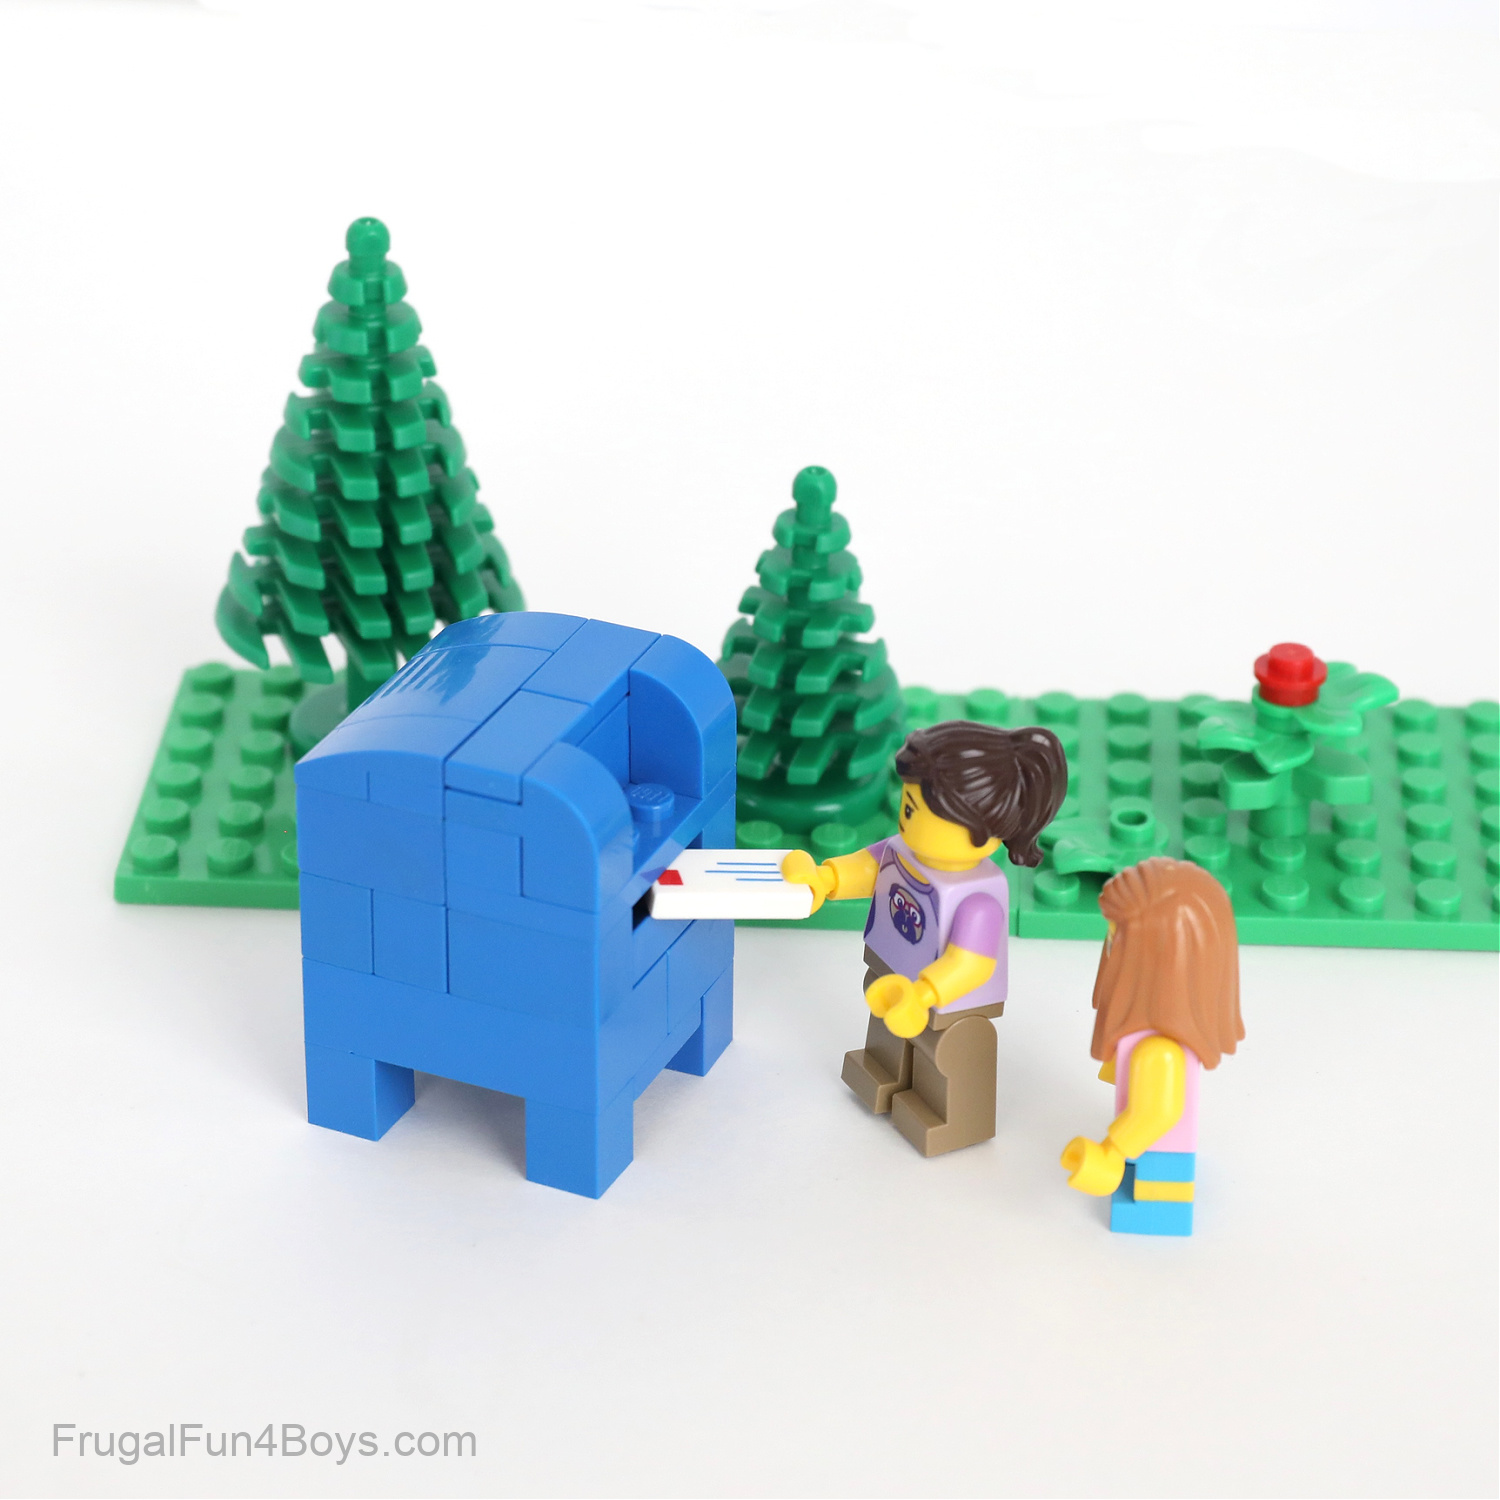
Here’s how to build the mailbox.
Note: The mailbox can only hold one letter. Feel free to tinker with the design and see if you can get it to hold more letters!
Grab two 2 x 4 bricks. Place them next to each other. Then add a 1 x 3 brick, two 1 x 2 bricks, and a 2 x 2 corner brick (or the equivalent of these bricks). Find a 1 x 2 slope (30 degree).

Add the 1 x 2 slope to the mailbox. Then find the bricks shown.

Place a 2 x 4 brick on the back of the mailbox and a 1 x 2 plate on the front.

Place a 1 x 4 plate on top of the 2 x 4 brick, on the front side. Then add a 2 x 2 curved slope and two 1 x 2 curved slopes. If you have two of the 2 x 2’s, use those.

Add a 1 x 4 brick and a 1 x 2 plate. Then find two 1 x 2 curved slopes with a cutout and two 1 x 2 tiles.

Attach the two 1 x 2 curved slopes with a cutout, and then add the tiles on top.

Turn the mailbox over and add a 2 x 4 plate and four 1 x 1 bricks as the legs. Your mailbox is complete!

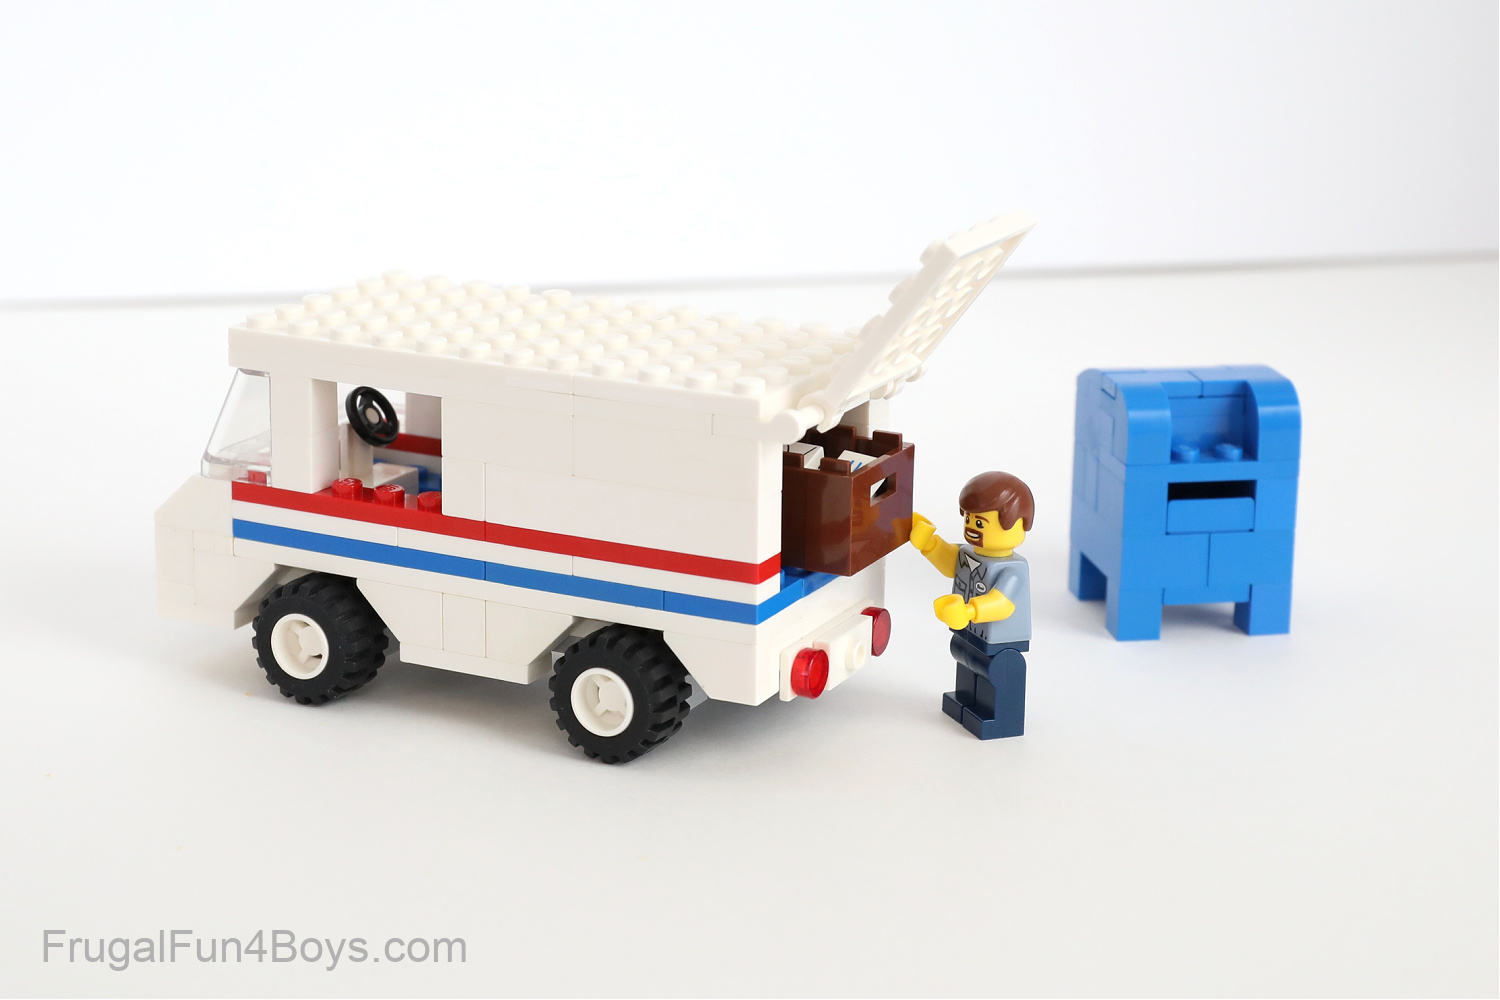
Build the Mail Truck
The back of the truck can open so that you can add a crate full of letters.
I don’t have the time to photograph full instructions for the mail truck, but I think that kids can get the idea from the pictures.
I started with a 4 x 12 plate and attached the wheels to that. I built the hubcaps with 1 x 2 inverted slopes. Those are attached to white plates, which I then attached to the 4 x 12 base.
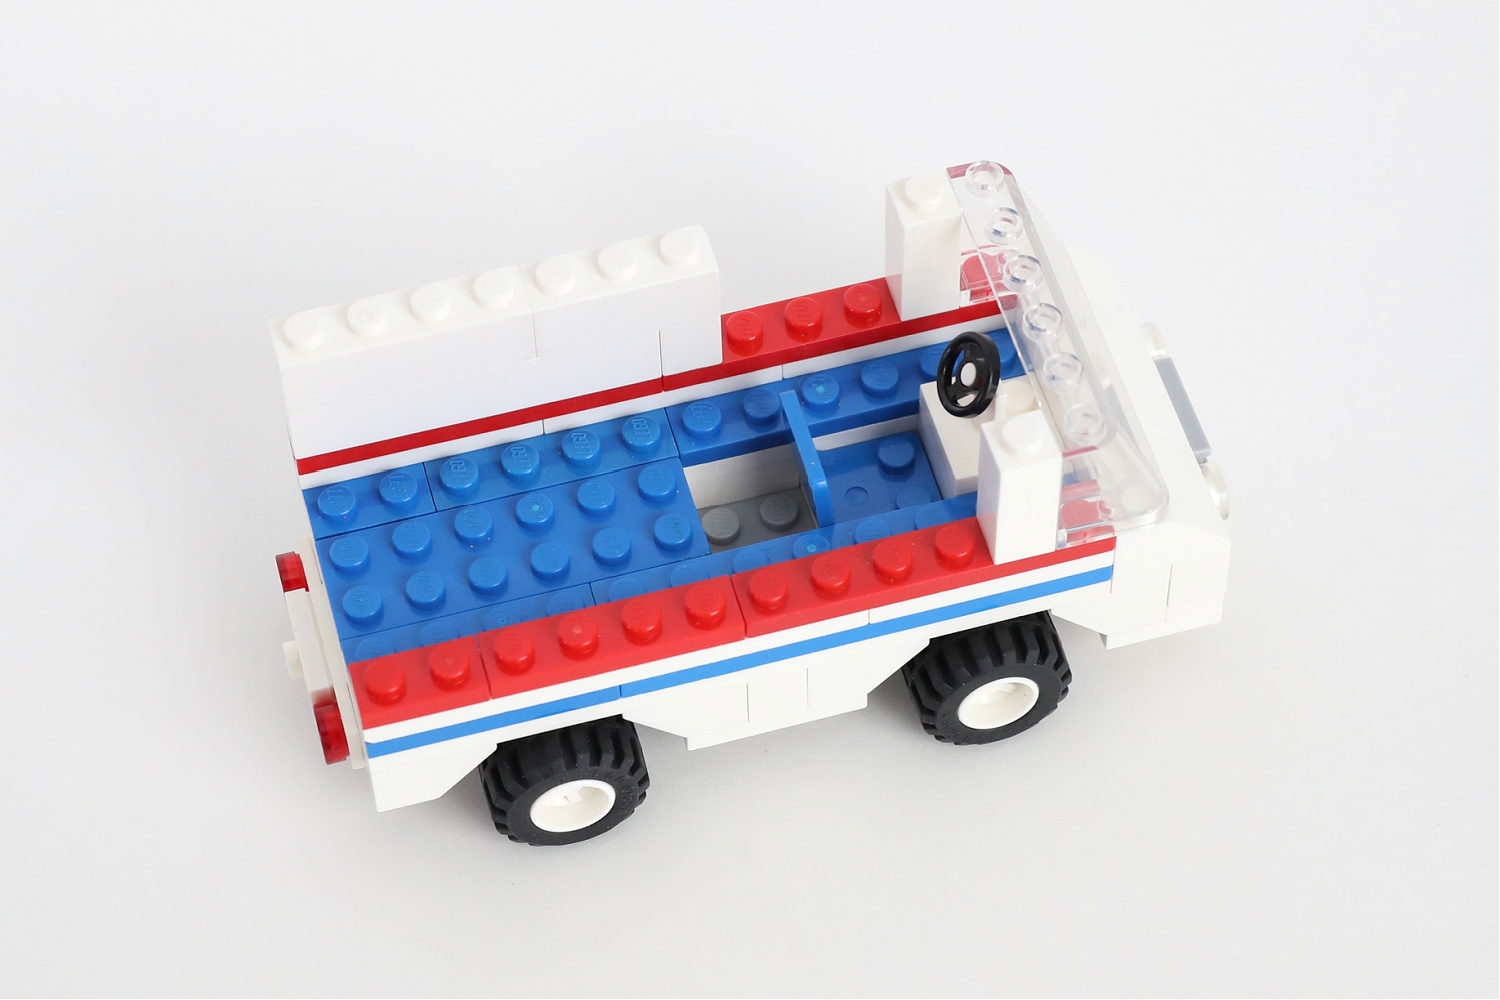
Here’s a view of the underside of the truck.

The sides of our US mail trucks have an eagle with a blue background. I couldn’t figure out how to get an eagle to look right… so I experimented with making one side of the truck solid white…

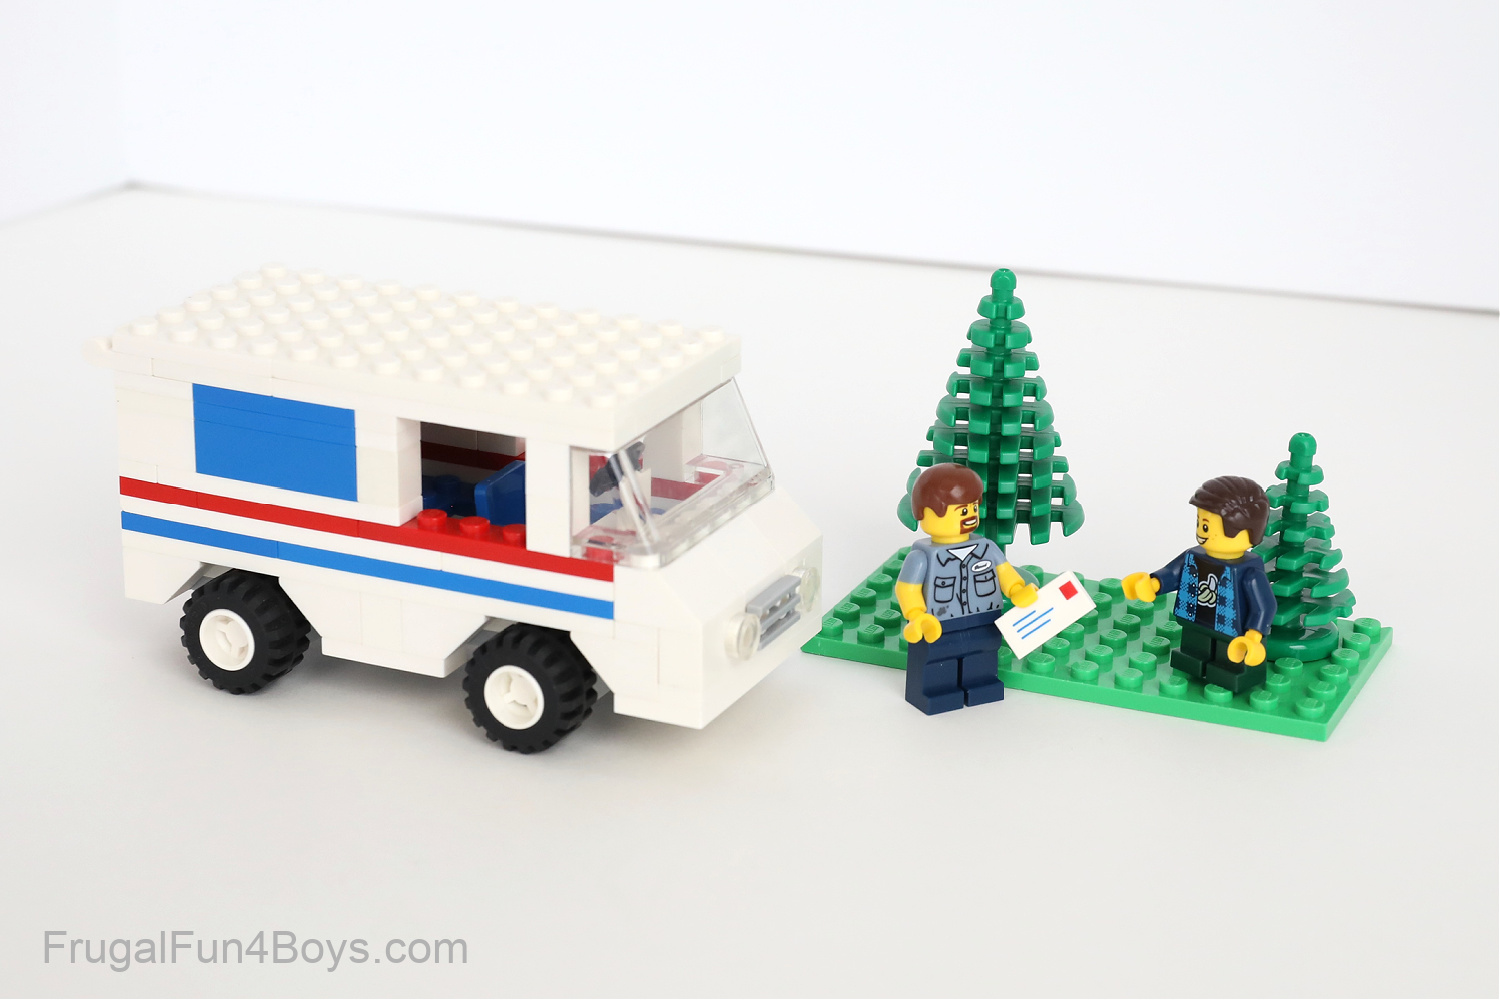
Then the other side of the truck has a blue rectangle. Which do you like better?

Set up a scene with your mail man or woman delivering mail!
Need more LEGO City Ideas?
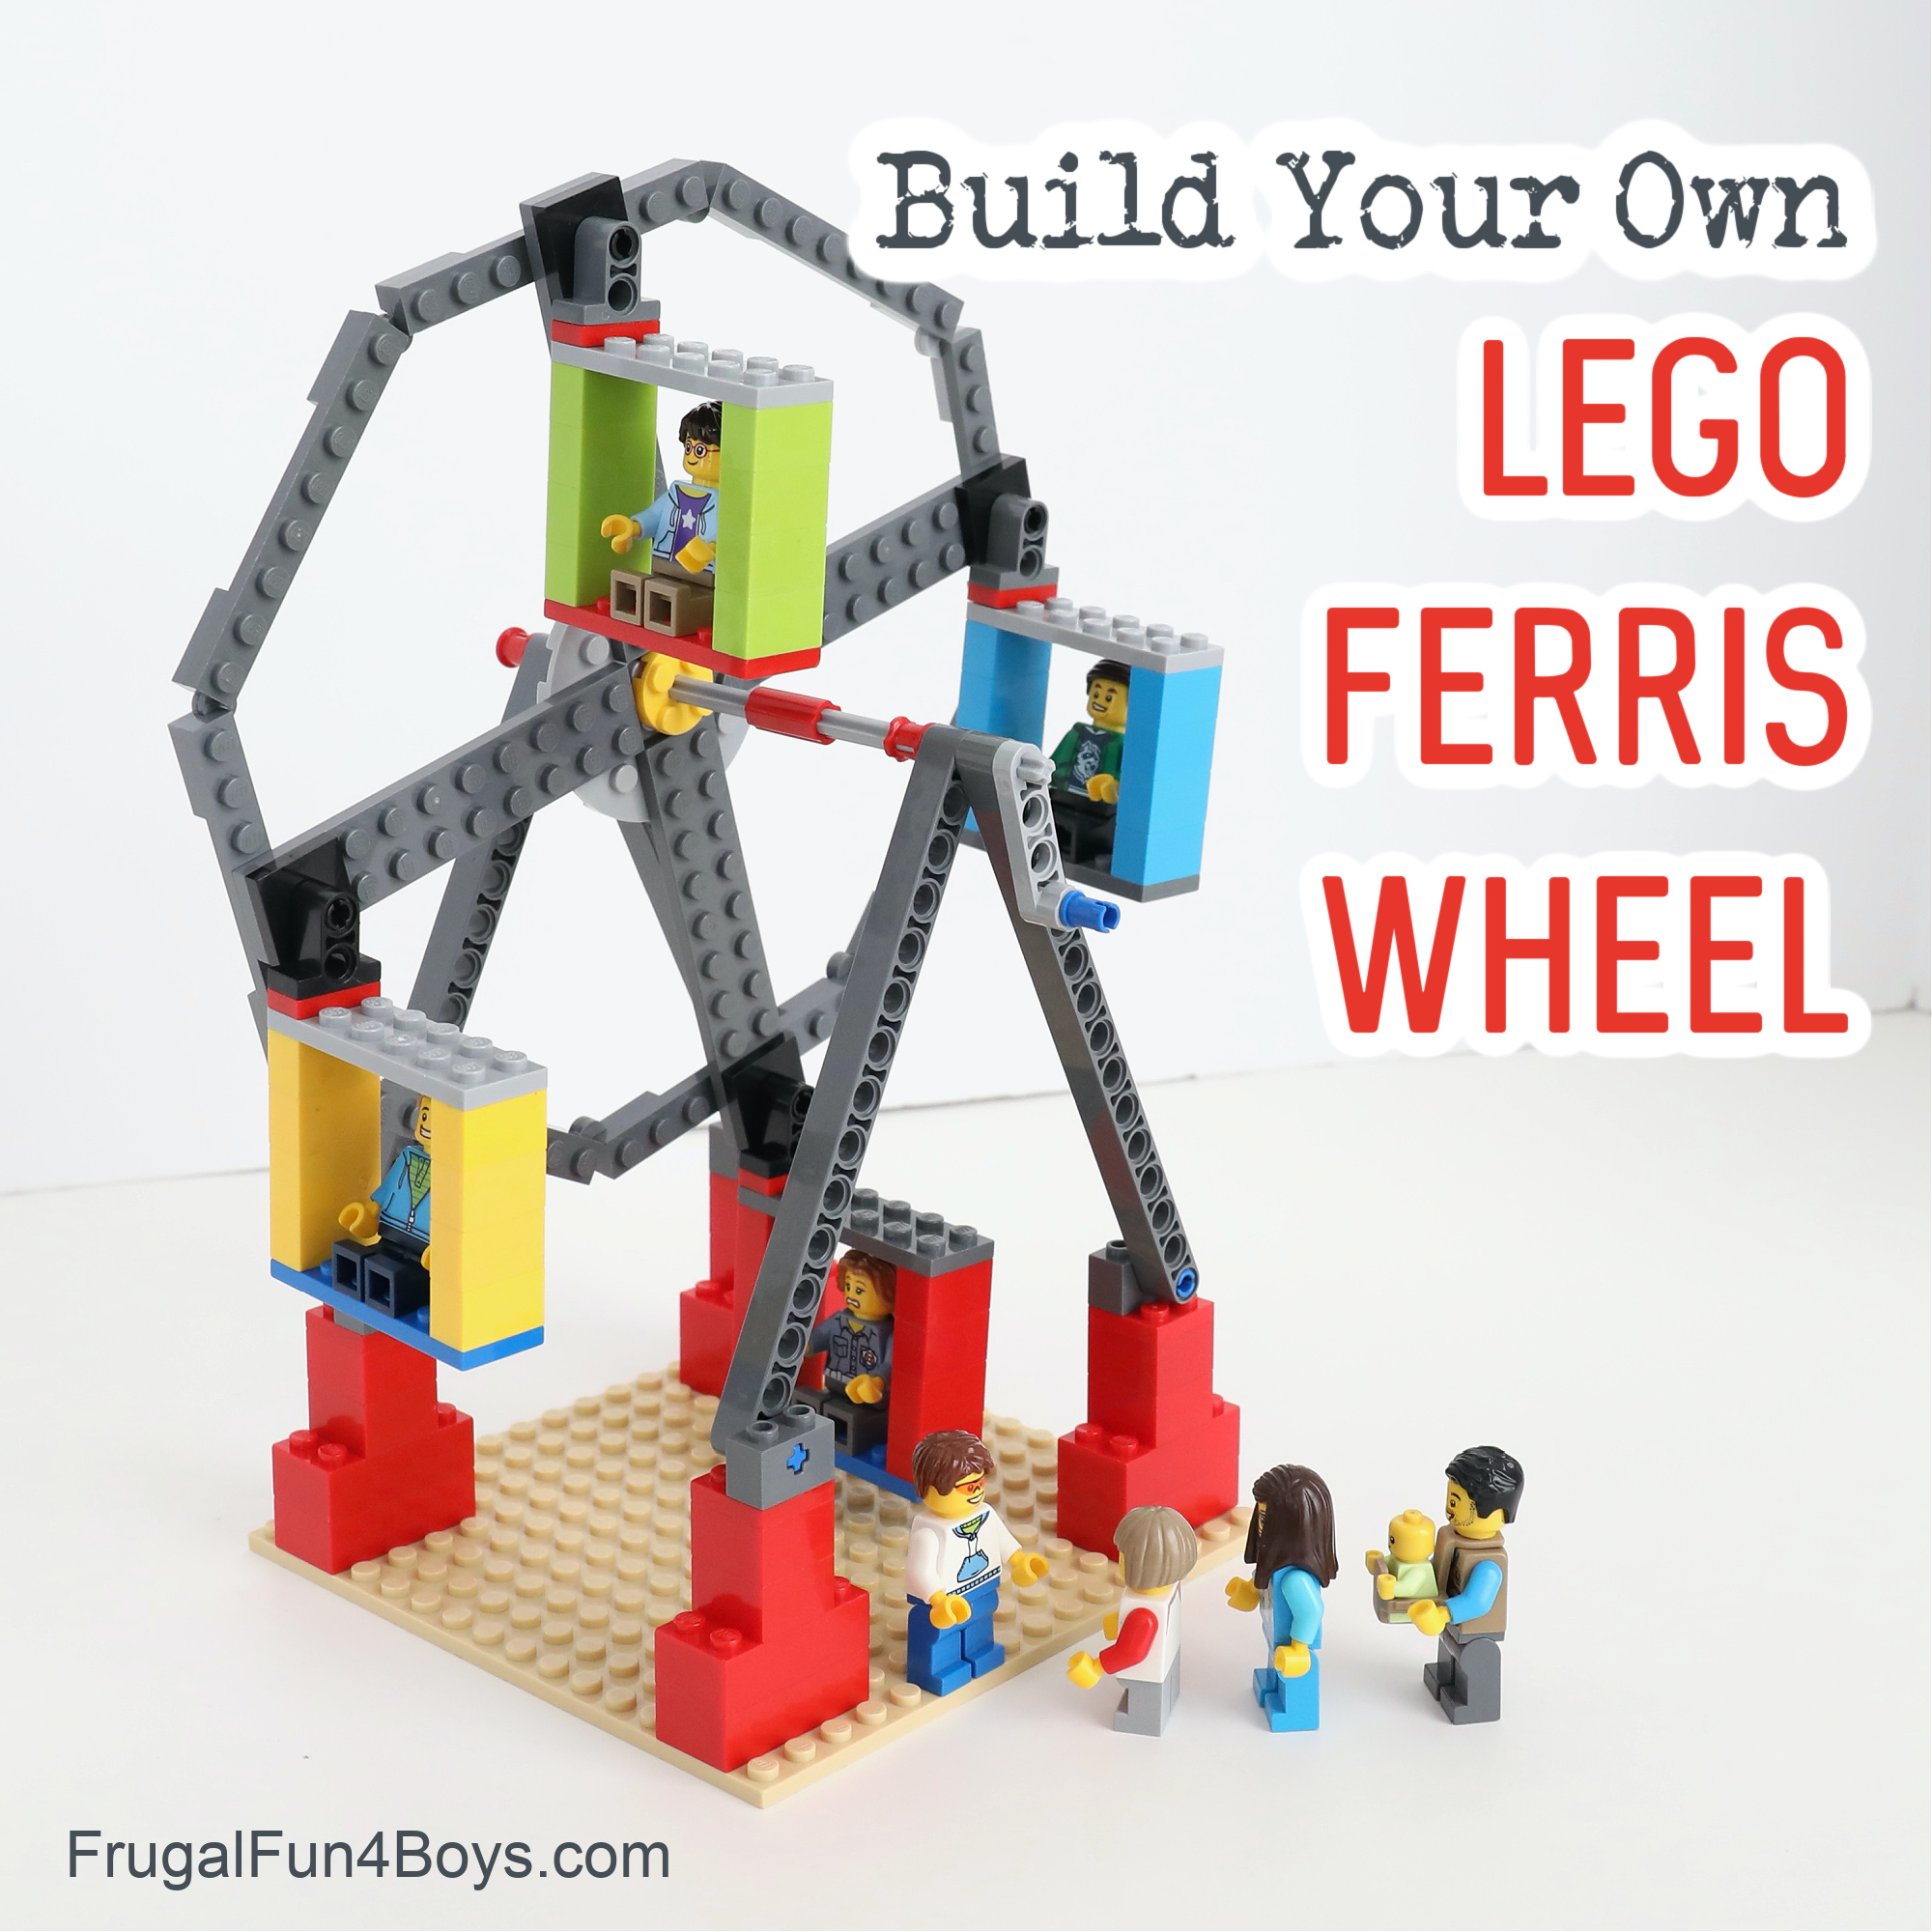
This LEGO Ferris wheel is a LOT of fun. It really works!
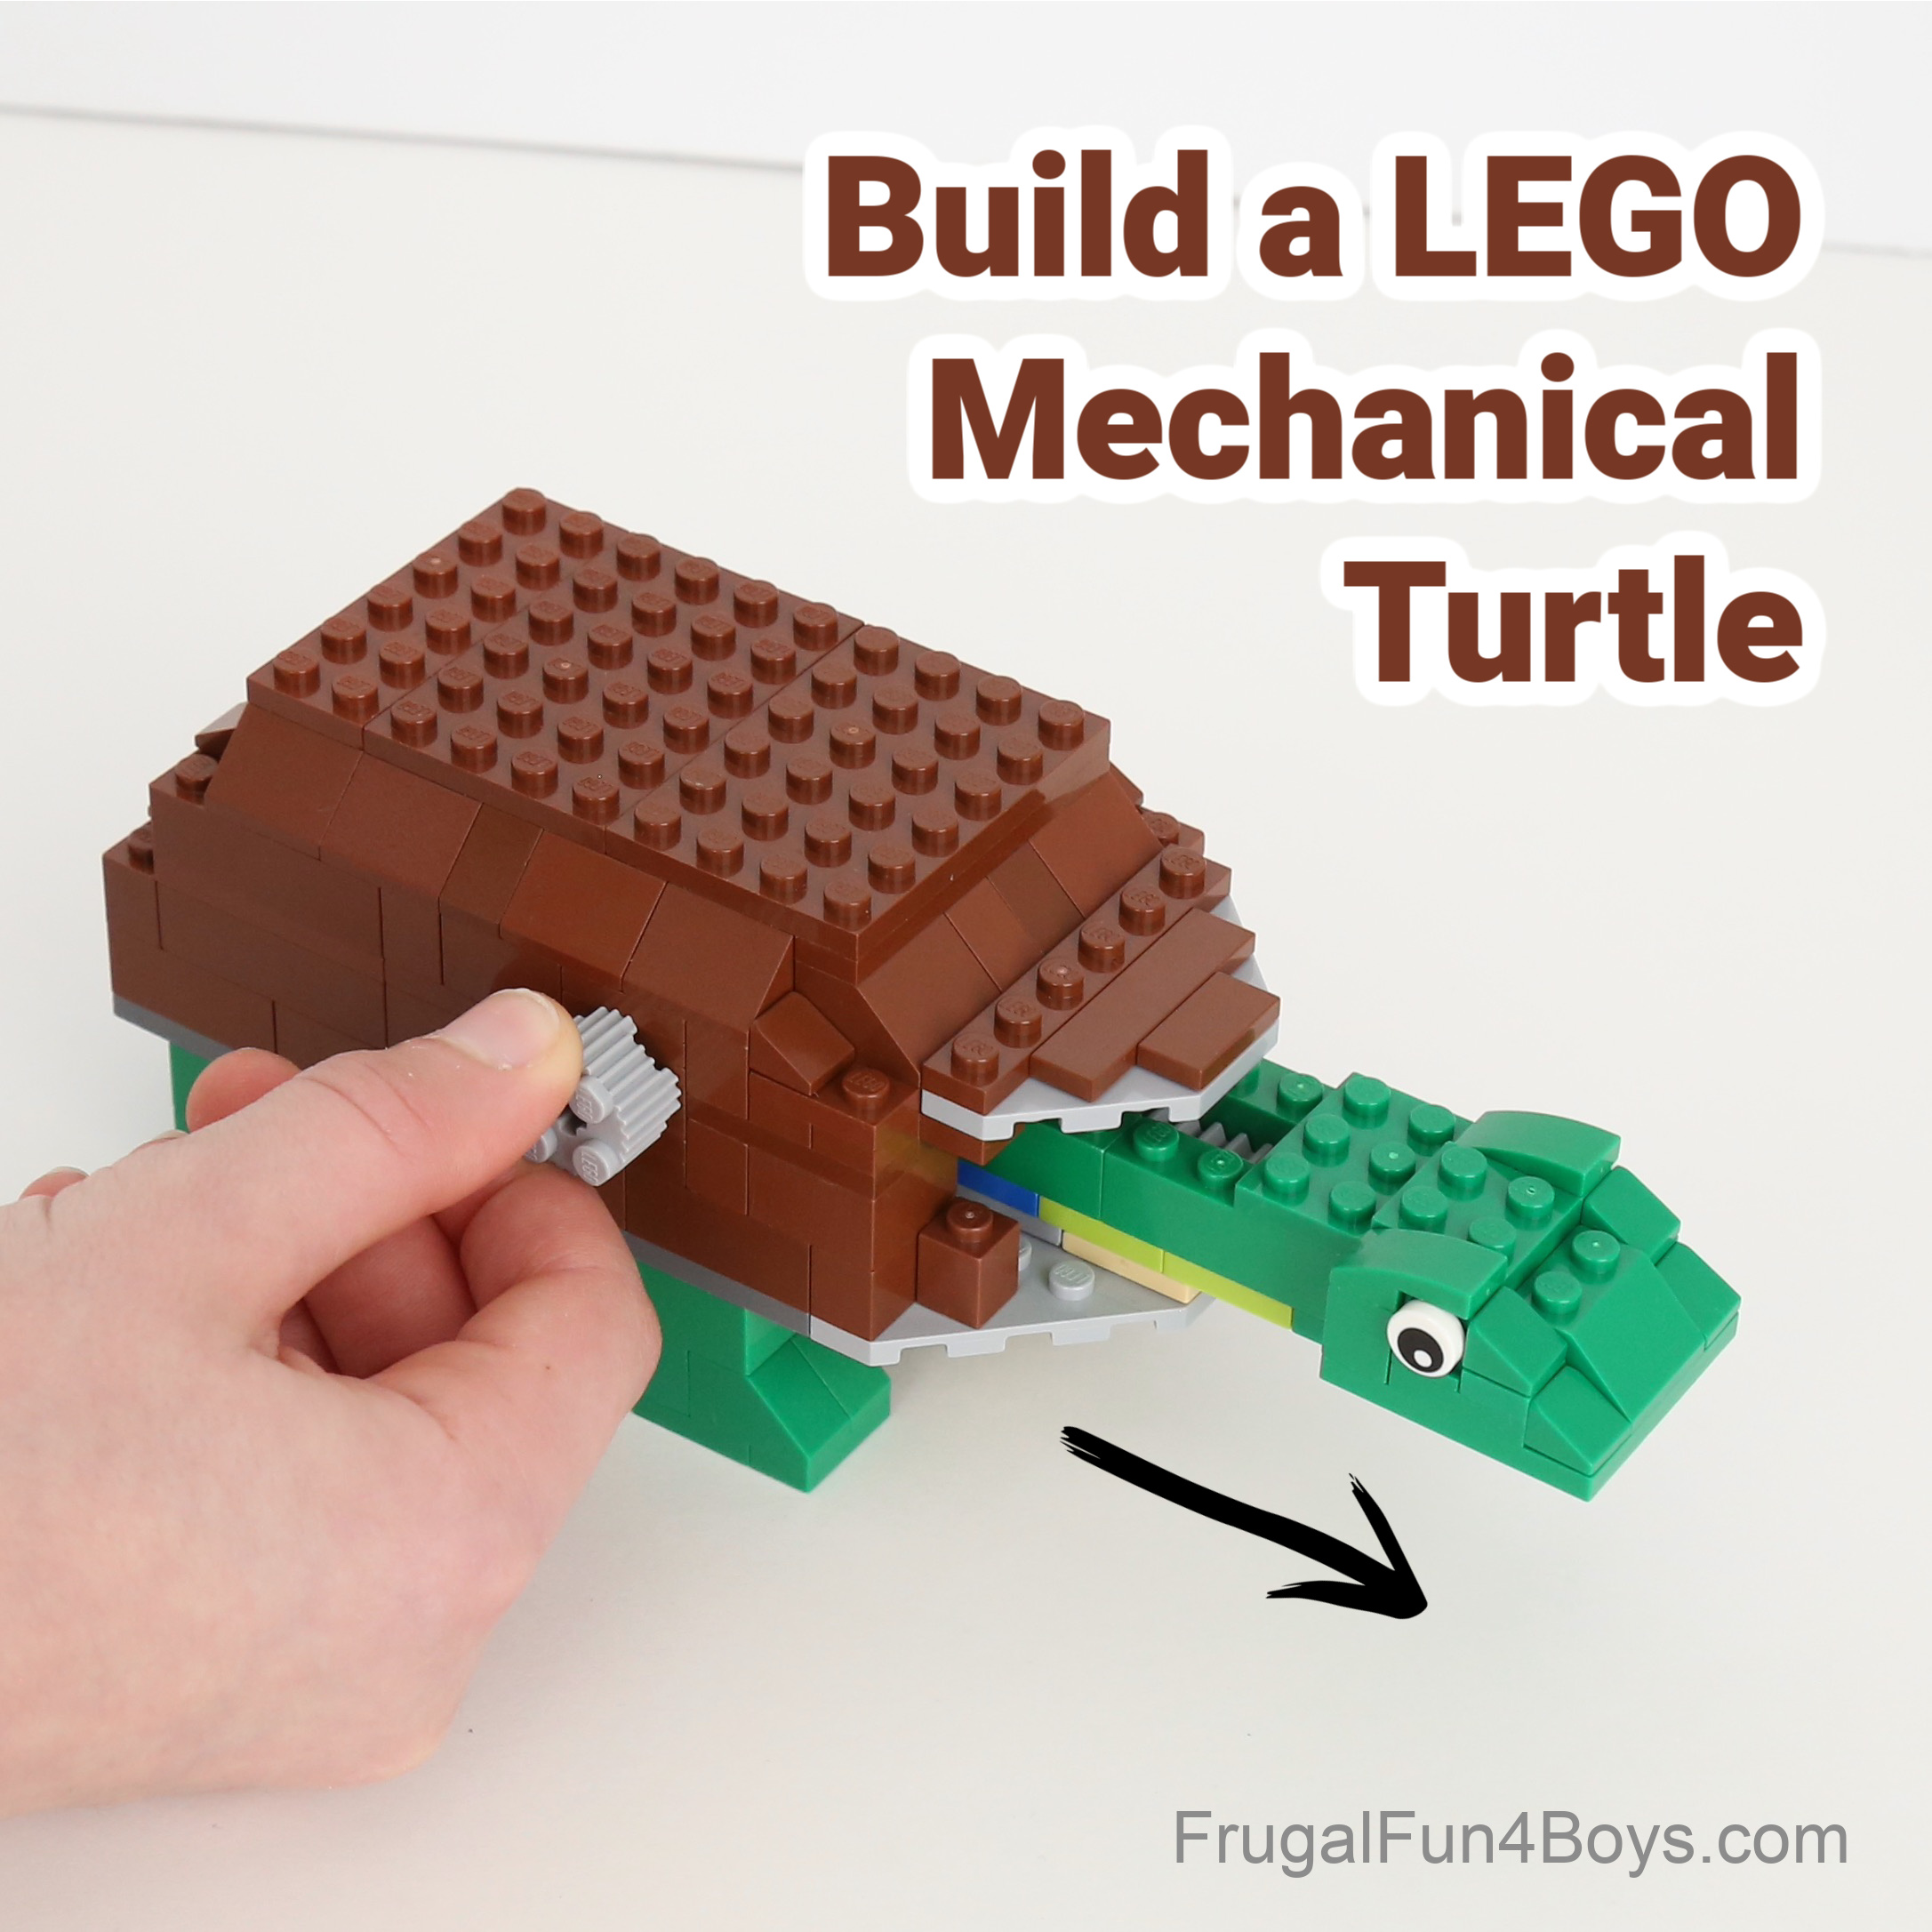
Another fun idea is to build a LEGO turtle that really sticks his head out of the shell!
3 Comments
Pat Apr 19, 2022
Thanks so much for these ideas, Sarah! I'm hoping to use them to inspire my grand-daughter to get a little creative with her LEGO collection. Any further ideas would be much appreciated.
Angela Blackwell Jun 4, 2024
I’m totally turning my dining table into Lego town this summer!!! Two boys of mine love gaming, but Lego’s are a strong 2nd! Thank you!
Rugghia Carol Jul 30, 2024
Thank you so much for the ideas very different things to build for my granddaughters this summer.
Post a Comment