
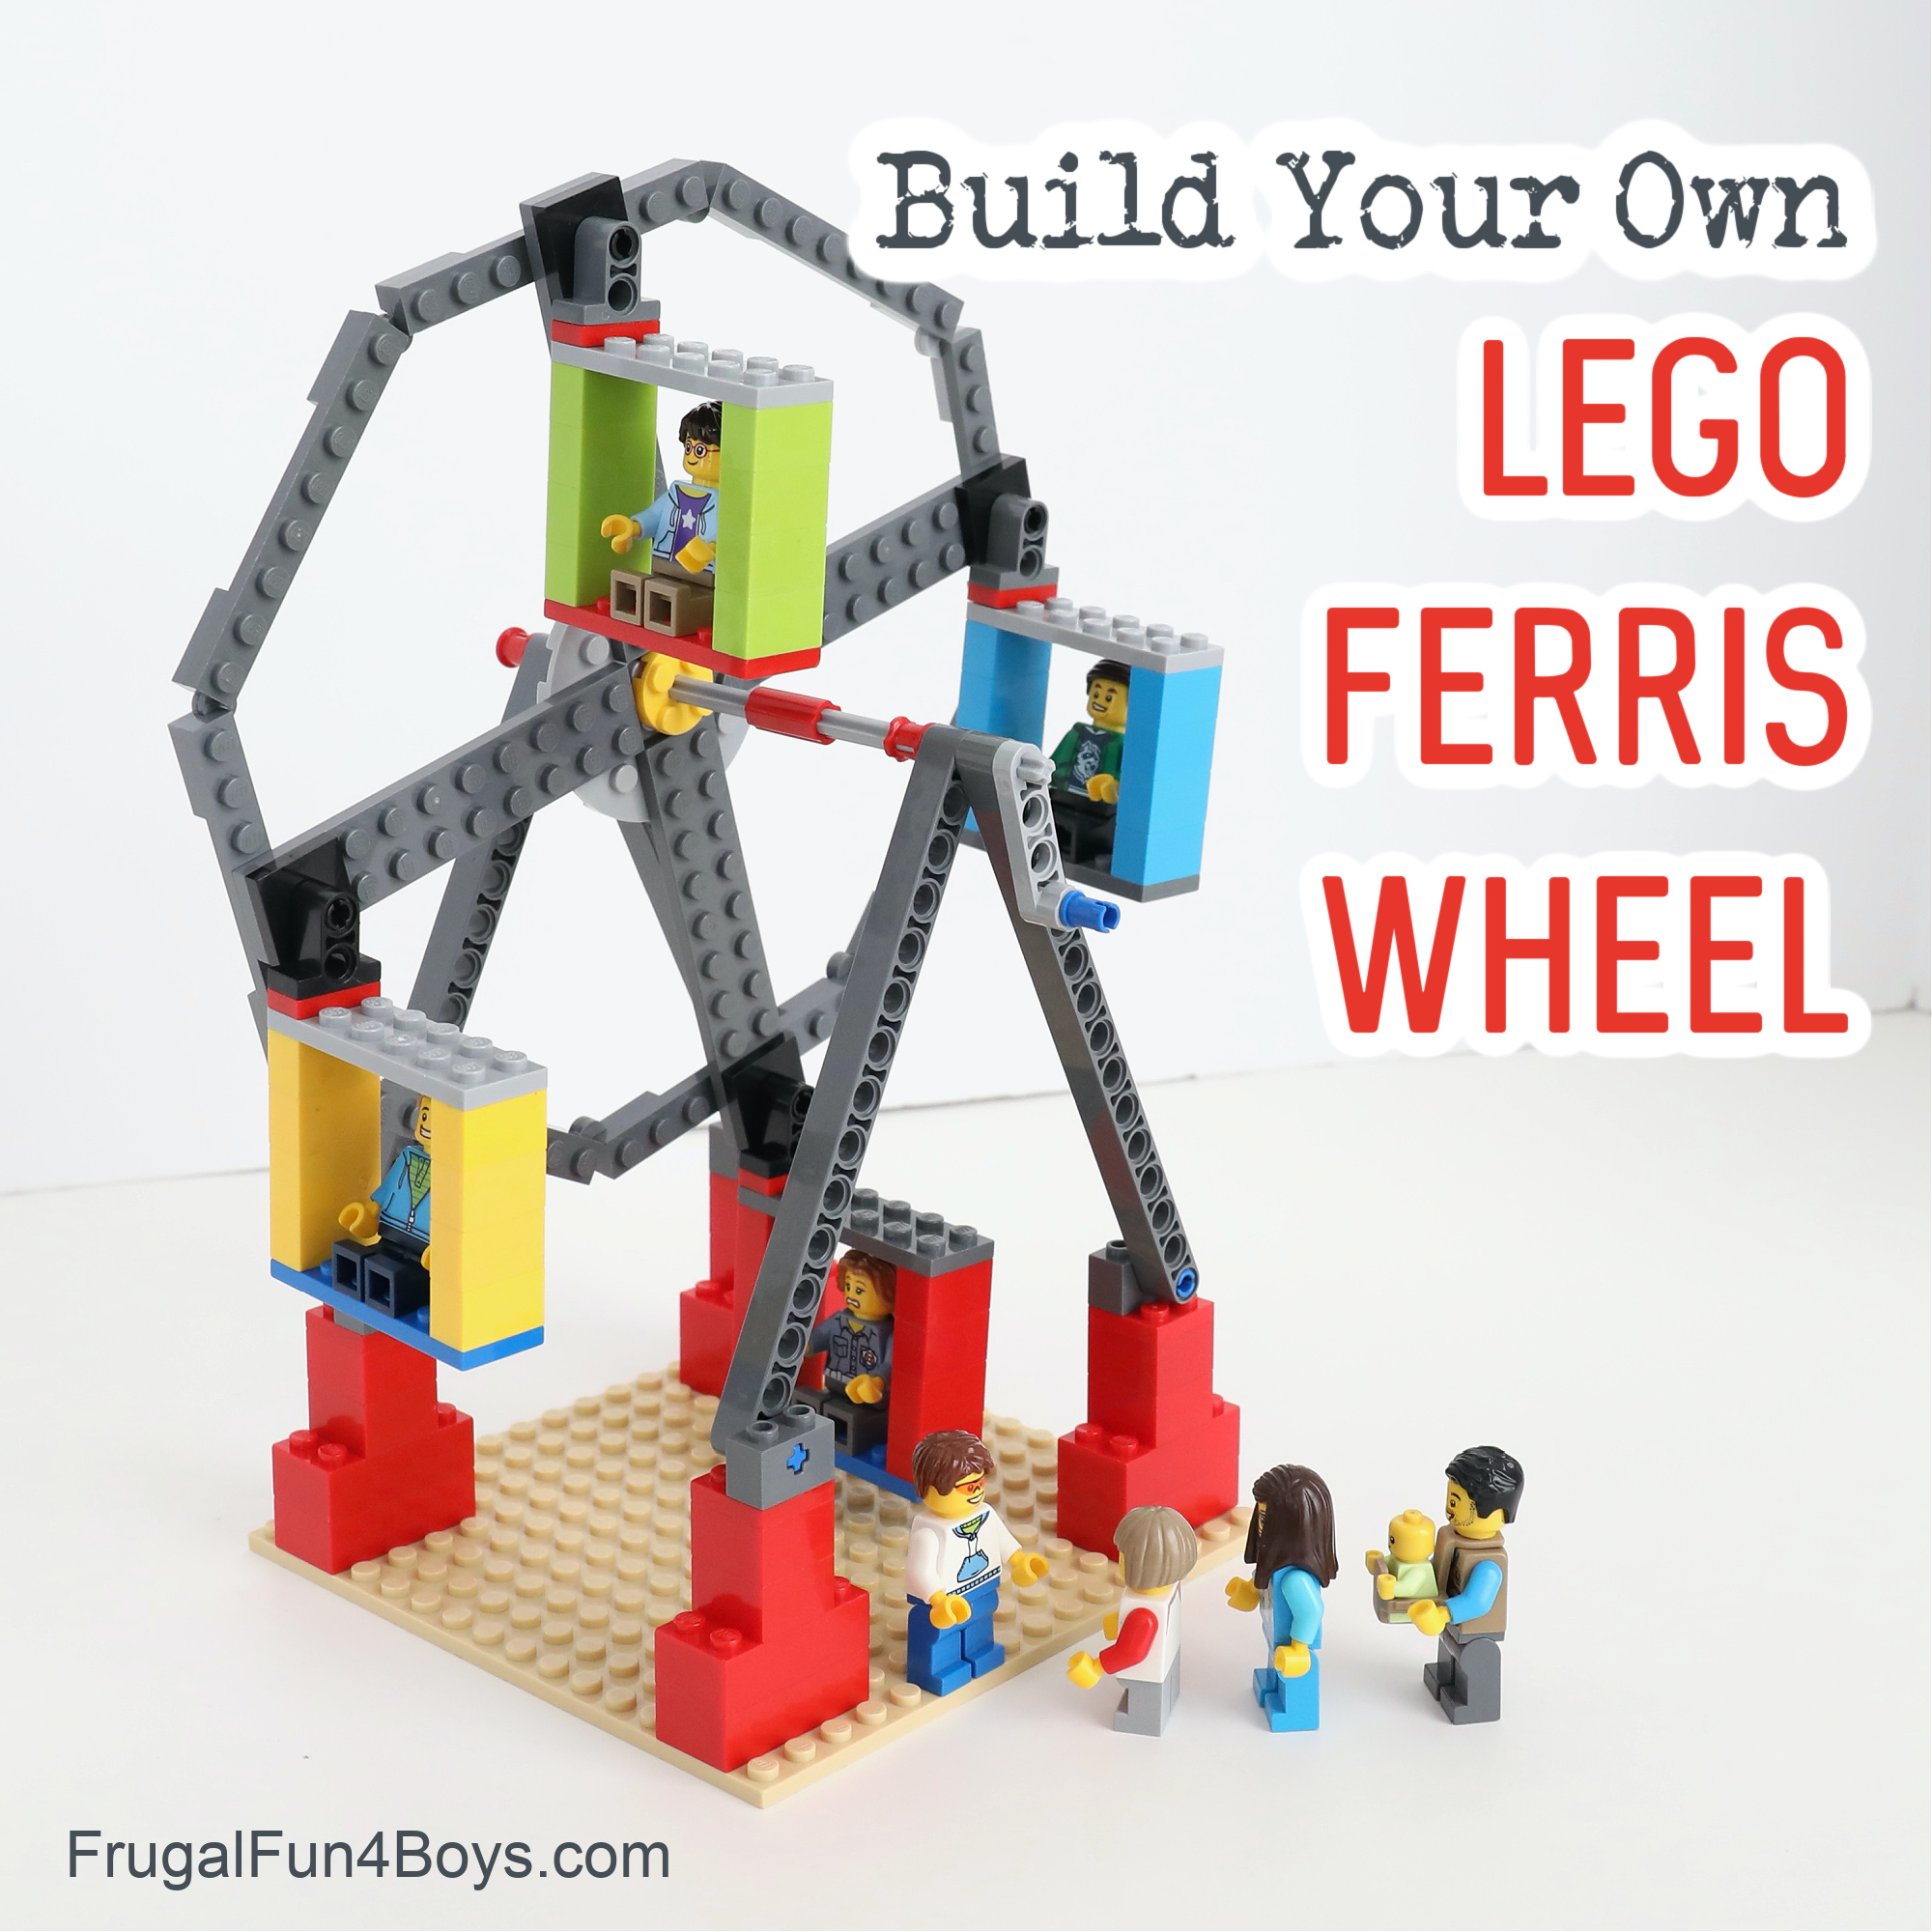
Use your LEGO bricks to build a real working Ferris wheel! We love building all kinds of mechanical toys. You can truly build just about anything out of LEGO bricks!
Turn the handle on this LEGO Ferris wheel, and the cars go for a spin. In this post, we’ll show you how to build it out of some fairly basic pieces. There are Technic elements involved, but these are common ones. If you want to order individual pieces to supplement what you have, I’ll how you how at the bottom of the post.
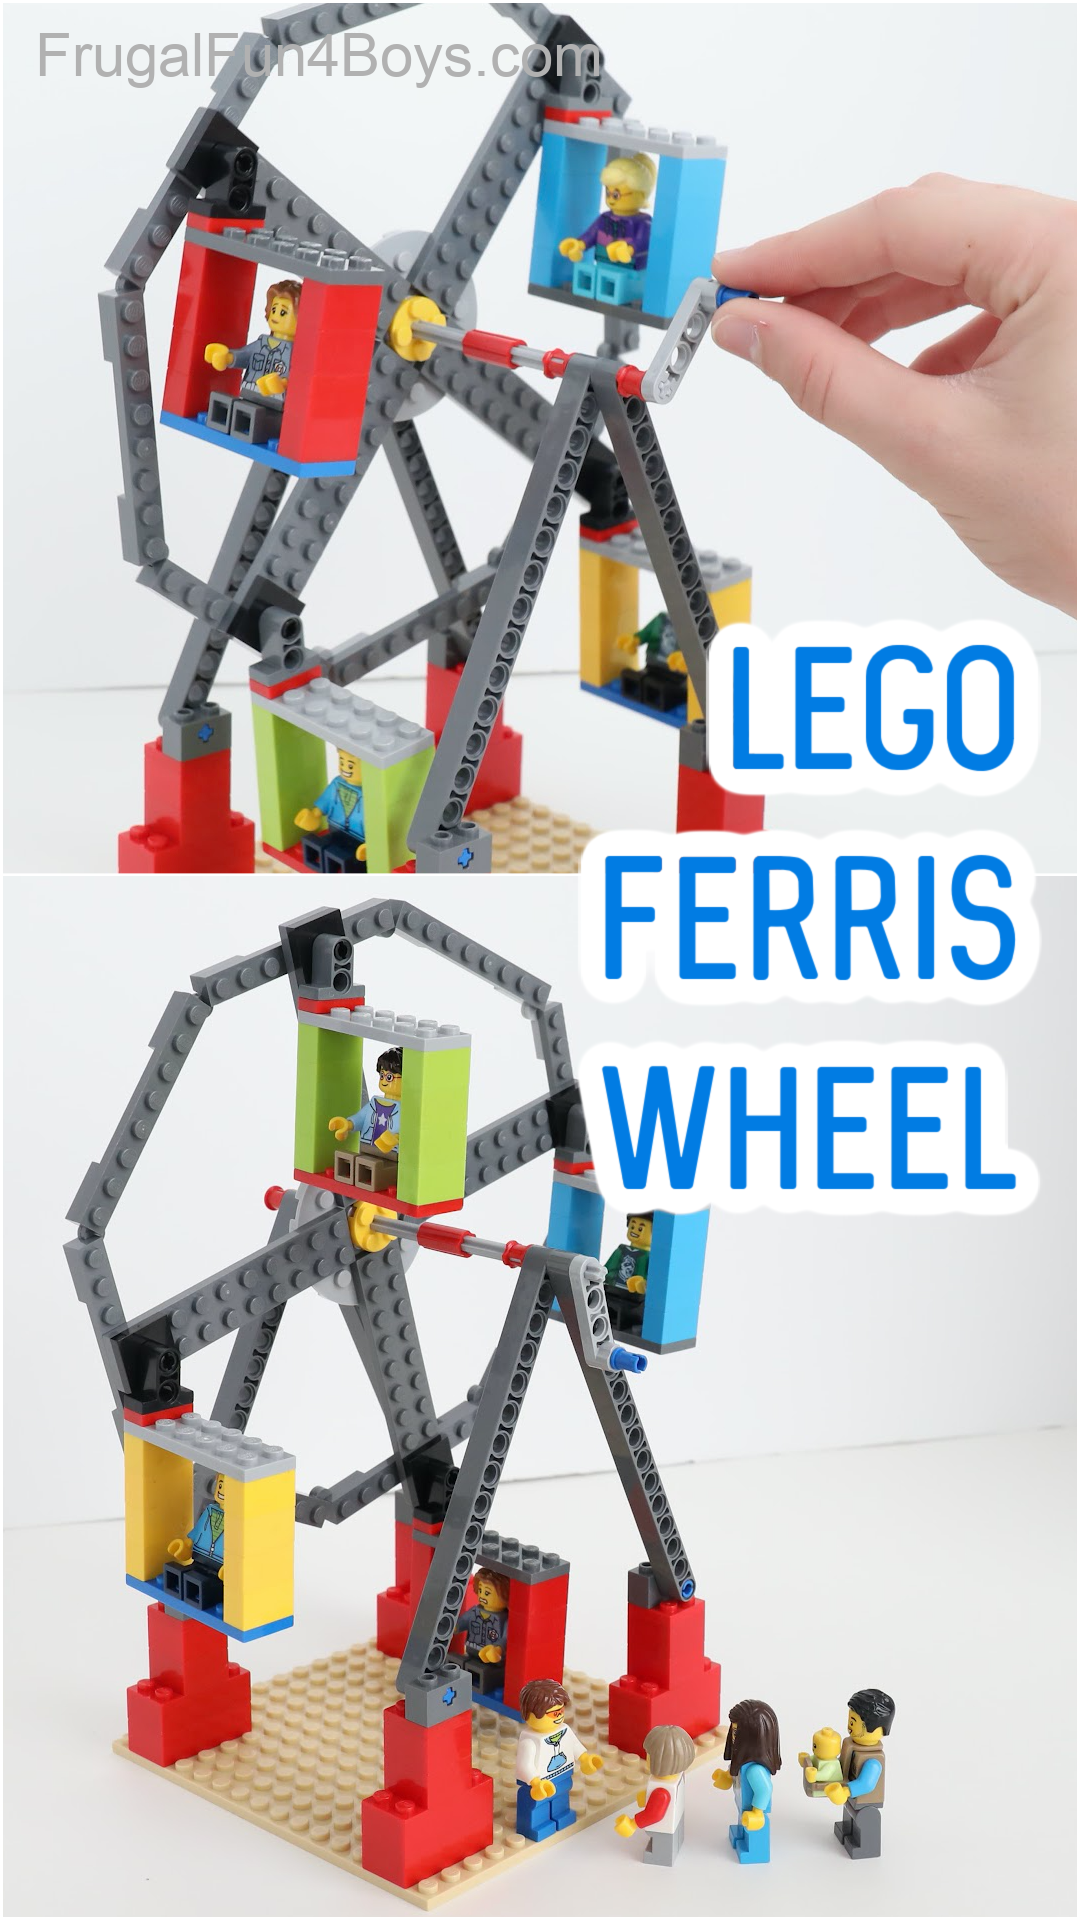
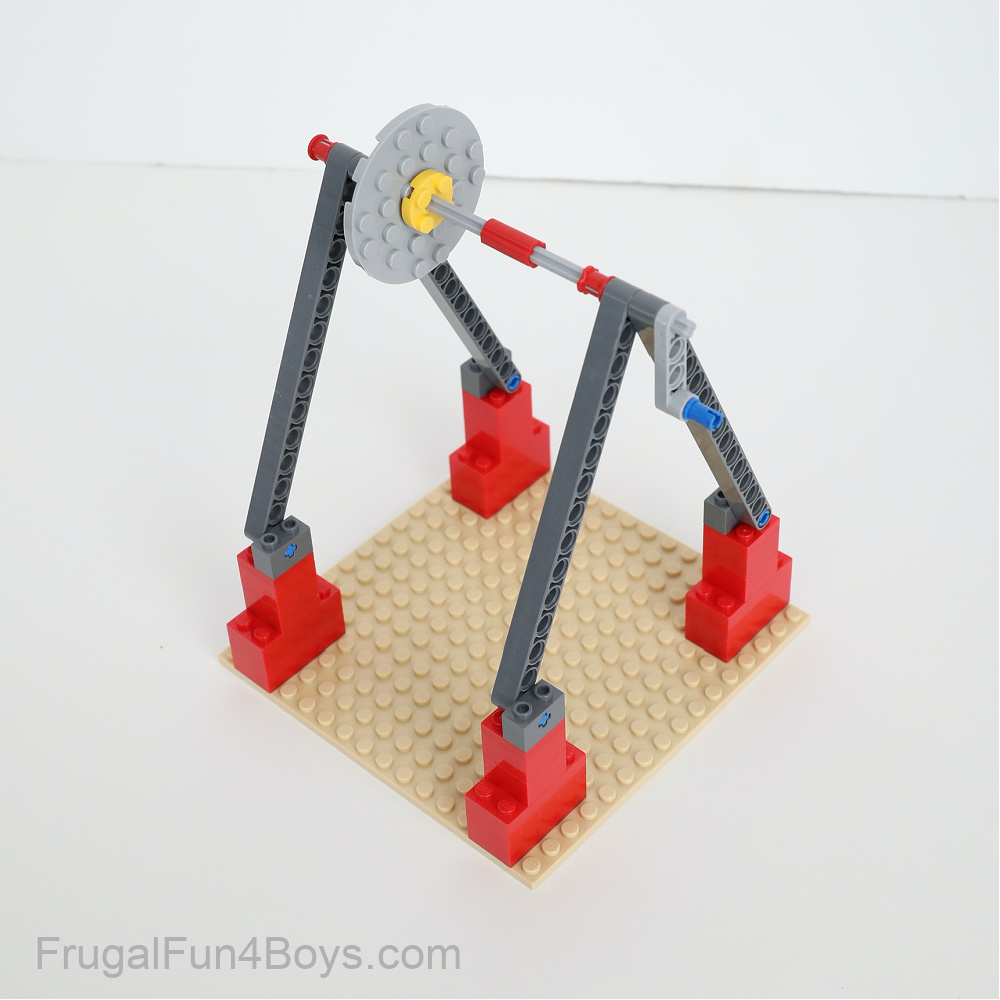
This LEGO Ferris wheel involves a few engineering issues that are valuable for kids to figure out. The first is how to build a sturdy frame that is secure and the right size. Then, they’ll need to figure out how to make the wheel turn freely within the frame. They’ll also have to figure out how to make the cars stay upright at all times while the wheel turns. I’ll show you how we did it, but you can always give kids this challenge and see if they can figure it out without first seeing ours!
Turn the handle and watch the Ferris wheel spin! It’s a lot of fun to play with. My 7 year old loves lining up minifigures and then giving them rides.
Want to see it in action? Here’s a video that shows the Ferris wheel spinning and also shows how we built the cars.
Hit the play button to watch the video. If you don’t see a play button, it’s probably because of an ad blocker on your device. Having ads at the start of the video allows me keep this site free rather than charging a membership fee for my content.
How to Build the LEGO Ferris Wheel
First, construct the frame.
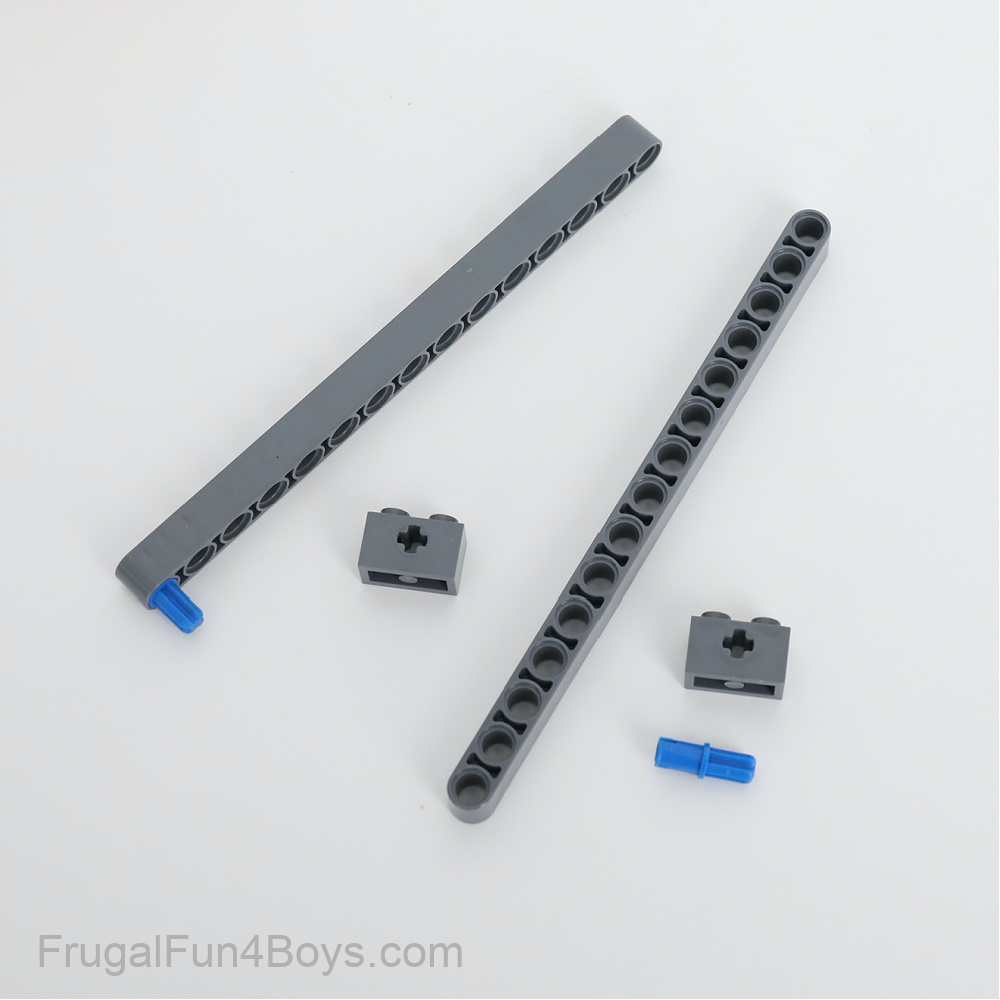
Grab four 1 x 15 Technic liftarms. They can be any color. Insert a blue axle pin with friction ridges into the bottom of each liftarm. Then slide a 1 x 2 Technic brick with axle hole onto each axle pin.
Here’s what our frame looks like.
Each “foot” for the base is made with four bricks and one plate. That’s the height you need for the wheel to turn smoothly.
The axle at the top of the frame is one light gray axle 9 studs long and one light gray axle 7 studs long, connected with a Technic axle connector 2L (2 studs long).
The wheel is made from one 6 x 6 light gray round plate. Then we attached a 2 x 2 round plate on each side of it, top and bottom. The 2 x 2 round plates have axle holes, while the light gray plate has a round hole. We needed the size of the 6 x 6 round plate, but needed the axle holes so that the wheel would connect with the axle and rotate WITH it.
Grab the bricks shown for building the rods that support the passenger cars. You’ll need four sets of these.
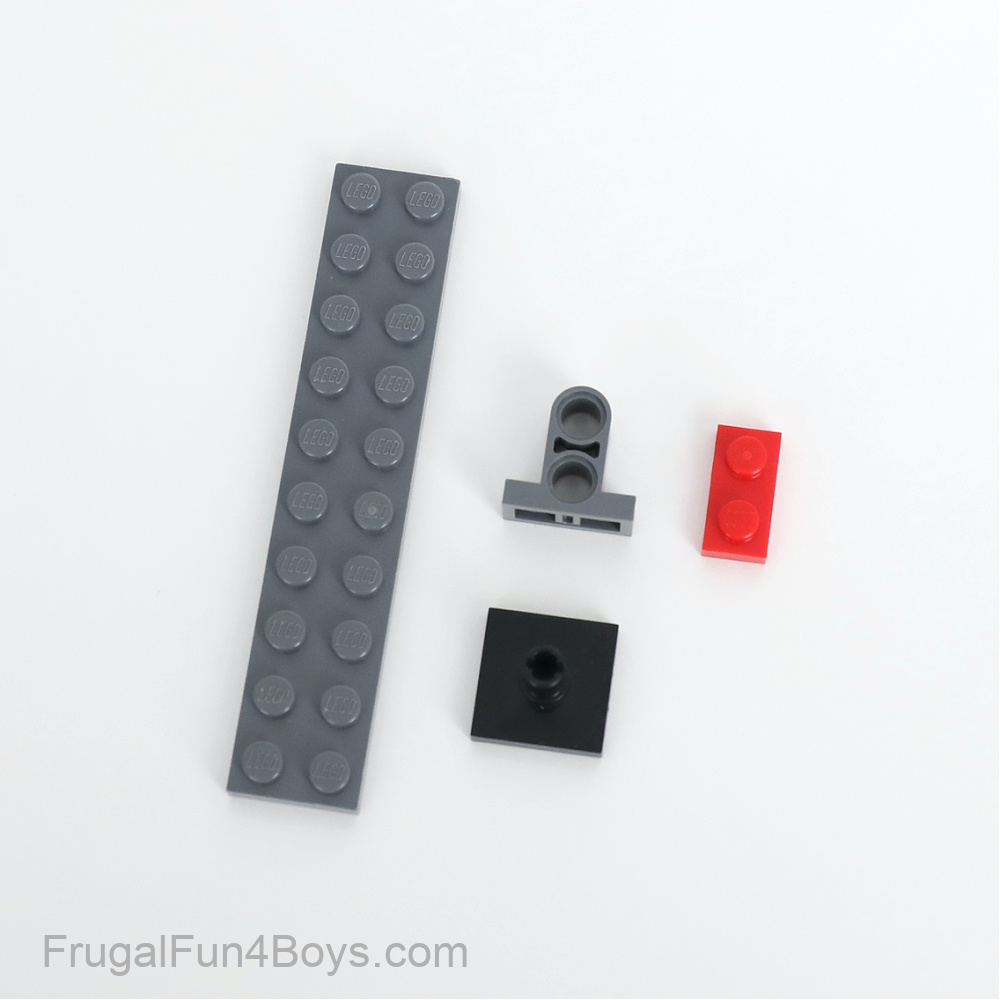
Attach a 1 x 2 pin connector plate to a 2 x 2 tile modified with a pin. Add these to the end of a 2 x 10 dark gray plate. Then add a 1 x 2 red plate (or any color you want) to the underside of the pin connector plate.

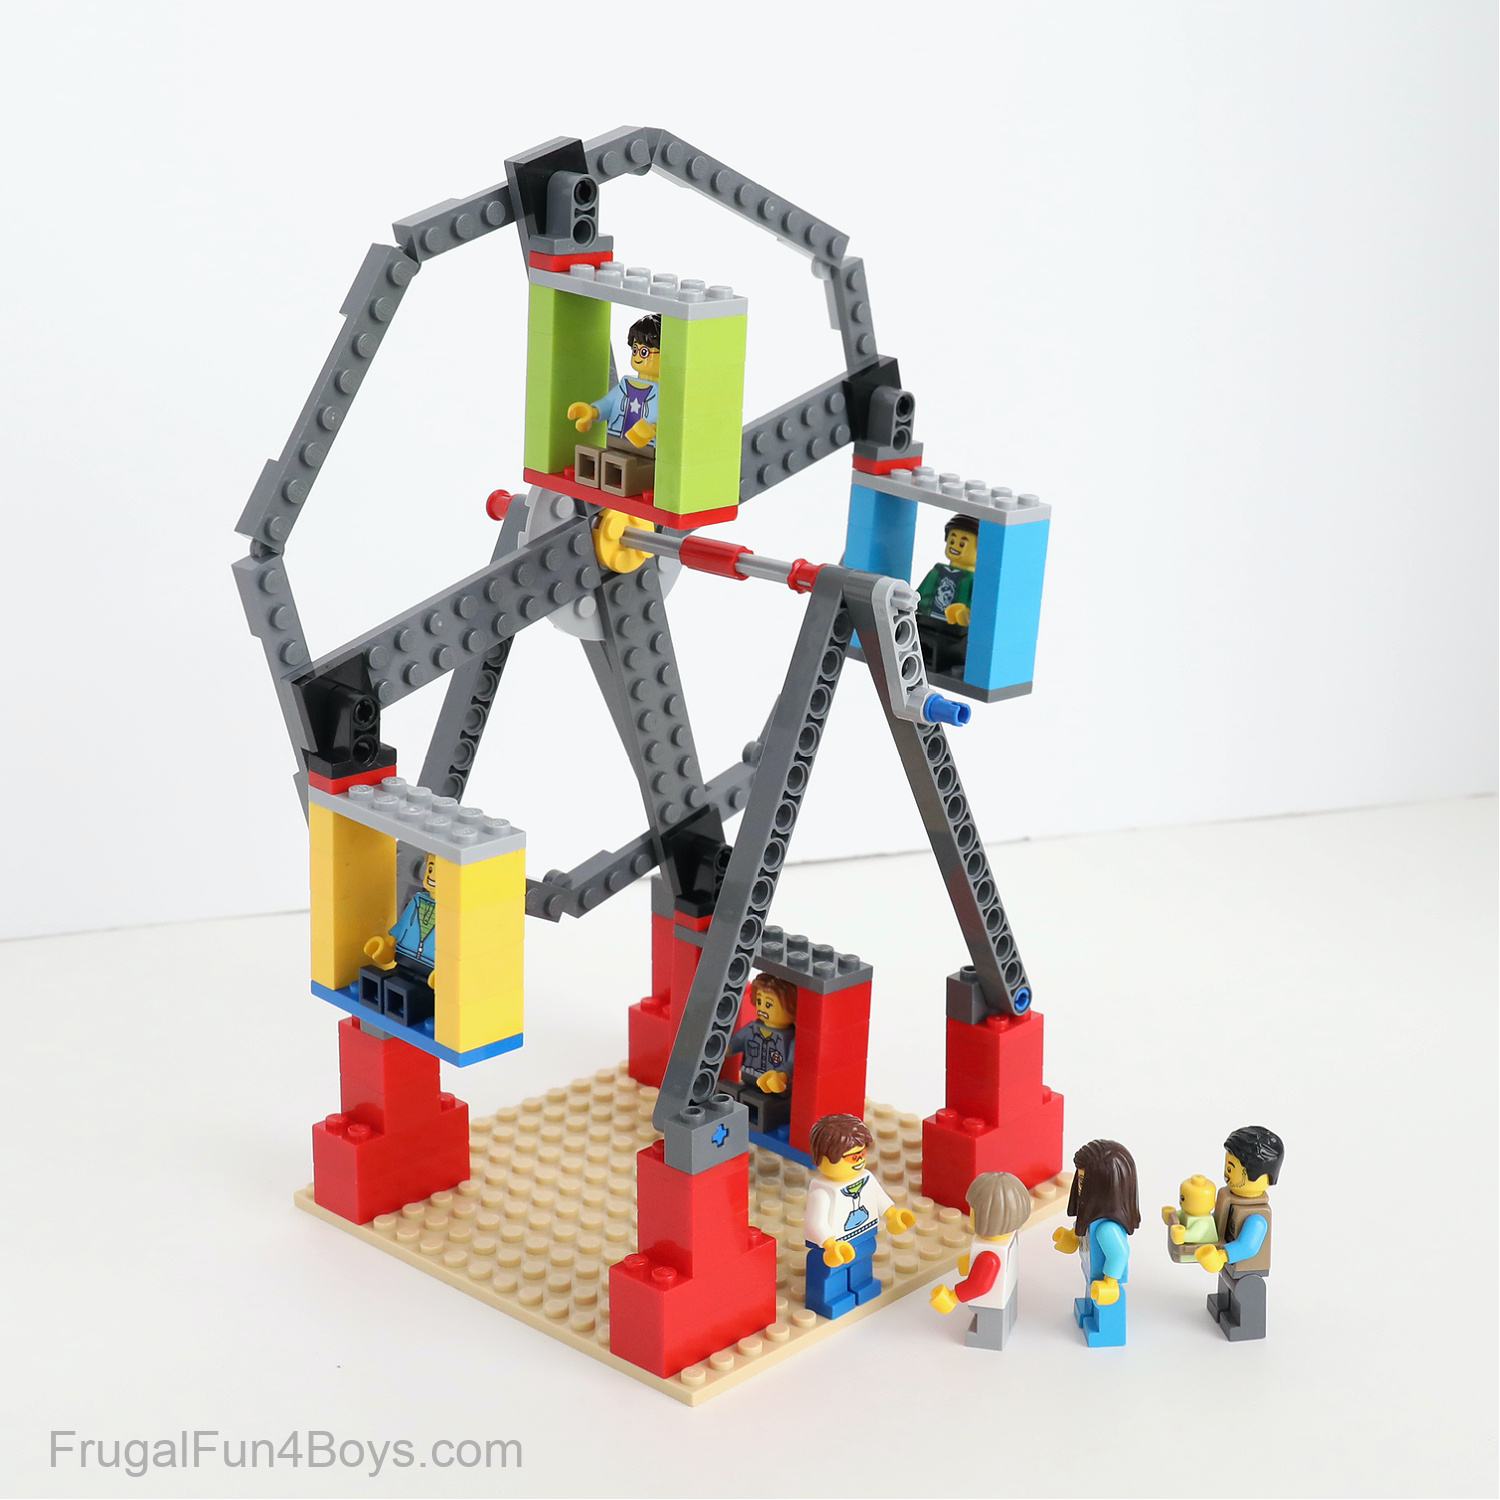
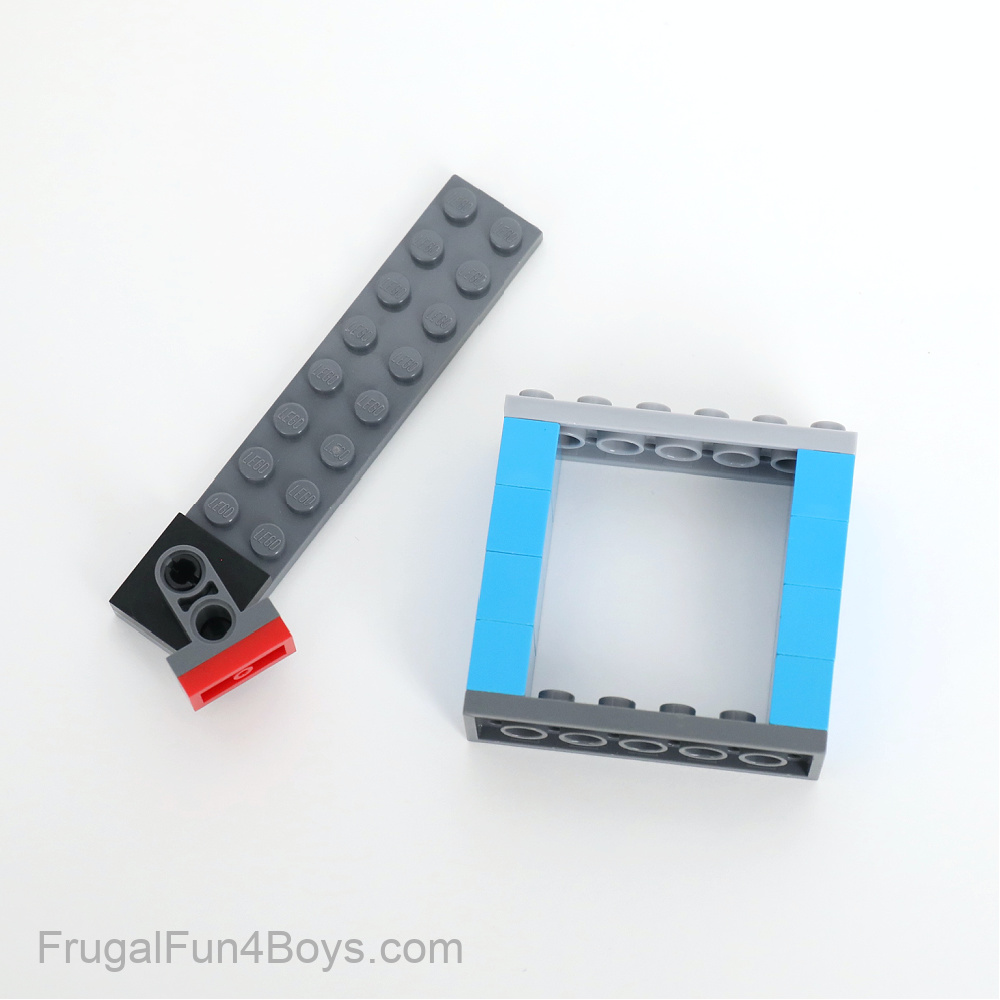
Build a passenger car. Use two 2 x 6 plates. Then there are four 1 x 2 bricks on each side.
Make three more of these. Then attach the passenger cars to the wheel on the Ferris wheel frame.
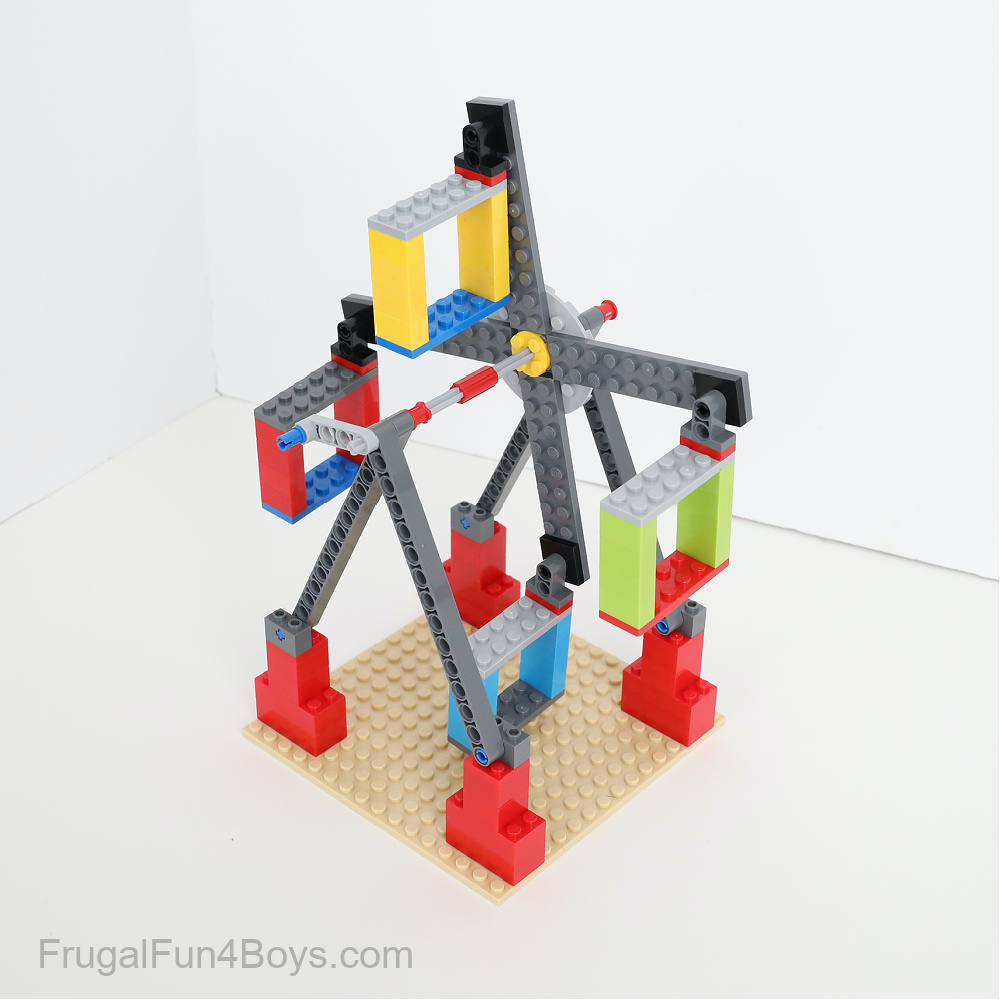
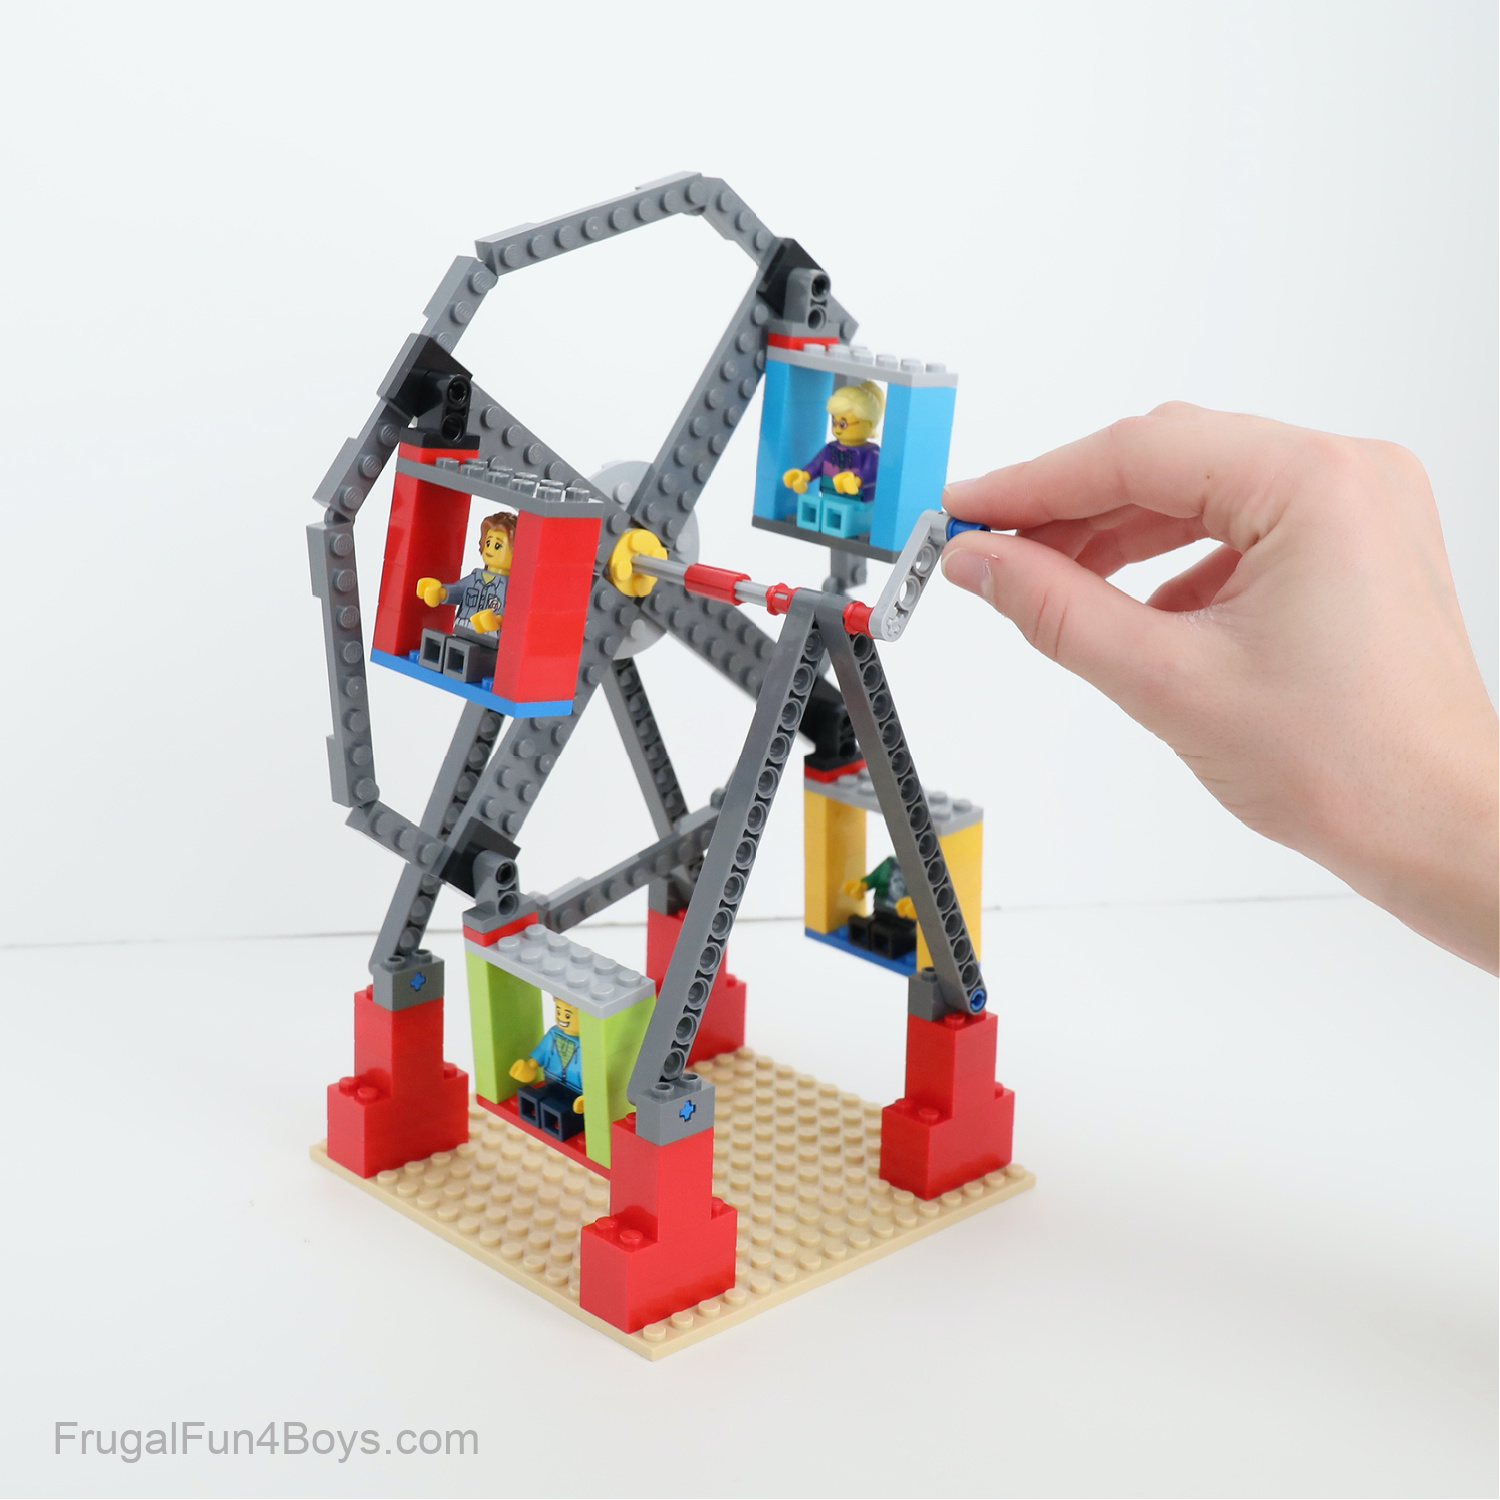
You can stop right here if you want! The Ferris wheel is now functioning and fun to play with. However, if you want to add a circular frame to the wheel, it will look even better.
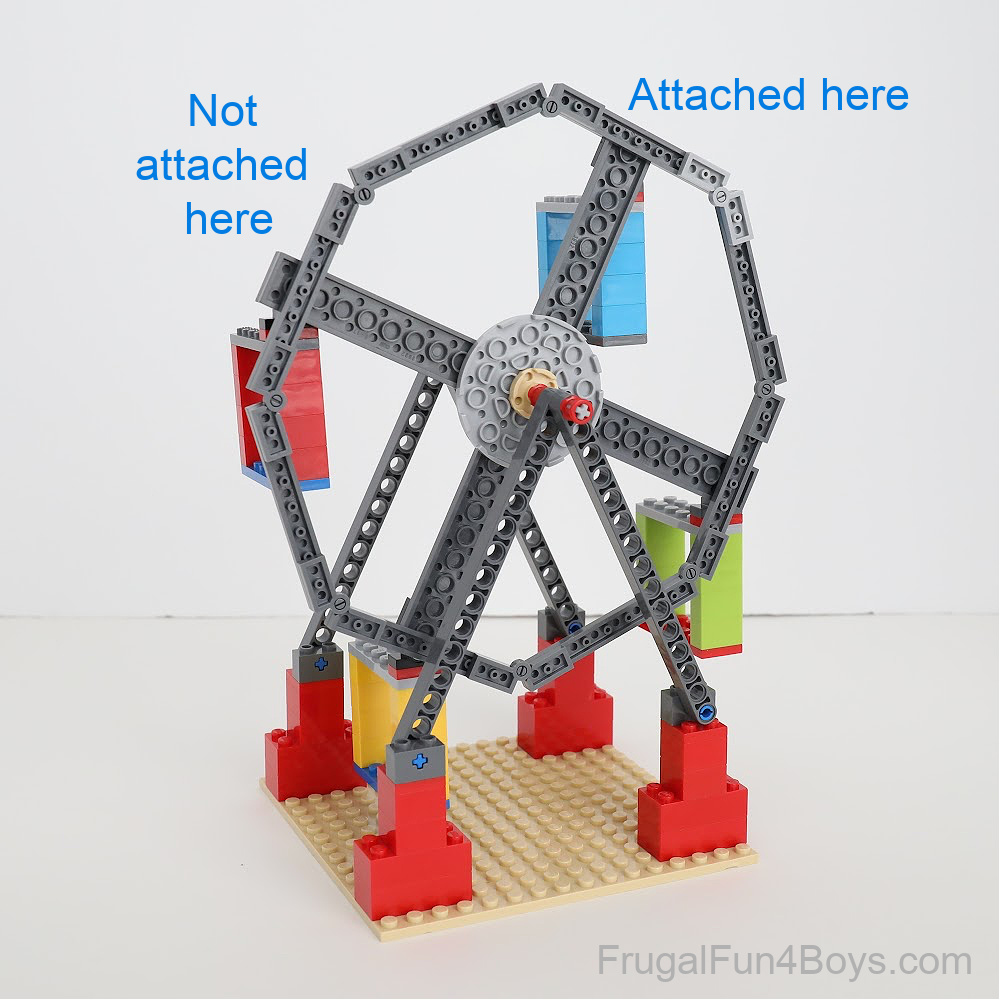
For the outside wheel, we used eight 1 x 8 dark gray plates and eight 1 x 4 hinge plates.
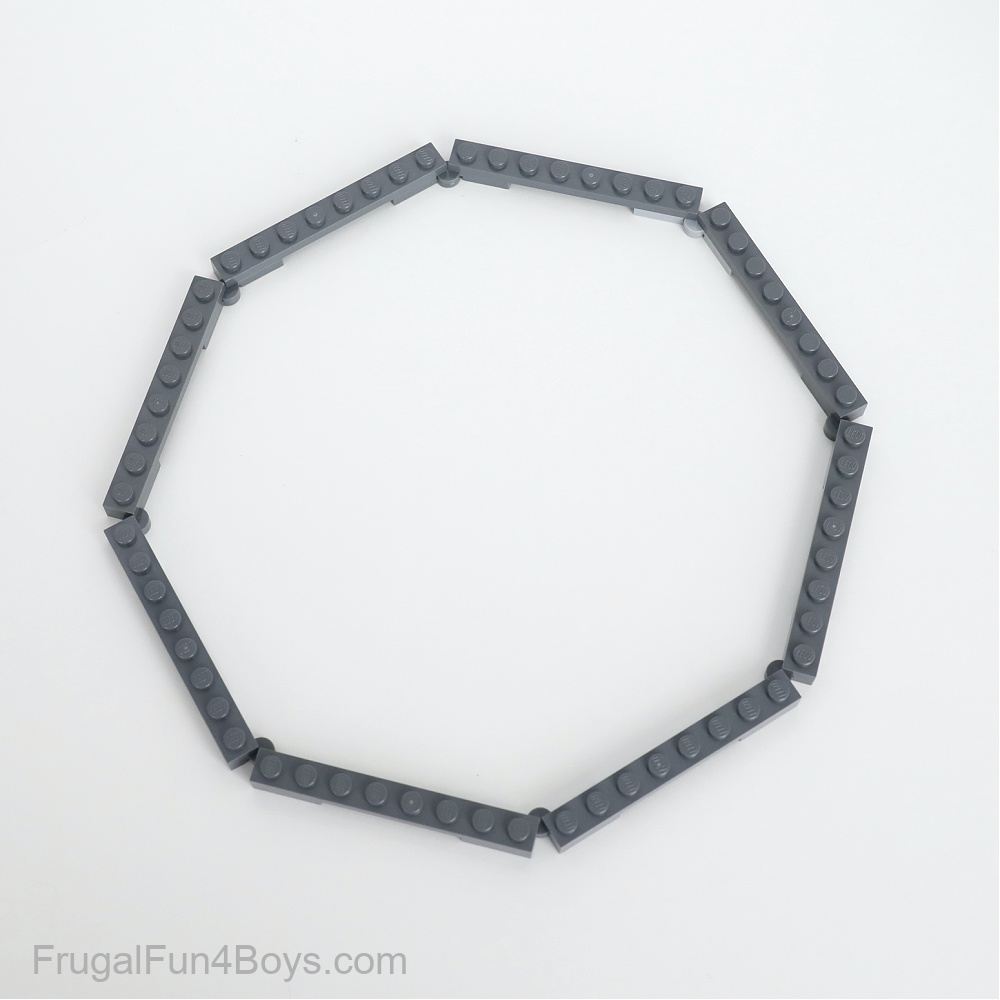
You’ll need to disconnect one of the hinge plates in order to install the wheel.
We did not find a way to build the wheel so that it would line up with the outside studs on each of the 2 x 10 plates. This was the best option we came up with! The outer wheel is attached to two of the 2 x 10 plates, and just sitting next to the other two.
Once your Ferris wheel is finished, add other fun carnival details like a concession stand!

Parts List:
If you don’t have all of the pieces listed, you can easily order from Brick Link. I have a post that explains how Brick Link works if you’re new to that site!
1 – 16 x 16 plate
8 – 2 x 4 bricks, any color
8 – 2 x 2 bricks, any color
4 – 2 x 2 plates, any color
4 – 1 x 2 Technic bricks with axle hole
5 – blue axle pins with friction ridges
1 – Technic axle, 9L (9 studs long)
1 – Technic axle 7L (7 studs long)
3 – red Technic bush
8 – 1 x 8 dark gray plates
4 – 2 x 10 dark gray plates
1 – 6 x 6 light gray round plate
2 – 2 x 2 round plates, any color
4 – 2 x 2 black tiles modified with pin
4 – 1 x 2 Technic pin connector plates
4 – 1 x 2 plates, any color
For the handle/crank:
1 – blue Technic axle pin with friction ridges
1 – 1 x 4 liftarm modified stud connector
For the passenger cars:
8 – 2 x 6 plates, any color
32 – 1 x 2 bricks, any color
Have fun building! Be sure to visit our other LEGO projects with moving parts.
Build a LEGO Ball Contraption – this is another great engineering challenge!
Build a LEGO Mechanical Turtle – turn a knob, and his head comes out of the shell.
Build a LEGO Weightlessness Training Machine – this is SUPER COOL. Really fun mechanical project!
3 Comments
Sandra Mar 23, 2022
Hello, just built it with my 6 year old. Thanks for the Idea. He is playing with it! Normally he doesn't play with the things he's building😅
We adjusted a little bit. It works 💪
Tee Mar 5, 2024
Thank you for the instructions! My 5 year old had a lot of fun building it. Now he's trying to figure out how to make it bigger so he can put more minifigs on it.
Marney May 19, 2025
Thank you for this! We just used it to make a ferris wheel for a "Charlotte's Web" diorama for a school project. We had to get creative for a few parts, but made it work for us.
Post a Comment