
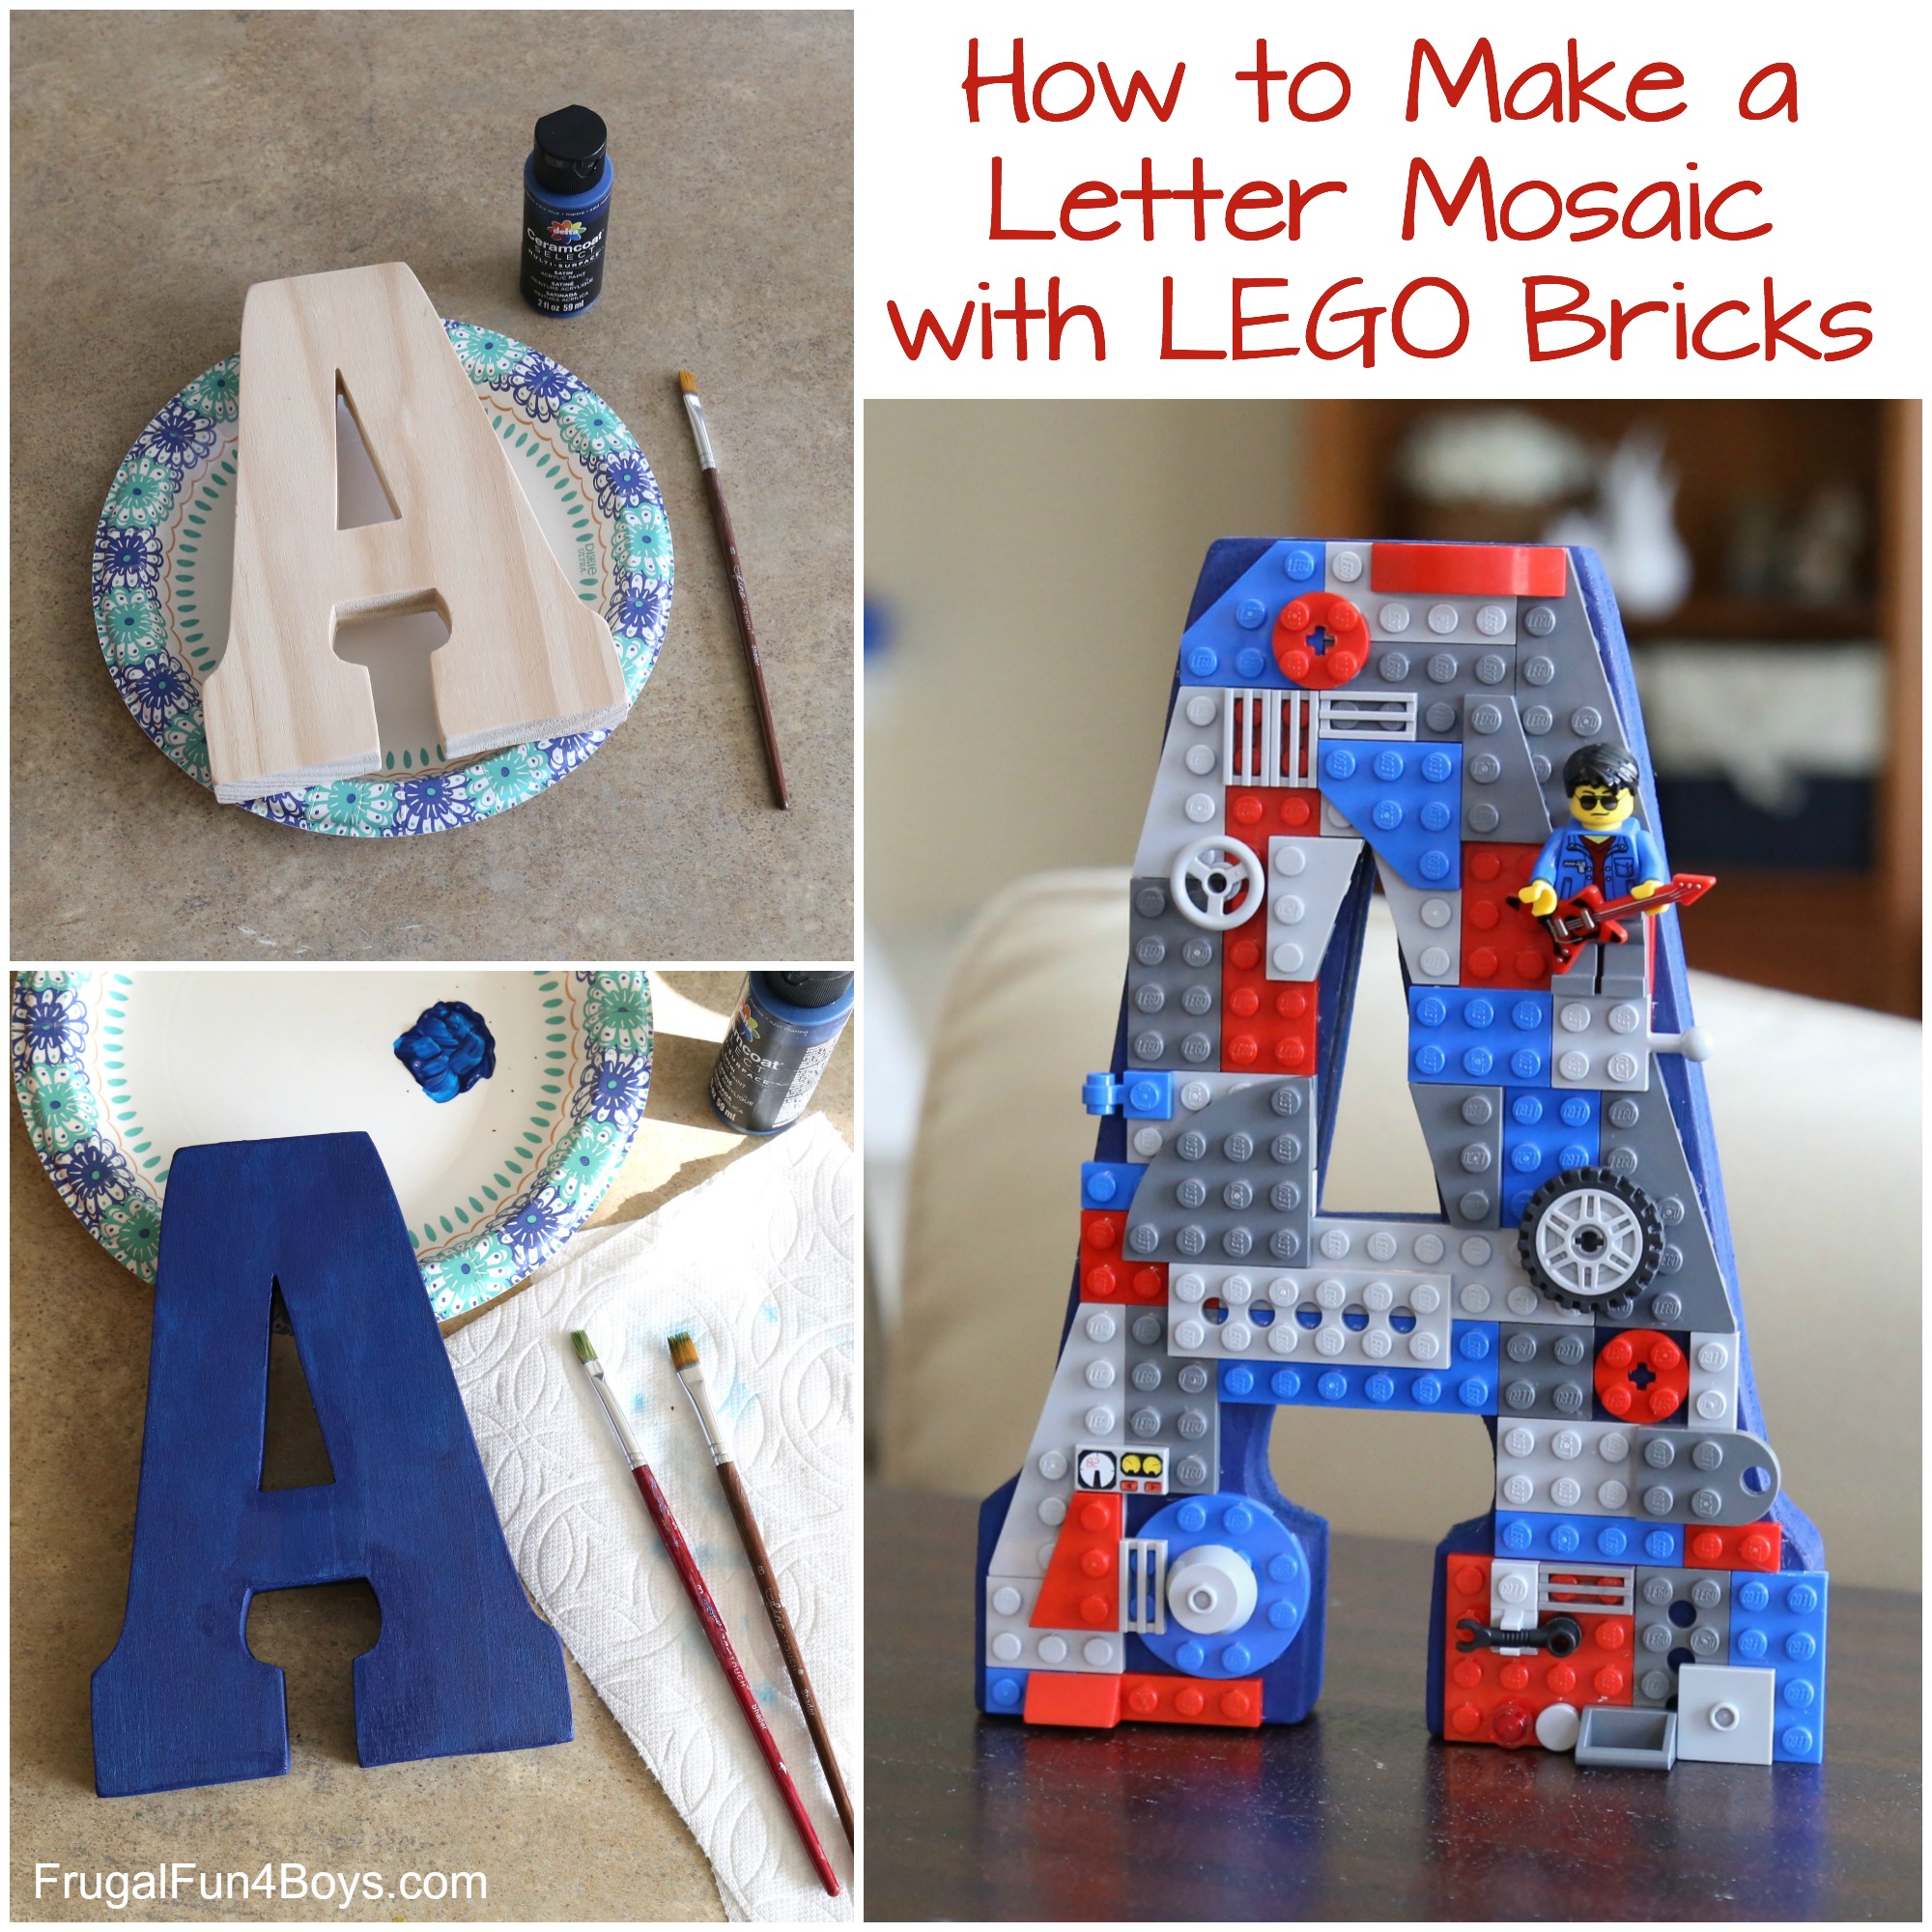
Here’s a fun project that will look awesome in any LEGO® fan’s room! Make a LEGO letter mosaic to hang on the wall or display on a shelf. Kids can even build on it and attach their favorite bricks and minifigures.
The bottom layer of bricks (well, plates – the flat pieces) are glued down, but the rest of the bricks and can moved around or removed.
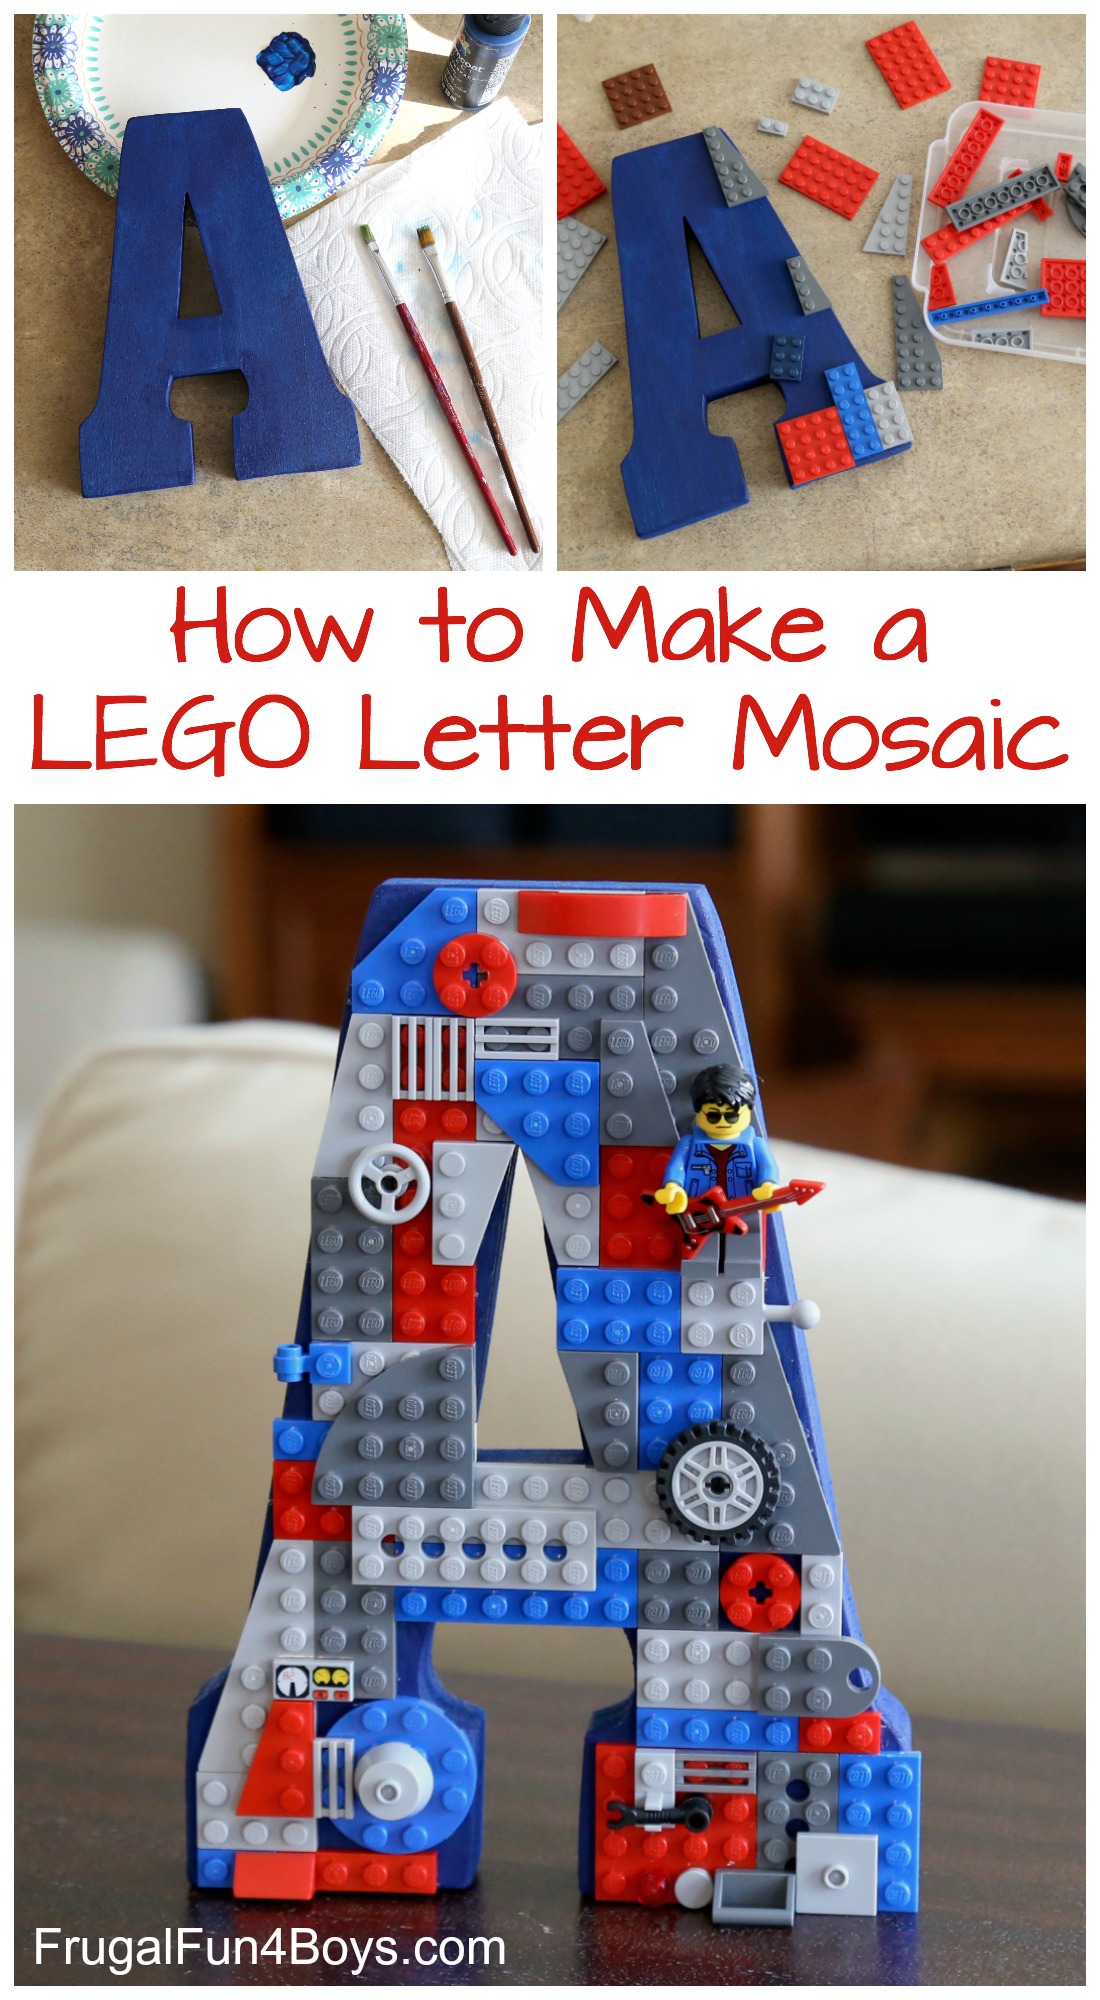
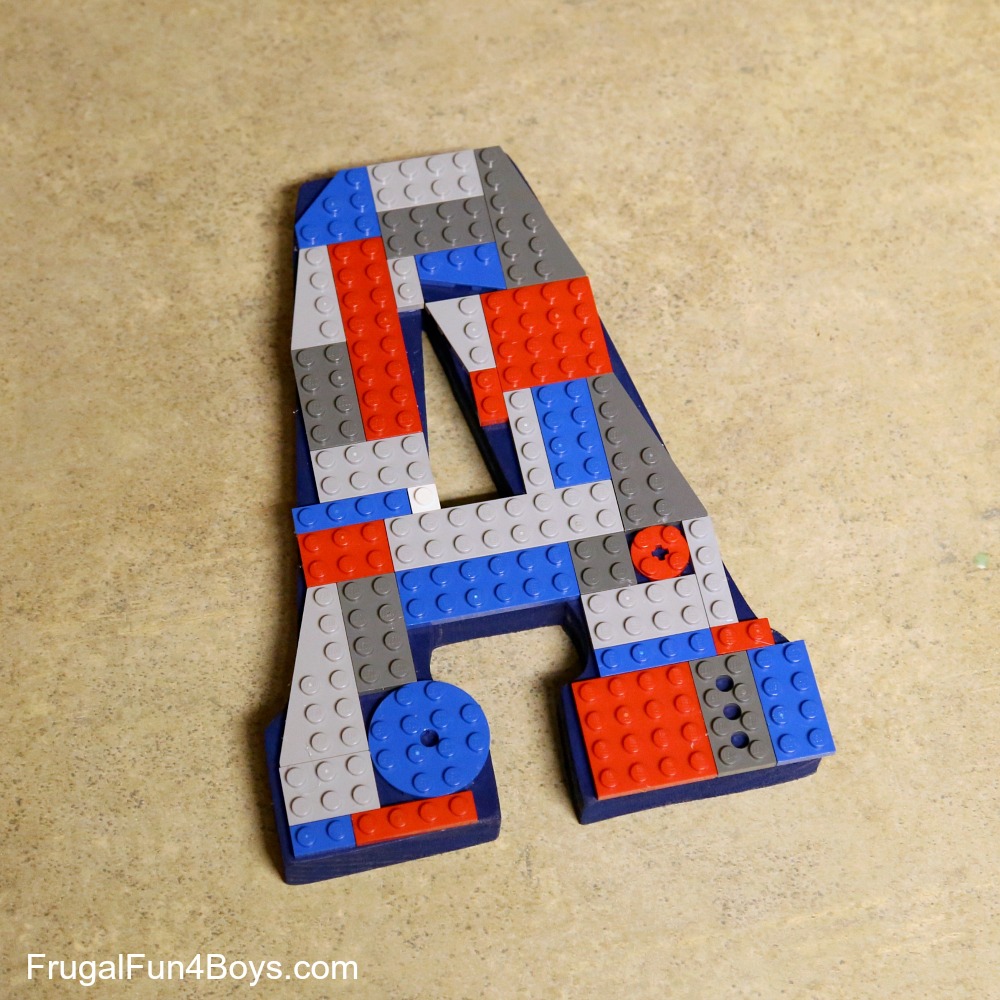
I have seen LEGO® letter mosaics for sale on Pinterest, and they usually have a huge variety of bricks glued on in a random arrangement. While these look really awesome, I decided that I wanted this letter to be buildable. The layer of bricks that I glued on are all arranged so that the studs line up and you can build on them.
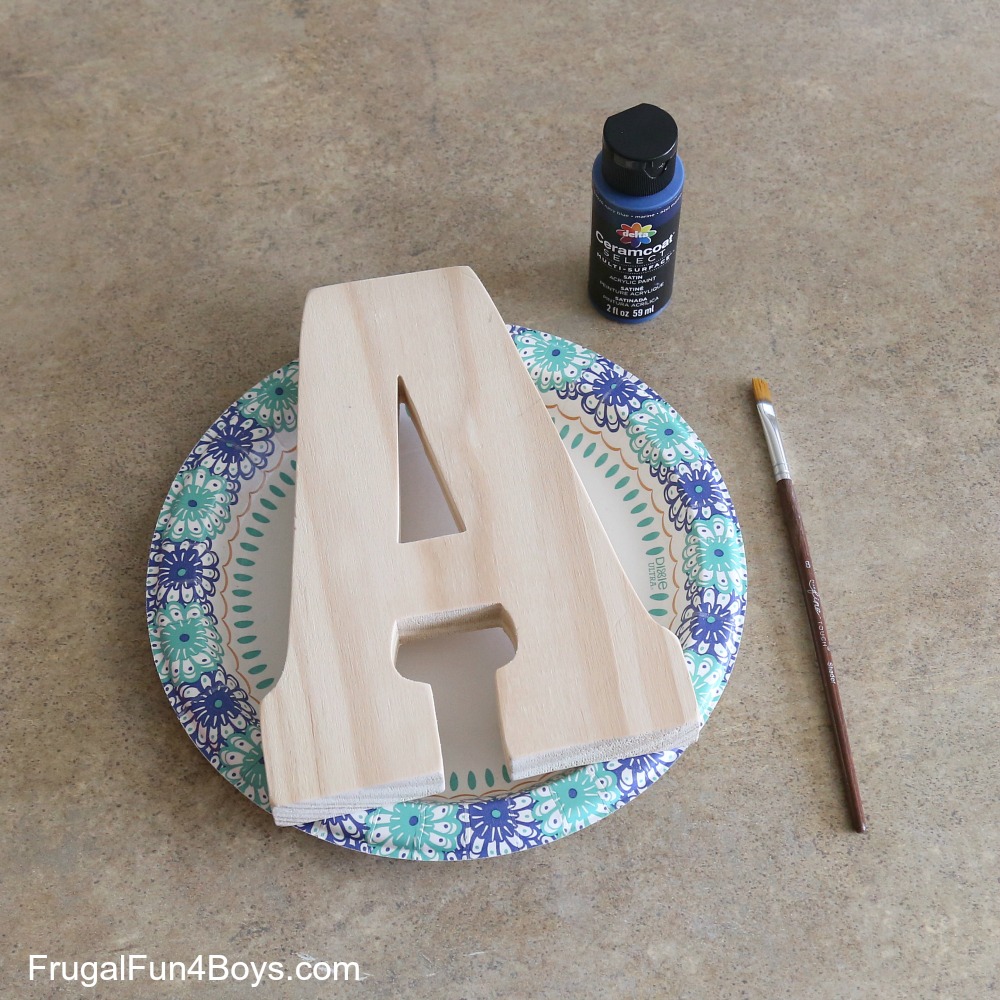
Here’s what you need to make one:
- A wooden letter from the craft store
- Acrylic paint
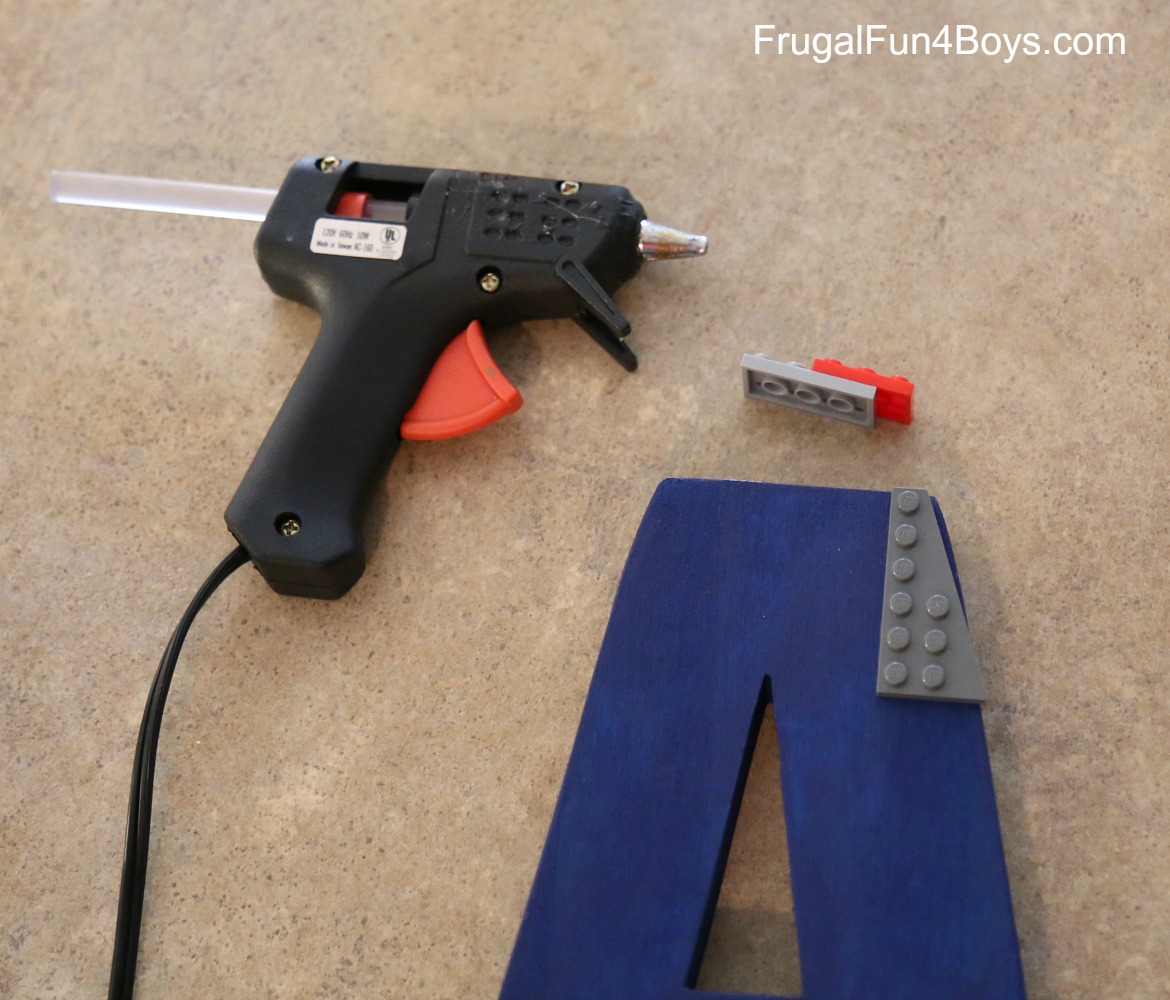
- Hot glue gun and glue sticks
- LEGO® bricks!
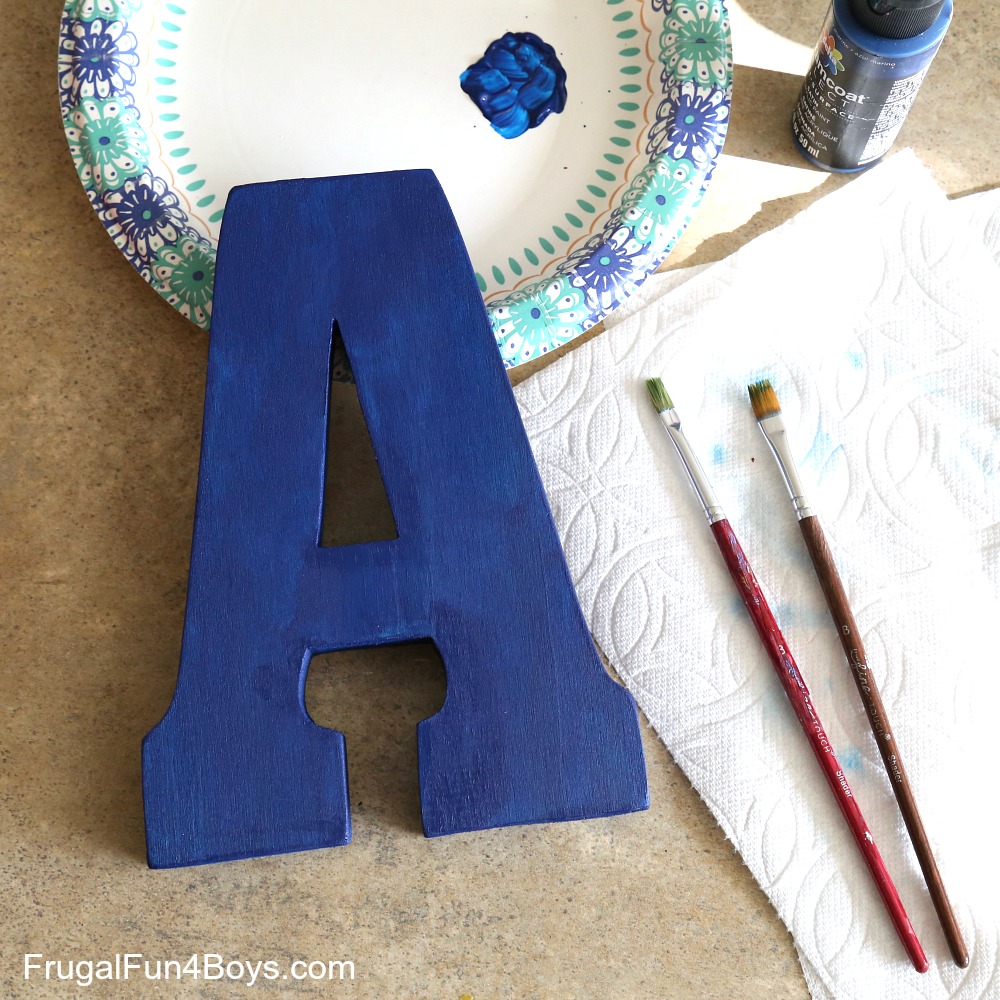
Step 1: Paint your letter with a coat of acrylic paint.
Be sure to paint all sides of your letter. If you’re planning to hang it on the wall, it’s not necessary to paint the back.
Step 2: Choose a color scheme and plan out your brick arrangement.
Kids can use any color of bricks they want, of course, but I think it looks best to pick a color scheme of 3-4 colors. The bricks (plates) that you glue down won’t be usable for anything else after this project, so keep that in mind. Then it’s best to plan out the arrangement of the bricks before you start gluing.
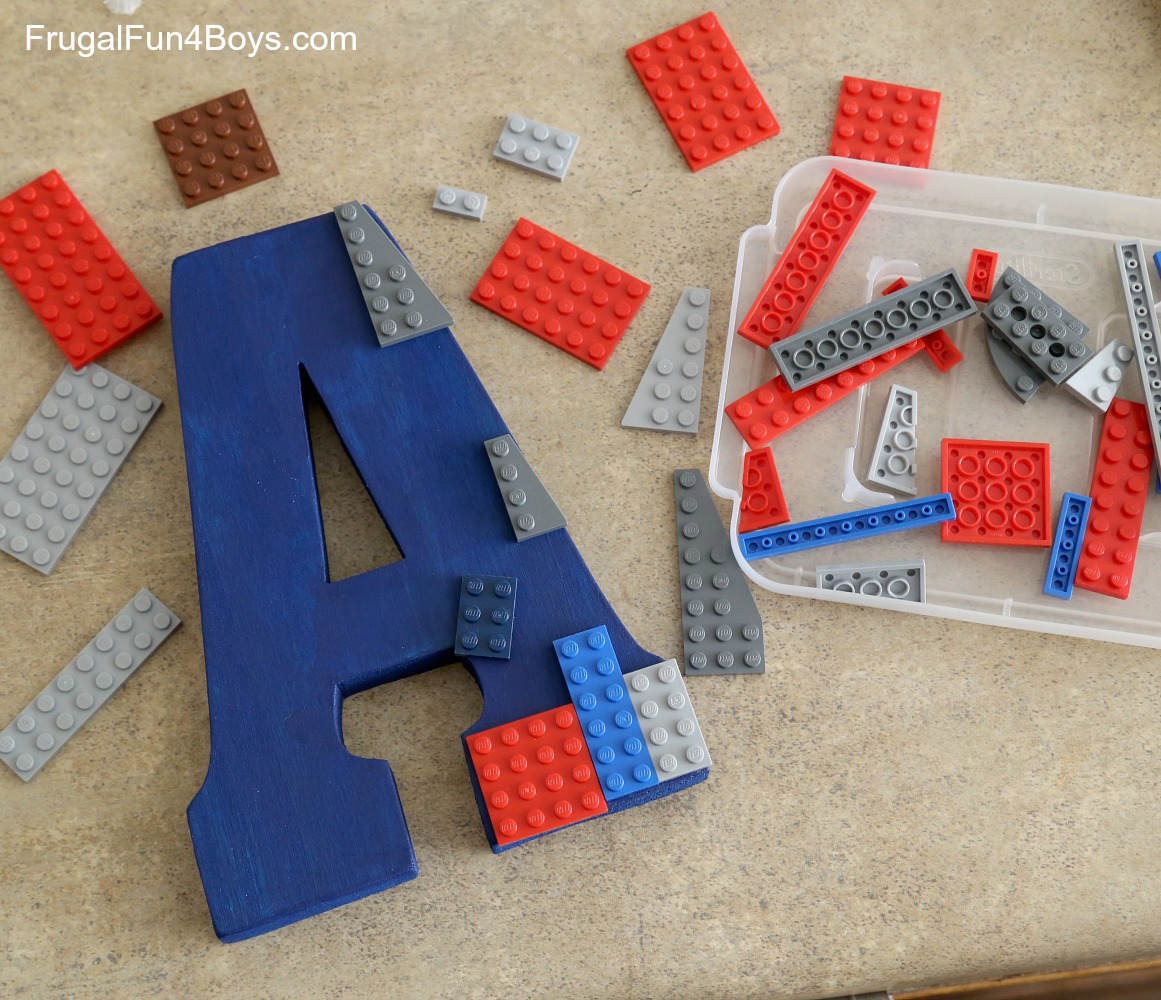
Step 3: Glue the plates to the letter. I used hot glue, and I think it will hold up well. I tested it by gluing down one brick and then trying to pull it off. It’s on there very tight! If you want some extra assurance, you can use super glue. Personally, I don’t love working with super glue and this seemed like enough hold to me.
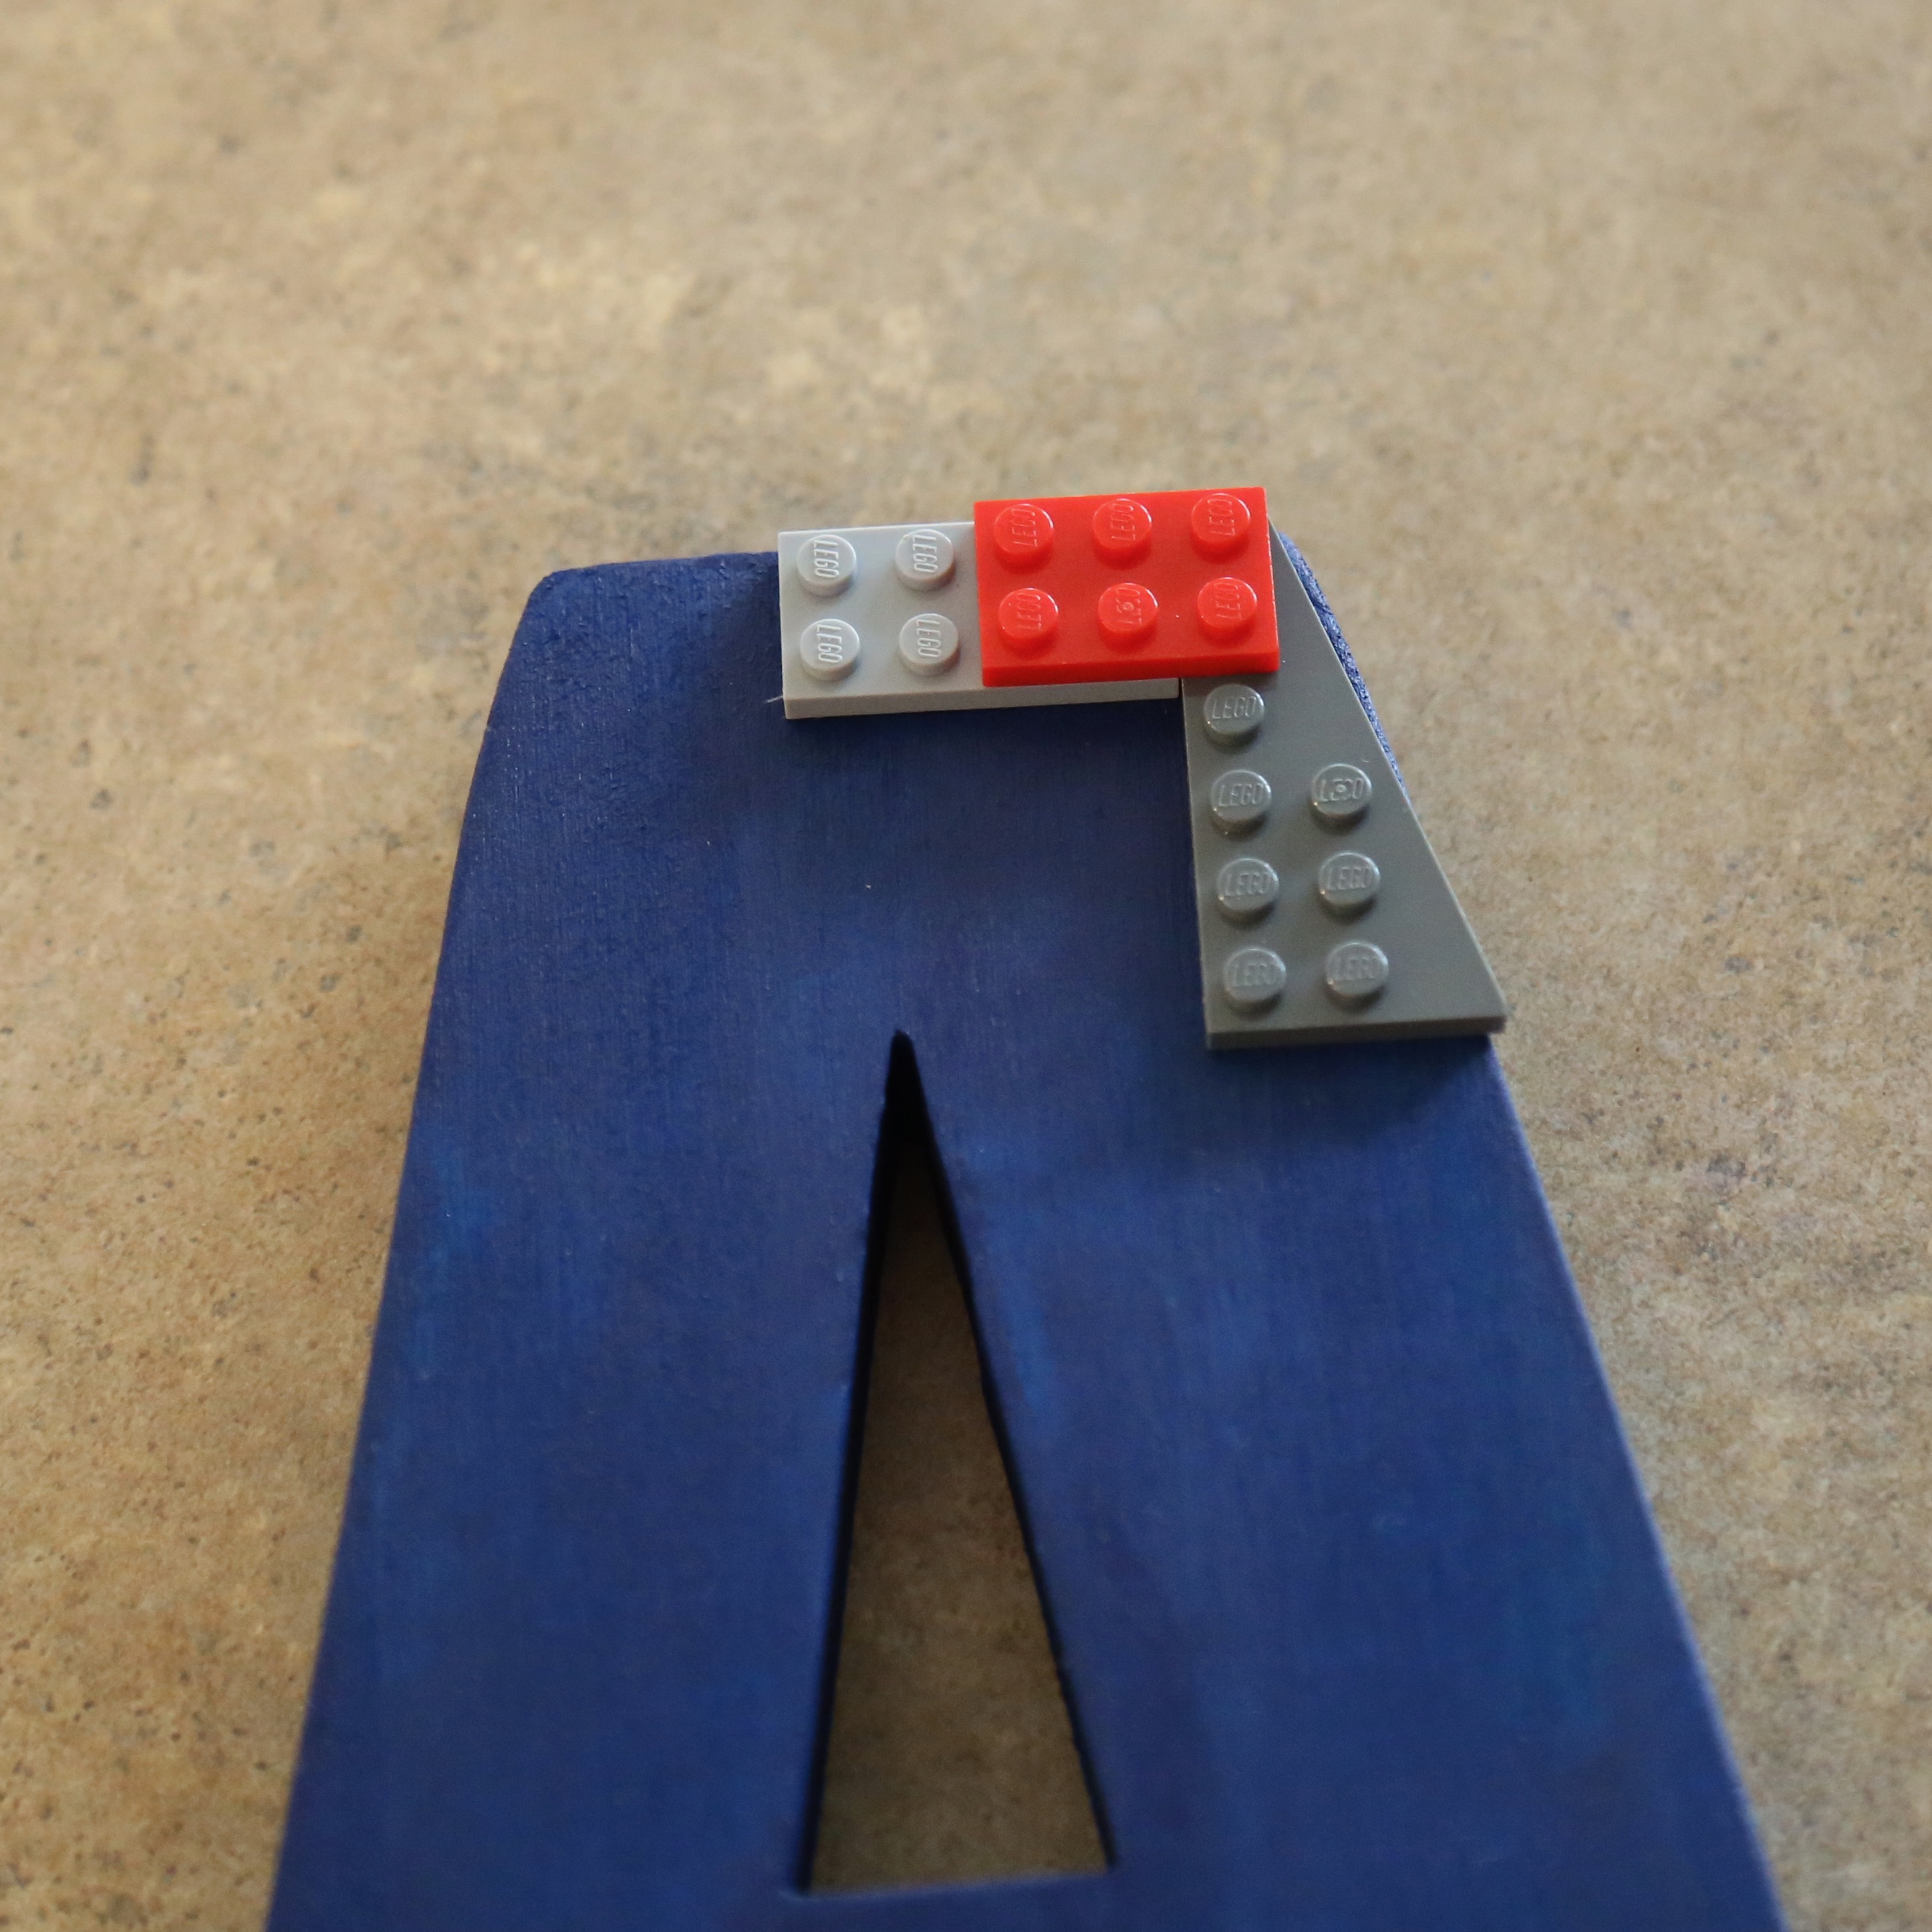
Tip: To make the studs line up correctly, you’ll want to connect the plates by using another plate on top as you glue them down.
First, attach a plate to the plate you want to glue down. In the photo below, I’ll put glue on the underside of the light gray plate and then use the red one to attach the light gray plate to the dark gray brick that is already on there.
Make sure that your first plate is lined up nice and straight, or EVERYTHING else will be crooked!
Use the red plate to attach the plates as shown below.
Once the glue has hardened for a few minutes, you can remove the red plate.
Step 3: Keep gluing until you have covered the wood letter!
(Sorry the lighting is so wacky – the sun had gone down and I was stuck with only fluorescent light.)
Step 4: Now add another layer or two of bricks! Use plates, round bricks, and even minifigures. Minifigure legs will attach to the letter.
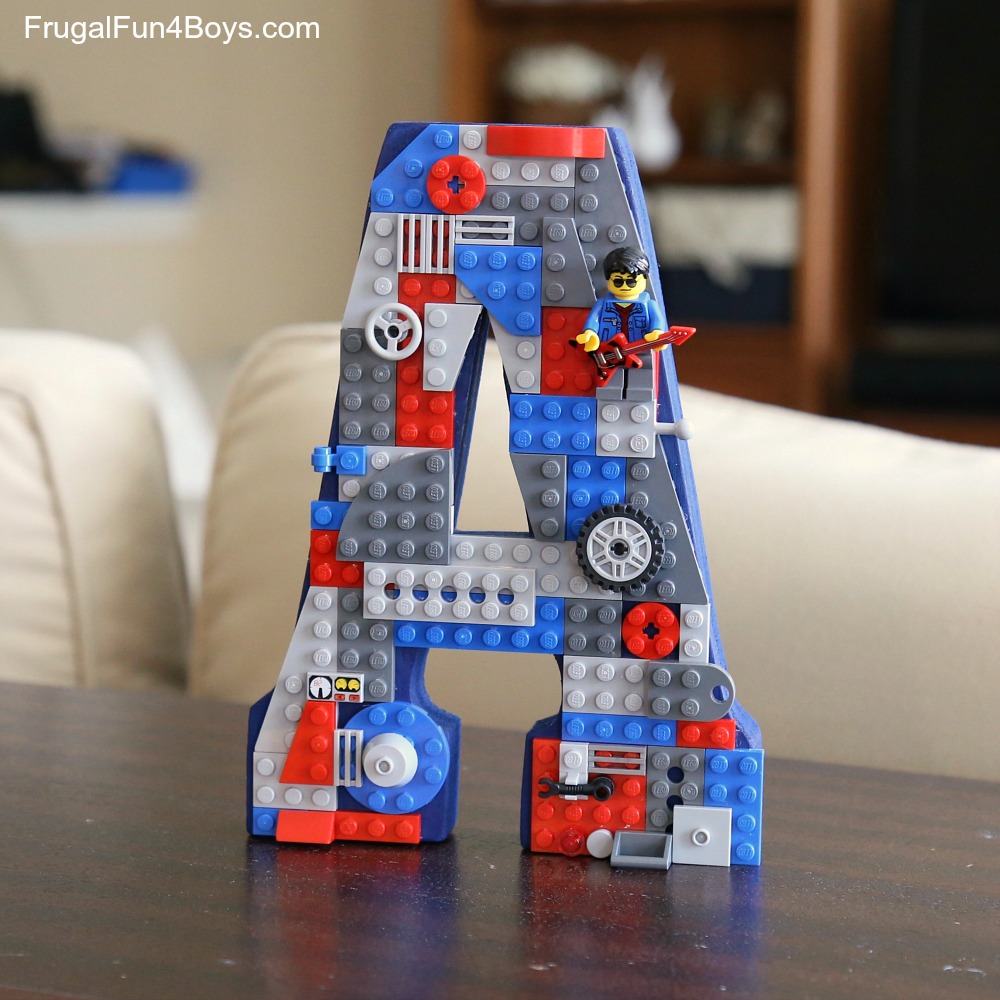
Here’s how I attached the wheel. It’s attached to a 2 x 2 tile with a pin, and it really turns!
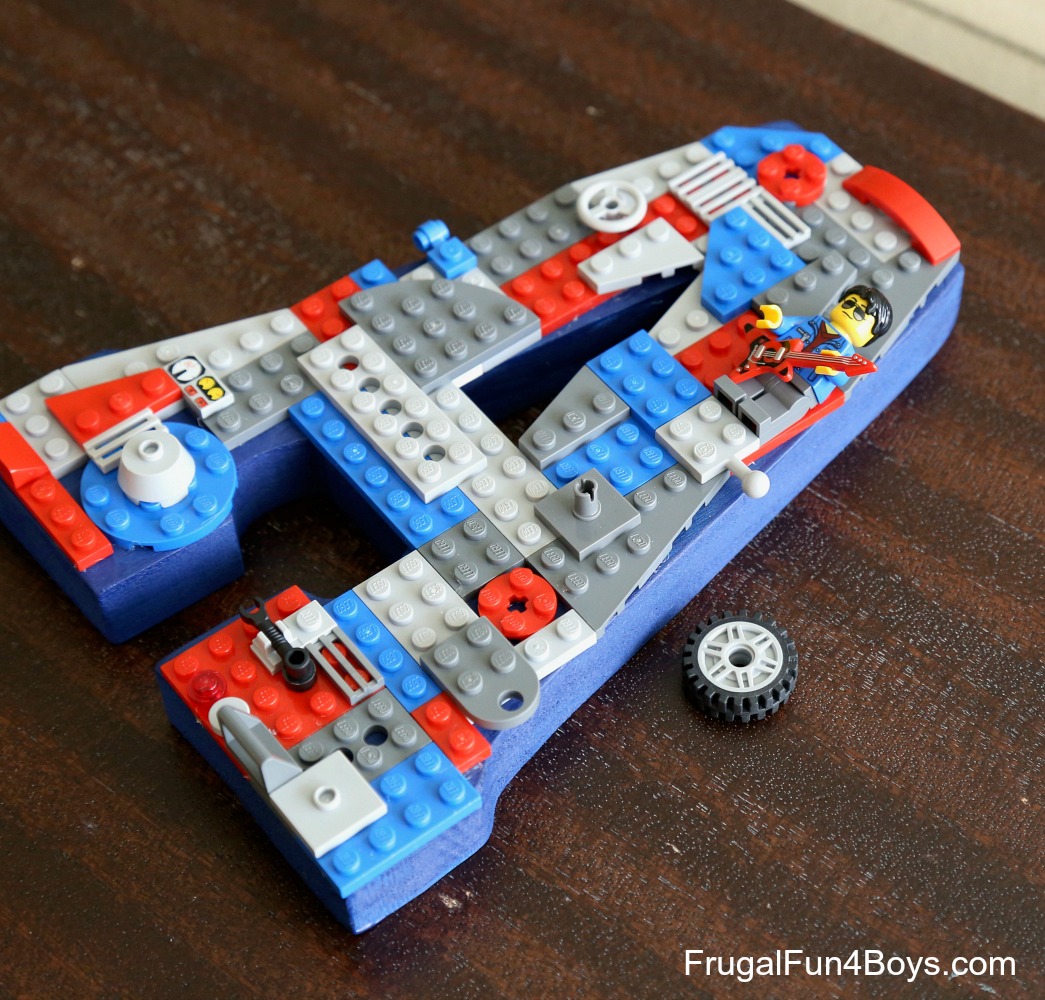
This A is going to be Aidan’s, so he chose to put his favorite guitar playing minifigure on it. It turned out super cute!
LEGO® is a trademark of the LEGO® group of companies which does not sponsor, authorize, or endorse this site.
Never miss a project! Sign up for our free weekly newsletter here: Frugal Fun for Boys & Girls Newsletter
Have fun crafting! Here are more LEGO® ideas that you might enjoy!
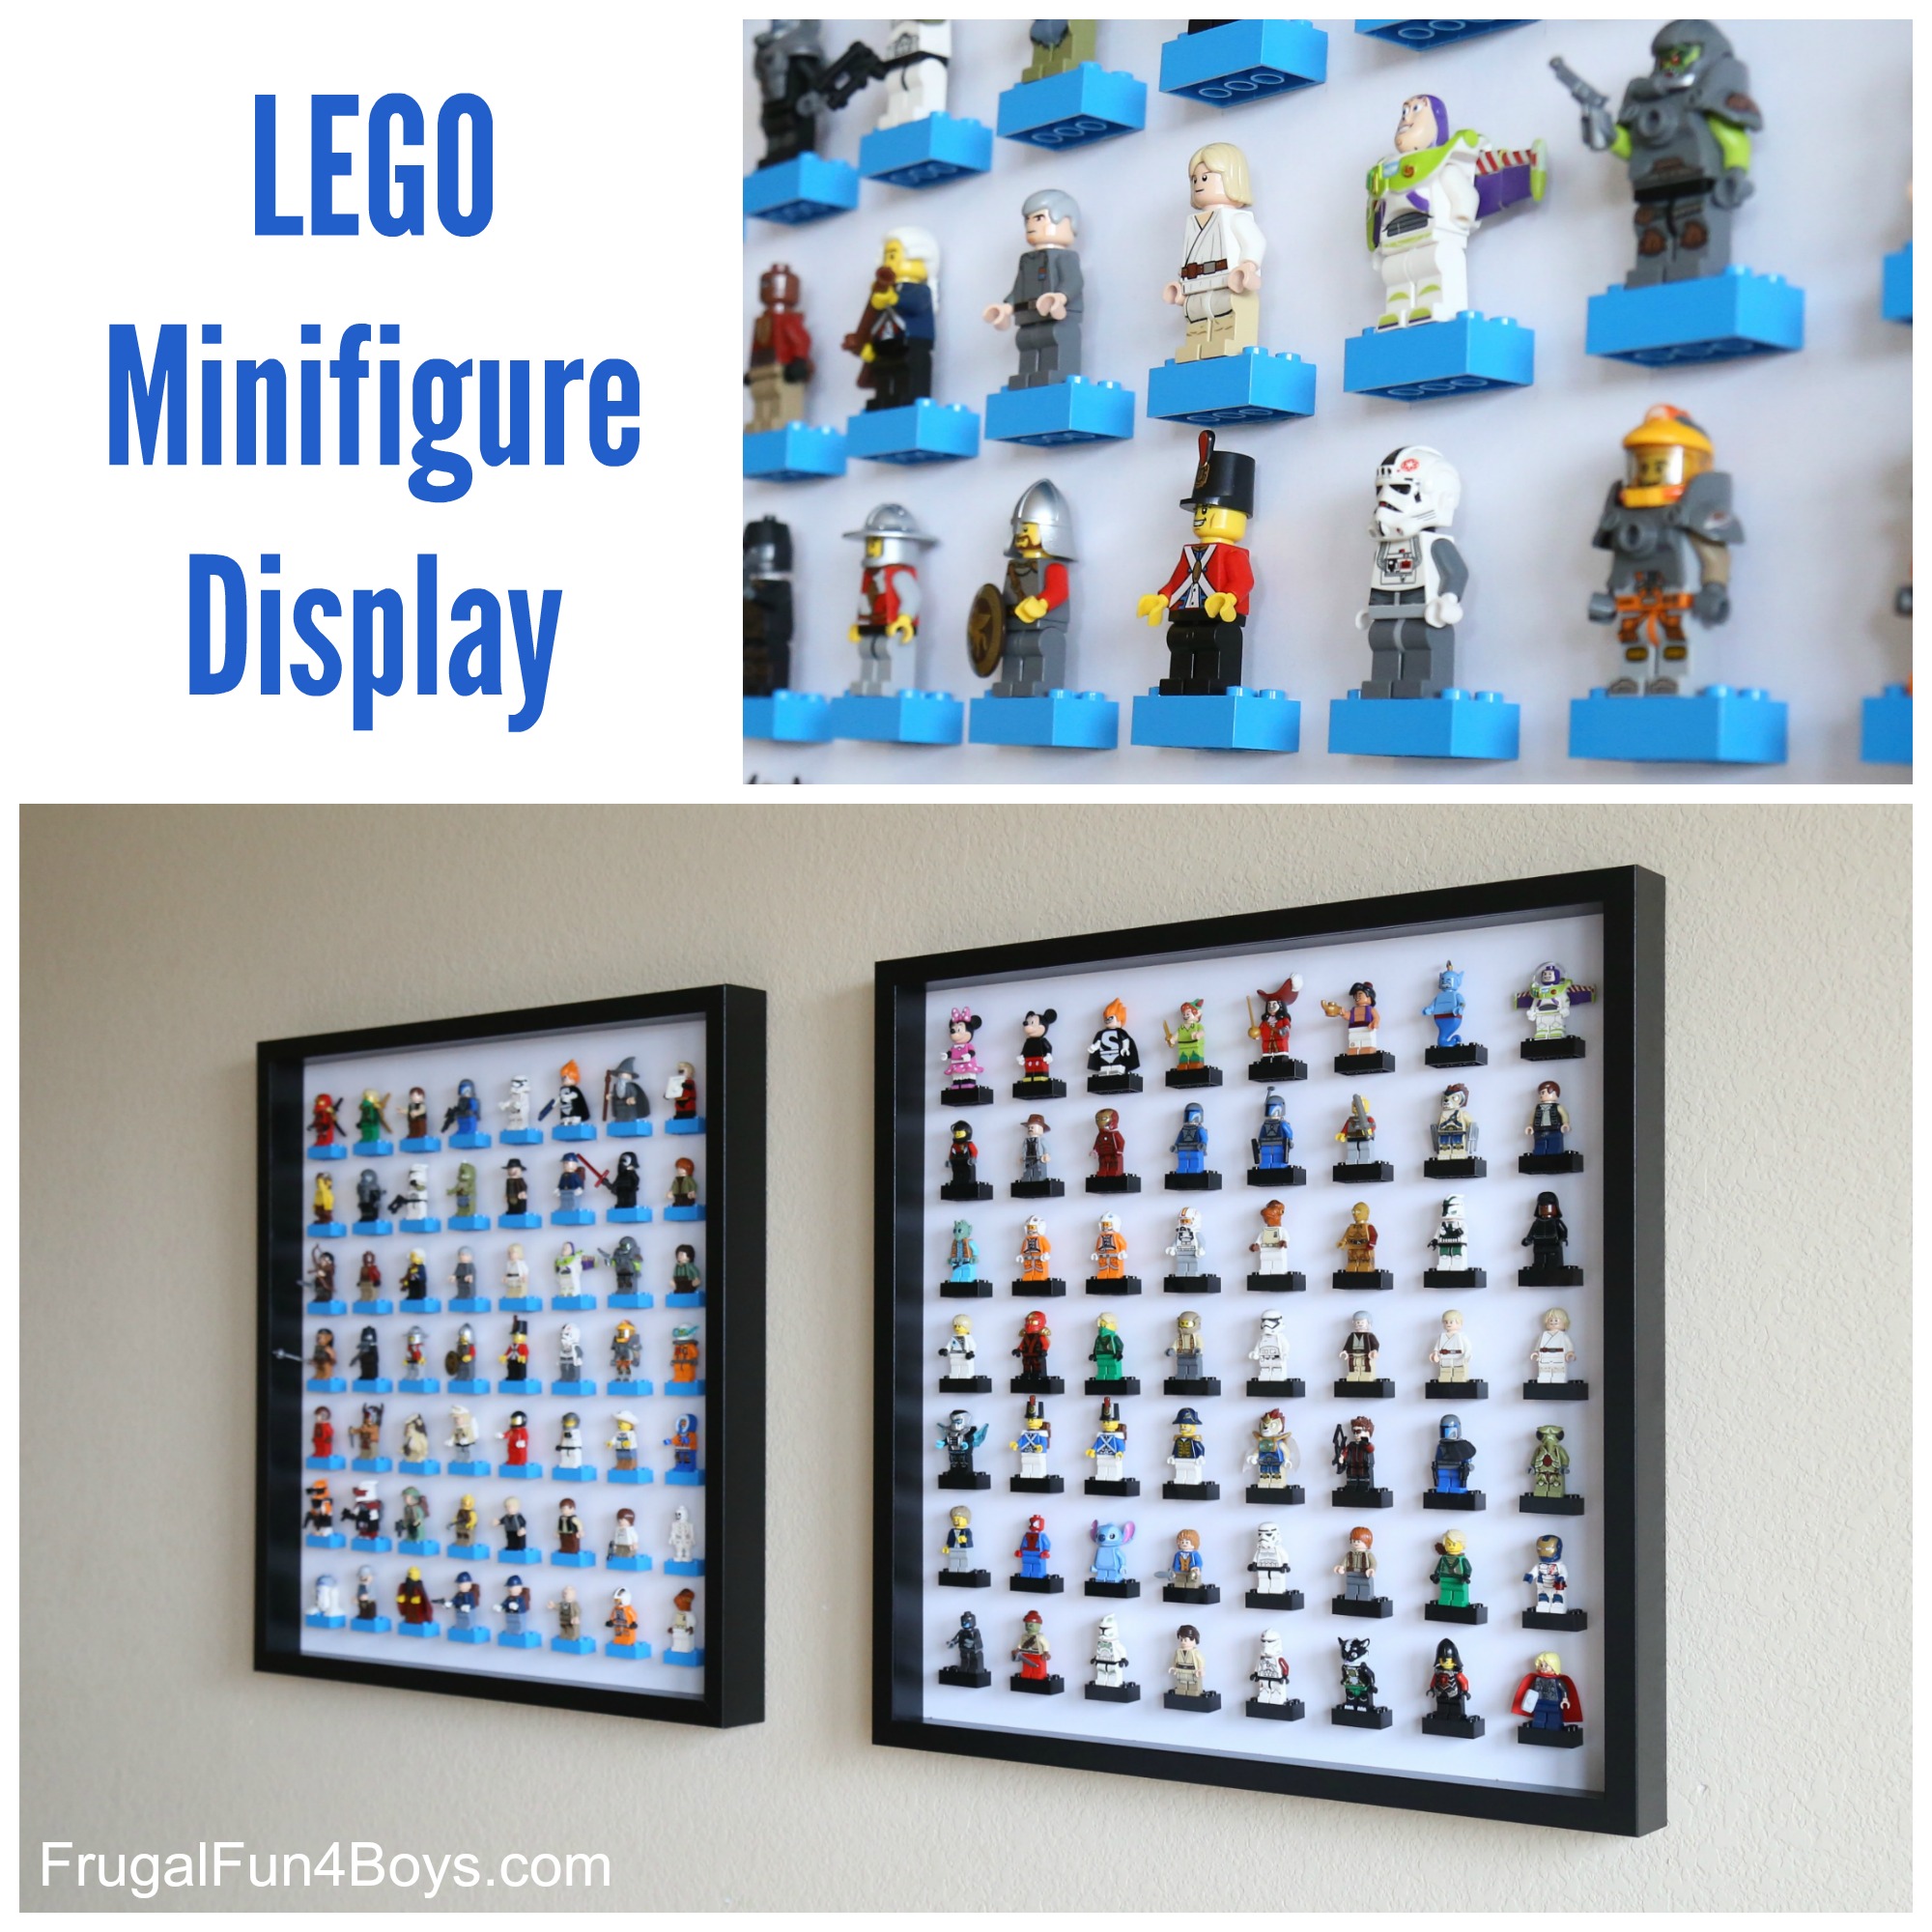
Turn an IKEA frame into a LEGO® minifigure display!
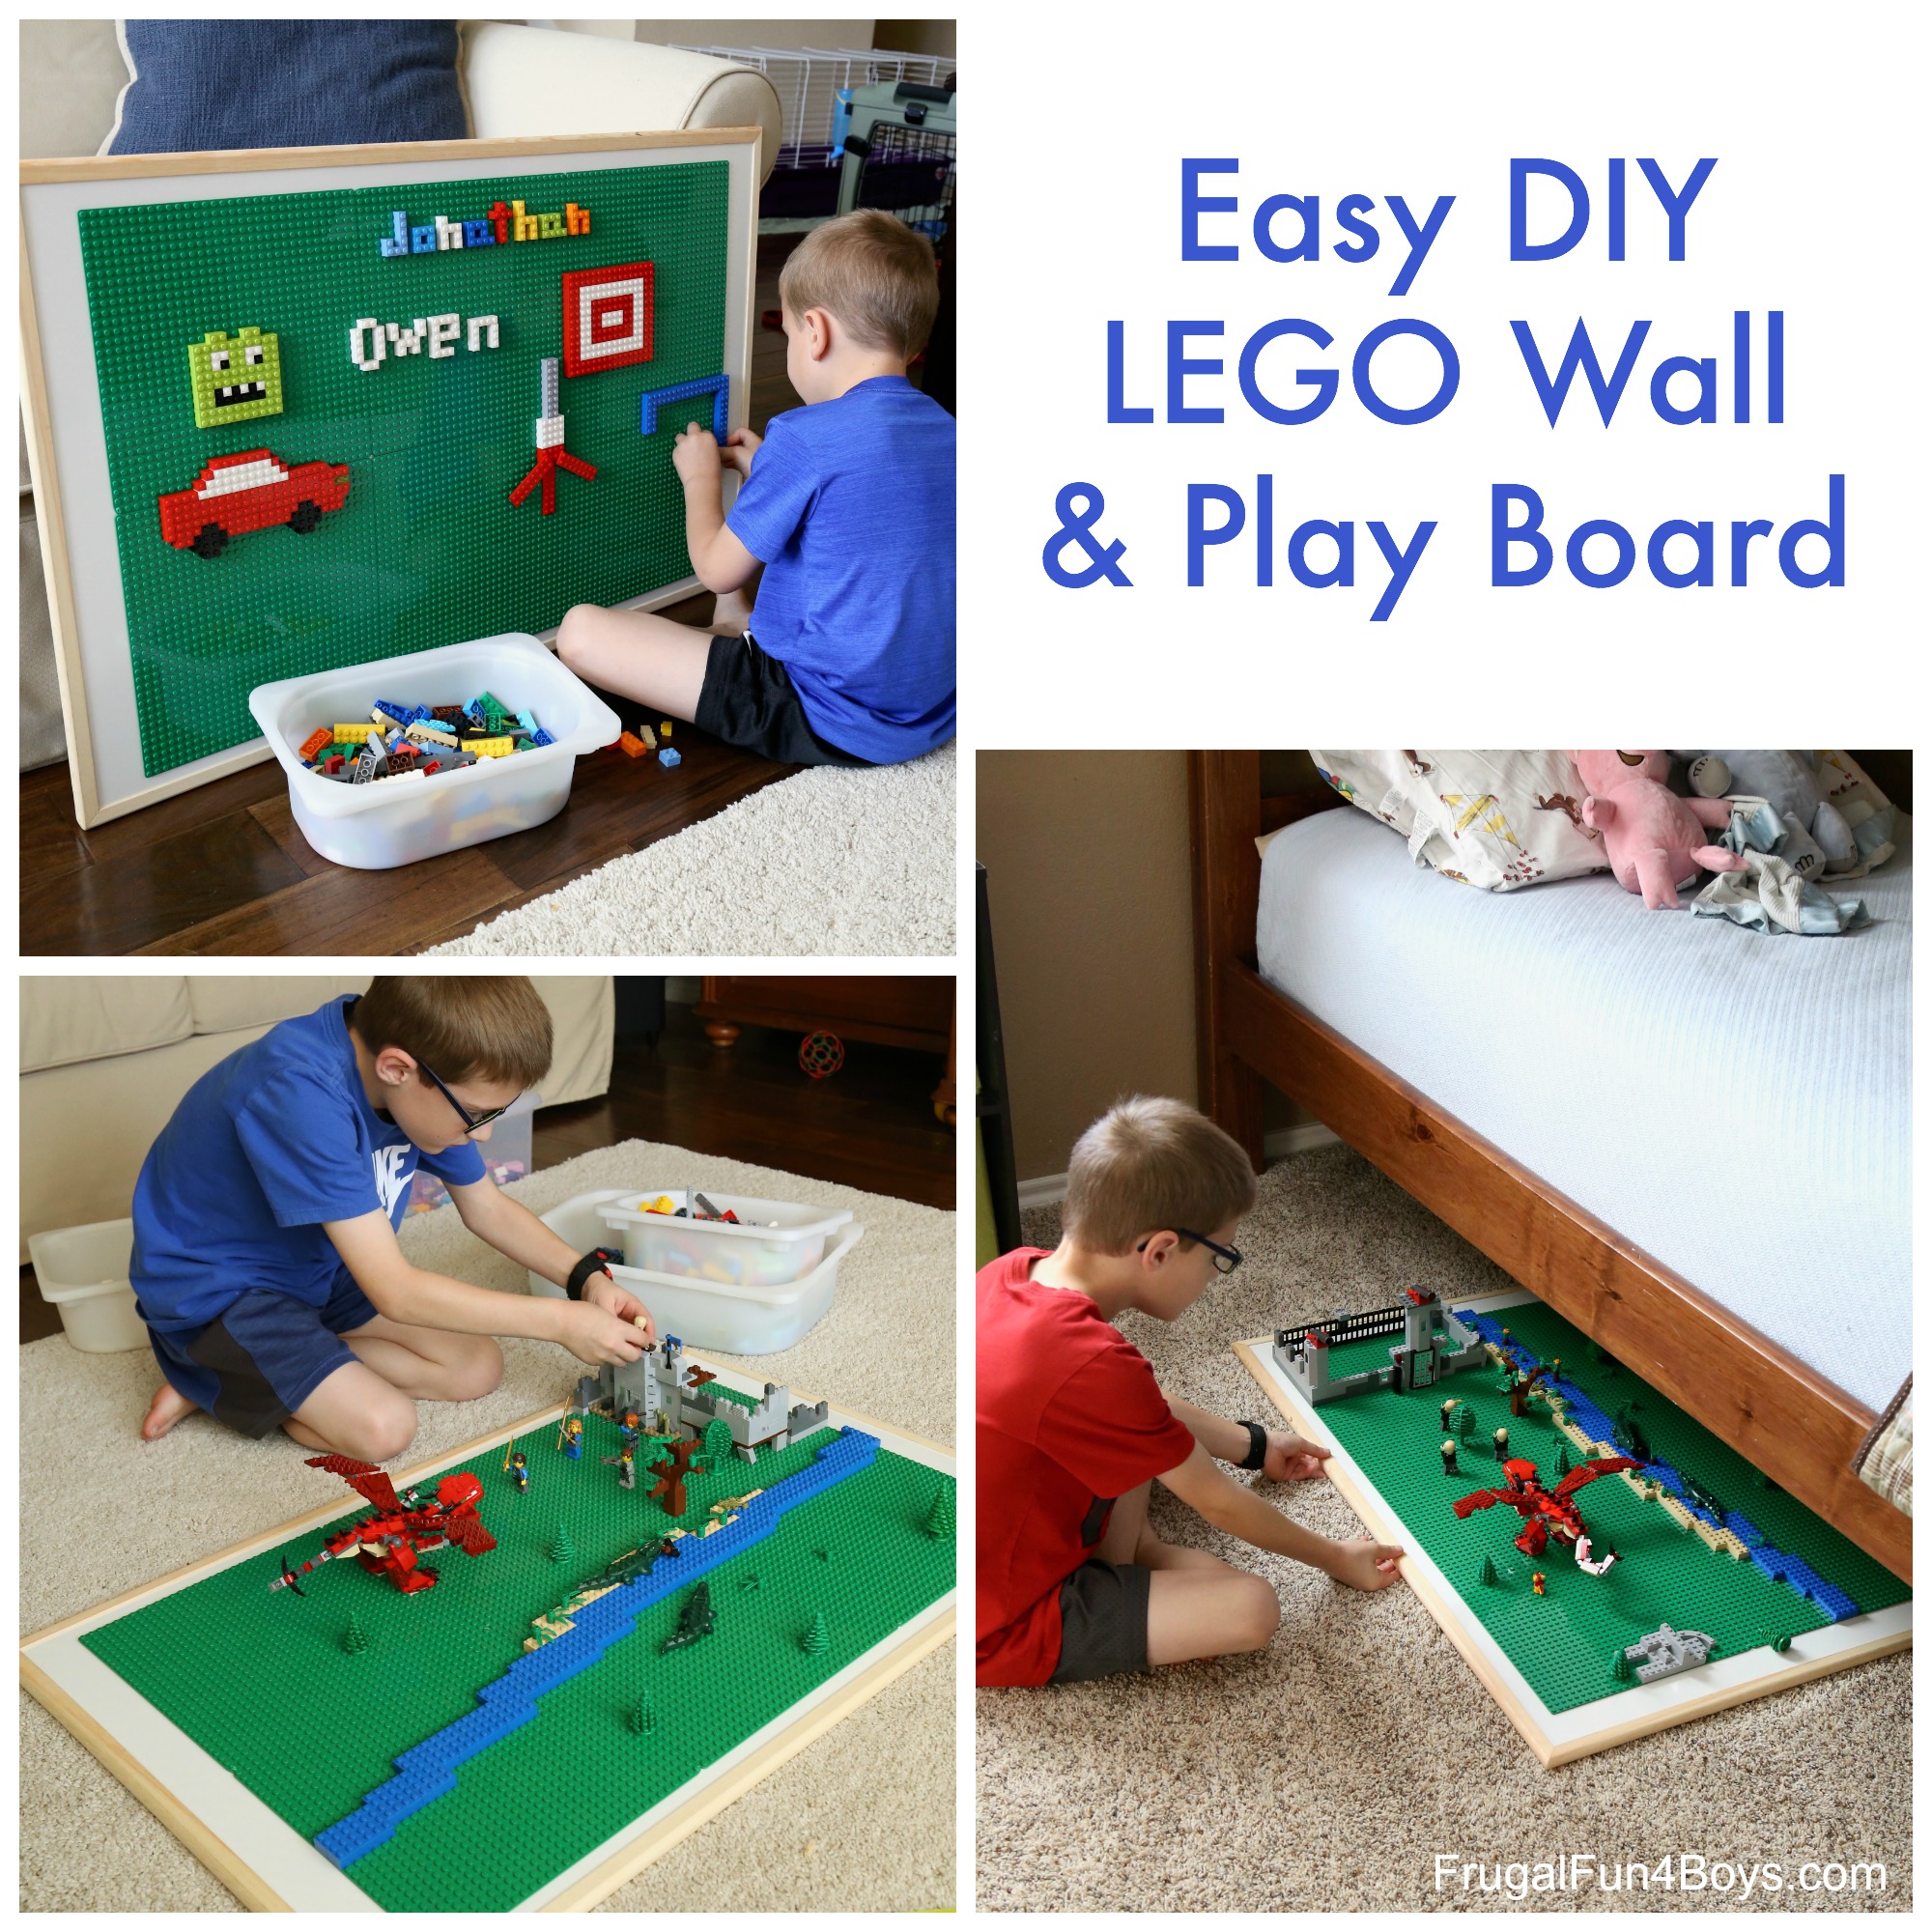
Make your own LEGO® Wall & Play Board
4 Comments
Sandra D Jun 1, 2018
Really wished I'd seen this a few months ago - the grandson turns 5 tomorrow and would have LOVED this (his name starts with A, too). Oh, well - it's pinned and I have a reminder to look at it again before he turns 6!
Loraine Apr 3, 2023
What about christmas and putting in a box frame , im doing this for my grandson
Danielle Dec 19, 2018
I really love your posts and tutorials. For a mom that works full time and has 2 boys your ideas keep me sane☺ thanks again for all your ideas
Lisa Jul 26, 2022
I wonder if the Lego like tape would work really well? If you ran the tape down in strips then they could constantly change it. Hmm...I love the Lego Mosaic idea...we are studying the Ancient Romans and the cities of Pompeii and Herculaneum - this might be a great craft idea!! :) Thank you!!
Julie Apr 9, 2023
This is a really neat idea! How would this work for the letter O though?
Post a Comment