
We have a fun LEGO® project idea for you! Build a LEGO® safe with a working lock and key. In this post, we’ll show you more than one way that kids can approach this project. After learning some basic techniques, kids can design their own. Such a fun STEM building challenge!
LEGO® machines are so fun to build. It’s awesome to build something that really works! Kids will also enjoy this LEGO® catapult and this LEGO® candy machine.
This project can easily be an engineering STEM lesson. Learn about levers and mechanisms – more details below!

My oldest son designed the mechanism for the first locking box, and then I built the box so that it would look nice. We make a good team. He’s a great engineer and comes up with mechanisms that I could not create, but he doesn’t do “cute” or making things look artistic. I can handle that part!
And really, kids can build this using any colors they want. We show our LEGO creations in solid colors because the photos are much less visually distracting and it’s easier to see what’s going on, but kids can do whatever they want!
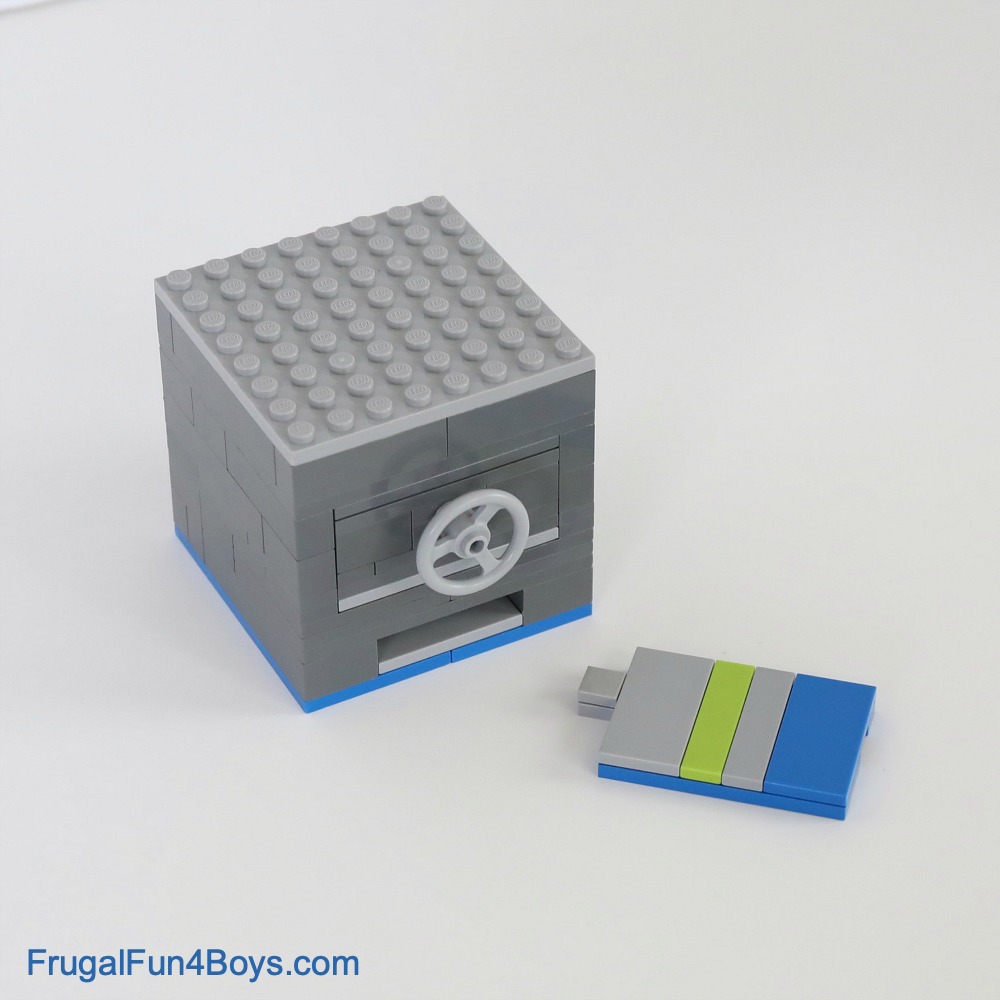
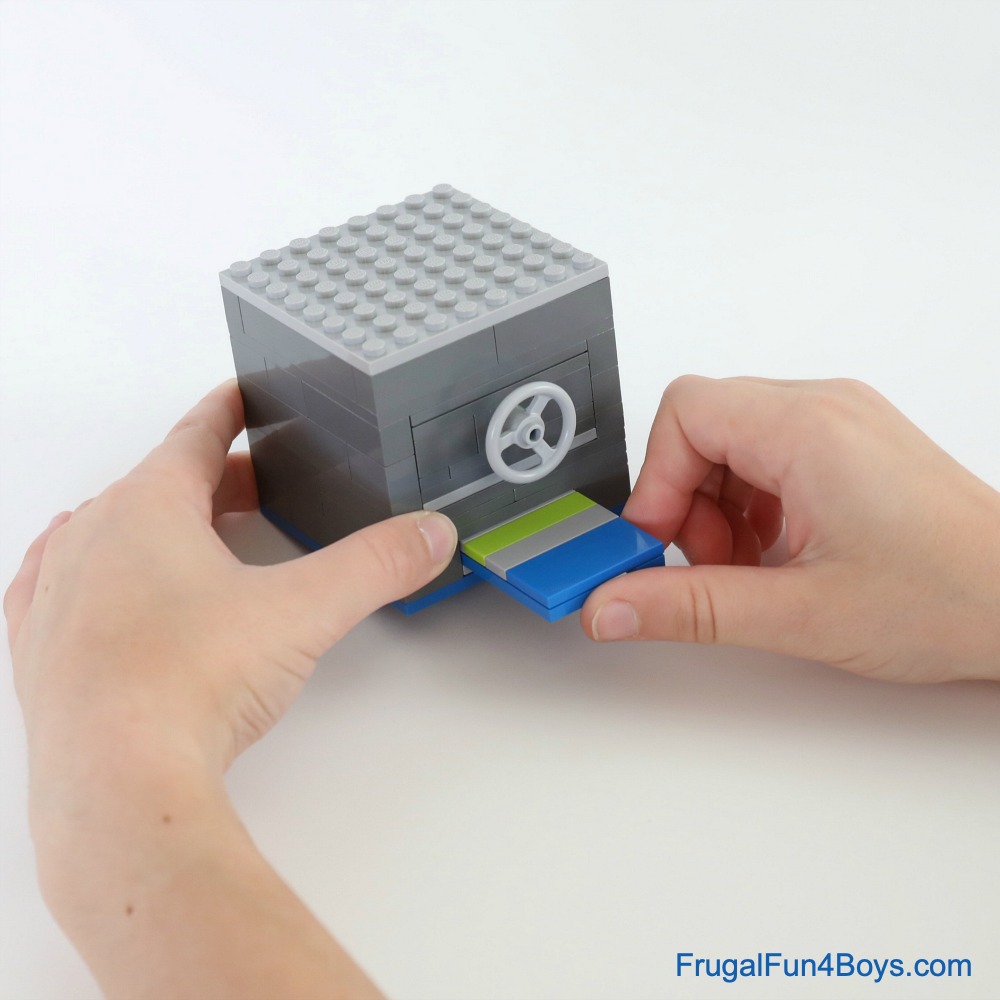
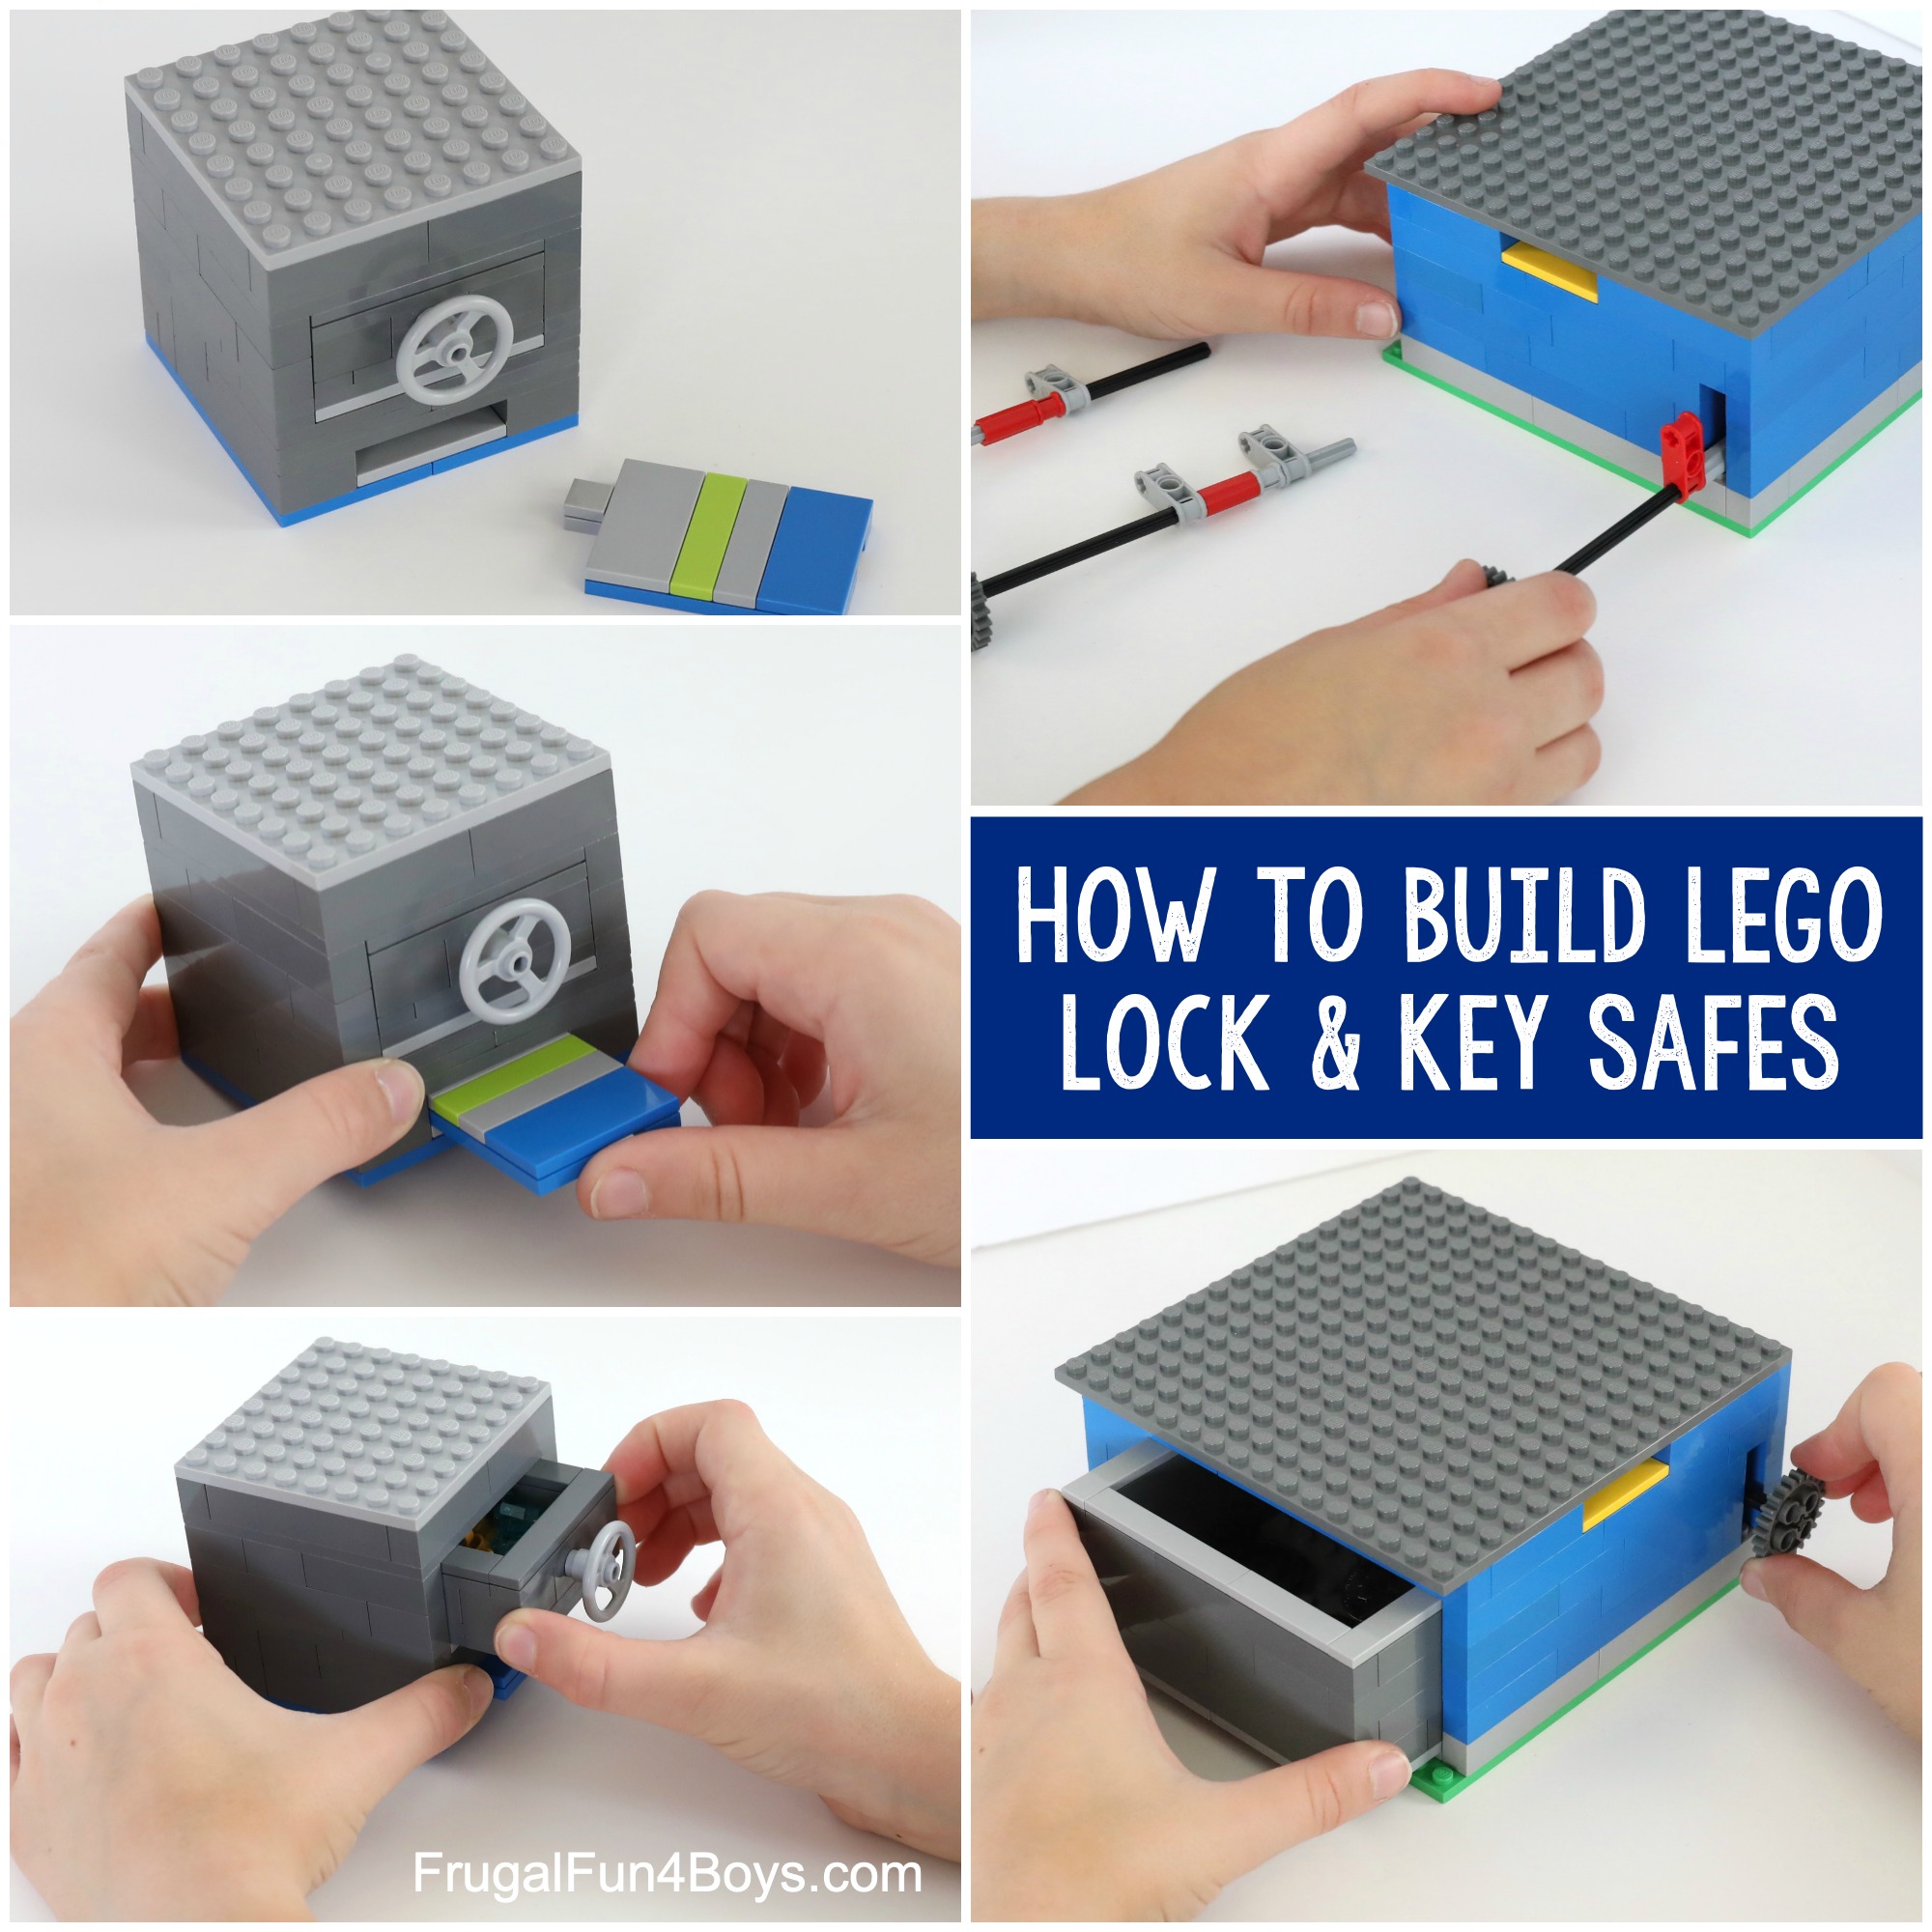
See that dark gray drawer on the left side of the safe? It won’t open unless you use the key!
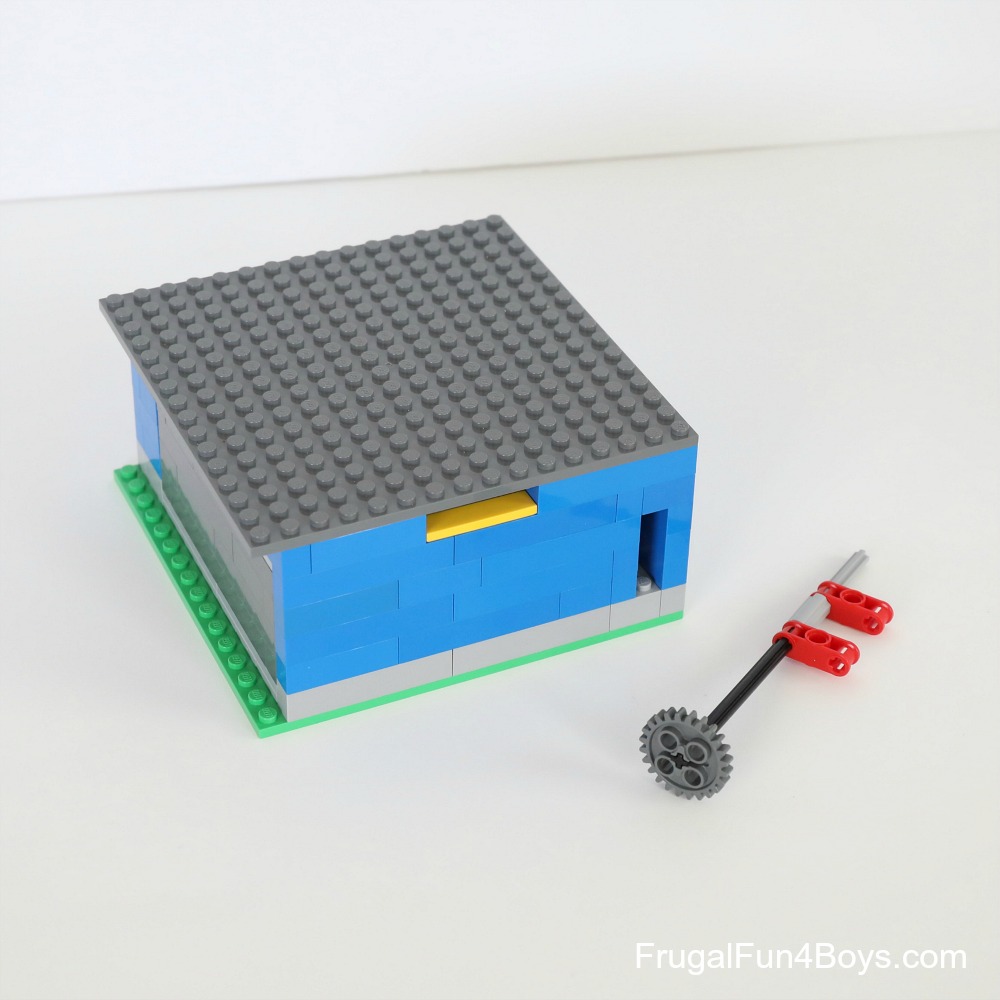
The safe (or you can call it a coin bank) has a slot for coins.
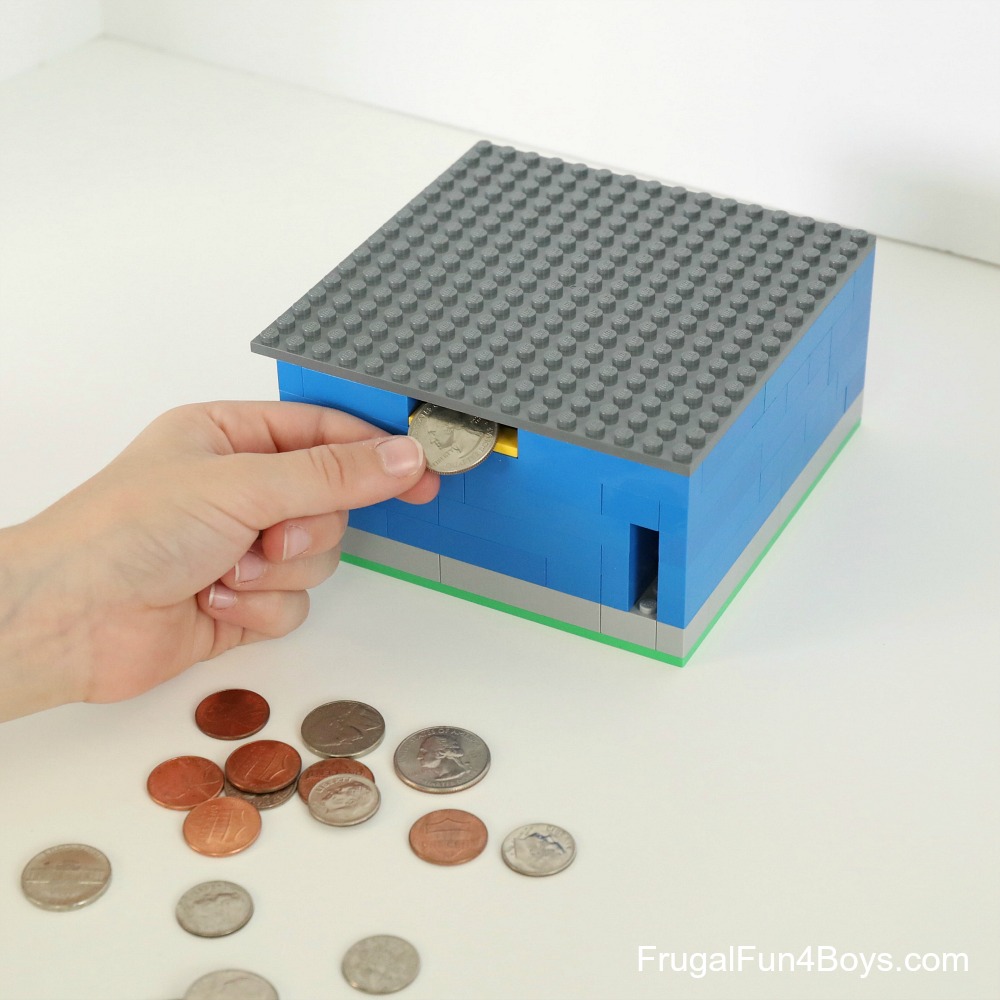
To open the drawer, slide the key into the box with the teeth facing up. Slide it in all the way.
Then turn the key to the left. For security purposes, it’s fun to make more than one key. Only one will fit the lock and open the drawer. But siblings and friends won’t know which key is the right one!
Want to see a video demonstration? Click below to play with video.
Ready to make your own?
How to build a LEGO® Safe with a Key:
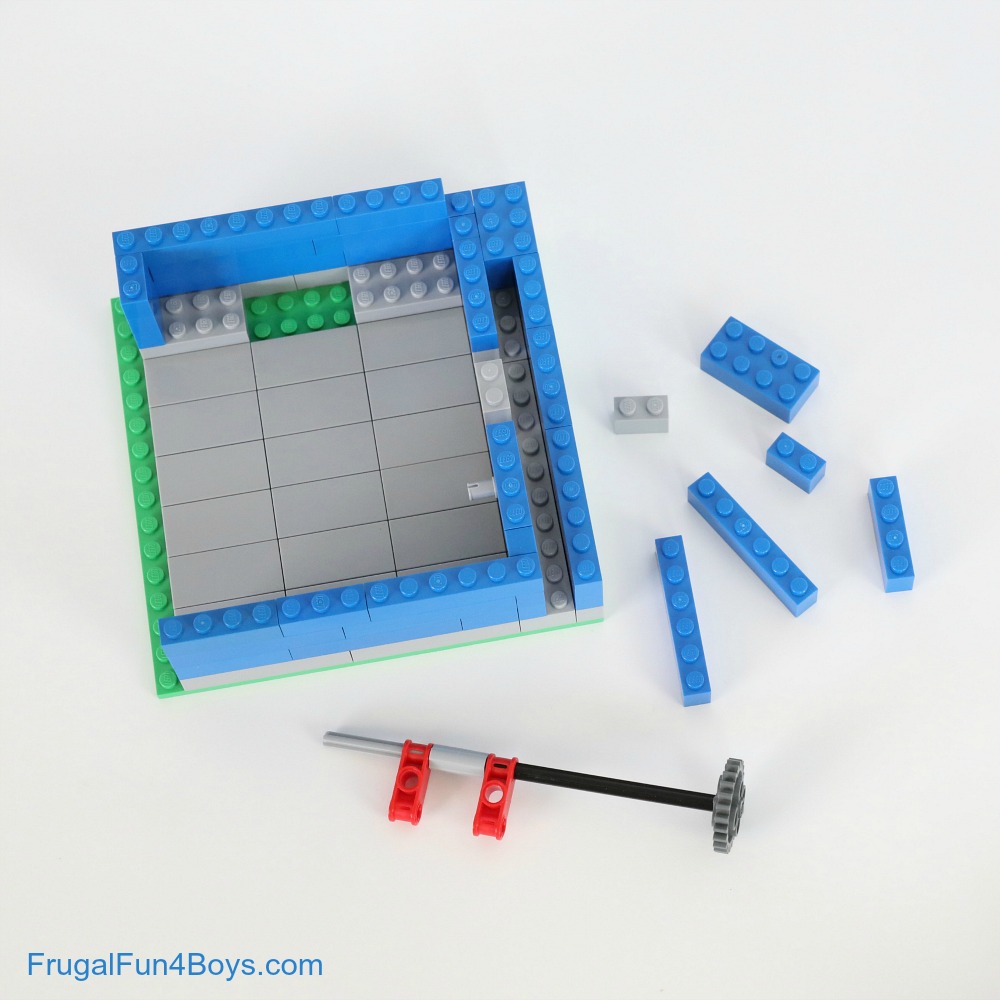
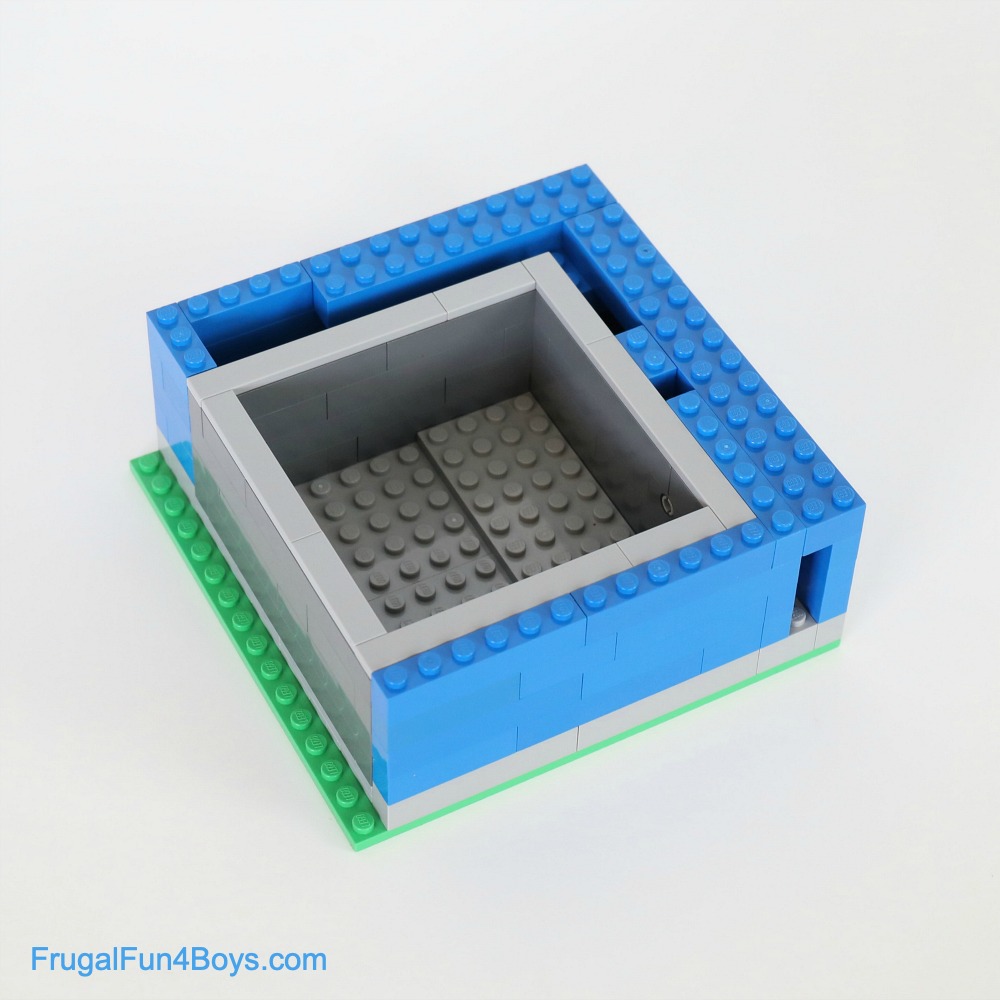
I would recommend starting with a 16 x 16 plate. It’s a good size for building a drawer that isn’t huge, but can hold plenty of coins or other objects.
Decide what size you want the drawer to be. Cover an area that size with tiles so that the drawer will be able to slide easily. The tiles shown make a 12 x 12 square.
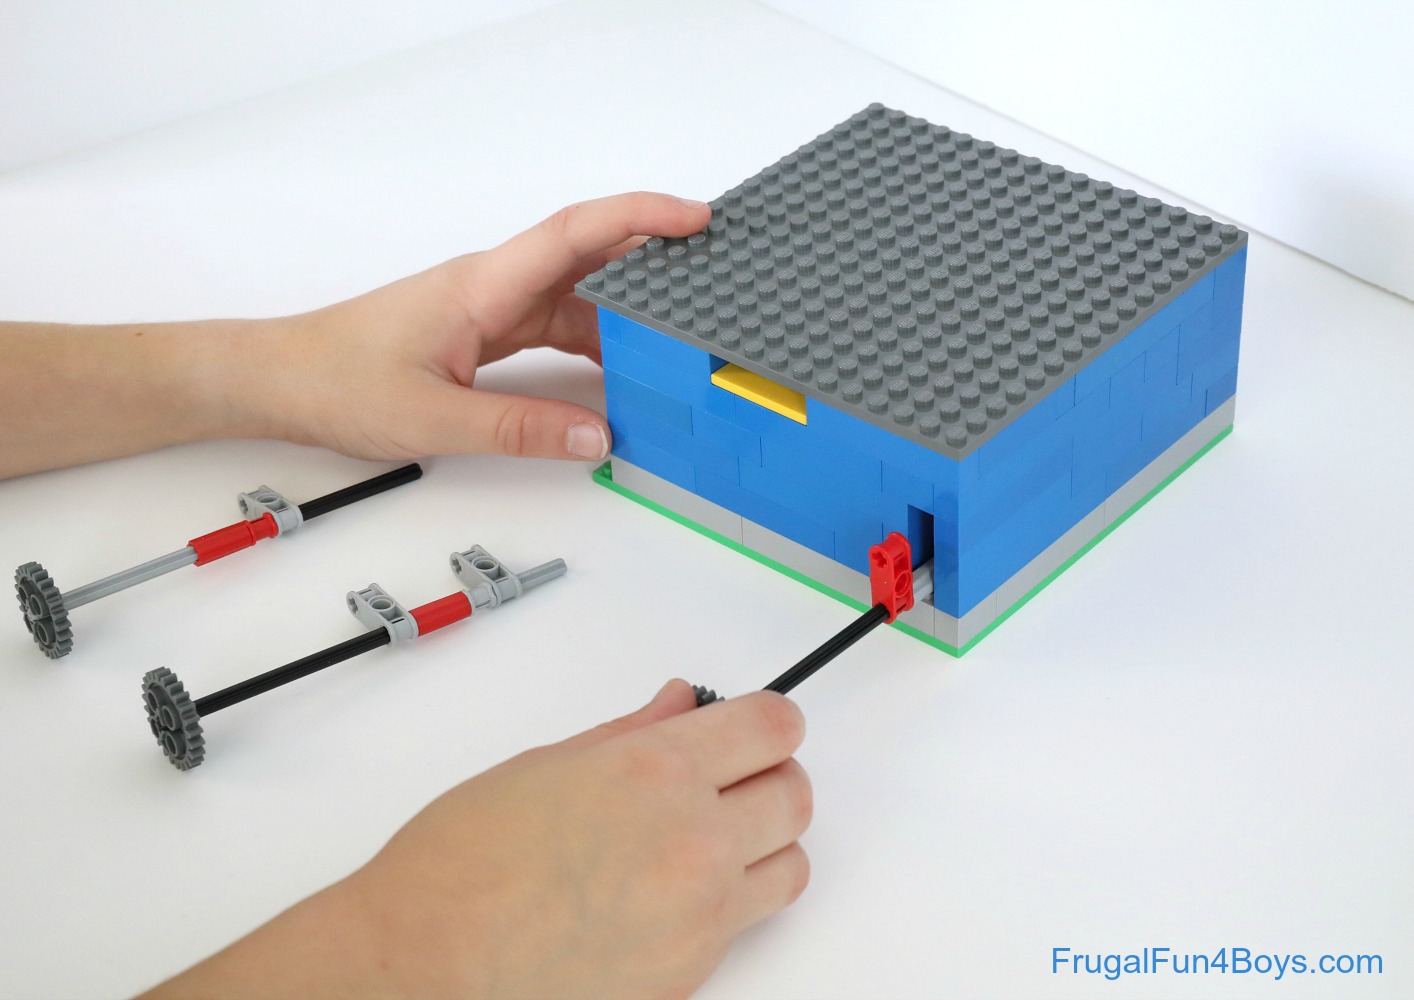
You’ll need a wall of bricks in front of the drawer and in back of the drawer. Leave one side completely open. On the other side, you’ll need to build a channel for the key.
(We’ll talk about that pin sticking out in a minute.)

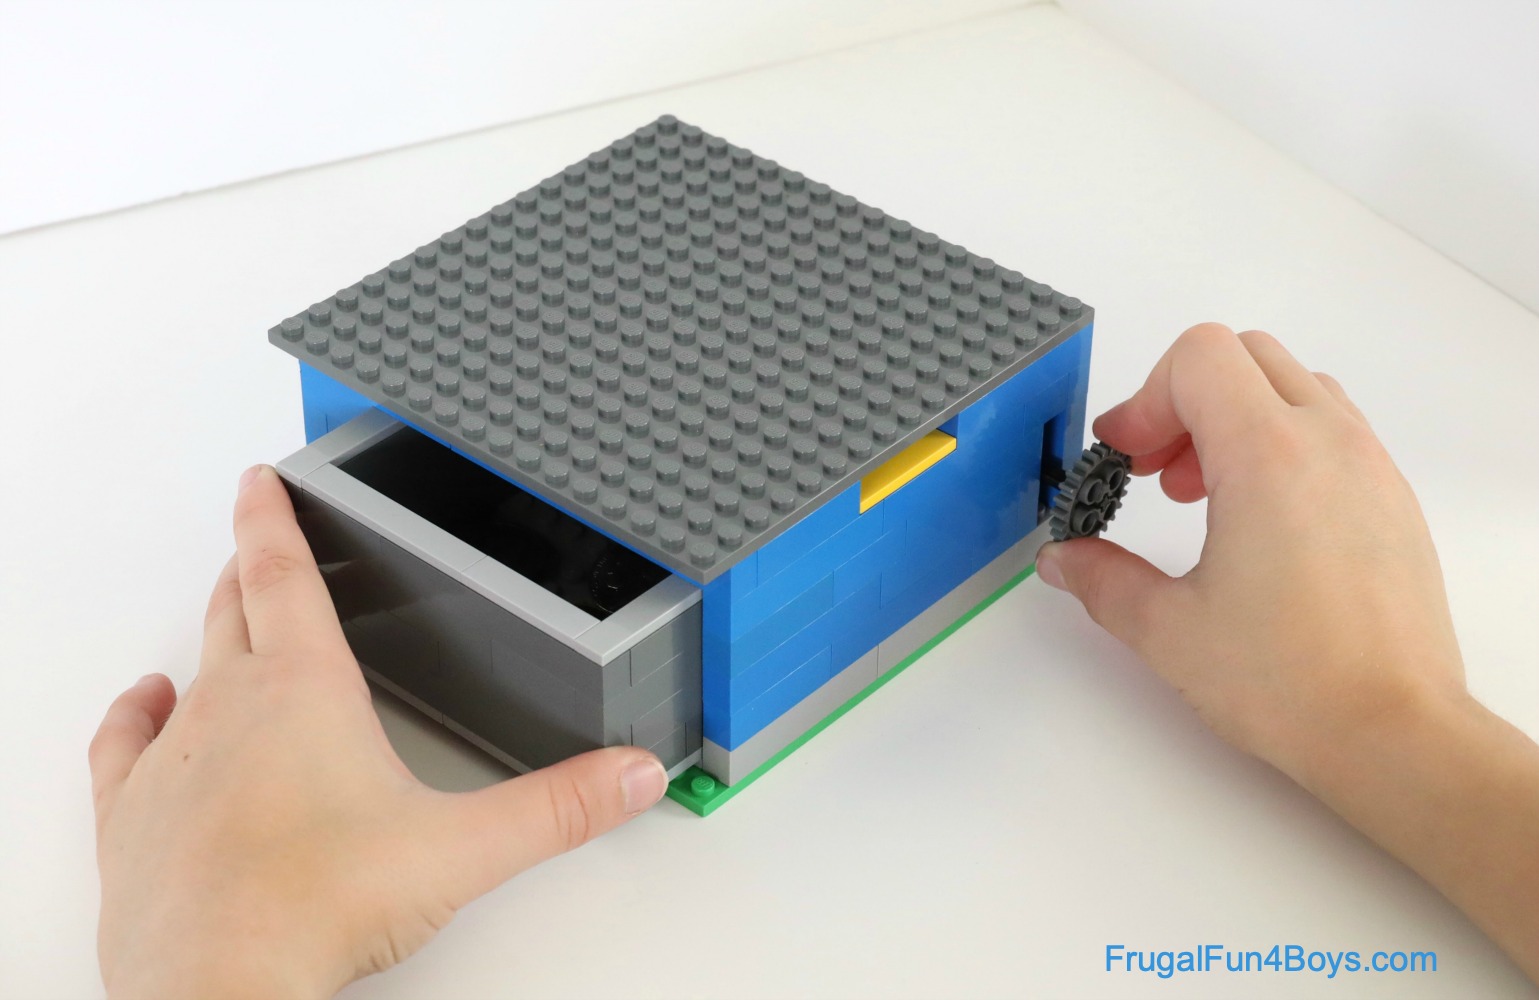
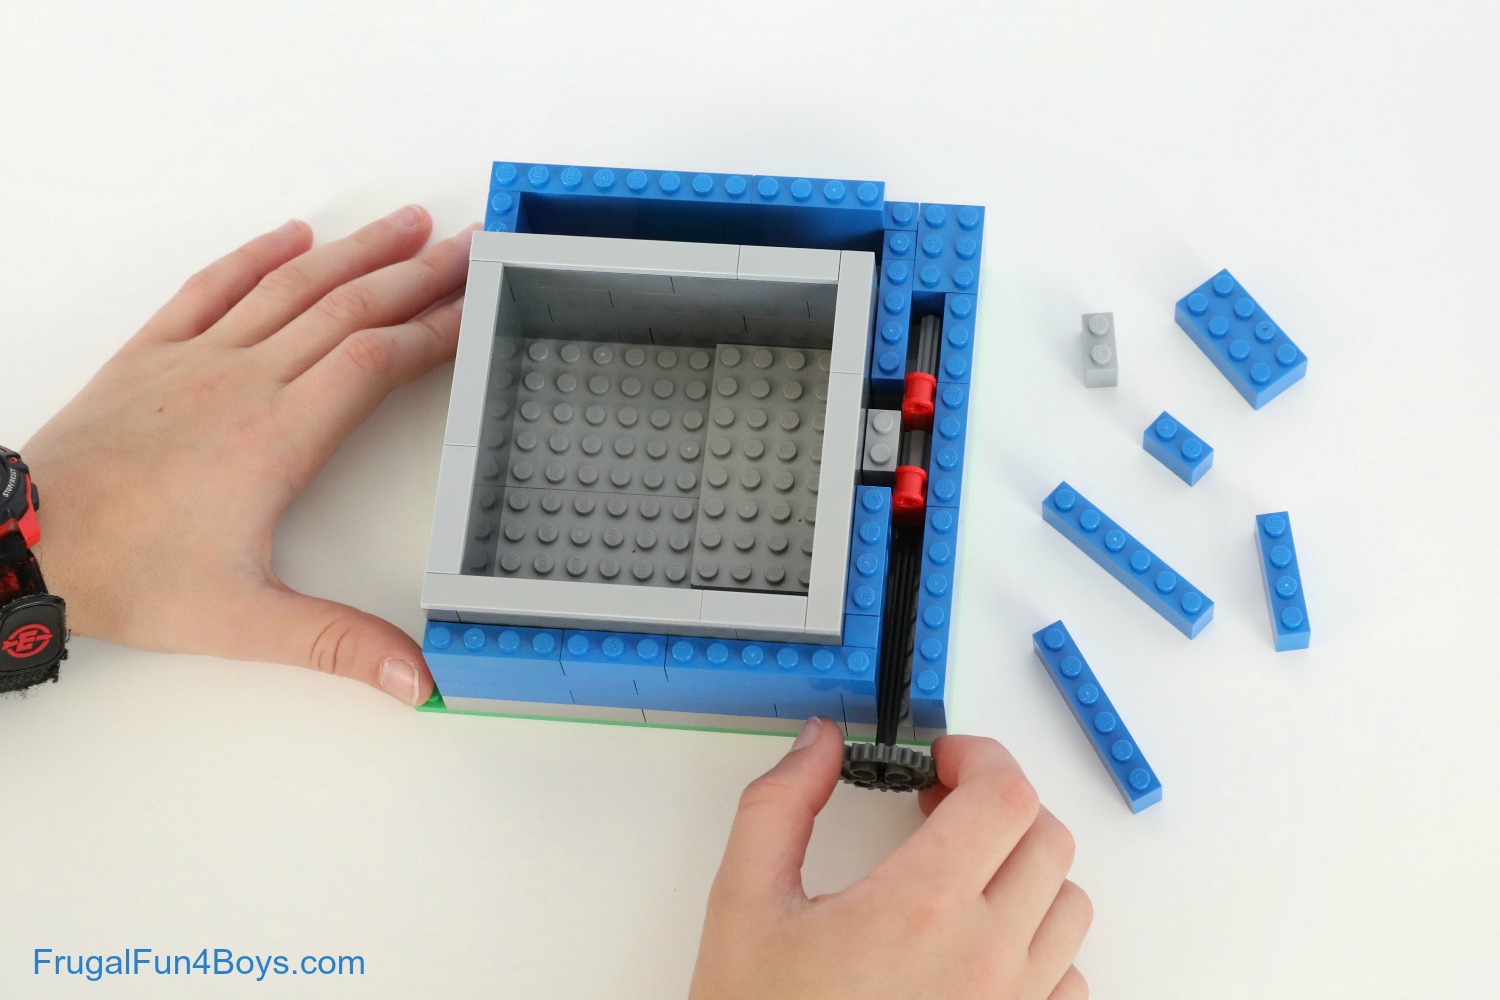
Here’s how the key works. I removed a few more bricks so that you can see everything clearly. The idea is that the key slides into the channel. When you turn the key, the teeth fit through openings in the wall and push the drawer open.
To use the key, you’ll slide it into the channel. Slide it all the way in until it hits the back of the safe.
Build a 12 x 12 drawer. I used two 6 x 12 plates and attached them with a 4 x 8 plate. The drawer is 4 bricks high. Then there is a row of tiles around the top.
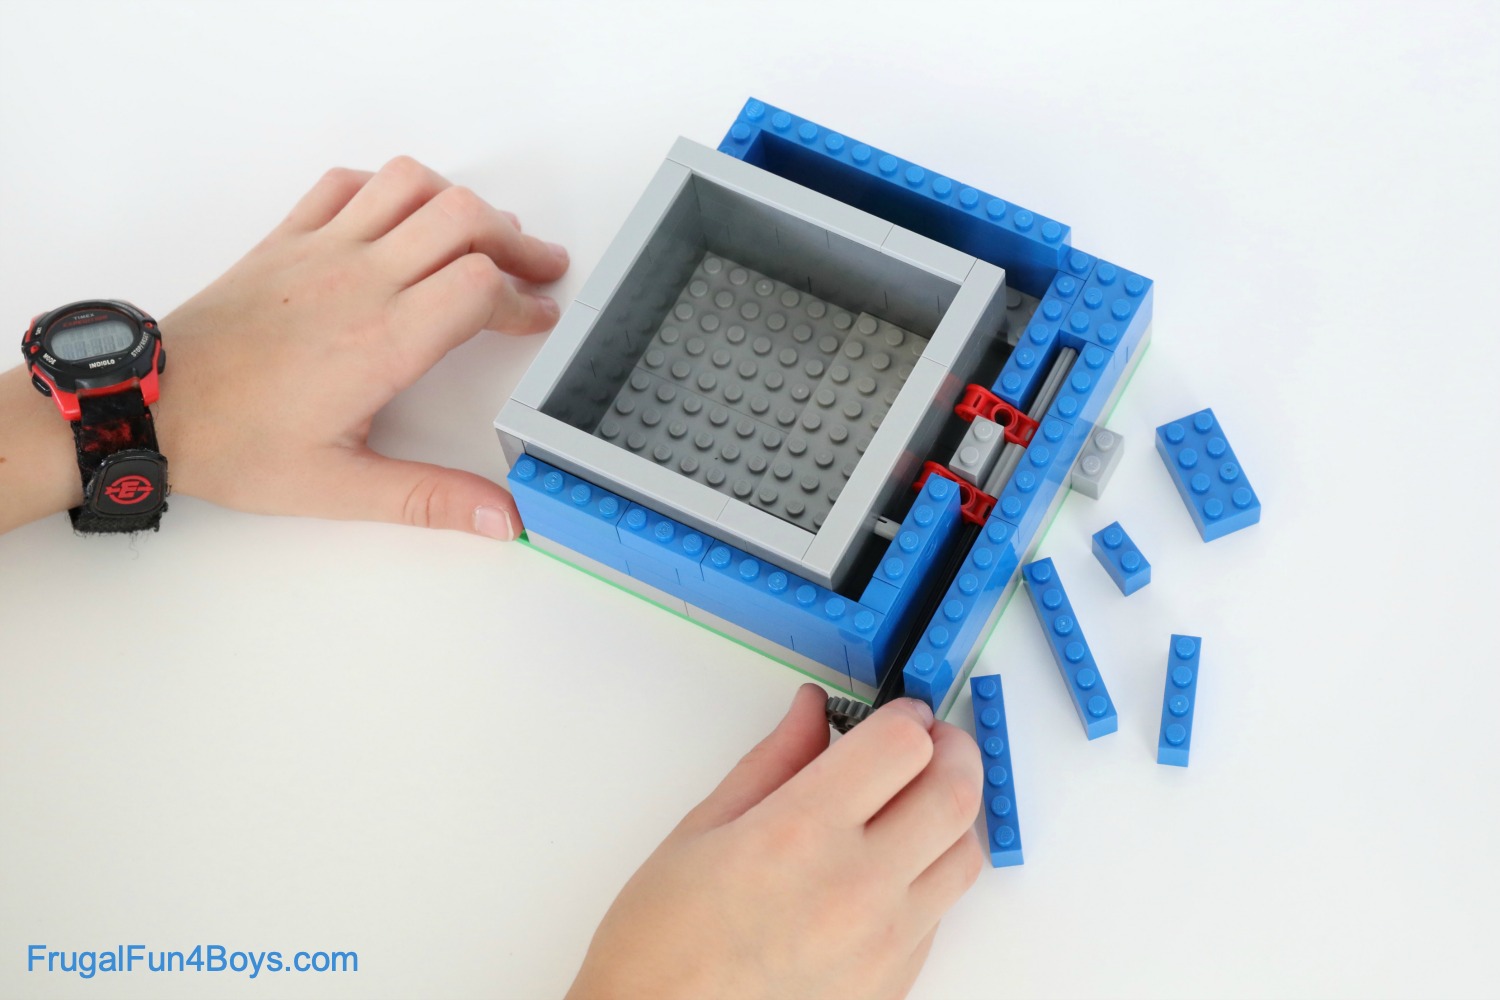
Then turn the key to the left. The teeth on the key should push the drawer out.
The drawer does not come out far on its own. This photo shows how far the drawer will pop out. Then you can use your fingers to pull it out the rest of the way.
You can use a pin to keep the drawer from sliding out when you don’t want it to. Slide a pin into a Technic brick and build it into your safe. Then add a Technic brick on the drawer.
Make sure that the height of the pin lines up with the height of the hole on the drawer!
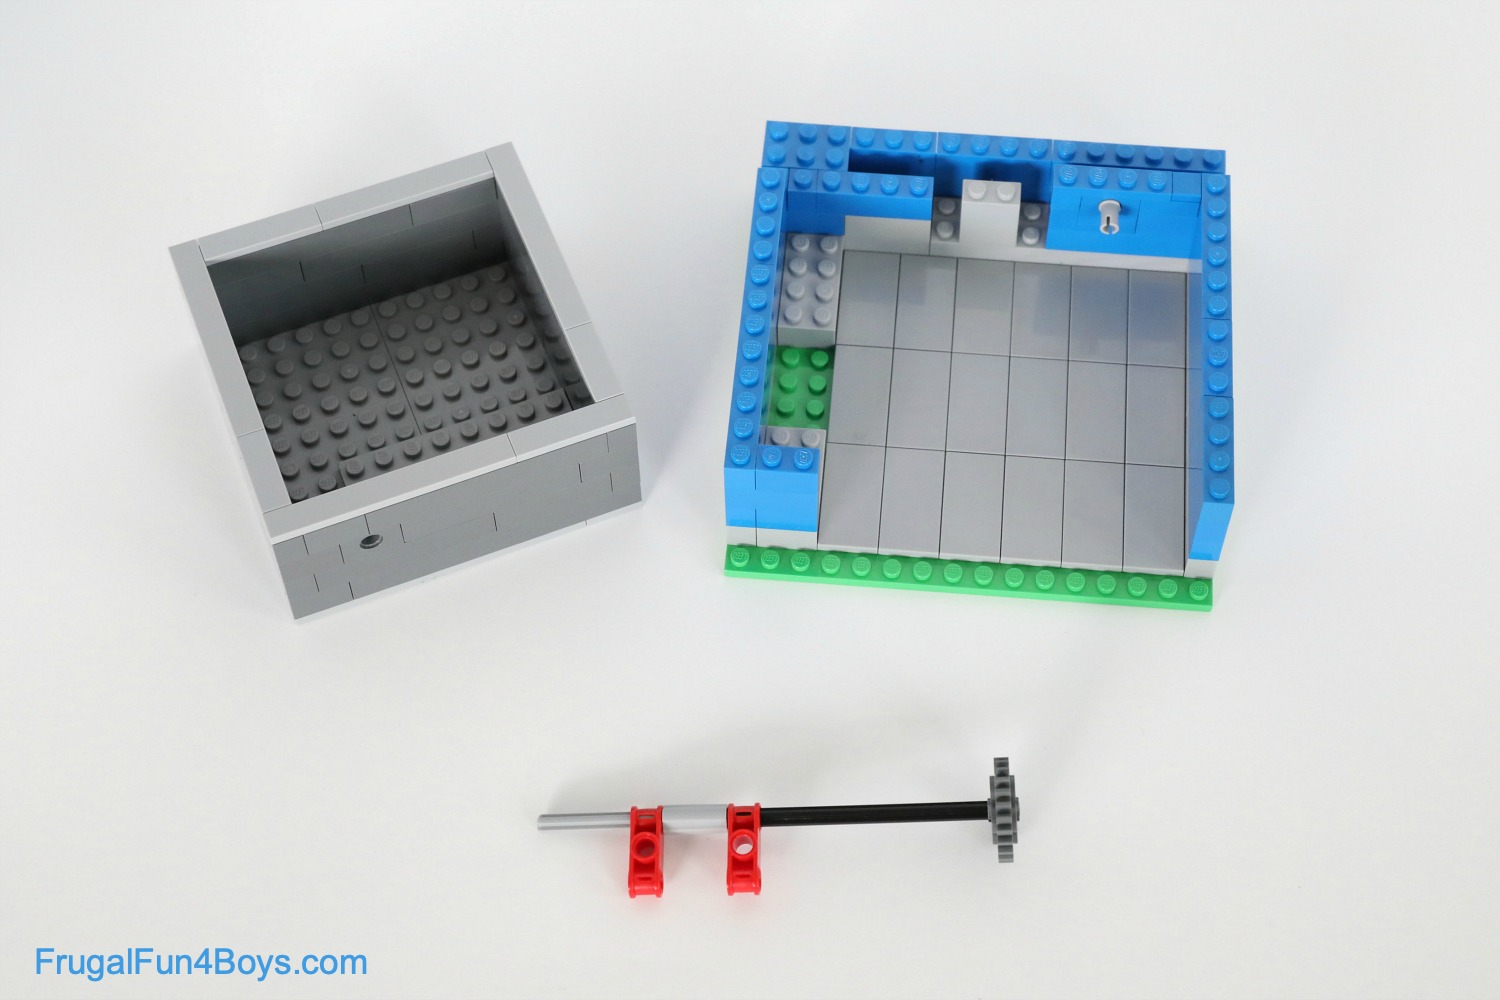
Once you get the mechanism working, place the drawer in the safe. Then build up the sides so that their height comes exactly to the top of the drawer.
If you want a coin slot, add a 1 x 4 tile to the top of the frame. Then add another row of bricks.
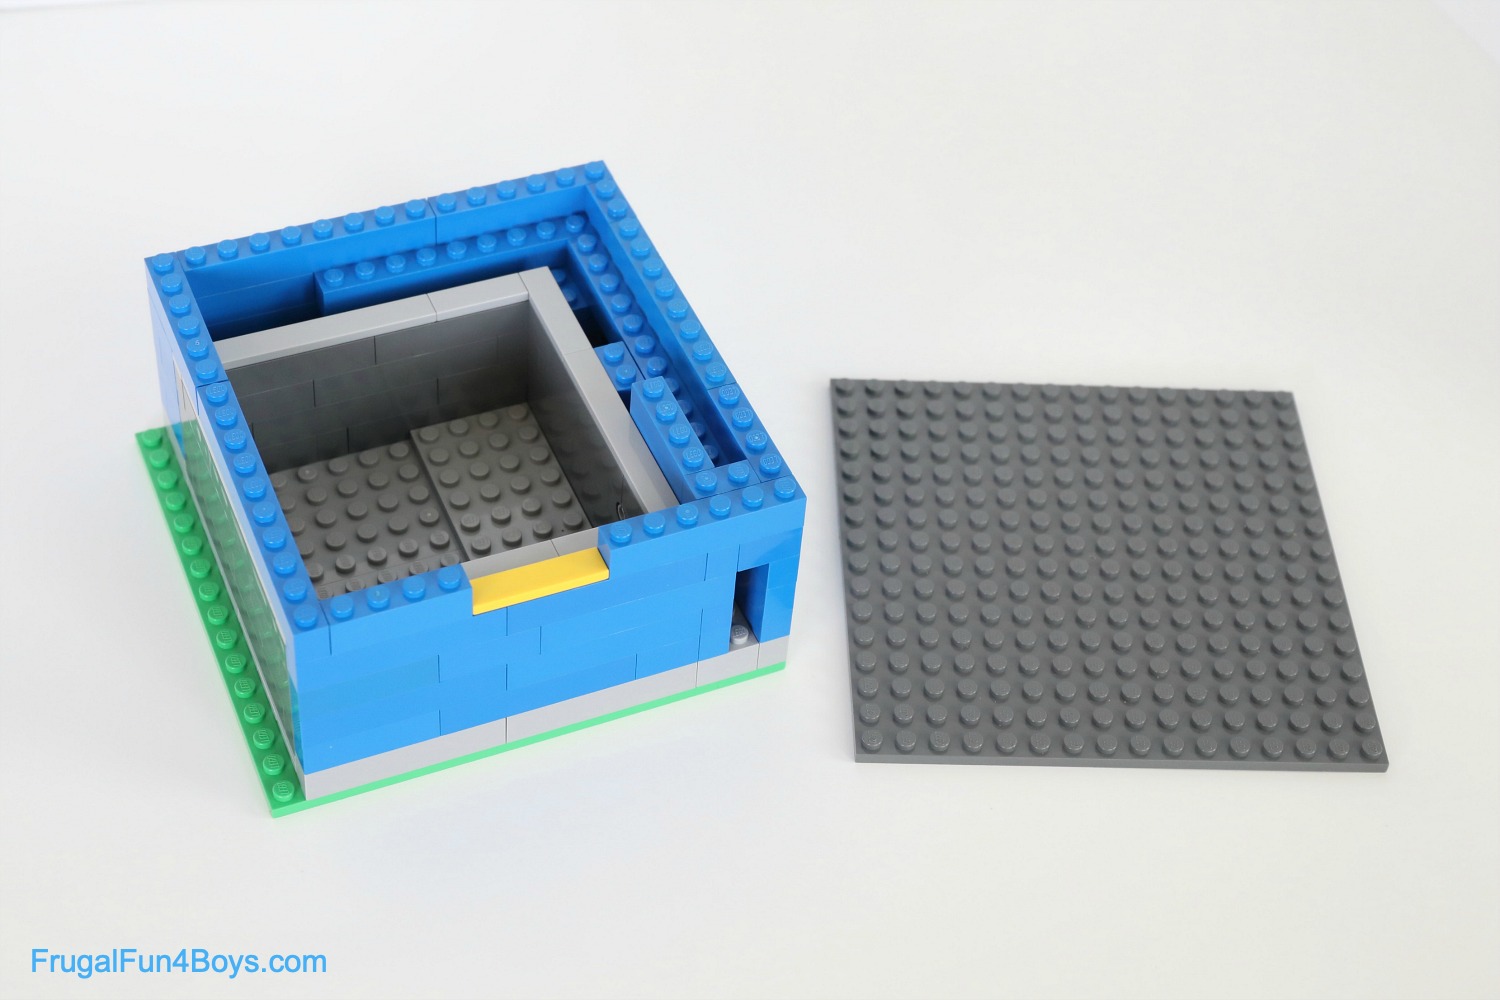
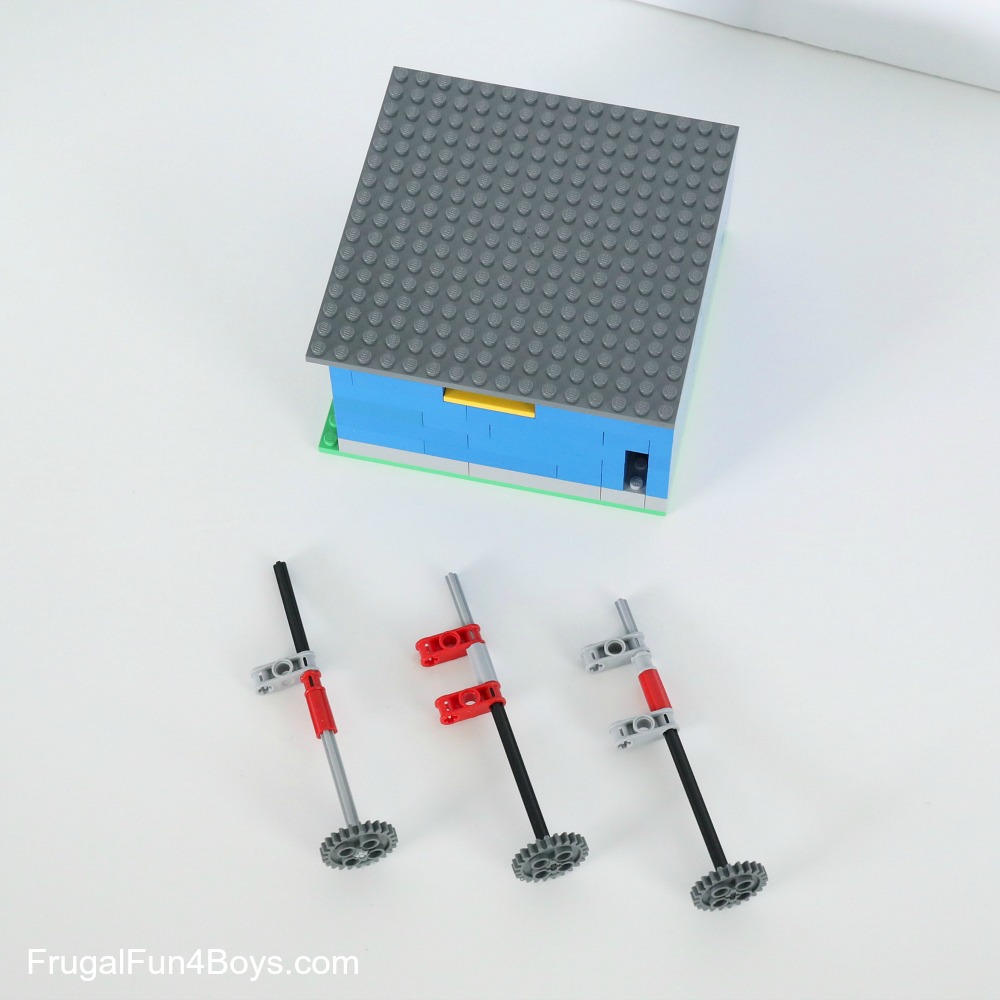
Finish up the machine by placing a 16 x 16 plate on top.
Then build some decoy keys, ha ha. The one in the middle is the one that works.
Here’s a second way to build a LEGO® safe.
This is a cool design because it demonstrates the use of a lever. When you push the key forward into the safe, it pushes on the bottom end of a lever, which pushes the top end of the lever (and the drawer) forward.
We found this design on YouTube and built it according to the instructions. I’ll include the video below so that you can build your own! It’s such a clever design.
Push the key into the slot on the bottom of the safe.
And the drawer pops open!

Here are the instructions we used from Let’s Do This on YouTube. Check out this channel for lots more LEGO® ideas!
Have fun building LEGO® safes!
Be sure to check out our other LEGO® building ideas!
11 Comments
Andre Hurd Aug 26, 2019
I love this safe! It works amazing ,and I also love some other of your amazing LEGO creations. I hope to see more ideas soon!?
Margieh Feb 16, 2020
What Lego bricks/parts for key construction
carol lima Apr 18, 2020
Thank You ! Me anda my son had a great time doing this project during quarentena .
Kisses from Brazil
Zayden May 17, 2020
when i was building my first safe i let my sister see the mechinisism so i built this one
Rocco Aug 4, 2020
They're both amazing safes that work!
You should have a look.
Carrie Nov 7, 2020
My kids loved this
Stormie Nov 13, 2020
My grandsons and I have started building some of your Lego creations, but many times we do not have the pieces.....what Lego sets are you working from?
Sarah Nov 16, 2020
We aren't working from any particular sets. We have accumulated a LOT of bricks over the years! If you want to grow your Lego collection in general, I'd recommend watching Facebook buy/sell groups and garage sales for used sets and tubs of bricks. If you need specific pieces, you can order from Brick Link. https://bricklink.com
Aizen Nov 24, 2020
I had fun building this. If I was a judge I would give this project a five star rating.
charles vincent Apr 10, 2021
the safe works so fun
Ti Yao Nov 5, 2021
This idea is great!!!
joe Oct 9, 2023
Very
cool stuff thanks for the ideas!
Post a Comment