
Last year, when we wrote Genius LEGO® Inventions, we really fell in love with building machines! Oh, we love all kinds of LEGO® building ideas, but there’s just something fun and satisfying about building a project that can really DO something… like our LEGO® Candy Dispenser and our LEGO® Safes (with a working lock and key).
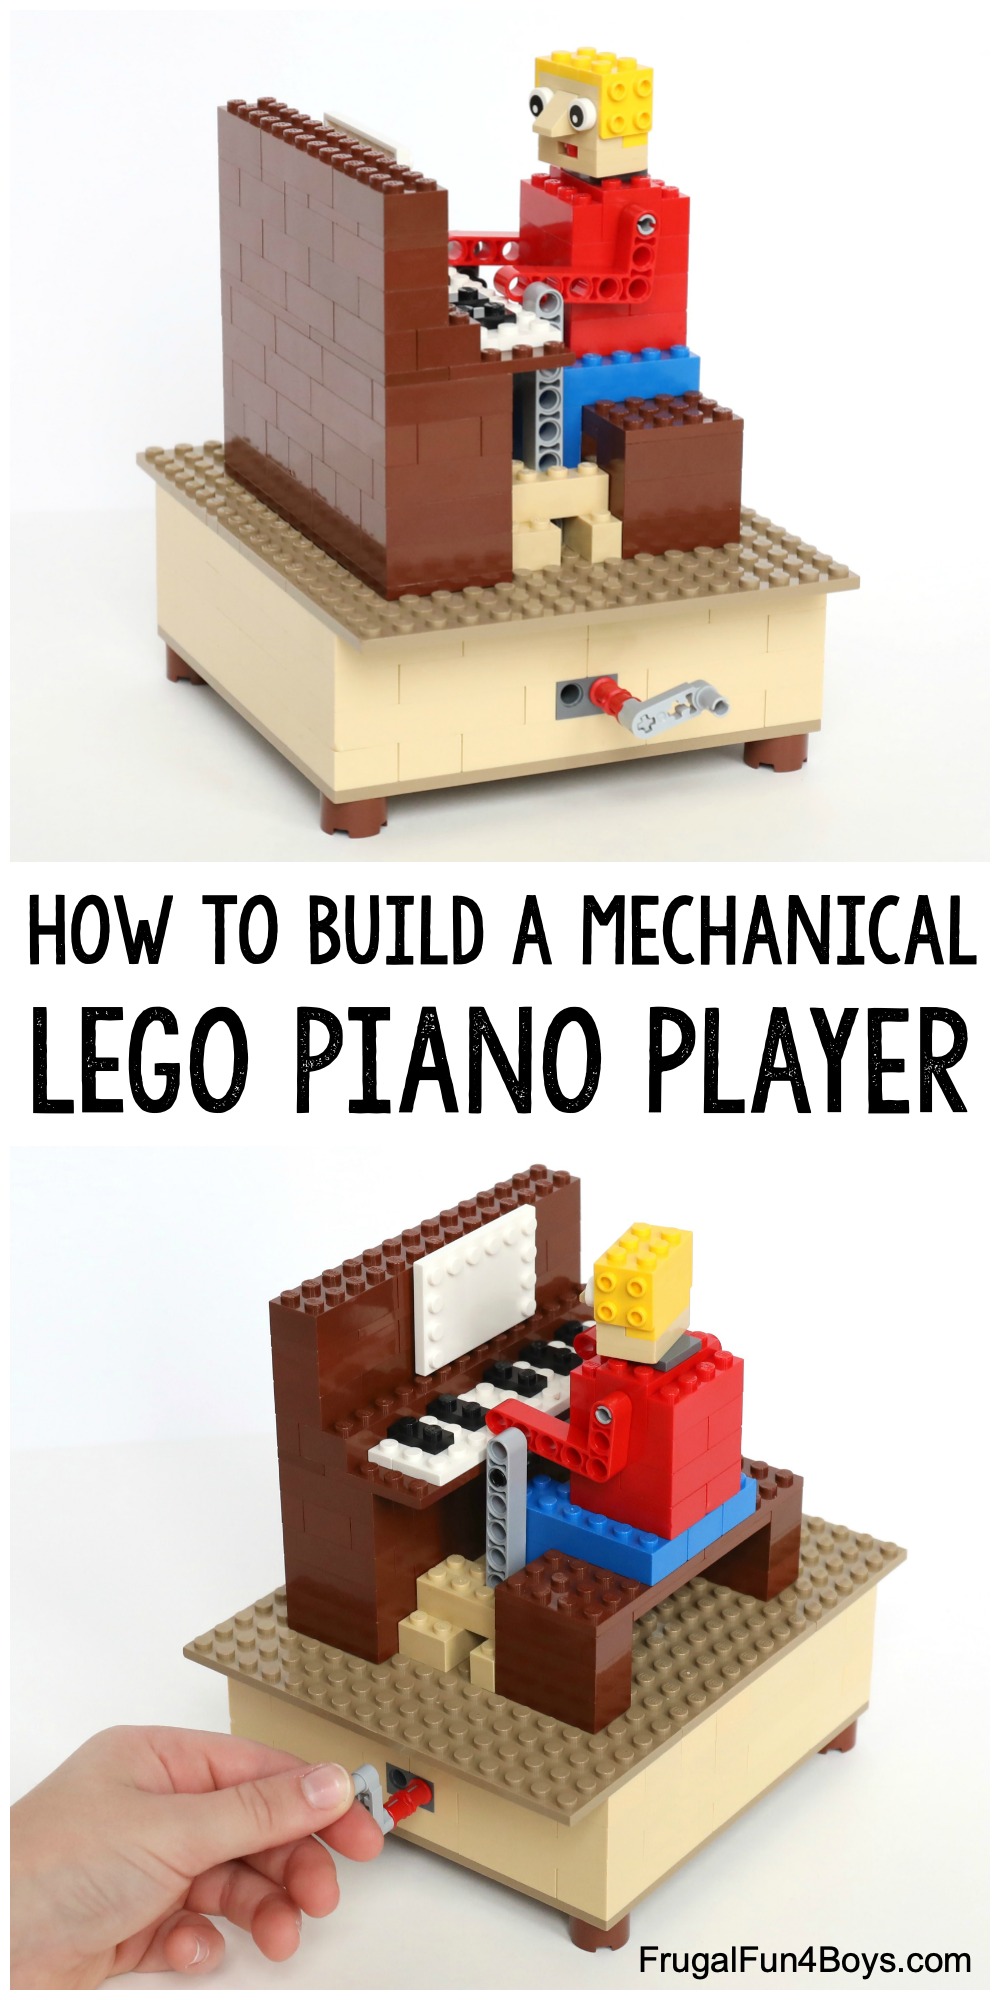
In this post, we’re going to show you how to build a mechanical LEGO® piano player!
One of our favorite projects in Genius LEGO® Inventions (affiliate link) is a drummer who really plays the drums. It’s one project that we’ll never take apart, that’s for sure! We’ve been thinking about building other instrumentalists, and I decided the other day to build a LEGO® piano player. I’m really excited to show you this project because the design is simple, and I think that most kids will be able to build it with the bricks they have on hand. There are a few Technic parts, but not many.
How the Mechanical Piano Player Works:
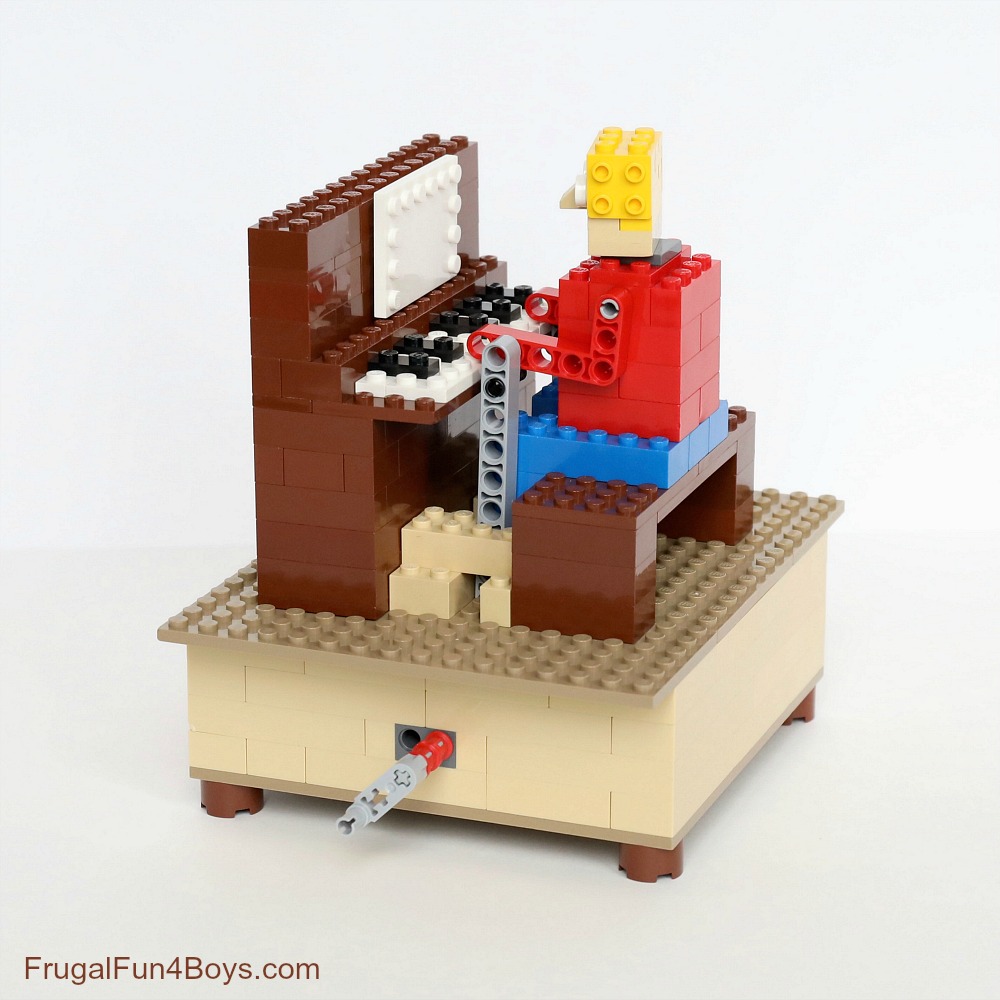
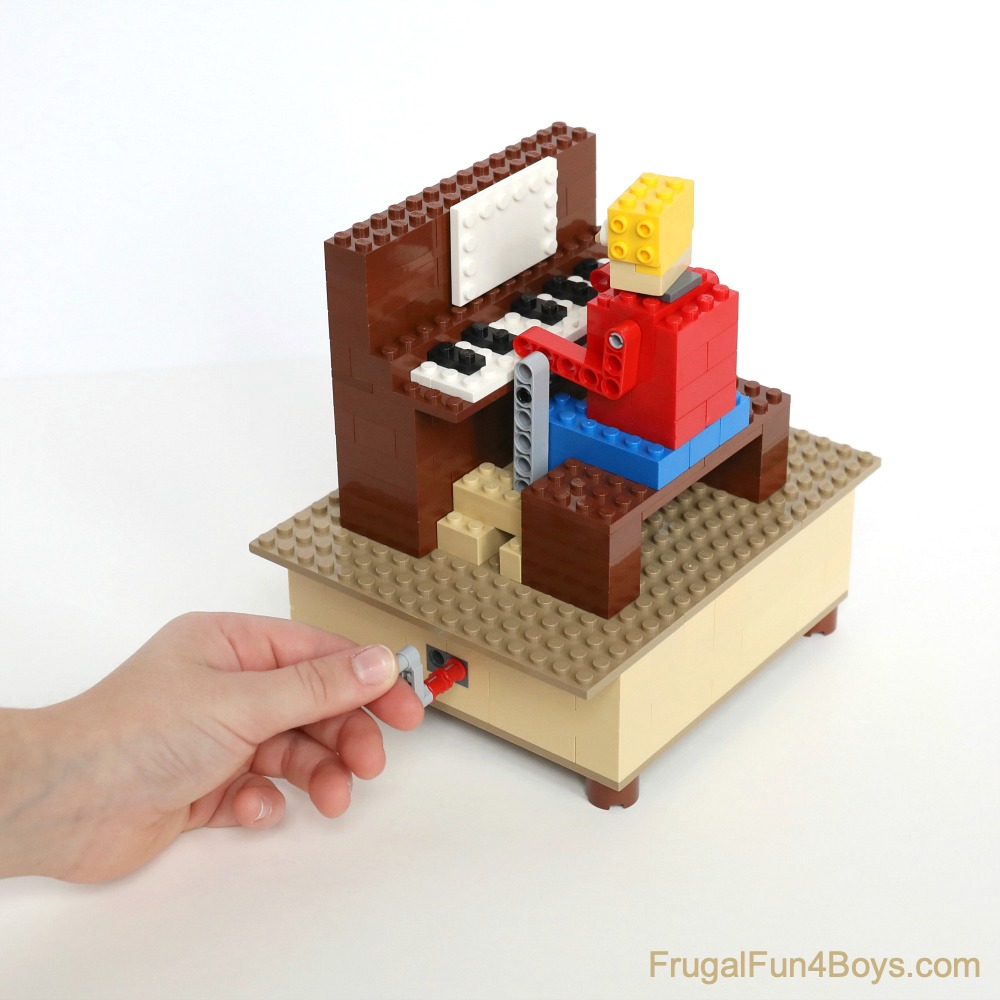
There are no gears in the mechanism for this LEGO® piano player. In fact, the mechanism is quite simple! The handle on the side of the base is connected to a rod with two cams on it. The cams are positioned so that one is up while the other is down. Turn the handle to rotate the cams. The cams lift the light gray Technic beams up and set them down again, which lifts the piano players arms up and down!
Engineering Vocabulary:
Are you wondering what a “cam” is? A cam is a wheel that rotates on an off-center axis. In this case, our cams are 1 x 2 Technic liftarms. The axis is on one end of the liftarm so that it rotates off center. As it does, it creates motion by pushing a rod (another liftarm) up and down.
Want to see the piano player in action? Here’s a video that shows how it works! I’ve also included views of how we assembled the mechanism. You’ll still need the building instructions below, but this video should be helpful.
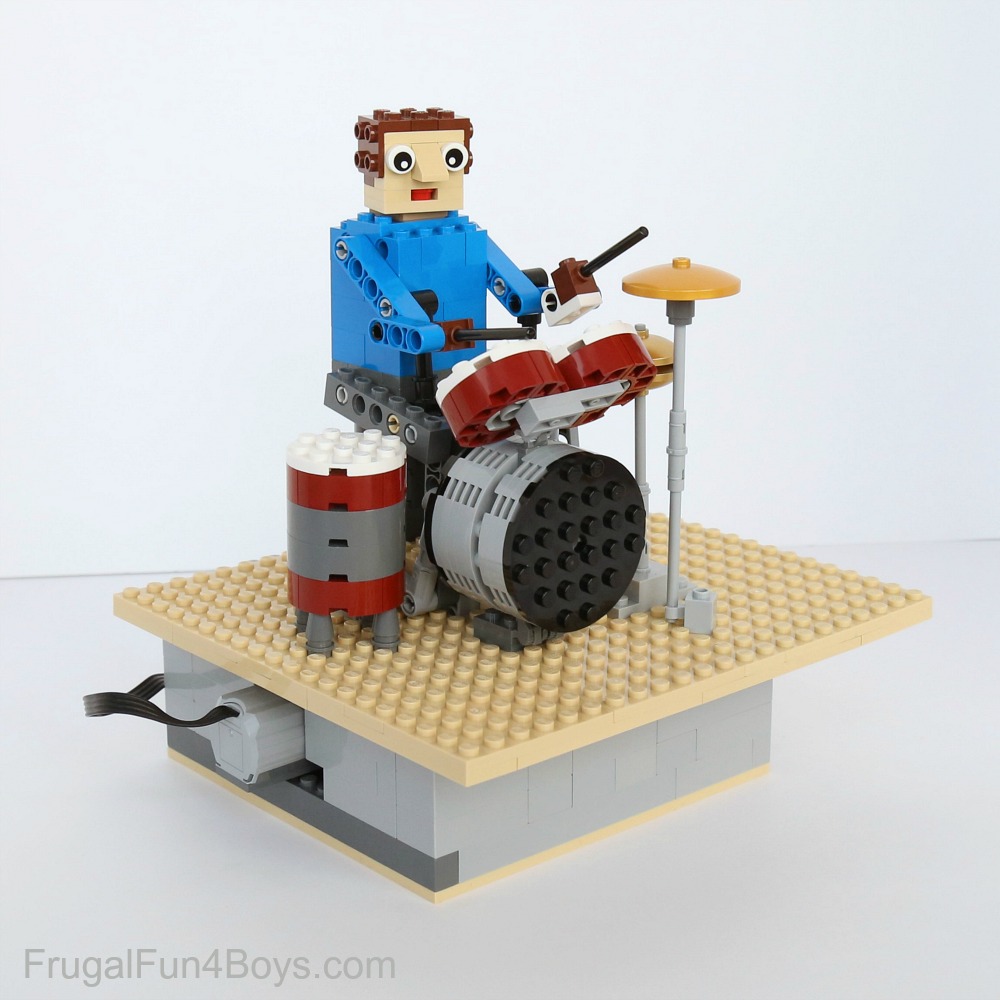
Build a whole LEGO® band! If you like this piano player, you’ll also want to check out our drummer. This one is motorized, and he really plays the drums! So cool.
You can find the instructions for the dummer in our book Genius LEGO® Inventions with Bricks You Already Have.
Ready to build your own mechanical LEGO® piano player? Follow the building instructions below.
Feel free to make substitutions if you don’t have the exact bricks shown. This is a very flexible project!
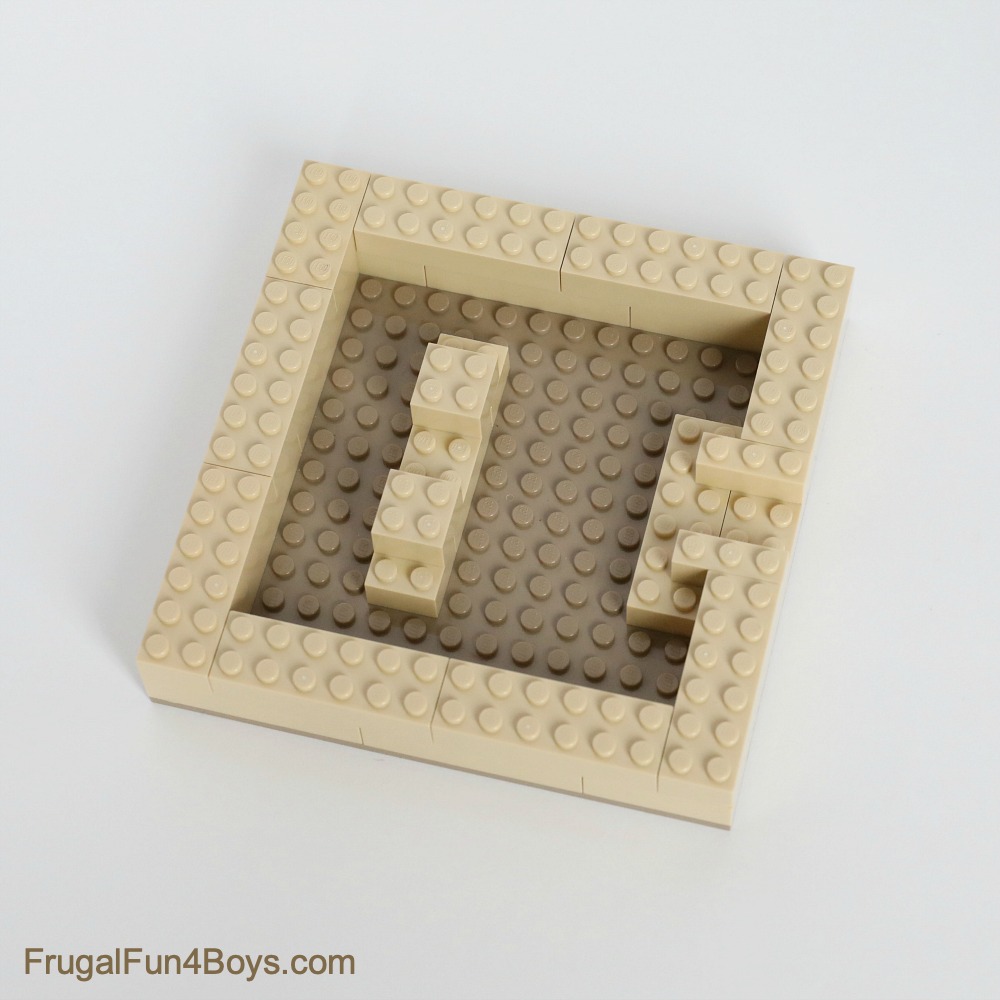
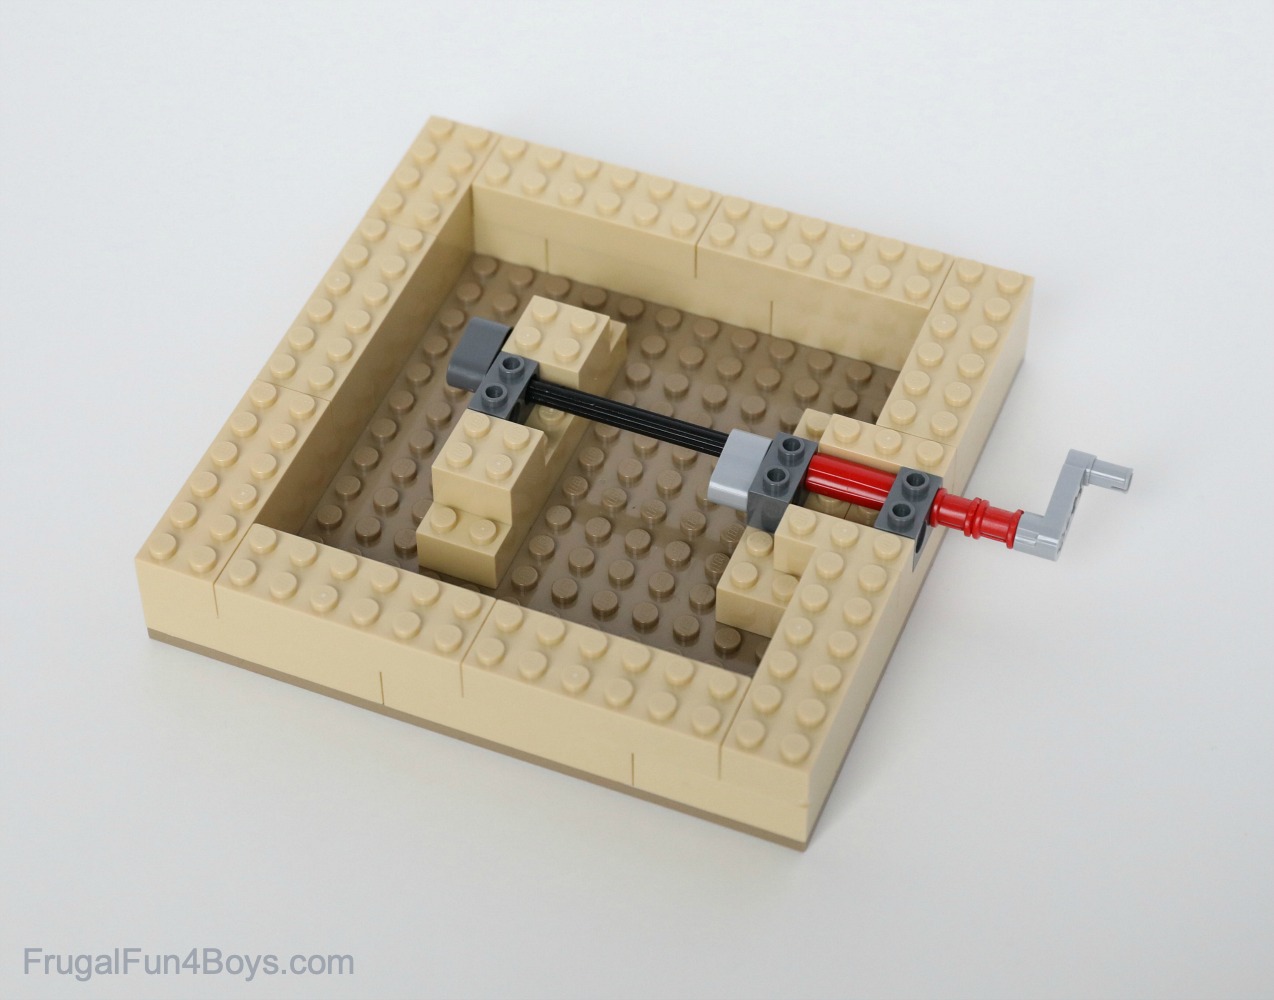
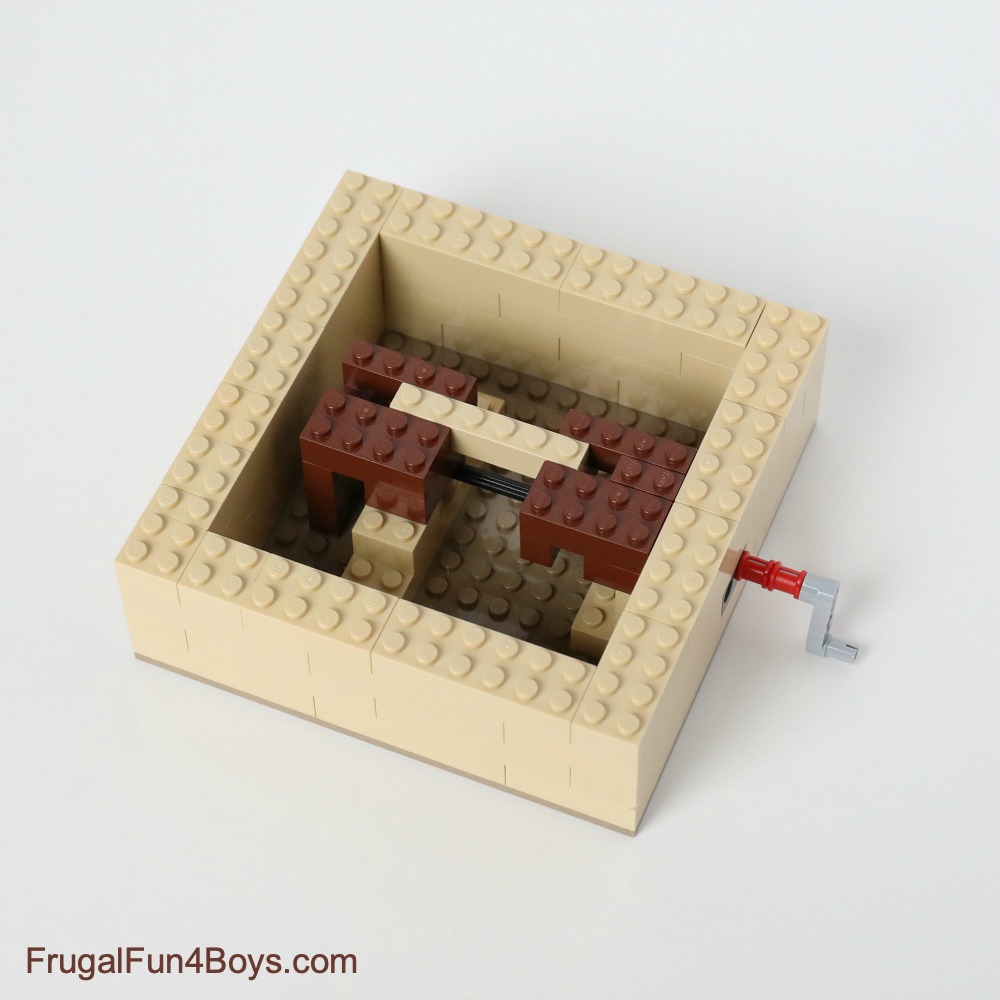
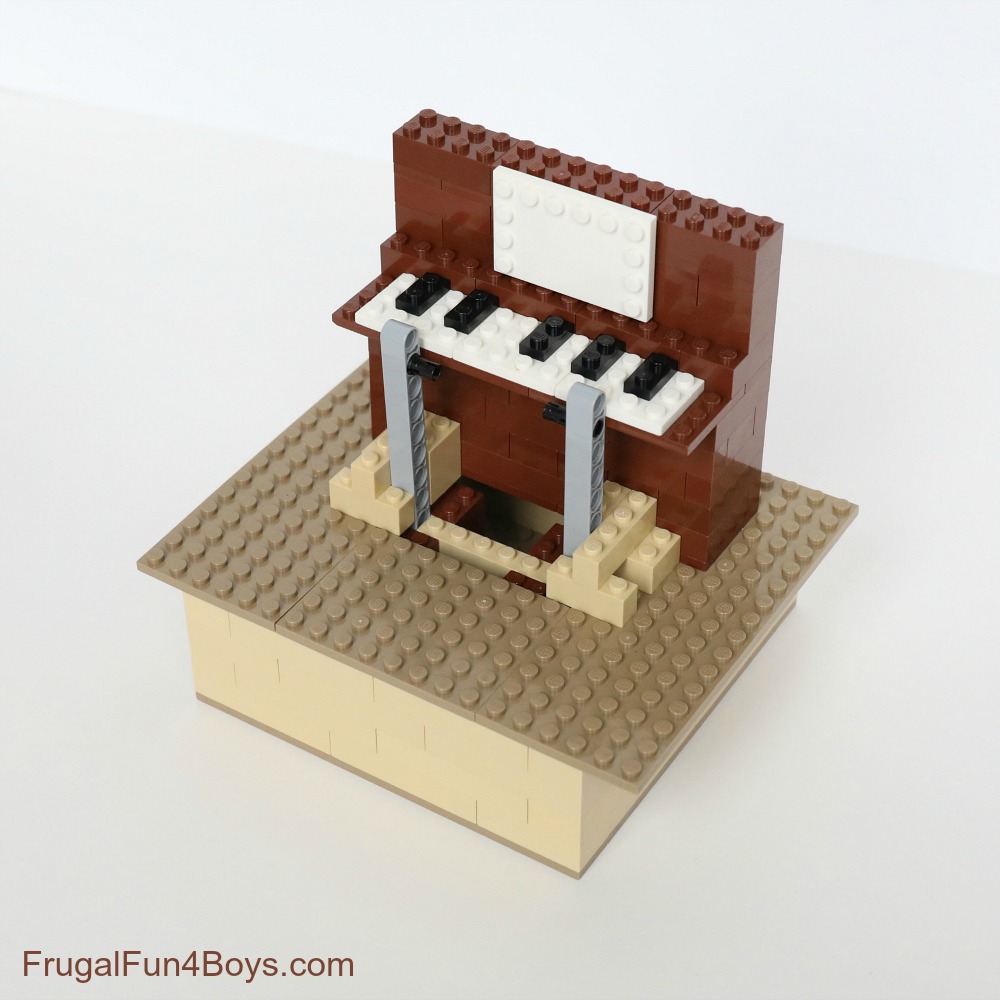
Step 1: Grab a 16 x 16 plate, or two 8 x 16 plates. Build two rows of bricks around the perimeter, with a 4-stud gap in the second row as shown. Place bricks inside the square, as shown.
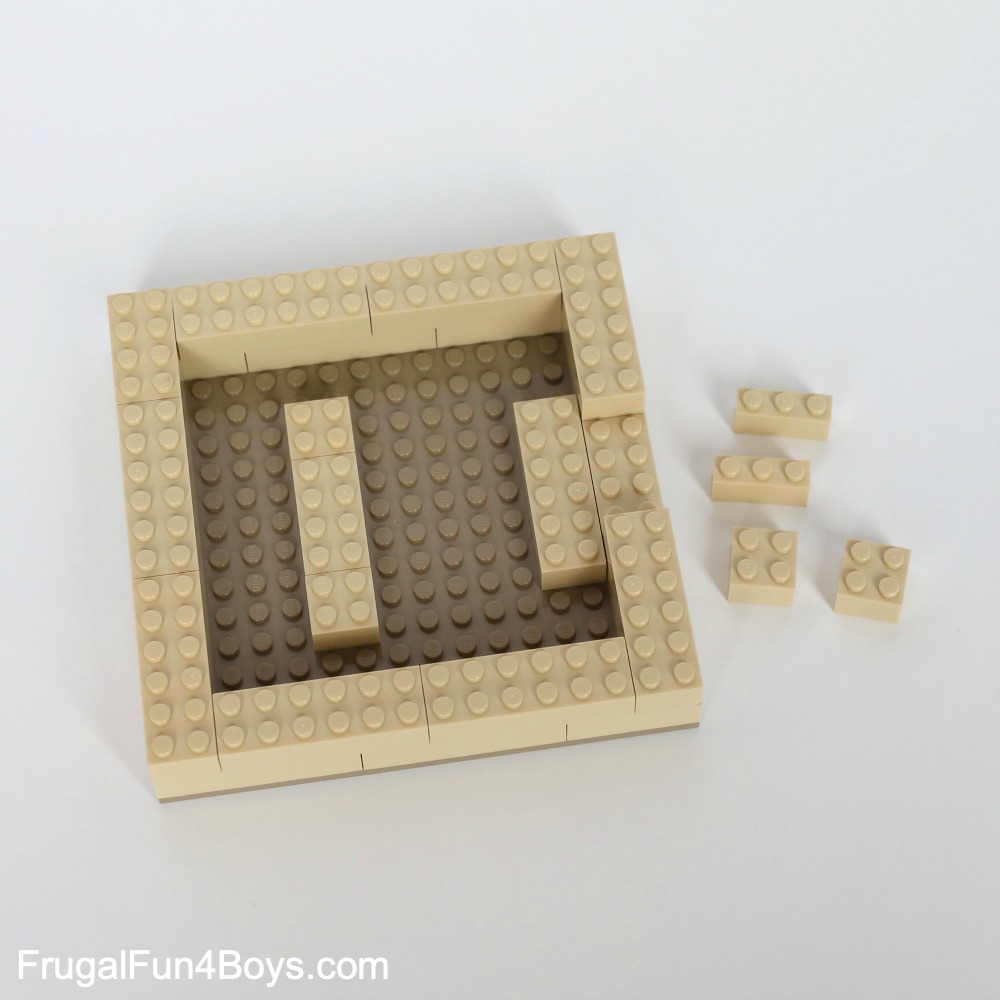
Step 2: Add two 2 x 2 bricks and two 1 x 3 bricks to the base as shown. This will create a channel for the rod and cams.
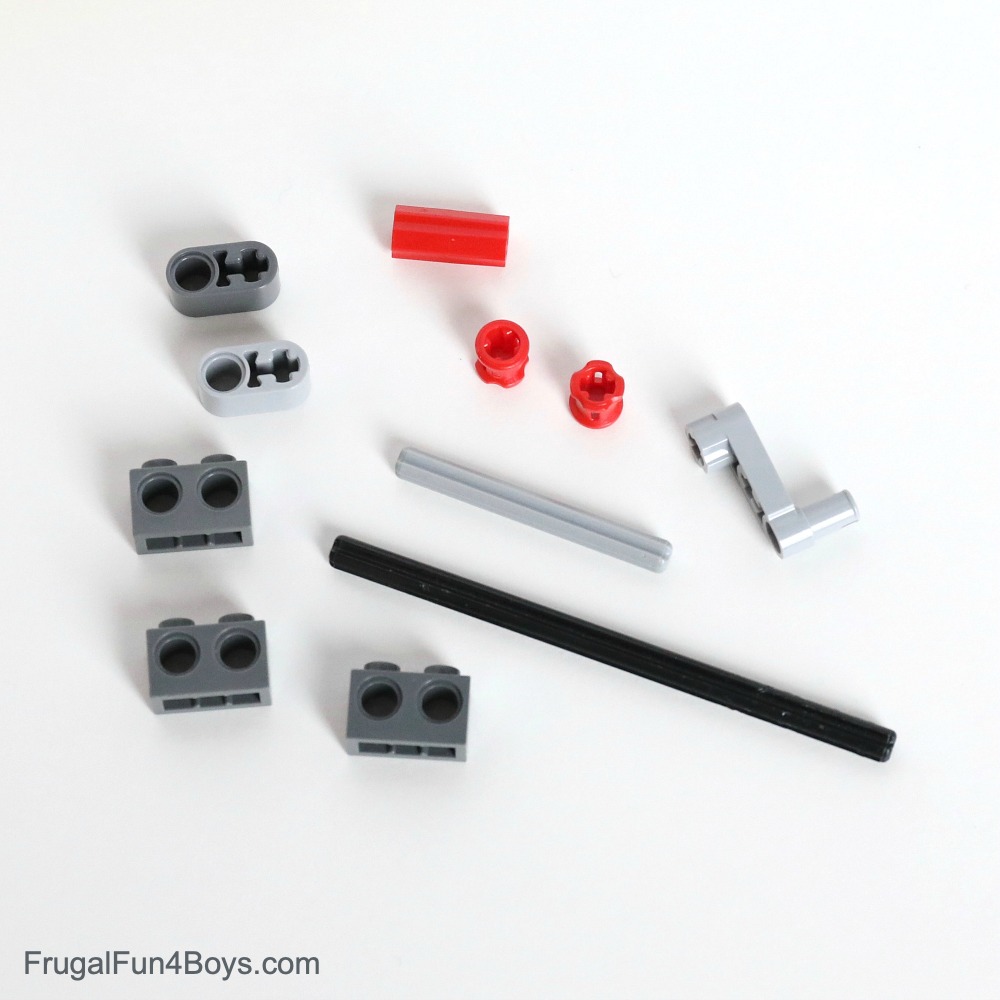
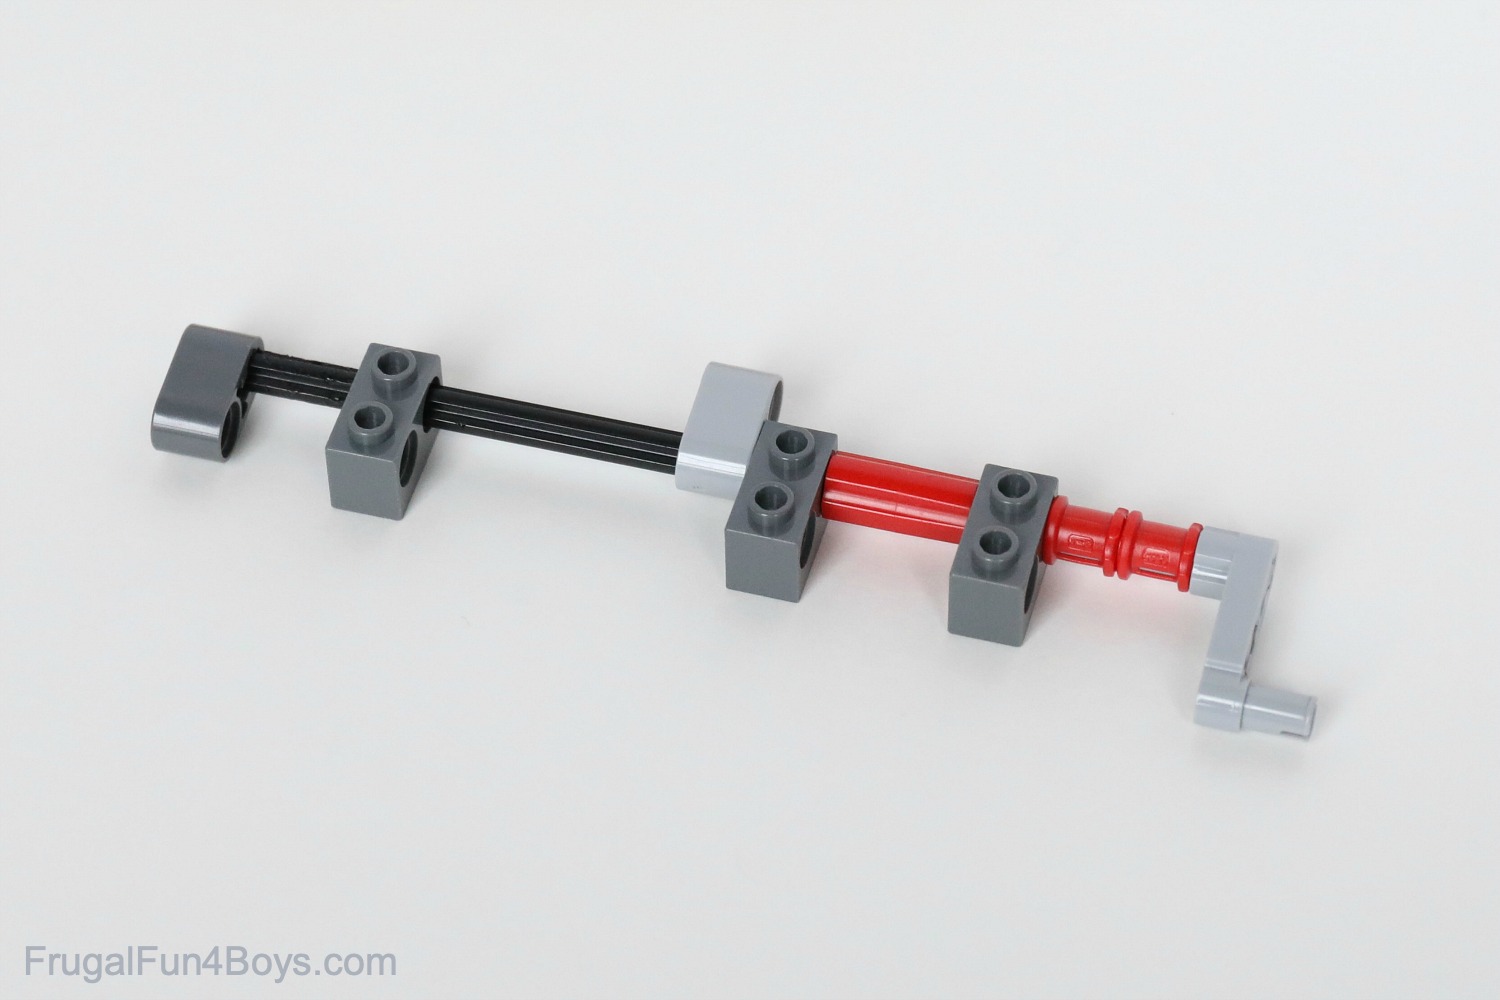
Step 3: Gather the bricks shown for building the cams. The axles are 10 studs long (the black one) and 5 studs long (the light gray one).
Step 4: Use a Technic axle connector to connect the two axles. Then slide a 1 x 2 Technic brick with 2 holes onto each one.
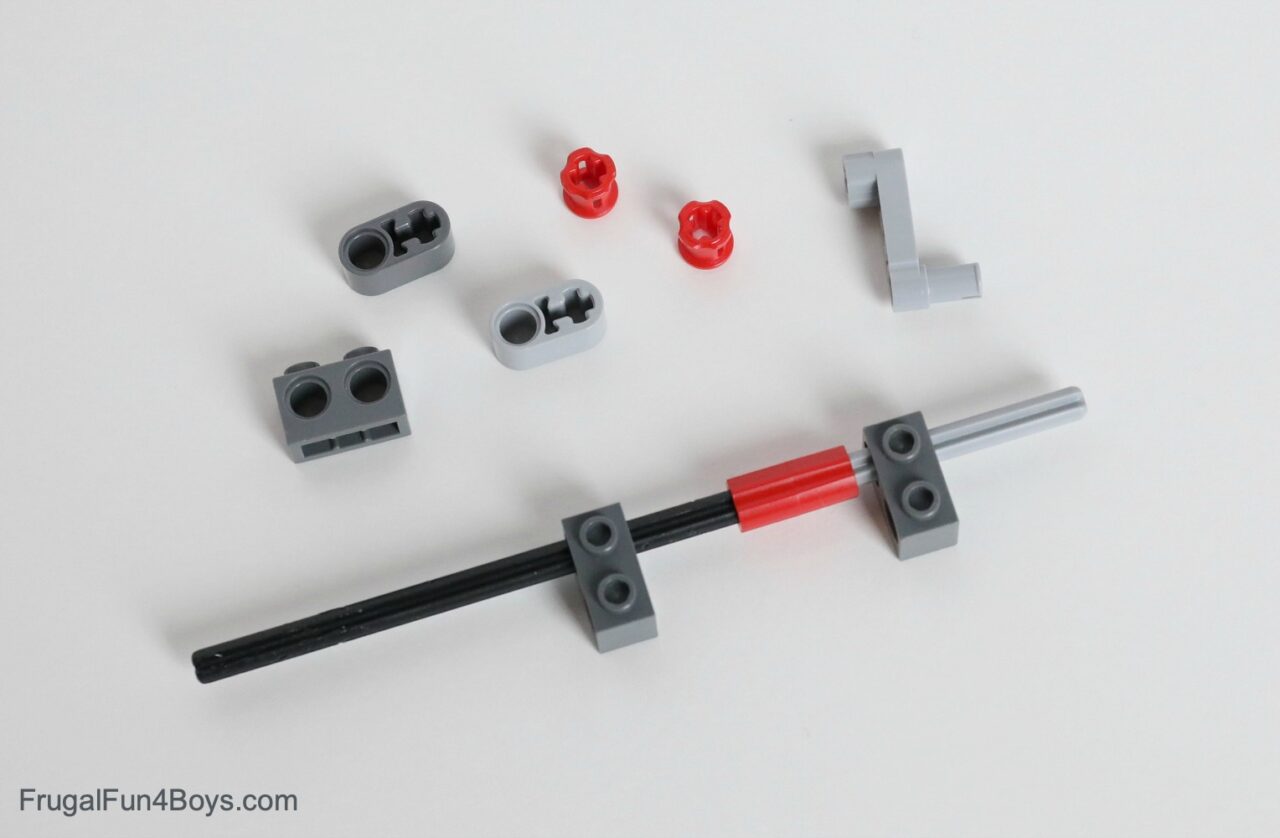
Step 5: Grab two Technic bush and slide them onto the light gray axle. Then add a 1 x 3 liftarm that has two axle holes and a pin. The pin makes a nice handle for projects like this.
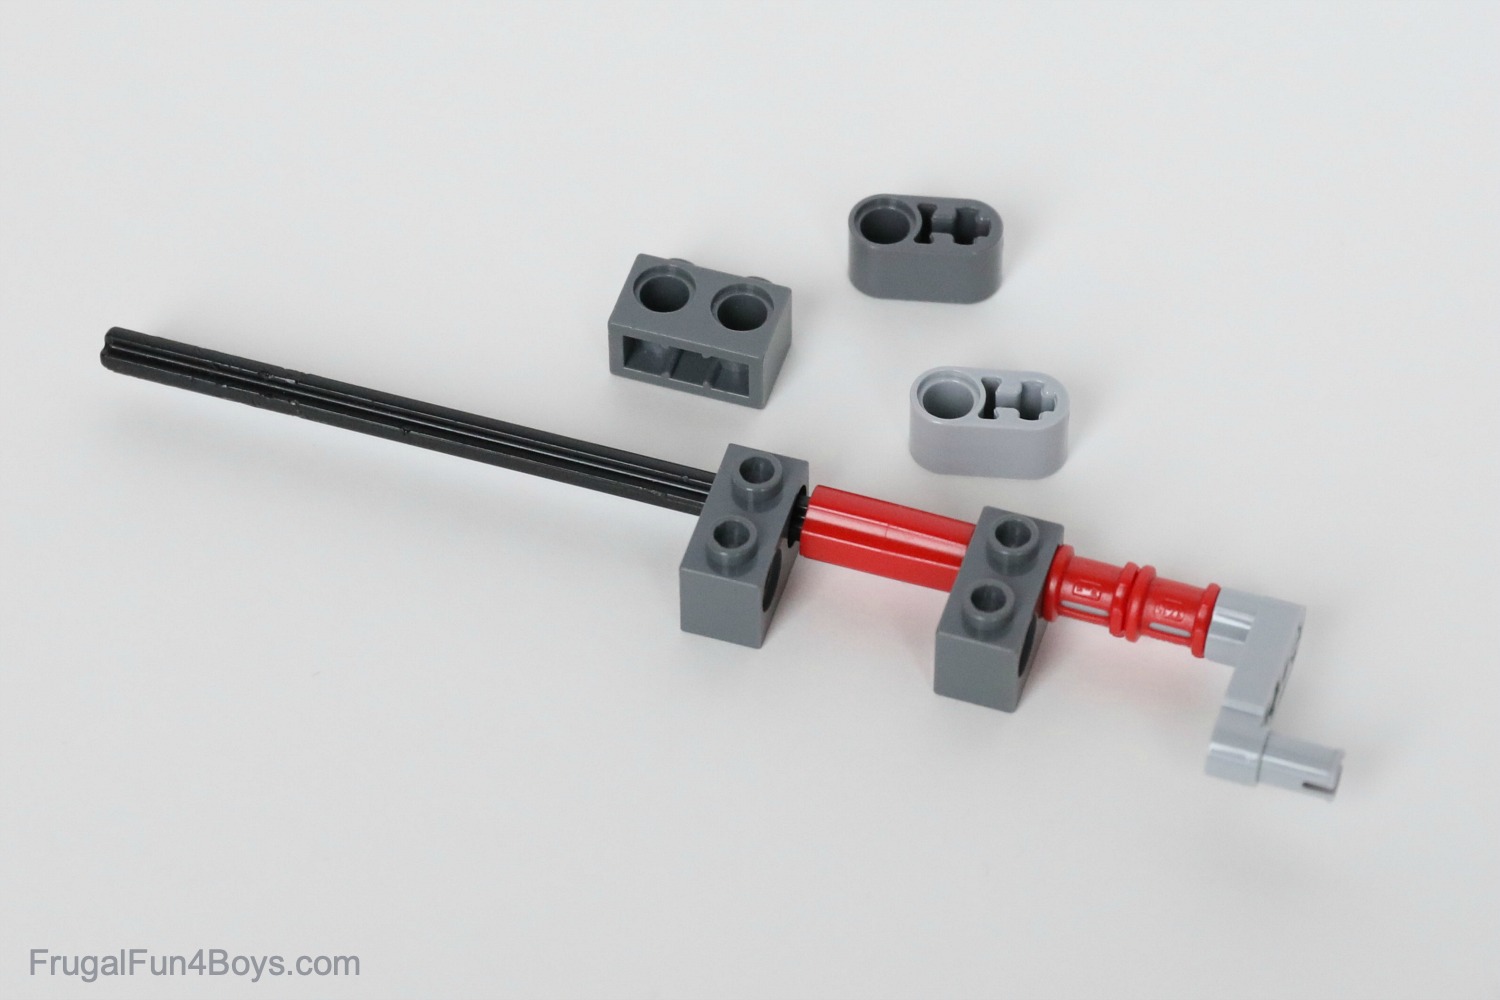
Step 6: Slide a 1 x 2 liftarm with an axle hole and a round hole onto the black axle. Make sure the axle goes through the axle hole – you don’t want the liftarm to be able to spin freely. Then slide on a 1 x 2 Technic brick with two holes and a second 1 x 2 liftarm. Make sure that the liftarms are oriented in opposite directions so that one will be up while the other is down.
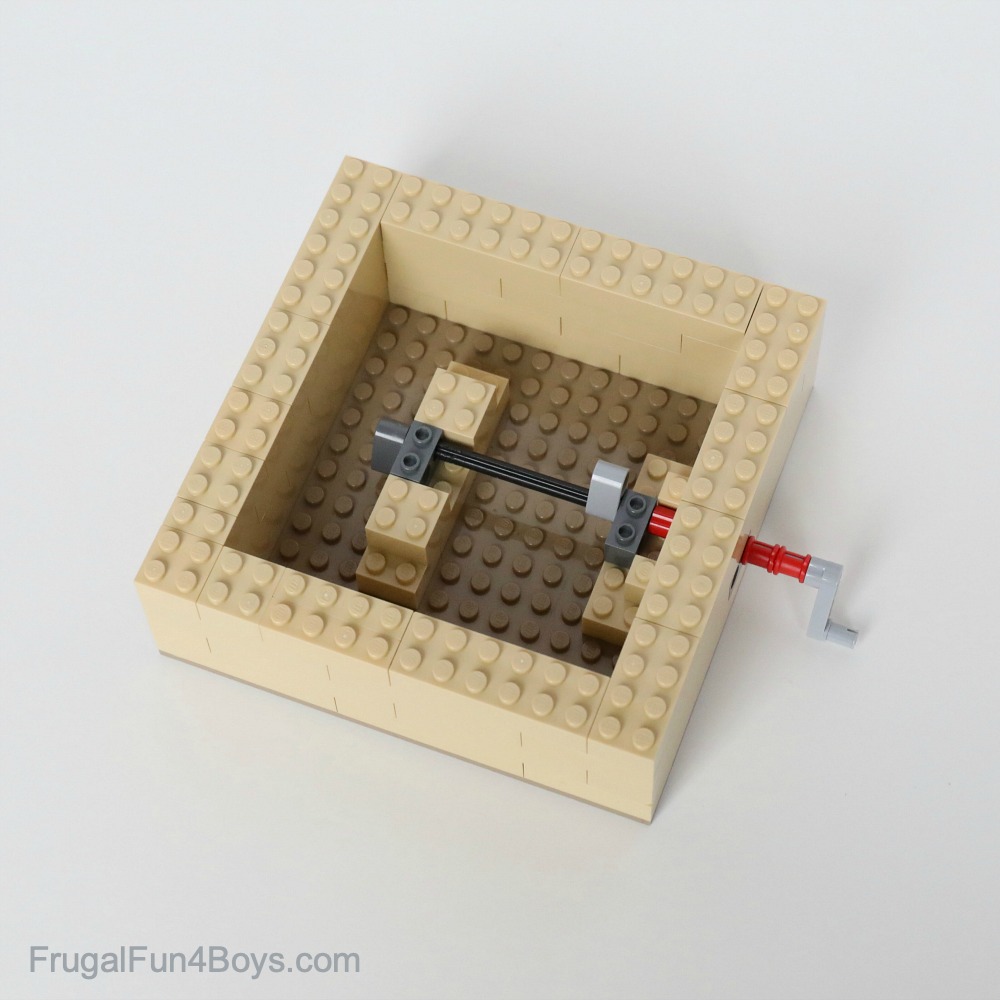
Step 7: Attach this rod and cam assembly to the base.
Step 8: Add two more rows of bricks to the base.
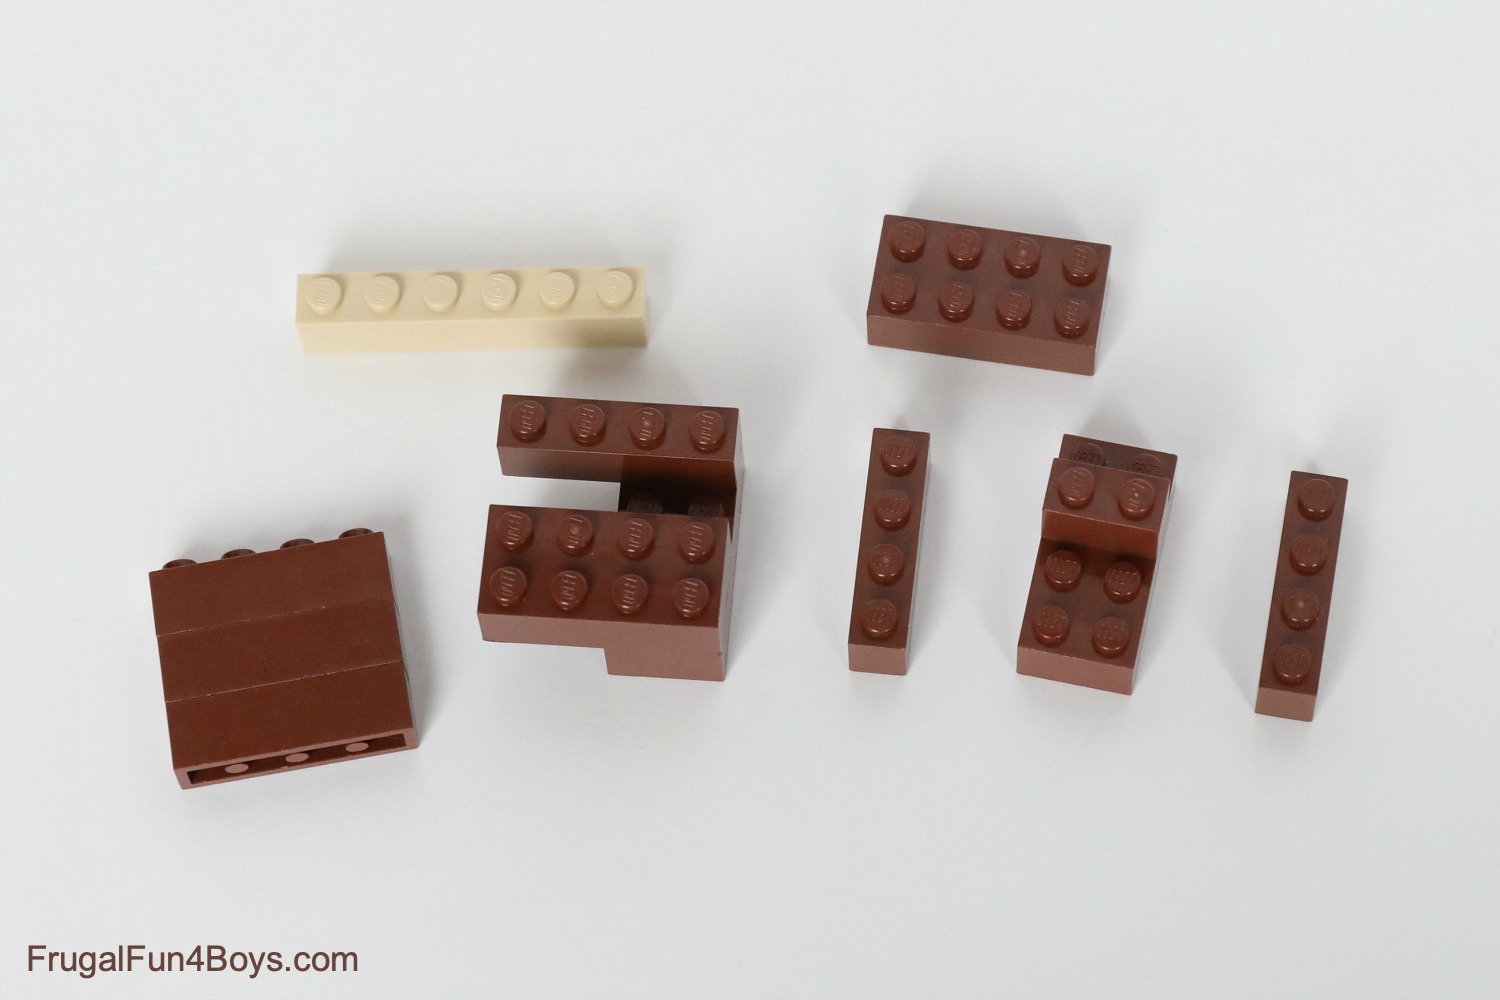
Step 9: Gather the bricks shown. These will be used to stabilize the Technic liftarms that move the piano player’s arms up and down.
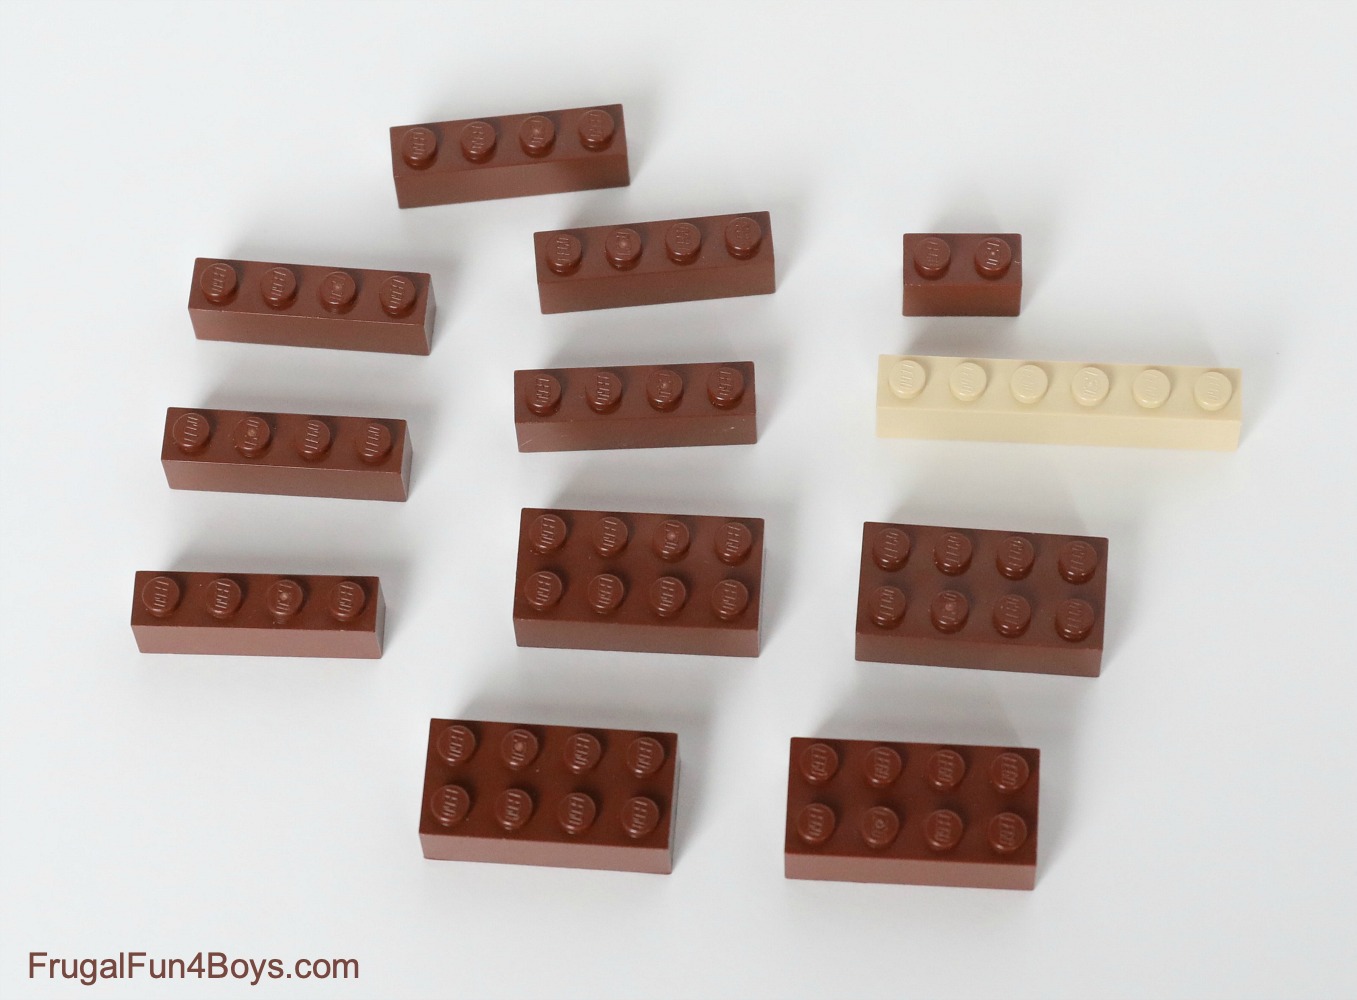
Step 10: Make a stack of three 1 x 4 bricks. Then attach a 1 x 4 brick and a 2 x 4 brick to another 2 x 4 brick as shown. Place a 1 x 2 brick on top of another 2 x 4 brick.
Step 11: Use a 2 x 4 brick and a 1 x 4 brick to attach the 2 x 4 brick (with a 1 x 2 brick on top) to a 1 x 4 brick with a space in between. These shapes look weird, but they do serve a purpose!
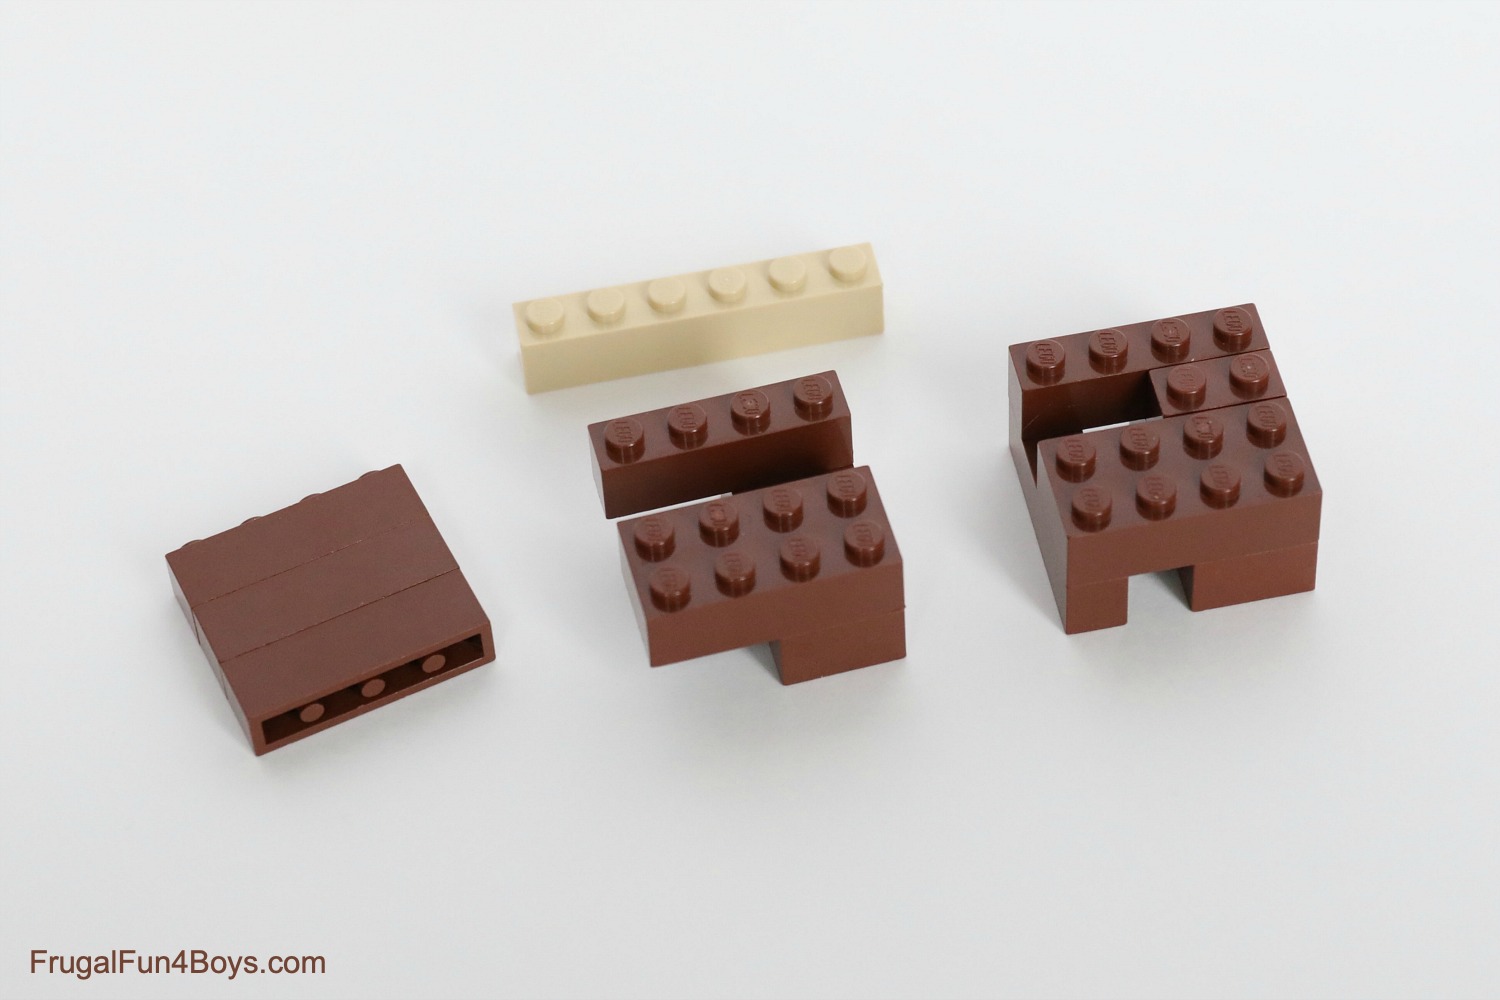
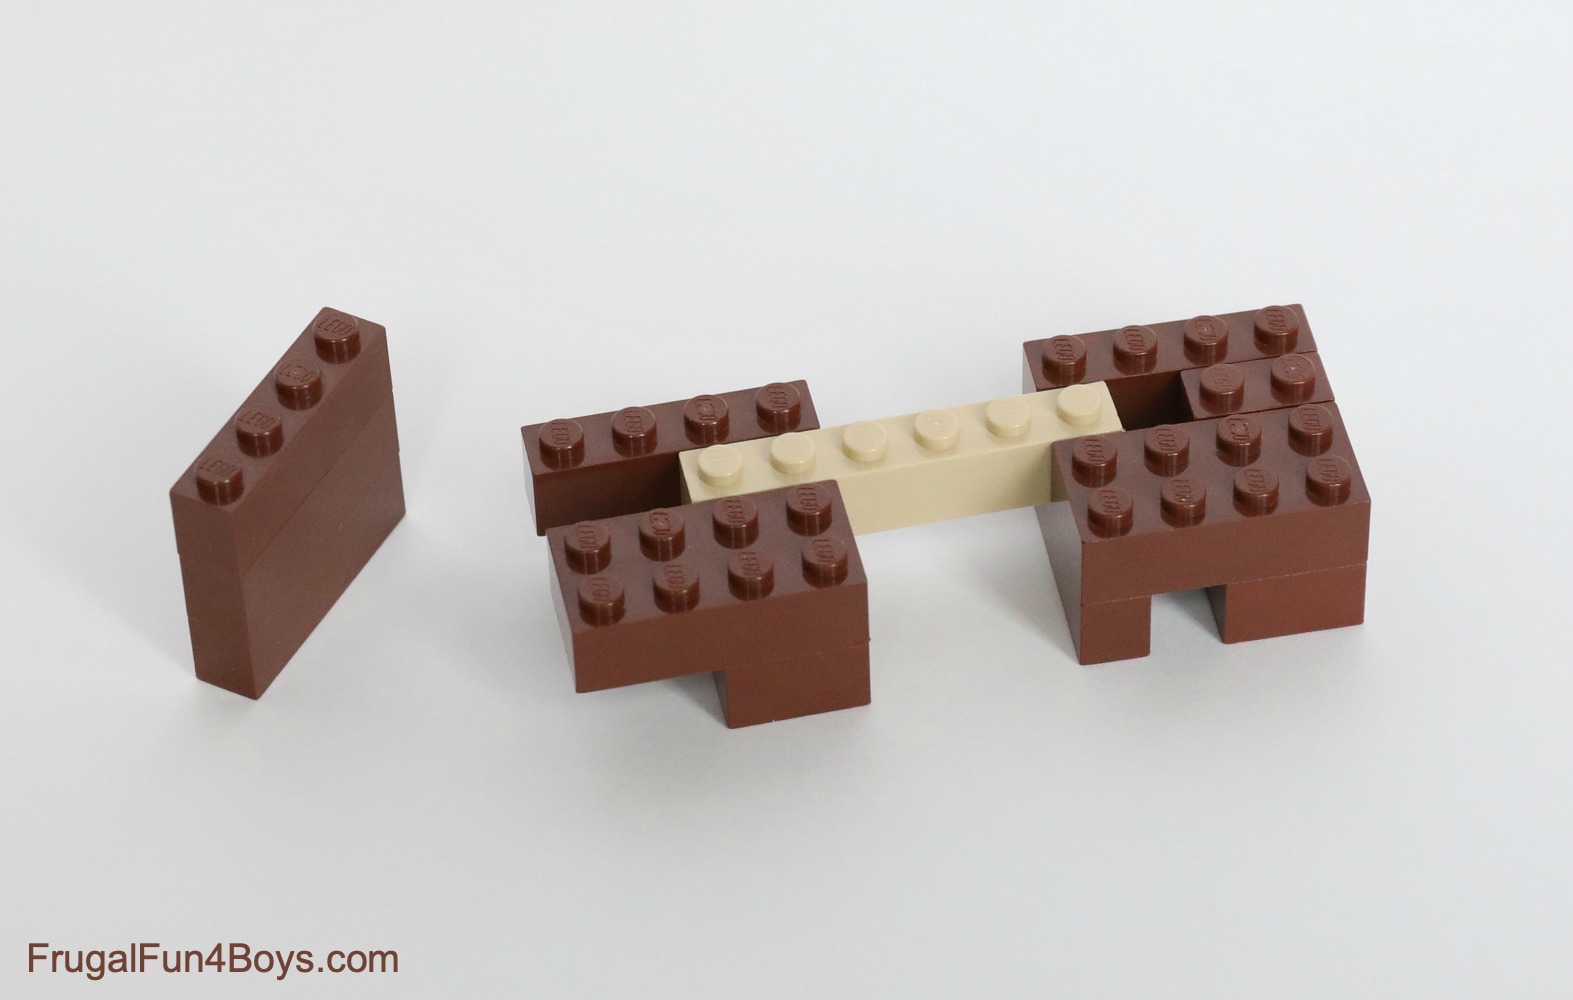
Step 12: Add a 1 x 6 brick as a connector.
Step 13: Add the stack of three 1 x 4 bricks to the base. It will sit right next to the cam.
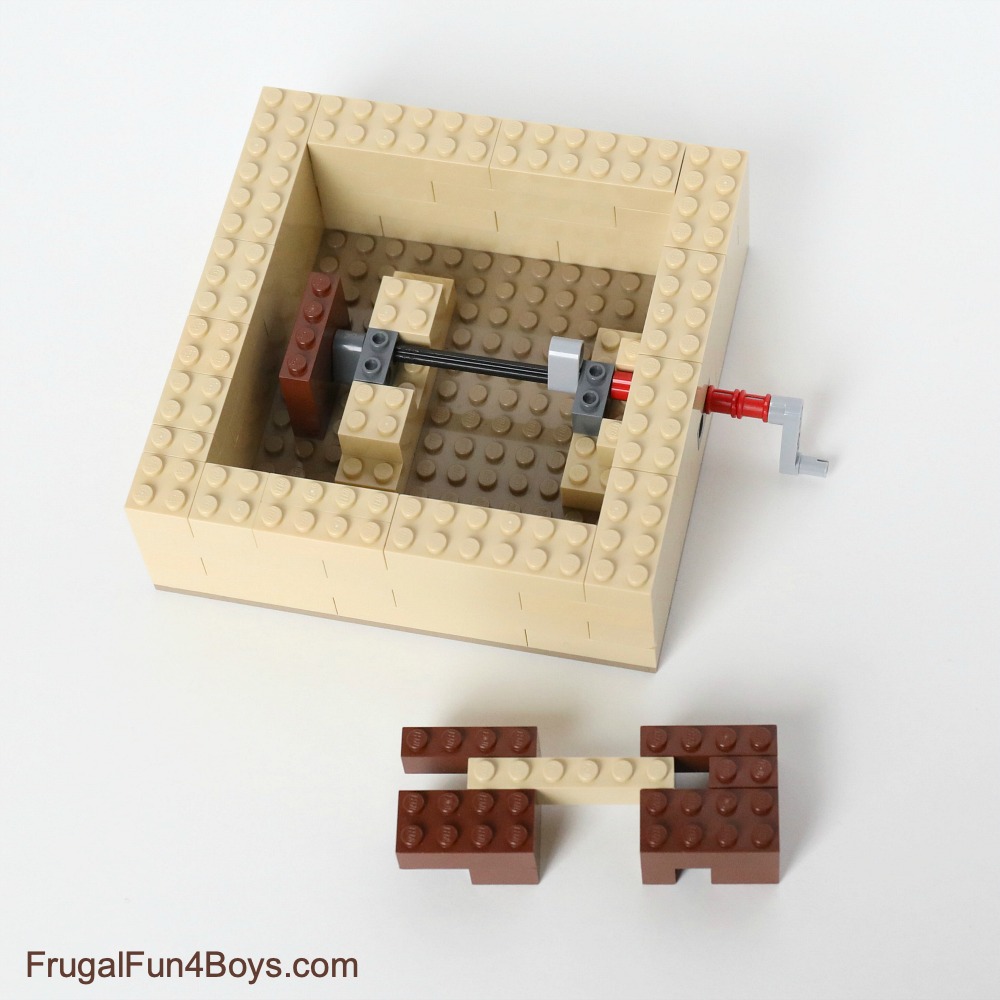
Step 14: Add the brick assembly to the base. There should be an opening above each cam. Check to see that your handle still turns easily.
Step 15: Now we can close up the floor. Add plates on top of the base. We used two 6 x 16 plates, a 6 x 8 plate, a 2 x 4 plate, and four 1 x 2 plates. (The four 1 x 2 plates were my 10 year old’s doing… thanks a lot, son! Couldn’t find a 2 x 4? Ha ha.)
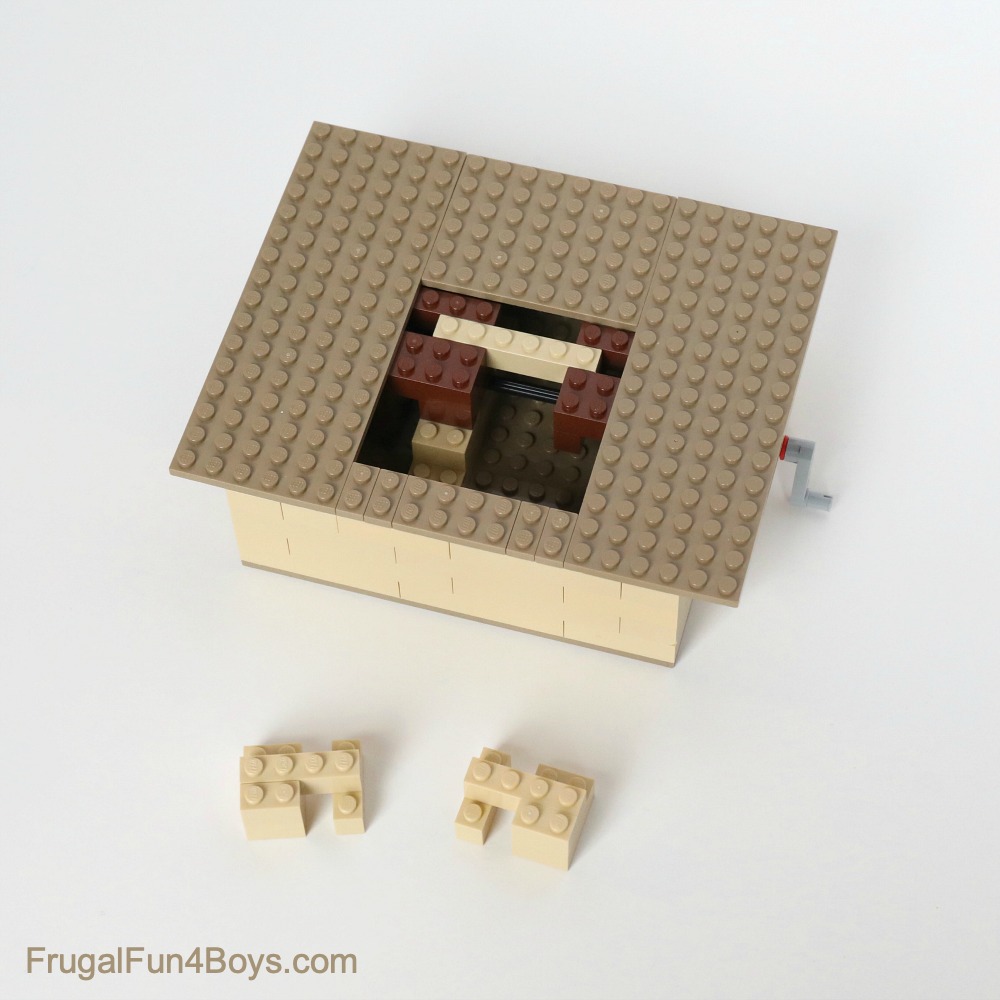
Step 16: Build these two shapes out of bricks. Any color will work, although I like tan. White would be good too.

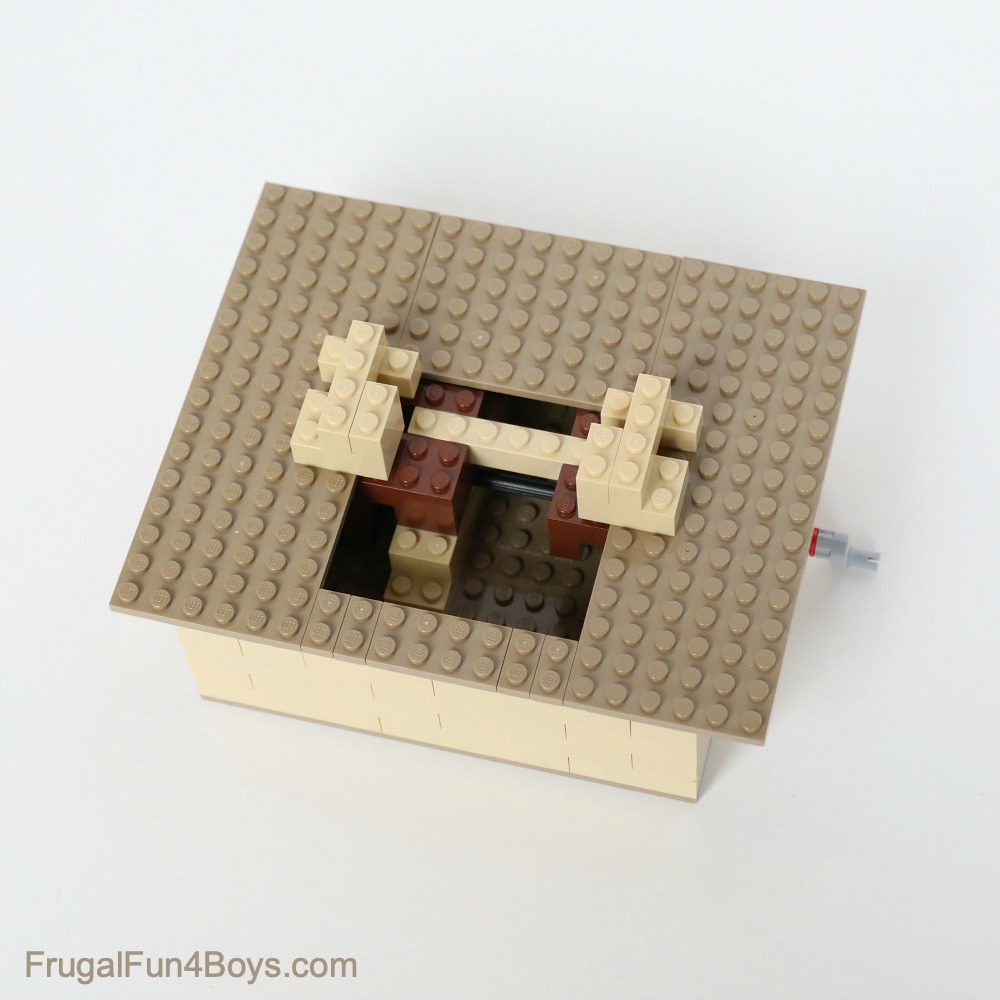
Step 17: Turn them 180 degrees. Then plate one brick assemble on each side of the machine. The holes should line up with the hole above each cam.
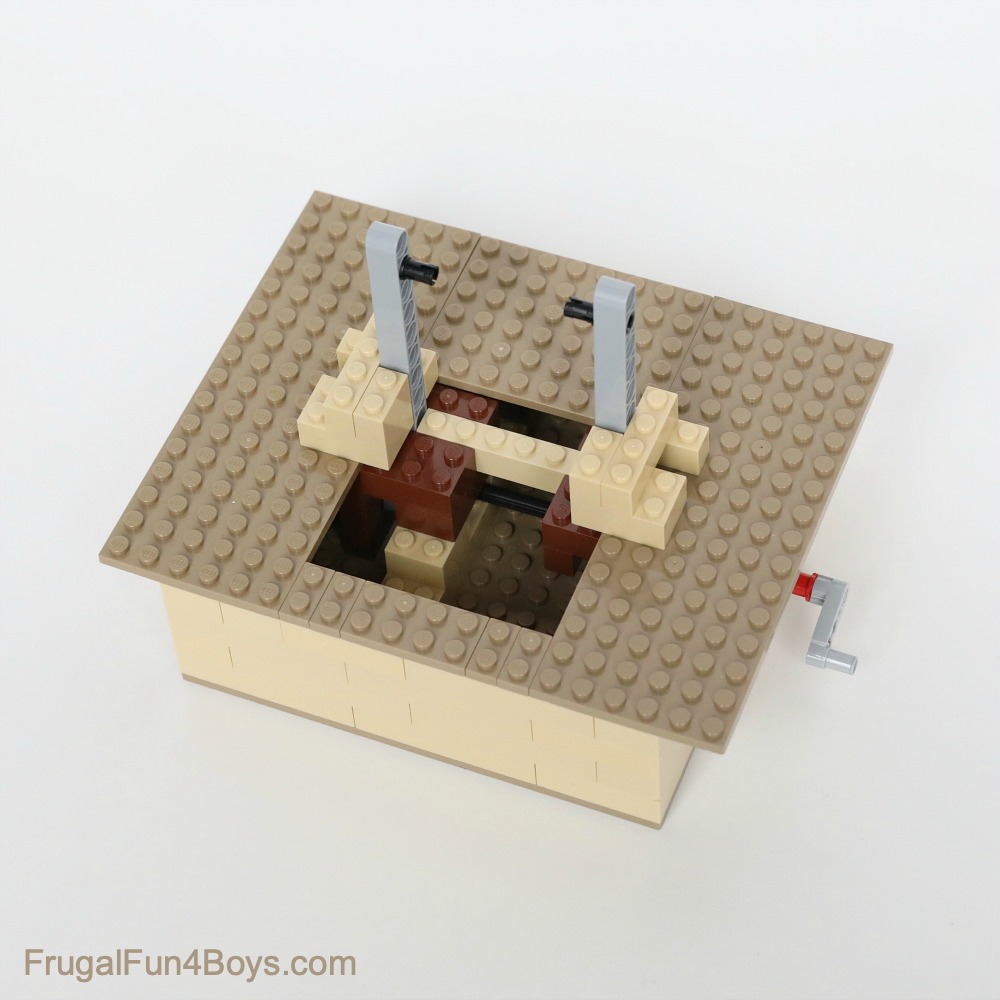
Step 18: Drop a 1 x 11 Technic liftarm into each hole so that they rest on the cams. Insert a black pin in the second hole from the top on each one. Note that the liftarms are NOT attached to anything! They are just sitting there.
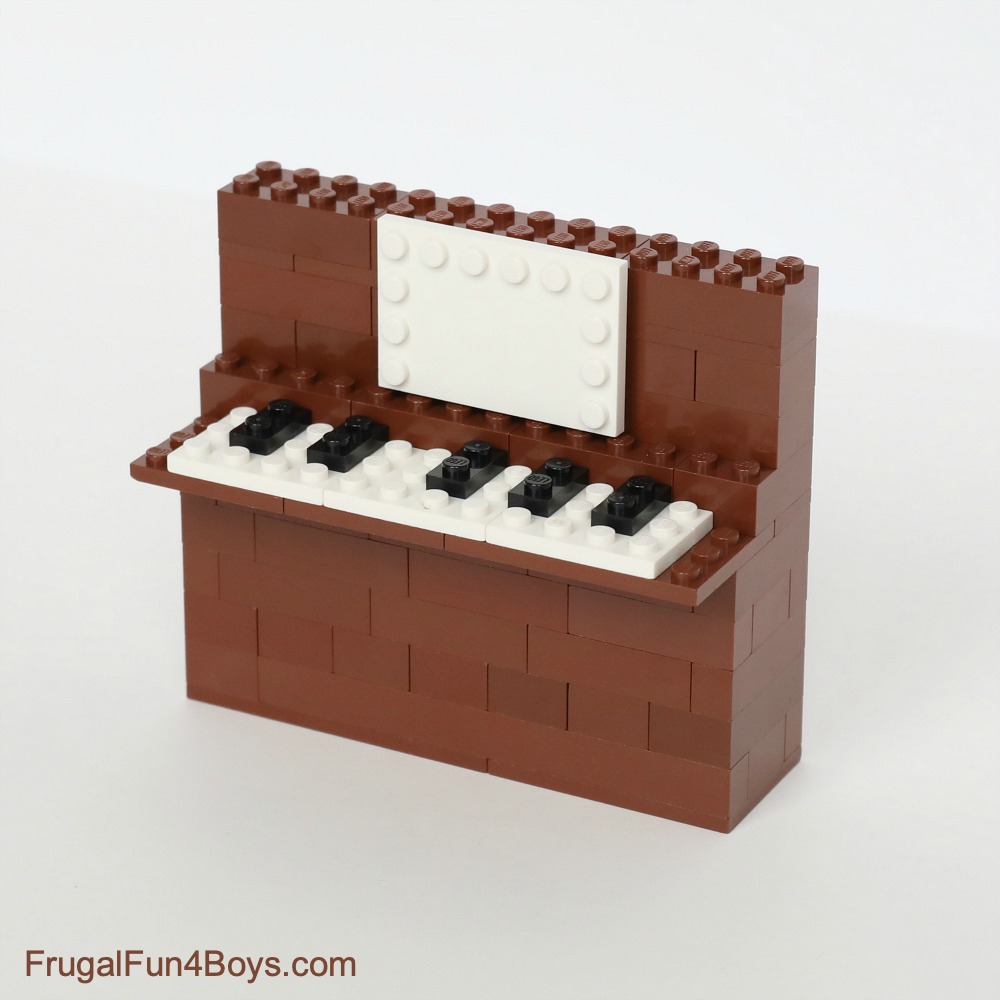
Step 19: Now, build a piano. Ours is just basic bricks and plates. The “sheet music” is attached to the piano with a brown bracket.
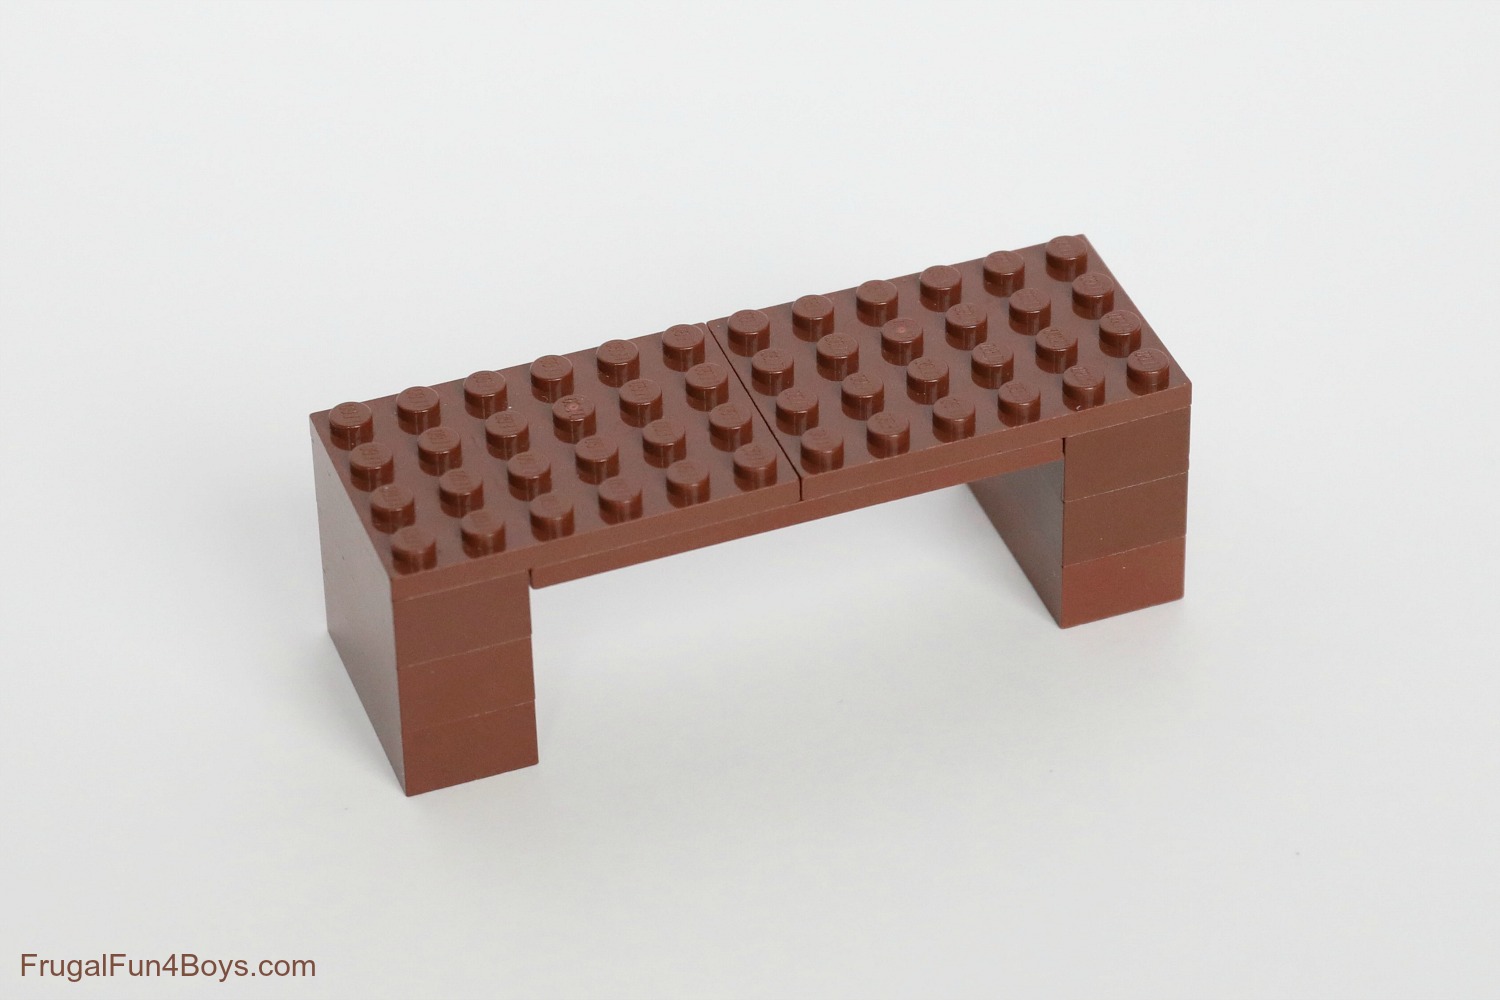
Step 20: Then build a piano bench.
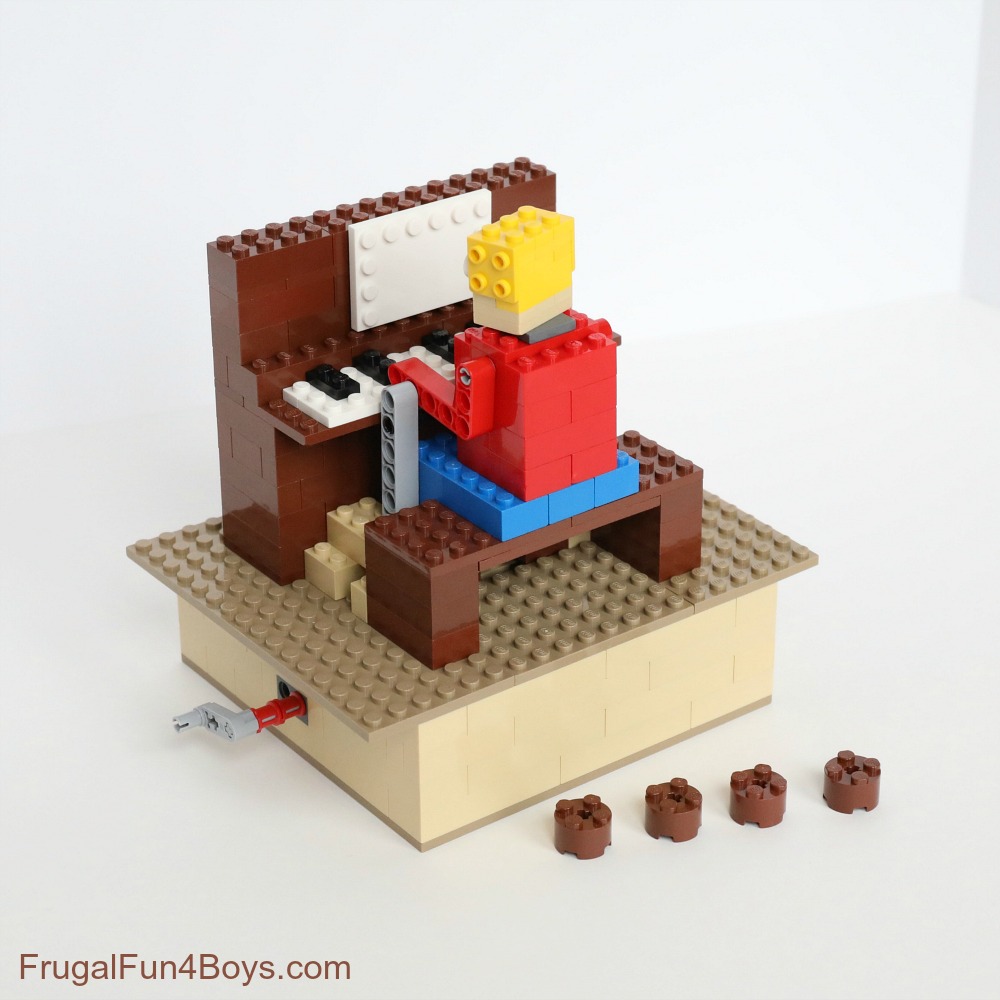
Step 21: Now construct your piano player. You can build it like ours, or give your person his or her own look! We used 3 x 5 L-shaped liftarms for the arms. The body of the piano player needs to have a Technic bricks at the top so that you can attach the arms using a light gray pin. The light gray pins allow joints to move freely.
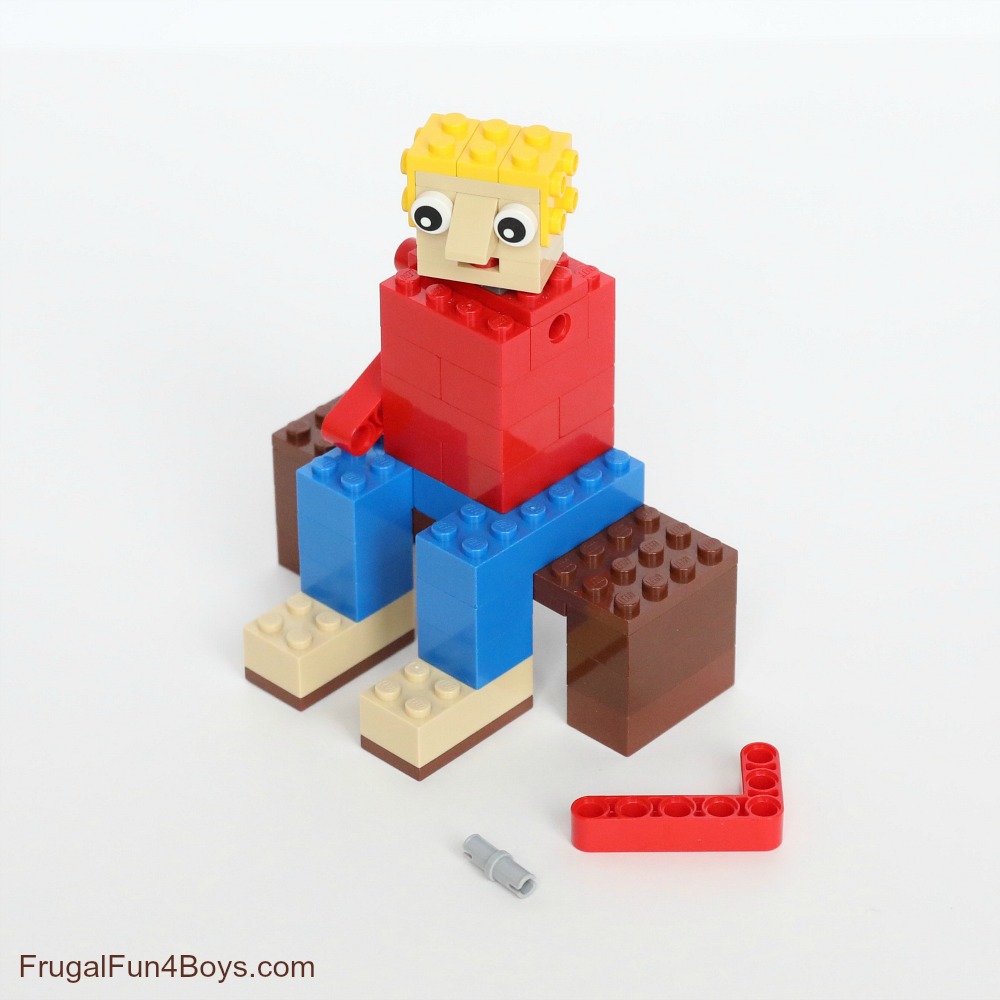
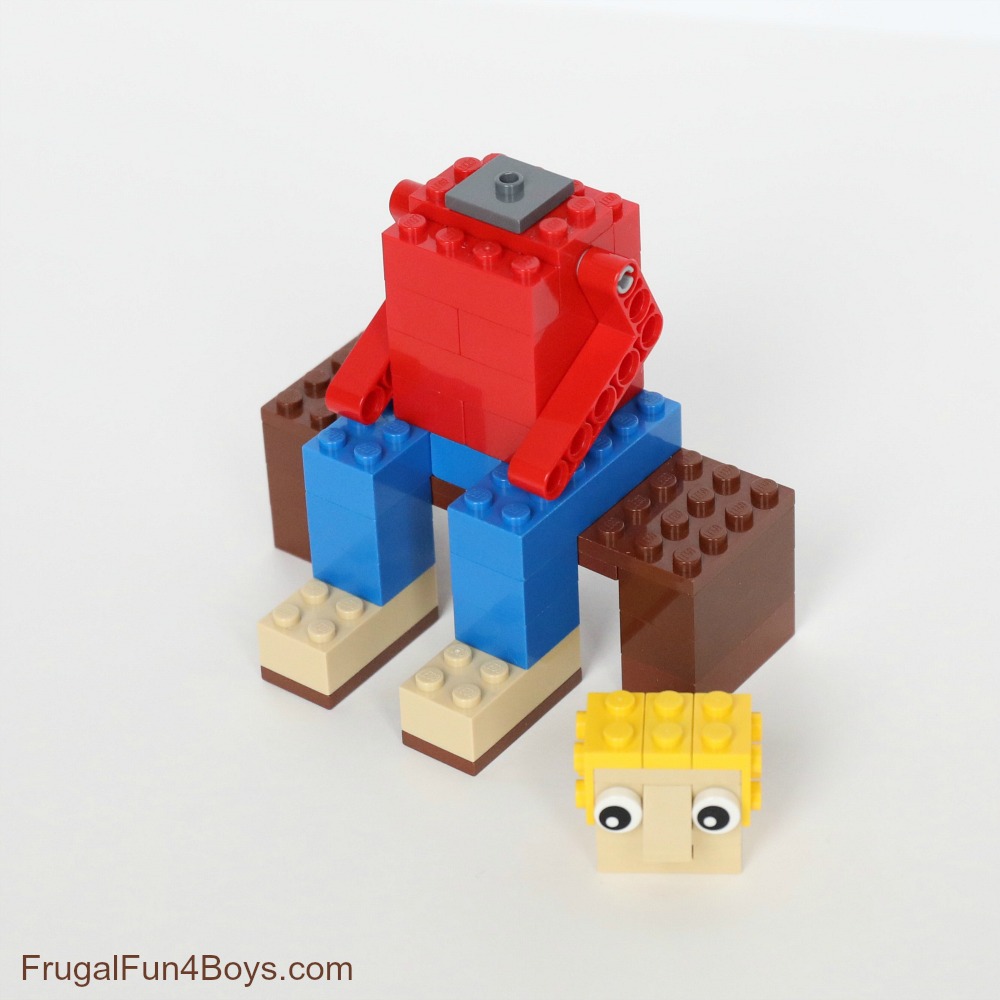
Step 22: You can make the head swivel by attaching it to a 2 x 2 tile with one stud on top. It’s fun to be able to pose the head.
Step 23: Attach your piano to the base of the machine. It should sit right up against the tan bricks.
Step 24: Now attach the piano player and bench to the base. Each arm should rest on top of one of the black pins. If you place a 2 x 2 round brick (or a regular brick) under each corner of the base, it will make it easier to turn the handle.
Then your piano player is all done! Turn the handle and watch him play a song!
NEED MORE LEGO IDEAS?
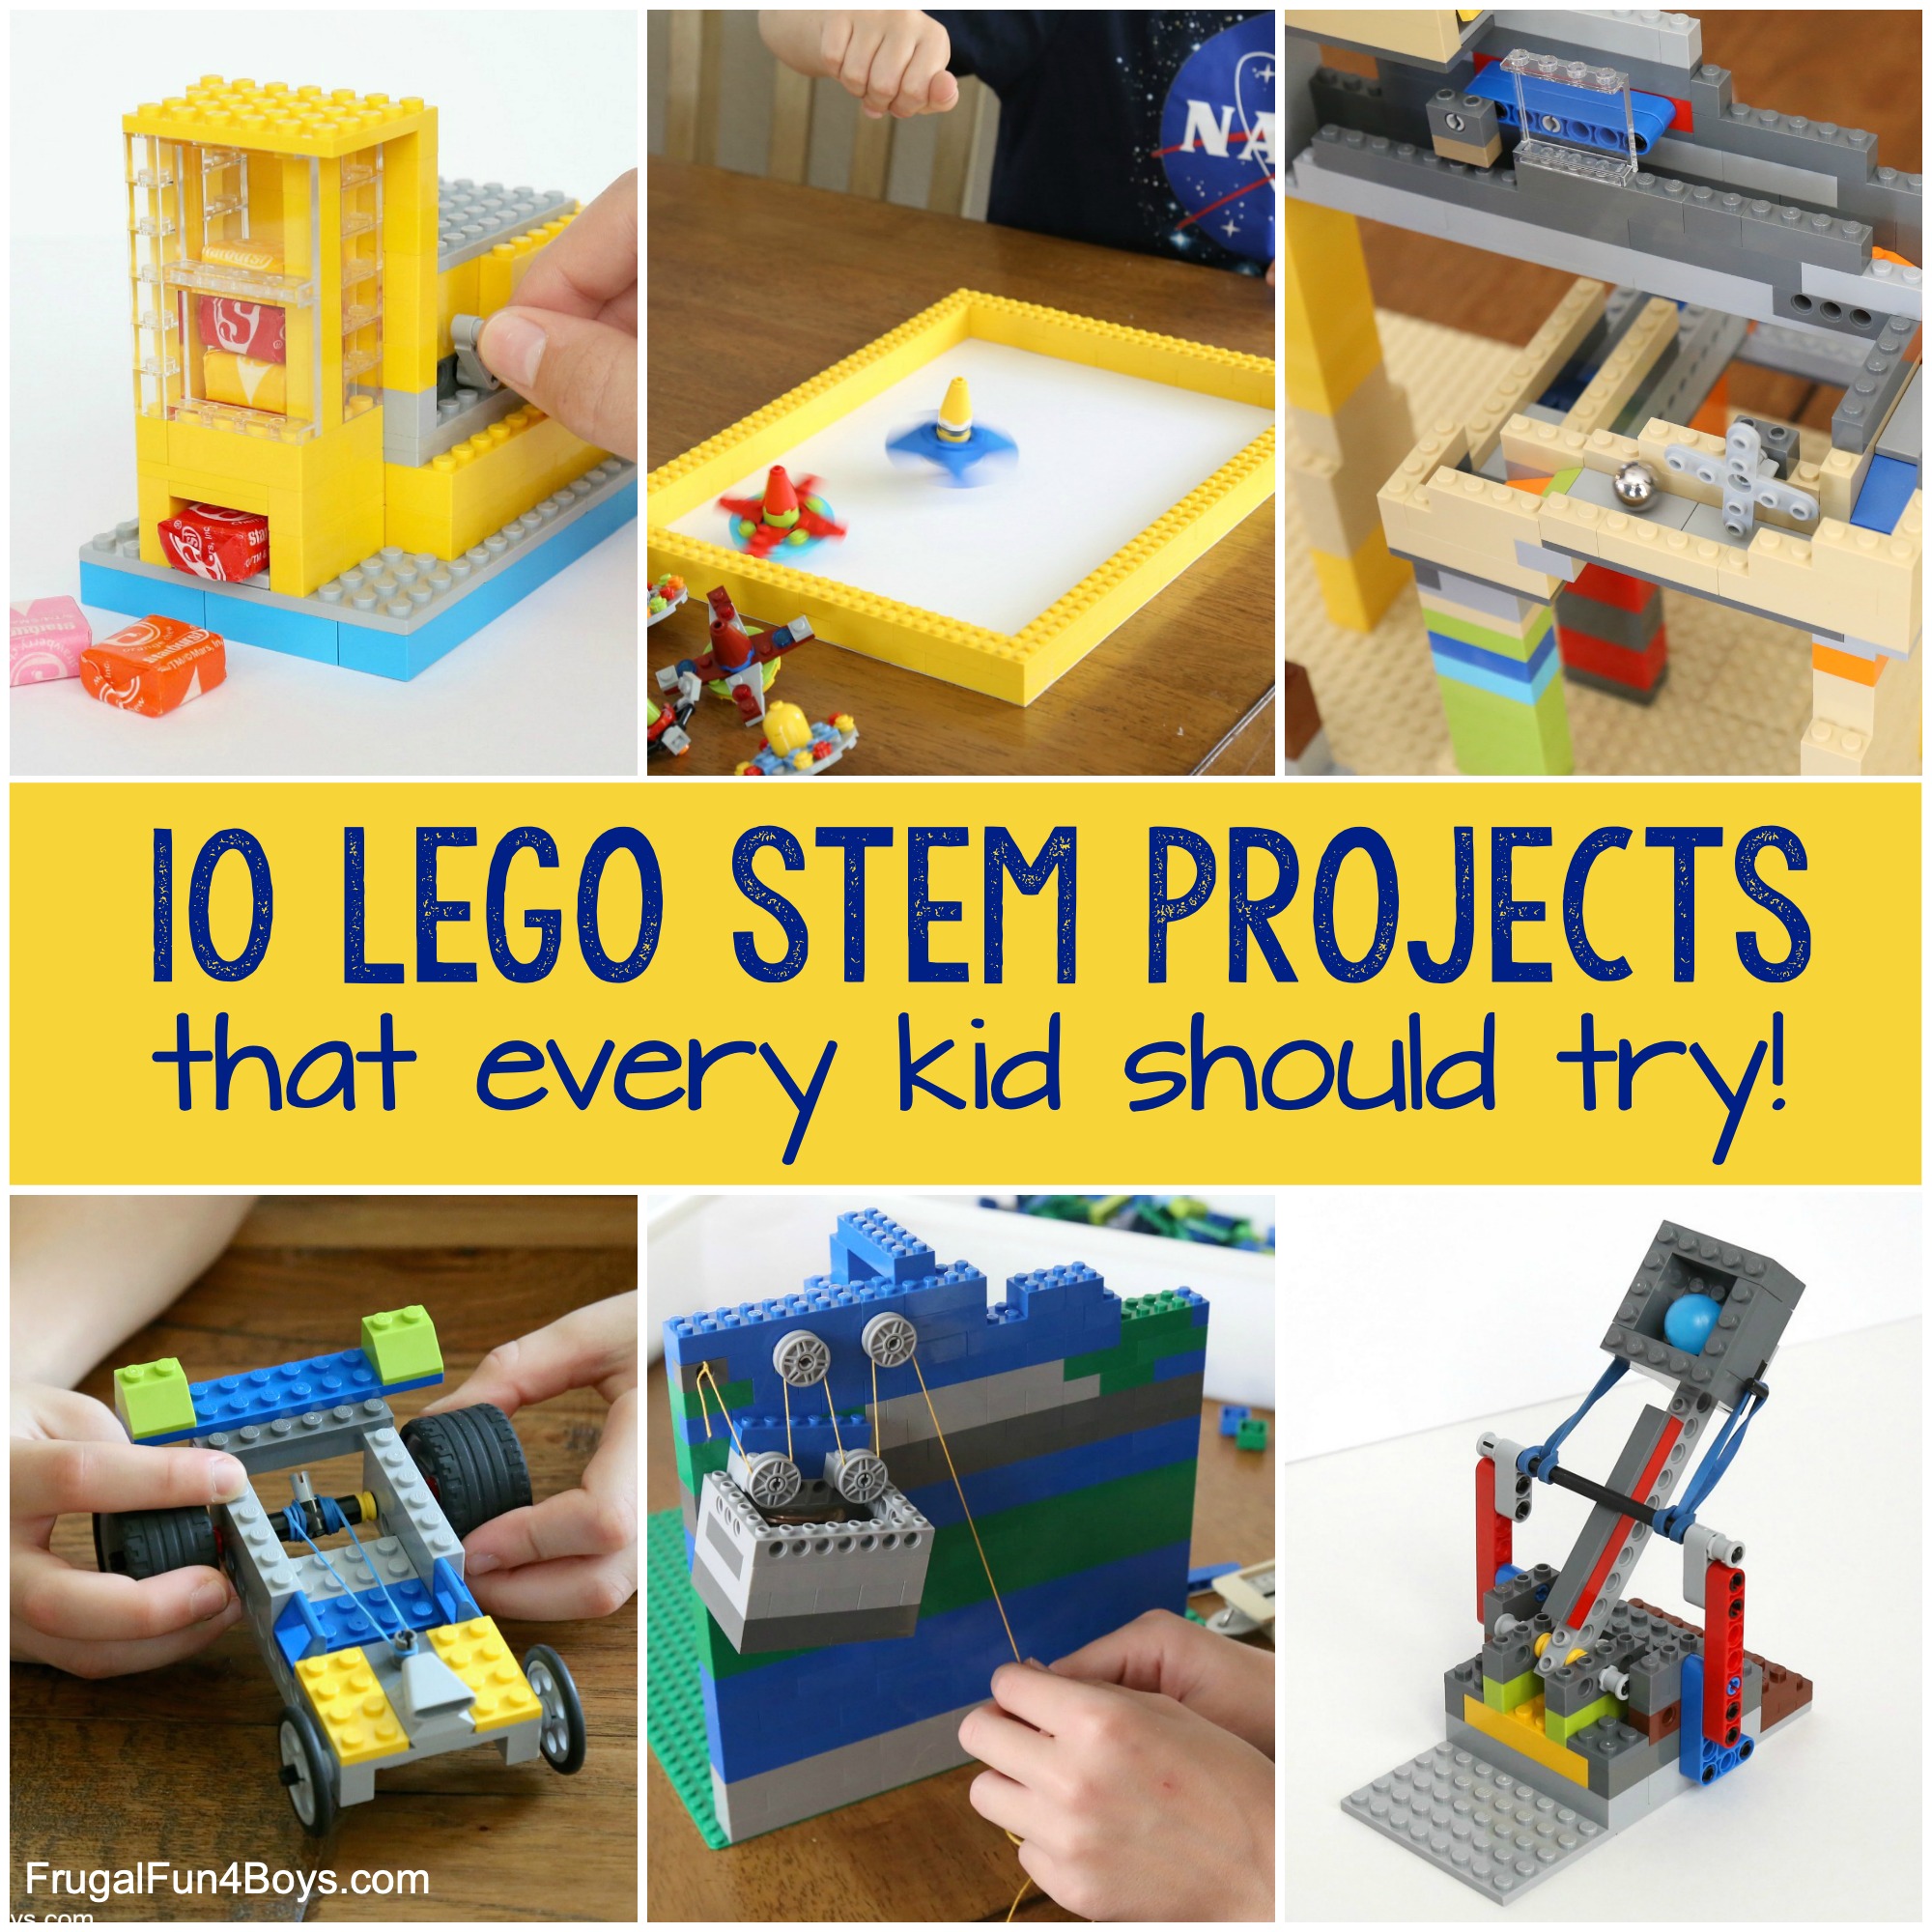
You can find more LEGO® machines to build in this post: 10 LEGO STEM Projects that Every Kid Should Try
0 Comments
Post a Comment