
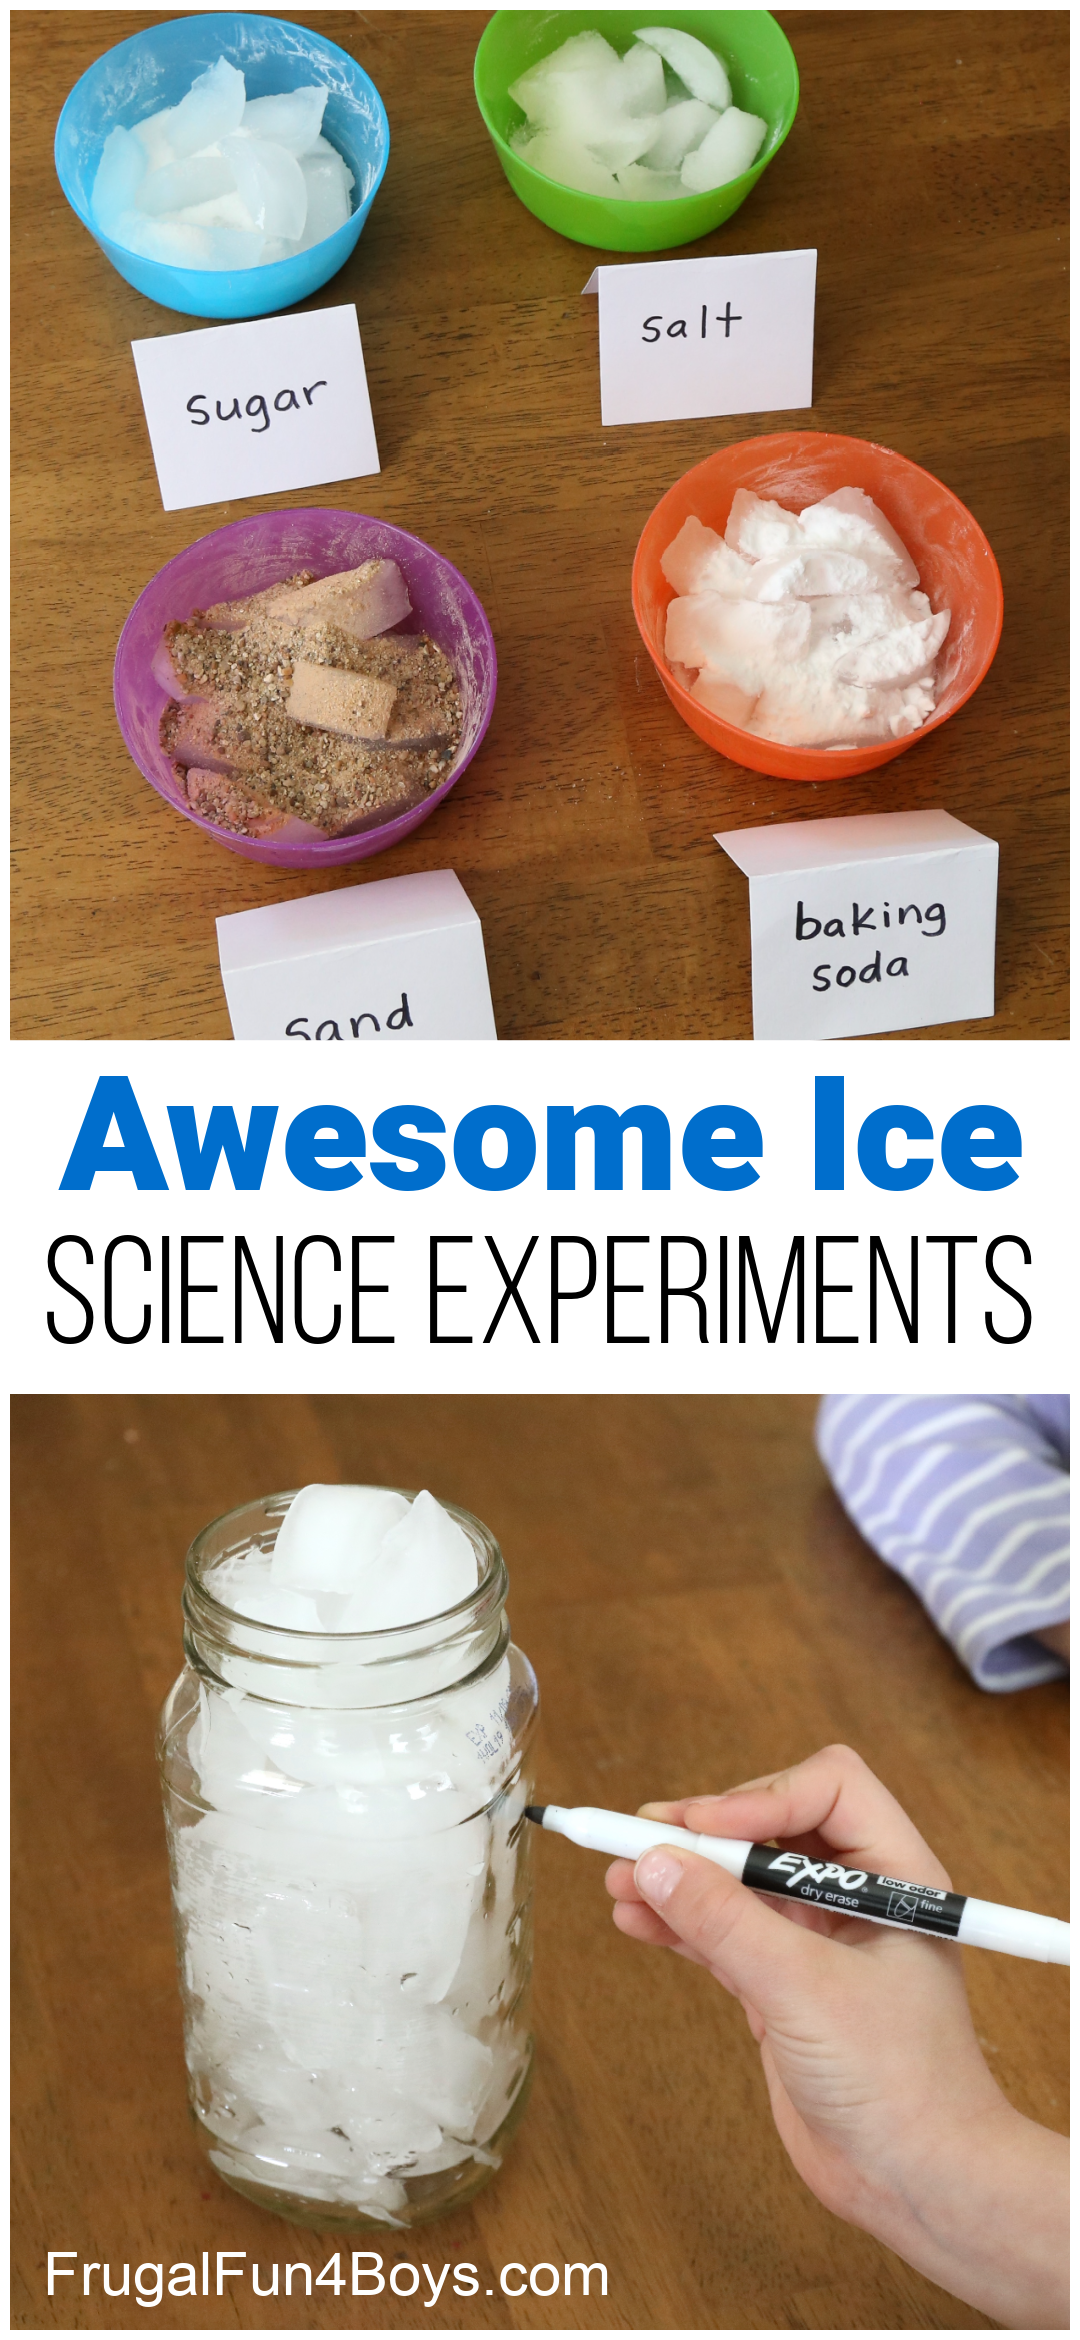
Here are two ice science experiments that are perfect for winter or for any time that you are studying states of matter. Both of these experiments use simple supplies from the kitchen, so they’ll be easy to set up.
First we’ll explore the volume of ice compared to the volume of water. Then we’ll answer the question, “Why does salt make ice melt faster?”
I would recommend both of these ice science experiments for the elementary grades (ages 6-10). You can definitely do them with preschoolers and kindergartners as well, but I think the first grade and up crowd will be able to more fully understand what’s going on.
Experiment #1: How much space does ice take up compared to water?
This science experiment was inspired by the classic experiment where you fill a jar with snow, let it melt, and then compare the volume of water to the original volume of snow. It’s amazing how much LESS space the water takes up! However, some of us don’t have snow. Like, almost ever. So here’s a way to do a similar experiment with ice!
First, find a clean empty jar and a dry erase marker. Fill the jar with ice. We chose to fill ours to the point where ice was sticking out at the top!

Draw a line on the jar to show where you think the water level will be when all the ice has melted.
We have two lines – one for Janie’s guess and one for Jonathan’s guess.

It will take several hours for all the ice to melt, so if you’re doing this experiment at school, you’ll want to start on it very early in the day.
Check in on the ice from time to time to see the progress!

Here’s what our jar looked like when all the ice had melted!

States of Matter Science Lesson
Once the ice has melted, you can discuss WHY water takes up so much less space!
- The cubes of ice had air in between them, and the air was taking up space in the jar. Ice is a solid, and solids don’t take the shape of the container. So even though the jar was full of ice, it wasn’t completely full.
- Ice takes up more space that the same amount of water. The molecules in ice (a solid) are arranged neatly in a regular pattern. When the molecules in the ice gain more energy (from the heat in the room around them), they begin to move around. The molecules in a liquid have more energy and move around freely, so water is able to take the shape of its container while ice cannot. Water expands as it freezes because of the shape of its molecules and the angles between them. The crystalline structure of ice takes up more space than water, which is a good thing! Most liquids contract as they freeze. The fact that water expands allows ice to float in the ocean, rather than sinking to the bottom, which would be very bad for marine life!
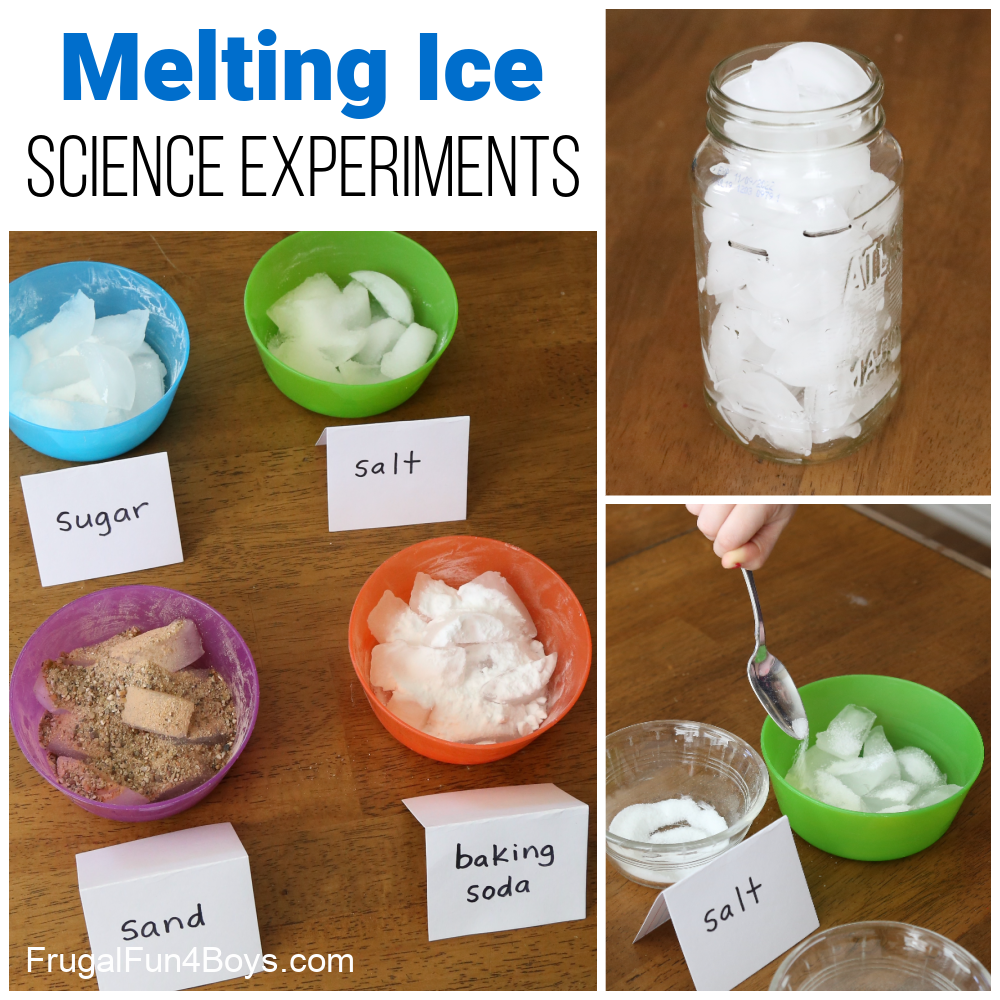
Experiment #2: What substance will make ice melt faster?
In this experiment, we’re going to test 4 different substances to see if any of them affect how fast ice melts.
We chose to use sand, salt, sugar, and baking soda, but you can compare other substances if you want! Just make sure one of them is salt. 🙂
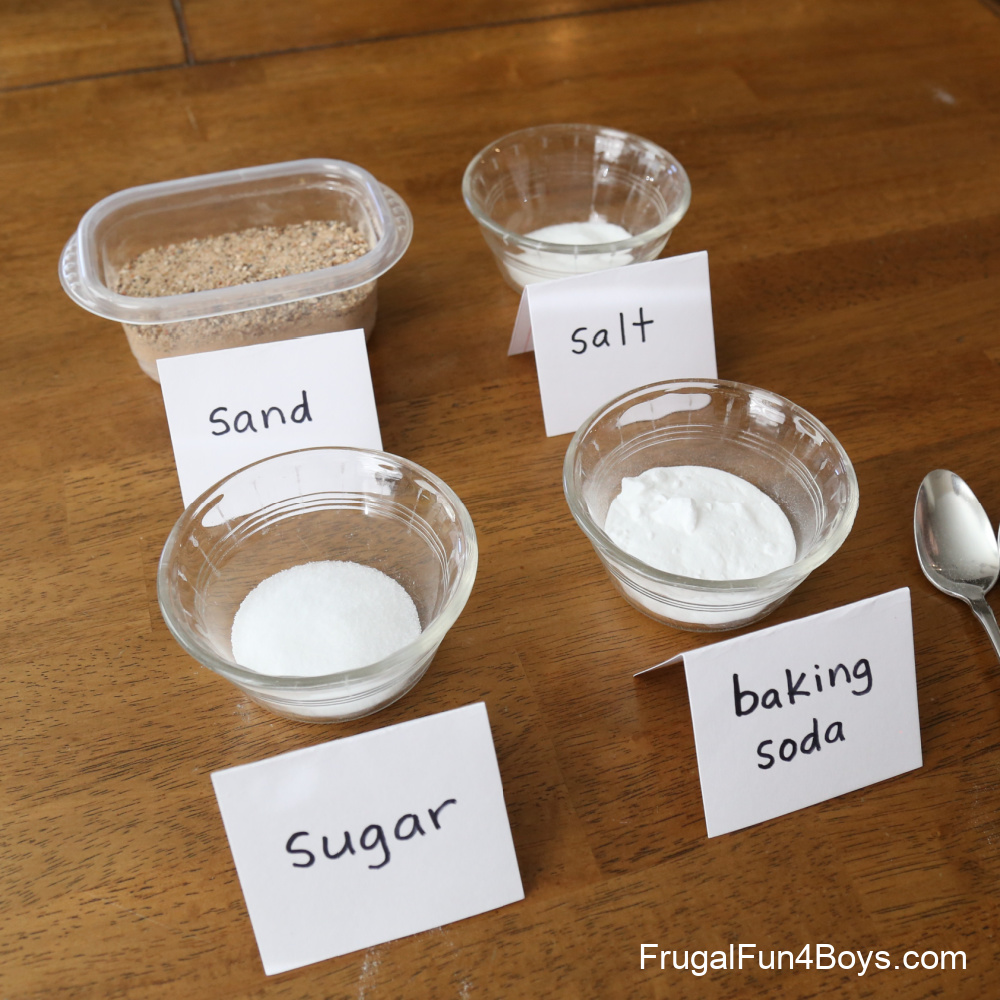
I chose to use all solids rather than a combination of solids and liquids. If we poured a liquid on the ice, the ice would melt faster because of its increased contact with the warmer liquid regardless of whether that substance really affects ice or not.
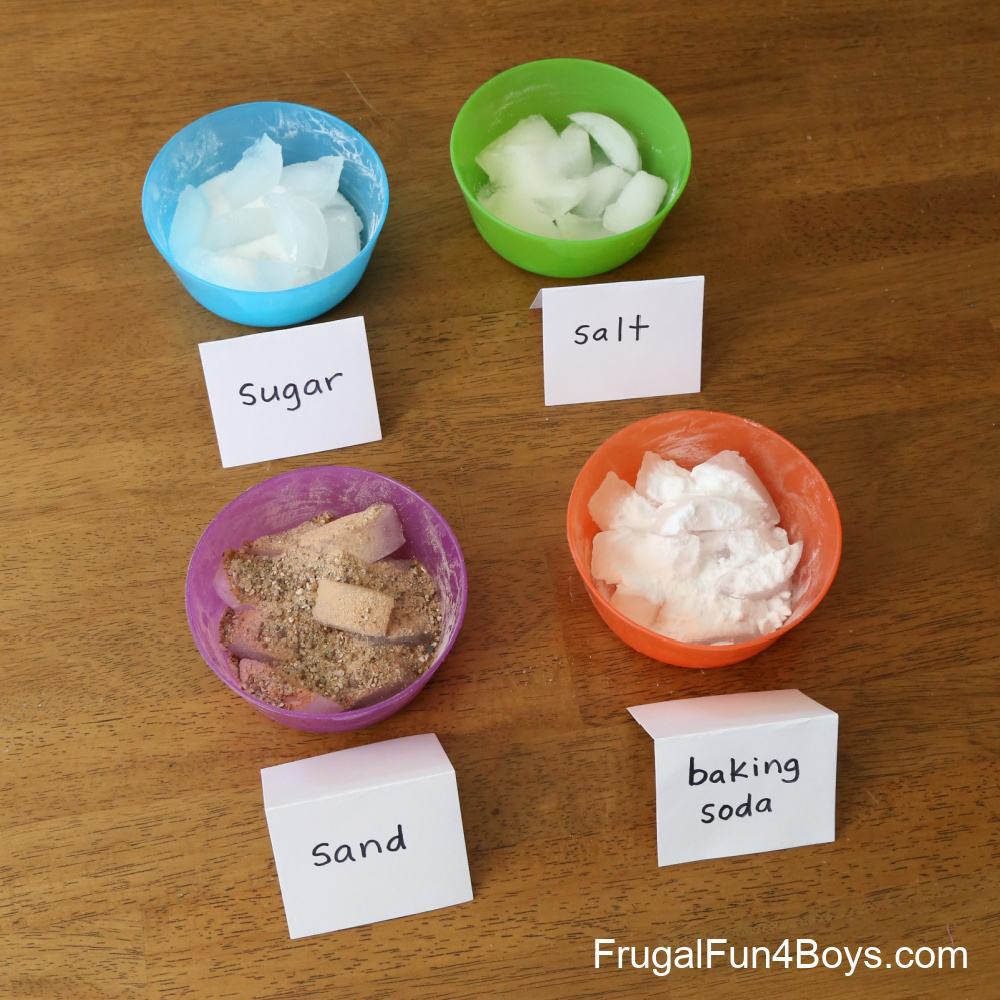
Once you have your substances chosen and ready, find four bowls. Put an equal number of ice cubes in each bowl.

Sprinkle some of each substance on the ice. Use a generous amount! Then label your bowls so that you can remember which is which.

Check on your ice every 15 minutes or so. Within the first 15 minutes, we could already tell that the salt was melting the surface of the ice!
Sand is often used on roads when it’s icy out. But sand only improves traction, and it does not cause the ice to melt any faster. We actually found that our sand and baking soda bowls melted the slowest, possibly in part because of the insulating effect of the materials on top of the ice.
After an hour, there was a very noticeable difference between the salt and the sugar bowls. The salt almost appeared to be eating into the ice cubes. It was interesting to watch!
*Note: The rate at which your ice melts will depend on the size of your ice cubes (ours are small) and the temperature of the room.
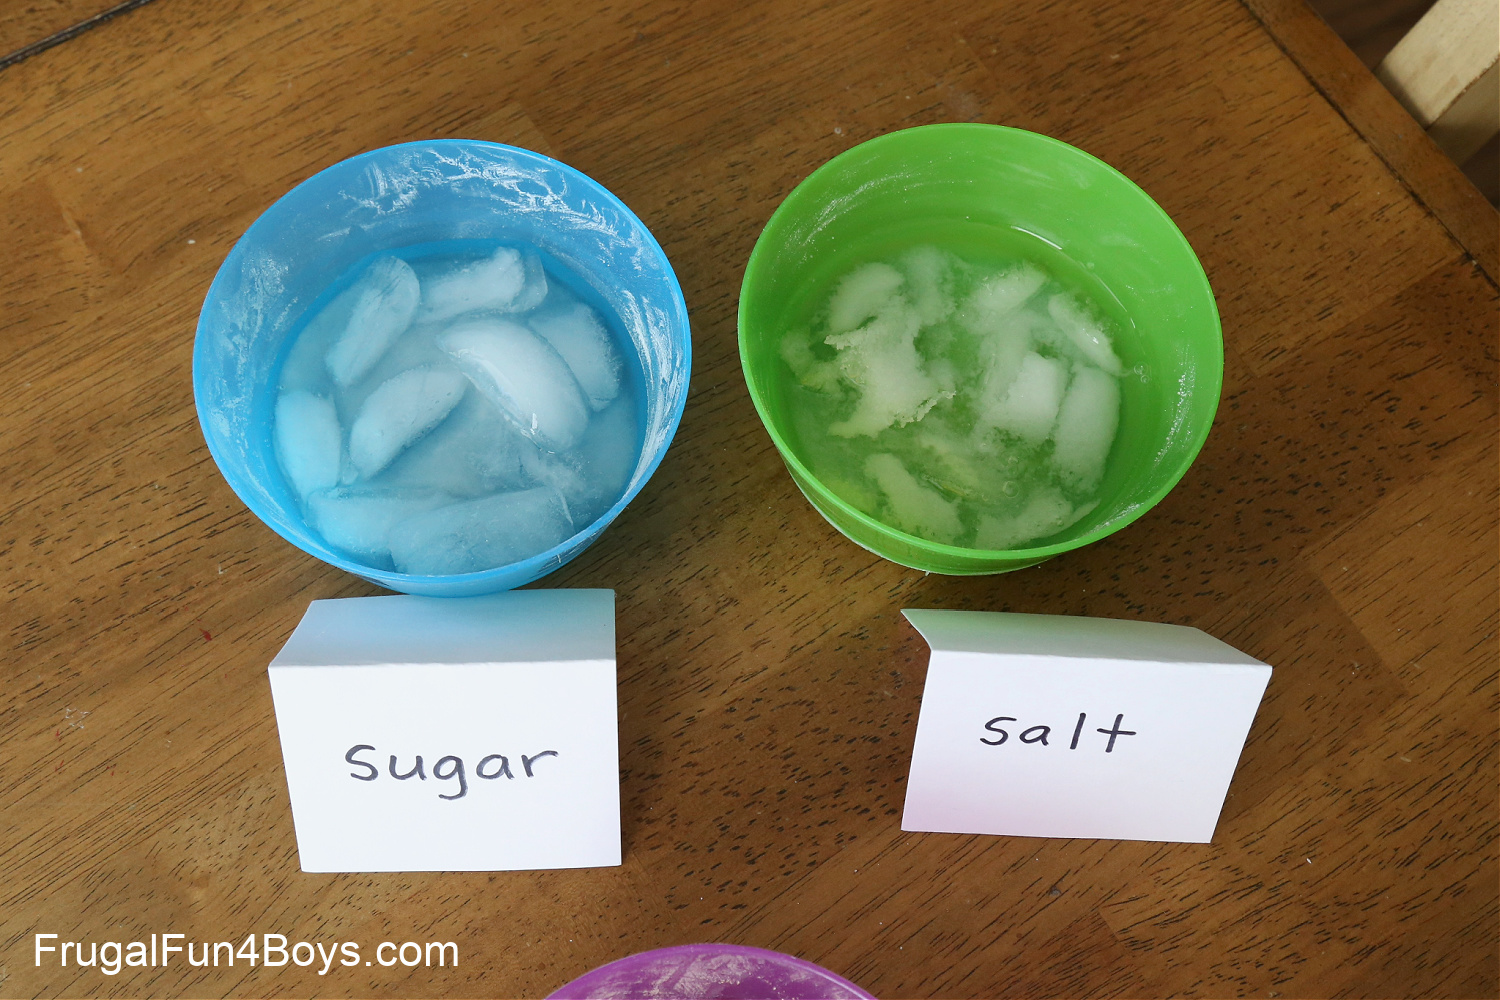
Why does salt make ice melt faster?
Salt lowers the freezing point of water. The freezing point of pure water is 32 degrees Fahrenheit/ 0 degrees Celsius. The freezing point of salt water is different depending on the amount of salt in the water, but for reference, the freezing point of ocean water is about 28.4 degrees.
As the salt mixed with melted ice (water) in our bowl, the salt water it made continued to melt the ice further.
The temperature of the water in the bowl was lower than 32 degrees, which actually allowed frost to form on the outside of the bowl! Moisture in the air condensed into water droplets on the outside of the bowl (because of the temperature of the bowl) and then froze. SO COOL!

Supply List for Both Melting Ice Science Experiments:
- Clean, empty jar
- Ice
- Dry erase marker
- Four bowls
- Salt
- Sugar
- Baking Soda
- Sand
- Four more bowls for the salt, baking soda, etc. (optional if you just have the containers they came in)
- 4 spoons
Science is awesome! If you’re looking for more science experiments, we’ve got some good ones!
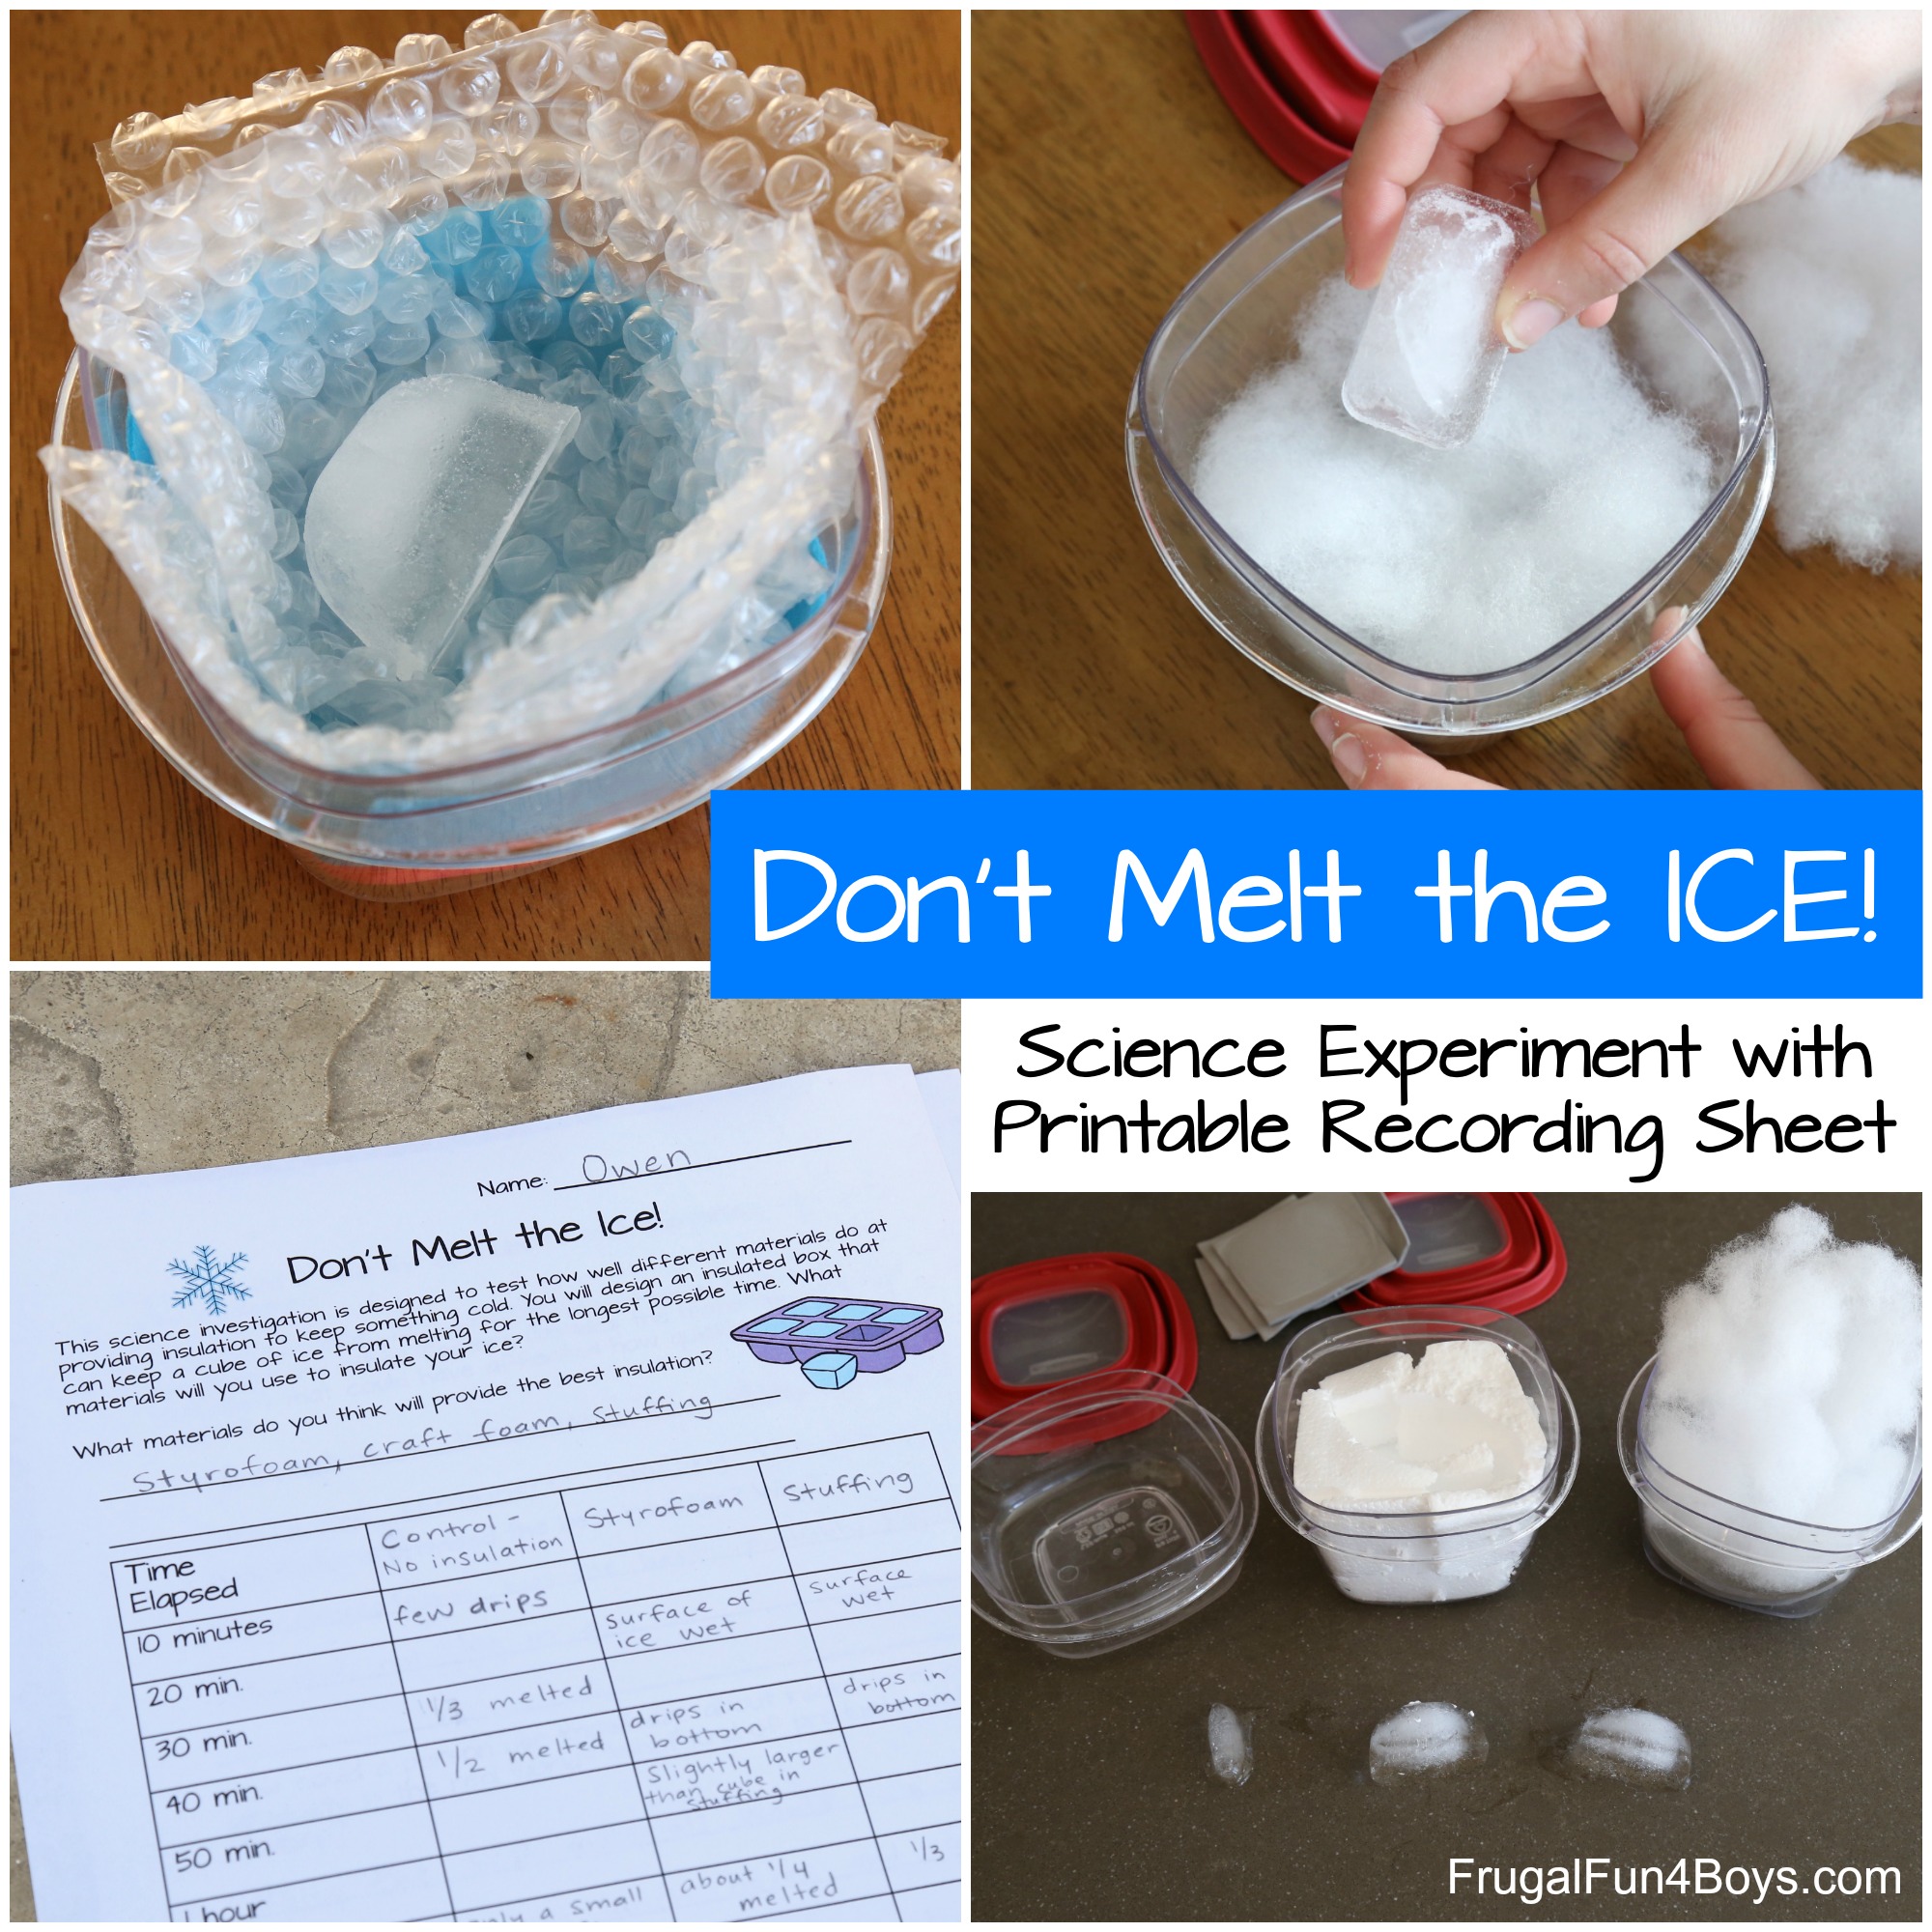
Here’s one about ice and INSULATION – Don’t Melt the Ice! Challenge kids to design a container that will keep ice from melting for the longest amount of time.
3 Comments
Rachel Angel Jan 25, 2021
Love your science experiments!
Leslie Jan 30, 2021
Hi Sarah, My two grandsons( 4 and 7 years old ) are into science experiments right now( especially the 7 yr. old ). I am enjoying giving them experiments from your blog to try. However, I am wondering if you have ever recommended a science experiments book that you think is particularly good? I am particularly looking for experiments that are easy to create, using mostly supplies you can usually find at home. I would appreciate any suggestions you might have on this topic. Thank You, Leslie Gardiner
Susan Wood May 12, 2021
Today my grandchildren age 10 and 7 did the ice experiments. They really enjoyed them. Tomorrow morning we’ll check the melted ice to see how much water is in the jar. They had a good time gathering what was needed for the experiment. Thank you for sharing your ideas. They help this grandmother.
Post a Comment