
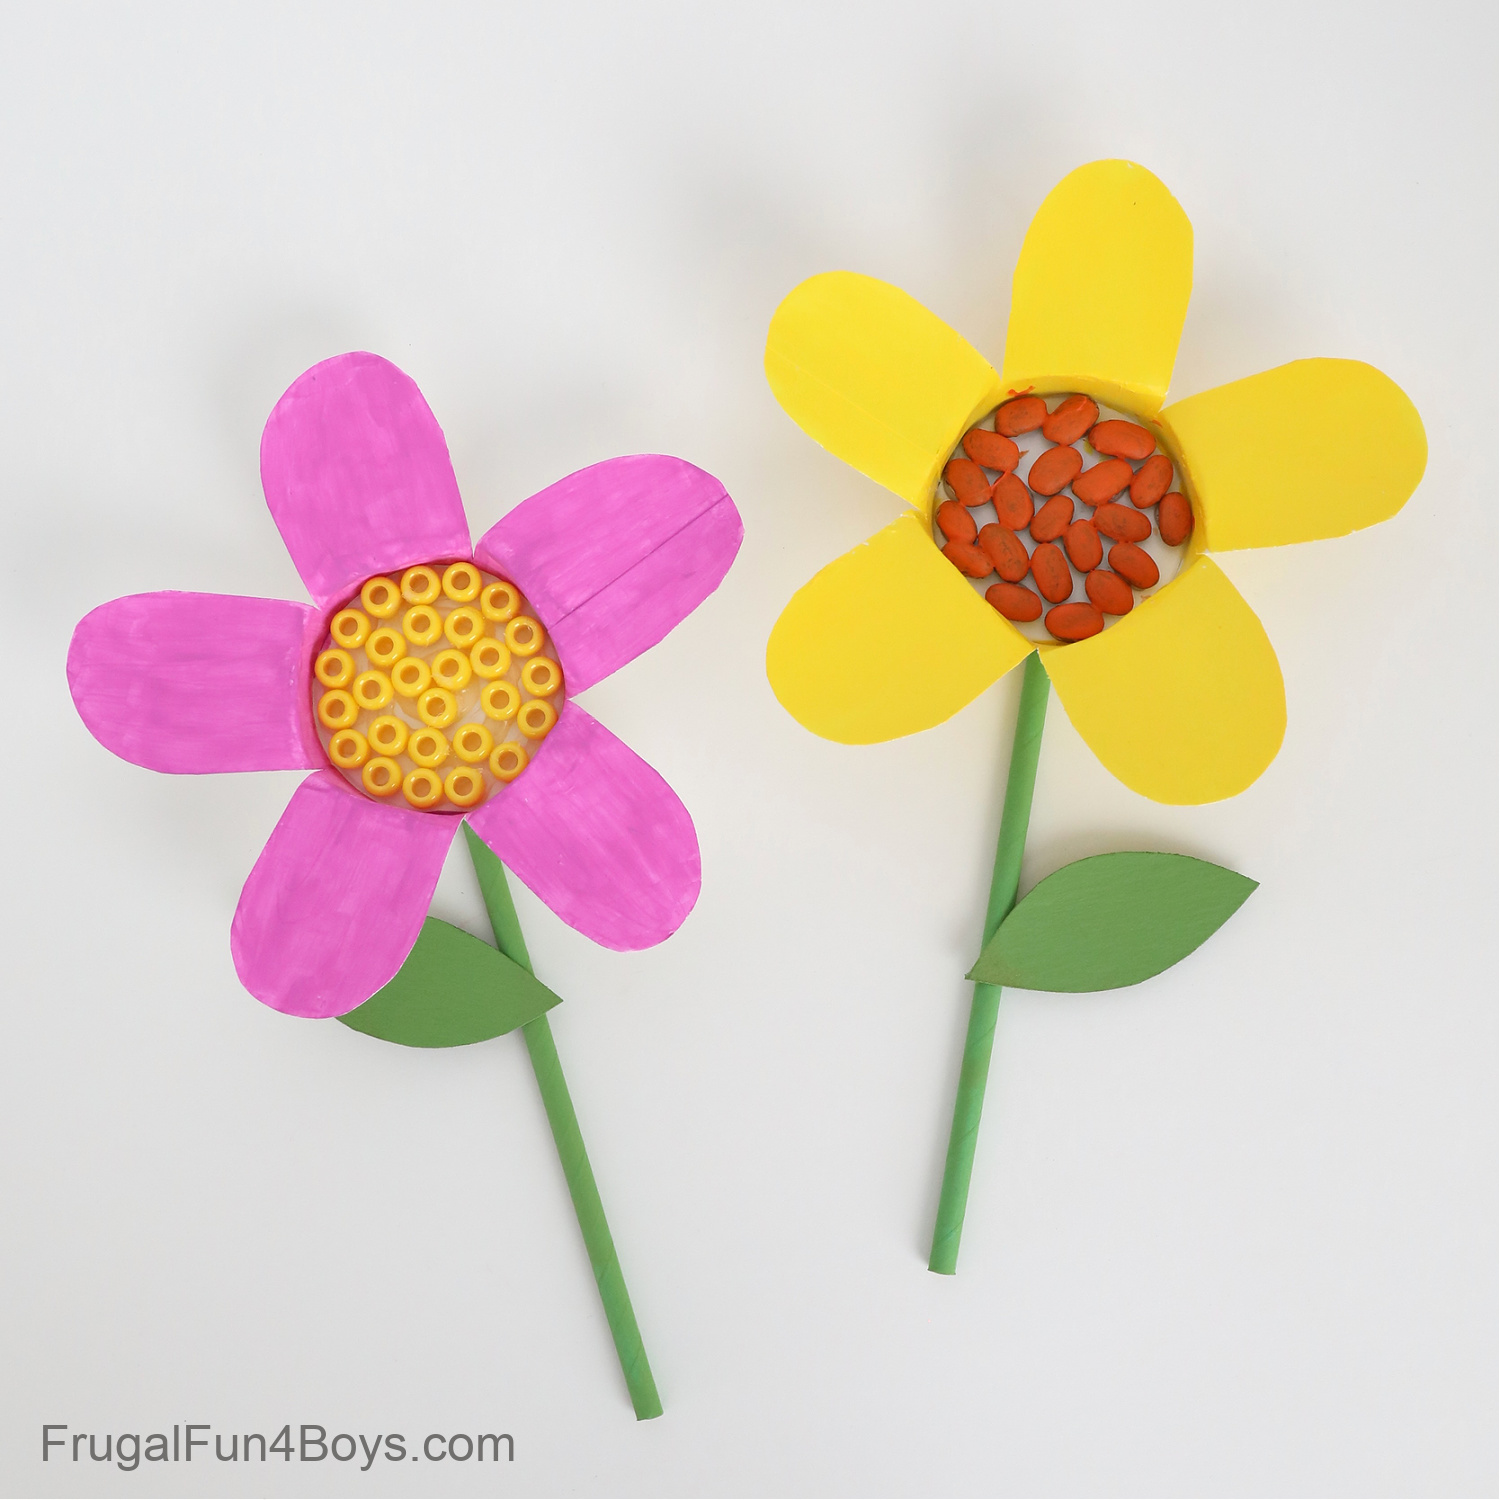
Here’s a beautiful paper cup flower craft that is perfect for spring, or really anytime!
There are two things that I especially love about this craft. First, the materials are very simple. And second, this craft is very open ended. Kids can choose the design and colors for their flower. Cut the petals in any shape! Add different filler in the center of the flower. There are so many options!
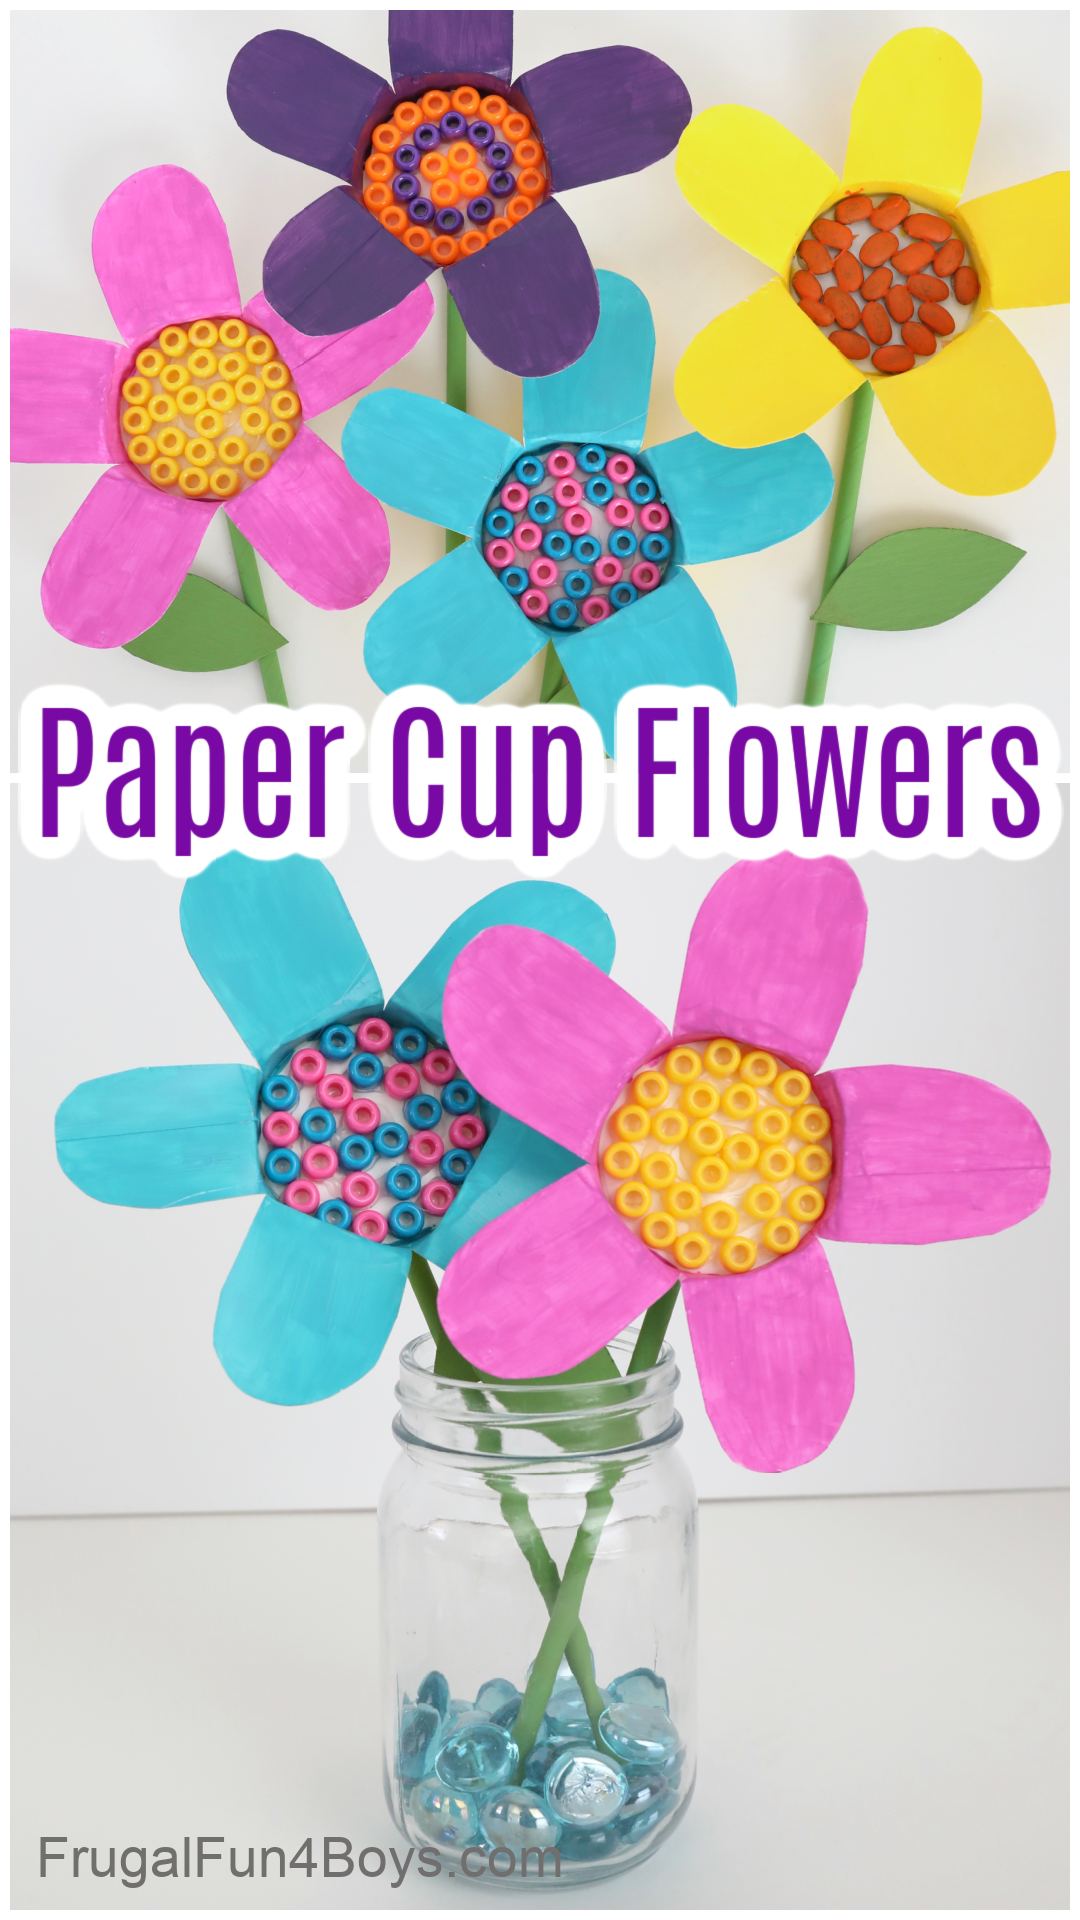
We are displaying our paper cup flowers in a glass jar. Add a few blue vase filler gems to look like water. These also help to hold the flower stems in place.
The flowers look so colorful and cheerful! They would make a great gift for a friend, a teacher or an elderly neighbor. (Side note – nursing homes get so many visits at Christmastime. It would be fun to plan a spring visit with child-made flowers to hand out!)
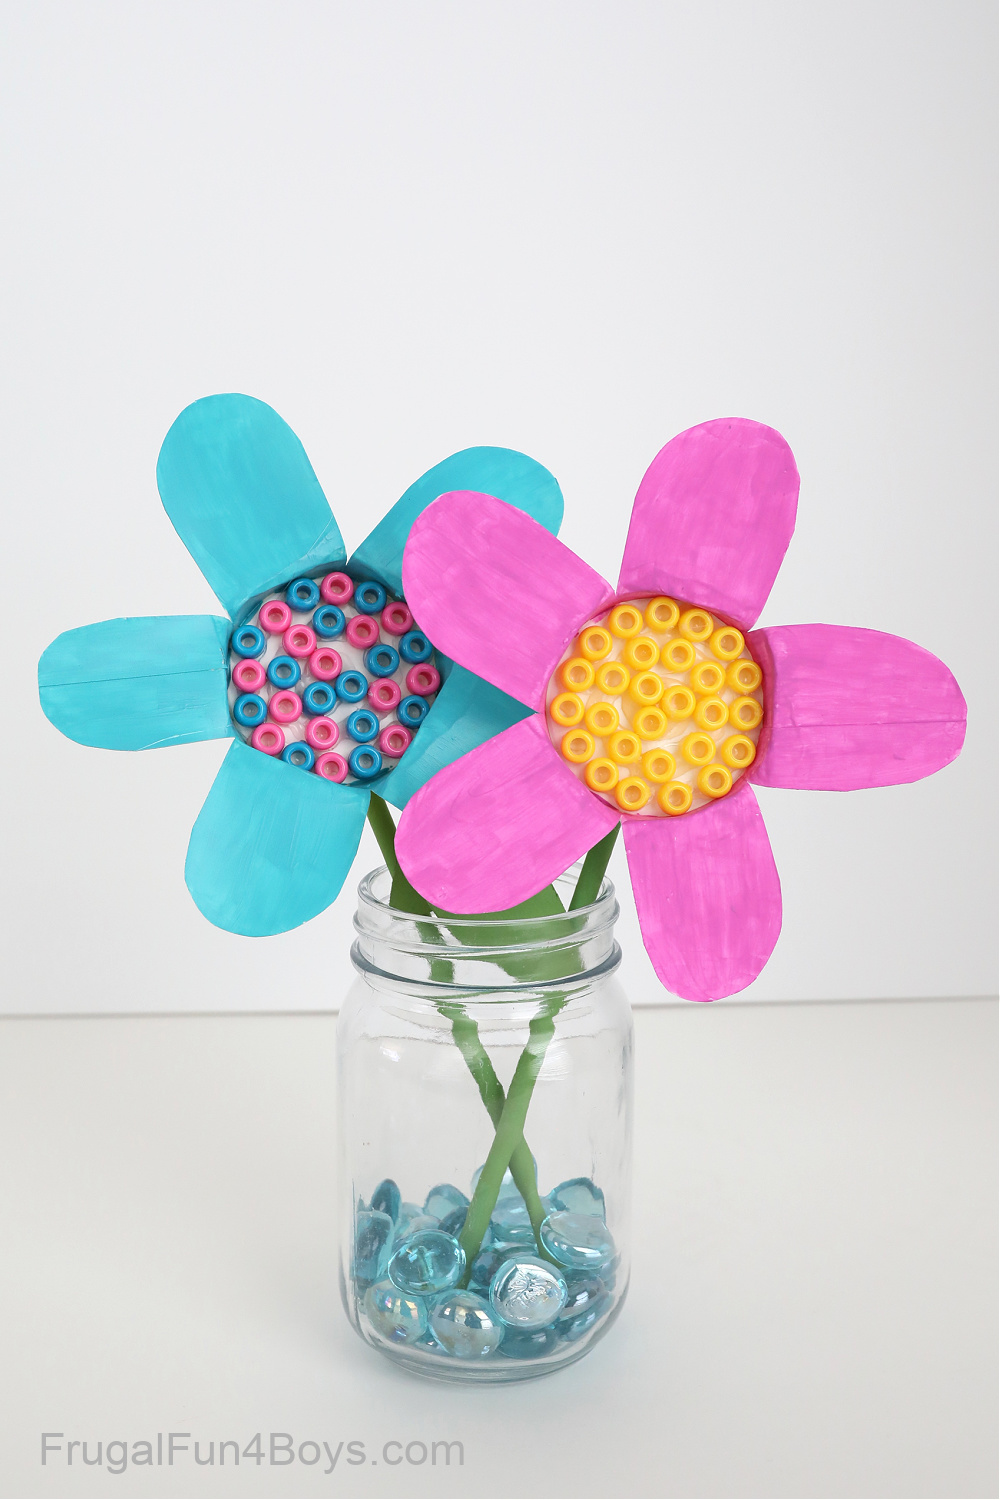
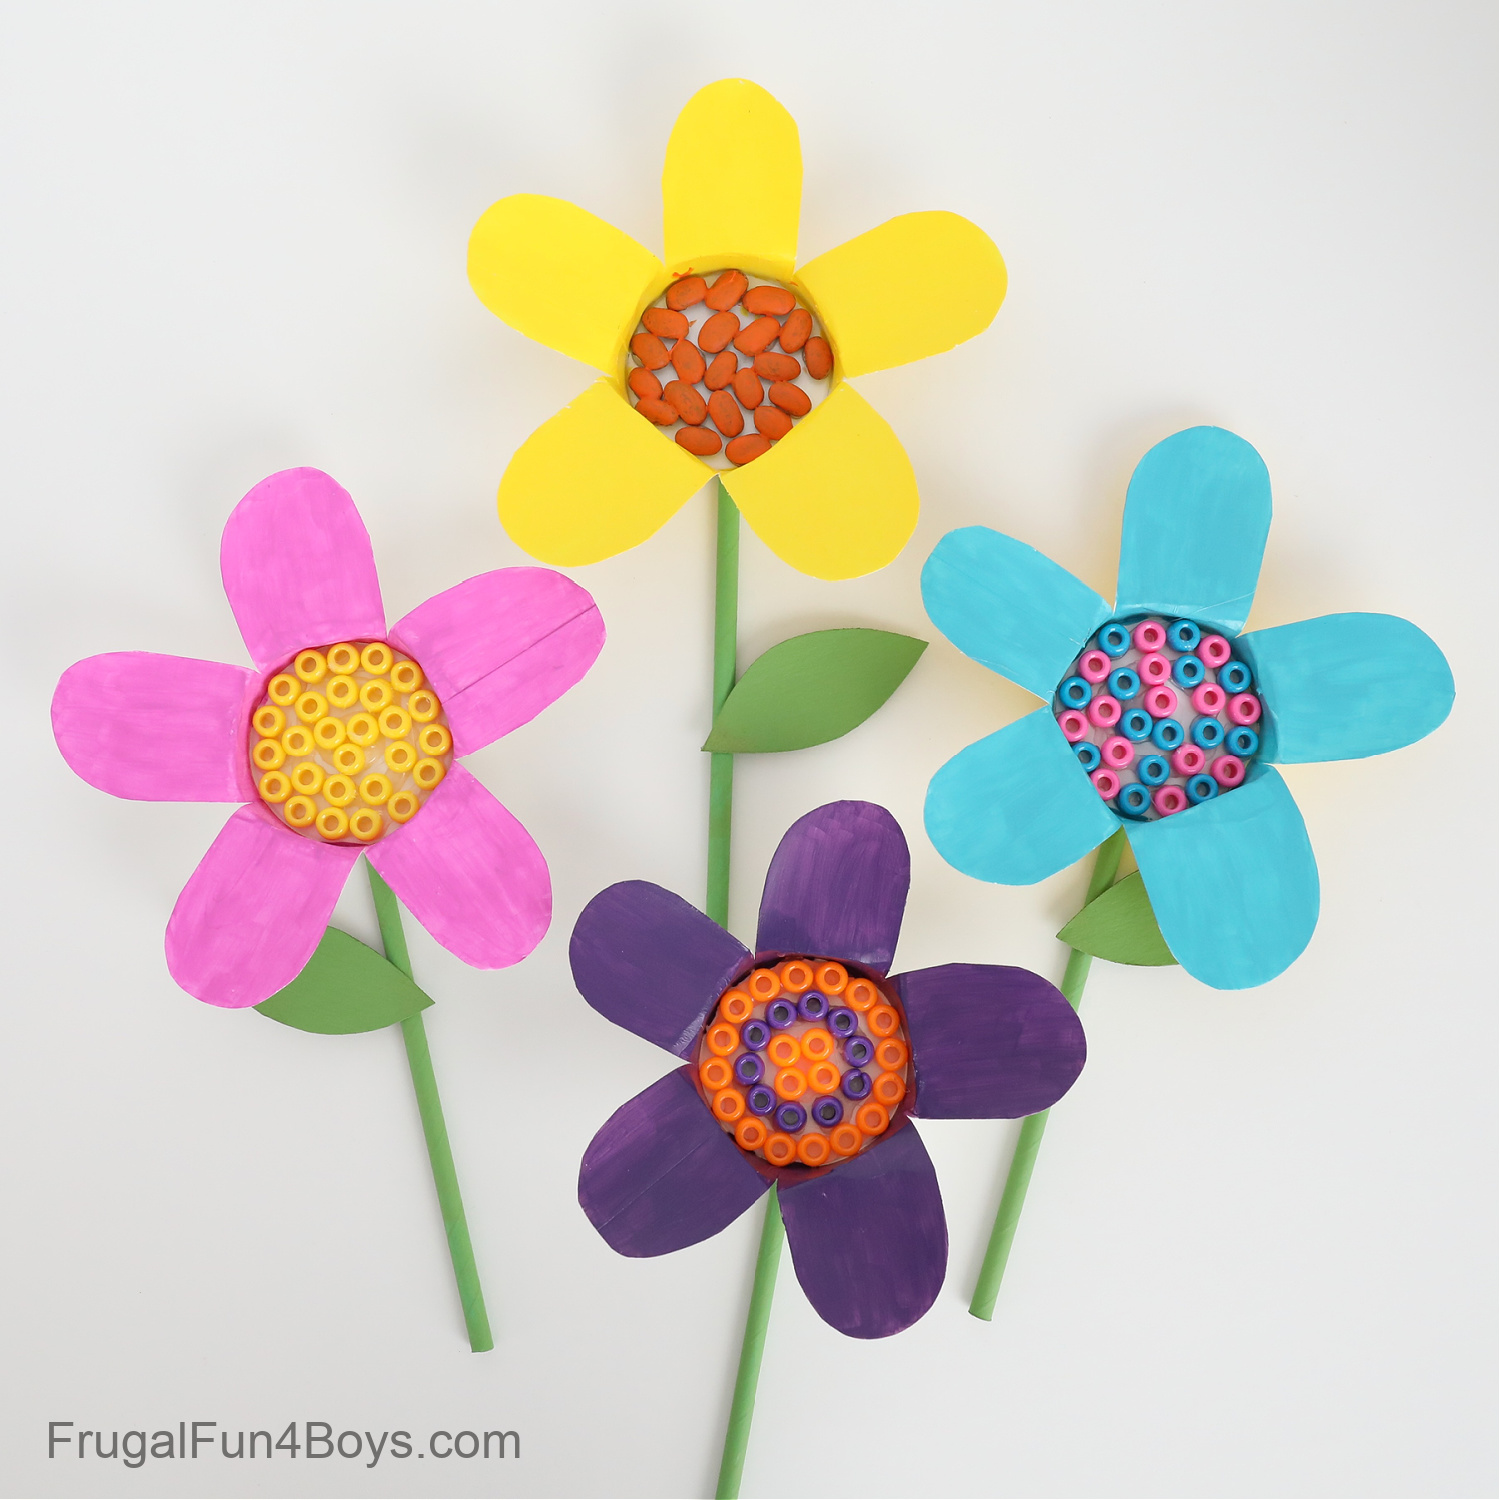
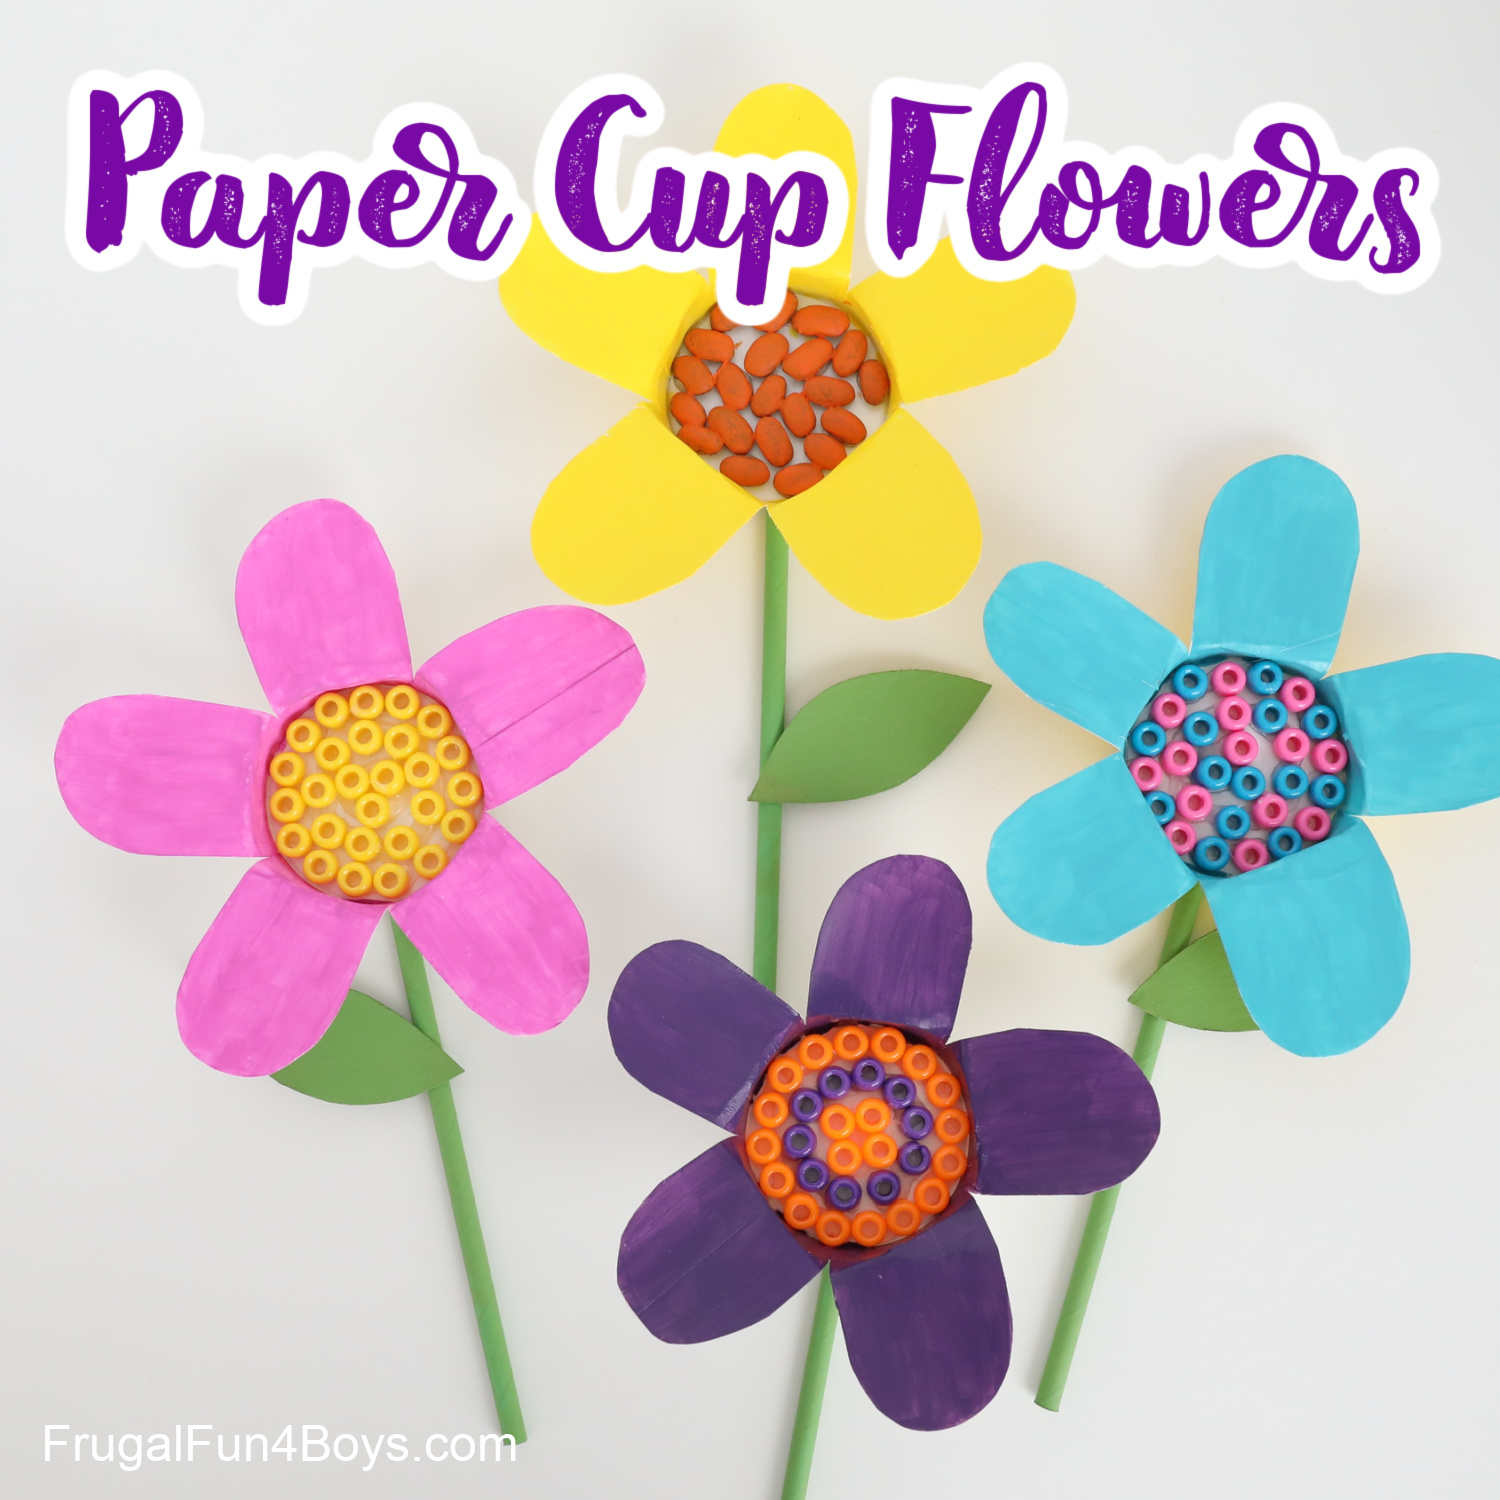
We used a variety of colors, and I can’t decide which flower is my favorite.
Ready to make your own paper cup flower craft?
Supplies Needed:
- Paper cups – we can always find solid color paper cups at Walmart and Hobby Lobby in the party section.
- Paper or plastic straws
- Acrylic paint in a variety of colors – green, pink, purple, blue, etc.
- Hot glue
- Scissors
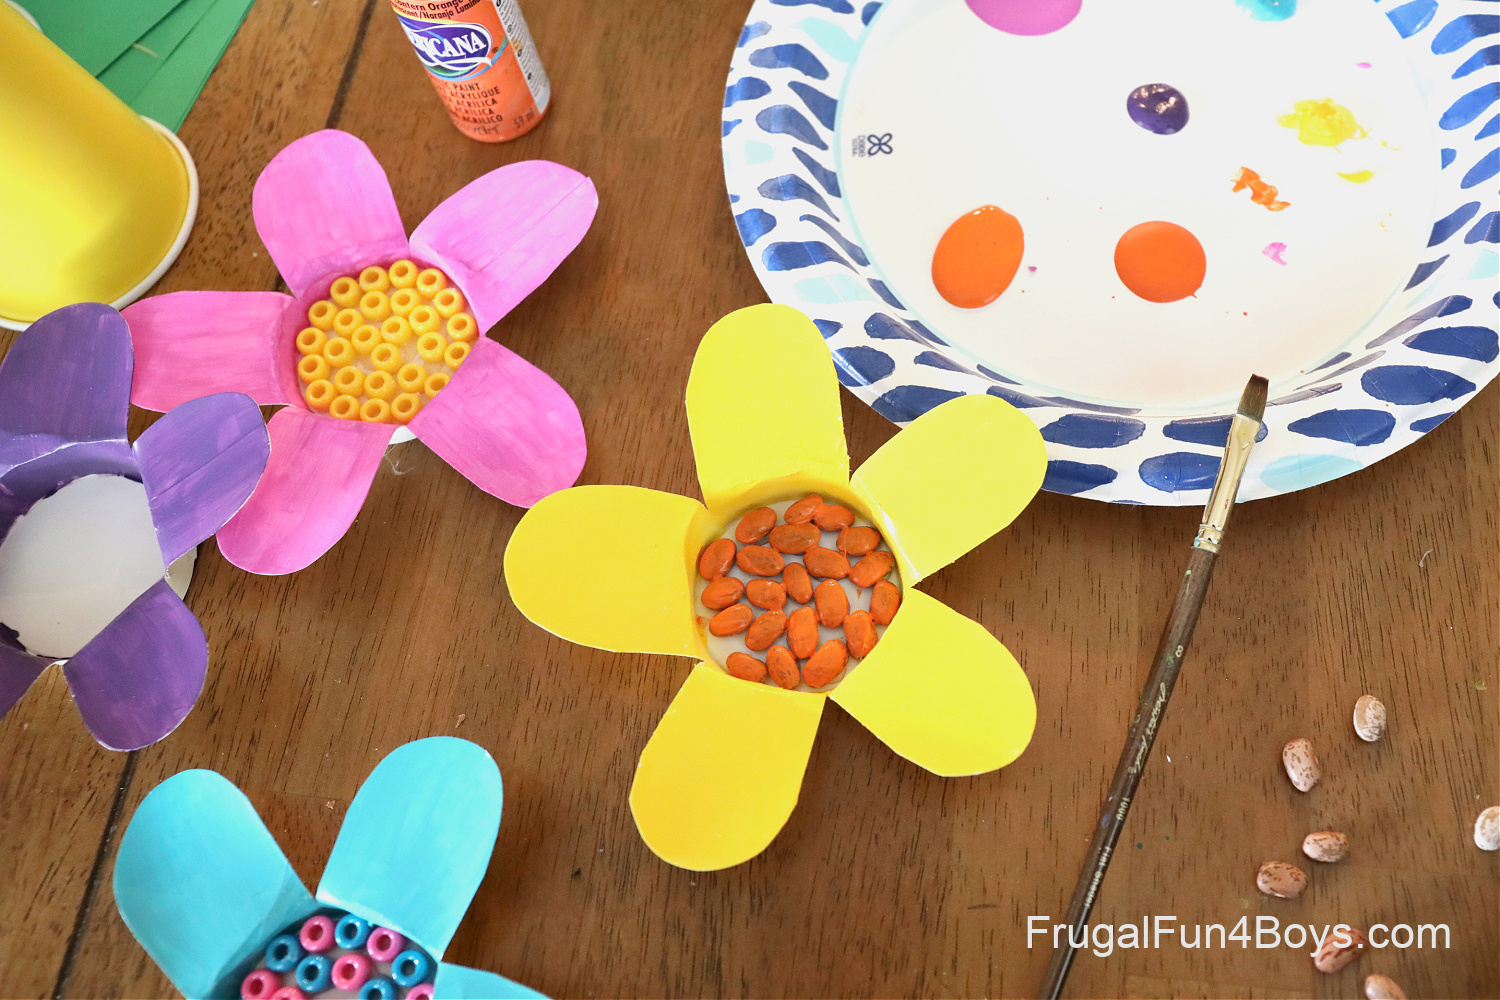
- Filler for the center of the flowers – we used pony beads and dried beans
As I started writing up this post, I thought of more fun materials to use for filling the center of the flowers. I think buttons and pom pom balls would make great options. Also, cotton balls. Tiny black beads would be perfect for the center of a sunflower. Really, you can make good use of whatever supplies you have on hand!
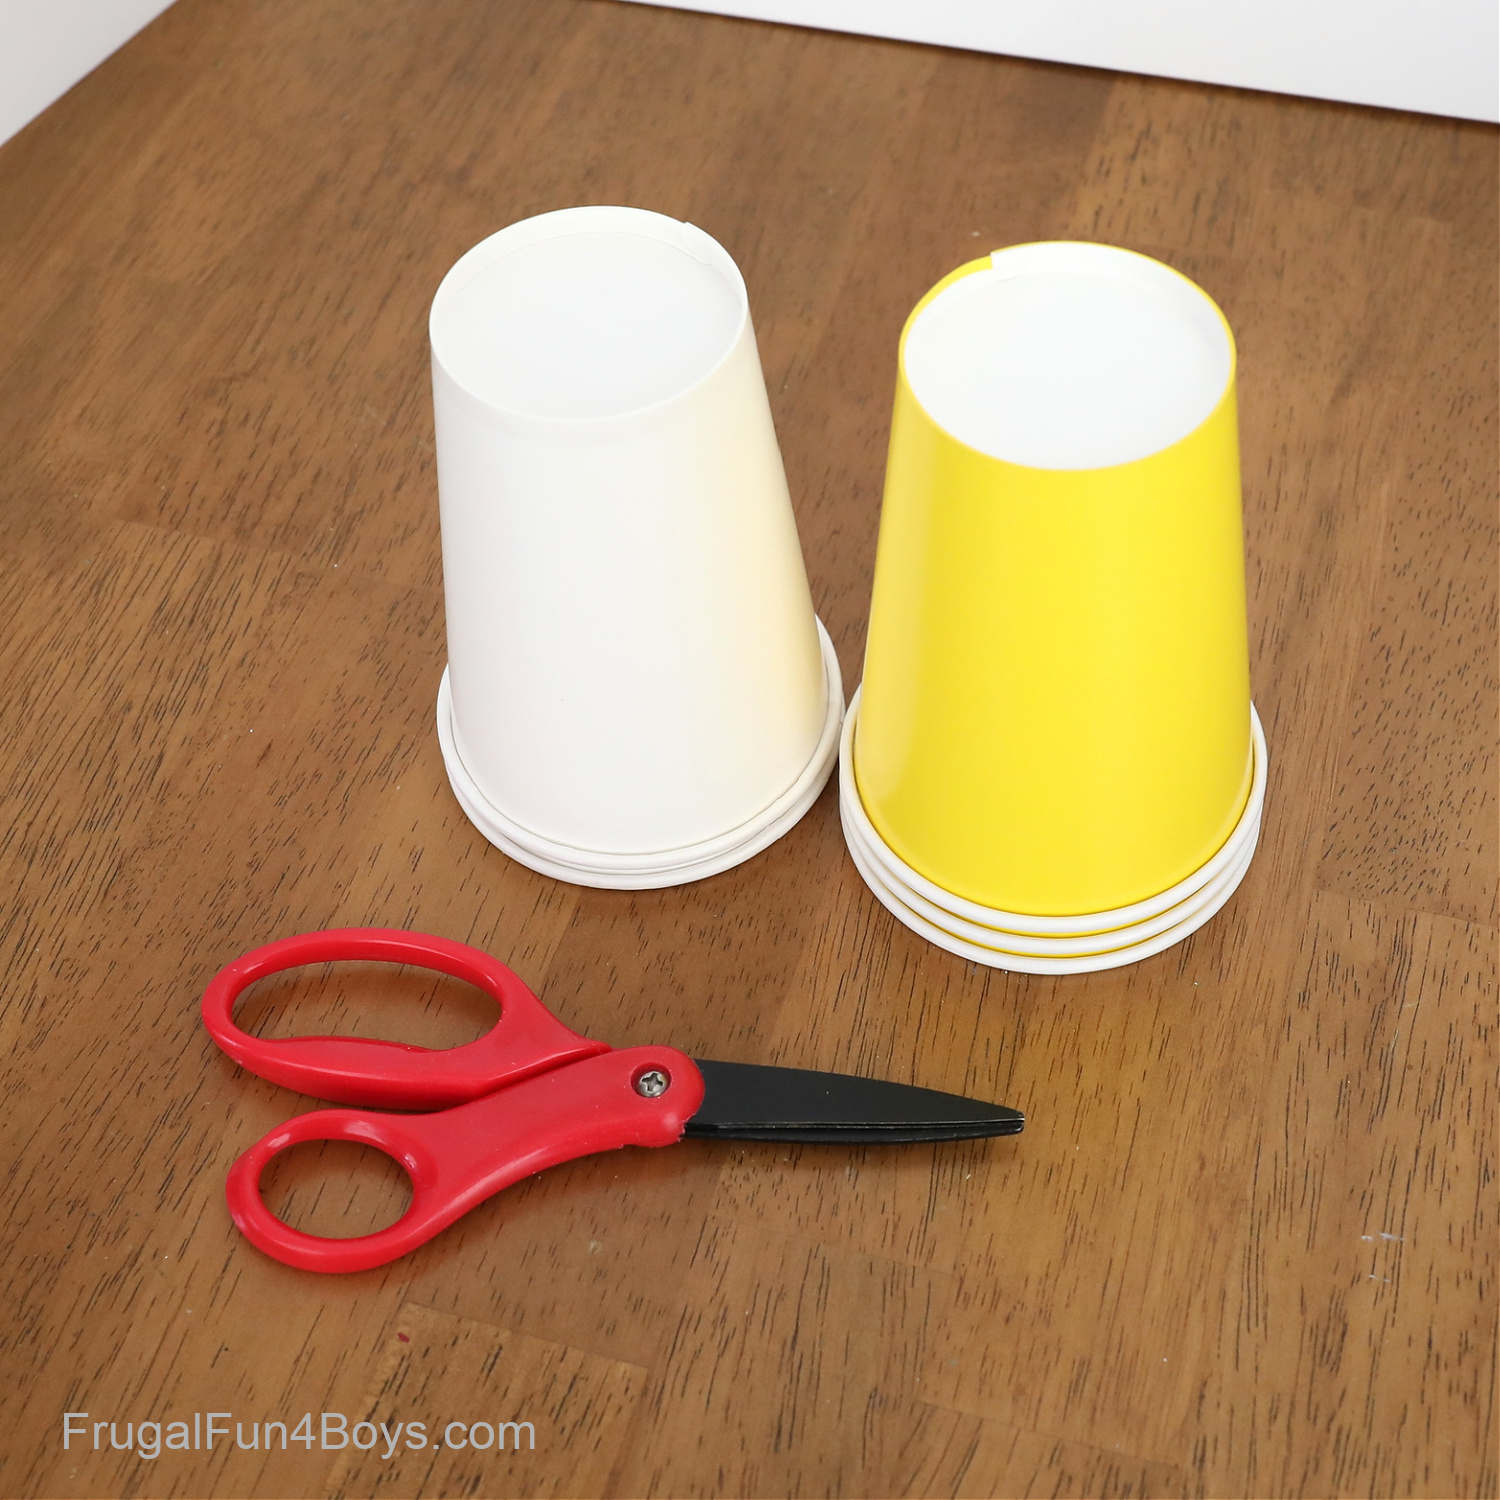
Start by cutting slits down the sides of your cup. I cut 5 slits so that I would have 5 petals. Then fold the petals down and away from the center of the cup.
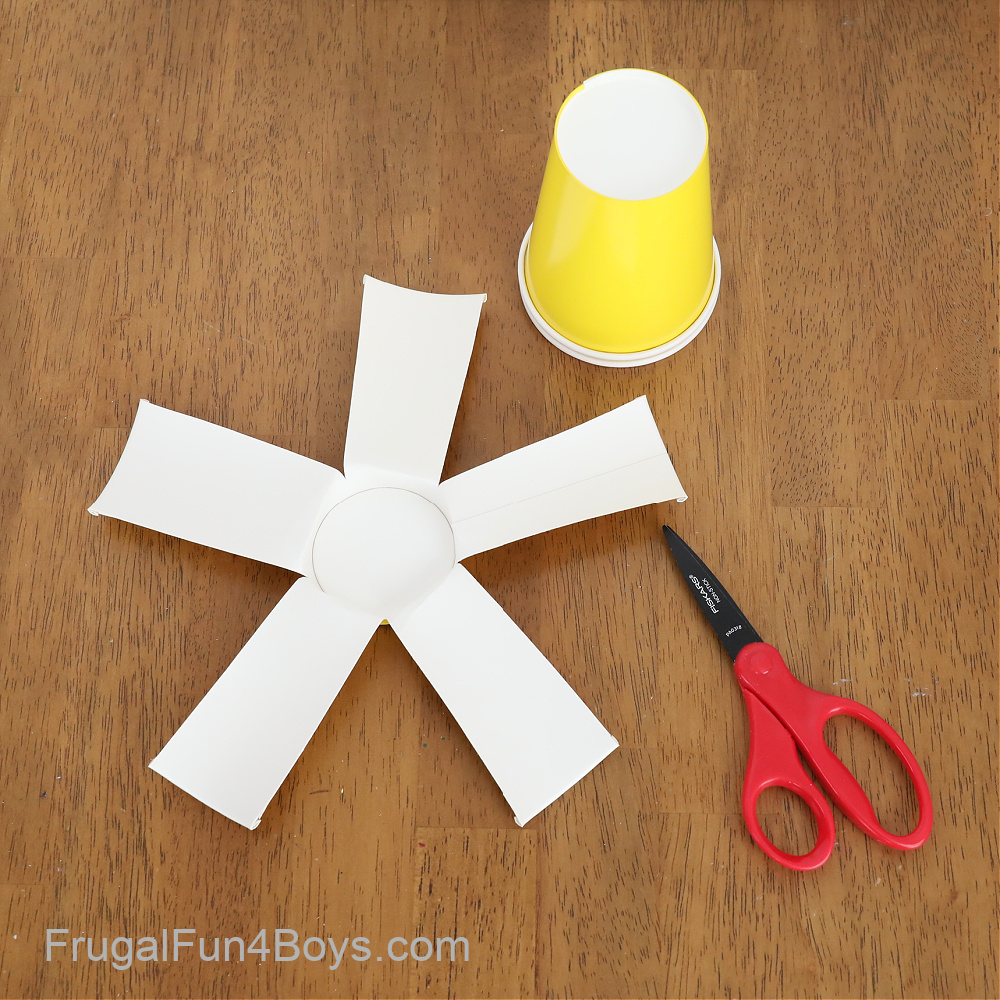
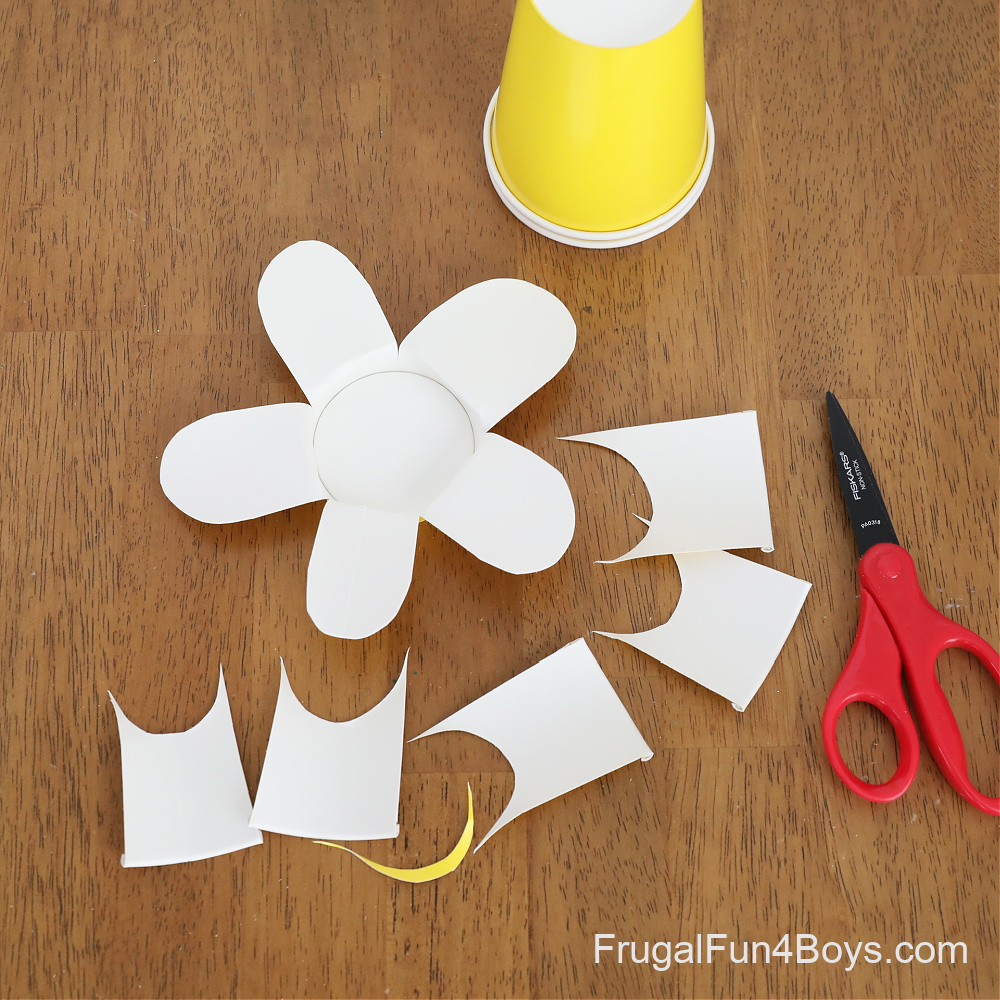
Then trim each petal to give it a rounded shape. Or, give each petal a pointed tip.
Then it’s time to paint the flower. Because paper cups have a waxy coating, the paint doesn’t adhere quite as well as untreated cardboard. It takes about three coats of paint. But the nice thing is that acrylic dries quickly! We only waited about 10-15 minutes between coats.

Then fill in the center with beads, dried beans, buttons, small pom poms, or whatever you like.
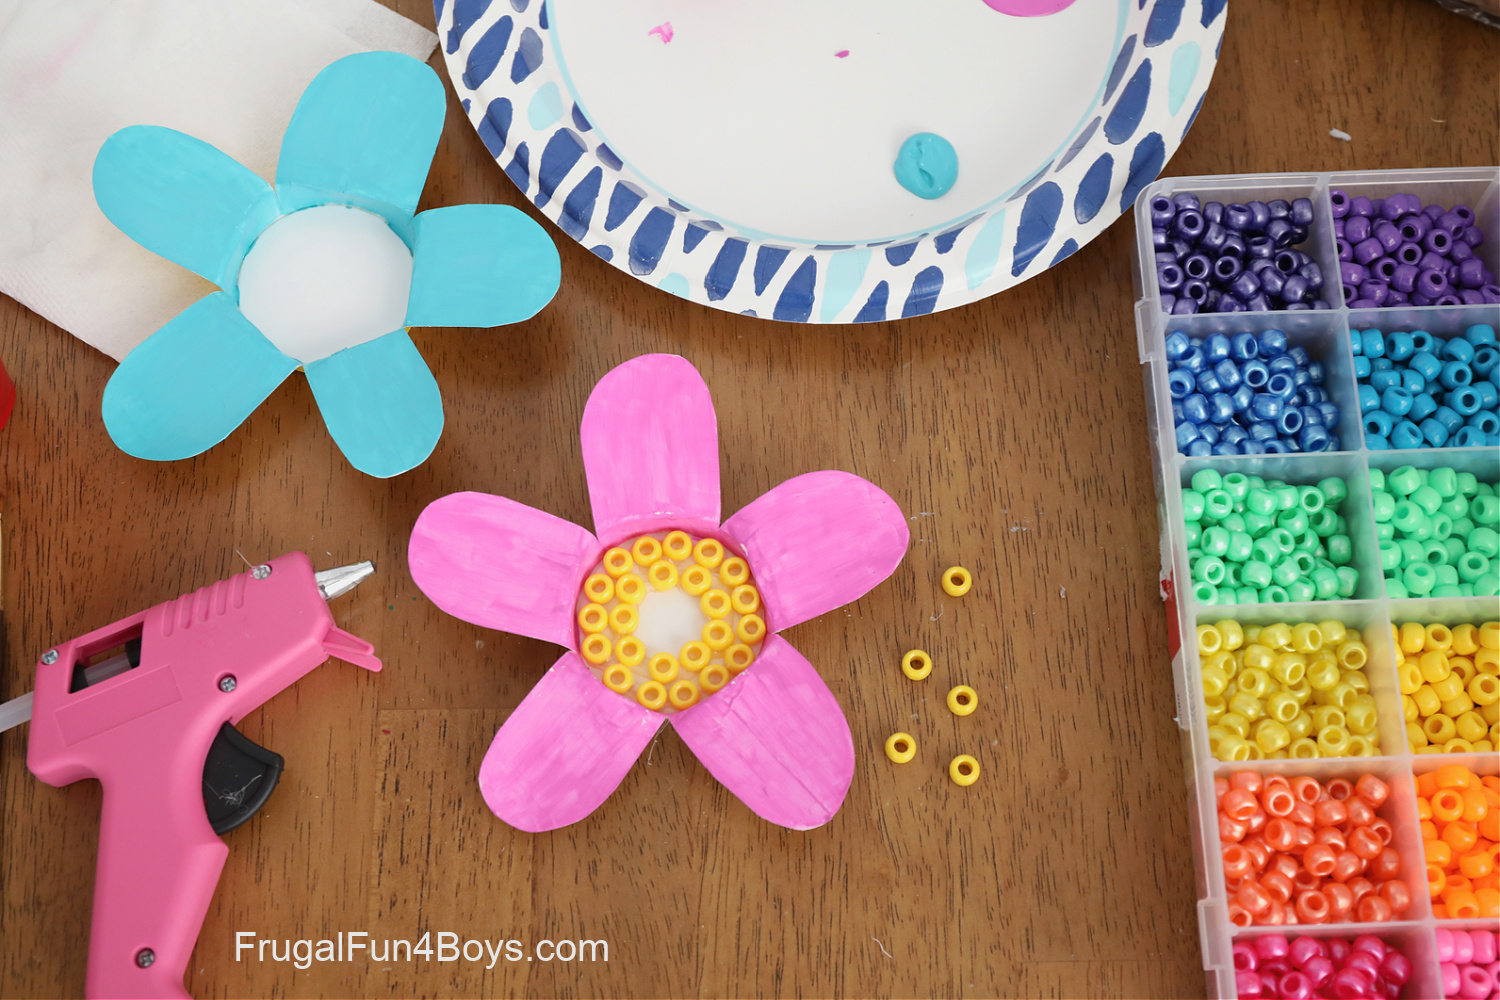
If you use dried beans in the center, you can paint them after you glue them in place. This method works really well and looks cool!
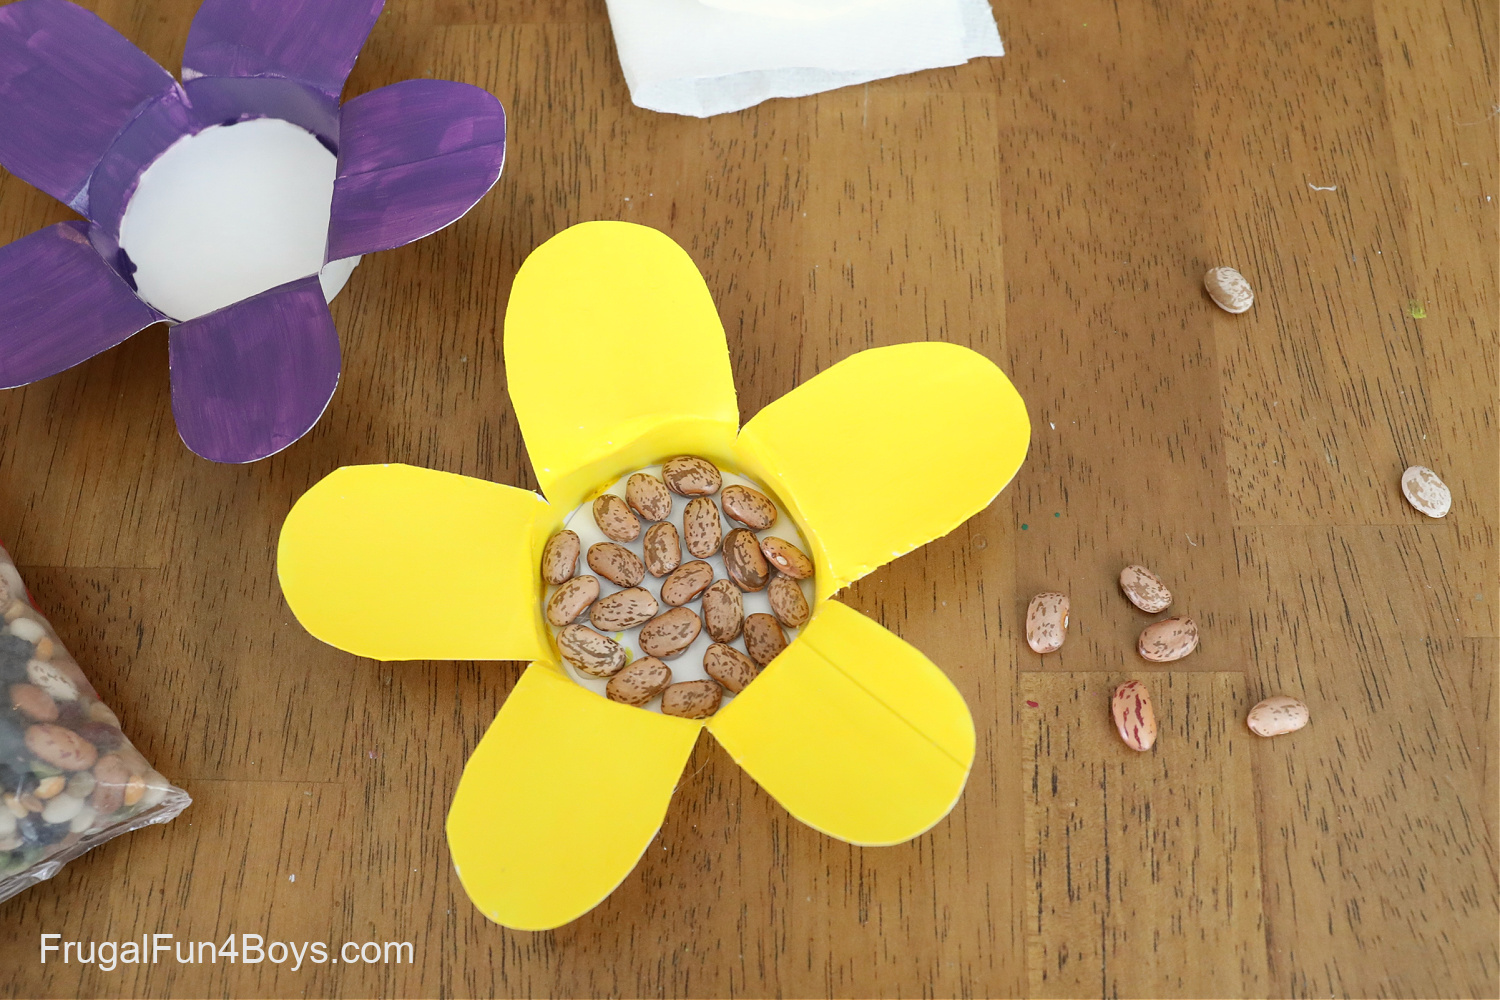
Because I used pinto beans (which have speckles on them), it took about 3 coats of paint.
Then it’s time to give the flowers stems! I used paper straws. We only had blue ones on hand, so I painted them green.
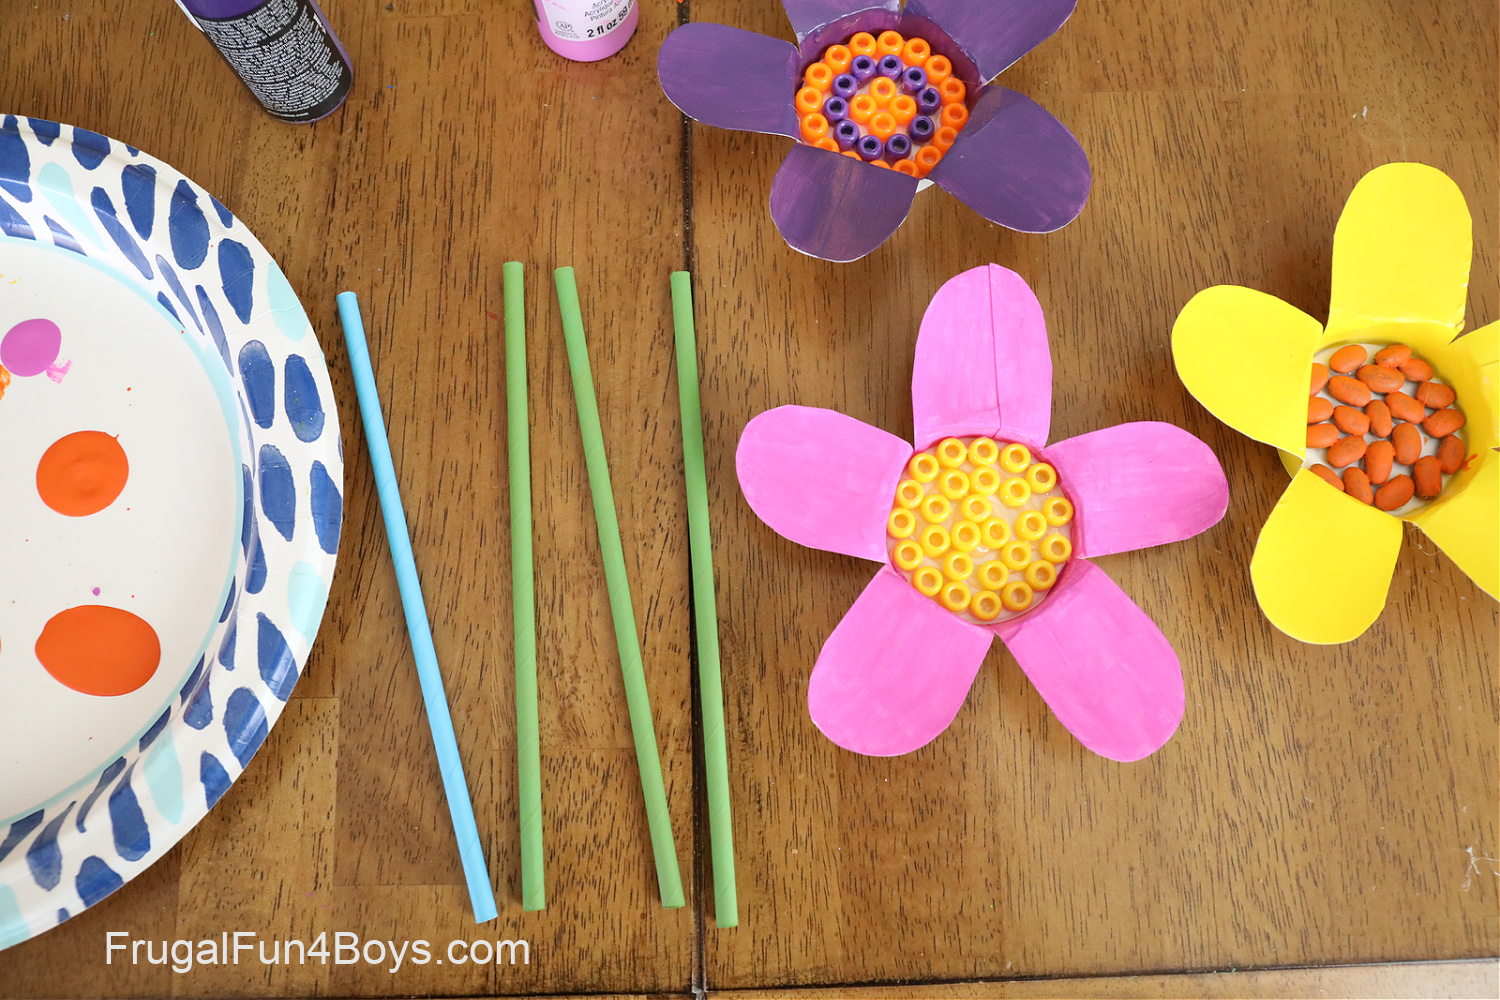
I glued them to the back of the cup with hot glue.
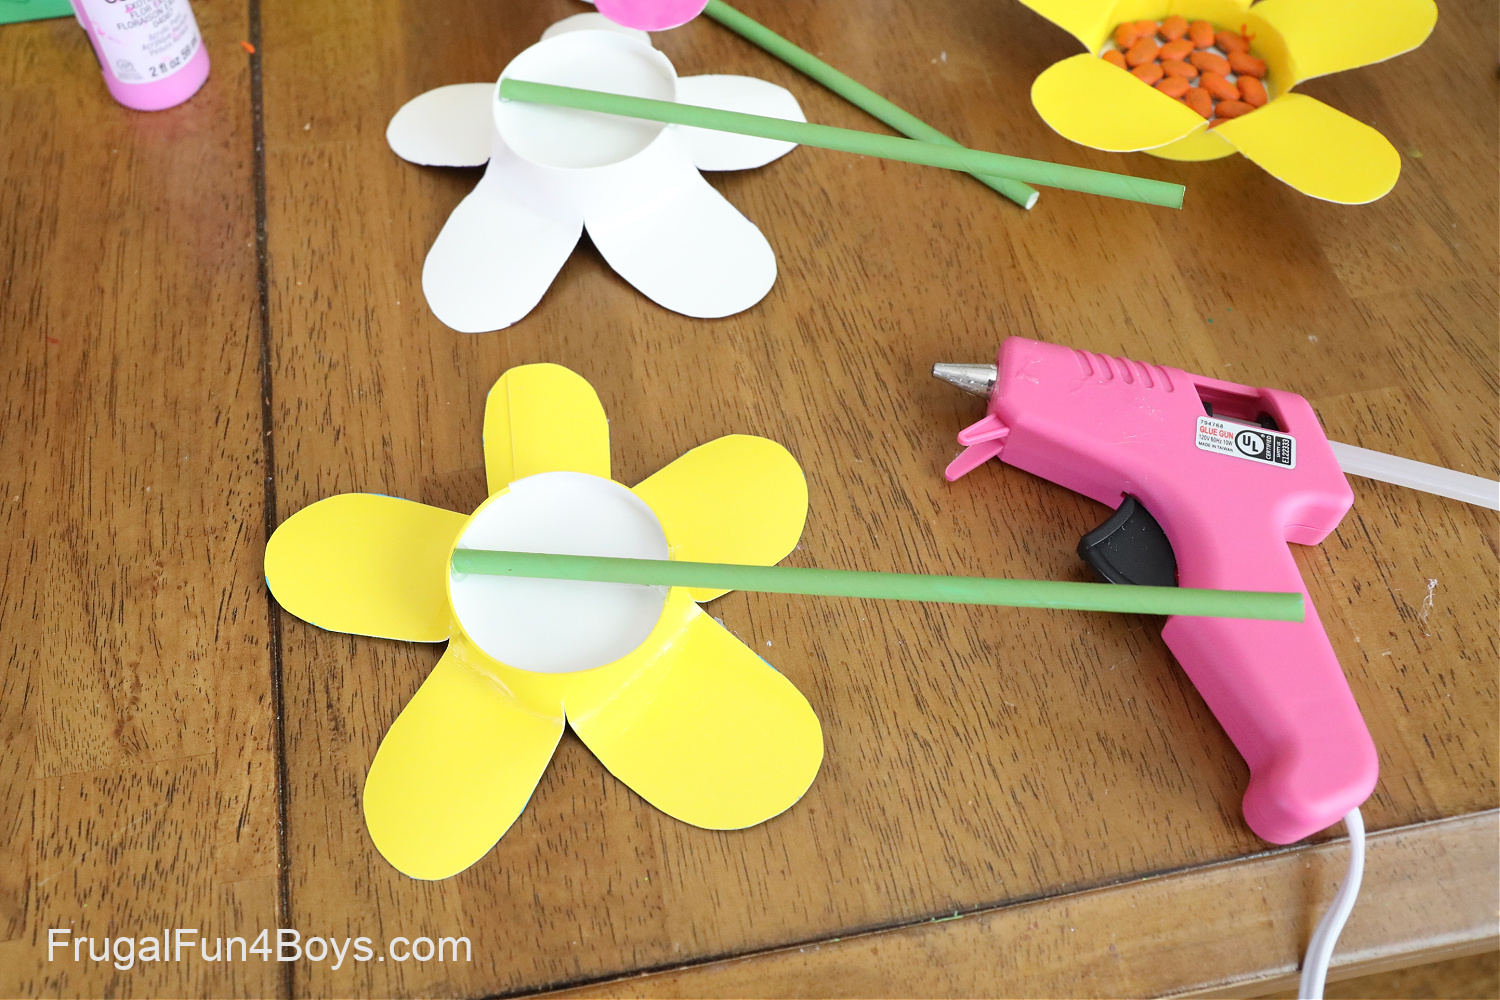
I also added some cardboard leaves, also painted green. SOOO CUTE!
Have fun crafting! And if you want more flower ideas, be sure to check out our Felt and Button Flowers.
We also have a fun printable Flower Tessellation Art Project.
1 Comments
Pascalle Bippert Apr 27, 2025
So cute! These might work for our summer vacation Bible school!
Post a Comment