
Build awesome summer LEGO projects!
It’s always fun to build things that go with the season, and these ideas are perfect for summertime. Construct a lighthouse, a swimming pool, a shark, a cactus garden, a beach scene, a watermelon slice, miniature airplanes, and an adorable little pirate ship.
If you’ve followed this page for very long, you know that we love sharing lots of LEGO® project ideas! If your kids love LEGO, you’ll want to check out our collection of projects and building challenges. Many of them have instructions!
This post was originally published in May 2018 and updated in June 2025.

Ready to build? Let’s get started!
Project #1: Lighthouse
Lighthouses are my favorite, so we’ll start with this one. The house is just two 2 x 2 bricks stacked and two 1 x 2 slopes (30 degree) for the roof.
If you don’t have the white brick with bars (2 x 2 plate modified with octagonal bar frame) you can substitute a 4 x 4 round plate.

Project #2: Cacti
Build a cactus, or several! They even look cute as a centerpiece for the table on taco night.

Project #3: Mini Planes
These were constructed by my 9 and 11 year olds, and I think they’re so cute!

Here’s how to build the red one.
Step 1: Find these bricks.

Step 2: Use a 1 x 1 plate with one stud on top to attach the two 2 x 3 wedge plates. Then attach the rest of the plates to the underside of the 1 x 4 dark gray plate.

Step 3: Turn the 1 x 4 dark gray plate over and attach it to the wings. Then add a tail – a 1 x 3 plate and a 1 x 1 slope (30 degree).

Step 4: Place a 1 x 2 black plate under each week. Then add a 1 x 3 black plate and a 1 x 1 clear slope to the nose of the plane. So cute!

Project #4: Beach
Use a tan baseplate to create a beach scene! Use blue plates for water, and then build some sand castles with tan bricks.
The minifigures can “swim” with their legs removed, ha!

Here’s a better view of the sand castles.

Project #5: Mini Pirate Ship
This one was created by my 11 year old. I asked him if the 1 x 1 white slope would look better in brown, and he said no because it’s part of the sail. So if you want it to be part of the ship you can make it brown, and if you want it to be part of the sail it can be white. 🙂

Step 1: Here are the bricks you need to build the pirate ship.

Step 2: Build the bottom of the ship with a 1 x 4 plate, a 1 x 2 brick, and two 1 x 2 inverted slopes.

Step 3: Attach the 1 x 2 plate, the 1 x 3 plate, and the 1 x 2 tile.

Step 4: Attach the 1 x 1 cone and then slide in the black bar to make the mast. Attach the sail and a 1 x 1 plate with a clip to be a flag.

Step 5: Then attach blue plates to make some ocean water under your mini pirate ship.

Project #6: Swimming Pool
Make your own swimming pool! This is really similar to the beach scene, but the diving board and patio chairs are a nice addition and fun to play with.

I used a 1 x 2 plate with a handle on the side and then some 1 x 2 plates with clips to make the patio chairs. Super simple!

Extend this project by building a snack bar to go with it! Or add a water slide to the pool.
Project #7: Shark
This one is my second favorite! (After the lighthouse!) It’s so easy to build, but the tail is posable and the face is just so cute.
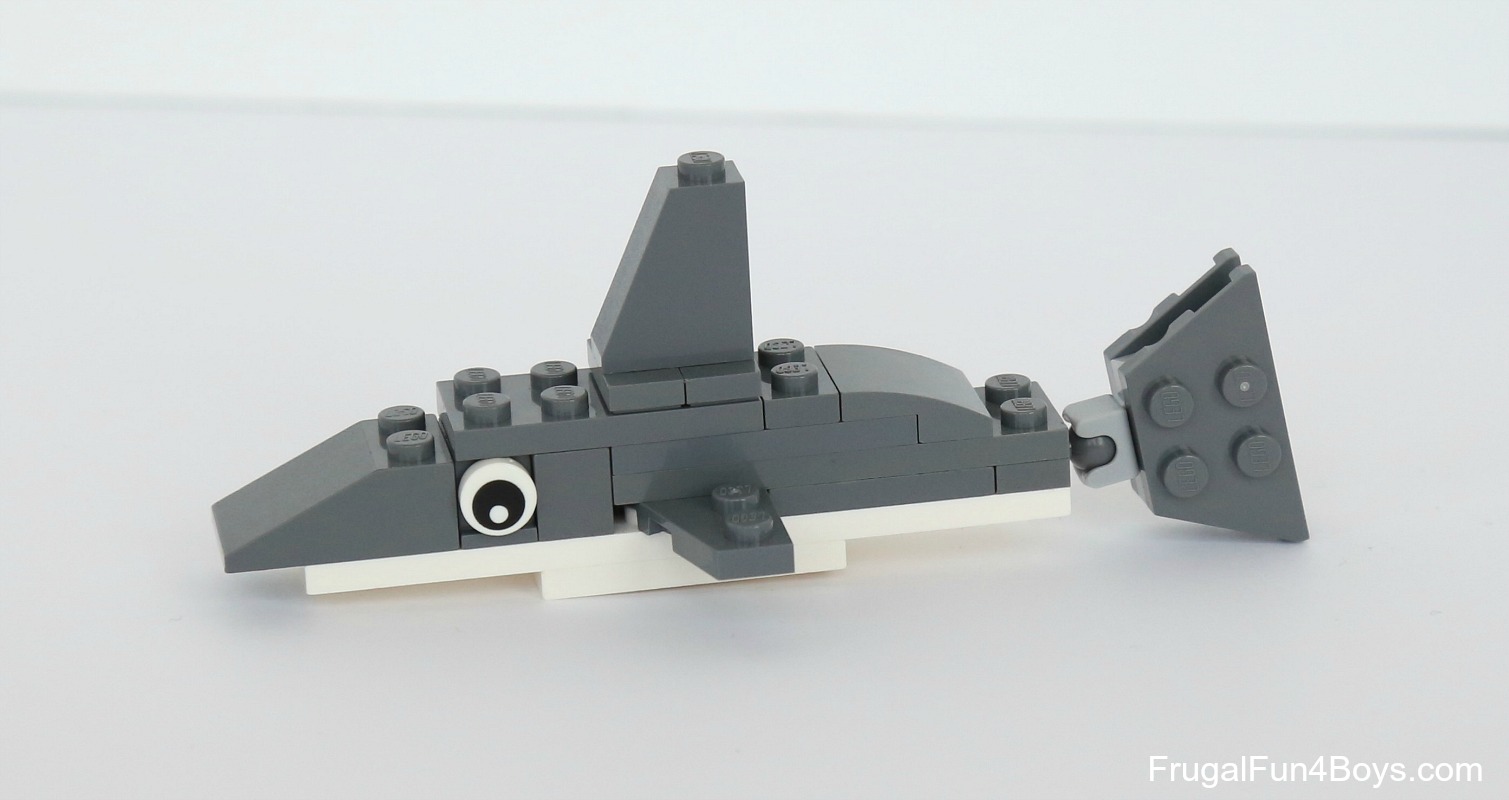
Step 1: Grab two 2 x 4 white plates and a 2 x 6 white plate.

Step 2: Attach them as shown.

Step 3: White on white background is a little hard to see! There, that’s better. From front to back, add a 2 x 3 dark gray slope, two 1 x 1 bricks with a stud on the side, a 1 x 2 brick, two 2 x 3 wedge plates (one right, one left), a 2 x 3 plate, and a 1 x 2 plate with a ball on the side.

Step 4: Attach the eyes. Then add a 2 x 6 dark gray plate.

Step 5: Add a 2 x 4 plate and then grab the bricks shown.

Step 6: Place the 2 x 4 plate over the eyes and back. Then add a 1 x 2 behind that, and then the 2 x 2 curved slope. Use the two 1 x 2 plates with one stud on top to hold the fin. Grab the pieces shown for building the tail.

Step 7: Attach a 1 x 2 dark gray plate and a 1 x 2 light gray plate with a socket on the side to one of the 2 x 4 wedge plates. Then add the other wedge plate on top.

Step 8: Attach the tail to the body and the shark is complete!

Project #8: Watermelon Slice
This watermelon looks good enough to eat! Ha!
Start with two 2 x 2 green inverted slopes on the bottom, with a 2 x 4 green brick in between them. Then add a 1 x 2 green plate on each end and a 2 x 6 lime green plate in the middle. Add one 1 x 2 lime green plate on each side. Then you just have to add red bricks and plates, with 1 x 2 black plates as the seeds!

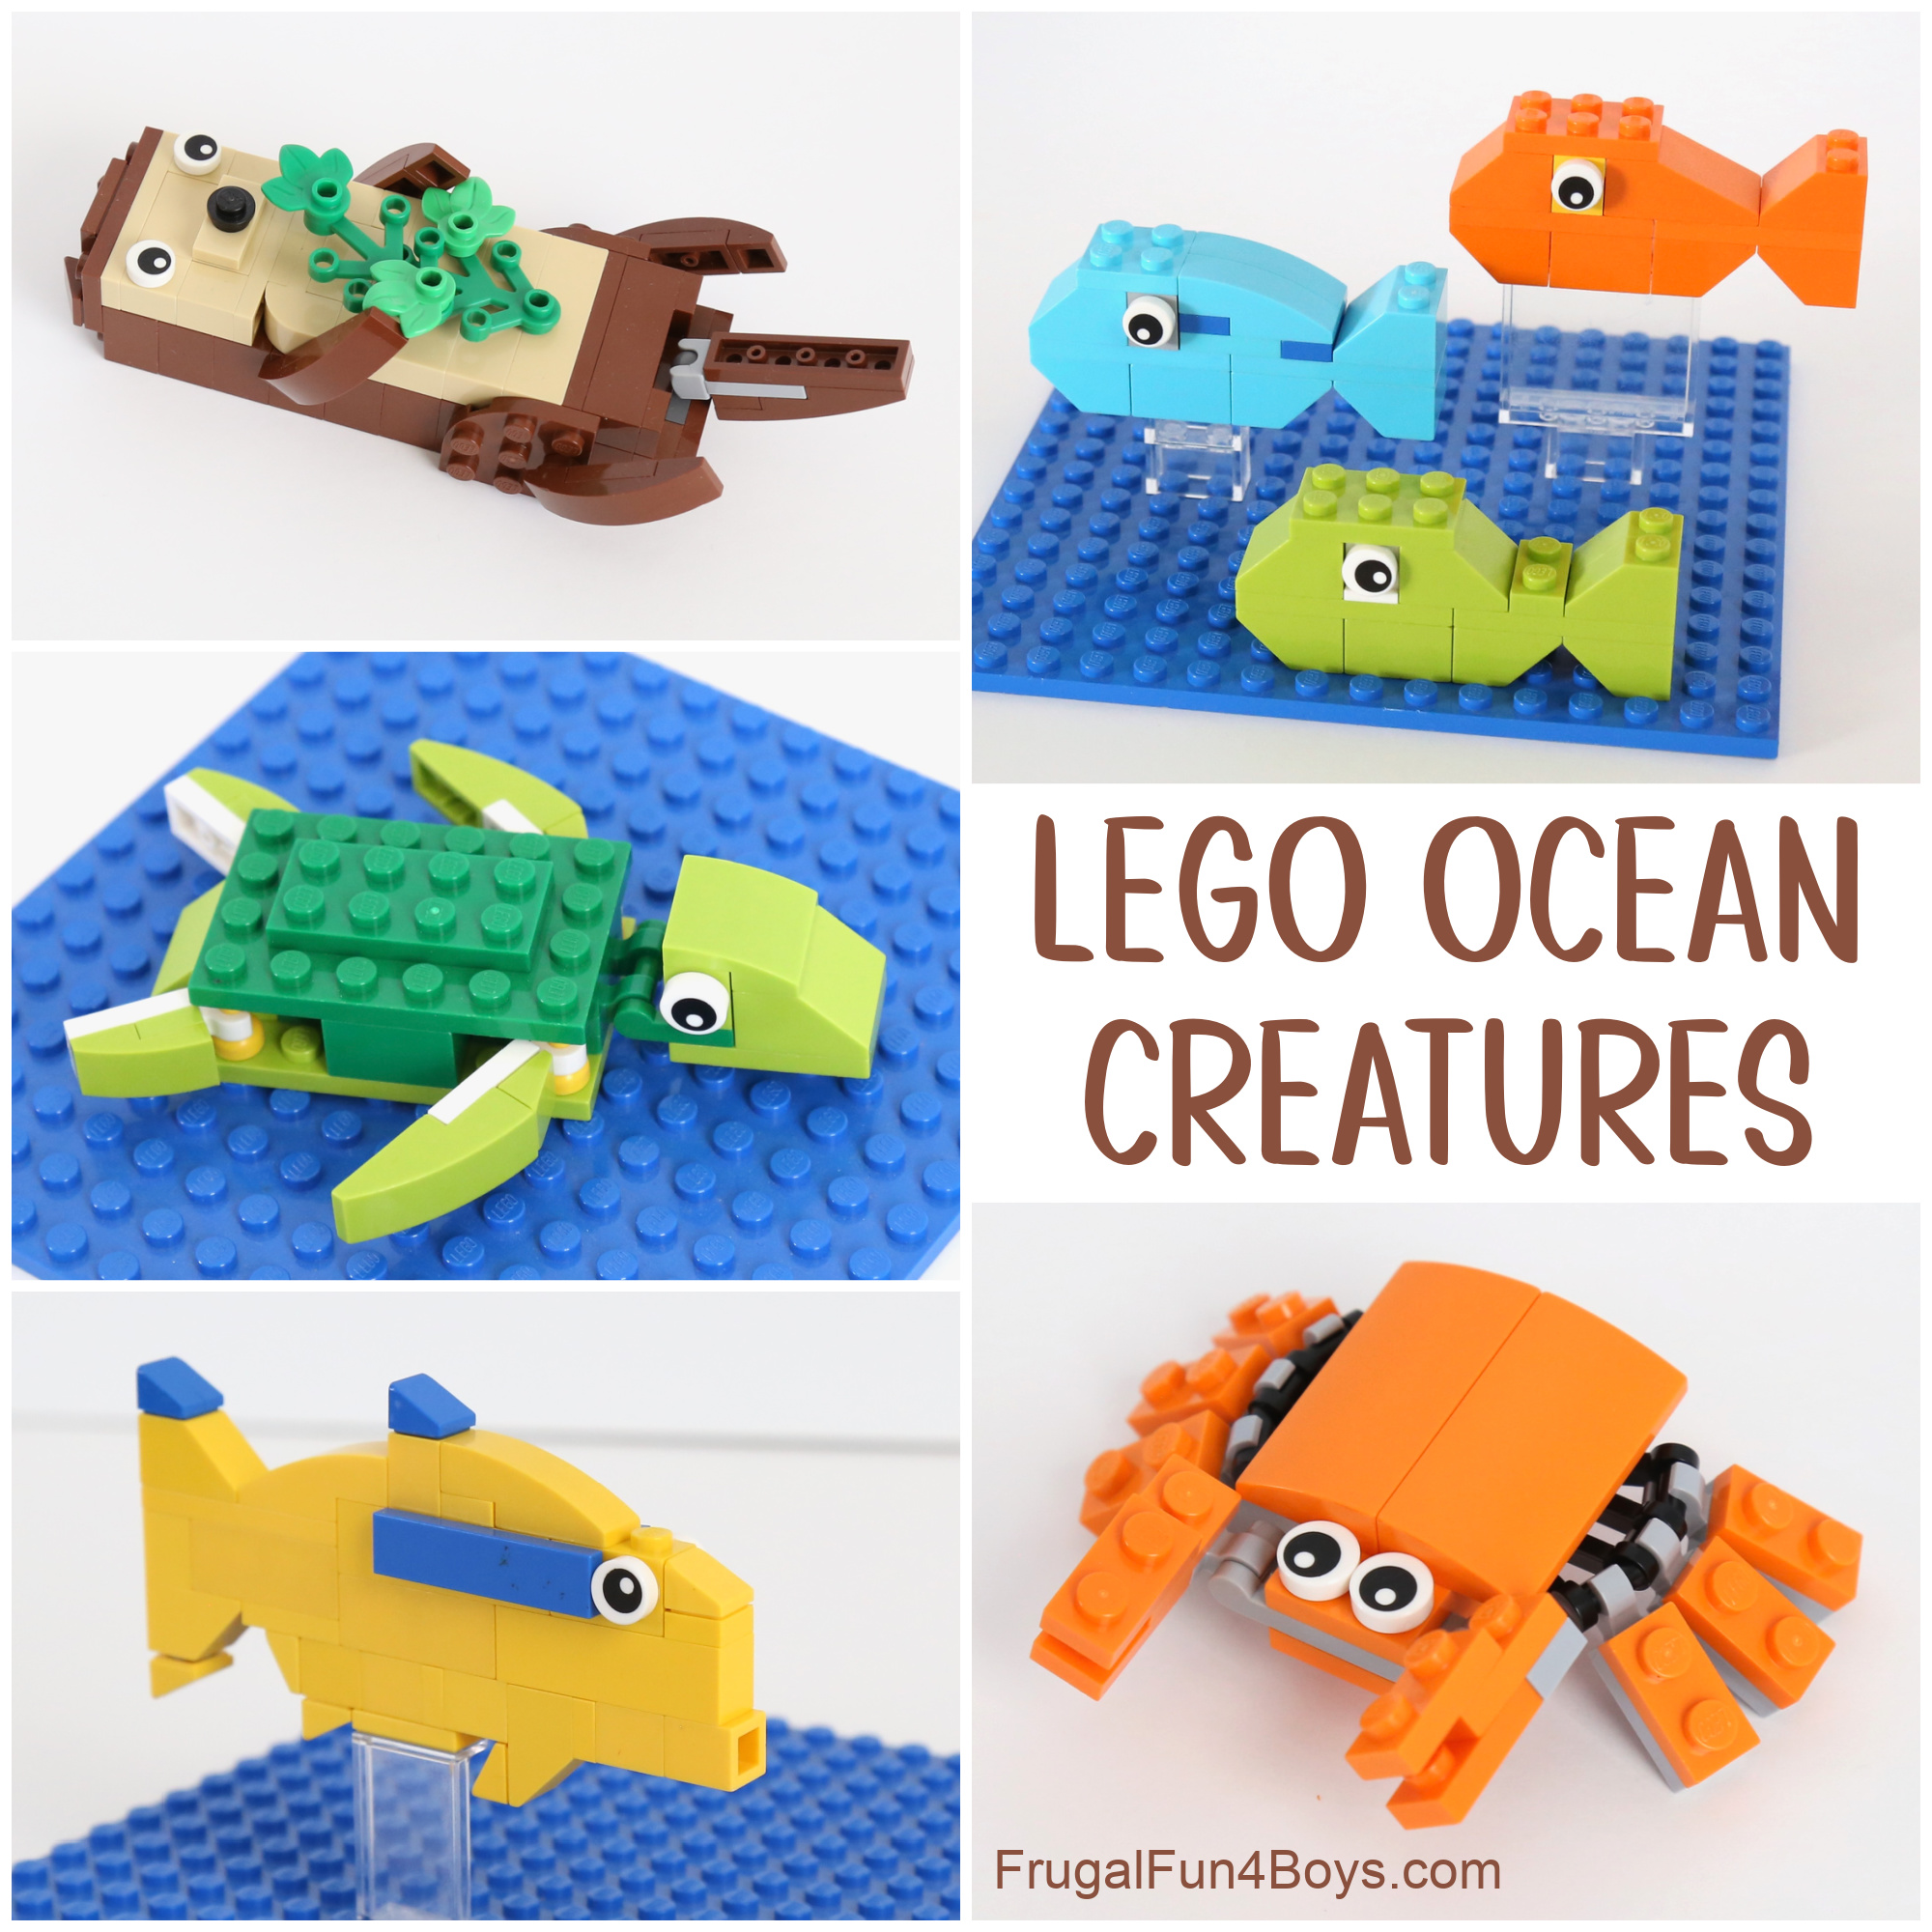
Need more ideas? Head over to build LEGO Ocean Animals!

1 Comments
Eve Webb Jun 1, 2018
Thankyou for all your great projects! We are just starting winter in Perth, Australia, but there are few wet and cold days, so outdoor projects are ideal. The above Lego building will keep the littlies happy on rainy days. Your pool noodle planes were a hit with the boys at the park....made by my grand daughter (6) and much enjoyed by her schoolmates during our regular hour at the playground after school. I have a task translating requirements, nickel, Hexbugs, liquid starch...but we get there.I have passed your site on to several new mums and a few of us grand mums, including a couple in the U.K, so the ideas are spreading.The Hexbugs are not available here, so had to get in quickly with Amazon U.S , as they will not be sending goods to Australia after July.Toysrus Australia are also about to close, which leaves us with little in the way of toy and craft outlets.If this email is published please don't include references to retail outlets, as I'm sure it will breach some rule or other and is for your information only.
Post a Comment