
Here’s a way to create a beautiful Thankful Tree using a photo frame and a few other supplies from the craft store. So easy to make, and the results are stunning!
Creating a Thankful Tree is such a meaningful Thanksgiving activity. I love this tradition because it’s a great way to help kids slow down and think about all the things they can be grateful for.
There are so many ways to do a Thankful Tree. I really love the Thankful Trees that use real tree branches and paper leaves as ornaments, but where we live, finding a couple of pleasant looking branches is harder than it seems like it should be. Maybe we don’t have the right type of trees! (One year, I sent my husband and son out behind our house looking for branches for a craft project, and they came home with poison ivy! But that’s another story…)
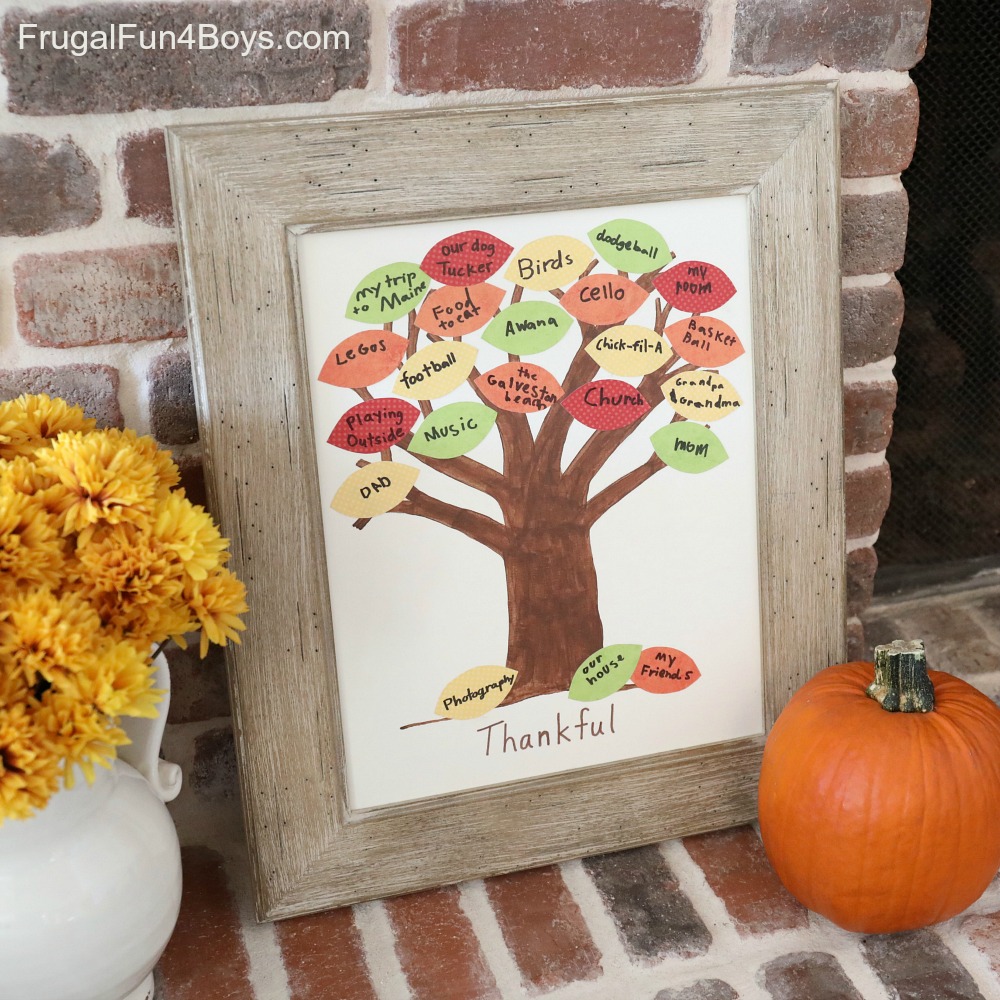
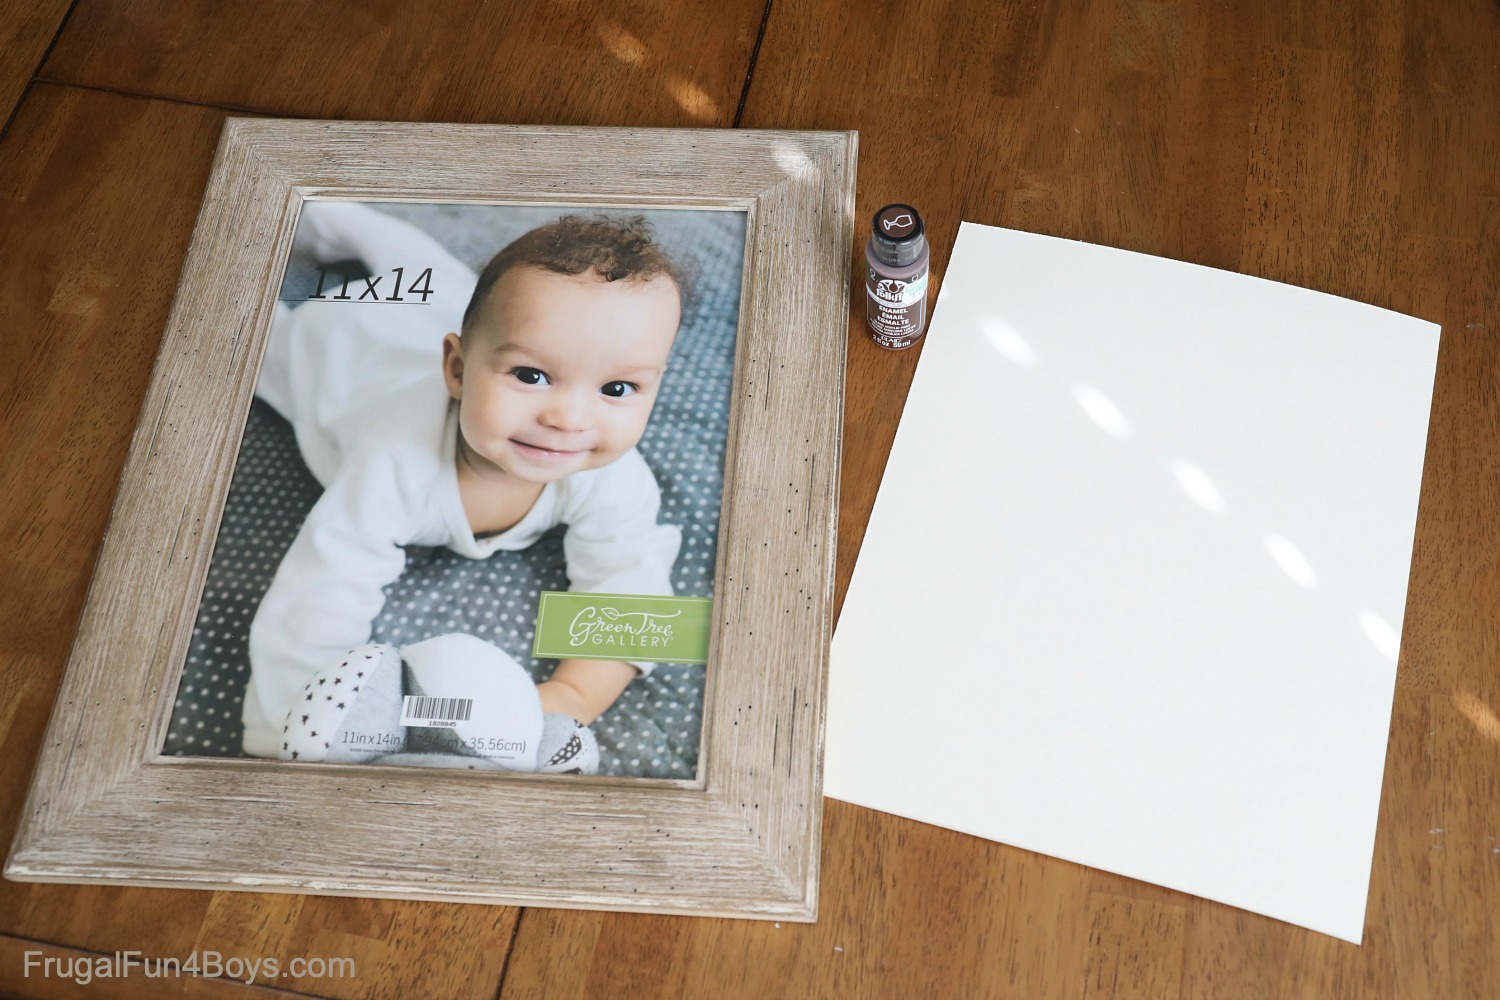
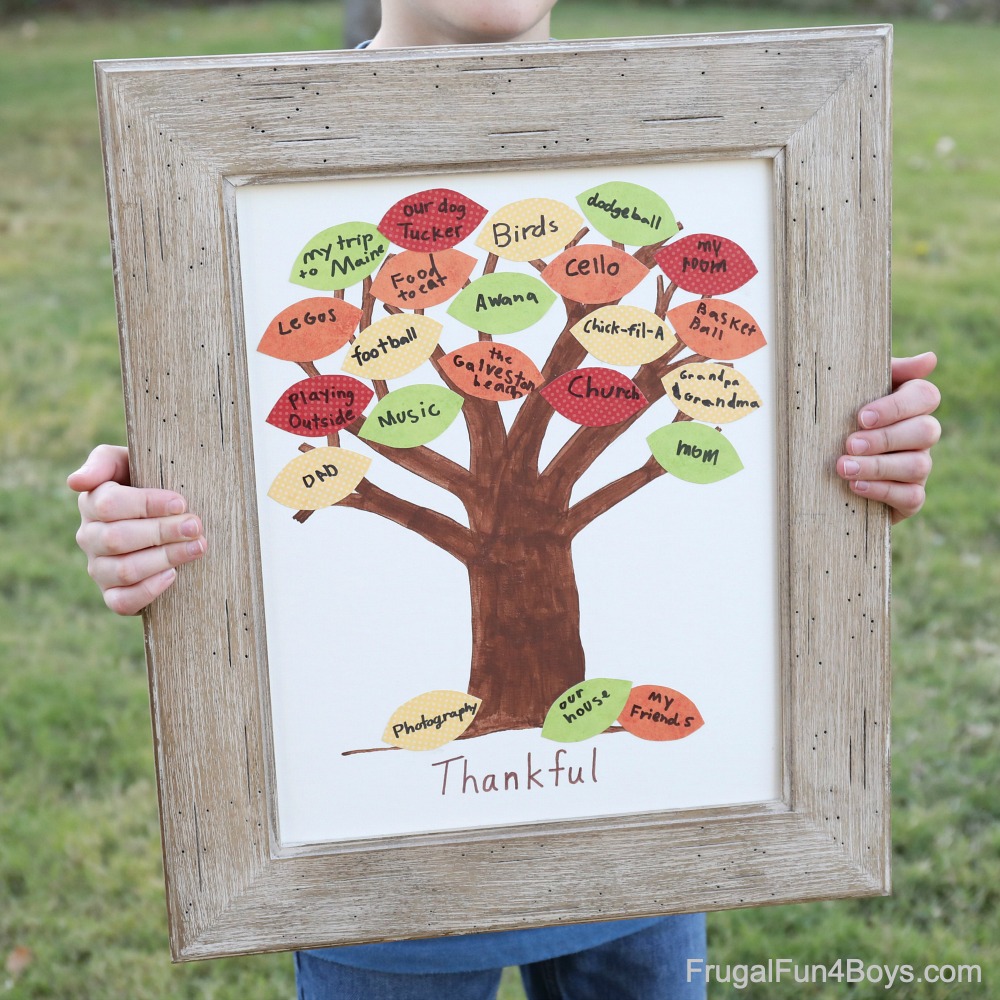
Our Thankful Tree is currently displayed on our fireplace hearth, and it looks so good there! We don’t really have the wall space to hang something else (very open floor plan), but this worked out very well.
Supplies Needed:
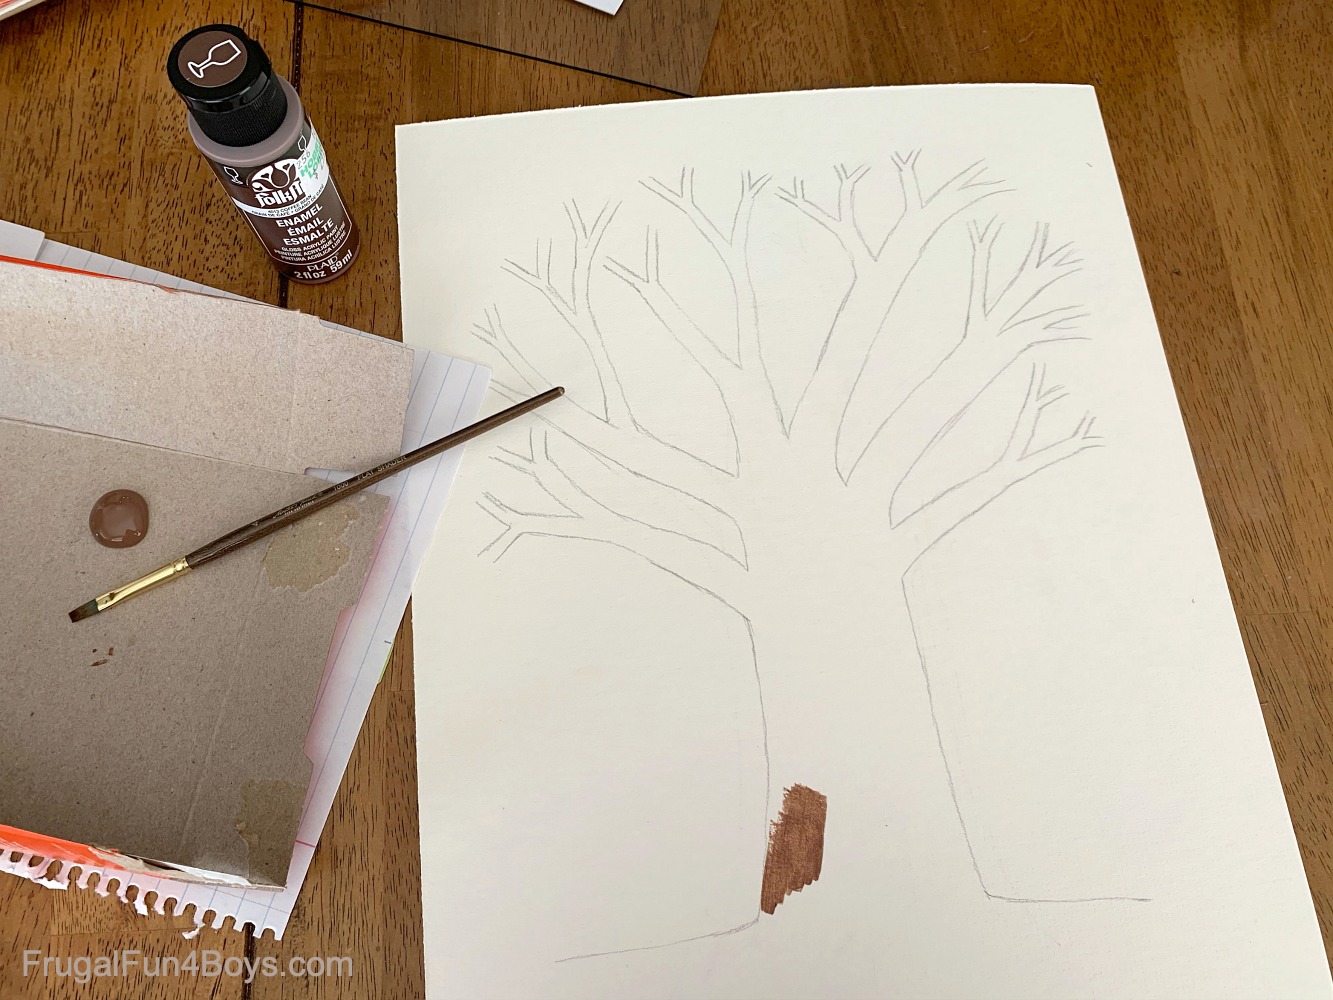
- Photo Frame – I used an 11 x 14 frame. 50% off at Hobby Lobby!
- Mat board – cut to fit your frame. Get a solid piece of mat board with no opening in the center.
- Brown acrylic paint
- Scrapbook paper in fall colors, or construction paper
- Pencil
- Scissors
- Black Sharpie marker
- Glue – I used Tacky Glue
Cut your mat to fit the size of your frame. I accomplished this by having the guy at Hobby Lobby do it for me!
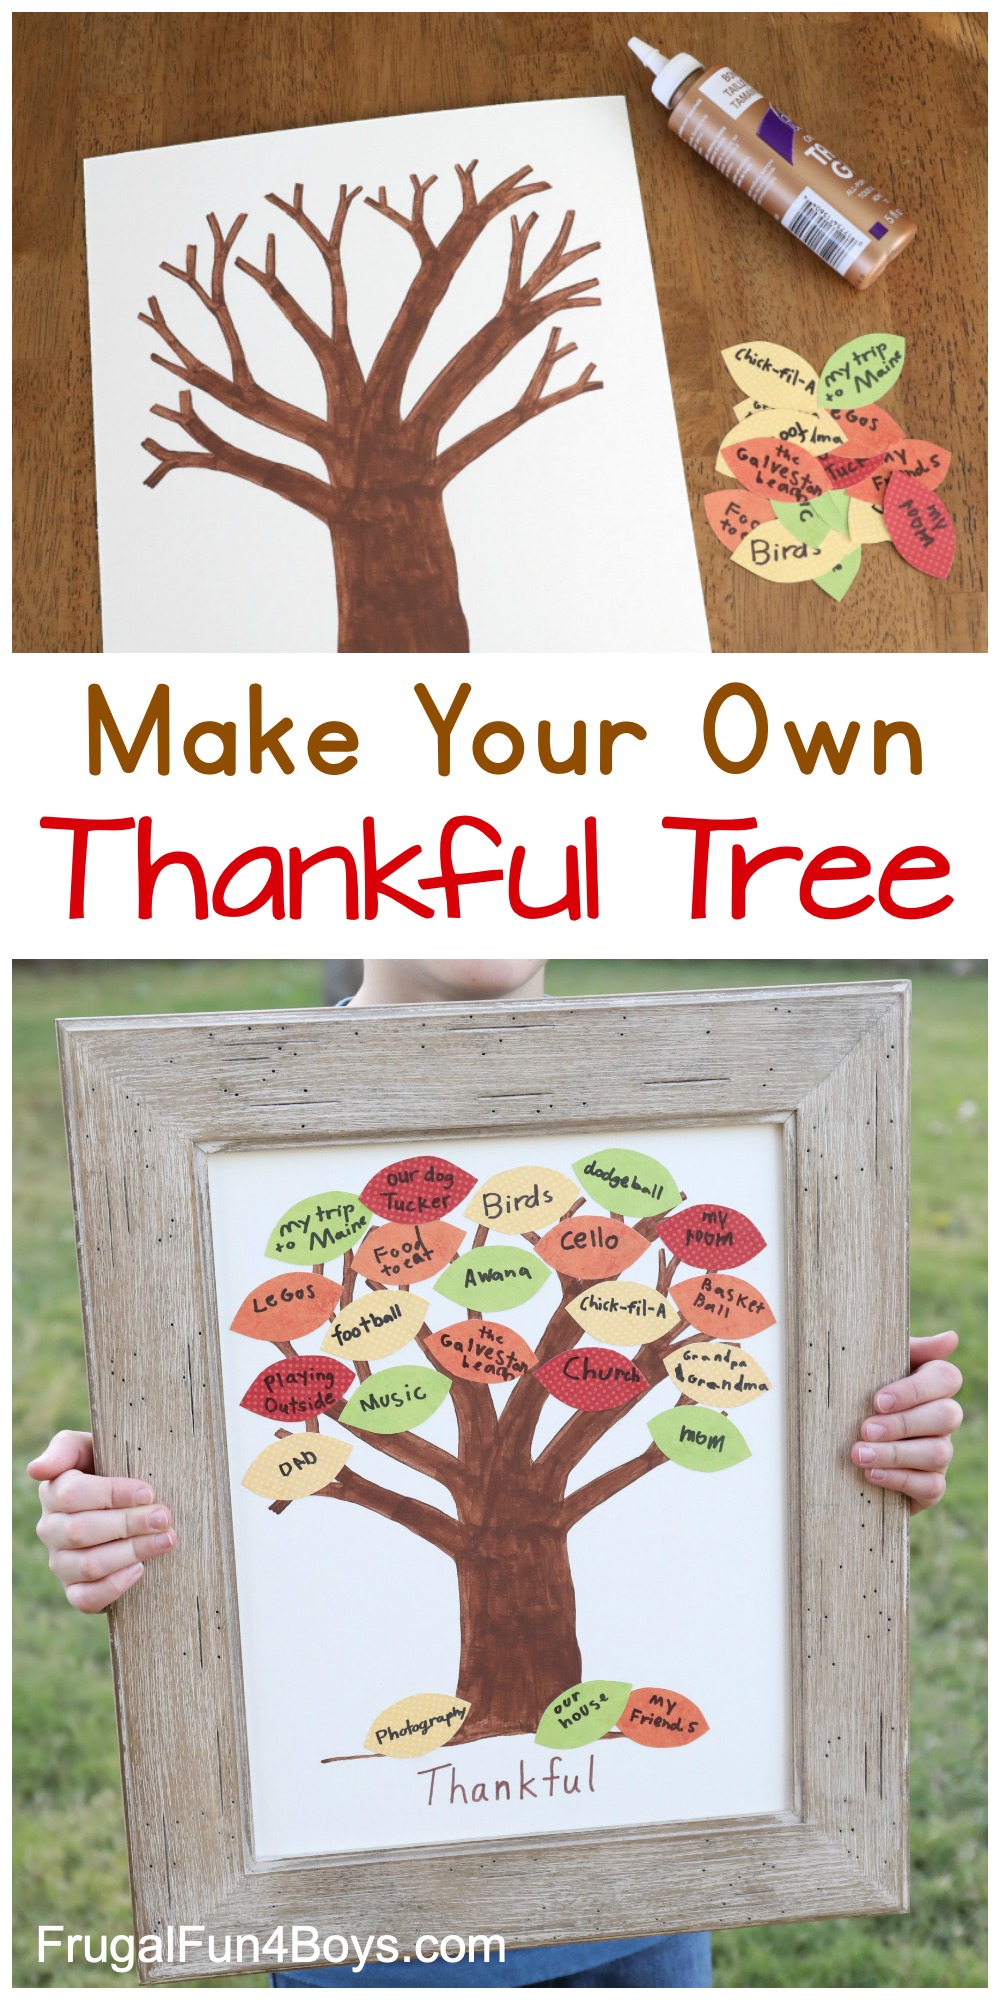
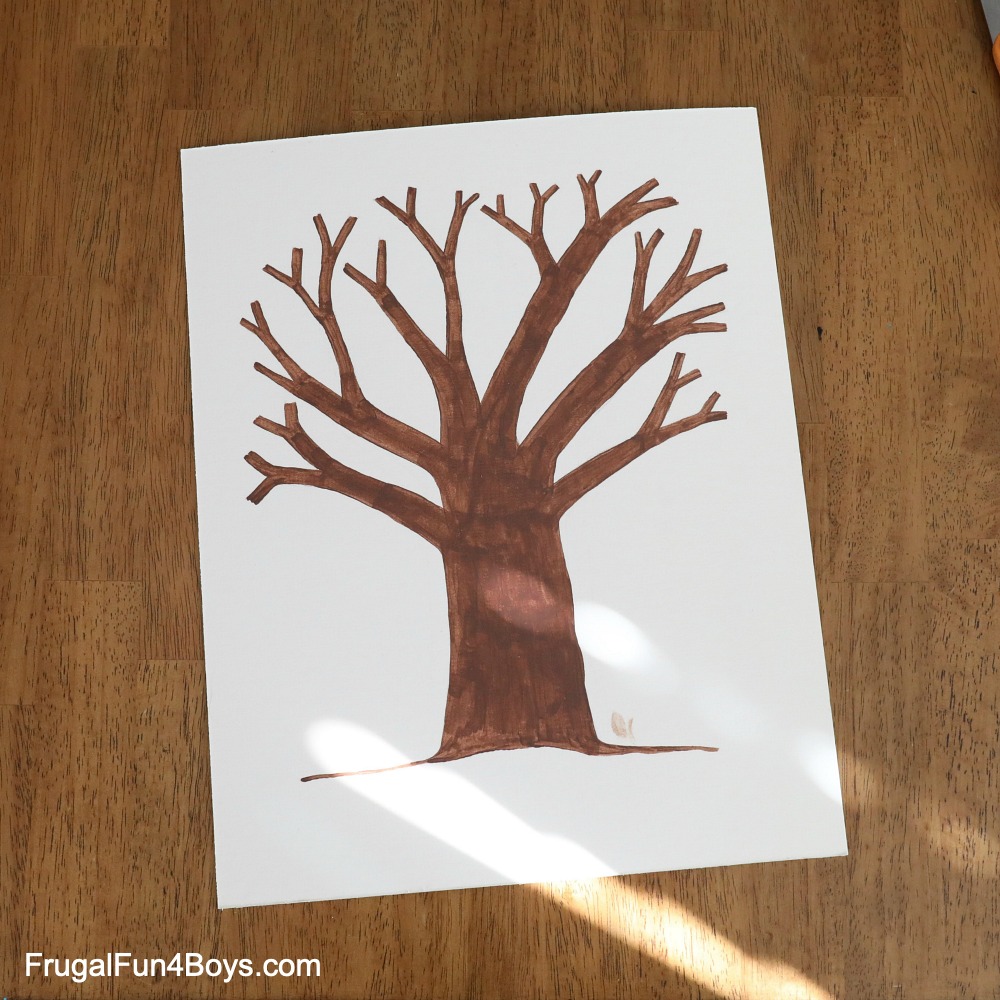
Draw a tree in pencil first and then paint it. Make sure that the edges of your design won’t be covered up by the frame. Then paint your tree with brown acrylic paint. A good brush is so much easier to control than a cheap one! I usually buy the ones that are sold individually at Hobby Lobby and that cost $3-5 each.
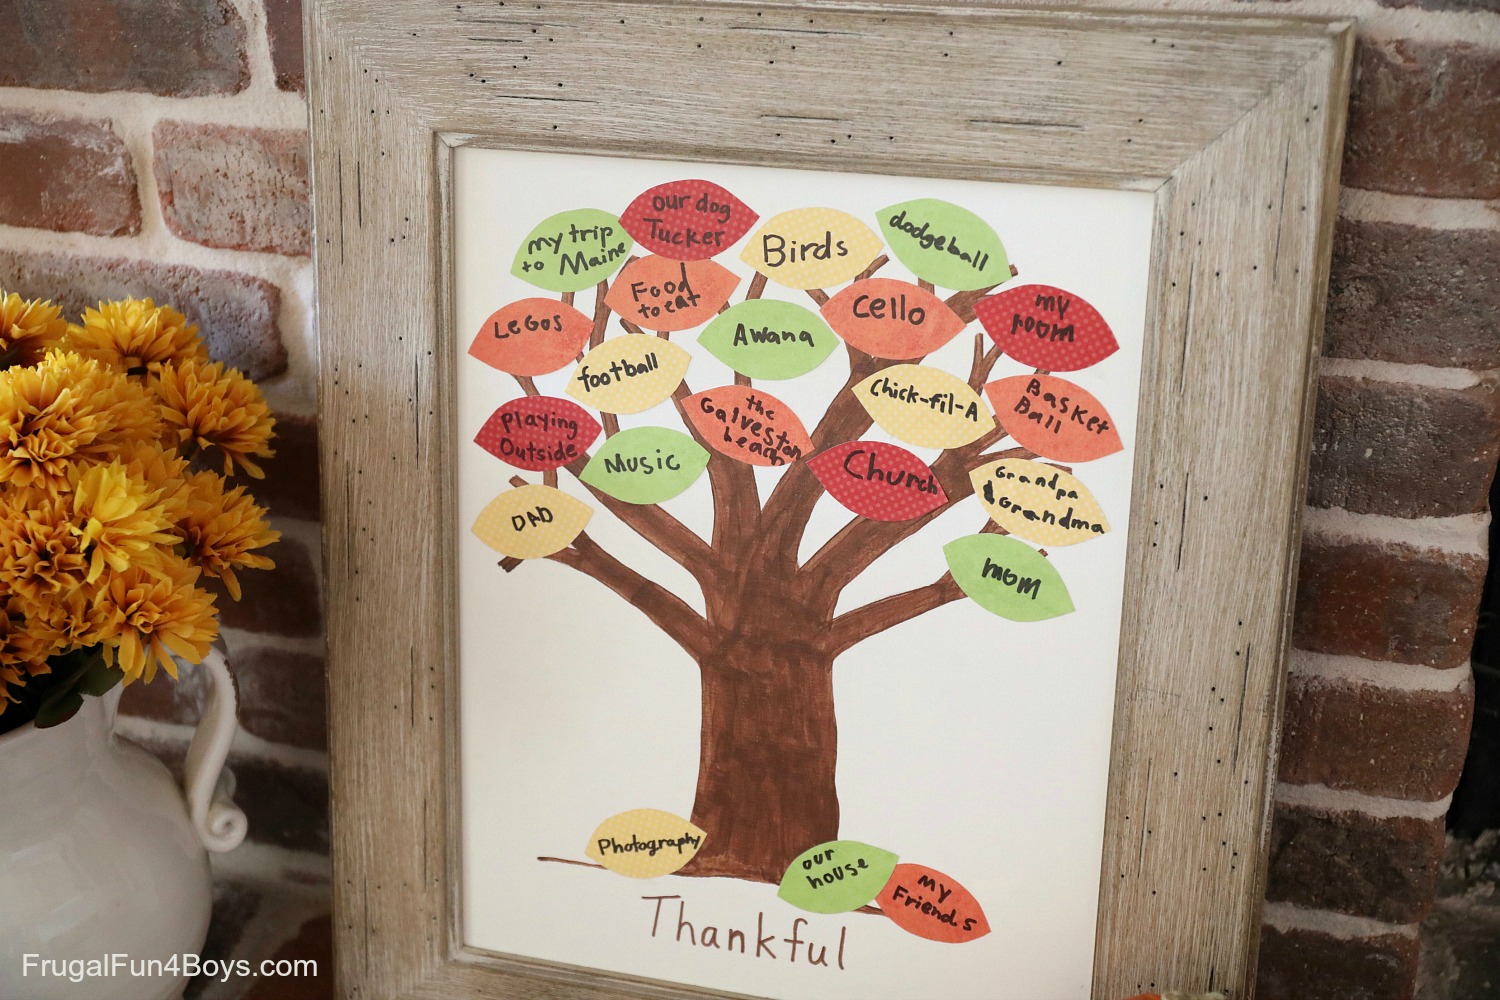
Here is what my completed tree looked like.
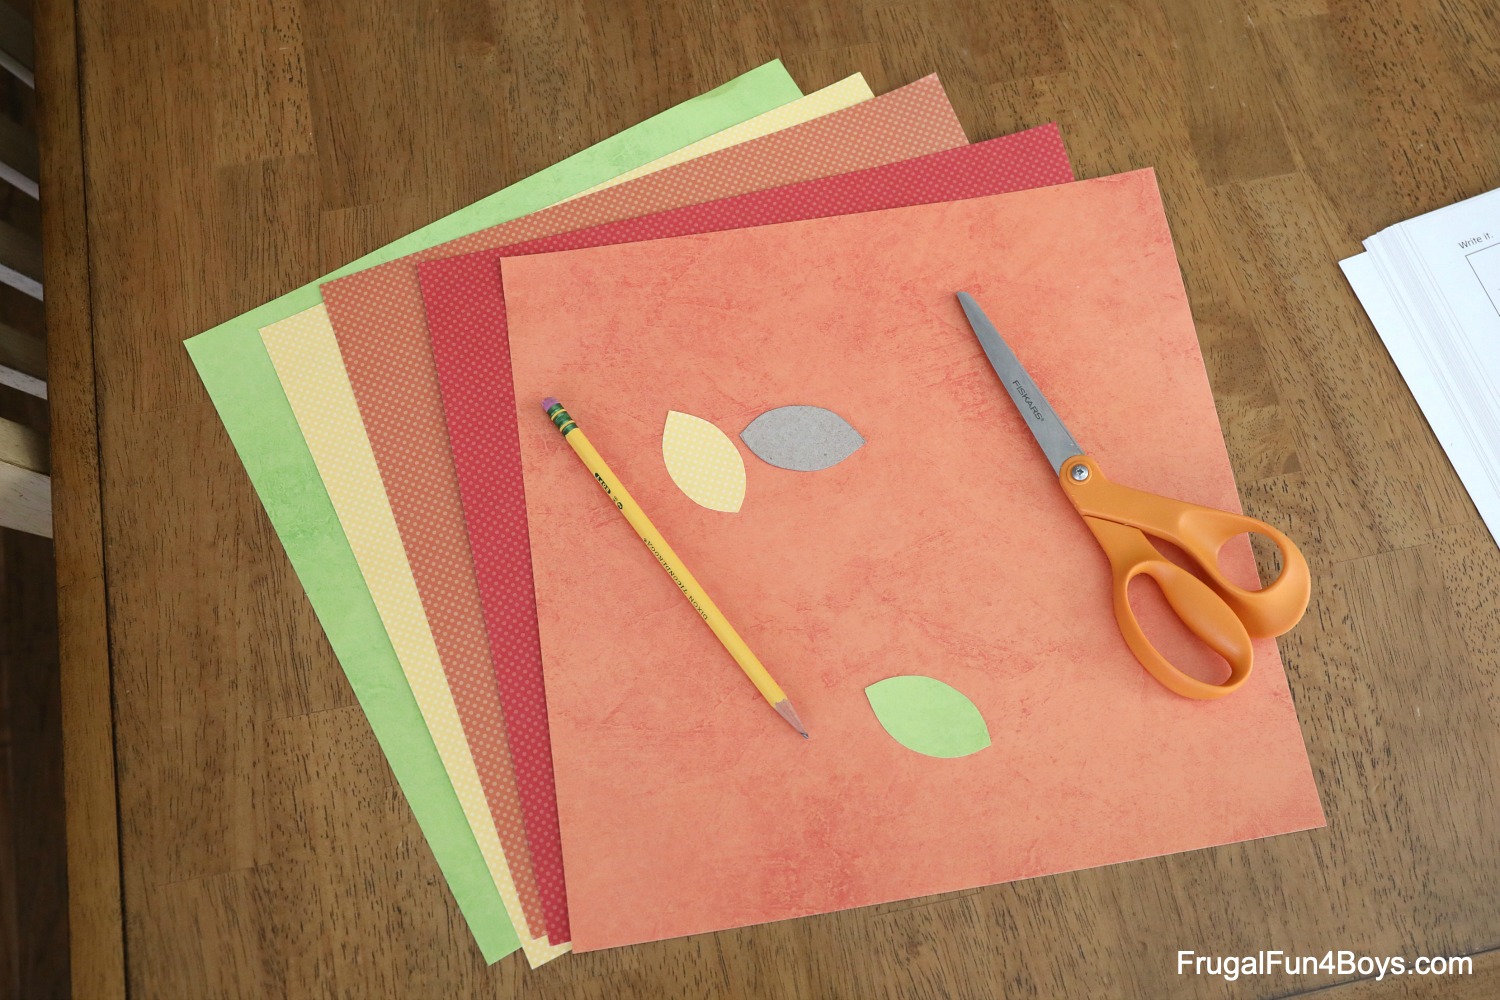
While the paint is drying on your tree, cut out fall leaves from fun colors of scrapbook paper. Construction paper is also a great choice! I used some cereal box cardboard to make a pattern.
Then have the members of your family write one thing they are thankful for on each leaf. We really enjoyed this step, and the kids thought of some really great things. It was such a joy to think of all the ways that God has blessed us! They are thankful for Legos (of course!), church activities, grandparents, trips, and even Chick-Fil-A. 🙂
Once the leaves are complete, it’s time to assemble the Thankful Tree.
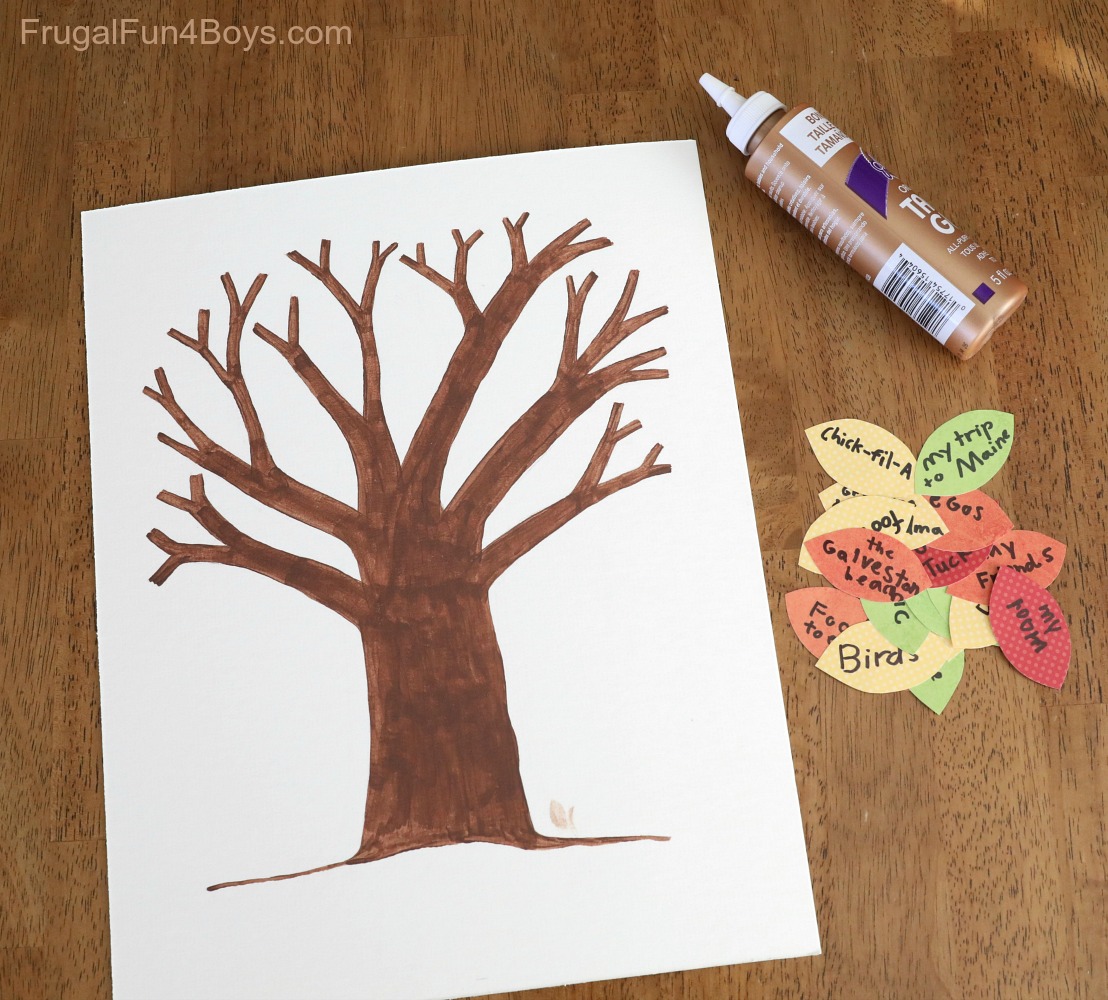
I chose to use Tacky Glue for this project because it’s less likely to make the leaves bumpy or wrinkly. I used a Q-tip to spread a thin layer of glue onto each leaf. It worked well! Elmer’s Glue may work also, but I didn’t try it. My favorite crafting supply, hot glue, would be too lumpy for this project, unfortunately.
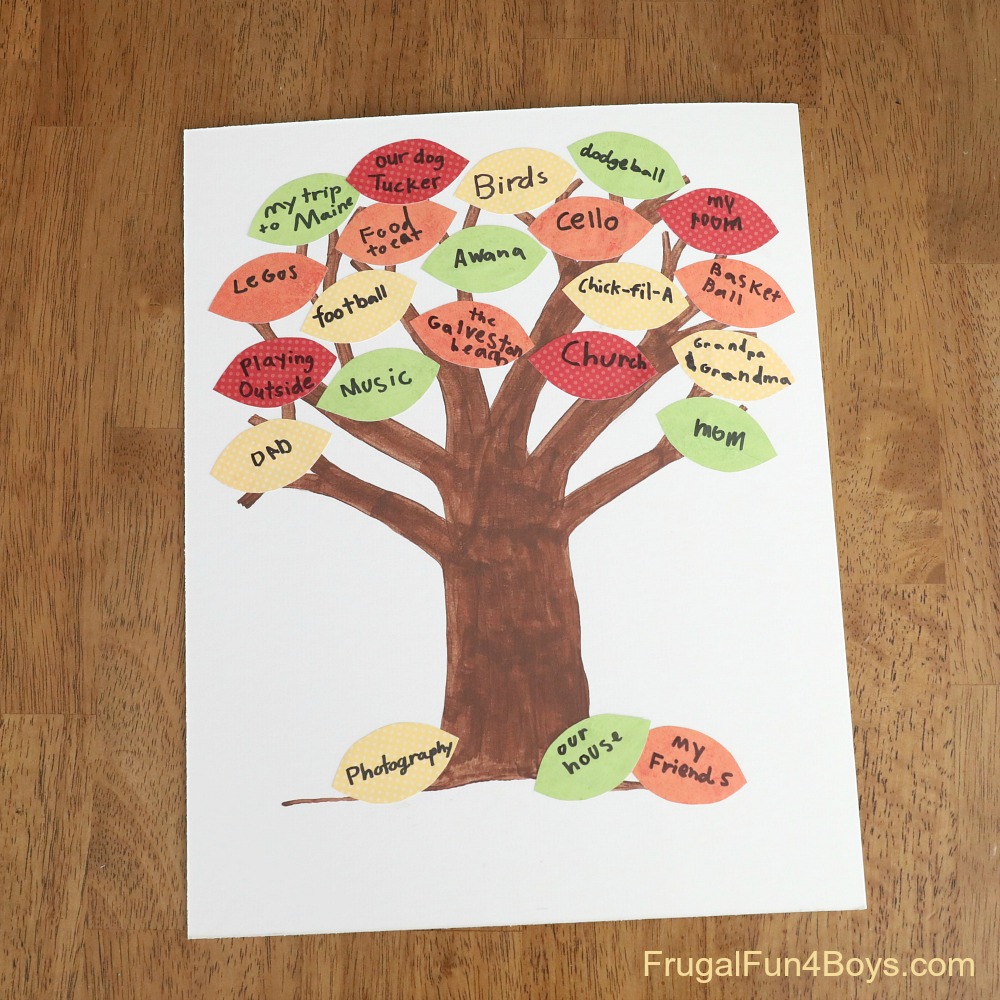
Once you have completed your Thankful Tree, mount it in your frame. I chose to leave the glass out of our frame. If you want to add a few leaves each day, that would be the best way to do it. If you make your tree all in one sitting, then it’s up to you whether or not to include the glass.
Then it’s ready to display!
Ideas for Reusing the Tree Year After Year
If you want to reuse this Thankful Tree from year to year, I have a couple ideas for you. One option is to attach the paper leaves with stick-on velcro circles. Place velcro circles on the tree, and then attach velcro circles to the backs of your leaves. You’ll have to make new leaves each year, but you can reuse the same tree.
Another option is to use the same frame again and start over with a piece of mat board. This is what we are planning to do. In fact, I had to buy a large sheet of mat board, so I went ahead and had two 11 x 14 rectangles cut.
Want to make a Thankful Tree without drawing the tree?
Here’s a printable version of a Thankful Tree! Head to a copy store if you want to make it larger than 8.5 x 11.
Want more kids activities for Thanksgiving?
Print this Gratitude Journal for Kids – Bible based, with 7 activities to complete.
Make some Scrapbook Paper Turkey Placemats – these are easy to make with the patterns in the post. Kids can write what they are thankful for on the placemats. Great activity while waiting for dinner to be ready!
4 Comments
Evelyn Webb Oct 31, 2020
We are very thankful to be living here in Perth, Western Australia. It's a beautiful place with many opportunities, even without the circumstances surrounding us in 2020. My 9 year old grand daughter was in a pensive mood last week, the theme for school chapel had been thankfulness. I'm thinking the tree could be a way for her to put her thoughts onto paper and sort out her priorities. The velcro dots idea appeals, so she can move ideas around and the tree can grow with her.
Bill Kern Oct 31, 2020
Will likely tap this one for my students at the end of the month. Greetings from Japan! Thanks so much!
Anne H Oct 30, 2021
I love the things you posted and this thanksgiving tree is great in encouraging us to reflect on God’s goodness.
Donna Maudell Armbrister Nov 1, 2021
I think the Thankful Tree is such a Lovely way for young child to be engaged, whil having an opportunity to reflect on the present Blessings in their lives.
Post a Comment