
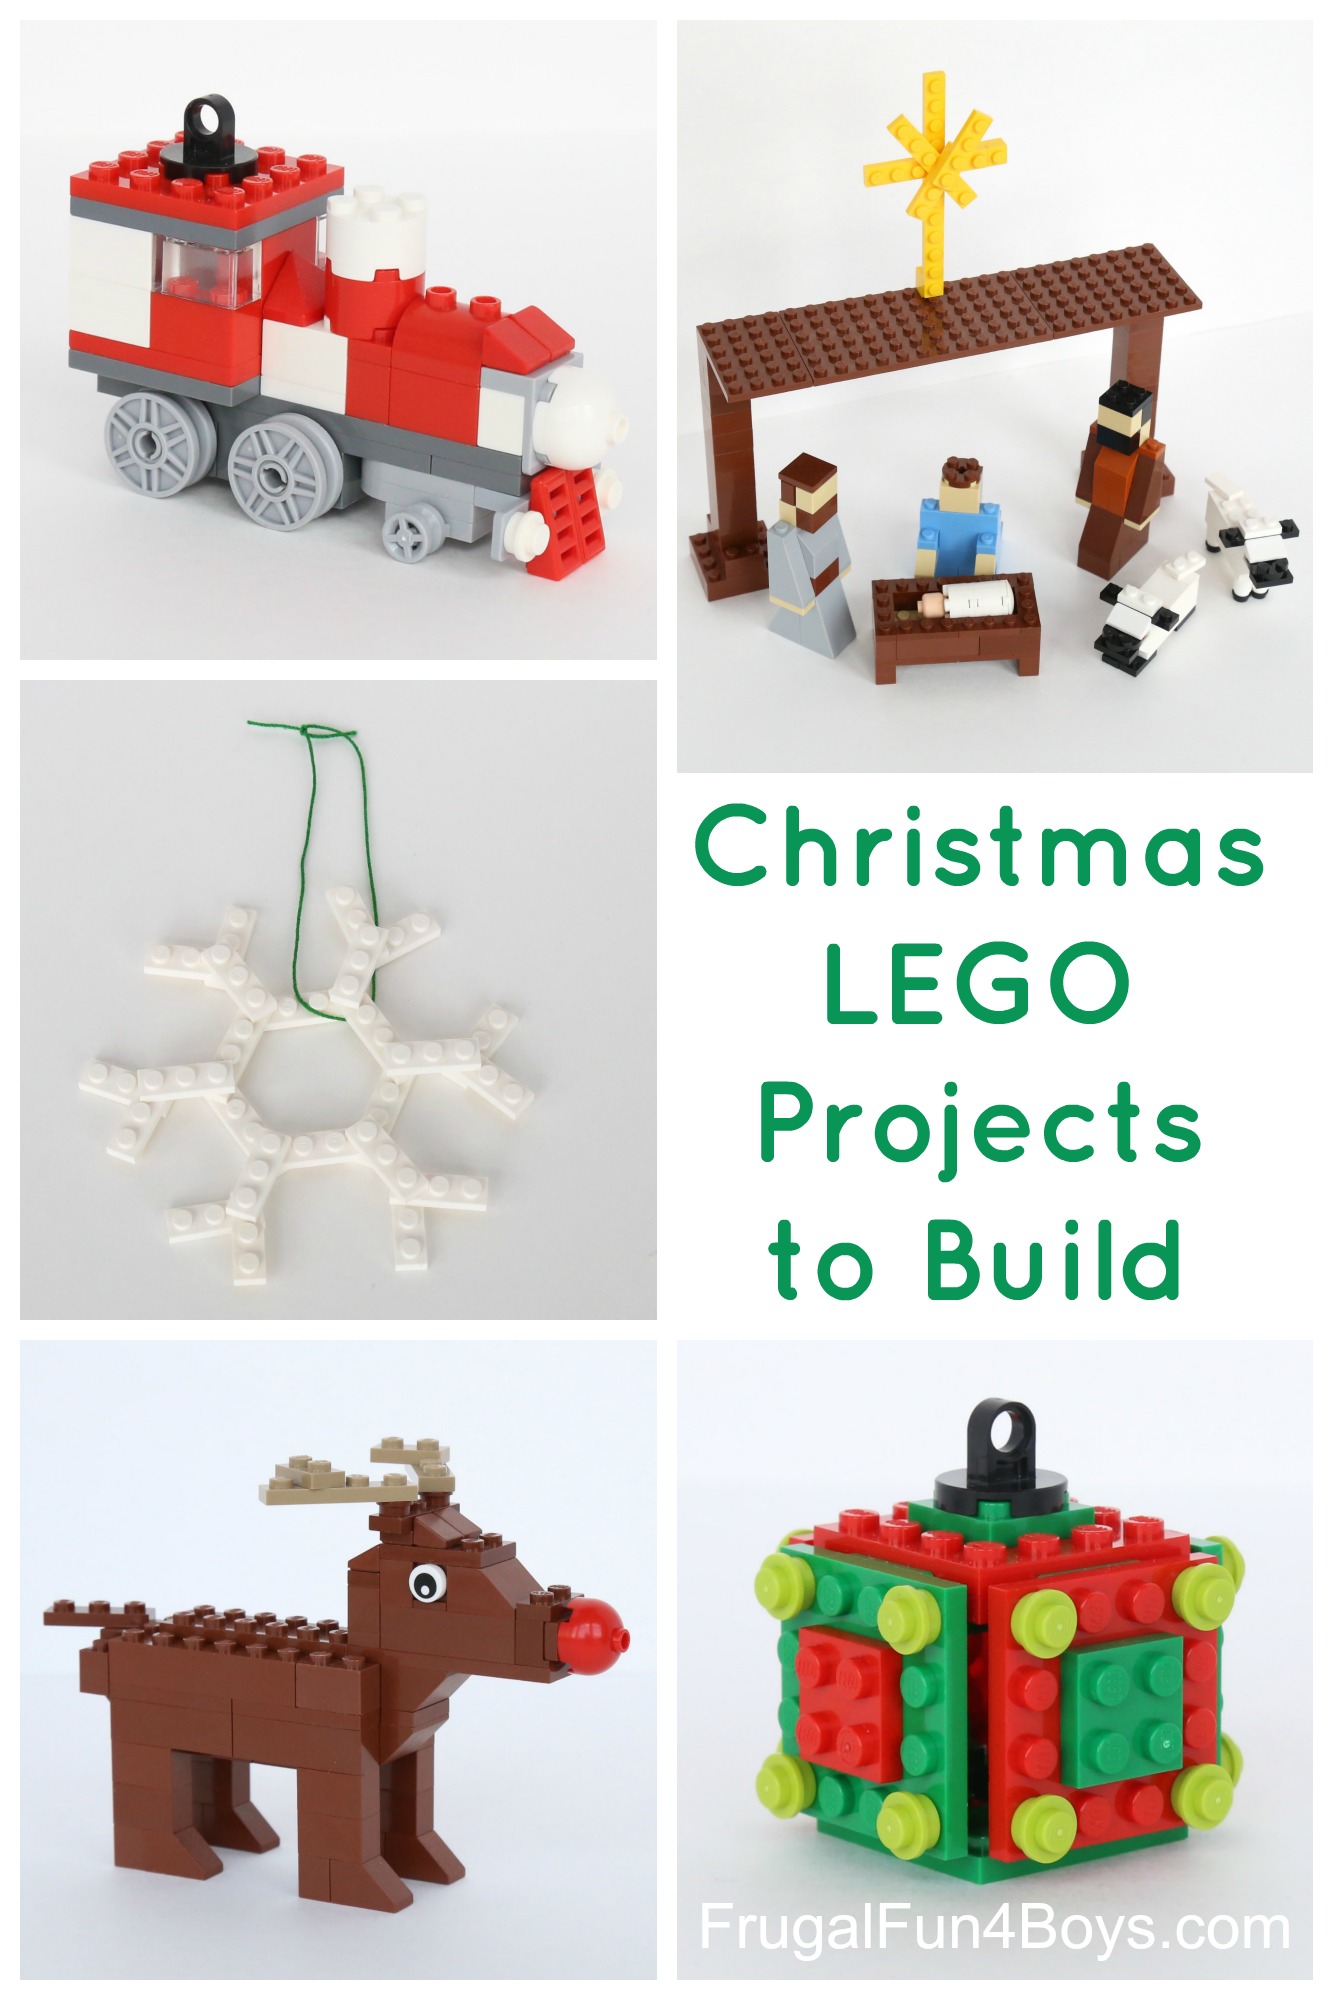
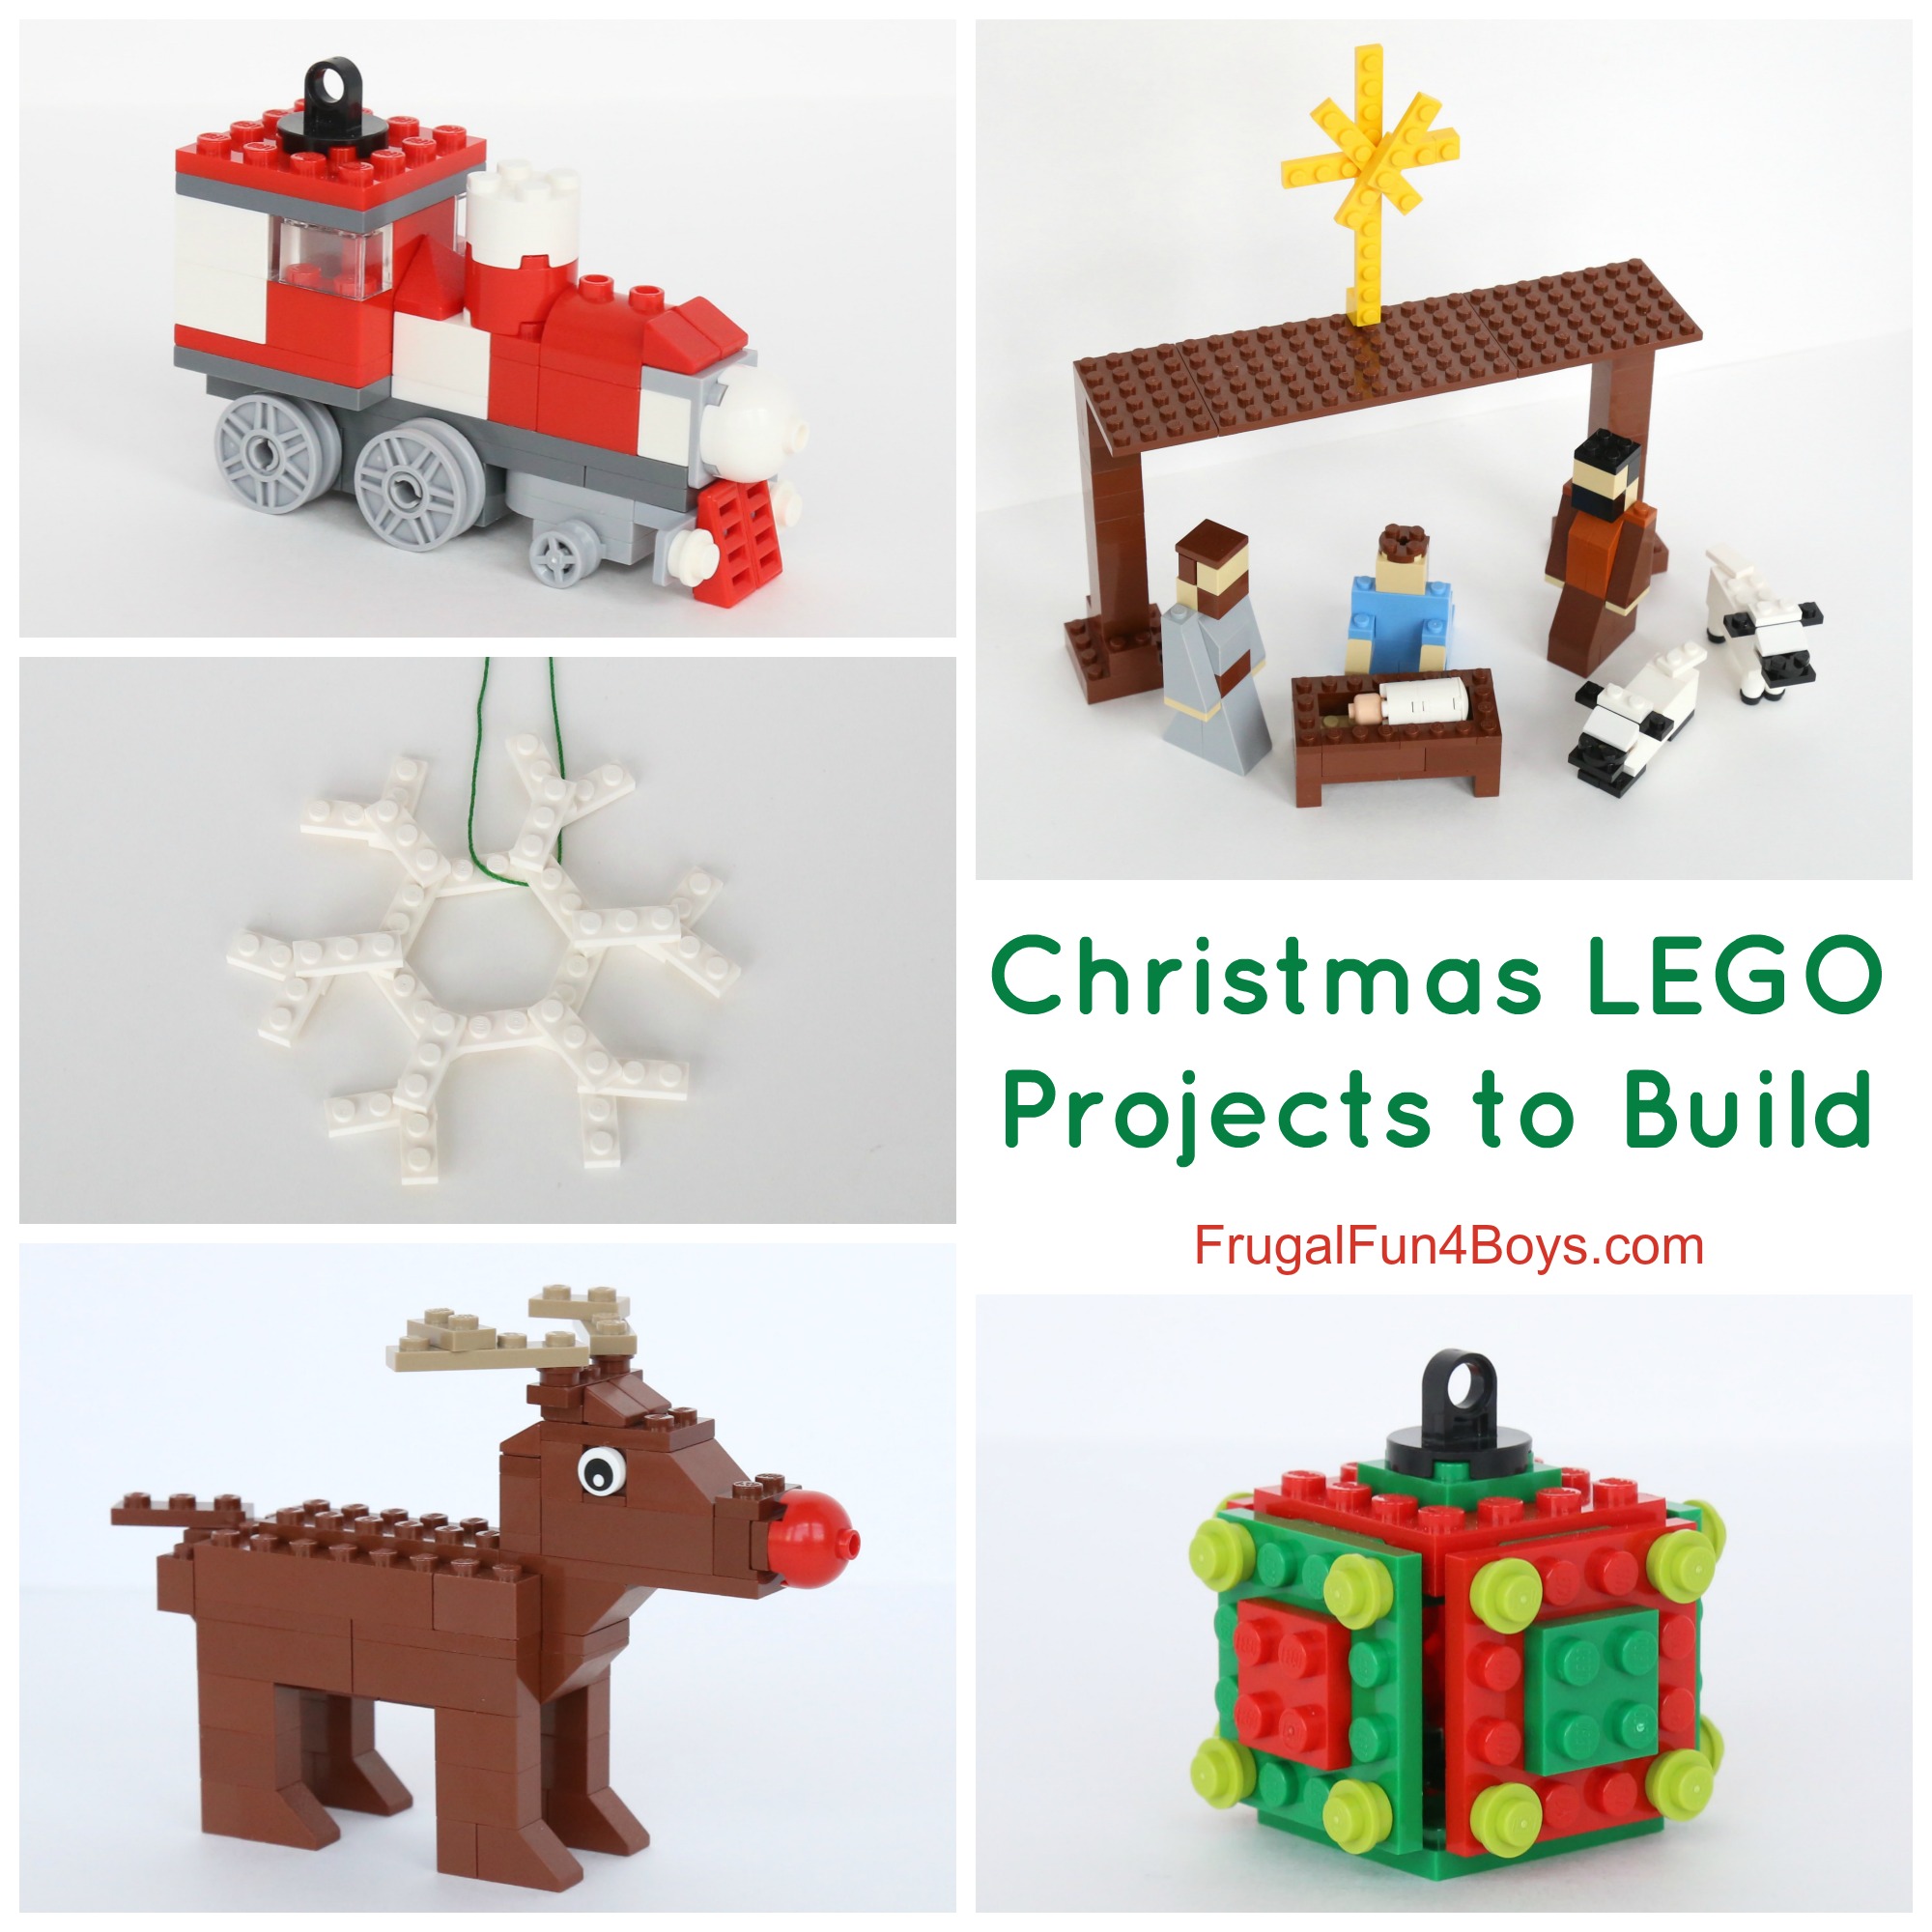
Five LEGO® Christmas Projects with Instructions!
Last year, we posted five Christmas projects to build, and we’re back with new ones for the Christmas season! Honestly, I’m not a big fan of Christmas stuff before Thanksgiving, and we don’t start celebrating until the day after Thanksgiving here. But, I decided to go ahead and post these because you may want to have time to order the pieces needed.
By the way, I have found Brick Link to be a great way to buy individual LEGO® bricks at a decent price. LEGO® has their own Pick-a-Brick section on their website, but the thing about that is that those orders ship from Denmark. It can take up to a month to get your order, as we have learned the hard way! Brick Link is sort of like eBay for LEGO®. There are hundreds of vendors selling new and used bricks. We usually pay 6 cents to 40 cents per brick, depending on what it is. Each vendor charges for shipping separately, so just keep that in mind when loading your cart… I look for sellers that have a high feedback number because they are more likely to have a large inventory of bricks and might have multiple bricks that we are looking for rather than making a bunch of tiny orders.
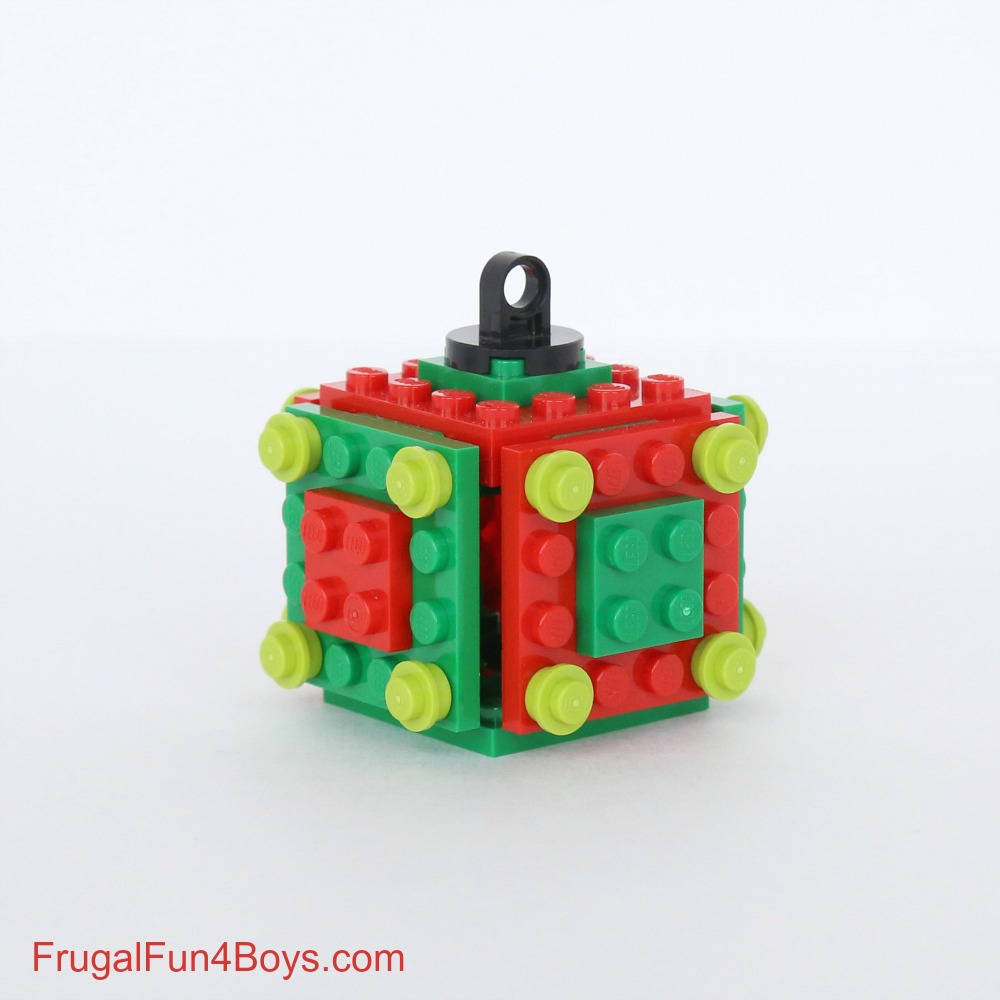
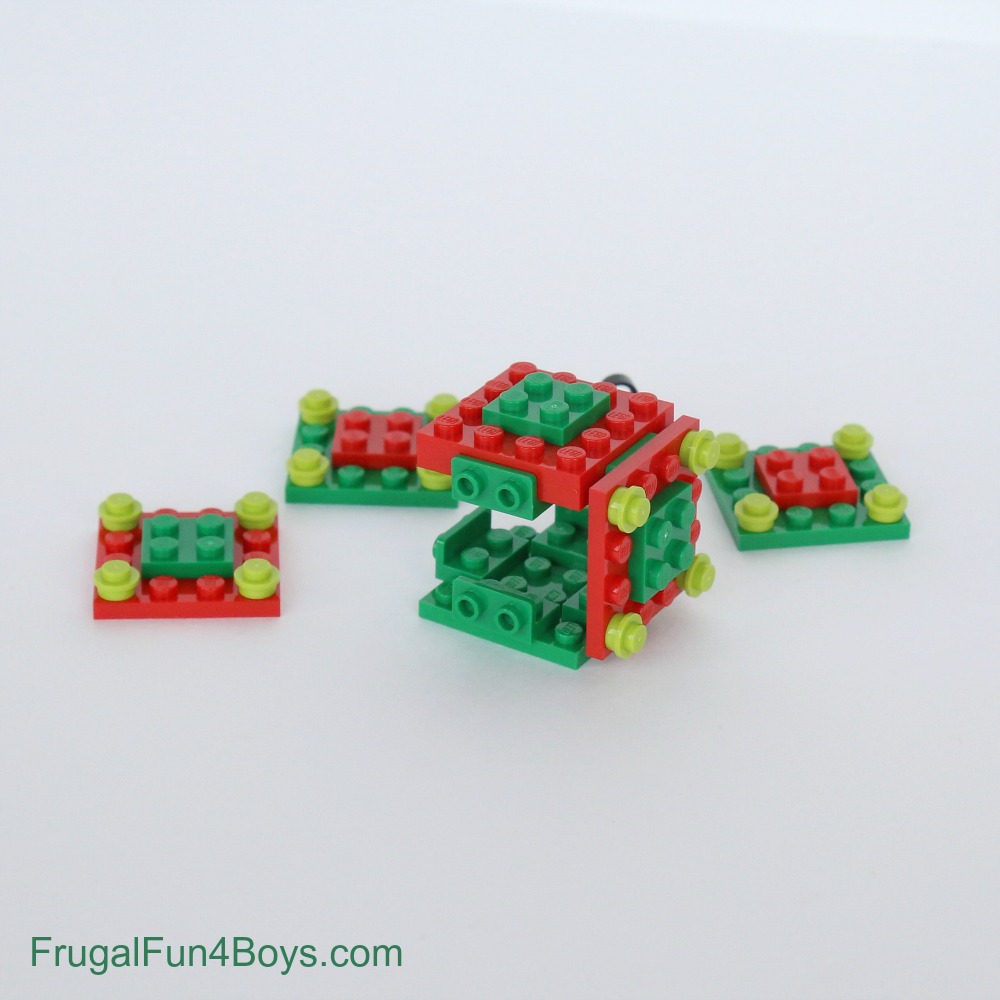
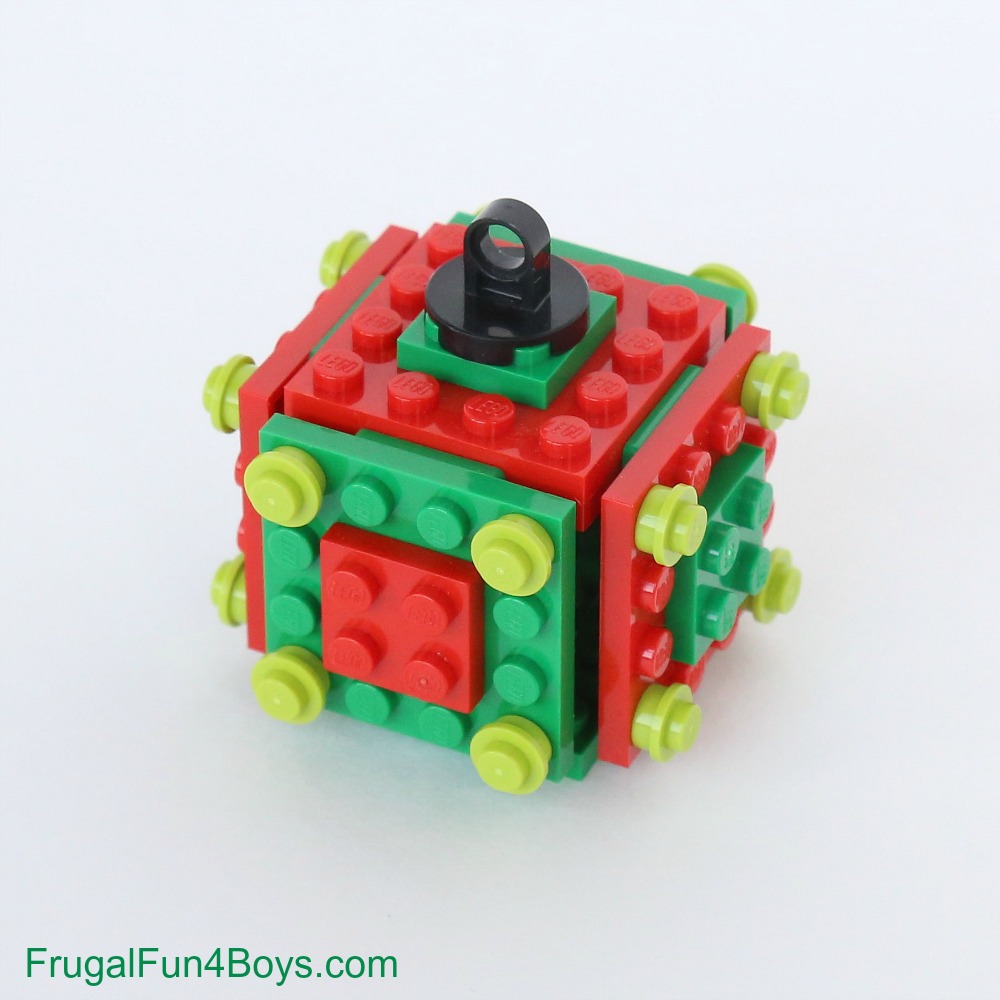
Project #1: Cube Ornament
Bricks needed:
4 – 4 x 4 red plates
4 – 4 x 4 green plates
3 – 2 x 2 green plates
2 – 2 x 2 red plates
16 – 1 x 1 round plates
8 – bracket 1 x 2 – 1 x 2 inverted
1 – 2 x 2 tile, round 2 x 2 with lifting ring
6 wheels – 4 large and two small
Step 1: Assemble the sides.
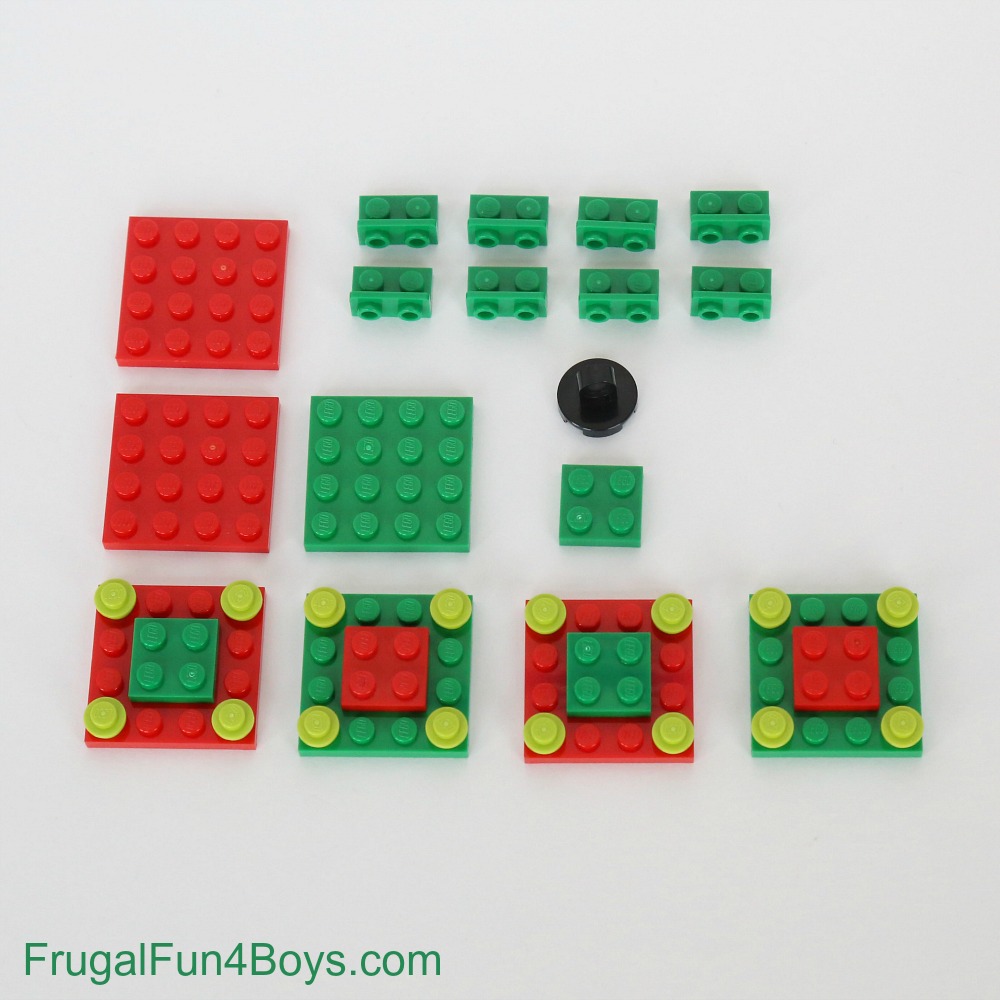
Step 2: Use a green plate for the bottom of the ornament. Add four brackets – one on each side. For the top of the ornament, stack two red plates together. Add four brackets under them as shown below.
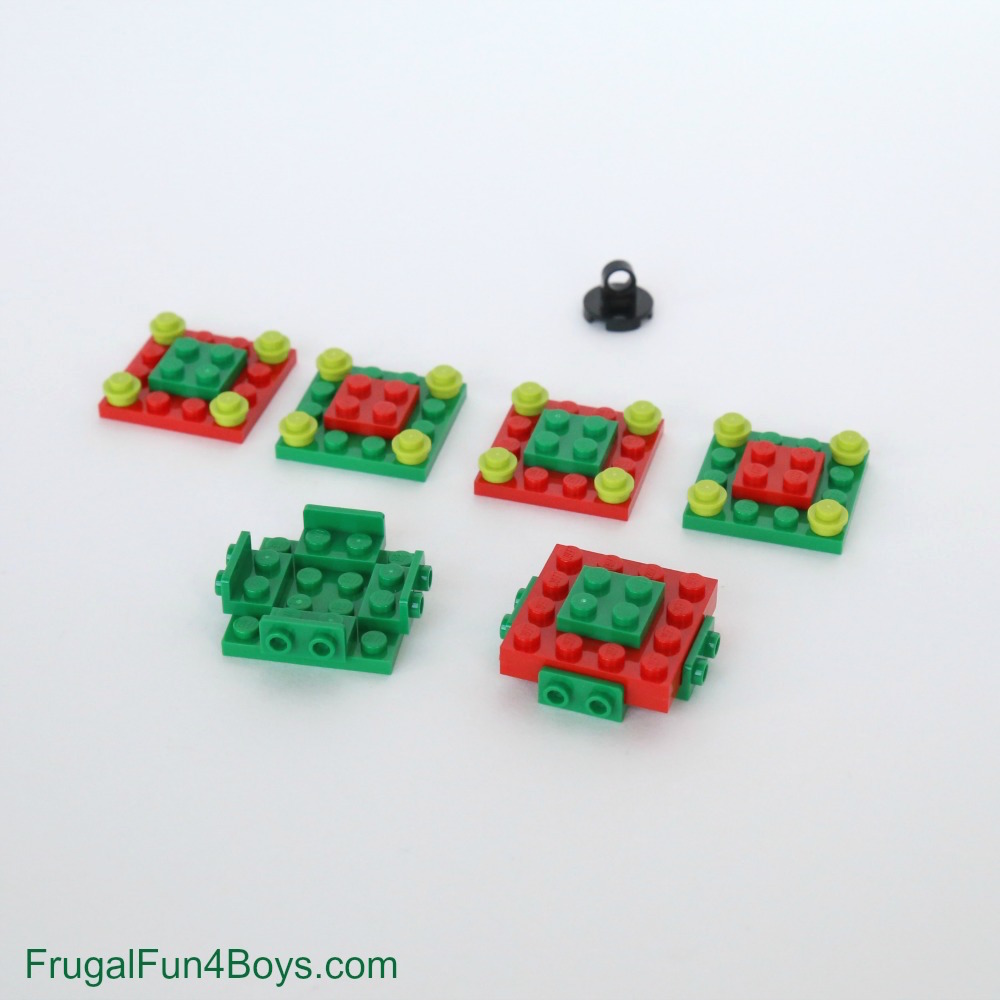
Step 3: Assemble!
Use ribbon or yard to hang your finished ornament!
Project #2: Nativity
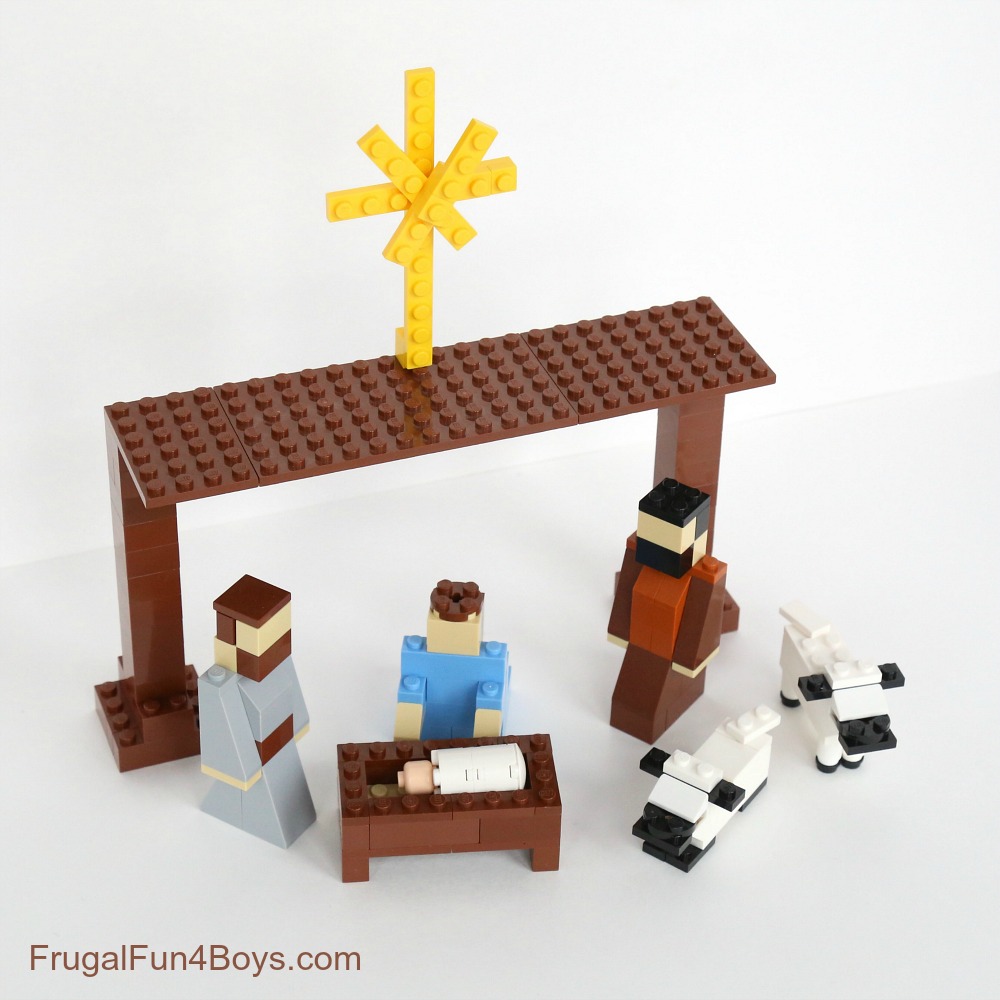
See more photos and instructions for the nativity set here: LEGO Nativity Set
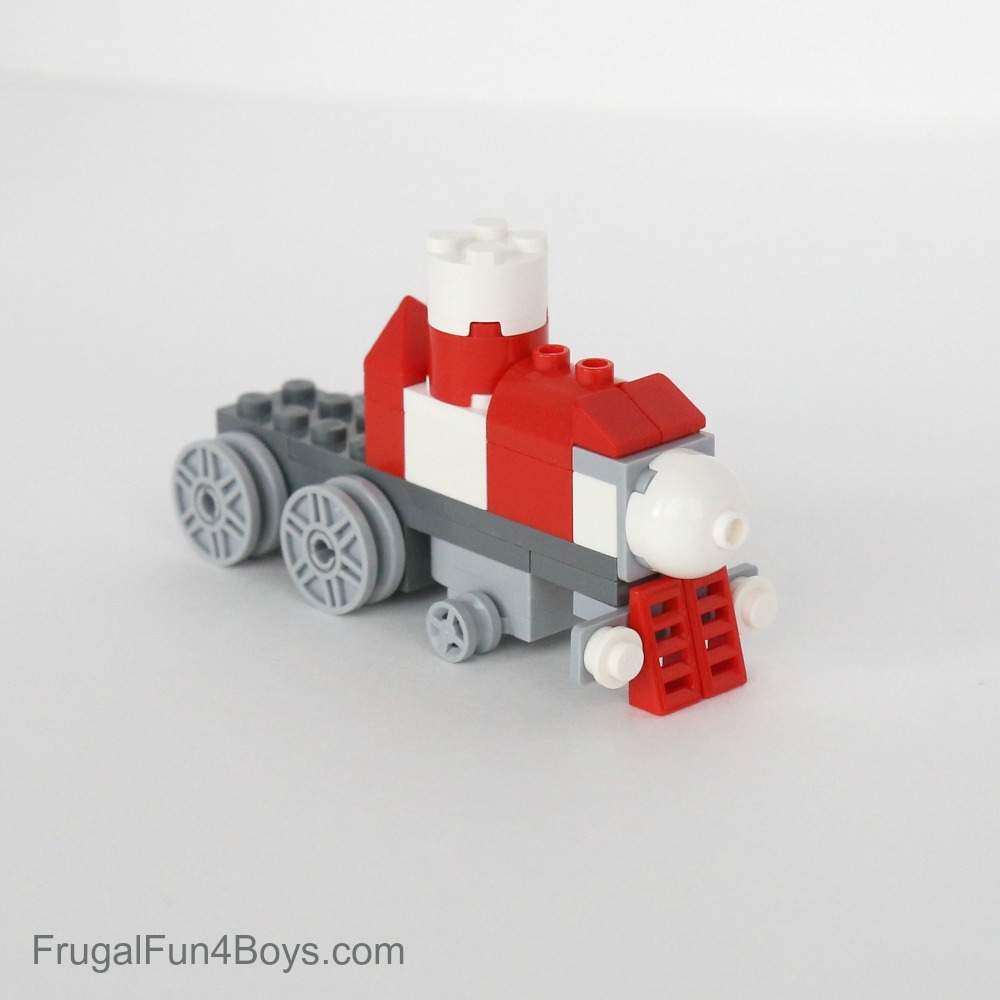
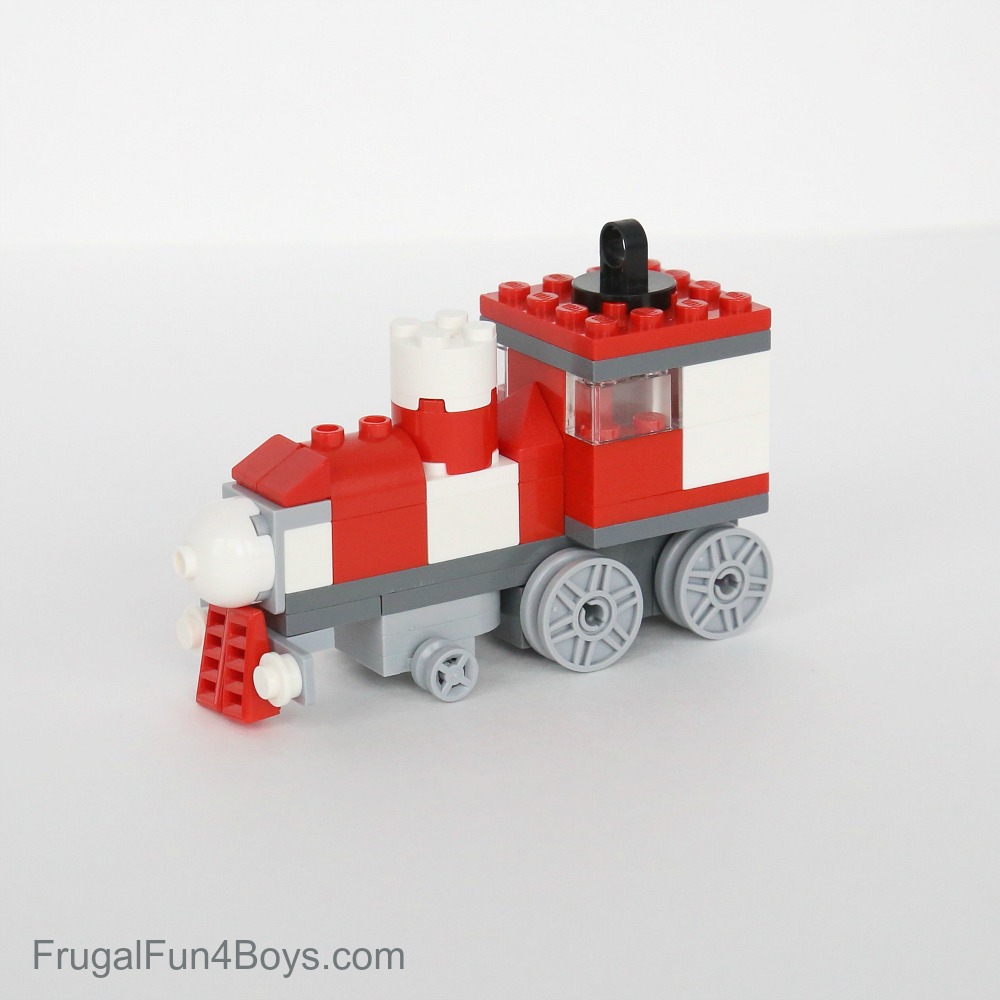
Project #3: Candy Cane Express Train (ornament)

Bricks Needed:
RED:
2 – 4 x 4 red plates
1 – 2 x 2 red brick
5 – 2 x 1 red bricks
1 – 2 x 2 red round brick
1 – 2 x 1 red plate
2 – red slope 2 x 1 x 2/3 with four slots
2 – 1 x 1 red slope 30 OR one 2 x 1 red slope 30
1 – 2 x 2 red brick, modified with curved top
1 – red slope 45 2 x 1 triple, with inside bar
DARK GRAY:
2 – 4 x 4 dark gray plates
2 – 2 x 10 dark gray plates
1 – 2 x 1 dark gray brick
4 – dark gray technic bricks
LIGHT GRAY:
1 – bracket light gray 2 x 2 – 2 x1
1 – bracket light gray 4 x 1 – 2 x 1
1 – 2 x 2 light gray plate with axles
4 – gray pins (axles)
2 – light gray plate, 2 x 3 with round end and hole
WHITE:
1 – 2 x 1 white brick
1 – 2 x 2 white round brick
5 – 2 x 2 white bricks
1 – 2 x 2 white plate
2 – 1 x 1 white round plate
1 – 2 x 2 white round brick, dome top
2 – 2 x 1 clear bricks
BLACK:
1 – black tile, 2 x 2 round with lifting ring thick
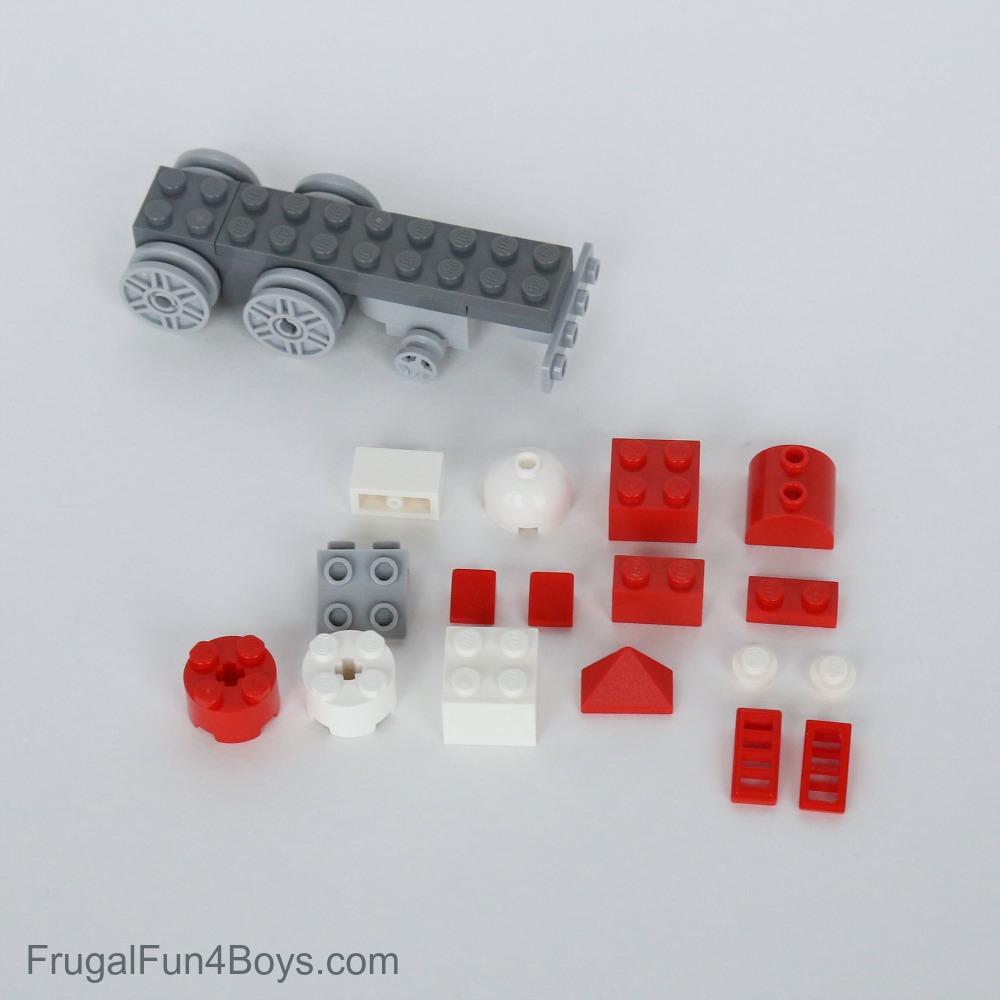
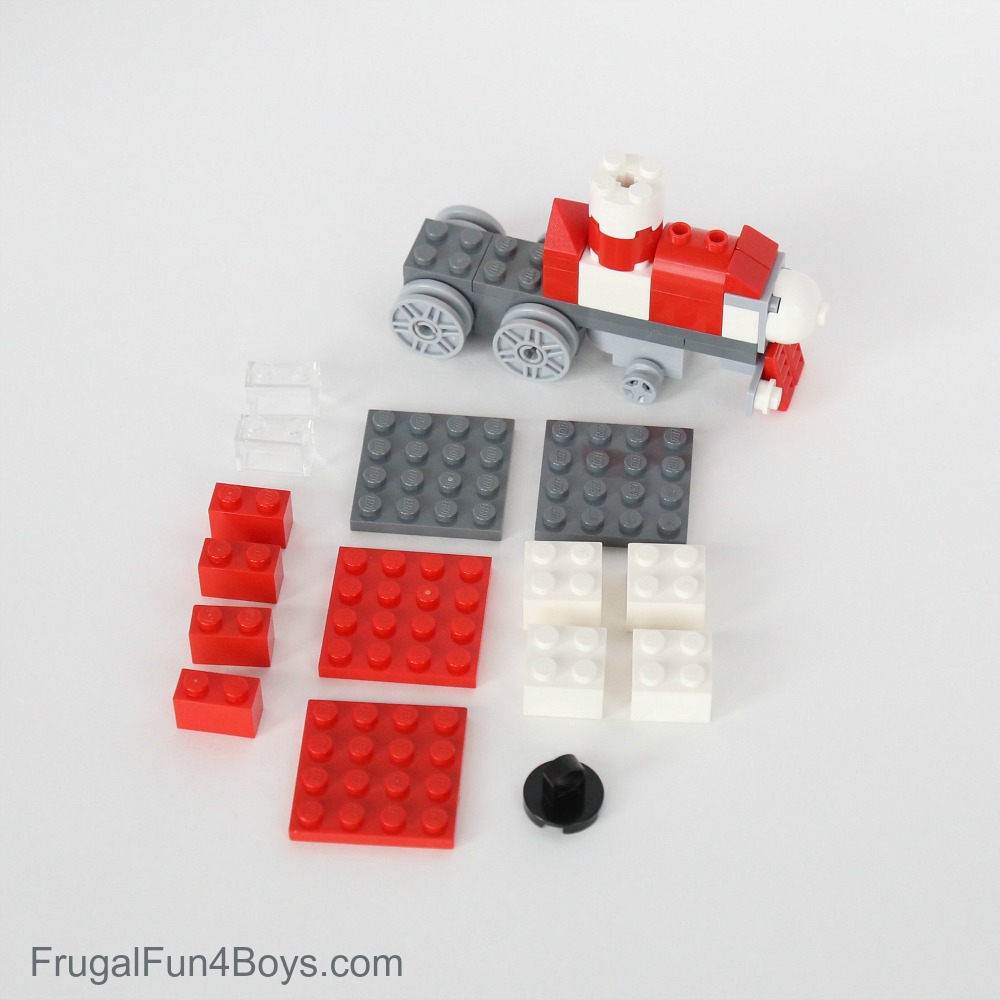
Step 1: Find these pieces for the base of the train. The wheels are attached to an axle and a 2 x 1 technic brick (with one hole). To begin the base, stack two 2 x 10 dark gray plates. Or, use two 2 x 8’s and two 2 x 2’s like we did. 🙂
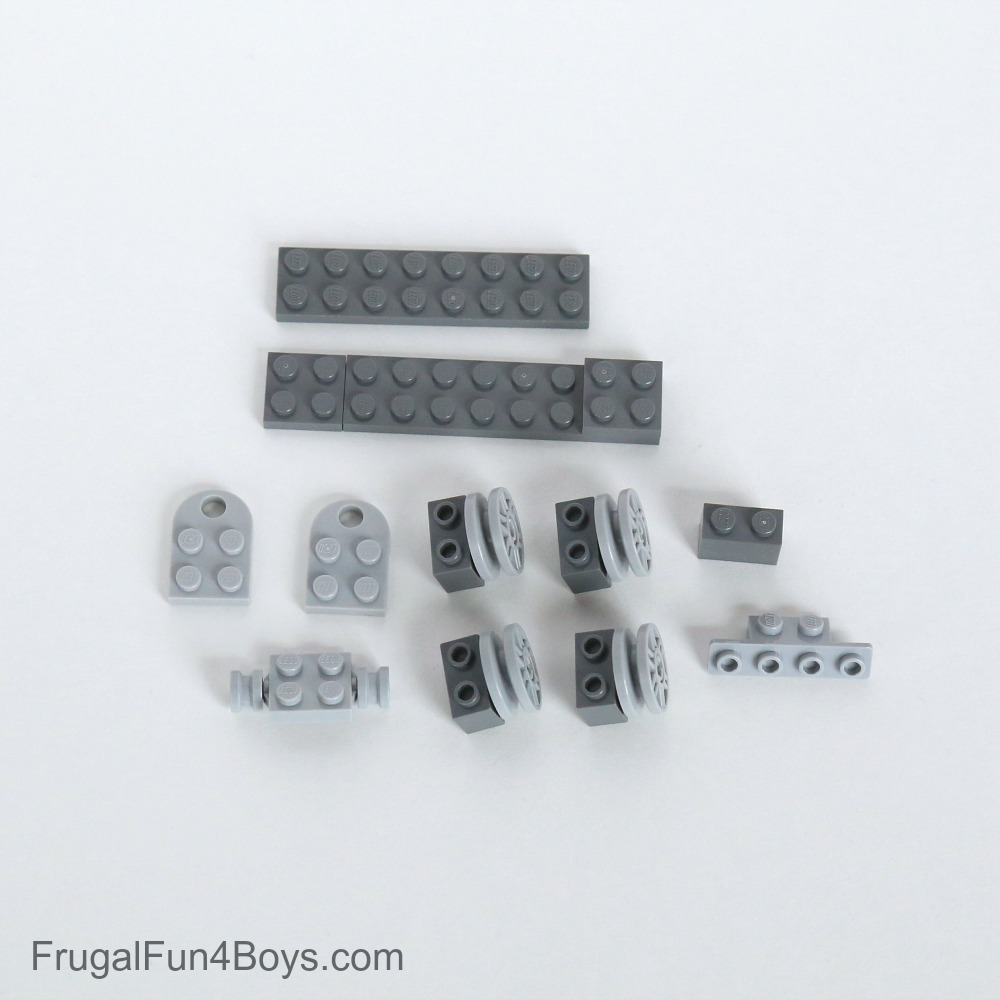
Step 2: From back to front, the base has a wheel, a 2 x 1 dark gray brick, another wheel, two 2 x 3’s (flat with curved ends) stacked with the small wheels underneath, and then the bracket in the front.
Then the photo shows the pieces used in the next steps.
Step 3: Build the front of the train.
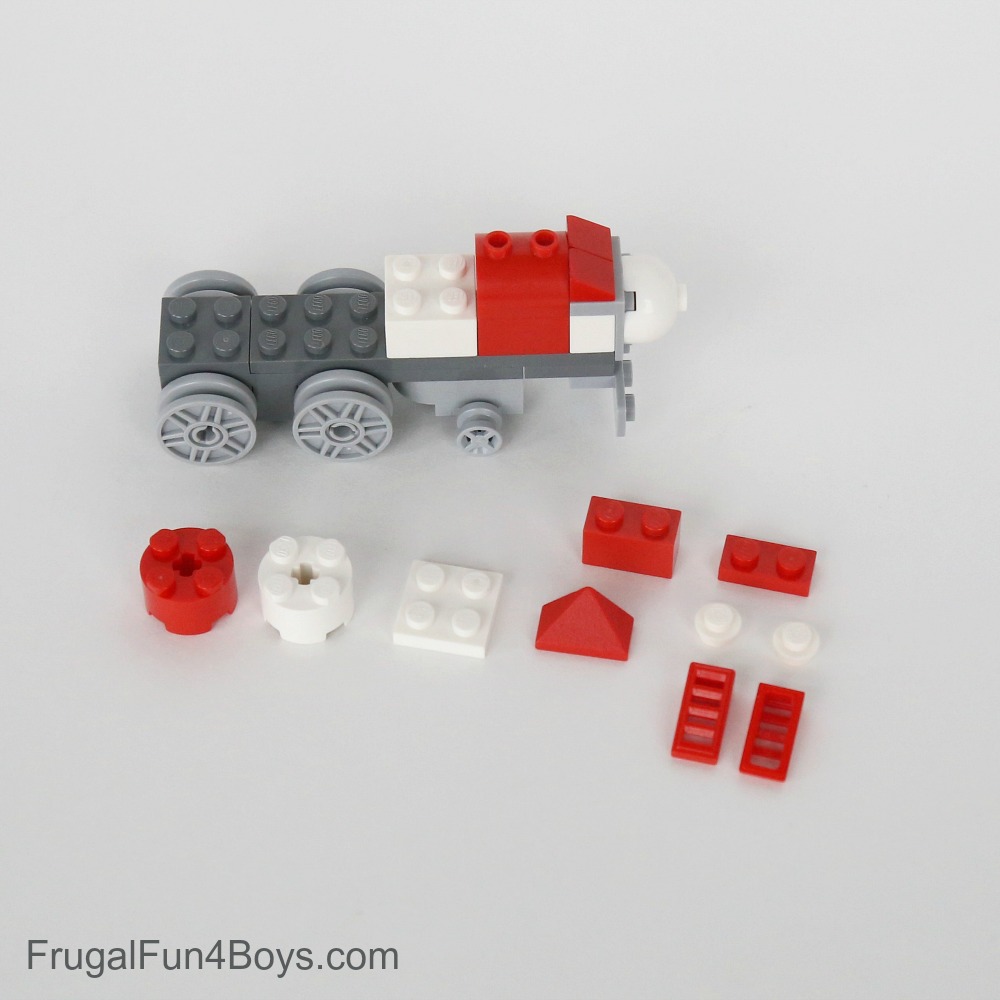
Step 4:
Step 5:
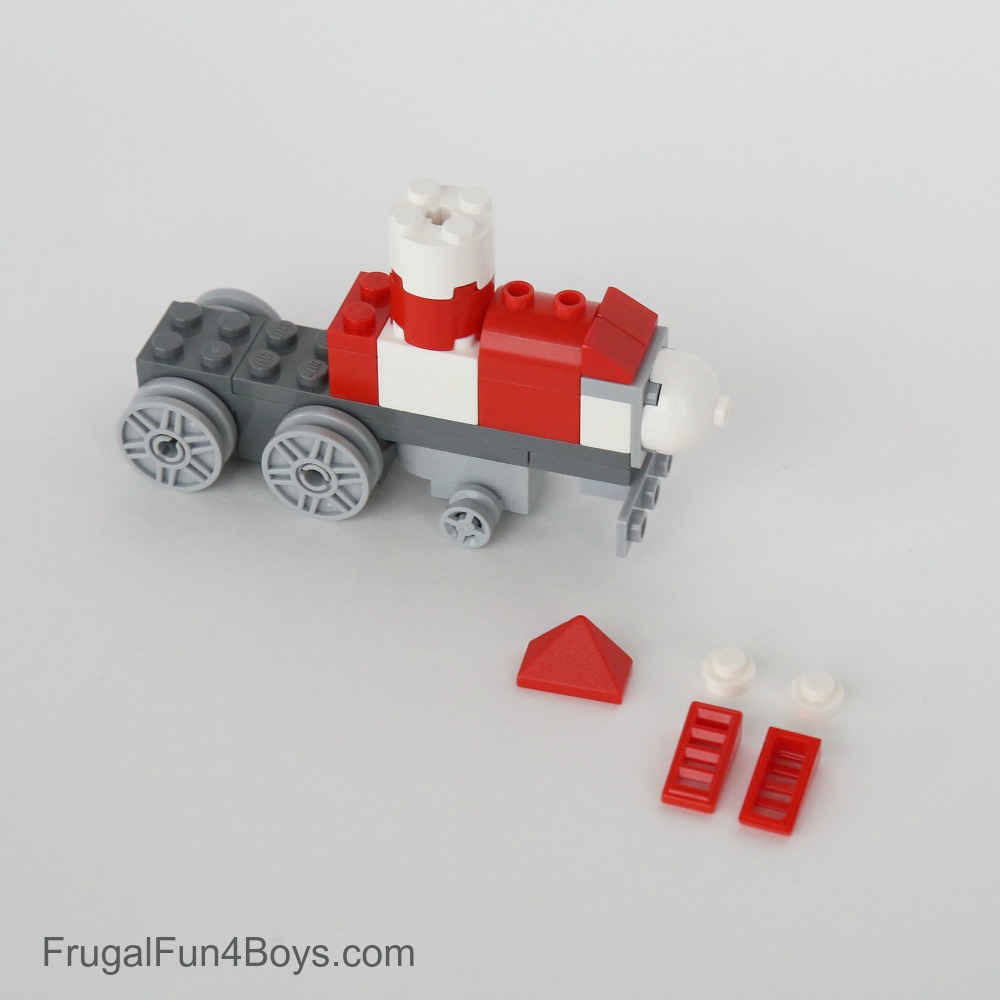
Step 6: Build the cab of the train. I used 2 x 1 clear bricks for the windows, but real windows would also look good.
Step 7: The bottom of the cab is a 4 x 4 dark gray plate with a 4 x 4 red plate right on top of it.
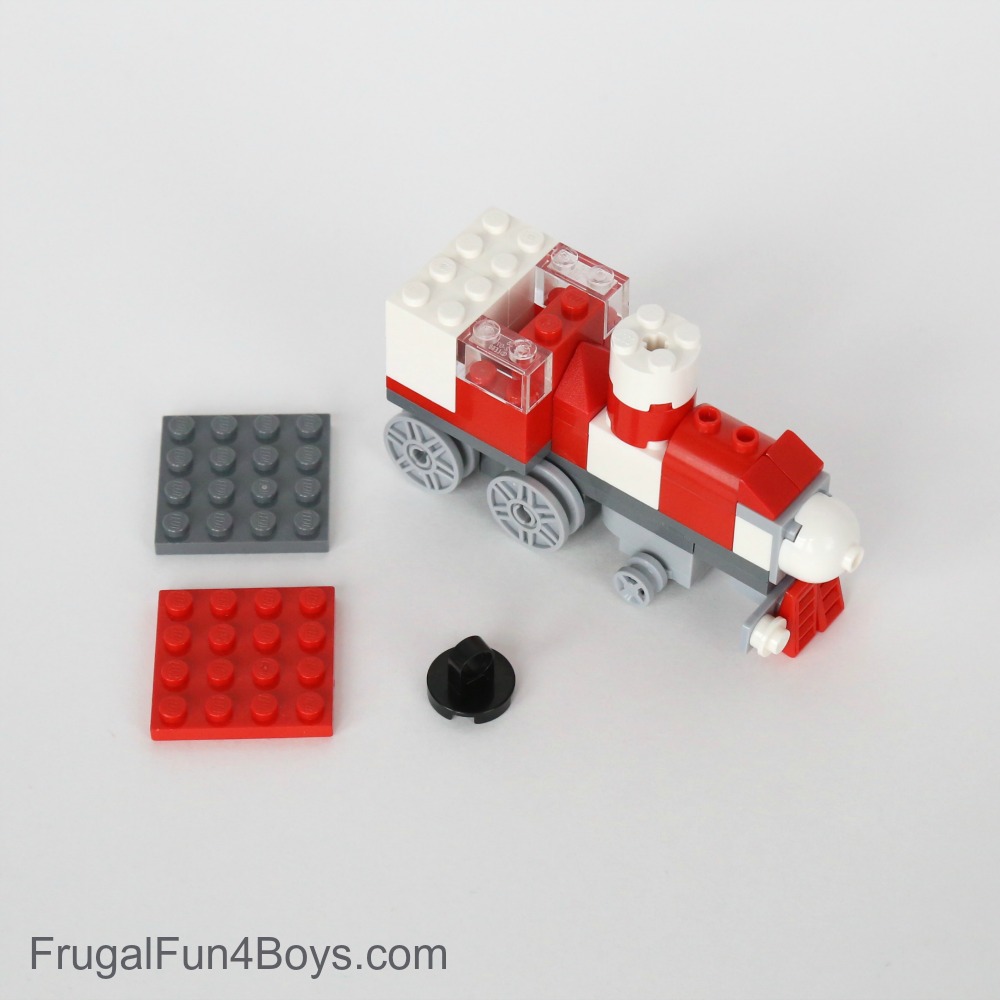
Step 8: The brick that makes this able to hang as an ornament is called (on BrickLink) a tile, round 2 x 2 with lifting ring thick.
Project #4: Rudolph
This Rudolph is my favorite! I didn’t have time to do instructions for this one, but all of the pieces that I used in the head are visible, so it shouldn’t be too hard to figure out.
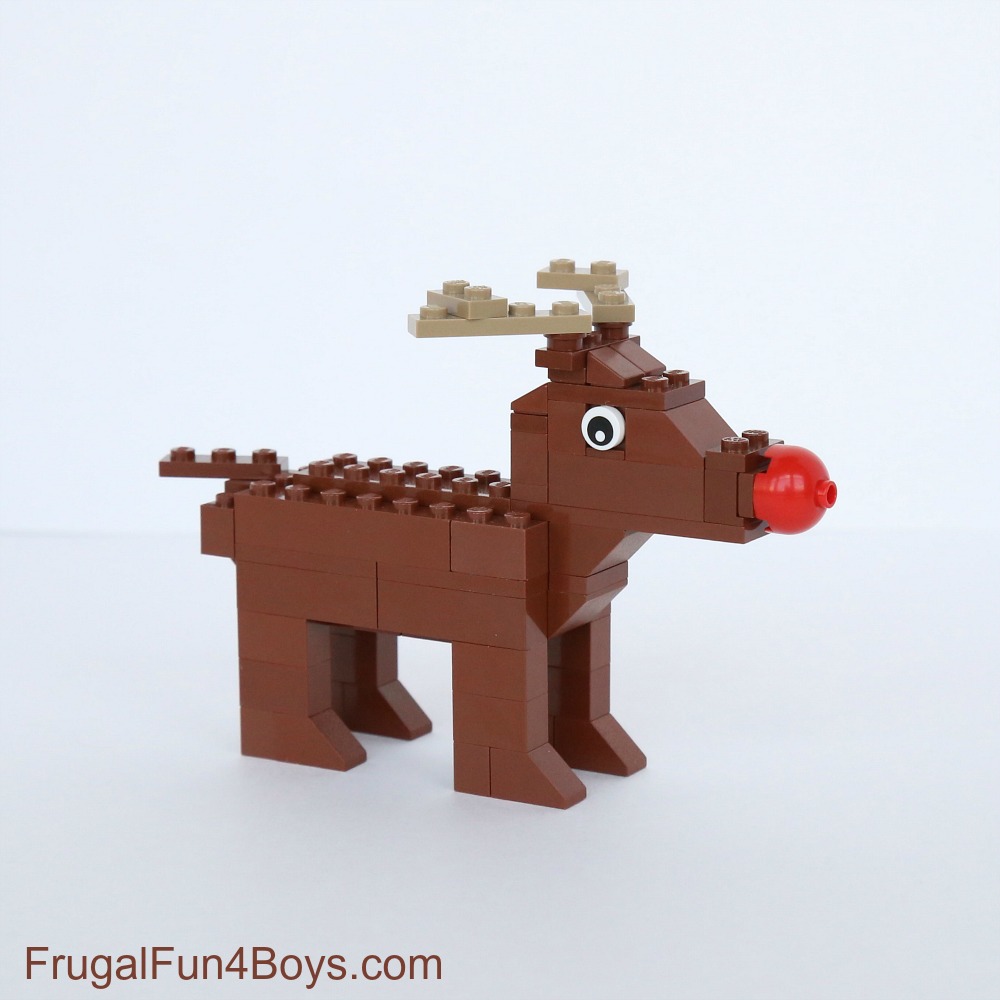
The nose is built with two 1 x 1 bricks with a stud on the front, then a 2 x 1 tile with one stud attached to those, then the red nose attached to that.
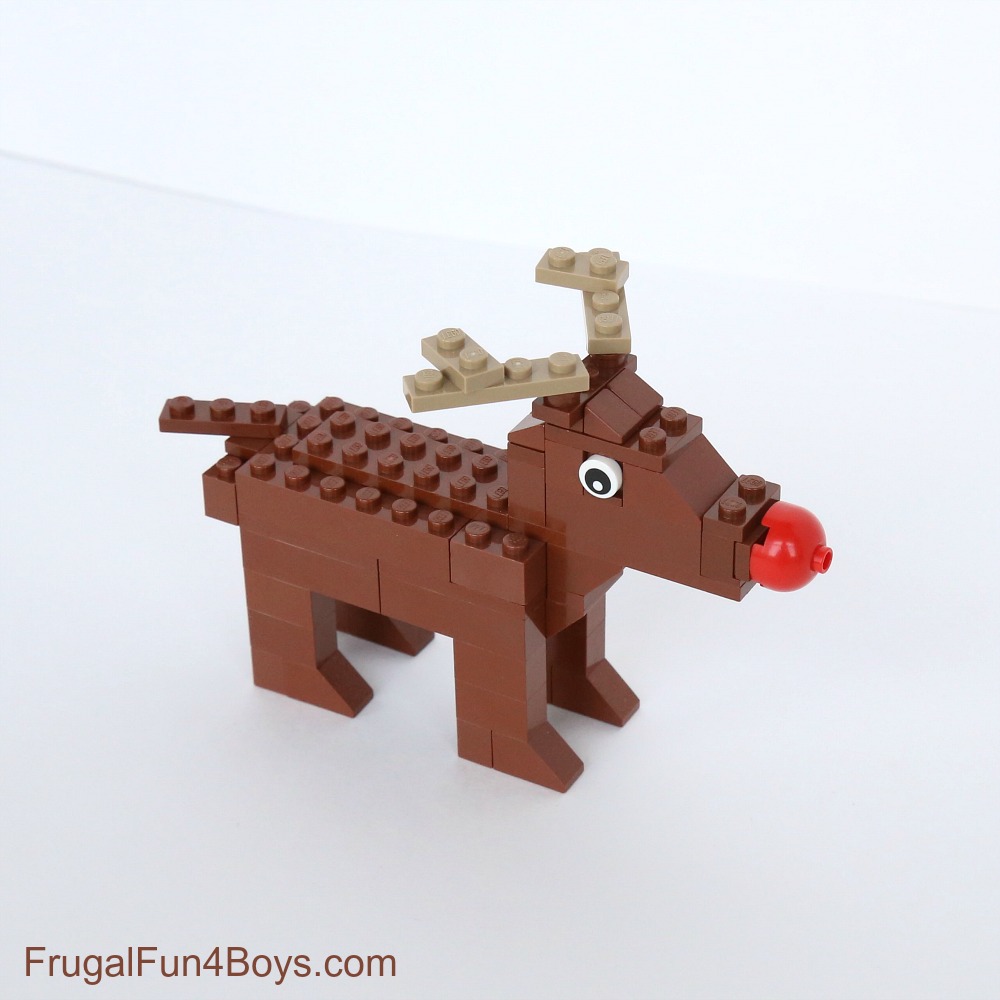
Here’s a side view:

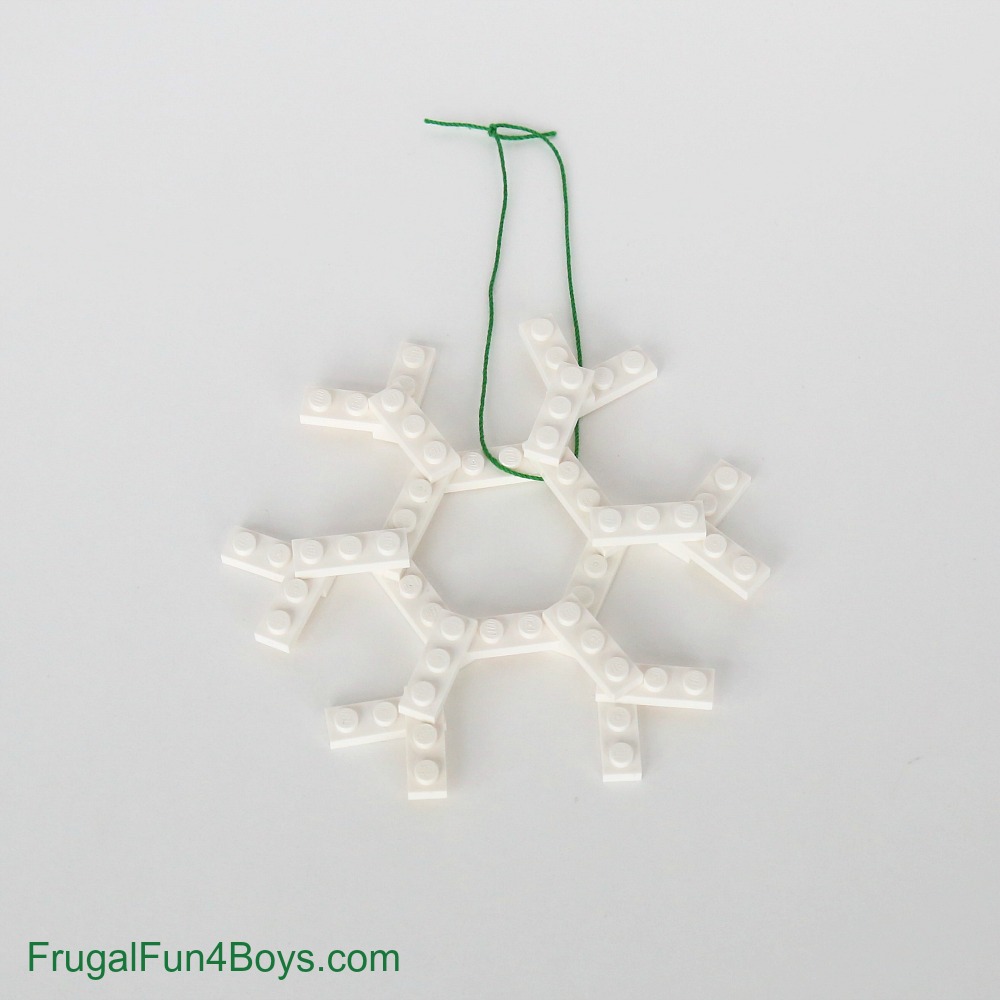
Project #5: Snowflake Ornament
Bricks Needed:
6 – 4 x 1 white plates
18 – 3 x 1 white plates
String or ribbon for hanging
Be sure and check out our first LEGO® Christmas post – Five LEGO Christmas Projects to Build!
Have fun building!
LEGO® is a trademark of the LEGO® group of companies which does not sponsor. authorize, or endorse this site.
2 Comments
Nana Jul 2, 2016
Wow what wonderful ideas, AND what wonderful generosity ! ! ! ! Thank you so much. I have grandsons and nephews with autism they will love these.
Ann Dec 22, 2020
Wish I had seen this when my son was little, or my daughter! Might be fun to pull pieces for stocking activity anyway, especially during a simpler COVID Christmas!
Post a Comment