
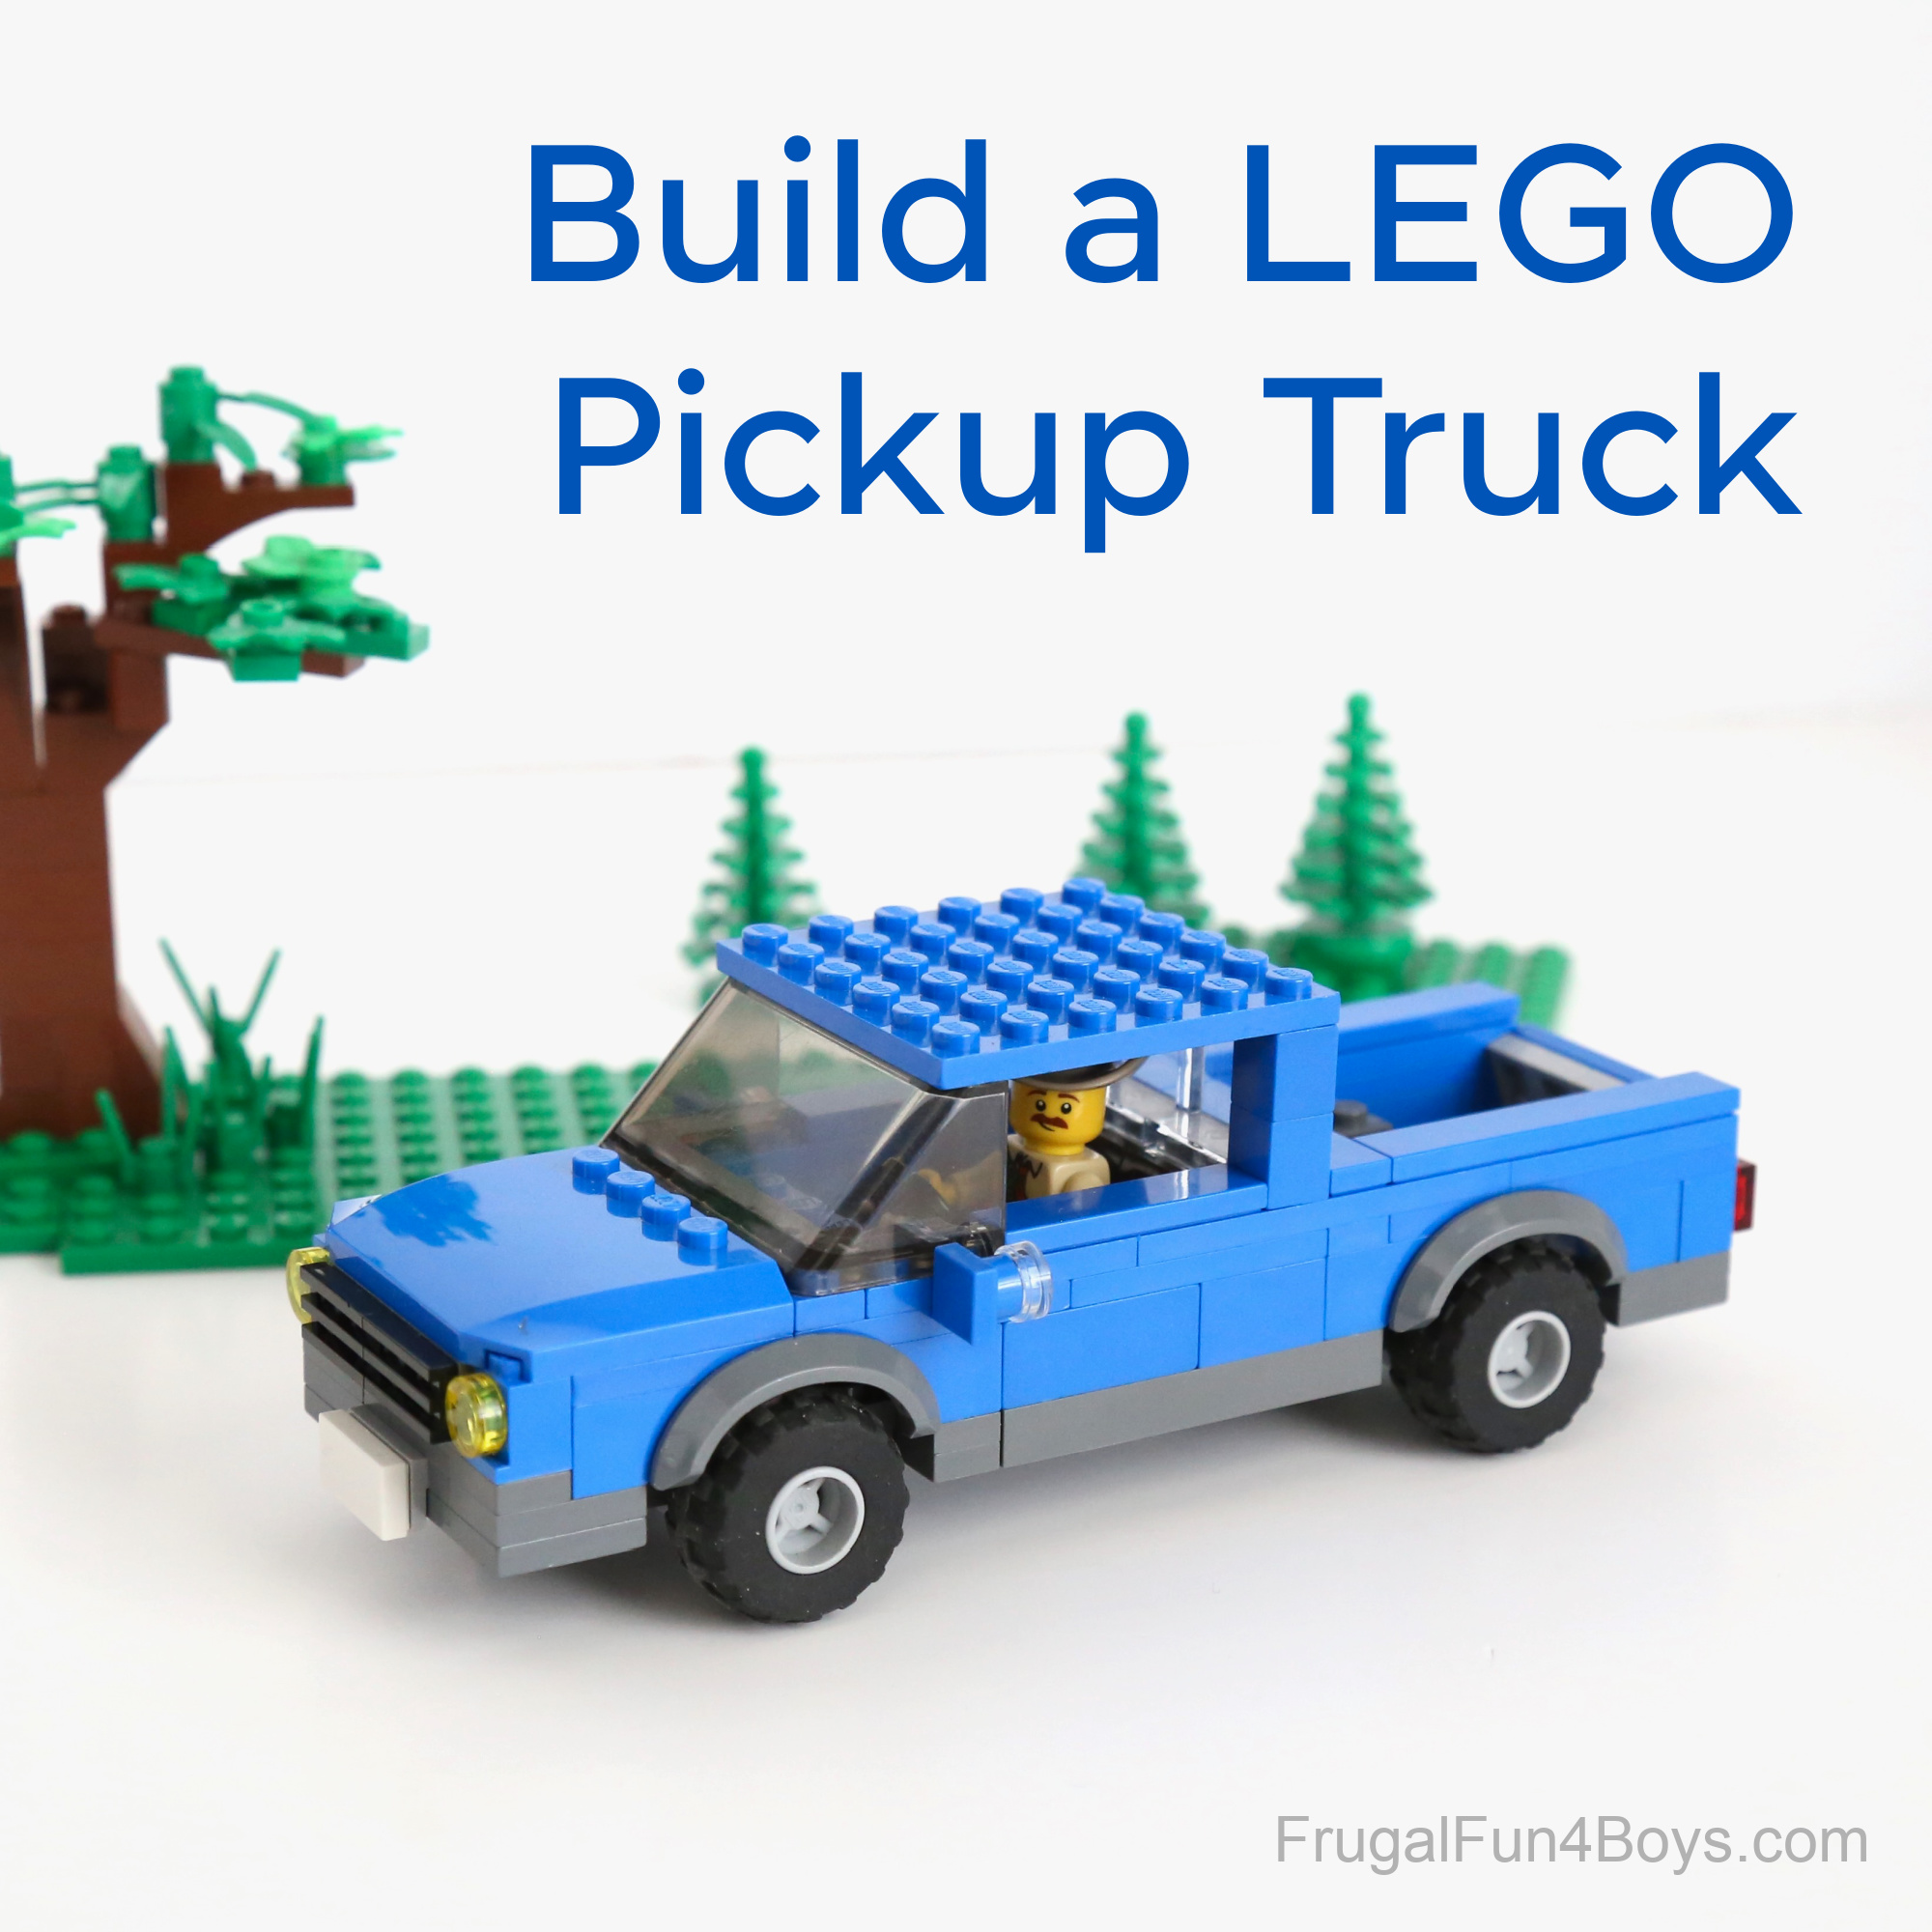
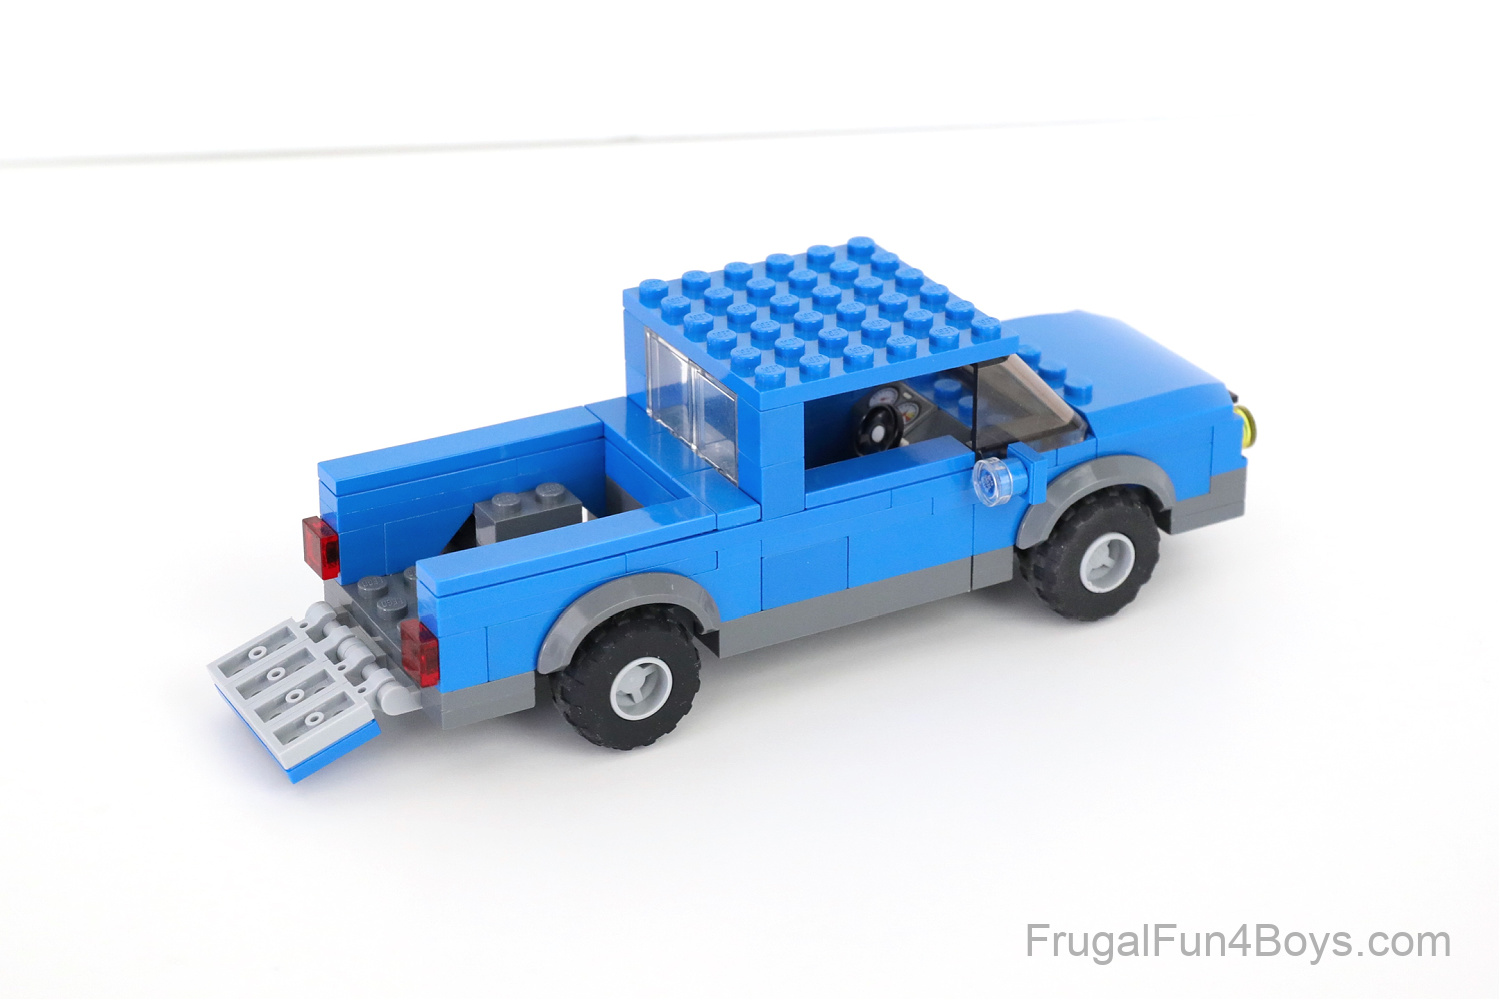
Let’s learn how to build a LEGO pickup truck with the bricks you have!
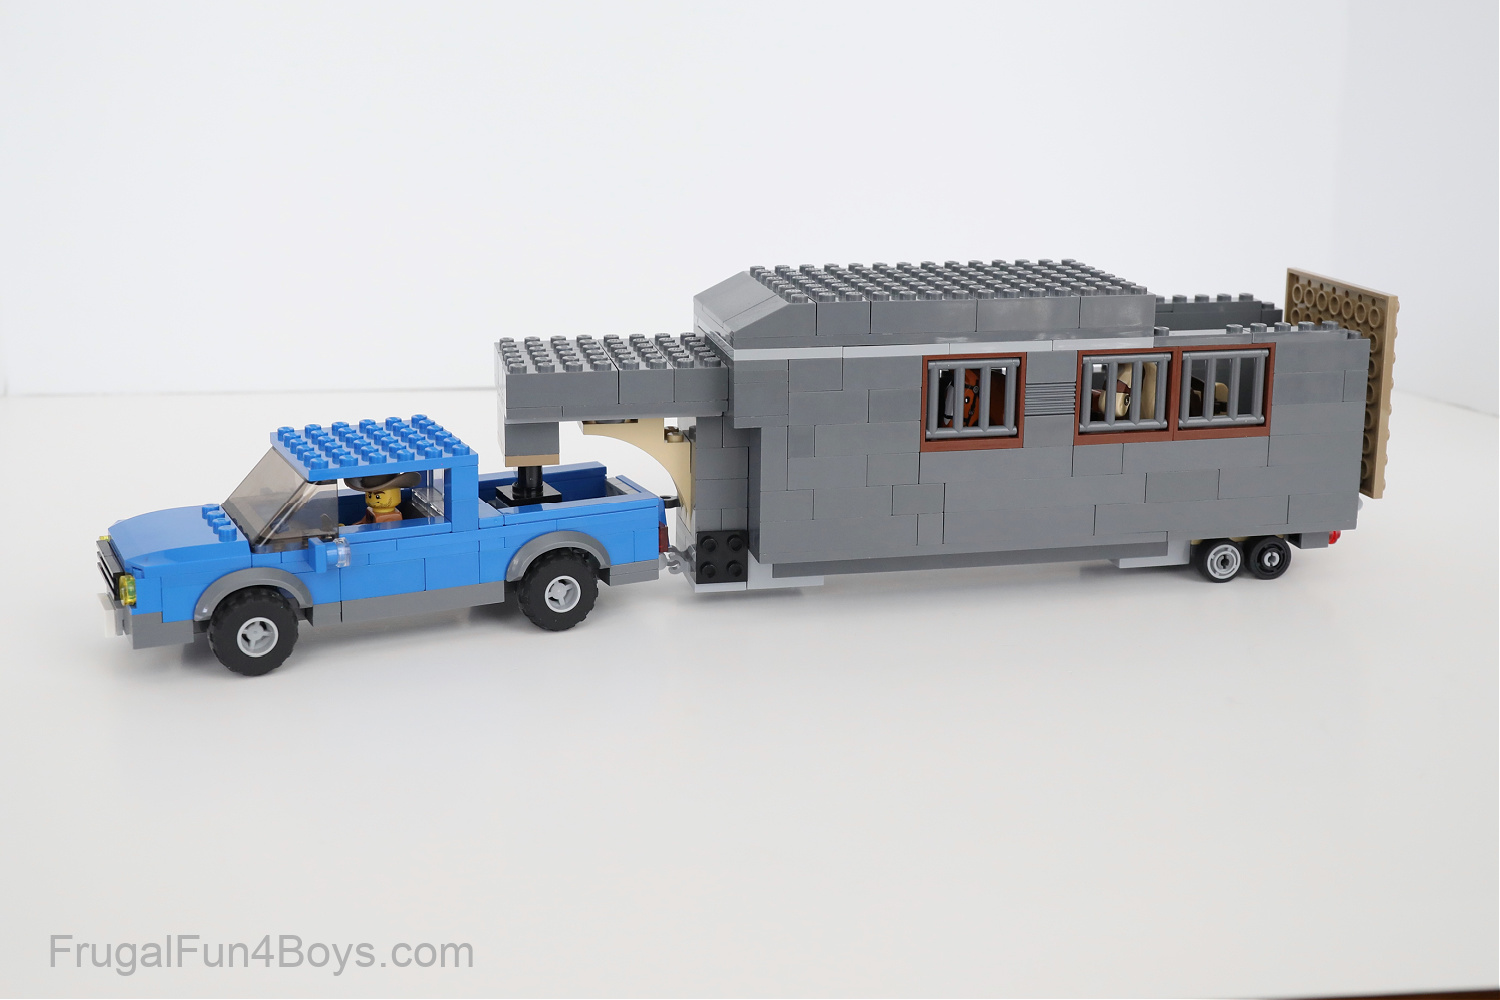
We have been wanting to create a good classic pickup truck for a long time. Owen, our 14 year old, loves to design LEGO vehicles, and he’s quite good at it. This little pickup truck took some work to get the proportions right, but I love the final result!
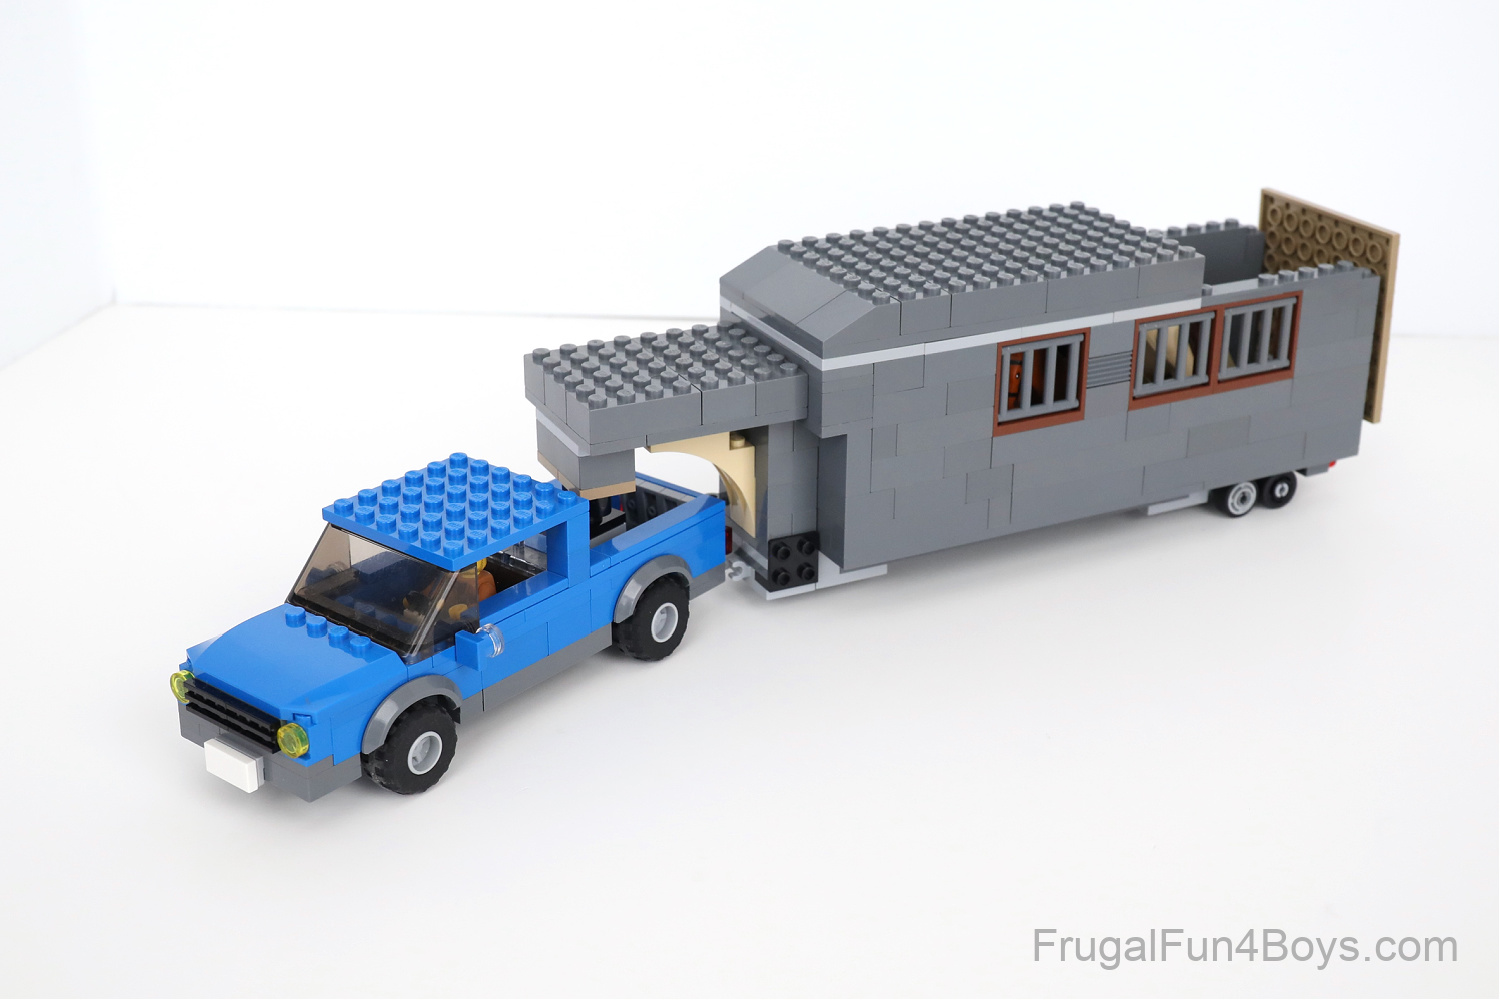
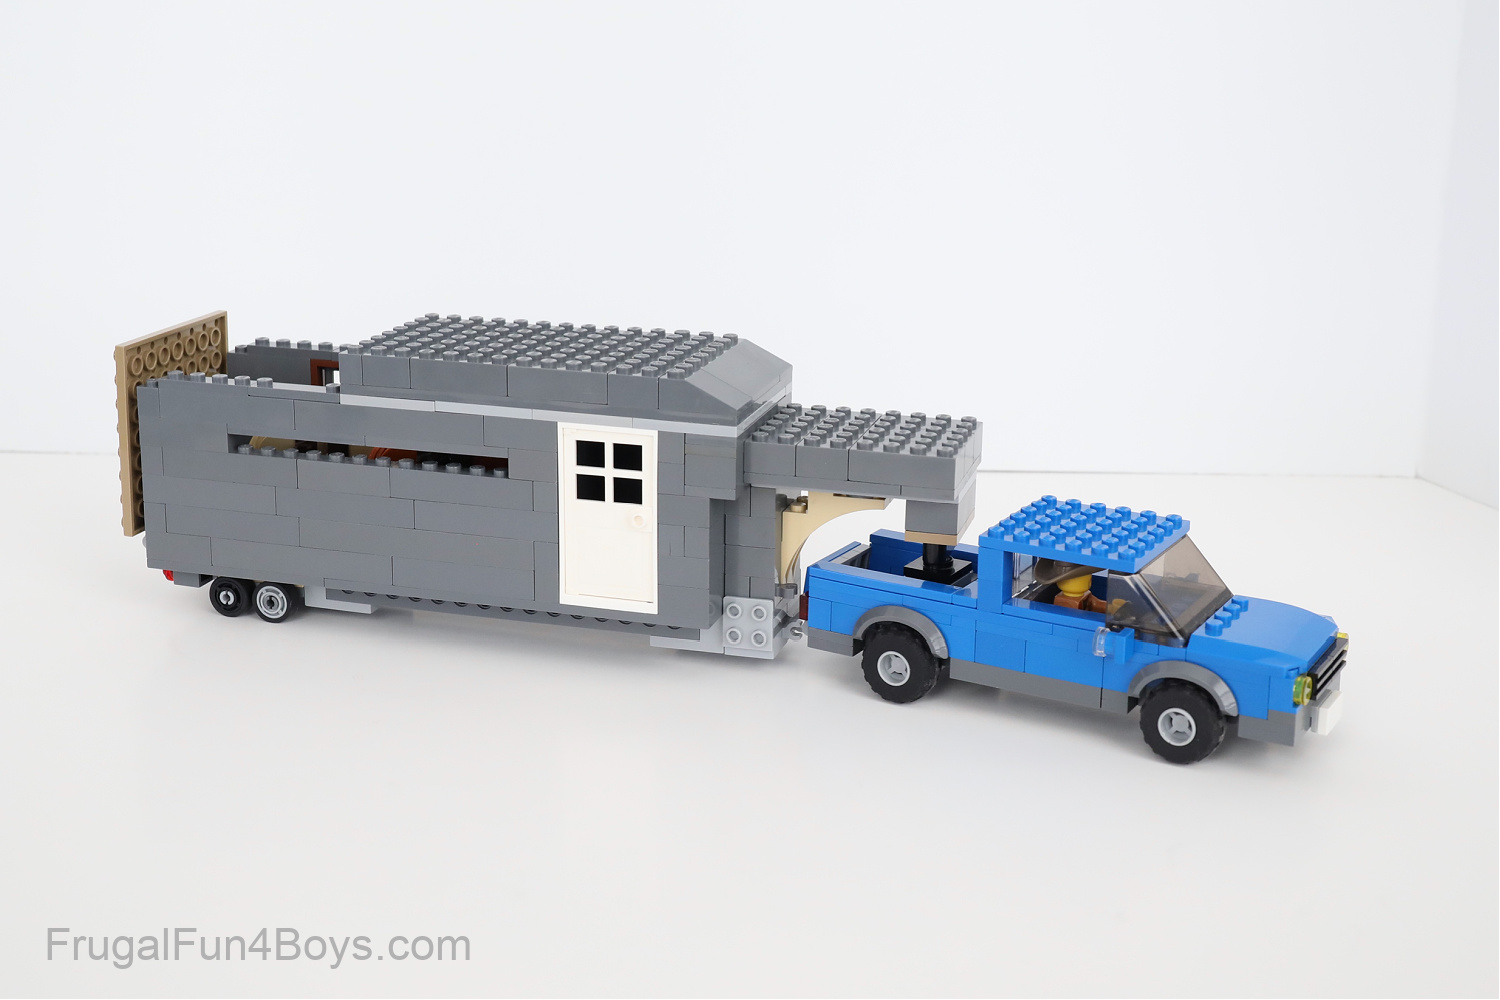
The other day, Jonathan (age 12) built a horse trailer to go with the pickup truck, and it’s amazing. Jonathan owns a horse (well, technically I do, but he’s the rider) and a trailer. Ours is a bumper pull trailer, but he wanted to build a gooseneck. He borrowed some pieces from his police trailer to make it happen, and it turned out great. He says it’s a two-horse slant load. Horse people will know…
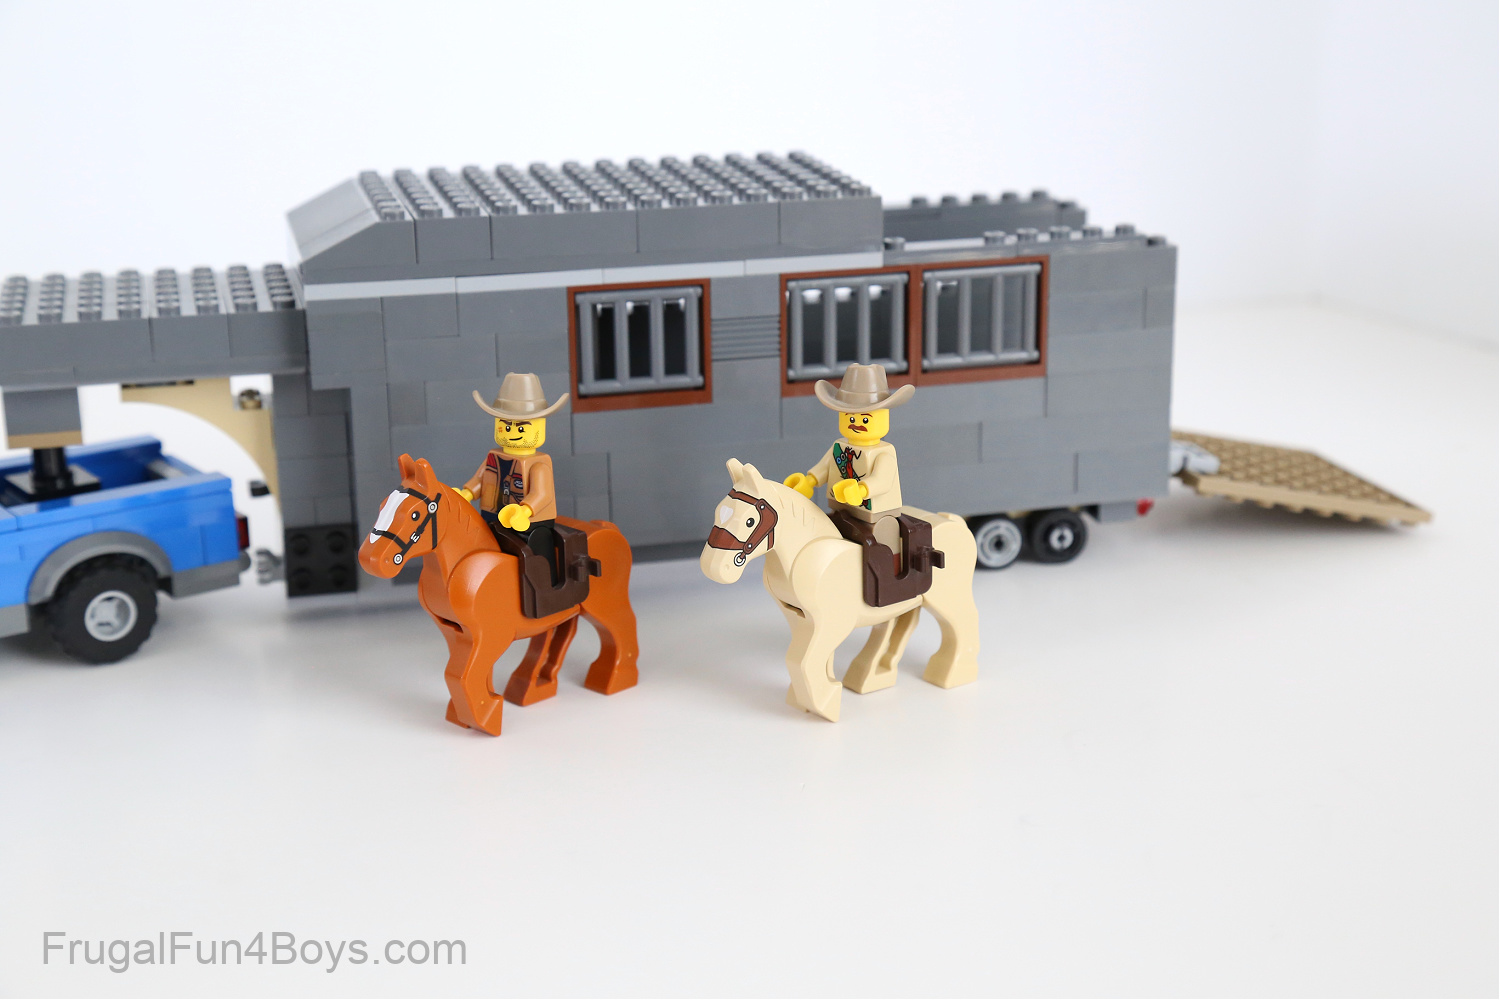
This sorrel LEGO horse looks just like ours! The only detail missing is the back feet – ours has one white sock and one white pastern. We’re tempted to paint more white markings our LEGO horse…
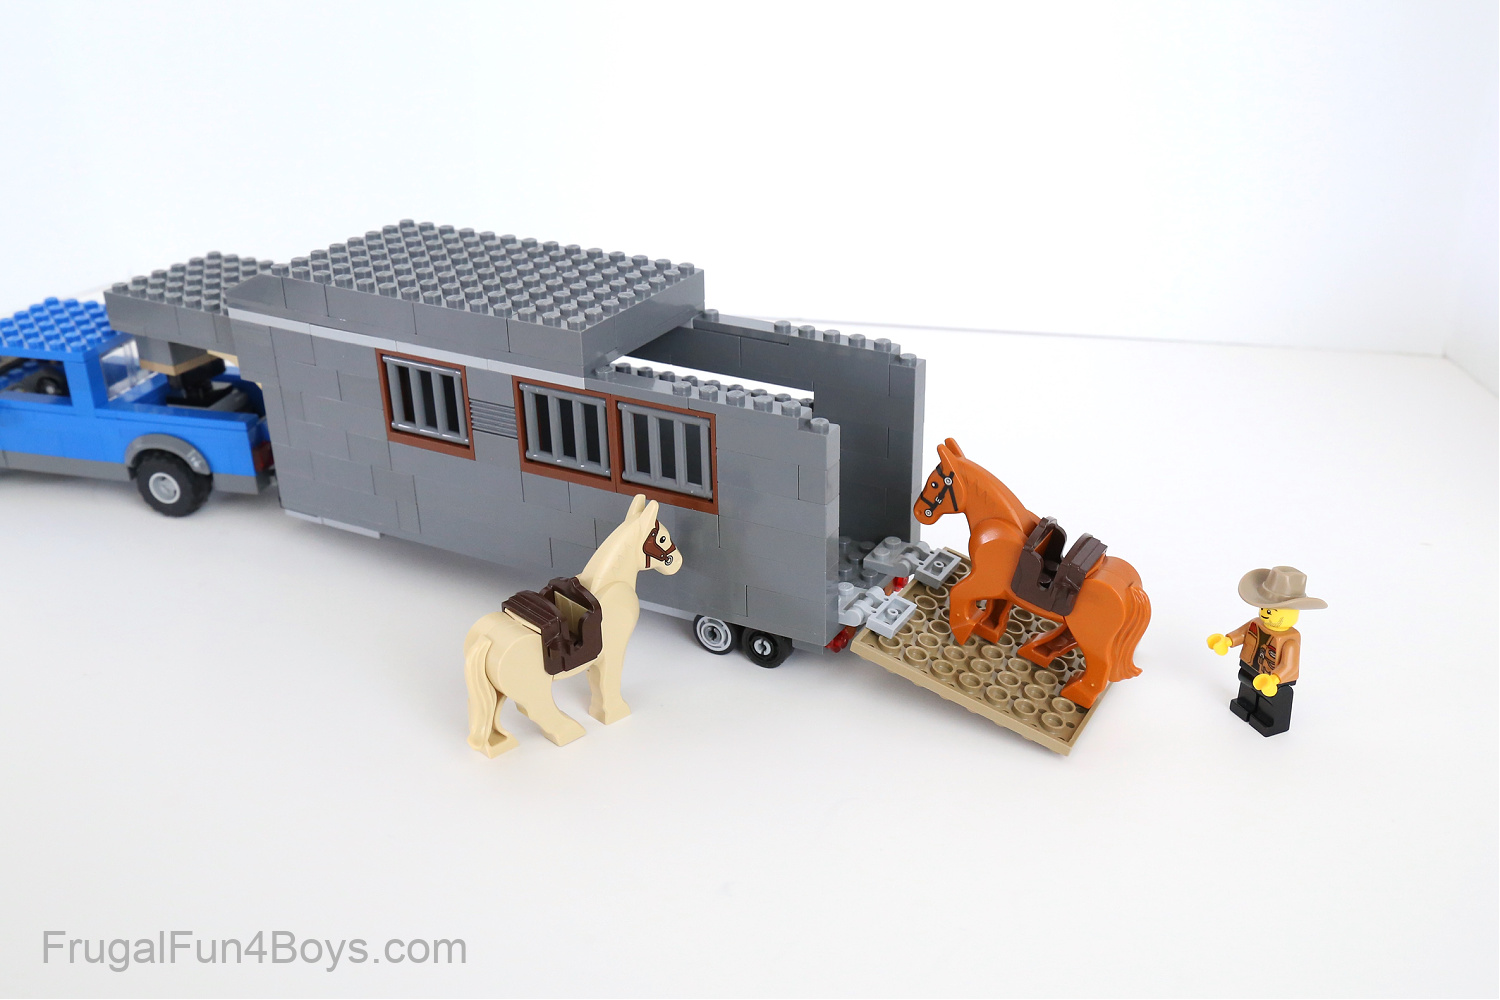
The back of the trailer folds down so you can load the horses.
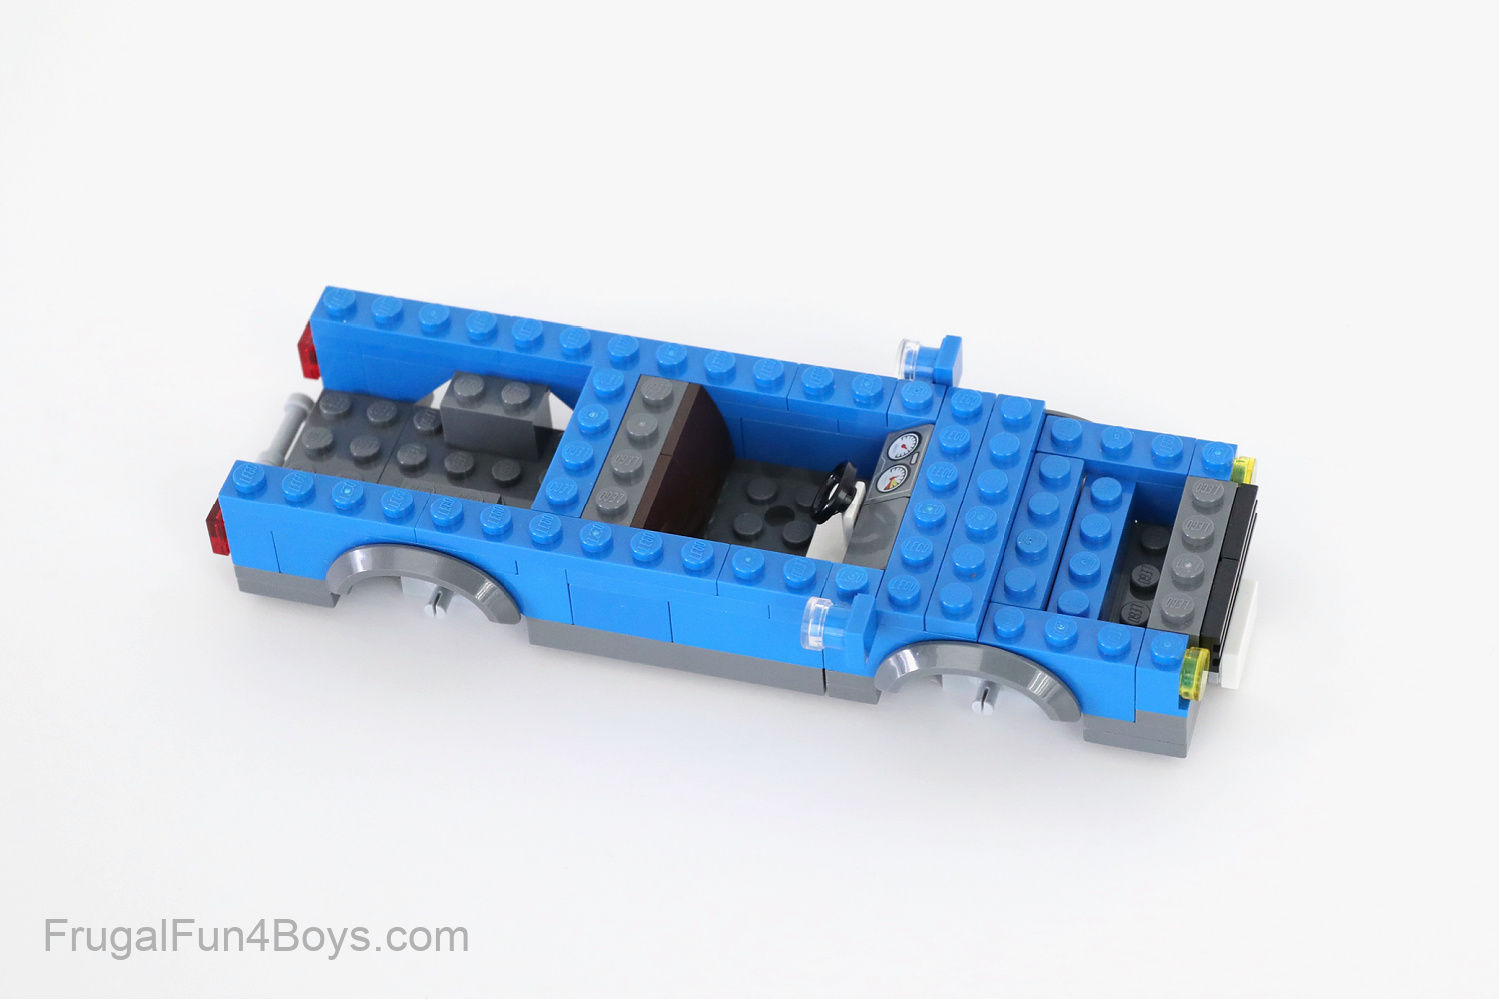
Back to the truck… this LEGO truck is built using a 6 x 16 vehicle base which I will link to below.
I don’t have full step-by-step instructions for this one because of the time involved. It would probably be 40+ steps to show every piece, which represents hours of work. So, I will show how we built the base, and I really think kids can figure it out from there!

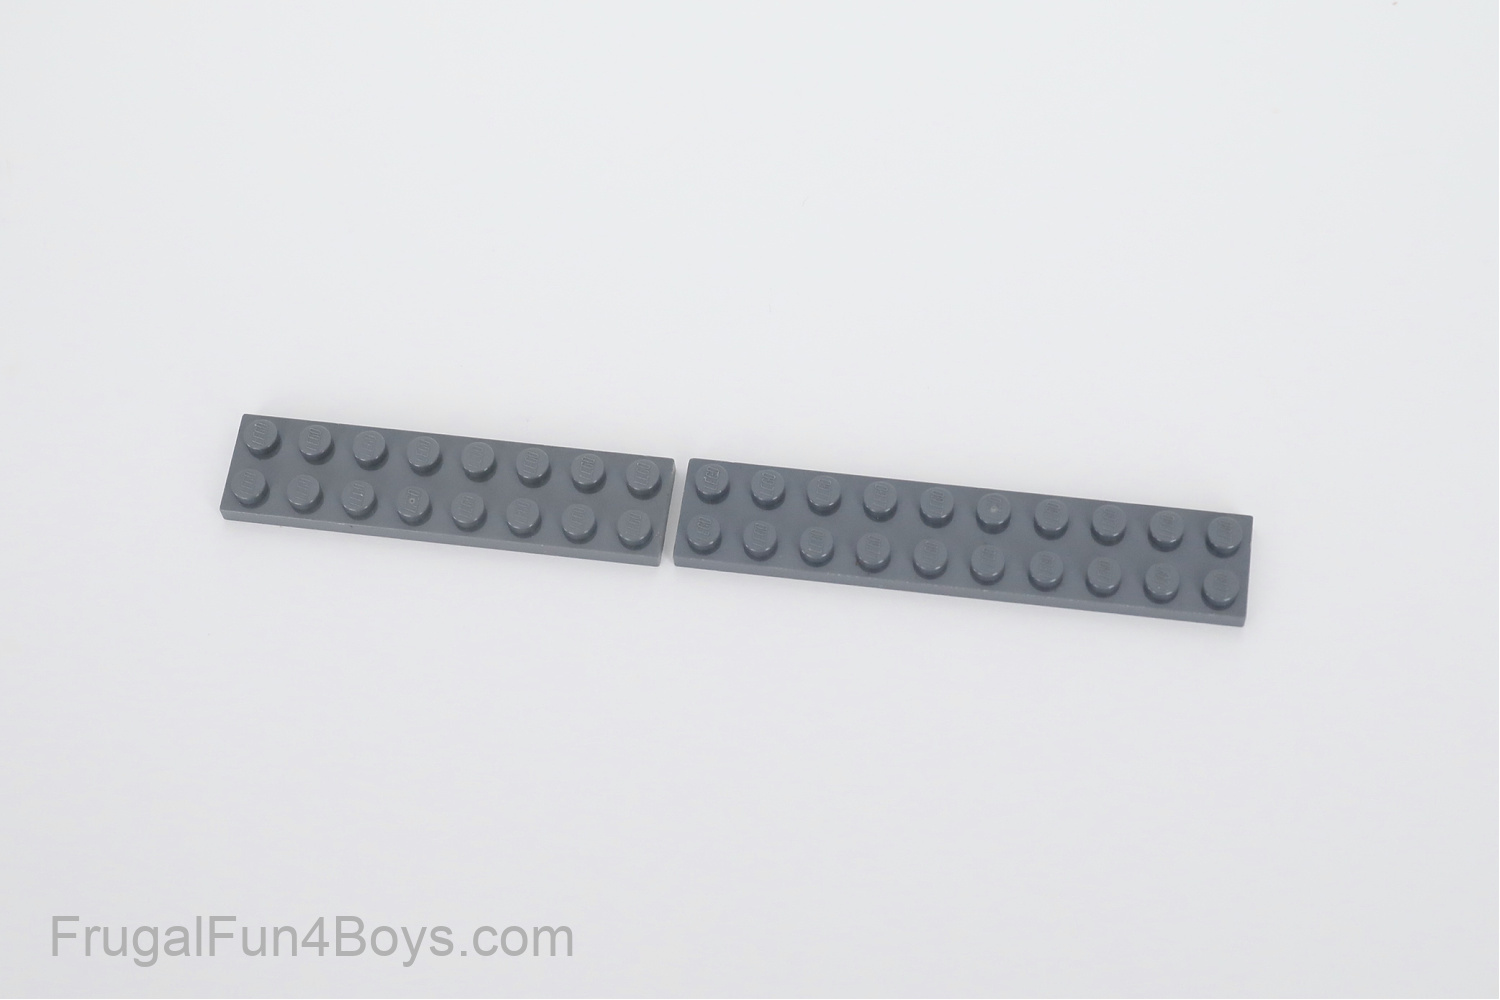
Start with a 2 x 8 plate and a 2 x 10 plate. You can use dark gray like we did, or substitute another color.
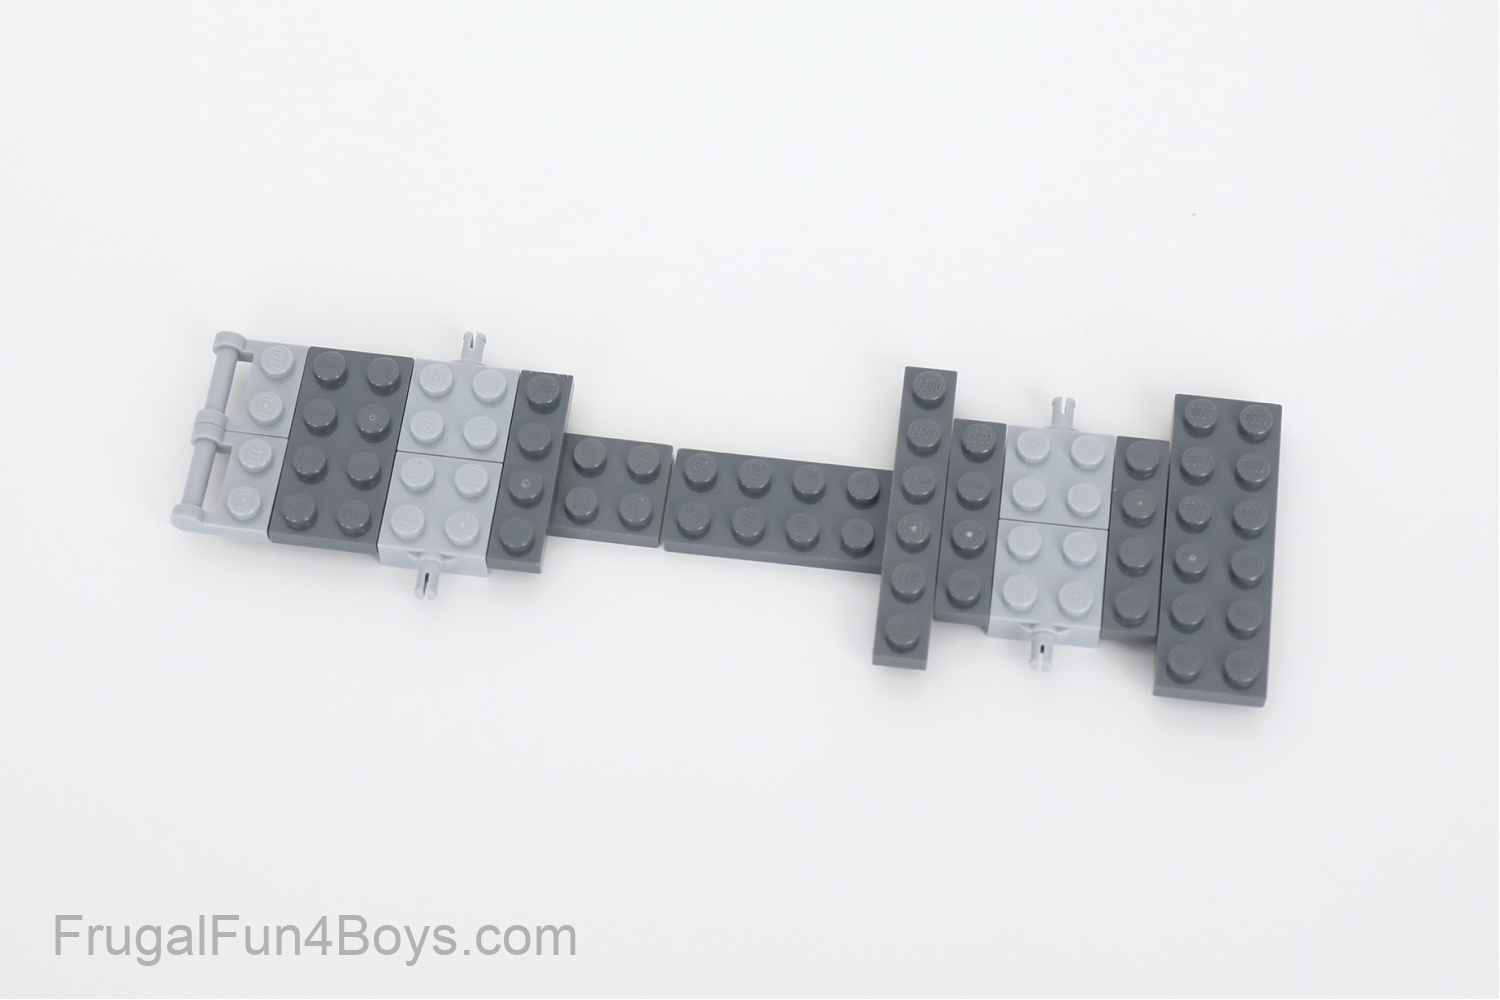
Then add plates and wheel holders as shown.
Attach a vehicle base on top of this.
Here’s the one we used – it’s a 6 x 16 vehicle base. This base has not been sold in any sets since 2018. If you don’t have one, you really can create this same shape with plates.
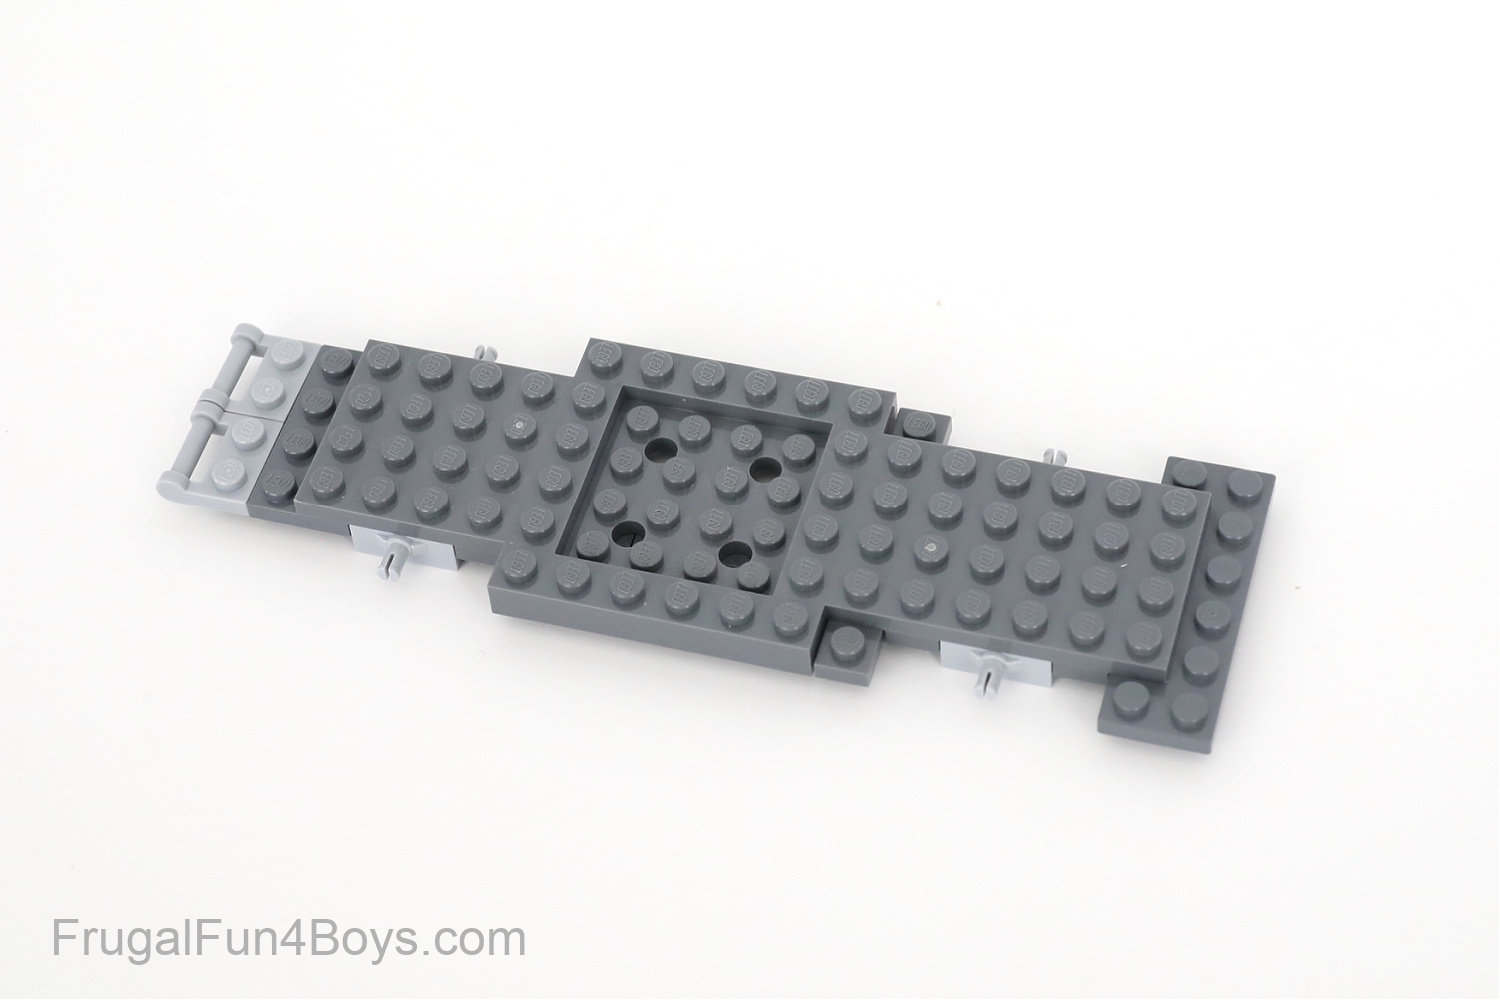
After adding the vehicle base, add a 2 x 6 plate on the back end. Then add four mudguards.
These are the ones we used – 4 x 2 1/2 x 1 vehicle mudguard with arch. (These are available in sets through 2024).
Add a dashboard and a steering wheel. Owen built a seat back by attaching some 2 x 2 curved slopes to a brick that has studs on the side.
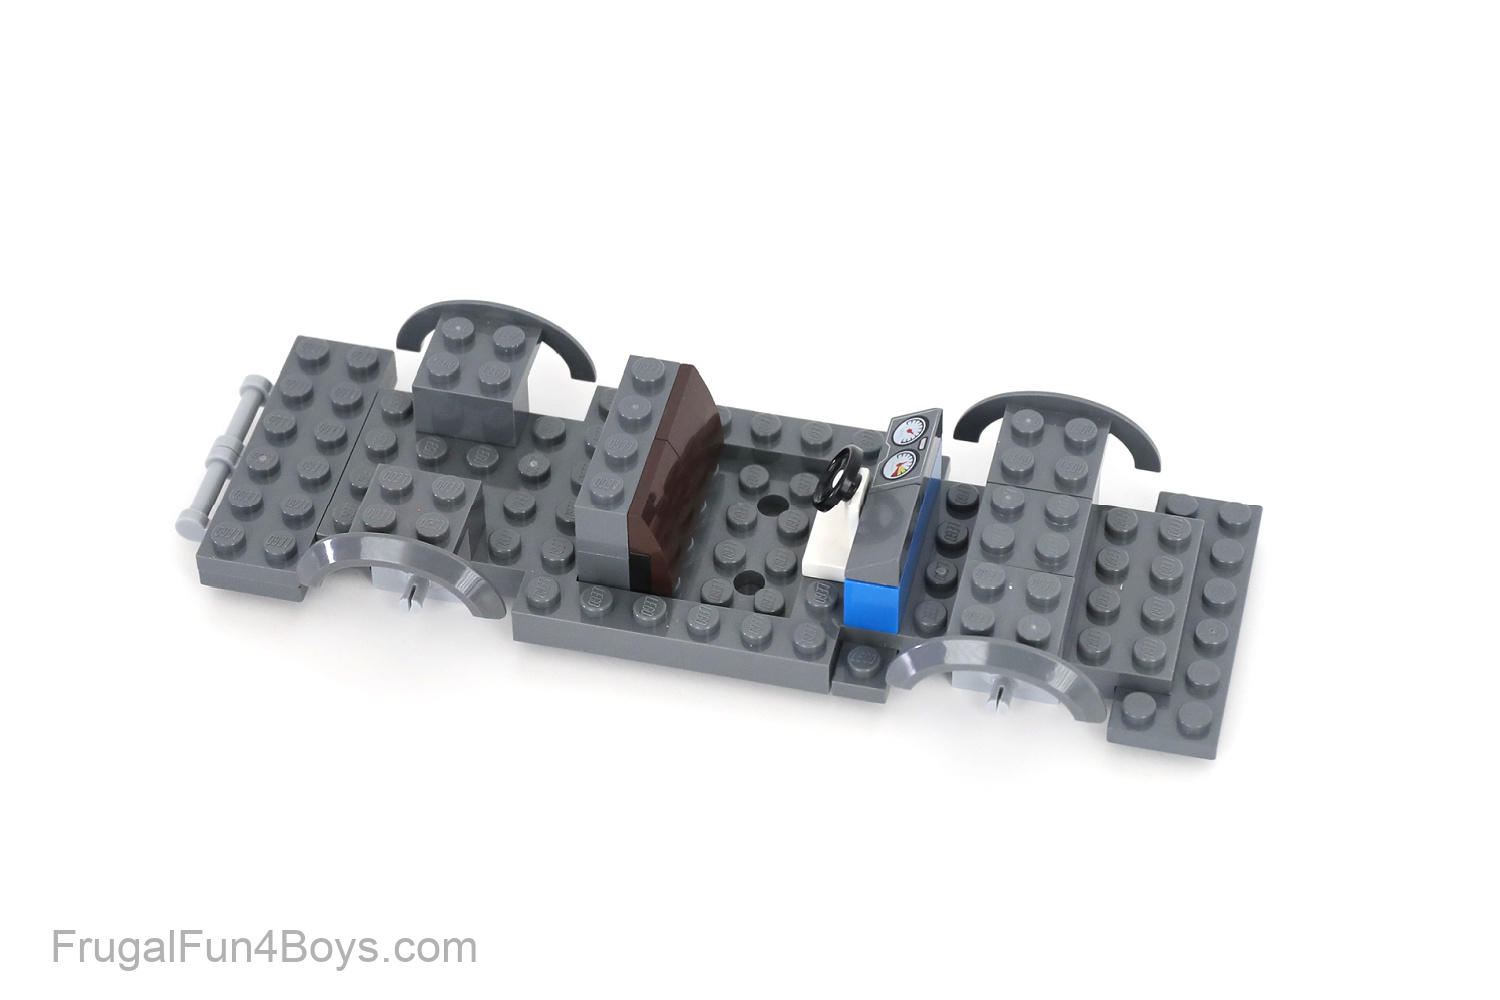
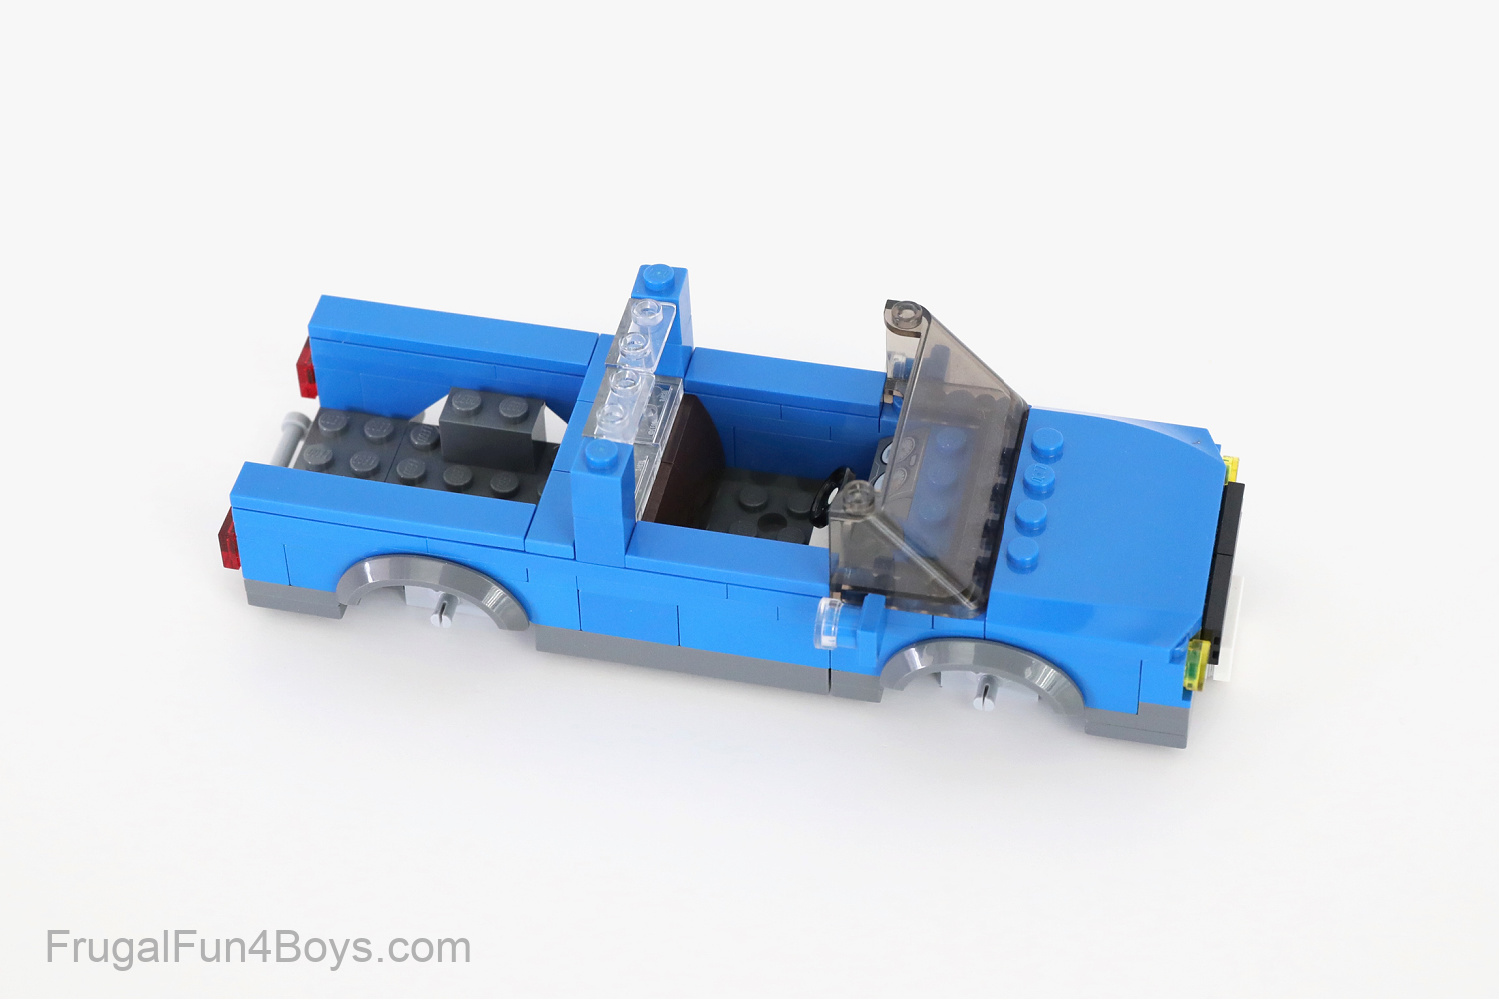
Now add bricks and plates to fill in the sides of the truck. Leave the back open for a working tailgate.
Then add a windshield and a hood and windows on the back of the cab.
Owen used tiles on the sides of the truck to give it a nice smooth look, but that isn’t essential to the function of the truck.
Here are the parts we used:
Windshield – 3 x 6 x 2 Windscreen
Windows – 1 x 2 x 2 clear panel
For the tailgate, we used four 1 x 2 light gray plates with a clip on the end and a 2 x 4 tile.
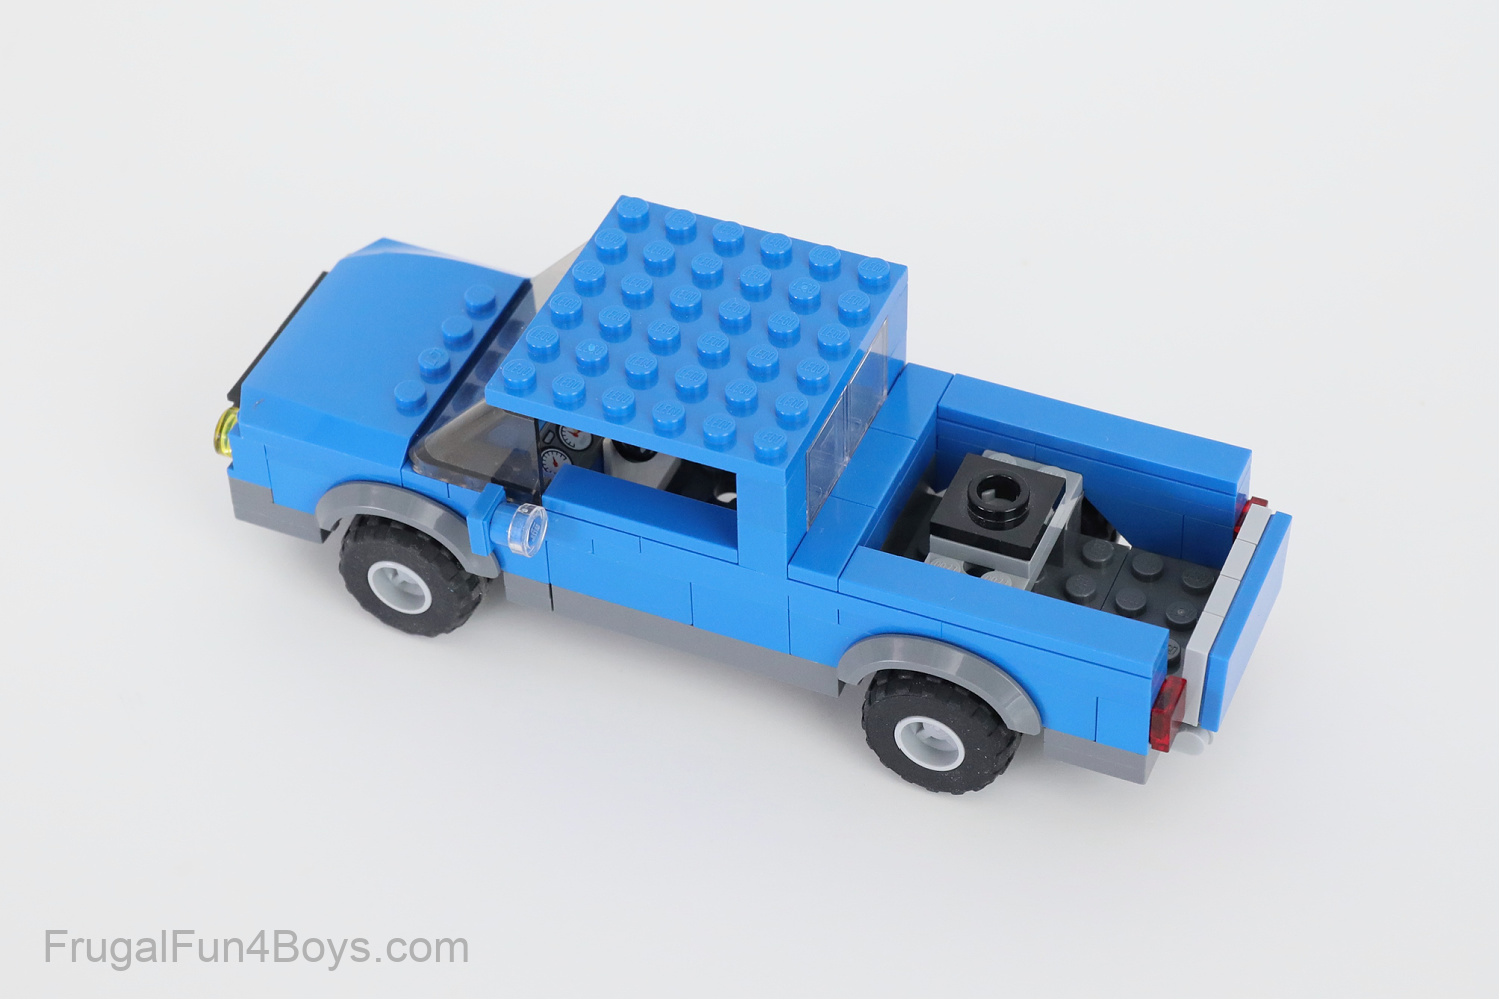
In order to hook up the trailer, my 12 year old son added a 2 x 4 plate (attached to the mudguards in the bed of the truck).
Then he added a 2 x 2 turntable base and a 2 x 2 light gray plate to hold the trailer hitch.
I’ll add a link soon for the trailer hitch piece.
On the other side of the trailer, Jonathan build a tack room for storing saddles. We just wish the LEGO horses had halters and bridles! And lead ropes.
Have fun building!
More LEGO Vehicle Building Ideas:
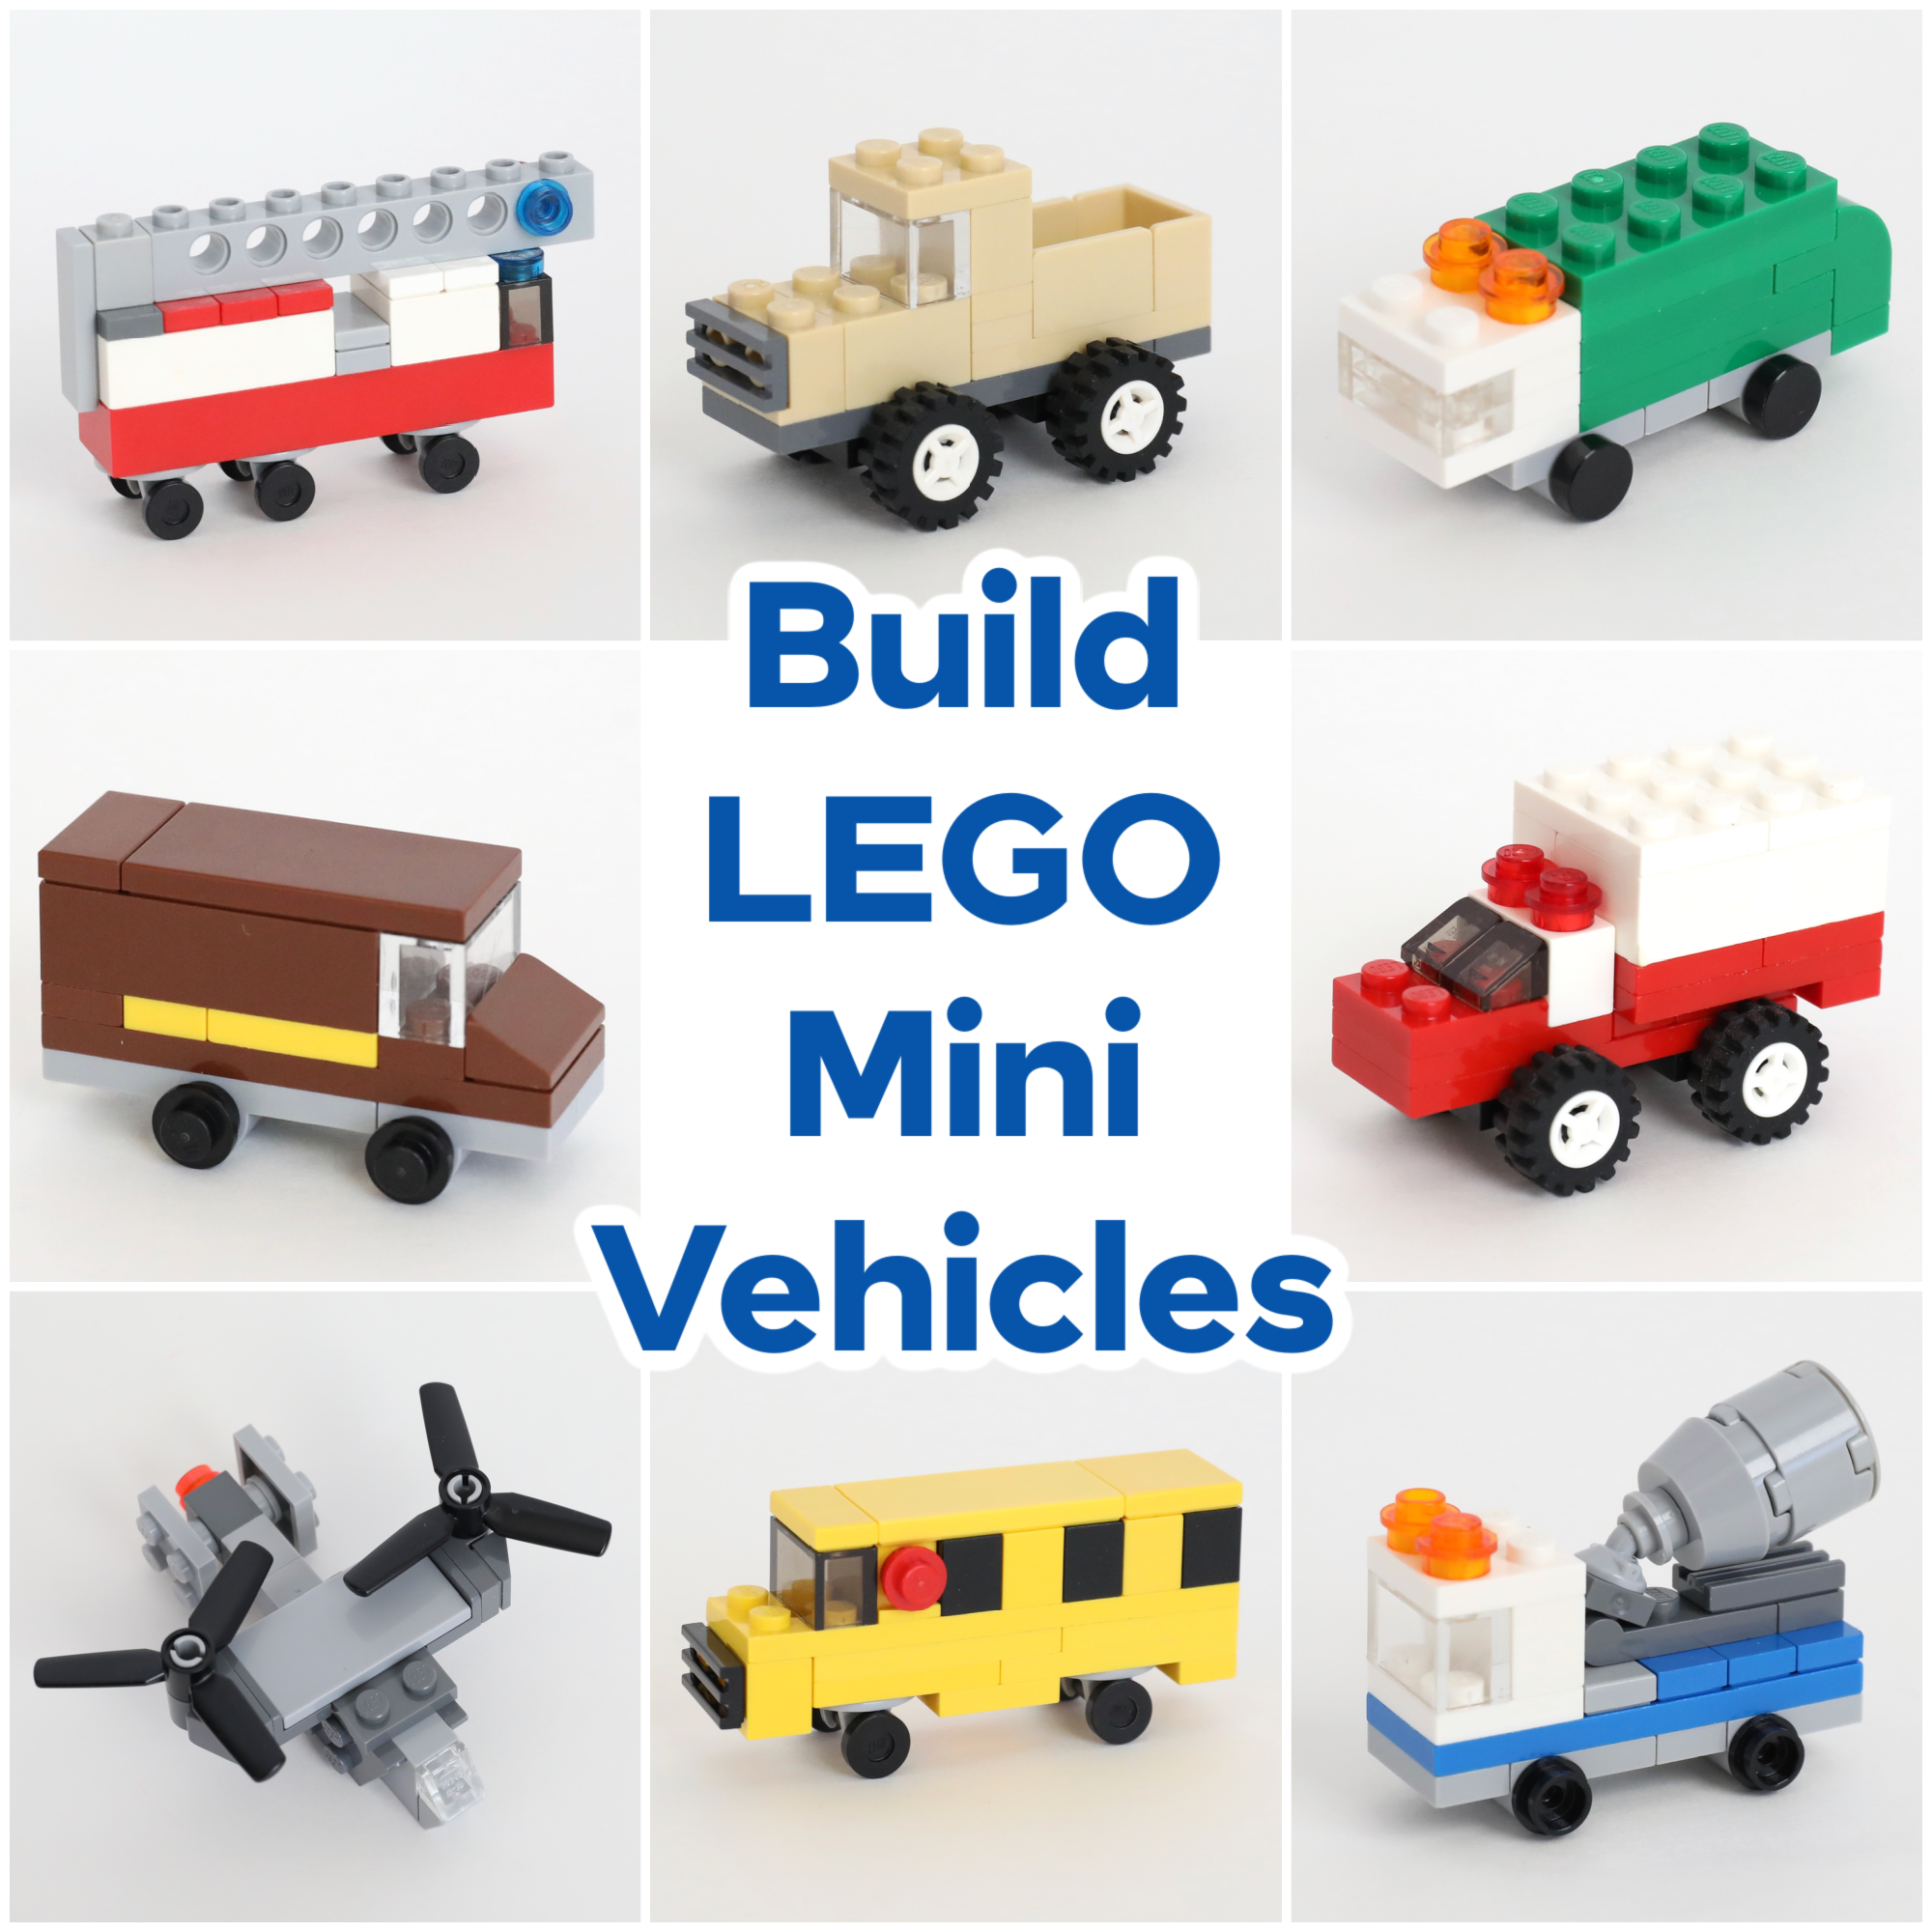
Here are instructions for building super cool Mini LEGO Vehicles!
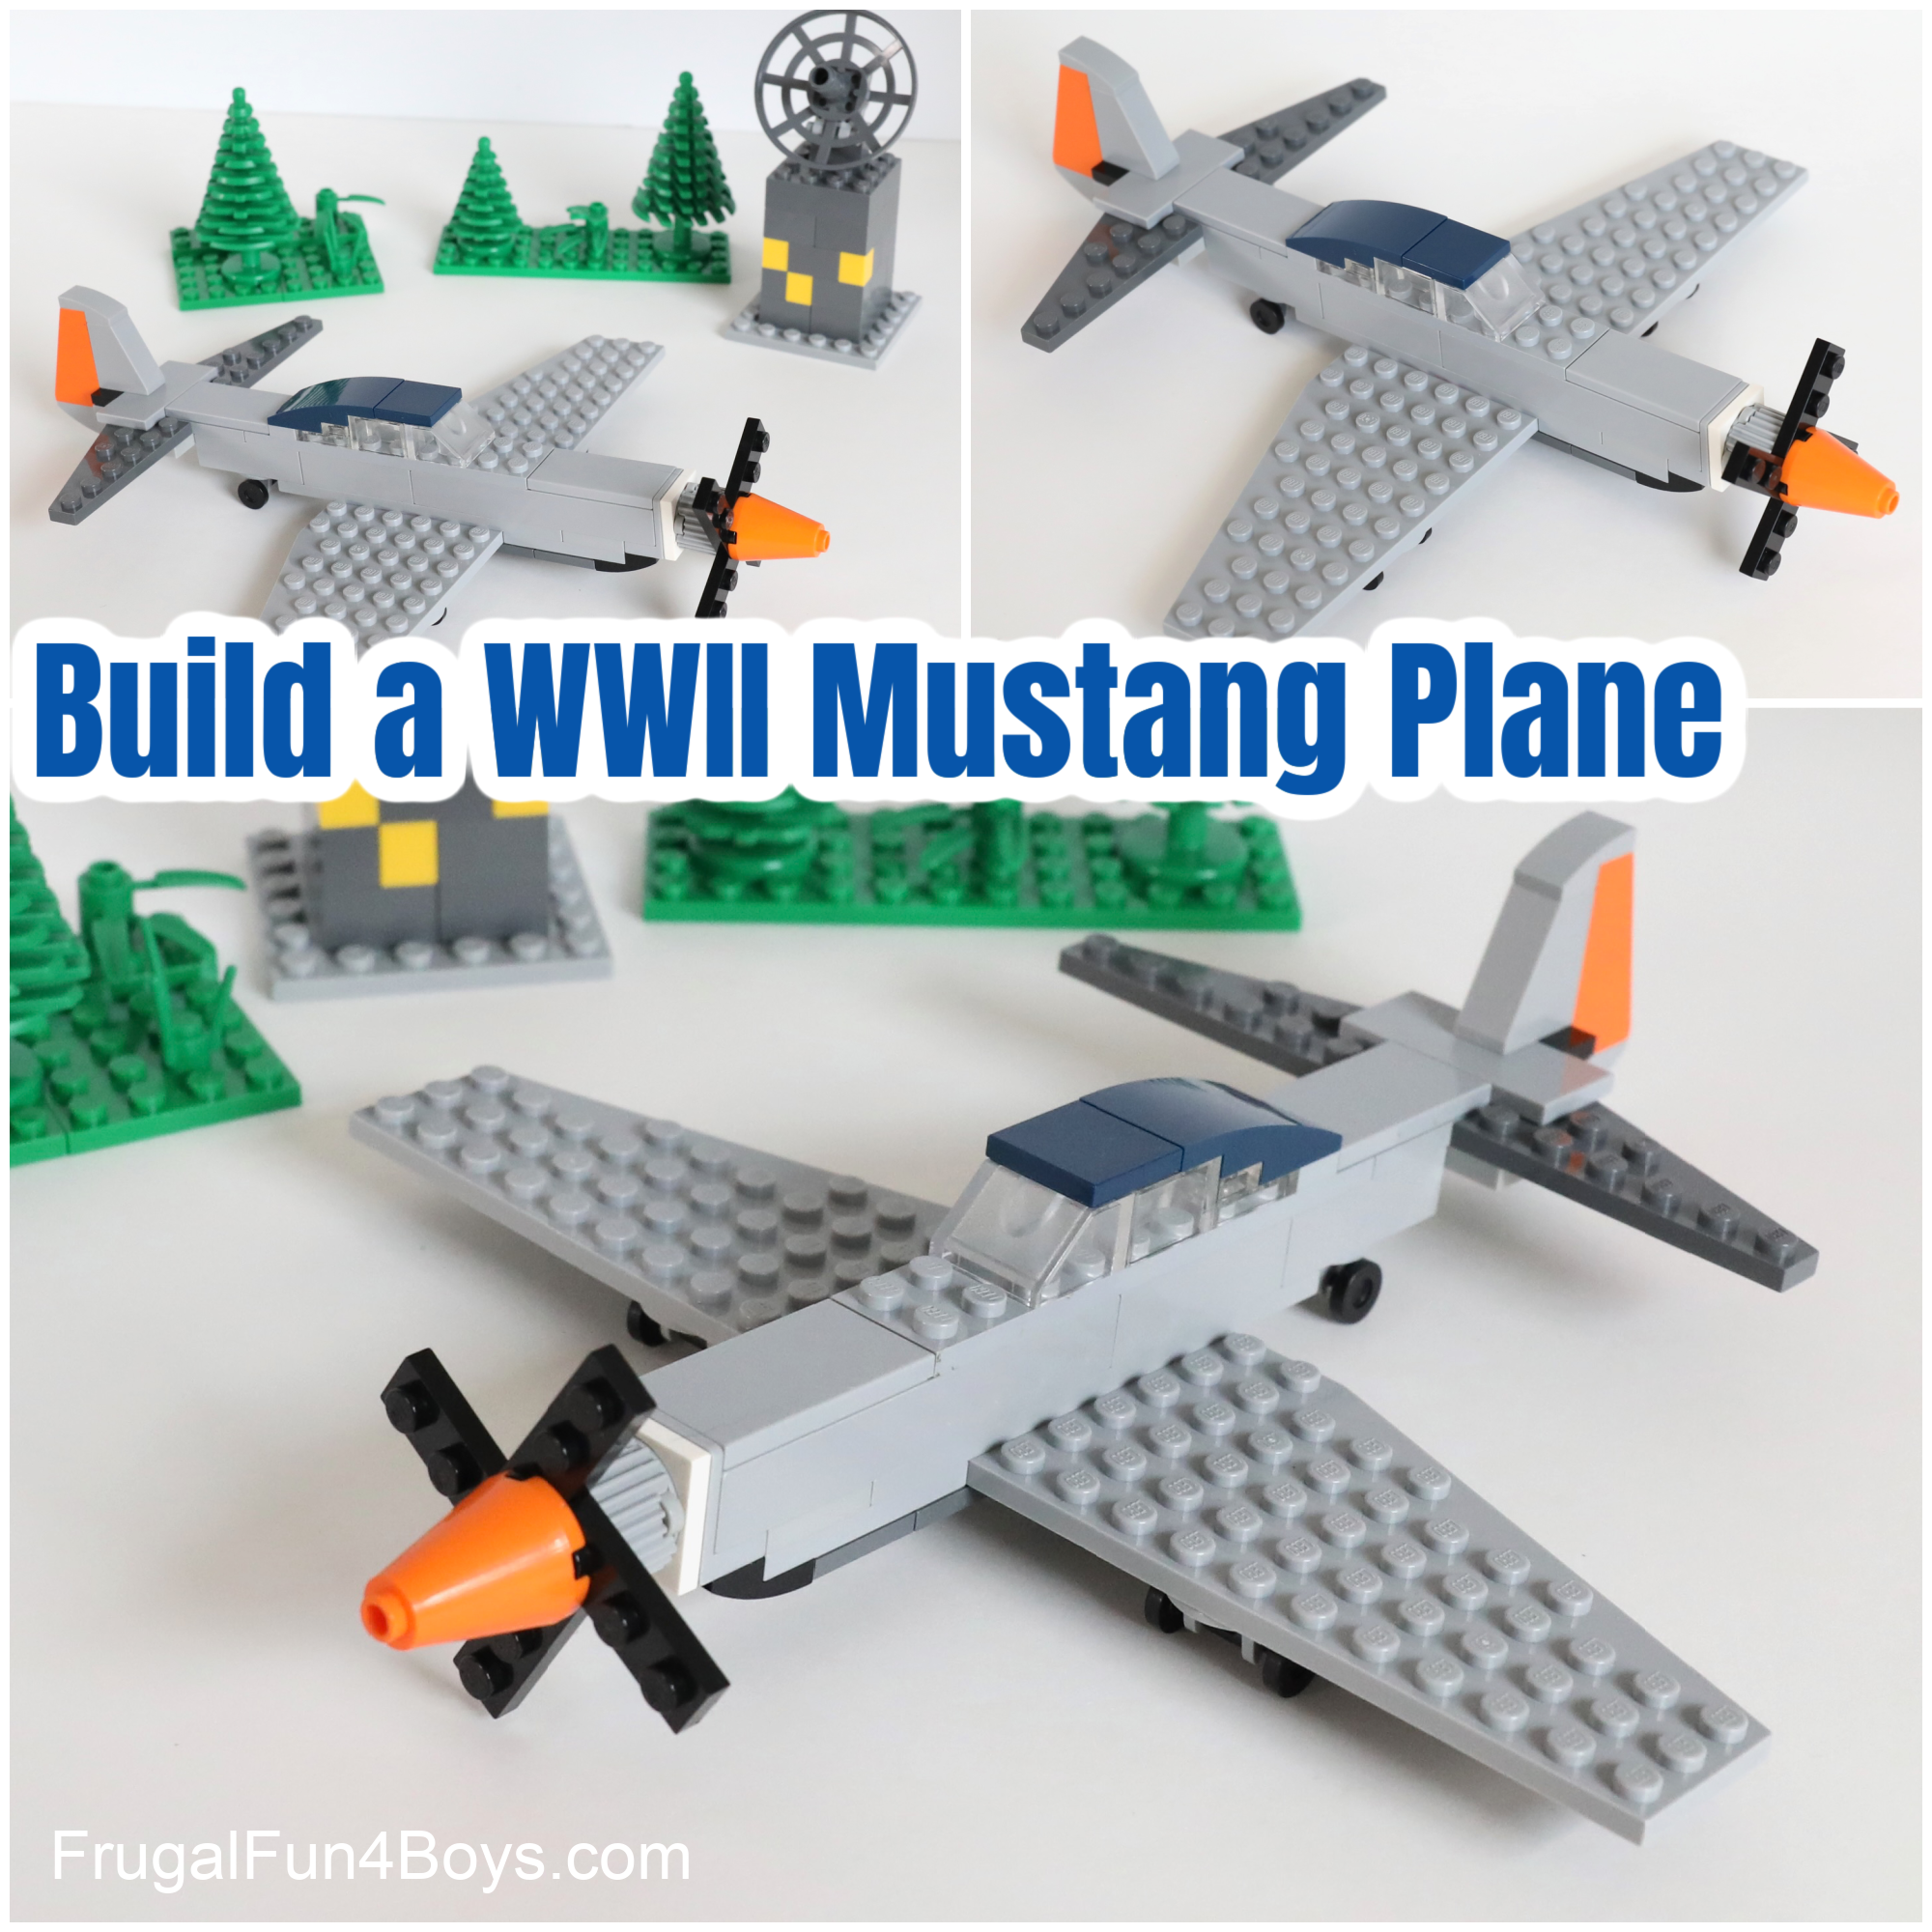
Then here’s a cool WWII era LEGO plane, with ideas for building a tank and humvee as well.
0 Comments
Post a Comment